Post Soviet Vacuum Cleaner

Introduction
Hello! I am Evgenii Vysotskii, I am 20 years old and now I live in Antalya (Turkey), but generally, I am from Siberia!
Sometimes in my spare time, I create my portfolio. Since it is more a creative process than working, the portfolio I create is in retro-futurism style (I JUST LOVE this style).
At the moment I am a Freelance 3D Artist, but I would very much like to get an artist into the studio developer! So feel free and offer me cooperation
Goals
In this work, I wanted to practice with Hard-Surface modeling, Subdiv modeling, smooth shapes, plastic material and retro-futuristic style.
I was very much inspired by the work of MachineGames and the series of Wolfenstein games (I LOVE them with all my heart). After all, they are ambassadors of the retro-futurism style, so I could not focus on their art.
For this work, I jokingly came up with a brand “Siberian fantasies”. It is my little sadness and personal fantasy that my hometown of Novosibirsk could be of more use to the world than it is now. And could produce the technique known worldwide.

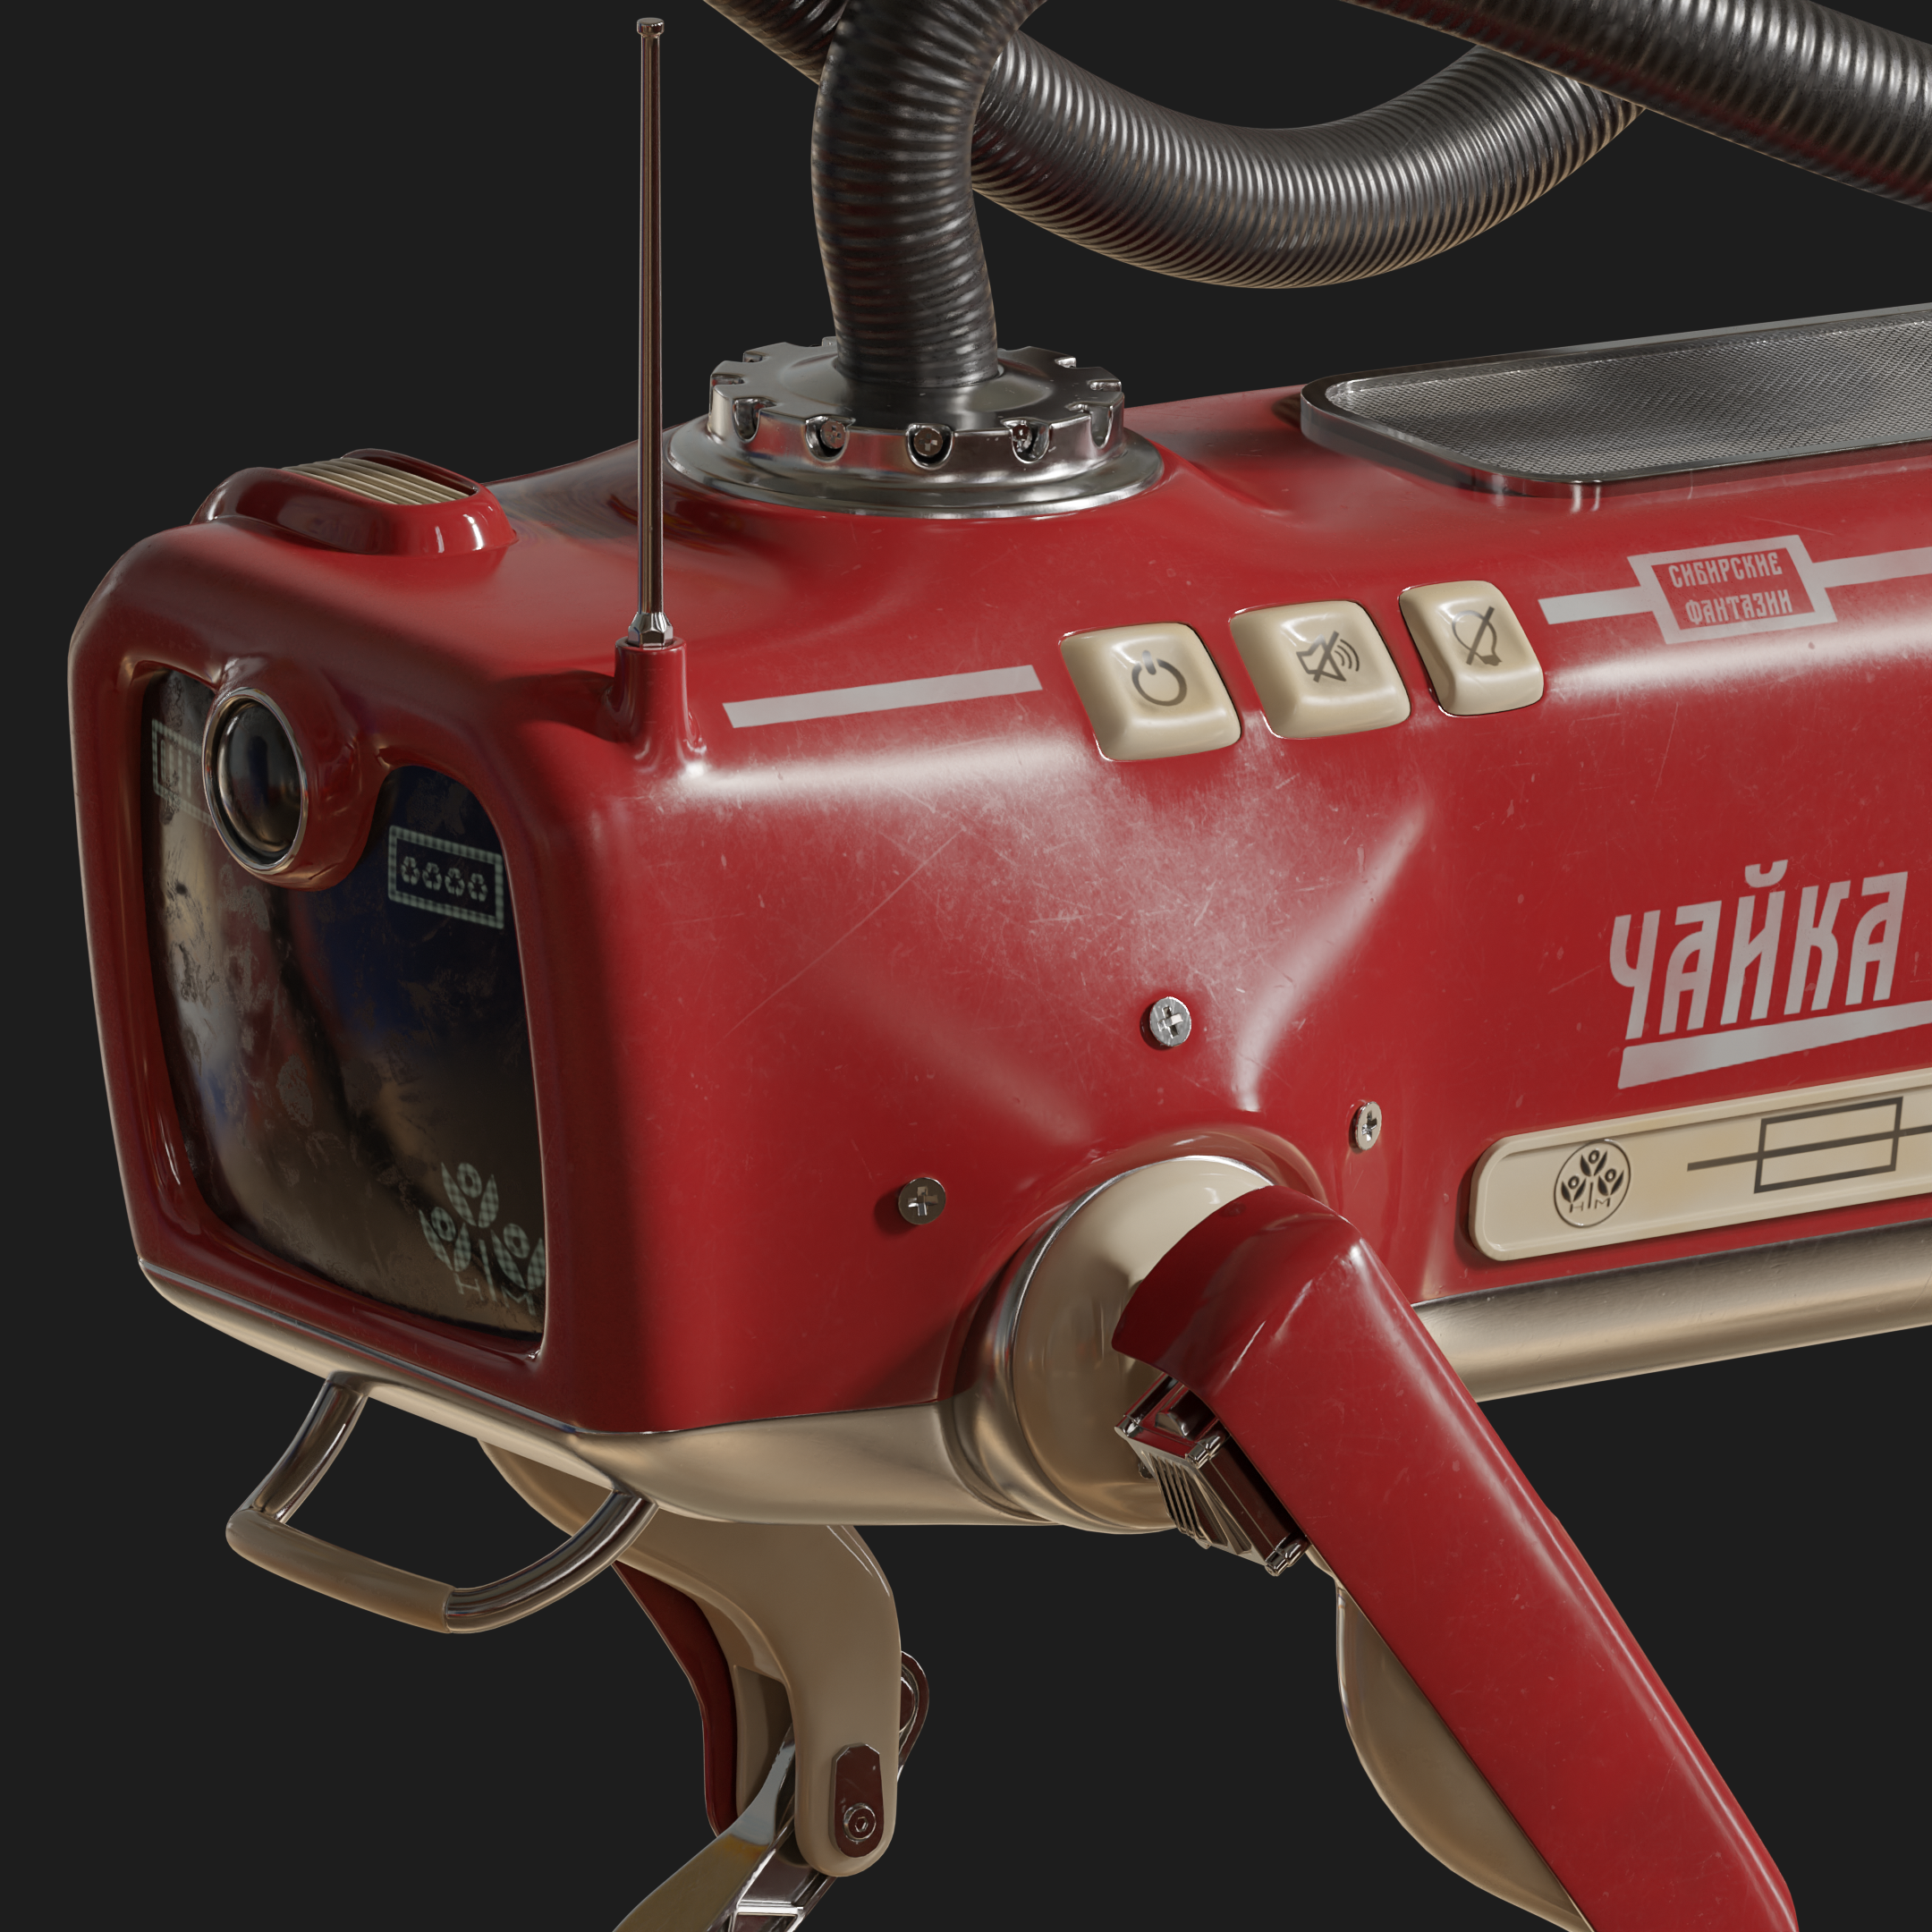
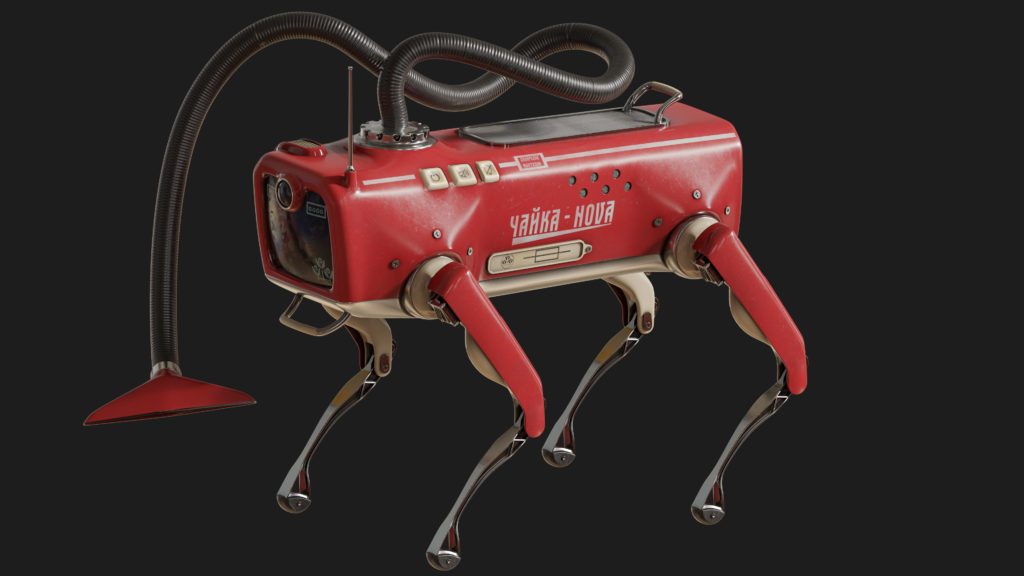
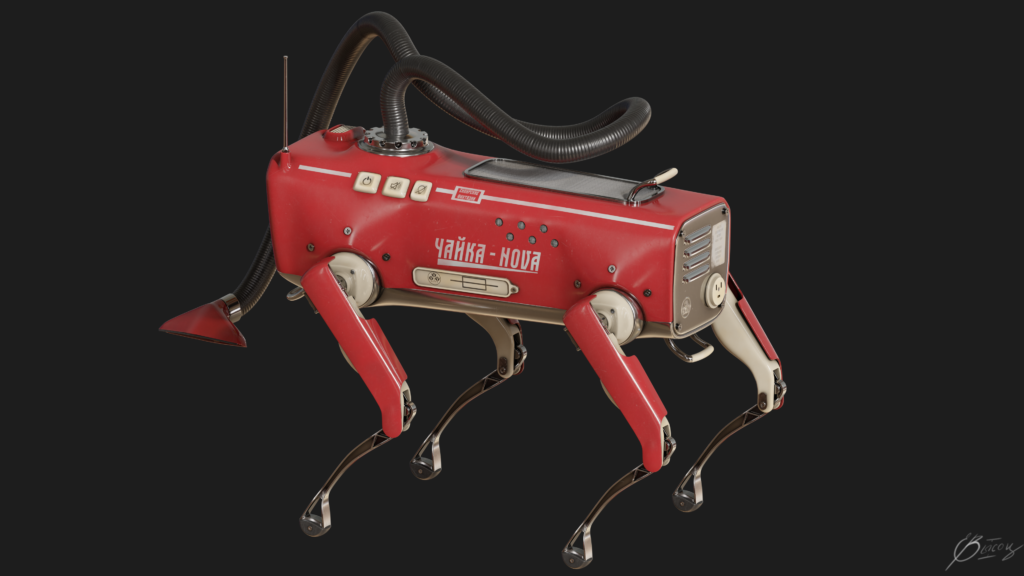
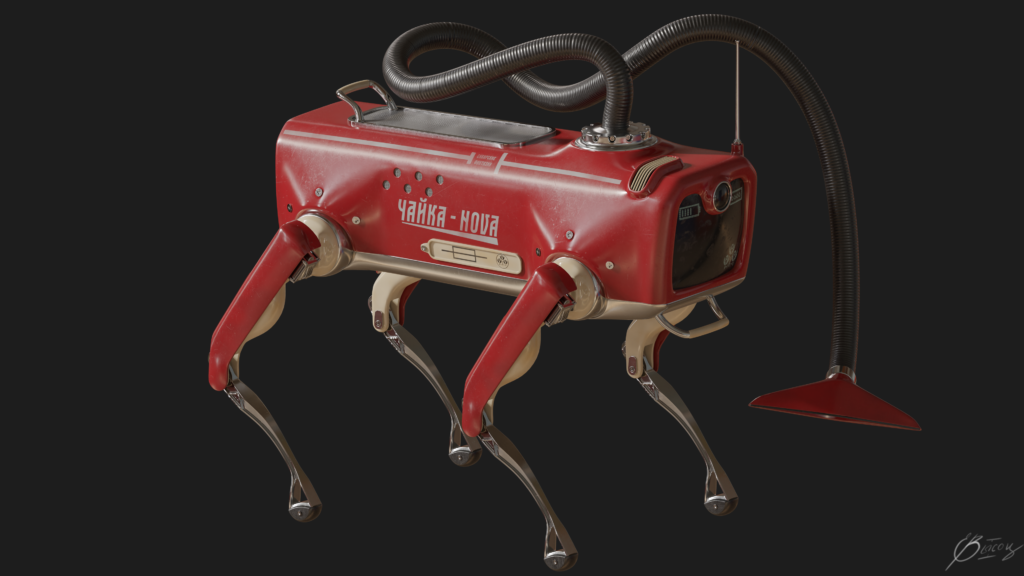
So for recognition I wanted to cross the Soviet vacuum cleaner “Gull” (CHAIKA) and robot “Spot”.
I wanted the viewer to look at the vacuum cleaner and remember “cheap and terrible” plastic from the USSR. And make it look like he could be standing in each of our homes.
Software
- PureRef
- Blender (High-Poly modeling)
- Marmoset Toolbag 4 (Baking)
- Photoshop: Stencils & Post-processing.
- Substance Sampler (Work with Textures)
- Substance Painter (Texturing)
References & Ideas
As I said, one of the ideas in the practice of Hard-Surface modeling and Subdiv modeling. I wrote out what I wanted to achieve and then I assembled a small ref sheet and a separate link to Pinterest with pins on the topic of topology:
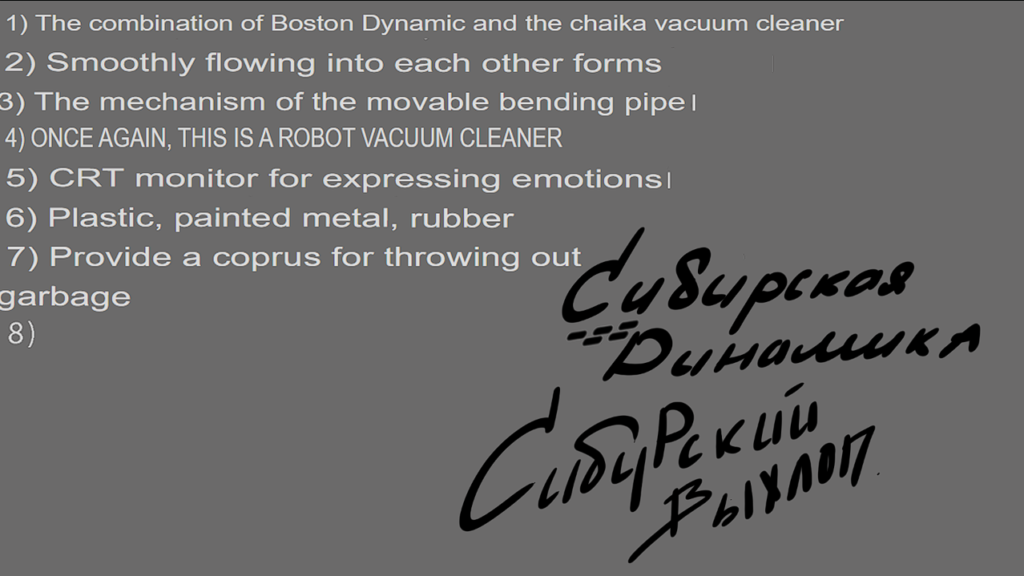
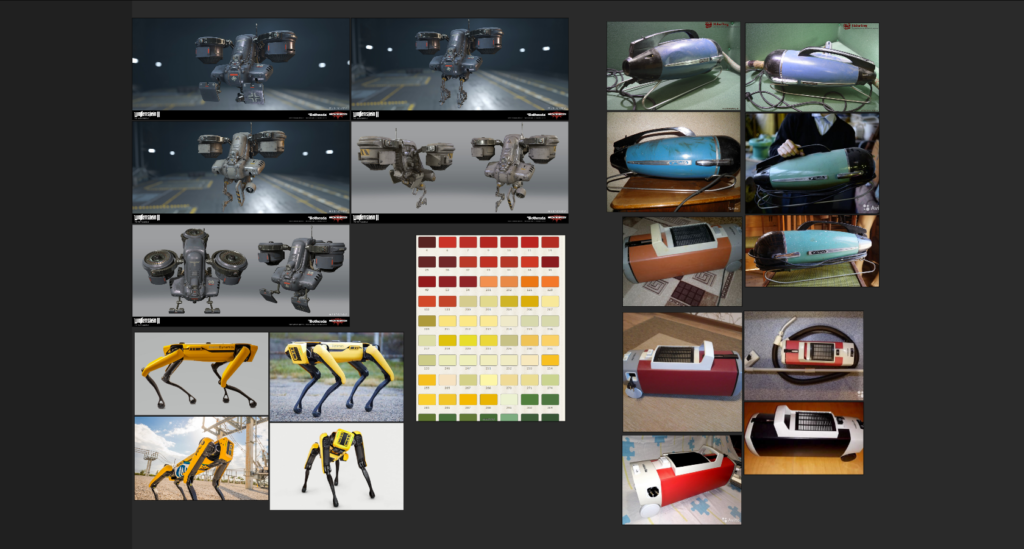
Afterward, I just looked for pictures with details by mood and tried to embed them into the vacuum cleaner.
I wanted to keep the design of the vacuum cleaner simple. I didn’t want to overload it with details. And a lot of it changed with shapes.
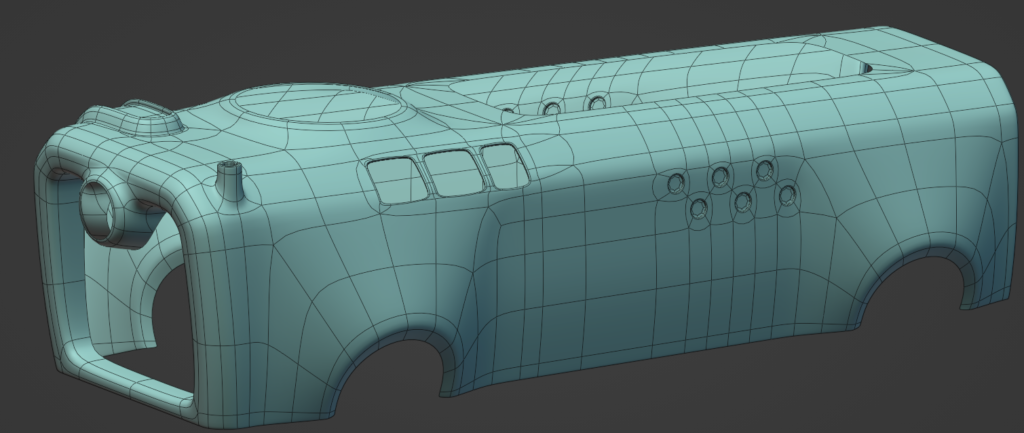
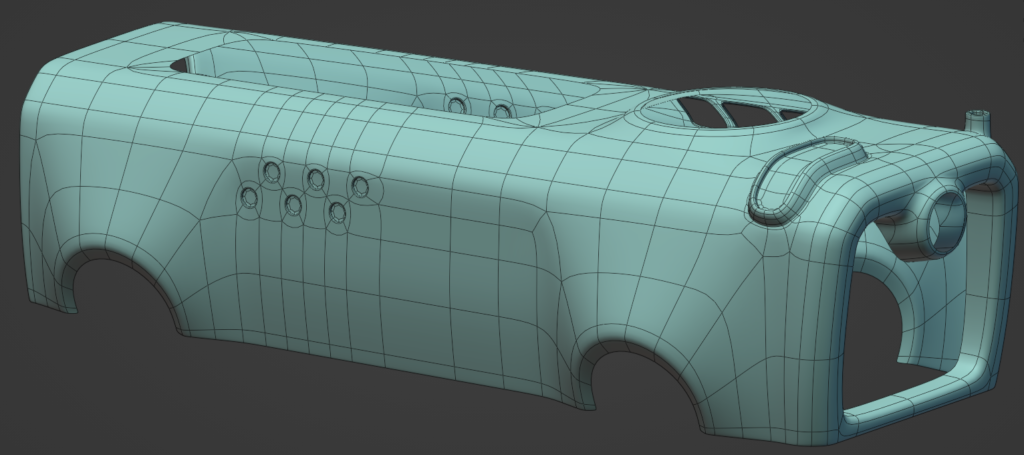
Modelling Workflow
This vacuum cleaner I decided to do this only in the highpoly variant.
To do this, I put the frame in advance to understand what it would look like on the final renderer, so in the process, I constantly switched to a camera view to better understand the situation.
At the same moment, I provided the dimensions of the vacuum cleaner, because I did not want to make it big, yet it is home and should not interfere with its owner.
Despite the references, we all have imagination, and I’ve relied on it more. So in the process, I experimented a lot with shapes before I focused on one thing. Unfortunately, the previous body shapes of the vacuum cleaner did not survive. If I did not like them, they immediately went to the furnace, as not to take up extra space on the disk. However, always keep backups handy, perhaps to create new shapes you can use the old geometry simply modified.

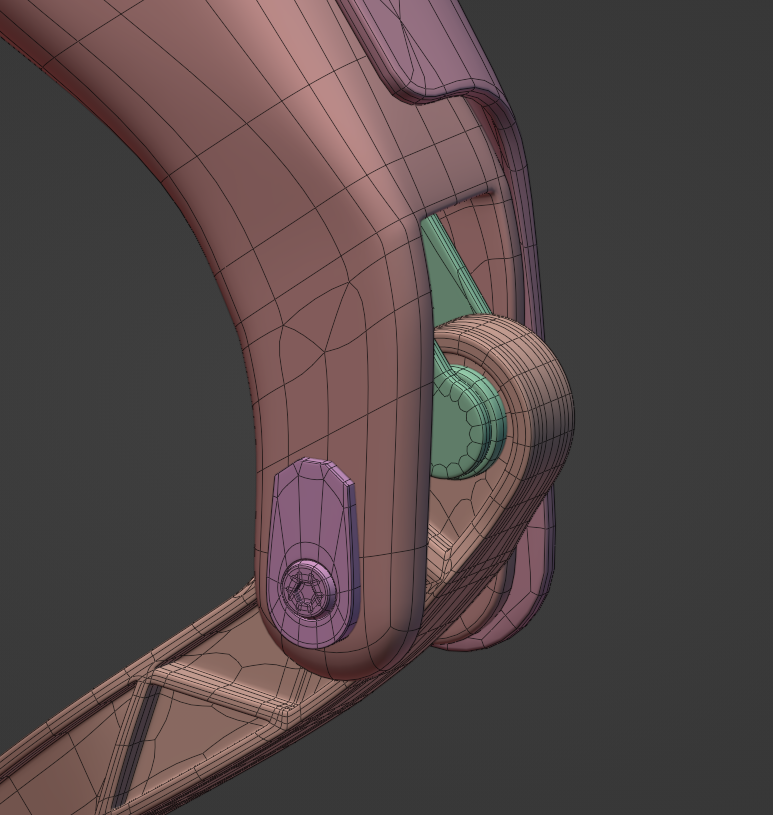
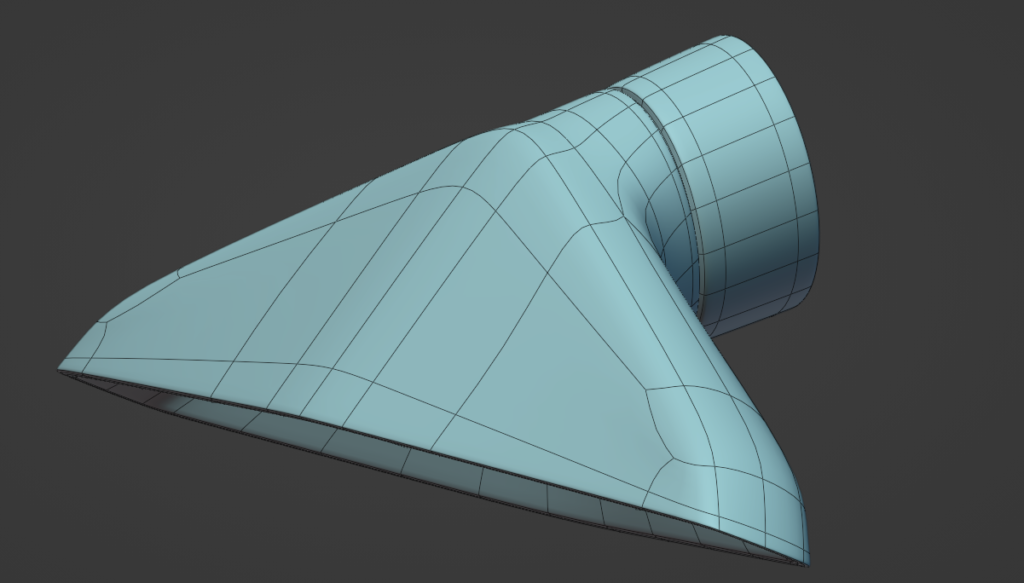
Here you can see the breakdown in detail. I tried to apply the 30/70 rule every time I could.
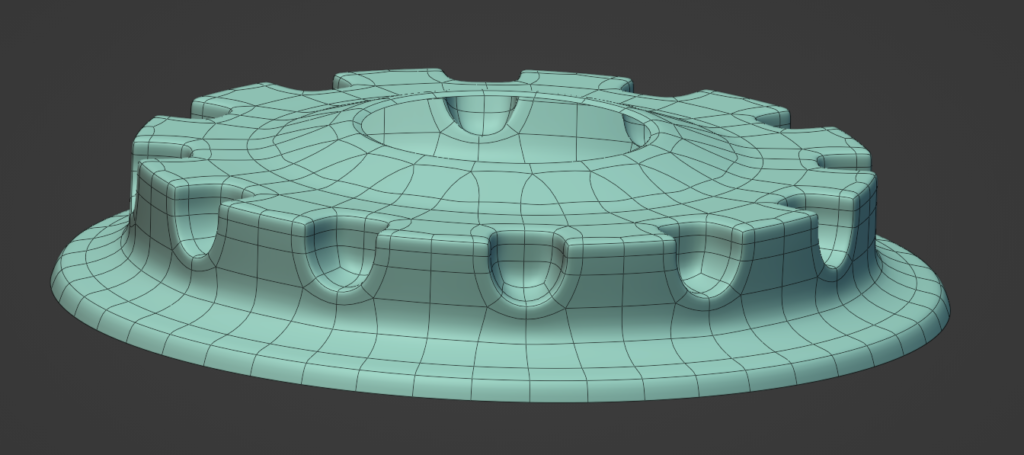
Below is a grid of some interesting details.
UV
Since I was making UV for the highpoly object I tried to get a minimum amount of seams and prevent stretching.
In my model I was not limited, I wanted to get the maximum possible Texel Density and keep it on all details. Also for the convenience of the hose, I have put in a separate UV set.
In order to properly deploy some objects it was necessary to align them. Addon UVToolkit helps with this.
Its functionality can be found at the link: https://alexbelyakov.gitlab.io/uv-toolkit-docs/
Next, I just packed it all with the addon UVPackmaster: https://blendermarket.com/products/uvpackmaster
He’s definitely worth his money.
Baking
I used Marmoset Toolbag and Substance Painter to bake.
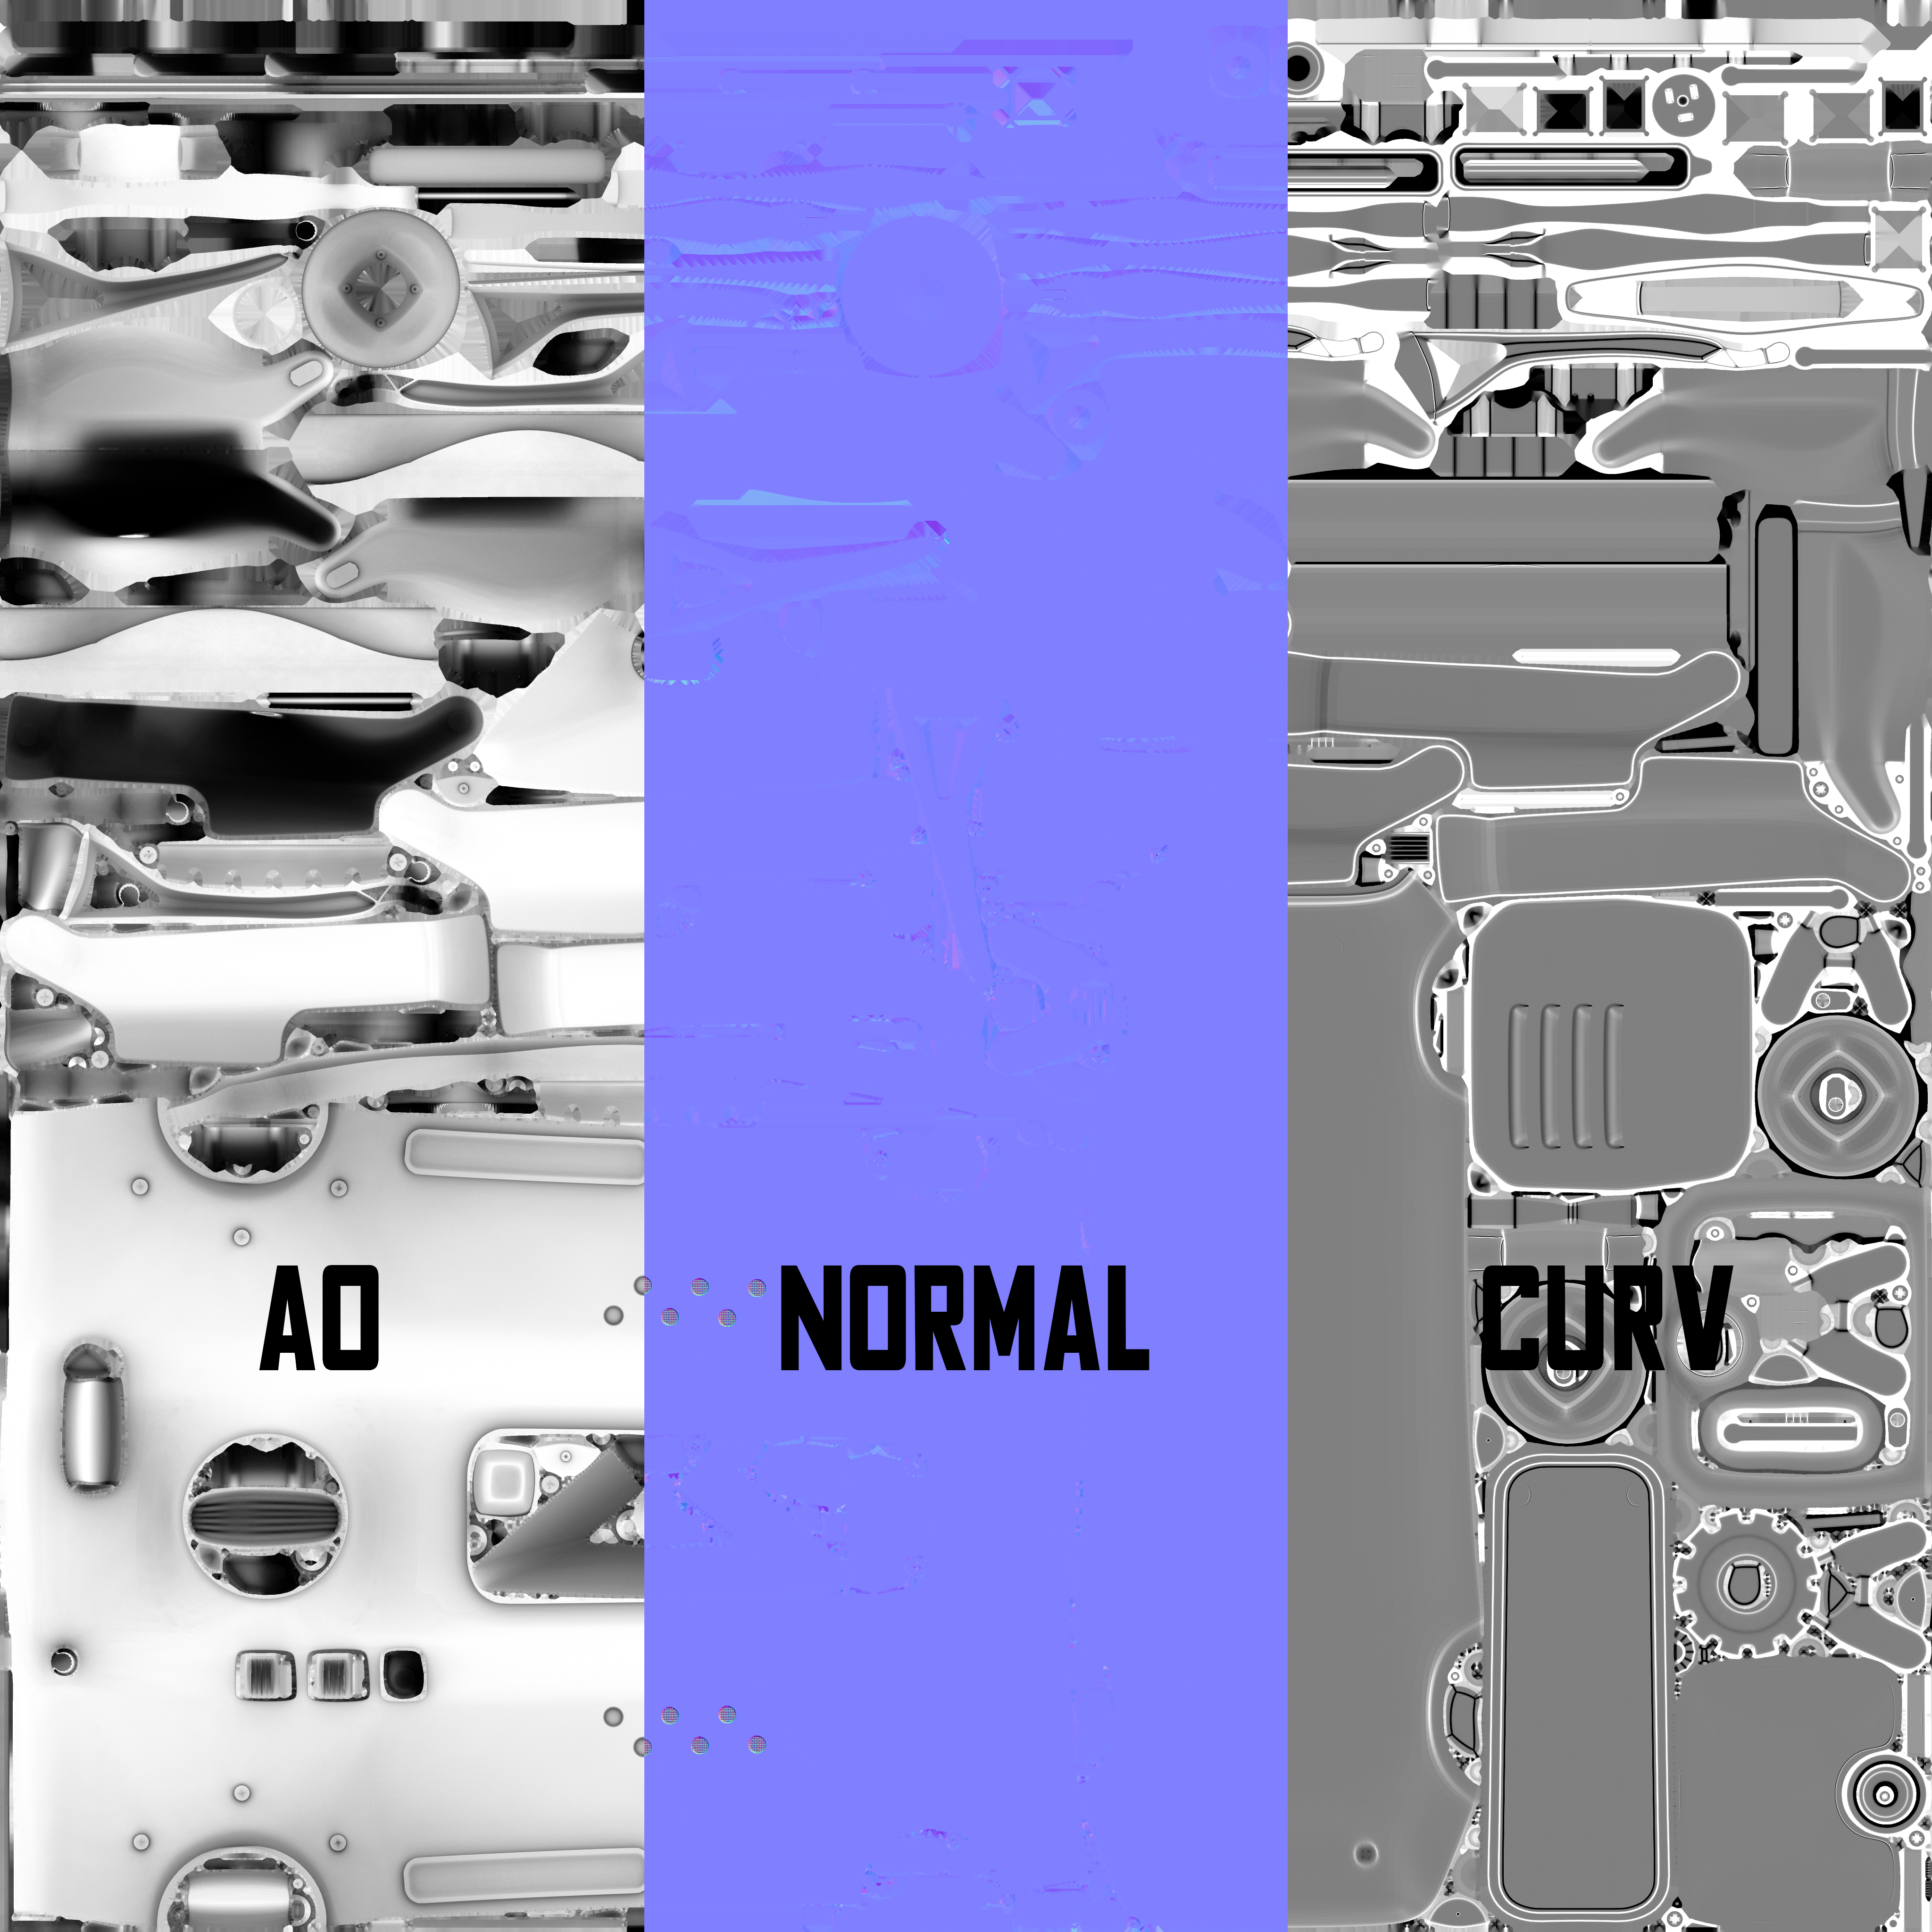
In Marmoset Toolbag I used the basic set of baking. And bake cards AO, Normal and Curvature. I baked them in the Marmoset Toolbag because it is not as hungry and demanding to your PC configuration for quick baking as the Substance Painter.
In Substance Painter, I baked World Space Normal and ID.
The main thing is to not forget about the right naming conventions!
Texturing workflow
At Substance Painter I immediately used the HDRI card I was going to use for the rendering.
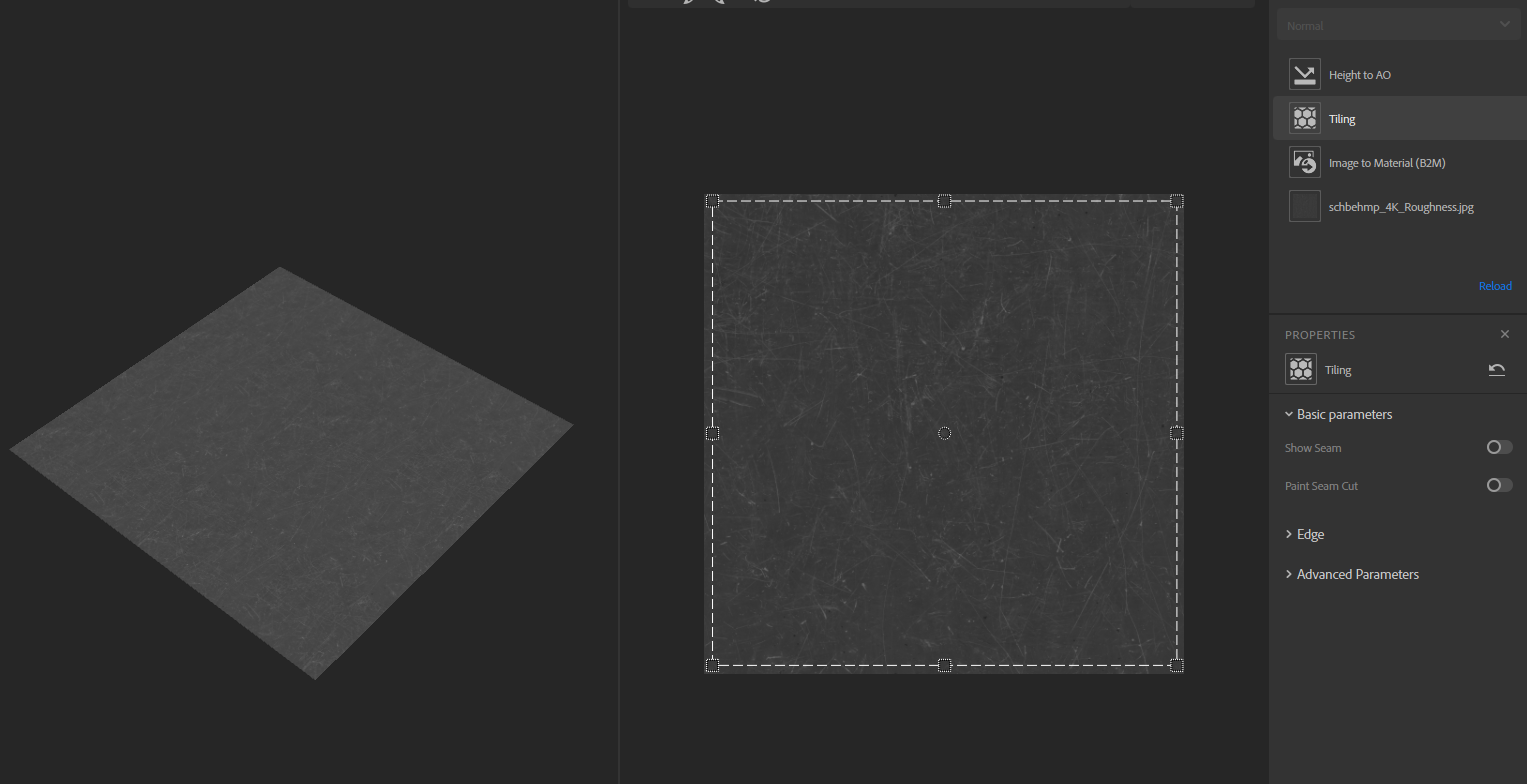
Substance Sampler can help you create cool tile materials. Better if you have a graphics card with CUDA cores, then you can use this tool with AI to the maximum. But CUDA cores I did not have, working in it was sad.
Basically, I used SSampler to tile materials and create AO maps based on height maps.
The best I can show you from the texturing vacuum cleaner is plastic. Let’s take a look at it.
I tried to create an interesting roughness map. For this, I needed 4 layers, where each subsequent layer was with larger damage.
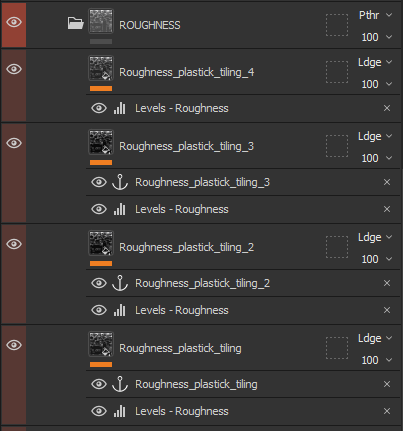
To fine-tune the manifestation of layers I used levels.
Then using Anchor points I changed the height for some scratches in roughness.
Then he added a variation in the color of the plastic. One layer was responsible for the heterogeneity of the material itself. The second layer was responsible for the scratches.
In this work, I didn’t want to create dirt, because it was a household item of the USSR, I meant that the vacuum cleaner was being watched by its owners.
And I wanted to make the materials realistic without much damage and dirt.
Rendering
I love the rendering engine Cycles. And this renderer is made in it. It is very convenient when your basic modeling package closes the need for half of the programs.
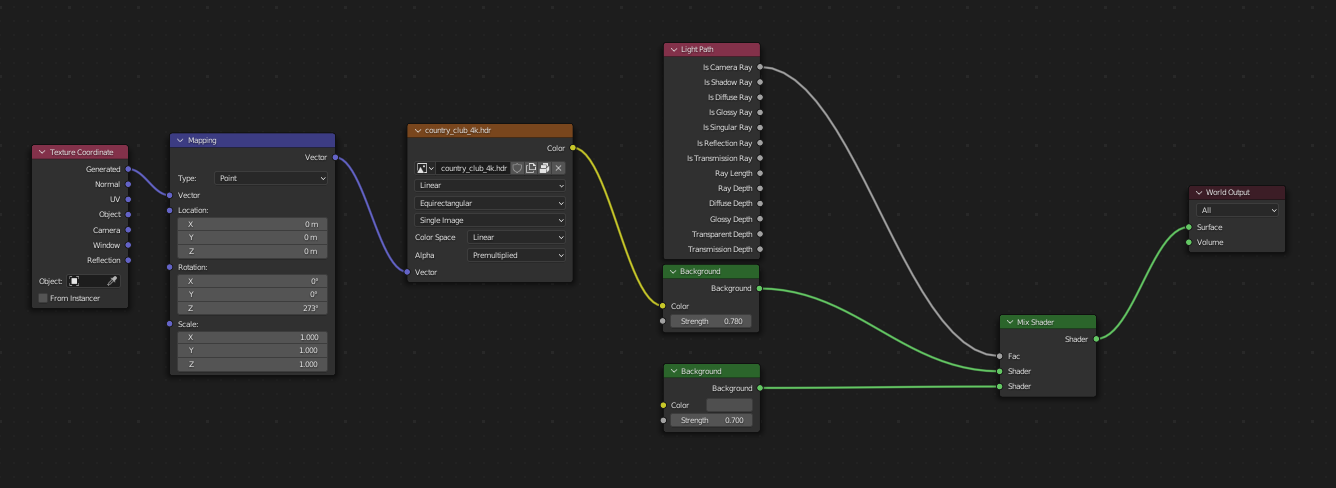
This whole hoover thing was experimental for me, so I decided to try something new. Usually, in my work, I use complex lighting schemes combining studio HDRI cards with conventional light sources. But not here. I found an HDRI card that reminded me of the interior of the “House of Culture” from the village.
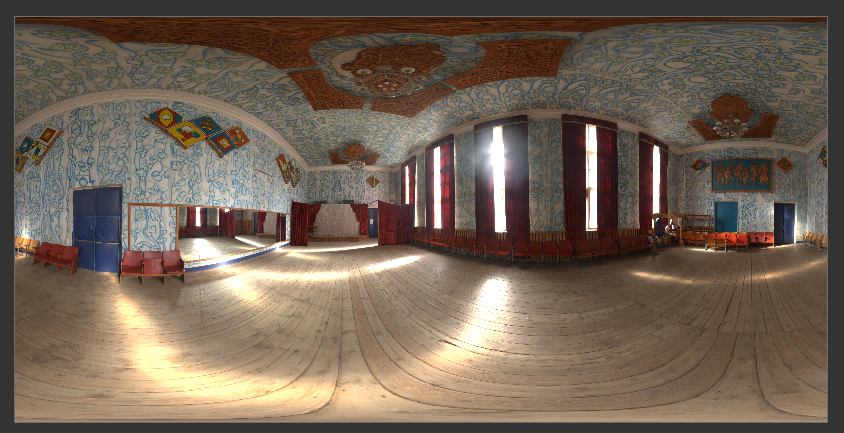
And I only used it to light the vacuum cleaner. In the spirit of the HDRI card was very suited to the vacuum cleaner and therefore complement the renderer with other light sources I just did not want.
Below I gave an example of how to configure the nodes to use HDRI.
The renders are in 4K resolution.
I’m lucky I tried rendering my vacuum cleaner while working, and I can show progress on materials. Here you see the basic materials changing and getting better:
Outro
I spent about seven days working on the vacuum cleaner. Five days before starting work I just thought, “What do I want to do in a retro-futuristic style?”. When the idea came along, I was unstoppable.
So if you have an idea, your job is half done.
Try to make it as good as you can now. Creating a portfolio is a creative process, it is very important that you like this idea first.
This is my first article, but now knowing that my skill has grown to the level that my work will want to publish somewhere, I will certainly do more backups and screenshots in the process of creating the work! )
Many thanks to the Games Artist team for this opportunity.
Read more articles
You might also like these articles.