Norwegian Village


Introduction
My name is Aleksei Bachinskii. With over seven years of experience in 3D content creation, I specialise in environment design, AAA asset production, cinematics, and concept development.
My work spans AR/VR innovation as well as game content creation for marketplaces and outsourcing studios.
I began my career in architectural visualisation, primarily working with 3ds Max and Corona Renderer to produce high-quality architectural renders for various companies.
After six months in this field, I gradually shifted my focus toward game development, studying game-ready asset creation through online courses and educational content.
When I first started learning 3D, high-quality educational resources, especially those focused on game asset production, were limited. This required a strong degree of self-learning and experimentation, which helped me build a solid technical foundation.
My professional growth accelerated after securing my first industry role, working on multiple mobile game projects through freelance platforms.
During this period, I significantly expanded my skill set, gained hands-on production experience, and continued to develop my professional career within the game industry.
Reference & Inspiration
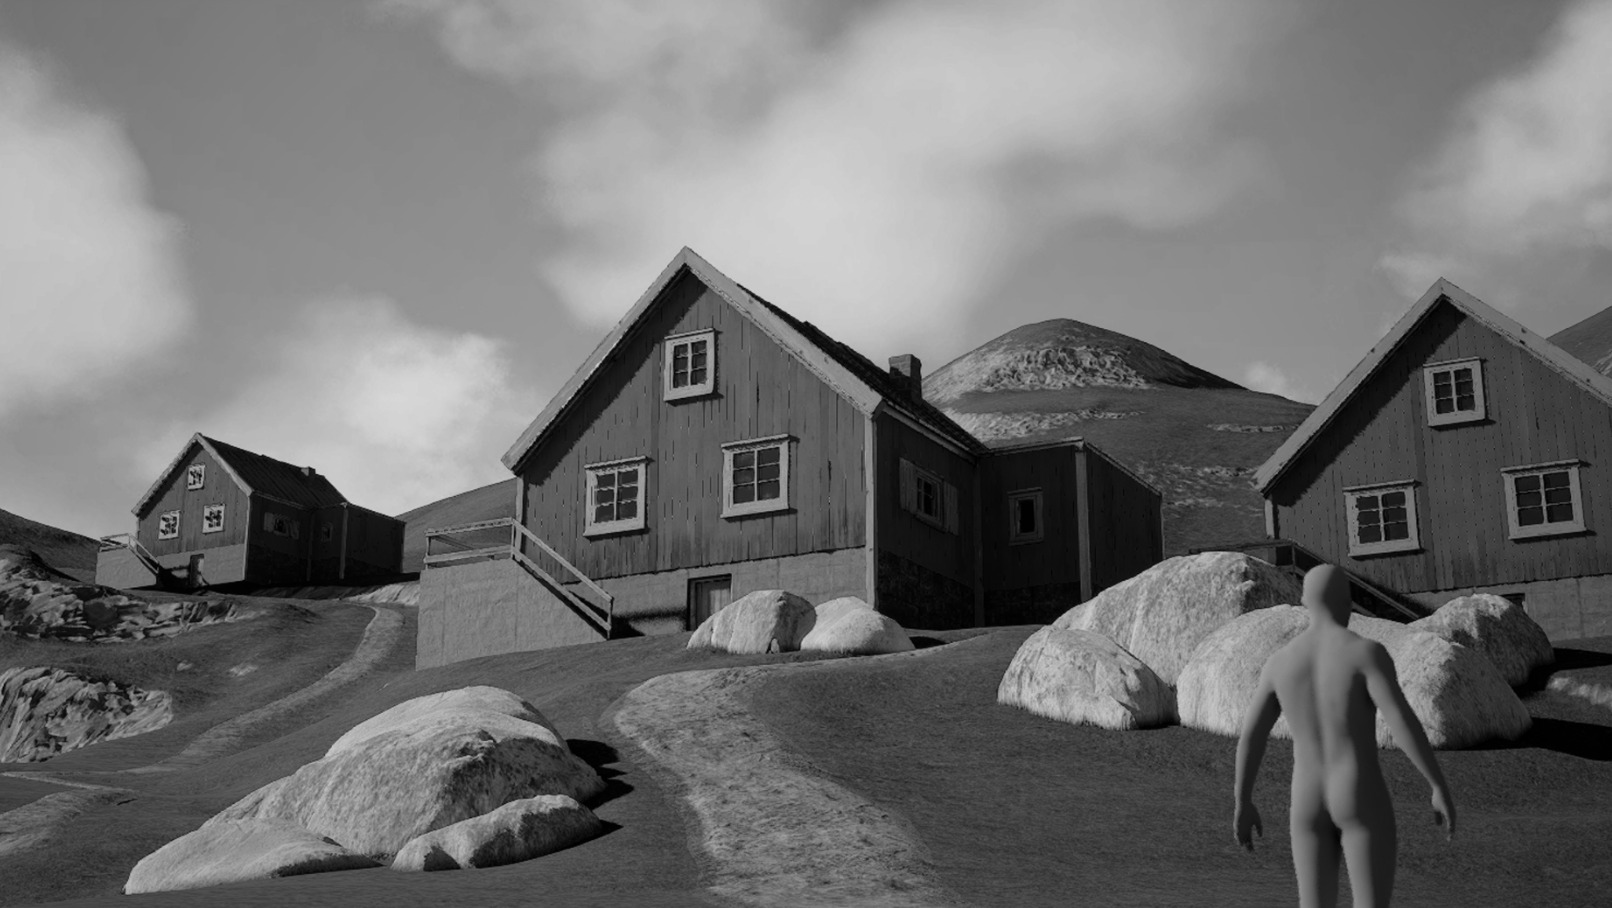
The idea of creating a Norwegian village came to me after I came across the work of Summer Archipelago by Pontus Ryman, Weather Station by Maxim Dorokhov, and concept art by Mark Komorowski.


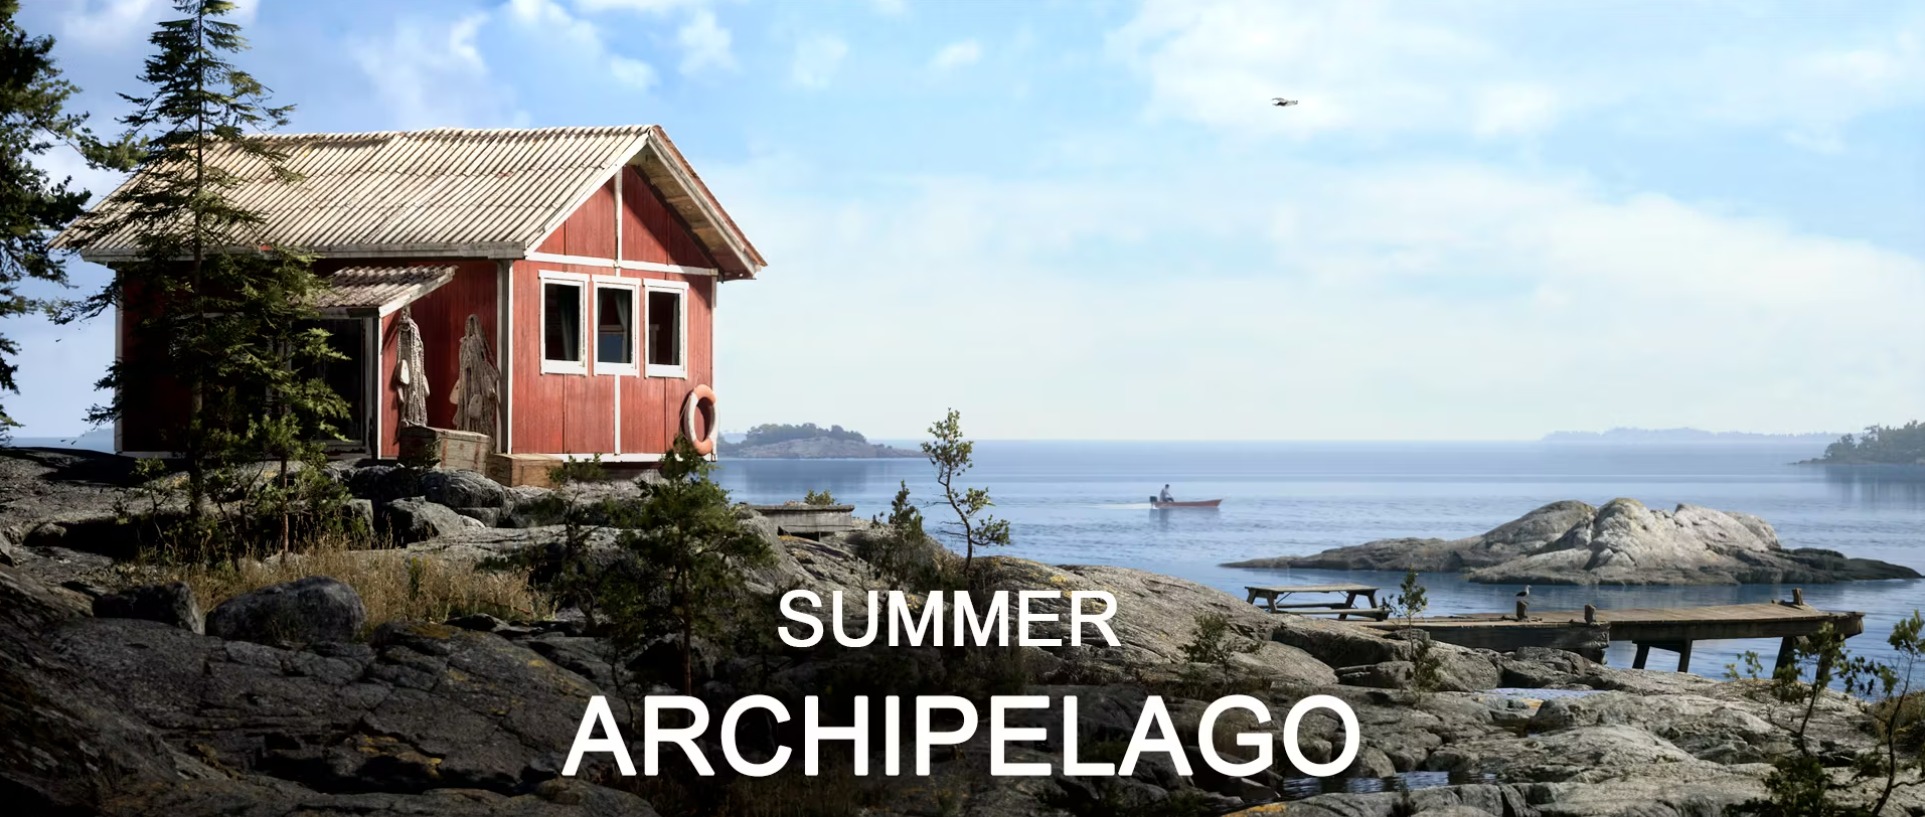
I used to live in such nature when I was a kid and was so inspired to create a realistic environment based on this mood and vision.
I wanted to create a similar vibe in Unreal, practise with lighting and atmosphere, and test the new Layered Material in Unreal.
Blockout & Modelling
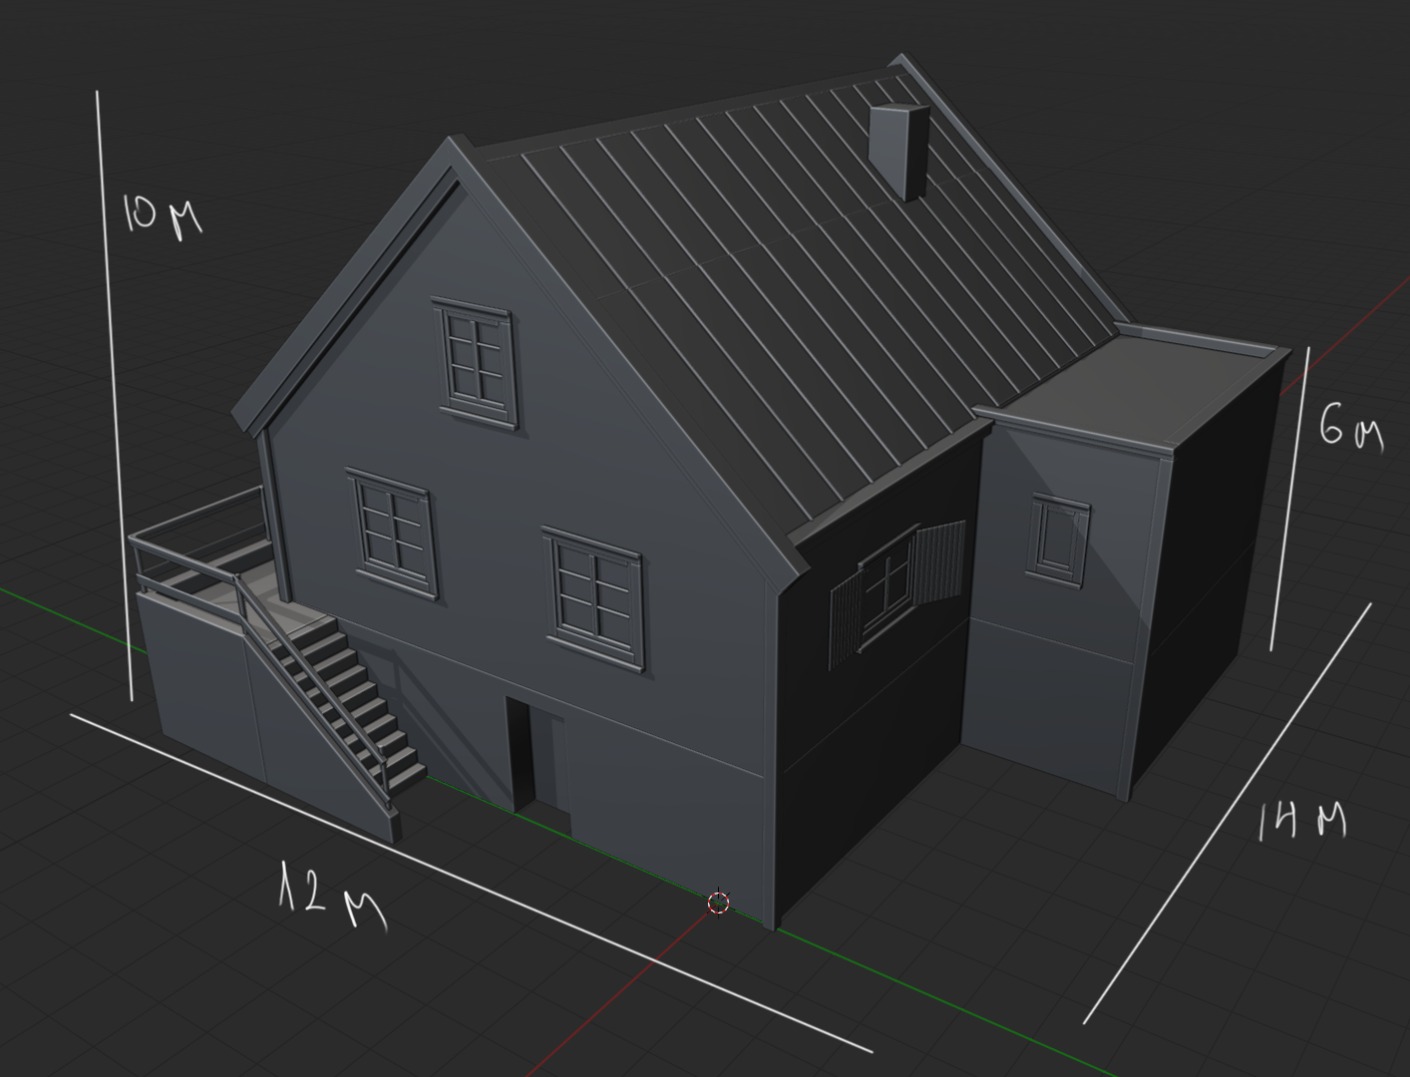
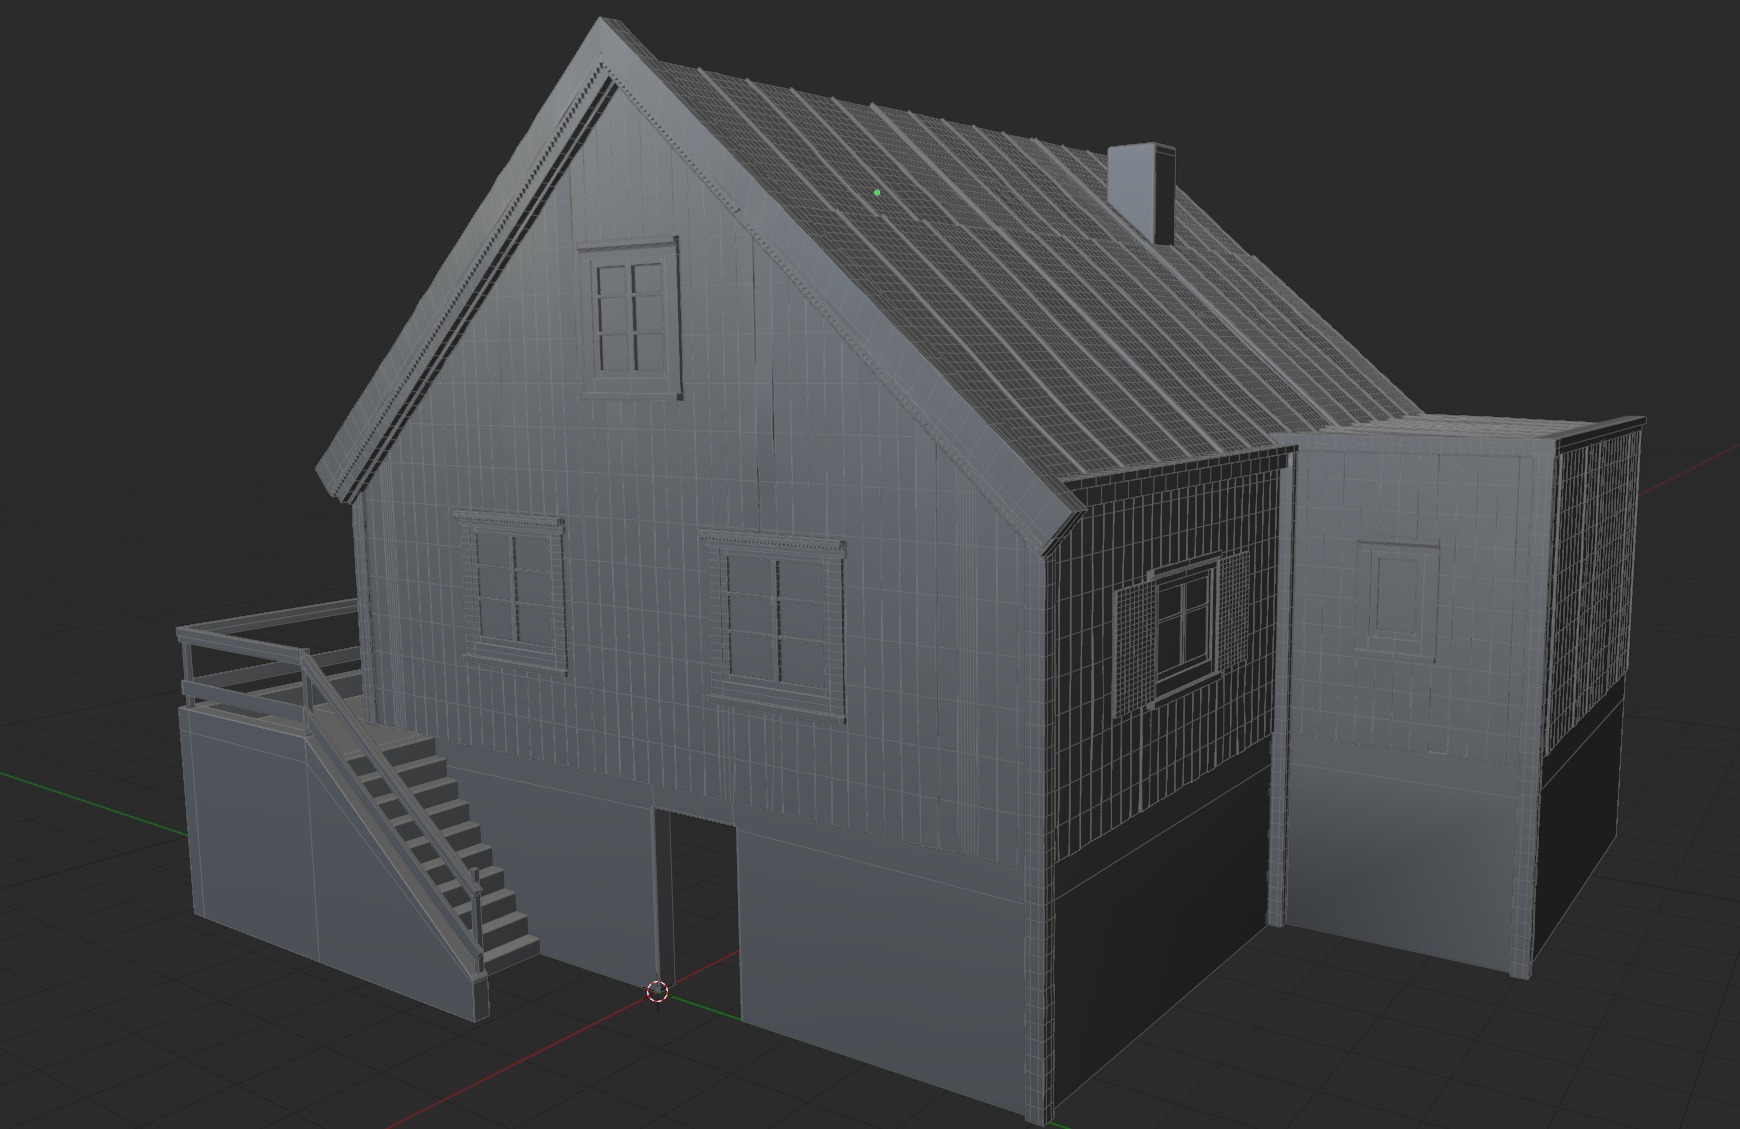
I began the process by creating a blockout of the house, focusing first on achieving a realistic scale.
I used a 2-metre-tall human reference as a baseline to ensure that doors, windows, and other architectural elements were correctly proportioned.
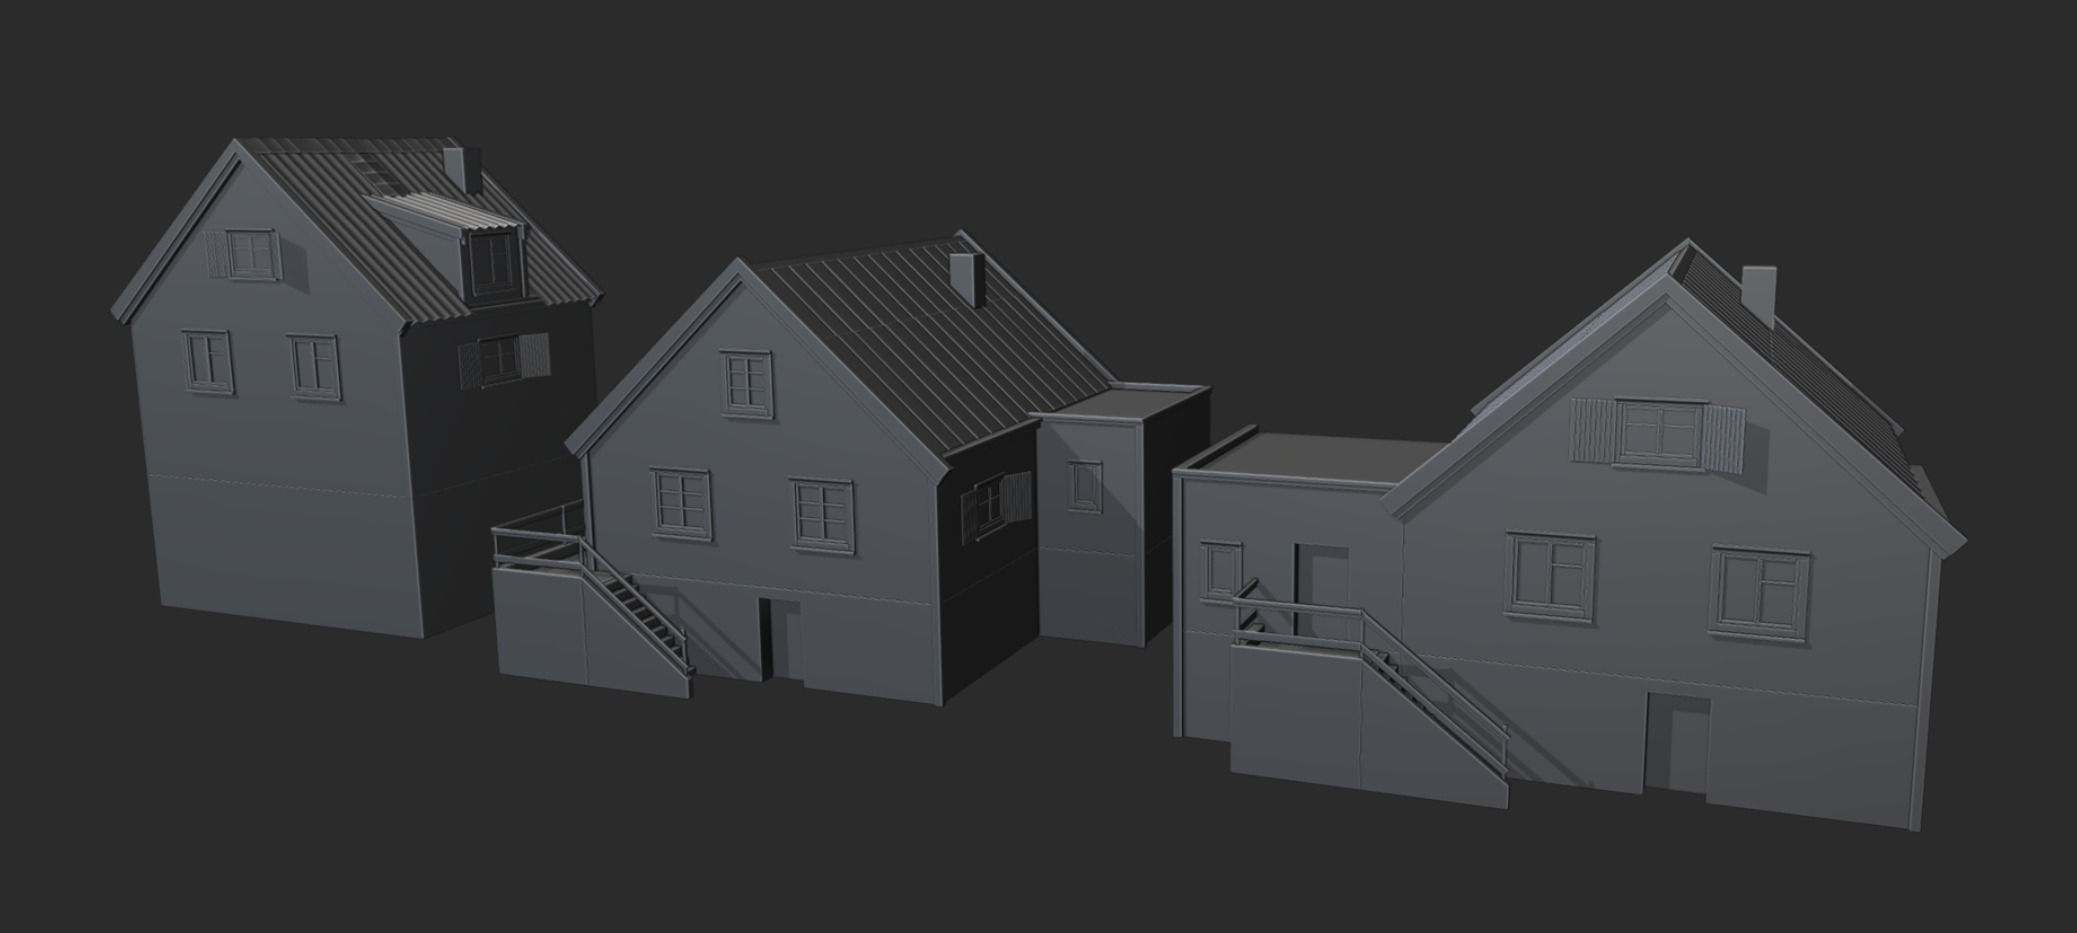
At this stage, I also broke the house down into modular components, allowing these elements to be efficiently reused in the construction of the remaining two houses.
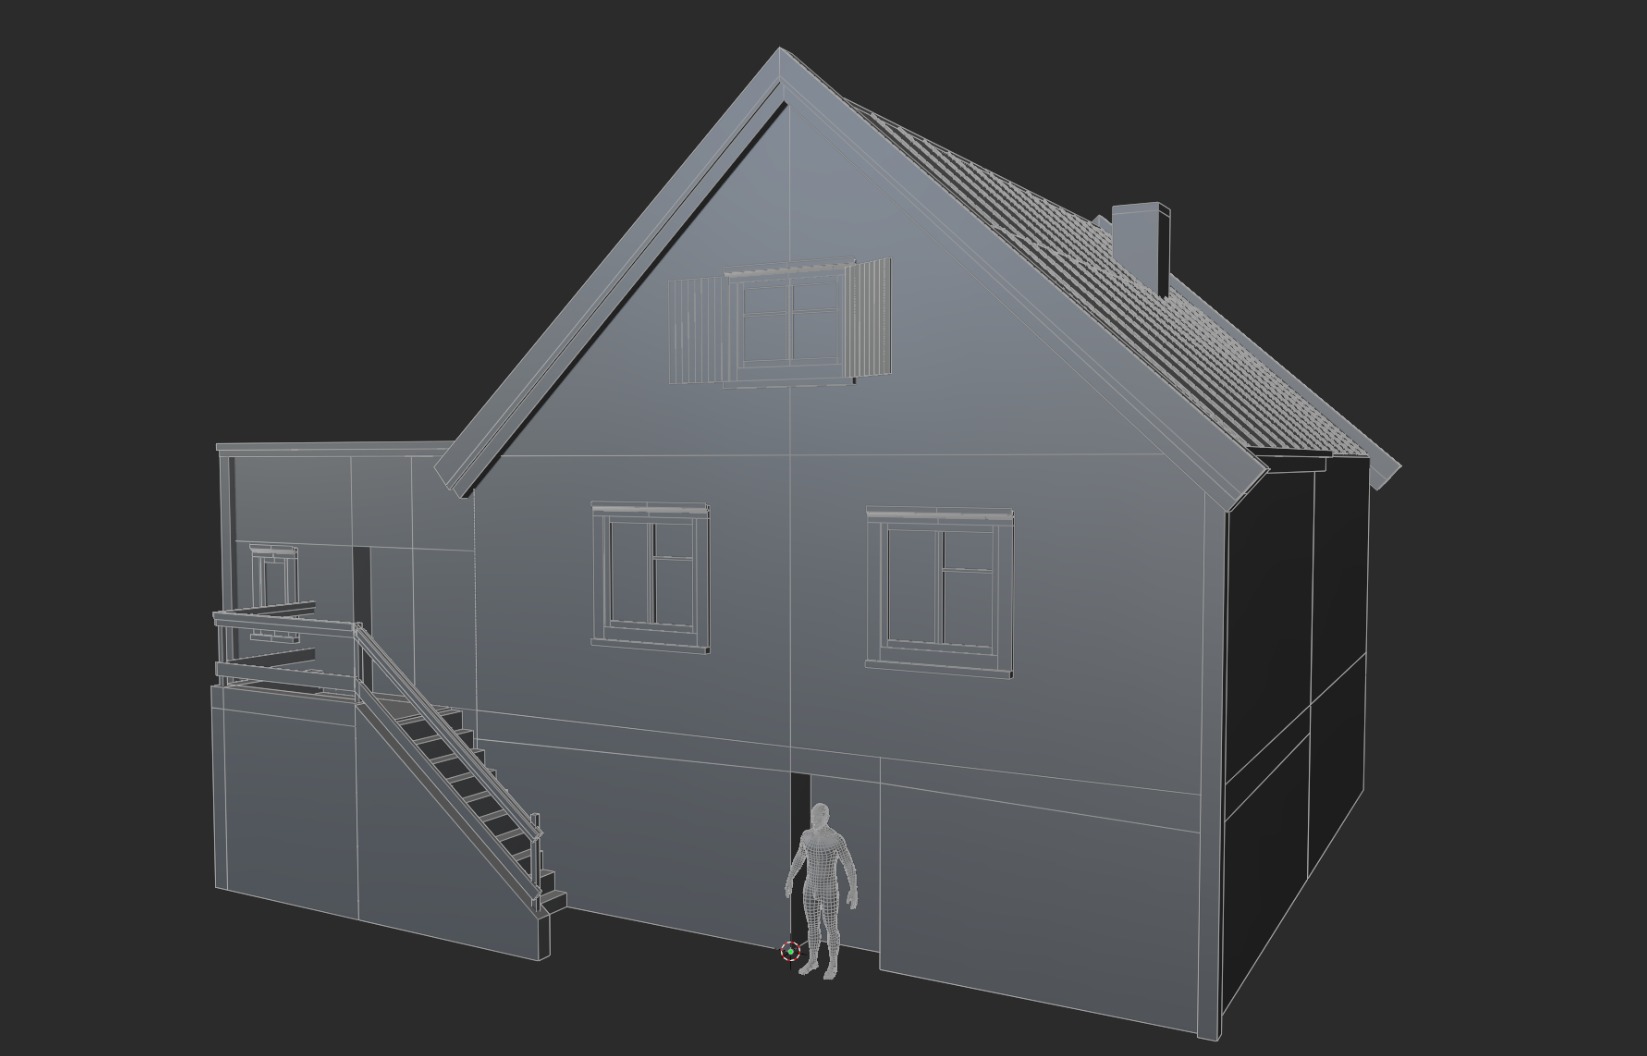
I broke the house down into its roof, walls, steps, windows, cornices, and foundation. So I created modular assets to build 3 different houses.
I tried to always maintain the correct step, a multiple of two, and a grid reference to make it easier to work and to correctly unwrap and apply textures.
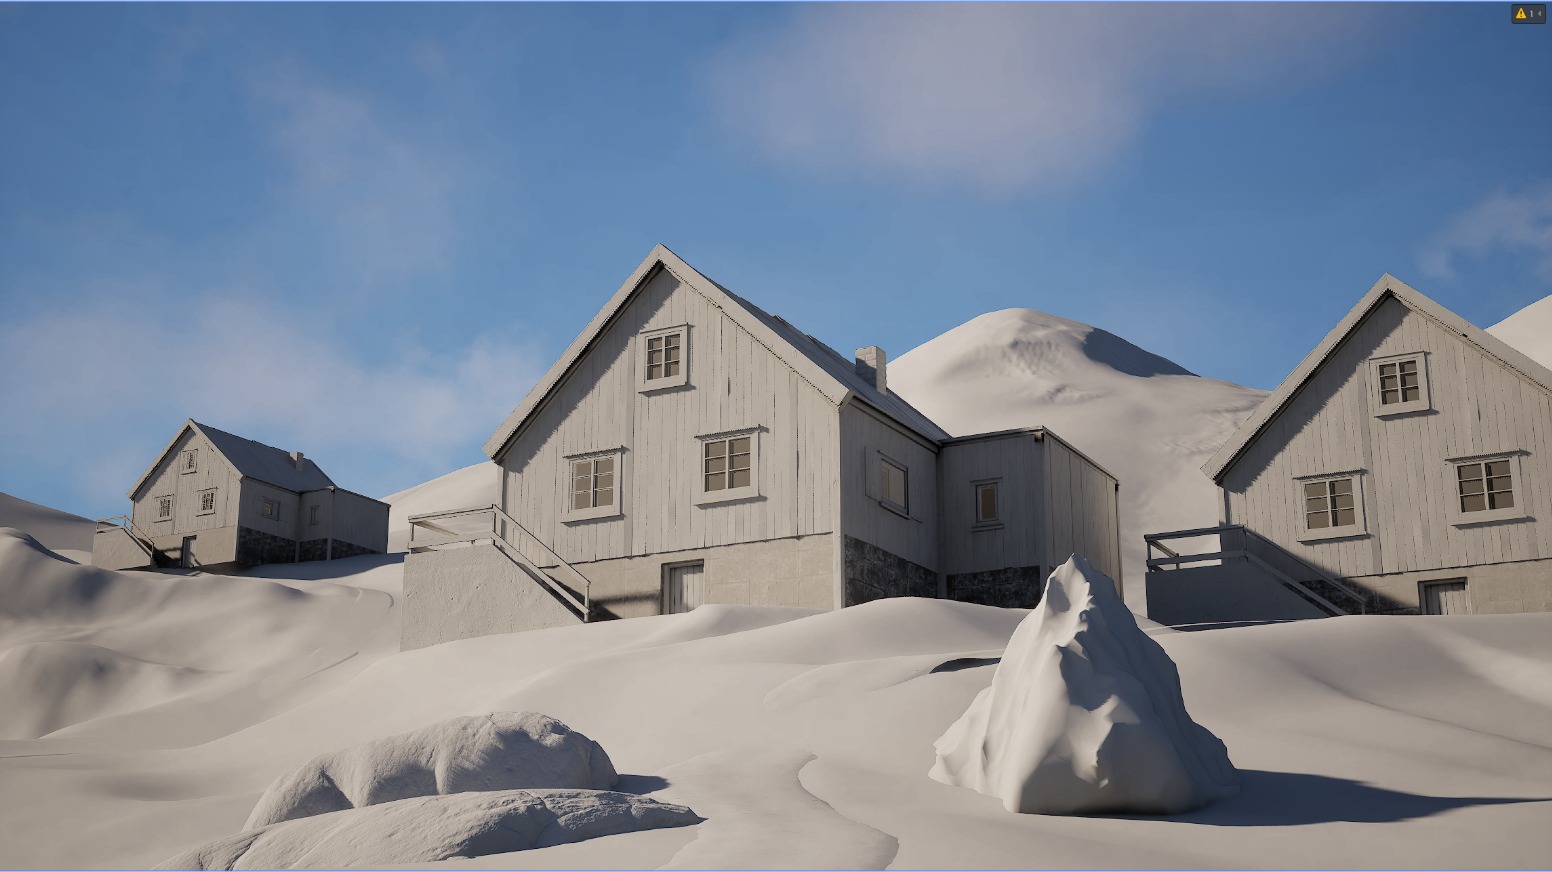
Once the house blockouts were complete, I imported them into Unreal Engine and began sculpting the landscape while establishing the main composition.
After I was satisfied with the overall scale and the landscape blockout, I proceeded with refining and developing the houses further.
Houses Detalization
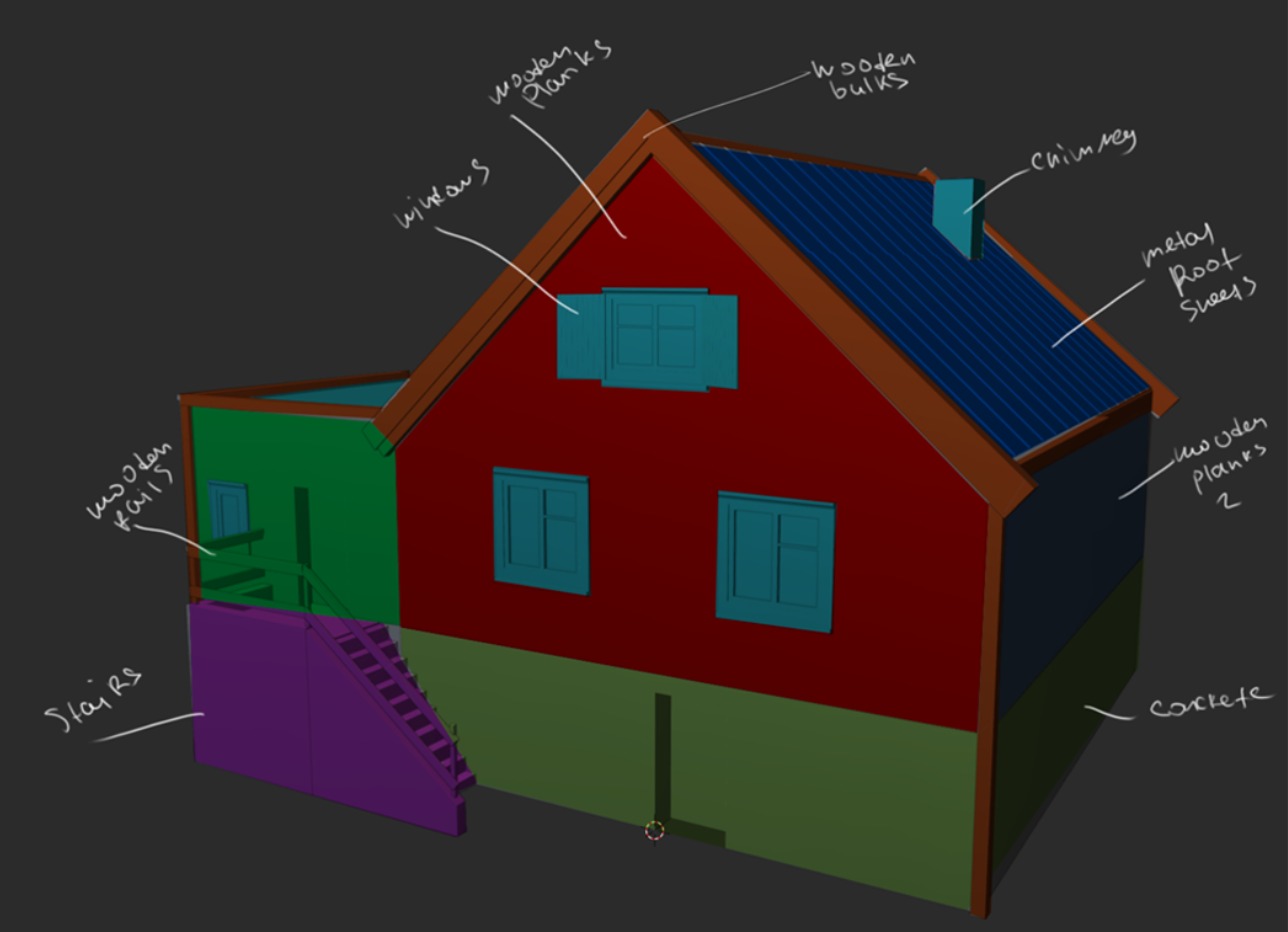
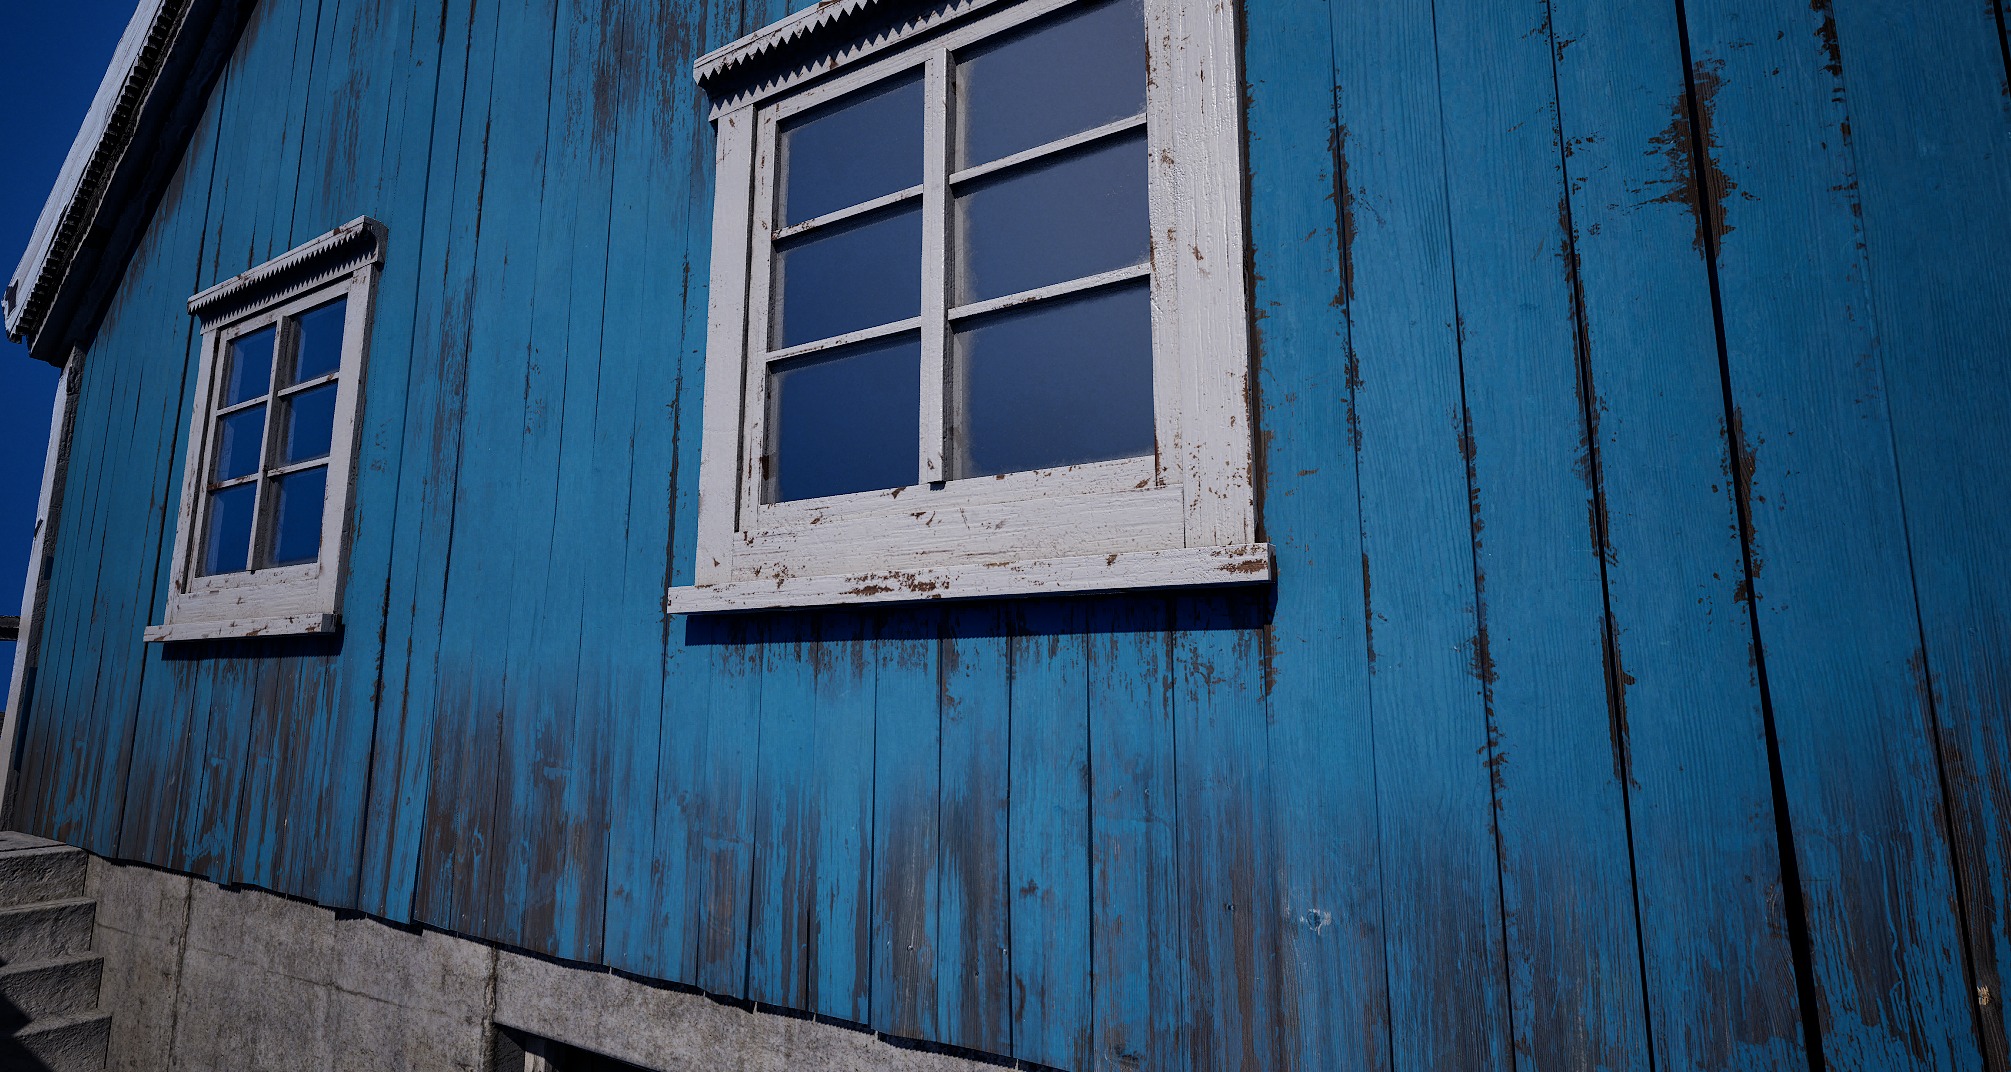
The next step was finalising the houses and transferring them into Unreal Engine. I began by detailing the walls, focusing on creating a rustic, aged look.
To achieve surface unevenness, I introduced deliberate cuts and manually adjusted individual boards, creating the natural imperfections associated with wear and aging.
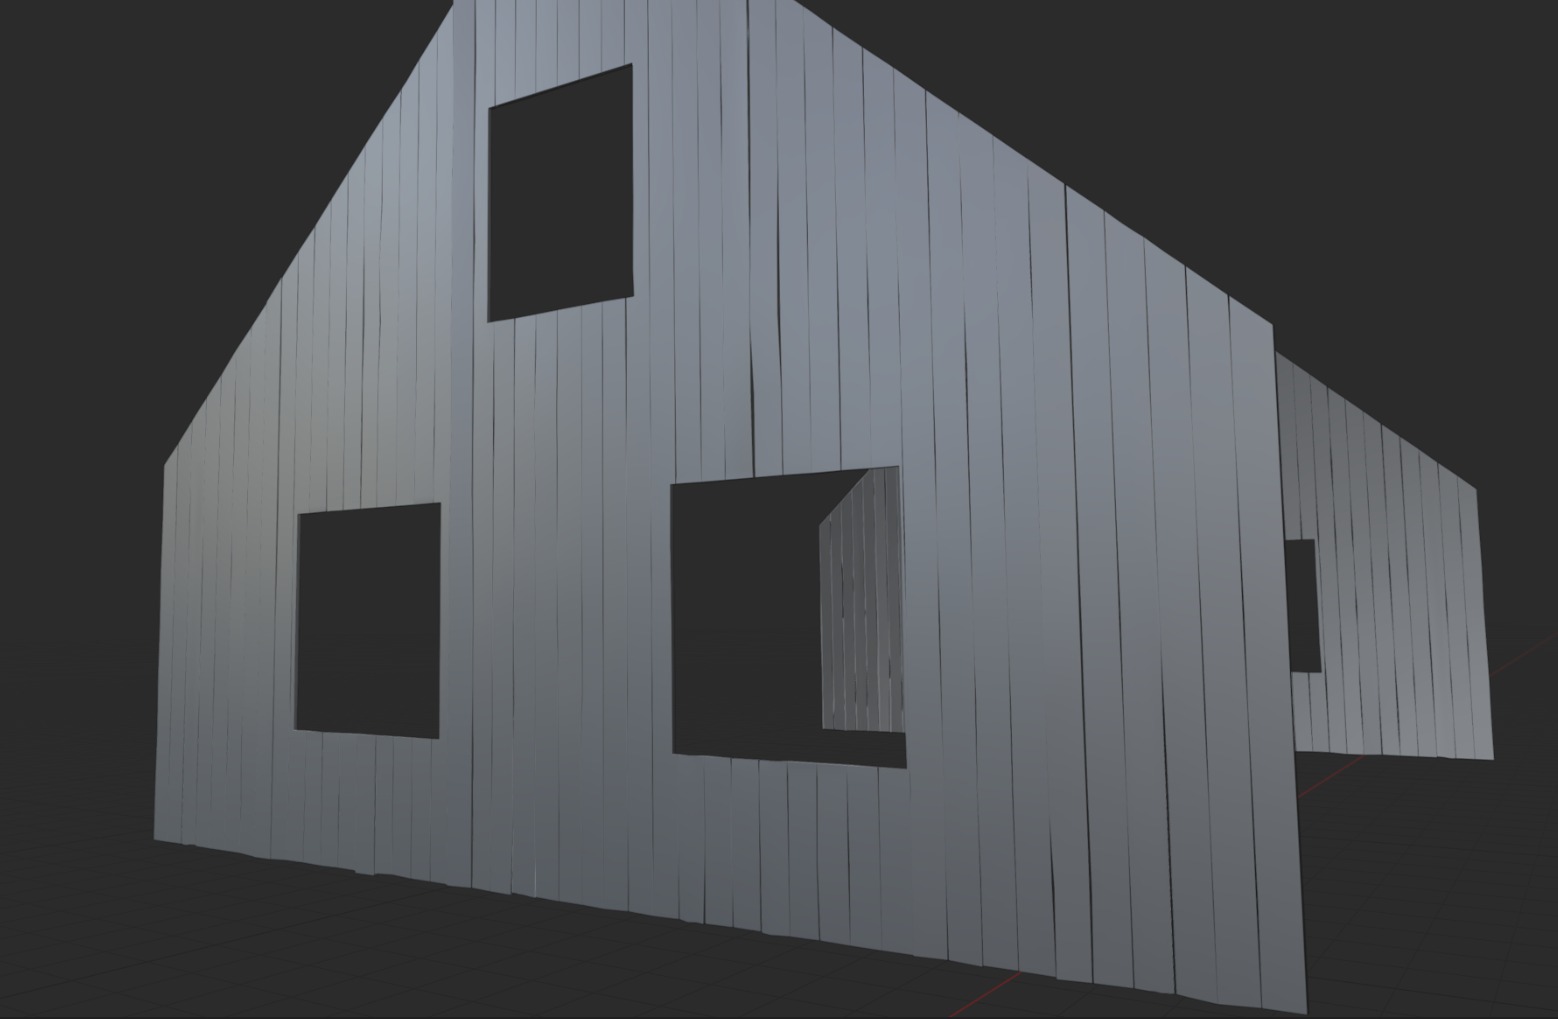
For the wood details, I used real references and wooden beams to make the windows more authentic and realistic in appearance.

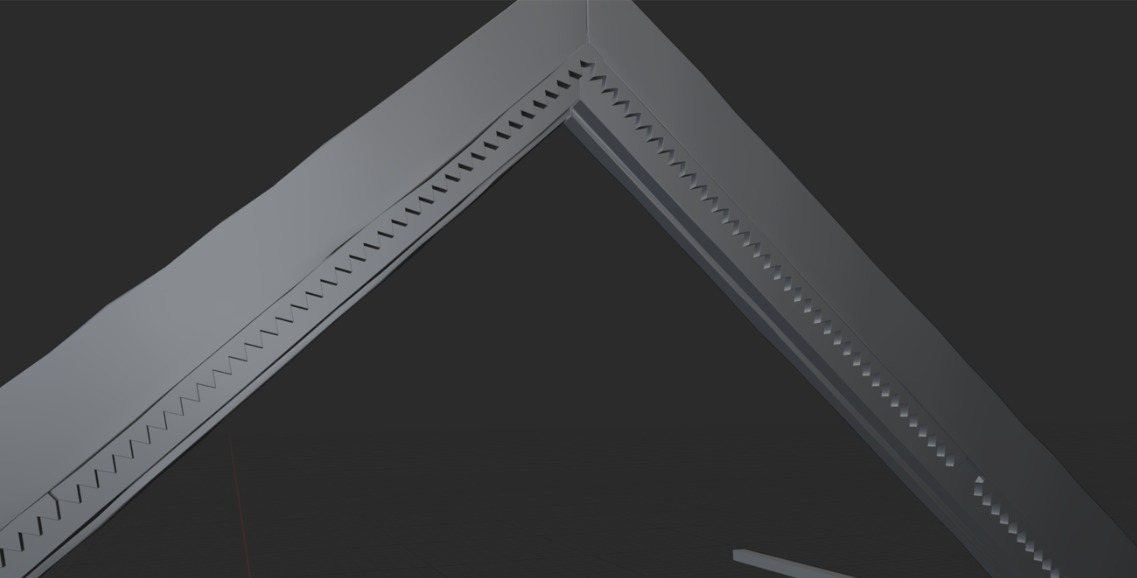


For the roof, I created modular metal sheets and scattered them across. To add details, I applied a displacement noise modifier.

Full house is ready.
UV & Materials
For UVs I used 2 channels, UV1 for RGB mask and UV2 for tilable textures. For RGB masks I chose 5.12 px for 2k texture, and for tile 10.24 px for 4k tile textures.


For materials I used the Megascans library and a few materials like wood and painted wood I made in Substance.
To assemble all materials in Unreal Engine, I used the Layered Material system.
This approach allows materials to be seamlessly blended using RGB masks, providing a high level of control and flexibility.
It offers numerous advantages when it comes to achieving precise visual results and maintaining a clean, efficient material setup.

For texturing I used 4 layers:
- Layer 1: base wood layer
- Layer 2: a little bit rotten wood
- Layer 3: painted wood
- Layer 4: old painted wood


I used this approach pretty much everywhere for houses.

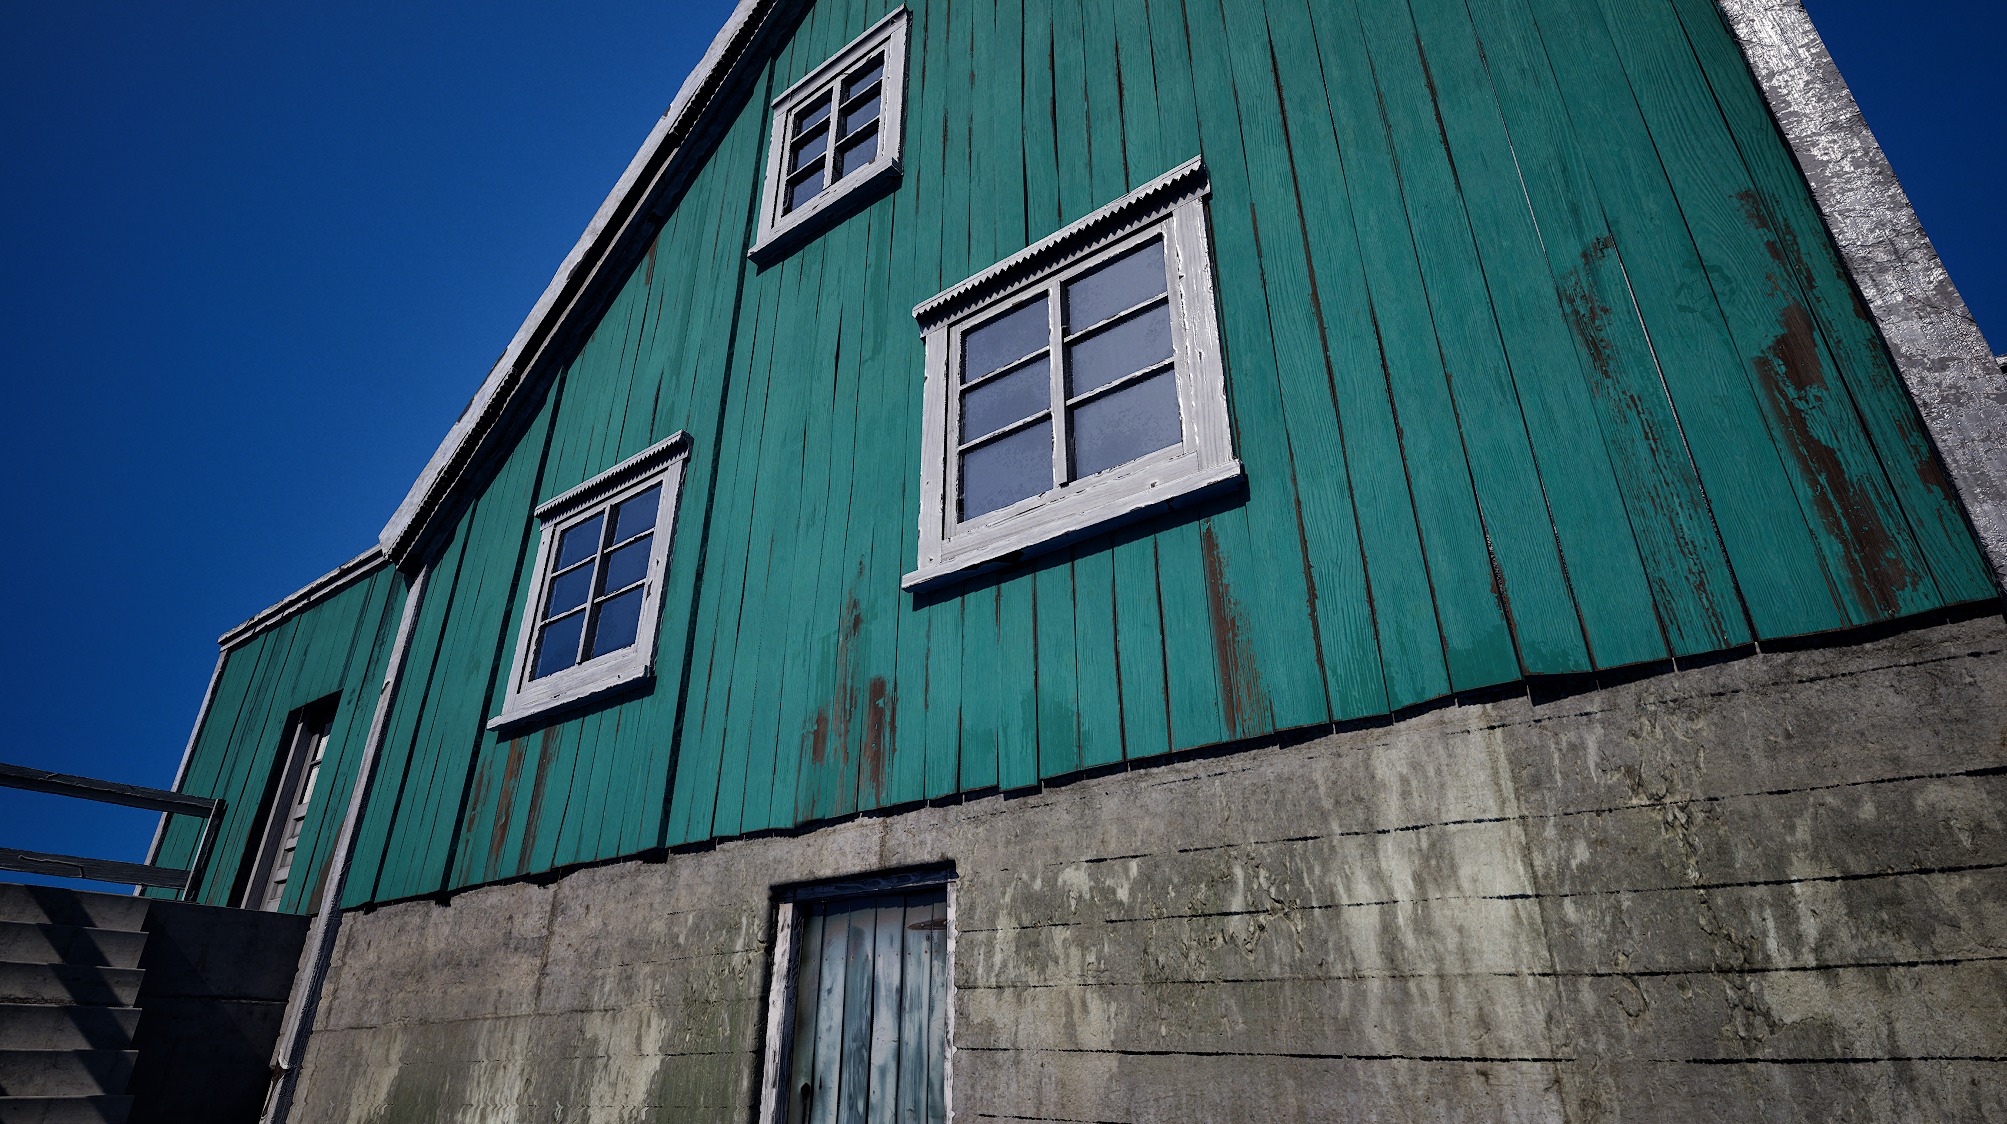
That helped me to save time on the texturing process in Substance and see full control in real time in Unreal.
Terrain
For landscape creation, I used Unreal Engine’s default Landscape tools along with the spline system to create the paths.
At this stage, my goal was to establish a basic landscape that matched the concept and helped define the overall scale and composition.
For paths I created dirty muddy road assets and used them with vertex paint combination.


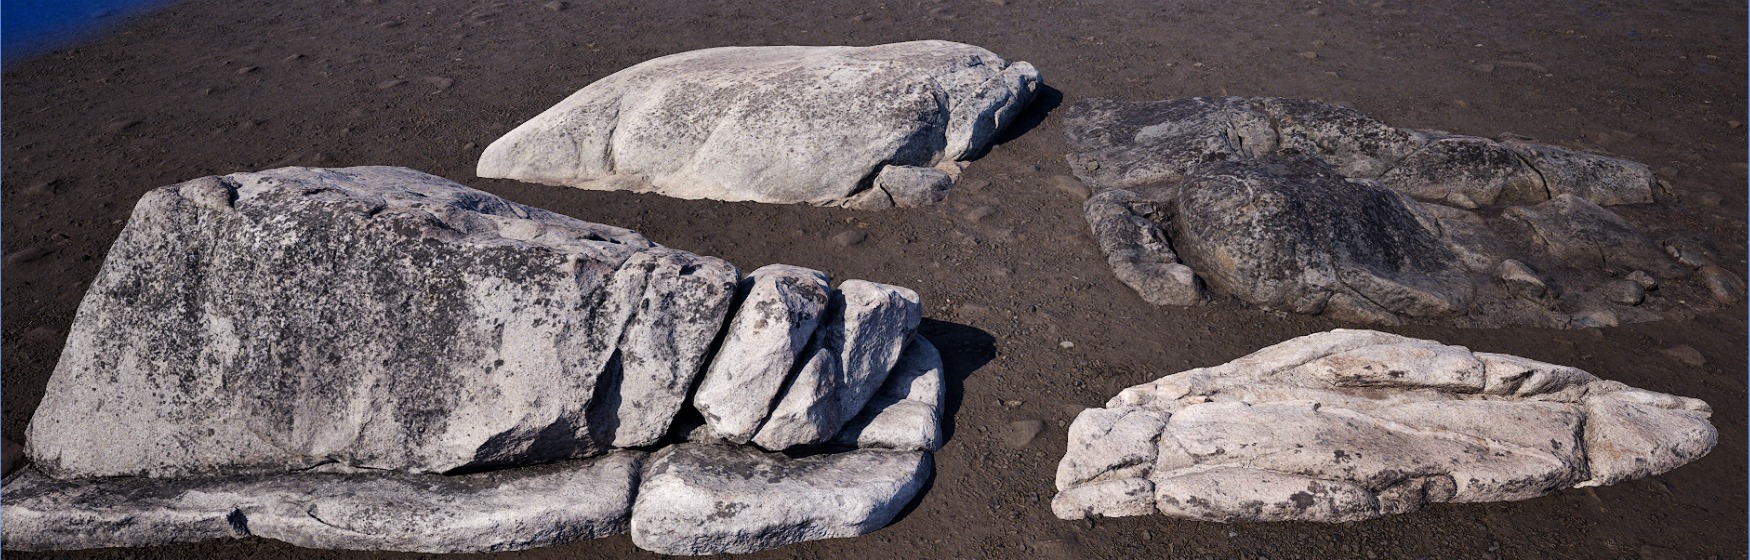
For foliage, debris, and rocks, I used Megascans assets, slightly modifying their textures to achieve the desired look.

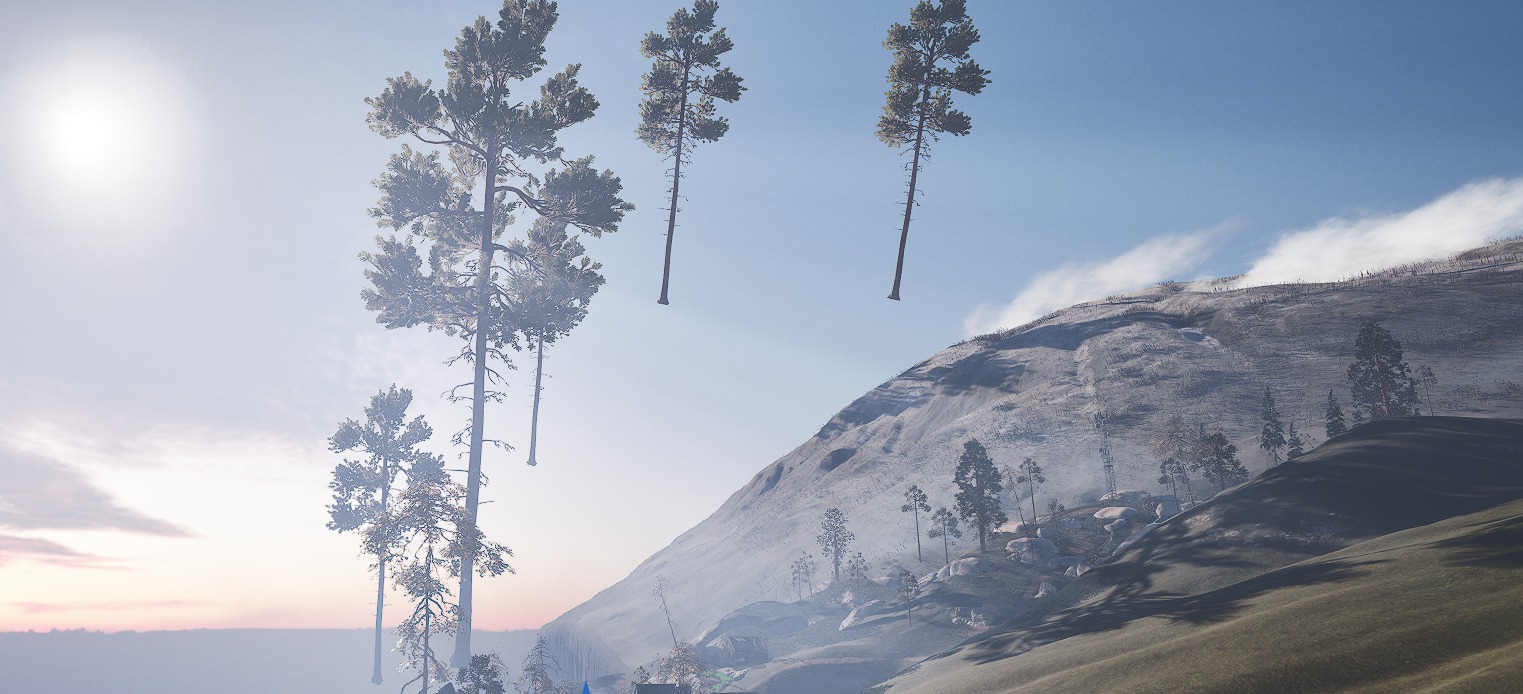
For trees and pines I used the Dekogon Pines pack; it was perfectly matched with my Norway vibe.

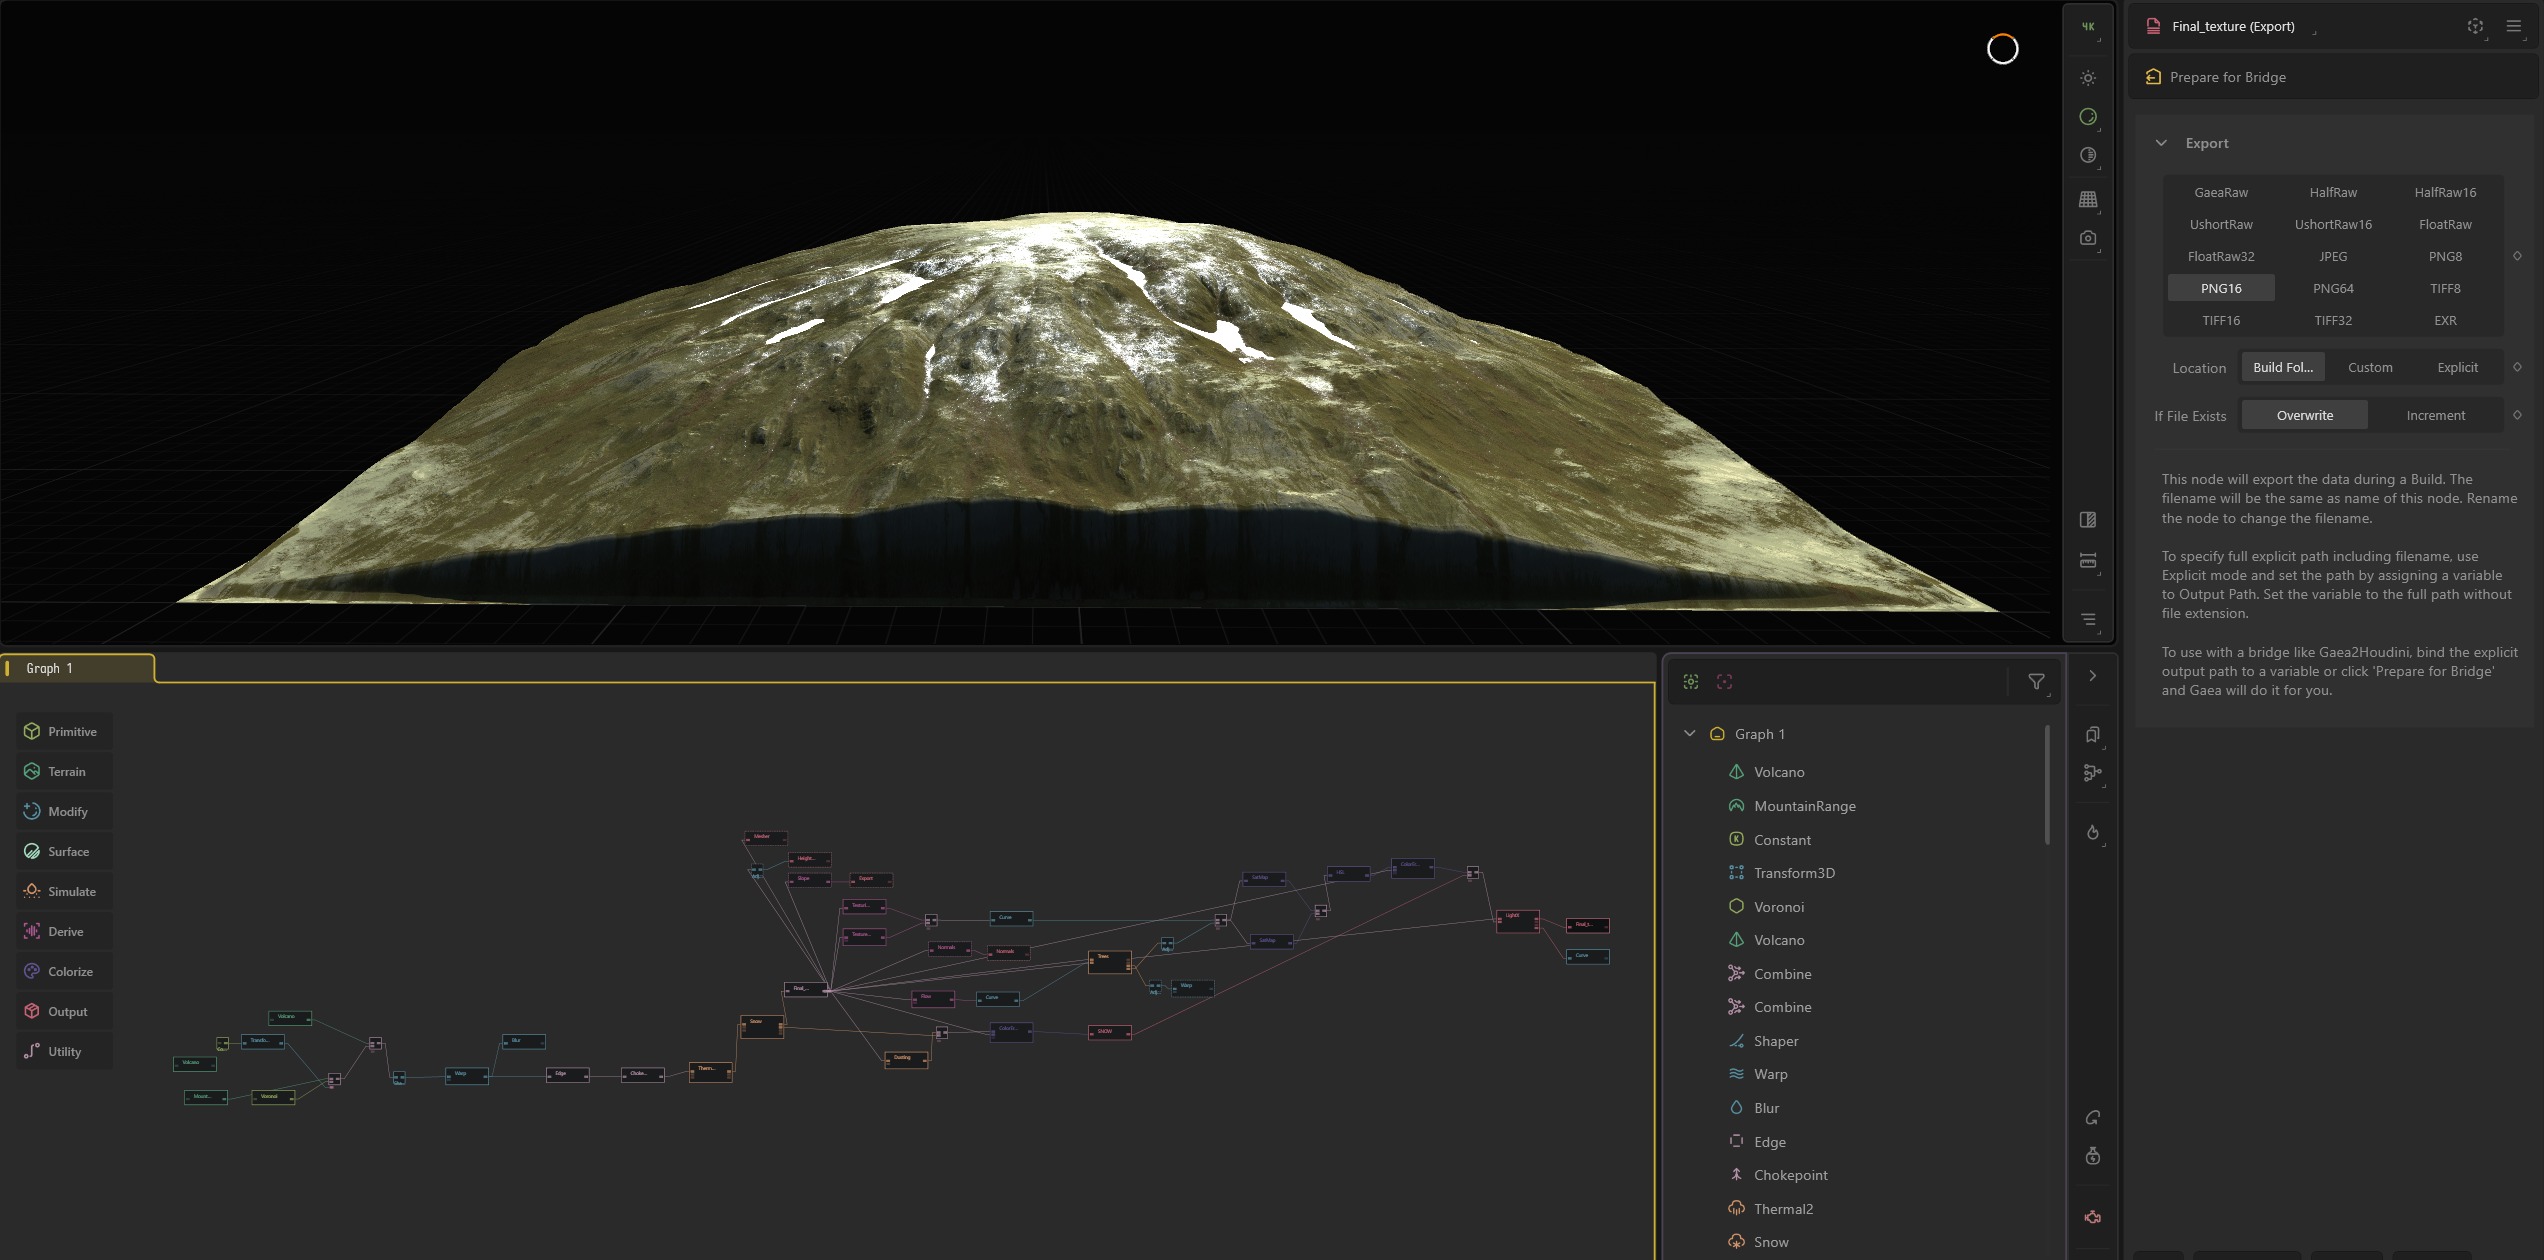
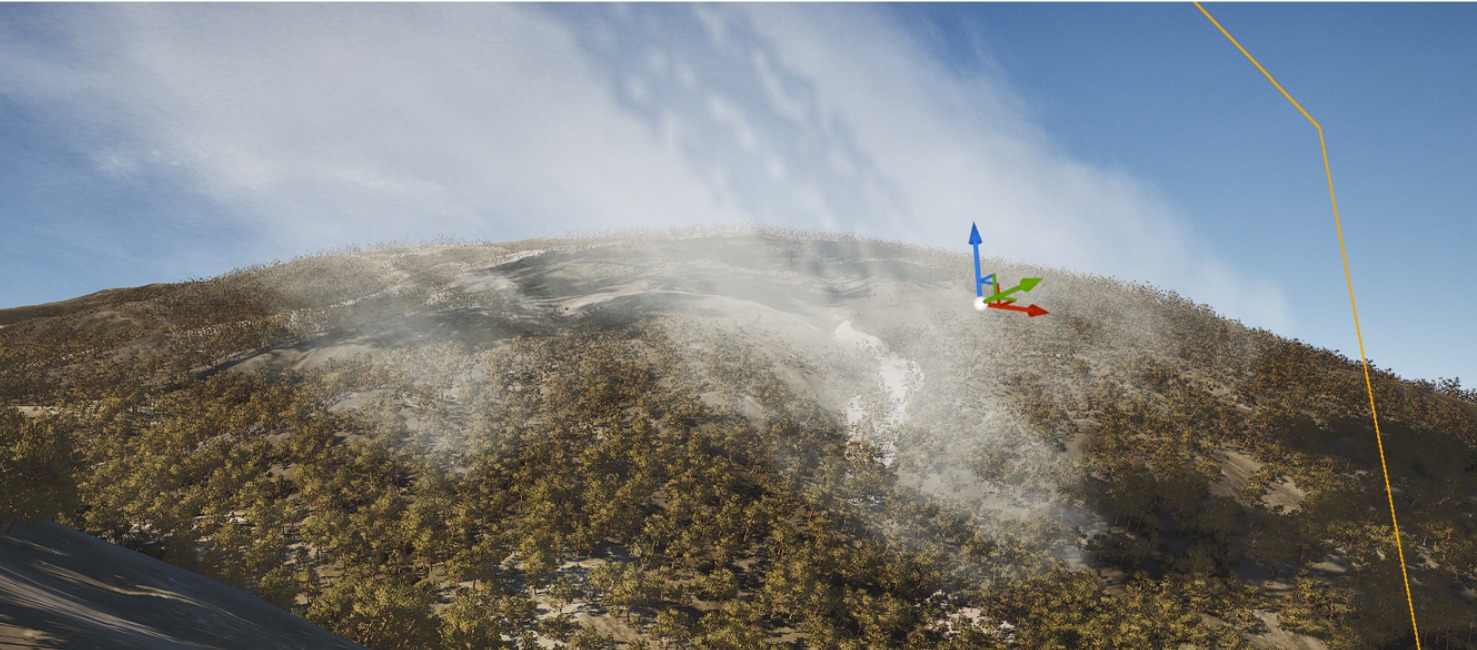
For the background mountains, I created the asset in Gaea. I wanted more flexibility and a specific look, so Gaea was the perfect tool for this task.
For the mountain material, I used the same layered material as the one applied to the houses, working with RGB masks for better control and consistency.
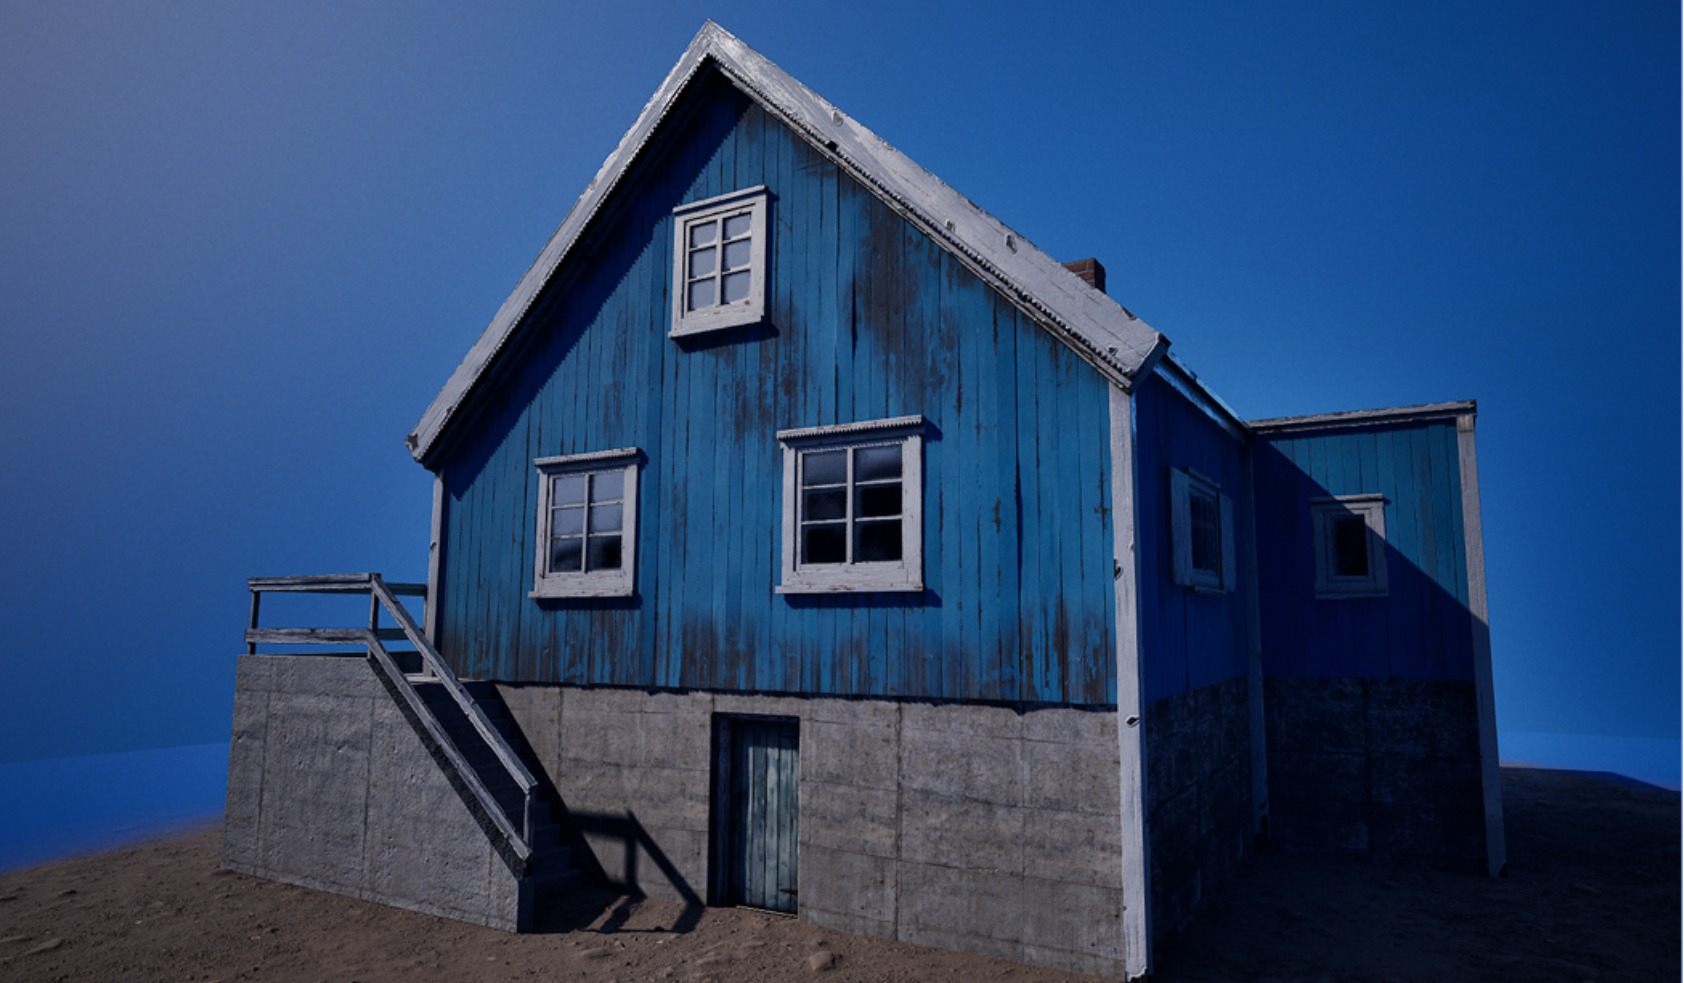
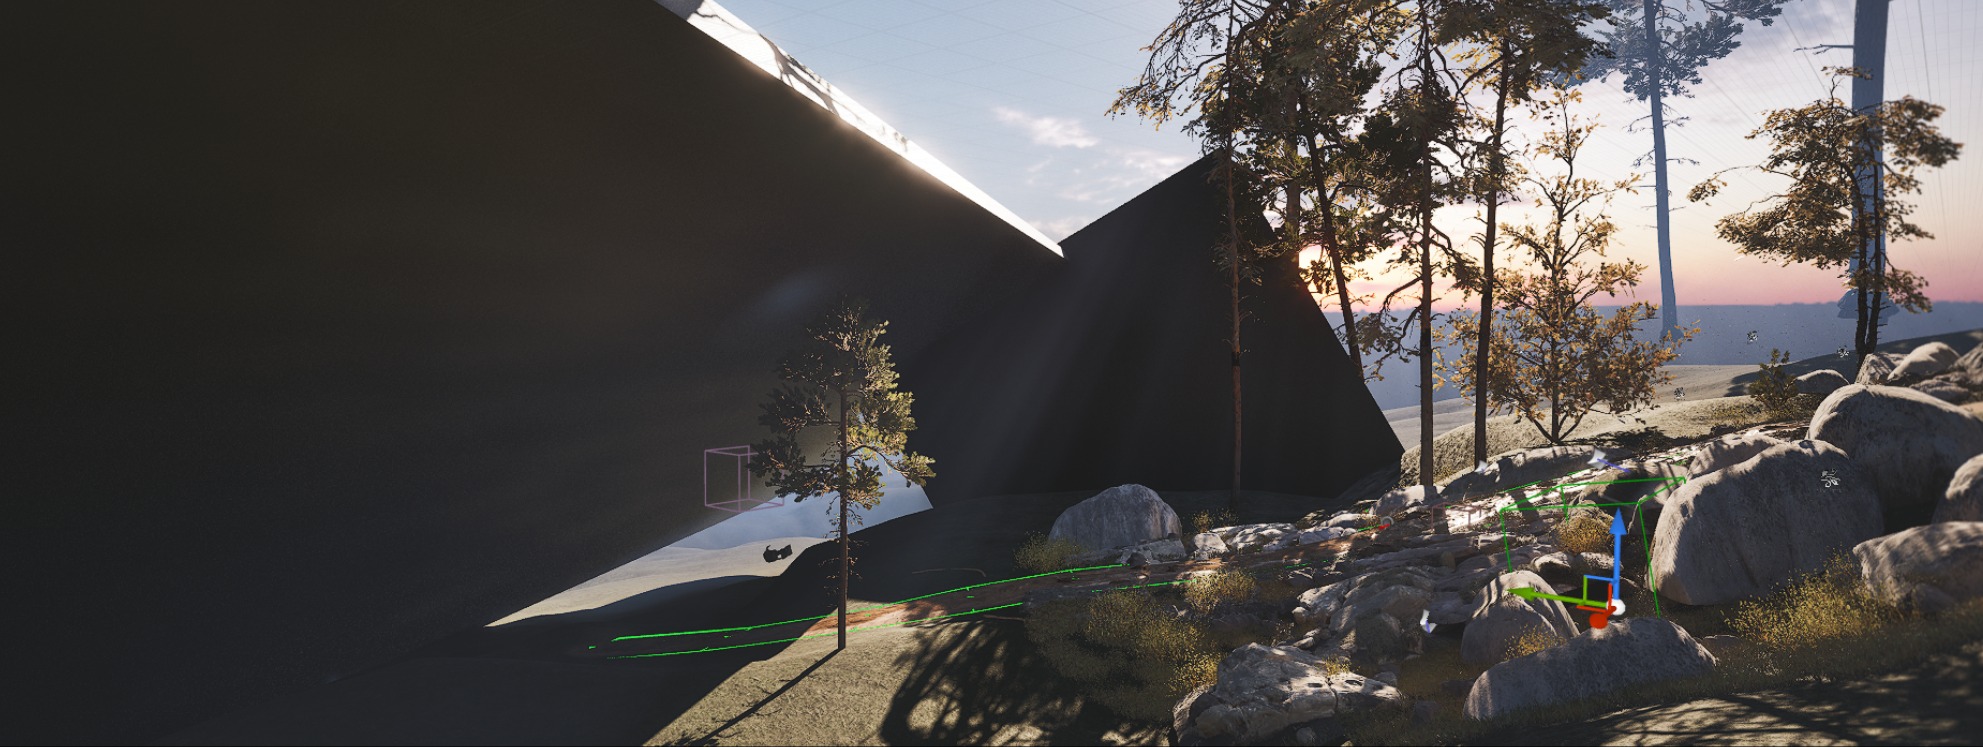
Lighting
The lighting setup was relatively straightforward. I aimed to recreate a sunset atmosphere with warm, golden tones and softened shadows.
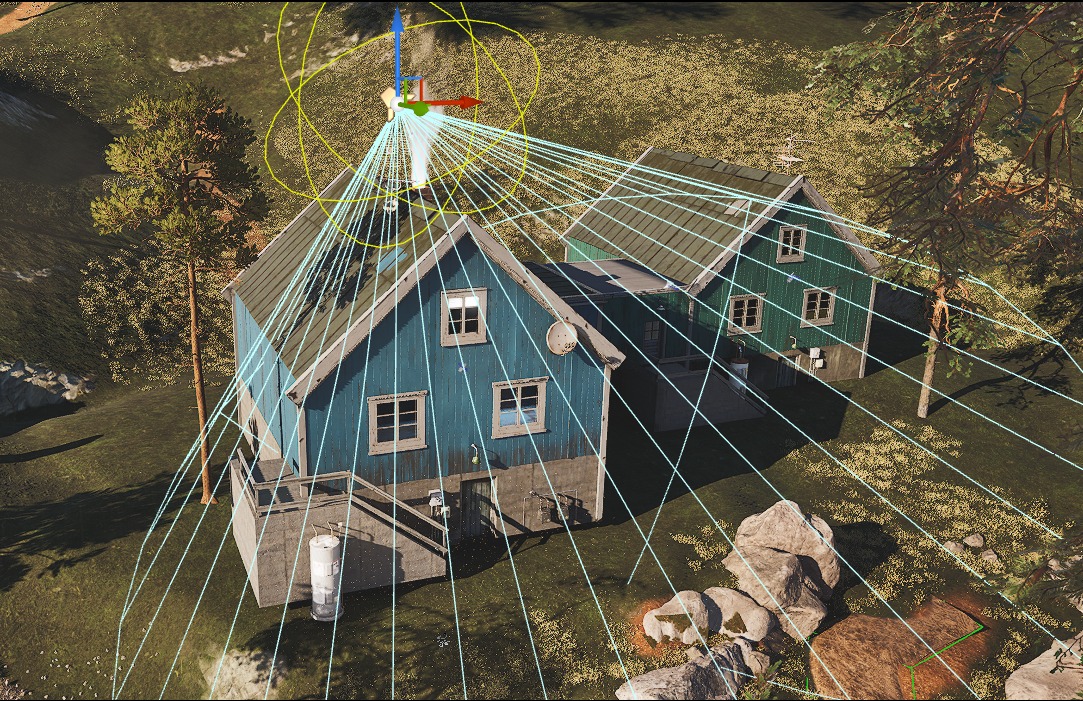
I used Unreal Engine’s default lighting tools, with a Directional Light and Skylight as the main light sources.
Additional spotlights were placed to highlight key elements of the houses and to introduce extra shadow variation in the distance.


To create extra shadows close to the camera I created shadow meshes to block lights from the back and added some big trees to increase shadow silhouette.
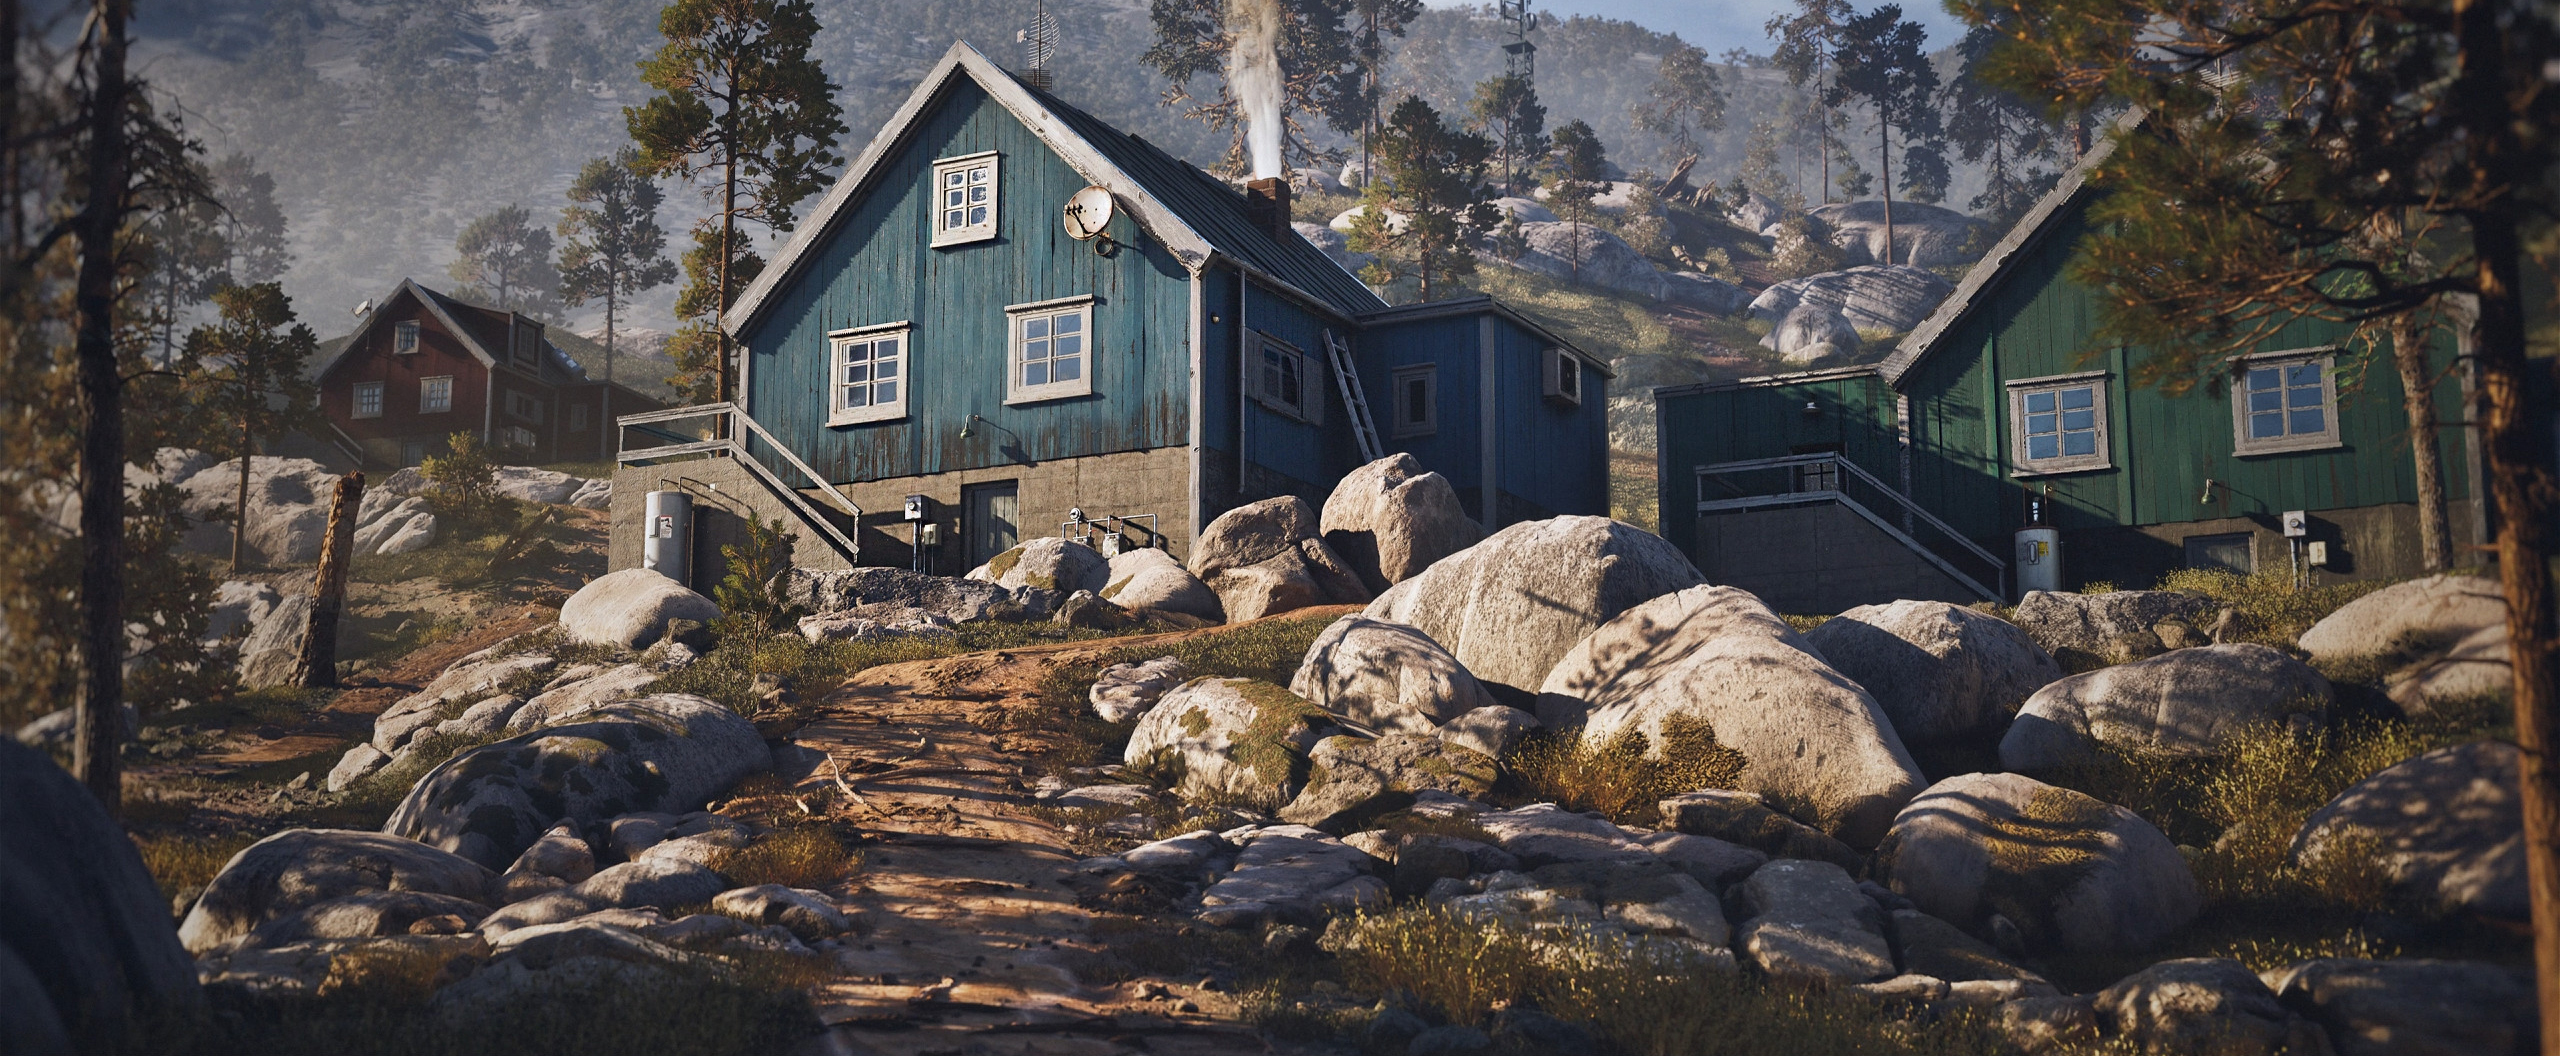
Final Touches
For final touches I decorated the scene a little with some assets from the market, like solar panels and boilers.


For VFX I used Easy Fog for distance fog planes and VDB smoke animation which I added on the chimney.
Birds on the background I took from my old project.

For post-processing, I used Cinematic LUT presets and applied minor colour corrections.
I prefer to establish the overall look directly in-engine before rendering, leaving only subtle final adjustments to be done later in DaVinci Resolve.

I like using local exposure parameters and convolution bloom; it brings a more cinematic look.


Overall, a useful tip: if you feel that your project doesn’t look good enough, try experimenting with lighting and post-processing.
I believe these two elements account for at least 50% of a project’s success.
Conclusion
The scene took around 3 weeks in my spare time to complete from start to finish.
Throughout the process, I learned a great deal and gained much more confidence in handling complex compositions, scene planning, and especially working with the Layered system in Unreal.
Overall, this project wasn’t about pushing myself technically or learning many new things. My main goal was simply to create a beautiful, cinematic game environment.
If I had to offer advice to artists who are just starting out, it would be this: trust the process and the skills you’re building.
There were many moments of frustration when the scene didn’t match what I had envisioned, but pushing through those moments and learning from them is what ultimately leads to completion.
Read more articles
You might also like these articles.