Orel Class Carrier

Introduction
Hello! My name is Jamison Cunningham. I’m a 3D artist from the state of Iowa in the United States.
I started 3D modeling back in 2019. My main specialty is vehicles, especially naval vessels.


Tools
For this project, I used Blender as both my modeling and rendering software (Cycles), heavily utilizing procedural nodes for texturing. For references, I used PureRef.
Goals and Challenges
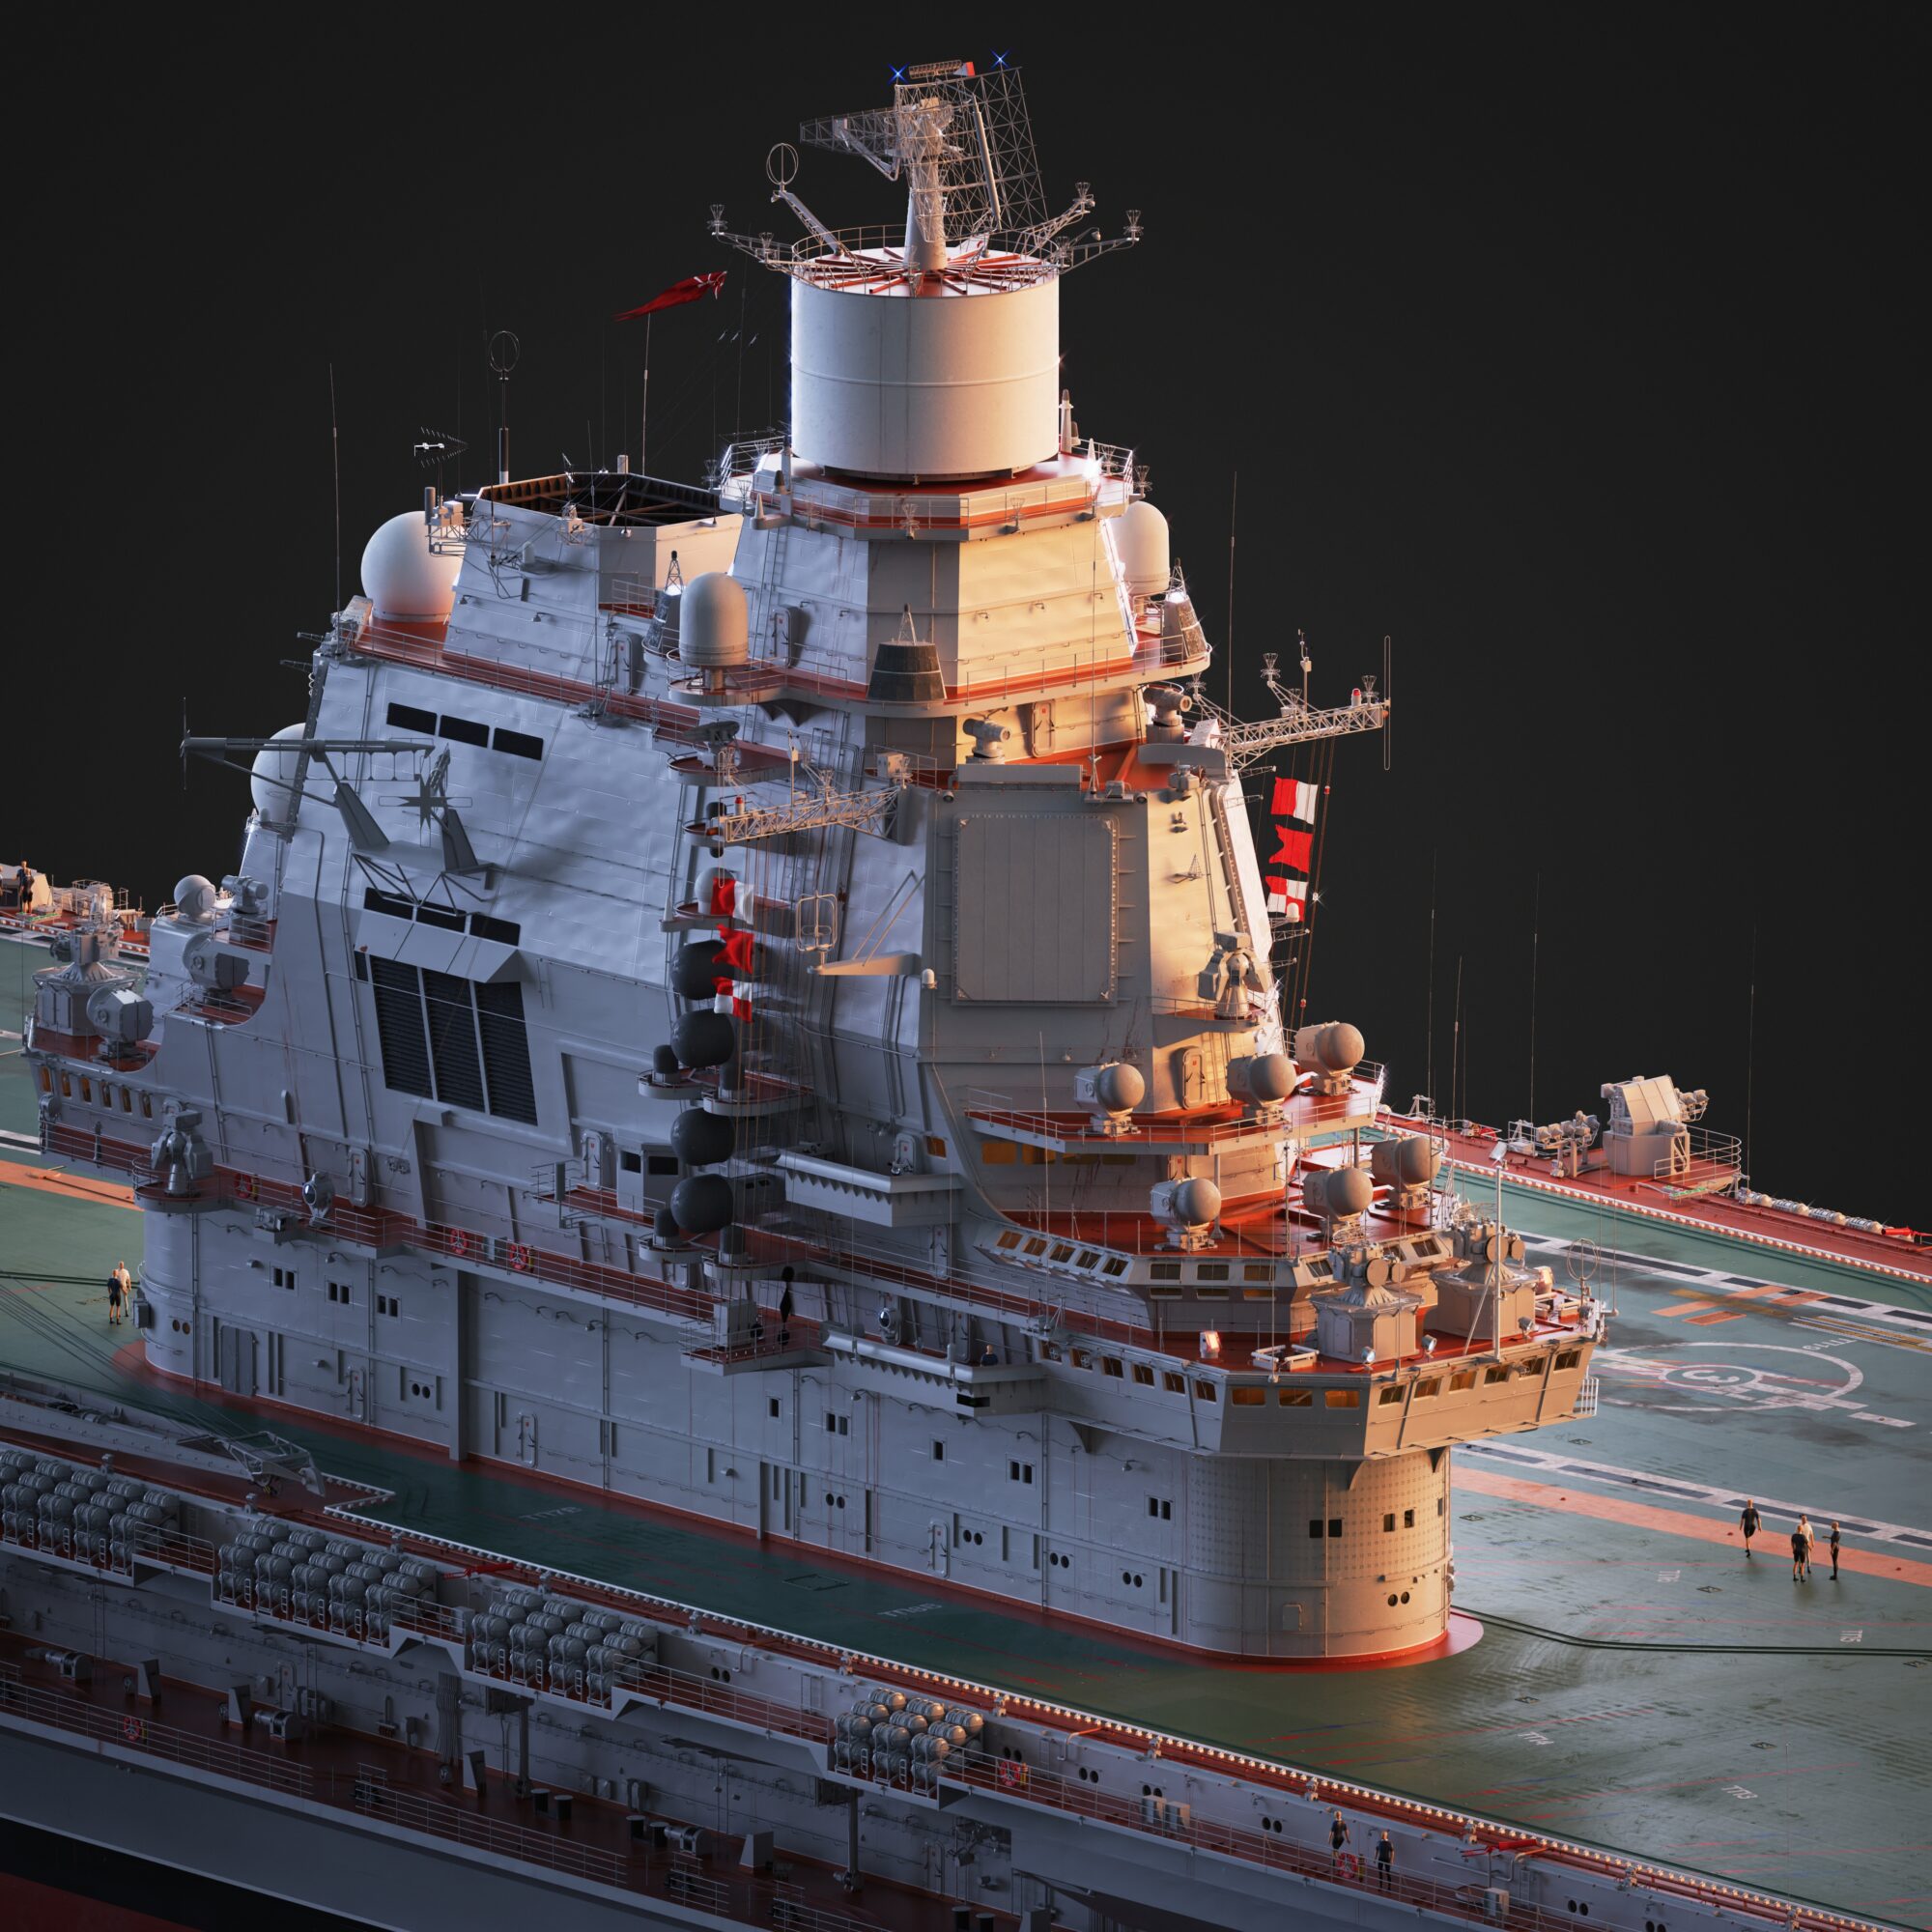
This was a very unique project. My overall goal for this was to bring Project 1153, a Soviet aircraft carrier proposal, to life.
I wanted to visualize what it would have looked like if it had been built, but the only official documentation publicly available for it is a few photos of some rough models with inaccurate depictions of weapons and sensor groups.
Another difficulty was going to be figuring out where to place many systems and facilities that were not depicted at all on the models.

References
Given the fact that Orel was never built, I have no real photographs of it and, thus, I am left with the decision of what similarly adjacent ships to use as a reference. I decided to use the Russian carrier, Admiral Kuznetsov, for almost all of my references, primarily because it’s one of the most well-documented Russian ships. I also collected references of the Soviet Kiev carriers to use as well.
Here is the reference sheet I used for this project along with a few closeups. I know some of it looks messy, but I can assure you it’s a (mostly) organized mess.


Blockout
The initial blockout phase is the most important (and also the most fun) aspect of any project for me. Getting the large shapes of the model down is detrimental to its identity, and no amount of detailing will hide mistakes made during the blockout.
The following images show my blockout process; for most naval vessels, I would have started with the hull. But, for this aircraft carrier in particular, I felt it necessary to work in the opposite direction since I wanted to get the most important aspect of the ship’s identity down first, that being the island, or “bridge.”


For the ship’s hull, I used subdivision surface to get an accurate and pleasant shape, as well as good geometry and shading.
Modelling & Materials
The next step is to begin detail passes using assets already made from previous projects along with the creation of an occasional new asset.
When modeling smaller, yet highly detailed, assets for massive projects like this, I like to treat it as though it’s its own separate smaller project; otherwise, I end up getting impatient and rush through the smaller assets.
Here are some of the newly-created assets used for Orel:


It is also important to build up an asset library that you can pull from the present within your project file. Having these models readily available will speed up your process quite a bit.

Here is a broad overview of how the model progressed throughout the entire project.


For my texturing and materials, I heavily relied on Blender’s procedural nodes combined with a few textures found online sprinkled here and there for more specific details such as tire tracks. Noise maps and color ramps are your friend.
Rather than UV unwrapping, which would consume a huge chunk of my time on projects like this, I used the “object” output on the texture coordinate node, which works very well for nonspecific details such as variations in roughness, color, and even rust streaks.
Rendering
For rendering, I use a 2 or 3-light setup combined with an overcast HDRI to provide some ambient light. In most of my shots, such as the one below, a spotlight object for white rim lighting, a sun object for cool light, and another sun object as warm light.
Sometimes the warm light will be accompanied by another colder sun object rotated in a slightly different direction to add a bit of nuance.


However, some of my shots, primarily the shots that focused on the vessel in her entirety, required a bit more specialized lighting.
You can’t always show off your subject’s form with 3 lights, so, I position a few light planes close to the model along the edges I wanna get some light reflecting off of, and the result makes the model pop.


Conclusion
I hope you enjoyed reading my article and perhaps even learned a thing or two. I really appreciate you giving it a read. I also appreciate GamesArtist for giving me the opportunity to write this article for them.
You can check out more of my work on my ArtStation page.
Thank you!
Read more articles
You might also like these articles.


