Magazine Pouch

Introduction
Hi everyone! My name is Vladislav. I am a 2D–3D artist, and the main focus of my work is illustration and character concept art, as well as weapon design.
Among the projects I had the opportunity to work on are Battlefield 2042 and Warhammer 40k: Rogue Trader.
In 3D, I mostly specialize in character creation, and lately I’ve been paying a lot of attention to clothing.


Introduction
It all started with a personal project about a military-themed character, and I’m a fan of the Battlefield and Escape from Tarkov series.
I created clothing such as the Defender 2 vest, pants, etc., but the space under the vest was empty, and I wanted to make a magazine pouch something in between, since the choice is quite vast and diverse.
I wanted something not too complex and not too simple. Since the market offers different options and provides a huge range for imagination, I chose this type of pouch.
Below I’ll attach my personal references and the character itself.


Tools
ZBrush, Maya, Marmoset, Substance Painter, Unreal Engine & Photoshop.


Blockout
Where it all started: in the previous work on creating the Lowa boot, there was a sculpt in ZBrush with ZRemesher and the mesh was adjusted.
But here everything was modeled entirely in Maya, and the mesh was immediately created for subdivision levels.
UV mapping was also done to allow fabric textures to be applied. To understand proportions and how it would sit, I loaded a magazine dummy and chest rig into Maya.
This always gives you a bit more information at the beginning and solves some problems later on.

Highpoly
ZBrush After a satisfactory result, we smoothly move to ZBrush. To make it easier to transfer files back and forth and not waste too much time, an addon is used for Maya and Blender.
For Maya I use GN Export Import, for Blender GOB. I place references of the pouch nearby and start increasing the mesh, working on it to achieve the result I see in the original.
Sometimes I add something of my own so it’s not too boring and copied. When the sculpt satisfies me, I connect the fabric texture through noise.
This is exactly why the UV mapping made in Maya during the modeling stage was needed, to roughly understand how well the dents and folds work and whether I need to enhance or reduce them.
And in the end, it looks nice and gives you a great render in the program itself.


Plastic & Curves
I made the plastic inserts in Plasticity. Lately I’ve been paying a lot of attention to it and modeling fewer small and large details.
I enjoy learning something new, and this is one example. The cords were created in Maya using curve and Sweep.


Retopology & UVs
After the highpoly is ready, I do a decimate to make retopology in Maya more comfortable, and begin the process.
UV mapping: After retopology, I check for extra points and whether everything is stitched on the object, then send it to RizomUV and cut it into parts.
Everything that could be aligned, I tried to do so. I also monitored the distortion level to avoid exceeding a critical stretching level.


Baking
Before baking, I load the entire scene into one file, separate HP and LP into folders, check that everything is in place, especially the material on the objects to get the material color map.
I spread out the details for good baking and export to FBX.
Some textures I bake in Marmoset such as the normal map, curvature, AO. The rest of the maps I bake in Substance Painter: world normal and position.
After that, I create a new file in SPP, load the obtained textures there and set up the scene for texturing.
Texturing in Substance Painter
From the main settings I use: I set maximum quality, HDRI map Tomoco, enable Active Post and load ACES_Standard_Log for UE5 to avoid color discrepancies when importing into the engine.
While working with texturing, I immediately load the object and textures into the engine, set up lighting to periodically check how they look.
Sometimes the texture color differs drastically from how it appears in Substance Painter.
When starting to texture, I apply base colors with various speckles so it’s not boring but chaotic.
Here’s one example of how to understand what color to add: choose a reference you like by color, but the color palette isn’t clearly visible.
Drop the reference into Photoshop and crank the contrast to maximum so the color spots are noticeable. Use the eyedropper to select them and determine which color is the brightest.
You can use that color. Sometimes it’s not present on some materials, so look for something already worn.
You can always go to sales platforms and find various types of worn clothing and use that.


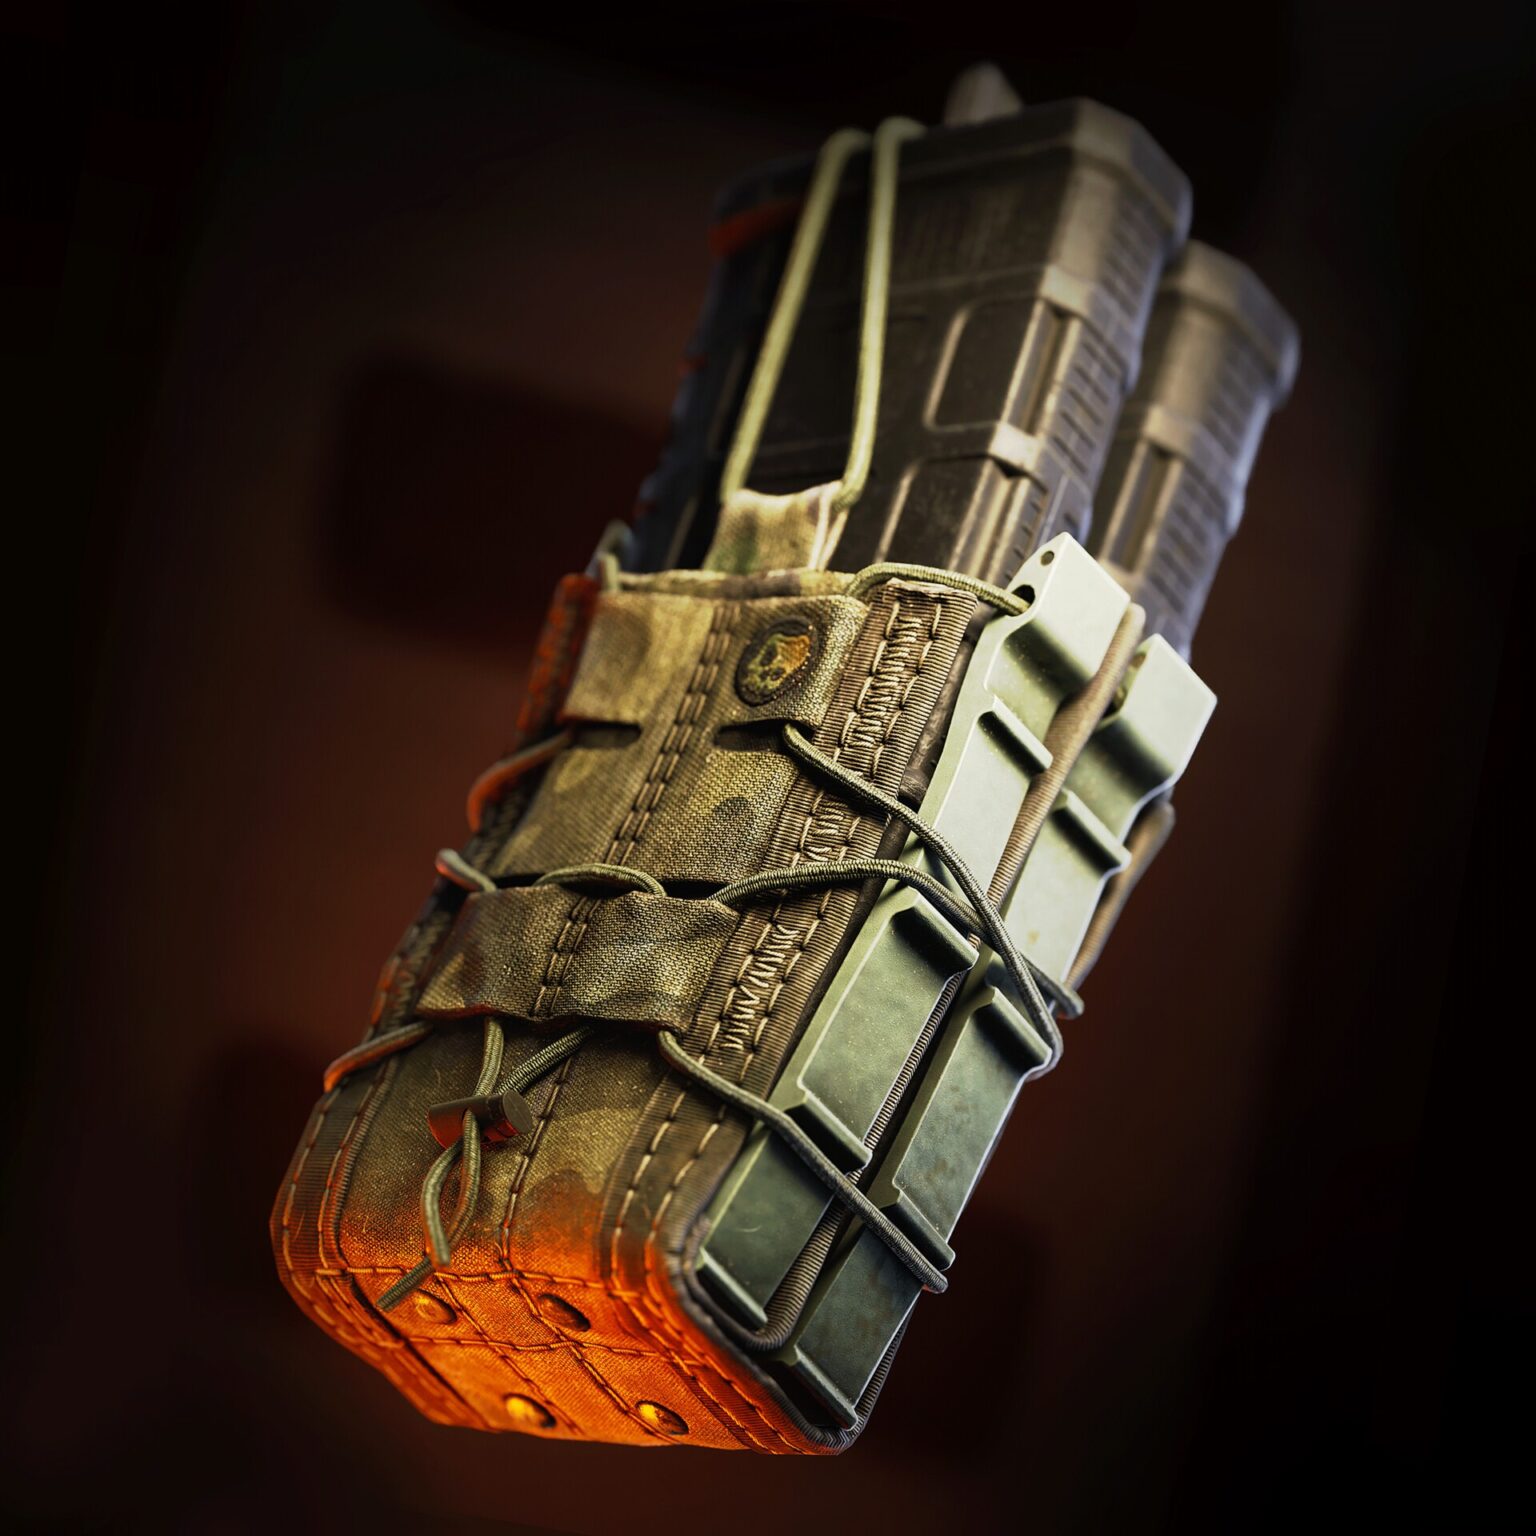
Rendering
The exported textures are loaded into a newly created material. Everything is quite modest here.
In my case, there’s not much need to tweak anything: the textures turn out pretty well.
Sometimes you just need to slightly adjust the normal and roughness maps and add a bit of contrast to the color.
For rendering, I created a primitive background for studio photos and set up lighting. I also made close-up renders to show the texture detail and its variety.


Conclusion
Thanks to the Games Artist team for their interest in my work and the opportunity to talk about its process.
I hope this helps. Feel free to write to me and ask questions, I’ll try to answer them separately.
You can also contact me and check out my other works via the link below.


Read more articles
You might also like these articles.