Porsche 1969

Introduction
Greetings. My name is Alexandr Suzikov. As an accomplished Automotive 3D Artist with a passion for the gaming industry, I have been immersed in the world of computer graphics since 2016.
My expertise primarily revolves around creating models of cars and various vehicles, but my creative skills extend beyond these boundaries.
I've executed several projects in a game-ready pipeline that utilizes the process of baking normals to ensure optimal in-game visual quality. Currently enrolled in an advanced course, I am honing my skills in creating game-ready automobiles with a focus on implementing custom normals.
My journey in the CG realm reflects both a commitment to excellence and an eagerness to contribute to the dynamic field of game development.


Project
For a long time, I dreamed of completing a collaborative project, aiming for an impressive addition to my portfolio. This aspiration led me to connect with fellow artists specializing in high-poly car modeling.
Each artist brought a unique background — some excelled in photography, others in interior visualization. Our project became a learning journey, with each of us taking turns as both students and teachers.
The project’s initial concept was encapsulated in the phrase “vintage Le Mans.” I believed that the form of sports prototypes from the ’60s to ’80s wouldn’t pose a significant modeling challenge, minimizing the risk of an unfinished project.
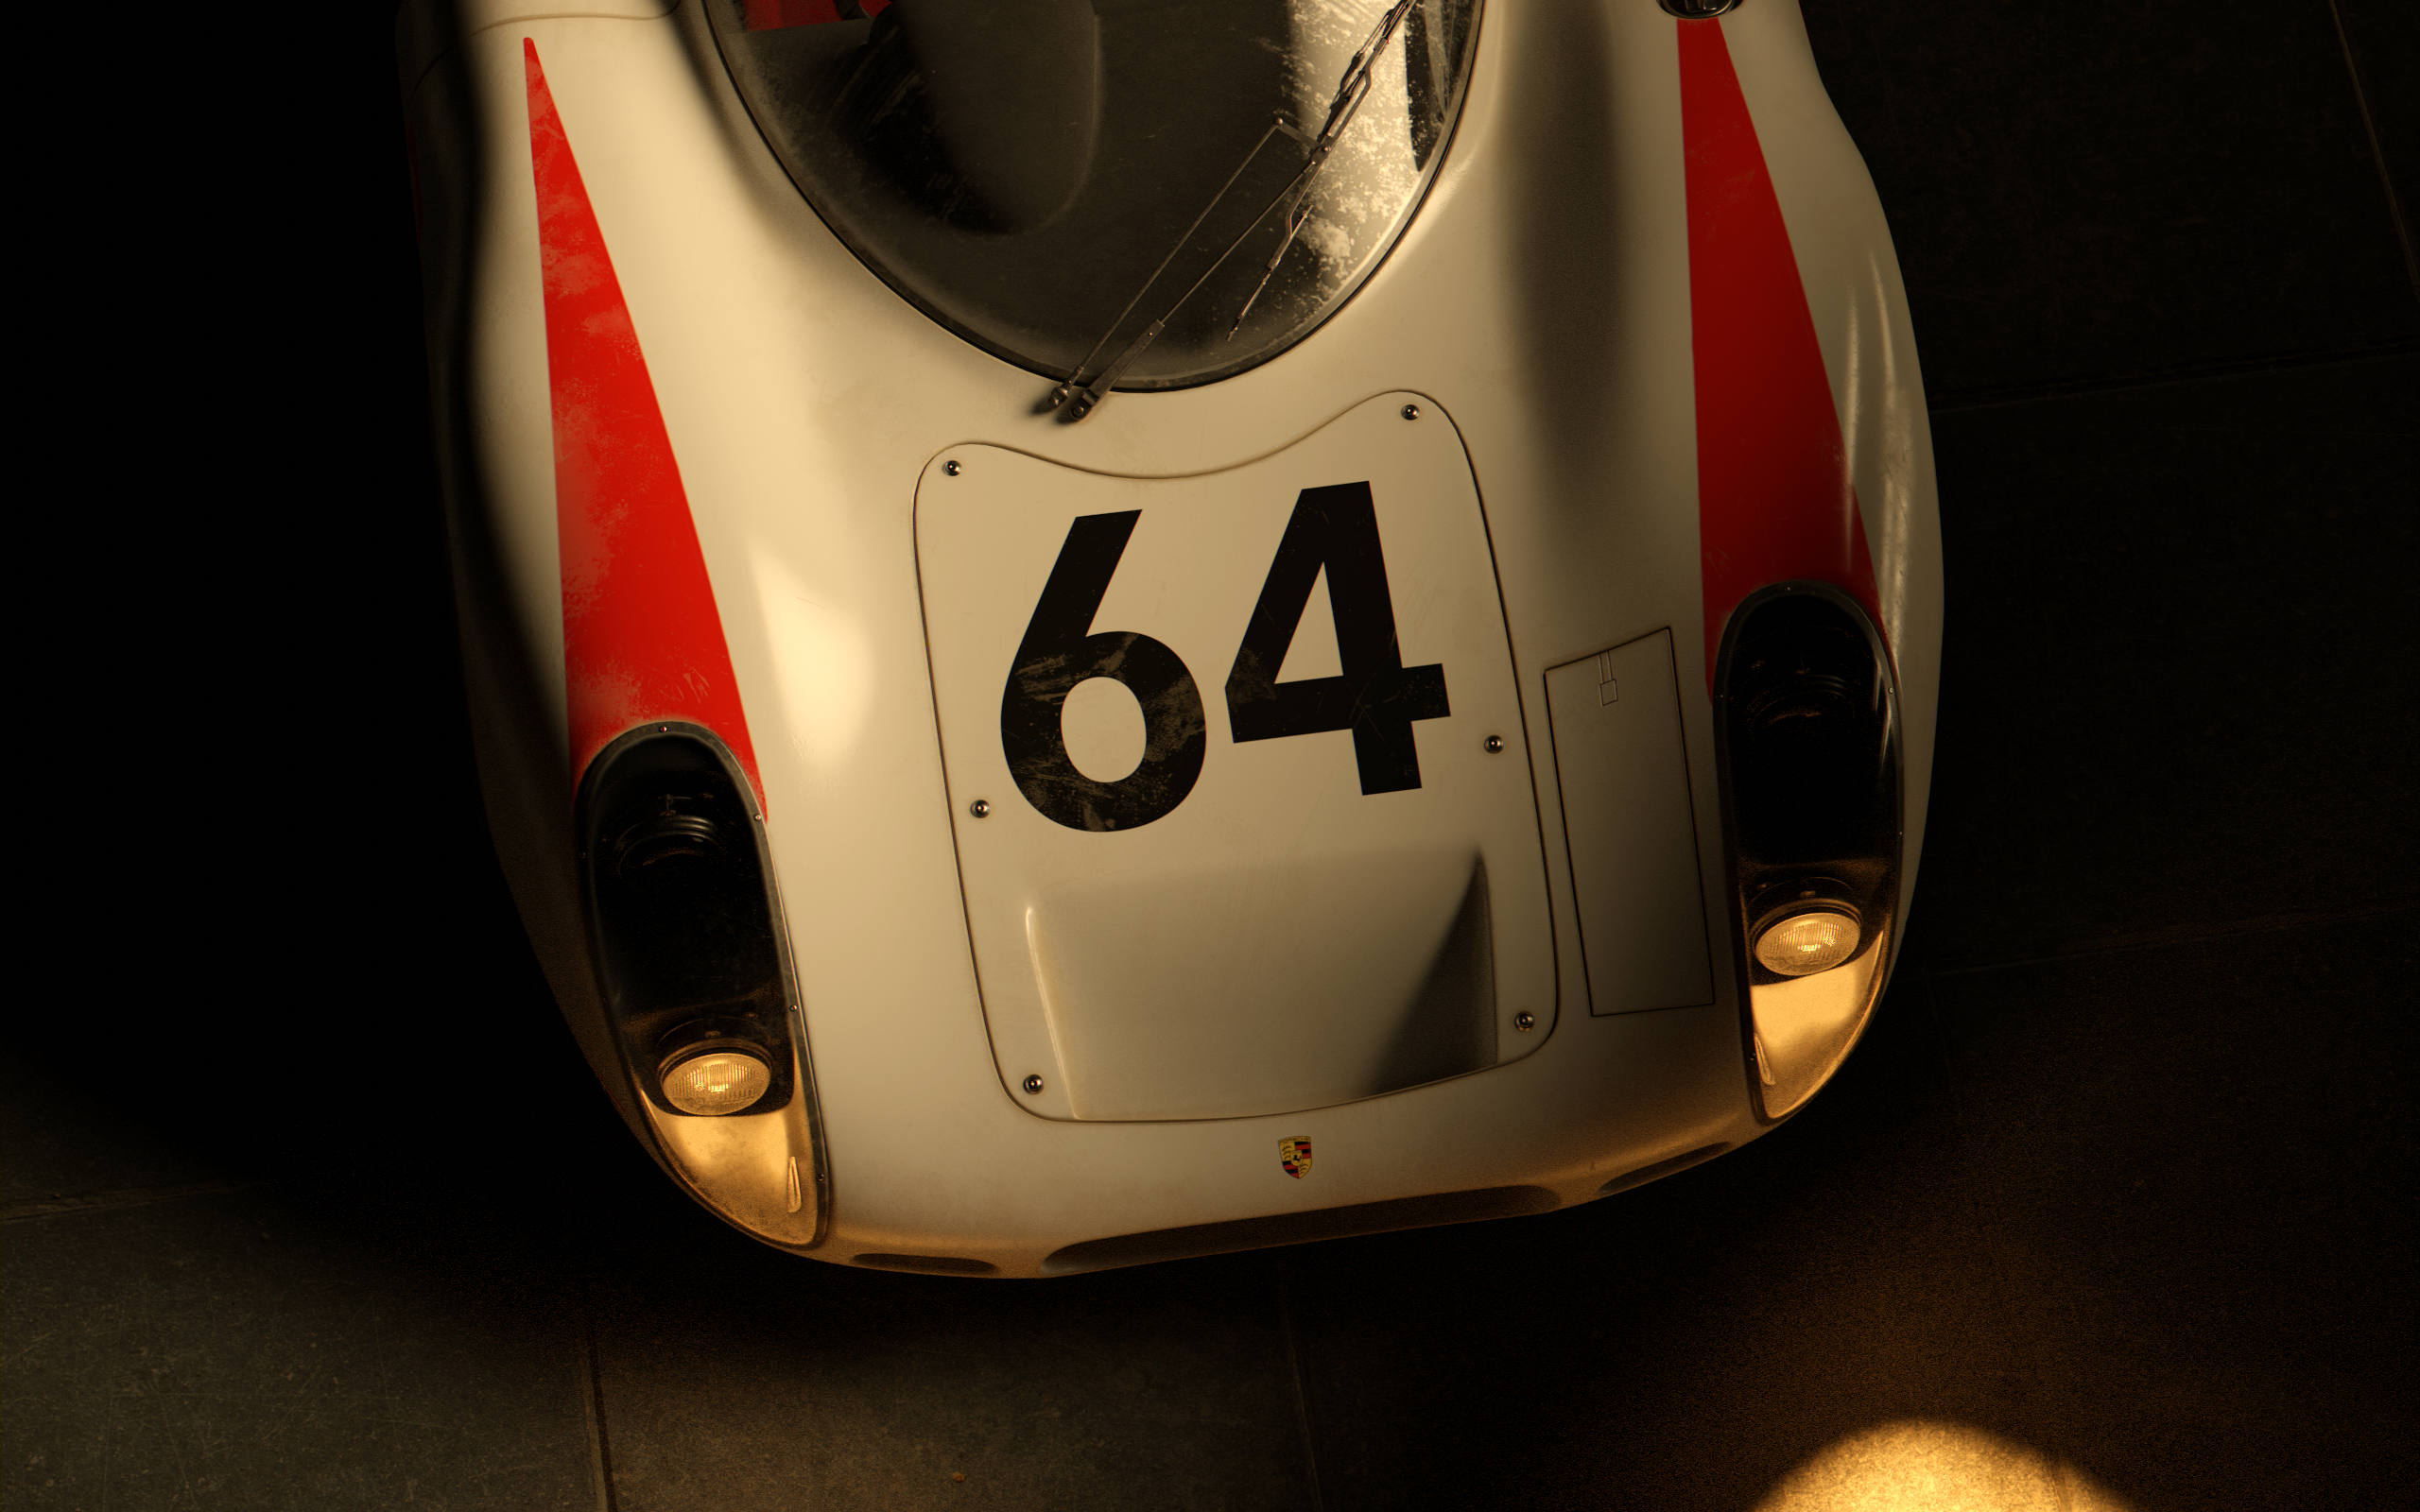
The goal was to capture a significant moment in endurance racing history, settling on the late ’60s to early ’70s—a period embedded in mass culture, as seen in films like Lee H. Katzin’s “Le Mans” (1971) starring Steve McQueen and “Ford v Ferrari” (2019).
The choice of the year 1969 appealed to us the most, and it’s noteworthy that the 24 Hours of Le Mans celebrates its centenary in 2023.
Software
- Blender
- Substance Painter
- Gimp
- Photoshop
References
The car doesn’t pose a challenge in terms of intricate details but presents difficulty due to its sleek, continuous form, offering fewer elements to “attach” to, so it was not easy to find the right curves, building the whole shape of the car body.
Was very pleased to find a lot of images of this car; additionally, I extensively relied on screenshots from the Assetto Corsa model, specifically to capture certain angles and enhance my understanding of the car’s rear design.
The original car that participated in the 1969 Le Mans had limited available images. As a result, certain features, both in terms of body and livery, are discernible only in a few old photos of questionable quality.
Modelling
Typically, I begin my work with a base mesh – a mesh with fairly dense geometry designed to preserve the overall shape of the car body. This mesh serves as the foundation for ensuring uniform reflections across the car’s body, even as I make cuts to form distinct body elements.


I will not describe the process of the modeling in detail – getting the right base mesh is the most challenging; further – it is mostly about cutting out the right pieces in the right places. Here are some shots of the final model in matcap.
Pay attention to the consistency of the glare.


Several elements are made following the game-ready pipeline with baking normals. Since we planned to have some shots with several cars in the scene, we needed to find ways to decrease the polycount.
So the first candidates for simplification were tires. Having them made with geometry in a high-poly style was a luxury we could not afford.


These two models were then imported into Substance Painter to achieve the final result.

A similar way I created the seats in the car.


Texturing
I would like to begin with the tires; Tire Sidewall Tire tread.


The tire sidewall consists of three layers. The initial layer comprises the fundamental properties, followed by two subsequent layers that exclusively impact the roughness channel. The ‘Roughness’ layer plays a crucial role in generating subtle, natural imperfections in both color and roughness, enhancing the tire’s overall realism. ‘Scratches’ layer is self-explanatory.
In contrast, the tire tread is a more complex material. While its foundation shares similarities with the preceding material, I have added a grainy filter. This filter contributes to the creation of microdetails, appearing as a result of the tire’s contact with the ground. Afterward, it is supplemented with multiple ‘dirt’ layers, characterized by variations in color and roughness.
These layers are unveiled using built-in Substance Painter generators or certain grunge textures, enhancing the overall realism of the dirt’s appearance. Finally, a ‘Dark Gutter’ layer is added to help distinguish the tread grooves, intensifying the contrast with the dirt. As for the body texturing, it is pretty simple. First, I added the base of our paint material with the properties to my liking.
Then I added the grainy filter, which represents the grain in the paint (who would have thought!). This little detail might be an overkill, but it is that little detail that helps your work stand out from hundreds of others; also, this adds realism, so why would I give up using it?
For the “scratches” layer, its role is nearly the same — introducing those subtle imperfections that might not be individually perceived but contribute to endowing the material, and consequently, the car body, with the flair of an inexplicably realistic object.
Then there is an ‘Edge Wear’ level; it helps put an accent on the seams between the body panels.

The key element for achieving a realistic appearance in this material lies within the ‘dirt’ section. Within this folder, several ‘Dirt’ layers exhibit variations in color and roughness, each serving distinct purposes.
Dirt 1 embodies the darkest dirt, typically located at the bottom of the car. It also serves as the most pronounced and contrasting layer of dirt.
The remaining two layers contribute to an overall subtle dirt and dust effect across the entire car, emphasizing specific lines throughout the car body and lending a realistic finish to the model.

Rendering
While rendering, I usually use two or three ‘Area’ light sources. In the picture, you can see the scheme in which I place them.
Occasionally, an additional, weak light source is required to prevent certain areas of the car from becoming too obscured in shadows.


I perform the final post-processing using GIMP.
I adjusted the temperature to make it warmer and made some tweaks to the levels for increased contrast in the image.
Conclusion
Reflecting on this project, it posed significant challenges for all team members, myself included. Creating a 3D model of the Porsche 908, along with the Renault-Alpine A220 and Alfa Romeo Tipo 33/2 LM, proved to be a complex undertaking that tested our collective skills.
Managing a project with multiple artists brought a new level of complexity. While I had expertise in modeling and texturing, a key aspect of our success lay in knowledge-sharing. Passing on my insights about texturing and learning from my teammates became essential. The journey involved numerous revisions – from adjusting geometries to refining UV maps and perfecting textures in Substance.
As the team member with the most experience in texturing, I took on the responsibility of guiding the team through challenges, providing explanations, and engaging in collaborative practice sessions.
Beyond being the project initiator, I assumed the role of a leader within our small group. This experience not only enhanced our technical skills but also facilitated personal and collective growth. Looking forward, I am confident that each team member has significantly improved.
The hurdles we faced not only enhanced our proficiency in digital design but also fostered a stronger sense of teamwork. As a leader, I am optimistic that this experience has paved the way for future collaborations.
The lessons learned will undoubtedly be applied to upcoming projects, and I foresee us undertaking similar creative endeavors shortly.
Two other cars you can find there:
1969’ Renault Alpine A220: https://www.artstation.com/artwork/YB2GbV
1969’ Alfa Romeo Tipo 33/2 LM: https://www.artstation.com/artwork/aoVLq2
Read more articles
You might also like these articles.