
Introduction
My name is Rémy Lauret, 3D Environment Artist. I've been working in 3D for five years, with almost four years of professional experience.
I'm currently part of the team at Gameloft Montreal. I was working on Disney Dreamlight Valley on different stuff like kits, houses, and props, and now I'm working on a D&D game for them.
I also did some freelancing for different companies, and before that, I was at Ubisoft Paris Mobile working on the game Arena Survivor.
Project Overview
For this project, it had been a long time since I wanted to create a fully finished character, so I challenged myself to do it.
It was super fun and also very challenging!


Concept
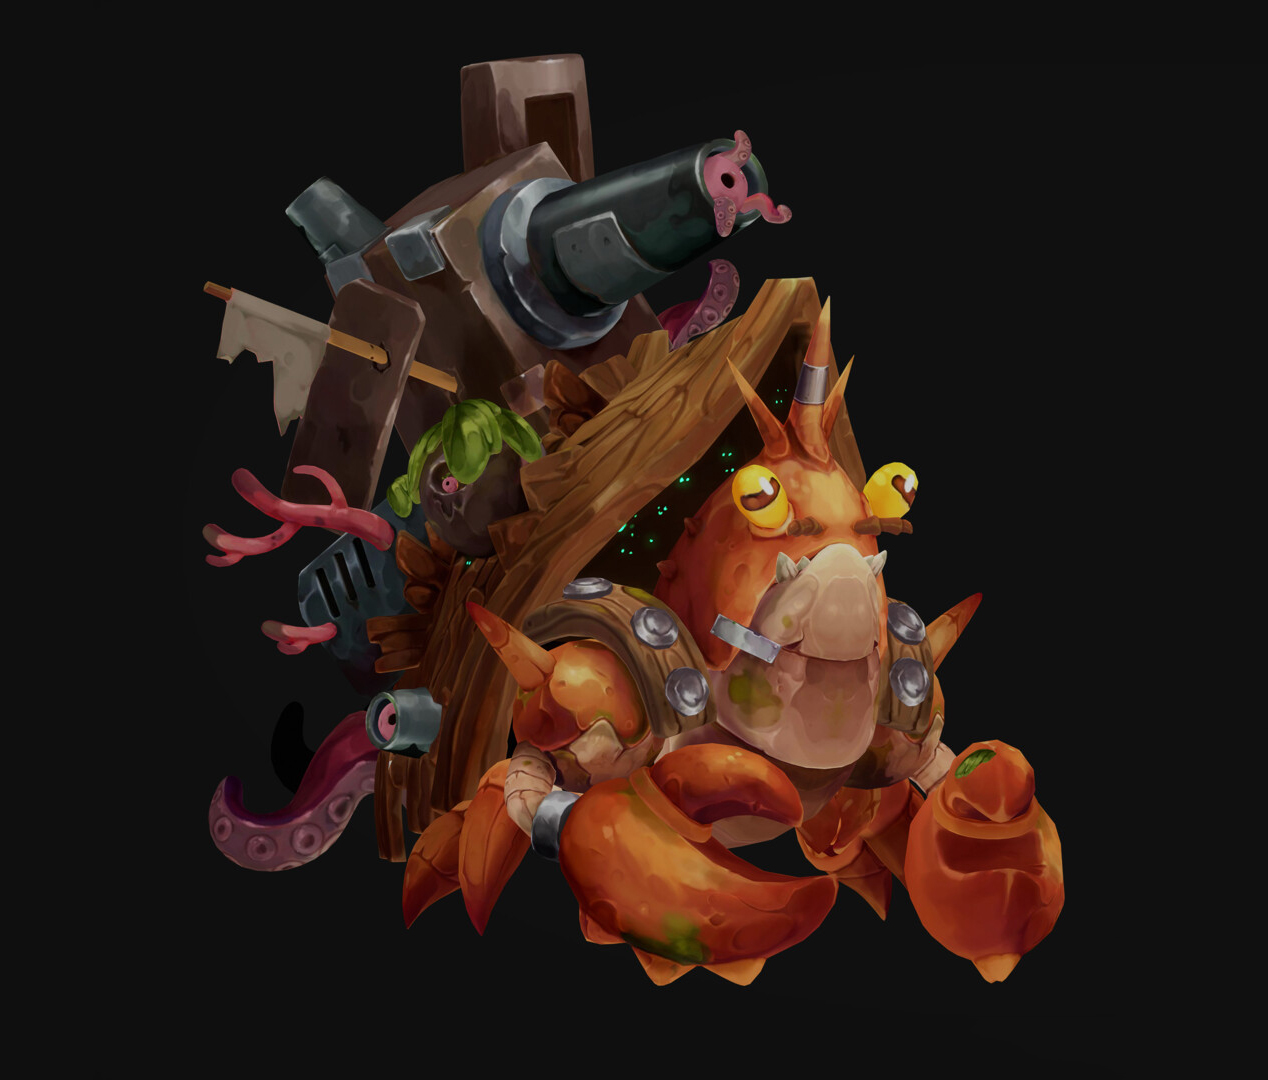
With each project I make, I really try to push my hand-painting skills further, since that’s what I truly enjoy doing right now. I was inspired by a concept created by Jiayu Chen.
My main goal for this project was to use a fully hand-painted workflow
Tools Used
For this project, I used:
- Maya
- ZBrush
- Substance Painter
- 3DCoat
- Marmoset Toolbag
Modeling & Sculpting
At the beginning, it depends on what I need to do, but usually I start in Maya for the hard-surface part.

As you can see, it’s just the carapace and cannon parts that I made in Maya, and for the body, I’m more used to doing it directly in ZBrush.
I sculpt in ZBrush, and I do some back and forth with Maya to match the carapace and the body, because in this image, it’s the first step, and the proportions are not good yet.


After the base is done, I place all my elements directly in ZBrush and start sculpting the details, adjusting the shapes so everything fits well with what I want and with the concept.

Some tips and brushes I use for the crab detail: I usually use the lasso tool a lot to carve shapes and add cavities and details to the mesh.

And how I made the tentacles:
I mostly used Curve Tubes to create the base, and after that, I used Move and DamStandard for the sharp edges. After this detailing phase, the second image is the final sculpt result.
For example, on the wood, I used different techniques to achieve this kind of stylization. With the Dam Standard brush, I usually decrease the intensity, activate Lazy Mouse, and set the Lazy Step to around 0.001.
I combine the Dam Standard with the Polish brush and also with the Orb Crack brush.
For the metal parts, I used the Orb Flatten brush to create sharper edges. I also like, when I do rocks or stuff like that, to use a lot of the lasso mask. One thing I usually do when the sculpt starts to look a bit soft or blurry is use the Polish and the Clay Polish features on the mesh.

And here is the final sculpt.

Retopology
For the retopo part, I mostly use Decimate, since it’s not going to be animated or used in a game.
But for my bake, I generally explode my mesh to get a clean result. After baking my high-poly, I reimport my combined low-poly to keep the bake details and see everything together.
Baking & Base Texturing
For the texturing, I started with the base colors in Substance 3D Painter to build up all the essential details like ambient occlusion, cavity, curvature, color variation, etc.
I also used SoMuchDiffuse to help me with the lighting direction.

GIF about my different layers in Substance Painter:
Hand-Painting
Once the base was done, I moved into 3DCoat to work on the hand-painted details. I don’t have many specific tips for this stage since it mostly comes down to time and practice, but one thing I learned with this project is to avoid adding too much detail everywhere.
That’s something I actually did on this piece, and I realized afterwards that it can make you lose the main focal point of your work.
However, having solid references helps a lot.


After this part of hand-painting, I also can add some mini details back in Substance Painter, but it depends on what I want.
What I also learned is to be really careful with the lighting and main focus in your hand-painted work, because for me, for example, near the end, I didn’t really have a clear focal point.

Rendering
For the render, I used Marmoset Toolbag.
I just tweaked the color tones a bit, and that’s it, since it’s a fully hand-painted prop, all the information is already in the texturing, as you can see before and after the render.


Conclusion
To conclude, this project taught me a lot about the hand-painted workflow. It helped me understand how to create a real focal point in a piece, even if it’s still something I need to keep improving.
It was extremely useful to figure that out. One thing I can say for sure is that working with references is essential for hand-painted work; it really makes a big difference.
Read more articles
You might also like these articles.


