

Introduction
Hello, guys! I’m Nicolas Guillet, a Character Artist in the game industry at Ubisoft Bordeaux.
I started working as a 3D Artist in 2014, and since that time, I've never stopped creating 3D art. The more time passes, the more I enjoy it.
Project
This project is my tribute to one of my favorite games, World of Warcraft. At first, it was just a quick Goblin sculpt for fun during my spare time.
However, the situation went out of control when I decided to create the entire character. Of course, because I really enjoy the Warcraft ambiance, I started to create a Goblin who could fit into Warcraft’s world as a cinematic character.
So, it became a challenging personal project because I added a lot of work, a story behind the character/scene, and I wanted to stay focused on this project, which I wanted to keep quick and fun.


References
Most of the time, it’s important to put references in a PureRef file to stay focused. But for this project, because I played WoW for almost 15 years, it was much simpler to start sculpting the character directly in Zbrush.
I just used some in-game references to create most of the character’s props.

Software
- Zbrush: Sculpting / Posing / Retopology (ZRemesher)
- Blender: Props Basemesh / UVs / Lighting / Rendering / Compositing / Video Editing
- Marmoset Toolbag 3: Baking Substance Painter: Texturing
- Photoshop: Environment
Sculpting & Posing
In every project, I start directly in Zbrush to block out my character. It really depends on what kind of part you are working on, but most of the time when I create something, I start with a raw sphere.
For weapons or some hard surface props, I start 3D blocking in Blender.
That’s maybe my personal preference, but doing everything with no basemesh will increase your skill in sculpting and improve your ability to create good shapes and silhouettes, etc.
Retopology
In the game industry, topology is one of the most important aspects you have to take care of. If your topology is not good, you may encounter problems with the engine, technical artists, riggers, animators, and more.
It is a really important step, and you should take your time to do it properly. But here, it is fine because it’s a personal project, and I know I’m going to use a lot of UVs UDIM to achieve the best image quality. I’m not looking for a real-time model, so a simple ZRemesher will do the job.

For most parts, I targeted 5 in the ZRemesher options, which was a decent percentage of polygons to capture all the shapes I have sculpted. One really important part here is to keep the silhouette and the shapes readable.
But for some parts, I increased this percentage to 10 or 15, depending on the shapes, silhouette, and important meshes like the head or the hood.
UVs
My approach is really simple: spend less time on UVs because all parts will have different UDIMs with 4K textures. The thing here is to include technical details only for what I’m doing at Ubisoft.
For my personal projects, I want to eliminate those parts because they can take a lot of time, and I prefer to focus more on sculpting, art, lighting, and rendering than straightening my UVs.
So, I made all the cuts in Blender following the logic of unwrapping a character, but I wasn’t worried about weird visuals in the UV viewer.

As you can see, I ended up with 14 UVs UDIM, which is a lot.
But as I said earlier, this character is not meant to be a real-time model, but more of a showcase character.
Baking: For the baking part, I’m using Marmoset Toolbag 3. One of the most important things to me is to maintain a clean workflow so that if
I want to modify one part of the character, I just have to export it, and it will replace the old mesh directly in the Marmoset scene.
Usually, I create a lot of folders in the bake options so I can modify every separate cage easily.

Here are all the baking maps I needed for texturing the character:

- Normal Map
- World Space Normal: for faking/baking light
- Ambient Occlusion: to add more shadow and contrast to the character’s base color
- Curvature: to add color to edges
- Position: for gradient
- Thickness: for Subsurface Scattering
Texturing & Smart Materials
In Substance Painter, I use my own smart material to quickly establish a good base to work on.

I exaggerate the colors so I can better visualize where AO (Ambient Occlusion), gradients, and lighting interact with the character, just to get an overview.
Then, I decrease the contrast and start working on the texture. As I mentioned, I want to keep my workflow as simple as possible to quickly get a nice character overview. Afterward, I will decide which details to add and begin a bit of hand-painting.
In the end, this is what the textures look like on the character.
As you can see, I added a lot of contrast to the roughness map so that the character will exhibit variations in roughness for all the different materials, such as leather, fabric, metallic parts, skin, sweat, dirt, blood, etc.

Most of the textures were created in Substance, but I also incorporated procedural textures in Blender. I used the Shader Editor to create the eyes and add some detail maps for the skin and clothing.
Even if you have a good Texel Ratio in your UV Map, it can be more useful to add details with separate Normal Maps and Roughness Maps. This allows you to adjust tiling and detail textures as needed.
Using procedural and detail maps can save a lot of time because it is a non-destructive way to work and can be quickly corrected. Here’s an example:
Props
For the props part, I wanted to keep it as simple as possible. I didn’t want to have a character with big weapons, full of spikes, totally overkill like you can see nowadays.
I really enjoy the old-looking Dungeons & Dragons vibe from the 80s/90s, so less is more.
Dagger
I tried to find an interesting in-game weapon with a cool old-school color and treatment.
So, I directly started in Blender, blocking the mesh, then worked on the UVs to not worry about it later and added a quick sculpt pass.

Keys
In the game, Rogues can unlock padlocks, so in my opinion, these props were essential to add to the character.
Bringing those details, even if they are small, can add so much life and lore to your character and make it more consistent.

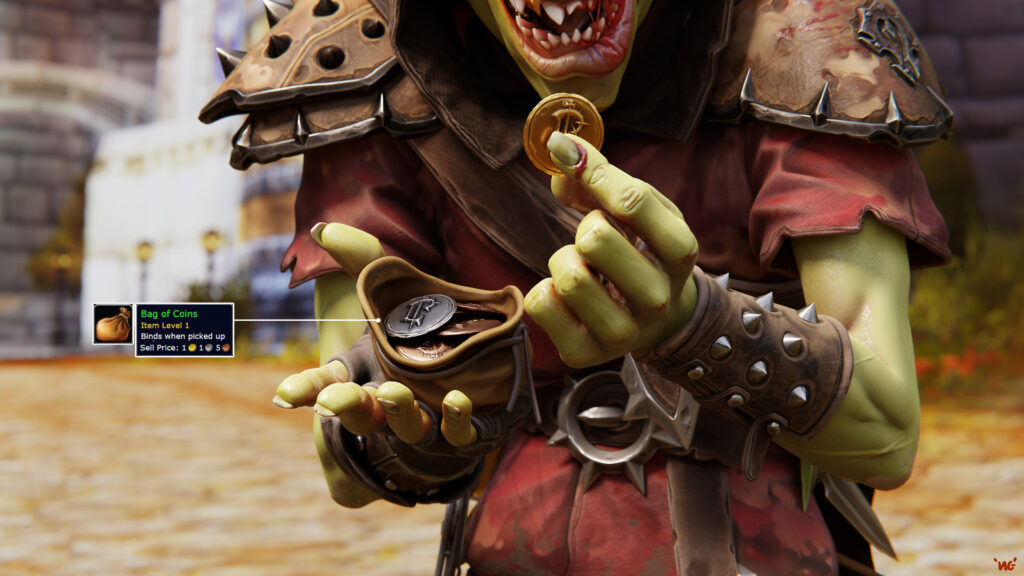
I added other props like potions, a Hearthstone in a little bag, and a bag of coins to complete the character.
Here, all props were made to fit the character, but the bag of coins also links with the intention of the scene.


Props Workflow
3D blocking > UV > Zbrush > Baking > Texturing > added a procedural glass shader for the potions and a leather Detail Map for the rope.
Background
To create the environment image, I logged into World of Warcraft and created a human hunter. Initially, I knew I wanted to have the hunter shooting arrows at a Goblin’s back while the Goblin is flipping a coin.
To pose the hunter, I engaged in a fight with a wolf in the starting zone, took a screenshot with the desired view, and then copied and pasted it into Photoshop.
Afterward, I went to Stormwind and captured different points of view by taking pictures to create an almost 360-degree image. Here’s how I did it in Photoshop:
I blended every screenshot to create a panoramic view, adjusted saturation and brightness and added shadows and highlights to match where I wanted to place the sunlight in Blender.
I then inserted the hunter in the background near the door and modified the sky to give it a more realistic appearance.
Lighting
Creating the lighting scene is one of the most fun and crucial parts, in my opinion.
In every project I work on, I start working on lighting after a good first pass at sculpting to understand the direction and mood I want to achieve. Here’s an example of the process:

I tried different ways to light the scene, which made me more certain about the final result.
I attempted a night environment, then I illuminated the scene in a desert, and finally, I completed the project in a forest with softer shadows and a fresh atmosphere.
Here’s an overview of the final lighting scene:

I’m not aiming for a complex lighting workflow. Since the scene takes place outside, I don’t need a rim light to emphasize the character’s silhouette; I just want logical lighting:
- One sunlight for the character
- Some props/detail lights to eliminate most of the shadows caused by the sunlight
- Some lights to capture the arrows
- An HDRI for global illumination in the scene.
Rendering
I captured all shots in Blender using Cycles Render.


I stuck with low sample settings, such as 256, and then enabled the denoiser option with Optix. Keep in mind that the more samples you use, the more time-consuming the rendering process will be. Why use the denoiser with samples?
- Samples will enhance the rendering quality and try to eliminate noise, but they will also increase the rendering time.
- The denoiser will remove noise and smooth the image, but if you don’t use many samples, it may also eliminate details and lines. For this project, I created a turntable to showcase the entire character, and I had to render 600 images. So, 256 samples with Optix Denoiser was, in my opinion, a good choice for 4k images.This allowed me to maintain quality without incurring excessively long rendering times for a single image. I conducted some tests to help you understand why you should strike a balance between samples and the denoiser.

Conclusion
This project was a lot of fun and was completed in just a week and a half. Sometimes, not focusing too much on technical aspects like retopology and UV mapping can infuse more artistic energy into the project than overthinking technical issues.
I hope this article about my workflow for this project helps some of you in your character rendering process.
Enjoy your work in 3D, create stunning images, and be happy doing something that brings you joy. Cheers! 🙂

Read more articles
You might also like these articles.


