Torak-sen Zhyra
Introduction
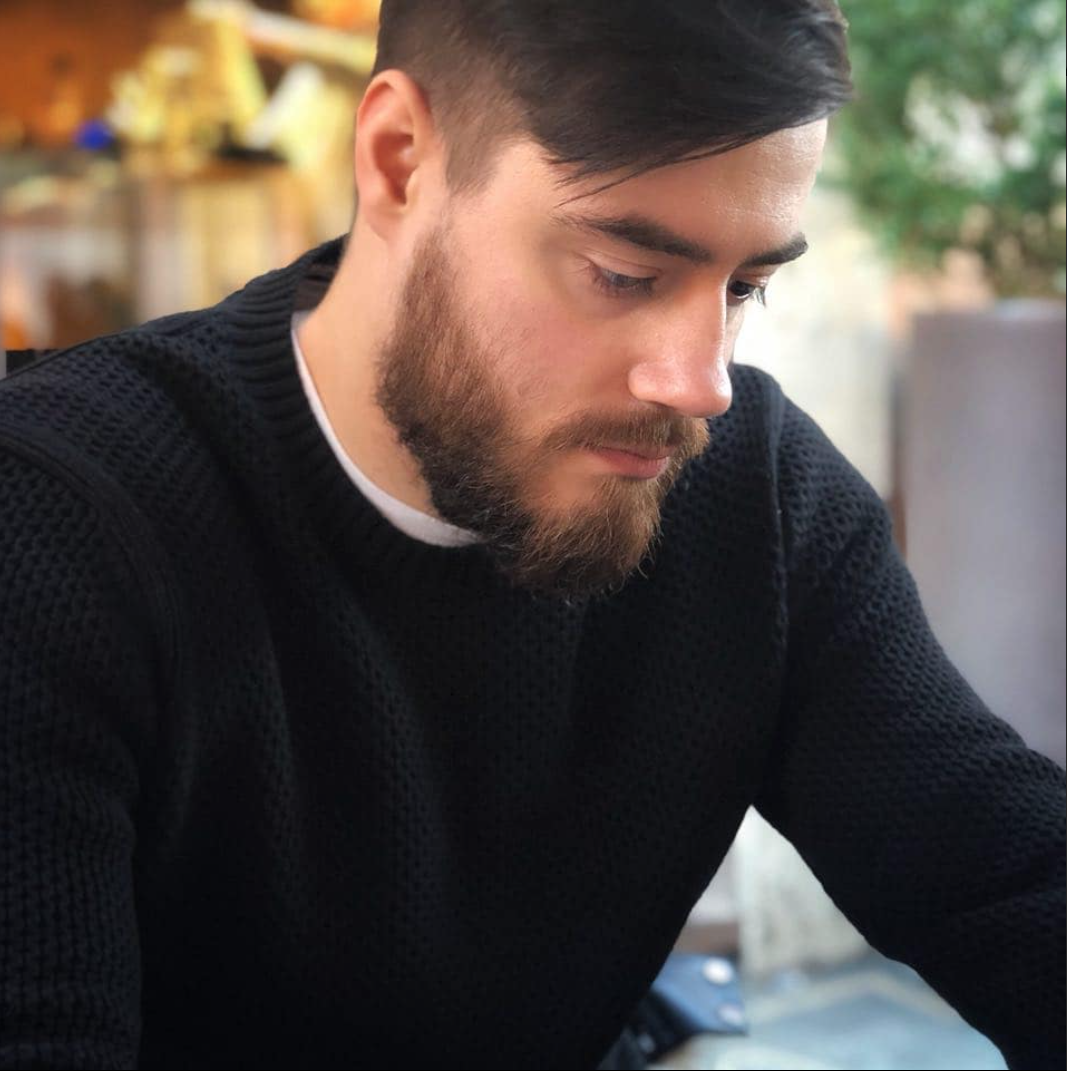
My name is Jan Kasperczyk, and I’m a Senior 3D Hard-Surface and Weapon Artist based in Kraków, Poland. I’m excited to have the opportunity to feature my work here again. Currently, I’m working at Room 8 Studio as a senior artist on multiple high-profile projects, such as Call of Duty and Apex Legends.
Previously, I was a senior artist at Bloober Team, where I contributed to the Silent Hill 2 remake. I graduated from the Academy of Fine Arts in Katowice, specializing in graphic design.
Alongside my professional work, I’m passionate about teaching and currently run online courses and my own original mentorship program to help aspiring artists grow their skills.
Project
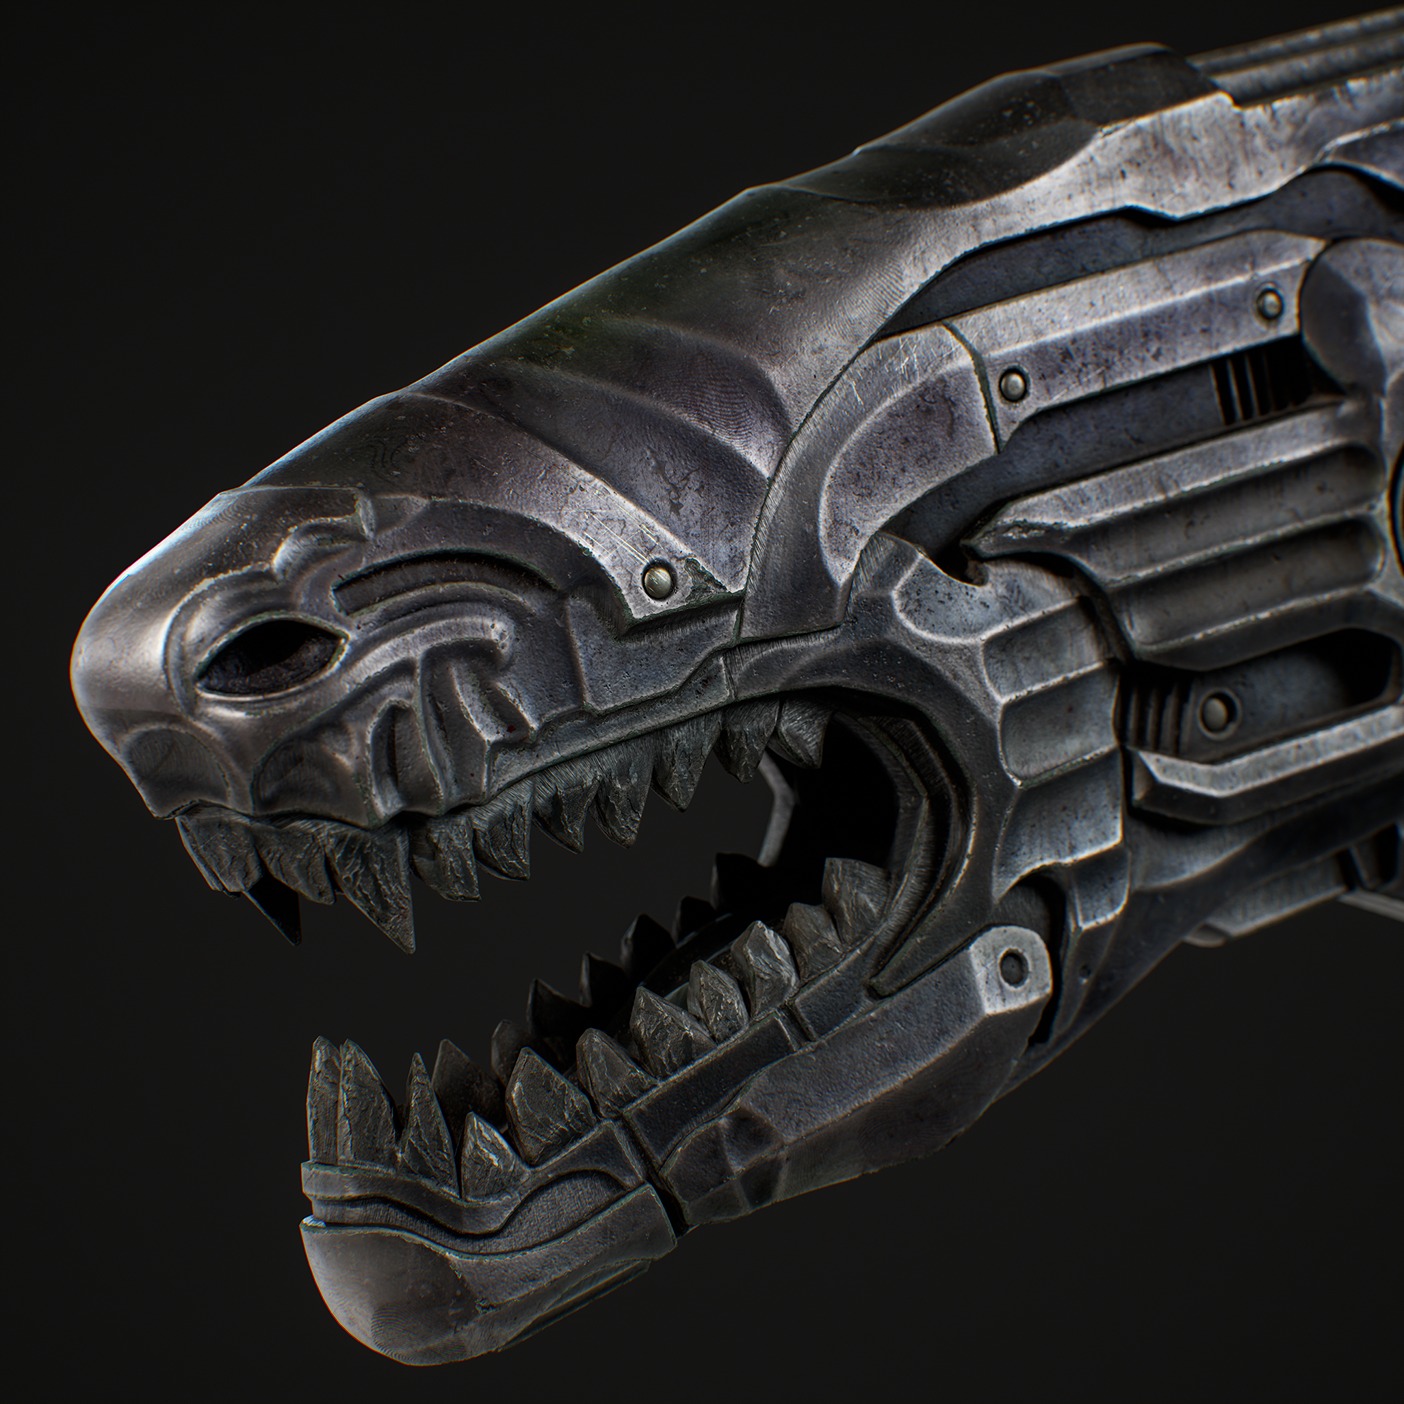
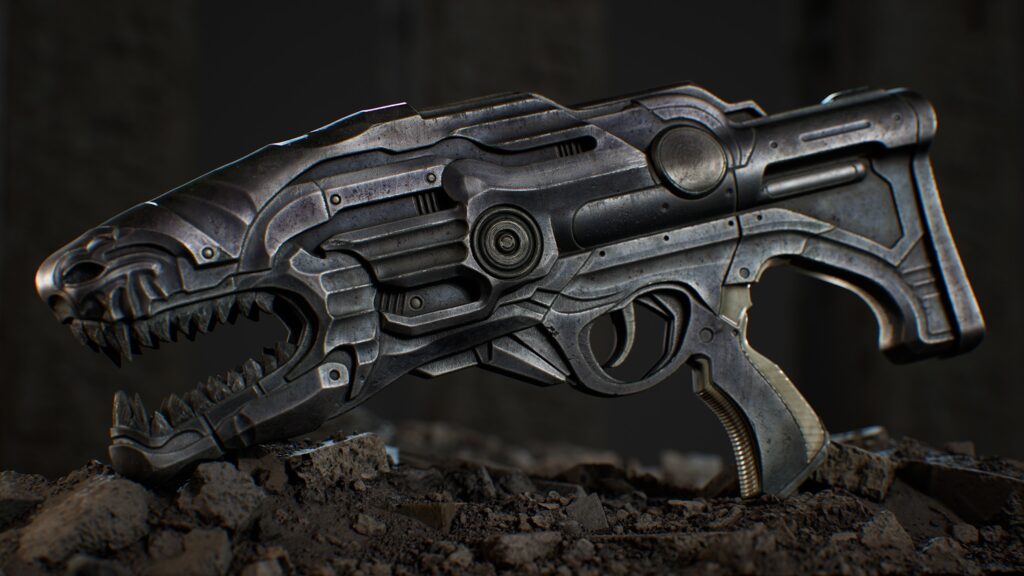
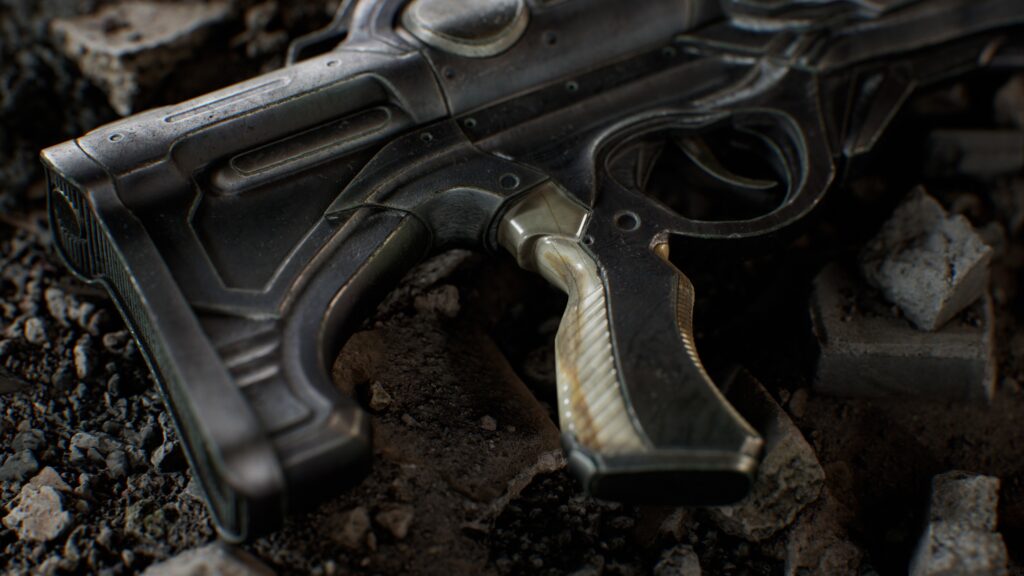
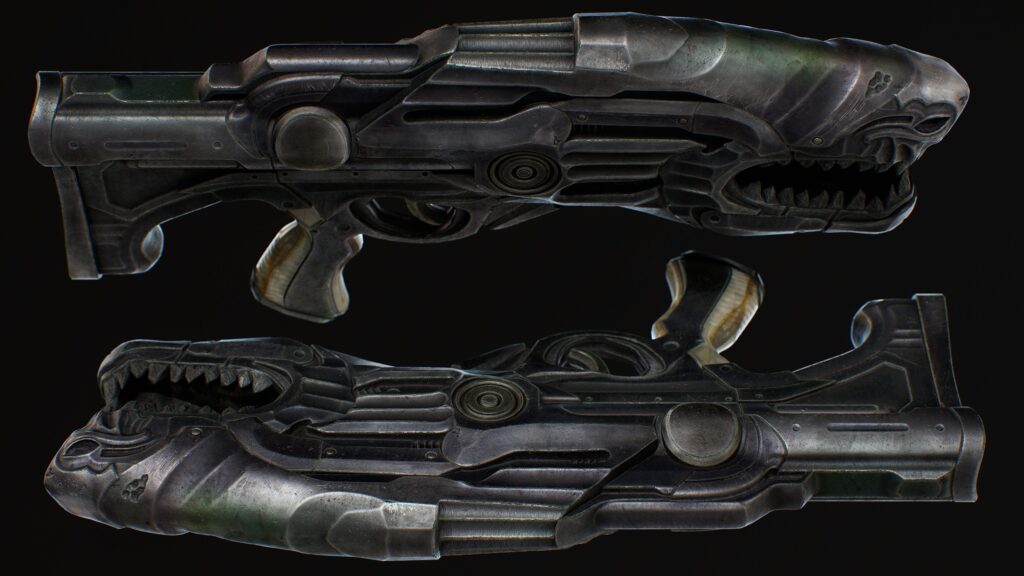
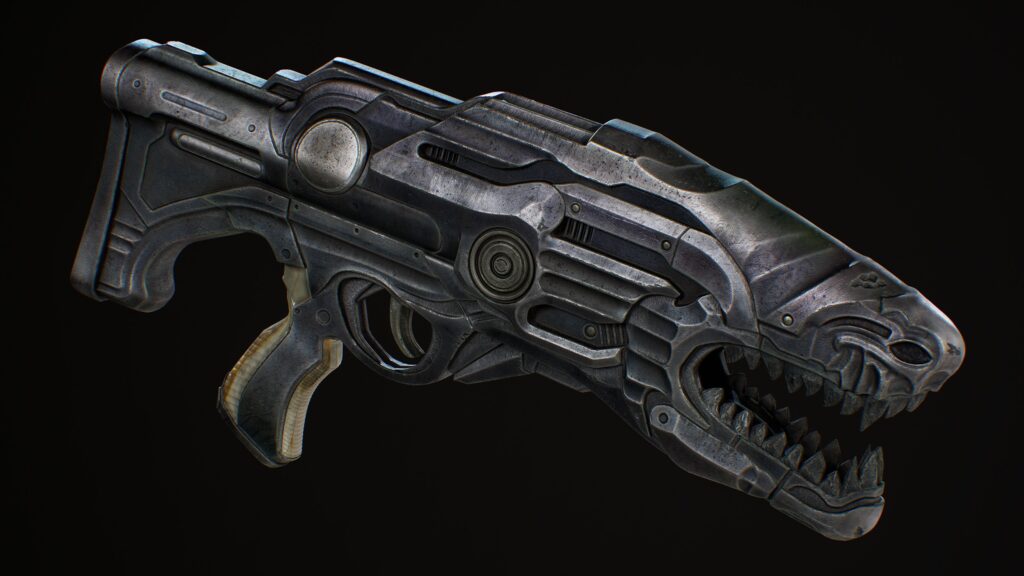
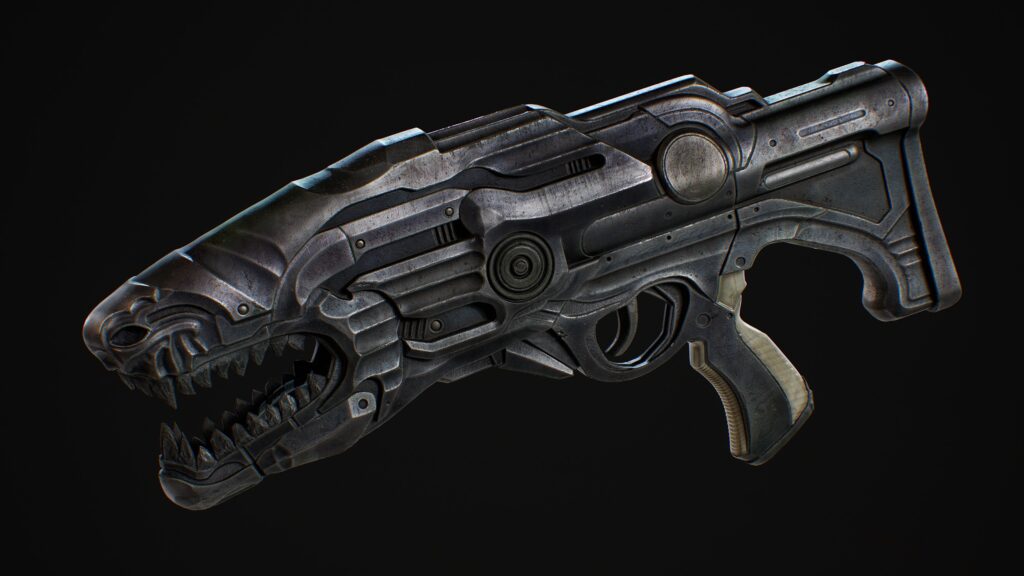
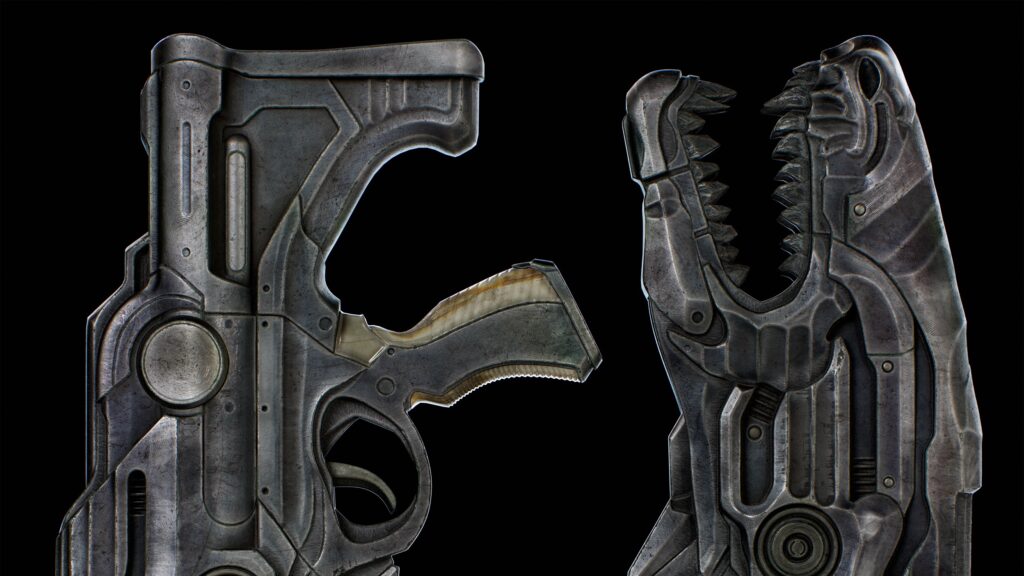
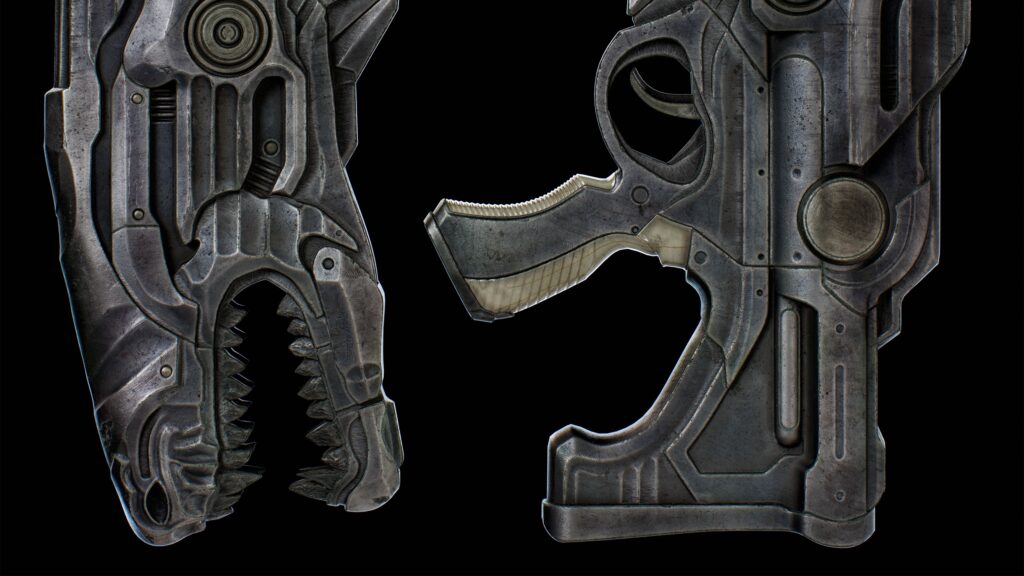
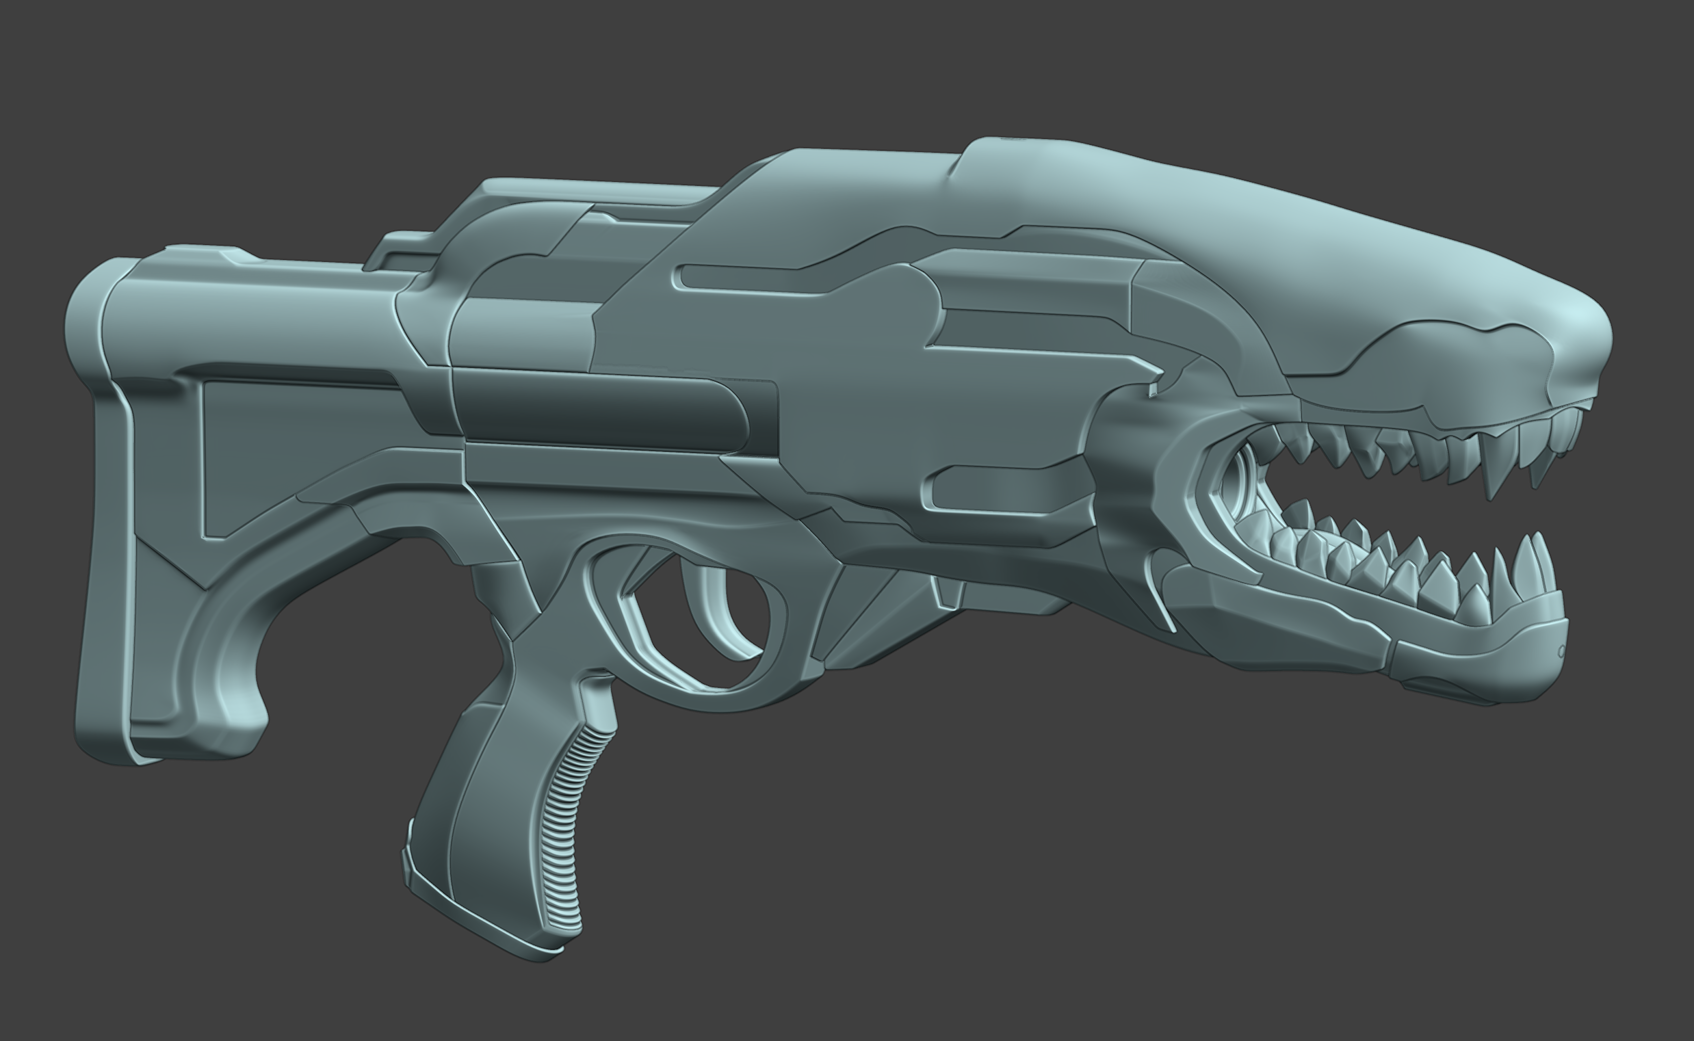
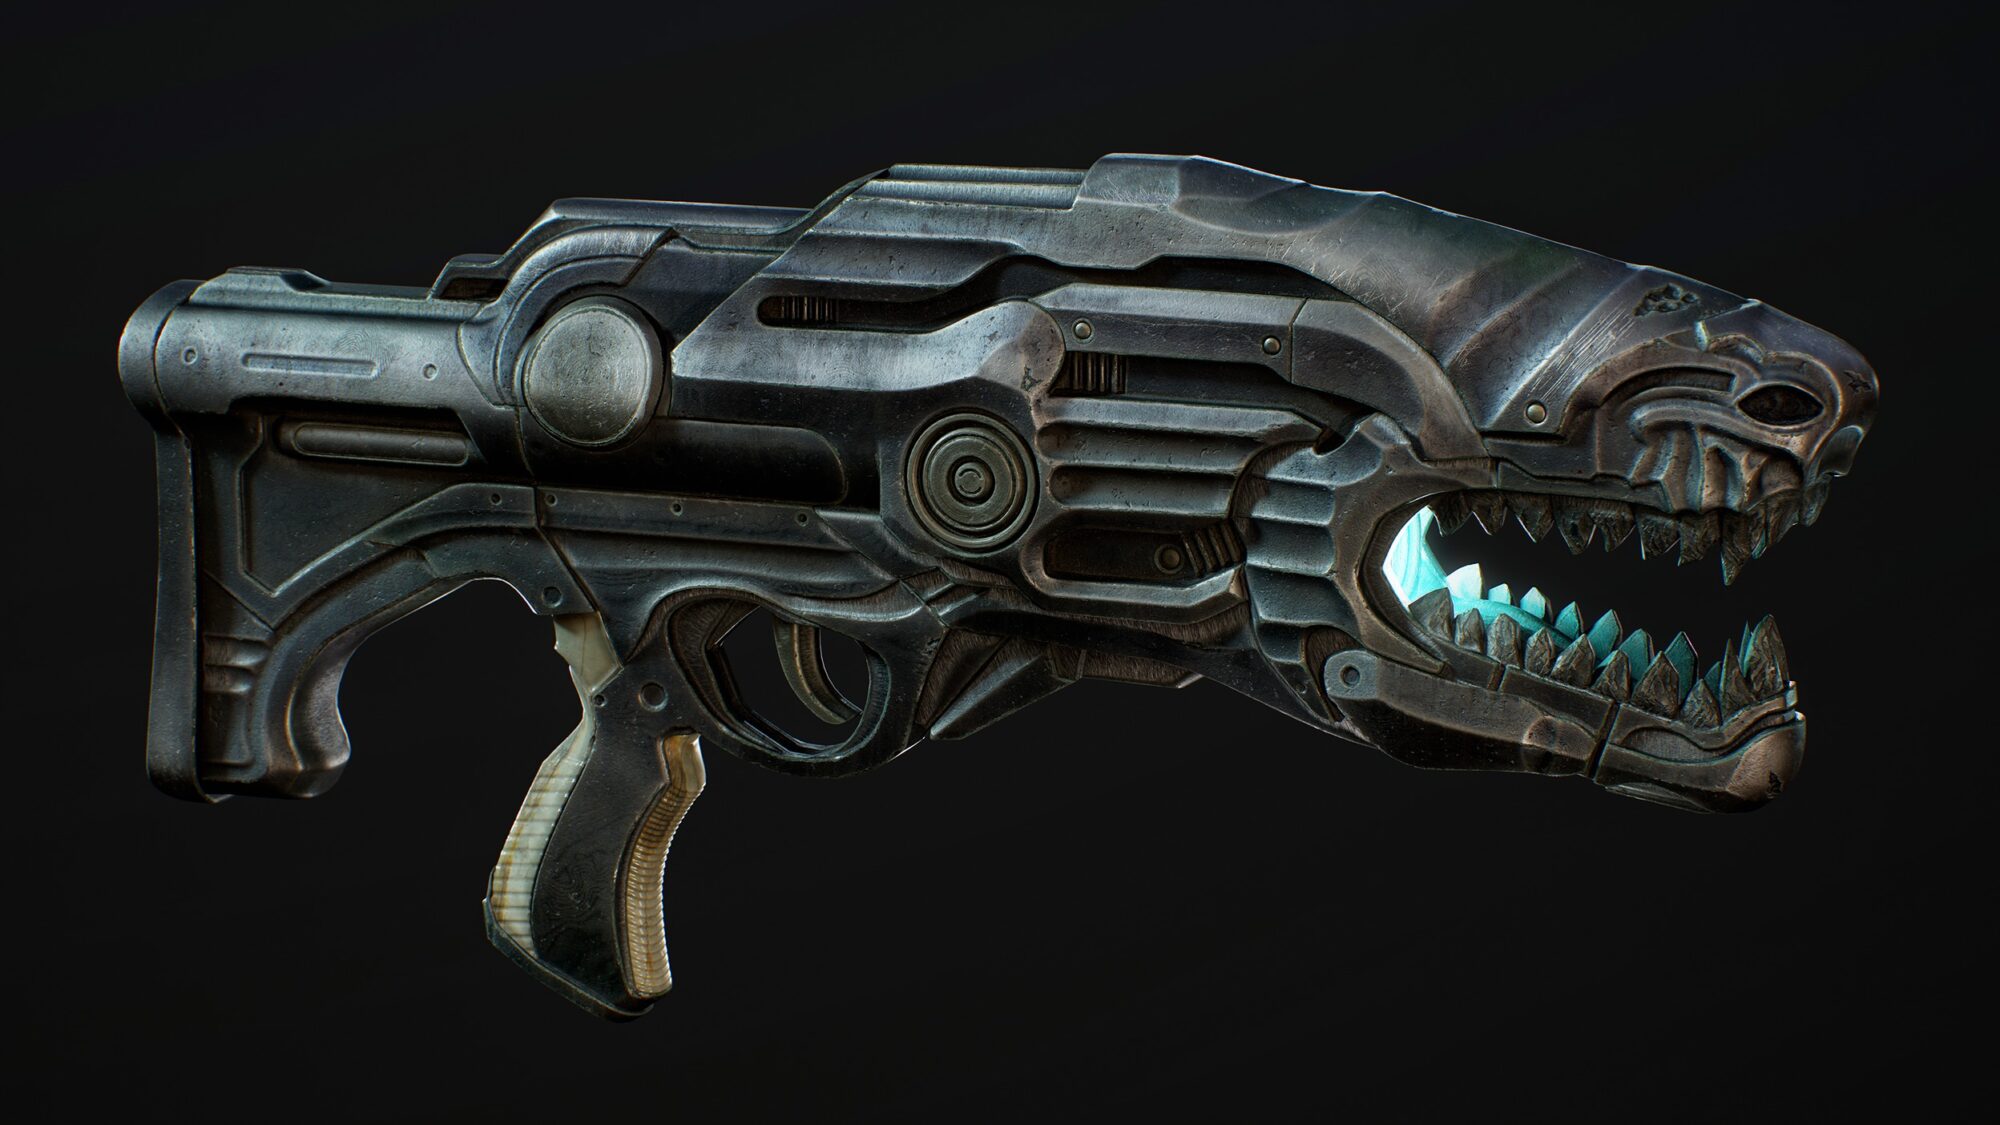
The piece you see here is both weapon and art, a fusion of the archaic and the futuristic. Its design evokes the primal ferocity of nature, with sharp, toothlike details and skeletal ridges, balanced against the industrial precision of polished steel and intricate mechanisms. It feels like a relic from a world where the organic and the mechanical have merged into something hauntingly beautiful.
To deepen the narrative, I’ve written a backstory for the weapon—a creation imbued with both mystery and history.
Thank you for joining me on this artistic journey. I hope my work resonates with you and sparks your imagination. Enjoy!
Fictional Background Story of the Weapon
Torak-sen Zhyra
In the endless silence of the void, where stars crumble into dust and light itself falters, a weapon is forged not by hands, but by the whispers of forgotten gods. Torak-sen Zhyra, the “Whisper of the Void,” is its name—an ancient echo that drifts through the chasms of time, carried on the sighs of a dying cosmos.
Legends say it was found resting on an altar of bone. It is a fragment of the abyss, a piece of eternity’s mourning song. Those who possess it do not merely hold a weapon—they carry the void itself, and with it, the promise of silence is eternal.
References
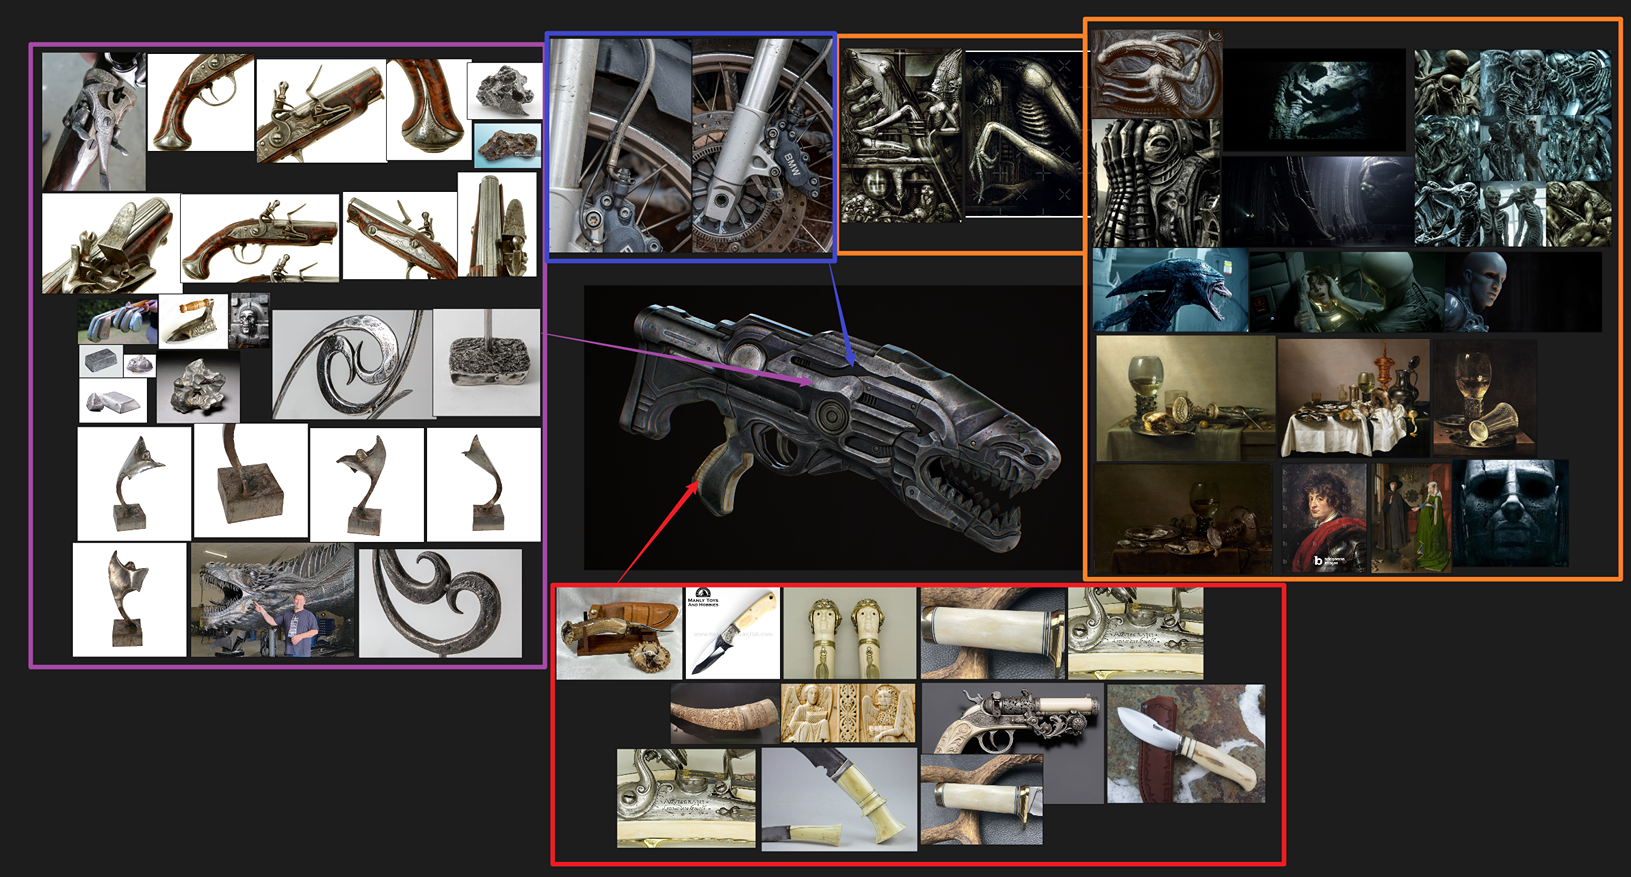
The process of gathering references for this model and conceptualizing its design presented significant challenges due to the uniqueness of the subject.
This was not an object one encounters frequently, nor one with an abundance of readily available references. My primary inspiration stemmed from the works of H.R. Giger and the cinematic imagery of Prometheus.
I aimed to evoke a dense, alien atmosphere imbued with an ancient and mysterious aesthetic.
Workflow
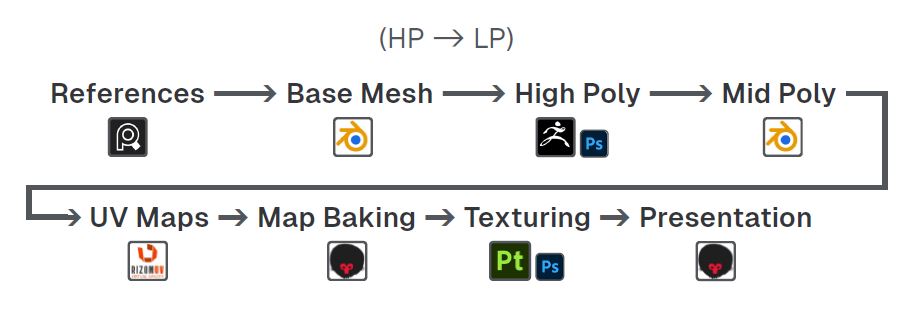
An essential part of the process was determining a fitting and efficient workflow. After careful consideration, I decided to begin with Blender and focus heavily on refining the model in ZBrush. Although I briefly considered incorporating Fusion 360, the organic nature of the model made it unsuitable for this project.
From a technical standpoint, one of the more innovative decisions was to create the final mid-poly (MP) mesh as a single, solid piece. This approach maximized the quality of the baked ambient occlusion (AO) maps.
Additionally, I utilized Marmoset for advanced map baking, adhered to the standard metallic PBR workflow, and employed a UDIM workflow for UV mapping to ensure optimal texture resolution and flexibility.
Blockout
For the initial basemesh process, I used Blender 4.2. At first, my goal was to create a highly detailed blockout for the model, but I quickly realized that achieving this solely with Blender would not be feasible.
Instead, I shifted my focus toward defining the main shapes and establishing the overall design. The blockout stage became a highly iterative process, with much of the design evolving dynamically during this phase.
I relied on simple poly modeling techniques, prioritizing form and proportions without concerning myself with topology.
Knowing that I would later utilize Dynamesh and sculpting tools for refinement, this approach allowed me to focus entirely on creativity and experimentation without being constrained by technical limitations.
High-Poly Modeling and Sculpting
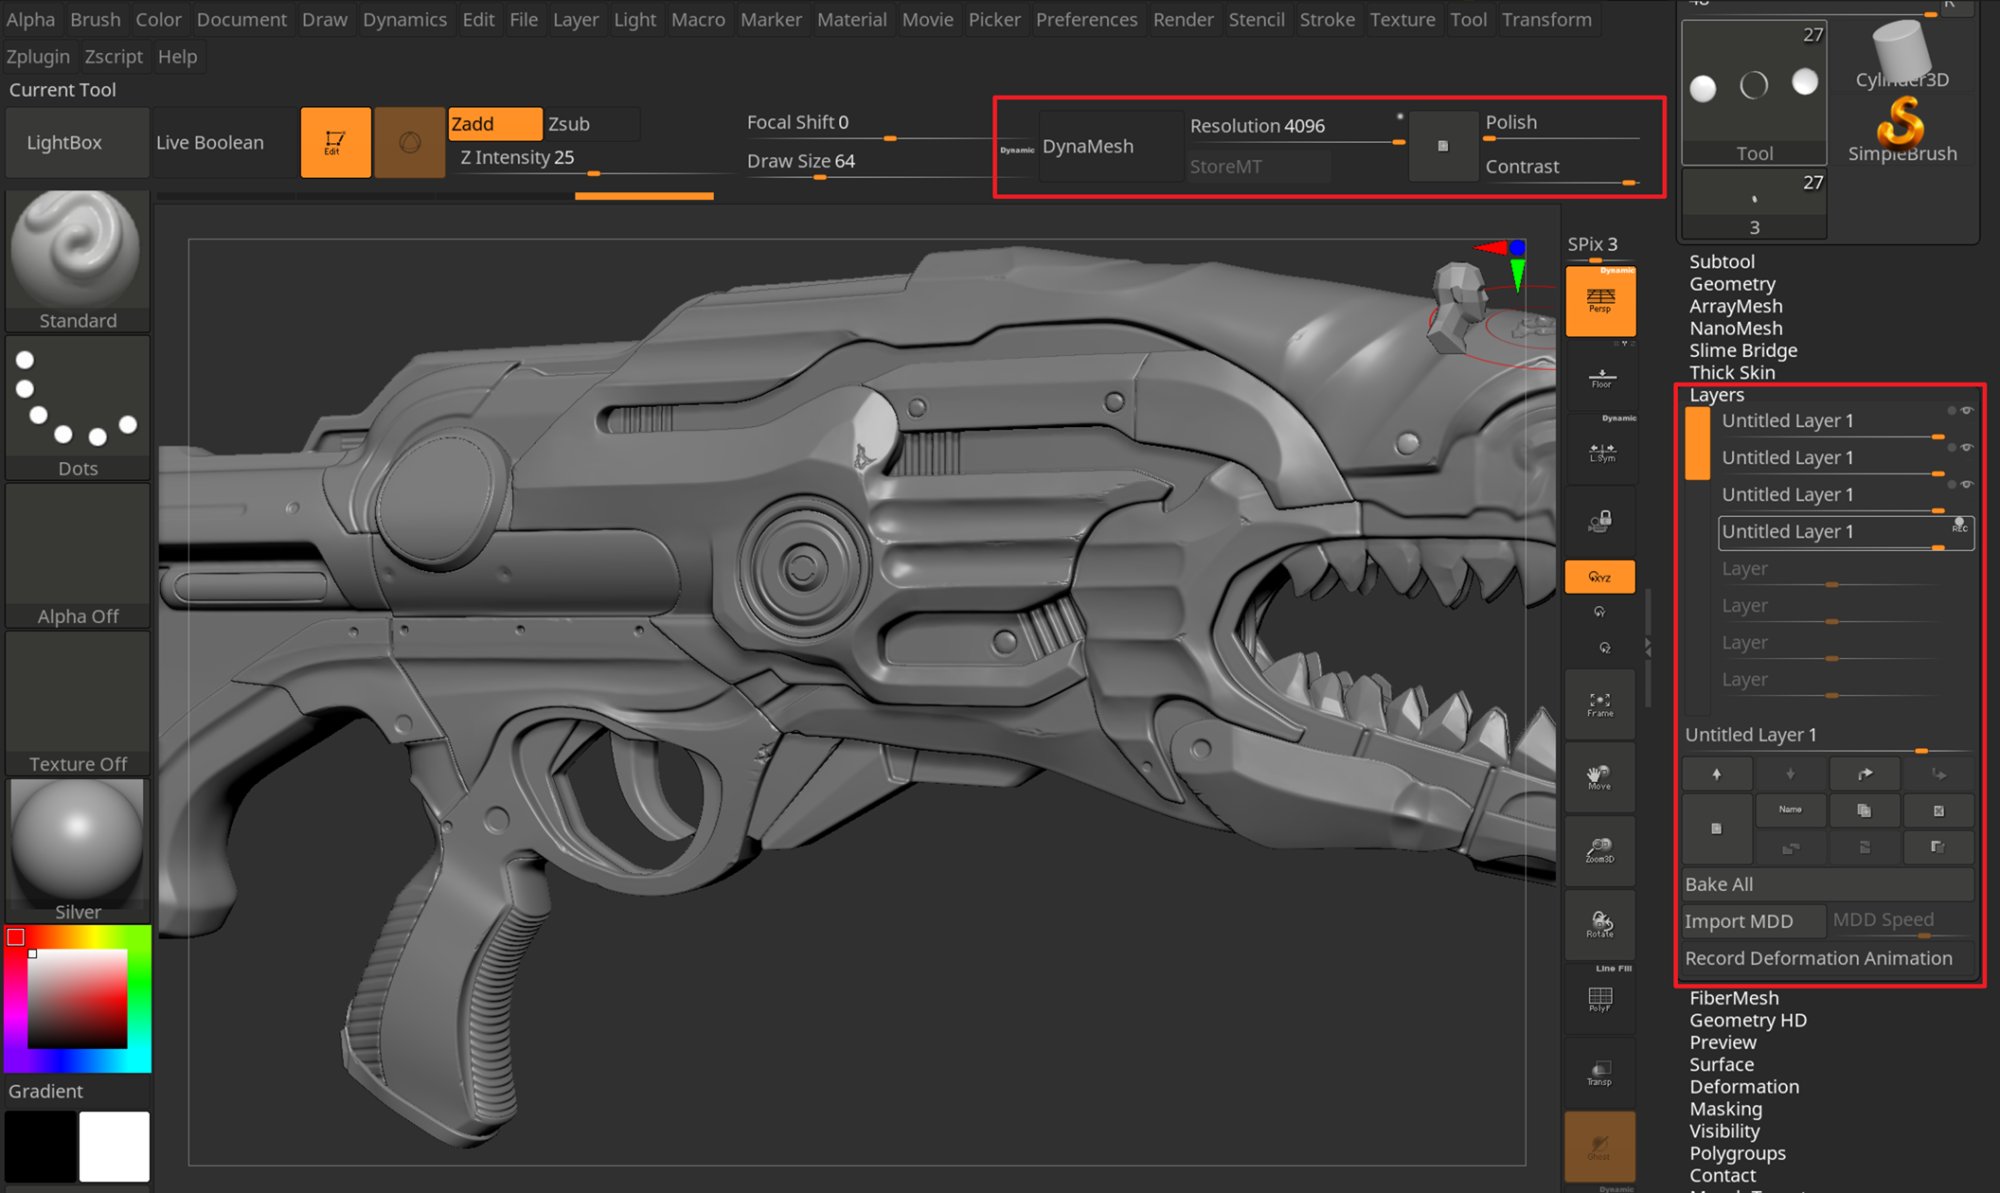
Once I transitioned to ZBrush, I began by importing the model as an FBX file, with each material separated into its own subtool. This organization significantly streamlined the workflow and made managing the project more efficient.
The process of creating a densely detailed high-poly mesh involved a combination of Dynameshing, live Boolean operations, and various standard brush techniques.
This hybrid approach allowed for both intricate detailing and the flexibility to experiment with forms and structures throughout the sculpting phase.
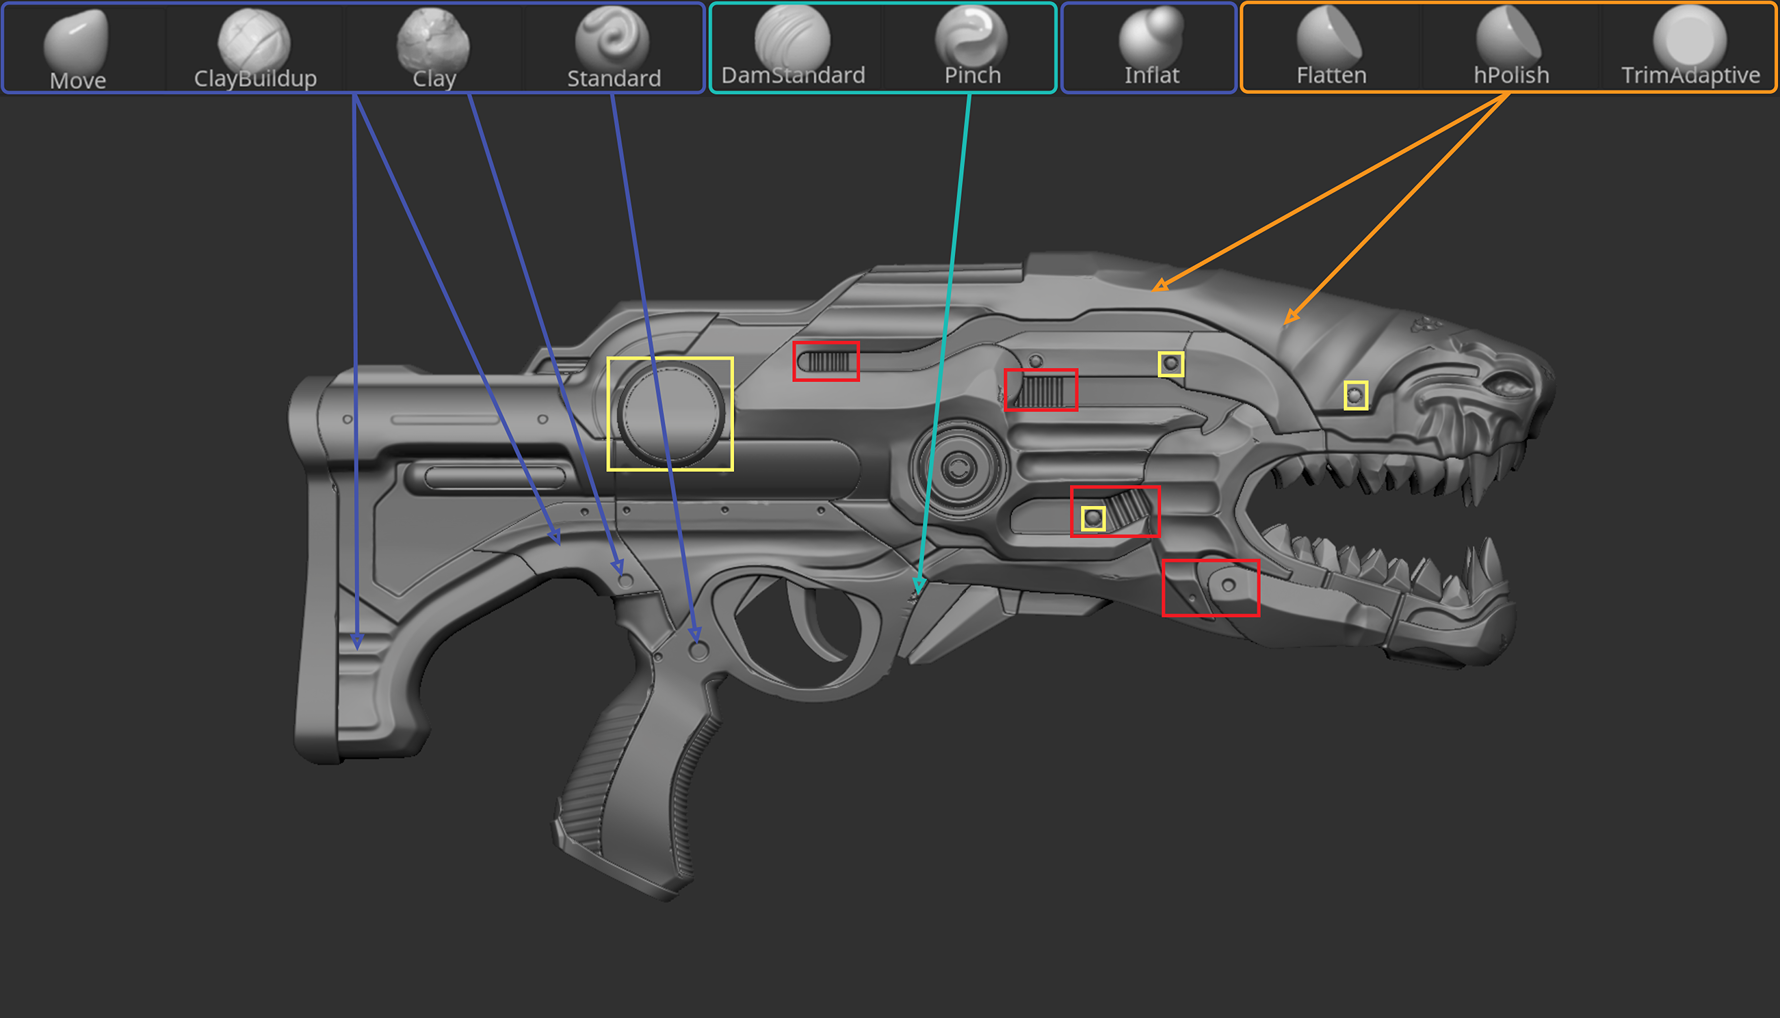
- (Orange) For these parts, I used an array of flattening brushes for chiseling microdetail on the edges.
- (Yellow) These parts are additional subtools created with Blender export or Mesh inserts in ZBrush.
- (Blue) Bigger overall parts had to be adjusted with some heavier tools. It took quite some time to get them into the final state.
- (Cyan) A combination of DamStandard and Pinch gives a very nice crease effect.
- (Red) The inflations I sculpted with the Clay brush and custom alphas created in Photoshop.
For every subtool and the entire model, I consistently utilized a combination of layer work and morph targets to maintain flexibility and control during the sculpting process.
For certain parts of the model, I also incorporated traditional hard-surface techniques, such as manual polishing, to achieve clean and refined details where needed.
This hybrid approach allowed me to balance precision and creativity throughout the workflow.
Mid-Poly Mesh
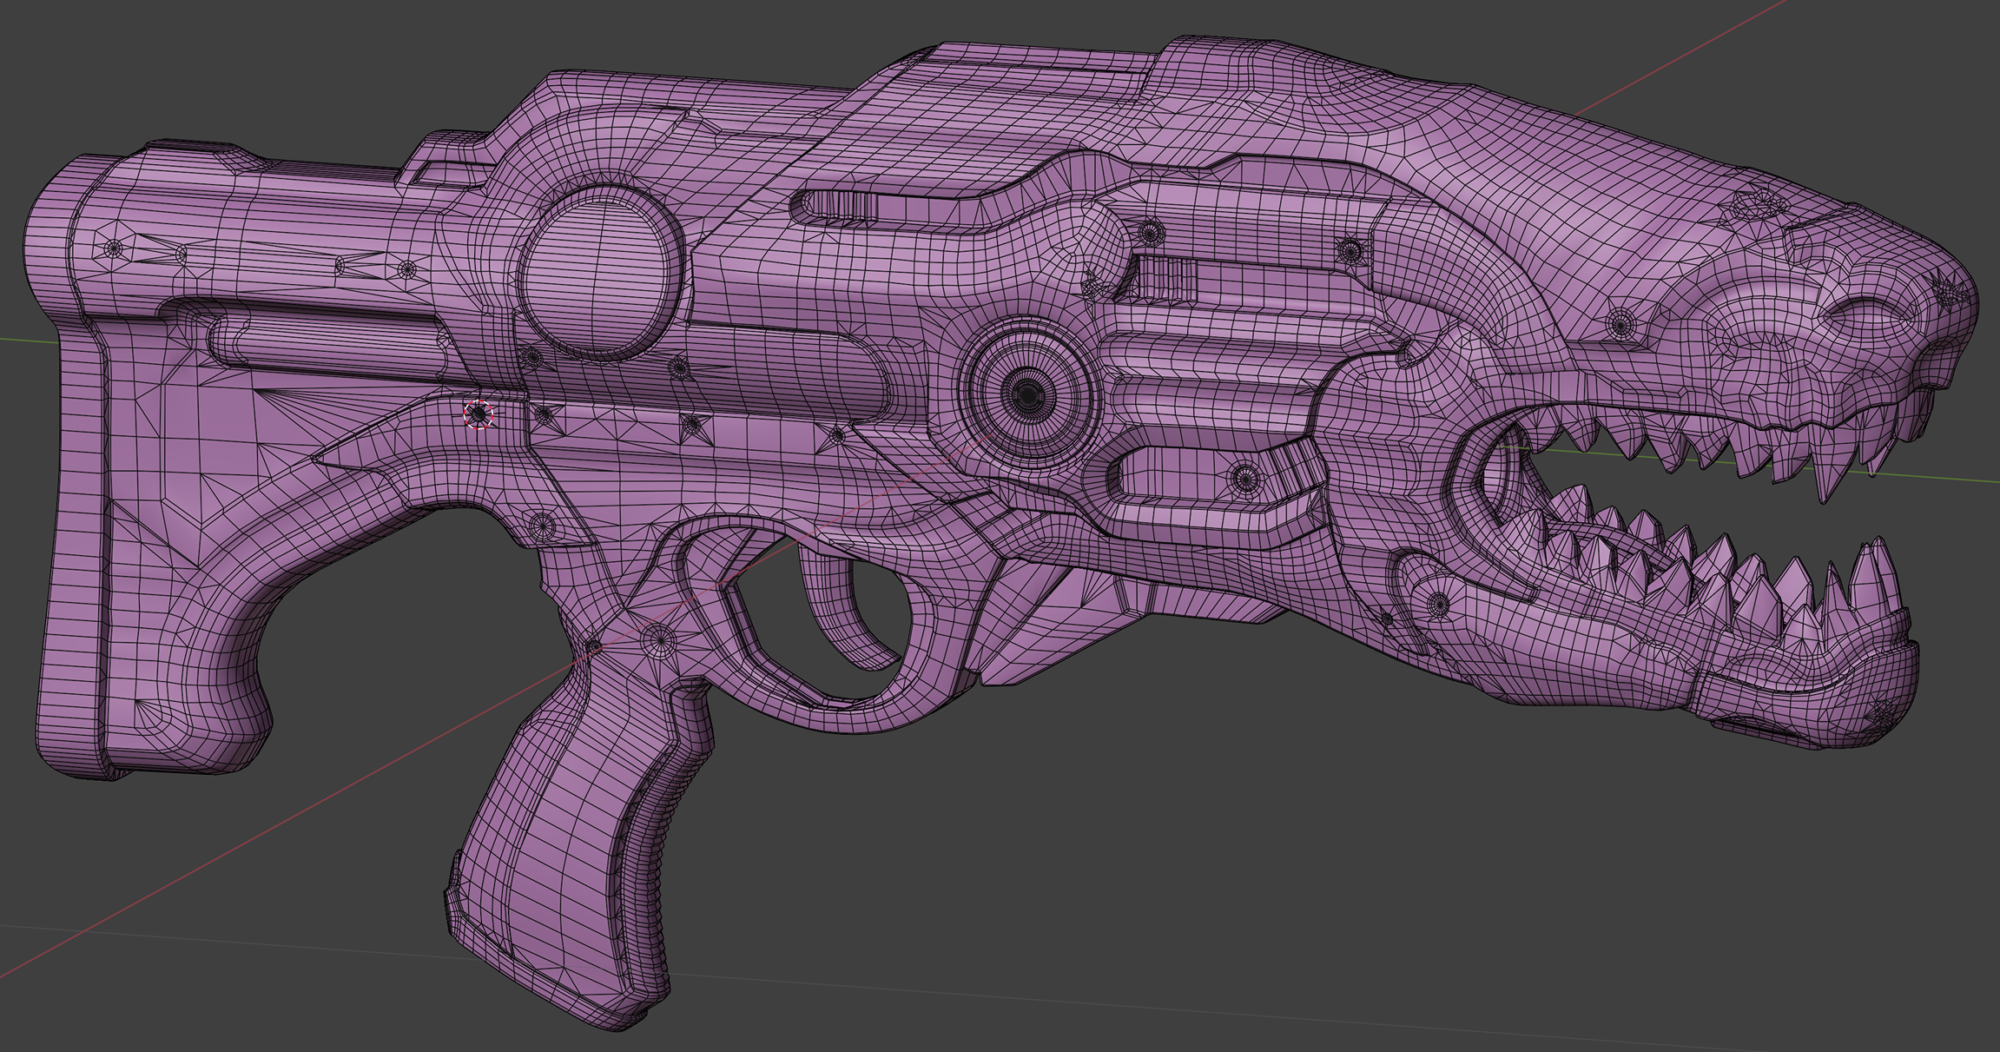
With the rise in popularity of Nanite and my experience implementing it across multiple projects, I explored a custom normals modeling workflow while preserving the benefits of a traditional high-poly (HP) to low-poly (LP) pipeline for baking fine details.
- I incorporated single bevels wherever possible to enhance the smoothness of the model.
- I ensured high polygon counts in all areas susceptible to faceting to maintain a clean and polished look.
- One critical technique was keeping the mesh as a single unified mold. This approach enhanced the baked ambient occlusion (AO) in the cavities, resulting in higher quality and more consistent shading. I highly recommend experimenting with this method for anyone aiming to achieve superior detail and shading in their models.
UVs
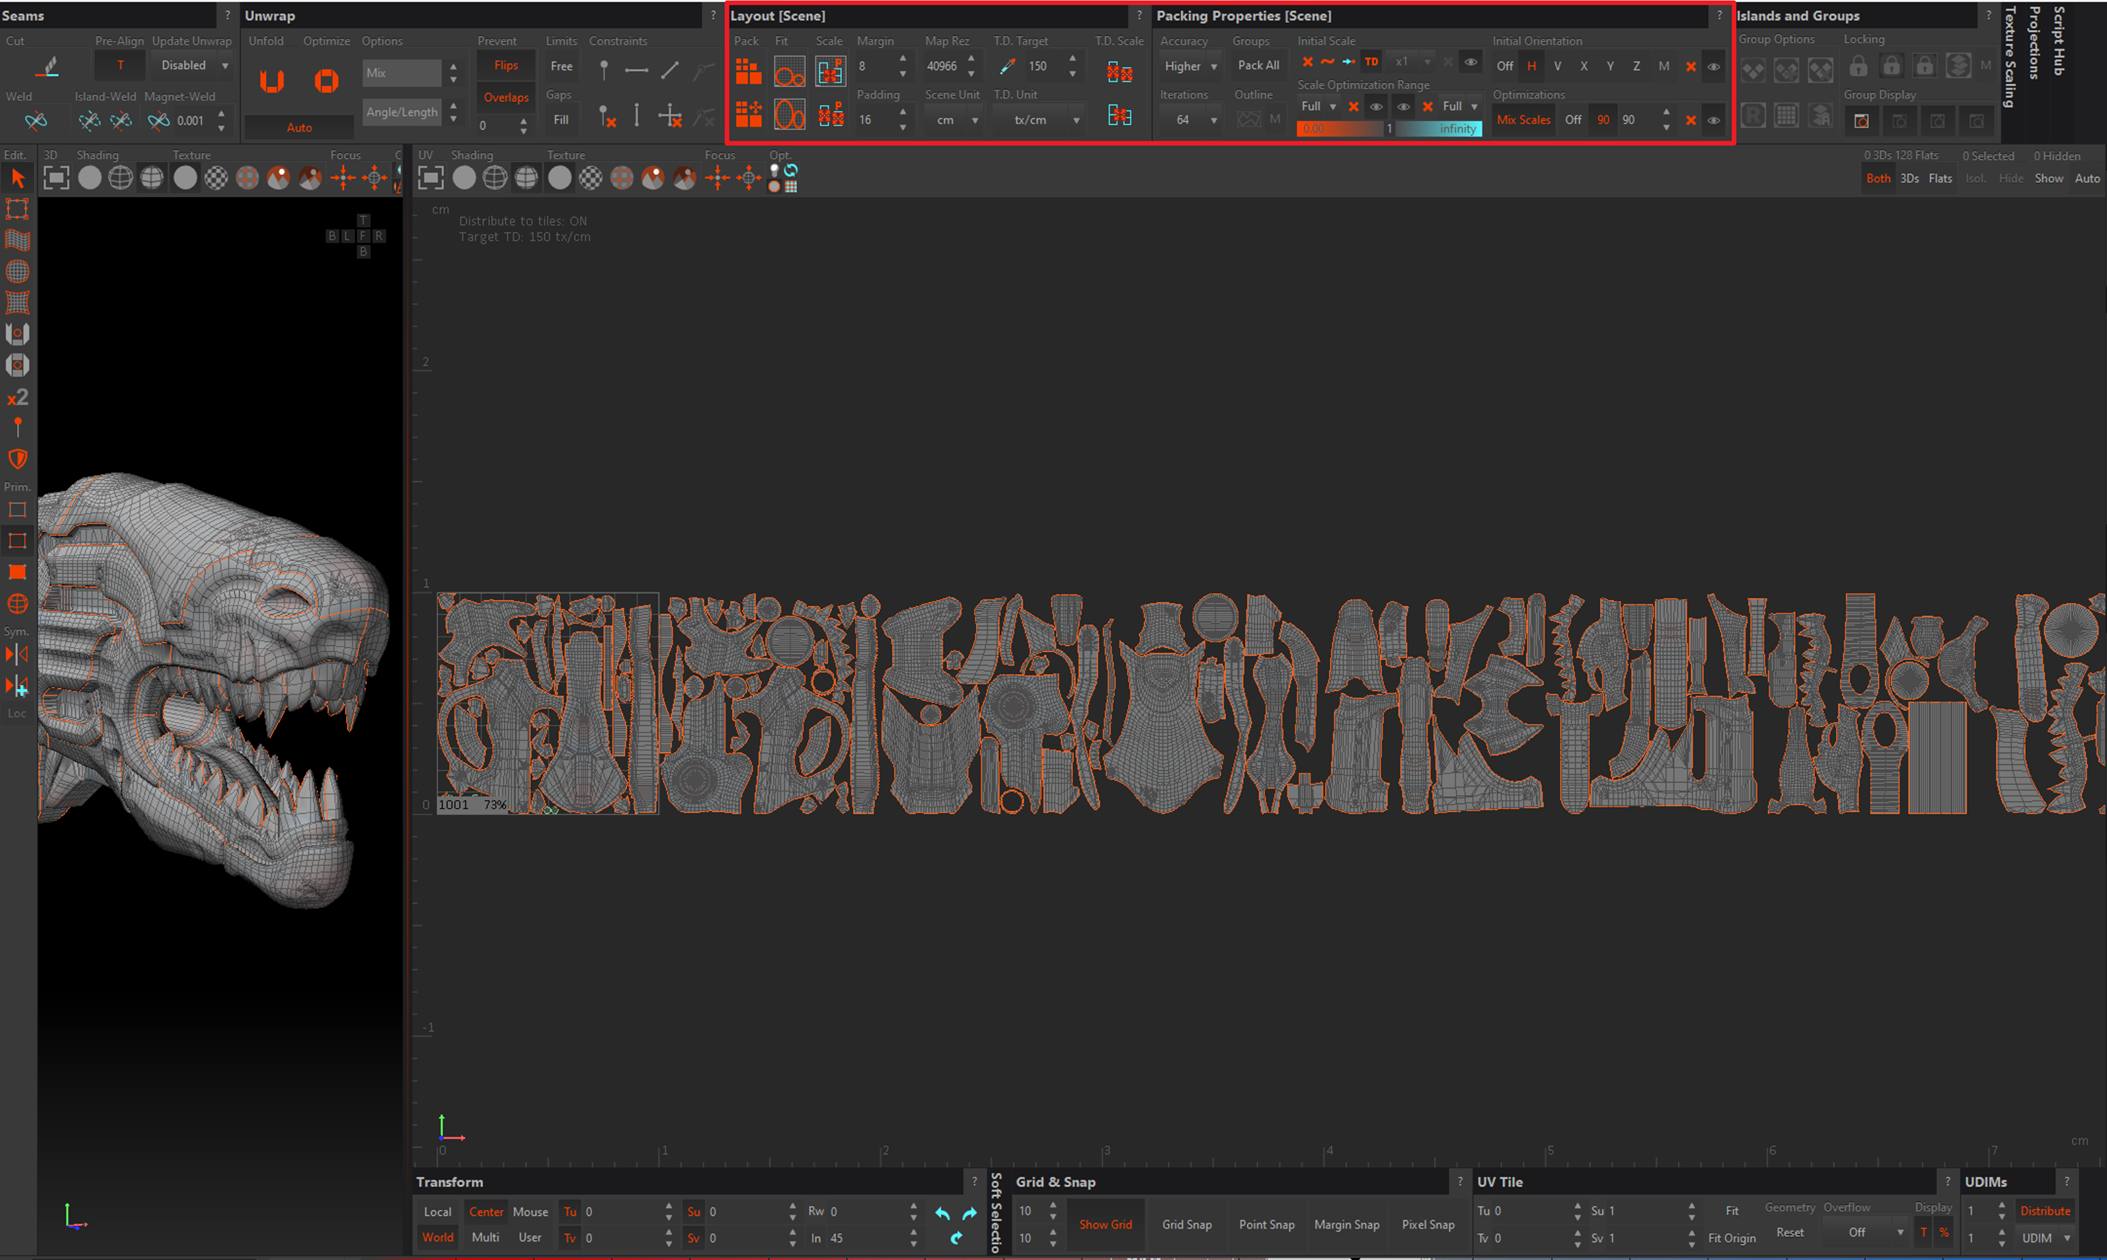
The UV maps for this project were fairly straightforward, apart from utilizing a UDIM workflow and maintaining a very high texel density.
For straightening and packing the islands, I relied on RizomUV, which I consider the best tool on the market and one I use daily in my professional work.
My goal was to achieve a higher texel density than what is typically used in the AAA segment, so I aimed for 150px/cm on 4K textures spread across multiple UDIMs.
This approach ensured exceptional texture resolution and detail, especially for close-up views of the model.
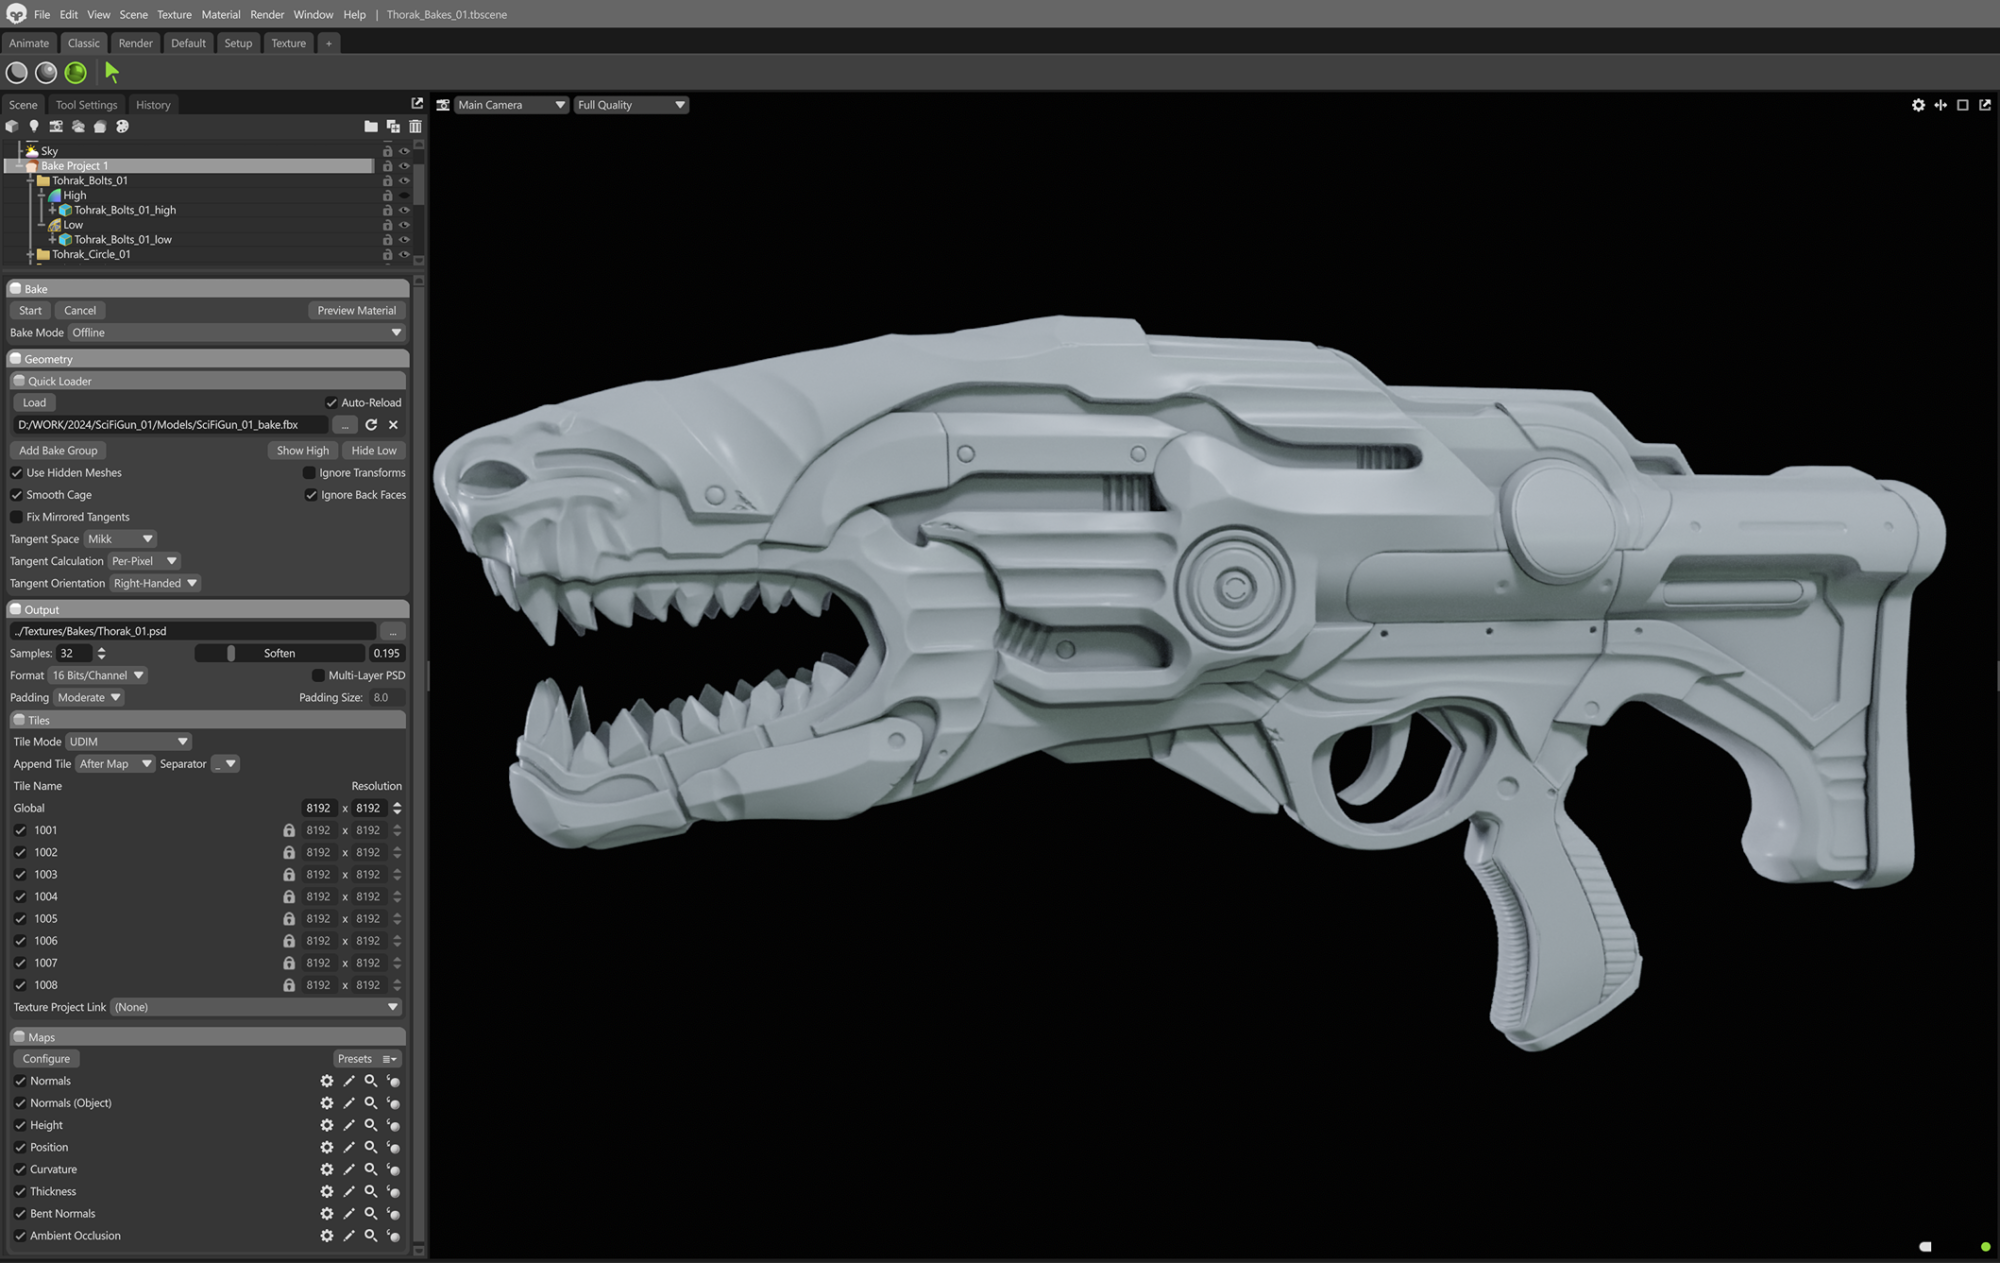
Map Baking
For the baking process, I used Marmoset Toolbag 5, which I consider the best baking tool available, particularly for high-end AAA assets. Its robust feature set allowed me to hand-paint the skew maps and adjust the cages precisely, ensuring optimal results.
The flexibility and control Marmoset offers make it indispensable for achieving clean, high-quality bakes.
The remaining settings I used are detailed in the screenshot below.
Texturing
Texturing is always the most critical and time-consuming part of creating an artwork, and this project was no exception. I dedicated a significant amount of time to this stage, ensuring that the textures brought the model to life and elevated its visual impact.
While I didn’t utilize any particular experimental techniques, I relied heavily on a stacked anchor point construction for added depth and complexity.
This was complemented by extensive layering, hand-painting, and creative use of anchor-based solutions to achieve a rich and cohesive texture.
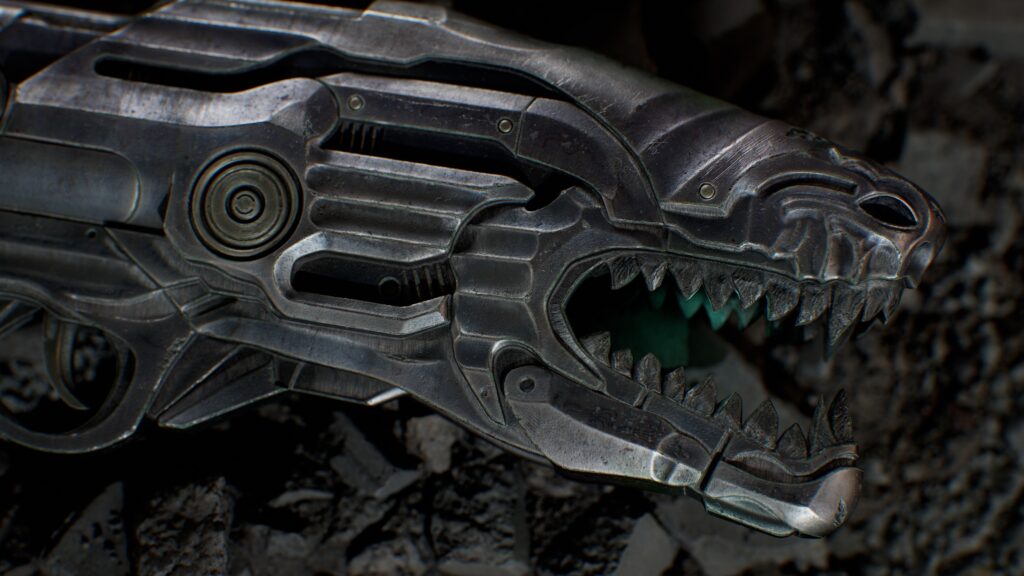
The unique challenge of this asset lies in its original design intent to feature only one material. Although I eventually decided to use two materials for practical and visual reasons, I worked hard to make the iron material as compelling as possible.
Without a wide range of materials to rely on, the metal had to carry the majority of the visual interest. I focused on enhancing its character, adding subtle imperfections, layering wear and tear, and incorporating visual storytelling to make the material feel authentic and captivating.
In the breakdown, I’ll include progress GIFs to demonstrate how the textures evolved throughout the process, offering a closer look at the layering, anchor point workflows, and the overall approach that brought this piece to its final polished state.
Rendering
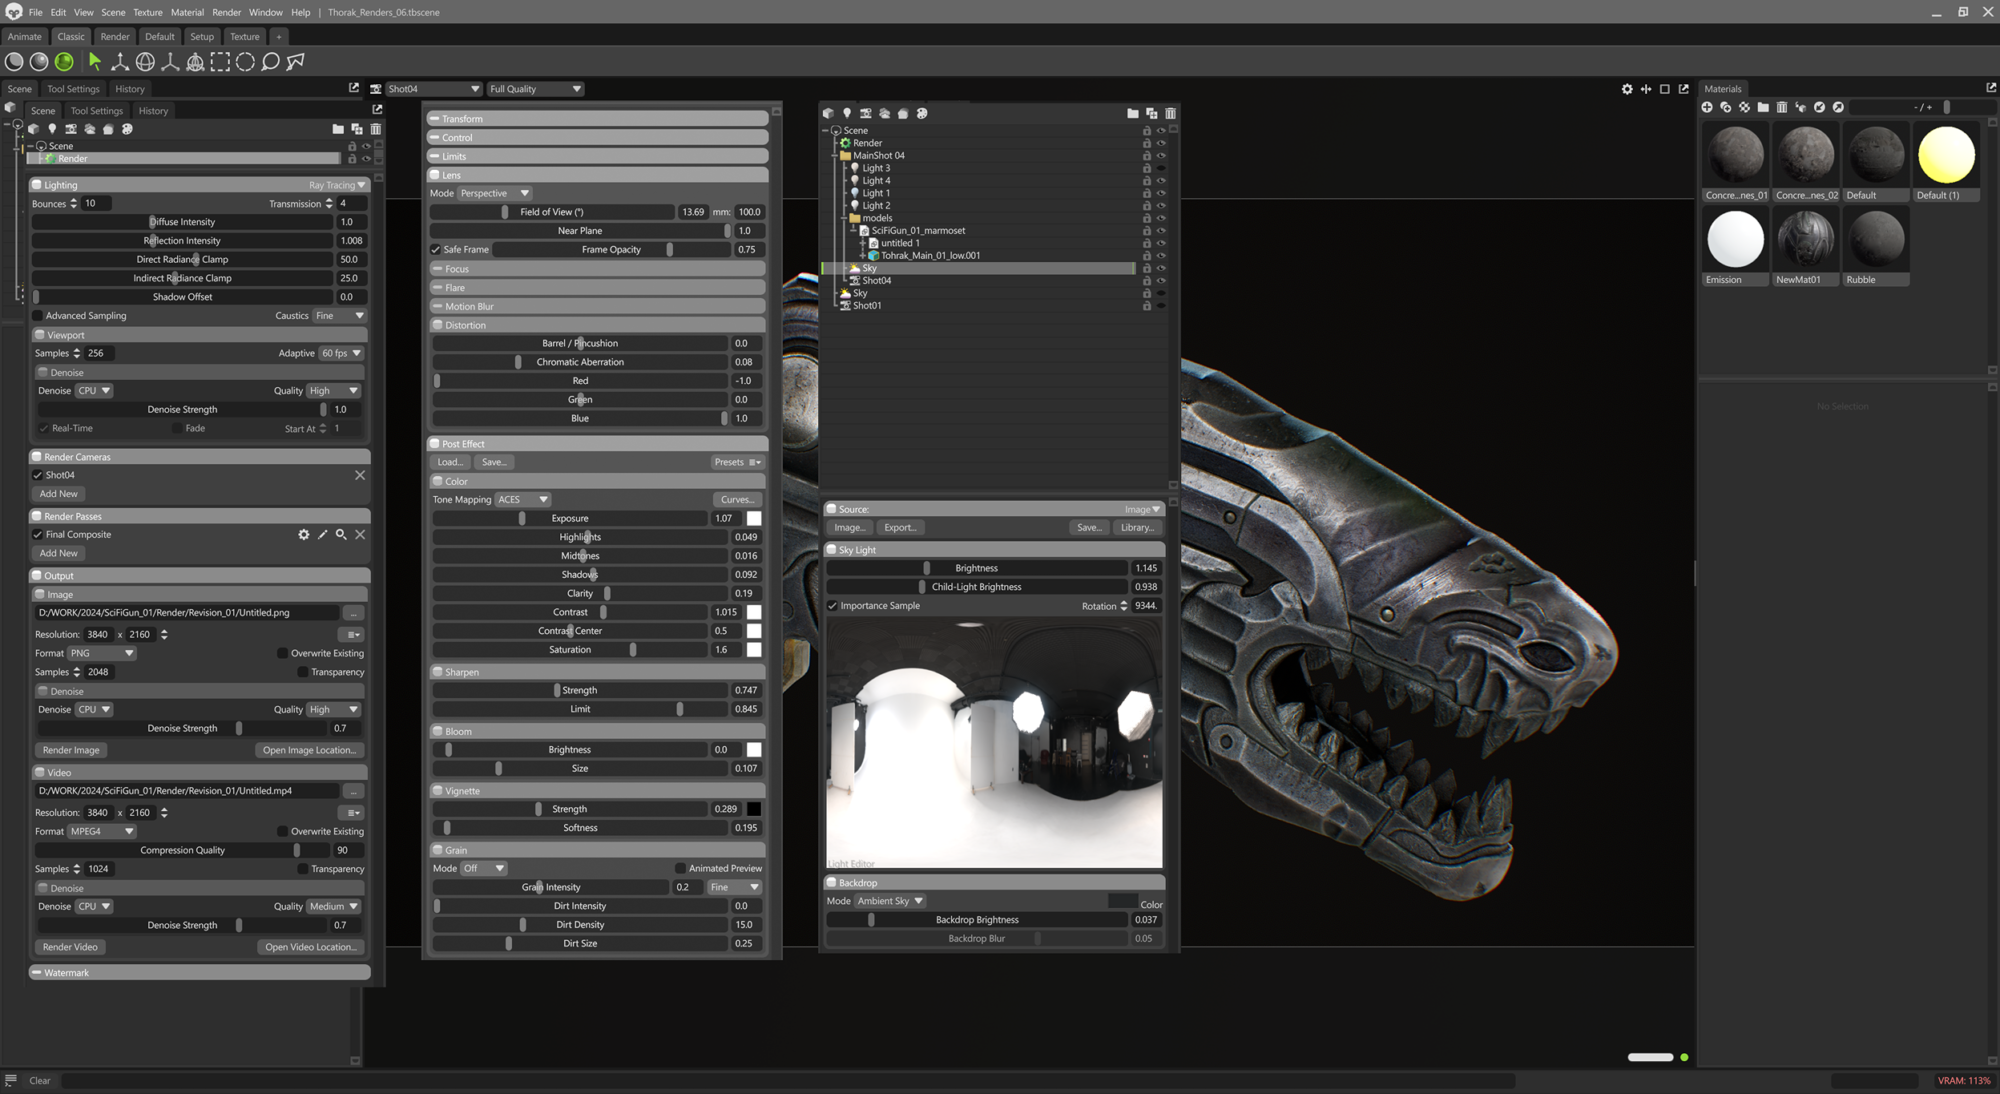
For rendering, I chose Marmoset Toolbag to demonstrate how the model performs across PBR, real-time, and RTX workflows.
The versatility of Marmoset allowed me to showcase the asset’s textures and details in a variety of lighting scenarios, emphasizing its adaptability to different environments.
To achieve the desired results, I created multiple light setups tailored to each shot. Each setup was saved in a separate Marmoset file, as the scenes quickly became too heavy for my RTX 3070 Ti due to its limited VRAM.
Most renders utilized natural lighting as the foundation, complemented by an additional rim light to enhance depth and definition.
I also took full advantage of Marmoset’s ray-traced rendering capabilities, which significantly improved the quality of reflections, shadows, and overall lighting fidelity.
This approach allowed me to capture the model’s details with clarity and achieve visually compelling renders that highlight its design and texture work.
By leveraging Marmoset’s robust tools and ray-traced rendering, I was able to create polished results that bring the asset to life.
Closing Words
This project represented a significant personal undertaking, marking nearly two years since I had dedicated time to a purely self-initiated creative endeavor.
I sought to explore organic forms and master fundamental materials, deviating from my usual work in modern and light sci-fi settings. The project, which spanned approximately 300 hours, allowed for a deliberate and unrushed creative process.
This experience has satiated my artistic appetite and inspired new directions for future work. I welcome any inquiries and can be reached via LinkedIn and ArtStation.
Read more articles
You might also like these articles.