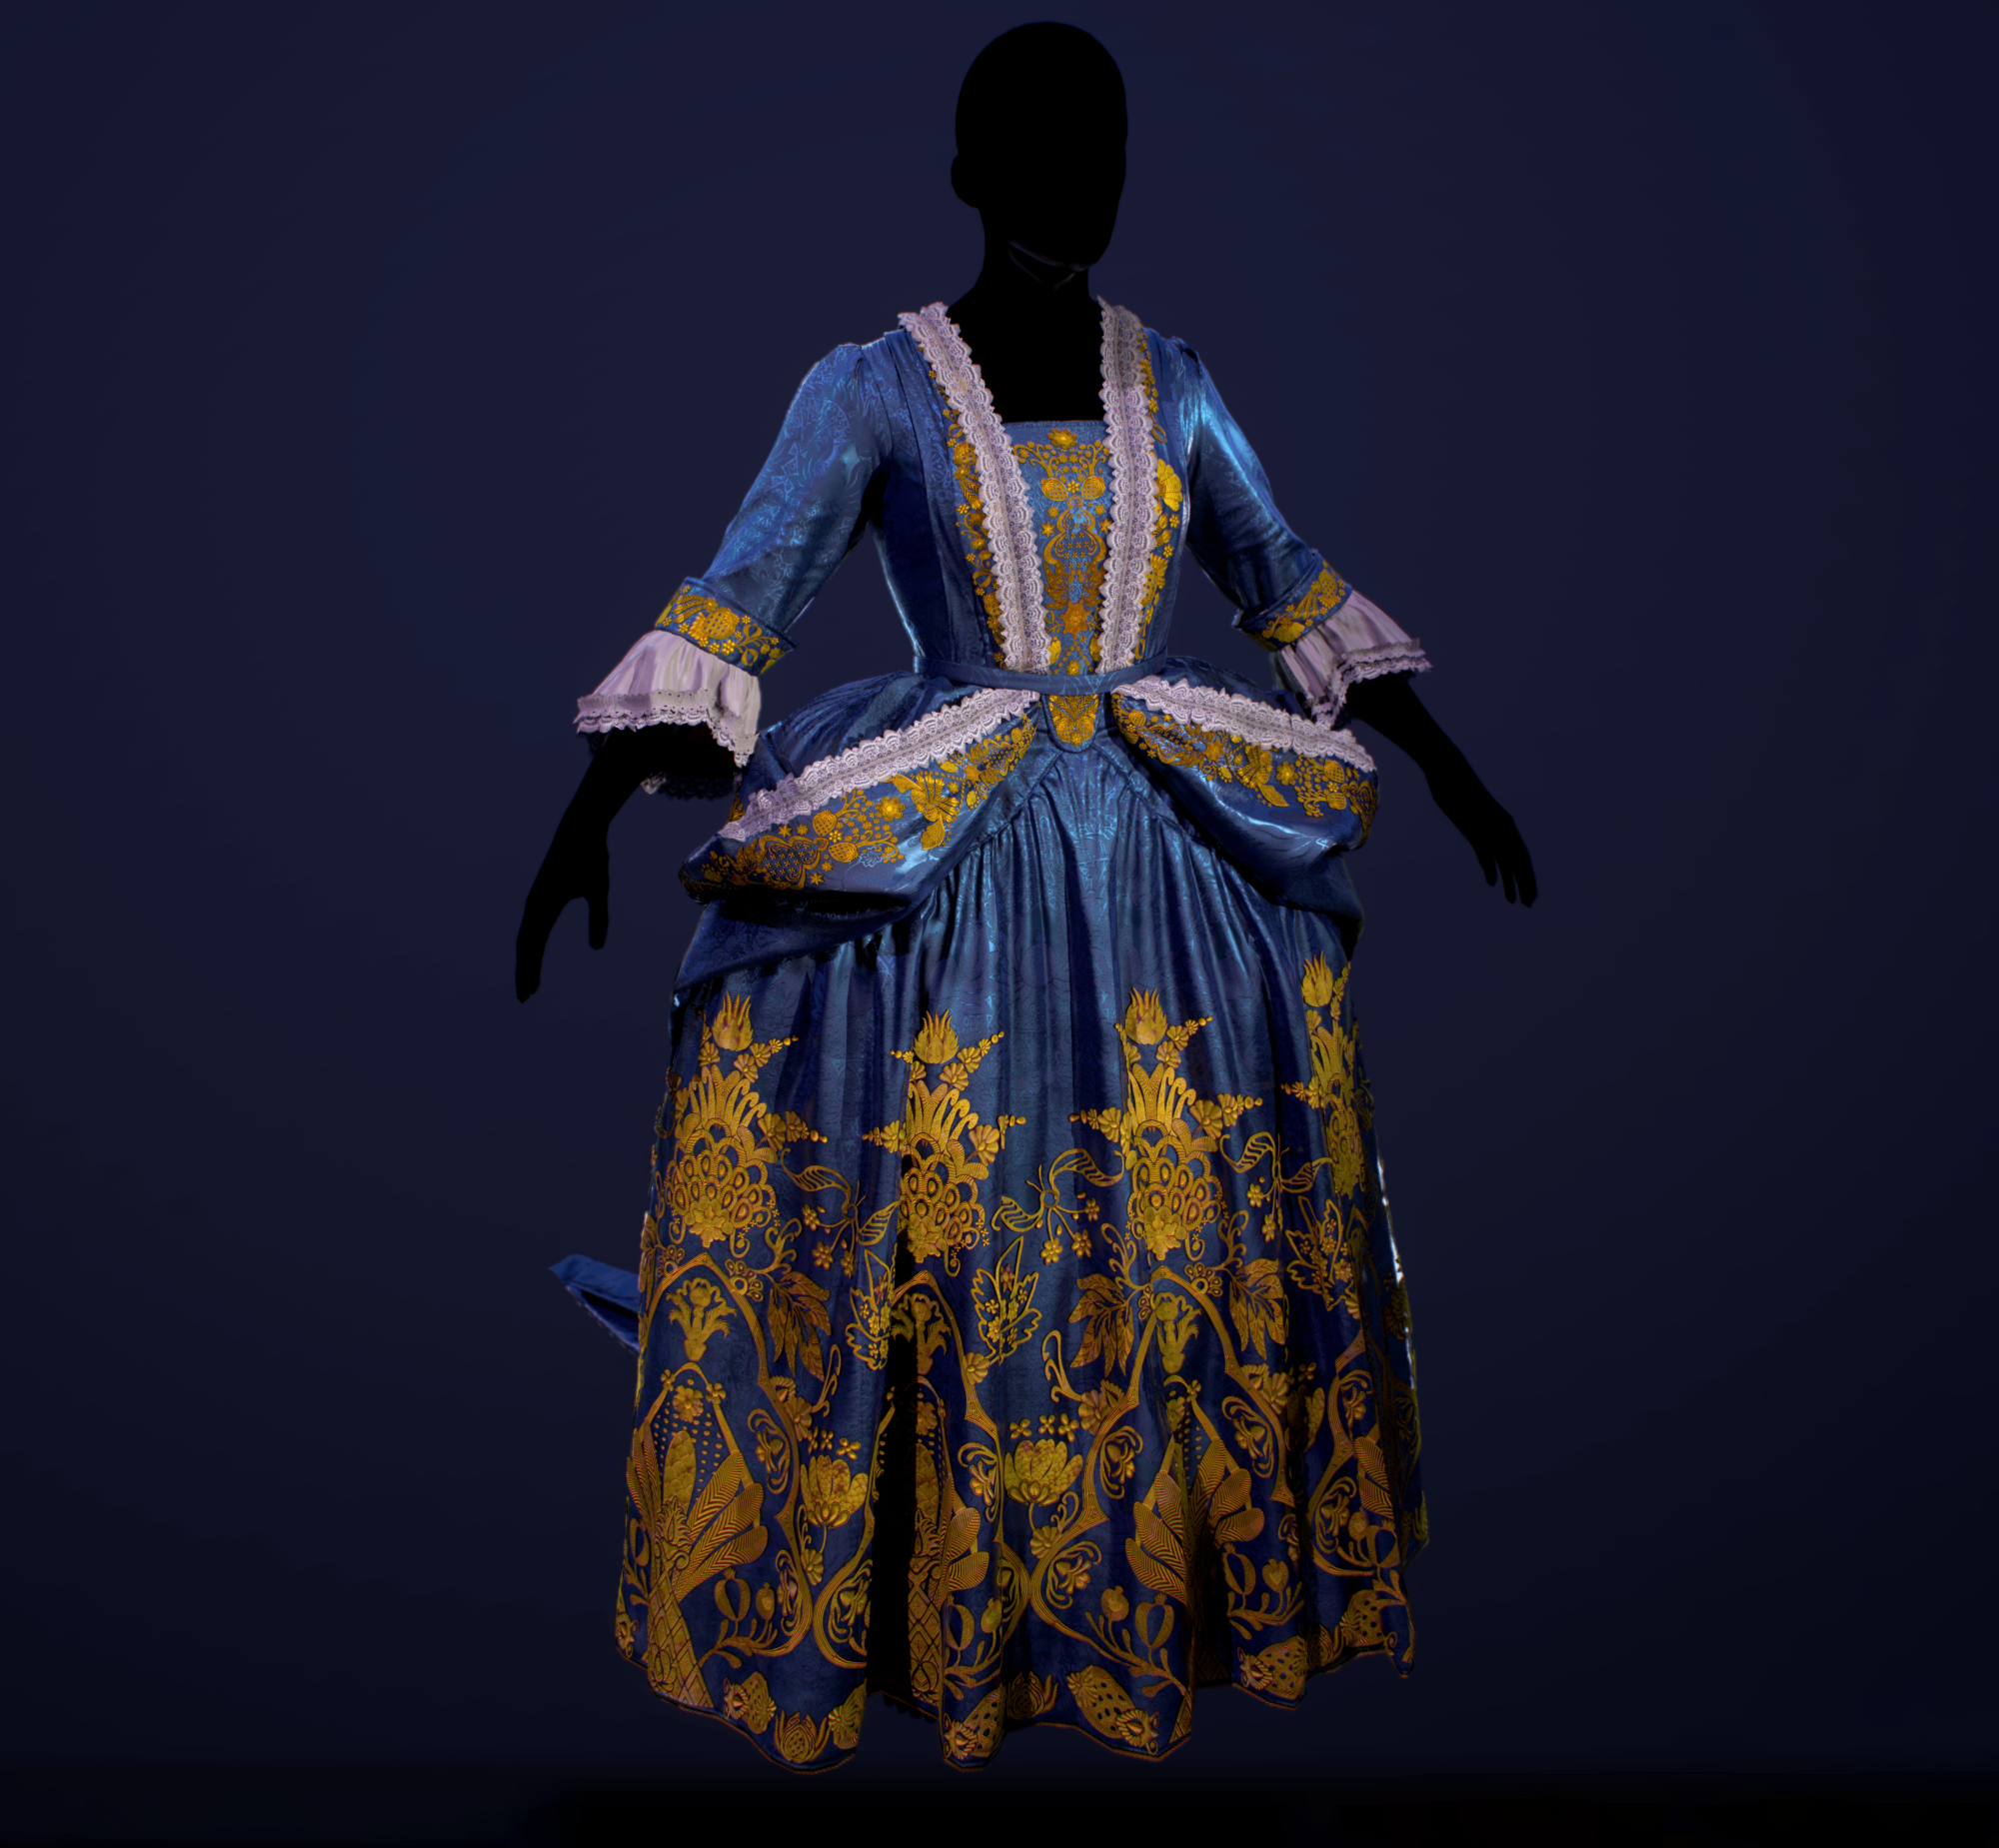
Mantua Gown

Introduction
Hello! My name is Liz and I am currently a 3D Artist working in the Games Industry, specializing in scanning.
As an artist, I have always been inspired by fashion and often found historical dress to be particularly fascinating. For the longest time I wanted to translate this passion into my portfolio, and this project was the first step in creating more digital garments. Another big motivation to create this dress was a wonderful “Cloth creation and simulation for real-time” class by Jayson Fitch at CGMA.
Creating 1790s Mantua Gown
As all good projects start, this one started with research and gathering references. I am forever grateful to a community of people who appreciate and recreate historical dresses.
There is a treasure trove of fascinating and free material which made this project so much easier.
However, the patterns that I found were not exactly helpful. Like a lot of clothing at the time, mantua gowns were pinned together.
This means minimal to no sewing. So I had to adjust my own patterns quite a lot in Marvelous designer, not to mention account for details like pleating which are difficult to work within Marvelous. The key to not losing my mind was giving up on some historical accuracy and taking this project a step at a time.
After a basic block out was finished, it was challenging to figure out how to create more tricky pieces. One thing that helped was starting to look at this complex and layered garment as origami. But one I will be cutting with scissors, using glue, and cheating in any way possible. For example, the folded back piece that transitions into the train was created by just sewing and adding fabric to create the desired shape.
As soon as all the necessary pieces looked good together and were of appropriate size and shape, I removed the sewing and merged them together, creating an appearance of a continuous piece that was just pinned to the waist. The same way of thinking applies to the pleats on the back of the dress. Even though it would be made from a single piece of fabric in real life, assembling those pleats one by one, layer by layer was much easier and gave me more control in the process.
Other tools that helped to work on this garment are freeze and solidify options. They helped to ensure the cloth wouldn’t overlap or deform in a way that I didn’t need. Solidify is probably my favorite way to let the piece of cloth stimulate and affect everything around it, but not deform too much, especially if I want to preserve the shapes I already have.
Here is a little snippet of how my Marvelous Designer pattern ended up looking:

You can see that I also added a simple petticoat over a modified mesh. This was done to achieve that pannier, wide hip look that was fashionable at the time.
The retopology was started in Marvelous Designer as well. While it isn’t something that I usually do, starting to lay out my geometry there helped me to see how it deforms on the garment, and if enough edge loops were created to accommodate the forms.
The majority of topology cleanup happened in Maya. Having more precise and quick tools really helped me to align, optimize, and confirm the topology even further
Having a clean, workable mesh really helped me with sculpting. One of the biggest challenges during this step was projection. The folded upper skirt was incredibly hard to transfer details from Marvelous to. The way that I ended up doing it, was by separating that piece into polygroups and projecting the details one by one.
Overwise I mostly focused on adding wrinkles, removing that “simulated in Marvelous” look, enhancing and adjusting the overall shapes. The most interesting part was creating the small memory folds on the elbow areas and throughout the skirt. While making those folds I really had to think about how the person would move and that type of detective work is what makes it so fun. As I mentioned before the original dress is historically pinned together, so this is another little detail that I wanted to bring through in my sculpting.


One of the areas I adjusted a lot was the folded skirt and the shoulders. During the simulation, I wasn’t able to achieve the same volume as I saw on the reference, but it gave the dress such an amazing full silhouette that it would be a big disservice not to add it back.
All the details and adjustments have been sculpted into layers for a less destructive workflow.
Working in this manner was a tremendous help, even at the end of the process, I found myself coming back to my Zbrush file, adjusting the intensity of the sculpted folds and rebaking my normals.
Next up was creating the materials in Substance Designer. But most importantly, I have laid out approximate UVs, which were straightened, optimized and packed well enough to test the material on.
Figuring out the exact pattern of cloth on a dress was difficult. Instead, I decided to go an easier route and just create a tileable fabric design from the elements that I saw and try to replicate the overall feel. As a starting point, I recreated a satin weave and then started to build up the elements of the design. Some of them have been copied over from my previous work, like the pomegranates, but the other 90% have been built from scratch. A little swirl greyscale and a mirror can definitely come a long way. Since there are a lot of unique elements, I did my best to reuse the shapes I already created, and continue to reuse them through the base blue cloth and two golden trim sheets.
The majority of the time was spent laying out and matching the visible elements, trying to figure out the way to make the patterns look cohesive and interesting while tiling. Here having the UVed dress and being able to see how everything looks on a garment and reacting to the light was essential. Checking how my UVs and geometry affect the read of the materials and where I could add a different pattern element and make the whole base fabric material seem less repetitive. I ended up overlapping some bigger pattern pieces, changing the size of them and adding common ingredients of every successful material – warps, noises and imperfections.
Here are some process gifs from the creation of substance designer materials:


During the creation of this project there was a lot of back and forth iteration. I have revised the topology, rebaked my normal maps several times and of course adjusted the materials a lot to fine tune the final look.

Rendering setup was nothing super special. My usual approach is to find an HDRI that works well, rotate it so the ambient light highlights the best parts of the model and after that setting up a three point lighting and some colored rim lights. I also enjoy using groups and turntable, for quicker iterations and cleaner file organization.


This project was a big learning experience for me, excited to apply everything that I figured out to my next artwork.
In the future, I hope to recreate more historical garments and some interesting contemporary outfits as well. Right now I am working on a more modern clothing set which is featuring a dachshund-shaped bag!
Super excited to show it off in the future.
I wanted to say thank you to all the people who helped me out with feedback or advice, my friends and my partner for being there for me!
And also to you, for reading this article.
Read more articles
You might also like these articles.