The Heretic Sword
Introduction
Hello, my name is Madalina Coman and I've been doing 3D art for about 8 years.
I used to work in architectural visualization and product visualization, but around a year ago I discovered my passion for game art, so I started to slowly learn the entire process that goes into making game assets.
Story and goals
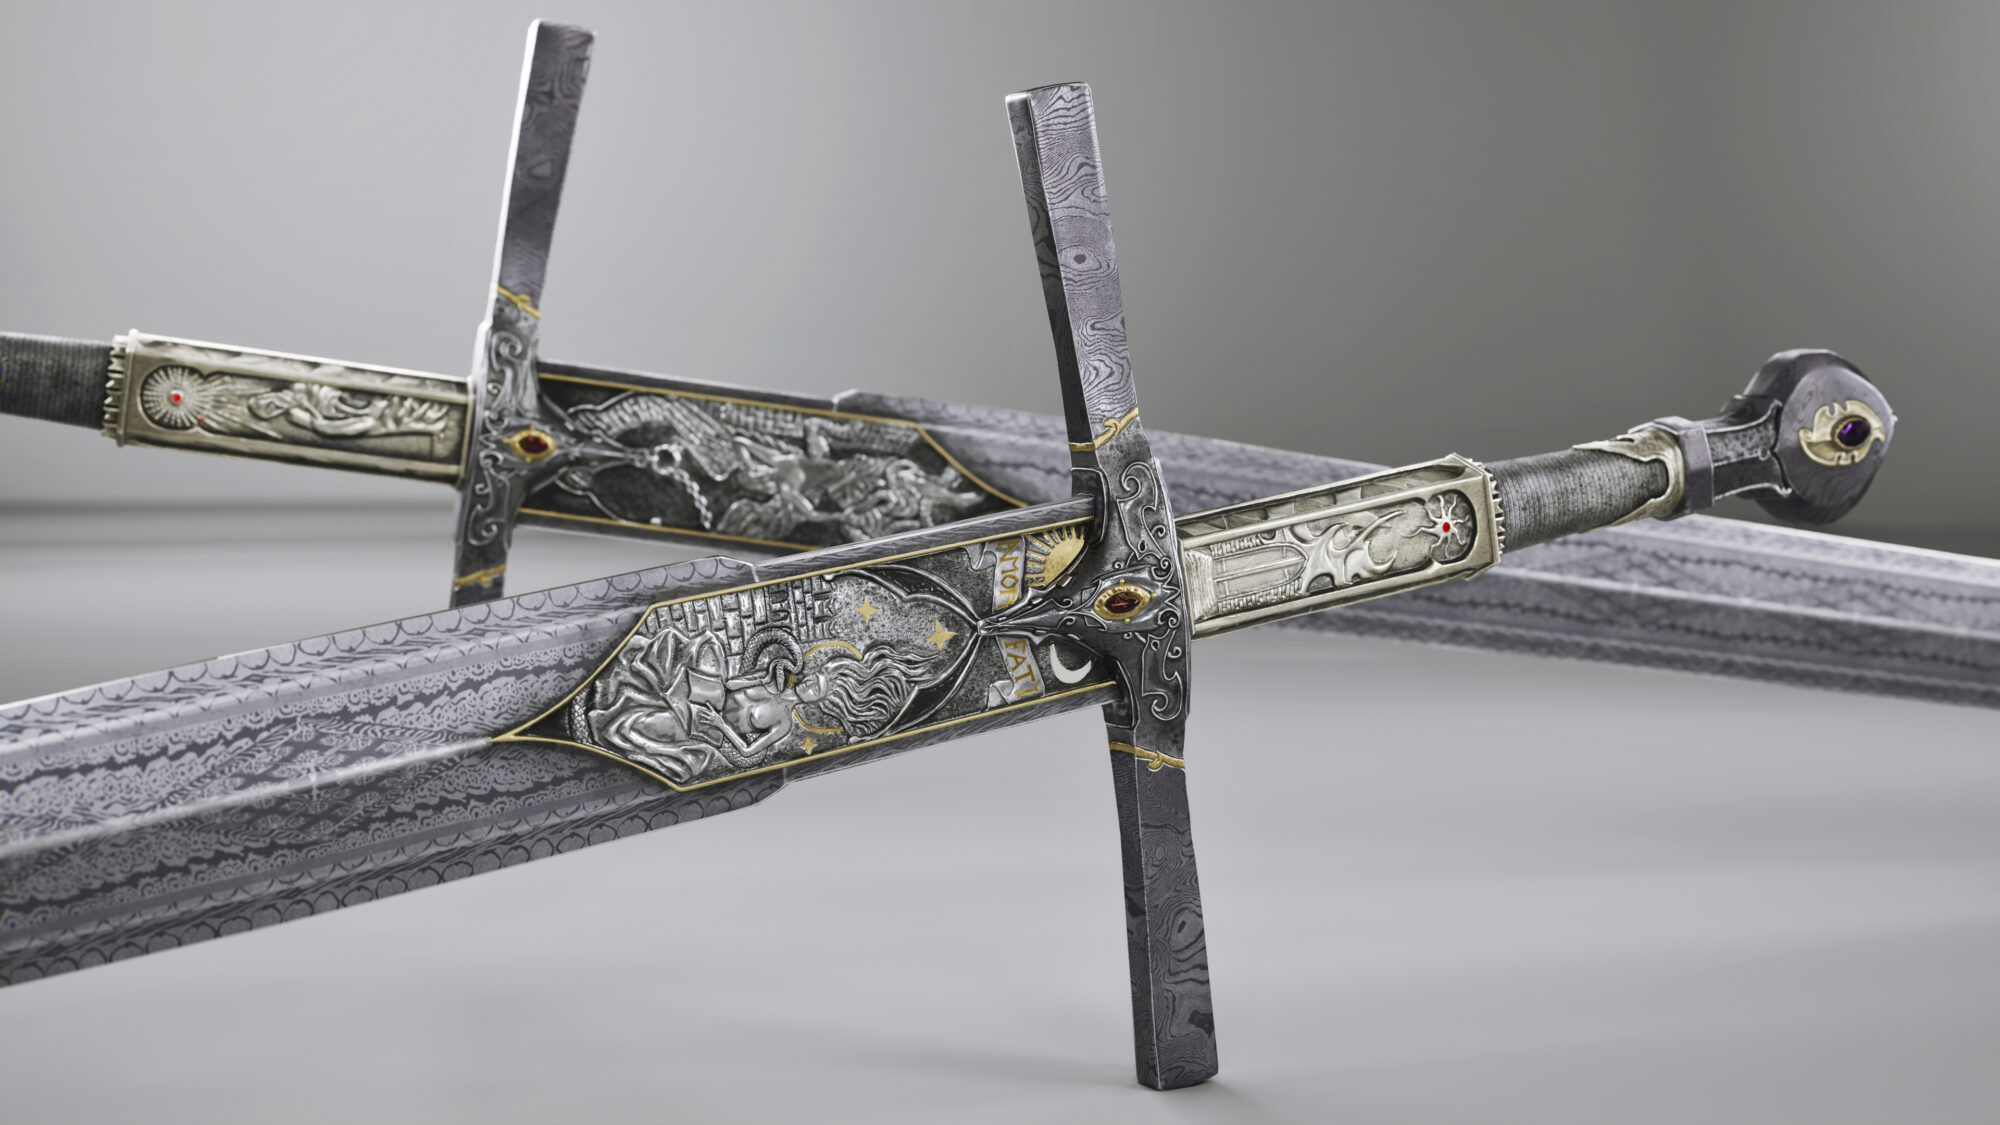
I found The Heretic, a sword made by Ilya Alekseyev while searching for sword references for a stylized concept I’m working on.
While doing some research, I found a video of this sword being forged (video below) and I fell in love with it and all of its details. I decided to first make the sword as the artist created it and then modify it so it would fit the concept I’m working on.
Since I am still learning all the programs and tools involved in creating game assets, this model was a big challenge for me and I used it as a learning experience and as a reason to push myself to get all the skills needed to finish it in a way that would make me happy.
It helped a lot that I had someone guiding me through the process, my husband Alex Coman.
One tip for everyone: don’t be afraid about choosing a concept that seems beyond your skills, find something that you really like and learn everything you need so that you can do it.
Another thing, that I think everyone who wants to improve as an artist, is to find an artistic community, be it on Twitch, Discord, forums, or any other, and seek feedback and help.
Of course, it is very important to search for answers on your own when you get stuck or you don’t know what to do, but when you can’t find them, most of the time, you will find more experienced people willing to help.
References
Having good references is a really important part while working on a project, and sometimes finding the right ones takes a lot of time and browsing through a lot of images and sites. This time it was a breeze to get the perfect ones, since having the video in which the artist explains each part of the sword forging process and the materials he used, made it really easy to grab screenshots of every angle.
A good tip when searching for references would be to spend as much time as needed in finding the right ones.
Software
Many programs are involved in making a game-ready asset from start to end.
I used 3Ds Max for the base mesh, Zbrush for sculpting all the details, Topogun for retopology, RizomUV for doing the UVs, Photoshop for making some of the textures, Marmoset Toolbag for baking and texturing, Unreal Engine for rendering the final images.
Workflow
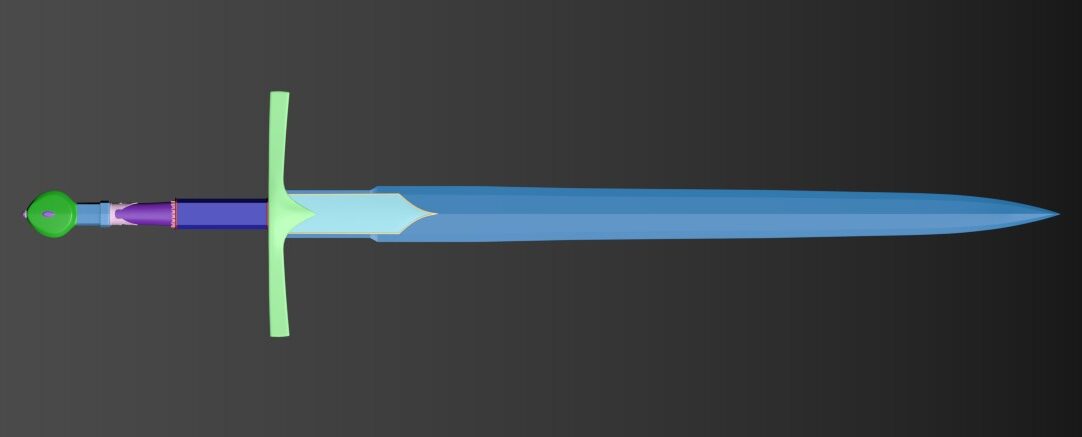
After gathering all my references, I did the blockout in 3Ds Max, then exported it to use in Zbrush. I like making every element separately and using a lot of colors in the blockout stage because that helps me tackle the project one small piece at a time and it is not such a big hurdle to pass at once.
After taking the base mesh to Zbrush, I started working on each piece and adding more and more details, until I got a result that was close to the real sword.
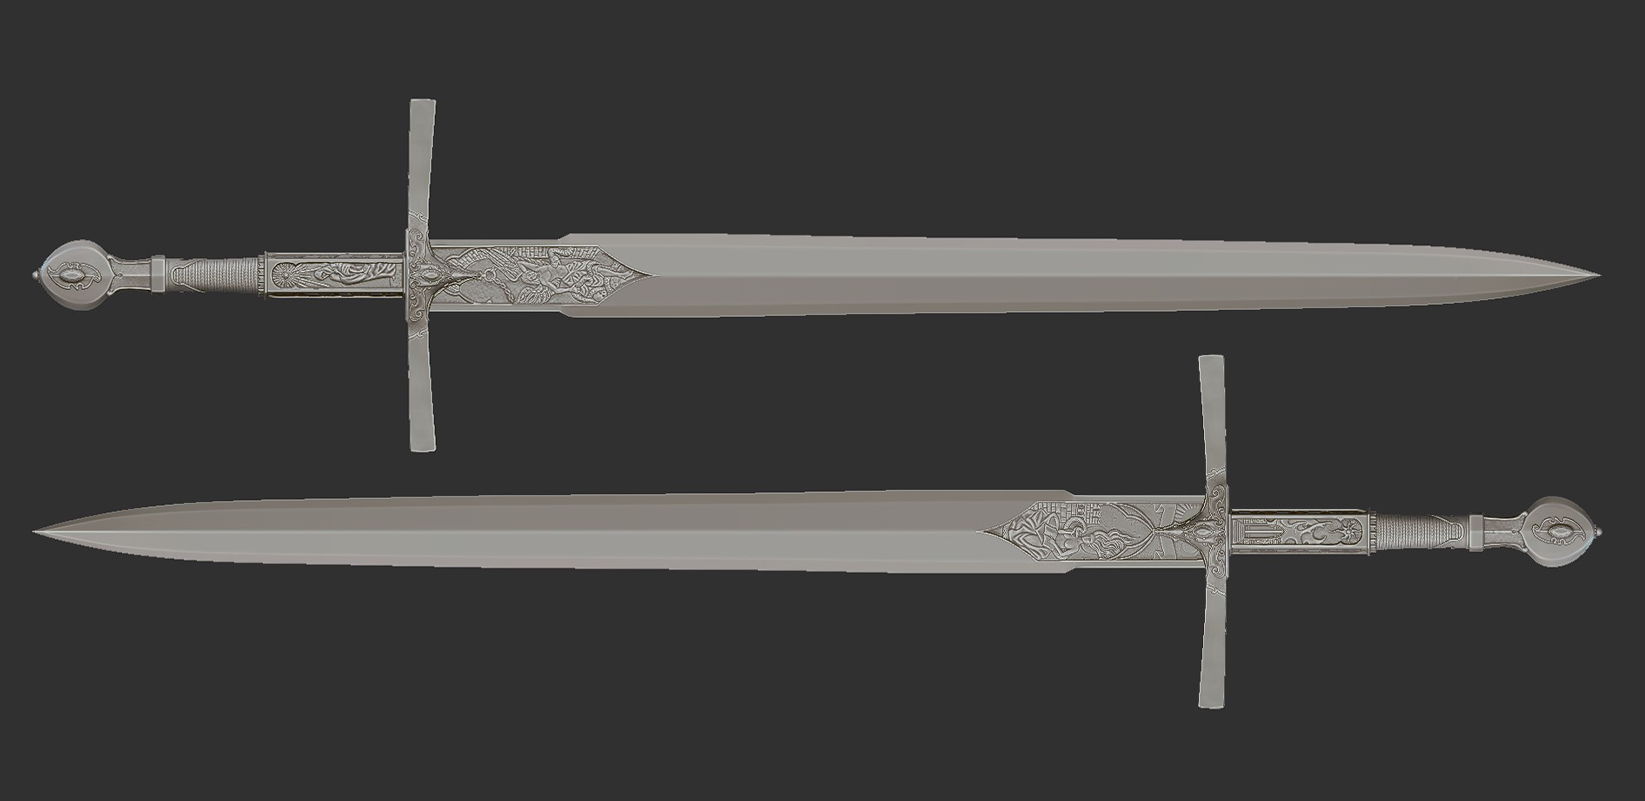
The biggest challenge in this part of the process was the engravings at the base of the blade. They have a lot of small and intricate details that I wanted to reproduce as closely as possible and any mistake in anatomy would make the entire characters look off.
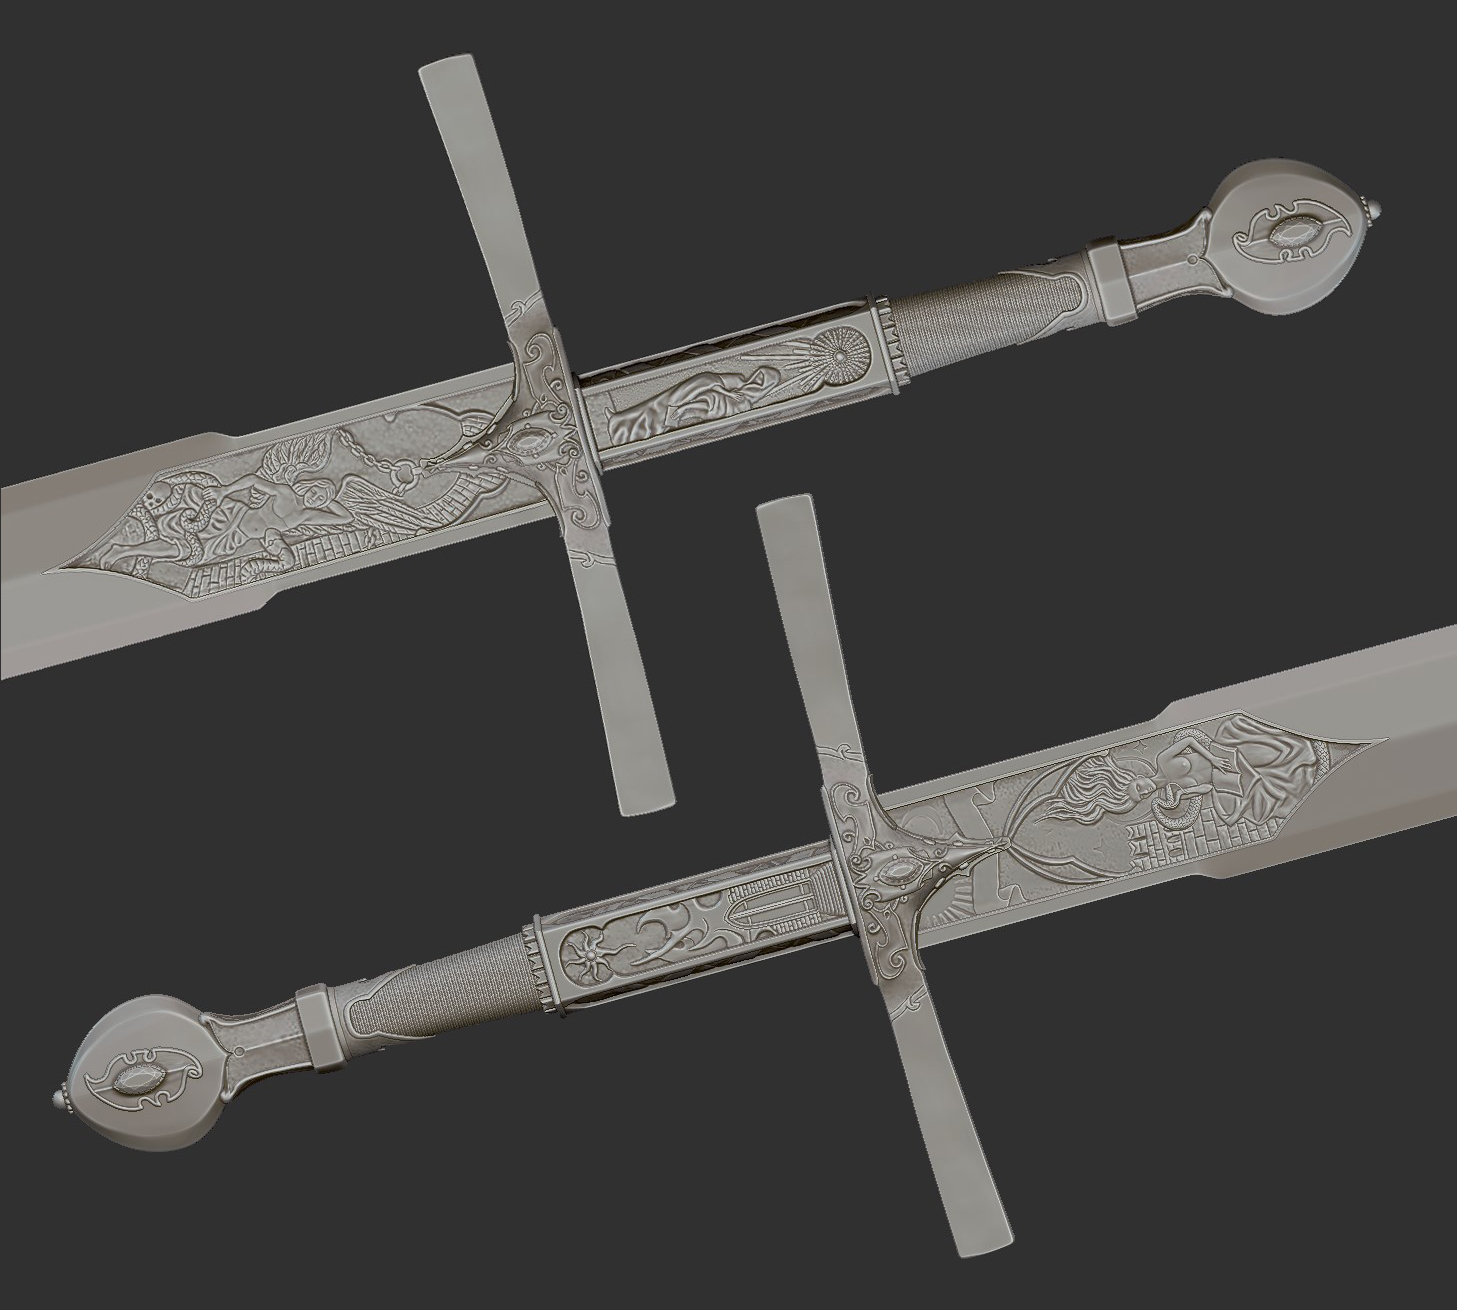
What helped a lot was having great people and artists around, willing to help with feedback and ideas when I got stuck. Natalia Stolarz https://www.artstation.com/natalia_stolarz is an amazing character artist and she was kind and patient enough to help me figure out the human anatomy and proportions.
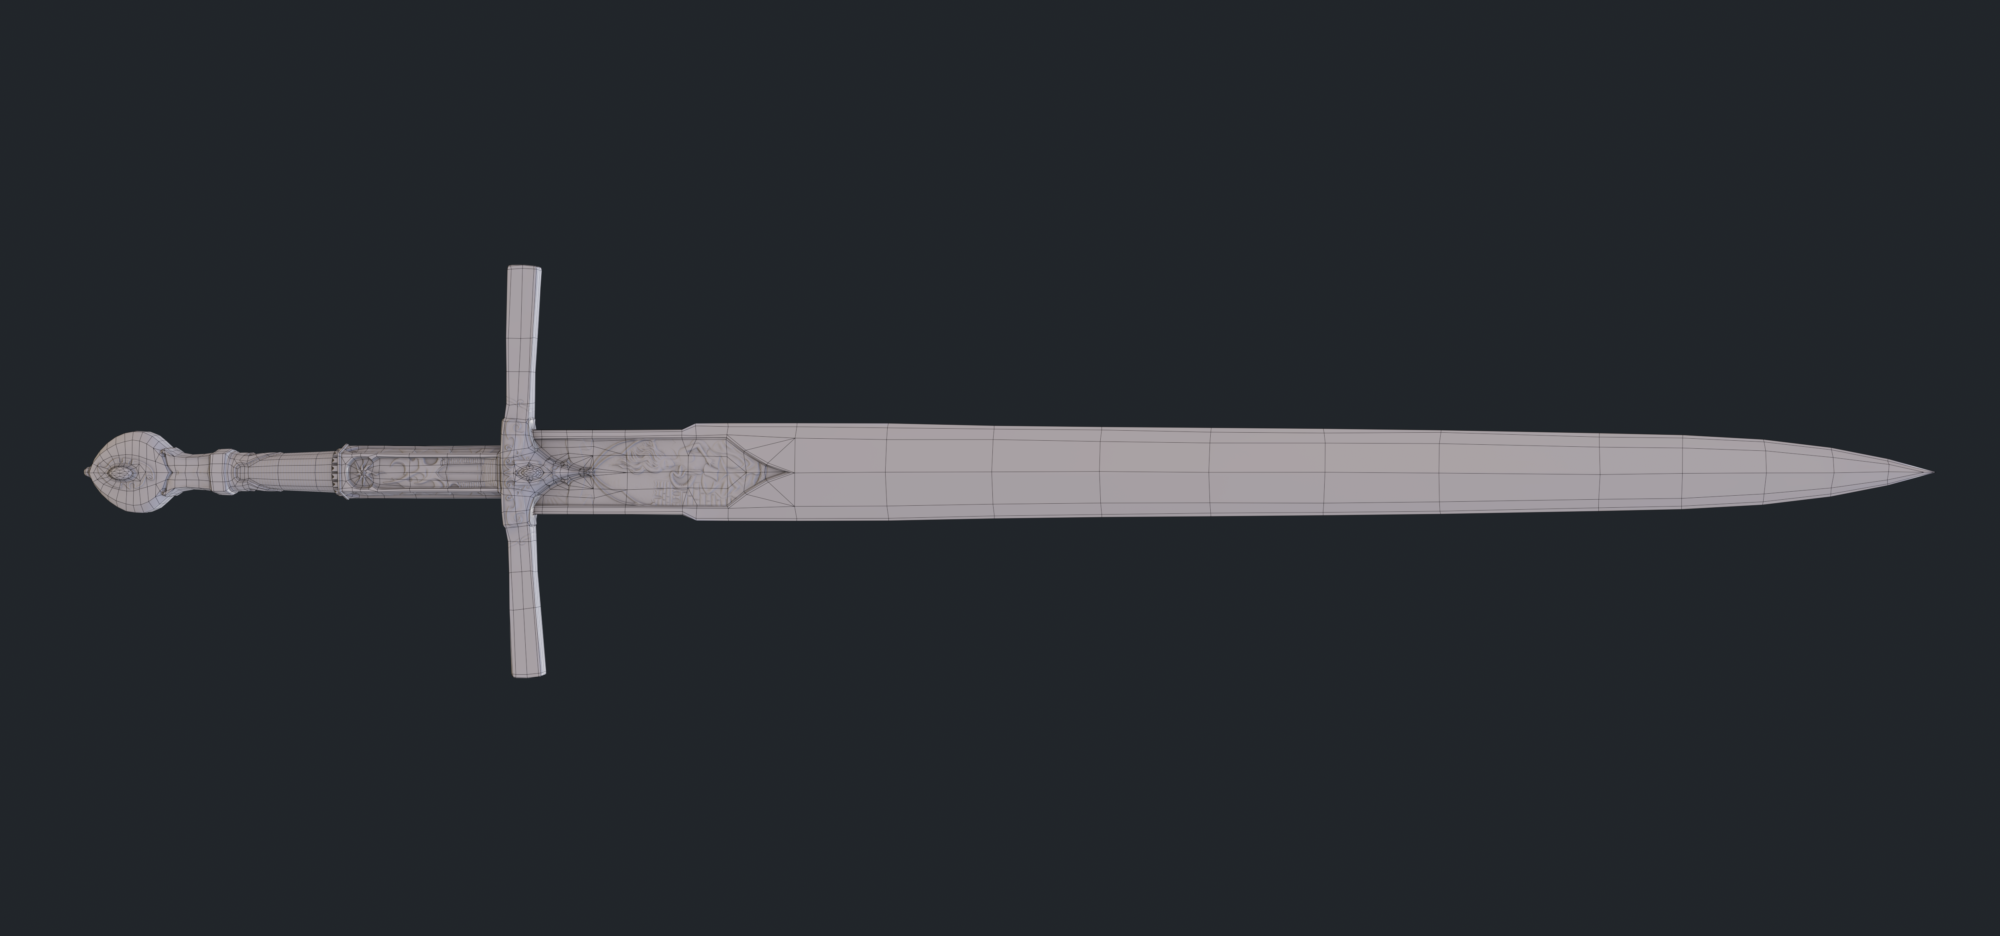
After finishing the sculpt, I made the low poly. This includes two separate objects, one of them is all the gems on the sword, and the other one is everything else. Both the low poly objects have a sum of 5544 triangles.
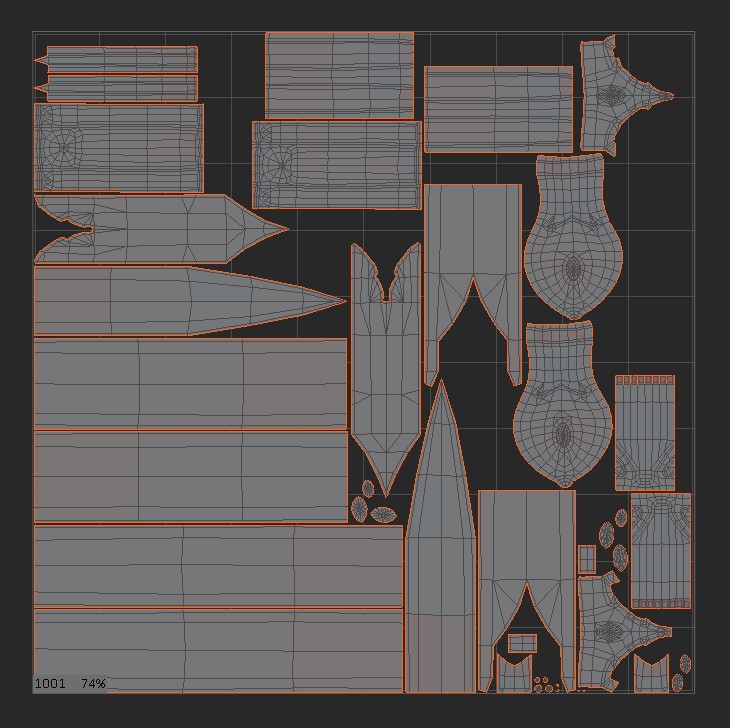
After UVing the objects, I merged them and repacked the UVs, so that I have everything at the same UV space and only one texture set.
Ideally, the blade should have been a single UV island, but since it is such a long object, I had to cut it into multiple pieces, so that the UV space is optimized.
Texturing workflow
After UVs were done, the next step was working in Marmoset Toolbag on the bakes and texturing. The texturing was a fun process since there are a lot of materials on the object: steel, Damascus steel, silver and gold details and of course, the gems: ruby and amethyst.
The most difficult texture to make was the Damascus steel for the blade. For this, I drew in Photoshop 2 separate textures, one for the diamond pattern and one for the pattern behind the diamonds, made them tileable and then merged them together and duplicated the pattern, to get a larger texture for the entire length of the blade.
Of course, the texture-making process needed multiple revisions, to make the material look the right way.
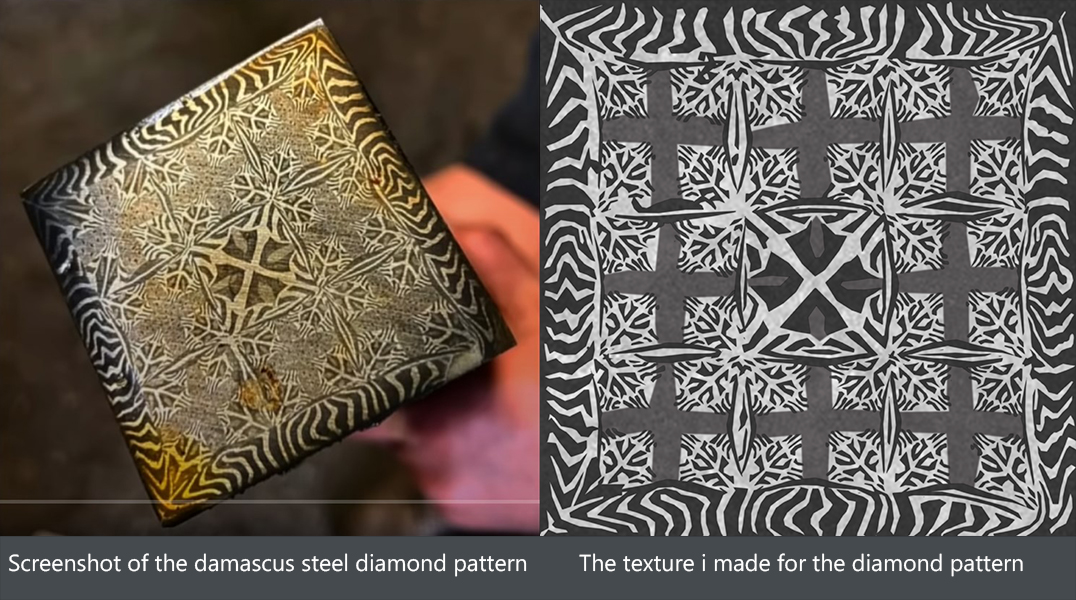
Since I broke the blade in the UVing part, I couldn’t use the UV to place the texture on the blade, so I had to use planar projection in Toolbag, and manually adjust the placement, so that the texture would be in the right spot.
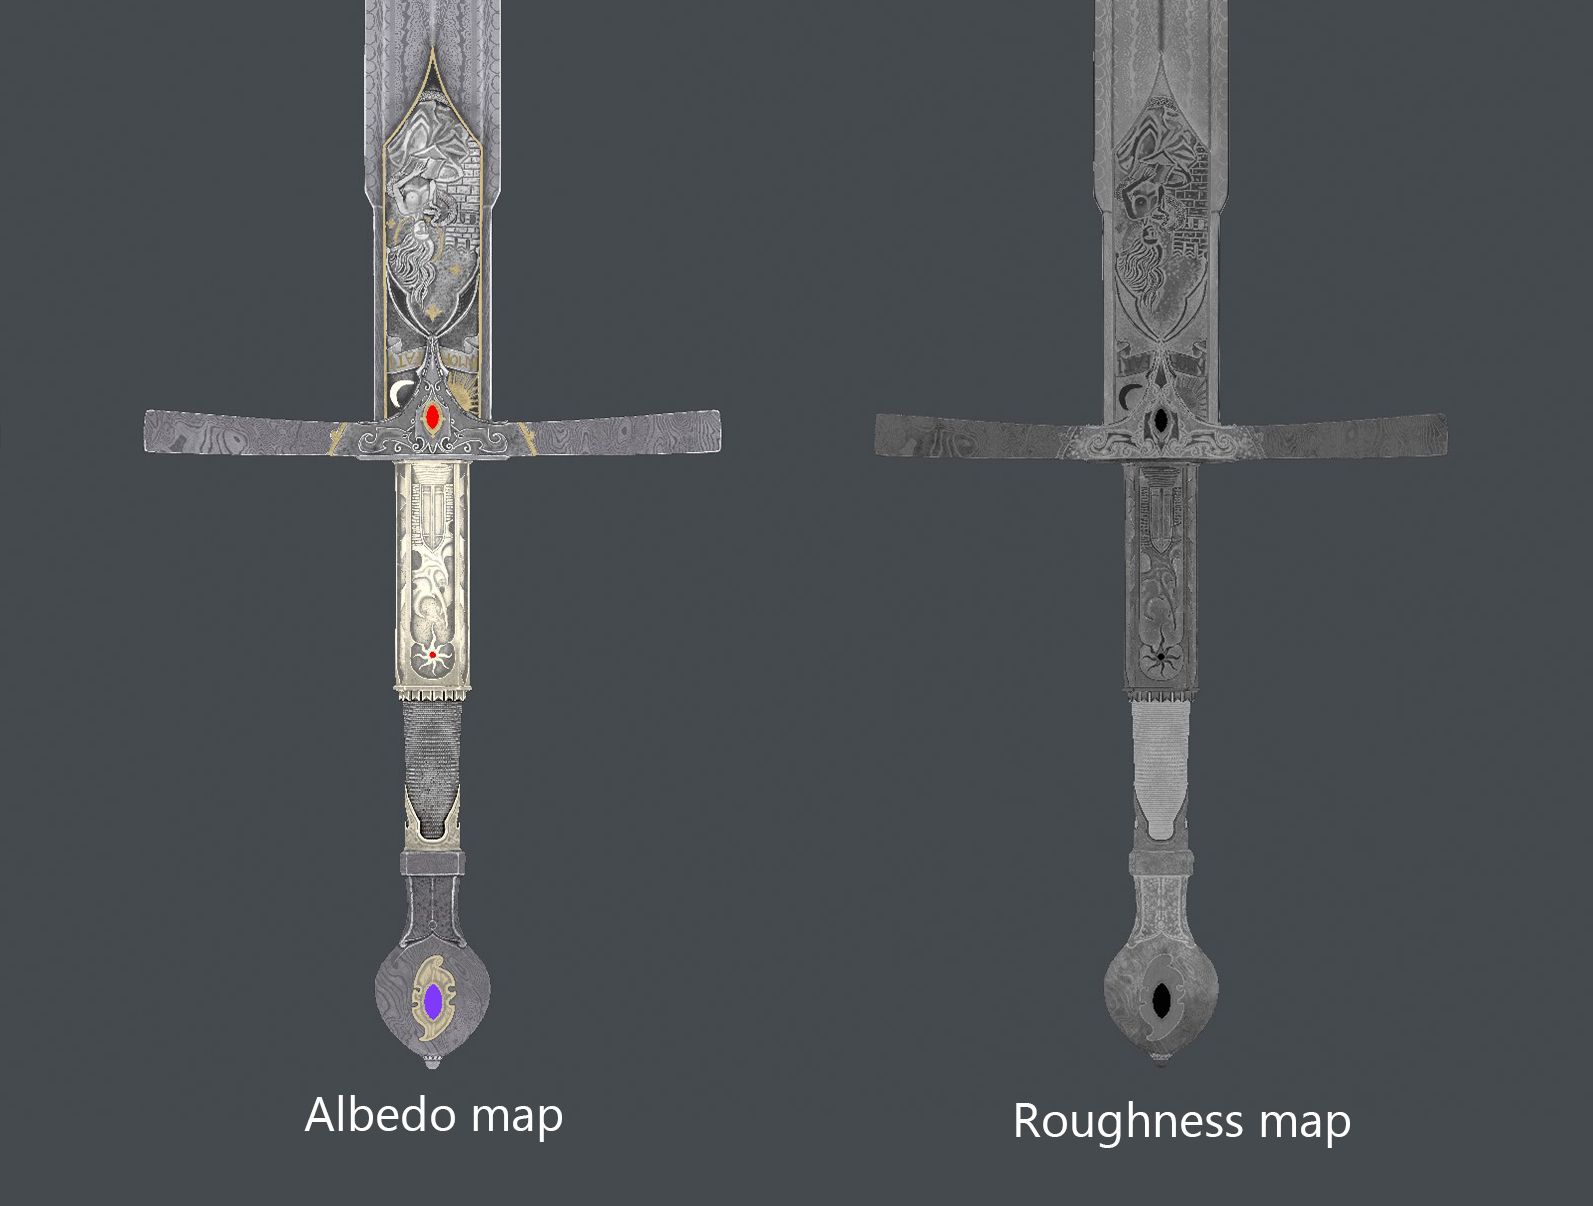
After making basic materials for all of the blade parts, I started adding details, like color variation, roughness variation, dirt and scratches. A trick for materials to look realistic is to add a lot of layers with details.
One very important part about adding all the details on every object, is to add them where they would naturally occur, for example, more dirt in the valleys and less on the peaks. Also really important are the transitions and the gradients between the values.
In the texture maps the variations and gradients are clearly visible
Rendering
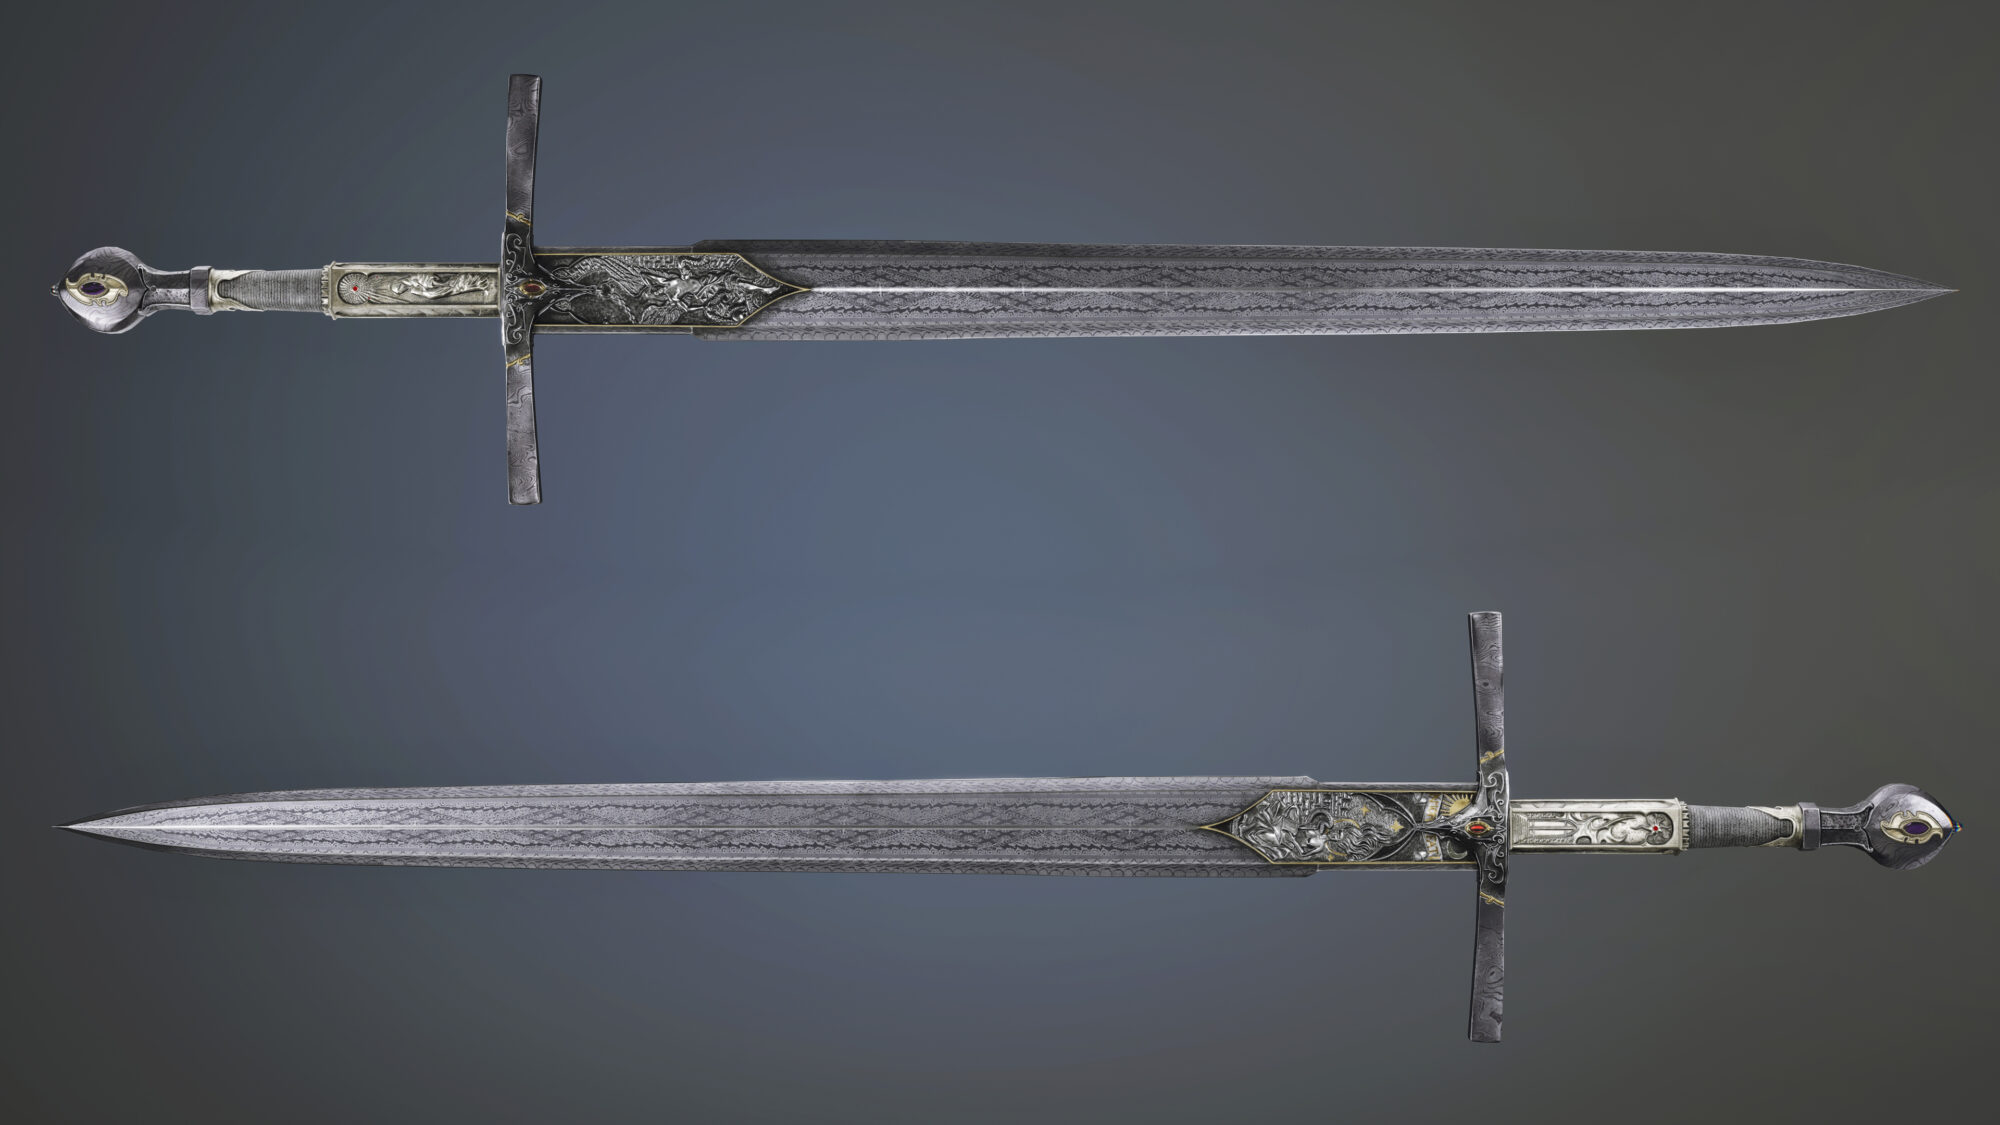
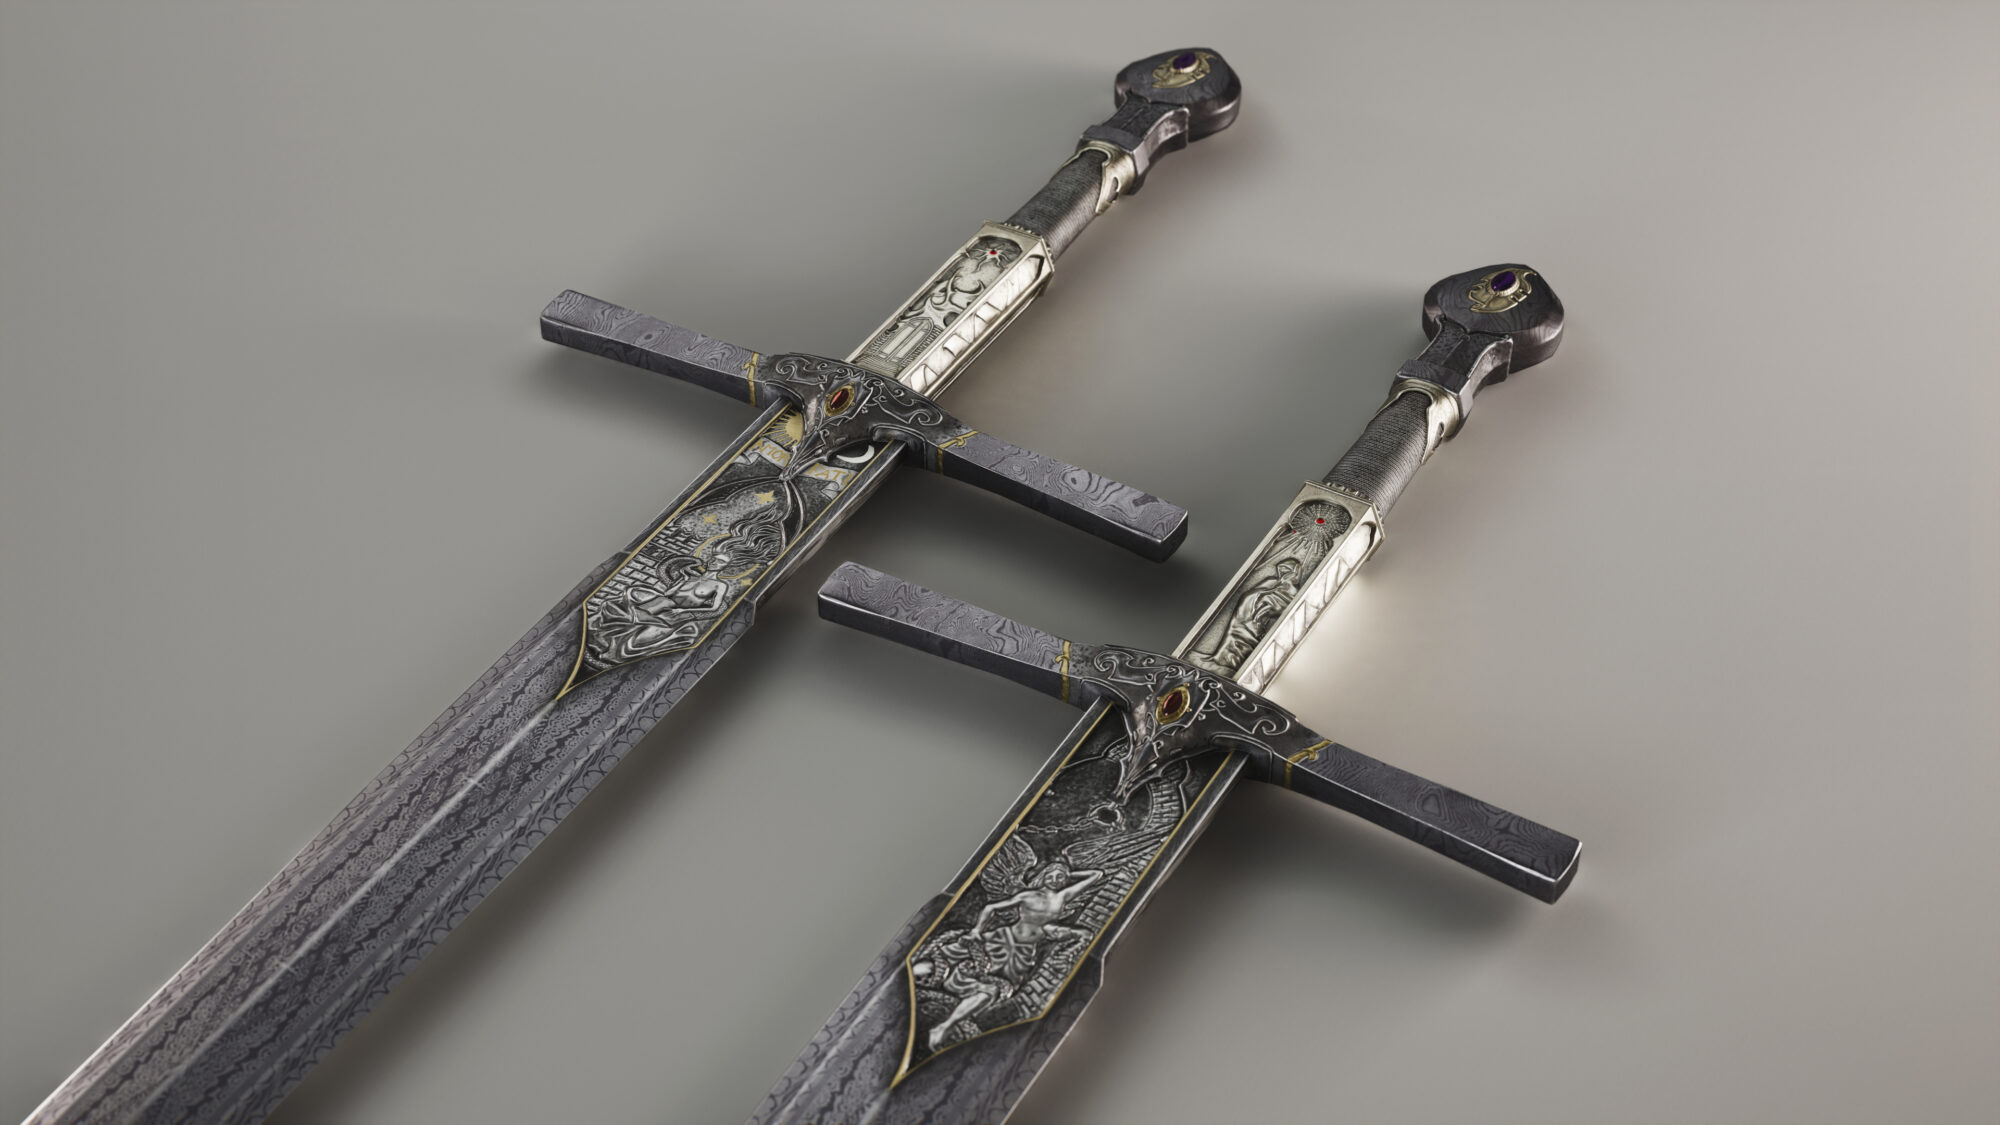
The final step in finalizing The Heretic Sword was working on the presentation and rendering and I did them in Unreal Engine. My previous, product rendering experience helped a lot in making the studio for the shots.
Showcasing long and thin objects does not make it easy to underline the shapes and details, but since the most interesting and rich parts of the sword are the hilt and the engravings next to it, I mostly highlighted those parts, with a number of lights around the object. The multiple soft lights accentuate the details without casting harsh shadows and the resulting soft gradients bring out the shapes.
Outro
One good piece of advice for when you are done with a project is:
To take a break for a few days, do something else, then take another look at what you worked on with fresh eyes. A lot of the time you’re going to find small things that you can change to make your project look better, that you missed previously because you were too focused on some other details.

