Nambu Pistol Holster

Introduction
Hi all! My name is Peter Tutaev. I'm self-taught a 3D artist from St. Petersburg and currently working at Blacksteinn.


Goals
This project was planned as an additional accessory for the Nambu pistol, which would perfectly complement the presentation.
In this project, I intended to practice sculpting and texturing, but my main goal was to create realistic leather and suede materials.
Software
- Maya
- ZBrush
- Blender
- Marmoset
- Photoshop
- Substance Designer
- Substance Painter
References
The main references I looked at were weapon auctions and specialized forums dedicated to weapons and ammunition.

Blockout
I started working on the blockout in ZBrush, modeling based on the forms of my pistol made earlier.
The main thing for me was to nail the proportions so that the cover and the gun would be a seamless whole, as if tailor-made for it.
Next, I proceeded to work on the blockout in Maya.

Highpoly and Sculpting
I used a Maya to ZBrush workflow. I set up creases at specific angles and applied Dynamic Subdiv. Then, I applied Dynamesh to achieve the required resolution for each subtool.
My next step is to sculpt using references, focusing on details such as seams, folds, and cartridge pocket details.
I utilized layers for each type of detail, as it is highly convenient. This allows me to easily go back and refine the object whenever necessary.

During the process, I used default brushes such as Standard, Dam Standard, Move, and Trim Dynamic. To address stitches and small flaws, I utilized custom alphas. Additionally, I employed the lazy mouse feature for achieving smoother strokes.
To facilitate the selection of stitches while texturing, I created an ID map by baking it. I followed the workflow of Masking, Polygrouping, and Polypainting.
Afterward, I performed Decimation and proceeded with the creation of the low-poly (LP) version.


Lowpoly
I have retopologized decimated meshes in Maya using the Quad Draw Tool, aiming to replicate the high-polygon (HP) outline or silhouette as closely as possible.

UV and Baking
All UV unwrapping I did in Maya, but I used the UVPACKMASTER 3 addon in Blender for packing, as it feels like Blender does it faster and more efficiently. I have two UV sets with a texel density of 95 pixels per centimeter. I decided not to limit myself because I wanted to create the most realistic textures.
However, that doesn’t mean optimization is not necessary :). In areas that were less visible, I assigned a texel value that was 30% lower than the total value. Then I performed bakes in Marmoset (for normals) and Substance Designer (for ambient occlusion, curvature, thickness, and ID).
Texturing
I used Megascans as the foundation for the leather and suede textures.
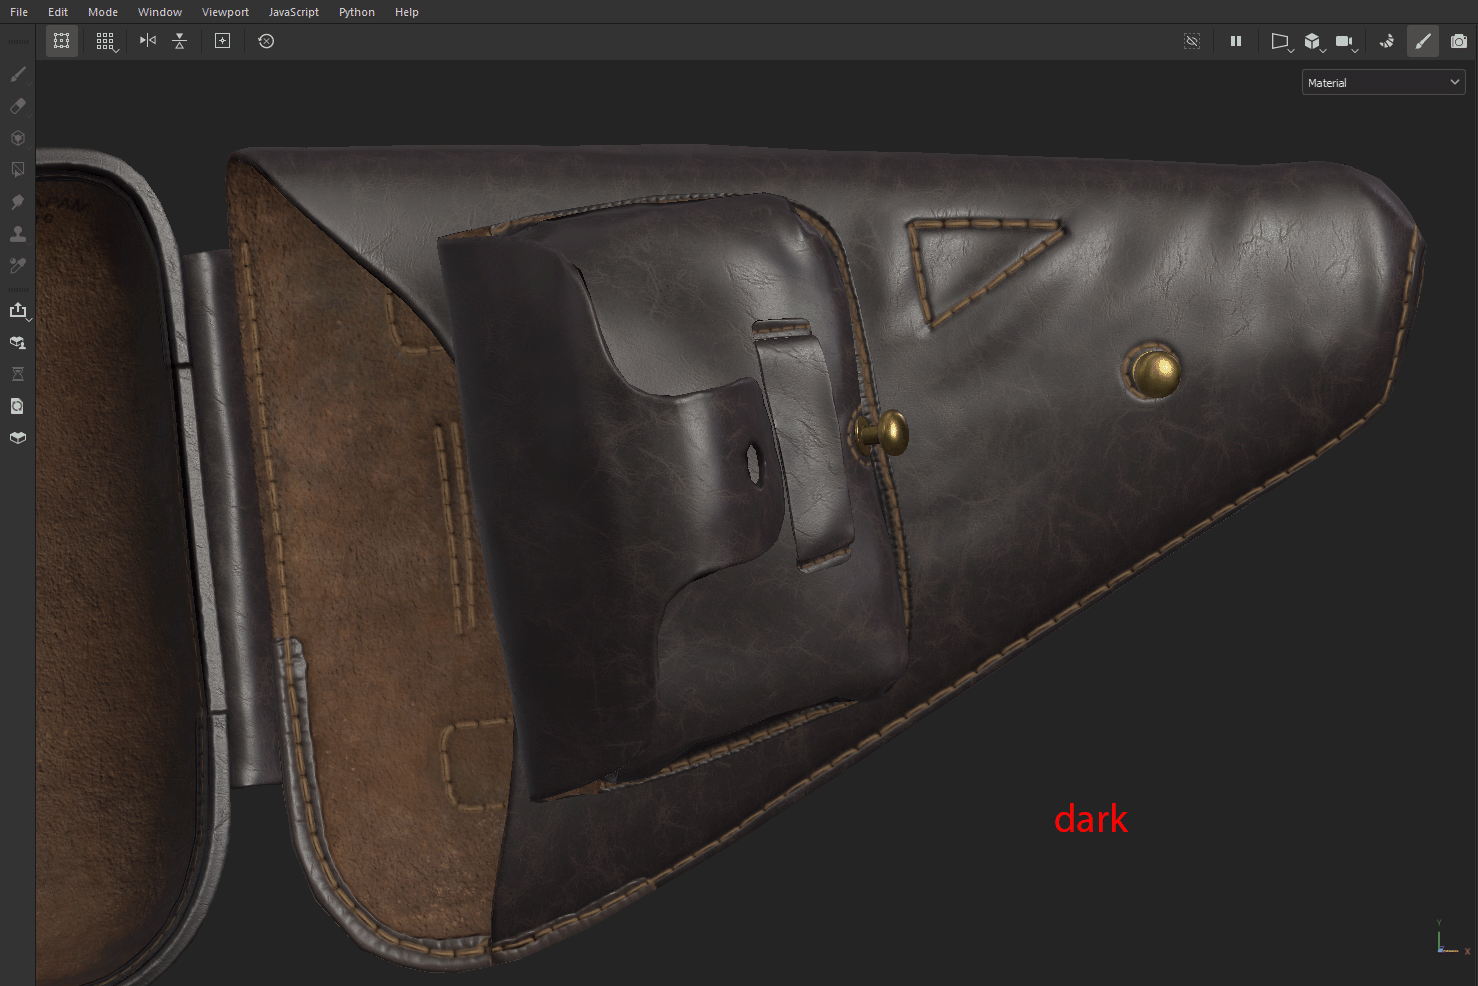
In Photoshop, I created three different variations for the base color of the leather, dark, medium, and light.
I did the same for the base color of the suede. I suggest you check out Artruism Digital’s tutorial on texturing realistic skin, which helped me a lot.
For each element, I tried to use a different shade of color so that the texture wouldn’t be boring and would enhance the visual composition.
I added color accents and worked with the roughness of the material. The next step was adding wear and tear (cracks, scratches, edge wear, areas of leather wear, and spots).
As a special touch, I inscribed the suede with my girlfriend’s date of birth, as she supported me throughout the entire process.
Next, I added some dirt and did some post-processing.


Rendering
Setting up the scene, I began by selecting the appropriate HDRi to enhance the overall silhouette and metal.
I individually adjusted the lights for each shot using the Light Controller with Marmoset 4.
In practice, it proved to be very convenient, allowing for quick and easy positioning of the lights. However, I still had to manually adjust them as the feature did not always accurately indicate the light direction.
The lighting was crucial in highlighting the sculpting and texture of the leather and suede. Once the lighting and camera setup were complete, I enabled ray tracing. For the final post-processing, I utilized Lightroom.


Conclusion
Big thanks to GameArtist for the opportunity to showcase the process of my work!
This has motivated me to continue creating and improving my skills. Thank you all for your attention.
If you have any questions regarding this project, please feel free to contact me!
Read more articles
You might also like these articles.