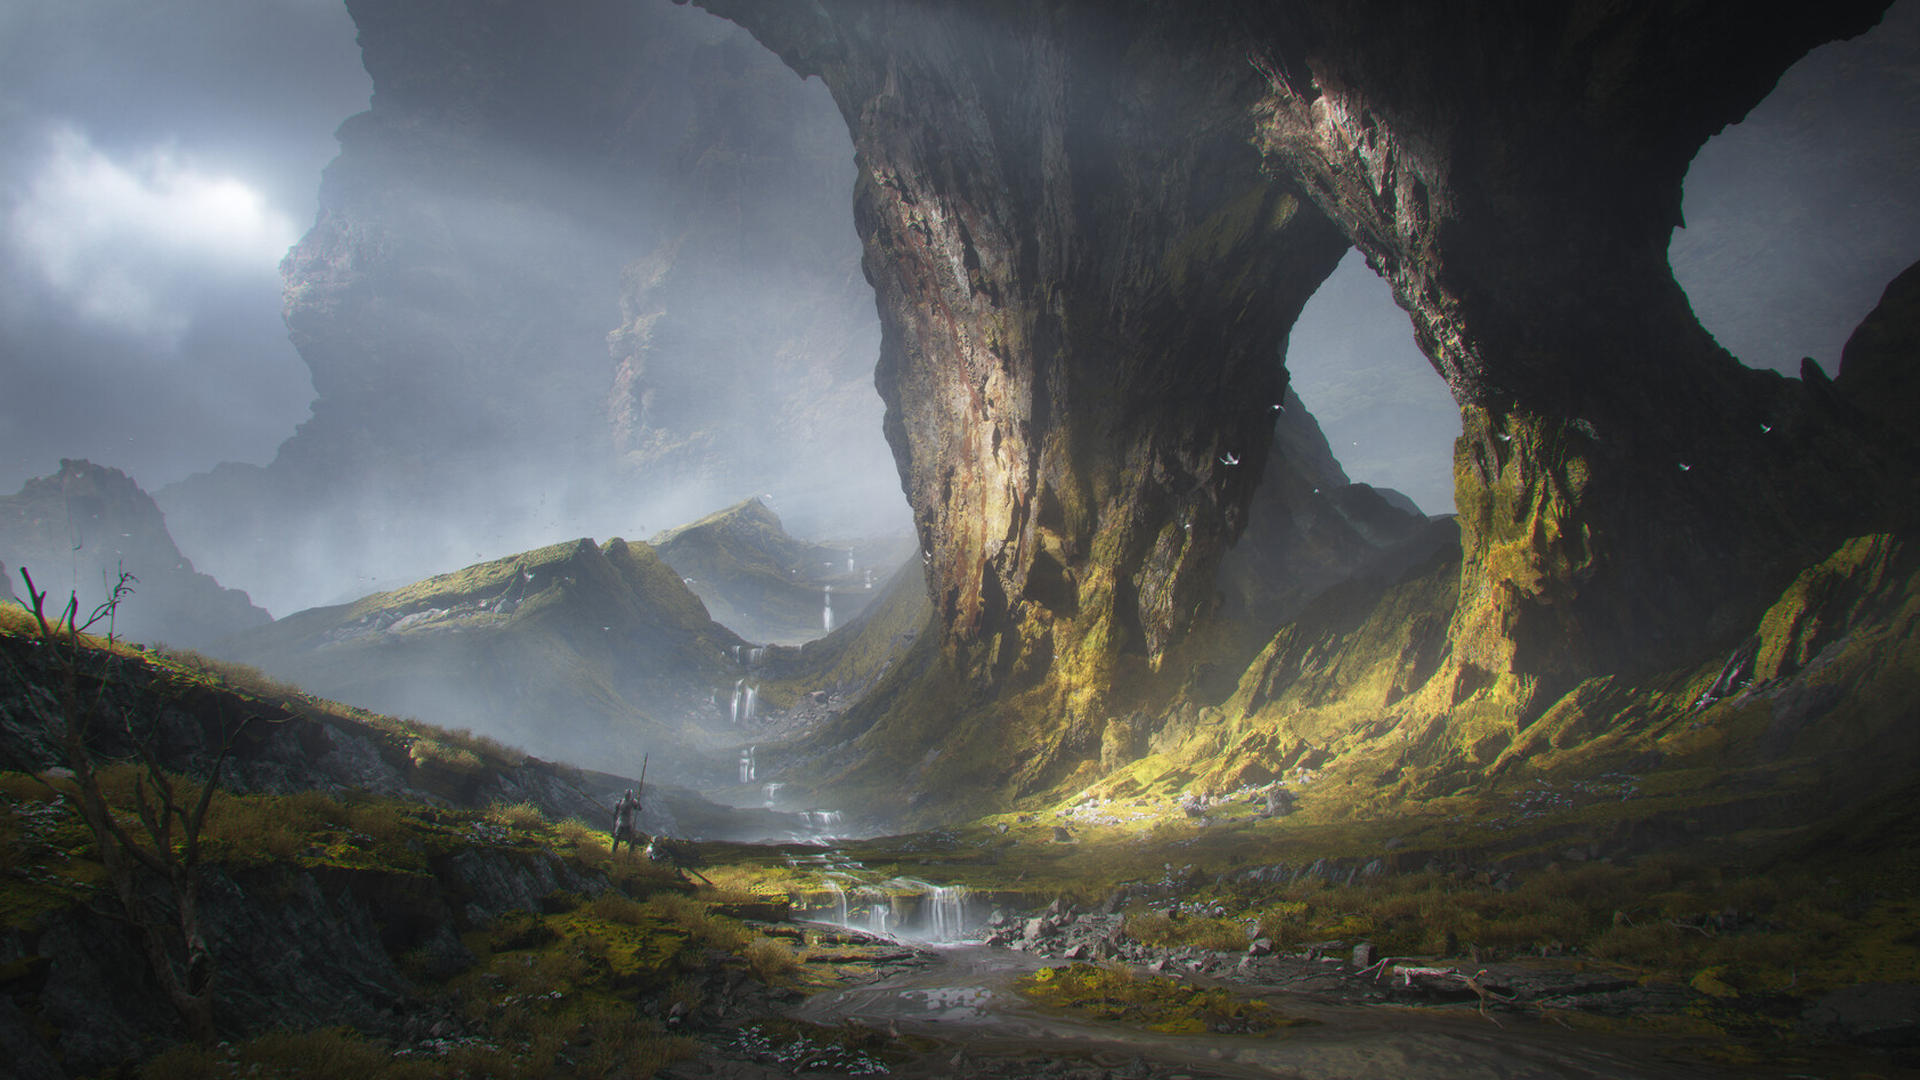
The Enigmatic Valley

Introduction
Hello, my name's Abanob Atef, and I am an Environment and Lighting Artist with a strong passion for creating visually captivating and immersive worlds. I began my career in late 2022, and over the past two years, I've had the privilege of working with different studios in Egypt's film industry.
Currently, I am a 3D Environment Artist at Instinct Games, where I apply my skills to the game industry.
Throughout my journey, I have dedicated considerable time to studying colour theory, composition, and environment creation, constantly striving to improve my craft. In addition, I have developed a deep understanding of lighting techniques to achieve artistic and atmospheric environments that engage the audience.
I am deeply committed to my work, constantly seeking to learn, grow, and push creative boundaries. I view every project as an opportunity to not only create art but to tell stories through the environments I design, offering a visual experience that resonates with the audience.
Project
I embarked on my recent project, The Enigmatic Valley, as a personal challenge to push my creative limits and develop an aesthetically captivating scene inspired by valley-themed artwork.
The core concept behind this project was to create a striking contrast between a fantastical, imaginative landscape and a natural, realistic environment.
By blending these two distinct elements, I aimed to explore the interplay of fantasy and nature in a visually engaging way.
Through this detailed breakdown of the project, I hope to inspire fellow artists to step outside their comfort zones, embrace new challenges, and push the boundaries of their creativity.

Goals & Software
My goal for this project was to focus on improving my artistic skills in Sculpting, LookDev, and Lighting.
By dedicating time and effort to these aspects, I aimed to enhance my overall abilities as an artist and gain a deeper understanding of the creative process involved in producing high-quality work.
Tools
• Unreal Engine as the game engine.
• Blender for the main rock/background terrain blockout.
• Zbrush for sculpting.
• Adobe Substance Painter for materials mask creation.
• DaVinci Resolve for color grading and final post-process.
• Quixel Megascans to speed the environment creation process, allowing me to dedicate more time to look development and composition.
References & Inspiration
At the start of the project, I spent time exploring Pinterest and ArtStation to find valley-themed artworks that would help shape the moodboard for my vision.
After gathering several references, two concept pieces—by Toivo Huhtaniska and Gabriel Yeganyan—became the main inspiration for the direction of the scene.
These pieces provided a strong visual foundation, guiding the overall look and design of the project.

This was my first time working with this specific style, which involved experimenting with new approaches to the layout, details, and lighting.
The challenge of trying something new was one of the main reasons I chose to pursue this project, and it gave me the opportunity to grow as an artist by expanding my skills and creative vision.

Blockout
I began by blocking out the composition and camera angles using basic shapes to define proportions and align the scene with its focal point.
Once the camera setup was complete, I proceeded to block out the level in Unreal Engine 5, utilizing simple cubes and starter content assets.

For the main rock formation, I used Blender to create the blockout, which allowed me to refine its shape effectively by adding subdivided cubes and controlling them using the grab tool in sculpting mode, and added some Boolean cuts to fit the shape I needed.
To create the background terrain, I started by using basic cubes in Unreal Engine to establish the rough shape and layout of the terrain.
Once the initial blockout was complete, I exported the cubes into Blender for further refinement. In Blender, I modeled the terrain by extruding a plane along the contours of the cubes, carefully shaping it to follow their original structure.
This approach allowed me to maintain the intended form while transitioning to more detailed modeling, ensuring a smooth and accurate representation of the terrain that could later be developed further.
Tip: Set up your cameras early in the process. This will allow you to prioritize assets effectively and ensure that your composition enhances the focal point of the scene.
Main Rocks
After completing the blockout of the main rocks, I exported the blockout from Blender to Unreal Engine.
I then placed two rocks from the Valley of the Ancient package by Epic Games and began cutting them into multiple pieces using Unreal’s modeling tools to match the shape I needed for the main rocks.

This workflow allowed me to work faster than starting from scratch in ZBrush.
Additionally, given the sheer size of the rocks, I knew it would be overwhelming to dive straight into sculpting them from the beginning.
Terrain Creation & Texturing
I took the terrain blockout I previously modeled in Blender and decided to apply some displacement using a scanned rock material from the Quixel Megascans library.
Afterward, I exported the terrain to ZBrush to refine its details, using two brushes:
“Trim Smooth Border” and “Trim Adaptive.” I also added crack details using alpha brushes to enhance the overall look.
After the sculpting process, I exported the terrain to Substance Painter for generating two masks, one for the moss and one for the macro rock details using Curvature and Dirt generators.
Then, I exported these two masks to use them in Unreal Engine with Quixel Megascans materials.

Ground
For the ground creation, I used assets from the Megascans Icelandic Collection, which includes rocks and mossy landscape elements.
This collection features highly useful assemblies created by the Quixel team, which I simply adjusted to suit my needs before placing them into my scene on top of the blockout.

Moss Shader Creation
Because not all of the Icelandic collection assets have moss on top of them, I applied a material function to the Megascans assets to project moss on the world position’s Z-axis, which ensured consistent moss placement on top of the static meshes regardless of their rotation.
I used the “World Aligned Blend” node in Unreal Engine to enable this technique, which allowed me to accurately and efficiently apply moss to various assets in the scene.
This is a widely used technique that can also be applied to other scenarios such as snow, sand, mud, etc. There are many videos and resources that demonstrate this method in detail.
Scattered Rocks
I chose not to use the foliage tool in Unreal Engine for scattering the rocks because it didn’t provide the level of realism I was aiming for.
The tool resulted in a more uniform distribution, with no variation in scale, which didn’t match the natural randomness found in real-life rock formations.
To achieve a more realistic and accurate look, I decided to use a scanned rock plate from the Quixel Megascans library. I then placed these rocks throughout the scene to enhance the overall aesthetic and bring more natural variation to the landscape.
Foliage
To ensure consistency within the environment, I used grass and flowers that matched the overall vibe of the scene.
The grass was subtly adjusted in terms of color and mesh variation to blend with the surroundings while maintaining a unified visual theme.


Waterfall
The waterfall was the most enjoyable part, as it allowed me to transform a static waterfall texture into a fully dynamic, animated waterfall using the FlowMap workflow.

FlowMaps
A FlowMap in Unreal Engine is a texture used to simulate the movement or flow of materials, such as water, lava, or wind, across a surface.
It typically stores directional information (like a vector map) that dictates the direction in which the material should flow, giving artists and designers control over the flow behavior within a scene.
FlowMaps are commonly used in:
- Water Systems: To simulate the direction of water flowing over a surface, such as a river, stream, or ocean currents.
- Surface Effects: For controlling the movement of liquids, like lava or oil, on terrain or meshes.
- Particle Systems: To guide the flow of particles in specific directions, such as wind or smoke.
FlowMaps are generally textures that can represent the strength and direction of the flow in that area.
By using this data in combination with materials or shaders, you can create dynamic, realistic effects for moving elements.
Waterfall Creation Process
• I obtained a real PNG photo of the waterfall with a transparent background.
• I imported it into a tool called FlowMap Painter by teckArtist and began painting the direction of the flow using the brush.
• Afterward, I exported the FlowMap and imported it along with the waterfall texture into Unreal Engine. I created the material and began building the shader to control the movement. There are several videos and resources available that explain this method in detail.
• Once the shader setup was completed, I applied the material to a plane and then merged it with a spline inside a Blueprint. This combination enabled me to control the flow of the waterfall using the spline.
Decals
Once I had finished setting up the environment, I took a moment to examine it thoroughly. Upon closer inspection, I realized that the variations in the moss and rock colors didn’t quite meet the level of detail I was aiming for.
I felt that these elements could benefit from some additional enhancement to make the scene feel more immersive and artistic. After considering various options, I decided to use decals in the scene.
This decision proved to be incredibly effective, as the decals added more aesthetic results to the textures, significantly elevating the overall quality of the environment and bringing it closer to the vision I had in mind.
Lighting & Rendering
Now, we will talk about the most interesting part of environment creation: lighting!
Before diving into the process of setting up the lighting, it’s crucial to ensure that the correct engine settings are configured to fully take advantage of Lumen’s capabilities and ensure everything runs smoothly and efficiently.
In the Project Settings, make sure that Lumen is selected as the Dynamic Global Illumination Method. Additionally, don’t forget to enable Virtual Shadow Maps, which will help achieve higher-quality shadows.
It’s also important to ensure that Nanite is activated, both in the project settings and for all supported meshes, as this optimization significantly enhances performance.


If you happen to have a supported NVIDIA RTX graphics card, there are a few extra settings you can enable to further improve the quality of your lighting and reflections.
Specifically, you can activate the “Support Hardware Ray Tracing” option and select “Use Hardware Ray Tracing when available.”
This will enable hardware-accelerated ray tracing, providing superior global illumination (GI) and reflection quality compared to the default software ray tracing method that uses signed distance fields.
Moreover, for the best Lumen reflection quality, you can adjust the ray lighting mode by changing it from the Surface Cache mode to Hit Lighting, which is specifically designed for reflections and results in the highest level of detail and realism.
These settings are essential for achieving the best possible visual fidelity when working with Lumen in your scene.
Why Choose Lumen?
I prefer Lumen because it offers an advanced solution for real-time dynamic global illumination. For my personal projects, I like to work with dynamic lighting instead of relying on precomputed lighting.
Since performance optimization is not a major concern for these types of projects, I enjoy the freedom of instantly seeing the final results without waiting for the lengthy bake process.
Lumen stands out in this case because, instead of relying on numerous artificial bounce lights to simulate indirect illumination, it efficiently and accurately calculates global illumination in real-time, offering faster and more realistic results.
Setting the Sky
The sky plays a crucial role in setting the overall mood of a scene. I experimented with several HDRIs from different packs available on the Unreal Marketplace, and ultimately, I found one that stood out.
The HDRI from the “Sky LA” pack offered more detail and contrast, which enhanced the lighting and made it much more visually engaging.

Once I placed it in the scene, something didn’t quite feel right—it lacked that dynamic touch. It needed to come to life!
To achieve that, I decided to animate it, drawing inspiration from the same workflow I used for the waterfall animation: FlowMap.
This approach gave the movement and realism it was missing.
After animating it, I added a skylight component to generate lighting data from the HDRI texture.

Directional Light
In this lighting setup, my goal was to have more control over the lighting and carefully highlight each area according to my vision.
To achieve this, I chose to use spotlights and rectangular lights, as they allowed me to focus on specific areas that required more emphasis.
However, to ensure the overall scene had a balanced feel, I first added a directional light with low intensity.
This subtle light source provided a soft ambient light that helped fill the scene without overpowering the more focused lighting elements. This approach allowed me to create a more dynamic and controlled lighting environment.

Highlights & Fake Lights
In my projects, I frequently use large spotlights to add more emphasis and depth to the environment.
These lights help bring out highlights in key areas, brighten shadowed regions, and enhance the overall contrast in the scene, pushing the greyscale values of the lighting even further for a more dynamic and engaging atmosphere.
When I begin working with these spotlights, I first convert the image to greyscale by setting the saturation to 0 in the post-process volume settings.
This method is incredibly efficient, allowing me to focus on the lighting and contrast without being distracted by color, helping me achieve better results in less time.
I’ve found that if the greyscale values look balanced and strong, the final rendered image will have a solid foundation and a more professional appearance.
Working in greyscale makes it much easier to spot any potential issues, such as whether the lighting feels flat, lacks contrast, or isn’t creating the depth I’m aiming for.
Once I’m satisfied with the greyscale setup, I return the saturation to its default setting and begin fine-tuning the color of the lights.
This is where I adjust the lighting to match the specific tone or color palette I want for the scene, whether it’s warm, cool, or something more specific to the mood I’m aiming for.
At this stage, I often find that some lights may need further adjustments in terms of position, intensity, or direction.
This is a natural part of the process, and I make these tweaks based on how the scene looks and what needs more focus or balance.
Each step in this process is an ongoing refinement to ensure the lighting supports the overall vision of the environment.
Adding Fog Cards
Incorporating fog cards really enhances the depth and atmosphere of a scene. For this project, I chose to use EasyFog, created by William Faucher.
It offers a wide range of texture variations, making it ideal for a variety of environments. What I love about it is how easy it is to use and how quickly it allows me to achieve the exact look I’m aiming for.
Post-Processing
This is the last phase of the lighting process, where I begin to make subtle adjustments to the overall color palette to fine-tune the visual appeal. Instead of using LUTs, I chose to fully utilize Unreal’s built-in color grading tools to achieve the specific aesthetic I wanted.
By manipulating the color balance, contrast, and saturation, I was able to refine the final look and enhance the mood of the scene.
In this stage, every little tweak contributes to achieving the perfect atmosphere.
Below, I’m sharing my post-process settings, which were key to bringing everything together.


Rendering
After configuring the Sequencer and finalizing our shot, we can proceed by sending everything to the Movie Render Queue for the rendering process. At this point, I’ll share the ACES rendering settings that I’ve consistently used in my projects for optimal results.
I won’t go into too much detail regarding the ACES color management workflow here, as it can be quite technical.
However, if you’re looking to dive deeper into the subject, I highly recommend watching William Faucher’s informative ACES Rendering tutorial on YouTube.
It’s a great resource that explains the workflow and its benefits for achieving professional-grade color accuracy in your renders.
This setup offers great flexibility, making it suitable for both still renders and cinematic animations.
The process is straightforward: if you’re working with a still render, all you need to do is adjust the shot duration in the Sequencer to a single frame.
You can also tweak the camera transform keying if necessary to ensure the framing is exactly as you want it. For cinematic renders, you can extend the shot duration for a smooth animation.
Additionally, for still renders, you might want to improve the quality by increasing the anti-aliasing temporal sample count to a higher value, such as 128, to get more refined anti-aliasing.
Conversely, for video renders, if you’re aiming for faster render times, you can reduce the temporal sample count to something like 16, striking a good balance between speed and quality.
This approach allows for easy customization, so you can optimize for either high-quality stills or efficient video rendering, depending on the needs of your project.
Below are Important Console Commands.

Additional Color Grading in DaVinci Resolve
Once my shot has been rendered, I import the .EXR sequence into DaVinci Resolve to make final adjustments to the overall look.
My process typically begins with refining the tone curve and adjusting the color temperature to set the right mood.
From there, I add effects such as glow and incorporate other screen effects like vignette, chromatic aberration, halation, and film grain to enhance the cinematic feel.
Below, you can see the comparison of the scene before and after applying color grading in DaVinci Resolve:
Conclusion
I truly hope this article has provided you with some useful insights into my workflow and creative process. It’s always a pleasure to share the techniques and methods I use, and I hope you found the information helpful and inspiring for your own work.
If you’re interested in seeing more of my projects, feel free to visit my ArtStation profile here.
Additionally, I want to express my sincere gratitude to Games Artist for extending the kind invitation to write this piece.
It’s been an honor to contribute, and I truly hope that you, the readers, have found the content valuable and that it has sparked new ideas or techniques you can apply to your own projects.
Thank you for your time!
Read more articles
You might also like these articles.


