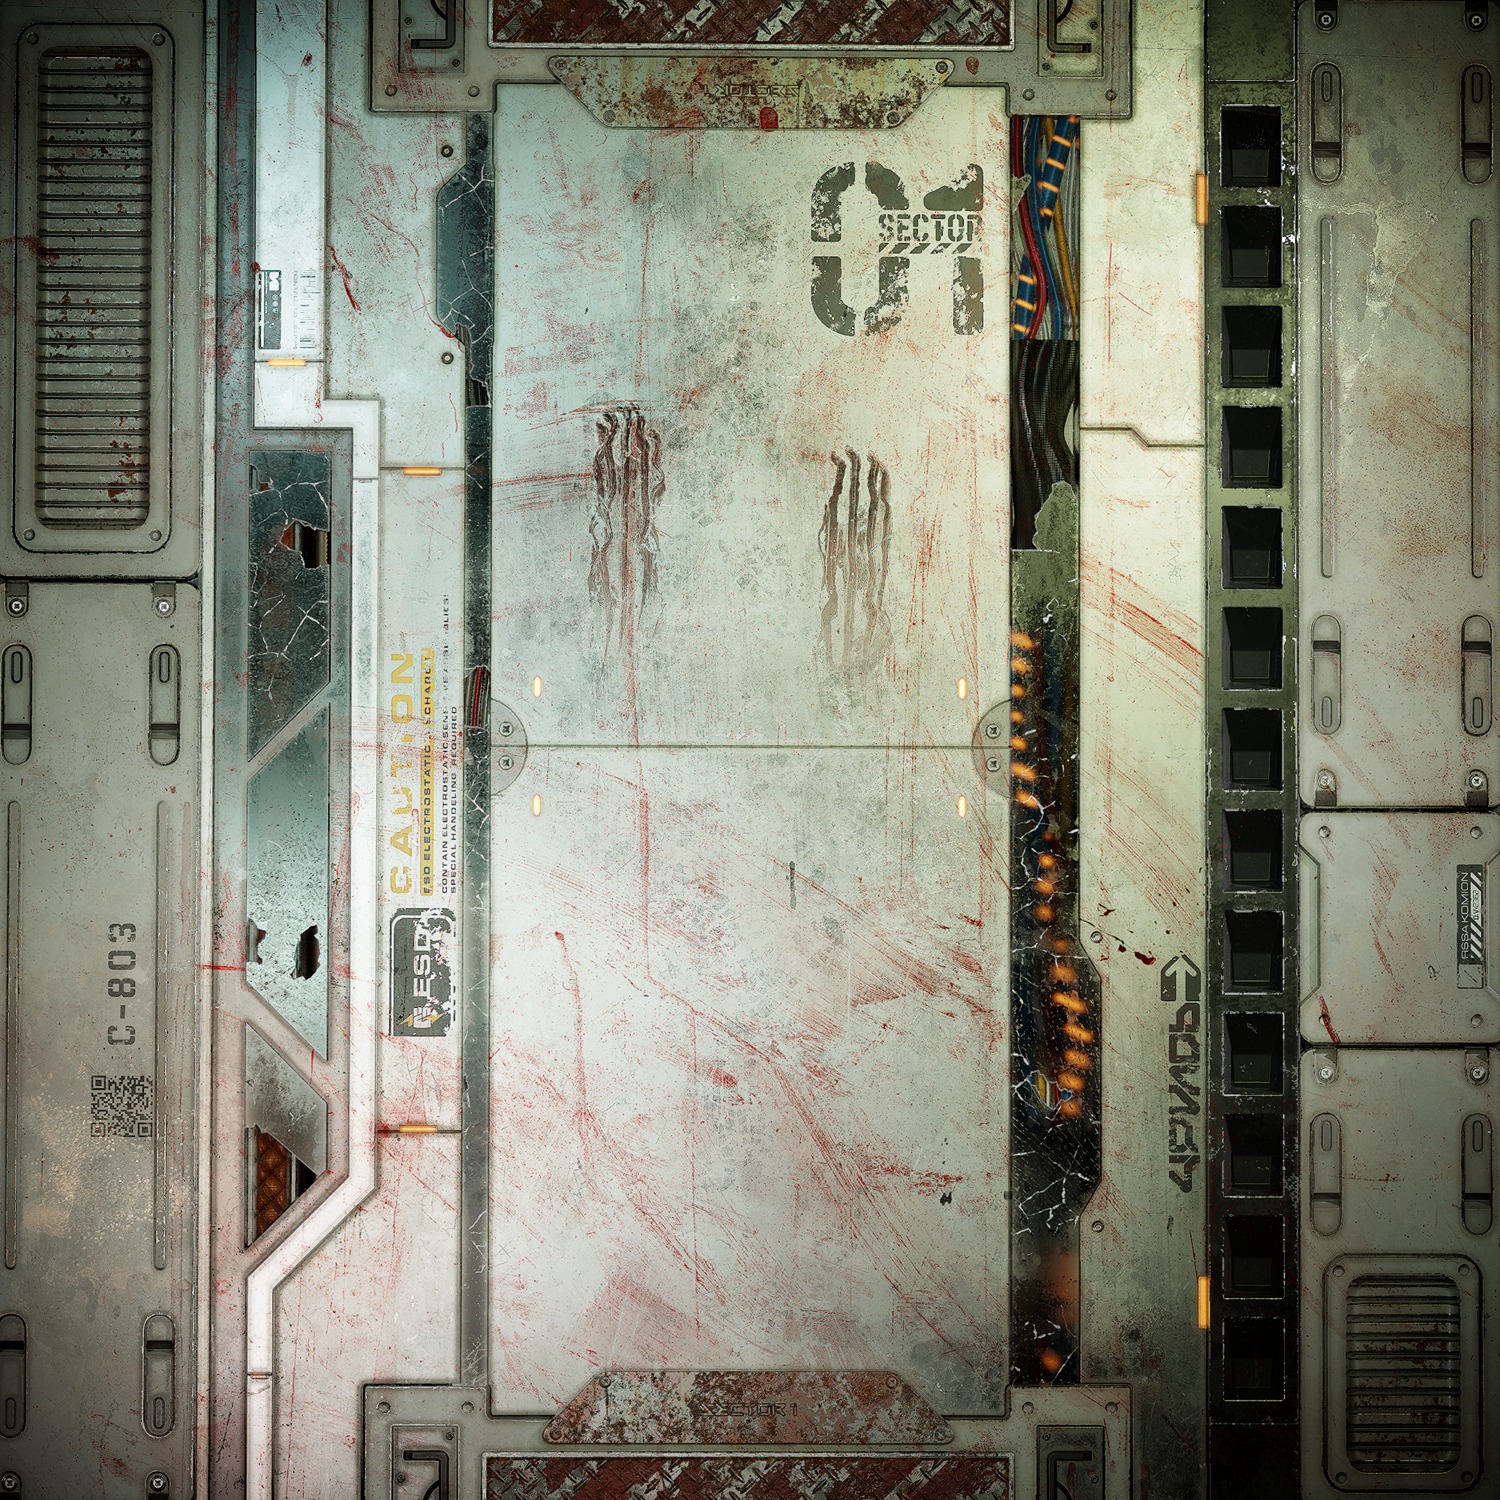
Sci-Fi Floor Panel

Introduction
My name is Chanel Brown, I'm a Material Artist from the UK and have worked in Material creation for over two years now.
Project
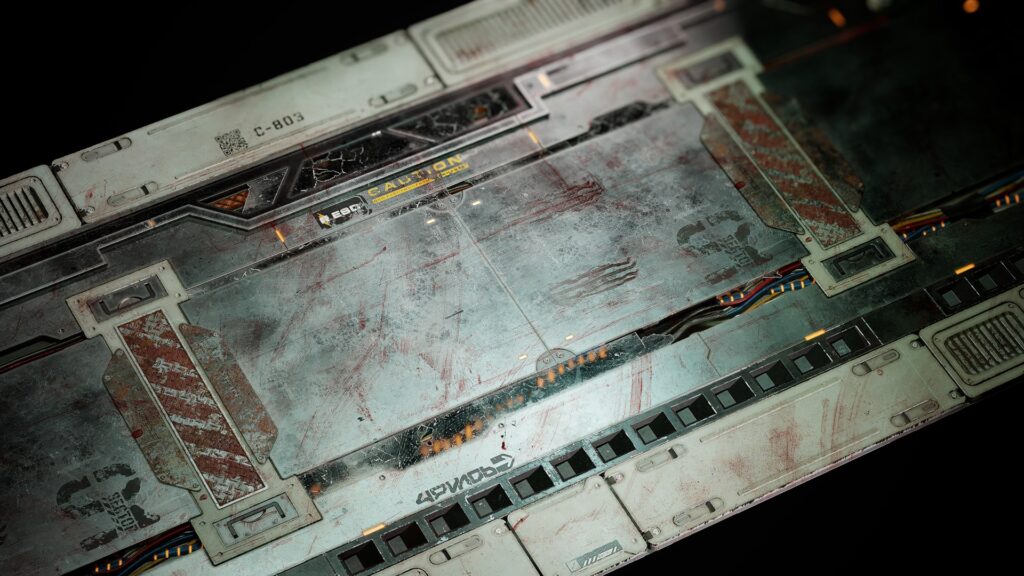
In this article, I will explain my process of creating such a large multi-texture material. This Sci-Fi floor has many components to it.
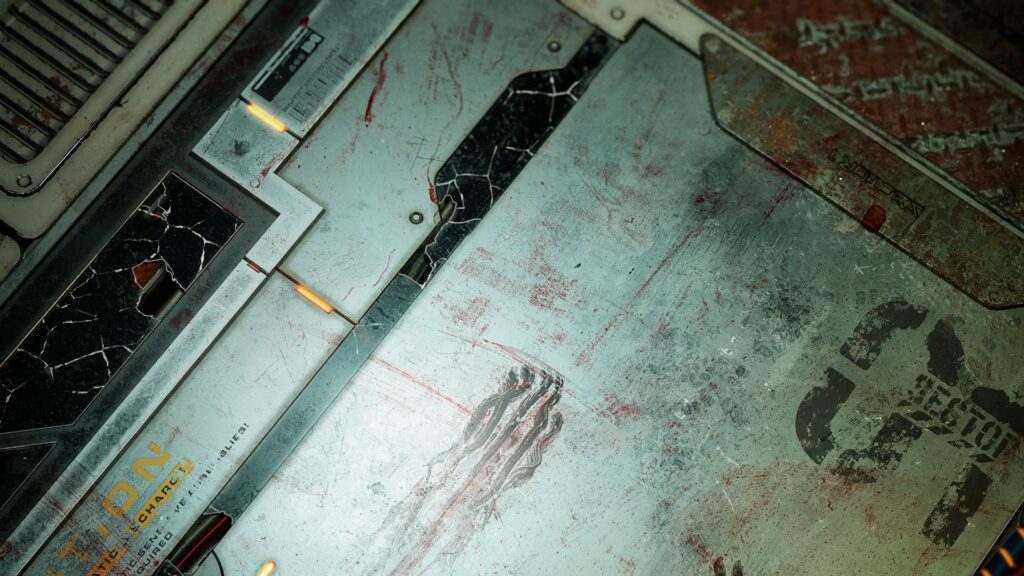
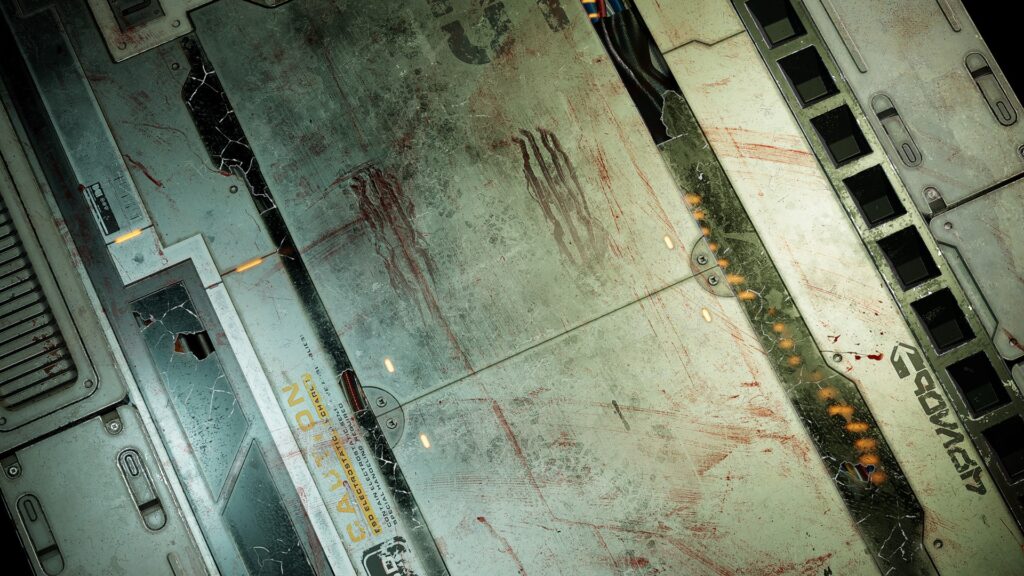
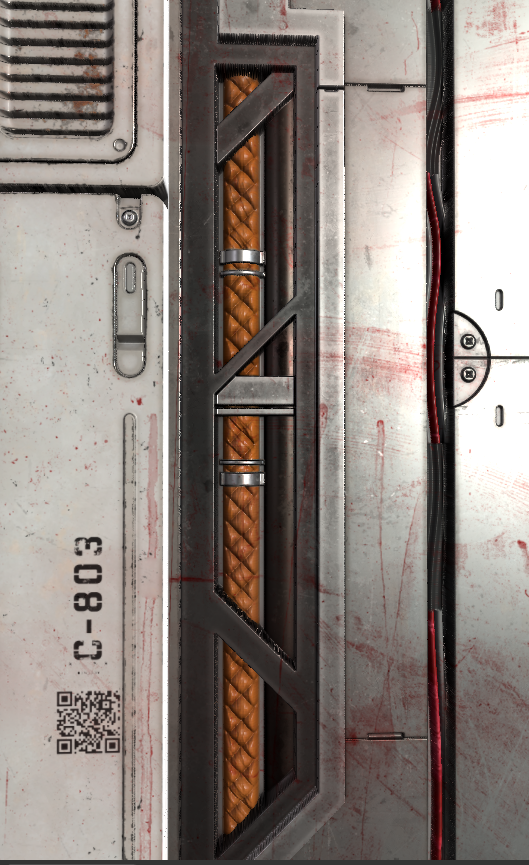
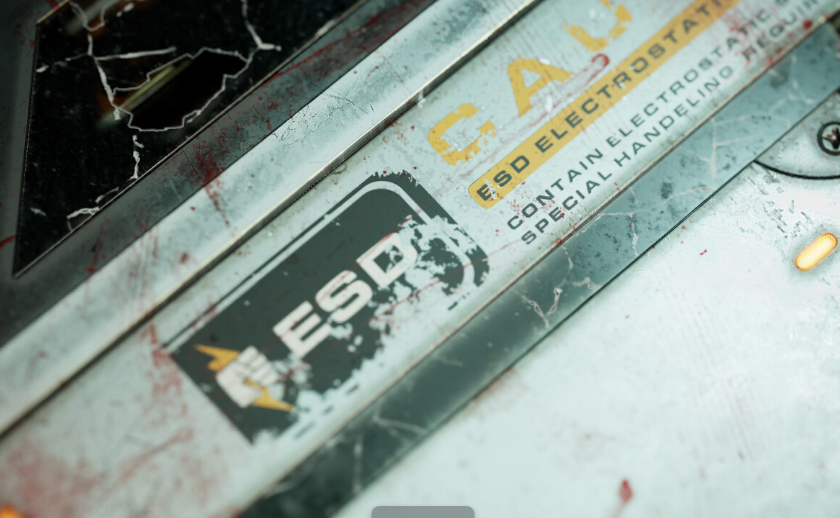
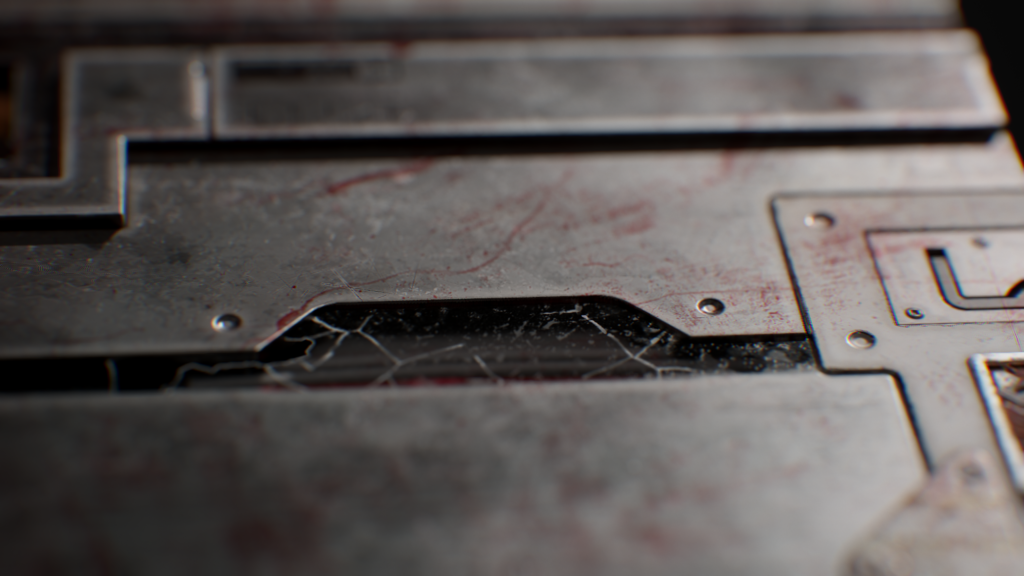
As you can see, we have: blood splatters, roughness, metal, pipes, wires, stickers, decals, etc.

This project has taught me so much! Especially when making the base shapes of a material. I love all things sci-fi and really had a lot of fun making this material!
This material was completed in Substance Designer and rendered in Marmoset Toolbag.
So, let’s dive straight into this project.
References
References are a crucial part of making any material.
They give you direction and motivate you. If you take some quality time to find high-quality references, you’re going to produce really well-detailed assets.
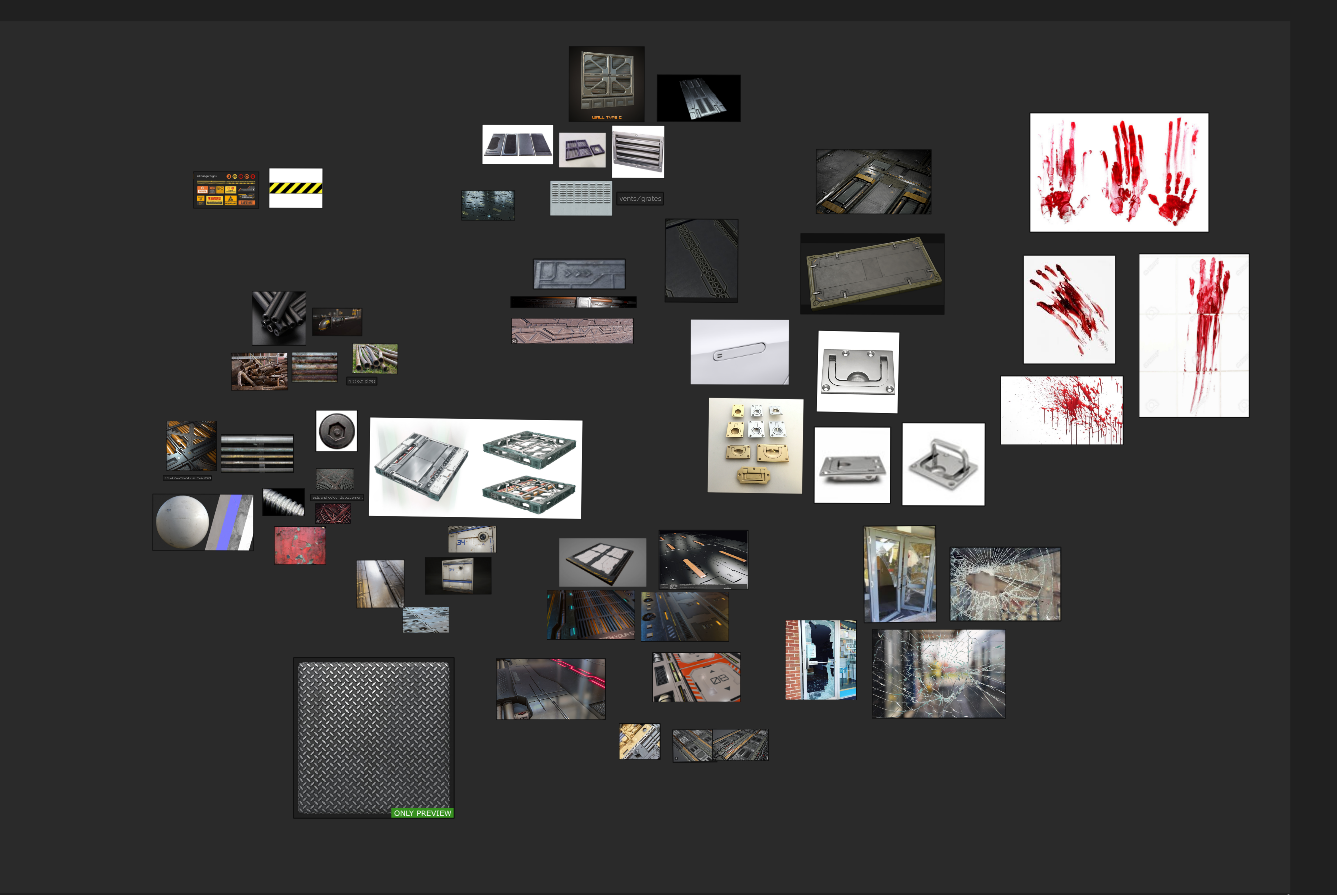
When I find references, I look for a main reference, which serves as my primary inspiration. Then, I break it down and work in sections.
Always have your references in front of you!
My original reference came from @Adam Taylor’s concept art.

Base Shape
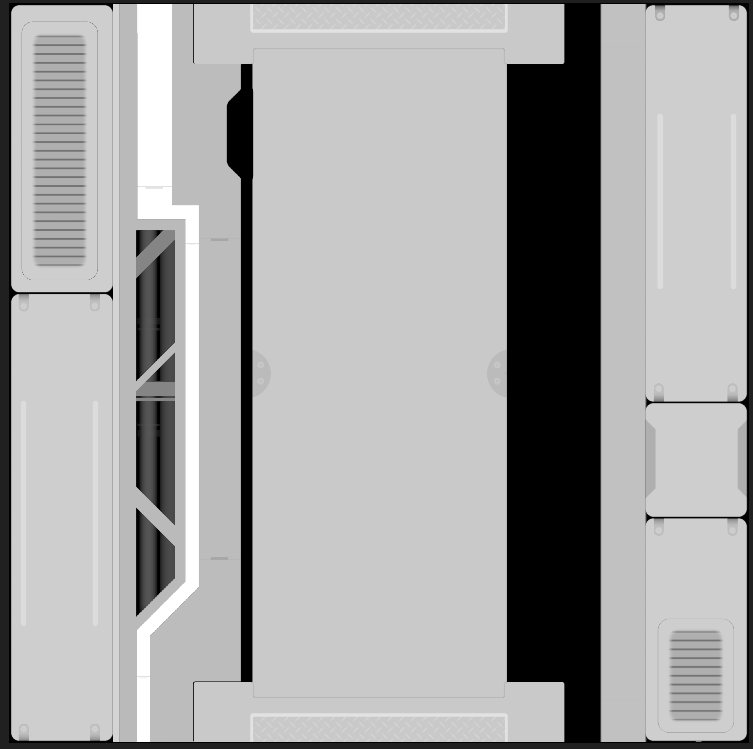
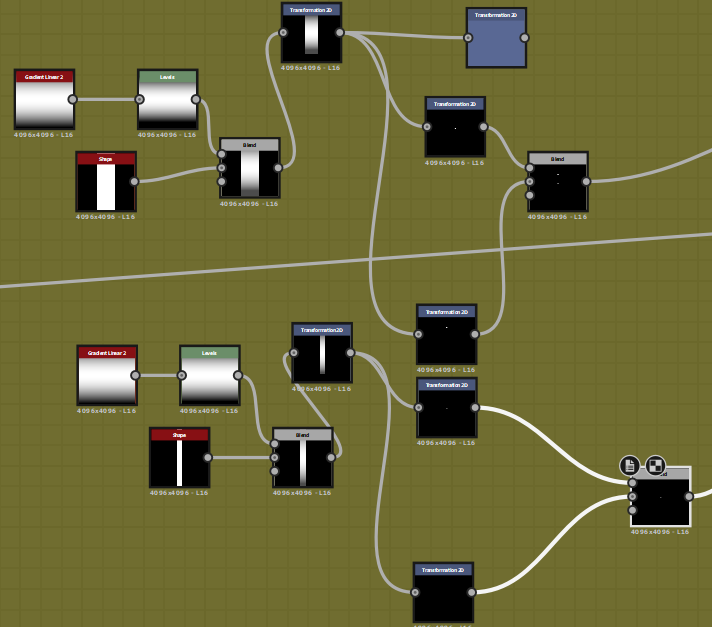
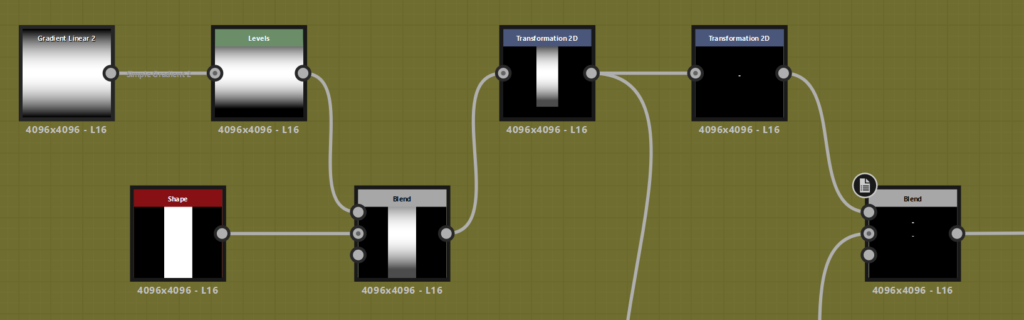
Starting the base shape for this material was all about the Shape node. I made the initial shape for the center floor panel and then elaborated on this central shape.
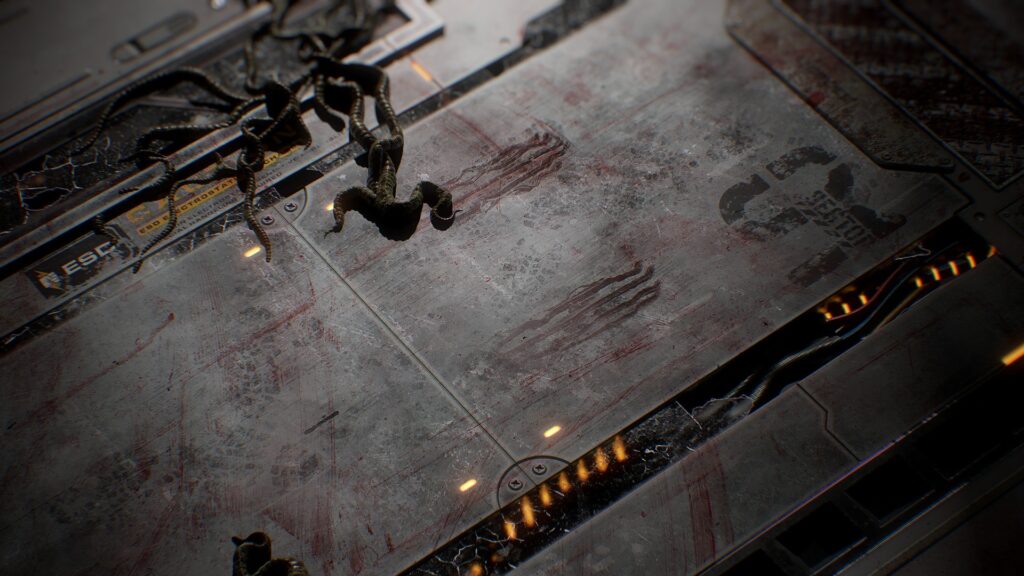
The Center & the Side Panels
From my original concept, I took inspiration from the idea of having a central panel and outer panels. I knew I could add a lot of roughness and blood to the central panel.
This means, that with the added blood and footprints, I’m not losing the central panel in the midst of all the other details.
Then, when working on the side panels, I could add details like vents, screws, metal, pipes, extrusions, etc., giving the material negative space rather than cluttering it with small details.
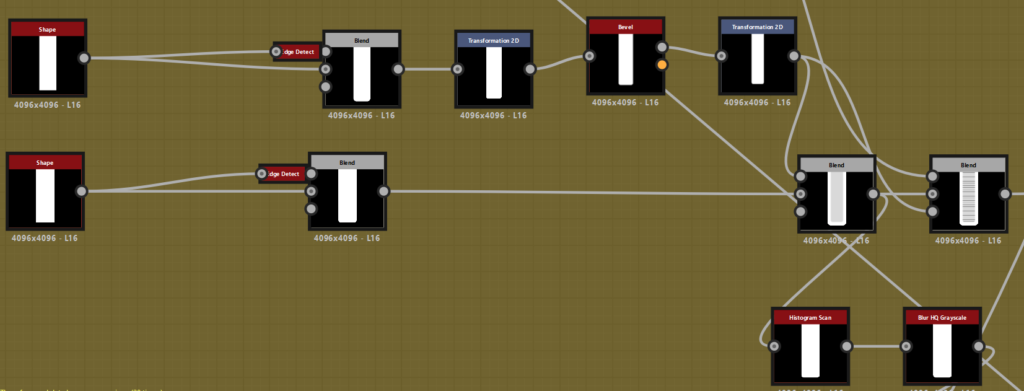
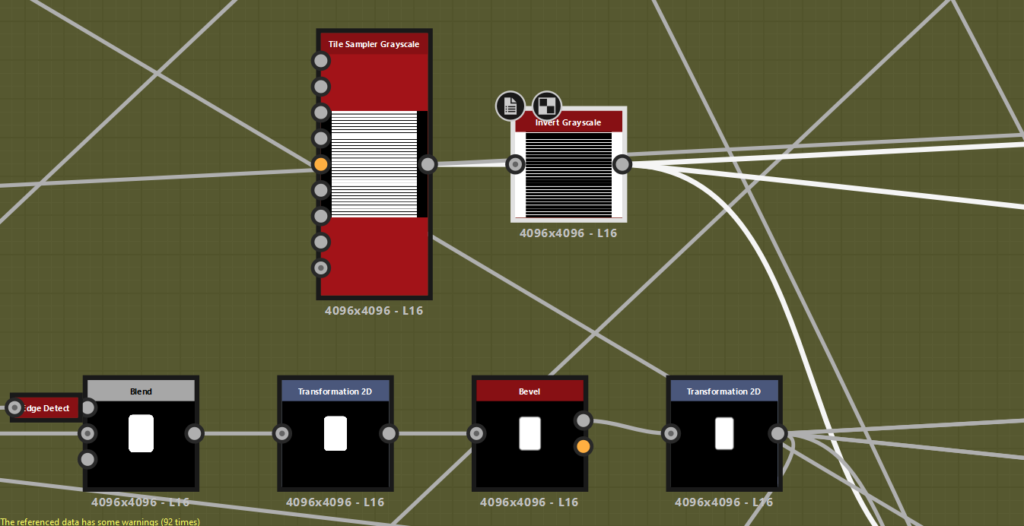
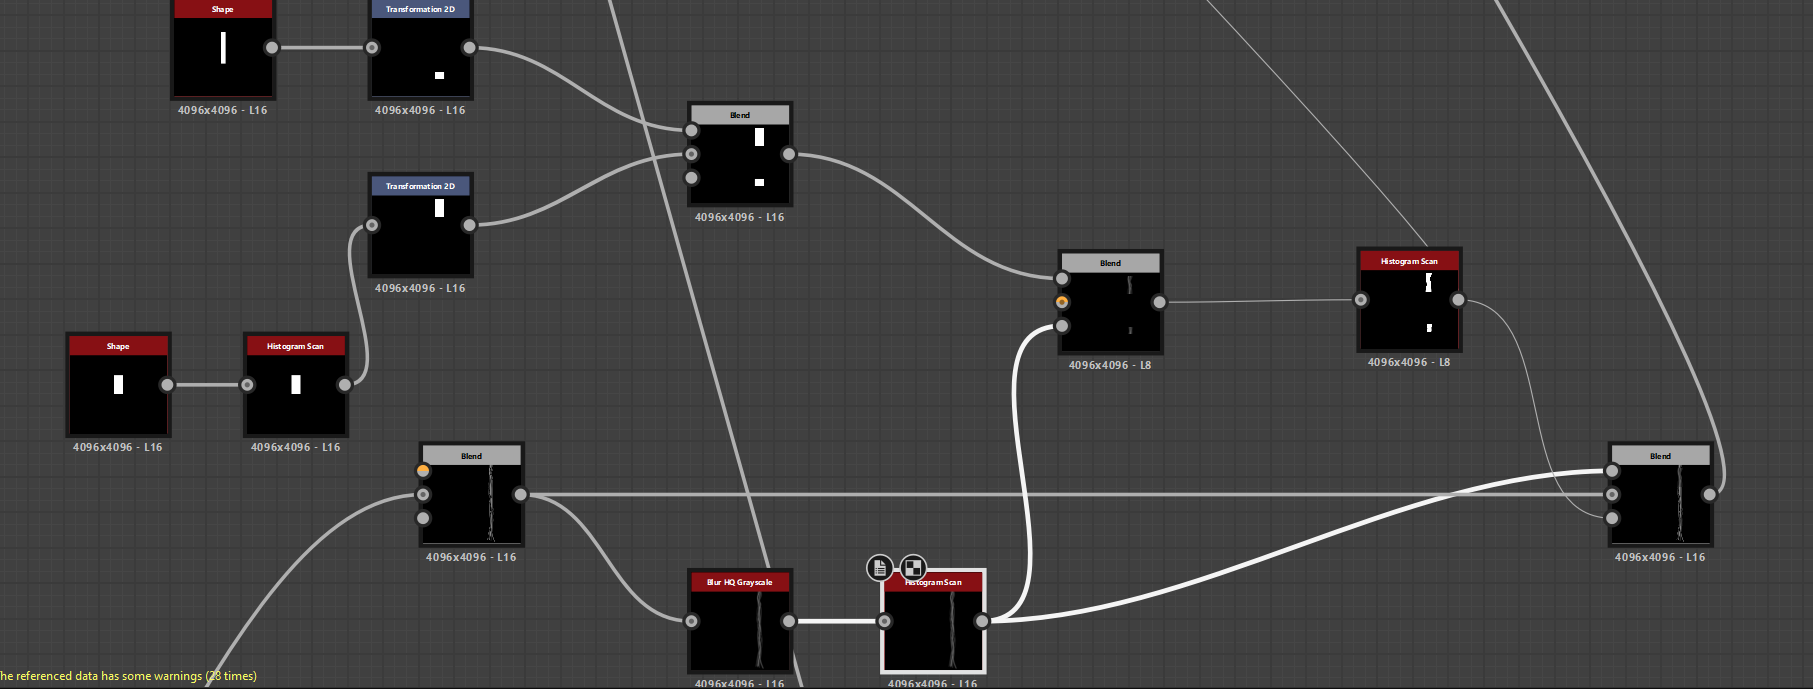
Vents
For the layered shape of the vent, I used a tile sampler, turned the X value way up, and inverted the tile sampler to create the vent’s inner shape.
I then used a non-uniform blur to curve the inner shape of the vents.
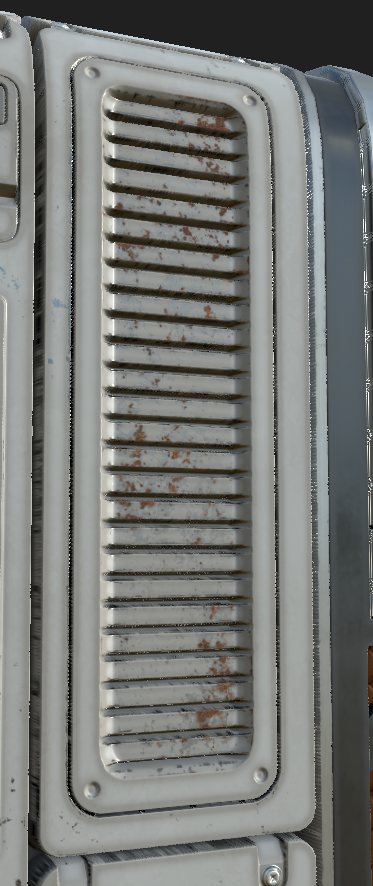
I used a blend to merge them together.
Finally, I applied a Bevel node to create a smoother curve for the inner edge of the vents.
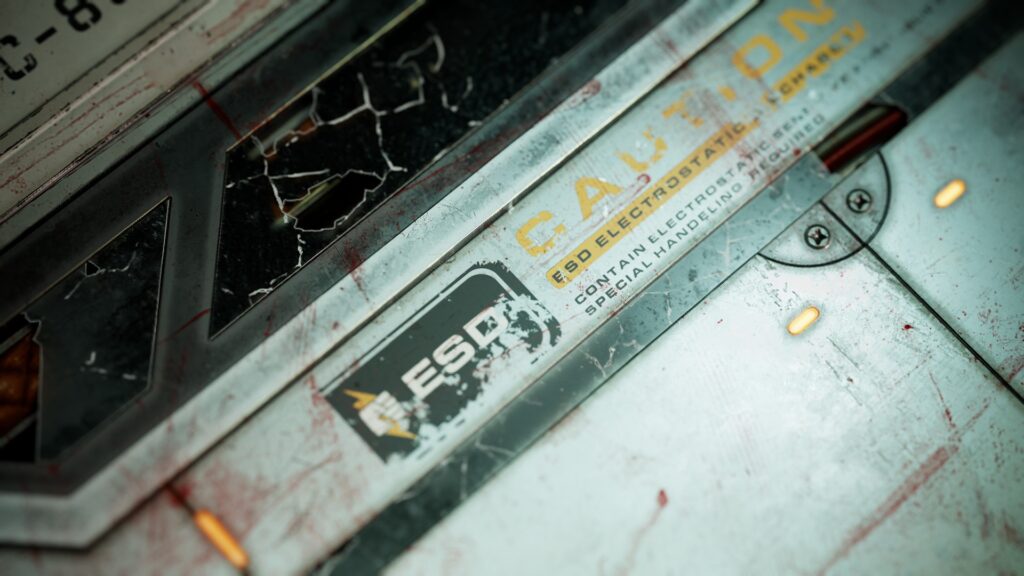
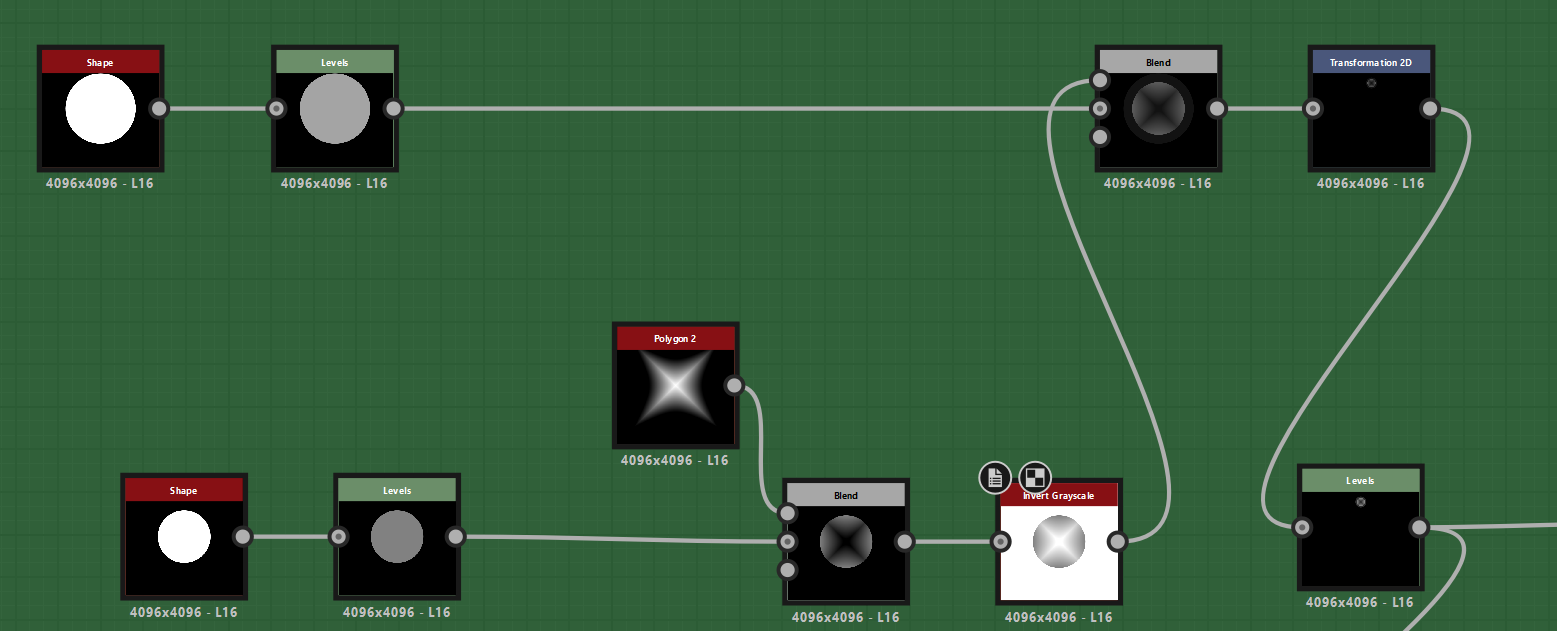
Screws
There are quite a lot of screws throughout the panel to give extra realistic details. To make the screws, I first made two circular shapes: one being the head of the screw, the other representing the screw’s spacer.
I used the Levels node to bring the height of the screw head higher and used the Polygon node to create the cross-head shape. I subtracted the polygon from the screw’s head shape with a blend node, set to 0.56 opacity, and inverted it using an inverted grayscale.
This allowed me to blend the spacer with the final cross-head shape. I used the Transformation 2D node to move the screws where needed.
When making screws, you can face issues regarding readability. Take into account the size of the screws and ensure they are readable. I was using 4K resolution, so I didn’t lose detail, but if you’re making a 2K or lower texture, you might lose some smaller details.
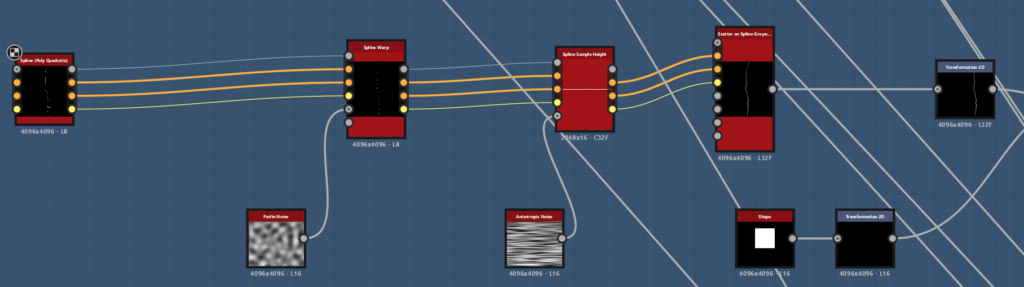
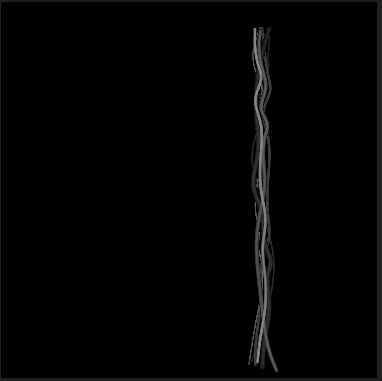
Wires – The Spline Node
Using the spline node, I created each individual wire.
Using a Spline Poly Quadratic allowed me to plot points to manipulate my wires. I then applied a Spline Warp with Perlin Noise to subtly warp the wires.
Once finished with the spline process, I used a Splatter on Spline Grayscale to access nodes like Transformation 2D to move the wires. Wires naturally move over and under each other, so by using the height blend, I could easily create this illusion.
Pipes & Clips
For the pipes, I used a gradient node to give a smooth curve and the Levels node to control the intensity of the curve.
If you need to create a curved shape, using a blur or gradient connected to the Levels node allows you to adjust the curvature by manipulating the blur amount.
Using a height blend, I ensured the pipes were at the correct height since I wanted them to be “underneath” the panel.
I also made silver clips that surround the pipes.
For the pipe clips, I used a Gradient Linear, increased the “level in low” value in the Levels node to create the curved and dipped edges surrounding my pipes, and blended the shape of the clip with the gradient using a multiply value of 0.7.
Tape
To create the tape, I started by making my own shape and creating two masks for where the tape would be on the wires. I then passed the wires through a Blur HQ Grayscale to blur them.
Next, I used a blend node to blend the mask and the blurred wires together. I passed the blurred wires through a Histogram Scan with a contrast of 0 and a position of 0.5. I blended this histogram with my tape masks and used another histogram scan for the blend.
Finally, I blended the blurred wires into the foreground, with the original wires as the background, and the mask as the opacity.
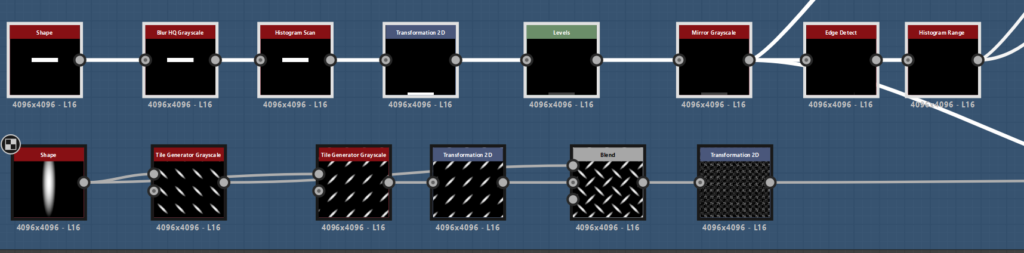
Metal Diamond Tread Plating & Rust
I started by creating the border shape for the plating. Using a Shape node, I made the rectangular shape and plugged it into a Blur HQ Grayscale.
After blurring the shape, I used a Histogram Scan to give rounded edges to the plating. I used Mirror Grayscale to symmetrically tile the plating correctly on both sides.
The Diamond Tread Pattern was made by using the Shape node and setting the pattern to Paraboloid, lowering the X value to make it narrower. I passed this through two different tile generators.
I used a Transformation 2D to slightly adjust the position and blended them together using Max Lighten.
After completing the shape, I used a Transformation 2D and divided the shape by four, though you could do this in a Tile Sampler as well.
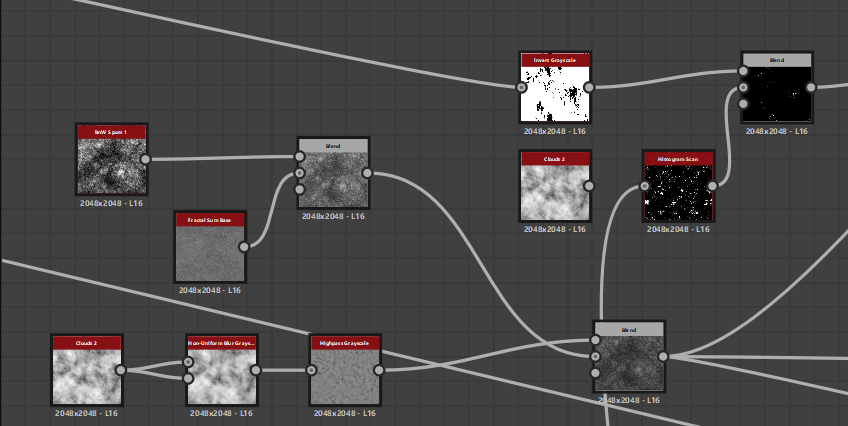
I pulled the rust from a previous texture I made. To create the rust, I used different noises like the Clouds 2 node and Fractal Sum Base, blending them together.
I blended these with a mask to create a metal rust mask. The use of grunge maps gave the rust a realistic look.

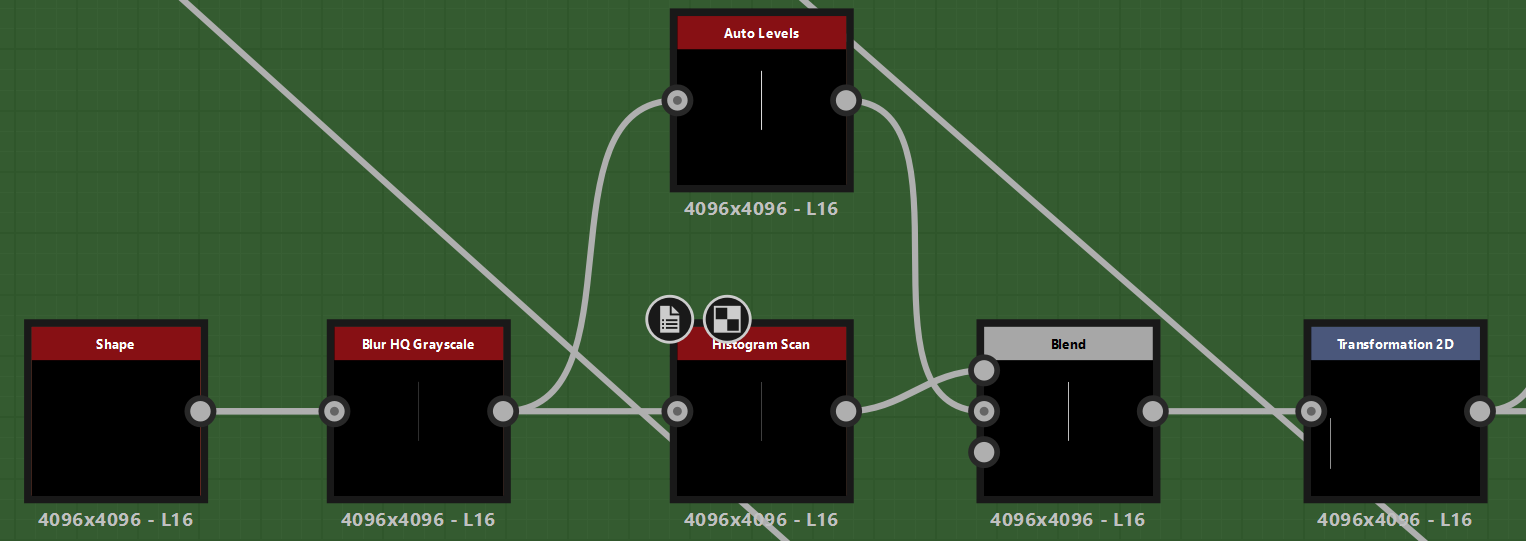
Contour Lines
First, I made a long rectangular shape in the Shape node and plugged it into a Blur HQ Grayscale.
Now I had a blurred shape, and using a Histogram Scan eliminated the harsh corners and gave smoother edges.
I also used Auto Levels to bring back the height of the shape. I used the Transformation 2D node to resize the contour lines and place them where I wanted.
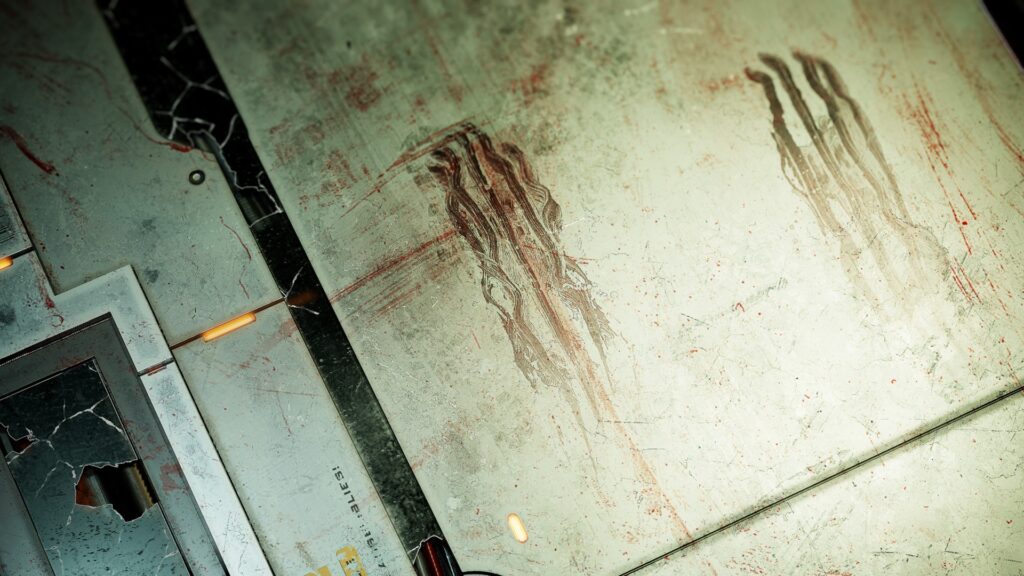
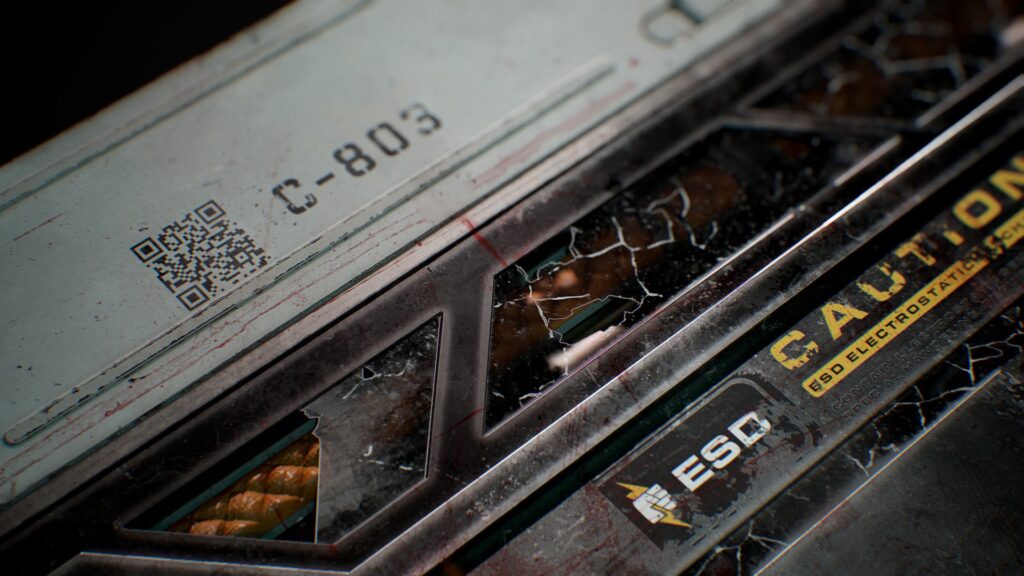
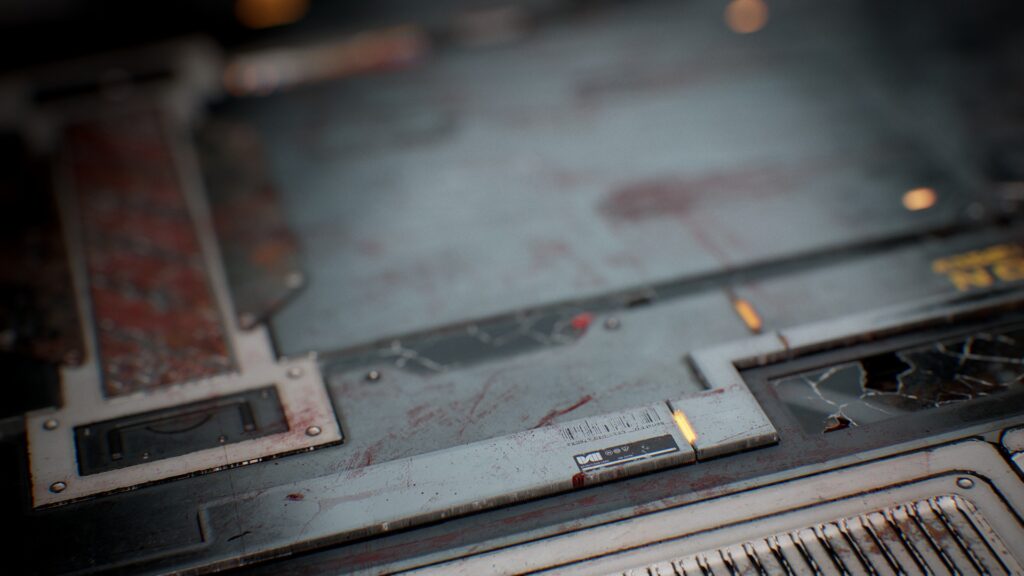
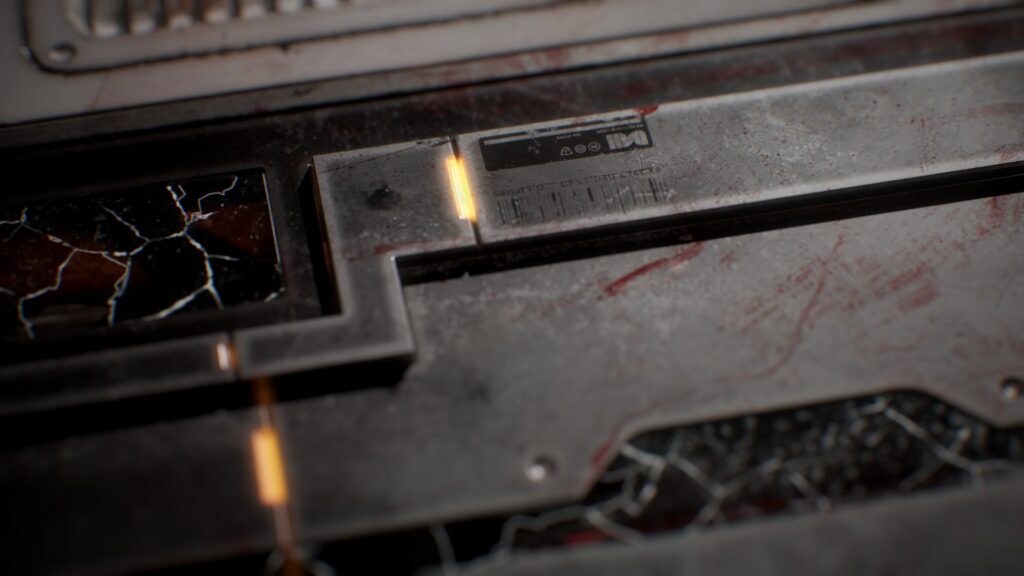
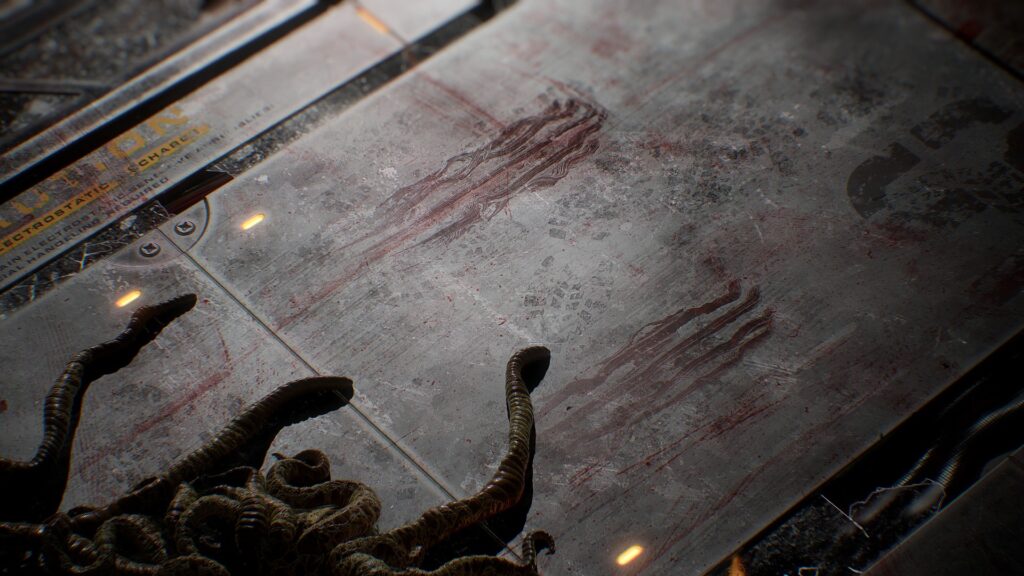
Blood Marks & Decals
For the blood marks (not the handprints), I found some from a blog and used them strategically to make it look like something horrifying happened, with realistic blood splatters.
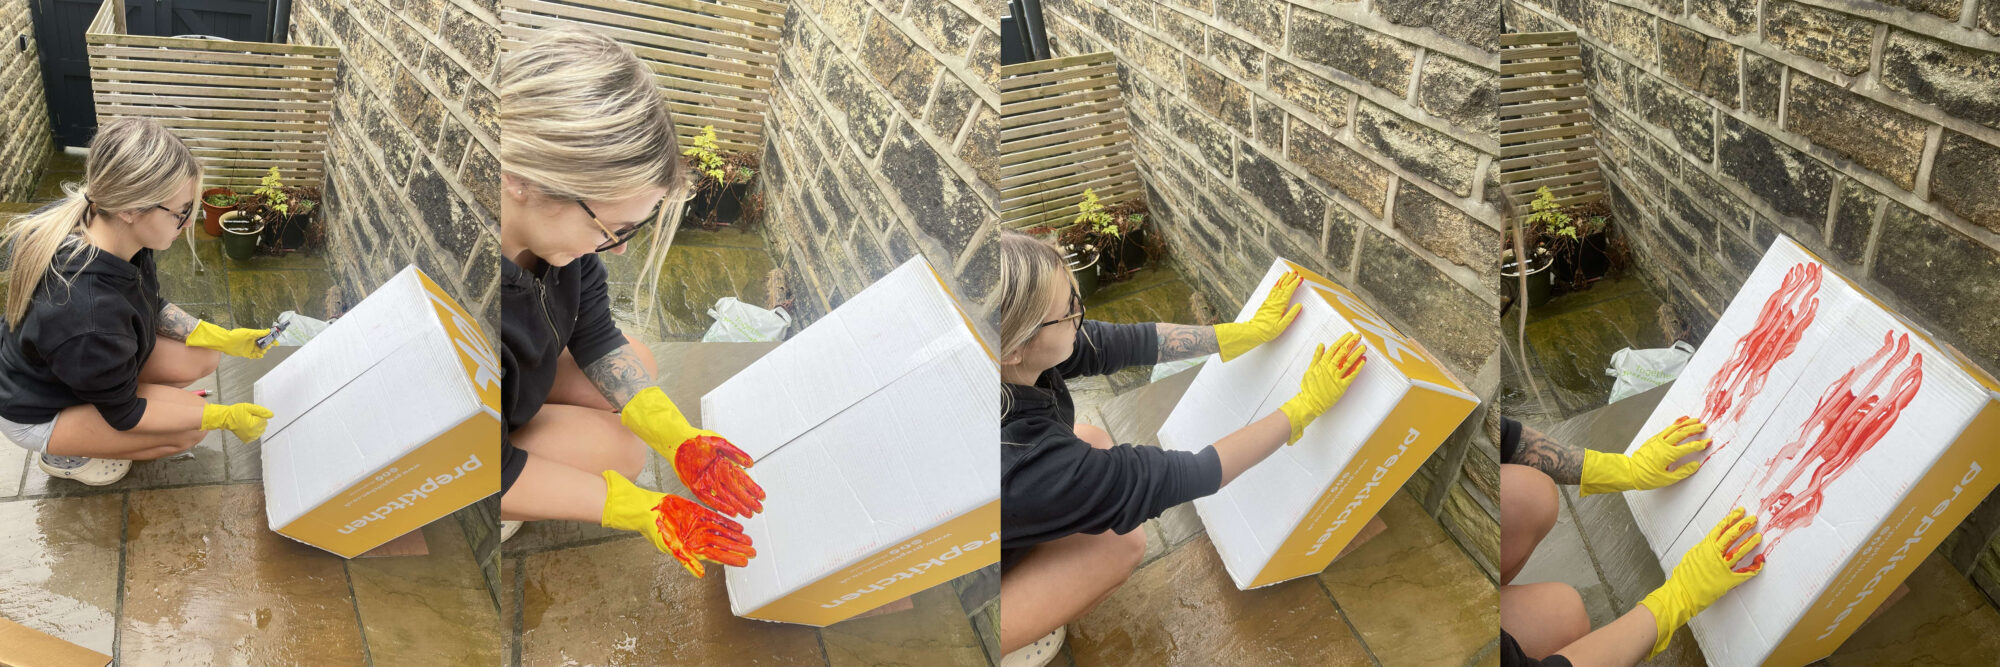
I knew I wanted to add handprints, but I couldn’t find anything online. So I had to get creative and make my own.
Luckily, I had some fake blood from Halloween and a cardboard box (from Prep Kitchen, as you can tell the diet didn’t pay off).
I made the handprints, took pictures, and imported them into Adobe Photoshop. There, I removed the white backing and made additional adjustments.
Finally, I created a standard black-and-white mask.
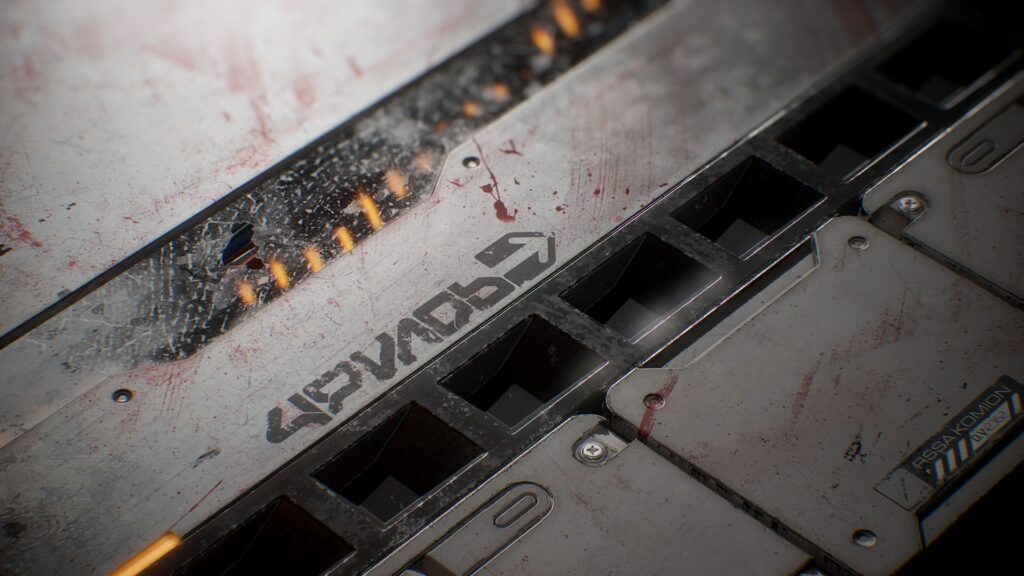
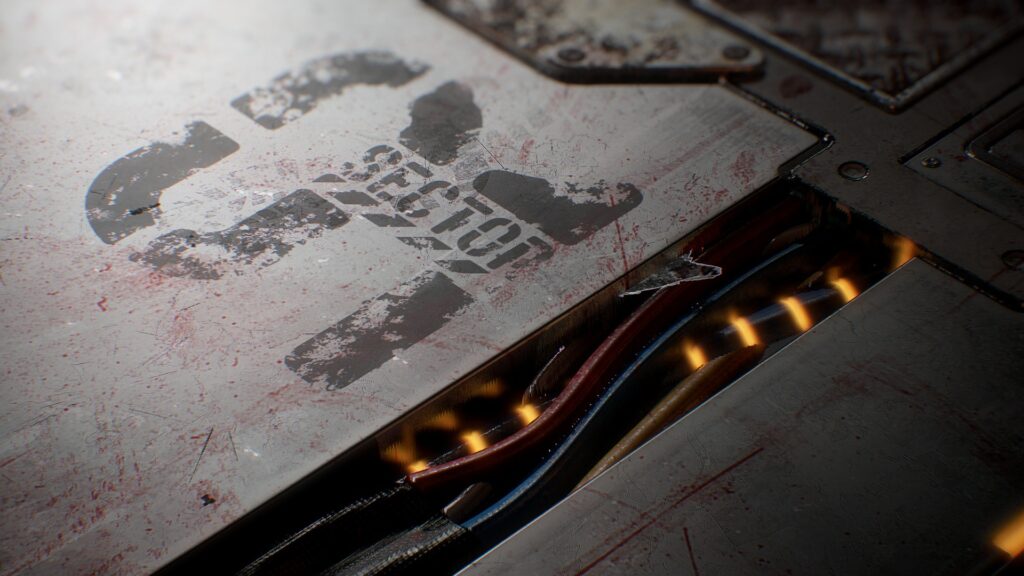
For decals like the stickers, I used a pack I bought from Gumtree.
There are many different “sci-fi sticker packs” available online for your use.
Glass
To create the glass, I masked out the gaps created in the base shape of my material and used them to start shaping the glass.
I took a Tile Sampler and used a Perlin Noise as the vector map input. By adjusting the vector map slider, I could randomize the pattern in the Tile Sampler.
I used a Distance node to close any gaps and connected it to an Edge Detect and a Slope Blur Grayscale, which gave me perfect edge variations.
I blended this in Subtract mode. To ensure my cracks were not randomly placed everywhere, I set the contrast in the grunge map to 1.
Lastly, I passed a Histogram Scan through a Crystal 1, used the Slope Blur Grayscale for additional damage, and used that as the cracked parts of the glass.
Albedo
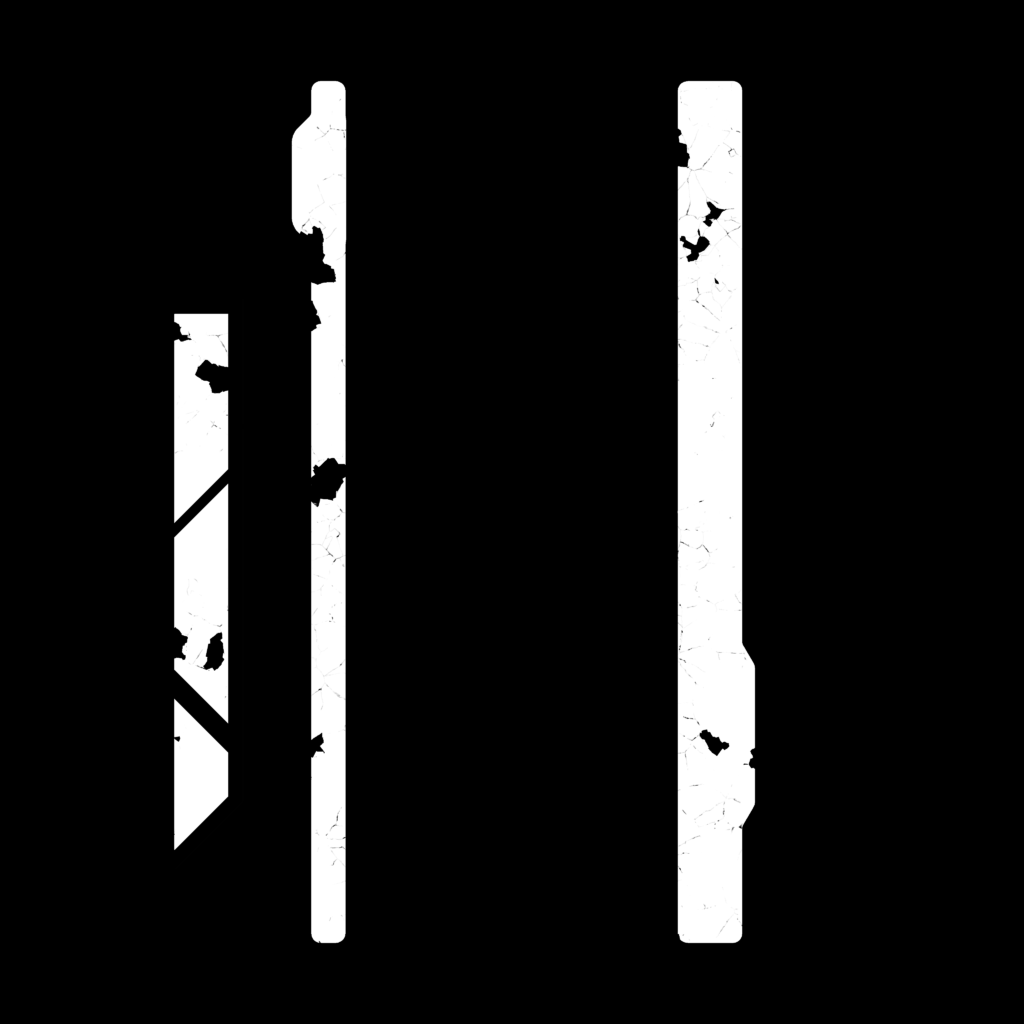
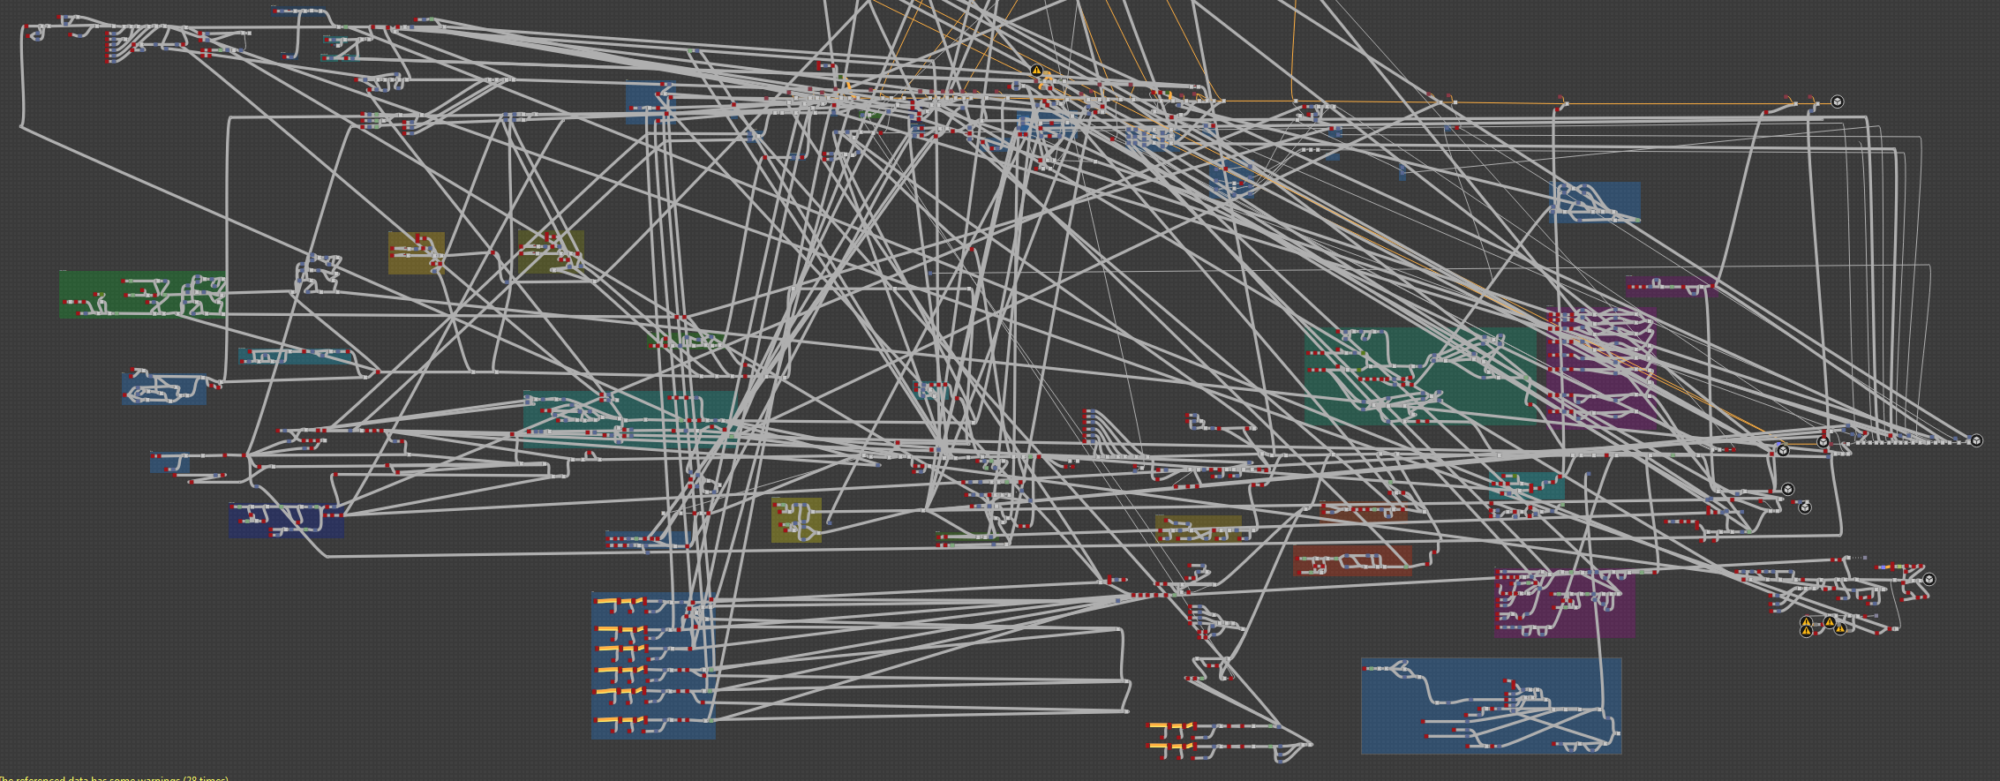
The Albedo process involved a lot of masking. I made sure every detail in my material had a mask ready to go, and the graph got messy quickly.
I color-coded every detail: gray for metal, white for side panels, etc.
After the colors were placed correctly, I started adding stains and Albedo variations. I used a lot of custom Albedos and grunge packs available in ArtStation stores.
Since everything was masked, it was easy to jump in and start playing with colors. Curvature, metal edge wear, and light nodes gave a lot of freedom in terms of masking crevices, dirt, and damage.
Having this much detail is definitely a long process, and trying to navigate through this graph brought out some PTSD, lol.
Polish and Final Pass
In the end, I was happy with the material, so I knew my rendering had to be perfect for me to publish it.
I rendered the material in Marmoset Toolbag and was very happy with the result, especially with the roughness, decals, and animation I added, with help from Christian Tammekand.
I want to express my appreciation and gratitude to the people who supported me throughout this project.
Thank you to Enrico Tammekand, Stan Brown, and Max Kutsenko for providing feedback on my renders and parts of the material.
And lastly, a huge thank you to Christian Tammekand for giving me so many amazing ideas and helping me complete my Sci-Fi Floor.
Read more articles
You might also like these articles.