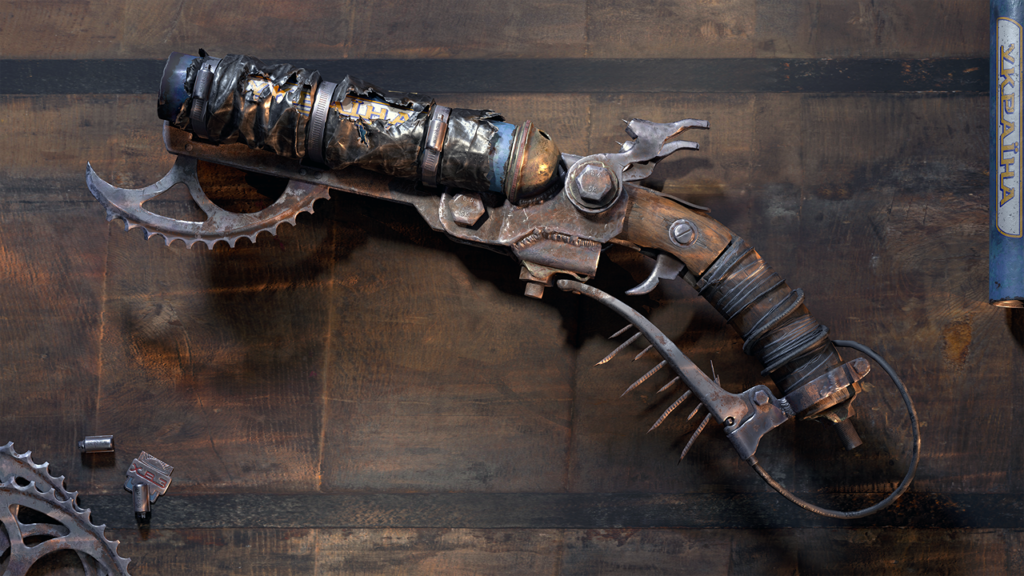
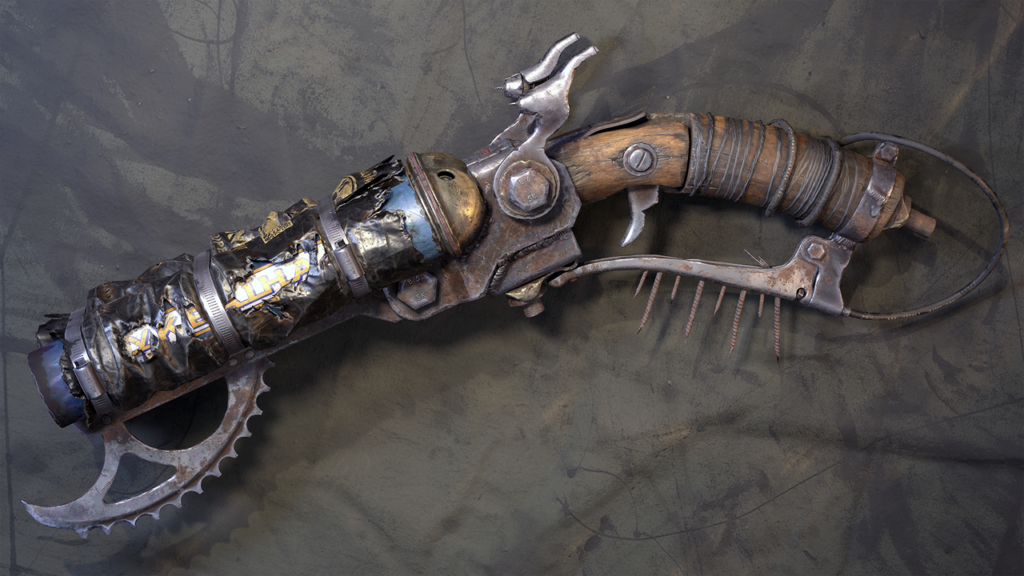
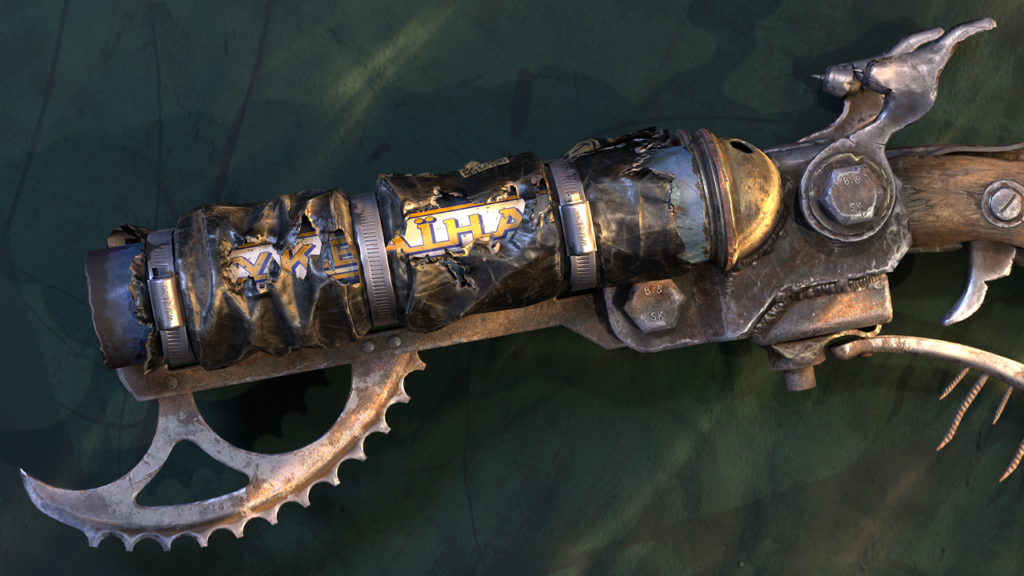
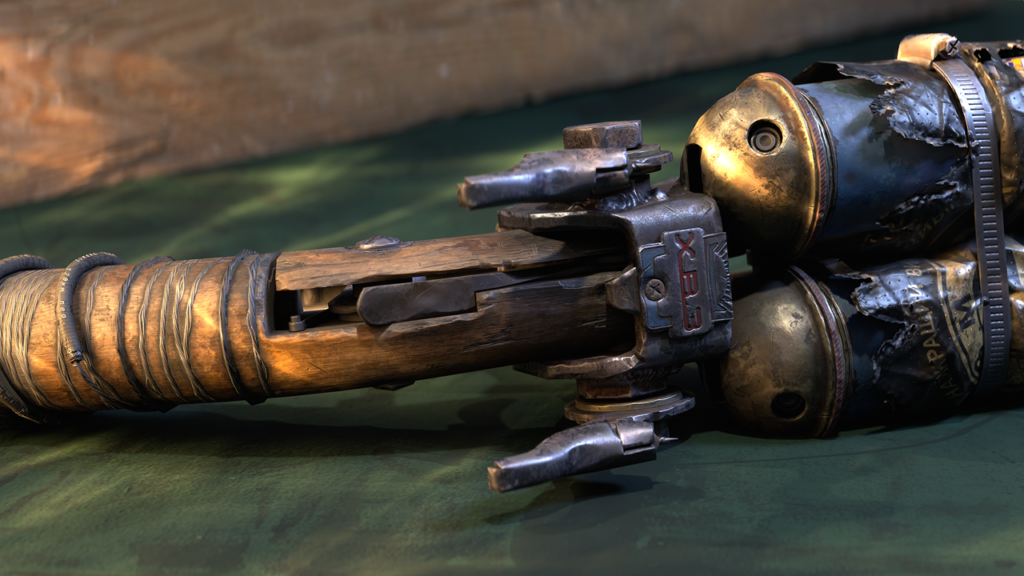
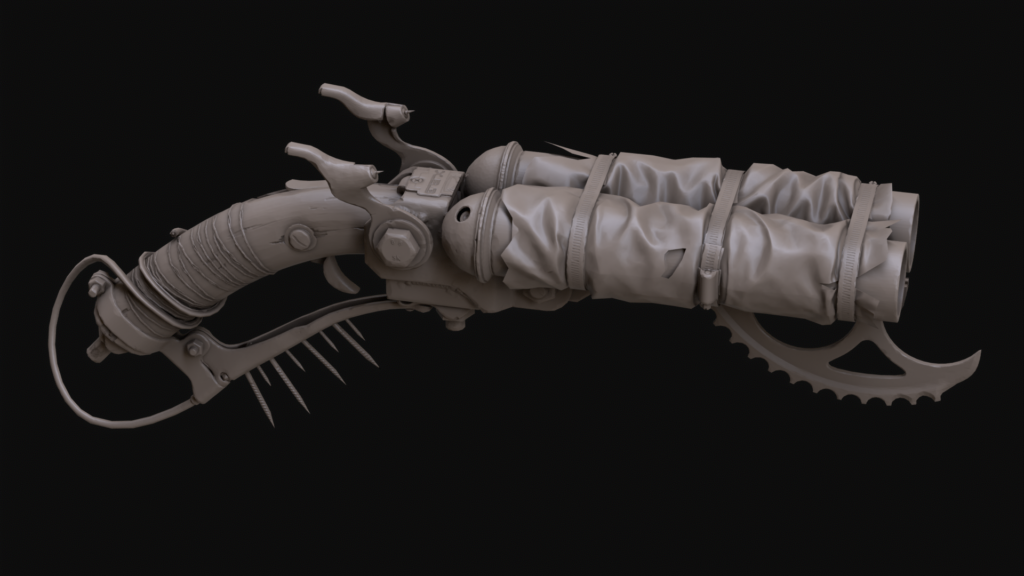
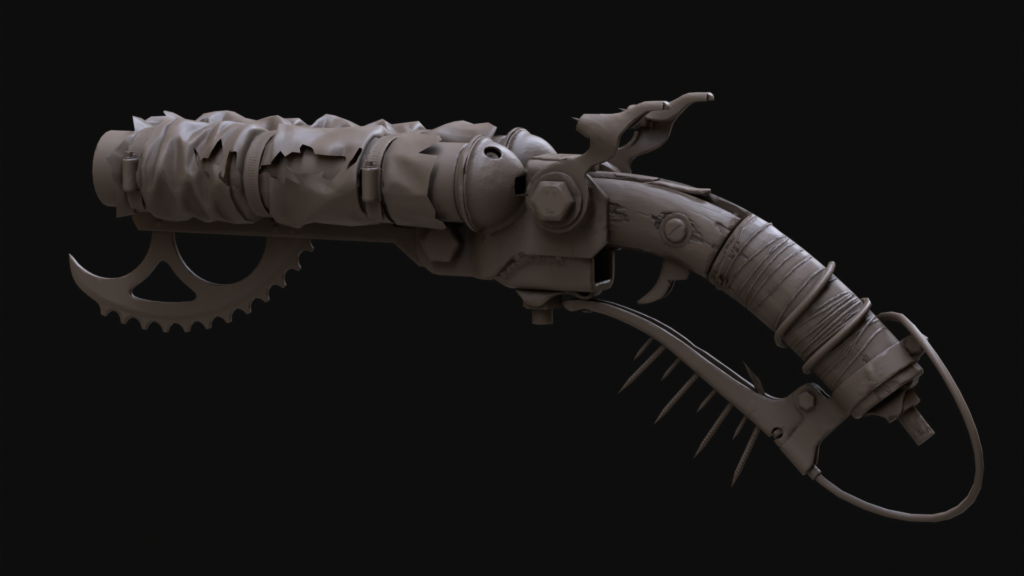
Sawed-Off Shotgun


Introduction
Hello! My name is Zhorzha Oleksandr, I'm from Ukraine, I'm a 3D artist, I've been doing 3D for over 10 years.
Goals
I created the shotgun for a challenge from MykhailykArt, supported by ARTNOVATOR studio.
There were some technical restrictions that had to be adhered to before participation was allowed.
Technical Requirements
-
- 1 texture set (2K – main, 4K – for renders)
-
- 15K tris
-
- Additionally: You can contribute 30% if you wish
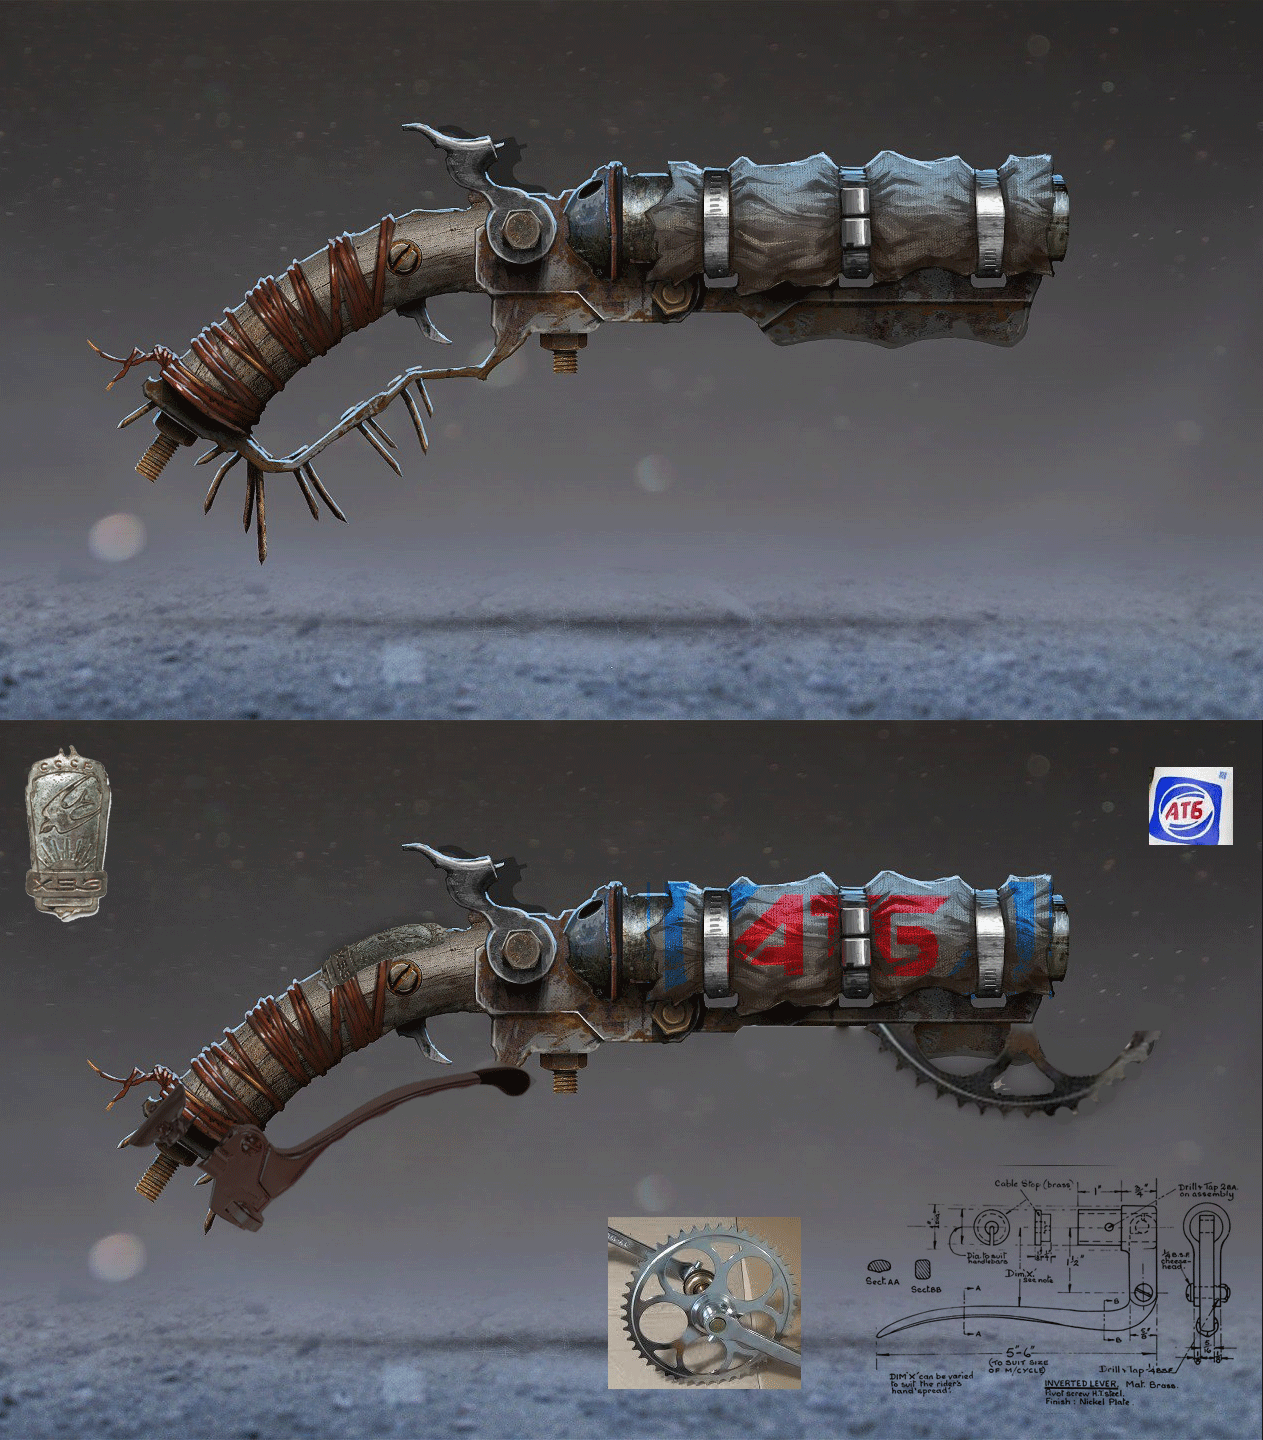
Ivan Taranenko gave participants a wonderful shotgun concept.
At first, the goal was to make a work that could win the challenge and also to make a model that could be created in reality.
The model had to look like it could be seen in life, with details that are familiar to many people, and I wanted to get maximum realism in the materials and textures.
Now we can say that the work won the challenge. There were many beautiful works in the challenge; you can see them on ArtStation.
Tools
- Concept – (Photoshop)
- Blocking – (3ds Max)
- High Poly – (ZBrush)
- Low Poly – (3ds Max)
- UV – (Rizom UV)
- Bake – (Marmoset)
- Texturing – (Substance Painter)
- Rendering – (Marmoset)
Idea, Concept & Reference List
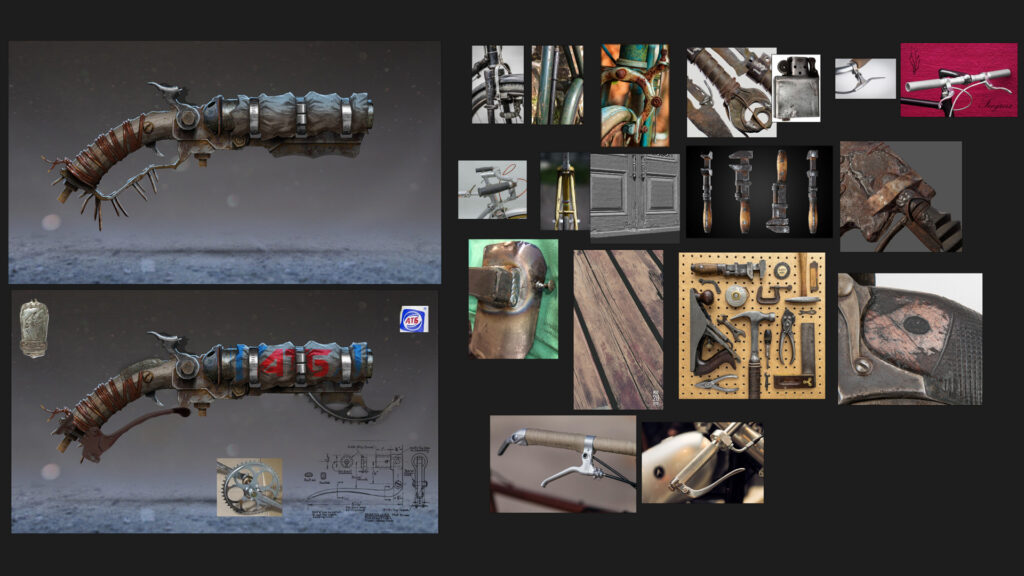
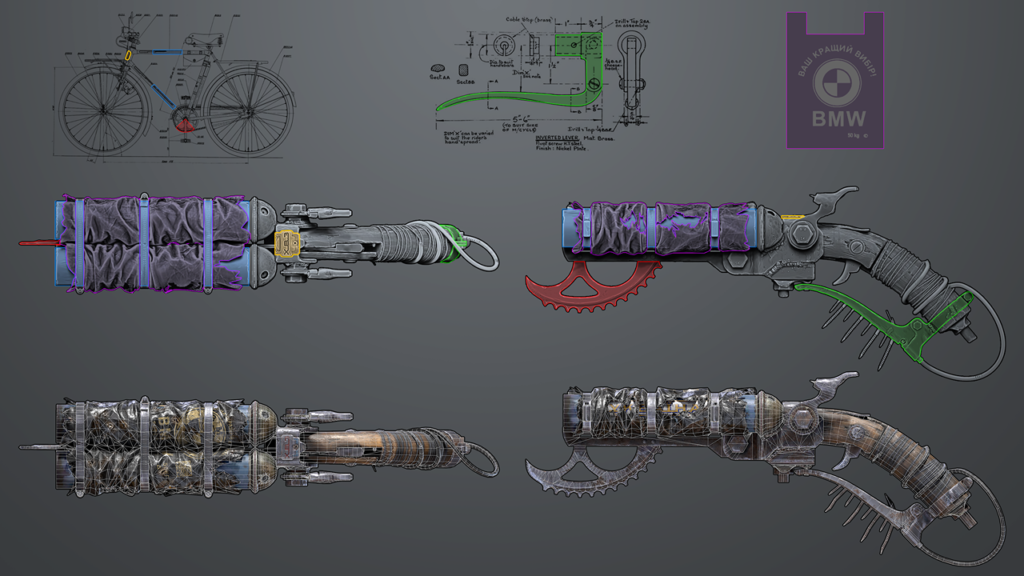
To add something of my own to the concept, I decided to make it from bicycle parts so that it looked as if I could do it in a garage in reality.
I started collecting the reference list and started supplementing the concept with bicycle parts.
If you have an idea and a concept, this is already 50% of the work done, and there is not much left to do.
Blocking
My main program is 3ds Max, so I do all the main manipulations in 3ds Max.
First, you need to load the concept into the 3ds Max viewport.
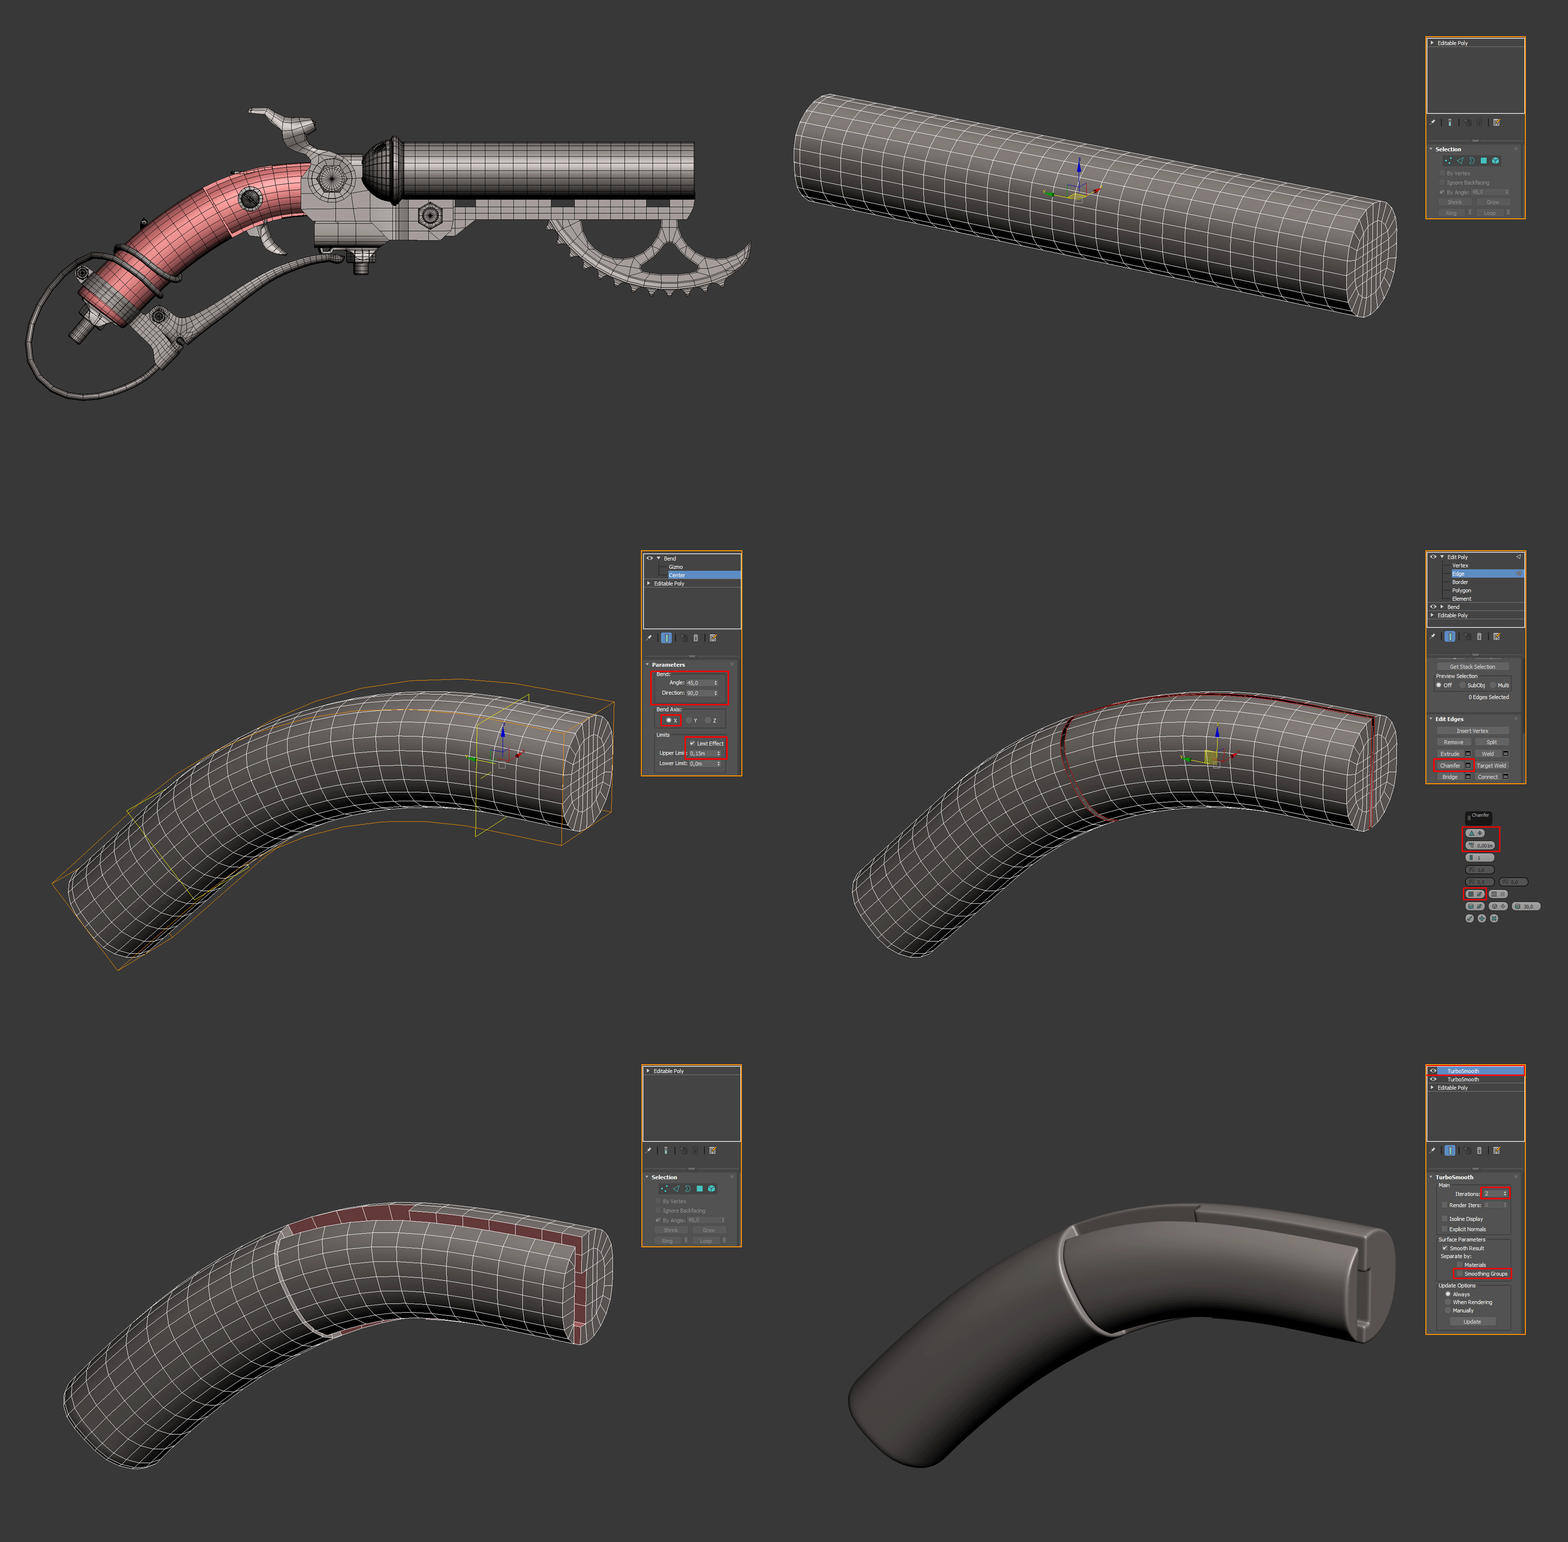
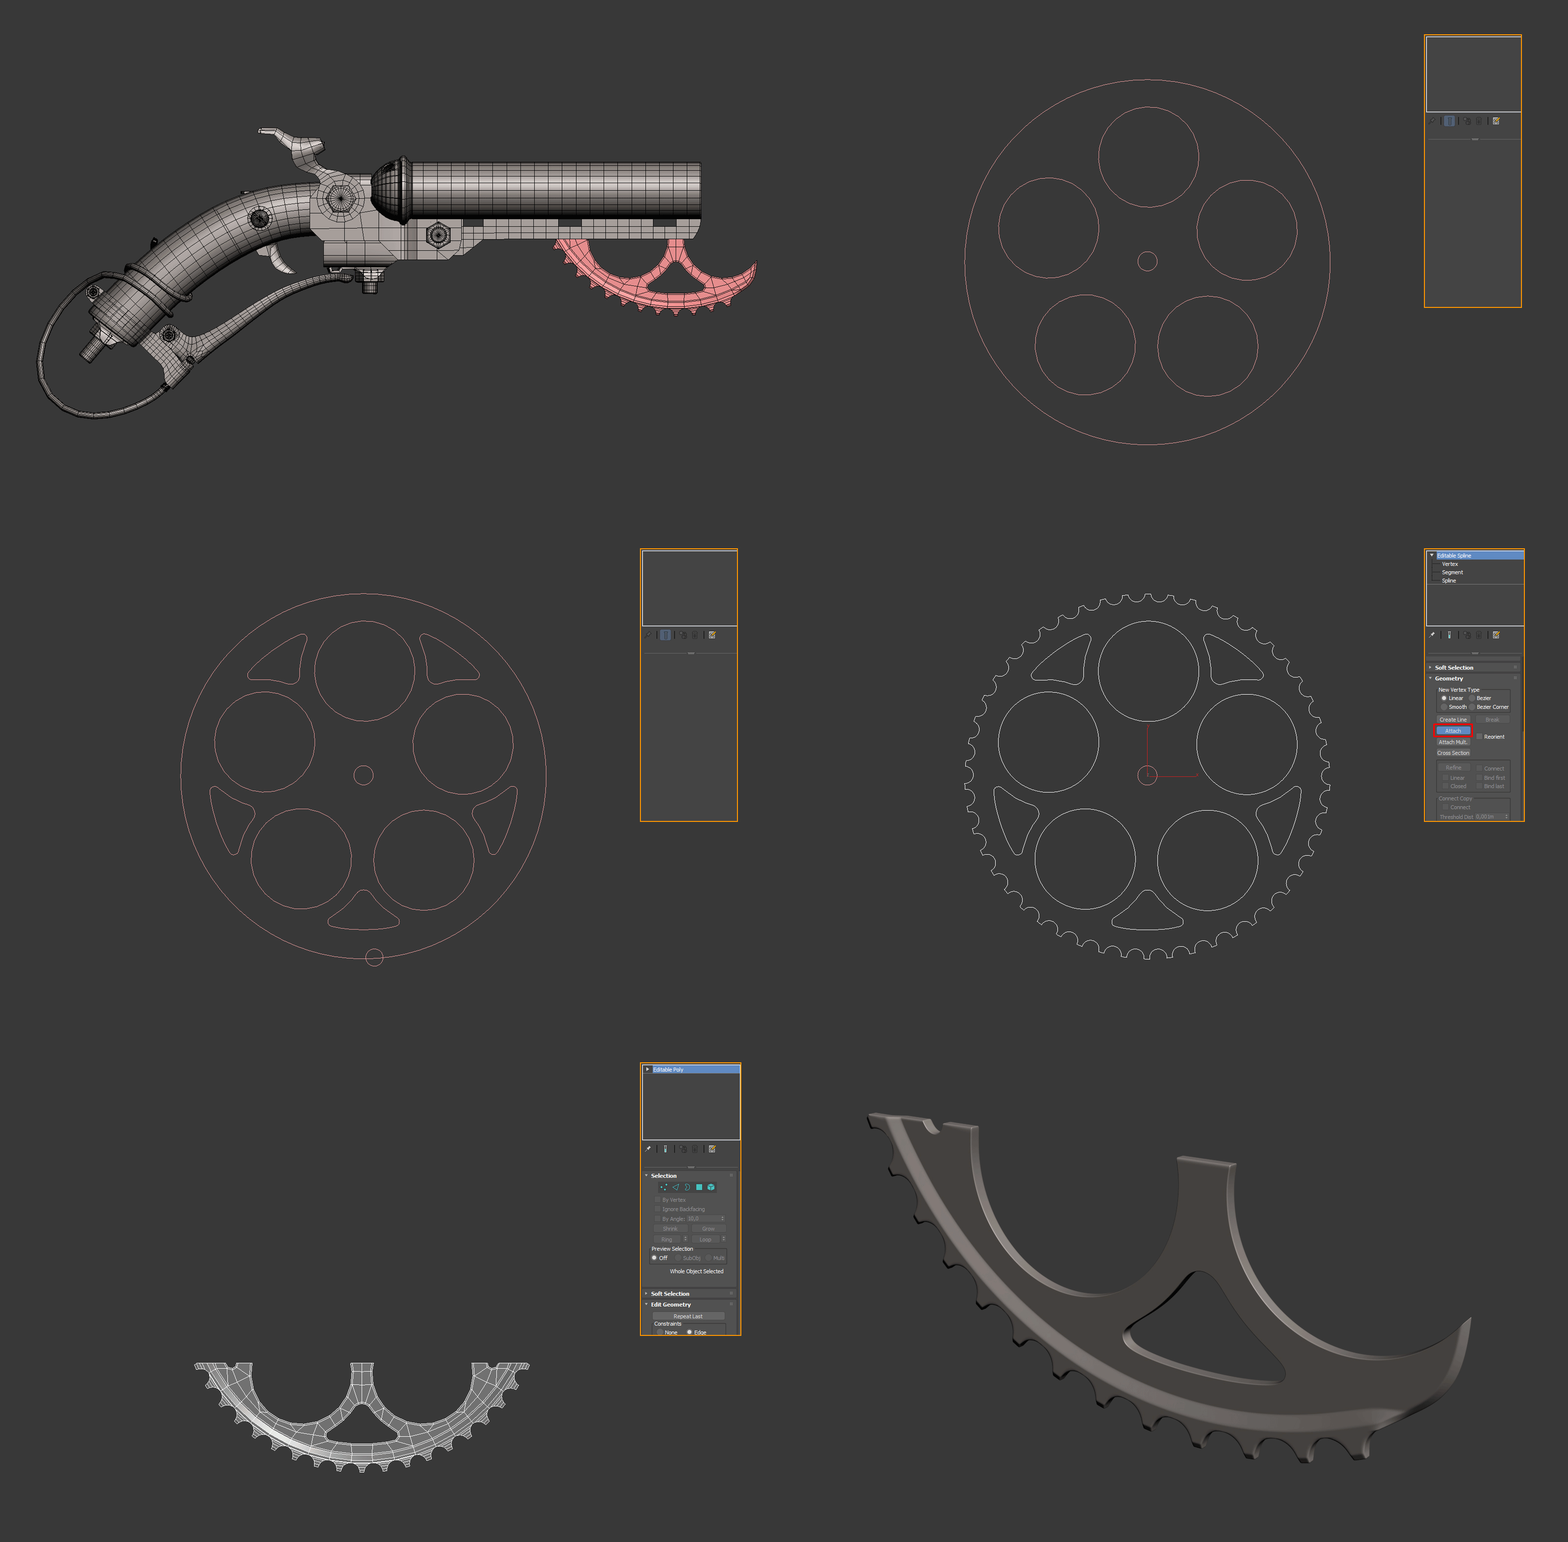
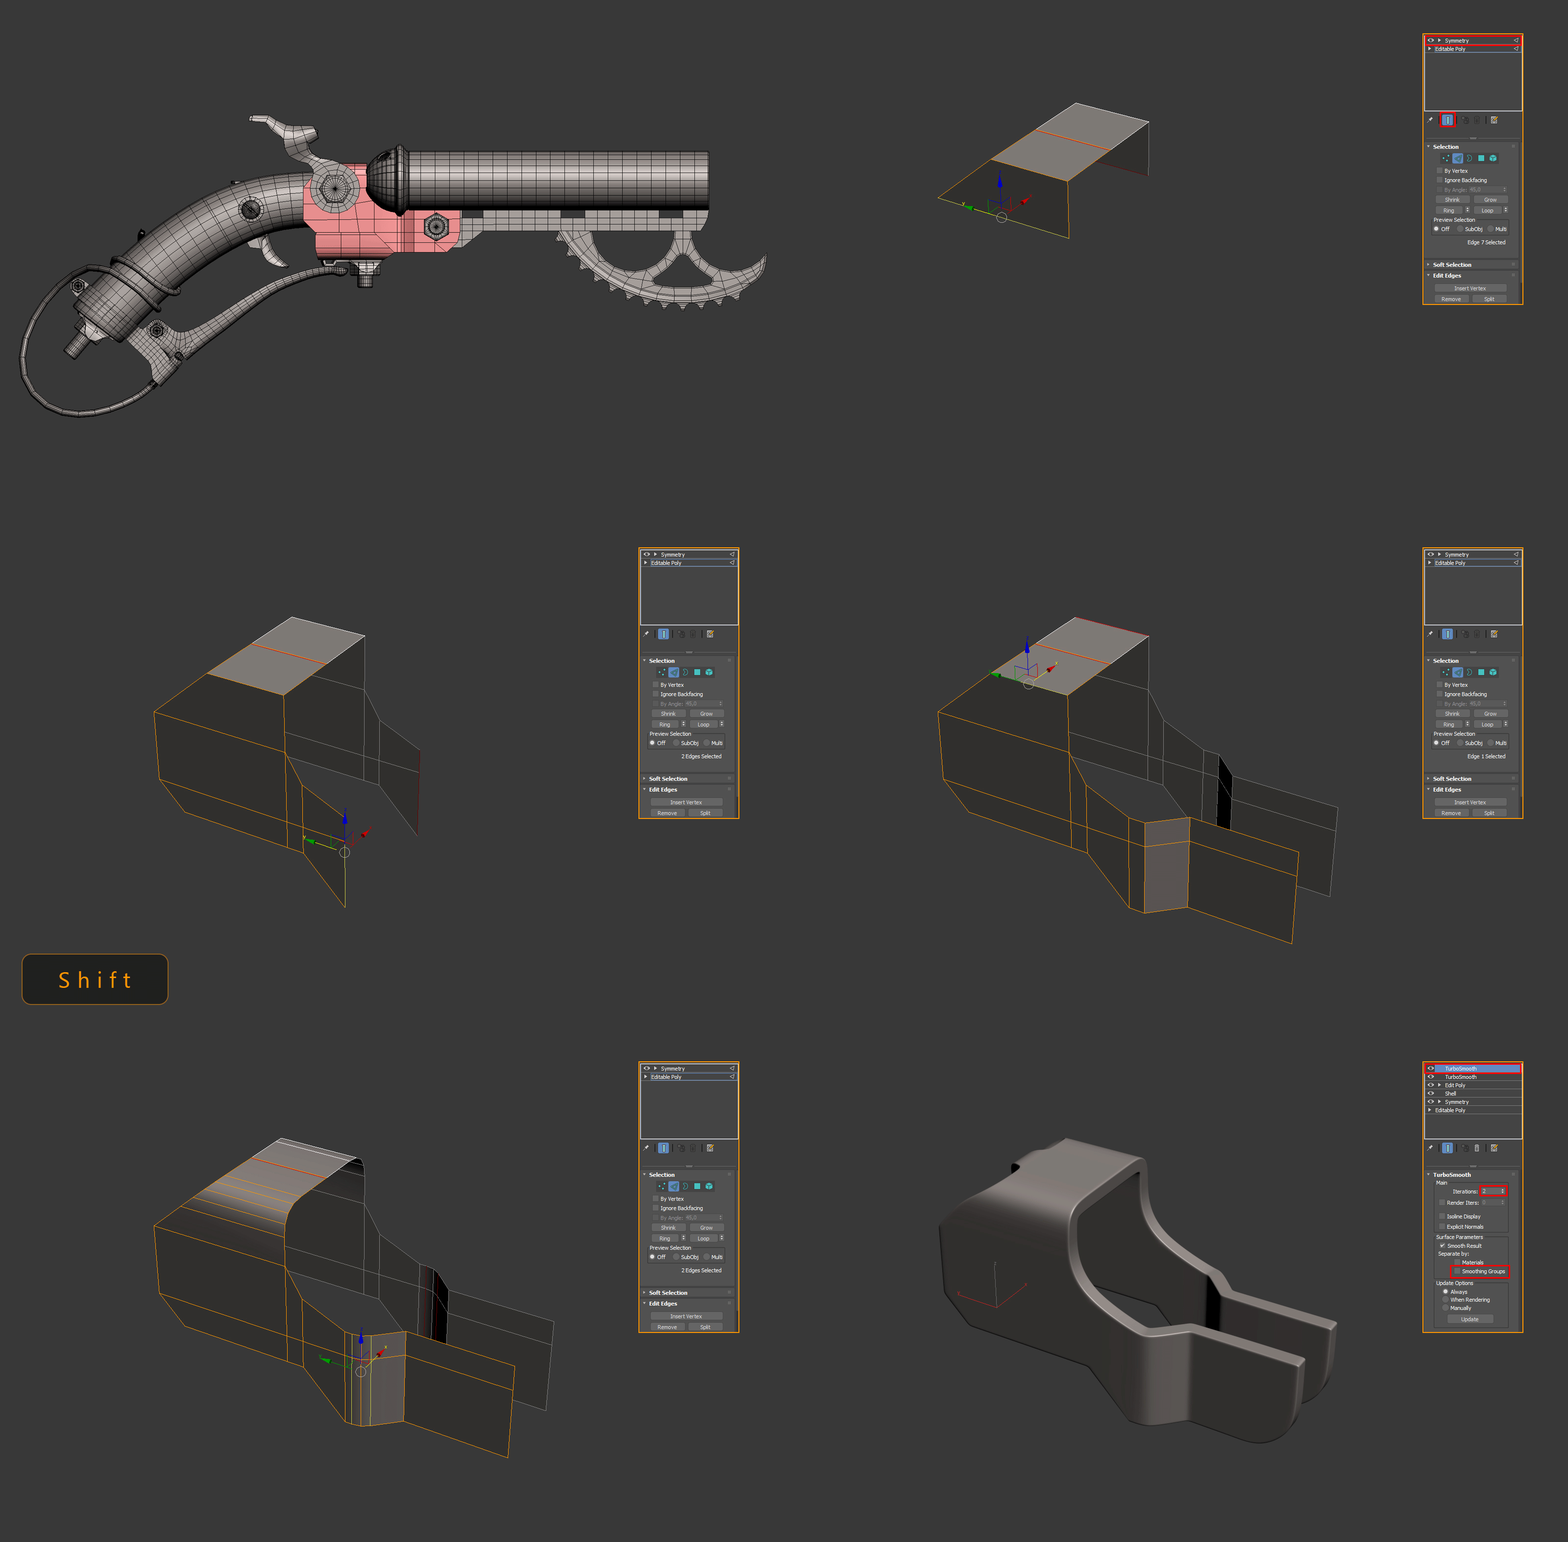
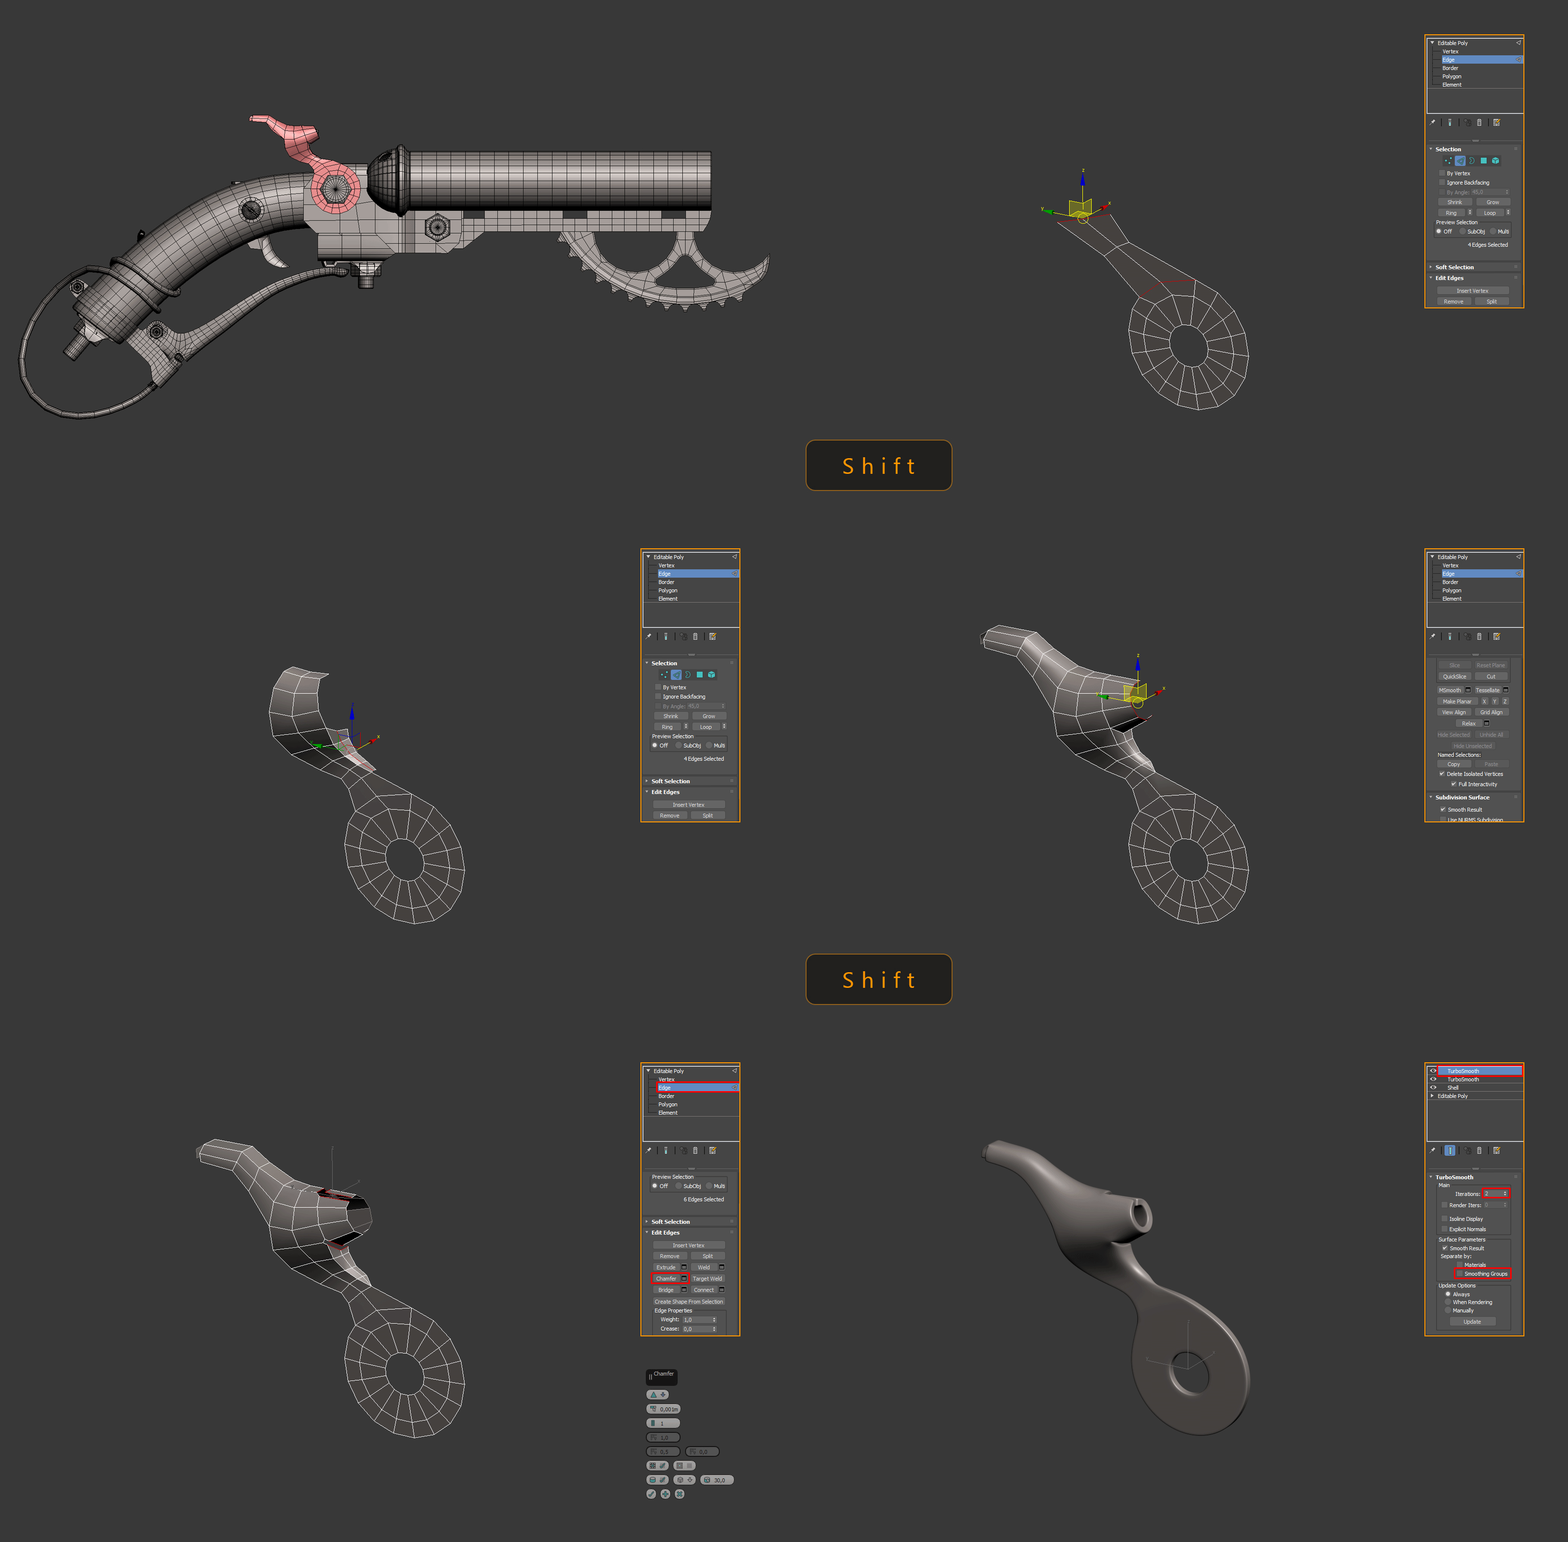
Almost all the details of the blockout are made according to the same principle. For clarity, I created GIFs for visual illustration.
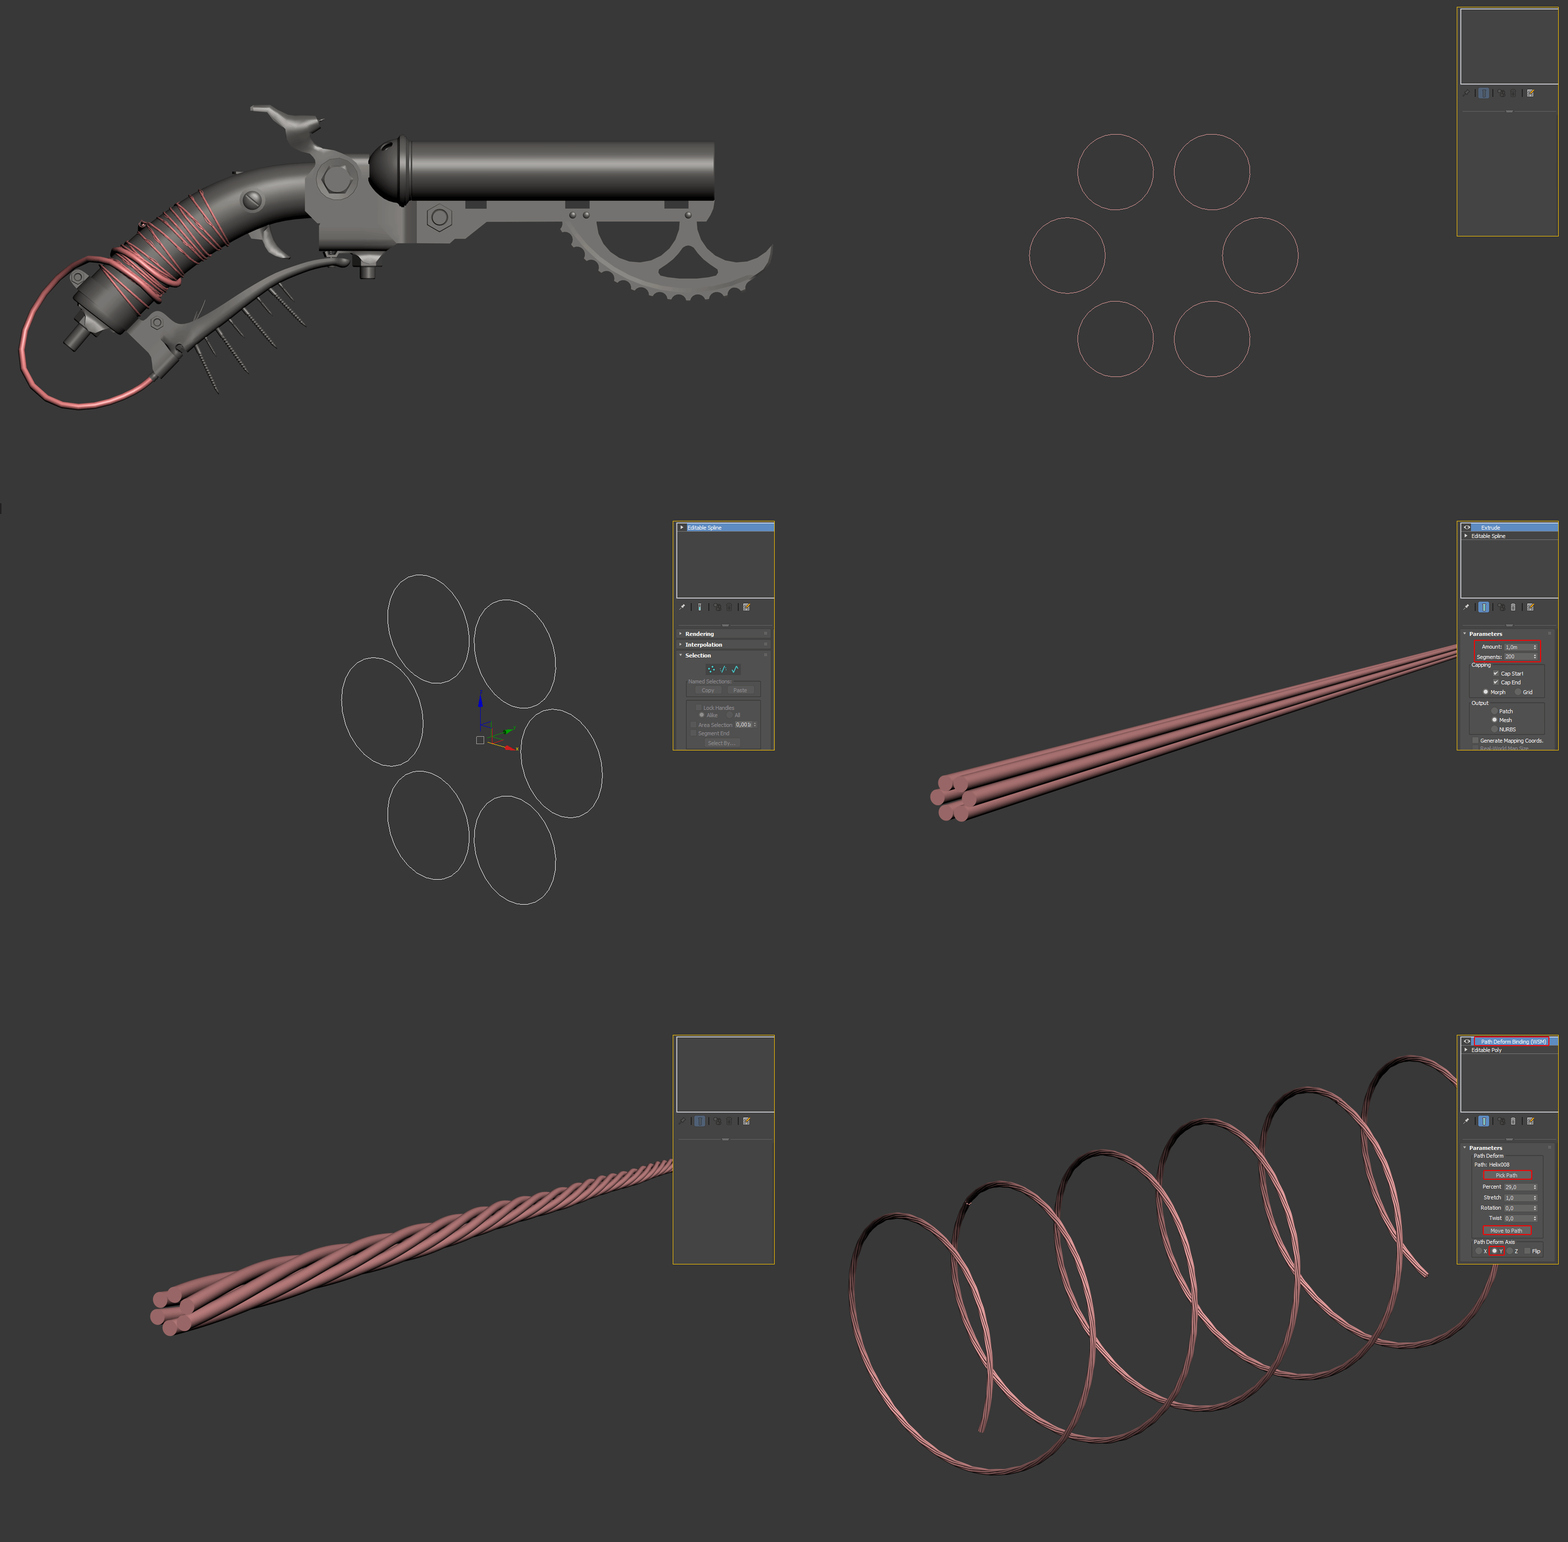
I wound a bicycle cable onto a handle using shapes and a PathDeform modifier.
Often used modifiers: Edit Poly, Bend, Shell, TurboSmooth, Symmetry, Normal & Push.
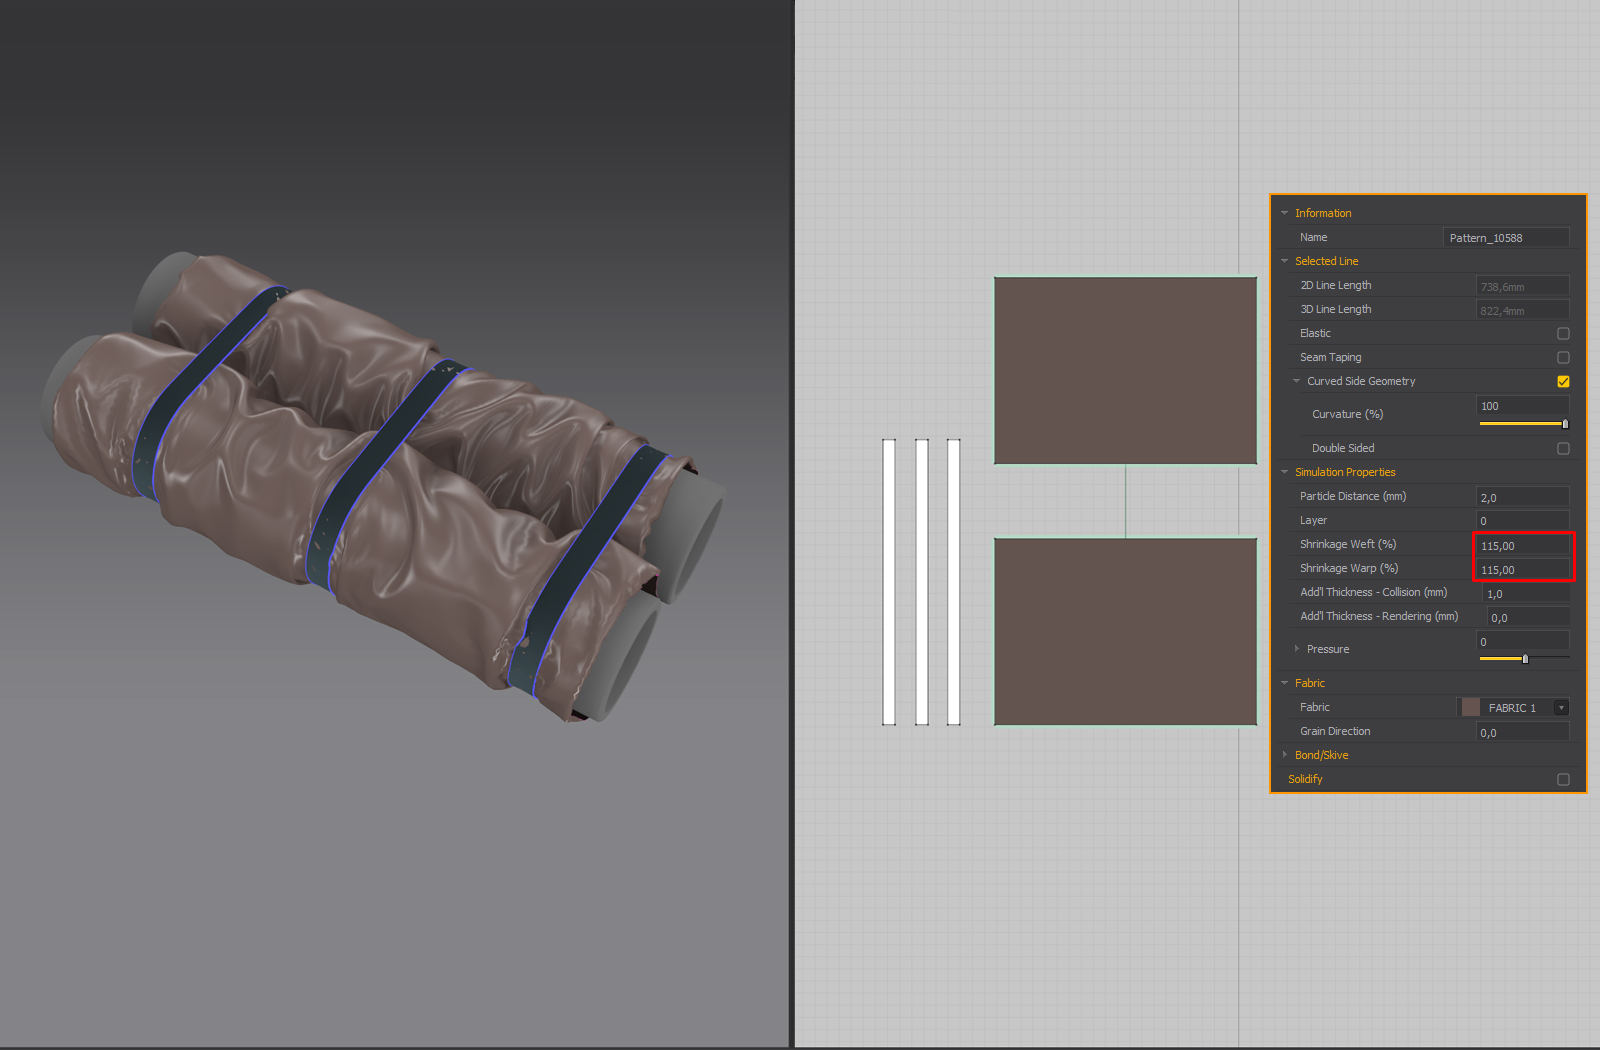
To create a package for the barrel, I used Marvelous Designer. Everything is as simple as possible here:
I loaded the barrel blockout as an avatar, made two rectangles, and threw them on the avatar.
To simulate the clamps, I rewound thin ribbons of stiff material. To increase and control the folds, you can play with the following parameters, shrinkage welt (%).
I made two exports to 3ds Max with different values of Particle Distance—one for High Poly and the second for Low Poly.
- Shrinkage welt (%) – 115
- High Poly Particle Distance – 2.0
- Low Poly Particle Distance – 10
This is what a blockout looks like, ready to be exported to ZBrush to add detailing.
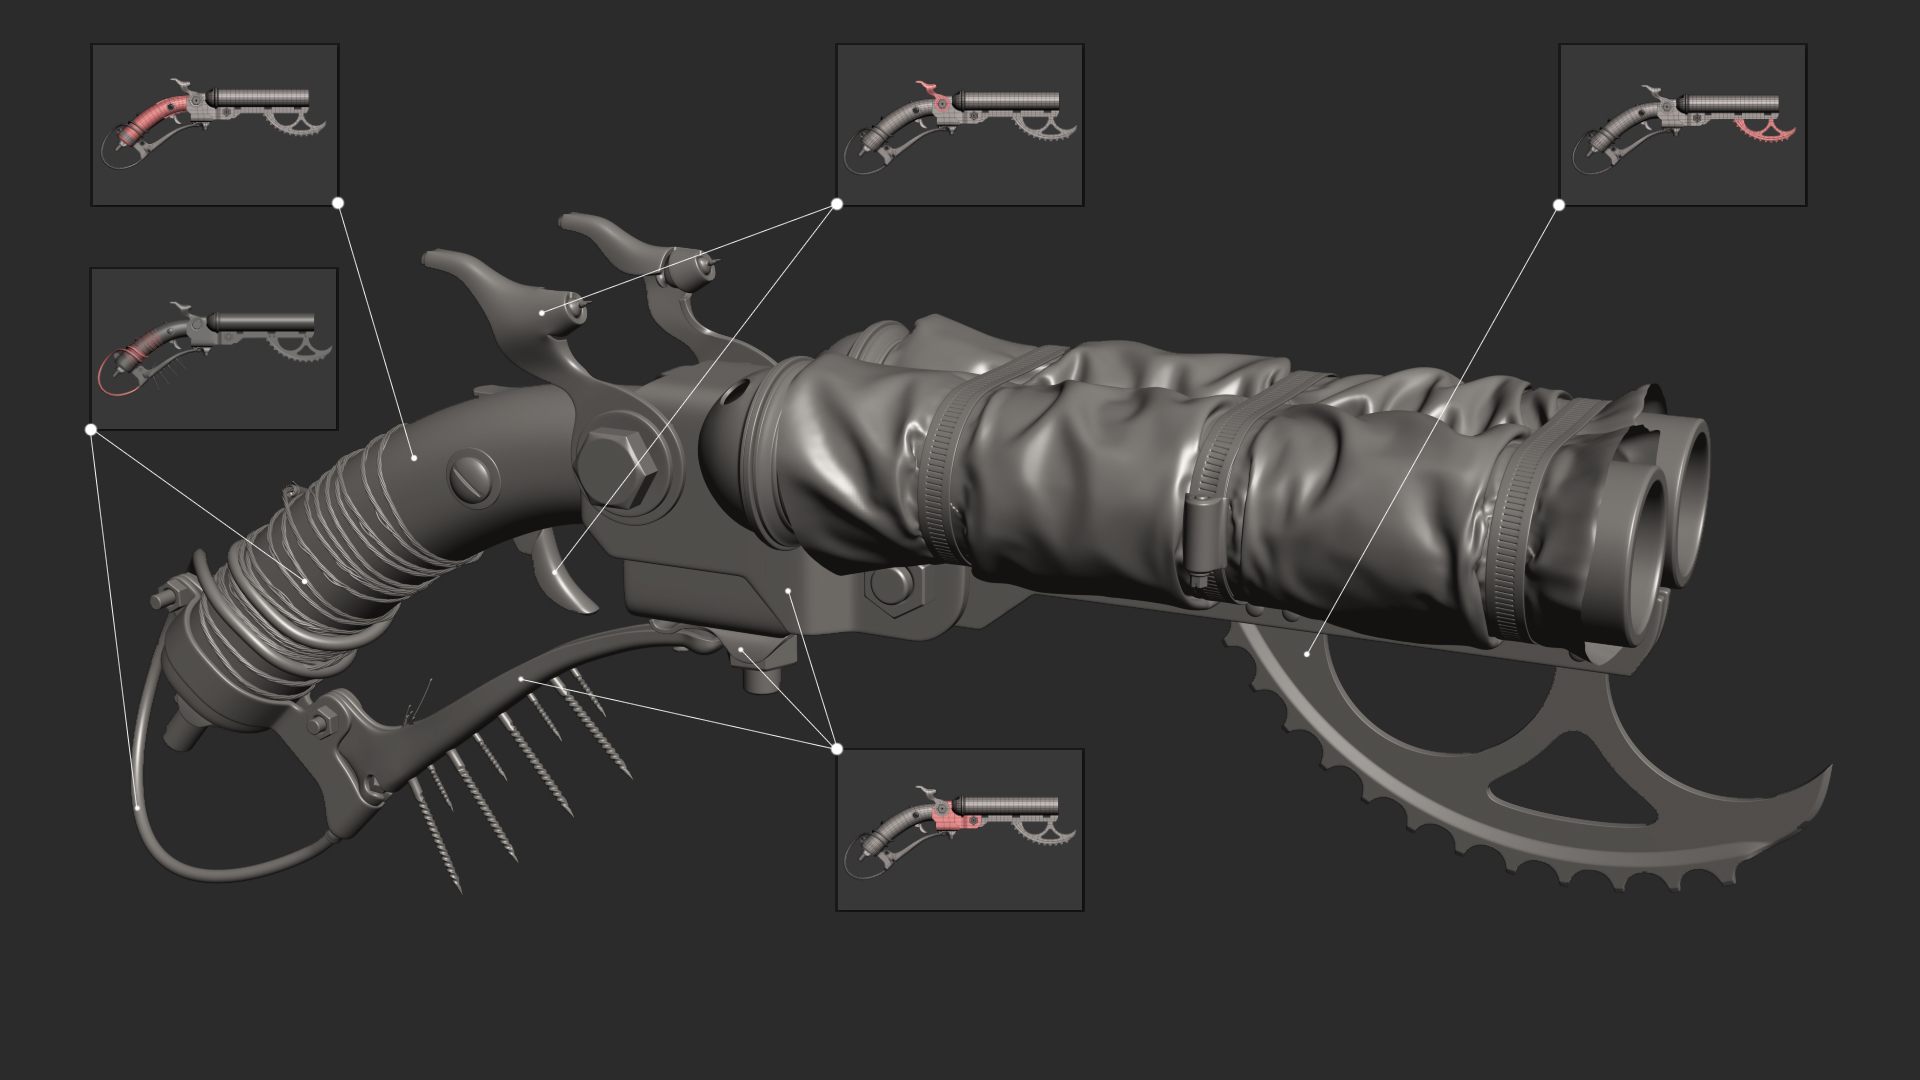
High Poly
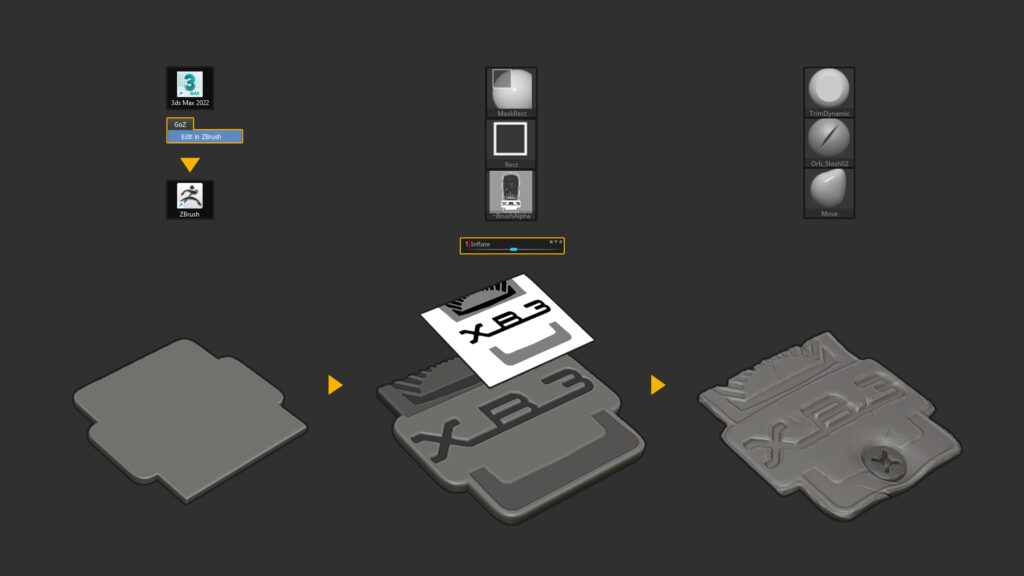
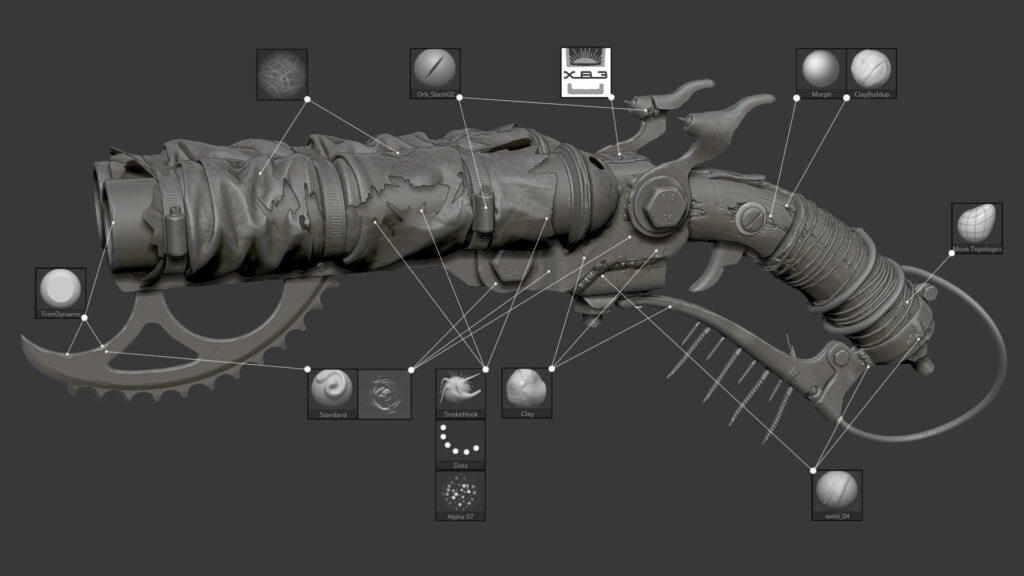
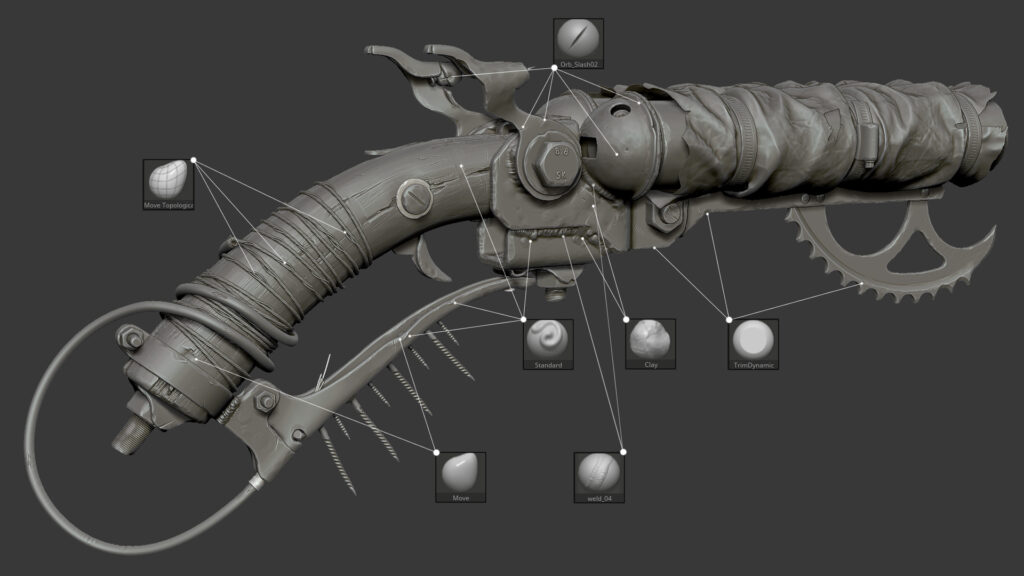
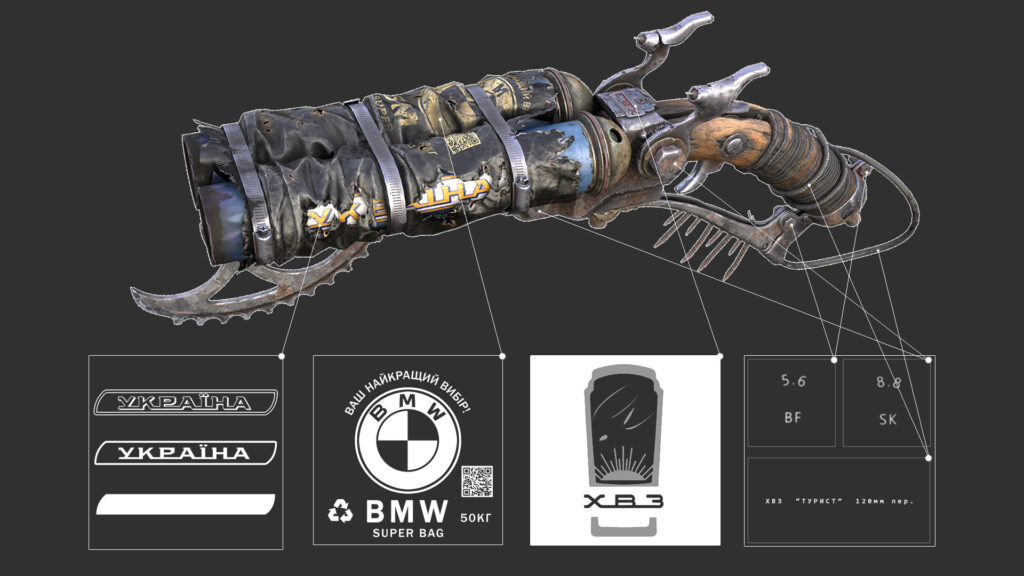
For High Poly, I used ZBrush. Mostly, I use standard brushes, but I also use custom ones that can be made or downloaded. For the “ХВЗ” logo, an alpha was additionally made in Photoshop.
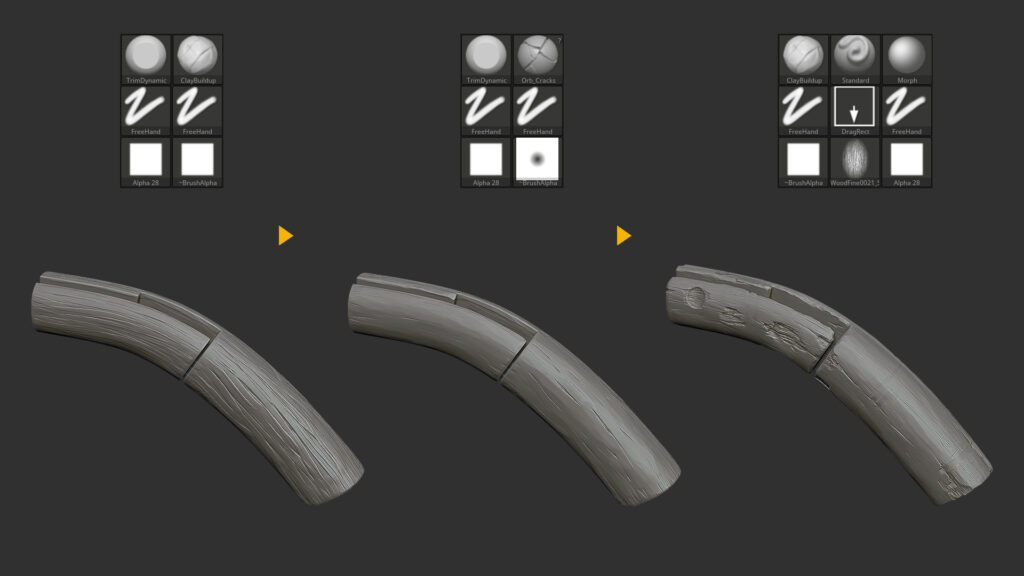
For the handle, I added roughness with the ClayBuildup brush with standard settings, then cut the roughness with the TrimDynamic brush with a square alpha.
To add deep cracks and tears, you need to turn on the StoreMT function to remember the current shape—this will help us return all our changes in the future. We make deep cracks, then return the shape with the Morph brush.
A nice tutorial on how to make such wood from MykhailykArt.
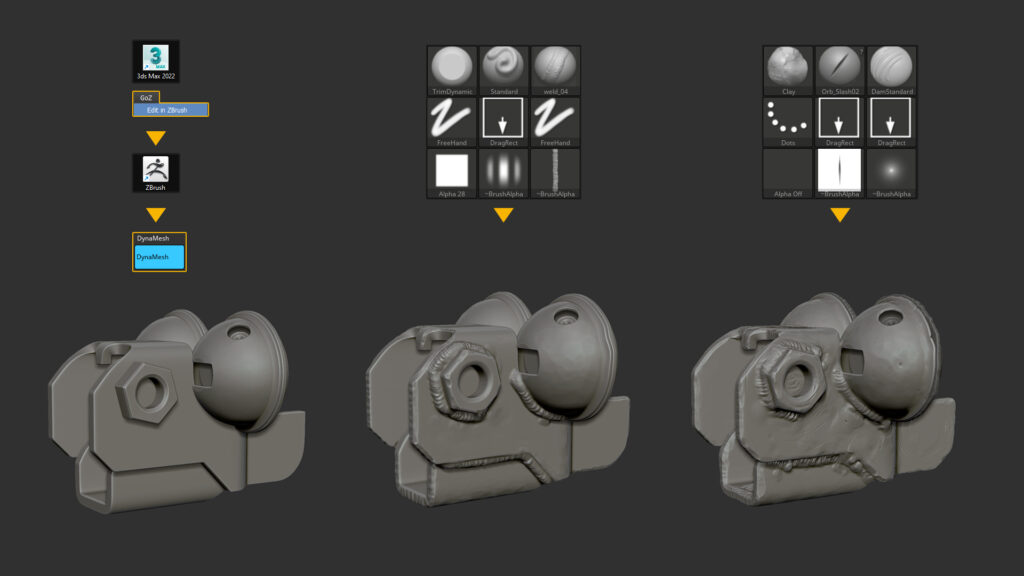
When working with metal, it is important to combine meshes using the DynaMesh function that needs to be processed by welding.
I add irregularities that could have been created by welding with the Clay brush, and then erase them with the Flatten and TrimDynamic brushes, as if they were traces of using an emery stone.
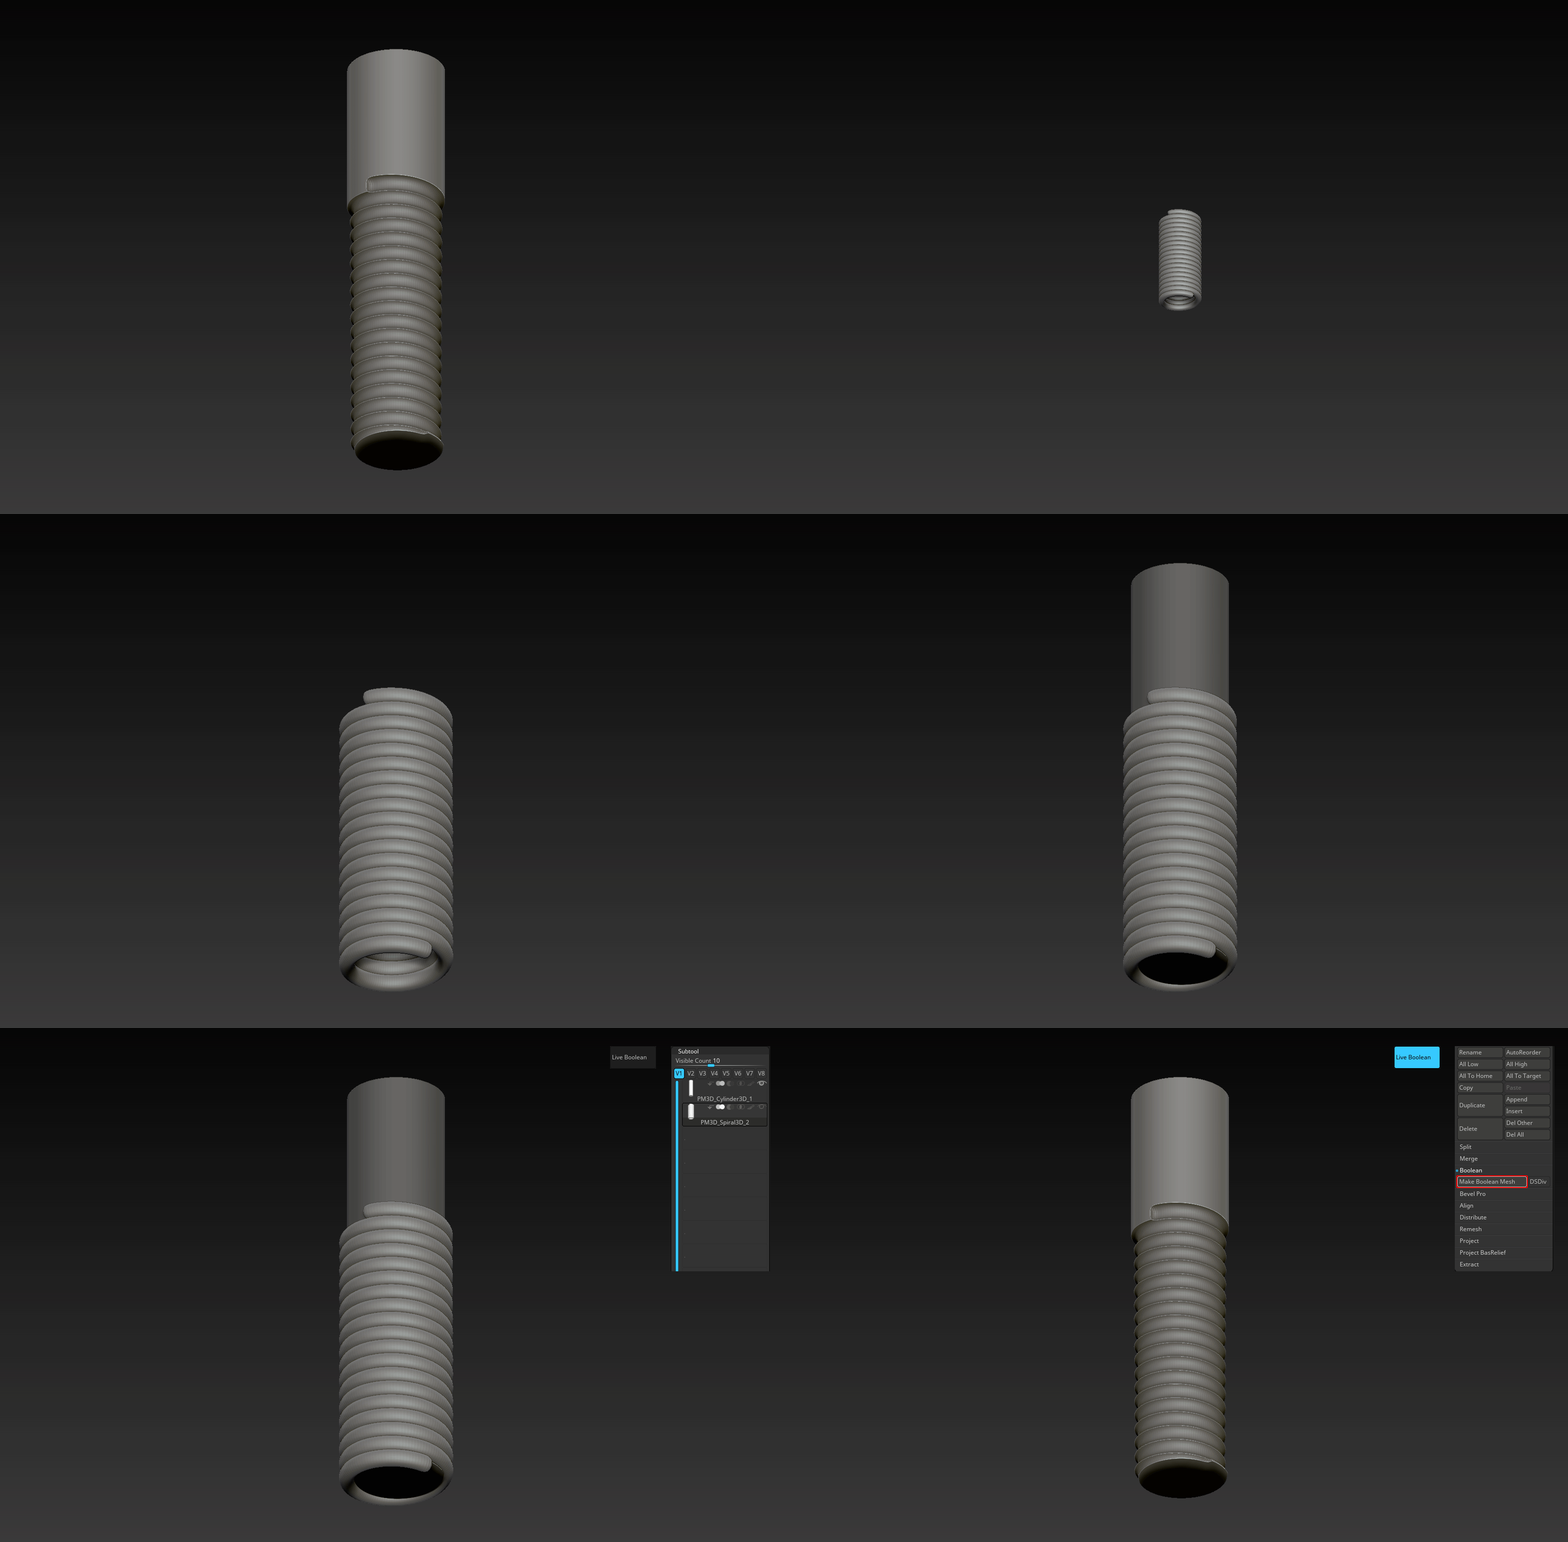
To create the threads on the bolts, I used a boolean in ZBrush.
After some time of sculpting and working out all the details, we got this result.
Then I exported the object to 3ds max. The model now needs to be optimized, for this, I decimate each subtool and then merge MergeVisible.
I export two models, one with a polycount of 200K – 300K tris and the second with 10 million – 30 million tris.
One to make it easier to work with low poly and retopology and the second for baking textures.
Low Poly
We duplicate the blockout that we have already made, rename it, and optimize it, remove the turbosmooth, on some parts you can leave it if it helps us get the desired shape.
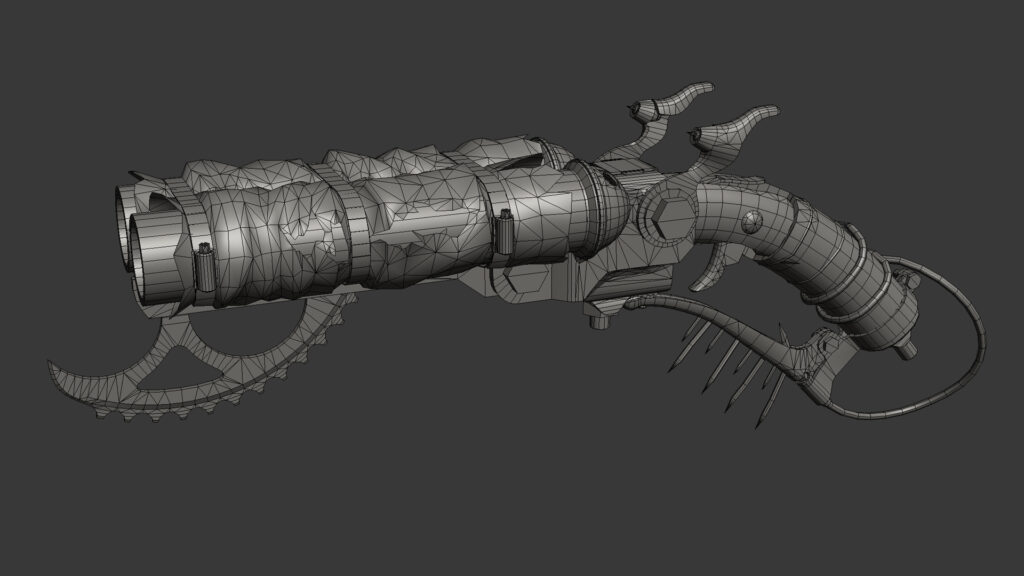
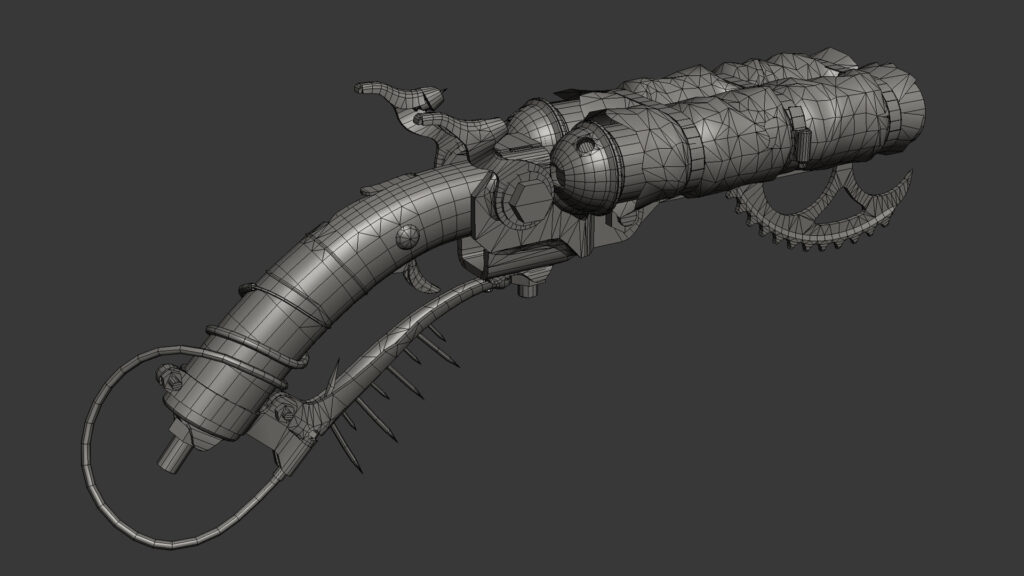
On parts with a weld, I did a retopology in 3ds max using the following Freeform functions and reduced the polycount to 15,358 tris.
The following functions are often used for optimization: TargetWeld, Weld, Connect, Bridge, Chamfer, Ring, Dot Ring, Loop, Dot Loop, Ctrl + Backspace.
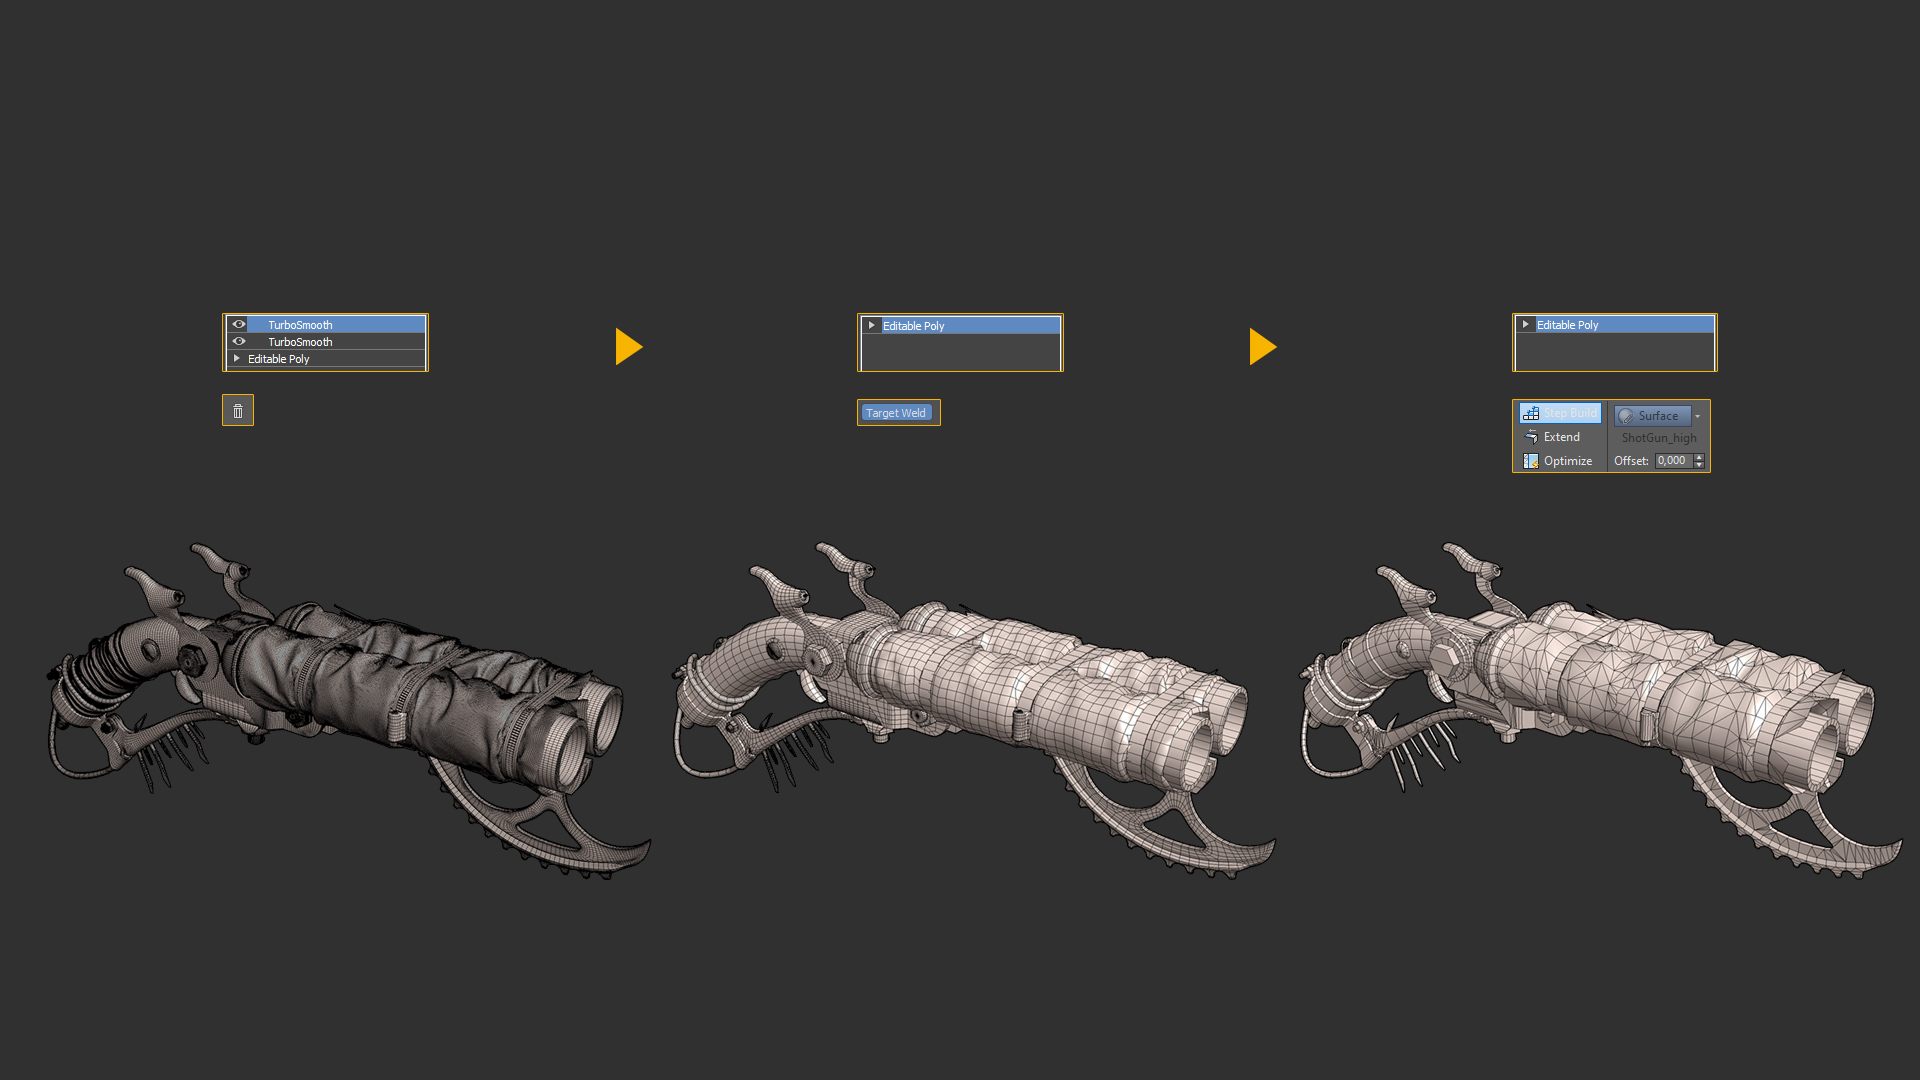
UV
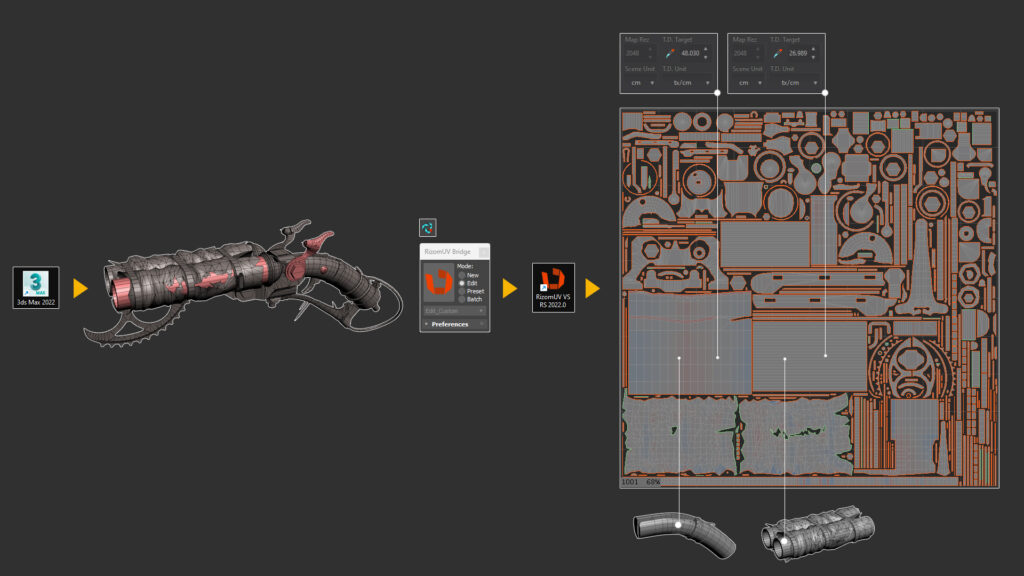
Next, we need to make UVs for our Low Poly. For this, I used Rizom UV and its bridge for 3ds Max. First, I analyze which details will overlap and detach them.
I export only the original details through the bridge to Rizom UV.
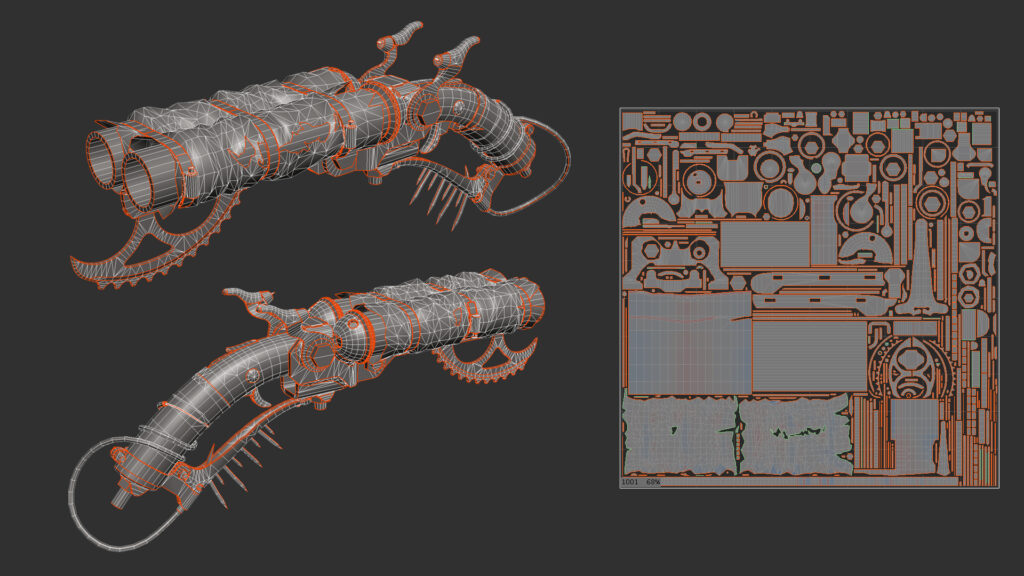
We make seams in places that are less noticeable to the player. All hard edges should have a UV seam, but not every seam should have a hard edge.
I align all possible shells into a rectangle—this helps optimize space and increase texel density.
I made different texel densities for objects that are closer to the camera and have more detail and lower ones for those that are less noticeable.
I use the TexTools plugin and Smoothing Group from the UV Shell function.
After mapping, we have this result.
Bake
The next stage is baking the texture, I use Marmoset, but before opening Marmoset, you need to prepare the model in 3ds max, throw materials with maximum contrasting colors on the HighPoly for baking the ID, on the LowPoly need to add one material with the naming ShotGun_mat.
Then, separate it into several objects with identical parts that do not touch each other, HighPoly and LowPoly, it is important to name the objects correctly, Marmoset by default, the suffix has the name high and low.
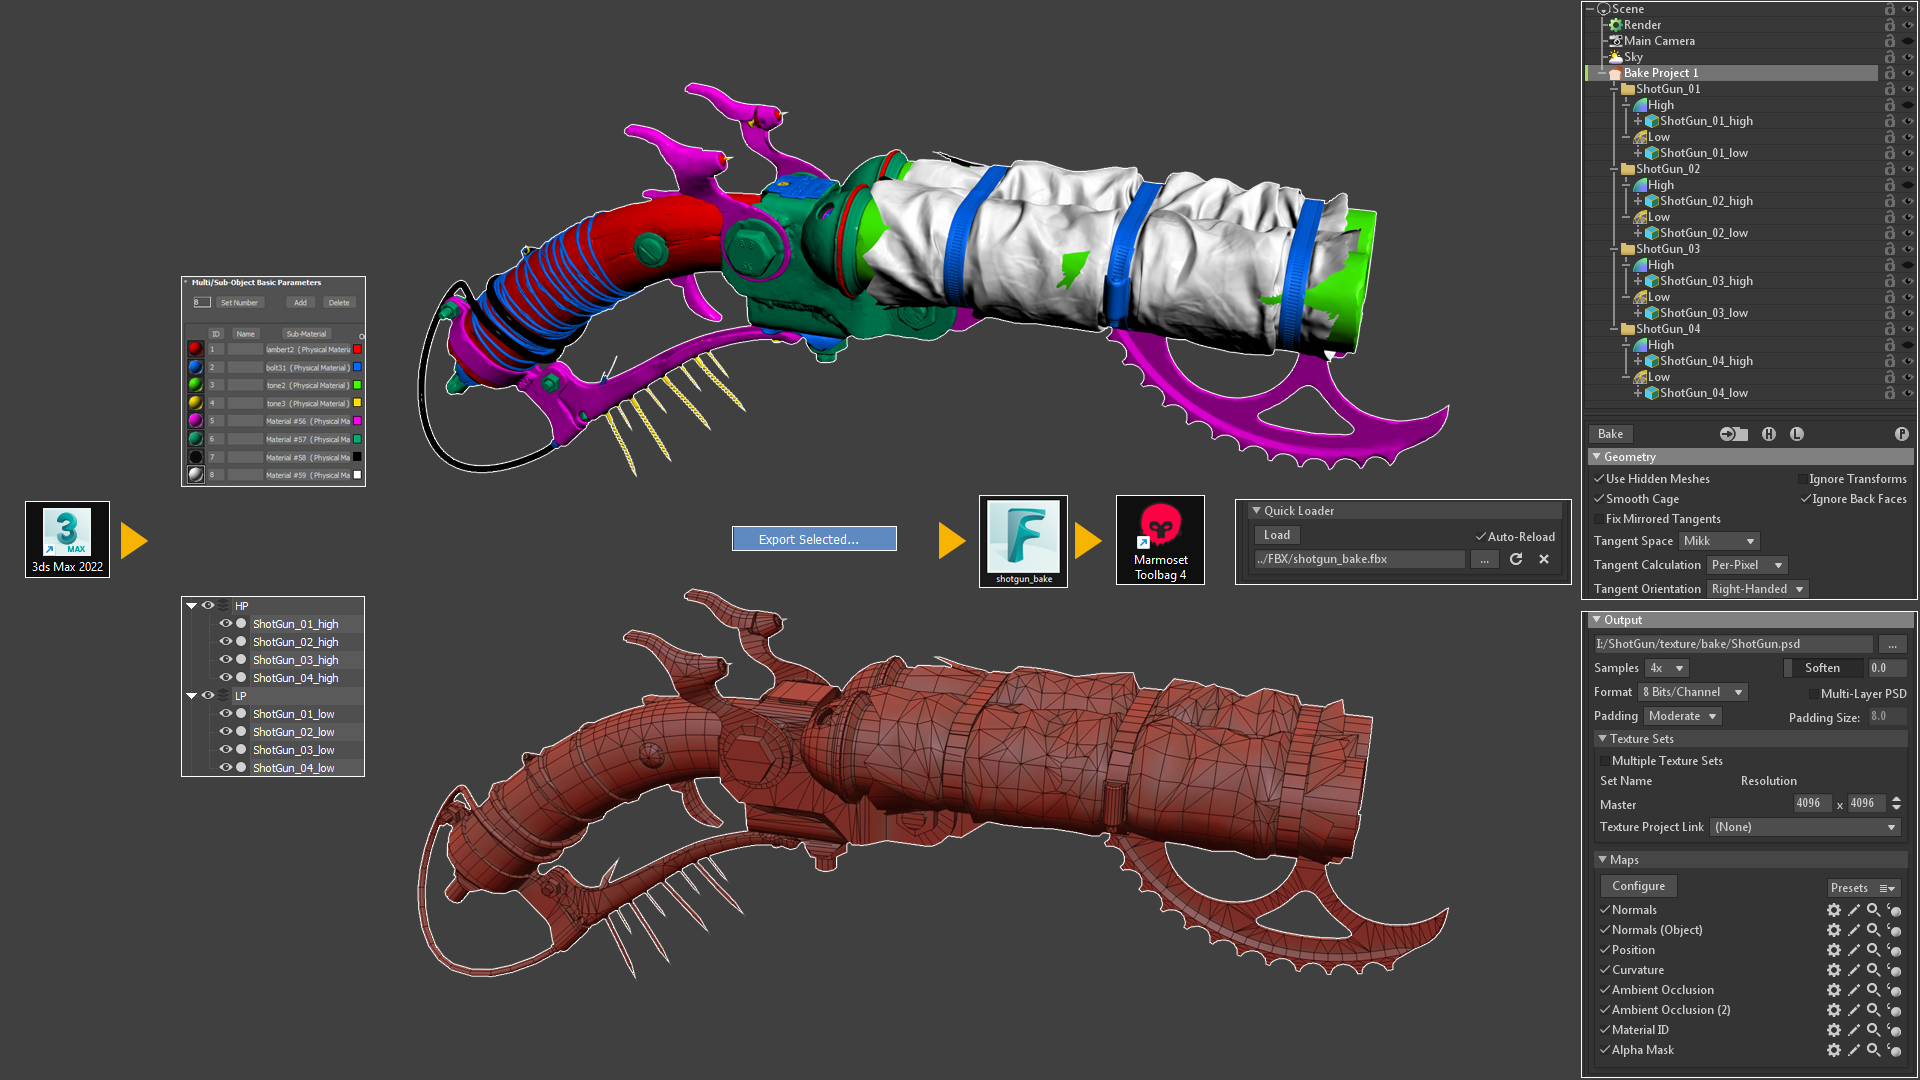
Naming is a very important point at this stage, Marmoset pulls up and sorts the groups for baking precisely by naming.
The naming is approximately like this, in each group I change the number.
- ShotGun_01_low
- ShotGun_01_high
We select two groups of models, HighPoly and LowPoly, and export them using the export selected into one FBX. We export our FBX to Marmoset using the Quick Loader. more is shown in the picture and the GIF.
Assign a folder for storing textures.
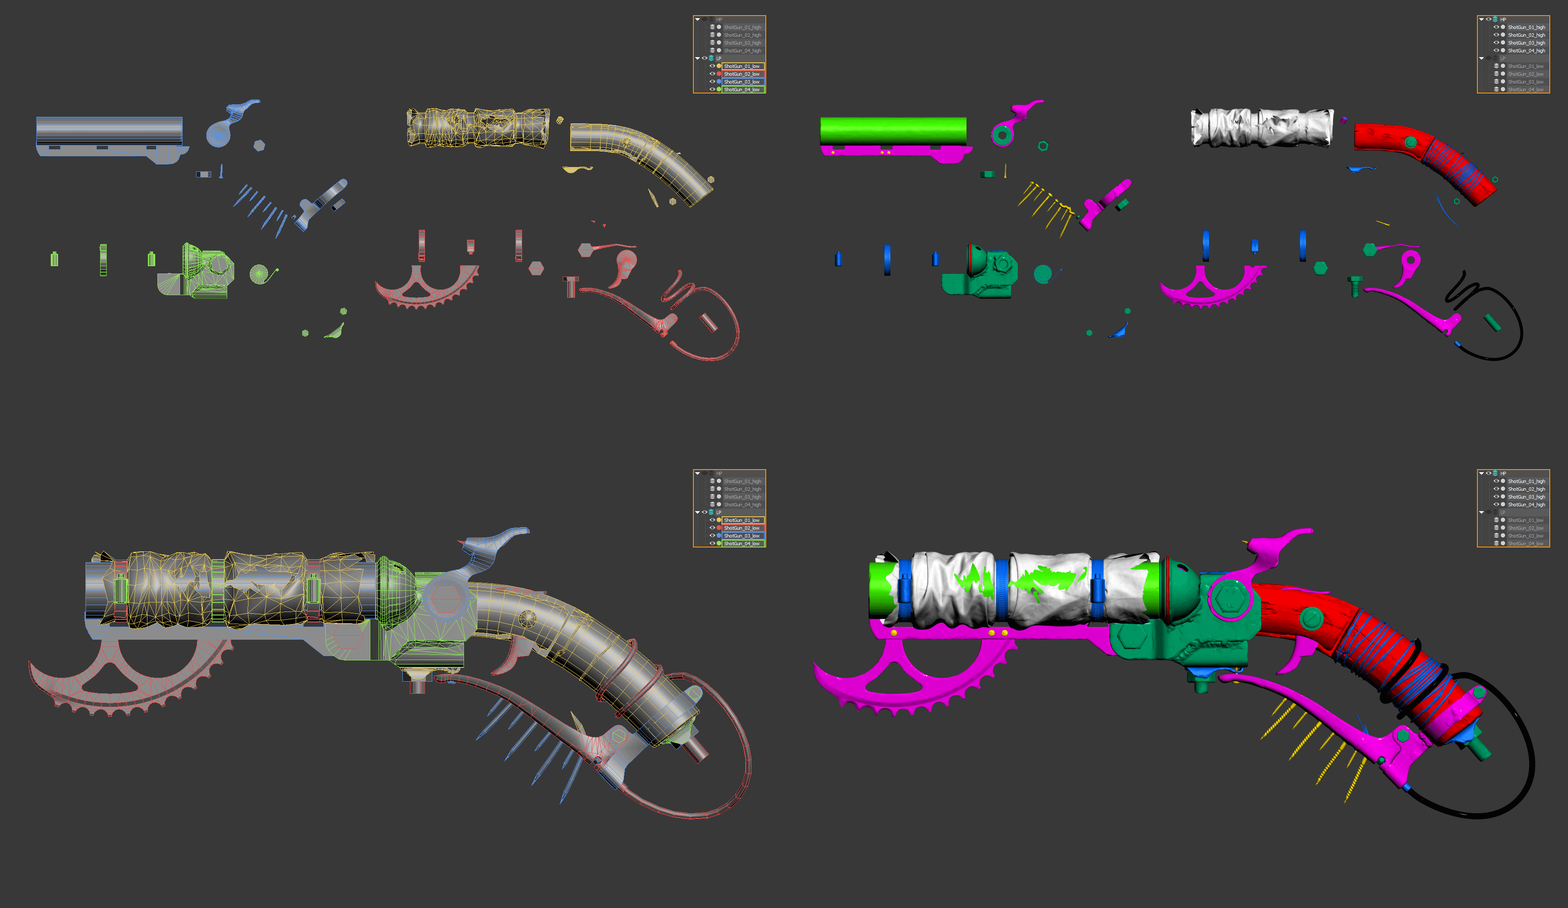
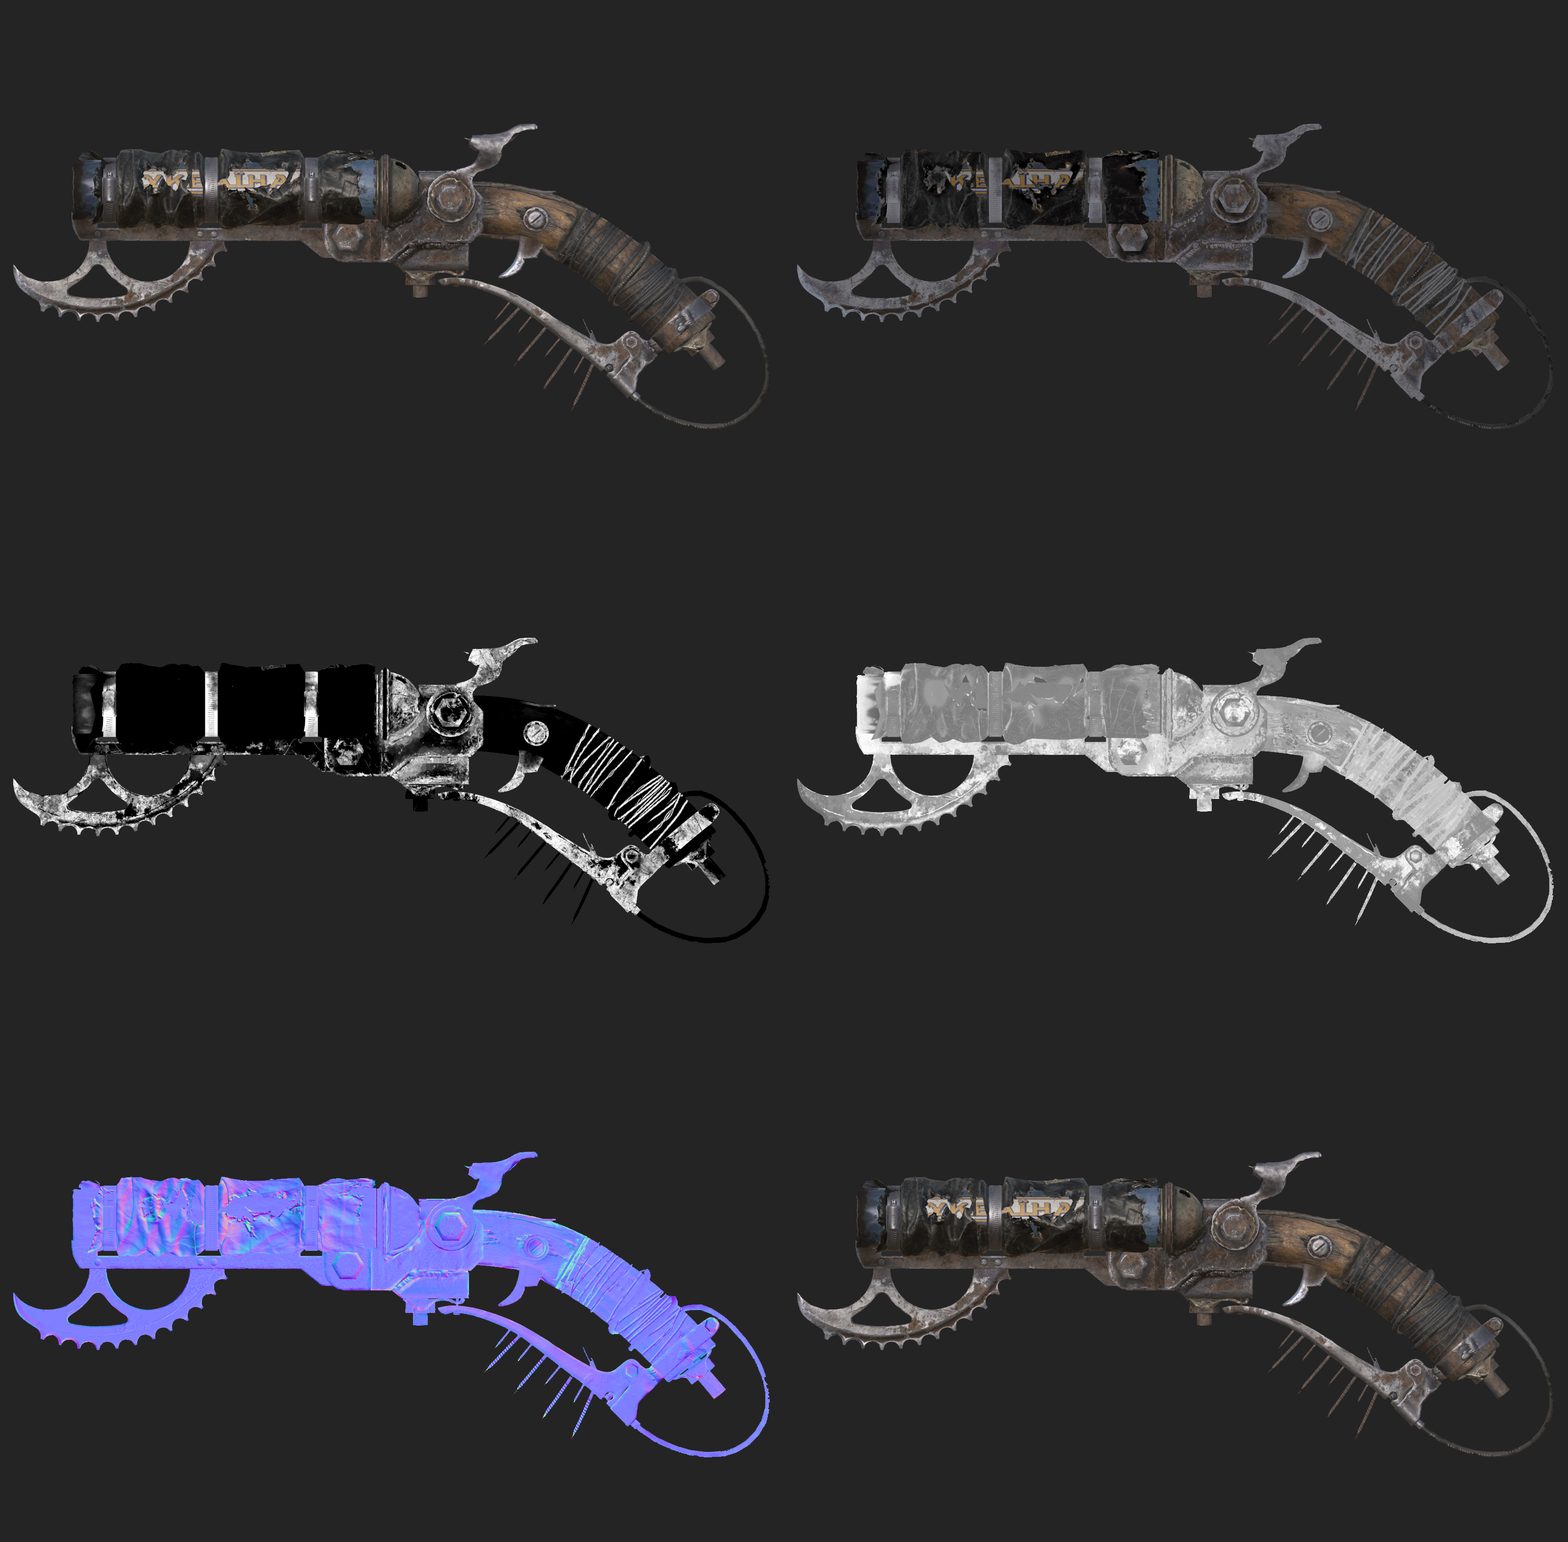
After baking, we have this result:
Texturing
We already have enough content to start drawing textures, which is the most interesting and picturesque stage for me, for texturing I use Substance Painter.
All the textures that we got after baking, and the LowPoly FBX, we import into Substance Painter and assign the textures to their slots.
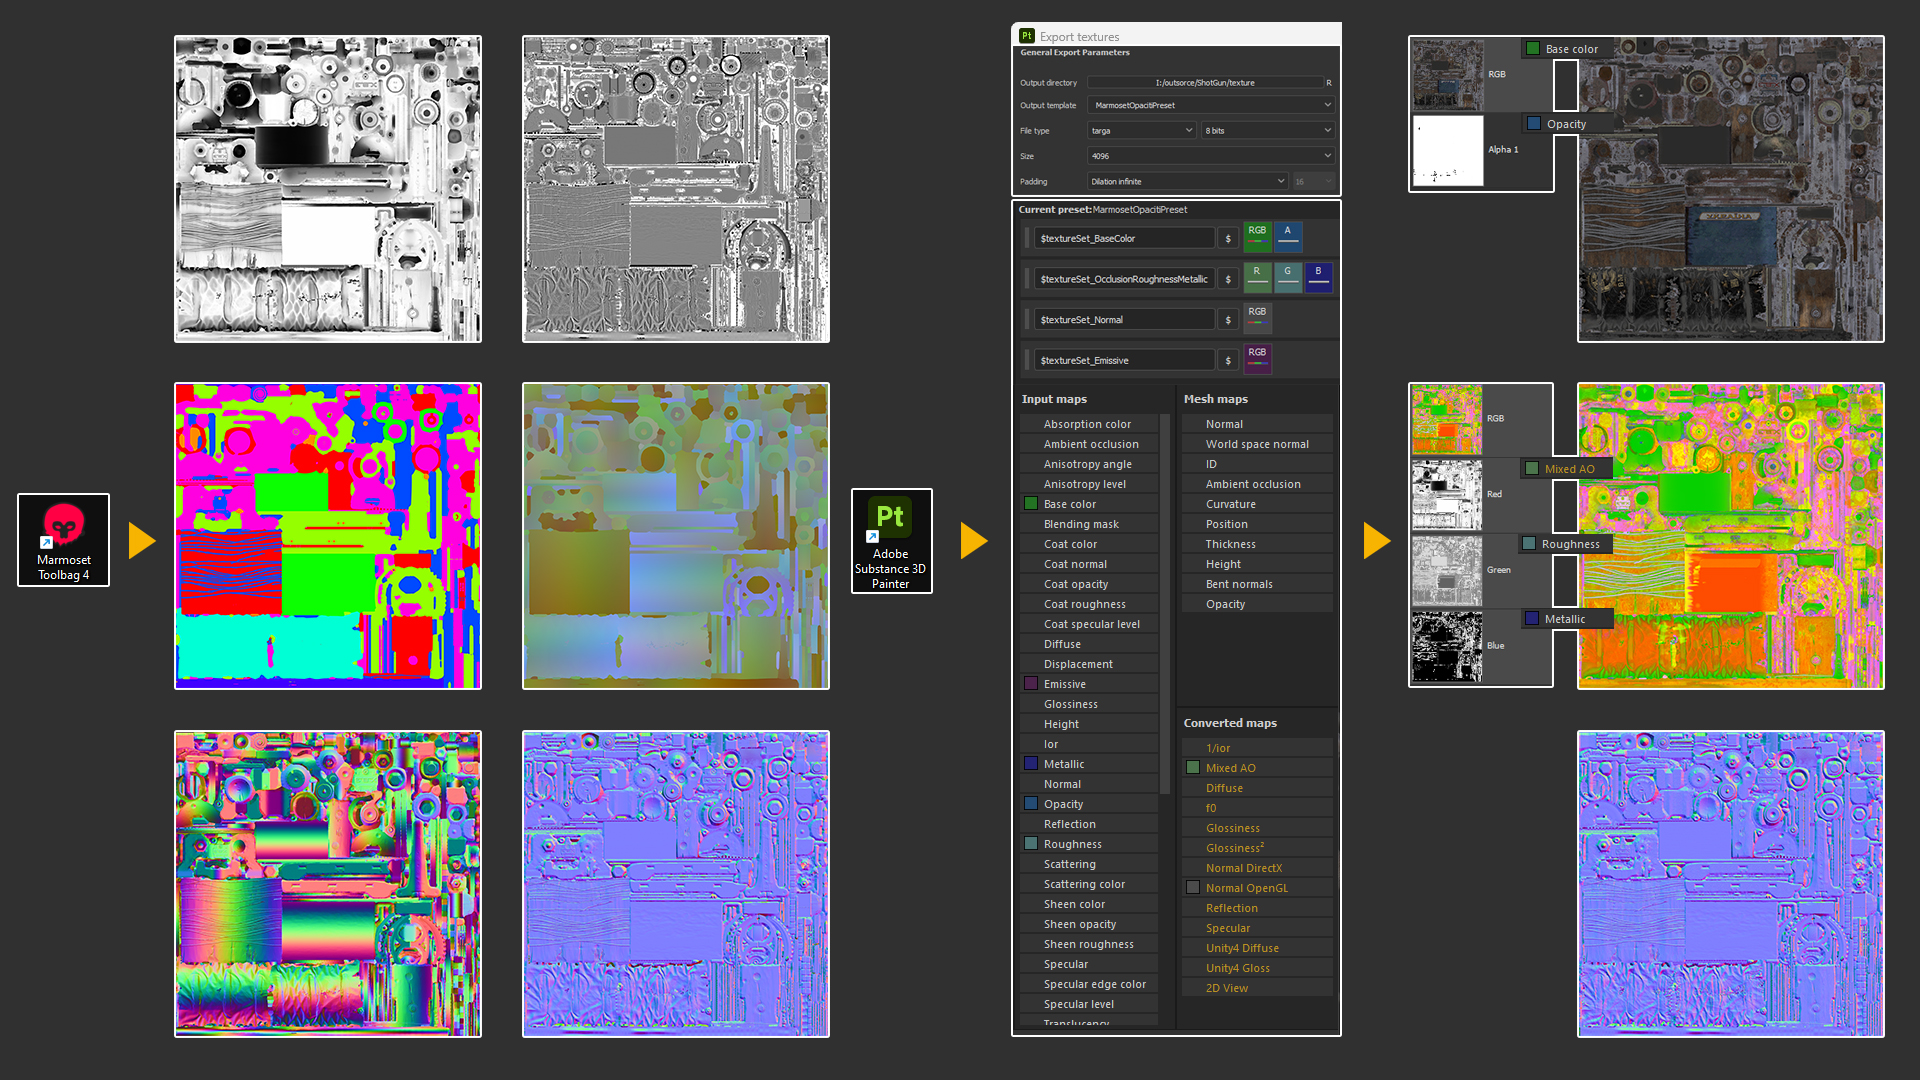
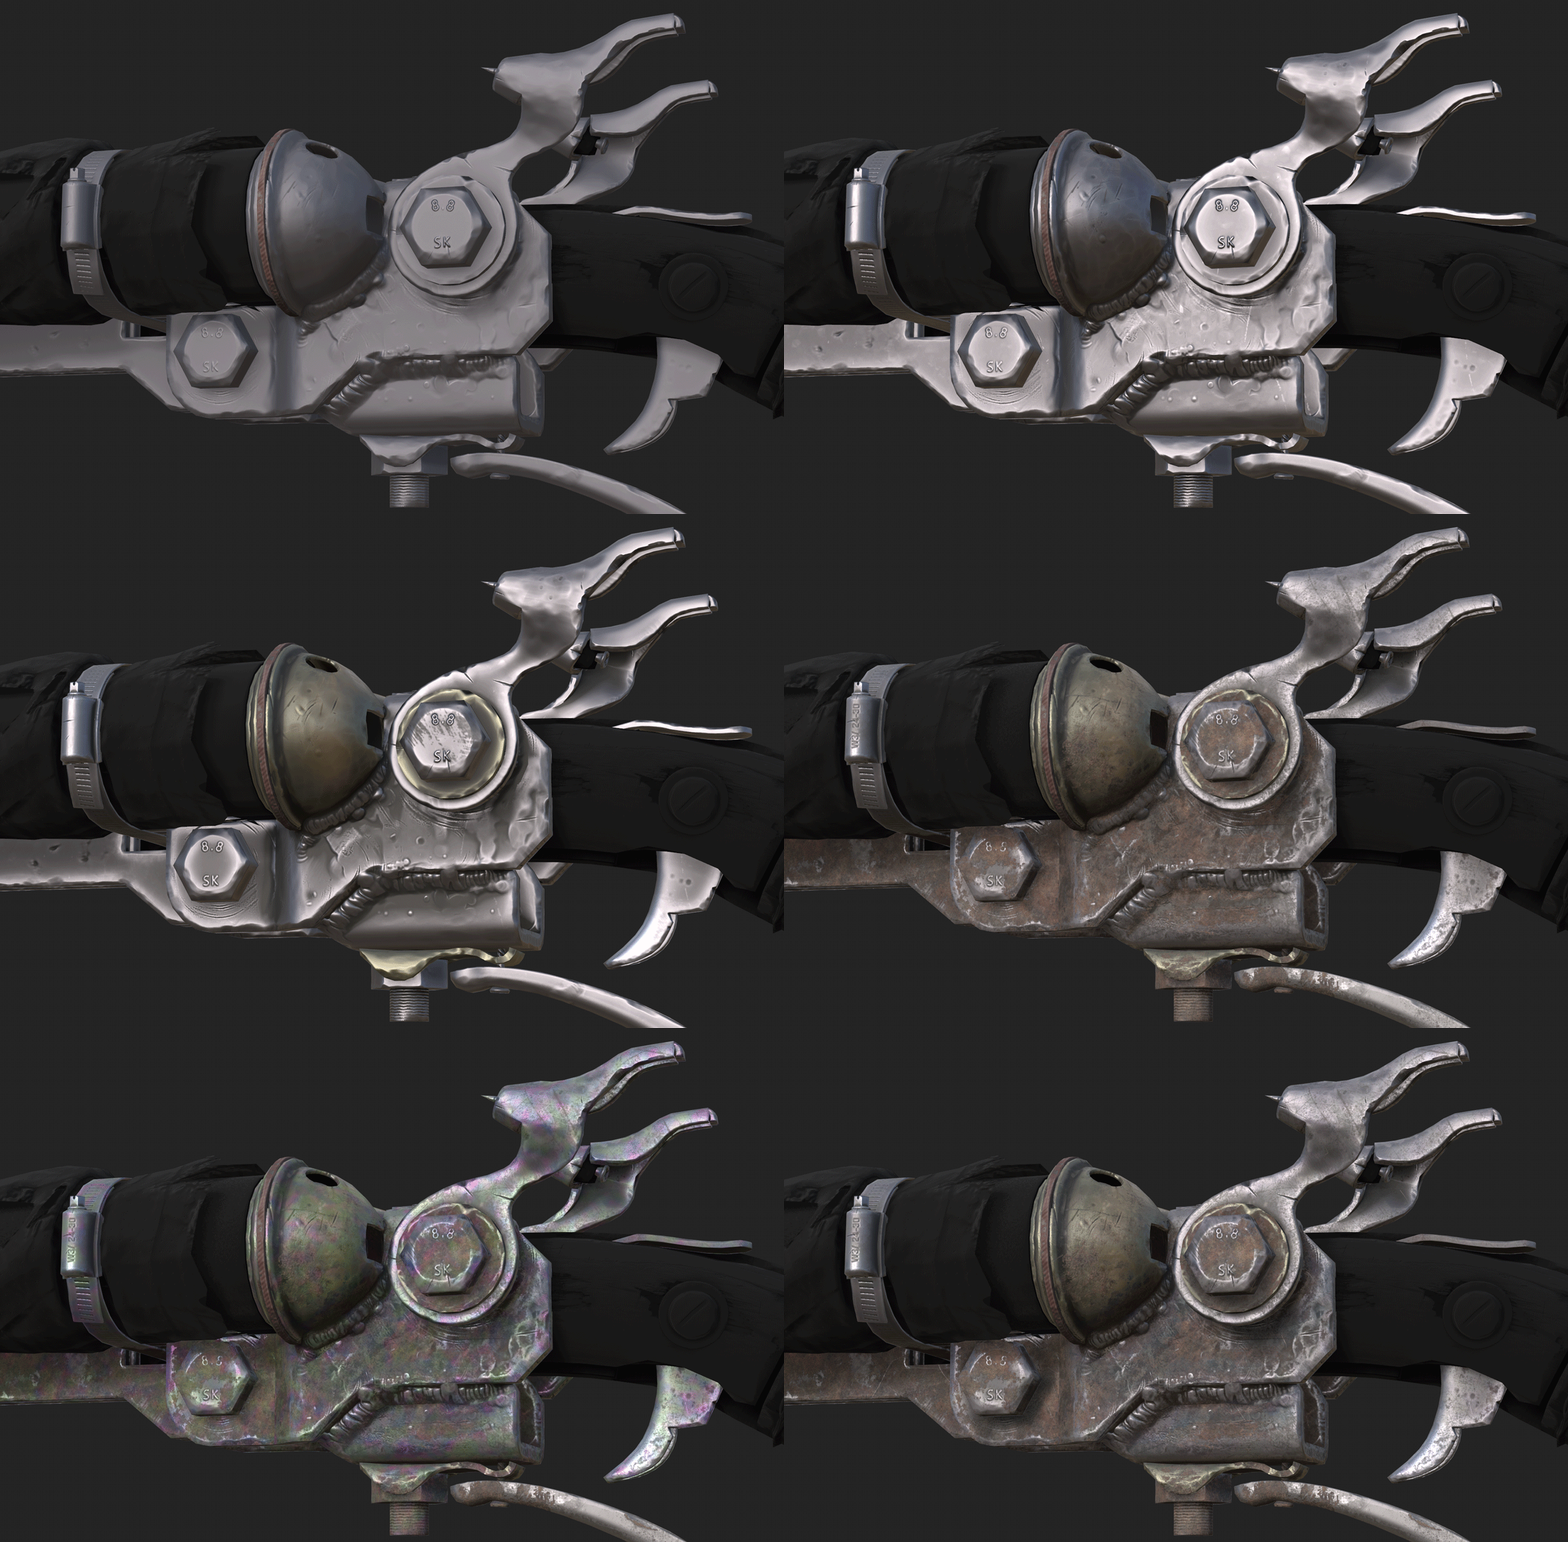
For texturing metal, I will note a few important points.
- Metal has many shades of color for this I use a layer for color variations
- Metal usually has a lot of wear, so the surface should not remain flat
- Rust can occupy a larger part of the surface than clean metal
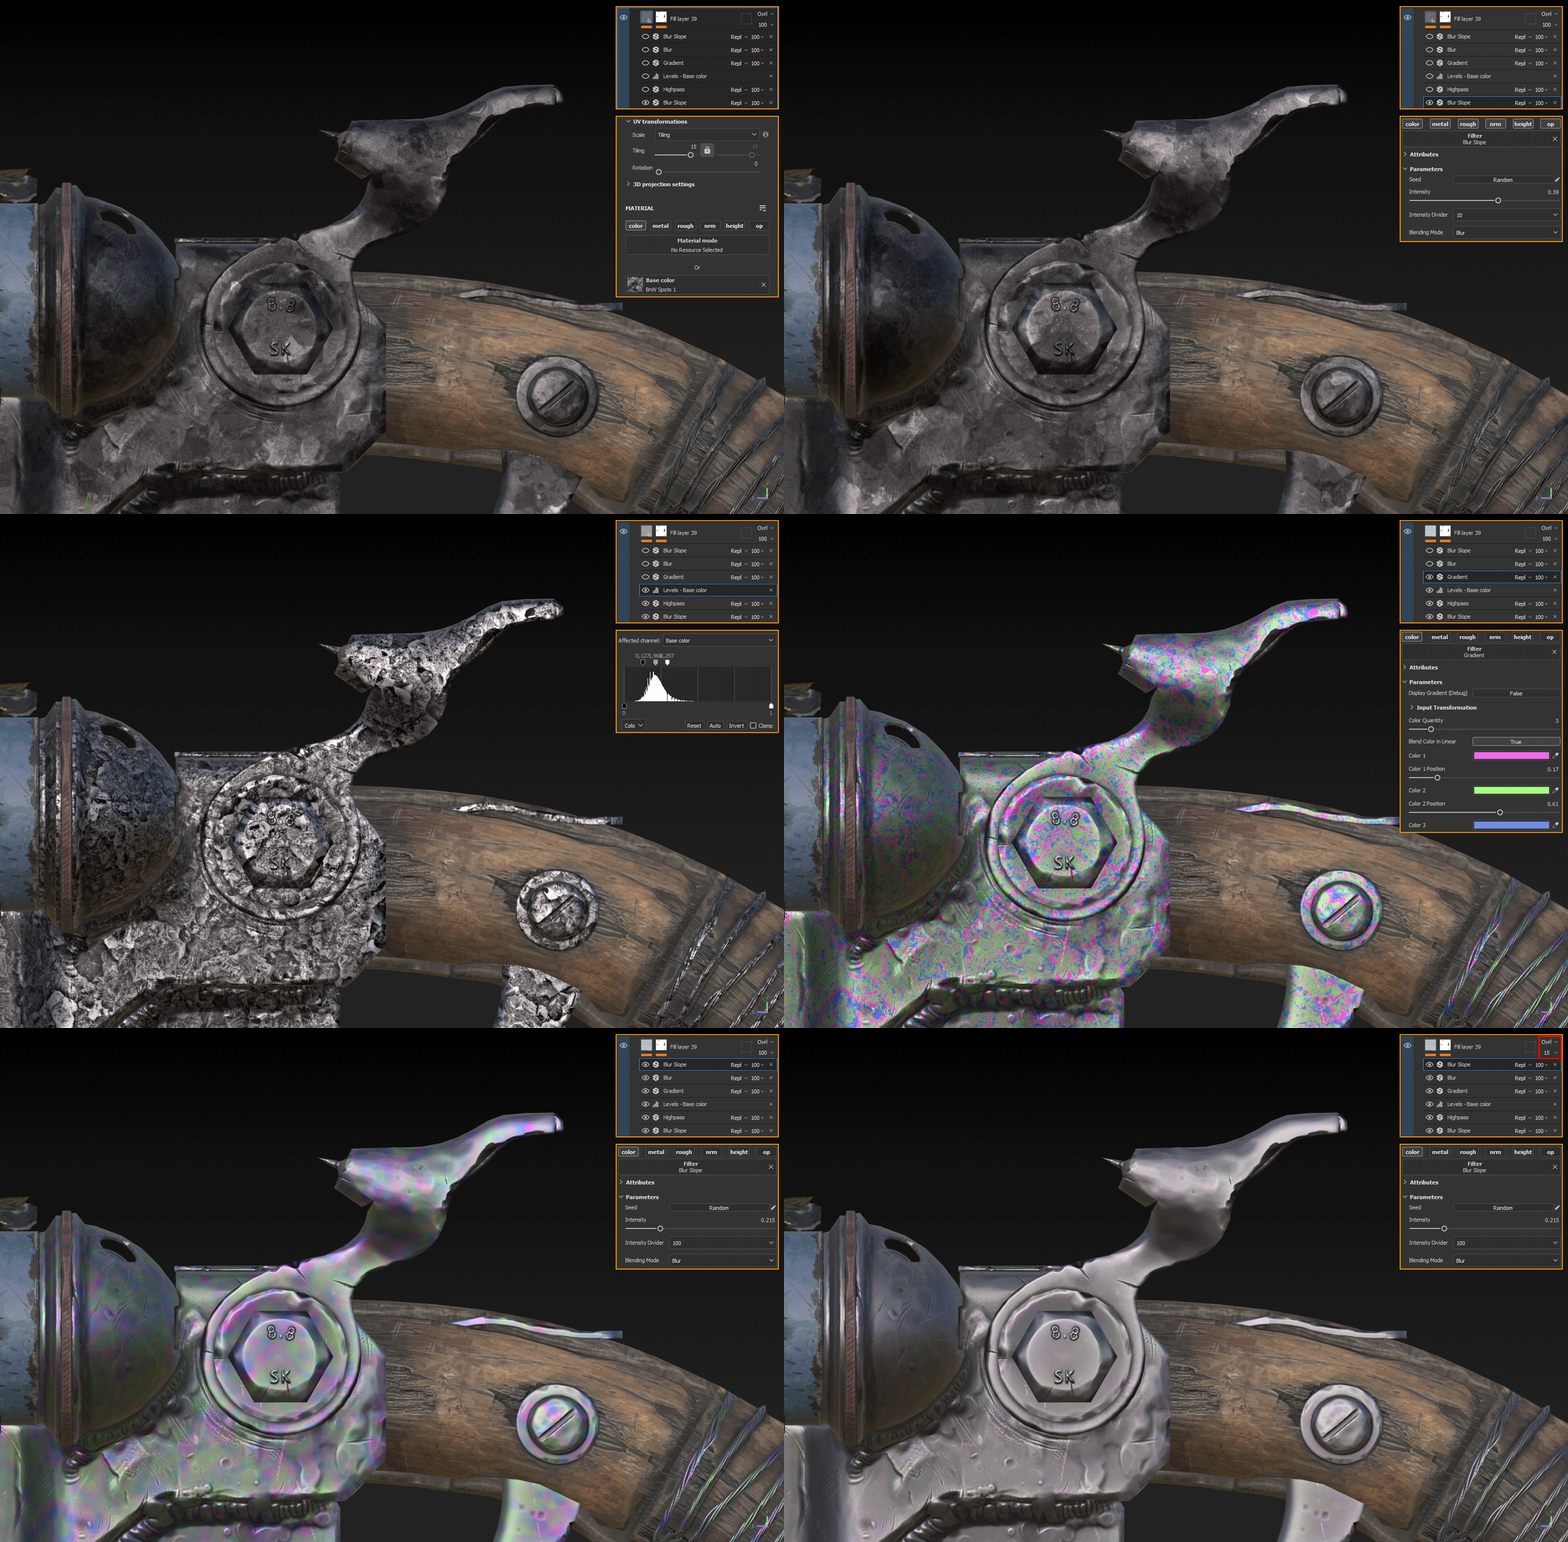
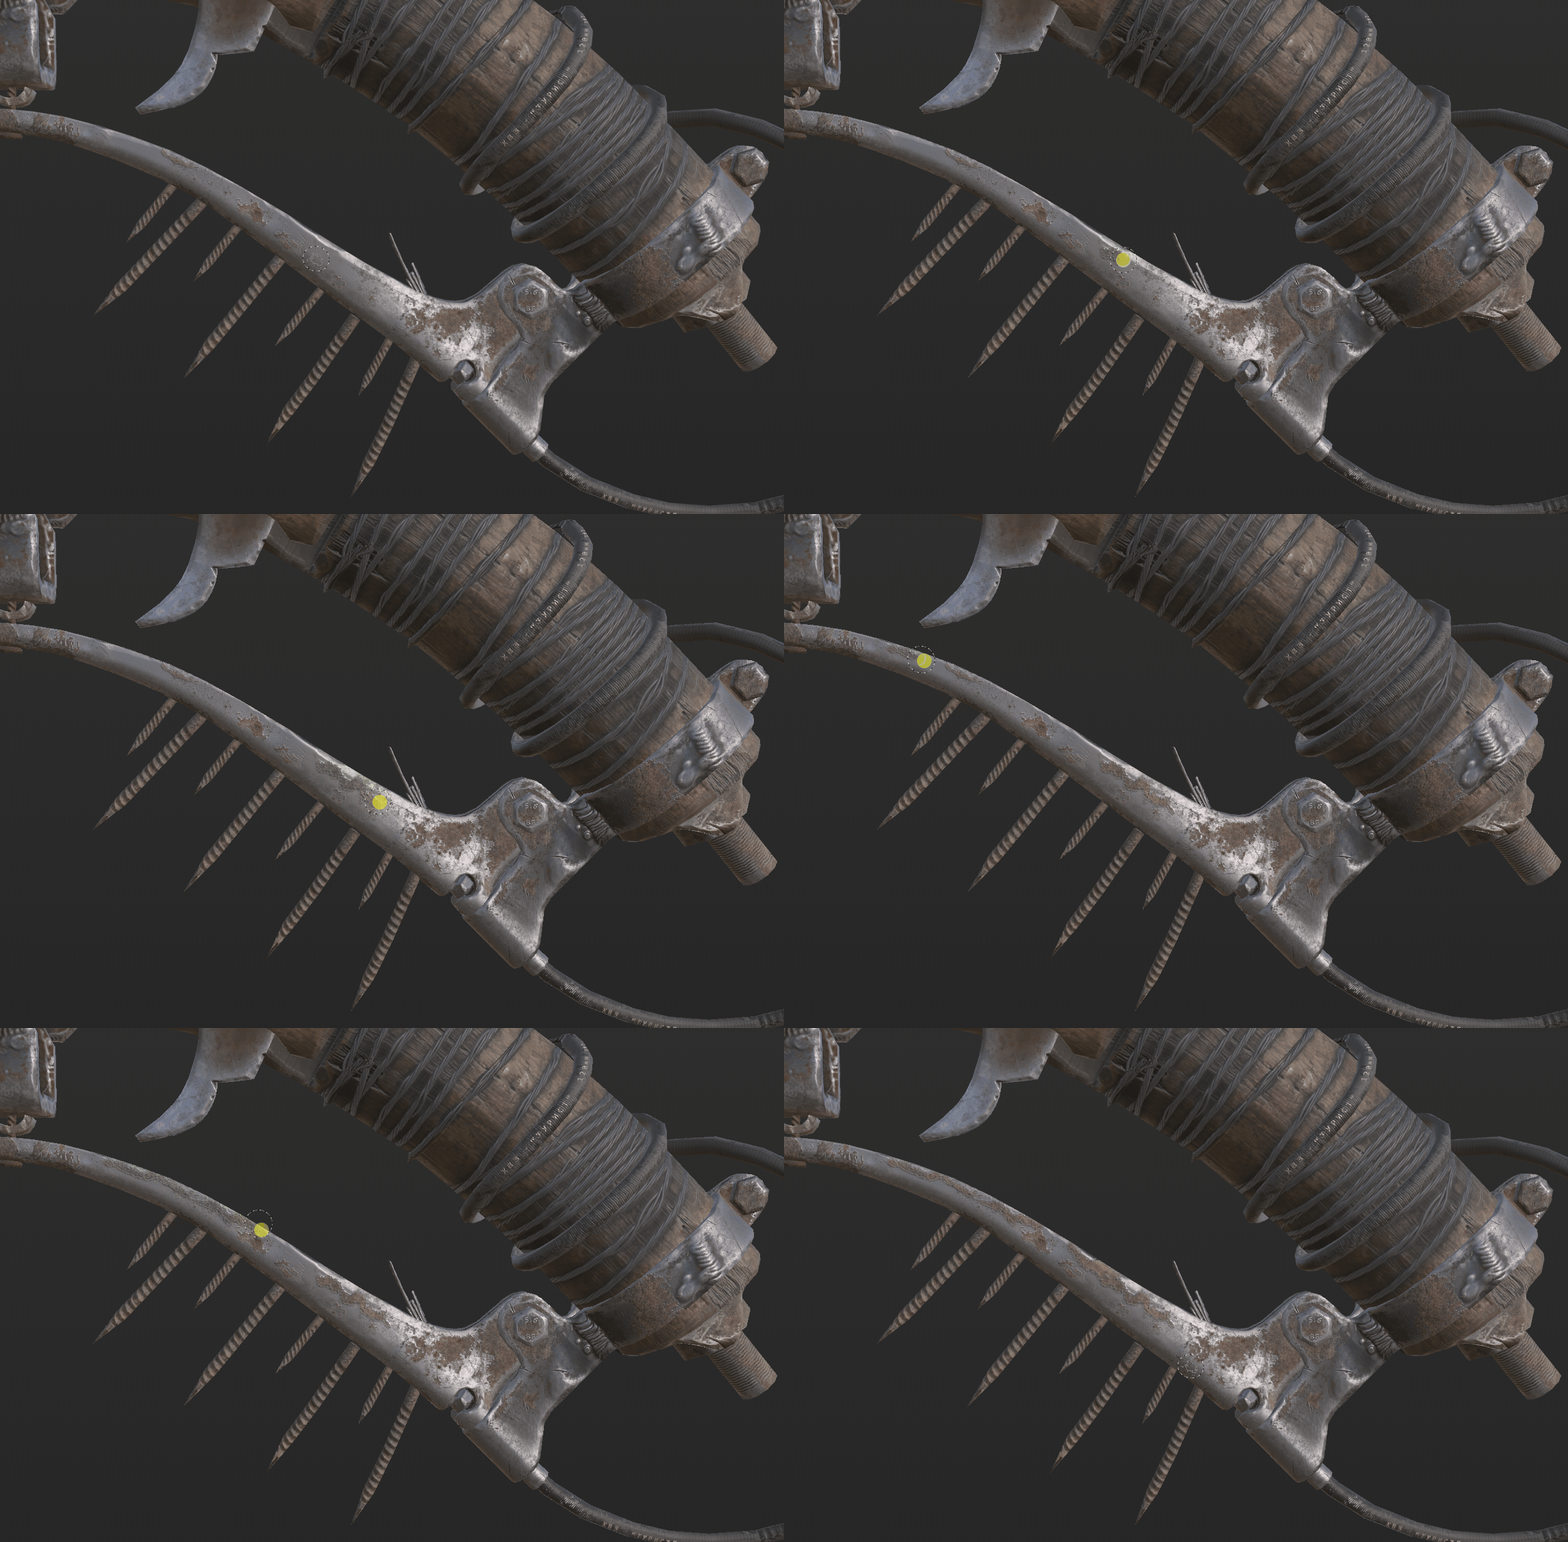
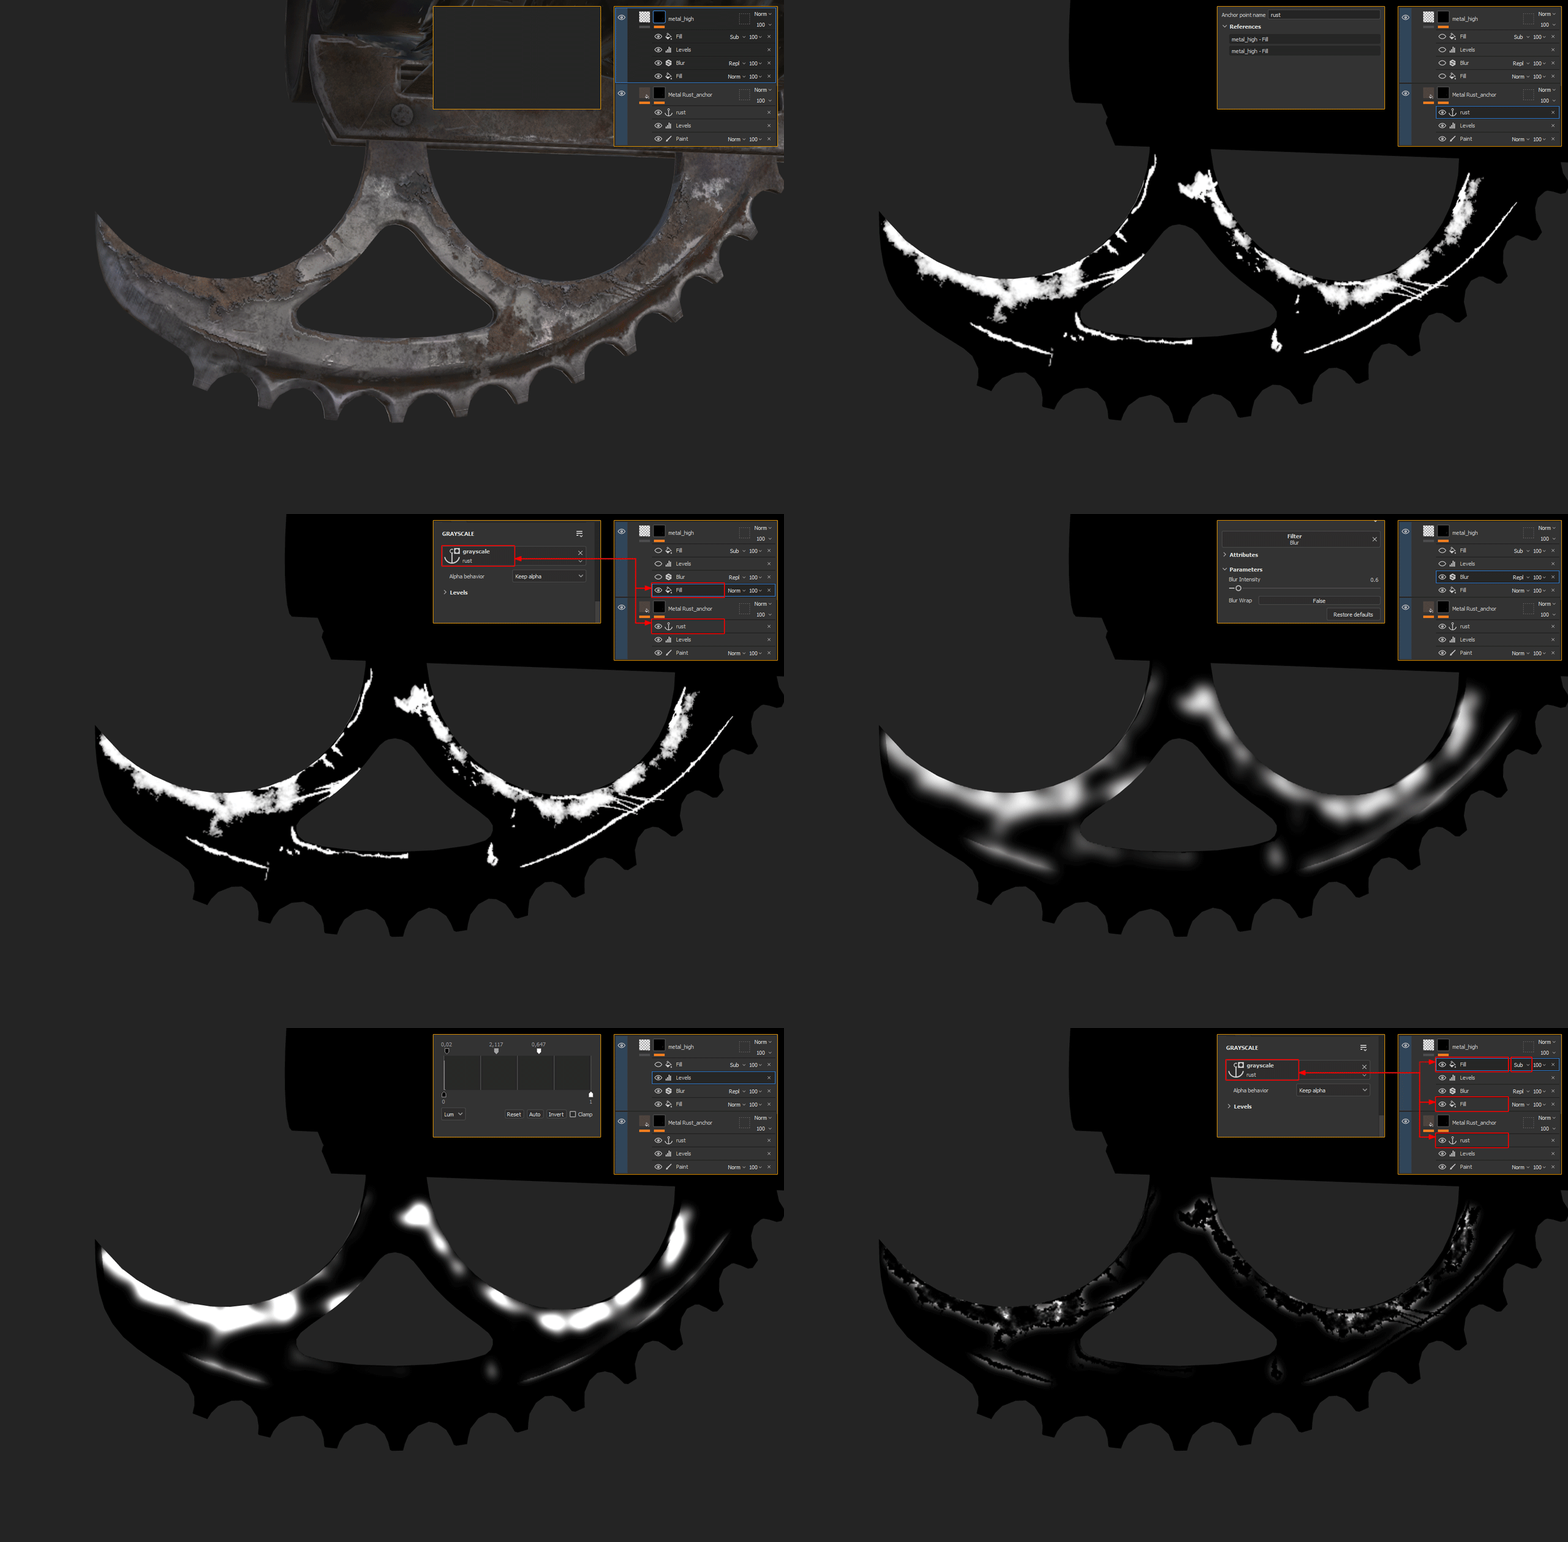
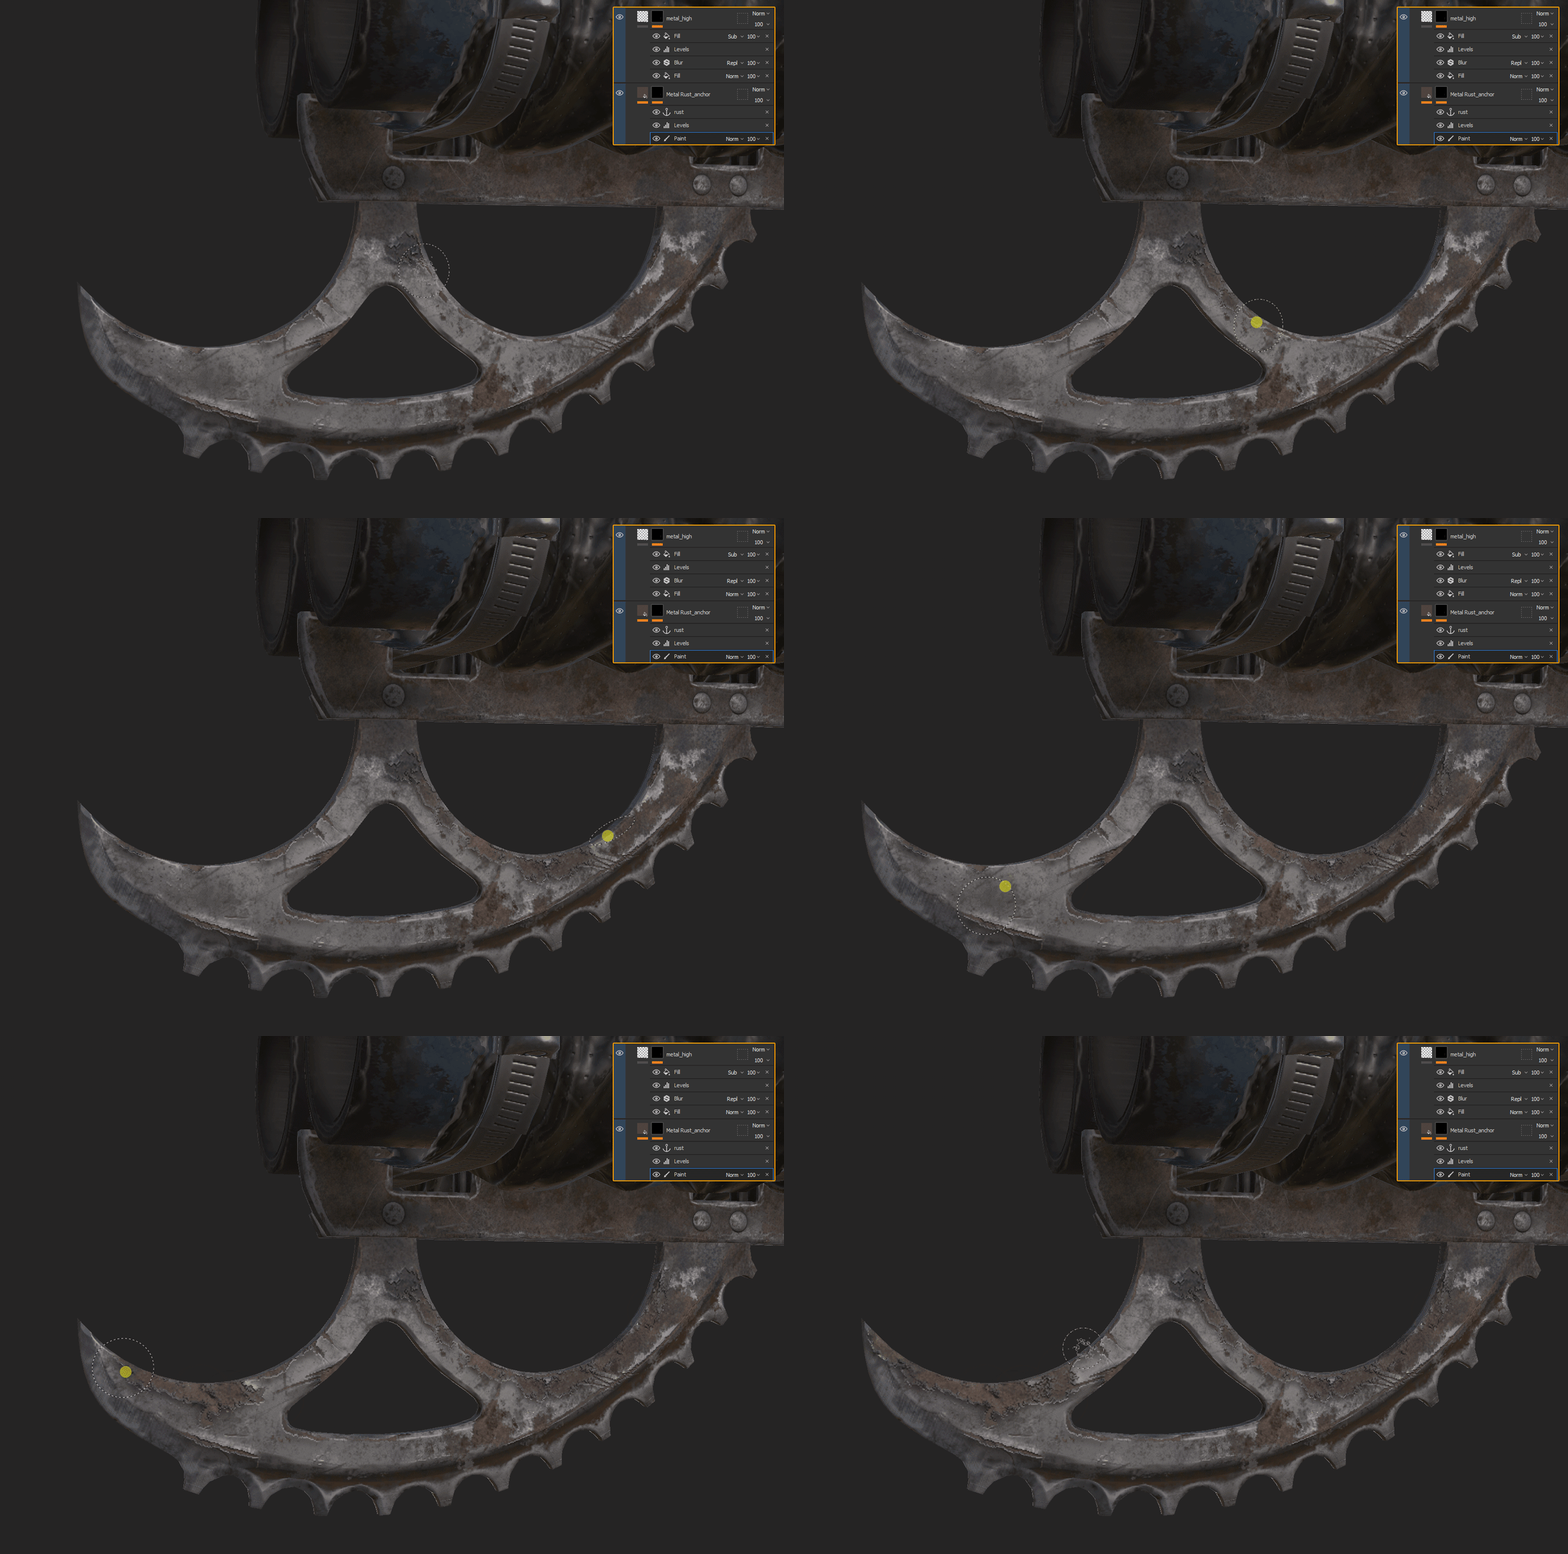
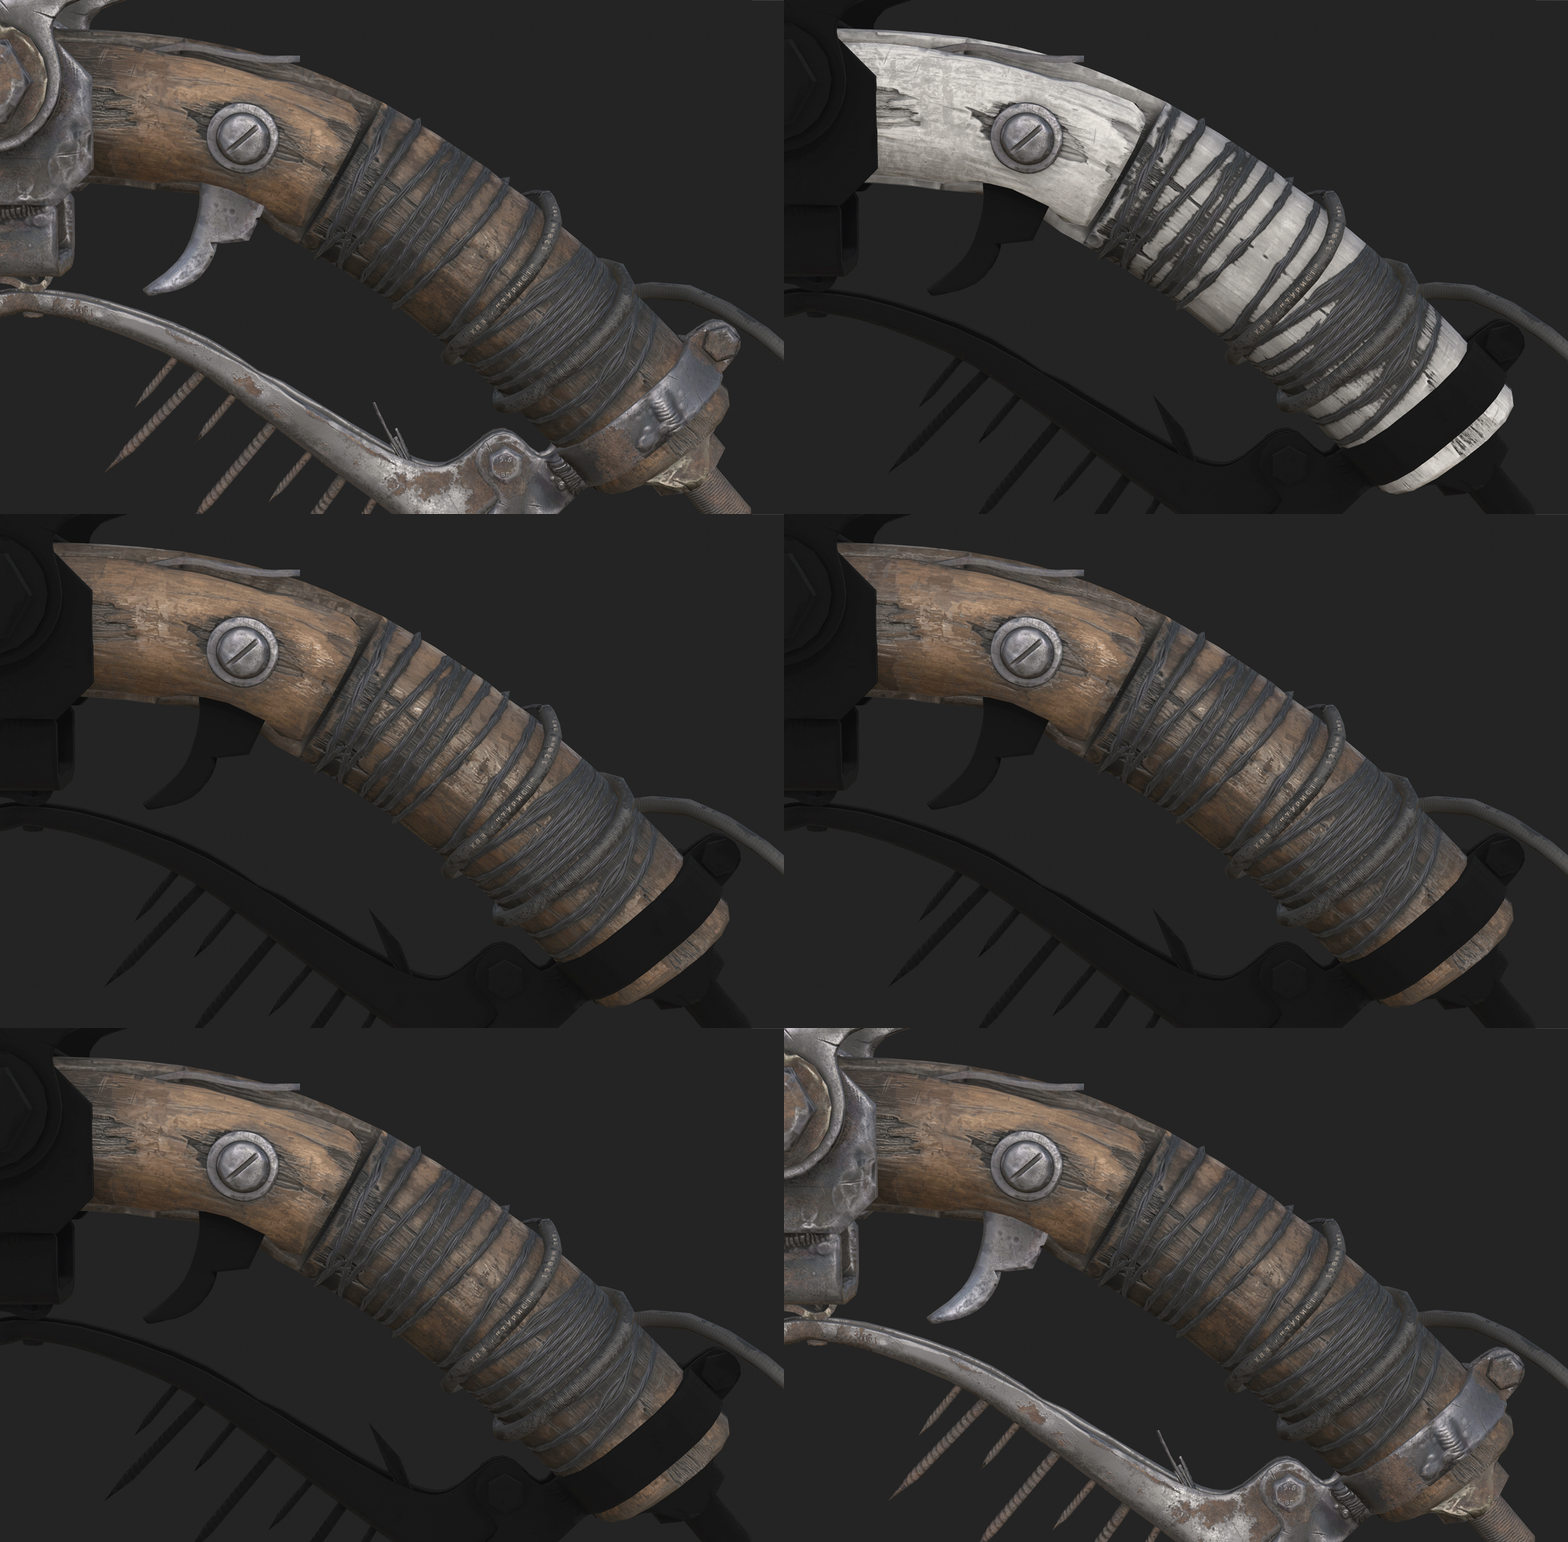
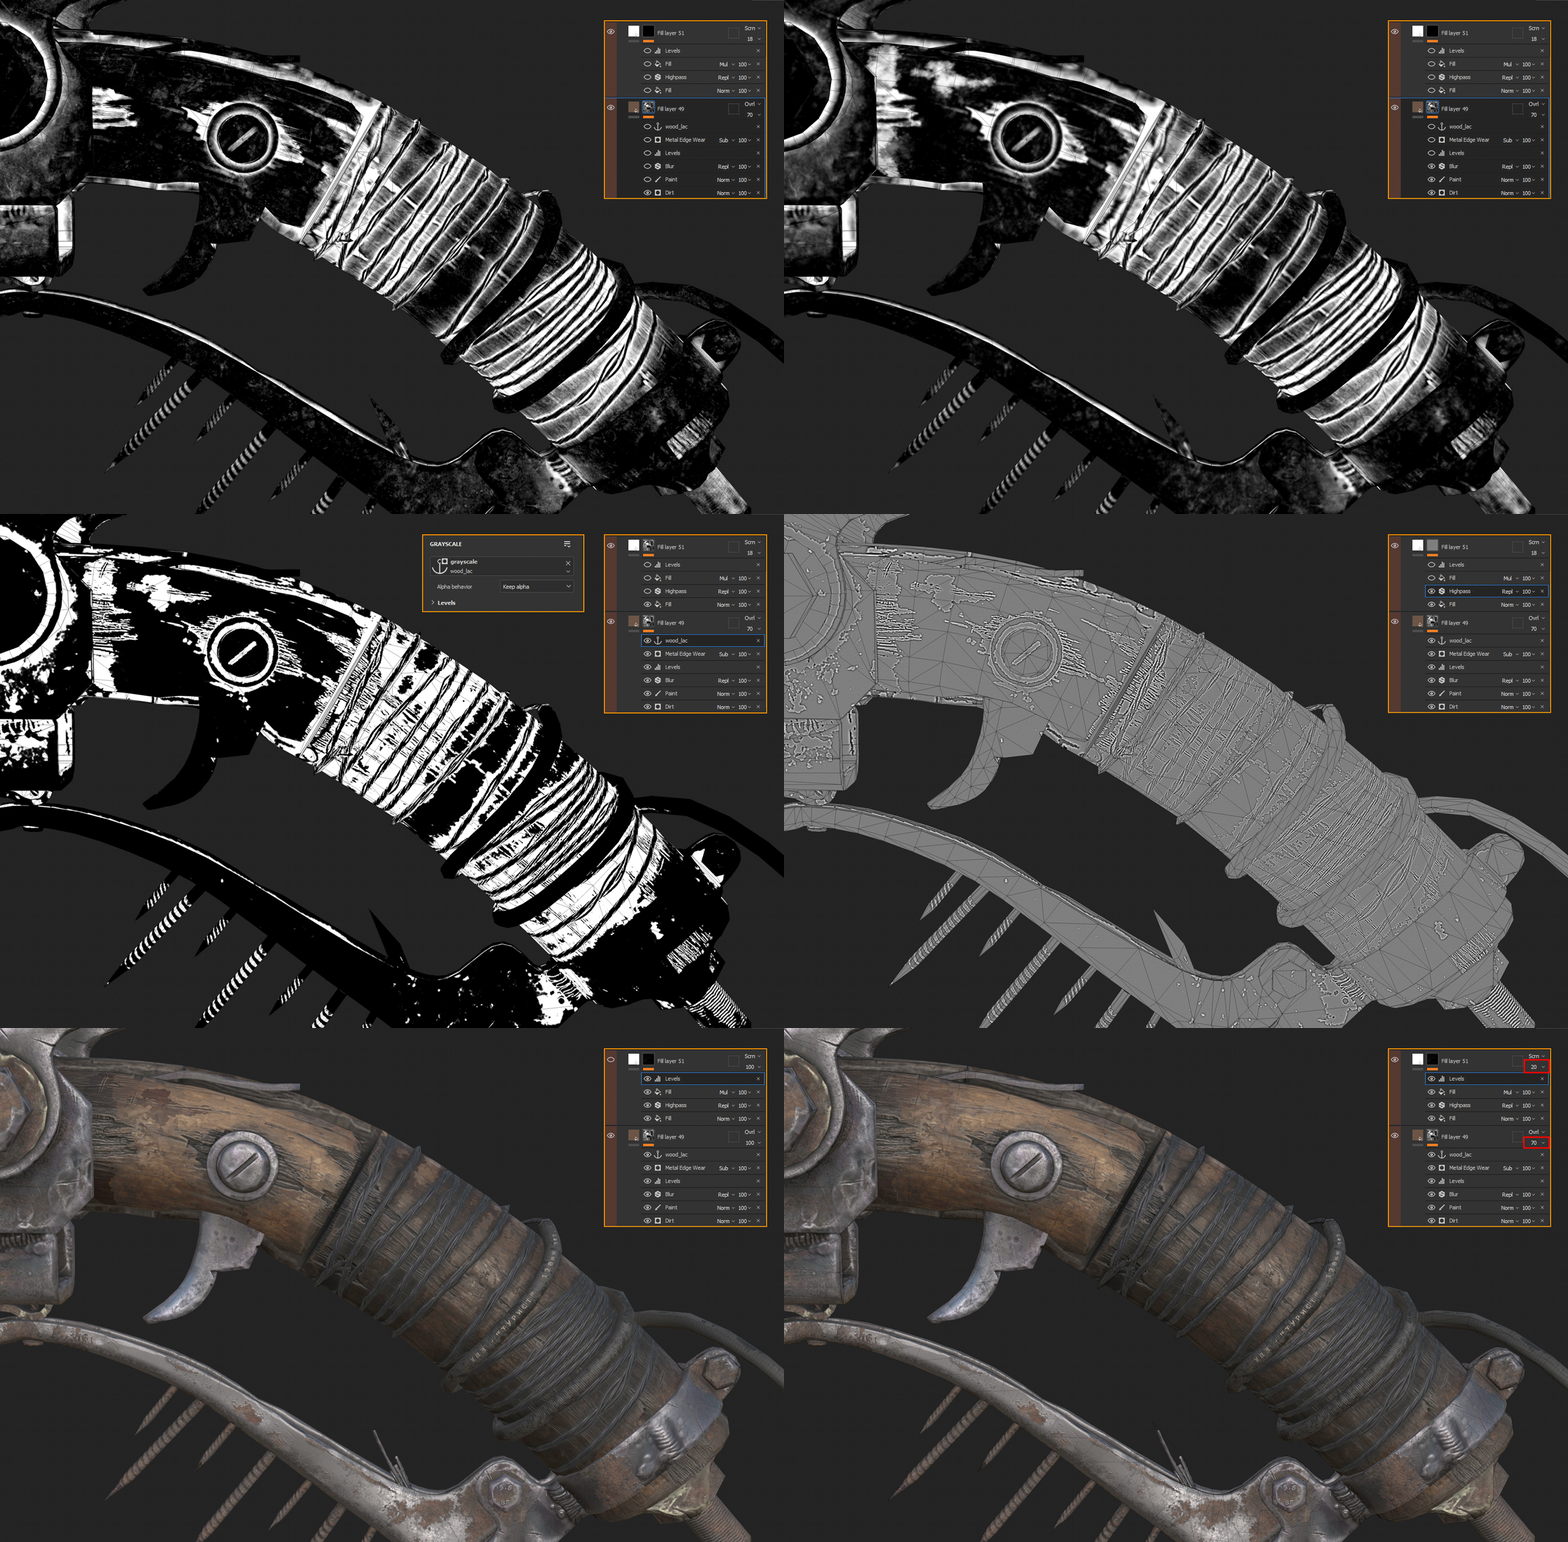
For some layers of metal, plastic, and wood I use anchor points, which are a good tool to simplify the texturing process, save time and show visually the result that is obtained.
I have not yet made a GIF to visualize how it works and tried to explain how to use anchor points.
In the rust layer Metal Rust_mask, add paint, then level, then anchor point, and name it to rust.
Add a new layer, call it metal_high, add a fill layer in its settings, and select the anchor point that we created below with the name rust, it will be on the Metal Rust_mask layer.
Repeating everything that you draw in paint on the metal_high layer, add a blur, a level, and another fill layer with the same anchor point with the name rust, but now with a subtract overlap, watch the GIFS.
Some layers for wood were made using a similar method.
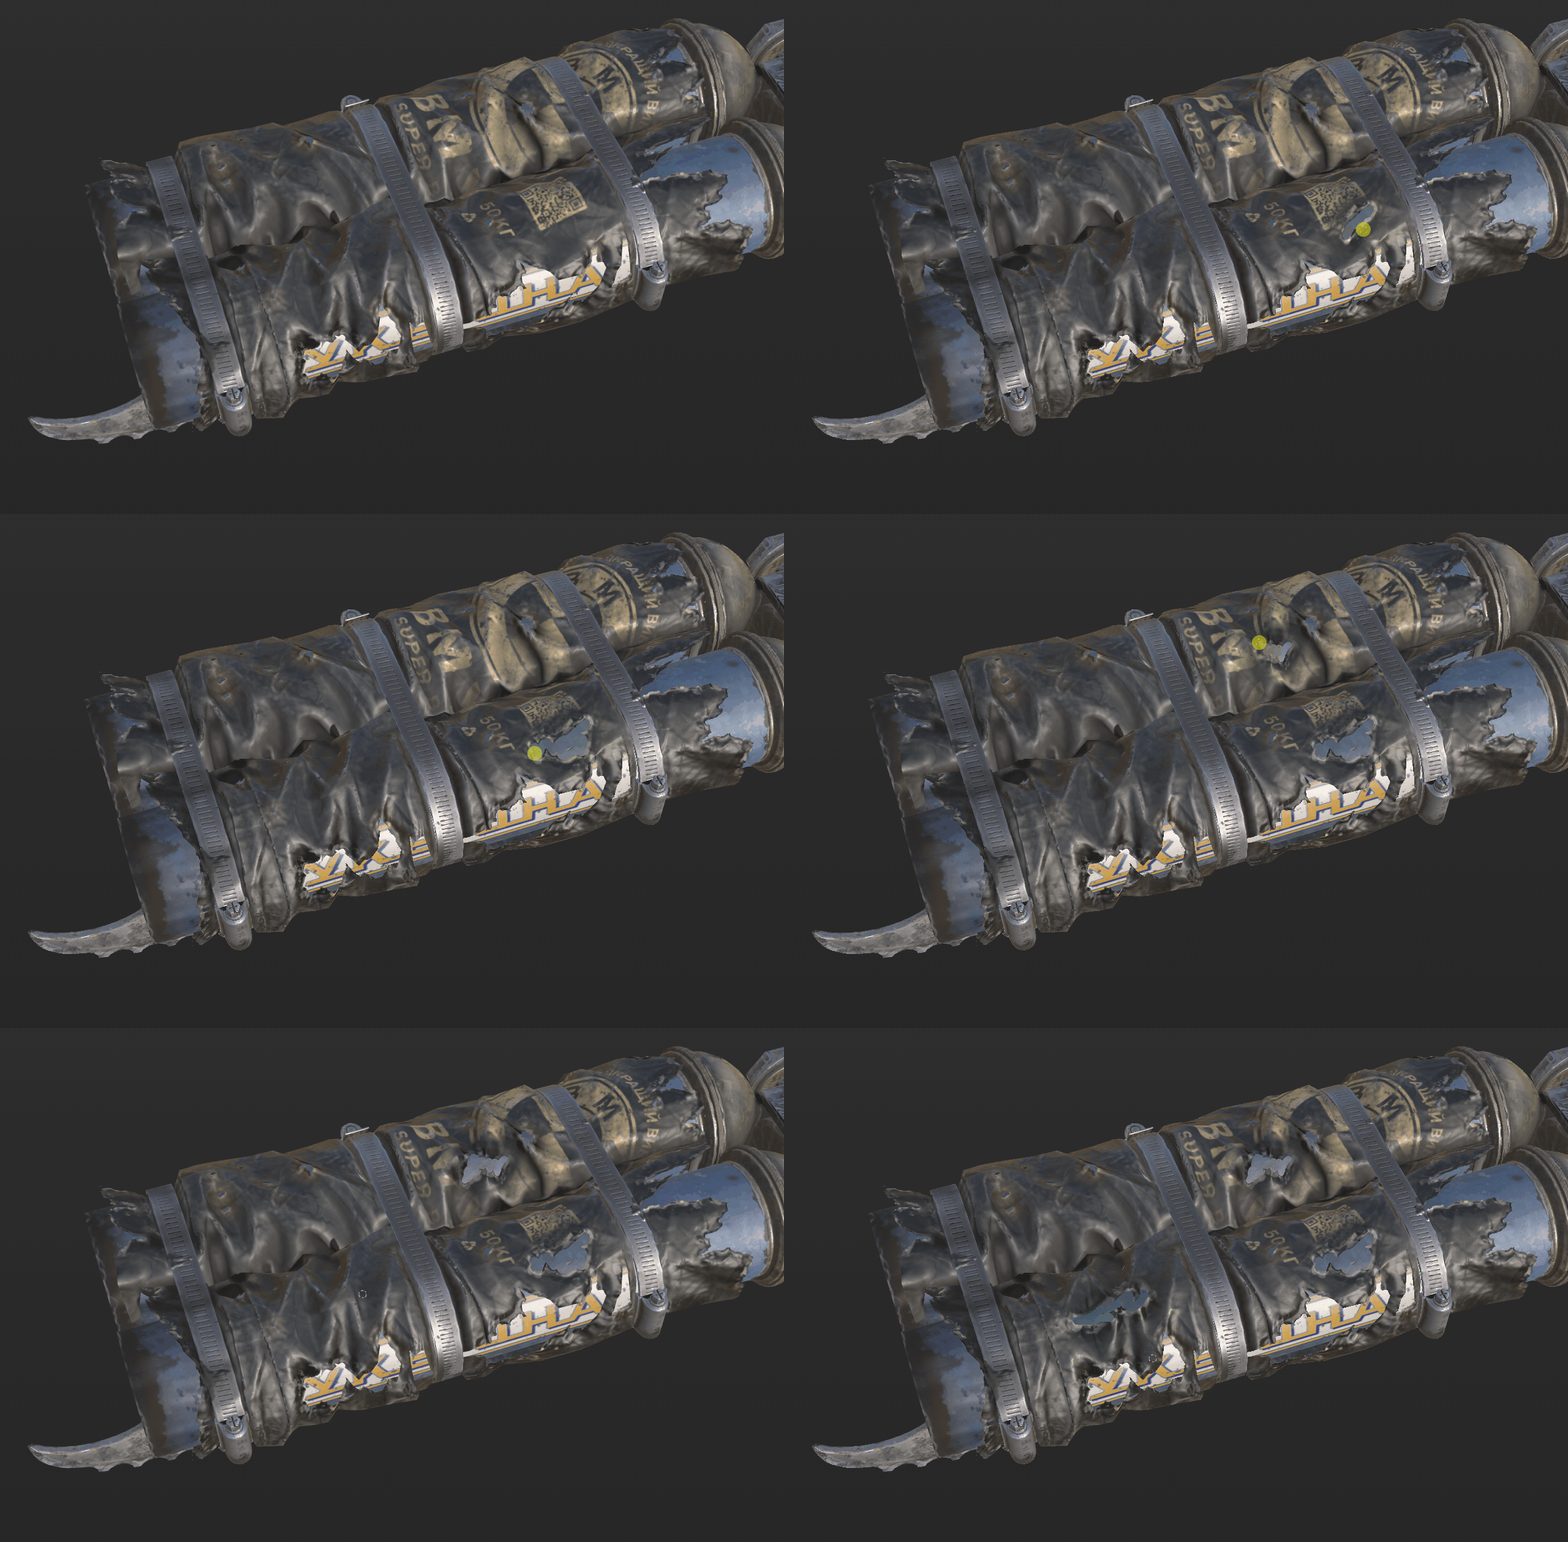
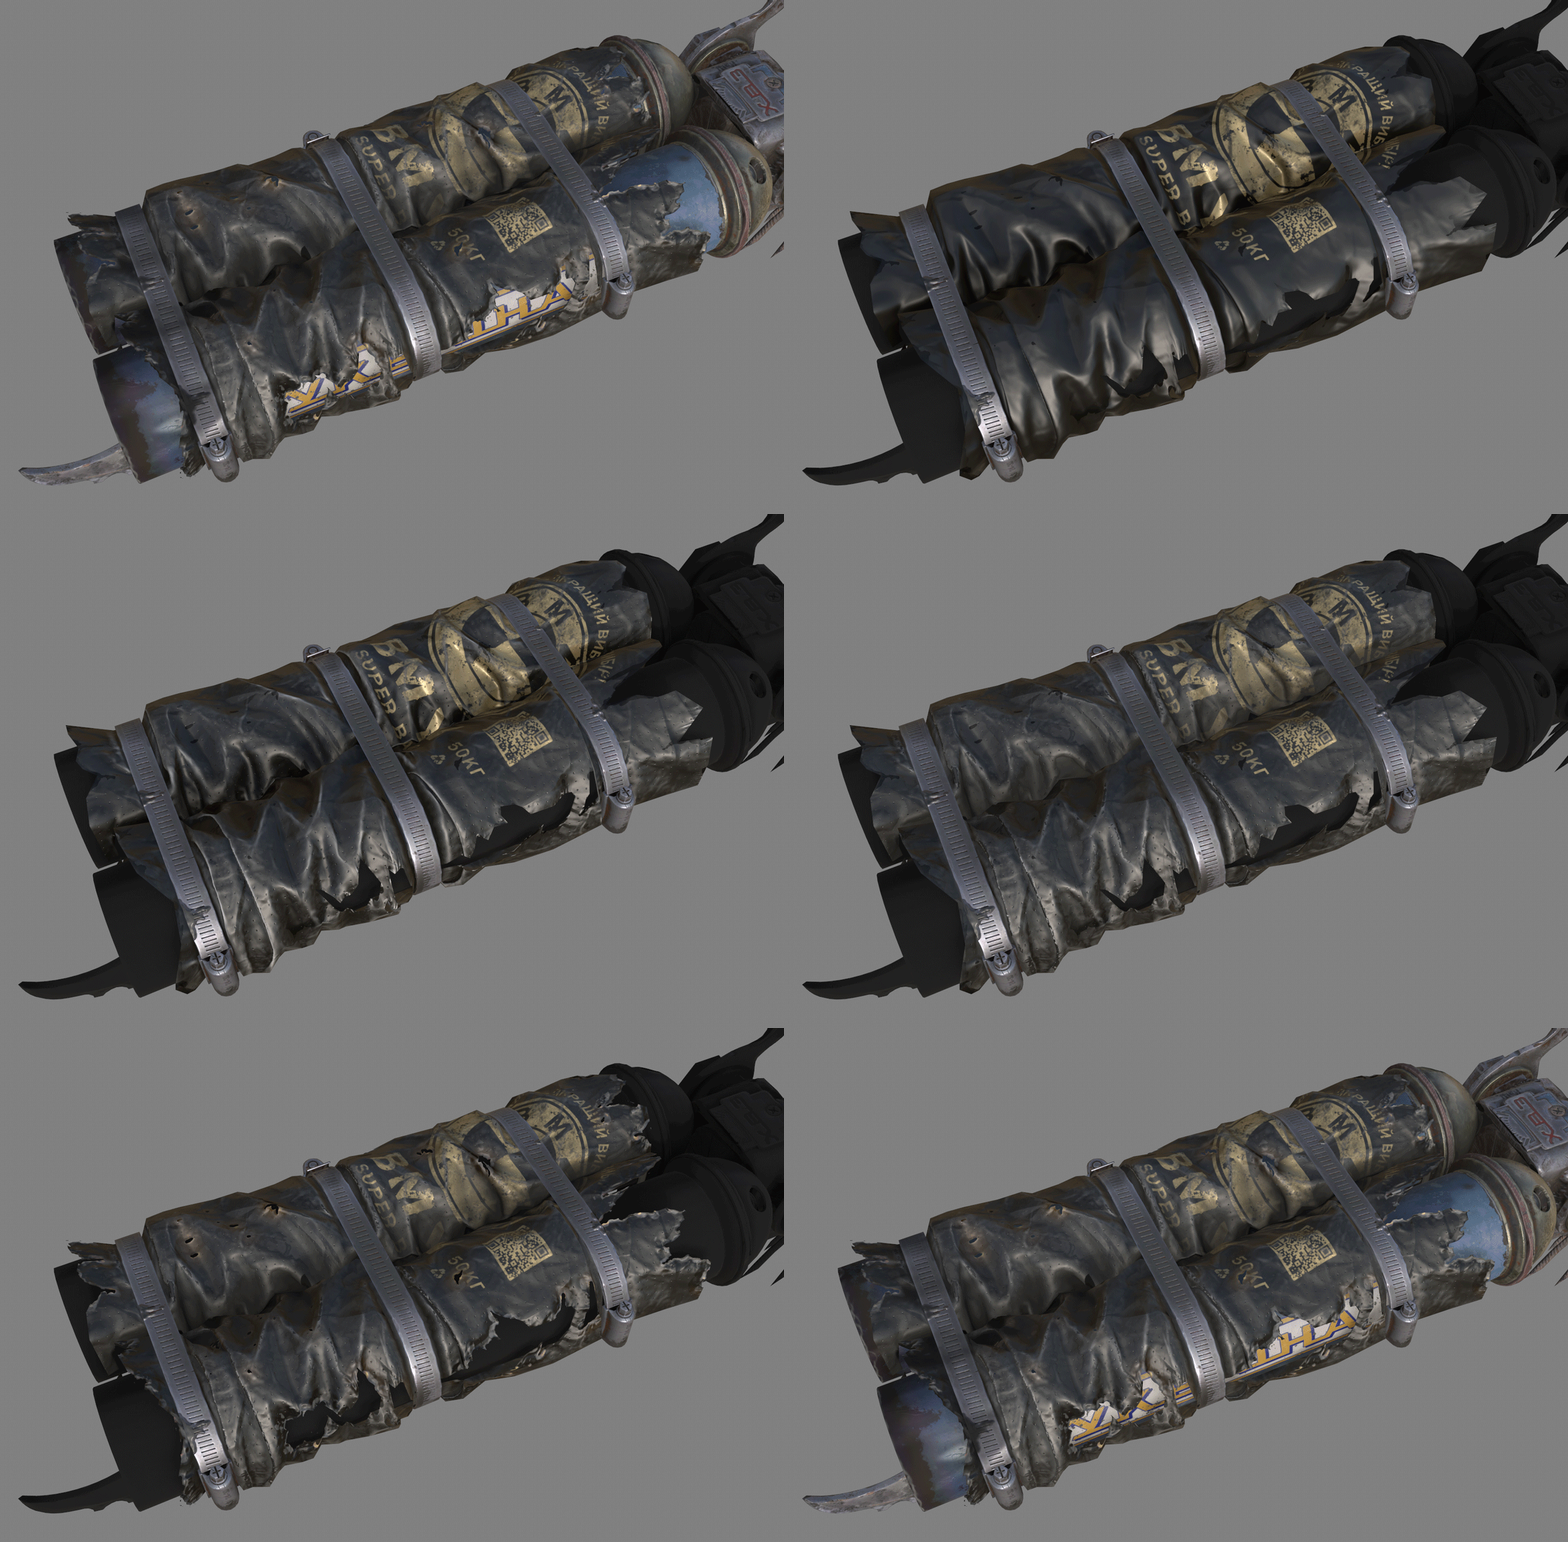
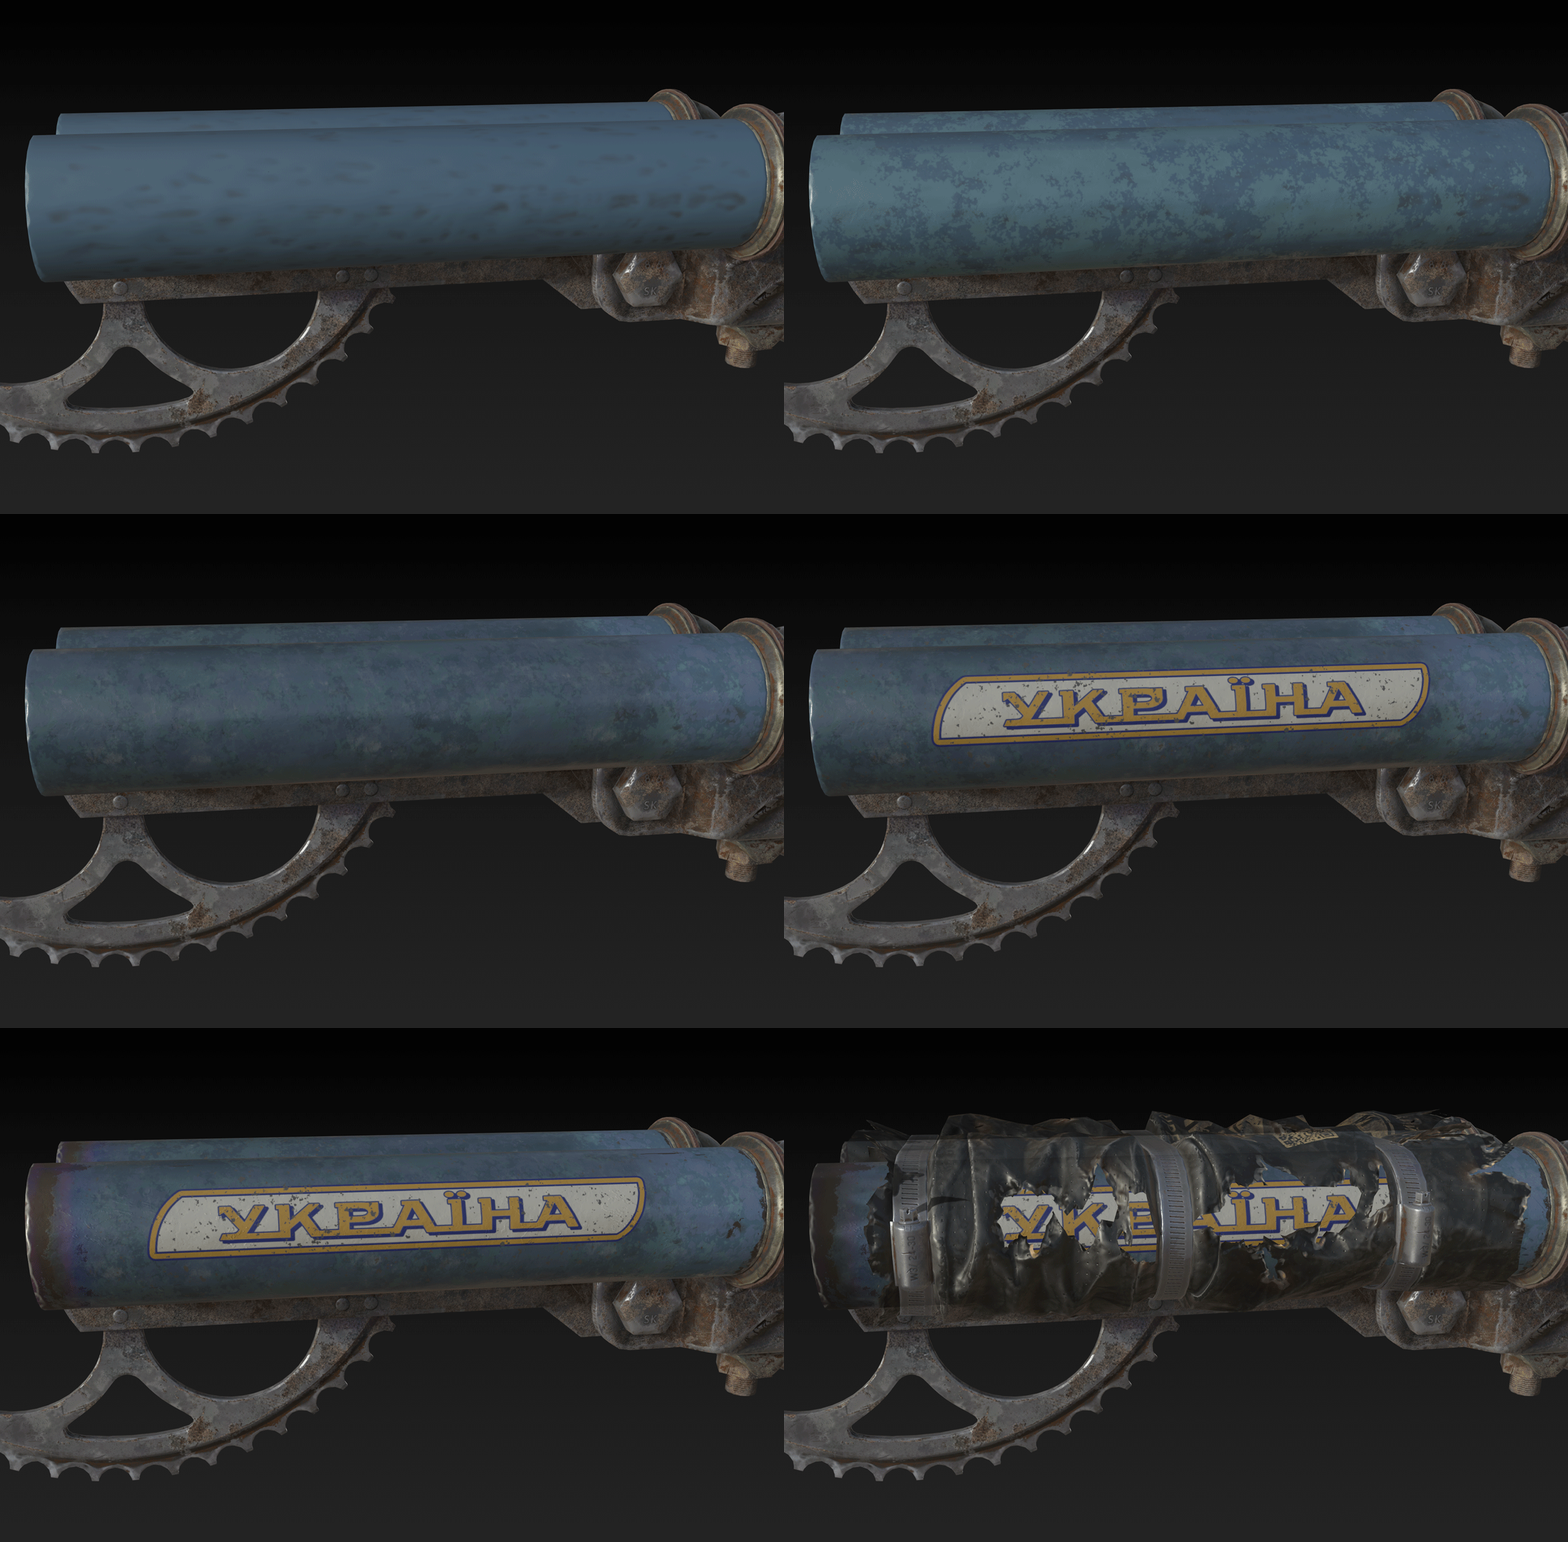
Plastic and Barrel images below.
Here are the alphas I used and the results.
Rendering
Marmoset for rendering is a very convenient and flexible program.
To correctly set up the material with the textures that we received when exporting from Substance Painter.
ORM – Occlusion, Roughness & Metalness
We add the ORM texture to all slots and we need to change the channel to this one.
Roughness – G
Metalness – B
Occlusion – R
The Color Map texture has an alpha channel for opacity, so in the transparency, we add a Color Map and change the channel.
Alpha Map – A.
Sometimes, for the roughness to work correctly, you need to uncheck the sRGB Color Space checkbox in the roughness settings.
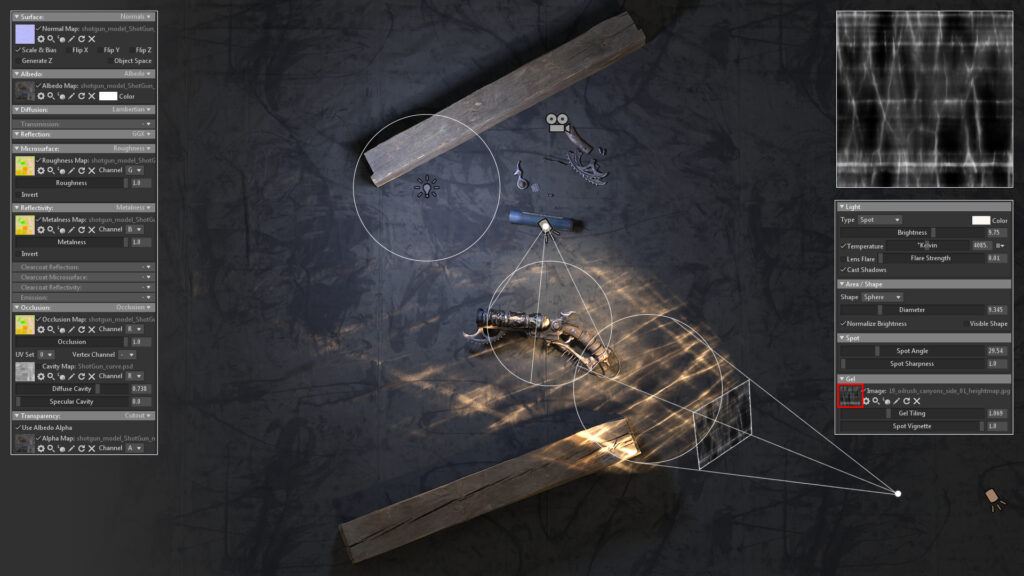
For rendering I used three light sources and HDRI.
- Main Light – Warm tint, hard shadows.
- Ambient Light – Cool tint, soft shadows.
- Reflect Light – Warm tint, hard shadows, for imitating reflections and caustics, to create the effect of light caustics I used this alpha, which is an inverted heightmap texture of the surface of the rocks.
To visualize how the lighting works in my scene here are some videos.
Base options that you can get on Megascans.
We have gone through all the stages of development and if we do each stage correctly and diligently, we can receive a reward in the form of good work in the portfolio.
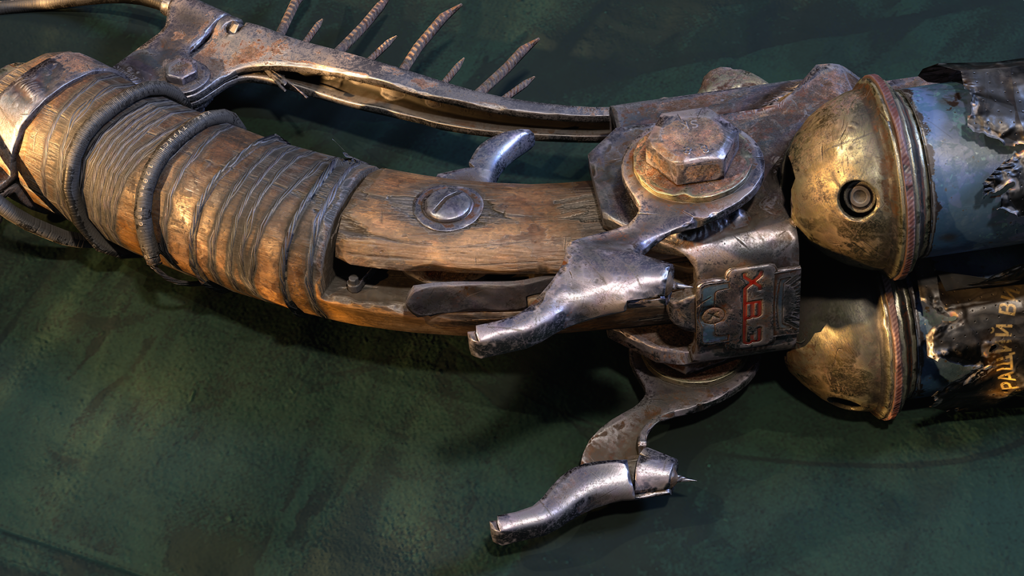
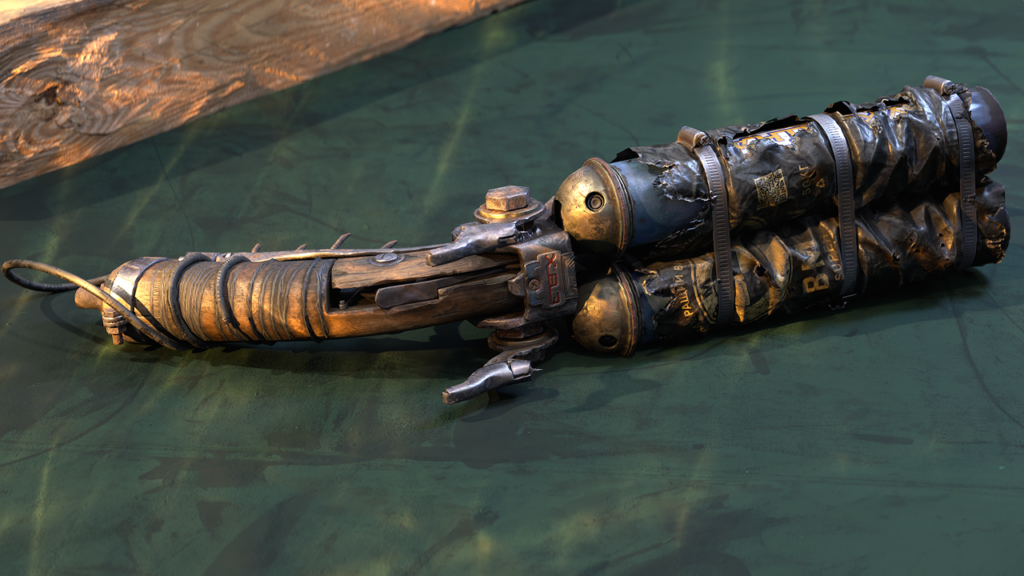
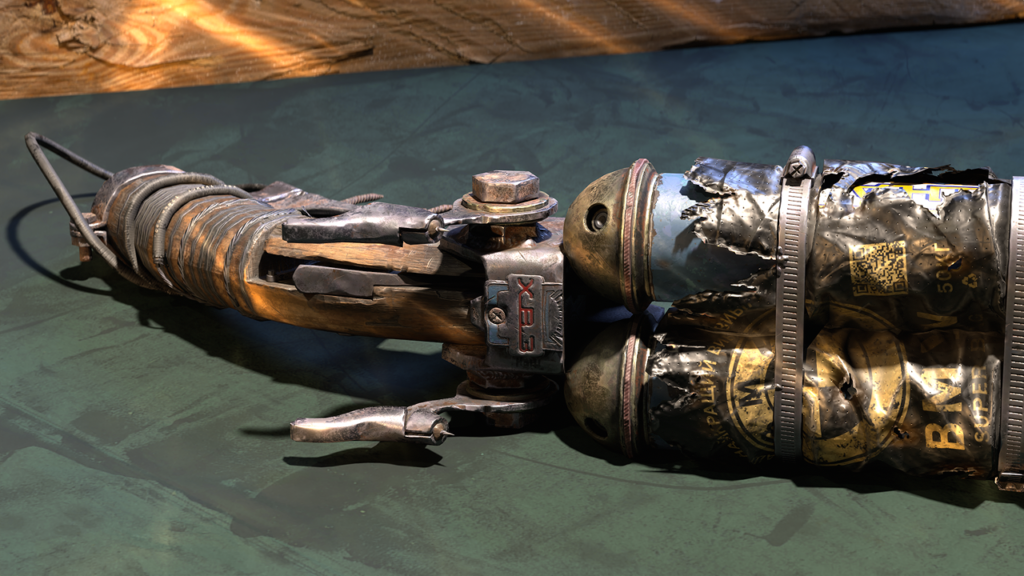
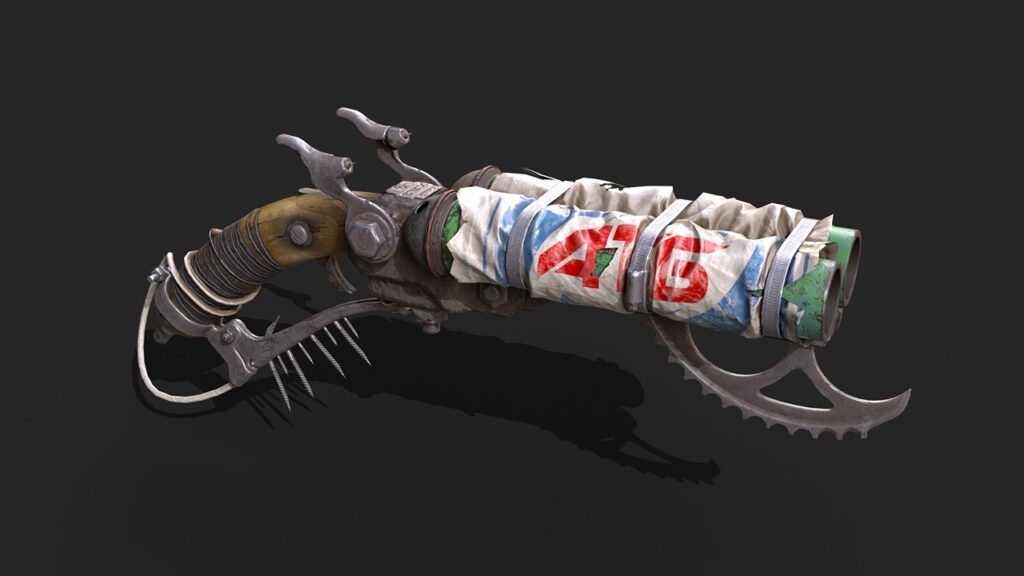
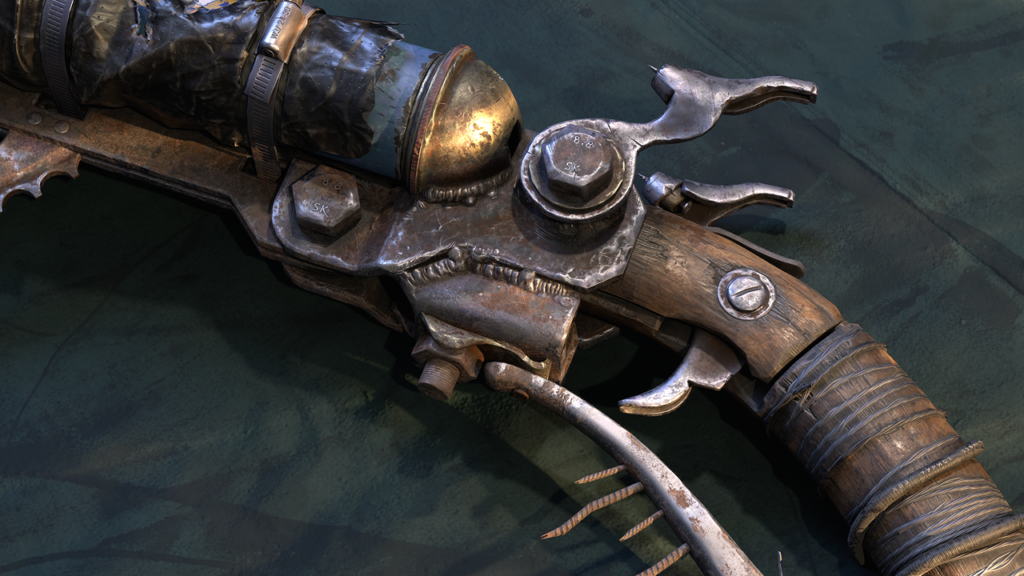
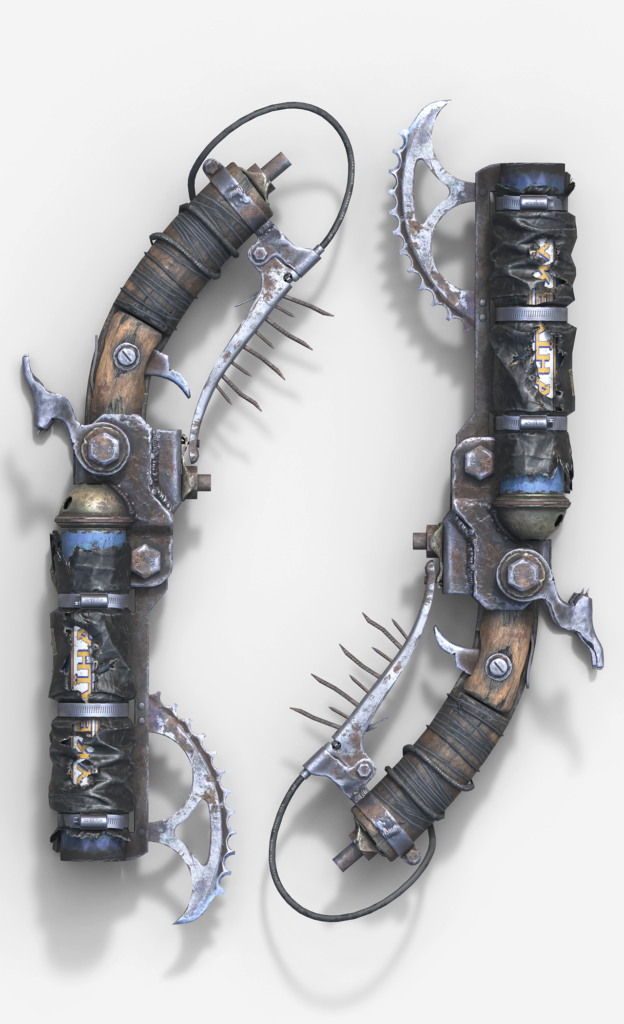
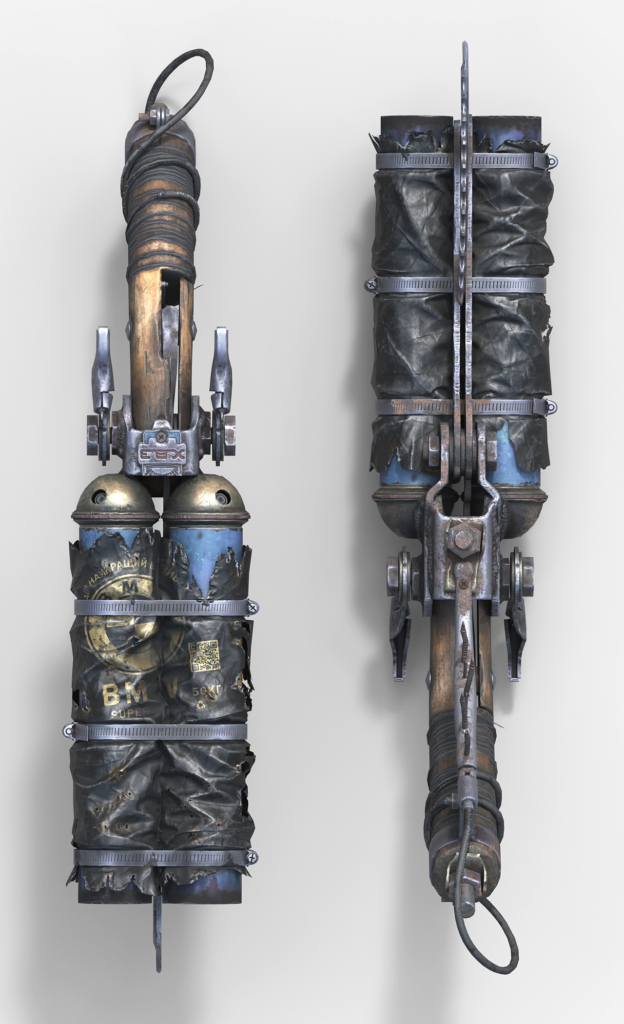
And so, after rendering we got this final result.
Conclusion
What conclusion can we draw?
Even before starting this project, when I looked at the concept and thought and analyzed how I could do this or that, there were details and materials that I had already made before, and there was no doubt about them.
But there were also those that I had never made before, and in general, I thought that it was a bad idea to make a package on the barrel, and how could I make it realistic so that it did not stand out in quality from other materials, but I did not give up.
I think the result turned out to be quite good, so the conclusion is this:
If you doubt something, you should do it first, then everything will work out for you, and you will be satisfied with the result!
Thank you for your attention, for your interest in 3D art and for reading to the end, I hope you liked it!

