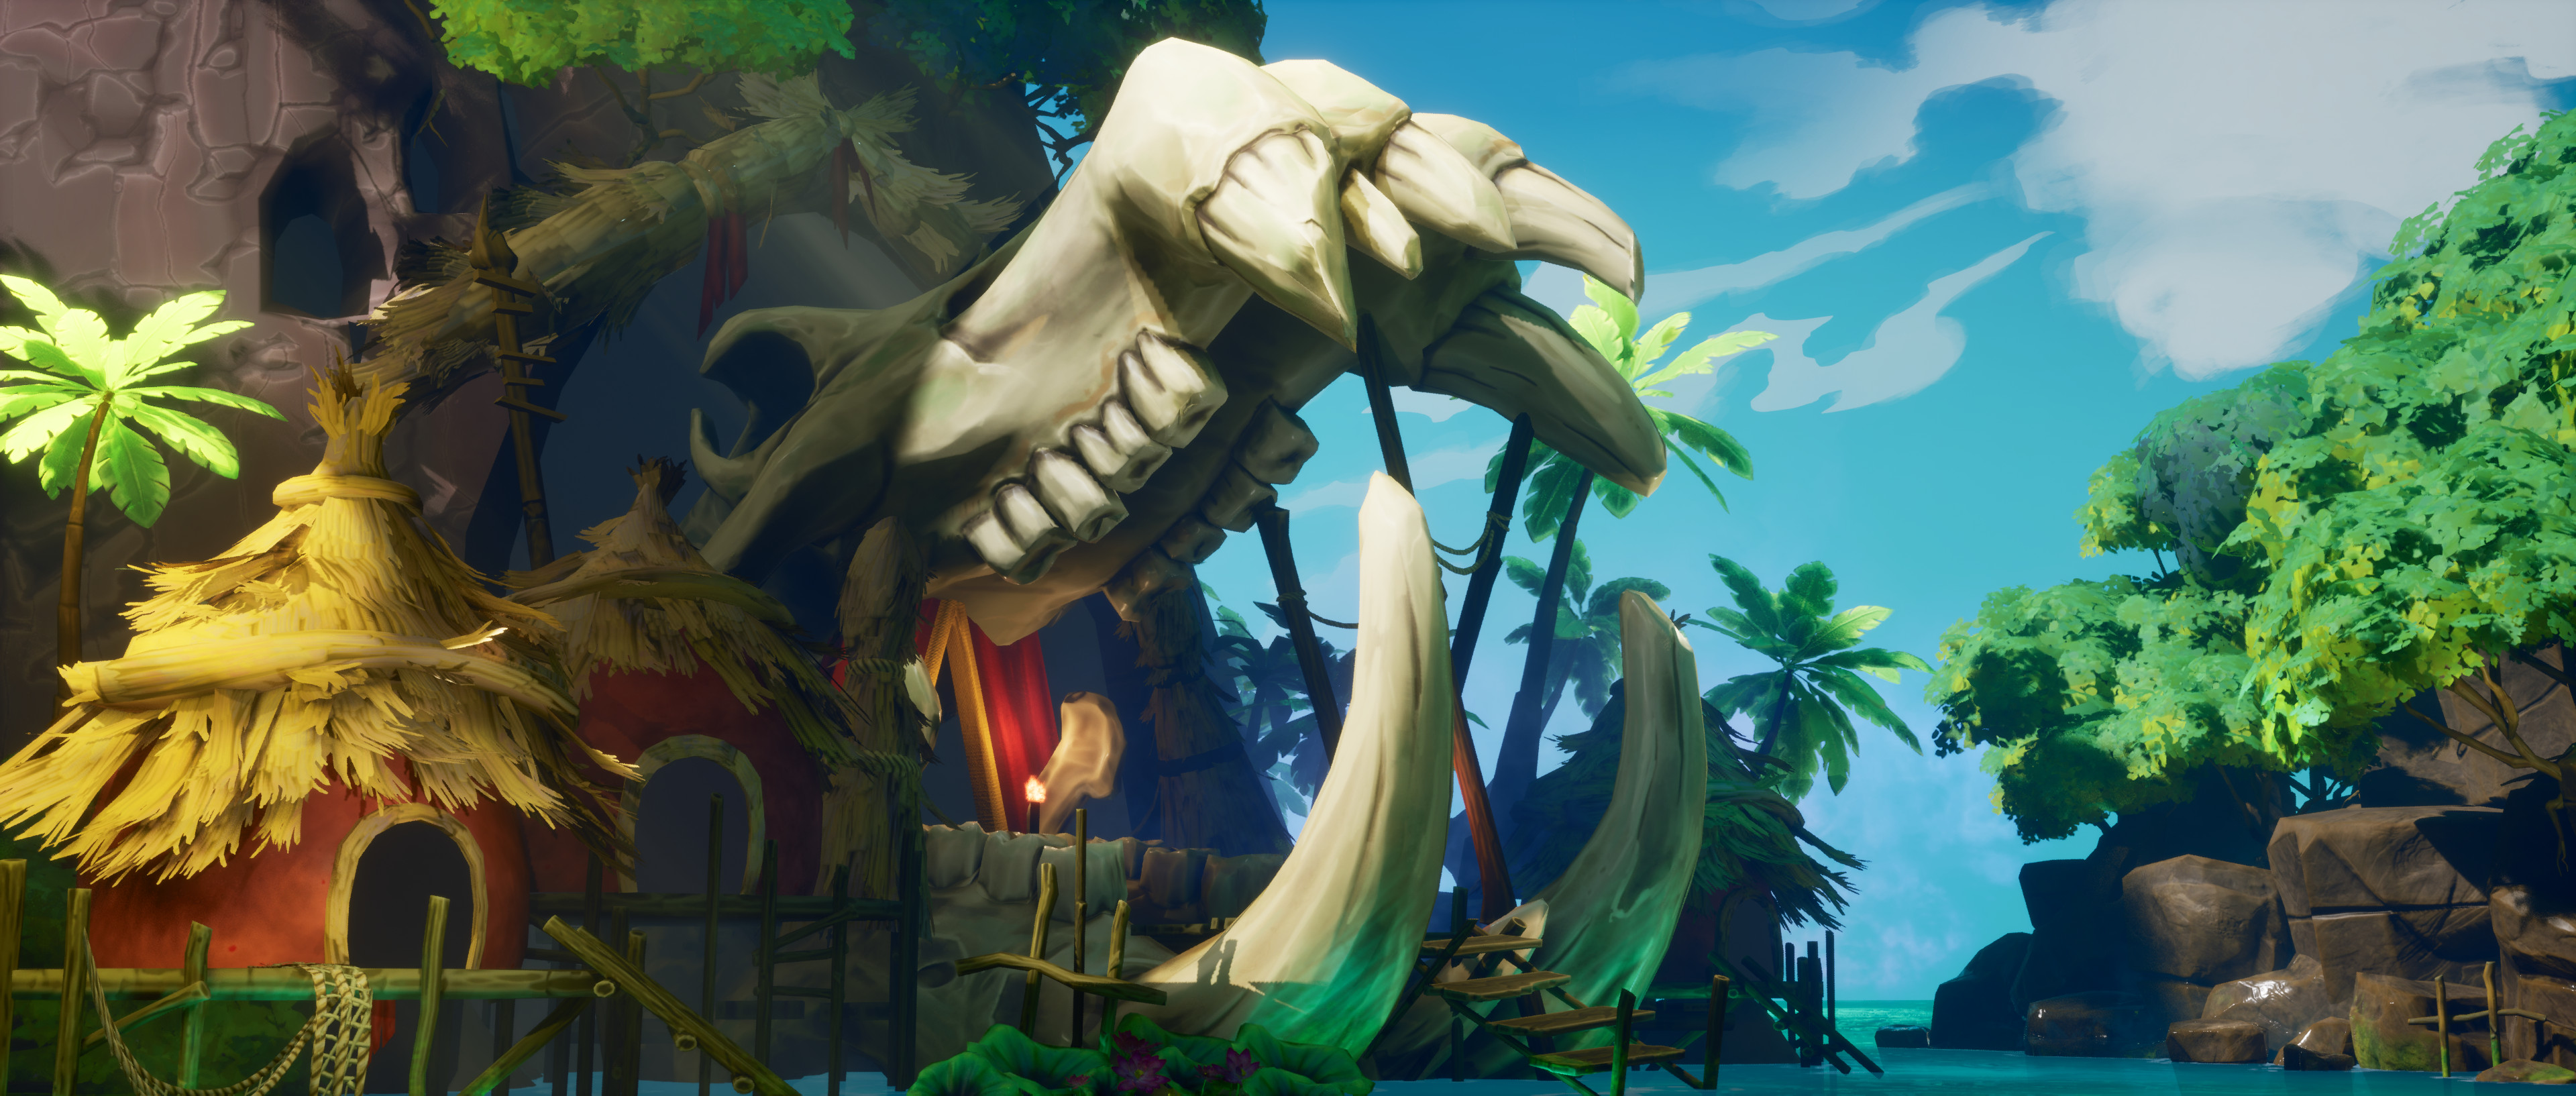
Forgotten Forge


Introduction
Hi! My name is Bradley Siegert, I’m a 3D Artist from Canberra, Australia. Art has always been a part of my life and from early on I was sketching characters and worlds from my favorite games and movies.
I first discovered 3D art after playing The Last Of Us and being in awe of the insanely detailed world the team at Naughty Dog had created.
Since then I have studied at the Academy of Interactive Entertainment and I have been steadily building up my skills and portfolio to land my first job in the industry.


Inspiration and Goals
My main inspiration came while playing Elden Ring and God of War. I fell in love with the sculpted fantasy art that I saw in their worlds, especially the sculpted rocks and fantasy architecture. This motivated me to create a ZBrush heavy environment in UE5 with the goal of furthering my skills and familiarizing myself with the new engine.
When gathering references I collected screenshots from Elden Ring, God of War and the Demon Souls Remake and looked at the breakdowns of other artists who worked on these titles. The final design is a result of combining the direct inspiration artworks with various elements from other references.

Blockout
The first thing I do when blocking a scene out is to study the reference or concept and highlight the different modular pieces I need to make. I then create low poly proxy versions to use when blocking out the environment, this way I can iterate quickly when changes are needed. I also use a mannequin to help me visualize the scale of my world.
Modelling
Once I’ve finished my blockout I’ll start modelling. For this project, all my modelling was done in ZBrush. I usually work from large forms to small forms, so I tackled the rocks first, then the architecture, hero props and finally the smaller set dressing pieces.


Technical
Since one of my main goals on this project was to get more familiar with UE5 I decided to utilize Nanite and work with fairly dense geometry throughout. I then optimised this to manage the file size of the project. Every model was retopologized with Zbrush’s Decimation Master. I highly recommend watching Dylan Abernethy’s tutorial series as it provides some great tips for working with Nanite Geometry.


Unwrapping
Everything was unwrapped in RizomUV as the point-to-point selection makes creating seams on dense geometry much faster than in other software. I also utilized Rizom’s packing tools to optimize my texel density for consistency in my textures and to manage memory usage at the level.
Once the unwrapping is done, I move on to Substance Painter for baking and texturing.

Texturing
I created a few custom smart materials in Substance Painter to help speed up the texturing of my assets. I always make sure to texture in a neutral lighting environment as a good texture should work in all lighting conditions and this helps me to maintain consistency in my textures.

Materials
My master material has a fairly basic setup using base maps exported from Substance Painter with some extra functions like colour tinting, detail normals and world align moss.

Foliage
For the trees, I followed an amazing tutorial from Simon Barle. The leaves were modelled based on photos, then assembled into various branch arrangements for baking into an atlas in Substance Designer. The atlas was then used to populate the final branch variations. Trunks were sculpted in ZBrush and then brought back to Maya for the final assembly.
To save on time I decided to borrow some grasses and weeds from Megascans and perform some minor tweaks to values in the shaders to better fit the mood.


Clouds
I really wanted to make an epic Cumulonimbus Cloud sell the fantasy mountaintop setting. I had previously watched Tyler Smith’s amazing guide on creating clouds by extracting textures from photos and merging them together to create unique designs. I used this method to create the cards and layered them together to create large cloud forms.


Lighting
Lighting this scene was a very iterative process. As you may have noticed in the blockout video the lighting changes quite a lot while I experimented with the sky atmosphere, fog, post-process and camera settings. Technically the setup was all movable and heavily relied on UE5’s new Lumen lighting system.


Conclusion
Thanks a lot for reading and if you want to see more of my work check out my Artstation:
https://www.artstation.com/bradleysiegert
Read more articles
You might also like these articles.