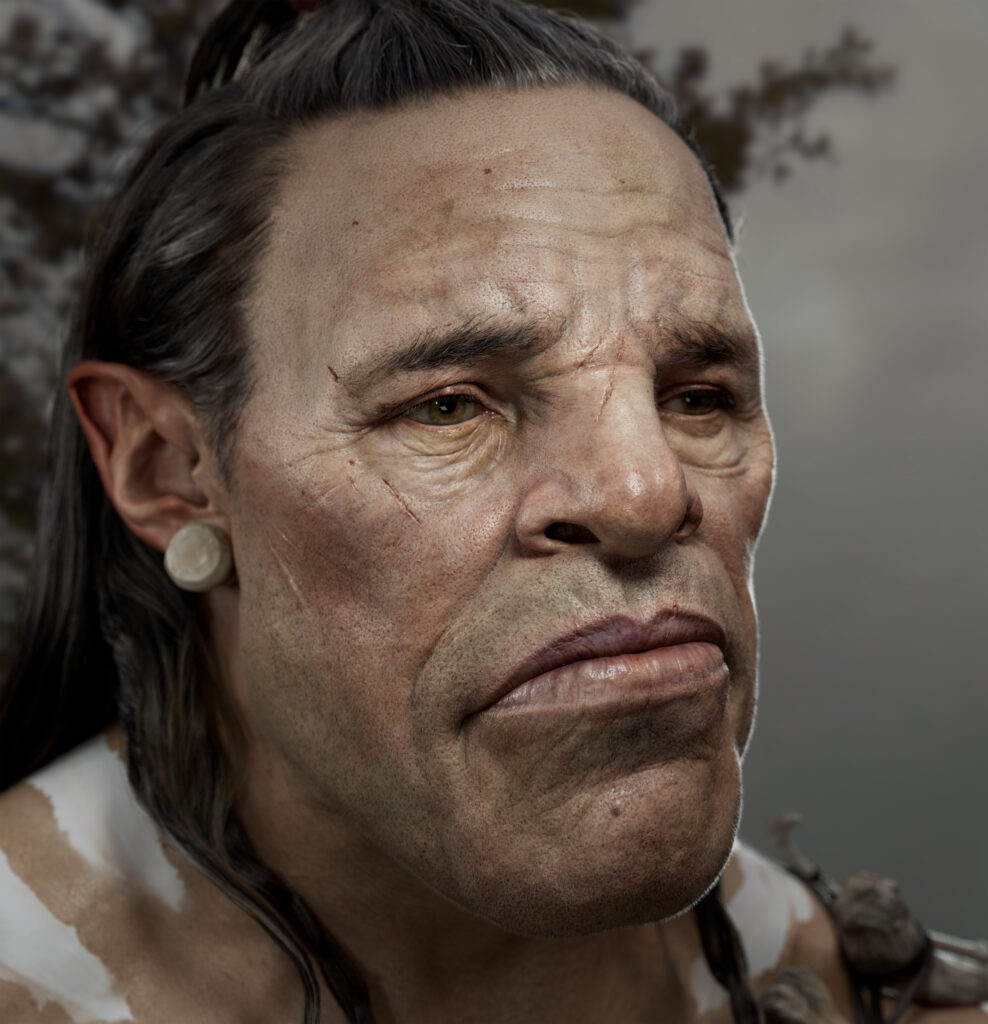
Orc Face


Introduction
Hello everyone, I’m H Cheng, and I’m excited to share a recently made project of mine, a tutorial on a high-precision Orc Character.
Made using Zbrush, Maya, Mari, Substance painter, Wrap4D, XGen and Arnold were used primarily in this tutorial.

Here is some of my previous work if you are interested, where I used similar techniques.


Reference collection
Before creating your project, collect the necessary reference materials. Our production of the orc character is similar to the production of realistic characters, the orc also belongs to the design of artificial creatures.
We need to master anatomy and then add our own understanding and design to achieve our final orc image. If the basic skills of human anatomy are not particularly solid, the need to find the corresponding structural reference will be present, try not to feel ambiguous when sculpting the structure.
That would make our sculpt lack depth, always pondering with the structure back and forth. The final result is not full enough and lacks tension. Secondly, the character lacked image design style as well as specific props with corresponding clear materials, realistic works also need to pay attention to the rationality of good modeling.

Model Sculpting Stage
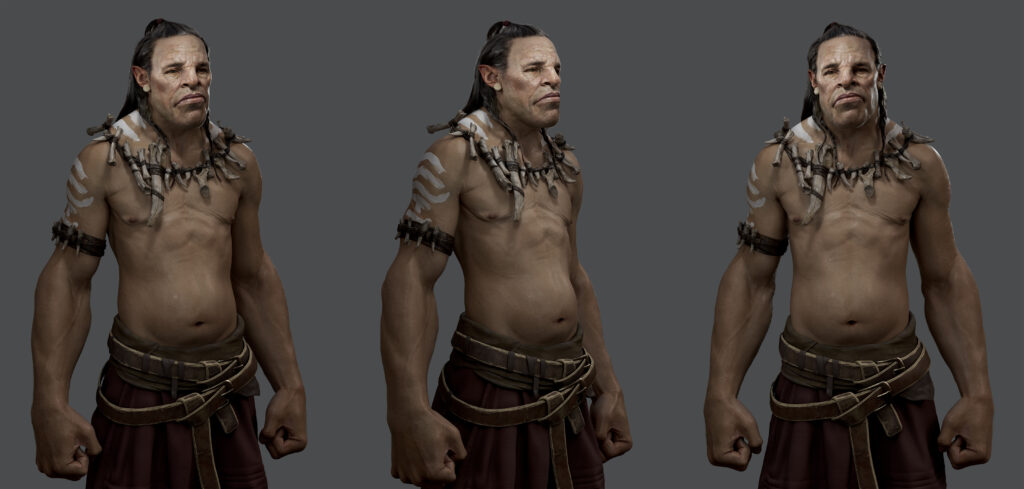
Modeling realistic characters requires correct scaling at the beginning. Displacement maps, skin effects, and hair are all scaled. In this case, the production of the character’s body parts started with a large sculpting demonstration in ZBrush from scratch. After, we match the proportion of the model with the model packages in WRAP4D. This gives us a good body/face for standard animating.
Using the wrapping node (wrapping in WRAP4DS gives us a nice topology for our sculpt) now, we continue to make the large model of the orc character, whose body shape and face image we had to iterate to make the whole character look more vivid and interesting. The large body sculpture is just as important as the face, most people will find it difficult and won’t put enough detail in here. Take the facial structure as an example, we need to have rigorous theoretical knowledge to support the movement of each muscle. That’s how we make sure the character is legitimate once it’s finished.
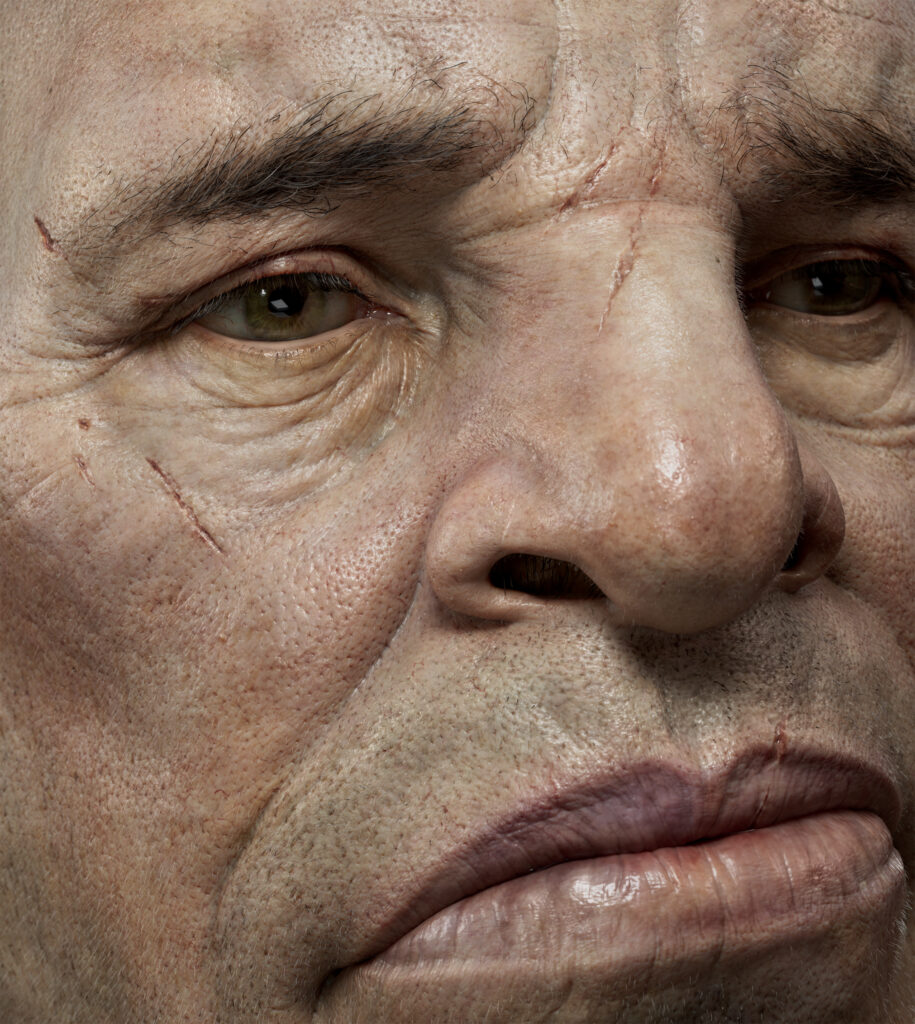
After finishing the large sculpture, we will enter the sculpture of the high model/texture. The skin texture in this tutorial is sculpted in ZBrush. First of all, we pave the pore texture, and then the wrinkles on the face we do this according to the direction of the muscle and its movement trend. Then continuously refine and enrich the information on the face, this is relatively simple, but it is more a test of hand skills, without a very solid foundation, the sculpt will feel very stiff.


The model making of the bone necklace also requires food reference, then we can make different bone shapes and have more detailed meticulous carving.


Character Mapping
After finishing the sculpting of the body parts, we enter Mari and began to make the skin map channels.
For color drawing we used XYZ scan material, WRAP4D wrapped scan material, which is used as a realistic texture base and then we go into MARI to repair the projected texture and add more details. We overlay a lot of different color biases on the colormap for a richer color effect. Finally, because the whole character is relatively simple, we painted some totem effects on his body/face.

We should pay attention to the specular level and Roughness intensity variation. The highlighted map can be drawn in the opposite direction of the roughness map and then adjusted. The final texture needed to be tested and adjusted back and forth in the rendering to see how the character’s skin felt under the lighting environment we set.

Eyeballs
Eyeballs always play a finishing touch in role-making. In this case, the pupil texture I used was also sculpted in ZB, the texture is deliberately strengthened to add some extra texture details.
Whilst eyeball rendering we should pay attention to the construction of lighting, sometimes eye light can play a good ornament effect on the whole character.


Hair
We use XGEN to complete the hair modeling. XGEN is a very popular hair modeling tool.
Traditionally, XGEN has very high controllability and versatility in the modeling controls, we can basically achieve all of our modeling requirements here. Pay attention to the hierarchy between the guidelines and the average distribution of them, also be aware of the shapes being made.
With the help of mask drawing, and the addition of modifier nodes to describe the modeling of different hair.
Hair modeling production ideas are also important, there are some specific hairstyles in the production we should consider before production, different modeling, choice of separate production or overall production will often have a great impact on our time management and effect.
The hairband, we just tiled it using the hair pattern and then used the Grooming aid.

Rendering
Finally, after creation of the hair we can go into the Arnold renderer and draw the image.

I hope this information was useful to you. If you have any questions please feel free to contact me via my Artstation.
Thanks for reading.
Read more articles
You might also like these articles.