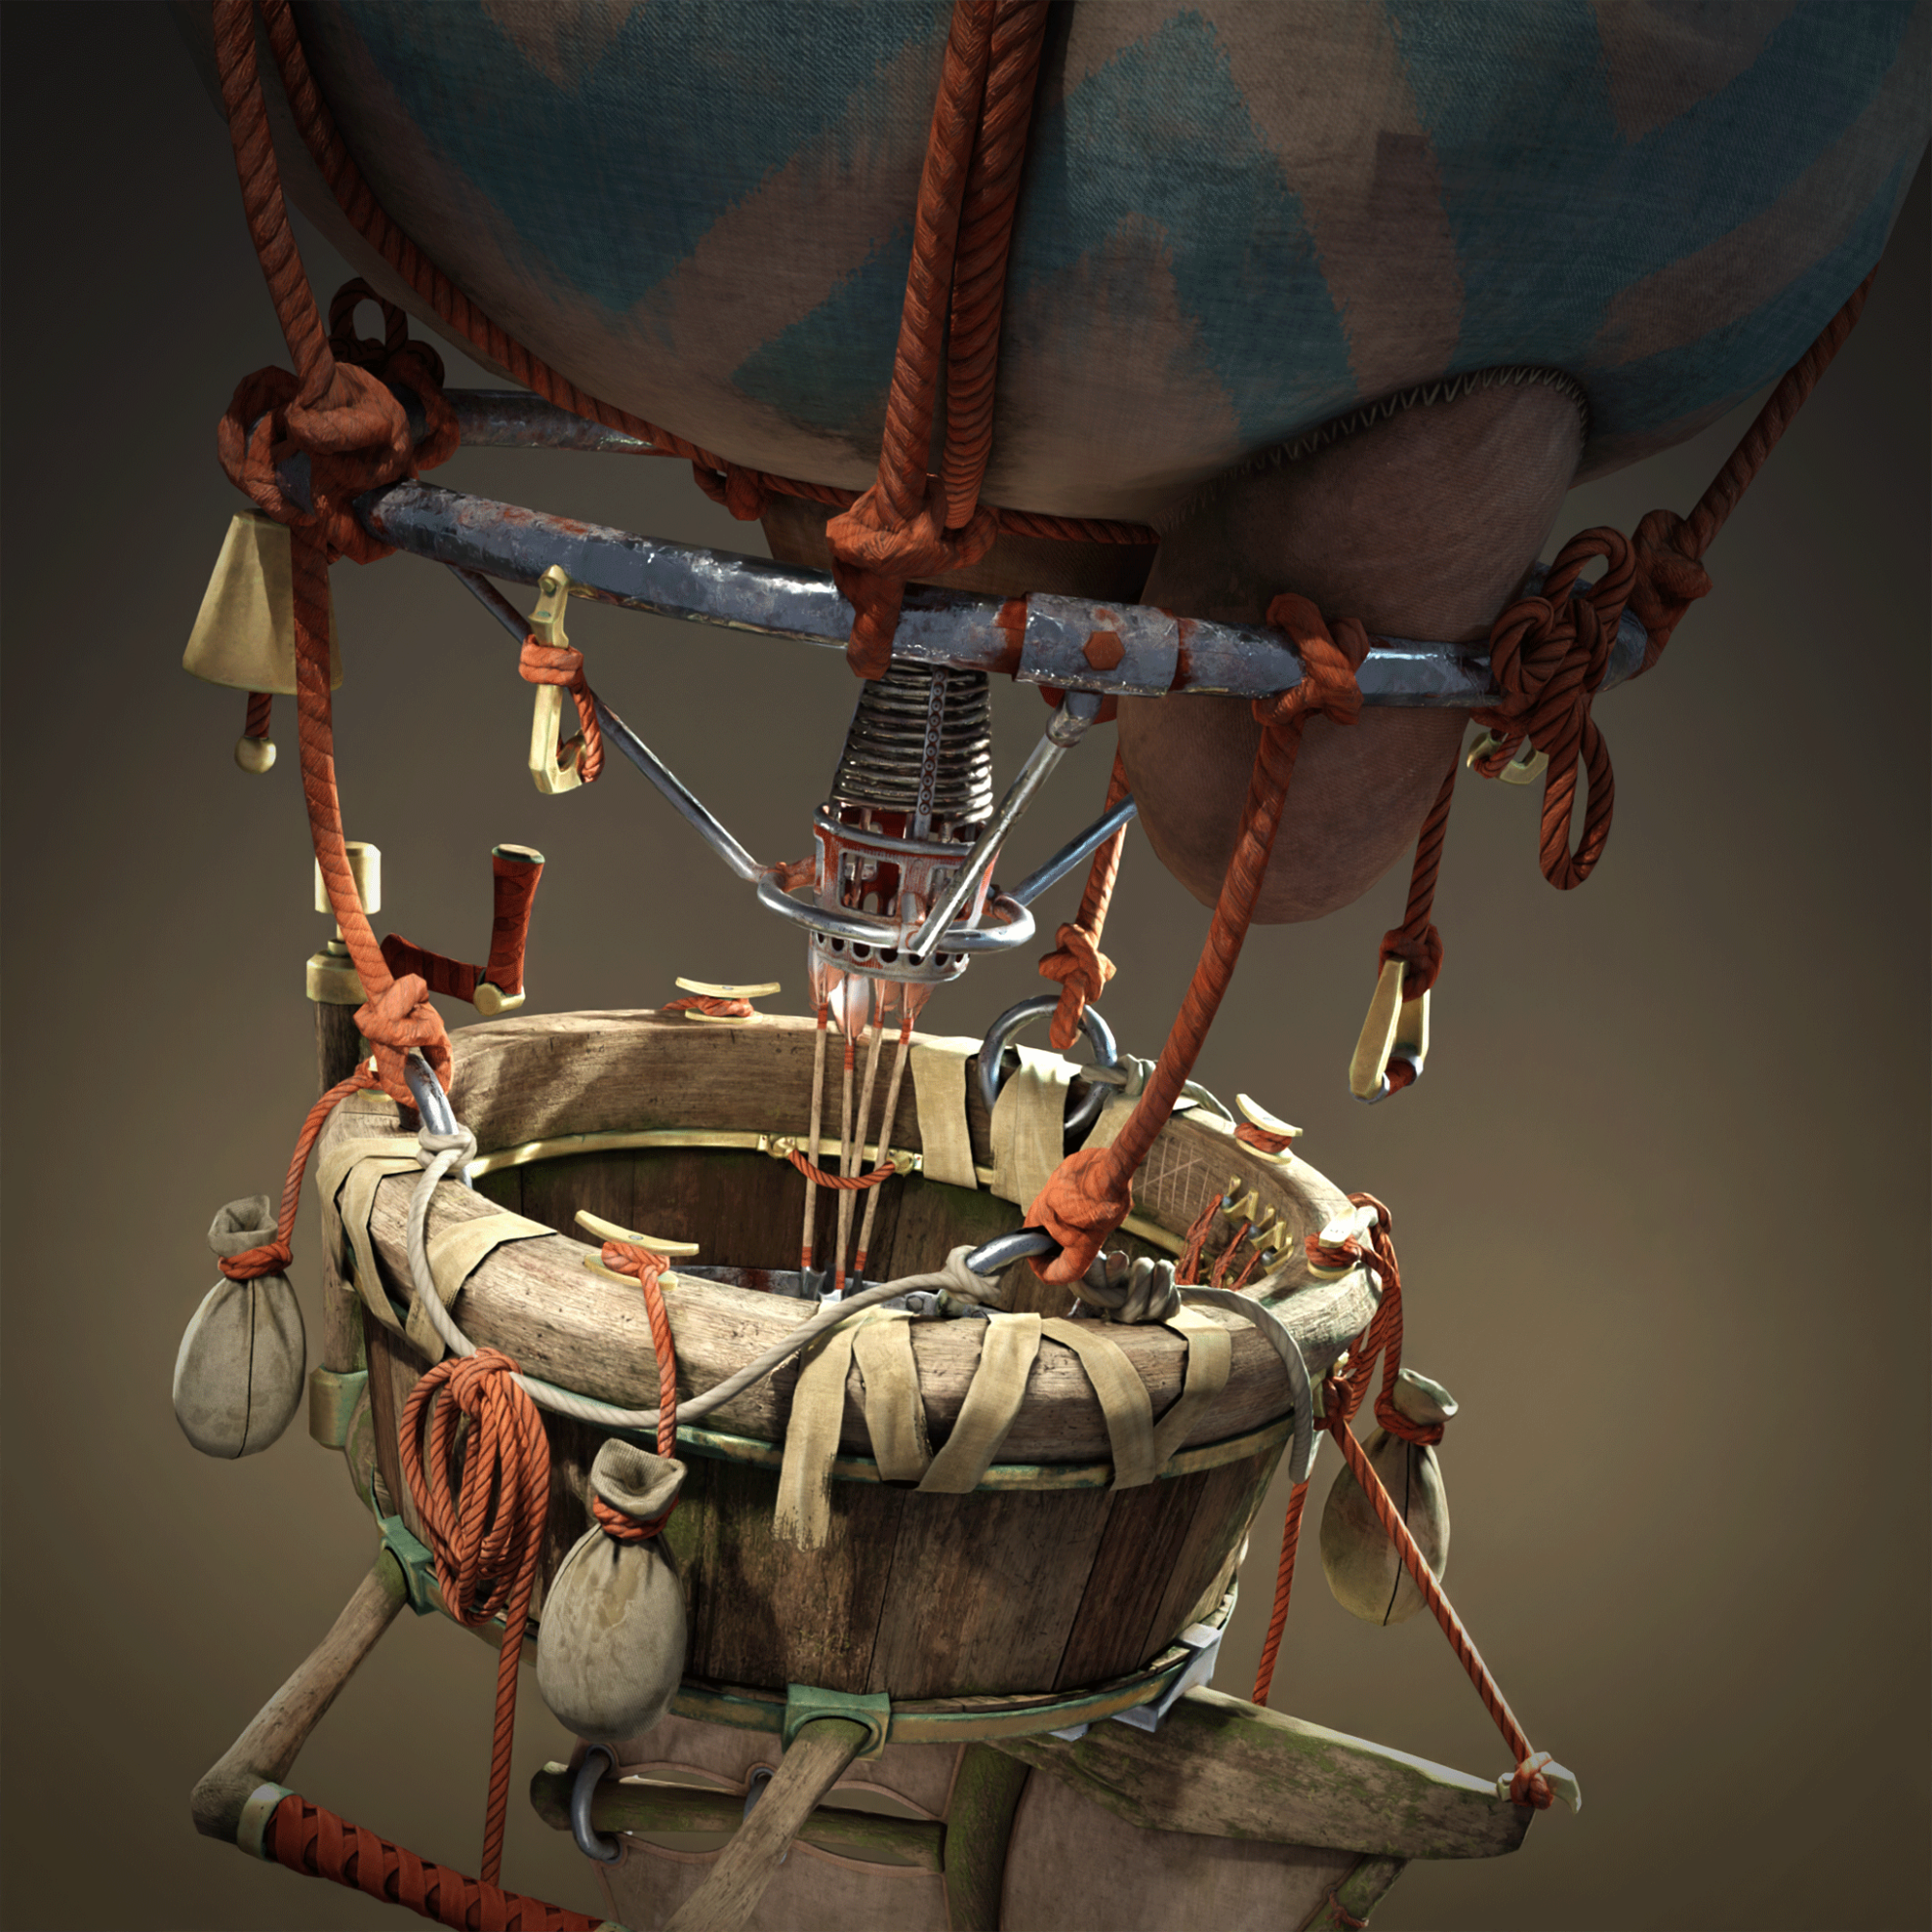
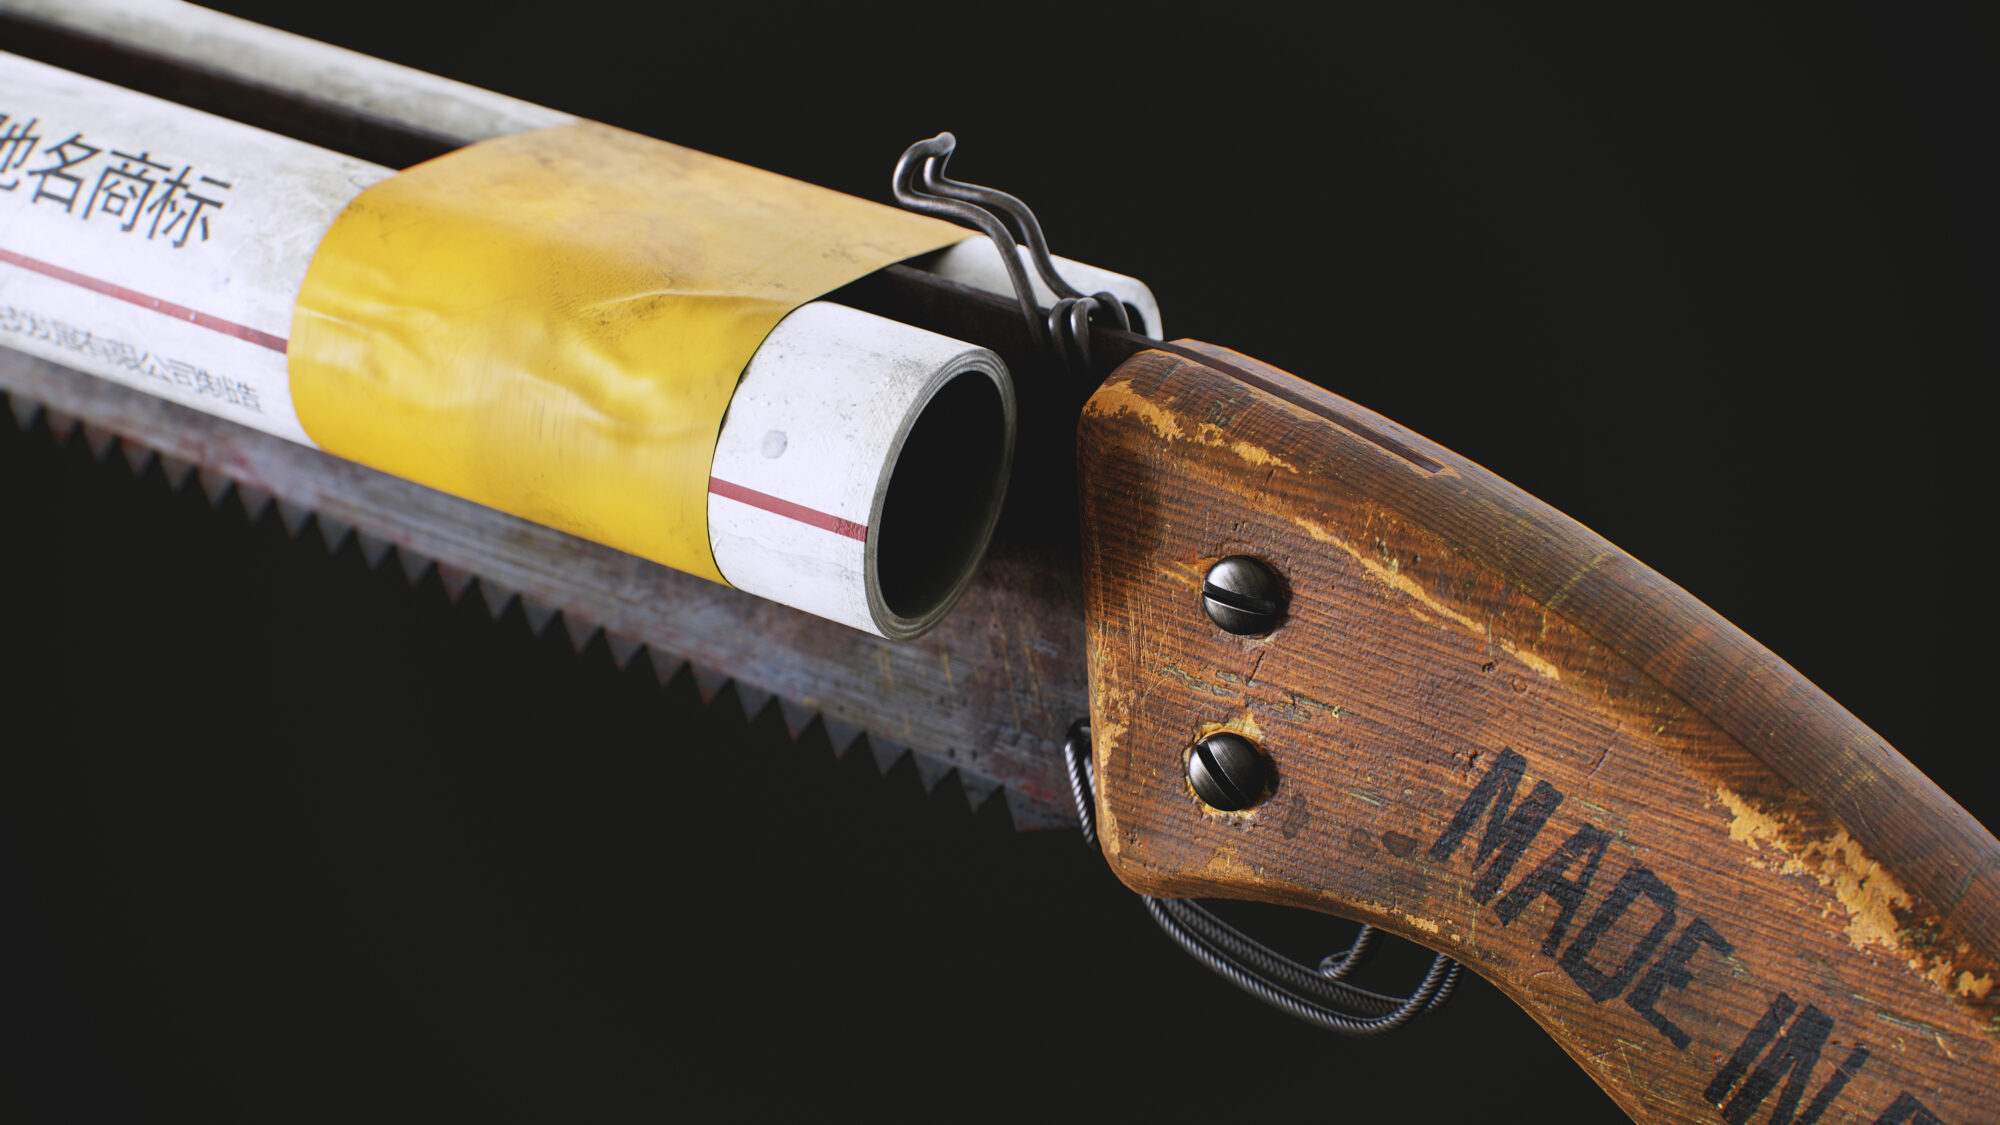
Propane Torch
Introduction
Hi, my name is Paweł Grabacki, I'm 27 years old and I live in Poland.
I’m currently working as a vehicle artist. My interest in 3D started back in 2018.
Goals
The original goal of this project was to improve my texturing skills and bring my portfolio up to date.
Tools
- Pure Ref – References
- 3Ds Max – Blockout, high poly & low poly
- RizomUV – UVs Zbrush – Sculpting
- Substance Painter – Baking & Texturing
- Photoshop – Texturing & Postprocessing
- Marmoset Toolbag – Rendering References & Inspiration
References & Inspiration
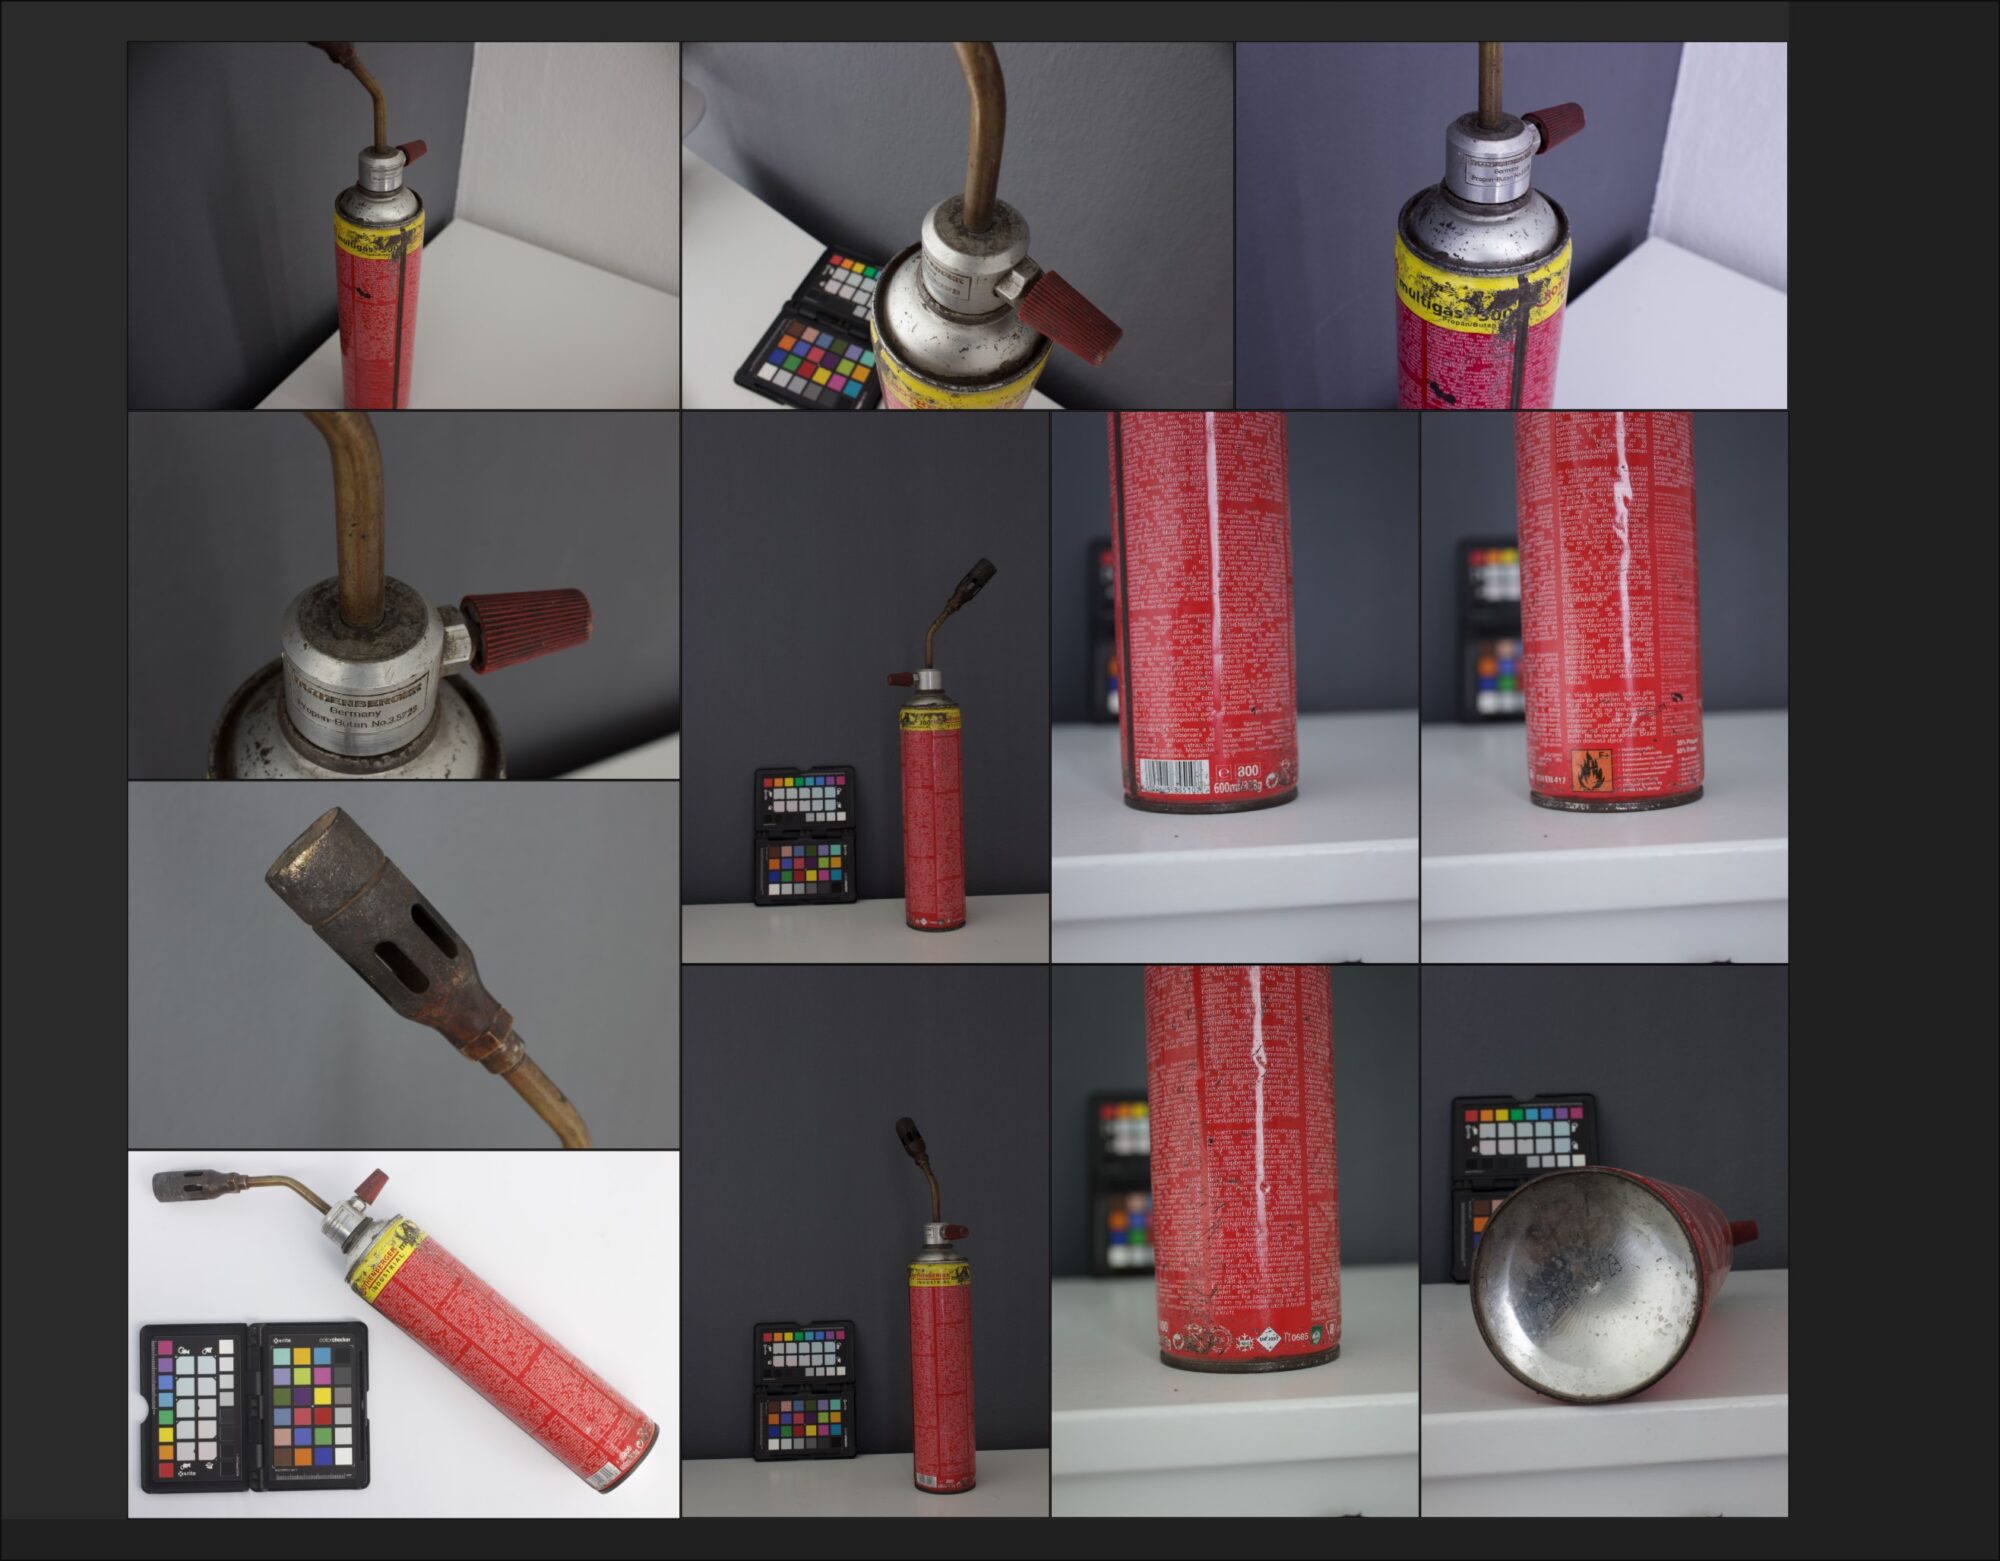
Gathering high-quality references is crucial for every future step of the project.
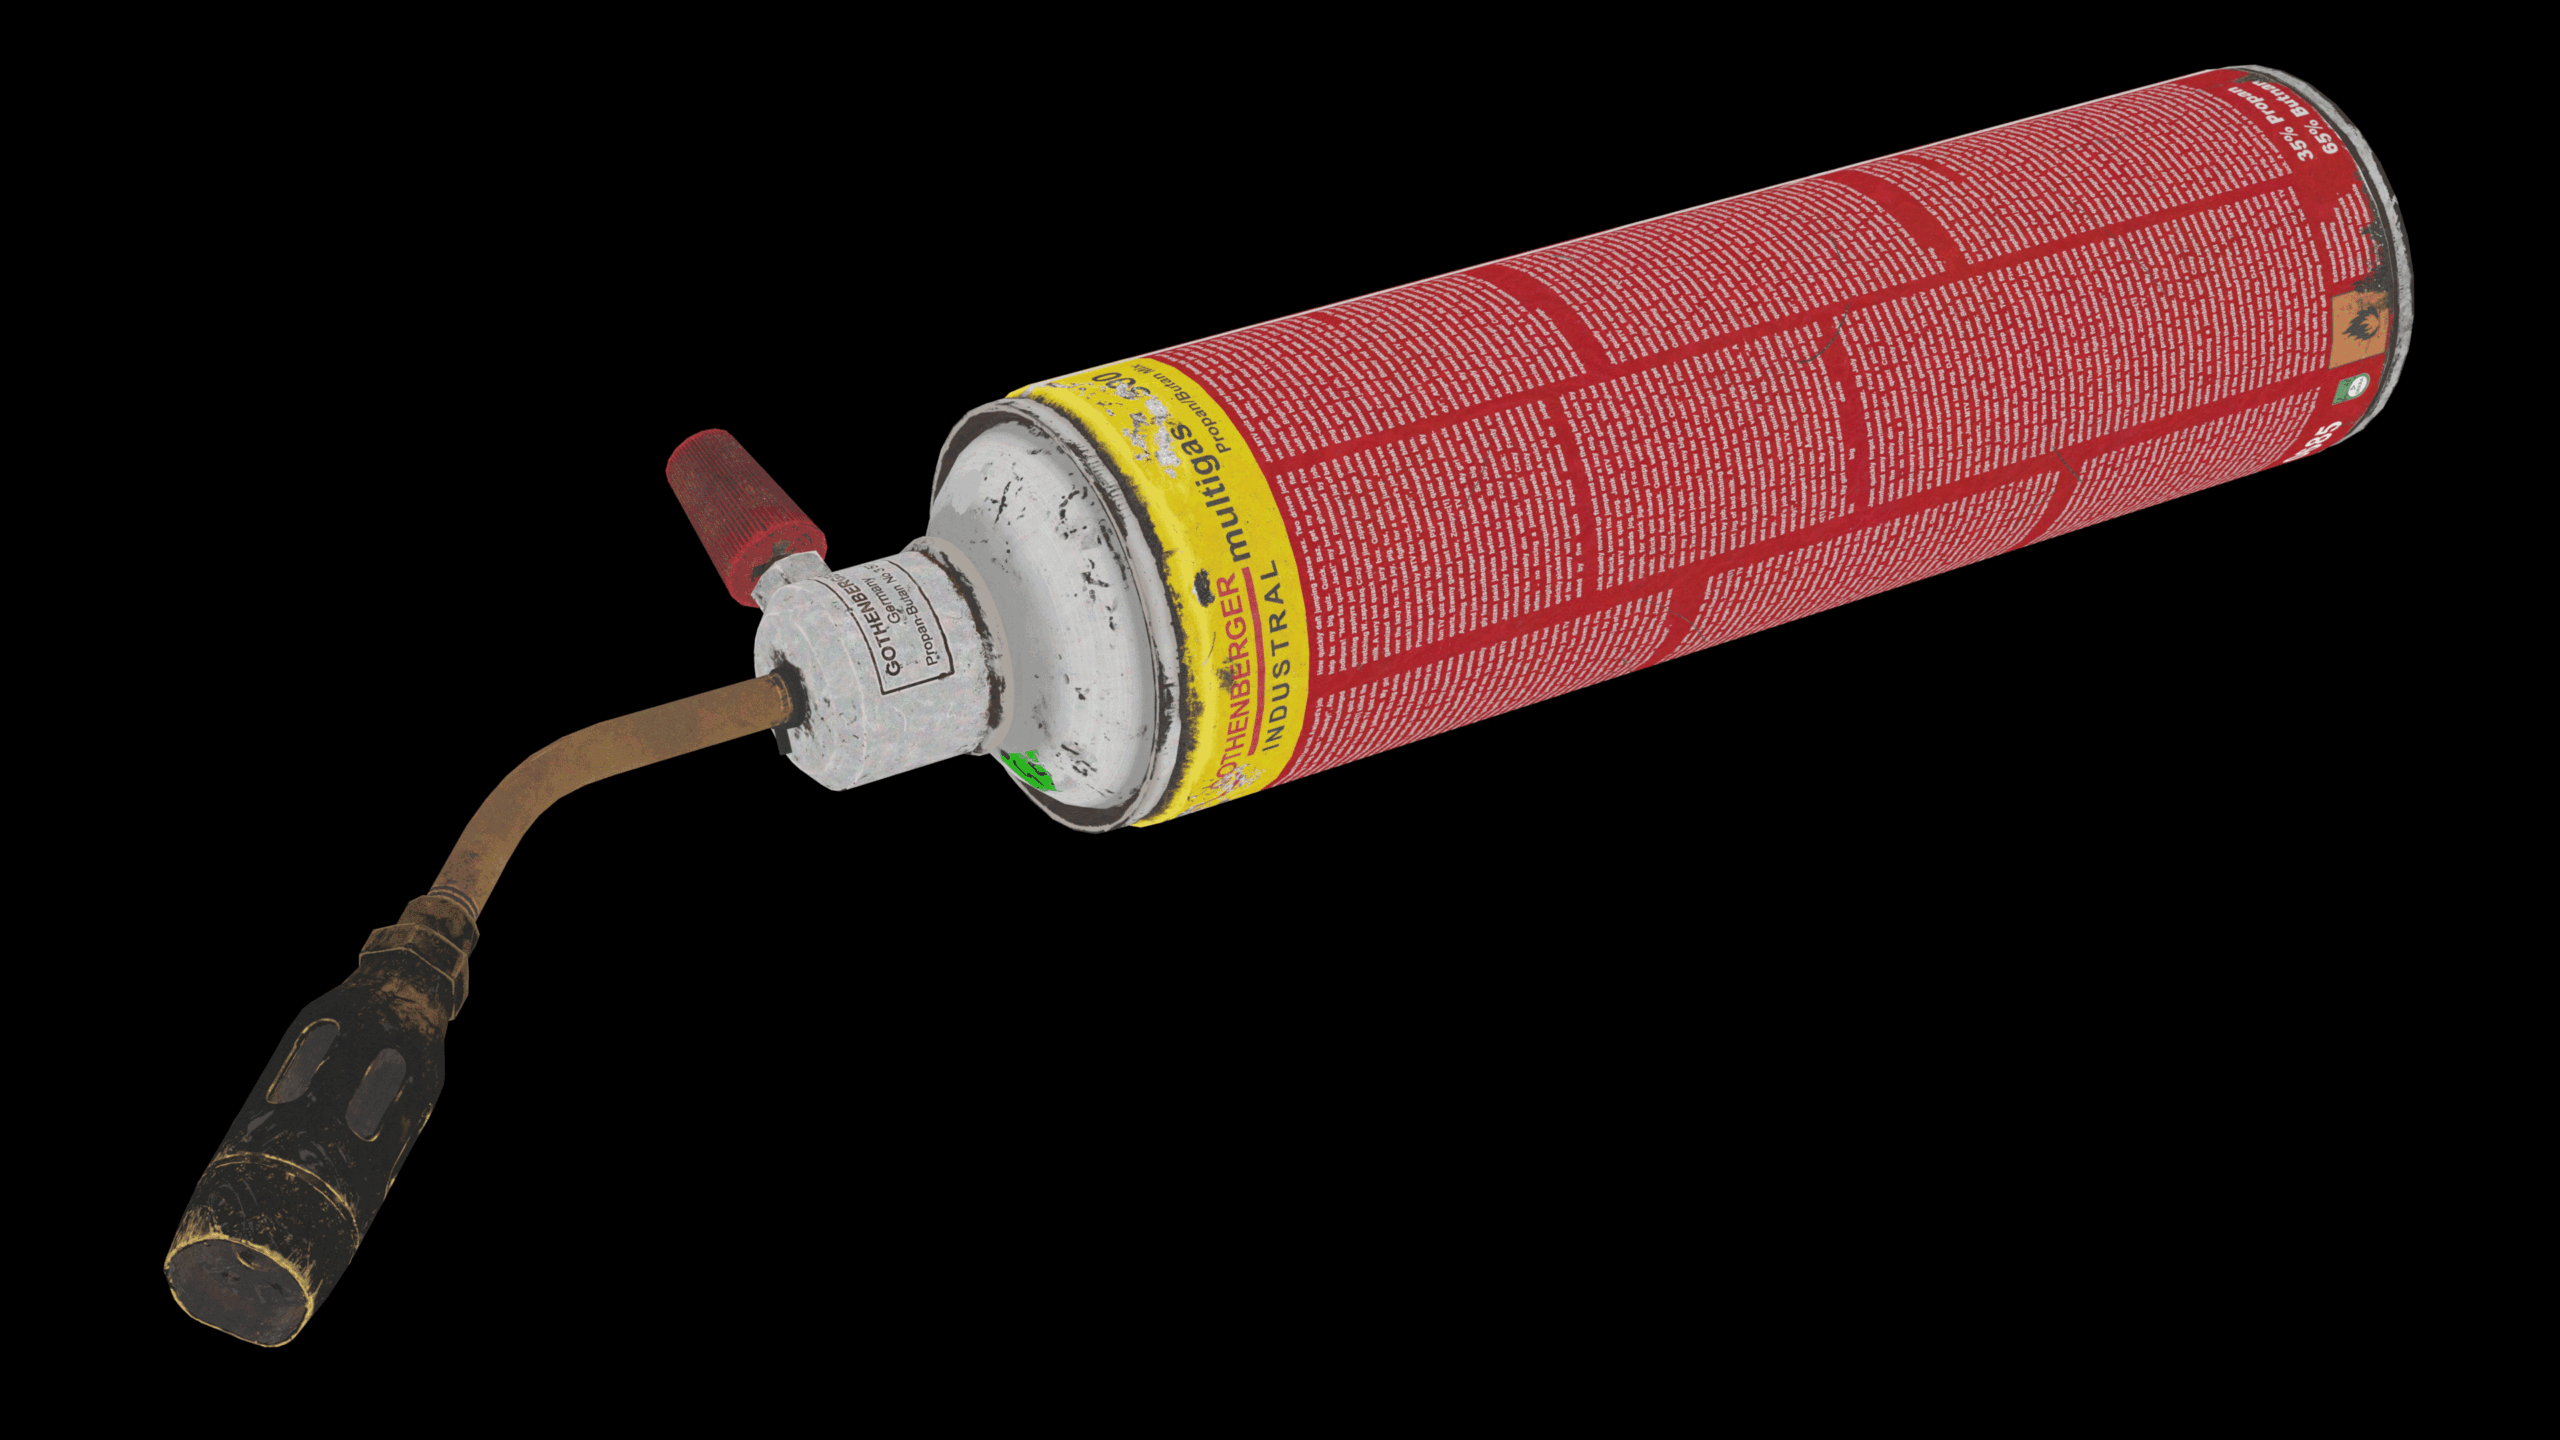
In this case, I had access to a real object, so I decided to take some photos of it. To get the best color accuracy, I balanced them using a color checker.
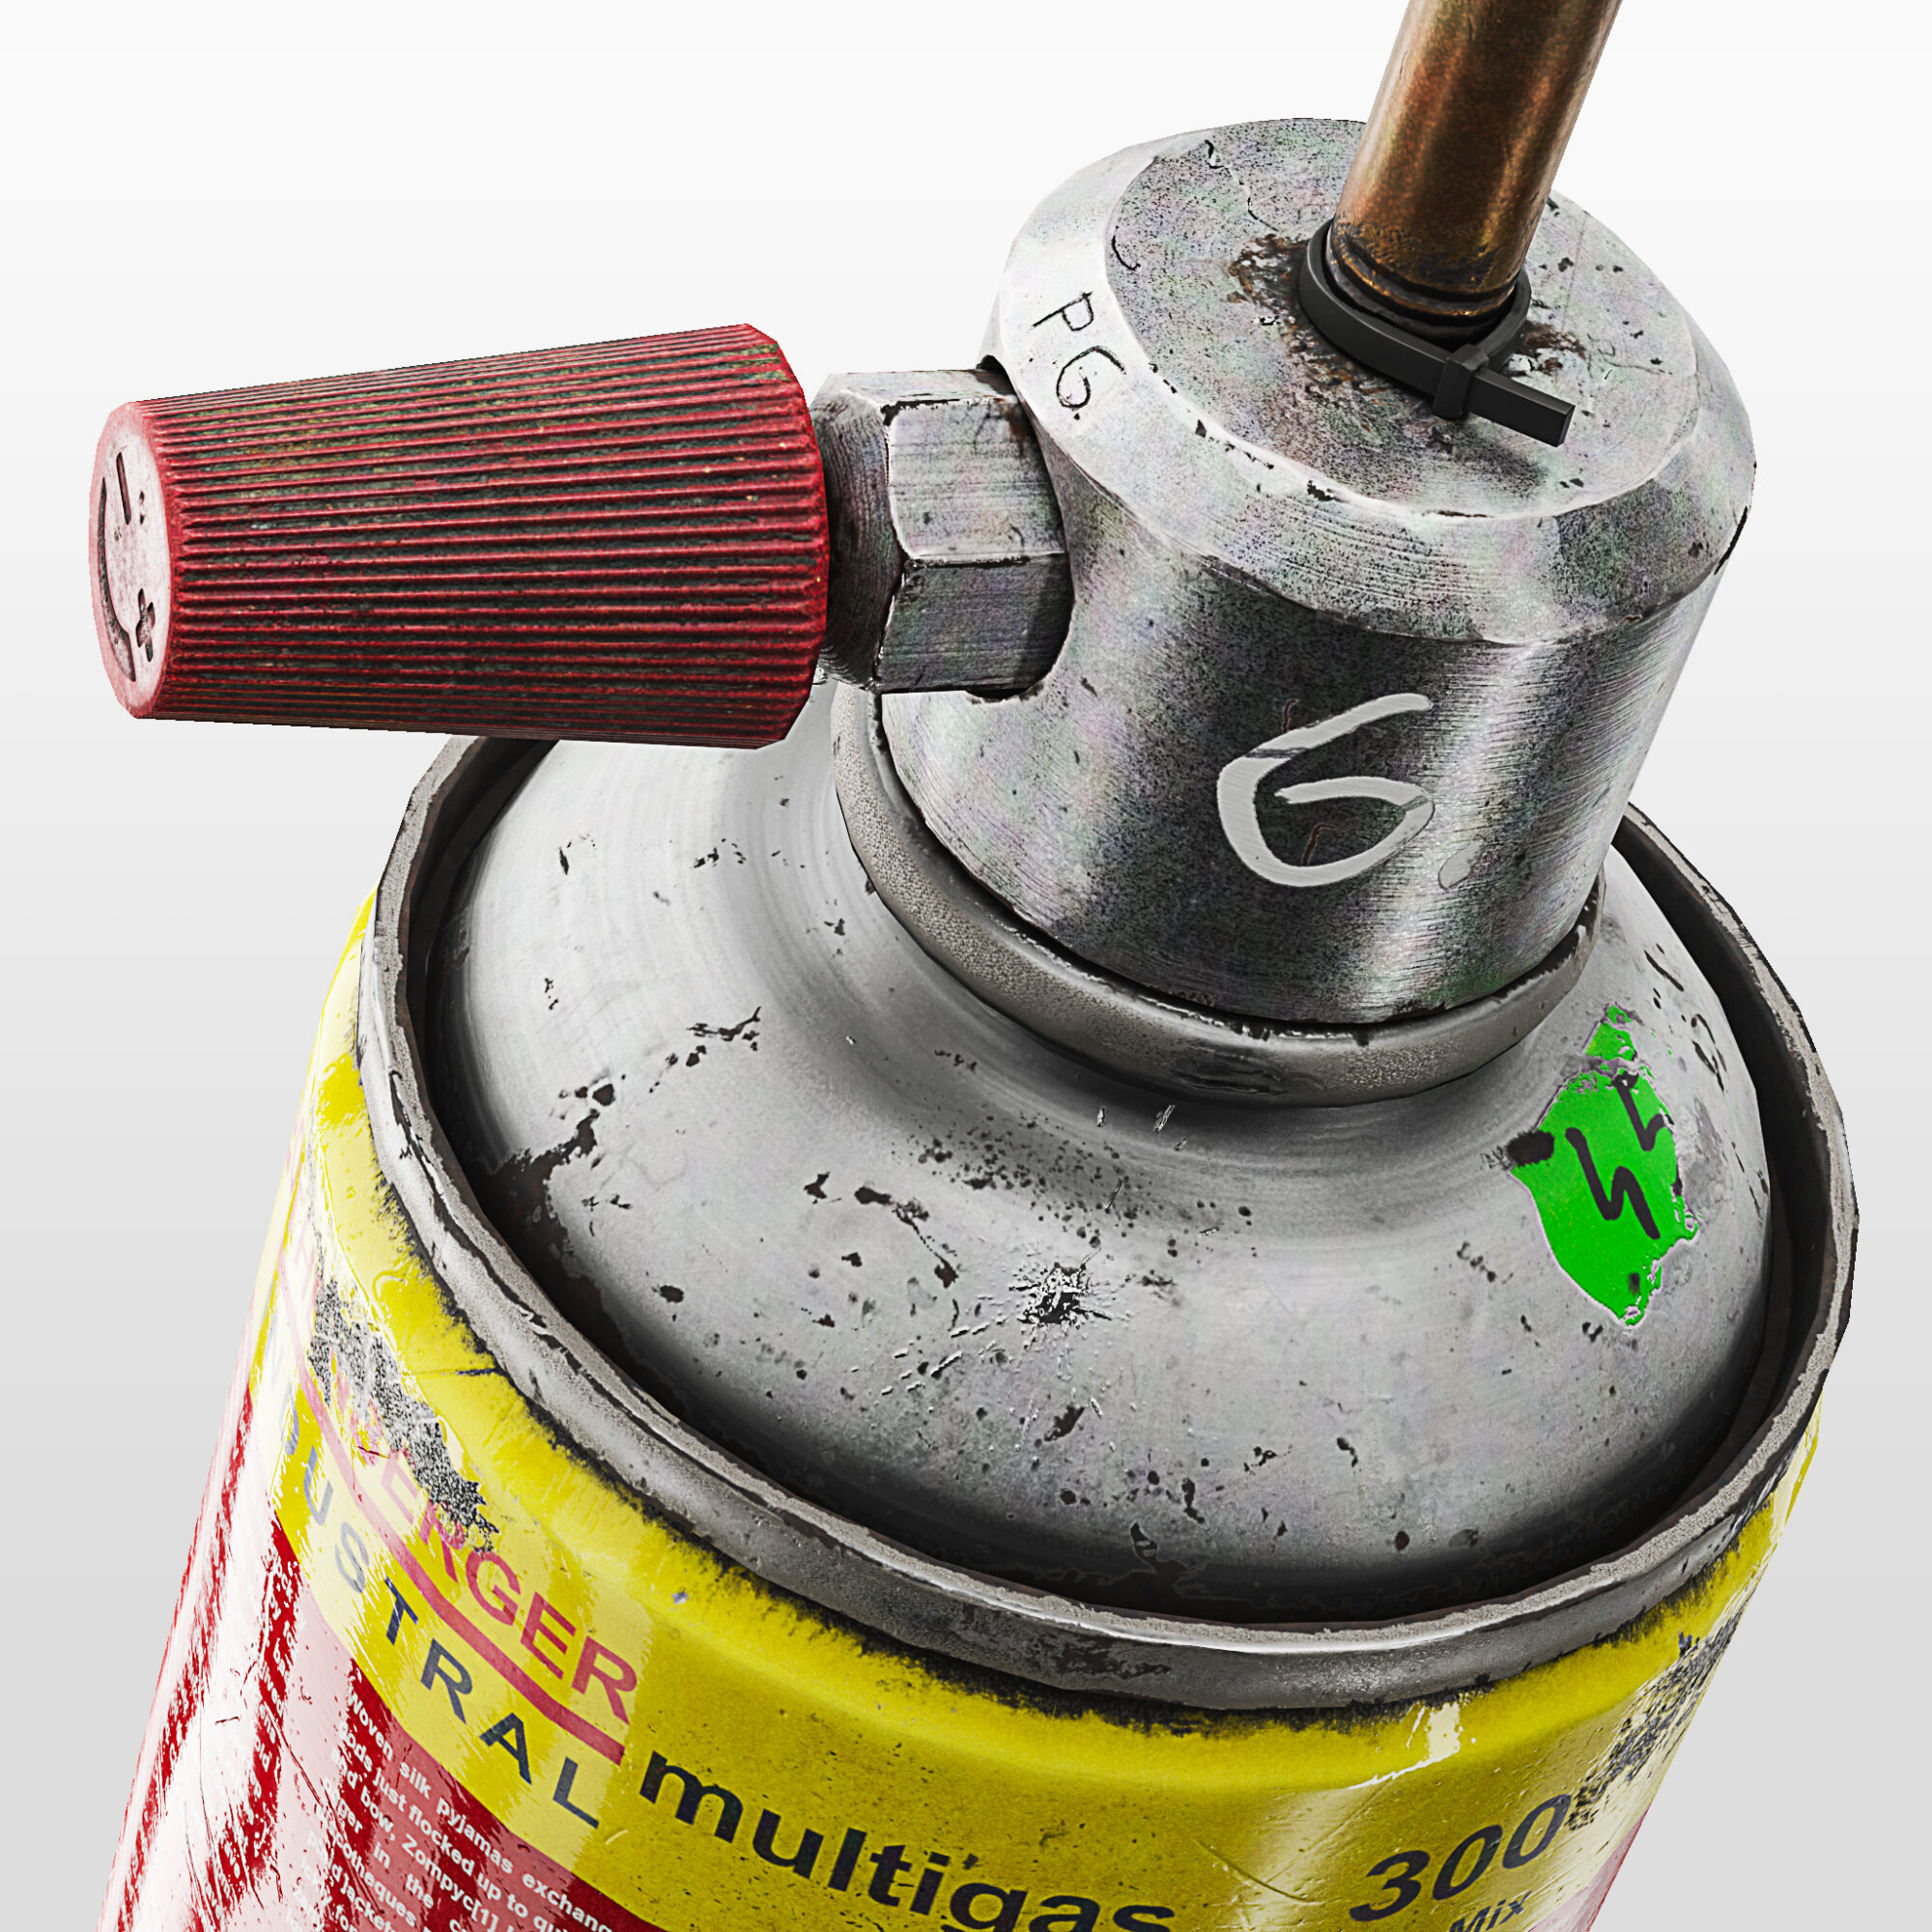
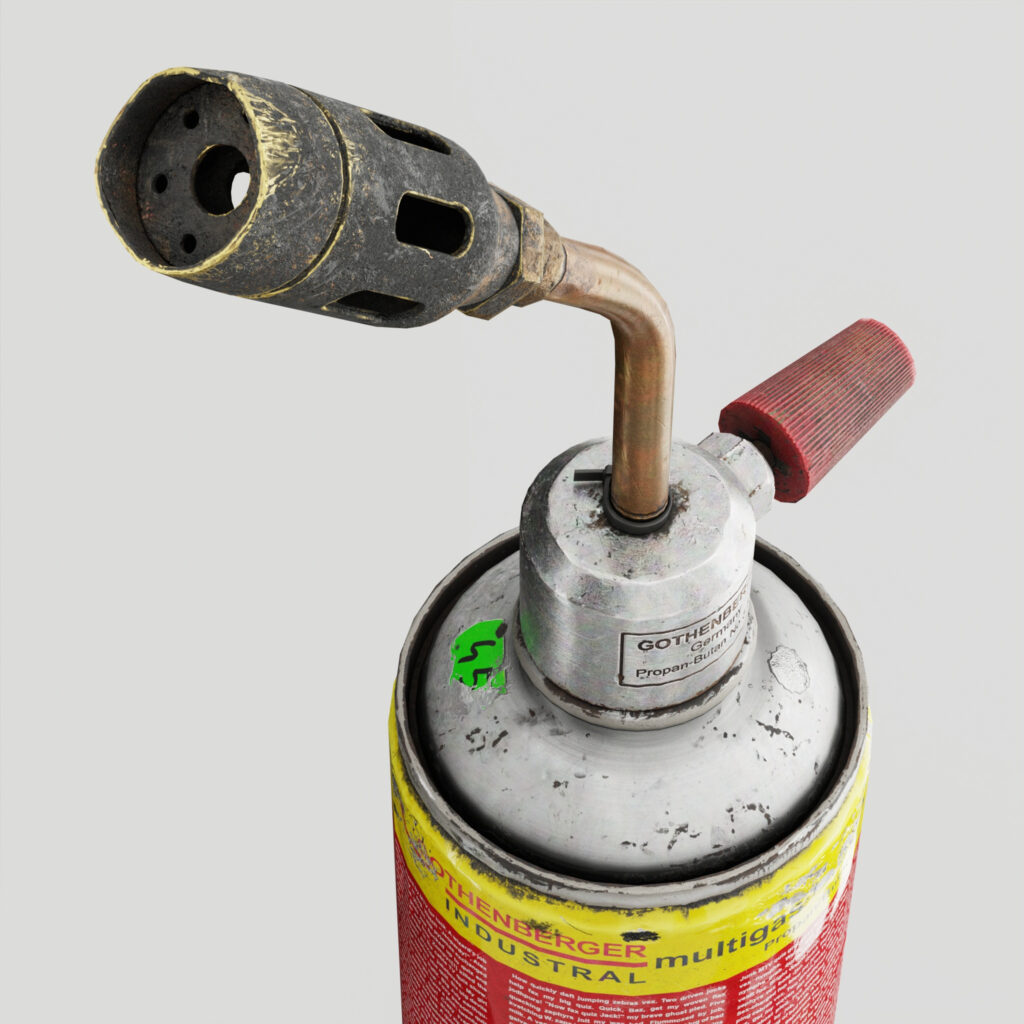
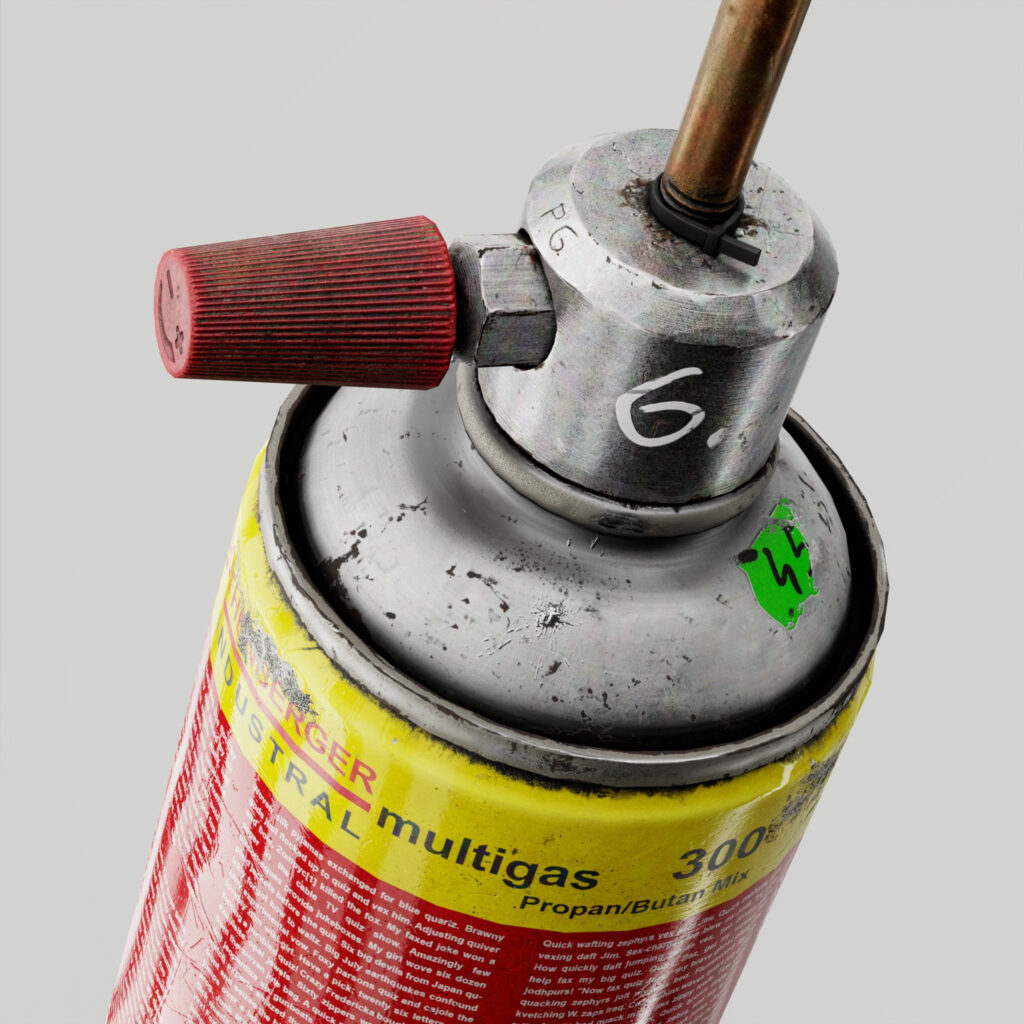
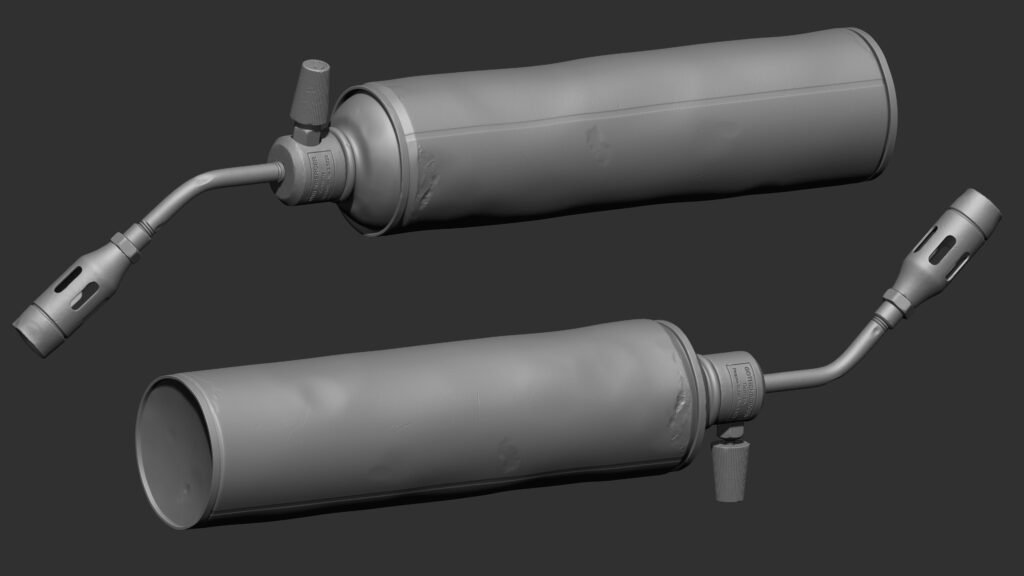
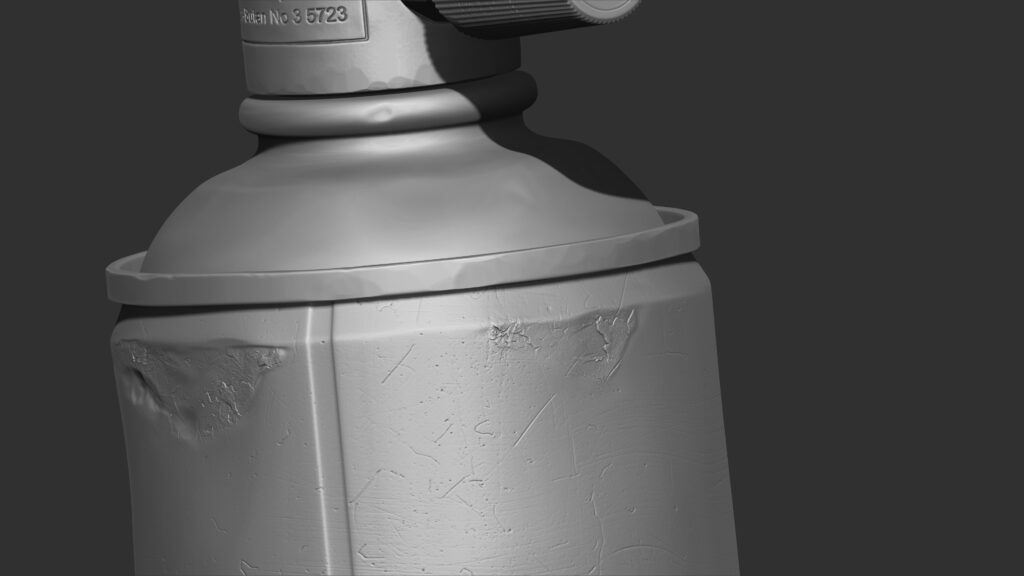
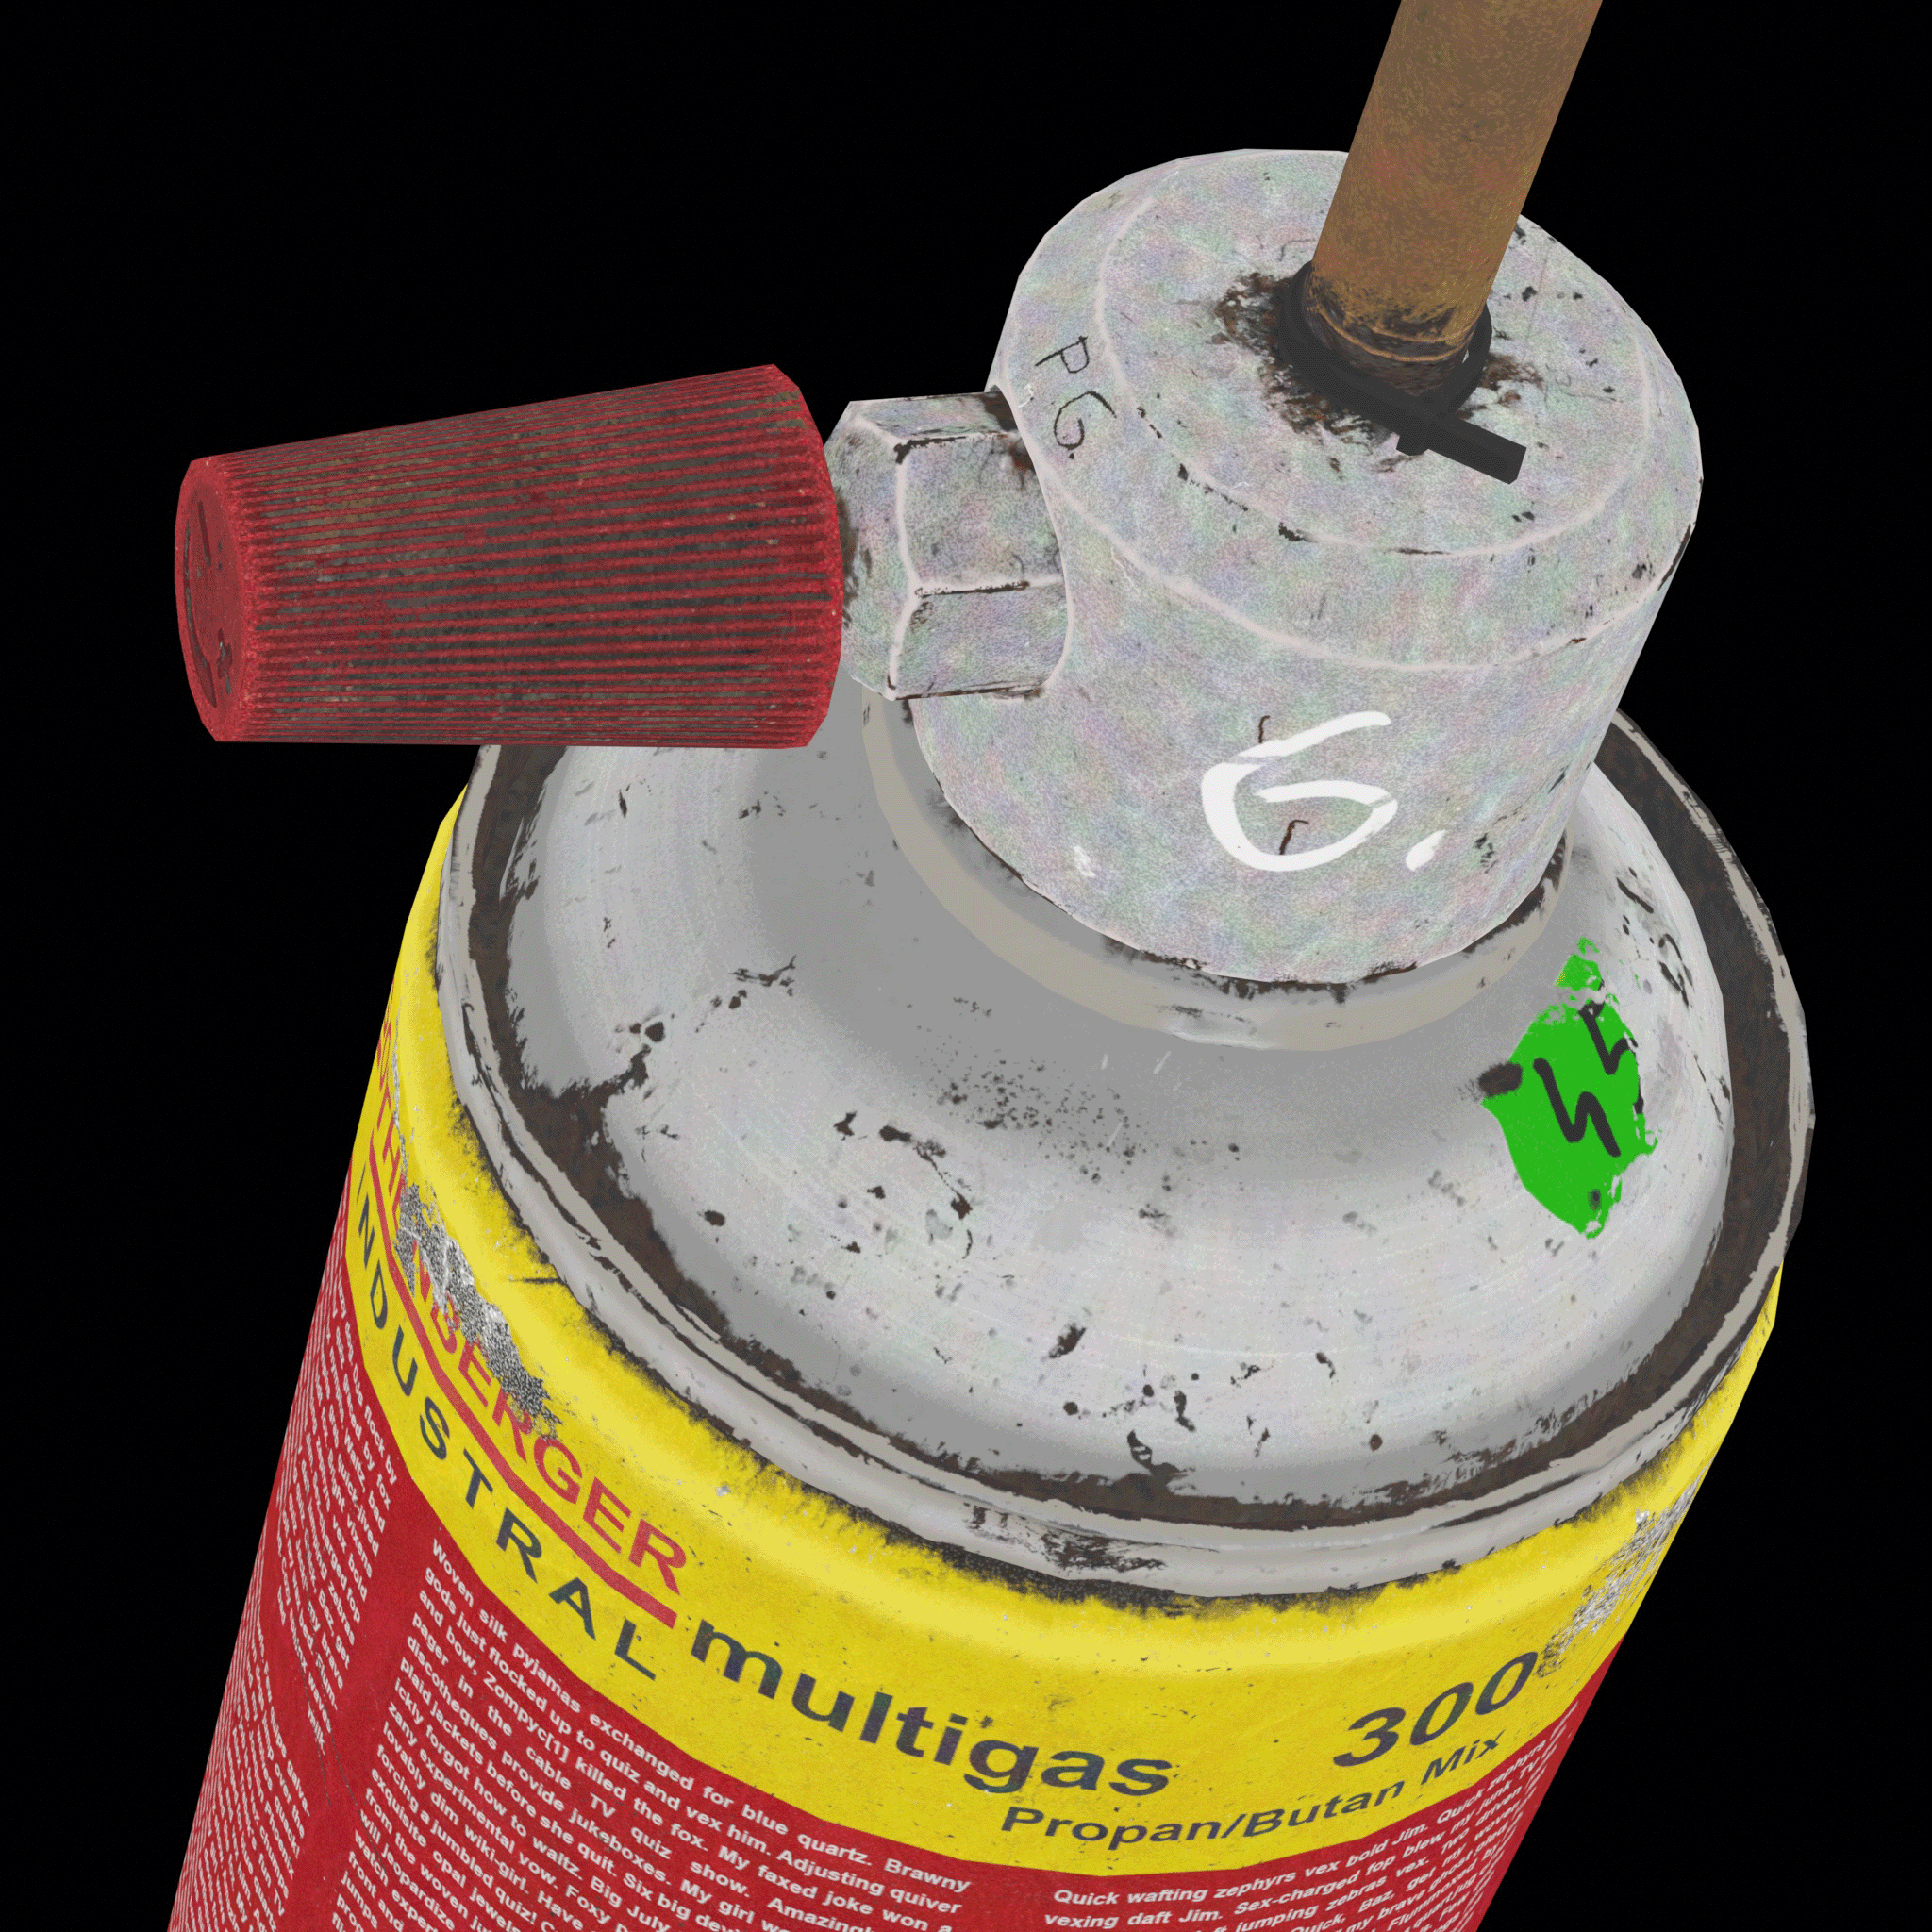
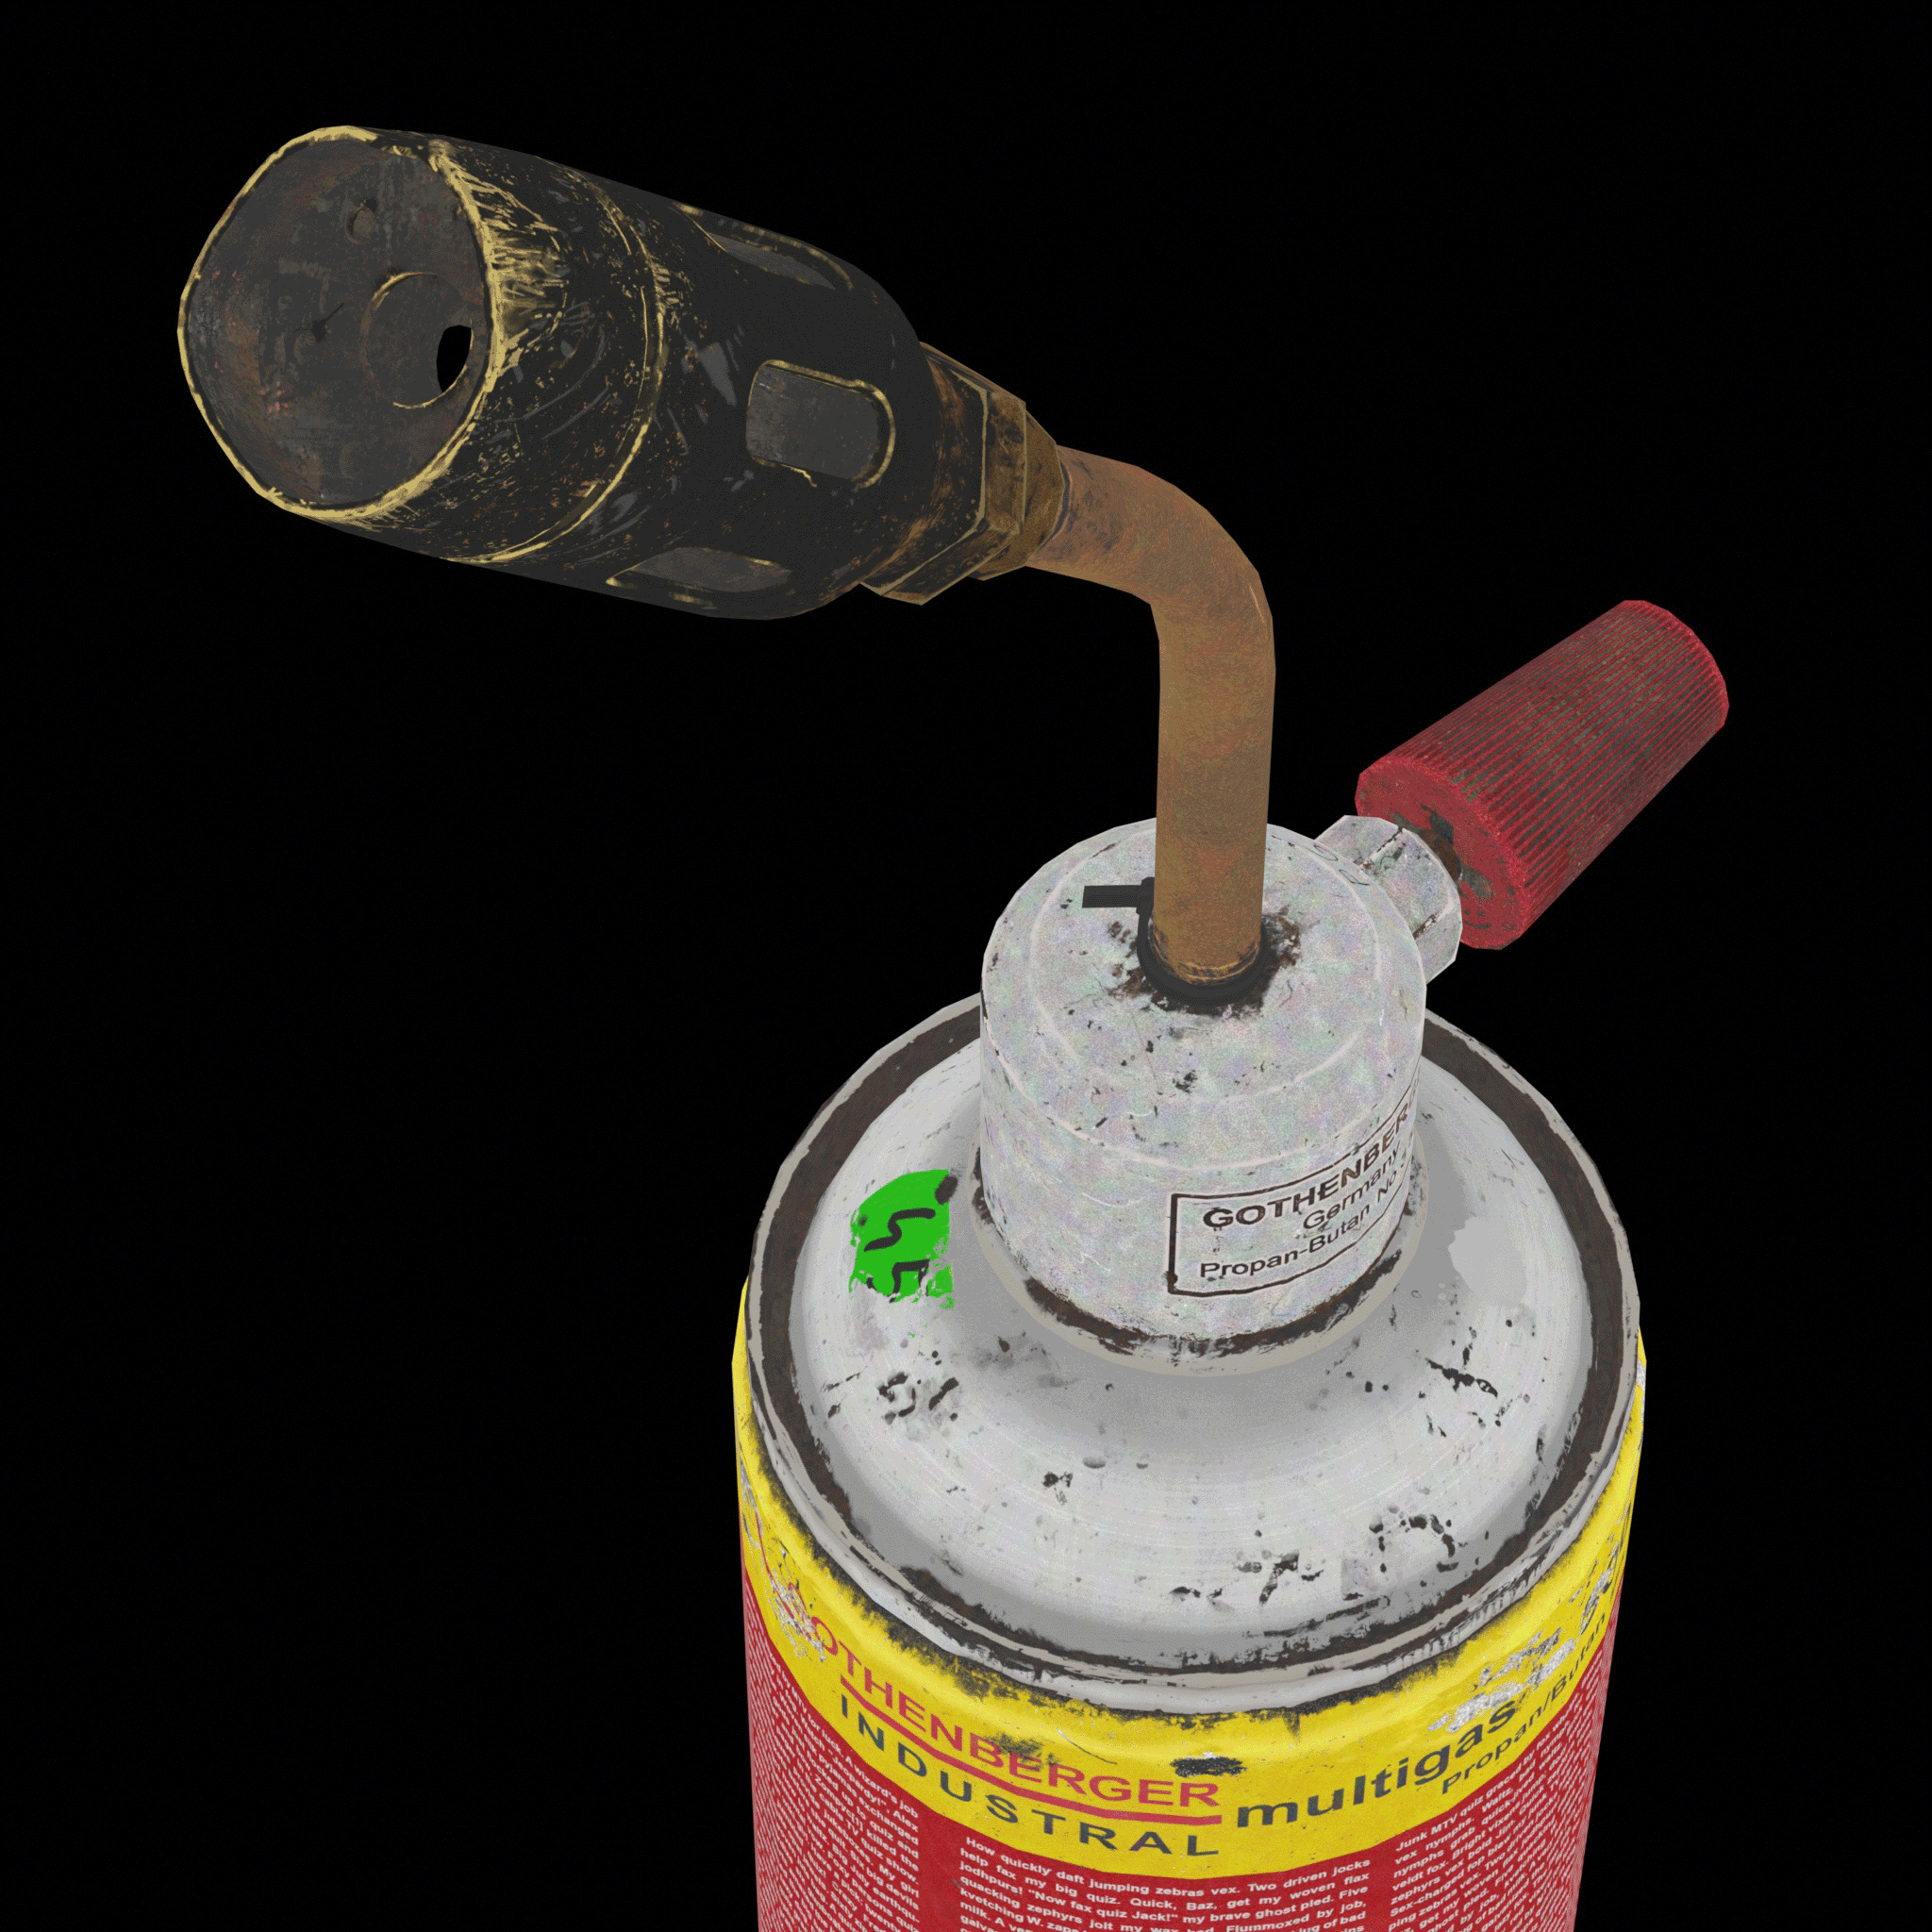
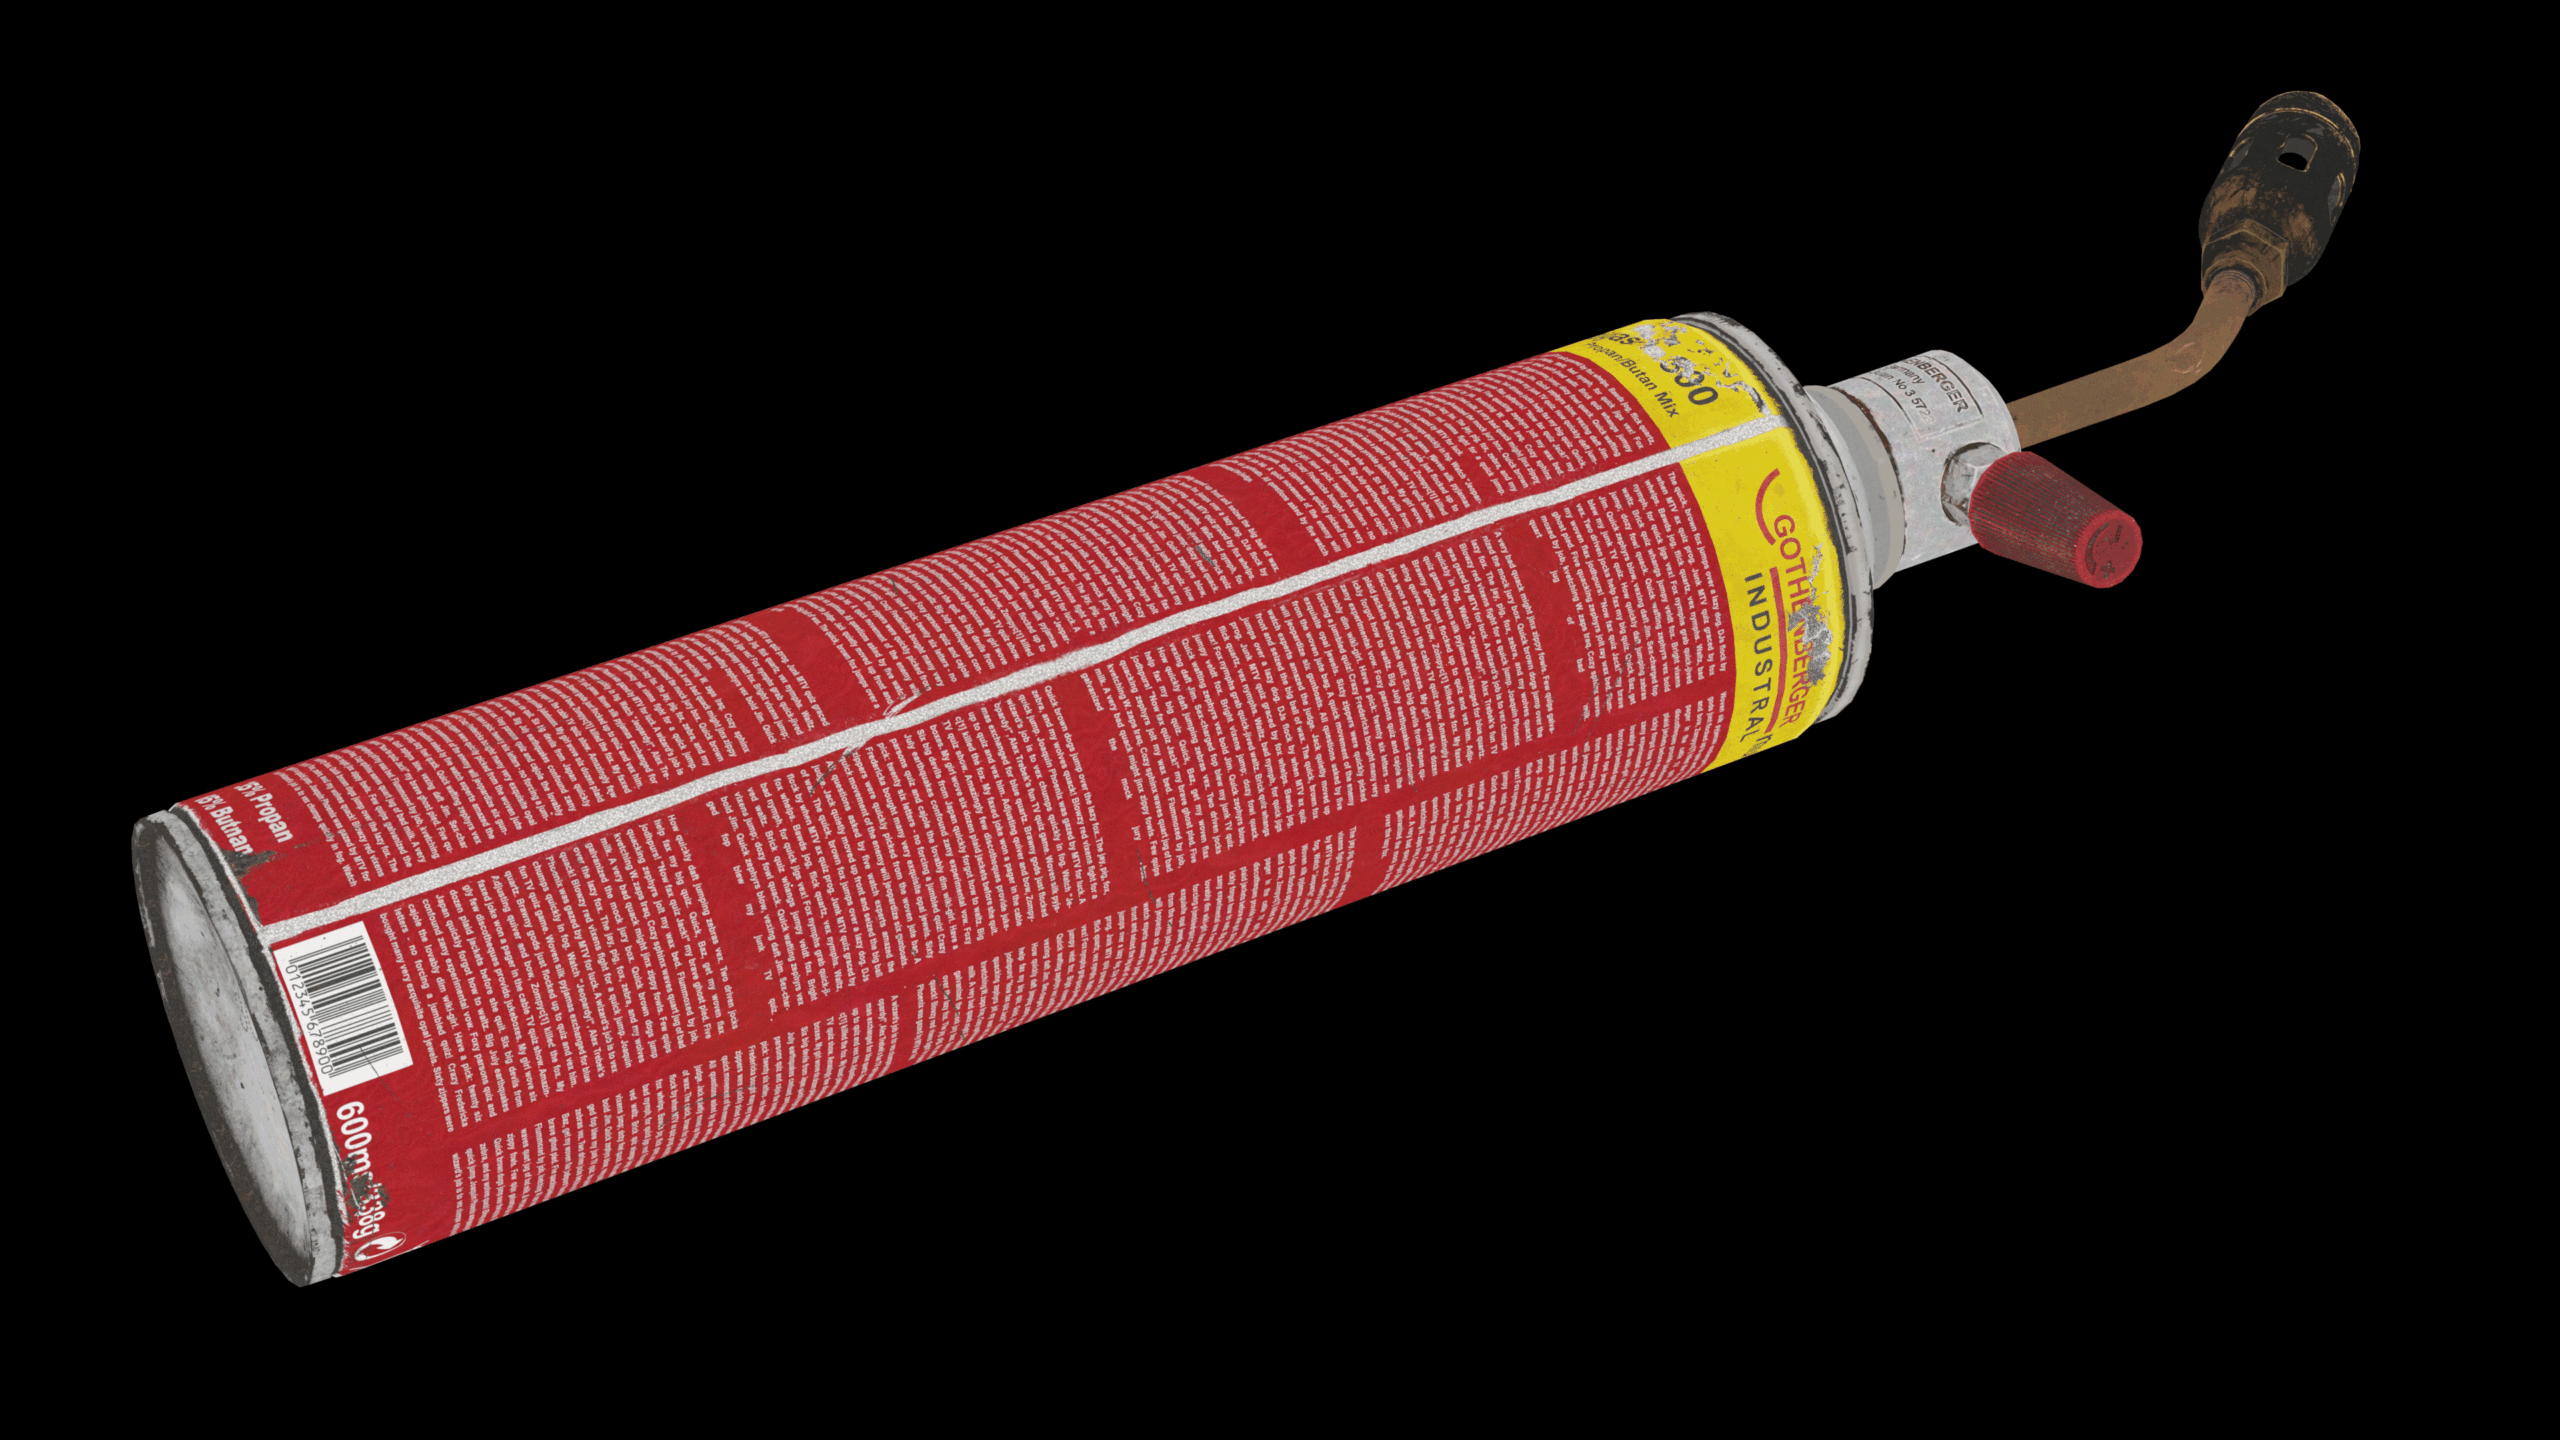
For the storytelling: I wanted to convey that the prop was often used in a working environment where it had been beaten up and customized a bit by its owner.
Blockout & Modeling Workflow
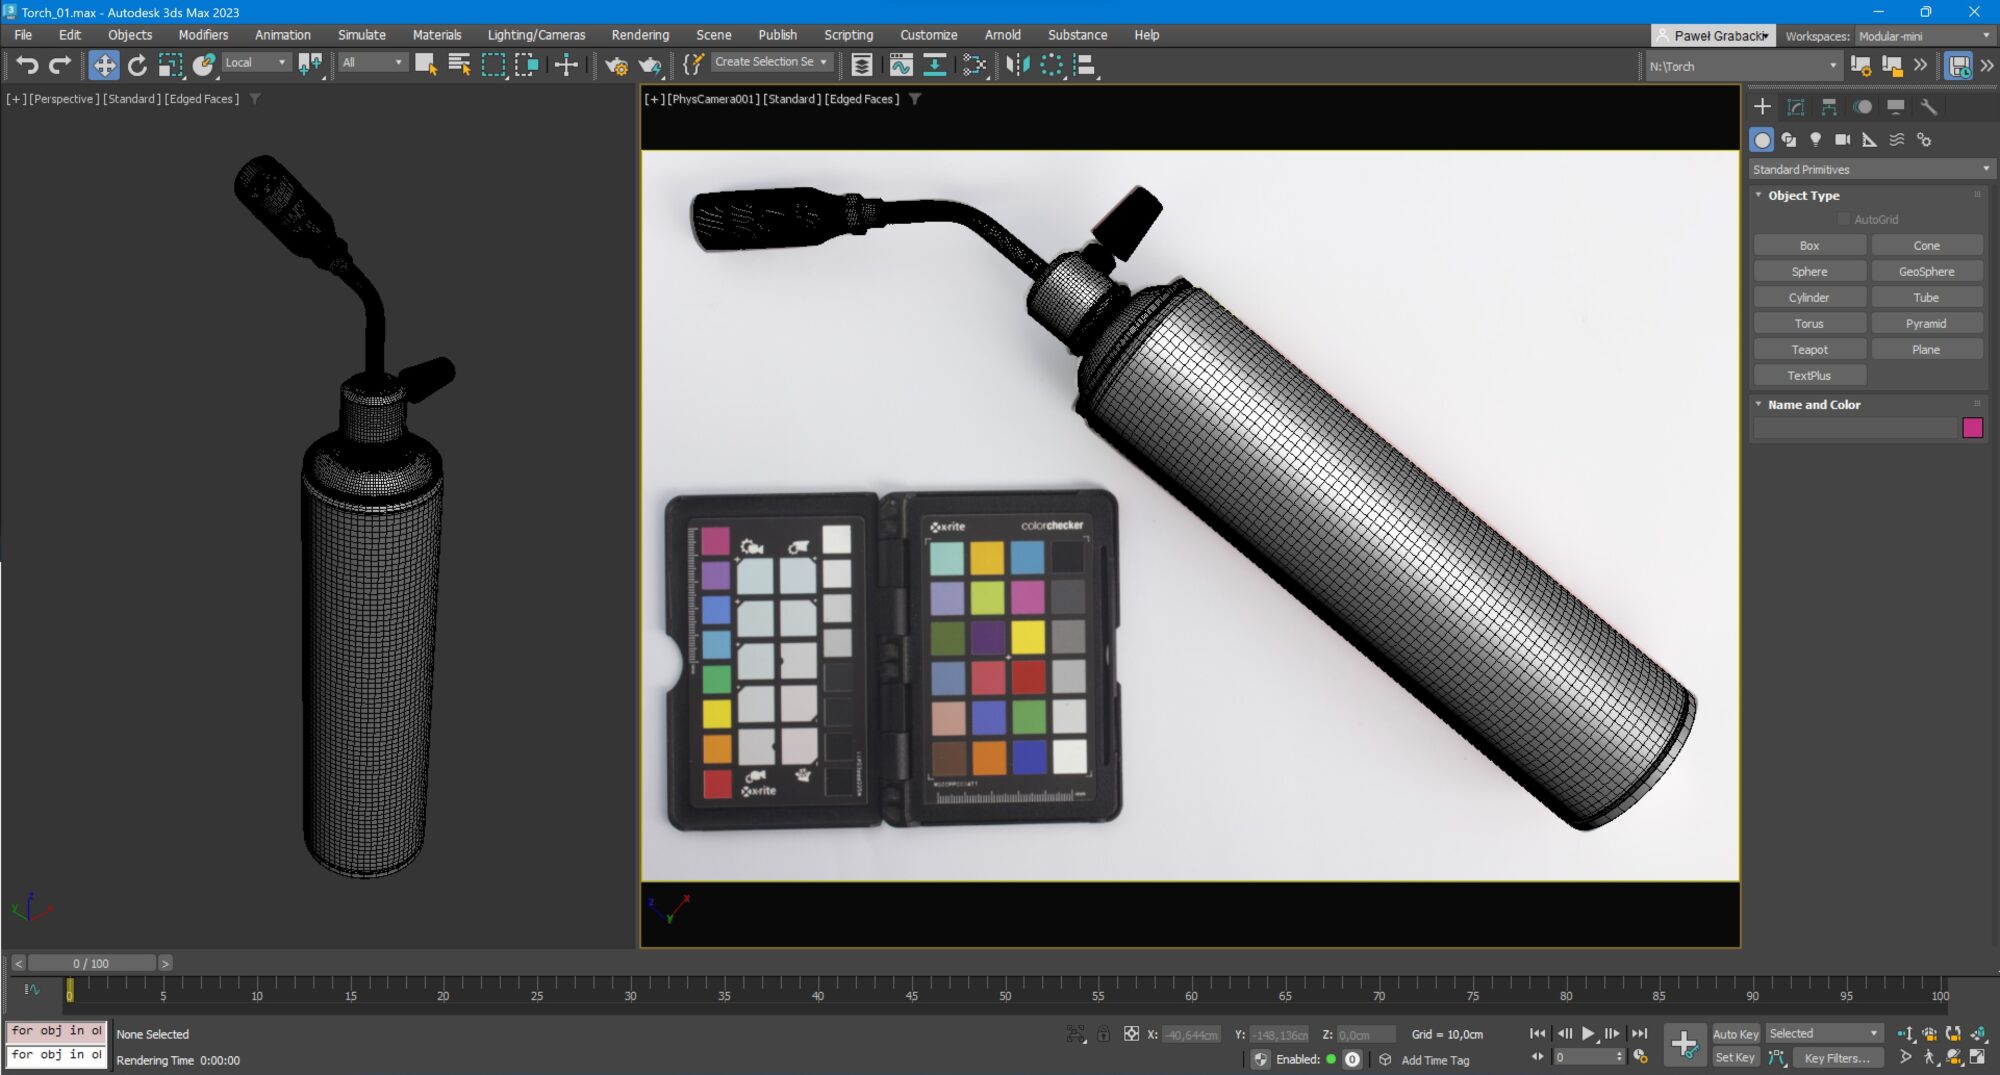
I created an initial blockout in 3DS Max using photo references. I made sure that the proportions/scale were as close to the real object as possible.
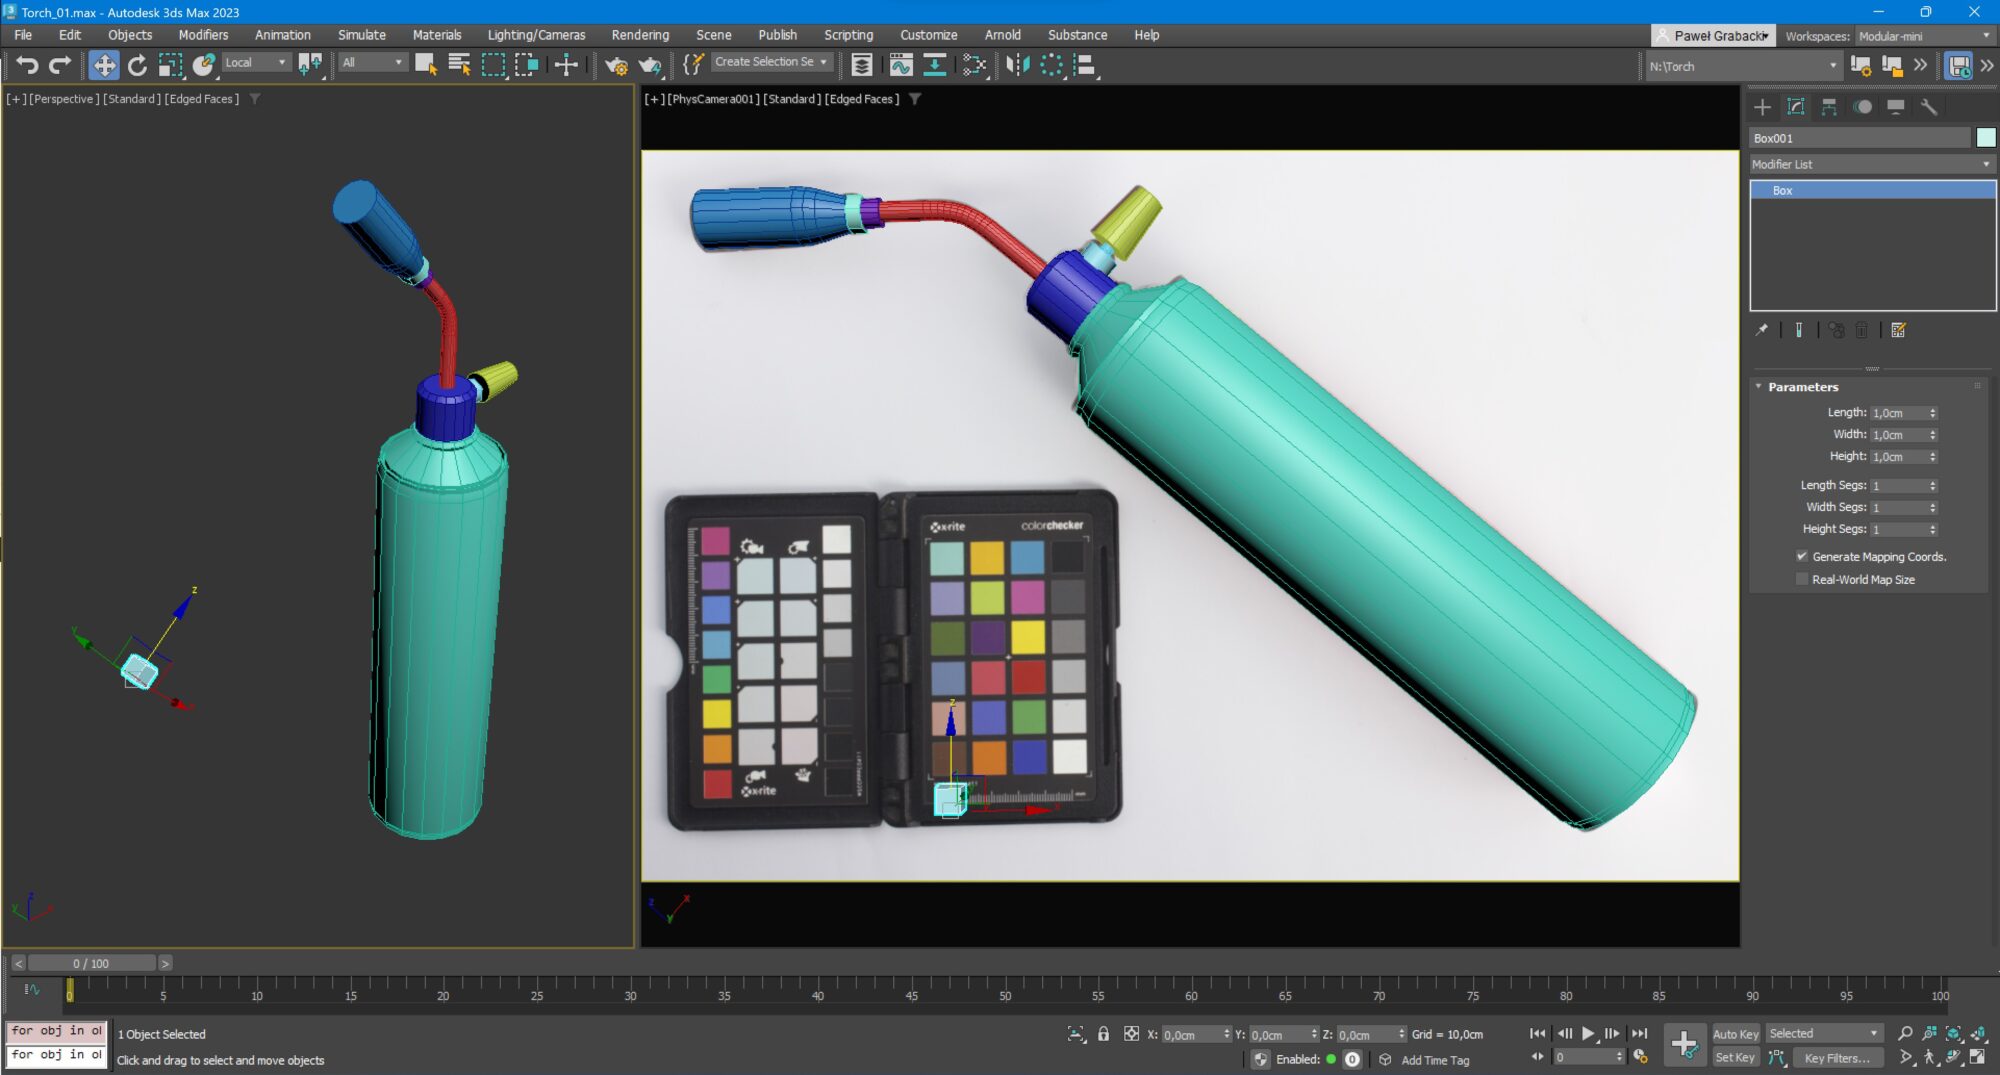
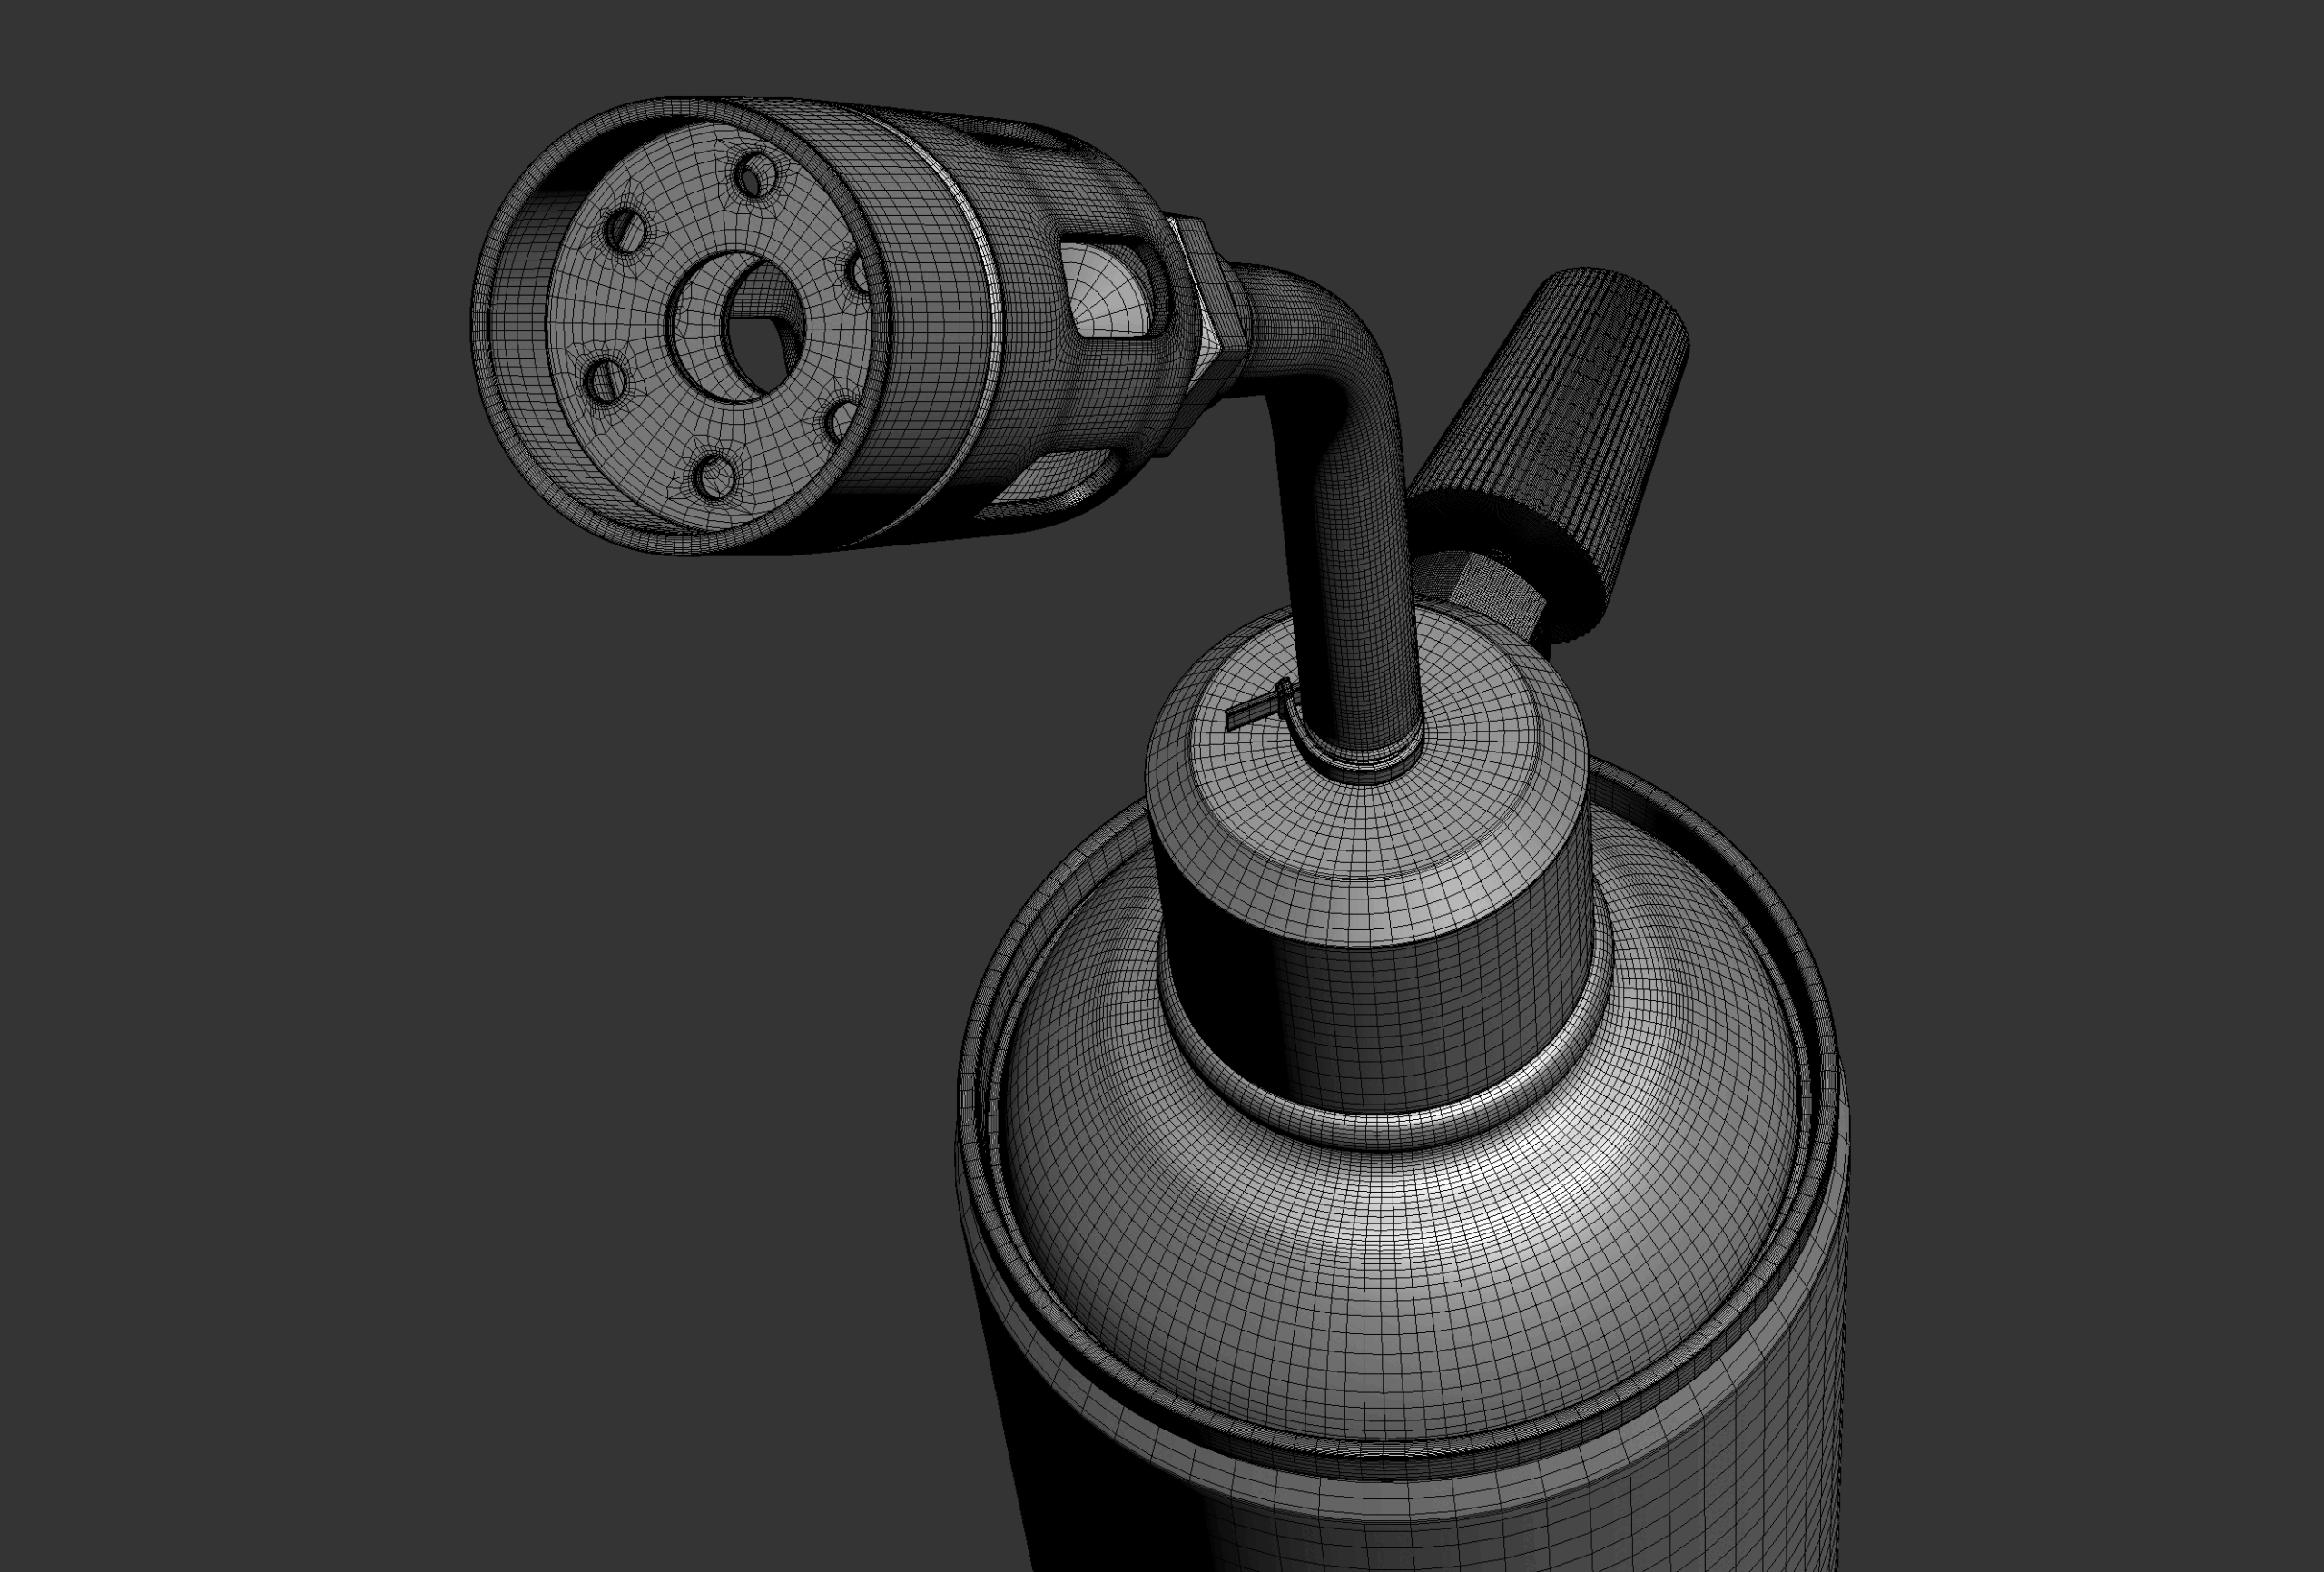
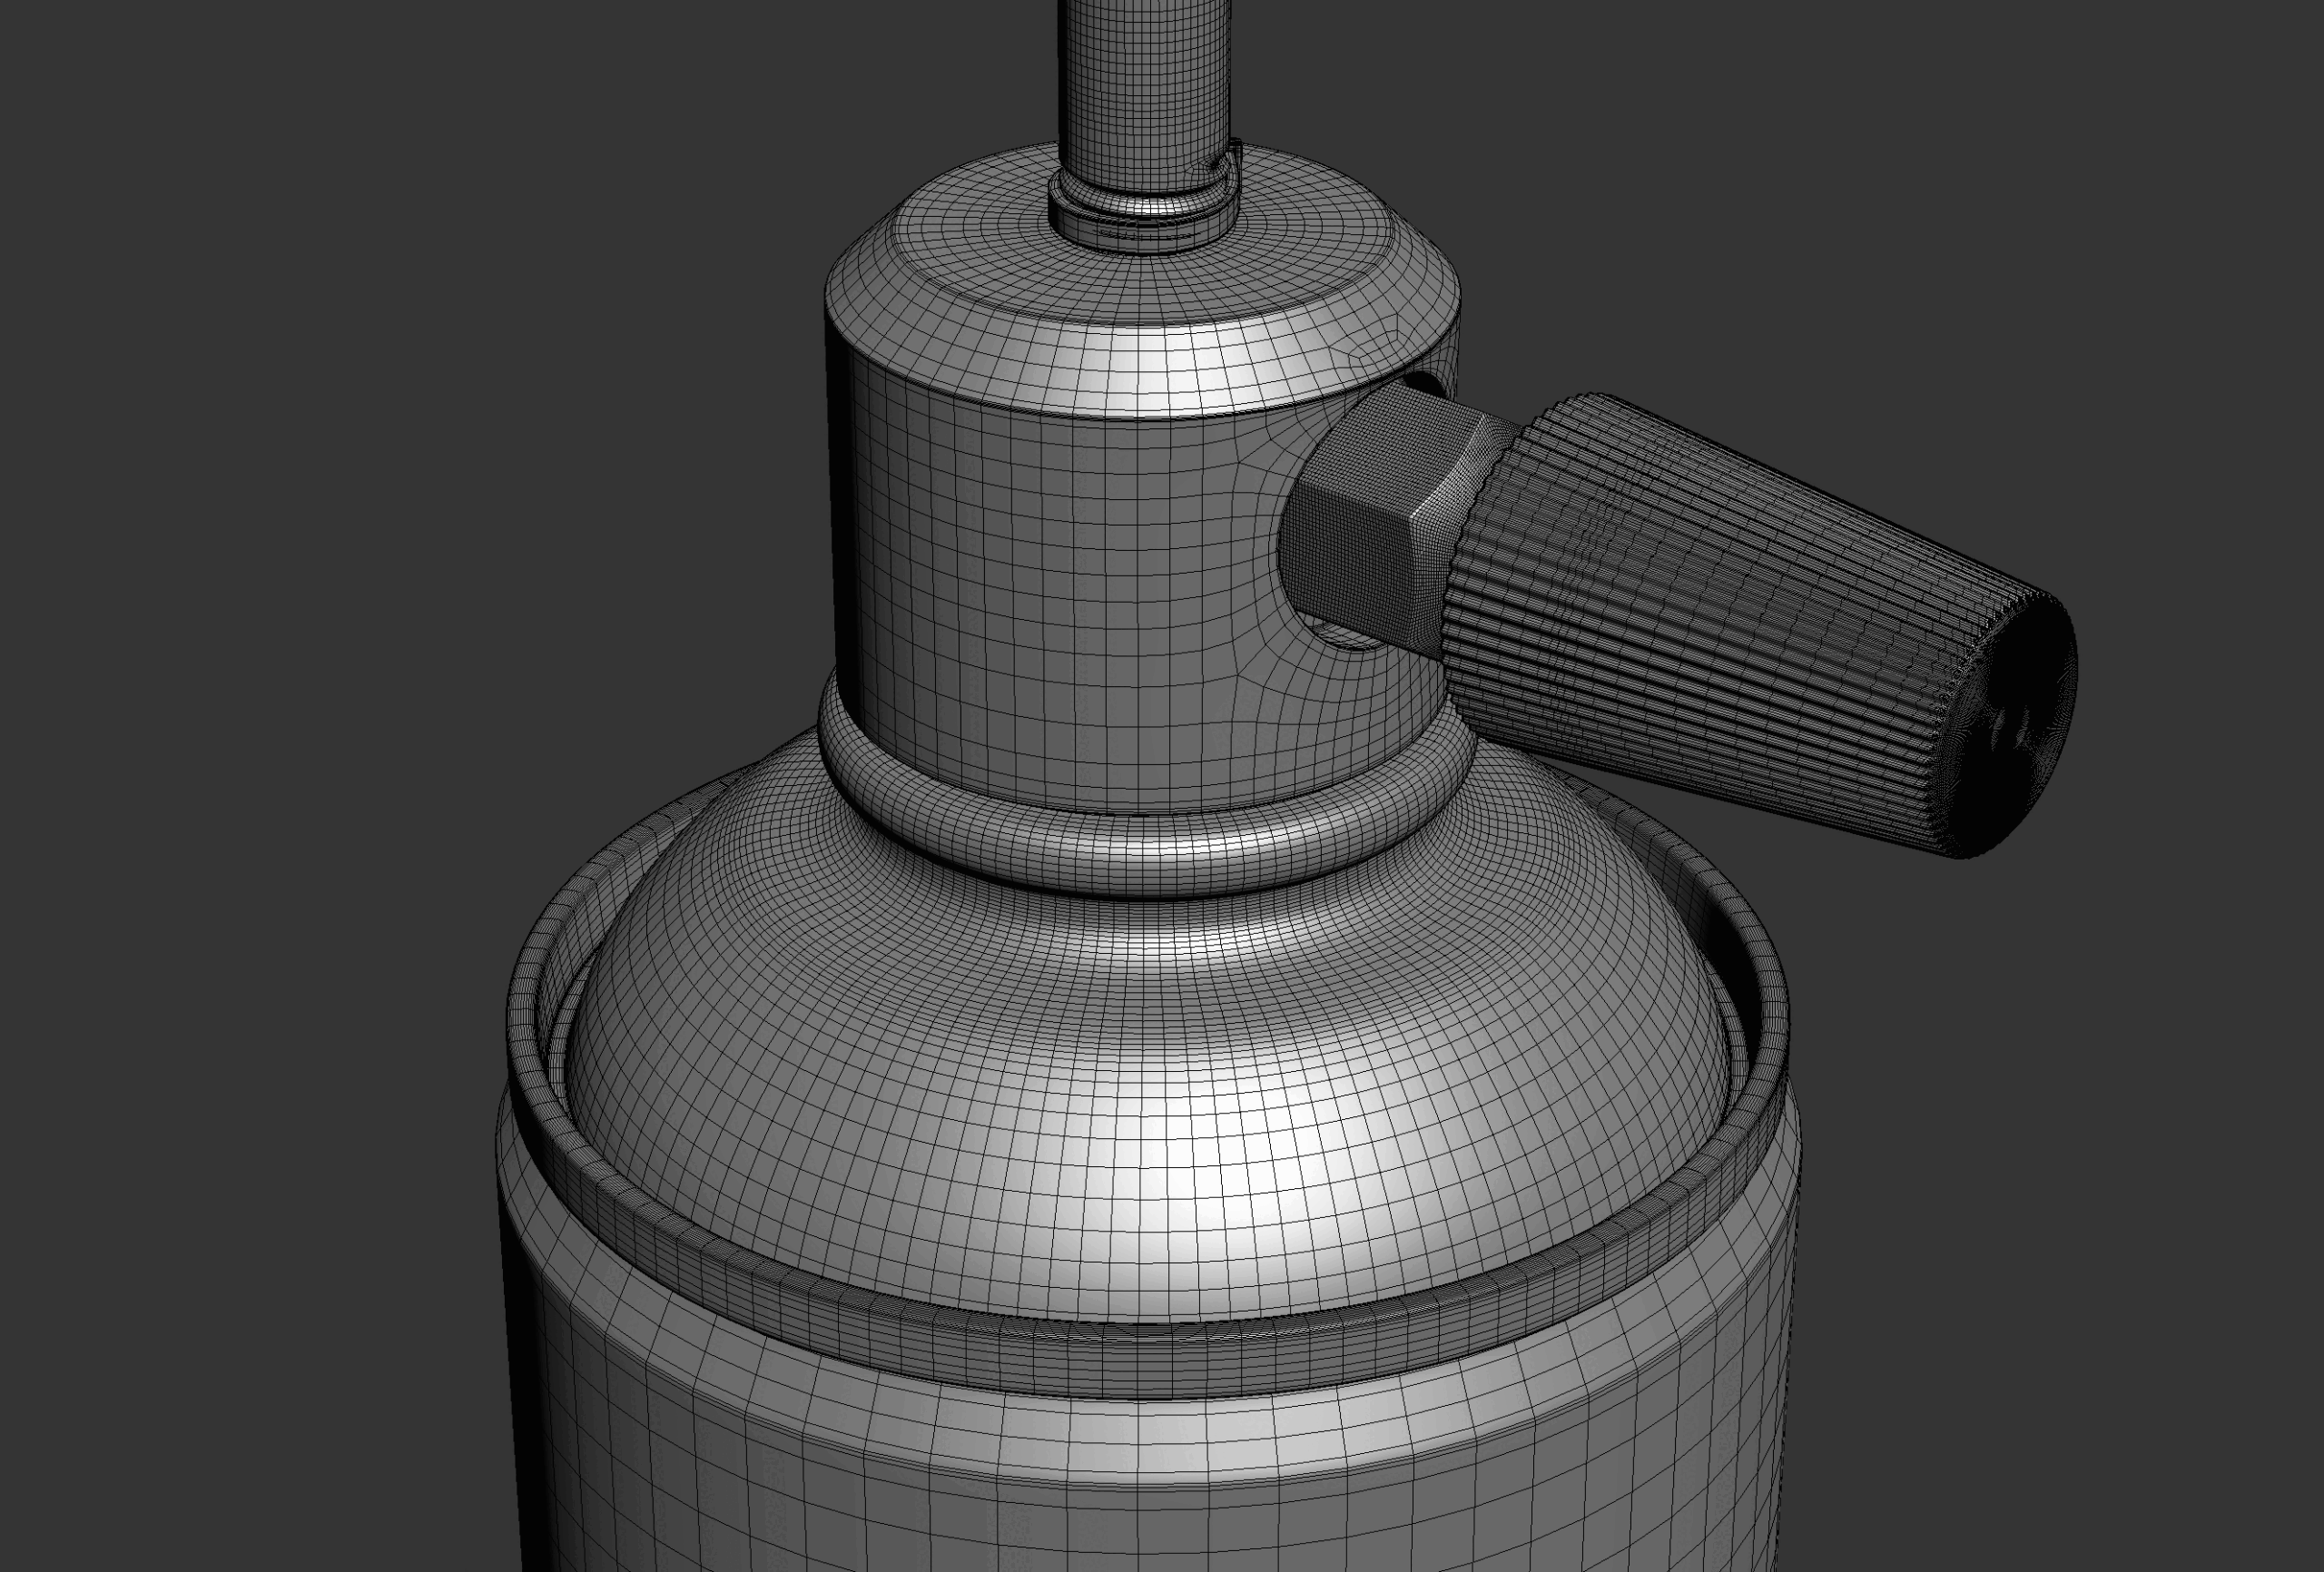
Then I created a base high poly mesh using a regular subD workflow, making sure the mesh had an evenly distributed topology. Since it will be later subdivided/sculpted in Zbrush.
Hard Surface Techniques
For the whole project, I used the subD modeling workflow in conjunction with the Live Boolean feature that Zbrush offers.

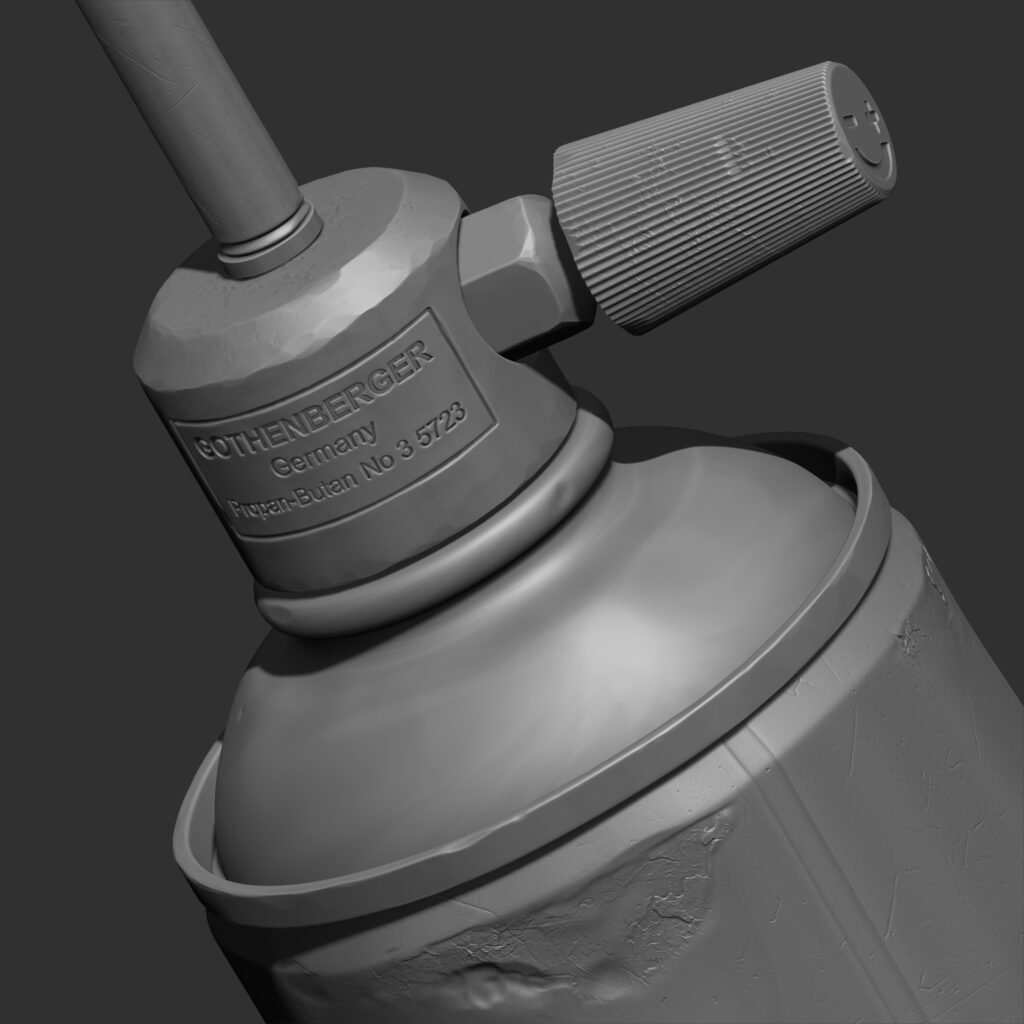
Just before sculpting, I created basic UVs for each object. This allowed me to get good-looking results while applying surface displacement maps in the final stages of detailing.
At this point, I started detailing each mesh in a workflow that went something like this:
- Create large generic details to break up the perfect curves/ideal straight lines. After all, nothing is perfect in the real world, and our eyes are used to seeing that.
- Add some specific medium/small details to guide the eye through the object and make it more interesting.
- Finish the whole process by adding very small details, in this case, tiling displacement maps.

The final step of the modeling process was to create a low poly mesh out of an unsubdivided high poly version, and then make sure that it fitted properly with sculpted geometry.
UVing & Baking
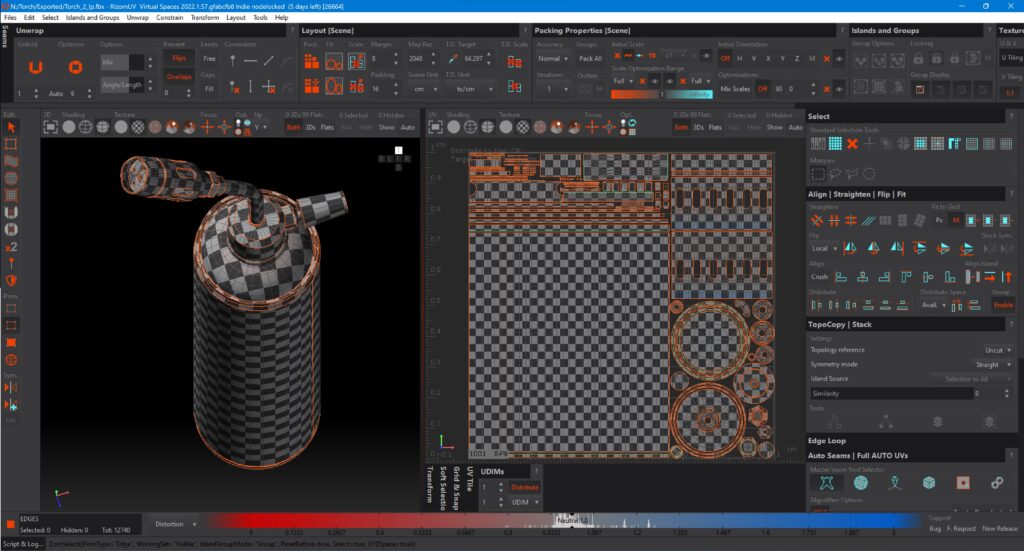
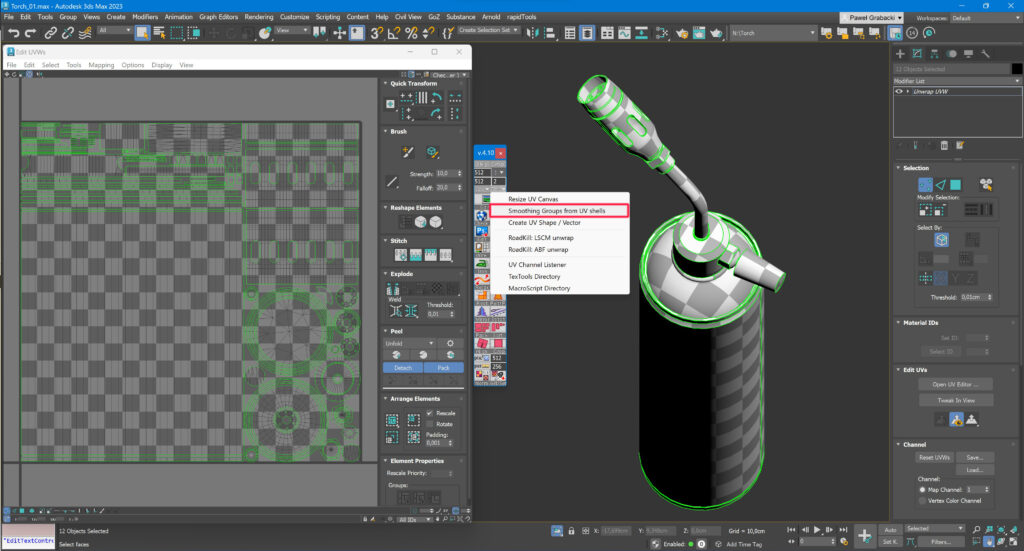
I created the UVs in 3DS Max and RizomUV. Yes, I use both programs interchangeably.
Max for cutting the UVs
Rizom UV for packing and final checks that everything is correct, including texel density, edges, distortions, etc.
I also used the TexTools plugin in 3ds Max.
This plugin has a feature that allows you to easily assign a different smoothing group to each UV shell. Baking was done in Substance Painter.
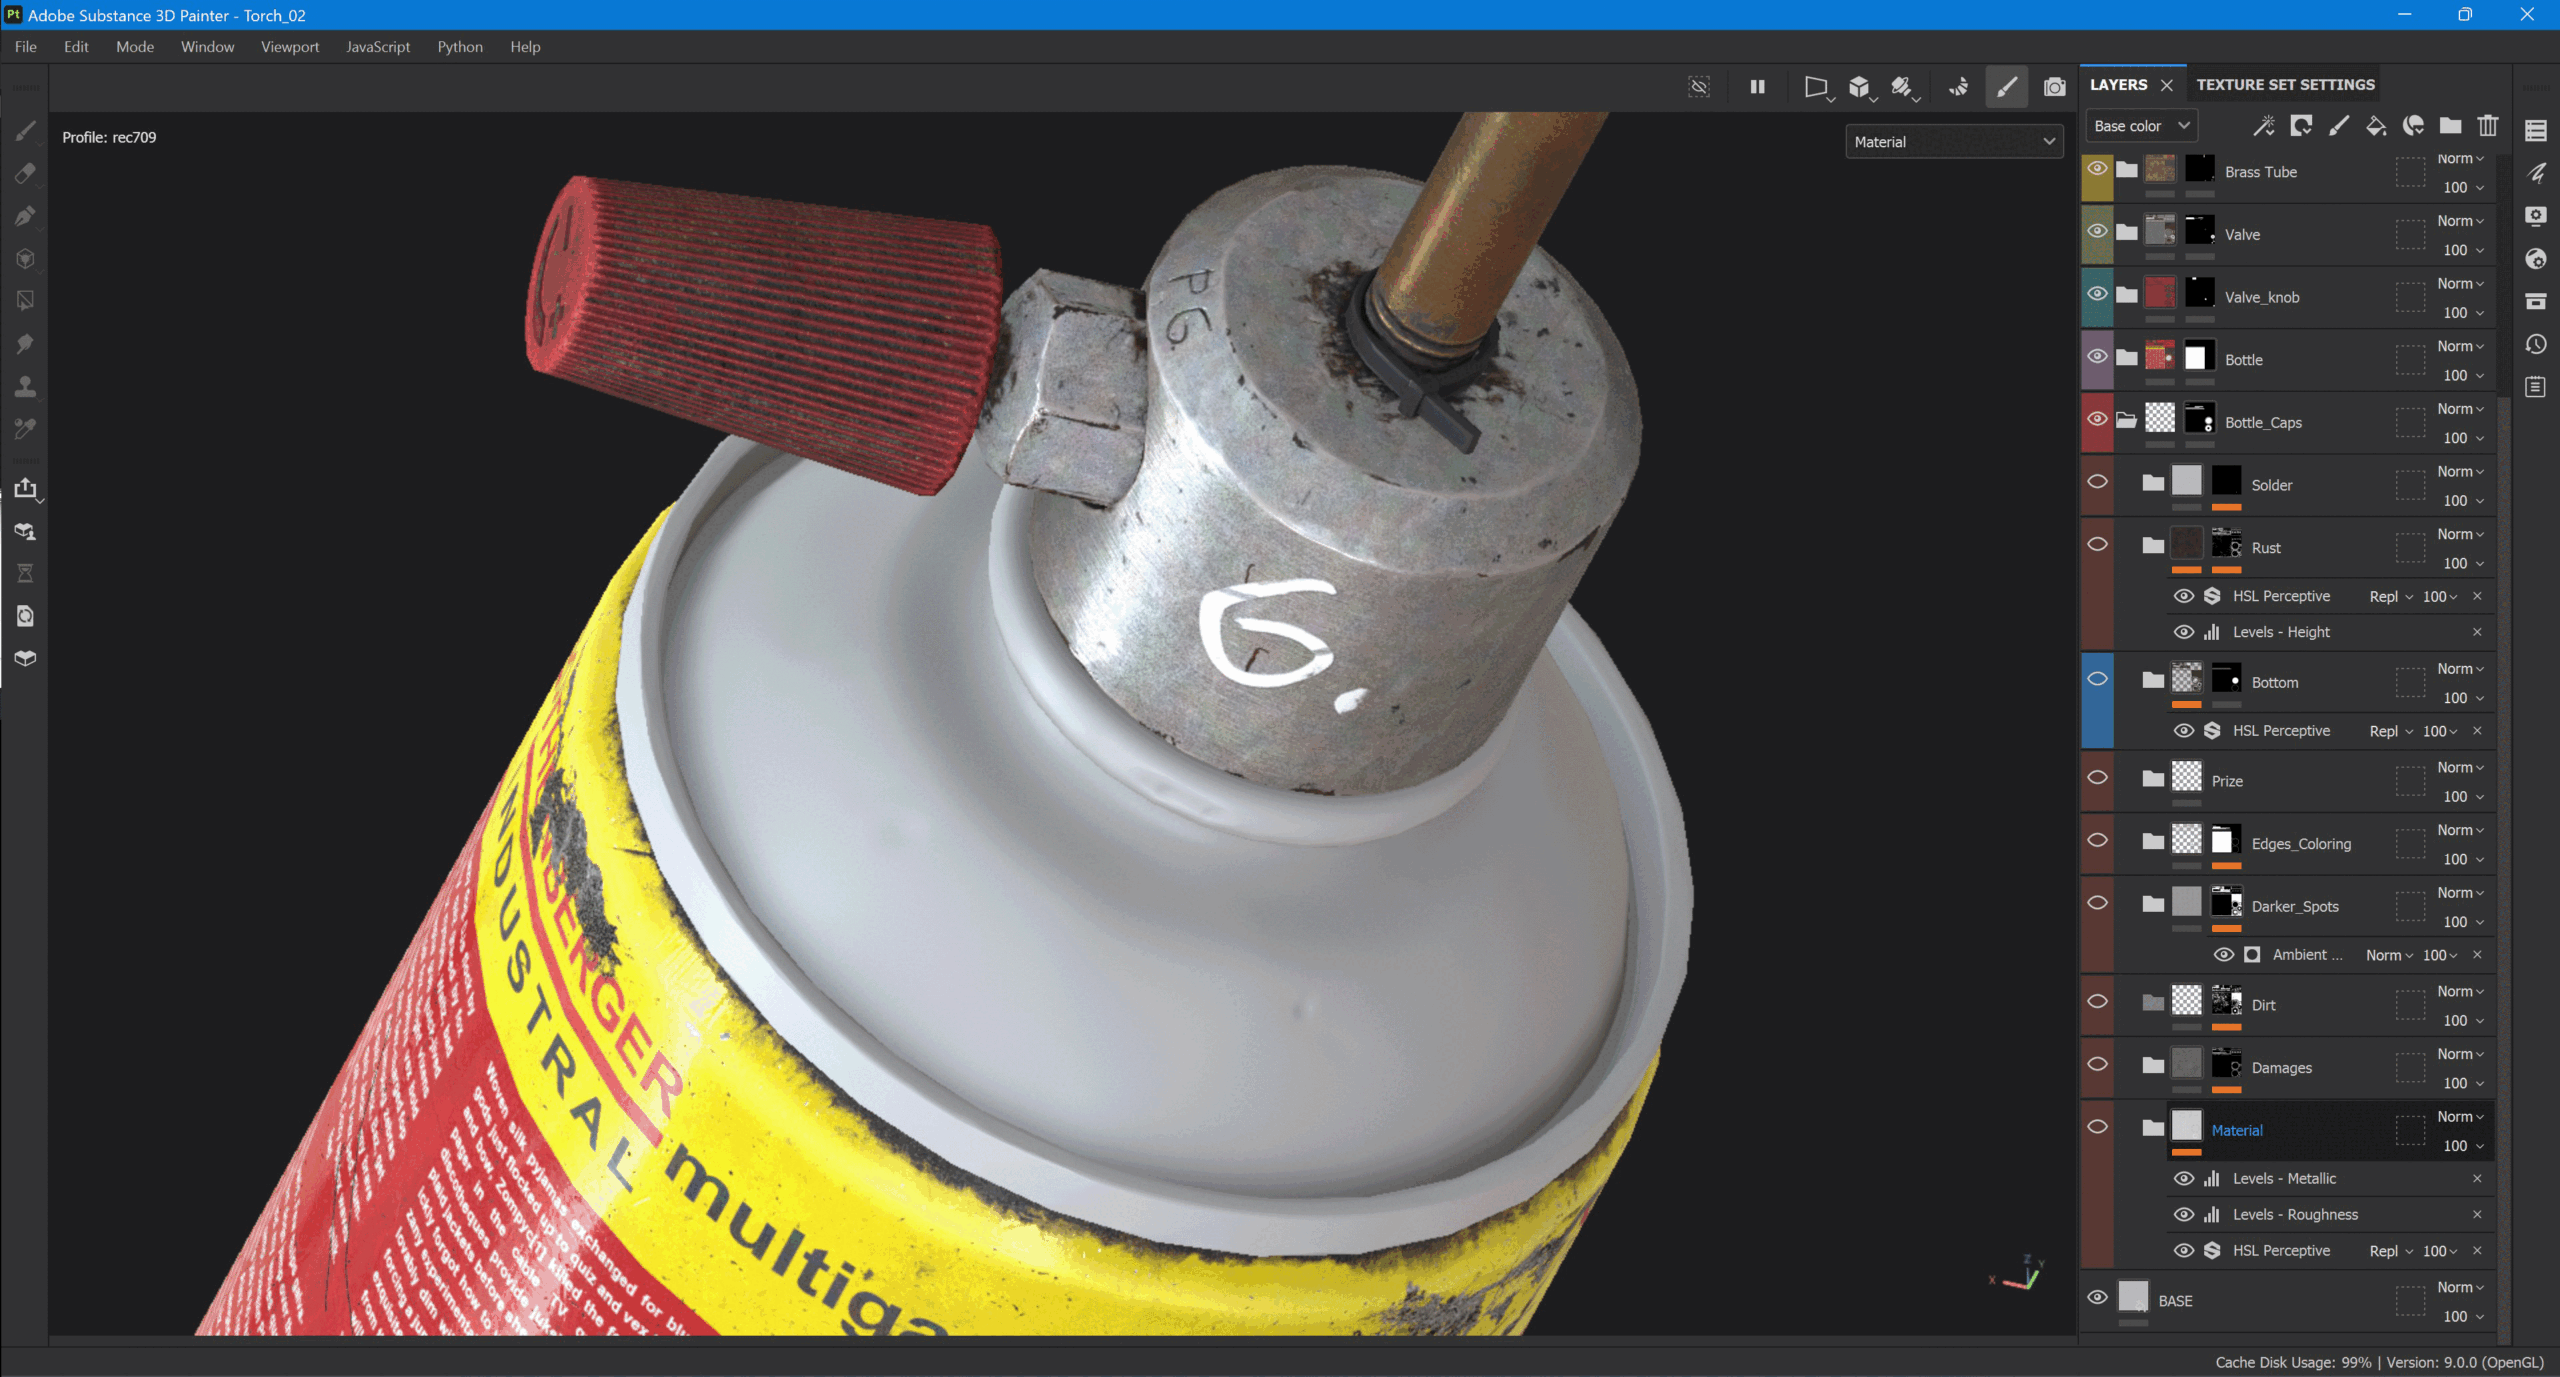
Texturing Workflow
I started the texturing process by creating a folder structure for each object. It is important to stay organized from the very beginning, as the structure of layers can get very complicated fairly quickly.
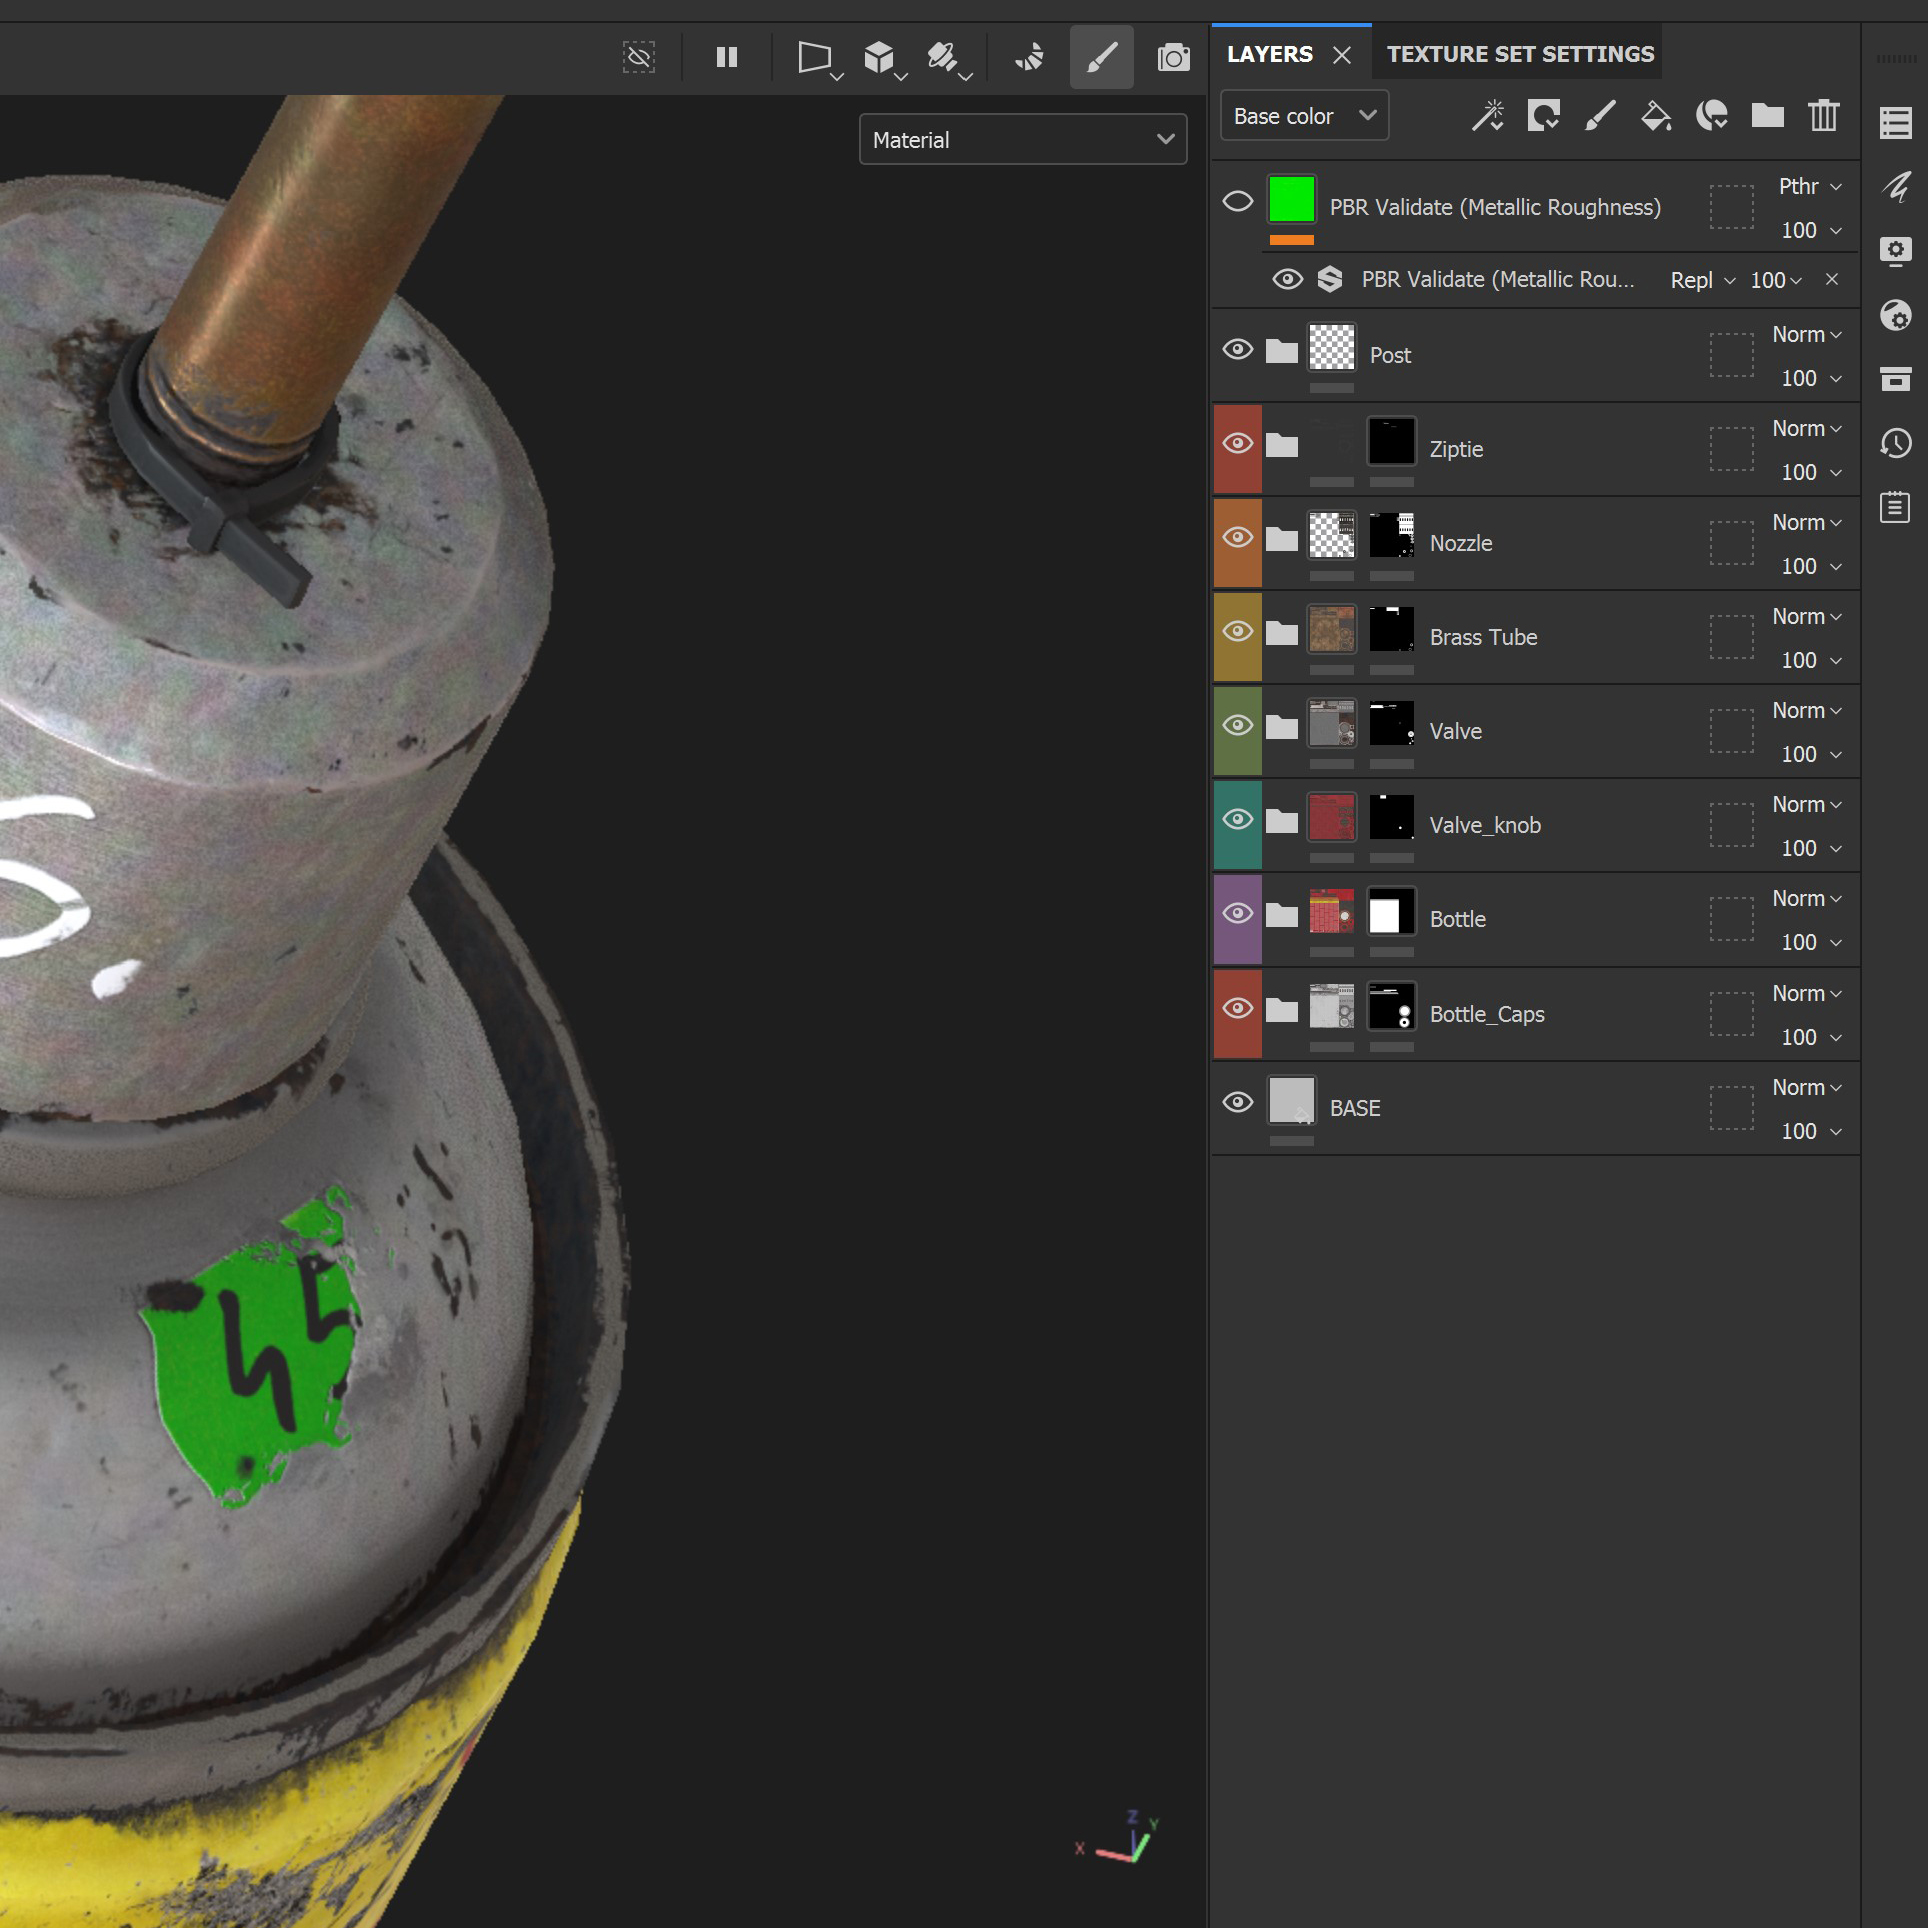
The next step was to create base materials and gradually build up layers of large/medium/small size details by populating all available channels with unique information such as:
- Noises
- Imperfections
- Textures
The best results are often achieved by masking the aforementioned layers with hand-painted masks and stencils – the key here is to avoid relying solely on the substance-built-in generators.
At this stage, high-quality references are essential to aid the texturing process.
Polish & Final Pass
In this step, I added storytelling elements, dirt, scratches, wear and tear, often checking texturing results in Marmoset Toolbag.
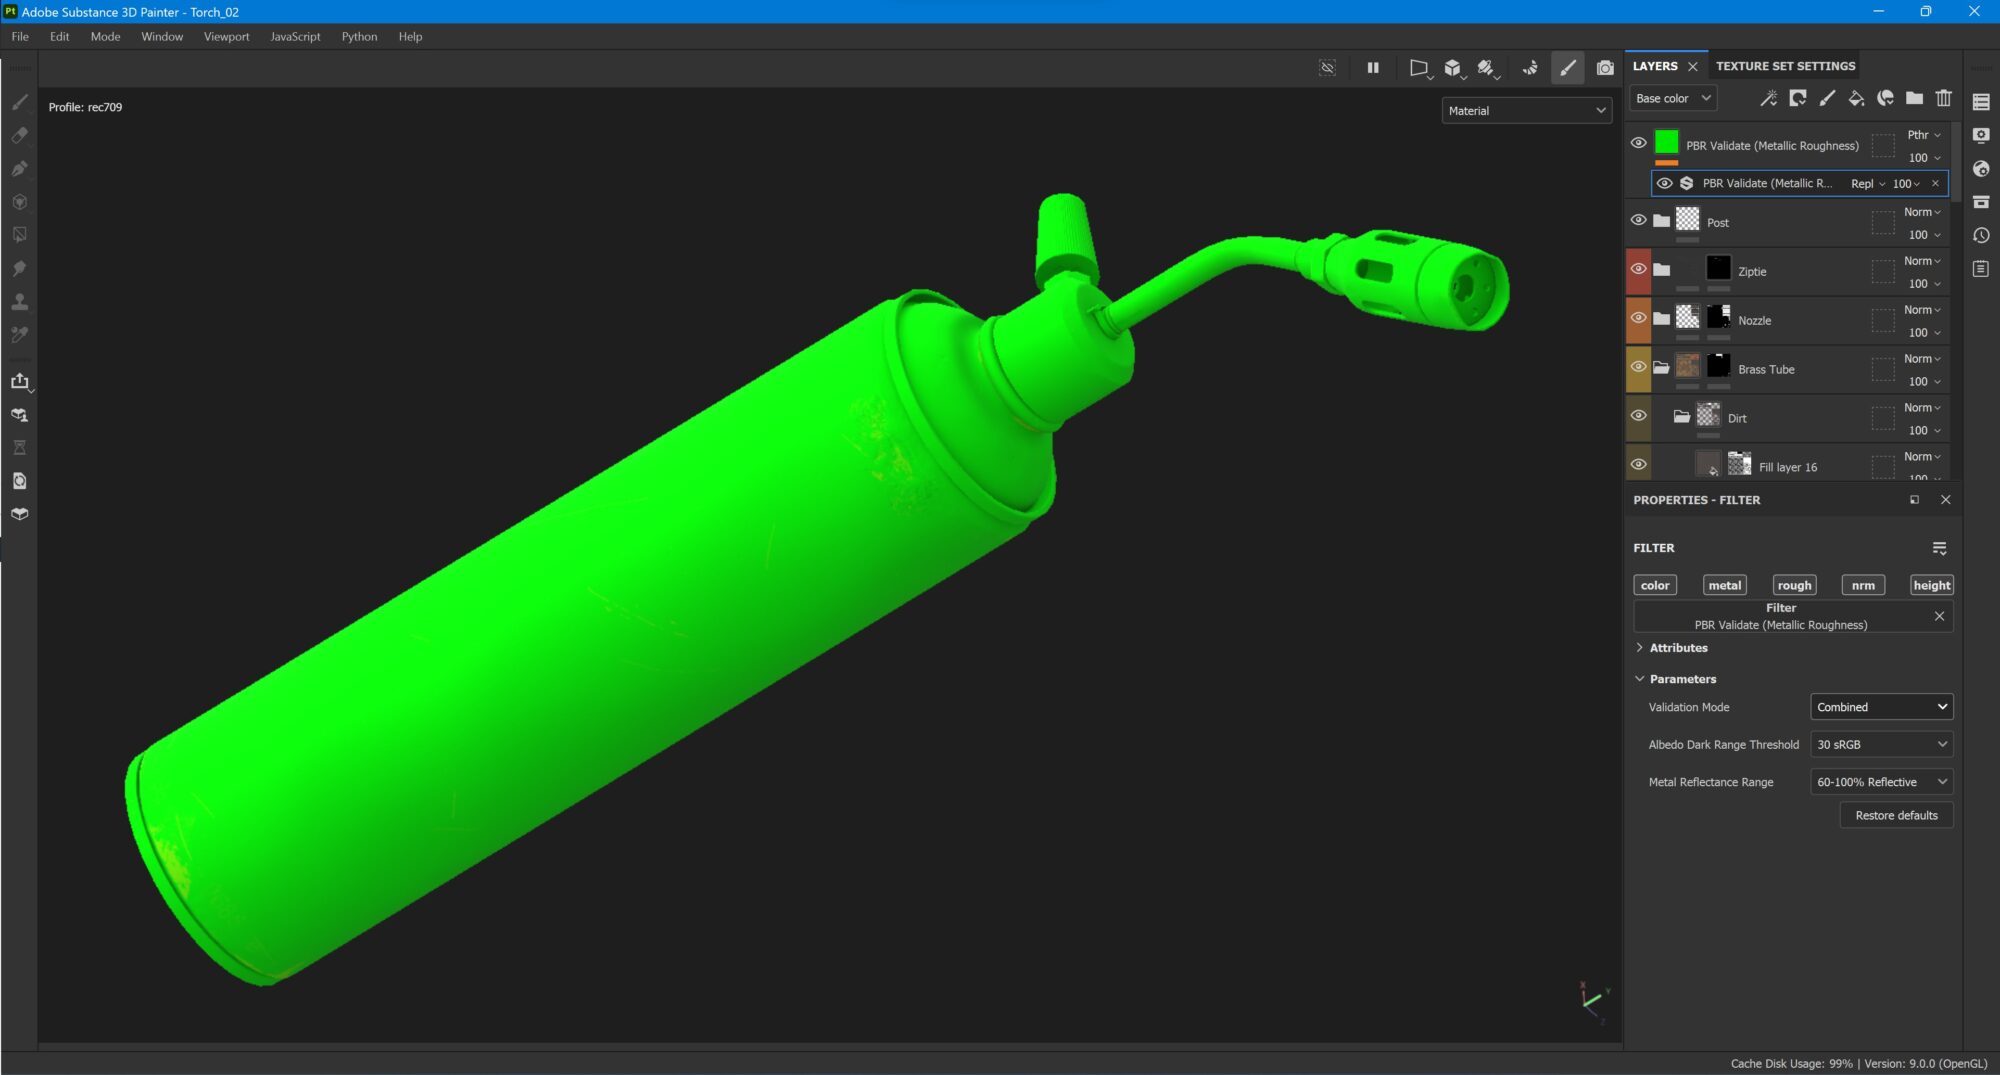
To call the texturing finished, I added a PBR validate filter at the top of the layer stack to check for incorrect Albedo/Metalness values.
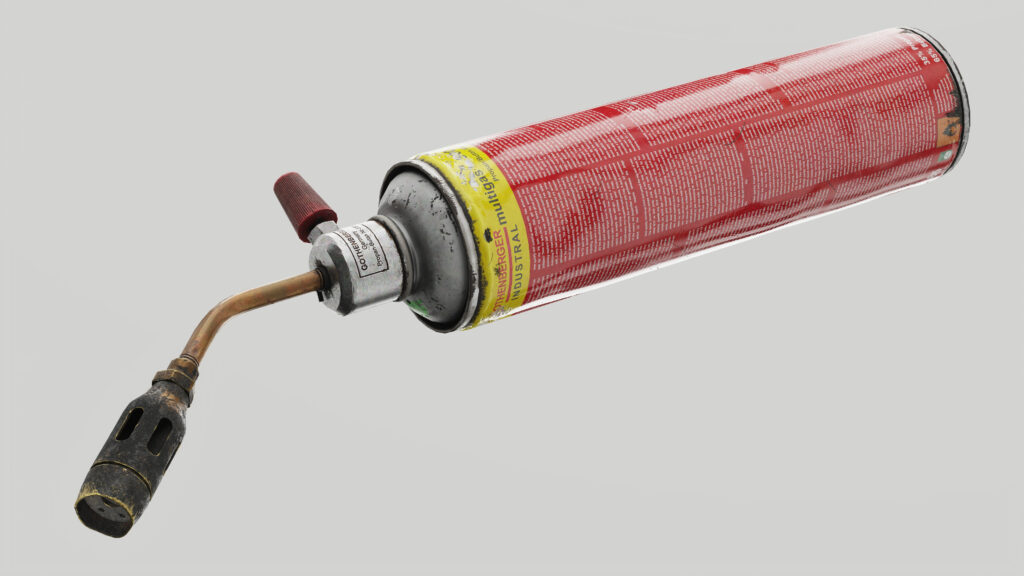
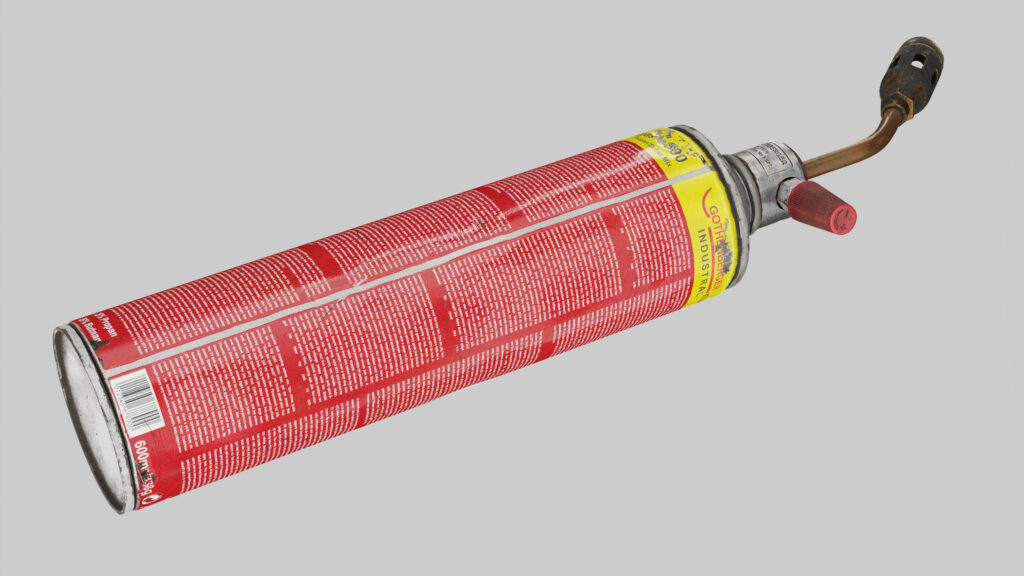
Presentation
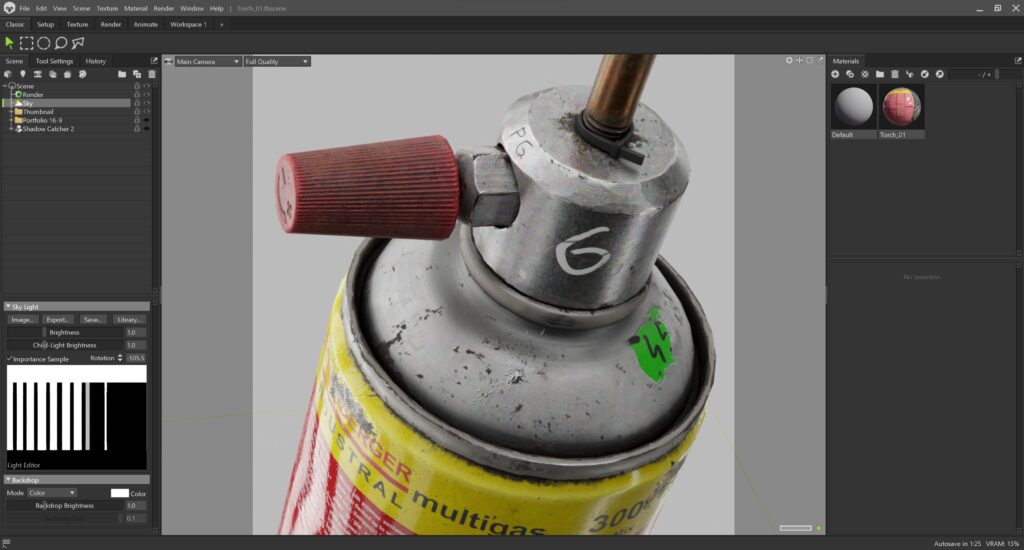
Marmoset Toolbag was used for the final rendering.
I decided to create close-ups with a ~85mm focal length with neutral lighting/background.
For this presentation, I created a simple HDRi map in Photoshop, which I later used in conjunction with accent lights.

All renders were created using ACES tone mapper and exported directly from Marmoset, except for the thumbnail.
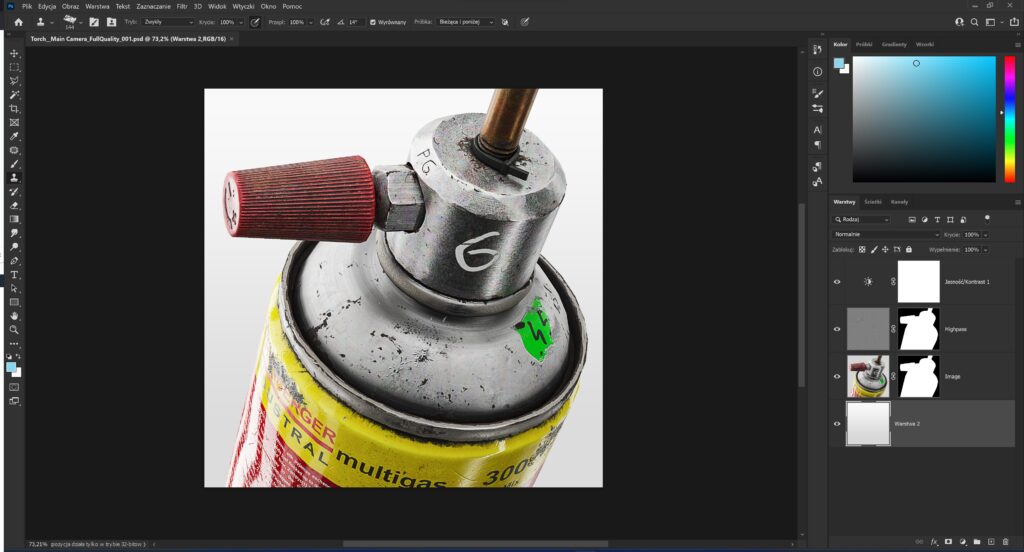
This one I post-processed further in Camera Raw / Photoshop to give it an extra high-contrast look.
Final Thoughts
There you have it. This is my complete process of how I go about making game-ready props. I hope you found something useful in it.
I would like to thank GamesArtist for reaching out to me and giving me the opportunity to showcase my work.
Read more articles
You might also like these articles.