
Introduction
Hi! My name is Guilherme Nunes and I'm a 3D Character Artist from Brazil. I would like to thank GamesArtist for the opportunity to talk about my latest work.
I'm often challenging myself and working on personal projects, they're the best way to get better and improve your skills.


About the project
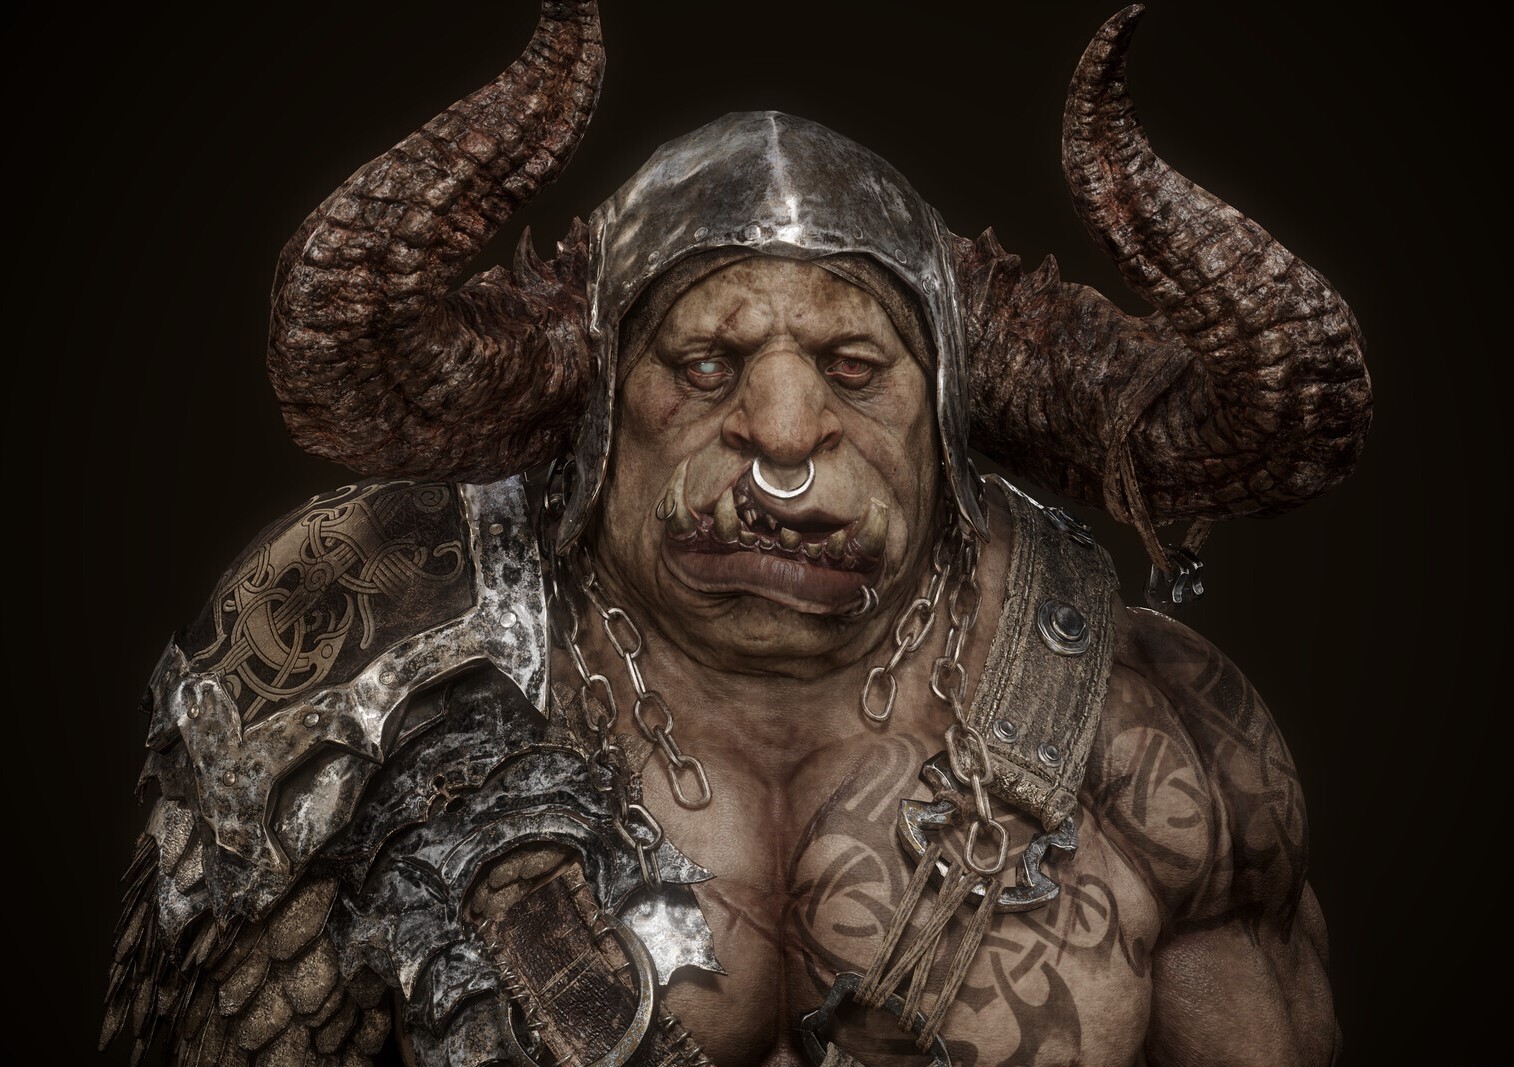
My goal in doing this project was to improve the quality of my art, I’ve always loved monsters and creatures. By making fantasy creatures, I can go beyond the norm and explore different anatomical shapes, I’m always looking to create things that are more interesting than real life, I was always very inspired by the work of Glauco Longhi, especially the orc he made, I was very impressed with the quality he achieved, so this orc became a perfect target for me to improve my art and achieve my goals.

References
I use PureRef to gather my references, when I begin to create the board references, I always start with a small amount reference, so that I don’t get lost in the creation process, my first references were the orc that Glauco made along with some other Orcs from the World of Warcraft, that is a universe that I love.

Blocking
For personal projects I always start from a sphere, because that is the best way to learn and improve your anatomy and sculpting skills, I always start with the sphere with low resolution, through that, I focus mainly on the primary shapes and the silhouette and proportions of the character. For this project, I used ZBrush for sculpting, Maya for retopology and UVs, Substance Painter for texturing and Marmoset for baking and rendering.

Sculpting
So right after I have a good solid primary shape using dynamesh and I already know the silhouette is not going to change much, I stop using dynamesh and create a clean topology using ZRemesh, I then begin to start using subdivisions to get a higher resolution during the modeling process, at this point, I start to sculpt my favorite parts which are the secondary shapes, this is the moment where the character starts to get interesting.
At this stage, I can play with the flow and rhythm of the shapes and how they interact with each other, I really love this phase. Besides that, I made all the armor and accessories using ZBrush.
Next, I start the tertiary forms, I start ripping and sculpting the Orc’s scars and then I go on putting the skin pores using different types of alphas. I prefer to do the armature details inside Substance Painter using height and normal map because by doing that I can have more control and I can get a higher texture resolution.

Retopology
After I finish my highpoly I decimate the model and export it to Maya, I then start doing the retopology, I begin to look at some references to make the loops flow correctly, especially on the face where there will be a lot of deformation in the animation, on the body I always like to follow the shapes of the muscles, for retopology it is important that your loops are following the shapes and volumes of the highpoly, this way you guarantee that everything will go well during the bake.

UVs
Right after my retopology is ready, I start unwrapping the character and organizing the UV sets, it is important to always try to hide the UV seams as much as possible so that it does not appear on the character, besides that it is also important to always duplicate the same UV for others that will use the same texture, for example, the chains and some metals of my character, by doing this I can have a higher texture resolution for my characters other accessories.

Baking
When I finish my UVs and organizing the UV sets, I organize my folders in ZBrush and Maya using the suffix High and Low at the end, I export everything into Marmoset and bake it. Marmoset is an excellent tool to bake with because you can control the cage size in case you have some bake errors in your mesh, by using the cage you can correct these errors. A quick tip, that I always use, in Marmoset, set the curvature map strength to 1.6 so, I find it very helpful when texturing.
Texturing
Finally, I export my low poly mesh to Substance Painter and the baked maps which were done in Marmoset, I start one of my favorite parts which is texturing!
I use the fill layers in Substance Painter because they are non-destructive and I can whenever I want, go back and change the layers whilst improving them.
Before I start, I like to make a quick base texture on the whole character so I can get an idea of what it will look like in the end, after that I start texturing the character, then I go on to texturing the armor and accessories. I start using some grunge masks to help me generate the dirt on the character and accessories, it is important that while you are doing the texture you are exporting the texture to your render engine consistently, in my case it was Marmoset because the light behavior is different in Substance Painter and Marmoset, so I keep texturing, improving and exporting until I am satisfied with the end result.
An excellent thing that I learned whilst creating this character, is that it is really important to break up your texture as much as you can, you can do this by hand, and also by using masks and generators, by breaking up the texture you will gain more details and you will make your texture go to the next level.

Rendering
After I finish my texture I export my low poly mesh and the textured maps in Substance Painter to Marmoset Toolbag 4, I like to spend a lot of time in the rendering stage, tweaking the lights and shaders to get a better quality look, I do a lot render tests and compare with my references with the images I rendered. I like to use Heiji mode to have more contrast. I make the lighting of the sky preset very low with just a little bit of light, I use a top light and two lights next to the character to soften the strong shadow generated by the top light I also add a ring light to make the character stand out from the background.


Conclusion
I learned a lot from this project, it was a really fun project to work on, I really love making dark fantasy creatures and exploring different anatomical shapes.
Thanks again to the GamesArtist team, and thanks for reading, I really had a lot of fun writing this article and I hope you enjoyed it!
Read more articles
You might also like these articles.