
Introduction
Hi! My name is Kai Li. I’m an Environment Artist based in Los Angeles, and I previously worked at Sledgehammer Games as an environment artist on the Call of Duty franchise.
I’m passionate about environment art and always looking to expand my skill set, with a current focus on procedural material creation in Substance Designer.


Tools
Here is a list of tools that were used to create this project. In this article, I will be focusing on Substance 3D Designer for the material creation.
- Substance 3D Designer
- Marmoset Toolbag 4
- Photoshop
- Substance Player
- Unreal Engine 5

Inspiration
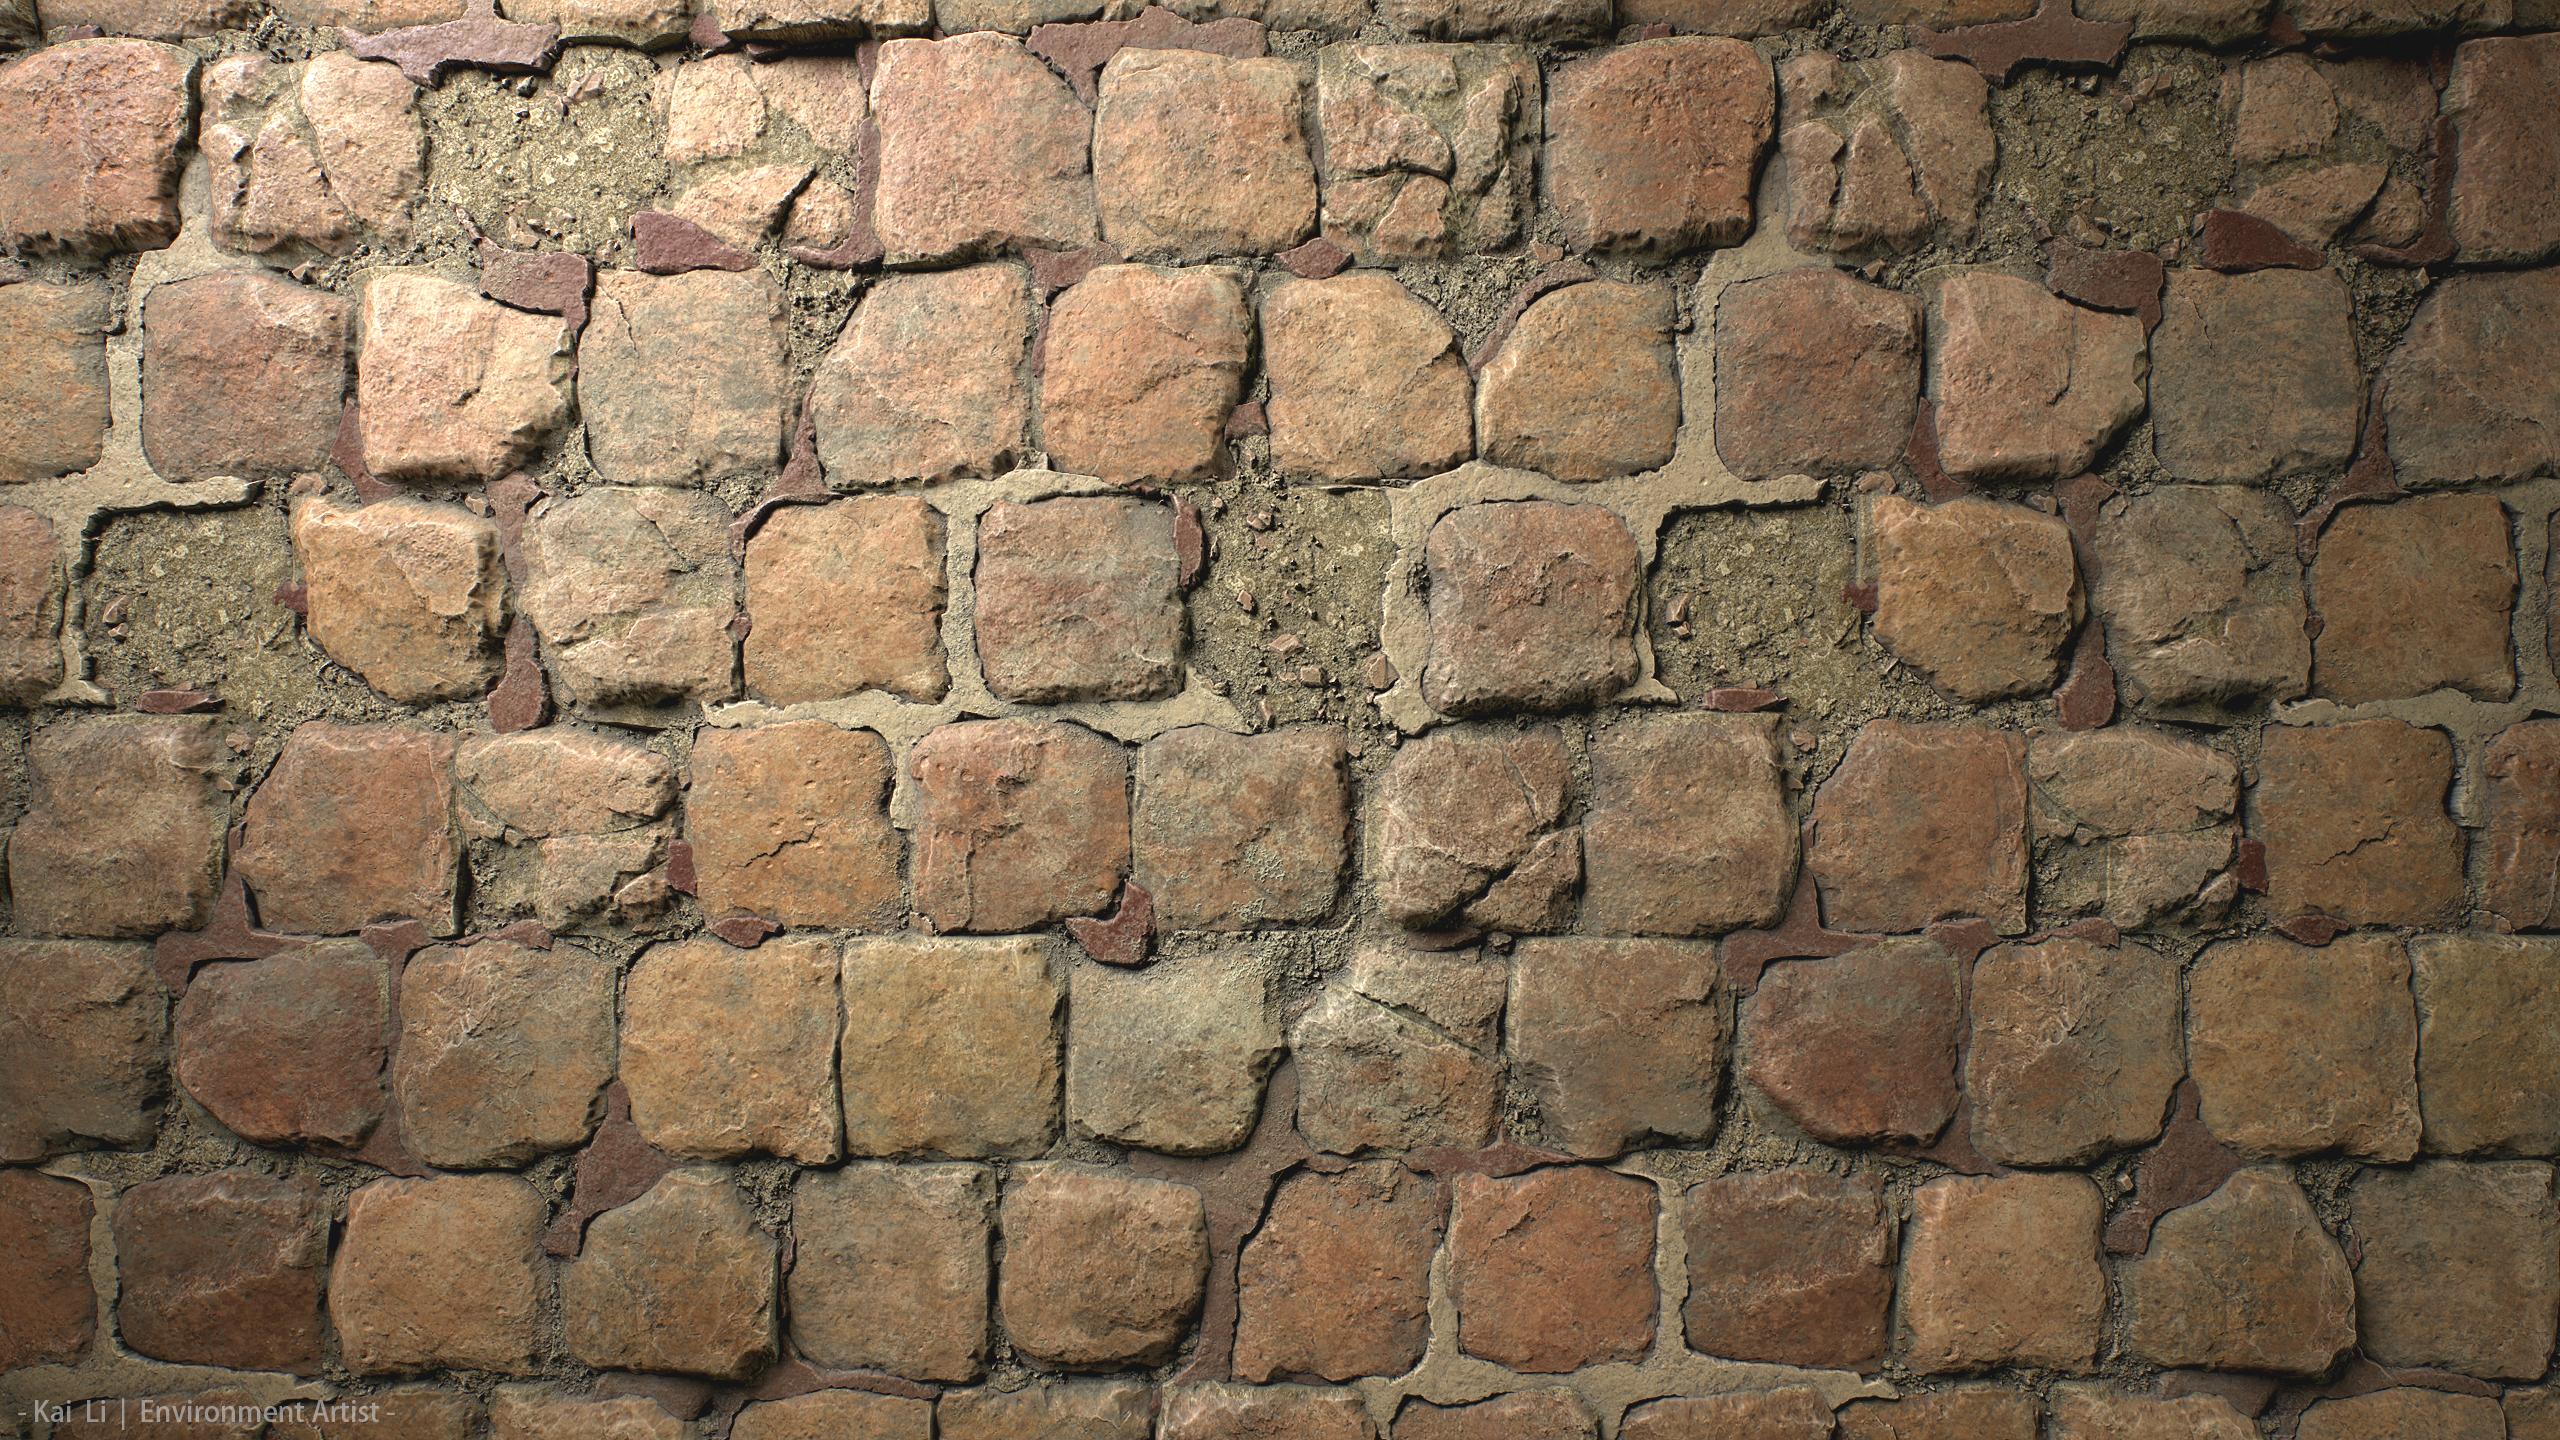
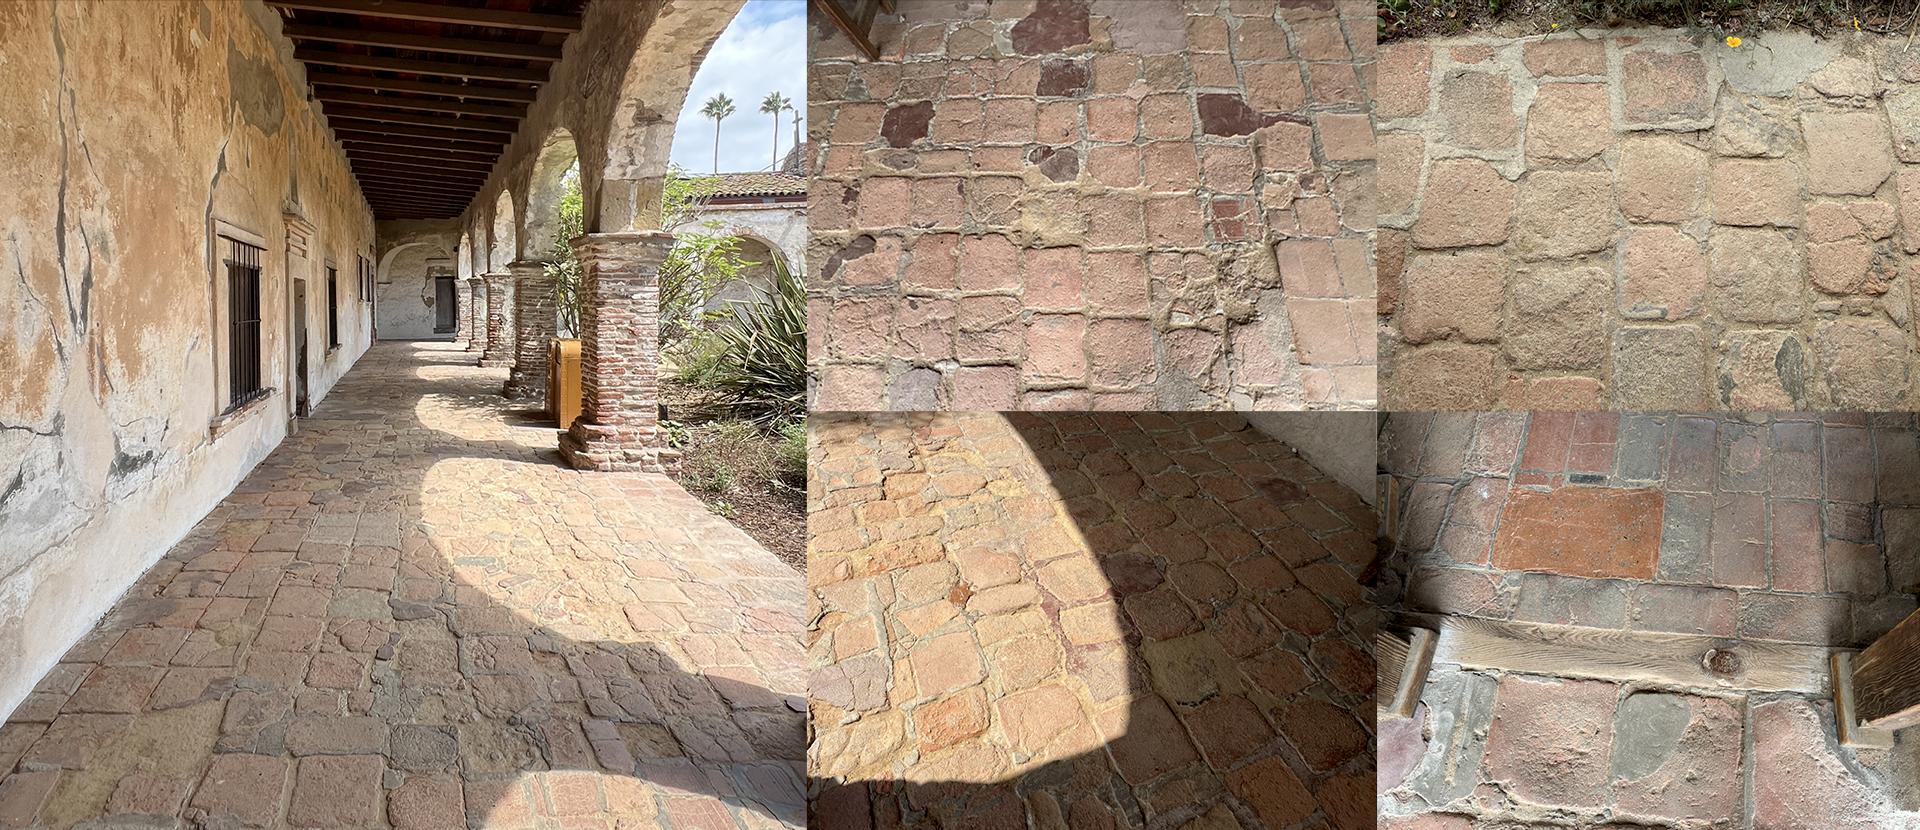
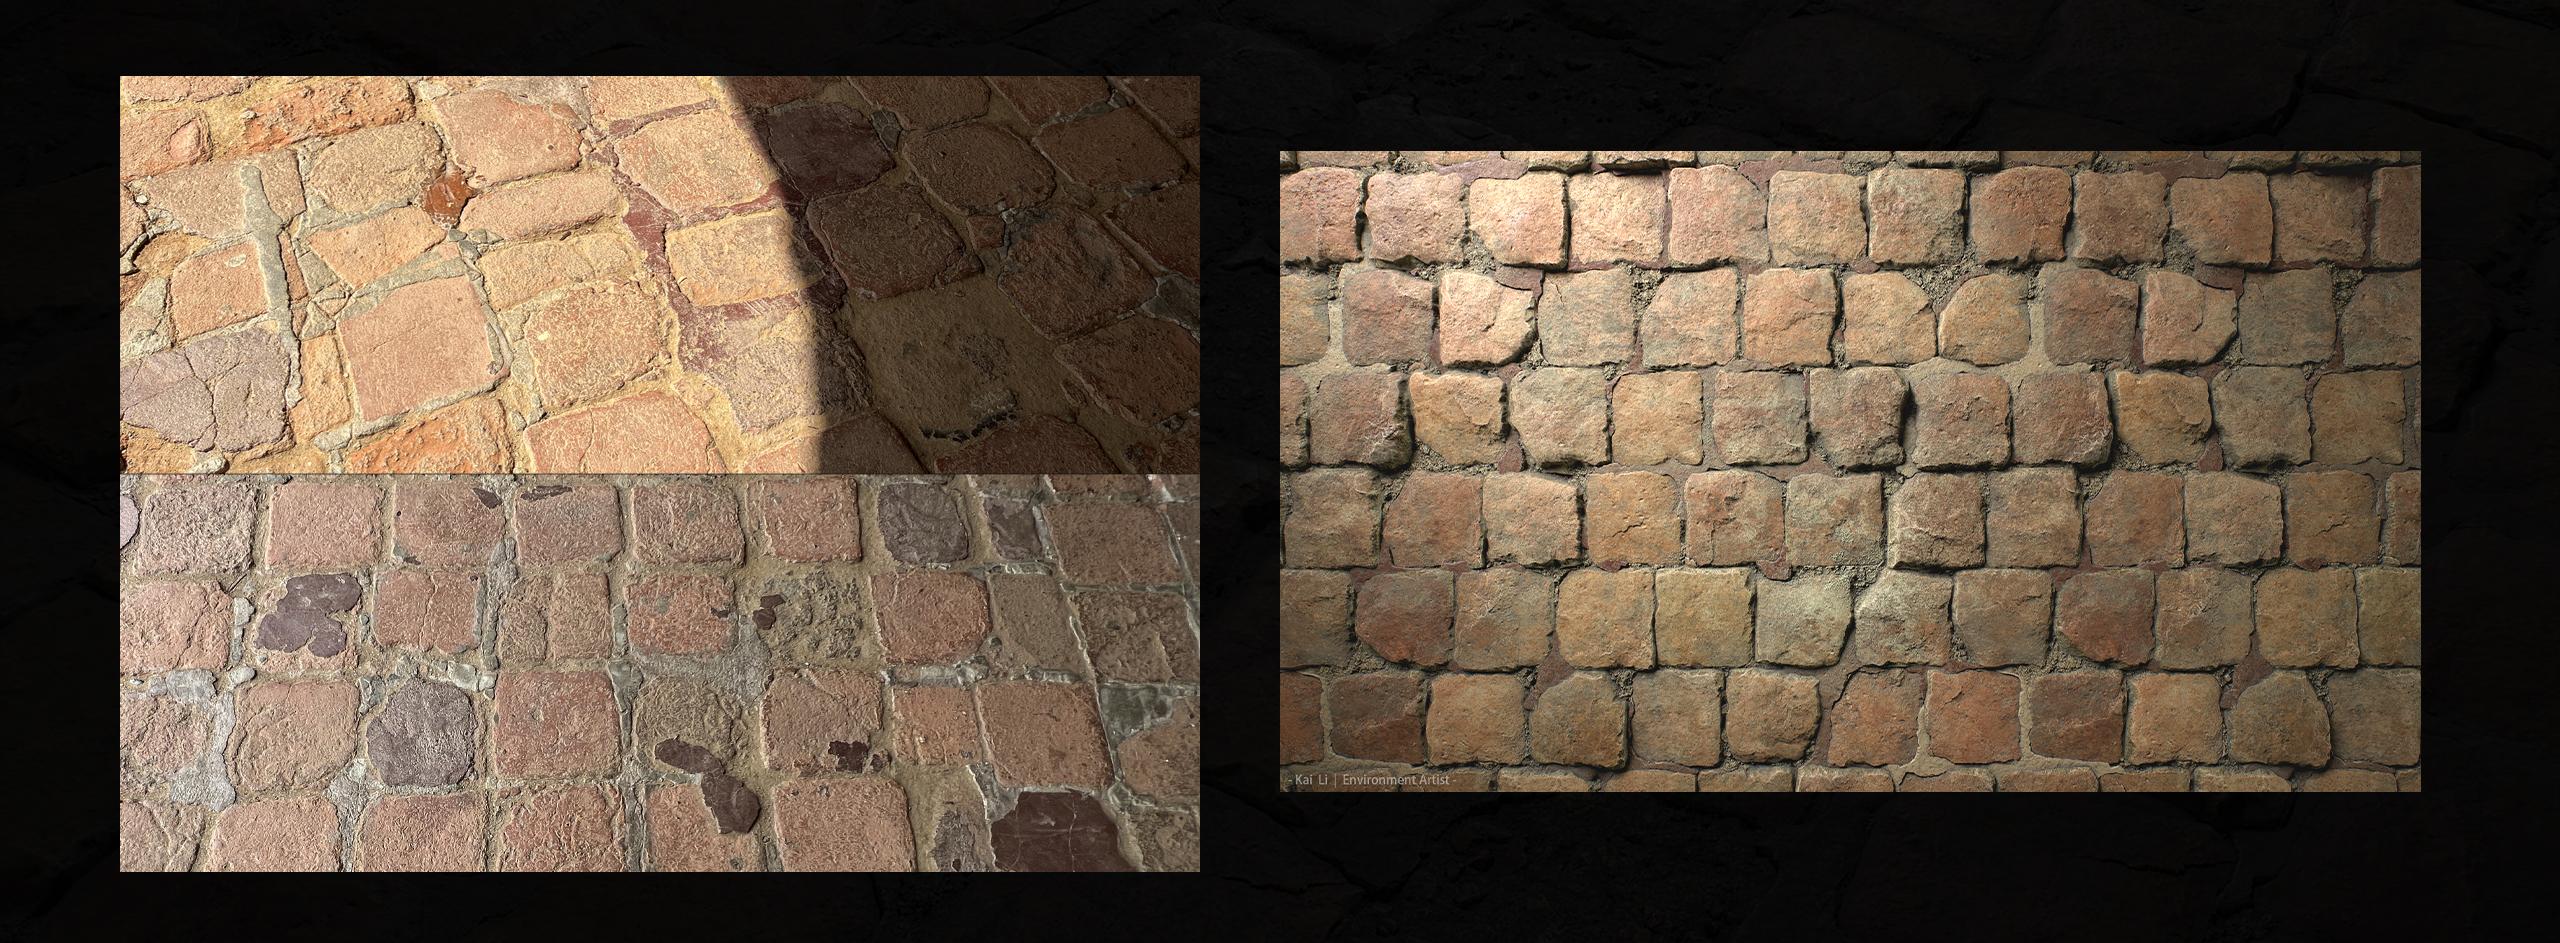
This project was inspired by the old paver floor I came across during my visit to Mission San Juan Capistrano, a beautiful historical landmark in Southern California, United States.
The moment I saw it, I was immediately drawn to its aged surface and decided to recreate it in Substance Designer.
Around that time, I also wanted to practice creating a variety of tile-based materials, such as pavers or terracotta tiles, so this turned out to be an ideal subject.

The photo references were taken with my phone while visiting the place.
What I liked most about the paver was its worn surface and irregular edges, especially the grout patches in different colors, which add a bit of randomness and convey a strong sense of history.
When working on the material, I didn’t precisely follow this paver since overall it appeared a little flat and thin to me.
I aimed for a slightly more elevated cobblestone look, especially considering its potential use in a game environment. I really liked the aged grout and overall breakage, so those became my main priority to recreate.
I know going through every node one by one would be overwhelming. Everyone has their own way of understanding and building cool stuff anyway.
So in this breakdown, I’ll focus on the core sections that mainly define the material.
Base Pattern
The base pattern is simple and straightforward as observed.
I started by creating a 7×7 square pattern using Tile Generator Grayscale, tweaking the offset and a little scale random to make it slightly disordered. That just simply made it my first pattern.

For this breakdown, I will mainly focus on this 7×7 paver (Figure A). Later, after I finished the first pass, I made two more: a 5×9 (Figure B) and a 5×5 (Figure C) pattern for the project.

When studying the Mission paver, I noticed it seemed to mix various sizes and shapes of tiles in one area.
As I explored the place, I came across even more variations which gave me the idea to create the other two patterns and mix them all together.
I then did a vertex painting pass and tested in Unreal Engine to see how they blended.


I took into account its usage in Unreal Engine, so it’s good to have some variation for texture blending.
After I finished the first pass, I decided to create a less fractured version for each pattern (refer to A2, B2 and C2 above).
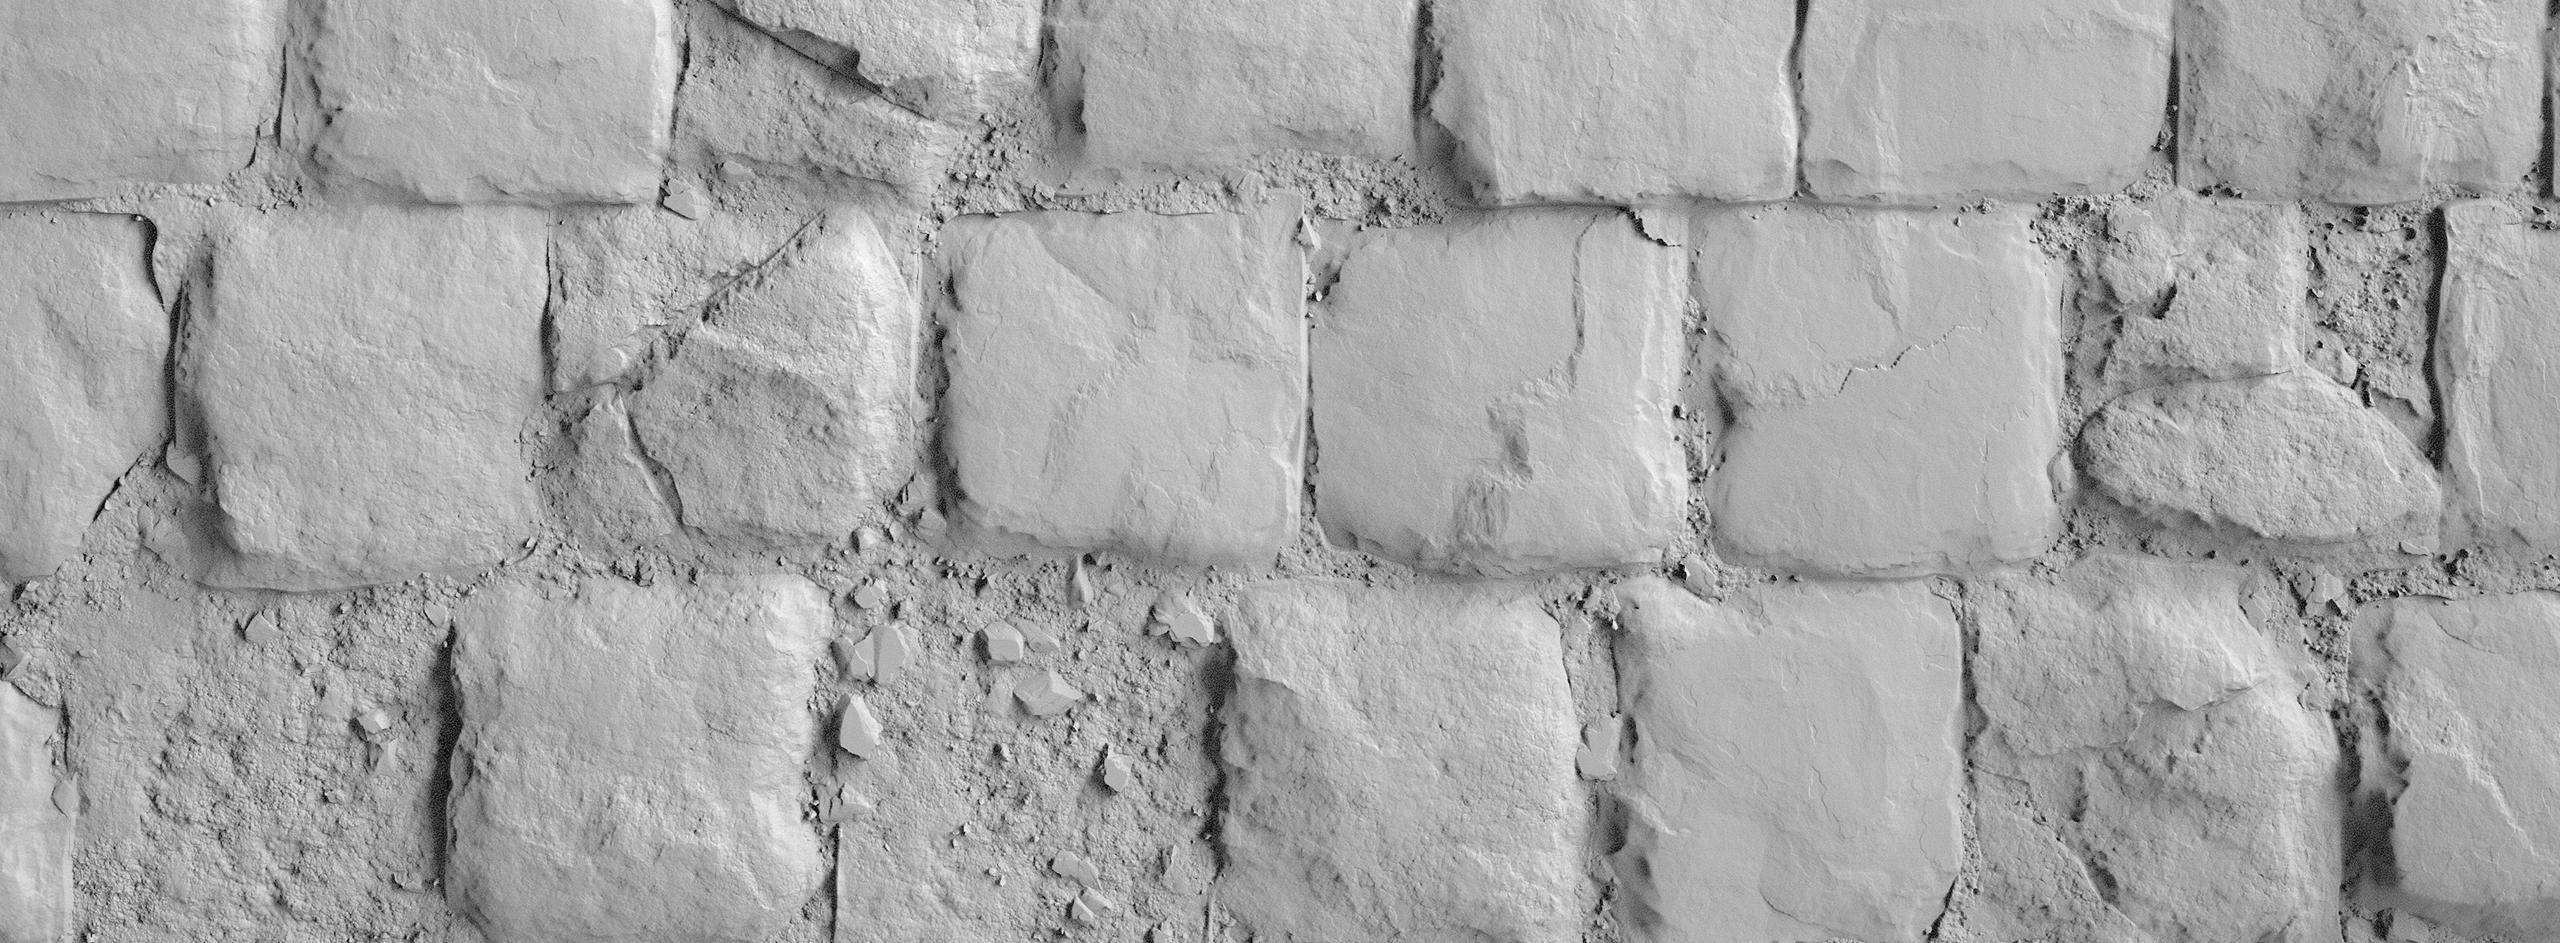
And overall, I made the paver slightly more exaggerated in height compared to its real-world counterparts as planned.
I tried to find a balance between looking cool and avoiding overly (visual) tripping hazards.
Shape Deformation
After the first base pattern was established, I further shaped the form by bevelling some corners, warping, and slope blurring the edges.
To bevel the corners, I always use the Edge Detect node. The Distance node that comes after is to clear out the “inner bubbles”.
It happens sometimes when the Edge Width is a small number.

You might have noticed in the graph there’s a Transformation 2D node that doubles the size, followed by another one that reverts it back down after the bevel is made.
The idea is to temporarily boost the resolution so the Edge Detect has more pixels to work with, which gives a smoother bevel result.
This trick makes a noticeable difference when you’re working at lower resolutions; for example, jumping from 2K to 4K really helps clean up the edges.
But once you’re already working in 4K, going further to 8K doesn’t add much visible improvement, even though it technically increases the pixel count.
Since I worked on this graph in 4K, doing this extra scaling step became more of an optional refinement rather than a necessity.


Continuing to the next shaping step, I used a Slope Blur Grayscale node with a couple of low-frequency noises to create large-scale edge damage.
This step was mainly to further shape the form of the pavers. I planned to revisit the edge damage later, once more grayscale variation was introduced.
Edge Damage
In this step, I was looking to create damage through a mixture of medium-scale breakage and subtle wear.
I experimented with several noise setups, such as blending two different frequency levels of Clouds2 to get a mixed-frequency result, and using a mid-frequency Perlin Noise as a mask to distribute two distinct edge damage patterns.
These simple tricks help achieve a more natural and less uniform procedural look. You can add more or trim down to be simpler depending on your performance budget.

Height Variation
After the edge work was in a good place, I moved on to the height variation. The goal here was to make the pavers feel naturally uneven.
For most tile-based materials, it’s common to have some tiles slightly raised, tilted, or even coming loose. In addition, once the cracks were introduced, each smaller fragment could also tilt or lift in the same way.
To achieve this, I used Flood Fill to Gradient with Angle Variation setup for the tilting effect, and Flood Fill to Random Grayscale to control both elevation and missing tiles.
These are the steps I always end up using, and I believe many of you do too.

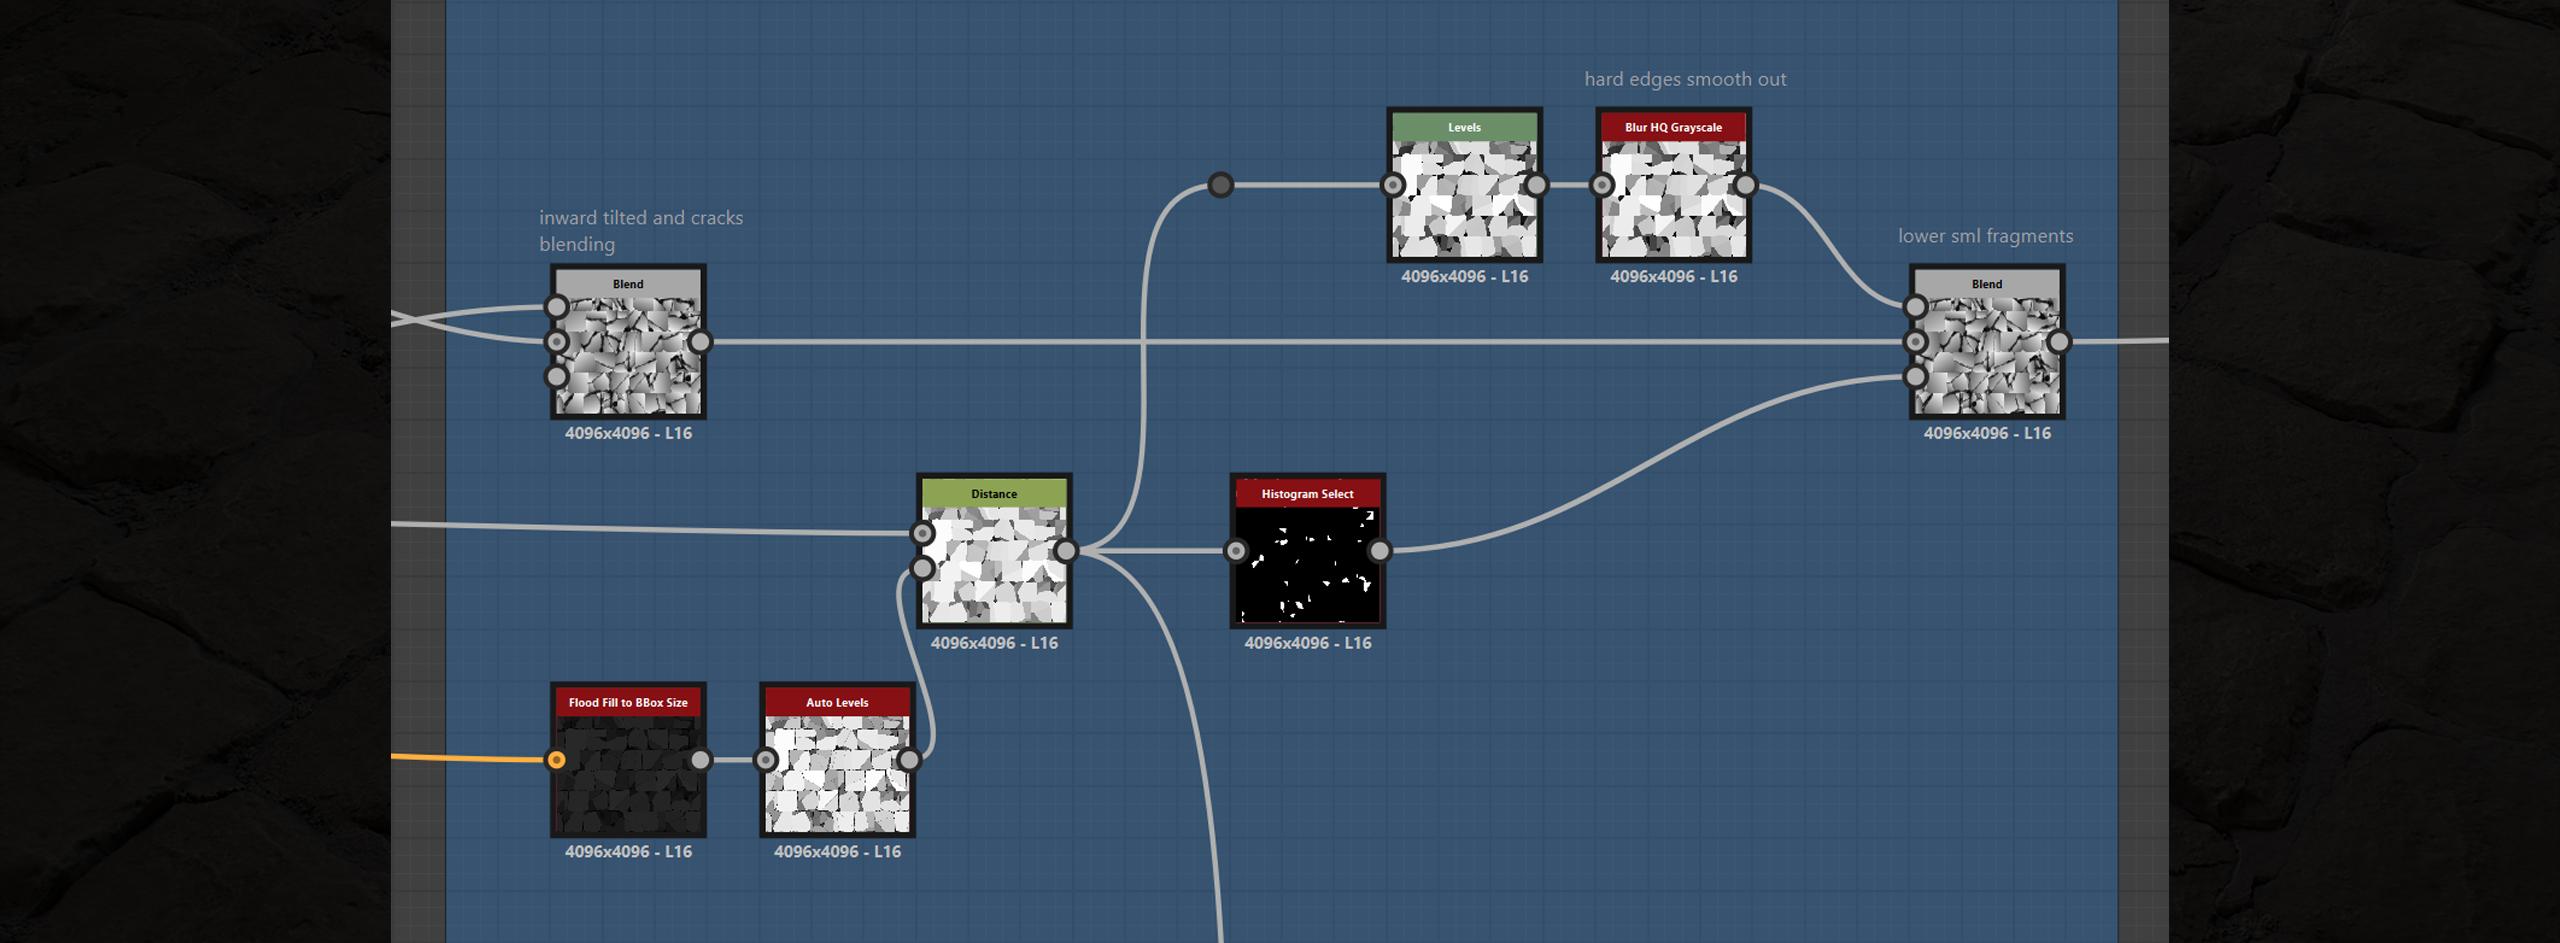
Cracks
Cracks are widely used across most tile-based surfaces. In this project, the crack is very crucial and I wanted it to be carefully controlled.
Creating the crack involved several steps: generating the basic shapes, deforming, warping, and adding edge chipping.
Since the graph was quite long, I used a simplified figure to give a quick overview. I usually spend some time adjusting sliders and testing different random seeds to find an optimal crack pattern.

Since the upcoming parts (such as the dirt, pebbles and grout) will be generated based on the crack data, it’s important to prepare the masks alongside.
So in parallel, I made a crack mask, along with a mask that combines the cracks and surrounding gaps, for the use of upcoming sections.

Here’s a GIF showing how the crack strength changes from subtle to strong. It’s controlled by the opacity of the final Blend node (set to Multiply).
In the final version, I used about 50% opacity which gives a neutral depth. I was aiming to match the reference, where the cracks are filled with dirt and appear worn and shallow.
Looking back today, I think pushing it to around 65% could have added a bit more contrast.
Another GIF shows the crack amount increasing from zero to almost full coverage. This helped me review how many cracks should appear in the final version.
I simply controlled the ID mask of the cracked tiles to progressively reveal more, which I later exposed as a custom parameter in the end.
Dirt
The dirt is one of the most crucial elements of this material. The grain fills every tiny negative space the pebbles couldn’t reach. It also naturally covers the missing tile areas.
It really helps blend everything together. And visually, it plays a huge role in emphasizing the big, medium, and small shape relationships.
A GIF below compares the surface before and after adding dirt. This does not include large pebbles, which I will talk about soon.
The basic approach for generating dirt surface is to manipulate a set of high-frequency noises to create the fine grain (I like using Slope Blur Grayscale to inflate the micro noise details.
Mimicking the shape of smaller pebbles and sand) and gather mid- to low-frequency noises to set up the slight undulation.
Finally, the finished dirt is scaled to match the desired overall size.

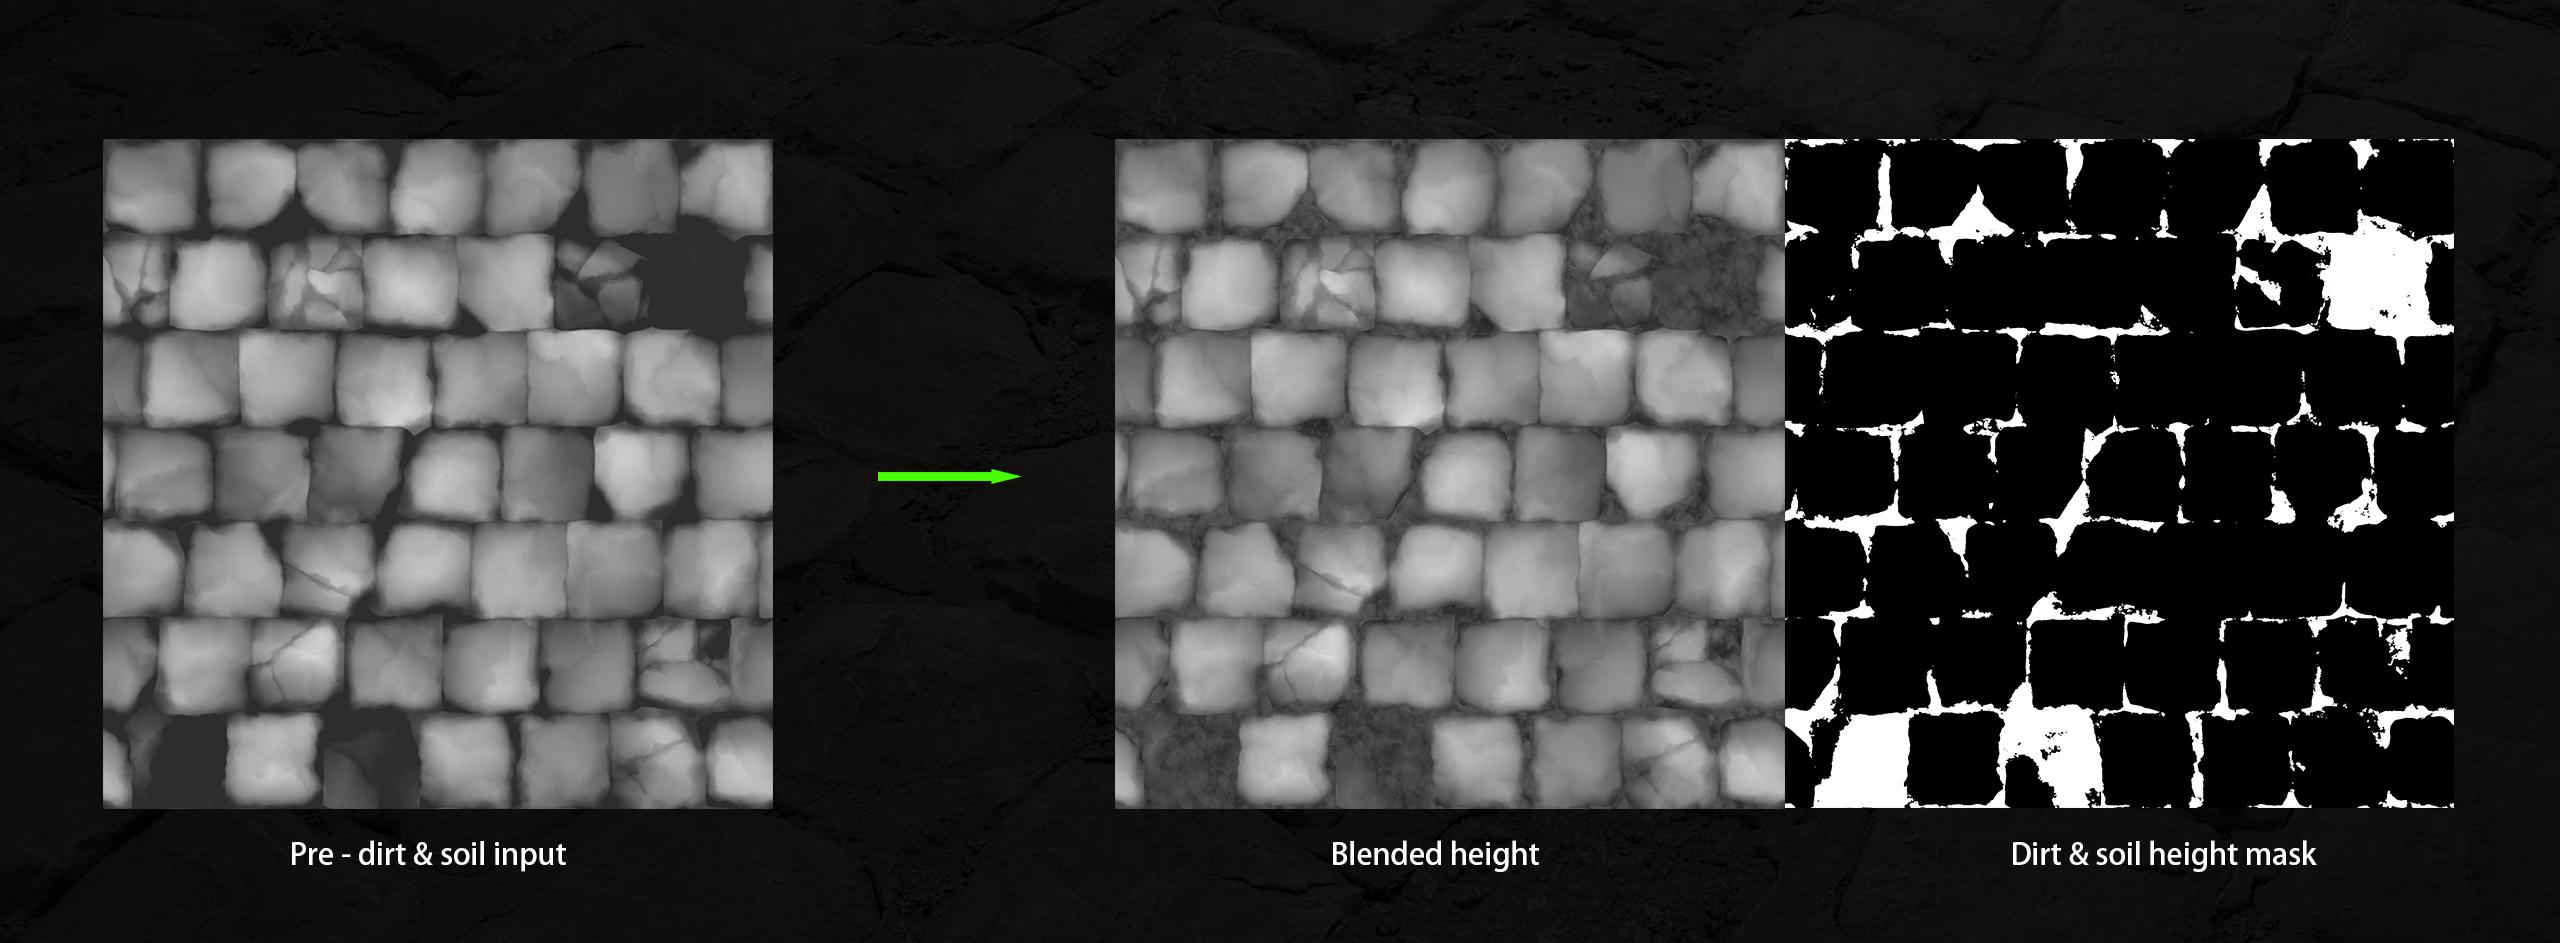
The dirt spreads across almost the entire negative spaces, such as crevices, gaps, and missing tile areas. In theory, I could plug the dirt noise into a Height Blend without any mask and it would naturally fill all the lower areas.
However, I realized that dirt doesn’t behave like a water flood; not every low spot needs to be completely covered.
Using a custom mask to guide it makes the result more interesting and less procedural.
Edge Damage 2.0
Why 2.0? Because after my first pass was done, the damage didn’t present strongly enough to me. So I added this extra section to push the breakage further.
At first I generated a new mask, which went straight to the Mask Map input of a Tile Sampler Grayscale node after. The Tile Sampler Grayscale helps create an enhanced edge damage mask that follows along the paver edges.
Basically, I reused the previous damage mask and applied a series of Blur and Non-Uniform Blur nodes to slightly “melt” and expand it.
The soft blur around the edges helps generate a nice slope transition. Then I used a bunch of high-frequency noise maps with Slope Blur to sculpt and chisel the overall shape a bit more.
Finally, I applied the damage with a Multiply blend.

This only applied to the more damaged versions of the materials (refer to figures A1, B1 and C1) and was inserted after the cracks and missing pavers section.
Since it was generated based on those masks, the damage automatically adjusted whenever those factors changed.
The following GIF shows the final result with and without the extra Damage 2.0.
I used the Height Blend to integrate the pebbles into the main graph, with most of them sinking into the dirt and then later even more were covered by the grout.
I can easily bring some back by tweaking the height through a Levels node.

Here is an interesting way to build pebble shapes, inspired by Johnny Nodes in one of his tutorials.
I used to make rubble stones and pebbles in different ways and this setup is quite a thing. It seems to take a bit of time to set up for the first time but it offers a more flexible way to control.

It’s fine to reuse the pebble shape if you previously made a bunch for other projects.
However, to be more precise, it’s recommended to remake the larger chunk from scratch in order to visually match the current style.
Aging Grout
I also call it “mending grout”, since it was most likely used for repointing gaps and filling pits to reduce floor unevenness. And the different grout tones reveal areas that were probably repaired or regrouted at different times.
At first, I gathered all previously created masks for the crevices and gaps. This is basically for targeting the areas that need to be repointed or regrouted in reality.
Similarly to what I did for the debris pebbles but no need to include the missing tile area this time, because I don’t want the grout to fully cover it.
I let the height work its way to decide how much the grout could spread.


The missing tile areas, which are filled with dirt and pebbles, can be seen as relatively the newest spots that haven’t yet been repaired.
And even more telling, the surrounding grout hints they’ve been patched before, probably more than once.
I think adding this feature helps emphasize the sense of an ongoing repair history. And most importantly, it needs to look cool.

The following GIF shows the grout amount increasing from zero to more coverage.
This helped me review how heavy the grout should appear in the final version.
Flood Fill
I prefer using the Flood Fill to Random Color node + RGBA Split to generate several random grayscale variations for later use.
It’s convenient to have multiple variations on hand so I can quickly switch between them and pick the one that feels right.
For example, in this project I used Random Grayscale_01 to control the height of individual tiles, _02 to mark the cracked ones, and _03 to define the missing pieces.
The actual usage goes beyond that and of course, I can swap around in any order.
You could achieve a similar setup by simply using several Flood Fill to Random Grayscale nodes instead, but I prefer this combination because the random color output can also feed into Vector Warp and Vector Morph, giving better noise variation in some cases.
Plus I can pack everything together inside one frame like a toolbox.

I also use Flood Fill to BBox Size very often when I need precise size-based control over individual shapes.
For example, to bring more variation to a cracked floor, I can extract the size values using this node and then process them through a Histogram Select node if needed.
This lets me lower and flatten the smaller pieces while keeping the larger pieces intact.
Base Color
To work on the Base Color, I started by color sampling from one of my photo references to establish the base tone, and then I began sorting out three types of color details.

The first type is closely tied to the height map, such as the pebbles and grout which need to be taken care of with masks and relevant grayscale inputs.
The second type includes details that may not appear in the Height or Normal maps but are visible in the Base Color.
These usually affect the Roughness as well. The third type affects a broader range; it spans across the entire surface to create better blending between all elements, typically driven by Curvature and Ambient Occlusion nodes.
For the color setup, I dropped in the photo image that was taken by my phone (this is relatively not the best source for color sampling; it really should’ve been a calibrated scan texture for the most accurate value and tone).
And then to remove the distracting dark values, I used an RGBA Split node and Histogram Scan to isolate and mask them out.
A Distance node was then used to close up and fix it. I followed up with an HQ Blur to further neutralize the colors.
And then a Flood Fill to Color distributes the colors, followed by additional color tweaking and averaging.

I learned this color sampling method originally from Jonny Nodes’ Damaged Patterned Floor example. It really saved me time from aimless color picking.
Note that my setup was based on it but has been simplified and customized to only fit my needs. The original example covers a much broader process.
I highly recommend checking out the full tutorial.
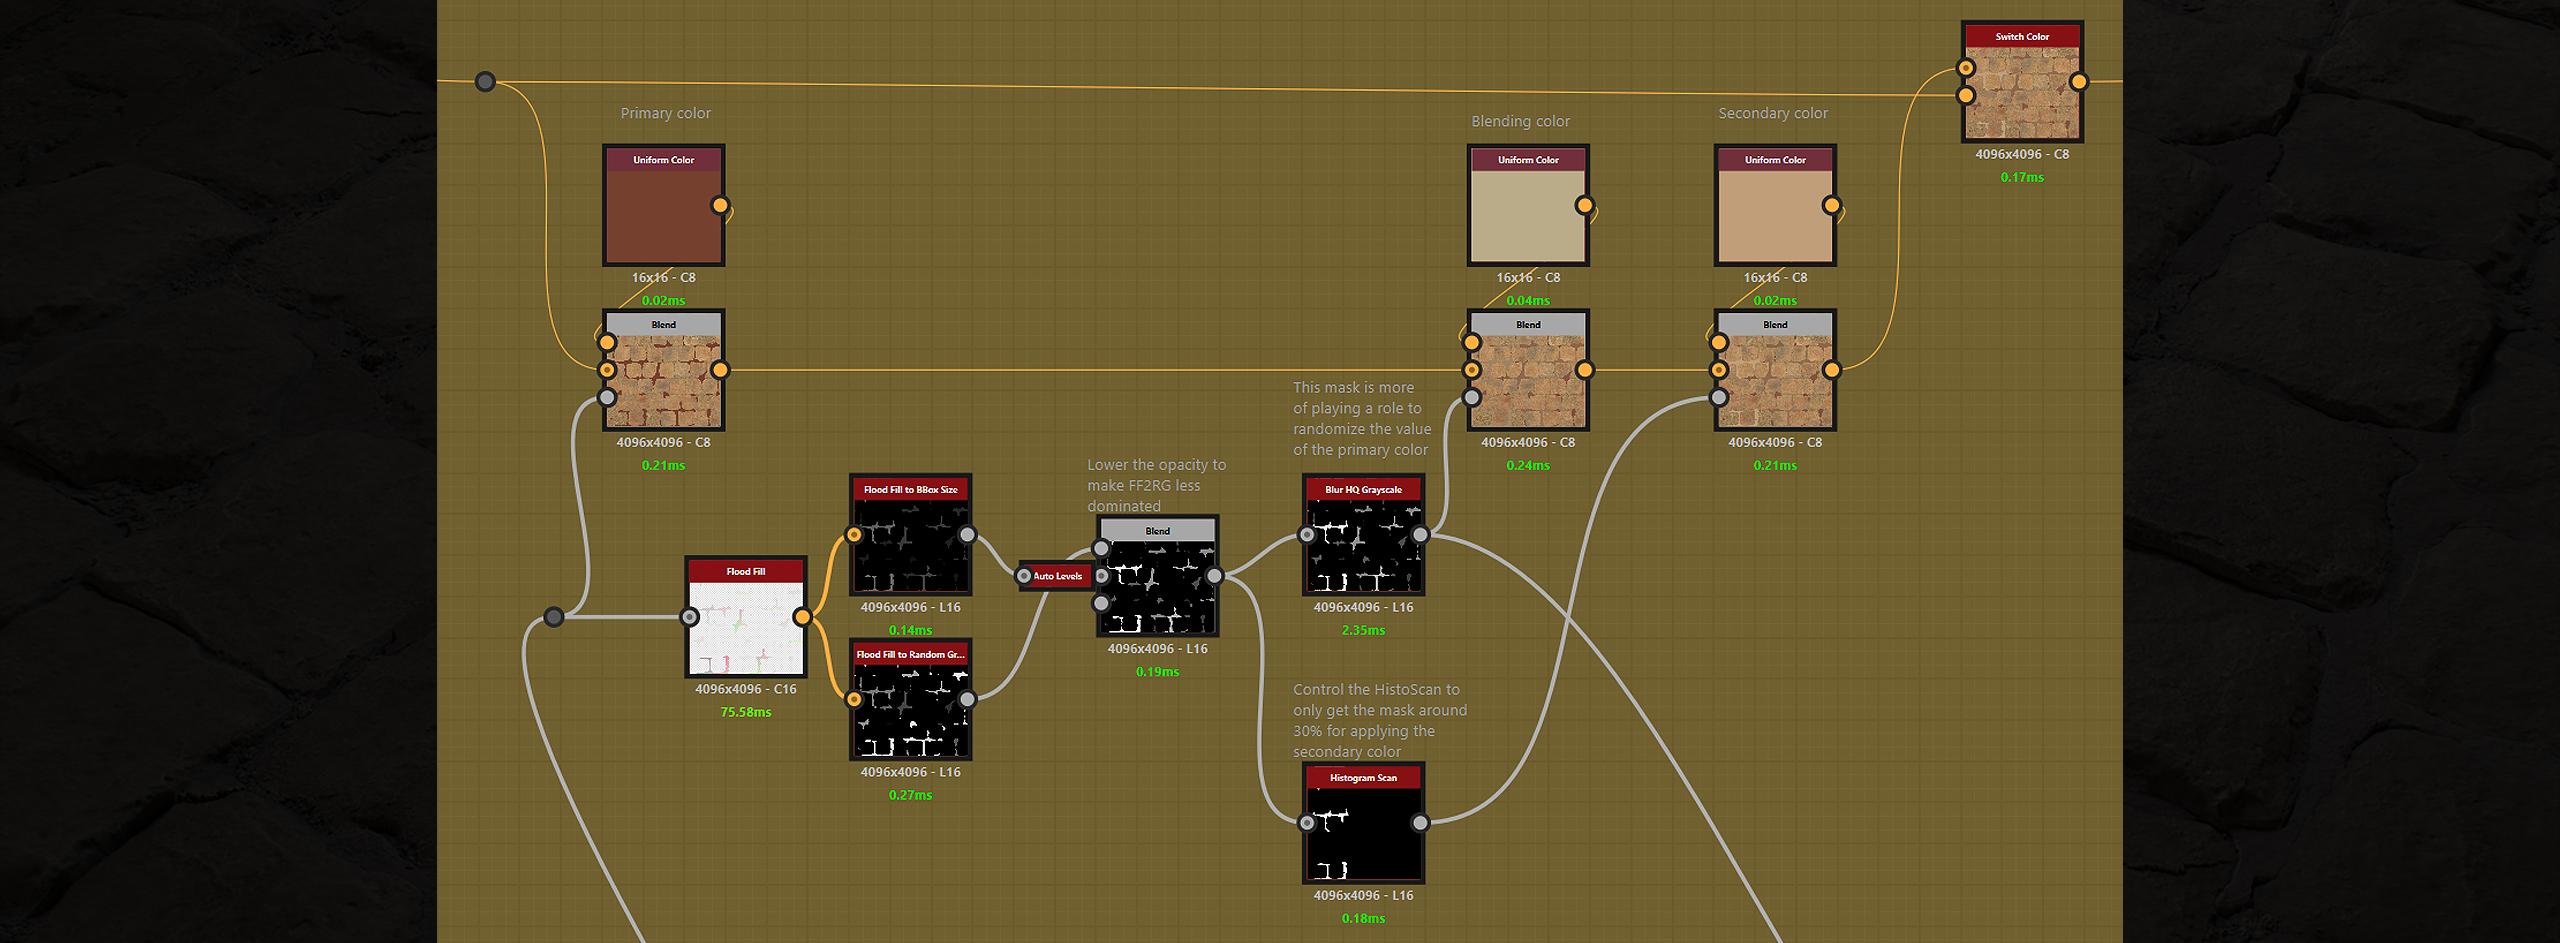
Here I want to expand a bit on the grout section. I started with an earthy brown as the primary tone for the grout.
Then, I reused the grout mask to run a Flood Fill process, generating a mask to control the secondary color.
Once that was in place, I blended in a beige tone to break up and shuffle the primary color. The final result gave the grout a rich terracotta-style variation, which was exactly what I wanted.
To wrap up this section, I used Normal Sobel along with a Curvature Smooth and a Curvature Sobel to gather different levels of curvature information and to crisp up the fine details.

I also brought in the Ambient Occlusion node to further emphasize the crevices and surface depth. These layers add more depth to the overall color response, especially in relation to the Dirt section.
They really help highlight the grainy look and make the surface feel more grounded.
Roughness
To generate the Roughness map, I started by converting the base tone to grayscale to get some initial value variation.
And then, I blended in a uniform grayscale for each group and paired with its corresponding mask layer by layer, following the parallel Base Color stream.
This gives me more precise control over each set of details independently.
Overall, the material doesn’t seem to need a wide roughness range, but I slightly exaggerated it for better readability.
The only part I emphasized more is the grout. It can be smoother and glossier since it likely gets rubbed more often in reality.
In the reference photo, you can see there isn’t strong contrast across the surface, but you still notice that the dark purple grout areas appear glossier and show less erosion.
My guess is that these are the newest patches compared to the rest.
Custom Parameters
The parameters were mainly introduced to help myself create a balanced preset for each pattern and its variations.
With the current limitation of my setup, I don’t have a smarter way to switch between patterns so they connect perfectly without any tweaking.
Some manual adjustment is still needed to keep them consistent with each other.
Here are some of the custom parameters I made for this project (the parameter types are noted in brackets):
- [Integer] Pattern Selection — select one of the three patterns I created. This can be expanded later as more patterns are added.
- [Boolean] Toggle Missing Piece — turns the removed tile areas ON/OFF.
- [Float] Missing Piece Amount — increases or decreases how many tiles are removed.
- [Boolean] Toggle Grout — enables or disables the grout with one click.
- [Float] Grout Randomize — shuffles to generate a new grout appearance while keeping the same overall amount/density.
- [Float] Grout Height — adjusts the thickness of the grout slightly. This one can’t go too extreme so I clamped the slider to a narrow range.
- [Float] Cracked Tile Amount — controls how many tiles are cracked.
These parameters are very basic, providing simple Boolean, Integer or Float controls. At this stage, they were more than enough to build the presets I needed.

The custom parameters are not only useful for adapting different patterns but also for restoring presets with lighter or heavier damage versions.
For this project, I created six presets corresponding to the 6 figures (A1, A2, B1, B2, C1, and C2) in the “Base Pattern” section above.
With this setup, whenever I make further adjustments to the material, I can simply switch between those presets to update and batch export the final textures efficiently.
After finishing the presets, I published the .sbsar file and tested the parameters in Substance Player.

Using the random seed is also a great way to verify the final result. If all variations remain consistent and keep the same overall vibe, it’s a good sign that everything is functioning properly.
The final texture set of material A1 I exported:

Conclusions
I’m pretty happy with how the final result turned out. Not only because it met my expectations as a material study, but also I have learned a lot from this project. New tricks, improved workflows, and a deeper understanding of both Substance Designer and the mindset behind material creation.
I’m really looking forward to the next project.
Thank you for taking the time to read through all this. I hope you found the information useful.
I’d also like to thank Games Artist for offering me the opportunity to share this work with you.
Feel free to reach out to me on ArtStation if you have any questions or would like to share your thoughts. https://www.artstation.com/kli7
Cheers.
Read more articles
You might also like these articles.


