Old Mincer

Introduction
Hi, my name is Denis Zakharov. I'm a 3D Artist working at an outsourcing studio creating content for games.
I’ve had the opportunity to work on projects like Escape from Tarkov, Call of Duty: Black Ops, and several other interesting titles. My main focus is hard-surface: props, vehicles and weapons.


Project Overview
I sometimes criticize myself for not doing personal projects for my portfolio, so I decided to fix that, even with a small one.
For this personal project, I chose an old Soviet hand crank mincer. I’ve always been drawn to old, vintage objects – their shapes, solid construction, and the sense of nostalgia they carry.
The goal was simple – to practice material creation and achieve a nice-looking render in Marmoset.


Software
- Blender
- ZBrush
- Substance Painter
- Marmoset Toolbag
References
I wasn’t aiming to copy any specific meat grinder. It’s more of a composite image – something I already had in my mind, since similar grinders were in every household.
Besides basic Google searches, I looked for references on websites with listings for used items.
I tried to find interesting dirt, wear, and details in the references that I could apply to my model.

Blockout
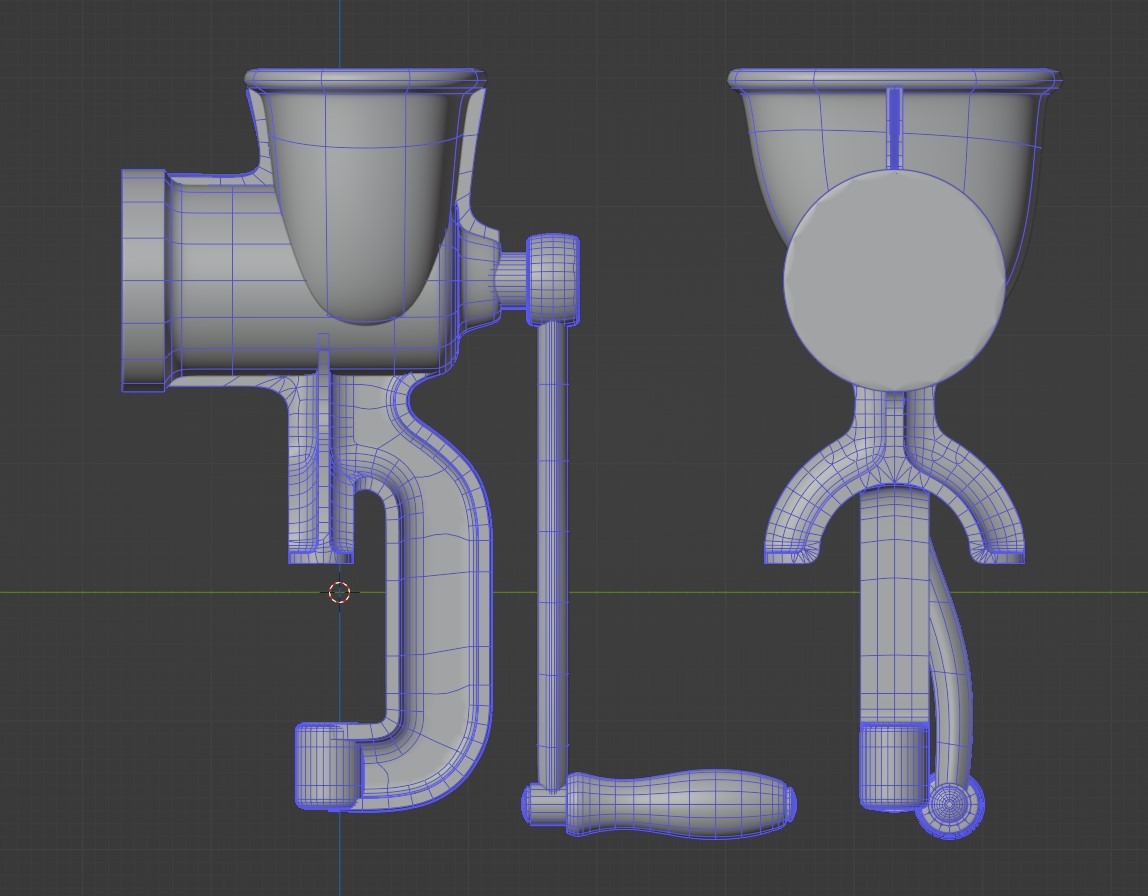
I started by blocking out the shapes in Blender using subdivide. Since I planned to do the high poly in ZBrush, I made the blockout from separate parts, which were later merged into a single mesh using DynaMesh.
I also prepared geometry for cutting out holes in ZBrush. I could have done this in Blender, but I decided that ZBrush gave me better control over the final shape.

Highpoly
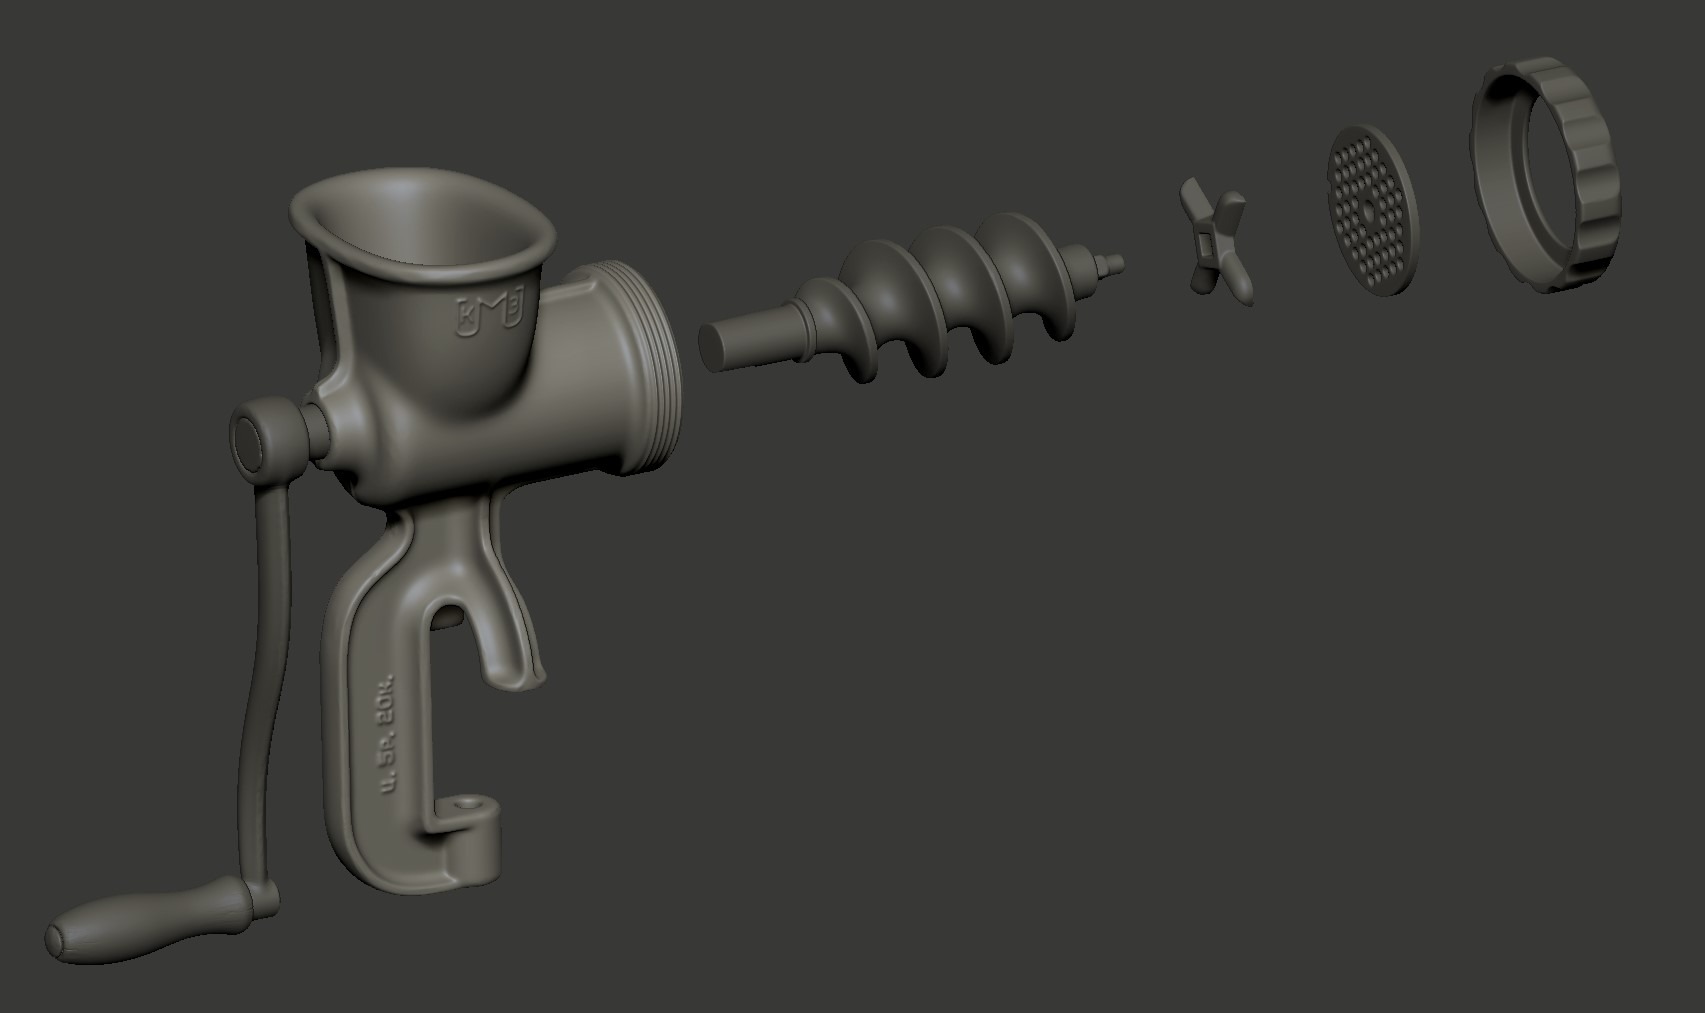
The high poly was done in ZBrush: merging all blocking parts with DynaMesh and using “Polish by Crisp Edges” to create smooth edges and transitions between combined parts.
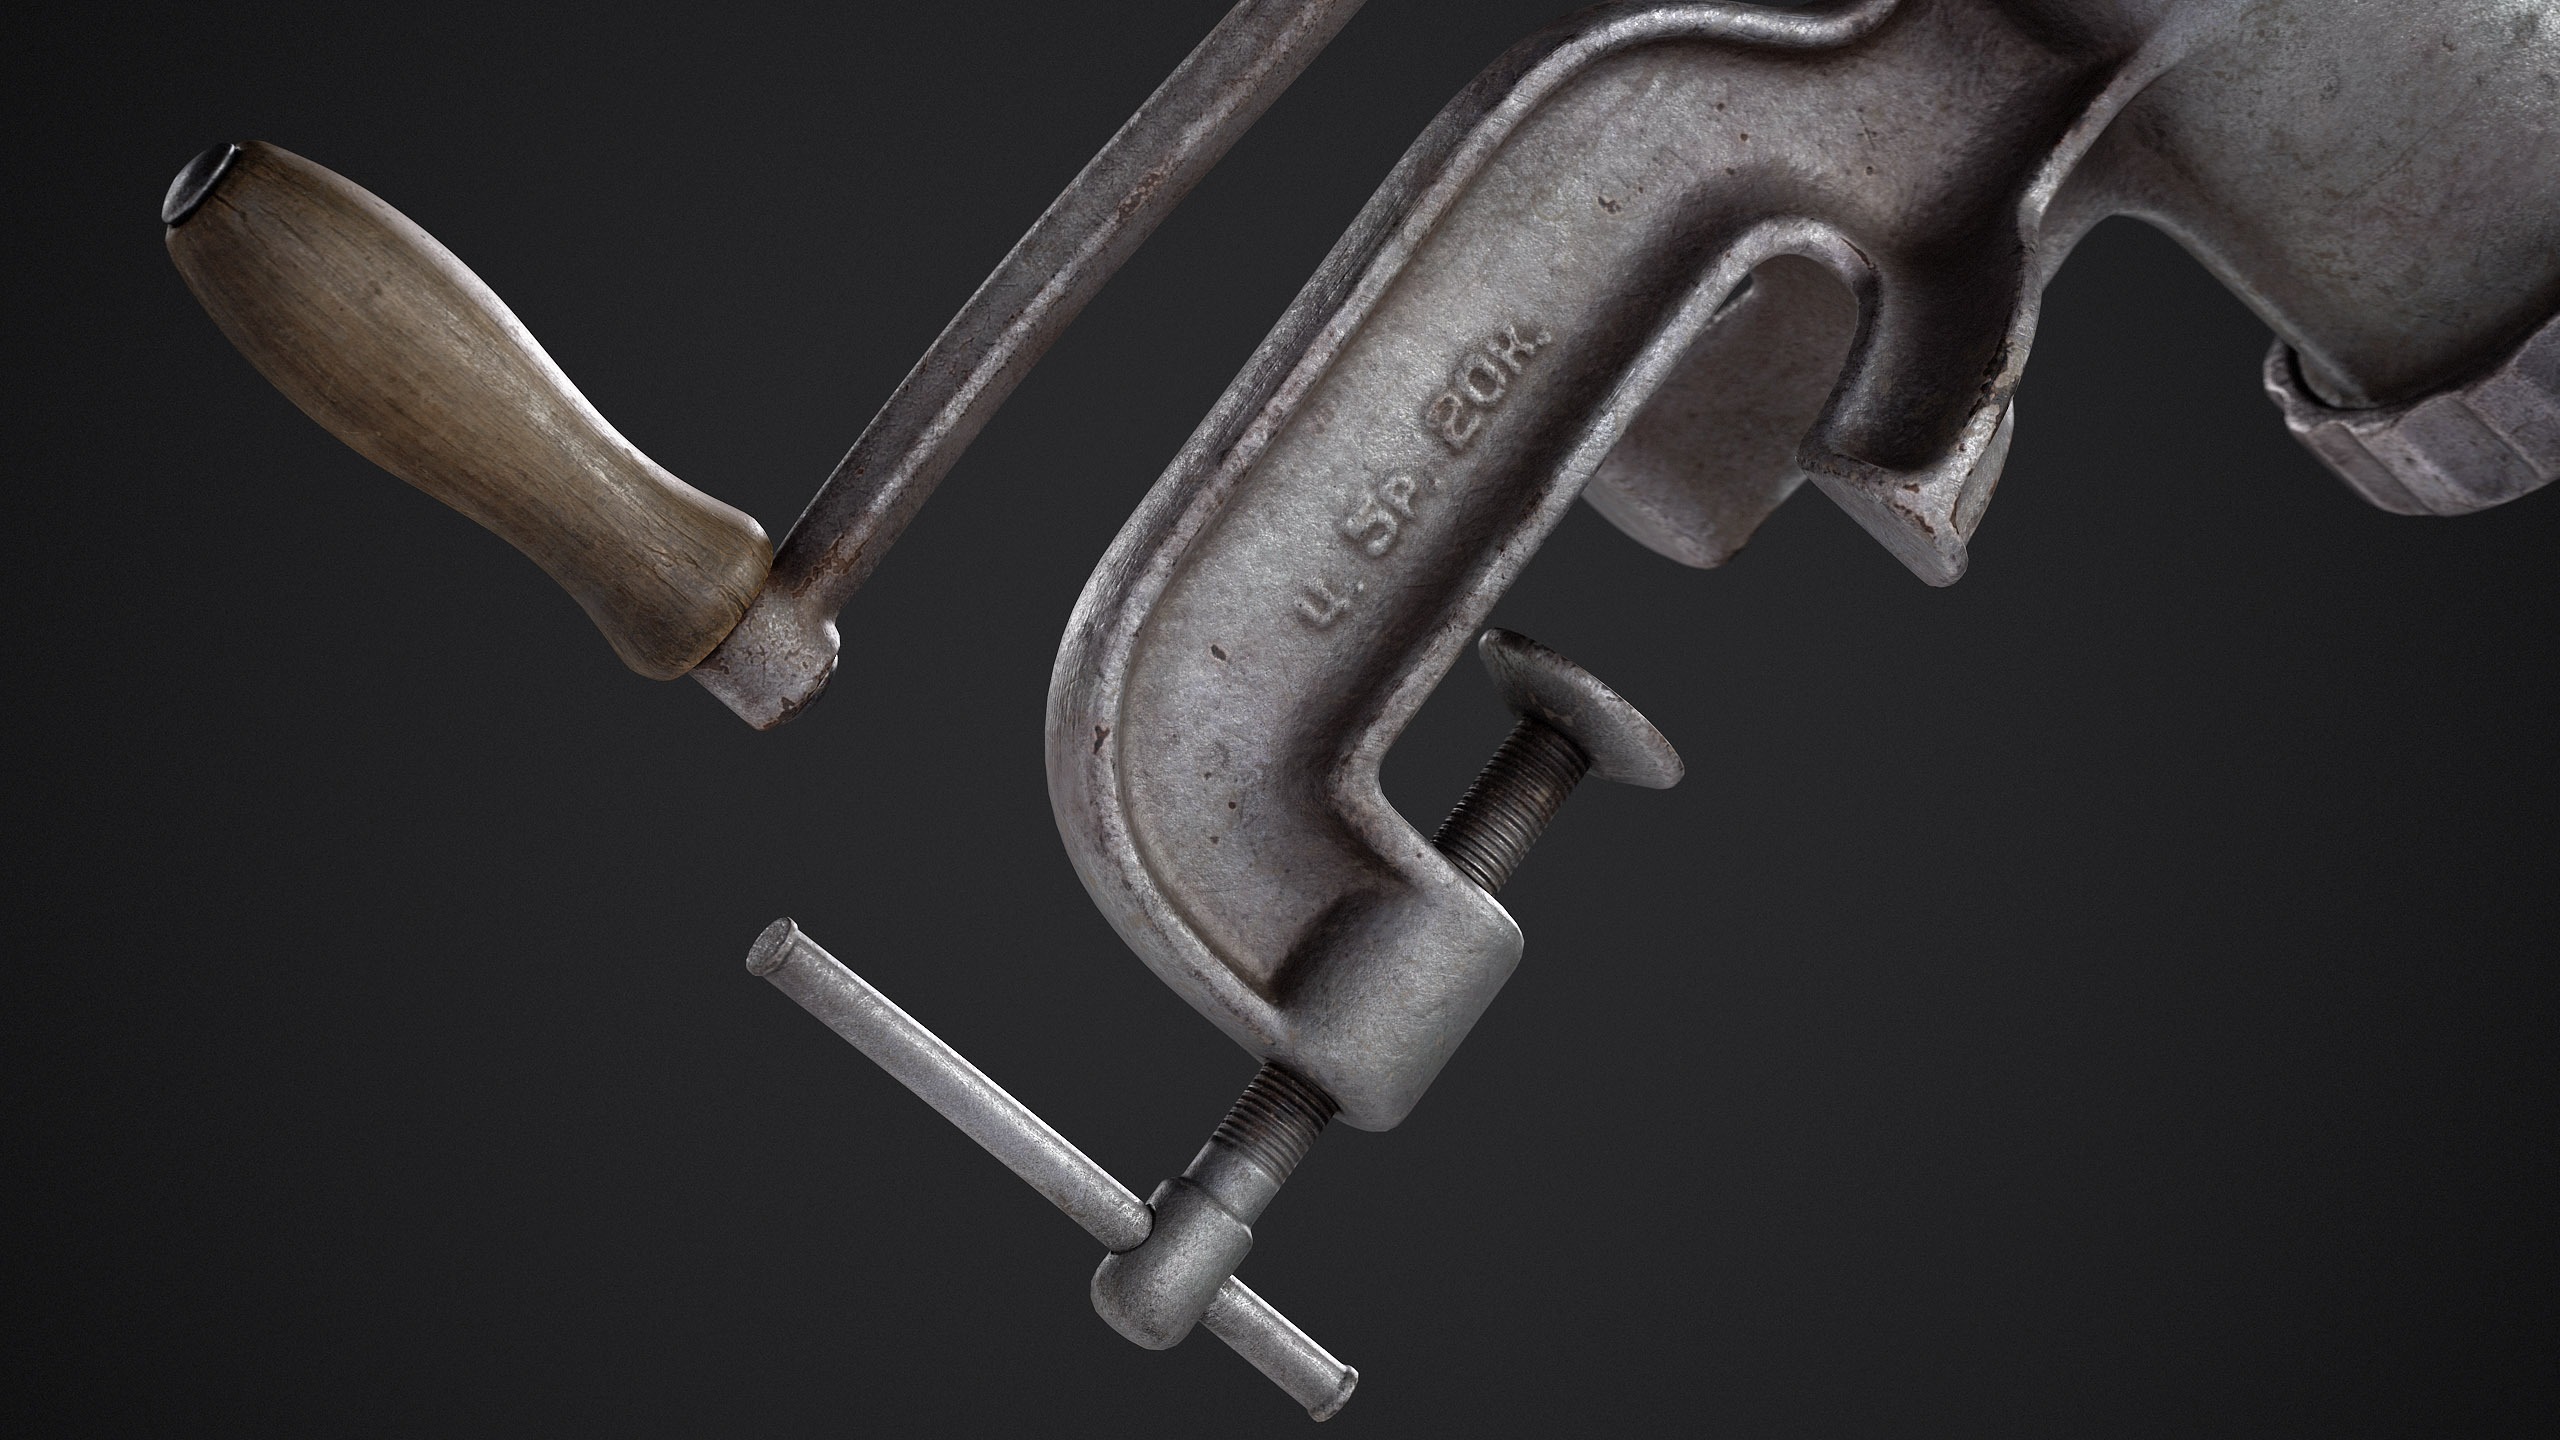
I added embossed text with the factory logo, year of manufacture, and price – typical for Soviet products, ensuring price control and customer trust.
I’m not a fan of creating surface details directly in ZBrush.
It takes away the ability to adjust the scale or character of the details later during texturing, which is often necessary when working with a client.
I just added a small damage to the edges of some parts and a couple of cracks on the wooden handle.


Lowpoly
I decided to skip the process of creating a proper low poly. That wasn’t my goal. Creating proper low poly is something I do all the time at work, so it’s become routine for me, so to start texturing faster, I used ZRemesher.
The resulting topology was fine, and I moved on. For simple parts that didn’t require much reworking, I just used the blockout meshes.
Some parts from the ZRemesher process had bad topology for UV mapping.
In certain cases, like the blades, I had to manually assign polygroups so that ZRemesher would align the topology along their borders and the edge loops would follow correctly, instead of spiraling around the whole mesh.

UV’s & Baking
I don’t have much to say about the UV and baking process since it’s pretty standard.
Because the low poly model almost entirely followed the high poly, there were no issues with baking.
Painter setup and Texturing
Since the main idea was to achieve good-looking renders in Marmoset, I experimented with environment setup.
A common issue for me is that textures can look different in Substance Painter and Marmoset due to different HDRI.
I chose an HDRI I liked online and used it in both programs to get a similar result. I also enabled ACES in Tone Mapping and turned on Tone Mapping in the Post Effects for a more contrasted result.


For the metal, I used several layers of different noises with varying intensity.
Some of them were applied only in specific areas, such as inner corners using ambient occlusion mask, while others were applied to flatter surfaces.
During texturing, I try to make sure that the details I add are visible in both the roughness and base color channels.
Even the noises added to the height channel are visible, at least slightly, in the base color, roughness and metalness (if we talk about metal).
The goal is to achieve rich and detailed base color and roughness. I used fairly common texturing techniques, adding some cloud noise with color variation and smooth gradients to break up the surfaces by color.
For edge chipping, I used a combination of hand painting and stencils. I often use a free brush by Ayi for these purposes.
When creating the texture for the wooden handle, I used a photo texture as a base, then added directional noise with a little bit of warp effect and a wood grain mask.
I also added gradients to highlight wear and a few scratches.


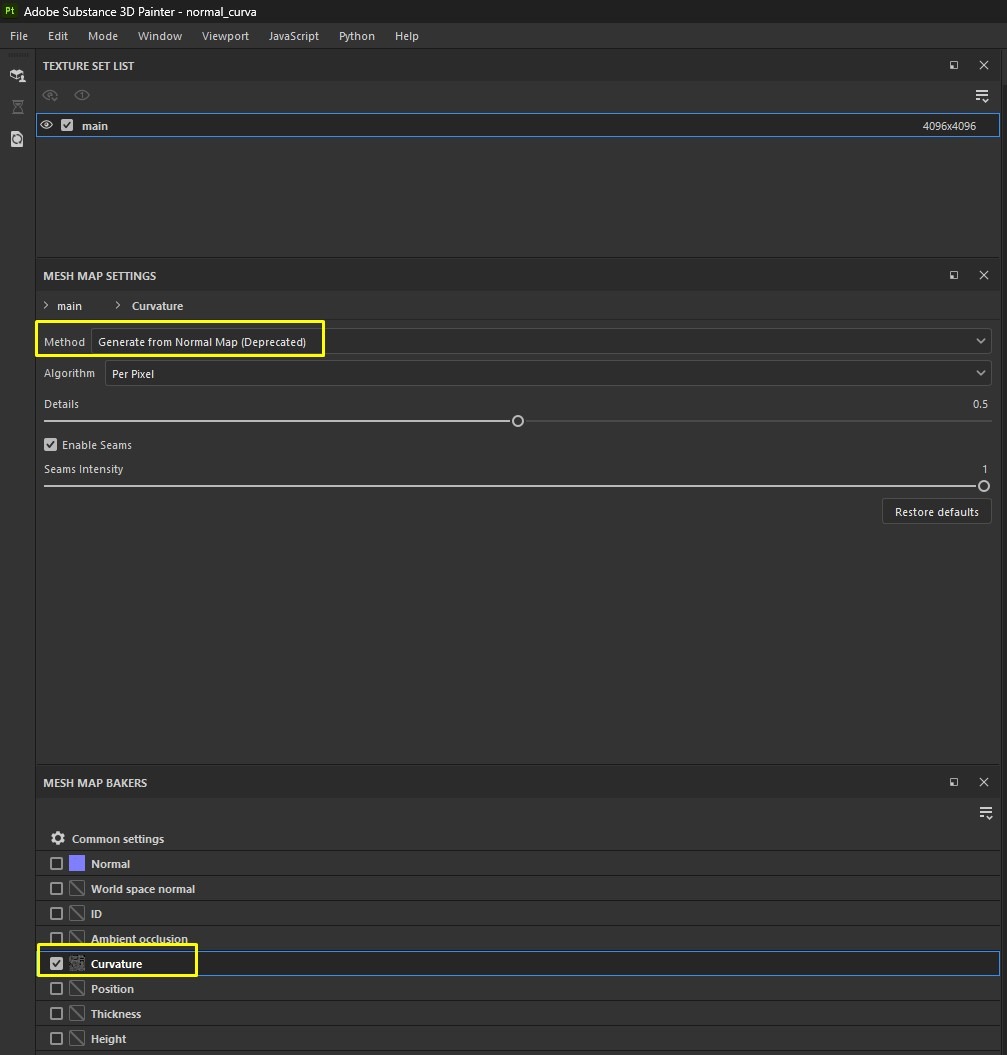
To highlight all the bumps, I baked curvature from the normal map in a separate scene, thus getting curvature for each small detail on the surface.
It looks quite rough, but if you blend it as an overlay into the base color and add just a little, it creates a nice effect.
Of course, you can achieve a similar effect with masks, but this method seems faster to me.
Lighting & Rendering
Because I was setting up materials in the same environment I would render in, lighting didn’t take much time. Using the same ACES tone mapping as in Substance I was almost satisfied with the result I got from the HDRI lights.
I just tweaked it a bit with intensity and post-effects.

Conclusion
I think I could make it look a bit better spending more time, find more interesting details from references, and so on, but too many projects remain unfinished due to over-perfectionism.
I tried to limit myself in terms of time and stopped at a result I was satisfied with.
Thanks to the Games Artist team for their attention to this project — I really appreciate it. And thanks to everyone who took the time to read this article, I hope it was at least a little useful.
I wish everyone a Happy New Year and lots of exciting new projects.

Read more articles
You might also like these articles.


