Introduction
Hi everyone! I’m Massimo, working as a Material Artist at 31st Union in its new office located in Valencia (Spain) after the recent acquisition of elite3d by 2K. Before this, since March 2019 I worked as a Prop/Environment Artist at elite3d and took part in AAA projects such as Cyberpunk 2077 and Forza Horizon 5.
Worth mentioning that, before starting my career in the games industry, I worked for almost 10 years as an archaeologist specialized – ironically – in ancient materials.


The Idea
This work is part of wider project – started one year and a half ago with my friend and colleague Xavi Anguita – of creating a small material collection inspired by some of the most iconic and characteristic features of the city of Valencia. The purpose of this whole project was mostly sharpening our skills in Substance Designer, training ourselves in analyzing a material having first-hand references, and lastly paying a small tribute to the beautiful city in which we live in.

The Mercat Central Azulejos: A material study
Artstation link: https://www.artstation.com/artwork/Rny2le
For my second contribution to this project (you can see the first one here) I chose to re-create in Substance Designer the well-known external wall of the Mercat Central – located in the Old City district – characterized by a pattern of ceramic tiles (the ‘azulejos’) with different hand-painted colored decorations (floreal, abstract, heraldic).


The reason behind this choice was not just the beauty of the material itself, but mostly was the possibility for me to challenge myself and investigate how to achieve a both realistic, good-looking and interesting material without relying on rich height/normal informations, but just pushing as much as possible the color and roughness ones in all their details and variations. Secondly, I was interested in how to create all the hand-painted decorations directly in Substance Designer and later on distribute them inside the tile pattern.
Jumping into the analysis of the material, the decoration/color aspect was the one that needed most of the attention: I first identified the common features in the decoration among all the tiles so that they could be later on extrapolated and processed separately from the rest, but also allowing me to treat each tile in the same way.
As shown in the picture, the following main elements have been isolated: 1-‘Background’, 2-‘Area’, 3-‘Borders’, 4-‘LightDetails’, 5-‘DarkDetails’. I also added another category called ‘Overpaint’ for both Light/Dark Details to be able to target some specific part to be treated separately (overlapping strokes, different color, directional strokes).

Other extrinsic details – miscolorations, grime, chippings in the glaze and/or ceramic – have been planned to be added later on, after finalizing the main pattern.
Material Creation Steps
The full creation of this material can be resumed in the following steps:
- Vector Drawing
The more obvious decision about how to re-create those intricate decorations was through vector drawing. I rarely used SVG nodes before this project so I wanted to give them a try and keep all the work inside the same software instead of dealing with annoying export-import processes when tweaking the shapes. Having the reference picture as a background, I started tracing the shapes divided by the categories mentioned above: a sub-graph created for each tile decoration will return those as outputs of a custom node.
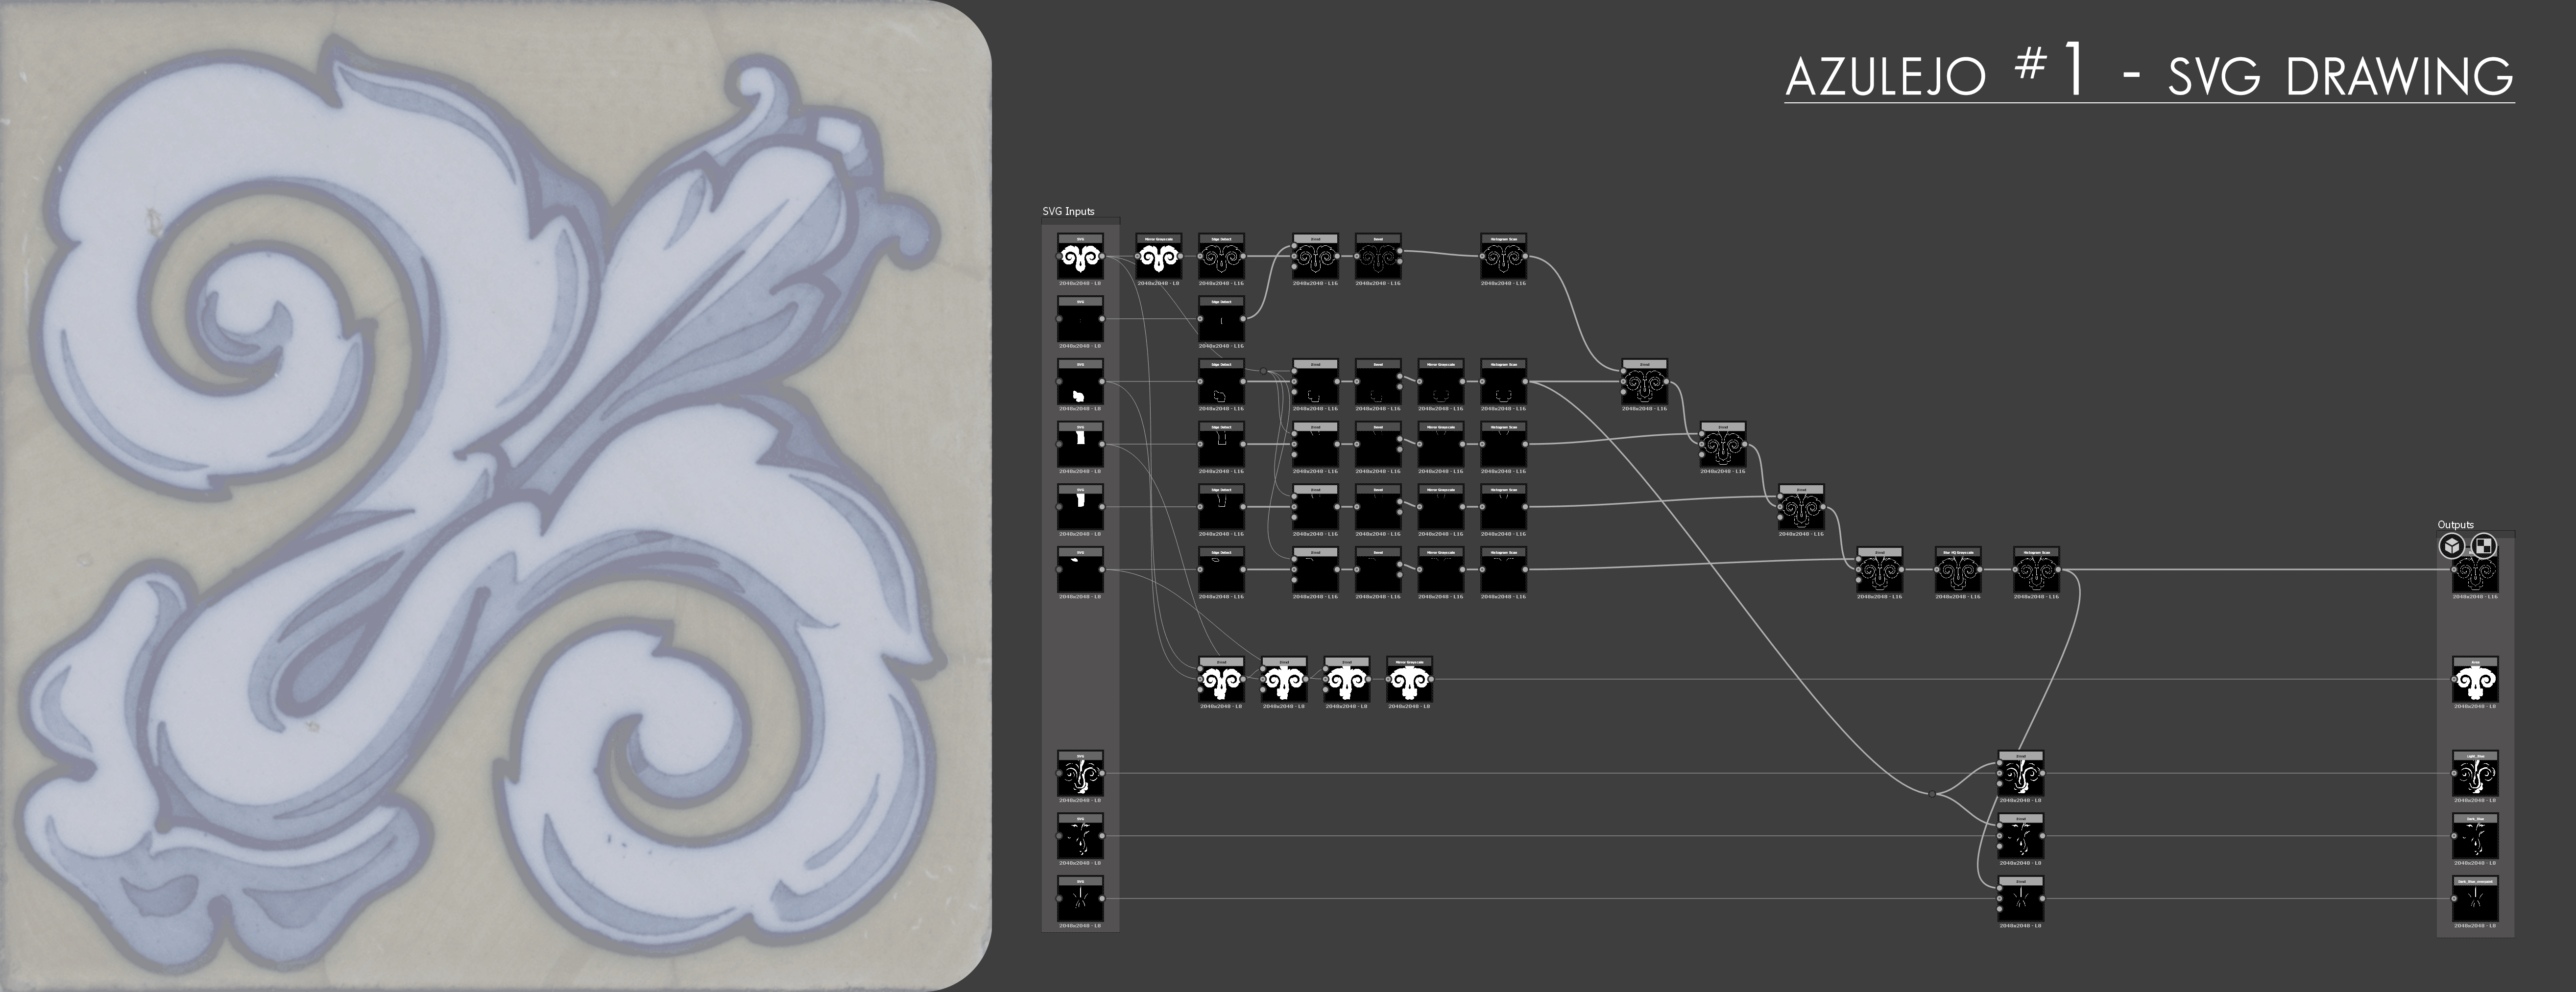
- Filters creation
After the first step, I started creating another sub-graph – probably the most important part of this whole work – meant to be a custom filter node, through which process each element drawn in the previous phase, but also useful as a good start for the non-decorated tiles. The exposed parameters set for this node (denominated ‘Ceramic filter’) control several aspects that contribute to achieve a nice ceramic, hand-painted effect (color variations, impurities, grainy effect, brush strokes intensity and directionality). Plugging any shape information, like the ones inside each decoration, the filter adds gradient effects and borders to the final color result and returns also a mask output to be used in the next step.
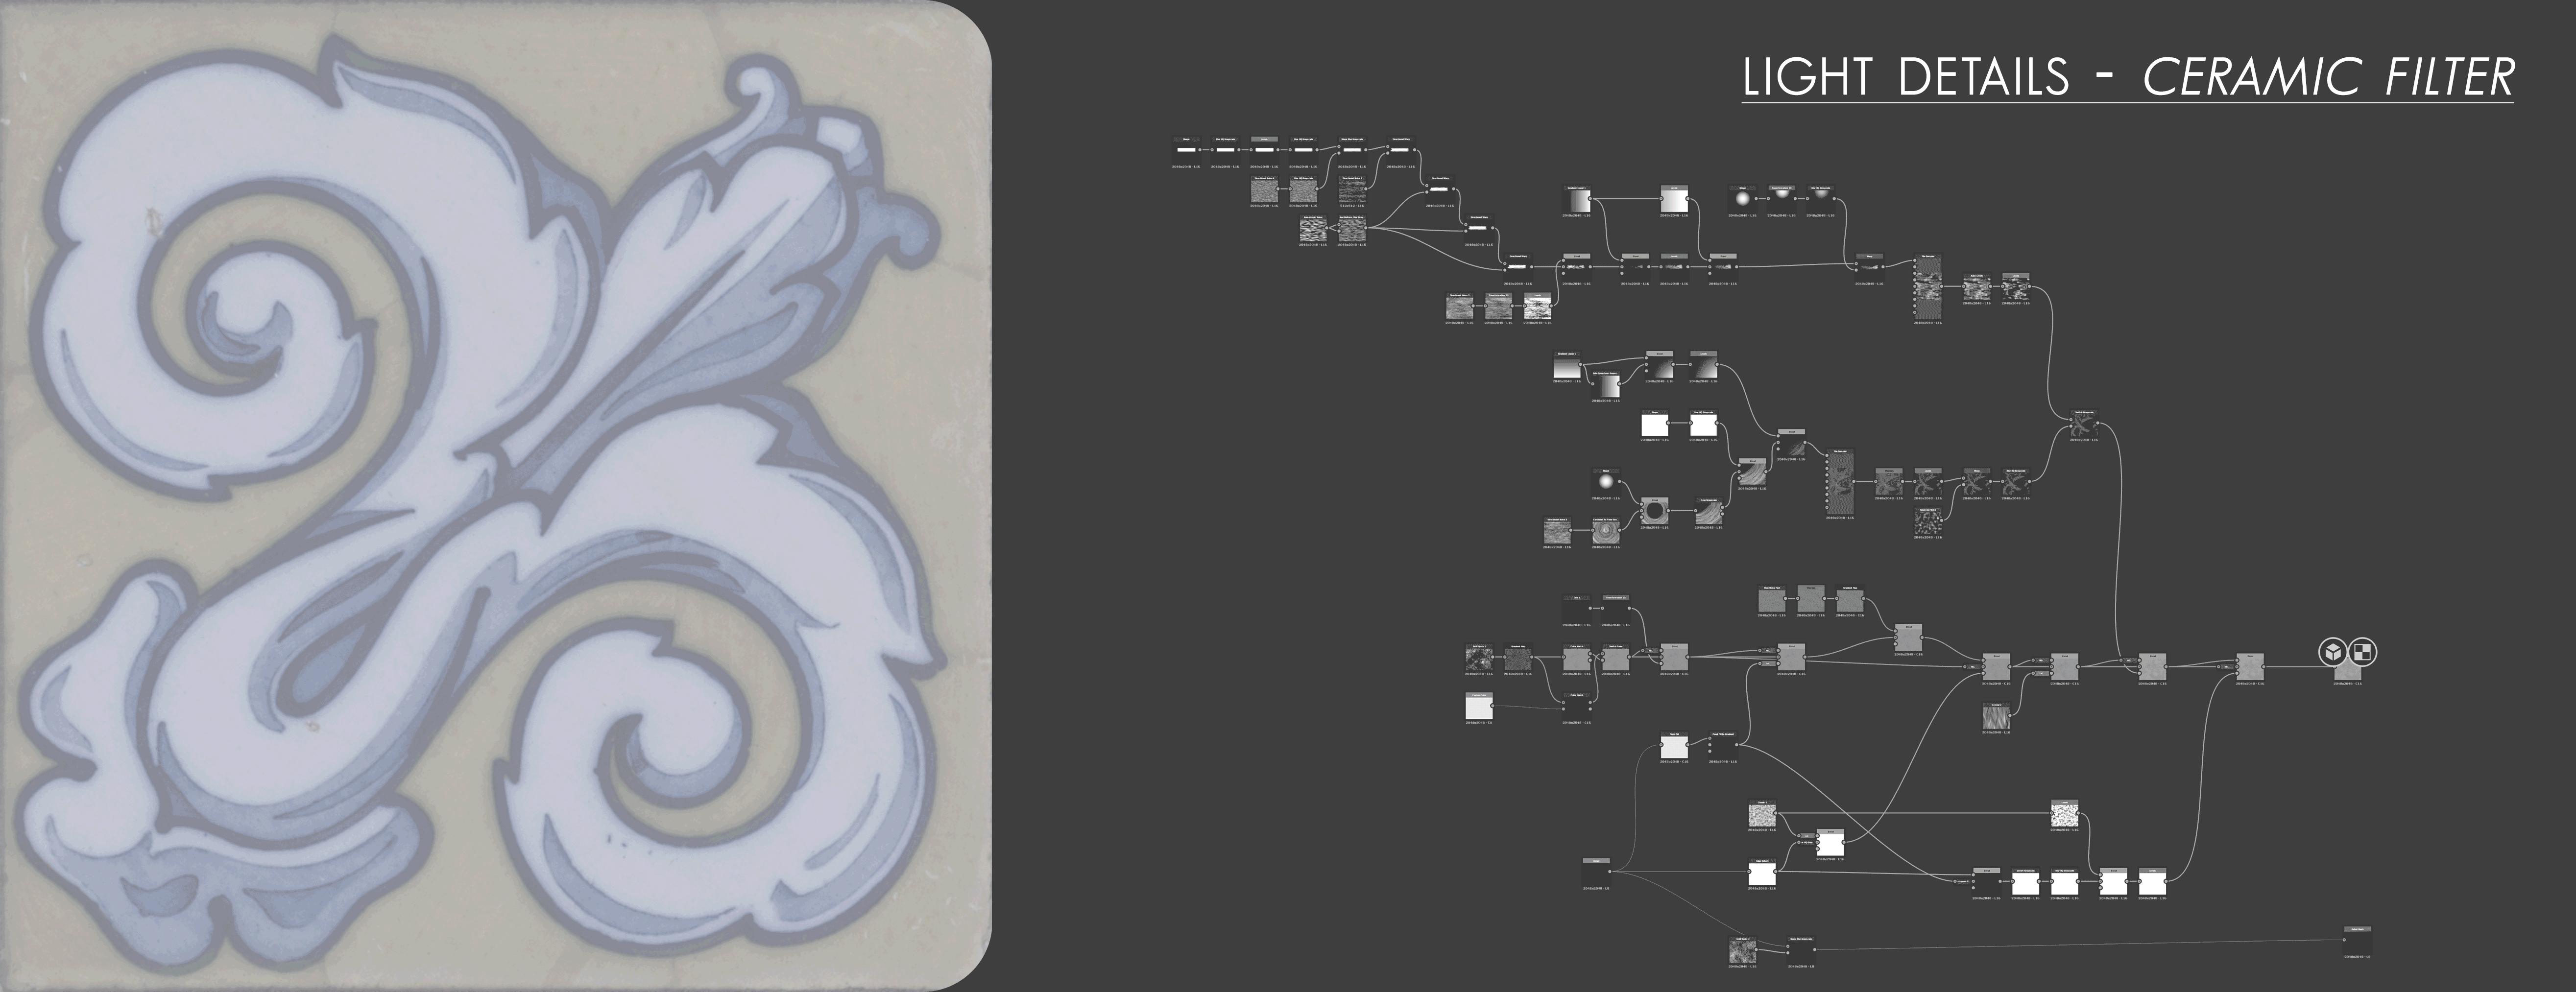
A second sub-graph (denominated ‘Azulejo effect’) has been created to receive all the decorations data coming as inputs, processing them through individual ceramic filters with different parameter settings, blend them together with a background and, when needed, with an overlay element (some of the tiles have a white/blue band on the top or bottom part). All the color variations are linked through HSV nodes to a single exposed color value that can also be replaced by an external color input to help keeping the same values among different tiles. The rest of the parameters for this node control the aspects already mentioned above, this time grouped for light/dark/overpaint details.
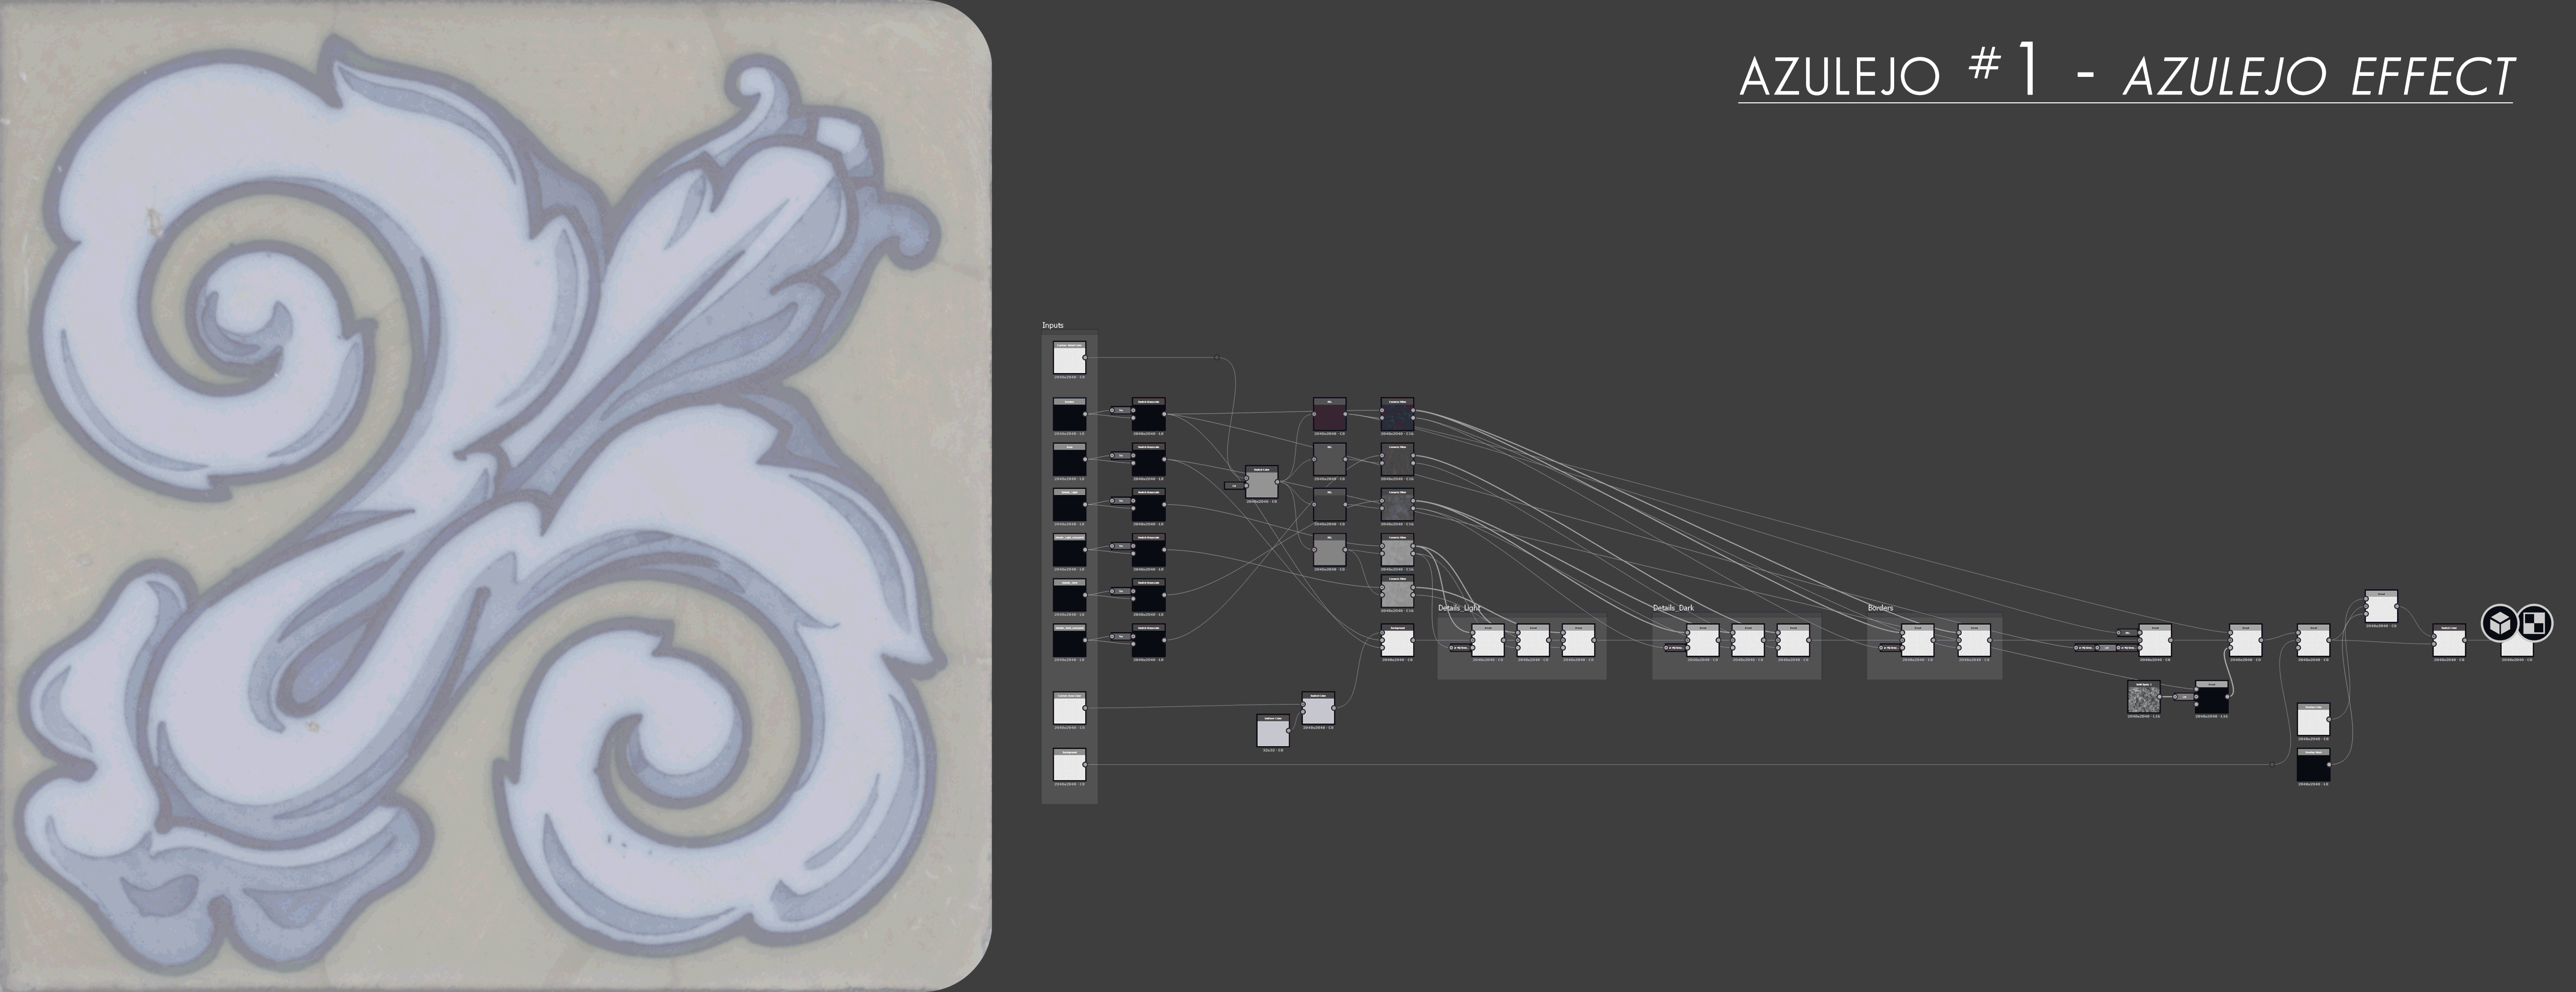
The last thing worth mentioning about the utility of keeping all these operations inside custom nodes regards not only how fast is tweaking the exposed parameters, but also how easy is to create different variations just changing the random seed value.
- Shapes distribution
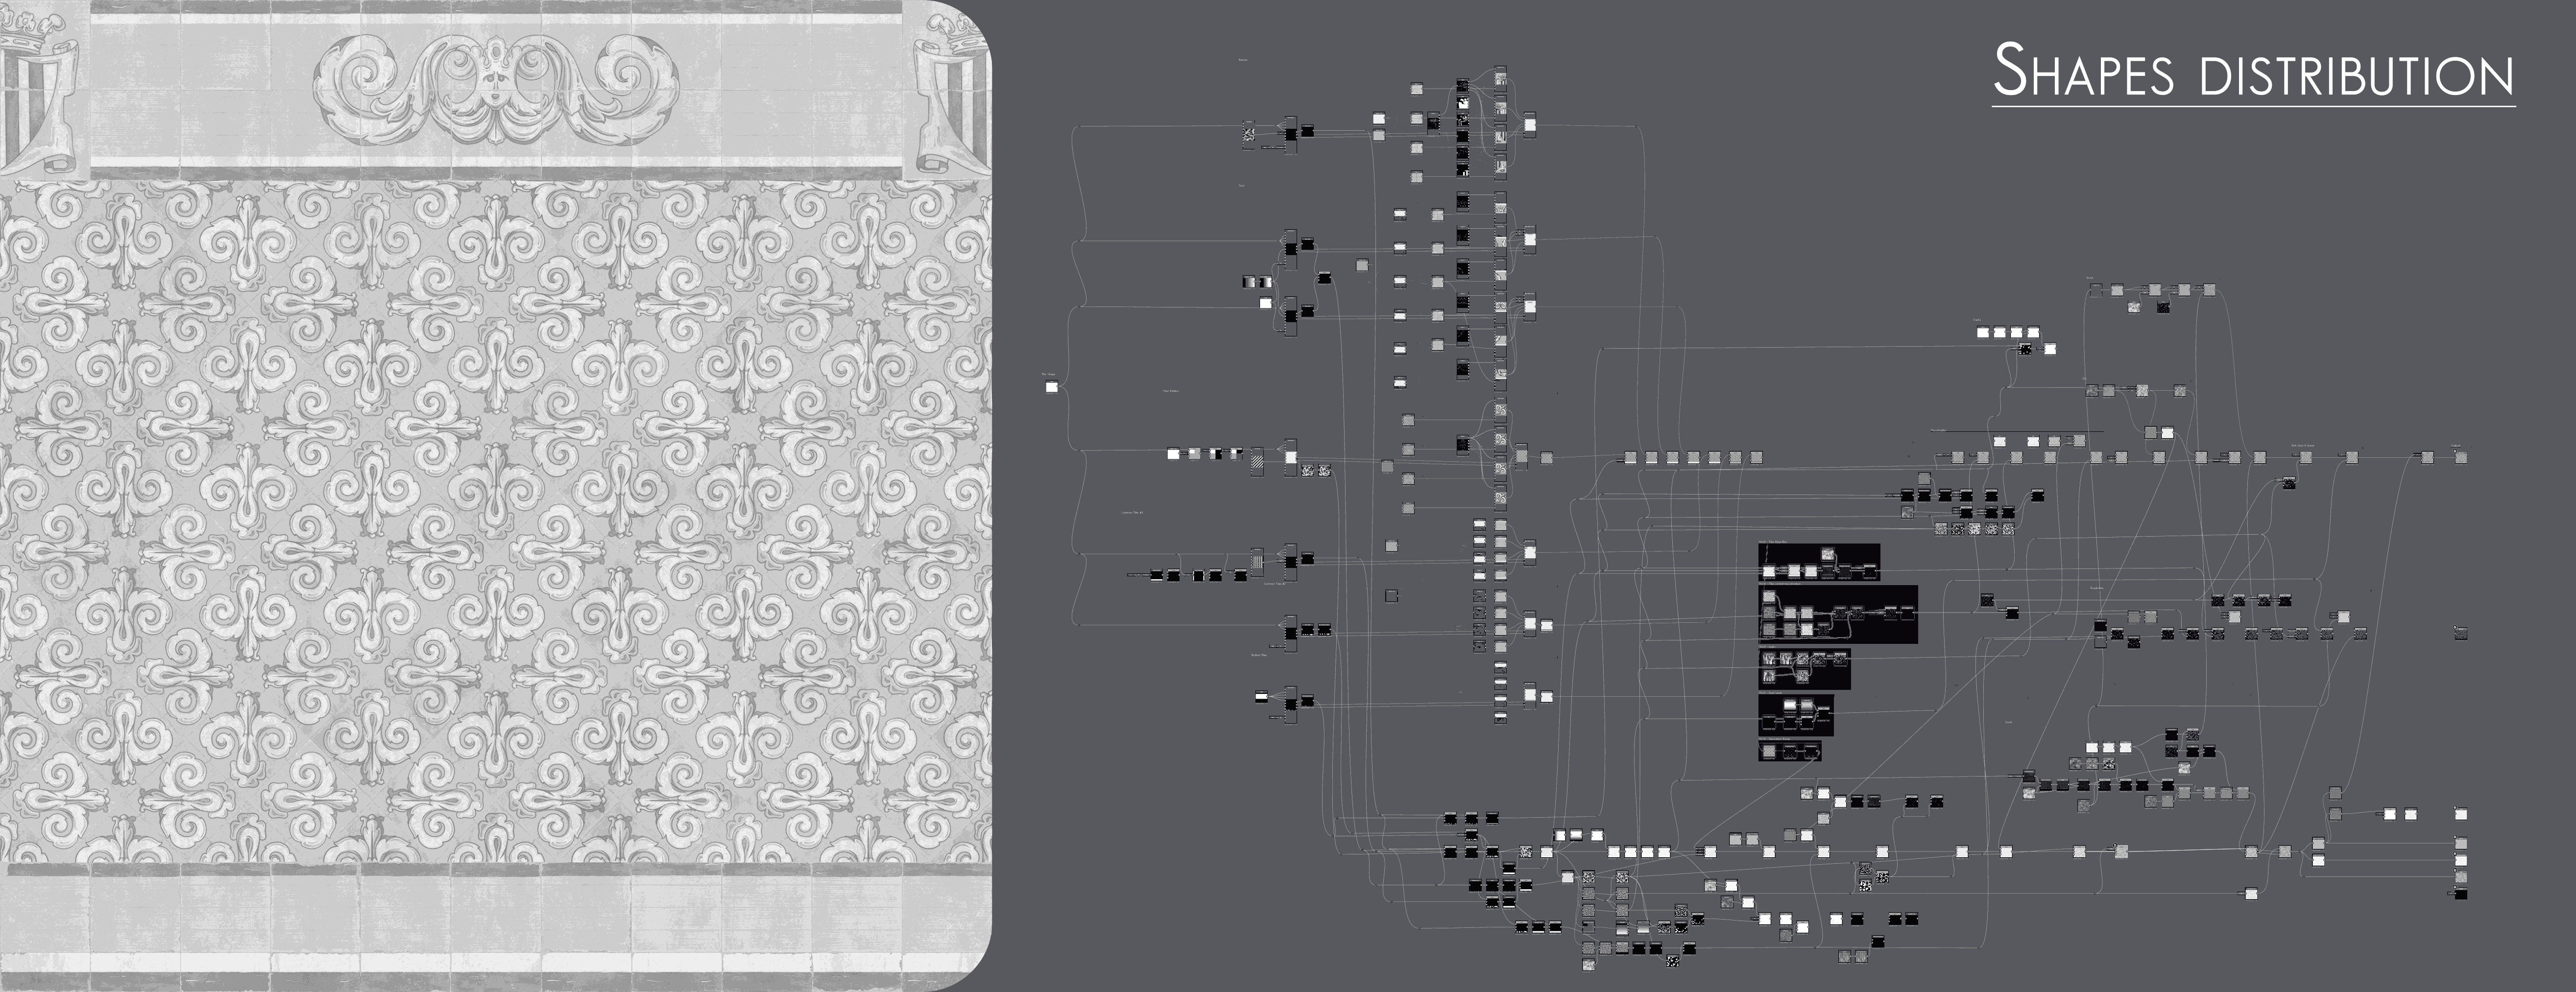
Having the base tiles’ color done, I needed to find a way to distribute them – and their related variations – across the pattern.
The best way I found was dividing the tiles into thematic groups and processing them through different ShapeSplatter nodes (having just a white square as input shape) controlled by individual distribution/rotation/mask maps. This way I had just to transfer their splatter data to as many ShapeSplatterBlendColor nodes that would distribute the colored tiles as desired.

- Height
The height pass was quite straight-forward to work on since, as we said at the very beginning, this material is characterized by very few and weak details compared to the color ones.
Starting from the grayscale pattern originated by the ShapeSplatter nodes I could easily EdgeDetect it and work on the tiles shape and profile. After that, were added a very subtle general surface noise and an even more subtle bump along the decorations borders that can be both appreciated only with a grazing lighting.
Chippings in the ceramic and in the glaze have been added through two different interations of SlopeBlur nodes and distributed along the pattern through an HistogramSelect node, so to affect just some tiles more concentrated in the bottom part (where it’s more likely they have been damaged).
Lastly, through an HeightBlend node I added a layer of grout in the interstices between the tiles, later tweaked to add further surface details and get a non-uniform distribution (probably I could have worked a bit more on that because I’m not 100% satisfied…but hey, the protagonists are the tiles!).

- Base Color
Having already all the colored tiles done and in position, a second color pass was needed just to add some more variety in terms of miscolorations between the tiles, on their surface and along their borders. Then, using the height information for the chippings as a mask, I assigned a very basic color for the ceramic underneath the glaze and I did the same for the grout.
Last step was creating a couple of masks for dirt and grime – in shape of dark leakings and spots – running along the whole surface to have a better blending between all the individual elements.

- Roughness
The roughness pass have been another important phase to achieve a realistic and interesting look for this material. Already with my mind projected to the presentation/rendering phase, I knew I had to emphasize this aspect to get interesting and vibrant play of reflecions and make less boring as possible a surface otherwise flat.
Having already available all the masks created in the height and color steps, I just had to blend them and assign proper roughness values to achieve a sharp but still homogenous final result.


Presentation
Presentation and renderings have been done entirely in Marmoset Toolbag 4 with a quite simple setup, trying to resemble the outdoor atmosphere similar to the one where the original tiles are located: both hdri and directional lights have been placed in a way to highlight the material’s features and its responsiveness to light.
Lastly, for the frontal beauty shots and the close-ups renders I quicky modeled a stone trim and placed it at the top and at the bottom, so to place the material in a more contextualized, less abstract, scene. I also added a fence and some human figures to be placed outside of the camera just to project some soft shadows on the vertical surface.


Conclusions
Drawing some conclusion for this work, I can say I’m pretty satisfied not just for reaching a nice final result but also for having sharpened a bit more my skills in this amazing software.
If I should give some advice to other artists out there approaching for the first times to Substance Designer, I would always recommend, on the planning side, to start with mentally dividing the one big picture into many smaller issues to be solved individually one by one. On the artistical side, I suggest– even when working with very good references – to always start studying a material and its components also for their real physical/chemical/mechanical characteristics, how they interact between each other and how they behave due to any external factors. In this way we will have a better understanding and awareness of what’s going on and we will also be able to create new materials from scratch more easily.
I think I wrote too much now, so if anyone wants to reach out to me for any question/suggestion/critics, feel free to contact me on any of my social media channels:
Artstation: https://www.artstation.com/masmo
Linkedin: https://www.linkedin.com/in/masmo3dartist/
Instagram: https://www.instagram.com/masmo3dartist/
Facebook: https://www.facebook.com/massimo.caggese/
Twitter: https://twitter.com/masmo3Dartist
Peace!
Read more articles
You might also like these articles.