Introduction
Hello everyone! My name is Egor Pasko and I am 18 years old self-taught 3D Artist from Russia.
I focus on creating 3D game environments and props. I started learning 3D in 2020 and have been studying it ever since!


Goals
My main goal when creating this project was to create a beautiful game model with realistic, interesting textures and lots of details. I wanted to practice hard-surface modeling and texturing.
Software
I used several different programs to create this project.
PureRef to save and arrange references.
Autodesk Maya is the main 3D software I used to create highpoly and lowpoly models and UVs.
Zbrush for creating Highpoly models and sculpting welds.
Adobe Substance 3D Painter for texturing.
Marmoset Toolbag 4 for baking, lighting and rendering.
Adobe Photoshop to create stencils and final post-processing.
Planning/References
The first stage of creating this model was the collection and sorting of references. I think this stage is the most important. Collecting references will help you plan the creation of the model correctly and imagine how your model will look in the end. To search for references other than standard sites (Google, Pinterest, Artstation, DeviantArt) I want to advise you the Yandex website, it has excellent photo search algorithms and, in general, working with pictures in it is made more convenient and better than in Google. I also advise you to look for references on thematic sites and store sites on which you can find additional information about the size of the object, the materials from which it is made, etc.
I found a lot of different references from different angles, photos of the interior of the car, close-ups that will help in the future at the texturing stage, and also searched for 3D models of the same car on Artstation, Sketchfab.

Blockout/Modelling
After collecting references and planning, I started blocking out the main shapes of the vehicle. This stage is skipped by many beginners, but it is very important. Blocking will allow you to quickly create a basic shape of an object and understand its proportions in 3D space, as well as quickly edit it if you notice any problems.

After making sure that my blockout proportions and dimensions of the object look good, I moved on to detailing the model. I prefer the highpoly to lowpoly workflow because it gives maximum flexibility in creating details, and also allows you not to worry about wireframe. To create Highpoly, I also used 2 pipelines: Sub-div and Zbrush dynamesh workflow.

Everything that could be done quickly using a sub-div, I did with a sub-div. And I made complex forms in Zbrush using Dynamesh workflow. This is a very simple workflow. To use it, you just need to make uv seams on hard edges for this I use a special script in Maya.

polyProjection -type Planar -md p;
polyUVHardEdgesAutoSeams 1;
u3dLayout -res 256 -box 0 1 0 1;
Then export the mesh to Zbrush and use “Auto Groups with UV” to create polygroups, use Dynamesh and Polish/Polish by Features to smooth the mesh. You can learn more about using this workflow and useful scripts in the wonderful Military Radio Tutorial by Simon Fuchs https://simonfuchs.gumroad.com/l/spEkf To create a roof and seats I did not use simulations. I just created the basic shapes in Maya, exported them to ZBrush and sculpted the folds using Standart, ClayBuildup, Smooth and TrimDynamic brushes.


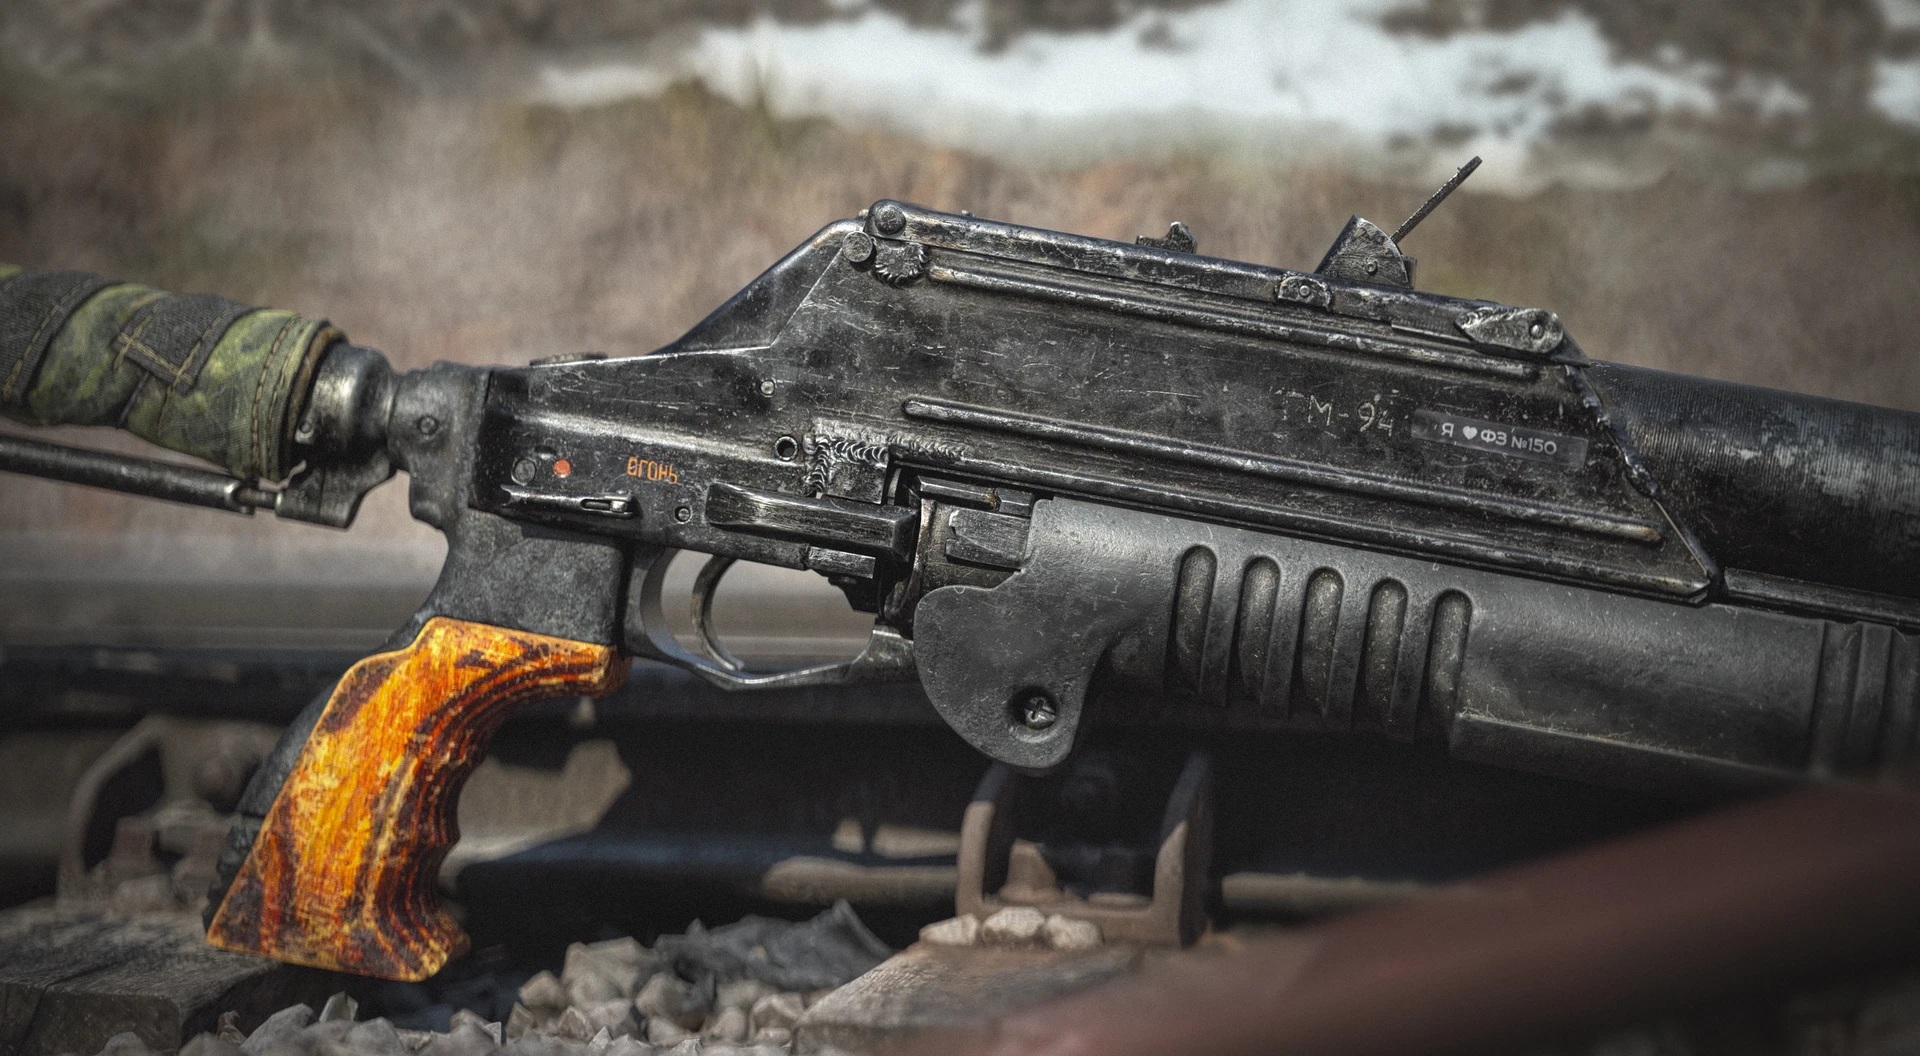
One of the most difficult stages of creating highpoly was the creation of the vehicle body because it was necessary to connect many different elements with a welding seam and for such purposes Zbrush works perfectly.

One of the most difficult stages of creating highpoly was the creation of the vehicle body because it was necessary to connect many different elements with a welding seam and for such purposes, Zbrush works perfectly.

To create the wheels I used Zbrush and Booleans. Created a basic model and prepared meshes for boolean. Exported them to ZBrush and used boolean – dynamesh – polish to smooth out the shape.


I also used floaters in some cases. This is a very powerful tool that will allow you to create details for baking very quickly.


Creating the interior was also quite a big challenge. Even with a large number of references it was hard to do since not all the details were visible on them. In such cases it helps to look at other people’s 3D models and find out how other people solved this problem.


Lowpoly
To create lowpoly, I did not make strong restrictions for myself because this vehicle was created as a project for a portfolio and I did not see the point in spending a huge amount of time on optimization. When I have made highpoly model, I create a lowpoly very quickly using backup meshes. Before smoothing objects and exporting them to Zbrush I create duplicates of these meshes and hide them until the stage of creating a lowpoly. Later I unhide them and make some shape changes if necessary, sometimes I add additional geometry or delete unnecessary polygons. The total number of triangles in Lowpoly was about 106k and I think it’s good enough for such a model.


UVs
Creating UVs is one of my favorite stages because it is very simple. To create UVs I do not use any additional programs like Rizom UV. I prefer to do UV mapping in the 3D software because it allows you to edit the geometry during the creation of the UVs. You can fix any problems that were not noticed at the lowpoly stage. Before creating the UVs, I decided that I wanted to make detailed and not blurred textures.
For this, I would need a large texel density. The final texel density was about 10px/cm which is a very good, even a little excessive texel density for a 1st person game. When creating UVs for this vehicle, I did not use any advanced techniques such as trim textures, tileable textures or masks. I just created unique UVs and used symmetry and overlaps for some UV shells. The final texture sets turned out to be: 4x4k (without transparency) and 1x1k (with transparency).


Baking
Initially I thought that baking would have many artifacts, since I do not have much experience in creating and baking objects with a lot of details but surprisingly the baking turned out to be almost perfect. For baking I usually create bake groups by naming. This allows you not to bake normal details into several meshes at once and avoids artifacts. I also moved the roof away from the vehicle body so that the ambient occlusion would not be too intense in the car


Texturing
Texturing was both the most interesting and the most difficult stage. First of all, I had to choose what color my car would be. I found several references with different colors. Most of all I liked the first variation because it gives the most interesting colours combination between the roof and the body.

Before starting texturing in Substance Painter, I advise you to change some scene settings to make it look more like in marmoset or the game engine.
- Set a neutral black and white Environment Map. This will allow you to see your textures with the correct colors, without mixing colors from the Environment map. I prefer to use “Studio Tomoco” because it is quite contrasting and displays Roughness well.
- Enable Activate Post Effects, Tone Mapping and change Function to Log.
- Download and install free ACES LUTs according to the instructions https://www.artstation.com/artwork/mrqd8
Enable Activate Color Profile and choose one of the installed ACES LUTs.


I also set the AO Intensity to 0.75 and selected High Quality in Shader Settings. After changing these settings you can start texturing. I prefer to upload multiple models to Substance Painter at once because it makes it easier to texture individual parts.

You can also hide Texture Sets if it’s convenient for you.

The main thing in texturing is to analyze the references very well to understand how the material is made in the real lfie and try to repeat it in Substance Painter. The main work is happening with Base Color and Roughness these are the main maps which makes the final look of your model.


I start texturing by creating basic materials. I’m trying to find well-matched colors and basic roughness, and then I move on to detailing.

Let me show you by the example of the vehicle body, how one of my materials was made. First I create a base layer with base color, roughness and metallic if needed. Next, I added a layer with small dents, the faded color of the paint from the sun, added scratches that create a variation in color and a second paint.
The second paint is a little lighter and less saturated than the first one and creates an interesting color variation. I also added leaks and dust that affect base color and roughness. Next, I added Dust by Ambient Occlusion and drew the main dust by hands at the joints of several objects. After that, I added rust and dirt drawn using stencils.


I worked with the rest of the materials in the same way.
One of the difficult elements in texturing was the headlights. I didn’t model the insides of the headlights, so I couldn’t use opacity on them, but I needed to create a fake effect of a glowing bulb inside the headlights. A tutorial from Andrii Mykhailov helped me to create a headlights base https://www.artstation.com/artwork/8emmbw
First I created a base layer with the almost white base color, metallic set to 1 and roughness set to 0.15. Next, I added layers with dirt to get a variation in color and roughness and added a normal layer to make normal more intense on the headlight and get more distorted reflections.
And at the end, I added an emissive layer to create a glow effect from the headlights. In substance painter, the final appearance of the headlights does not look as good as we would like, but at the render stage after adding lighting, they start to look very cool.


To create different inscriptions, I drew them in Photoshop and then used them as a Stencil in Substance Painter.

Also I created a special smart material that I add at the end of almost every project. In it, I created PBR Validate layer to check materials for PBR, and some layers to adjust the final textures, for example, to add a little contrast, brightness or sharpness.

Rendering
To render this vehicle, I used Marmoset Toolbag 4 with Ray Tracing. This article by François Larrieu helped me a lot in creating renders and lighting.
Before starting the lights I changed some settings.
1) Enabled Ray Tracing, Ambient Occlusion and Local Reflections.
2) I changed HDRI to Industrial Room. This is my favorite HDRI, I used it back in Marmoset Toolbag 3, but in version 4 it was removed and I had to download from the HDRMAPS website https://hdrmaps.com/industrial-room
3) Changed camera mode to orthographic, enabled save the frame to see the final frame and changed Tone Mapping to ACES. You can also change sharpen, bloom, vignette and grain settings to make your renders look better.


Lighting using Ray Tracing is quite simple. I added a few point lights in front of the headlights to create a glow effect and in combination with emmisive glow, I got a great effect of a glowing bulb inside the headlight.


To create the main lights, I added Directional Light, which illuminates the side of the car, added several light sources that lights the silhouette and one point light close to the car to get interesting Roughness reflections.

After rendering, I also use Photoshop to adjust final images a bit. I just add a few layers, such as Curves, Brightness/Contrast, Hue/Saturation, Color Lookup if I feel that I need it to make renders look better.
Conclusion
This project has helped me a lot to improve my skills in hard-surface modeling, working with a lot of details and realistic texturing.
I started making this vehicle in December 2021 and finished it only in July 2022. I worked on it in my spare time, sometimes I could not touch it for several weeks, but in general, it took about 130 hours of work.
I think the most difficult part of large projects is to keep motivated until the end. In the 8 months that have passed since I started working on this project, I’ve wanted to quit it several times and start something new and smaller, but fortunately, I’ve finished it.
I want to advise you to spend more time at the planning stage and gathering references in order to initially imagine how your model will look at the end, how damaged it will be, how dirty the textures will be and etc. This will help you understand what you have left to do to complete the project and how long it will take.
If you still have any questions you can DM me on ArtStation: https://www.artstation.com/artwork/DAWD89 or Discord: Egor Pasko#9725. I will always be happy to answer your questions.
Big thanks to Games Artist for the opportunity to write this article
Read more articles
You might also like these articles.