Introduction
Hi there! My name is Dave Lynham and I’m a Senior Environment Artist at Black Shamrock - a Virtuos Studio in Dublin, Ireland.


Software
- 3DS Max
- Photoshop
- ZBrush
- Substance Painter
- Unreal Engine
Goals
The main goal for me on this project was to gain more experience making hero assets for Unreal Engine 5 using Nanite.
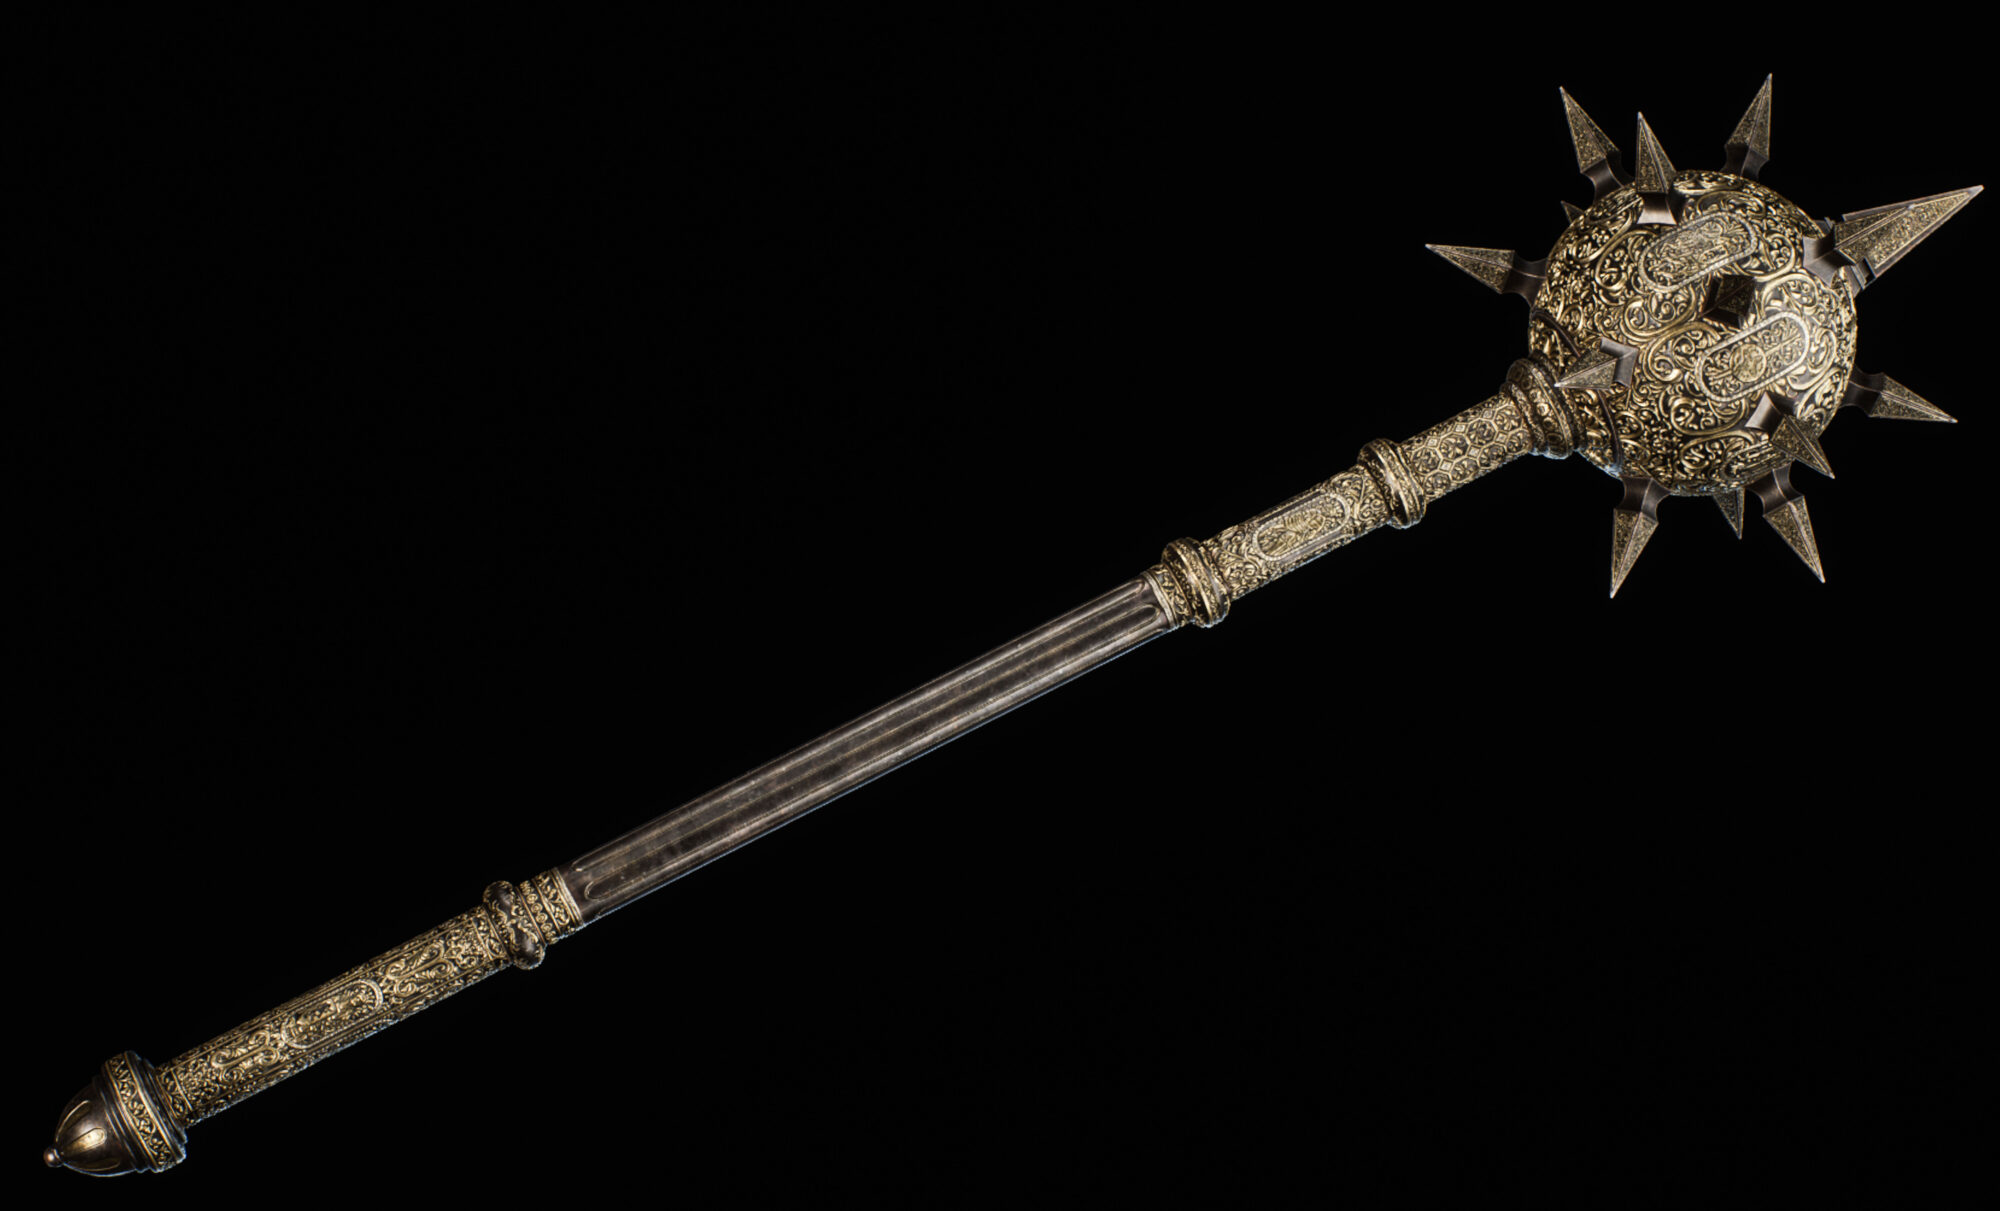
I wanted to make something very intricate and unique, so I selected a mediaeval morning star that I found in a museum in the United Kingdom.
References
I couldn’t find many references on the morning star but it was enough to get started. During the process I changed some aspects of the design and colours on the weapon.

Blockout
For the blockout phase, I set up a reference picture of the morning star and started making the basic low poly shapes. Some parts, for instance, the spikes and hilts, were going to be replicated a number of times. To make it efficient, I only modeled one of each and planned to mirror them when the asset was finished. This way, I saved time in the long run and optimized the UV space.

Low Poly and UVs
I made a duplicate of the blockout, set it up in a new “Low Poly” layer, then started to chamfer all the sharp edges of the morning star. Depending on the section, I added extra edge loops or turbo smooth, keeping the polys uniform.
This was to help prevent my mask from getting stretched and distorted when applying subdivisions in ZBrush later. When that was finished, I proceeded with the unwrap.

Photoshop – Mask
I opened the unwrap and rendered a UV template for Photoshop. I used this to create a mask for all the intricate details on the morning star. After rendering, I saved the template as a .jpeg file.


With the template opened in Photoshop, I added a black layer and reduced the opacity to 50% so I could still see the UVs underneath. This was to help me make sure
everything would fit perfectly on my UV template.
Once that was done, I added a new empty layer above that, which acted as my mask details that would be painted in white. For the details, I used a combination of an alpha pack I got on the ArtStation marketplace, as well as hand-drawing certain parts.
When my mask was complete, I went back onto the black layer, changed the opacity to 100%, and exported the mask.

High Poly
I exported all the meshes from 3ds Max as .obj files, then set them up in ZBrush.
Next, it was time to add the mask I had previously made in Photoshop. To import the mask, I clicked on the Texture tab at the top of the menu bar, selected “Texture” and then “Import”. Once the mask was imported, I clicked “Flip V” to flip the texture vertically.


All the pieces of the morning star were made the same way, but I’ll use the handle as an example:
- Selected the handle, then subdivided it a few times to bring up the poly count.
- I turned on my mask found in the Texture tab.
- Went to the masking tab and selected “mask by color” and then “mask by intensity”. This converts the texture into a mask that I could manipulate in ZBrush.
- Went to the deformation tab and started messing around with the Inflate and Inflate balloon sliders until I had the desired effect.
- Once I was happy with the general shape of everything, I softened any rough edges and sculpted extra details on top of the details I had just inflated, usually using the Dam Standard Brush for those additional steps.

When I had finished sculpting all my meshes, I duplicated the spikes and hilt to get an overall picture of what the high poly looked like.


When the morning star was fully sculpted, I put all the pieces into individual folders, then duplicated them twice.
In each folder I had:
The original high poly mesh which I left as it is, in case I needed to go back to it at any stage.
A decimated high poly that will be used as my high poly baking in Substance Painter.
A decimated low poly will be my final mesh for texturing and Unreal.
An important point to add here is when I used Decimation Master. I needed to ‘keep UVs’ turned on. Otherwise, it would delete them when I decimate and I obviously don’t want that!
When I was finished in ZBrush I exported all the decimated high and low polys, imported them back into 3ds Max and made two new folders for each, to keep everything tidy. I added an unwrap to the low polys and made sure that the UVs were all still intact.
Because the low polys have been decimated and changed considerably since the last time they were in Max, I needed to slightly relax the UVs, making sure I didn’t relax any of the borders of the islands though.
When they were all set up, I just made sure all high polys were aligned with the low and all of them were named correctly for baking. Once that was done, I exported them all and brought them into Substance Painter for texturing.

Texturing
I get really excited when it comes to texturing, as you can very quickly see your work come to life.
I loaded up my decimated low polys into Painter, then imported the highs to bake all my mesh maps. When texturing, I like to change the Environment Map to Studio Tomoco.
This map has a lot less color so it doesn’t interfere when I’m texturing. Once everything is baked it’s time to start!
The morning star is entirely metal so I didn’t have too many types of materials to experiment with here.
The texturing for it was pretty complicated, using a lot of layer stacks, however, I’ll give a brief overview of how I made the metal material.
I think the most important thing to get right is to create a convincing and readable diffuse.
Starting with a base layer with color, roughness and metallic, I got a basic clean idea for the morning star. I built up fill layers using different types of grunge maps and smart masks making sure they were set to Tri-planar projection.
Each layer had slight discoloration and was set to a very low overlay so it wasn’t overpowering the base. I then added a subtle noise mask to help break up the surface followed by a couple of height-fill layers with scratch and damage grunge maps applied to them to get some nice wear in places.
I applied only subtle rust to certain areas that I felt would build up in the joints and crevasses or parts with deeper cuts and scrapes. Adding a curvature overlay also improved the definition of the dark metal as well. Finally, I bound everything together with a dirt generator.
I duplicated the finished metal material, changed the color and roughness values, then imported my mask from Photoshop to quickly mask all the gold intricate details. Adding a PBR validate filter at the top of my stack through this process also ensured there were no issues with my maps during its production.


Unreal Engine
The final step – I brought the morning star into Unreal Engine 5 to take my screenshots and videos.
The morning star was imported as a nanite mesh along with the textures, unchecking the sRGB on the RMA map, then I set up a basic material for it.
For the screenshots and videos, I used two scenes in UE5. One is the ‘Megascans abandoned apartment’, not really medieval but it did the job! All I changed in this level was deleting the tarp and foliage that was covering the table in this scene. Then I just added some cinematic camera actors for my shots.
The other which I ended up preferring was just a new level where I only added a few rect lights around the morning star, then used the cinematic camera actors for the screenshots and videos.
Conclusion
Overall, I had a blast working on the morning star and I felt that I learned a lot from this project. This was the first time I tried using a detailed mask I made in Photoshop to help with
all my high poly sculpting. I was blown away by how well that worked along with how much time it saved me in ZBrush.
Usually, when I finish up a personal project I just take down some notes to myself on how I can improve my work in the future. It’s always important for me to keep trying to improve my skills.
I hope you found this article useful! And thanks to gamesartist.co.uk for asking me to write it!
Cheers!
Read more articles
You might also like these articles.