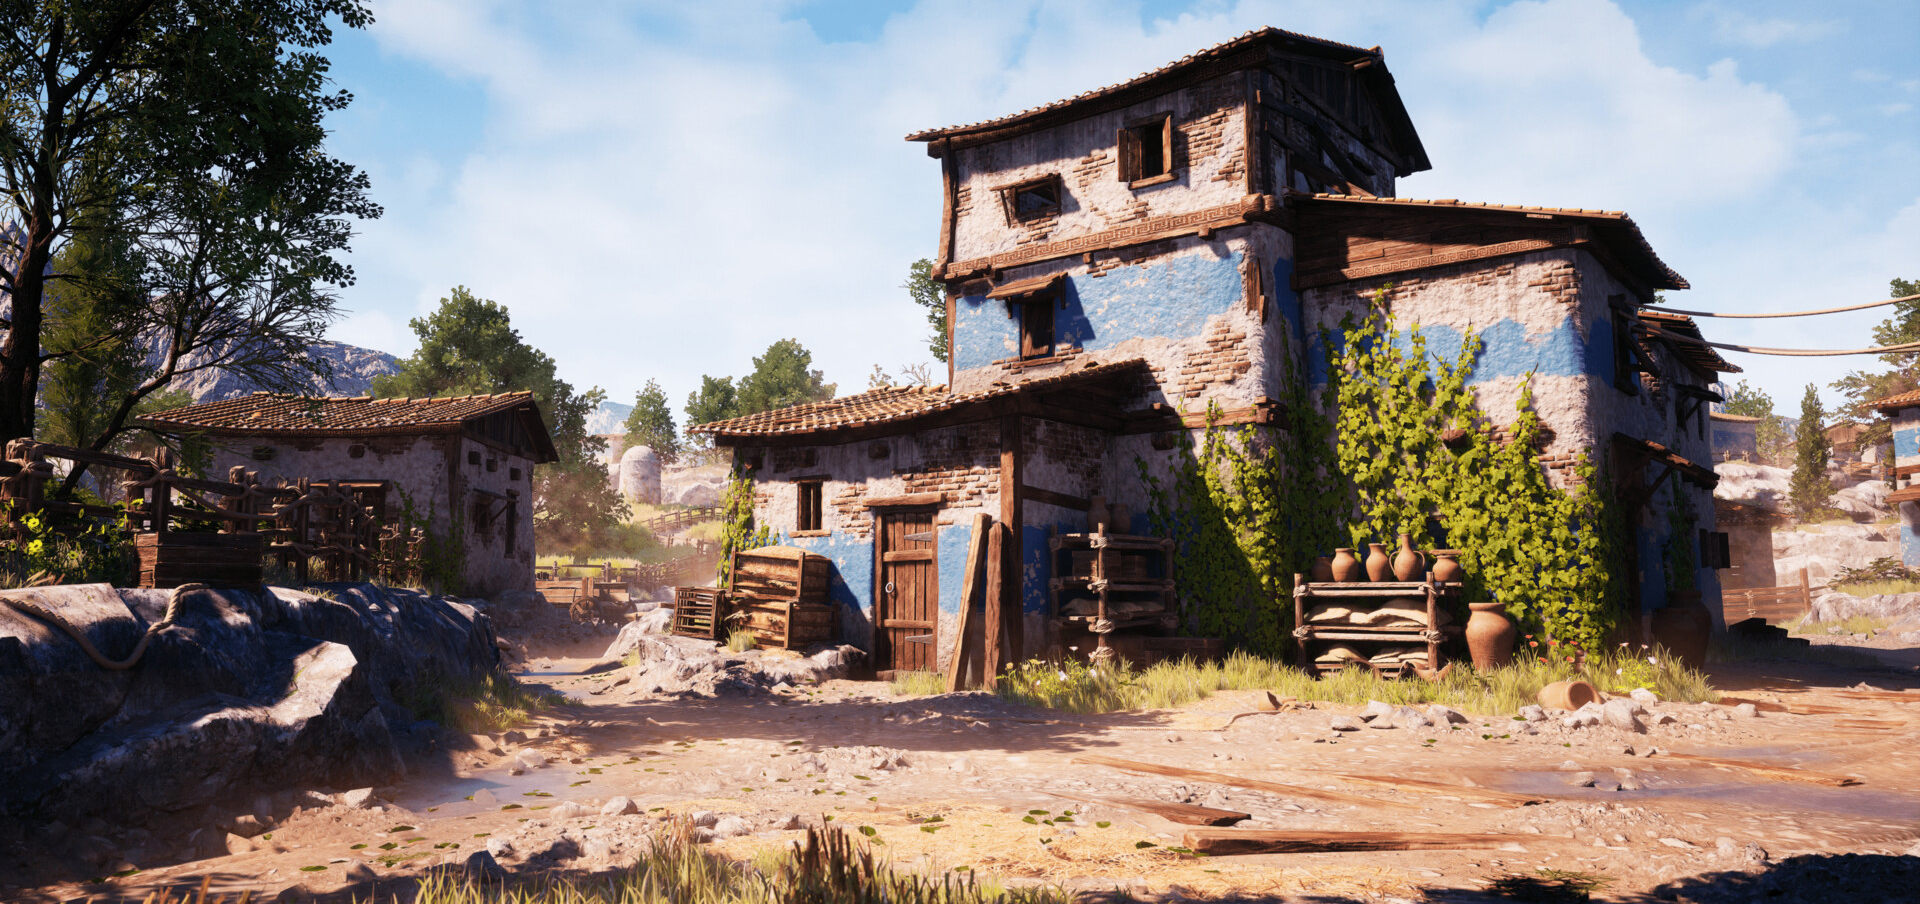
Attikan Farmlands

Introduction
Hi everyone, my name is Nathan and I’m a student currently studying Games Art at Staffordshire University in England. I’ve been interested in 3D Art for games since starting College and specializing in Environment Art before pursuing it further at University.


What I wanted from the project?
First off I would like to give a big thank you to Games Artists for the opportunity to write an article for them. This project started as an environment for a university module in which I was tasked with creating a building based on a chosen piece of concept art. For my environment, I chose to work from concepts of Assassin’s Creed Odyssey.
From the project I wanted to:
● Create a high-quality portfolio piece
● Learn industry-standard workflows
● Create an architectural modular kit
● Produce foliage and rocks
● Create high-quality outdoor lighting
● Expand knowledge of composition and set dressing
Software Used:
● Maya
● Unreal Engine
● Zbrush
● Substance Designer
● Substance Painter
● Photoshop
● Miro
● Gaea
References
All of my research and references were gathered and organized using Miro, I found all of the architectural concepts of the area of the game that I wanted to base my environment on that I could find online. When I discovered the work that Felix Robitaille did on the game through ArtStation, it quickly became my main reference when working on the architectural kit.


When working on anything from a material, to a prop, foliage, lighting, etc., I made sure to gather plenty of references on my miro board so that I was never guessing when creating an asset or material.
Something I’d like to push is the importance of getting variation in your reference. My reference relied heavily on assets from the game and so I gave no room for further design. It’s crucial to get as many useful references and study them – this will push your work and allow for creativity.
Scene Development
Attikan Farmlands developed in an interesting way due to a lot of factors, most notably less experience with large projects led to overscope.
Below was my original Blockout and as you can see It was rather large and I was expecting too much from myself.

Through self-analysis and feedback, I realized I needed to make some drastic changes to stop the progression hindrance I was experiencing.

Removing the surrounding environment forced me to focus on creating a higher-quality piece that I could expand on in the future.

Expanding past the building, I wanted the scene to feel like it was on the outskirts of a village, so I went for an expanse of wheat on the left and buildings on the right.

Once the composition of the village started to take shape I then started to experiment with the cameras, testing different angles until settling on my favourite.

Once the main composition was established it was strengthened by adding rocks and trees.
Though using Speedtree interests me and it’s something I’d like to explore, I opted to make use of the Megascans Trees pack to speed up scene progression. Colour grading was a key component in capturing the vibe of ACO. High but balanced saturation and similar albedo values help link this project to the game.

Finally, adding smaller details such as more ground clutter, items on the shelves, baskets and more wear to the footpaths to finish off the scene. Making the ground interesting with clutter is something that I put a fair bit of focus into as I didn’t have in-shader tessellation.
Materials
Environments rely heavily on tileable materials and Attikan Farmlands is no different. I opted to use Substance Designer to author all materials that I created, however, I did utilize a megascans surface for the rock and this rope material.

Here are five of the most dominant tileable materials in my scene. All were authored by me in Substance Designer and presented in Marmoset Toolbag.
Trimsheet

For the trim sheet, the focus was function over extravagance. Due to the nature of the environment, small village farmland houses would not have intricately detailed wood adorning their homes. This is why I opted for a plane trim sheet design.

All trim elements were sculpted in Zbrush, decimated and exported to Maya where they were laid out for baking. I made sure to overlap over the baking plane so everything would have ambient occlusion evenly affect itself.
For the two horizontally tiling elements I made use of Zbrush’s Wrap mode feature allowing the brushes to tile over the workspace. I found using a mixture of Clay Tubes and Trim Smooth Border brushes in Zbrush was good for getting chunky unrefined shapes when sculpting.

If sculpting repeated unique elements, be smart with it. Do you really need a unique sculpt on each object? For example, I only needed to completely sculpt 4 of these vertical planks as I could flip and orientate them to create 16 unique wood planks from the front perspective. This was a lot more time-efficient.

I personally decided to bake my trim sheet in Designer as it produces a heightmap for bakes, making the texturing process in designer much easier. Substance Designer is software I really enjoyed using so I challenged myself to texture the trim sheet in Designer.
An alternative would have been bringing the baked maps into Substance Painter and texturing the Trim through there. Substance packages are incredibly versatile, often with multiple ways of accomplishing results.
Below is the finished trim sheet presented in Marmoset Toolbag.

Modeling from Materials
An interesting process that I further explored in this project was the use of the material as a base for modeling. Examples of this in my project are the creation of the 3D bricks that were used in combination with my brick tileable and the roof material that was used to produce the 3D roof tiles. Cutting edge loops and extruding shapes out from a plane to create a silhouette that matches the material below is super powerful and can be useful in a lot of situations – particularly with trim sheets.

The above shows the combination of material and geometry I spoke of. The distance the camera was designed to be at in the scene helped to mask the mismatching of the geo and underlying material. This technique helps create a more interesting silhouette.


These images show a glimpse of the modeling that took the material to a full roof. It’s mostly about putting edges on the plane where the edges of the material underneath are. Having the roof tiles all placed at the same distances apart was a big help for adding edge loops.

This is one of the finished roof pieces. Combined with the trim sheet – a quick mortar material and my wood tileable. The subtle variation of size and offset of the roof tiles add to make it feel more real along with a bit of drooping in the center.
Pots
A prop collection created for this project that I’d like to highlight is the pots. Up until this point in the project, I’d only touched Substance Painter for RGBMasks and Normal bakes. I wanted to put a bit of extra work into the props – though this is an area I would very much like to work on in future projects.


A useful tip that a friend shared with me was creating a sphere, displacing it with noise and overlaying it onto the pot. Using a Difference boolean, I’d cut out a chunk of the pot, but the nifty thing is if you select the sphere in the outliner, you’ve basically got a Maya equivalent of Zbrush’s Live-Boolean. It does require a bit of clean-up afterward though.

I made a base clay tileable in Substance Designer to use on the pots that had pitting, albedo and normal information. The clay lines were added in Substance Painter on the pots.
Slight roughness and albedo information via noises help to add realism and to give the pots a unique feel. The technology at the time would not have machines manufacturing items like we have today.
Below is the clay tilealble combined with Horizontal noises in Substance Painter.


Having a prop focussed shot gives the props the attention they deserve.
Rocks
With Greece being a very mountainous and rocky place, the rocks are a big part of Assassin’s Creed Odyssey’s environment. Although I wasn’t aiming for particularly rocky terrain, I wanted to practice my rock sculpting using Zbrush to create some high-quality rock sculpts for my environment.
Below is an example of a sculpted rock made for this project.

Some tips from my sculpting workflow:
● Use Flatten Edge to protect from Orb’s brush pack with a square alpha to create large
planar shapes.
● Trim Smooth Border with a square alpha and high focal shift.
● Don’t be afraid to go big with your shapes. Focussing on small shapes too soon might
negatively impact the overall silhouette of the rock.
● Get plenty of references, there are some brilliant ref packs out there on Artstation.
Textures.com and Megascans are super helpful too!

To get a low poly version I decimated the high poly, unwrapped and then baked them in Substance Painter. The shader for the rocks relies on blending a baked normal map and a tileable normal map.

The RGB Masks consist of AO, Edgewear and a Tri-planar grunge for some further breakup. Breaking up edgewear with clouds on subtract helps to give the edgewear a less cartoony look.
I wanted to tackle a rock shader that utilized a world aligned tileable and RGB Masks to keep things coherent between rocks.

This is the tileable setup in-shader to be world aligned. This is very useful as you can move the rocks around and as the tileable is essentially overlaid on top, all the rocks blend together.

Splitting each colour of the RGBMask and using them as a mask for colour to be influenced in certain areas. For example, a lighter colour on the edges gives them a worn look.

Using the edge mask to give the edges more roughness from where they are more worn, along with Dithering, subtle colour variation and using RVTBlending.

These are the final rocks produced for the project. I displaced a small, round plane with my gravel texture and used smaller, non-sculpted rocks to blend the rocks into the ground.
Shader Organization
A minor skill I’d encourage people to acquire is shader graph organization and learning to identify when shaders truly need to be adjustable. Instead of relying on Scalar parameters all of the time to identify parts of a graph, try to avoid bloat and make use of the node descriptions feature in UE5 on non-parameterized inputs.
If you do need to adjust some parameters in a material instance make sure to go back to the material graph when you are happy and convert it back to a constant; inputting the value that worked for you.
This helps to declutter complex materials as your Instances won’t be filled with a bunch of parameters that you don’t need to adjust anymore.
This is a good habit to get into even just for a portfolio scene as you are training yourself to keep things concise which could come in useful in your career when working with others.

Material Functions and Material Attributes are something I’d encourage anyone making a shader to try to use in their projects. It encourages clean and readable graphs and it is a very modular system.
Material functions are small bits of material graphs that can be saved and reused across multiple materials. You can effectively create nodes for reuse, for example, my Albedo Tint material function above.
Tackling Terrain

For the distant terrain, I used Gaea to create a mountain that would be useful from multiple angles as I planned on bashing this around a lot. I never anticipated the mountains taking up much screen space so I used some hacky ways of tackling things in the shader.
For example, I edited the contrast in grunge to use as a mask to be tiled across the mountain to fake the effect of distant shrubbery. The key to making the mountain look more like the mountains in ACO was to have a high-intensity rock normal map.

Baking out Curvature, Slope and Flow maps and putting them into a mix map is super simple in Gaea. I baked these out to help with material placements in Engine.

This is the finalized mountain. As you can see the intense rock normal really helps give it more of a broken-up look – something I needed to make the distance feel climbable.
Capturing Final Renders
I just want to highlight the method in which I rendered out my image stills using Movie Render Queue. This is a tool that a friend introduced to me recently. This allows high-resolution images with command effects on the images (i.e r.tonemapper sharpen).
This takes longer to render than a simple hi-res-screenshot, but the difference is astounding. It also means you don’t have to have certain command effects active whilst working on the scene which improves performance.
However, overlaying commands in posts technically detracts from the real-time aspect of the project.
There are some brilliant resources exploring the topic like this mini-series made by William Faucher found here.

Conclusion
This project took roughly 5 months to complete on and off. During that time I learned and experienced so much, be it workflows, skills, managing burnout and motivation dips and lessons on what to avoid or utilize in my future projects.
I would also like to give a huge shout-out to all the folks who helped me during this project by providing constant feedback and support, and for always believing in myself and the project. I am forever grateful to you all.
I hope this article gives some insight into some of the workflows and thoughts that went into making the Attikan Farmlands project, along with a few crucial tips I felt needed to mention. If anyone has any questions I’m more than happy to answer.
Thank you for reading the article and thanks again to GamesArtists for allowing me to produce this.
Read more articles
You might also like these articles.