Kowloon Walled City


Introduction
Hello, my name is Sherman Waffle and I’m a self-taught 3D environment artist starting three years ago. I’ve always been obsessed with building things artistically, either through sandbox video games or LEGO, and when I found environment art as an output, I knew it was right for me. Urban architecture specifically interests me, so that’s what I’ve mainly pursued thus far.


Concept
Five months ago, I challenged myself to recreate the exterior, alleys, and interiors of Kowloon Walled City in Unity, while still taking certain artistic liberties through lighting and storytelling. I wanted to push my modularity, materials,
composition, and lighting as far as possible.
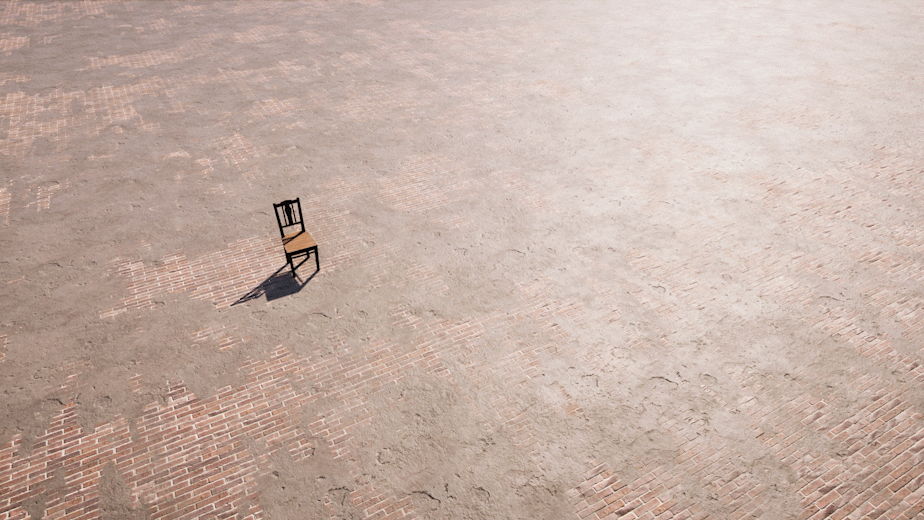
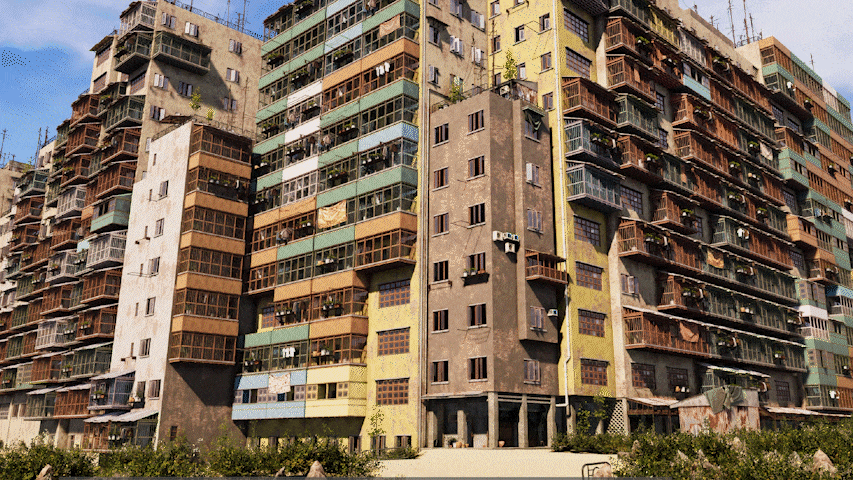
Kowloon Walled City was a densely populated, largely ungoverned enclave known for its dentists, salons, butchers, and drug trafficking. I especially like this picture. The angle and barren ground reveal much of the exterior.

Planning & Inspiration
I started to gather references as well as determine the quality control and art direction of the project. Although there are a lot of blueprints in the bottom left, I hardly ended up using them. This is my Pureref board:

For the exterior, many of my inspirations were bright, detailed, captivating artworks from extraordinary artists. I love the lighting and contrast in these.

For the alleys, my inspirations were neon-night, dystopian-cyberpunk underground. After following the development of Stray for years, I couldn’t help but indulge in color when I had the chance. I wanted to explore colorful lighting.

Blockout
After mentally deconstructing the environment to its most fundamental features, I began to model some modular pieces with a 10cm grid in Blender. The wall and window dimensions are 4m high, 3m wide, and 20cm thick. I personally think a 3:4 width-height ratio is more realistic and interior-friendly than a 1:1 width-height ratio.

I also began work on a modular concrete set, intended for the alleys and corridors. These are 3x4m, 30cm thick, with some variations in width.

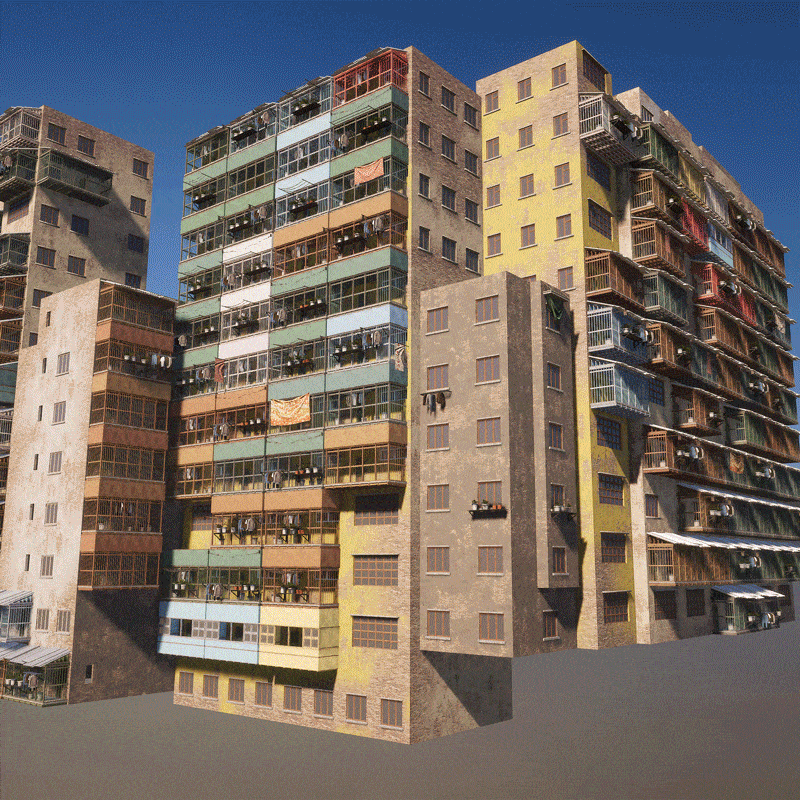
From these pieces, I could build most of the exterior early on. I also applied some prototype world-space tiling materials using free textures online. Due to their world-space projection, I forewent UV unwrapping entirely.

Asset Production
My modeling usually consists of face-weighted bevels and tiling textures/trims. For props, I uniquely unwrap to bake in Substance Painter. Face-weighted normals are an excellent way to smooth sharp edges without a unique bake, especially for modular pieces.

Interiors
This is the interior kit. They’re 2.4m tall with no backface since I can just duplicate them around 180 degrees in Unity.

Stairs
While straight, on-the-grid walls and windows work well, variety can always help, especially for tricky interior spaces.
For the staircases, I modeled four unique meshes, two of which are based on photographic reference. The entrances/exits are on the grid so they line up with my other pieces. I decorated these stair meshes with pipes, wires, and decals in Unity, all of which I will break down later on.

I ended up changing the lighting from what’s shown below, but these are better for the comparison.

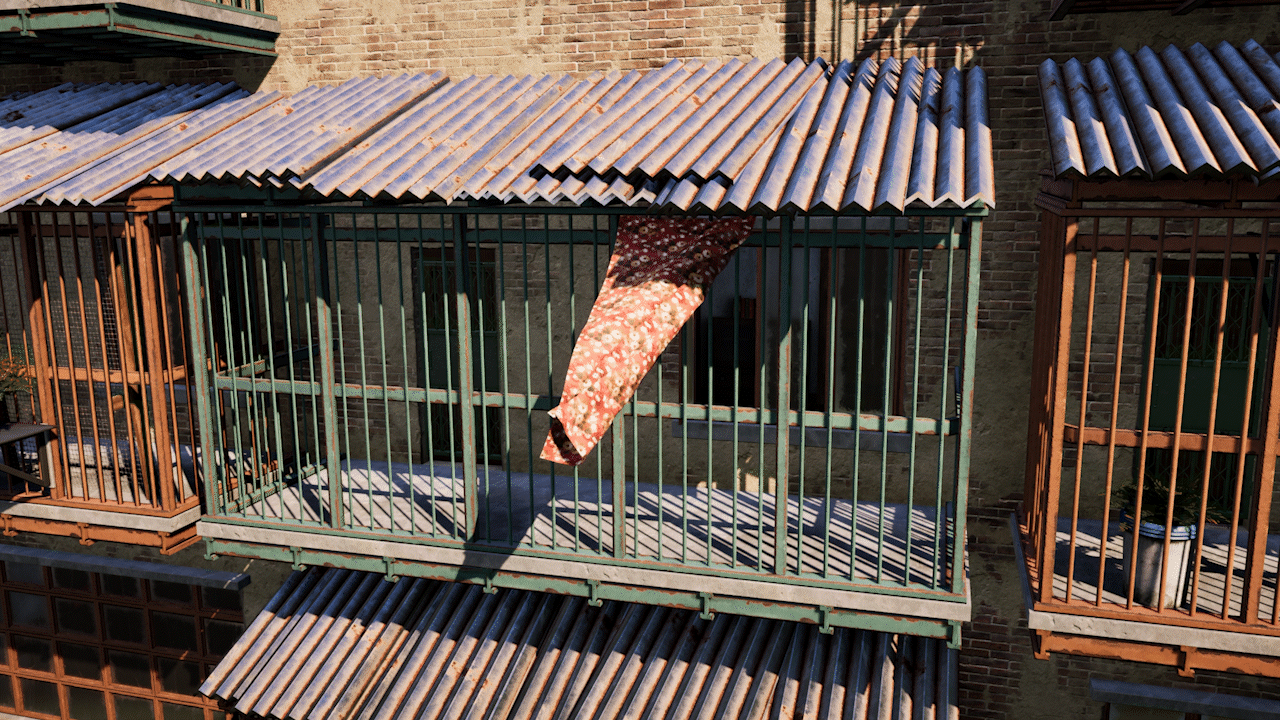
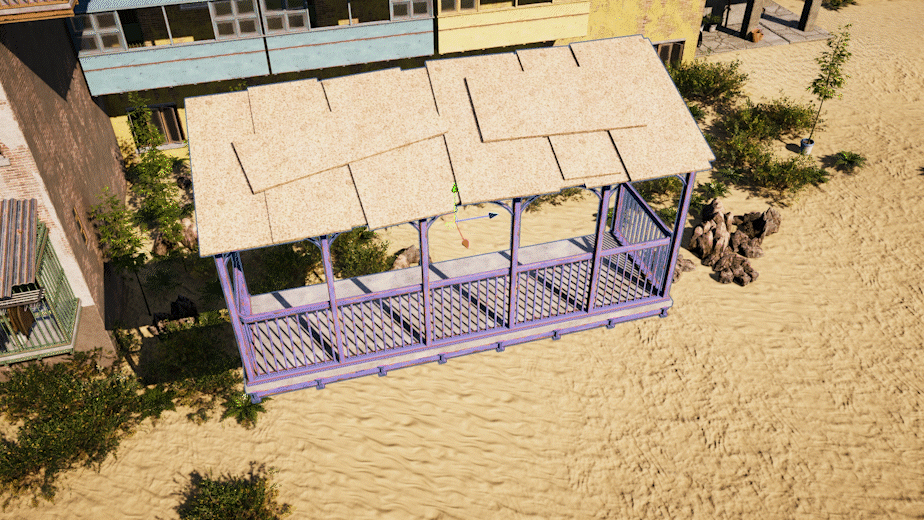
Balconies
The balconies use face-weighted normals with a metal trim sheet. I recommend the “Textools” add-on for quick trimsheet UV unwrapping. The corrugated metal roof is a tileable material applied to some raised geometry.

I created the metal trim sheet in Substance Painter with some simple brushstrokes, grunge maps, and curvature information. Justin Lazzaro’s “Ultimate Trim Generator” saved me a lot of time generating the normal, from which I baked a curvature, ambient occlusion, and heightmap.

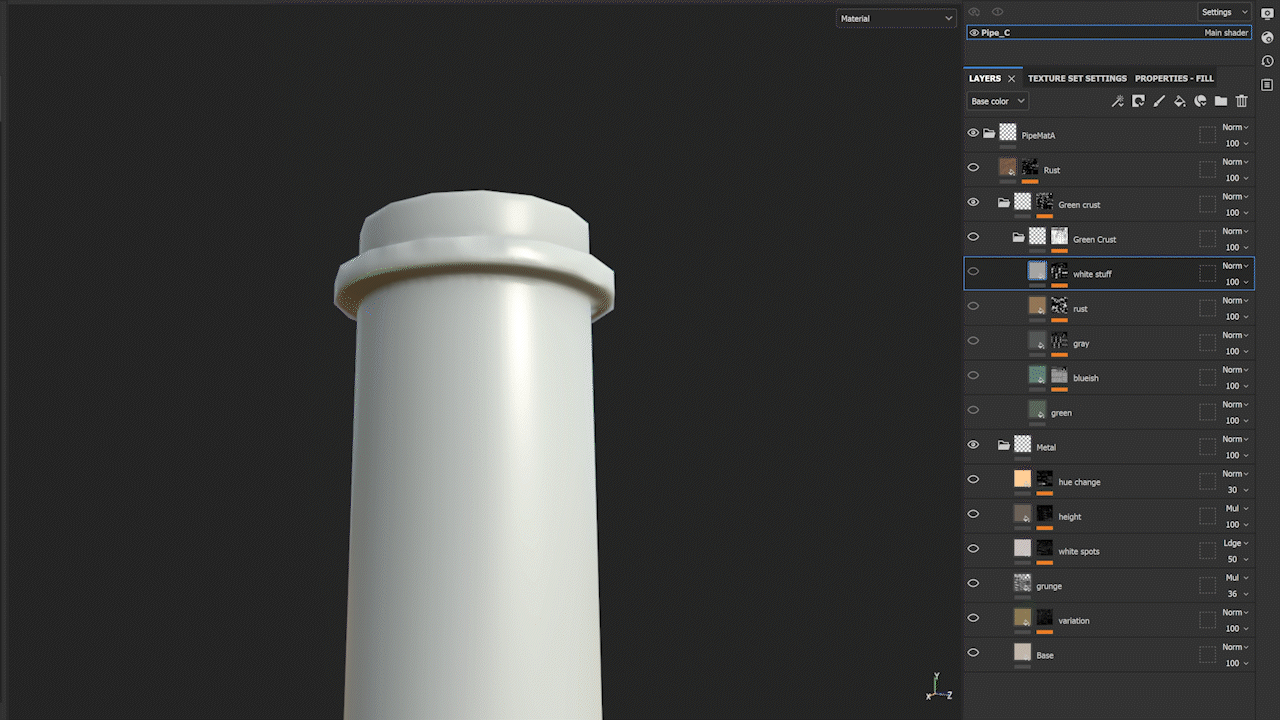
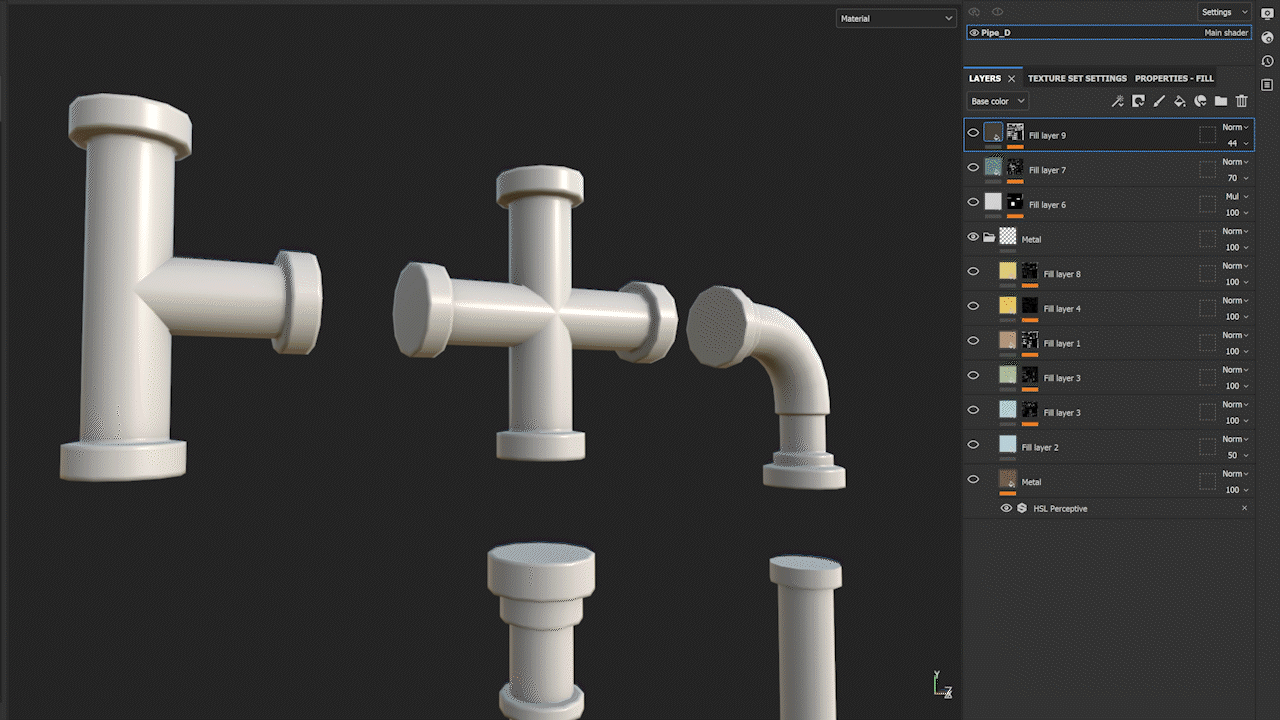
Pipes
For the pipes, I first looked at real-world references.

Using simple cylinder geometry, bevels, and subdivision, I created four different pipe kits. I wasn’t too strict with the height/length of these, just as long as they were on the grid.

After baking from high-poly to low-poly in Substance Painter, I began the texturing process. I like to layer grunge maps, smart masks, hand-painting, base materials, smart materials, and custom Substance Designer materials. Most of the layers contribute color, roughness, height, and metalness information, even if just slightly.
Here are some of my favorite grungemaps:

After repeating this process and sourcing more reference images, I ended up with these:

Cloth
For the tarp awnings, I simulated some cloth in Blender and baked the result in Substance Painter. Cloth simulations in Blender can be unpredictable, particularly self-collisions.
However, simply scaling the cloth up can really help resolve glitchy behavior.

For the windy cloth, I used Unity’s cloth component and pinned some vertices. It’s just a subdivided plane with a tileable fabric material.
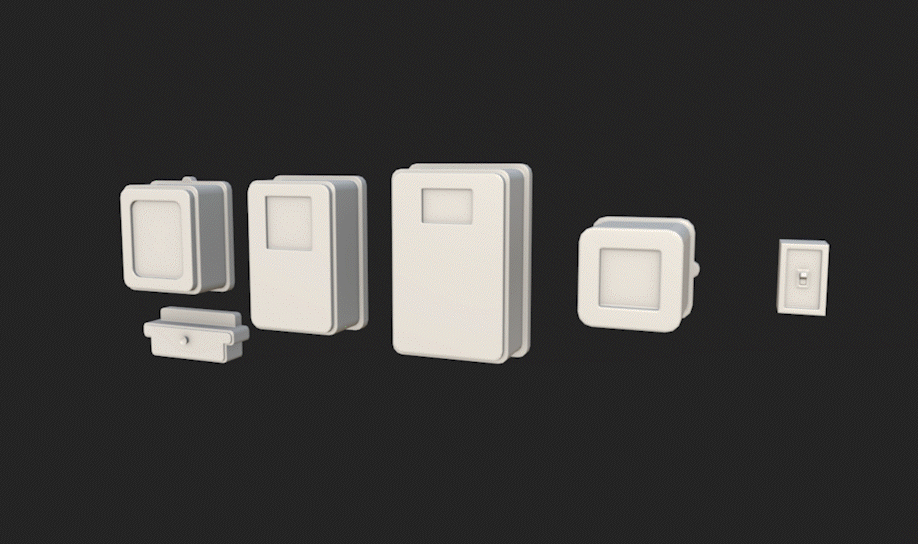
Electrical Boxes
For the electrical components, I looked toward Kowloon’s alleys for reference.

Then I modeled some electrical boxes, textured them in Substance Painter, and started to assemble them into larger pieces with wooden boards.
The cables are just simple splines manually placed around. I even duplicated some to accelerate the process.
The cables and wooden boards use a tiling texture and trim sheet, respectively.

Here’s what they look like in Unity:

I felt like I also needed some extra wires mixed in, so I opted to bake some splines onto alpha cards. These can be placed anywhere in the level.


In total, I ended up creating a few hundred assets using this workflow. Some of which, though few, are from Polyhaven (public domain assets).

Materials
My material creation process is atypical. Alongside Substance Designer, I also like using custom alphas in Painter to create materials from scratch. You can find a wide variety of high-resolution, free textures on Pixabay to sample.

Here you can briefly see my Substance Designer concrete material that I used as a base for my plaster. The basecolor is mostly white so I can tint the color in Unity.
The plaster is blended on top of a brick material with a mask I made in Substance Designer. Everything is on world-space UVs.
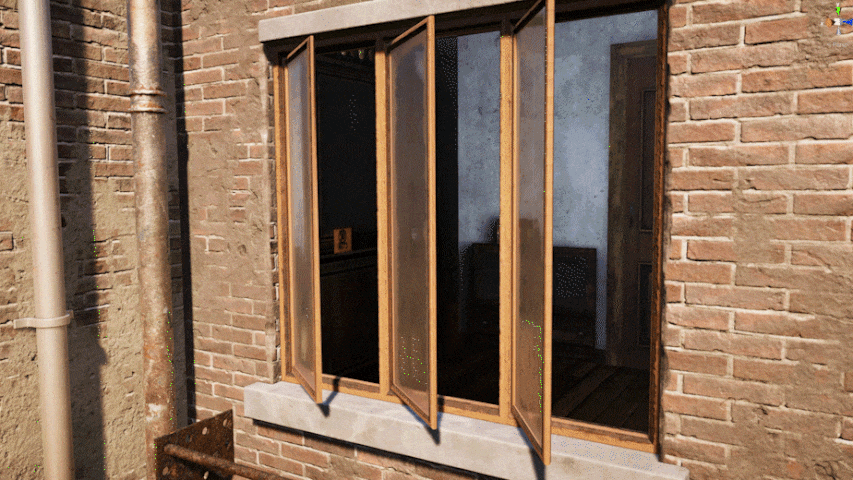
This is the glass material. Due to its versatile layout, I can texture any glass pane with crust around the edges. I fragmented the mesh vertically so I could paint without affecting the other planes.

In Unity, the glass material is transparent and refractive. The window frames are also separate so I can rotate them.

Shaders
For the metal trimsheet, I created a ‘paint mask color variation’ shader. It accepts any mask with hue/saturation/lightness sliders. In this case, the rust is not affected.
I can also set a random hue range per object based on world position.

This the Unity shadergraph:

I also created a fake parallax interior shader with the help of some online guides and videos. There are only two cubemaps: one for day and one for night, which I can switch between in the shader.
This is the day version. It’s not perfectly realistic but it helps the overall image from far away.
I rendered each side of the cubemaps in Unity using the assets I’d already made and then assembled them in Photoshop.

Decals
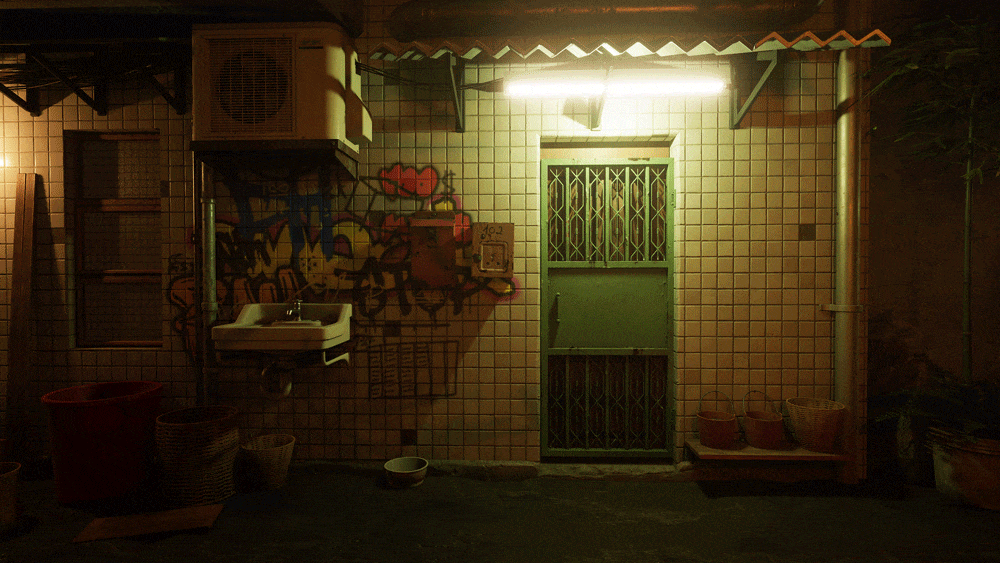
Decals are an excellent way to push your environment further. As you can see below, I used a ton of them in the alleys.

Here you can see most of the graffiti decals I made in Photoshop using free fonts from this website.

I also made a wide variety of damage decals in Substance Painter by handmasking my concrete material. The ‘leaking’ decals were also handpainted using alpha brushes.

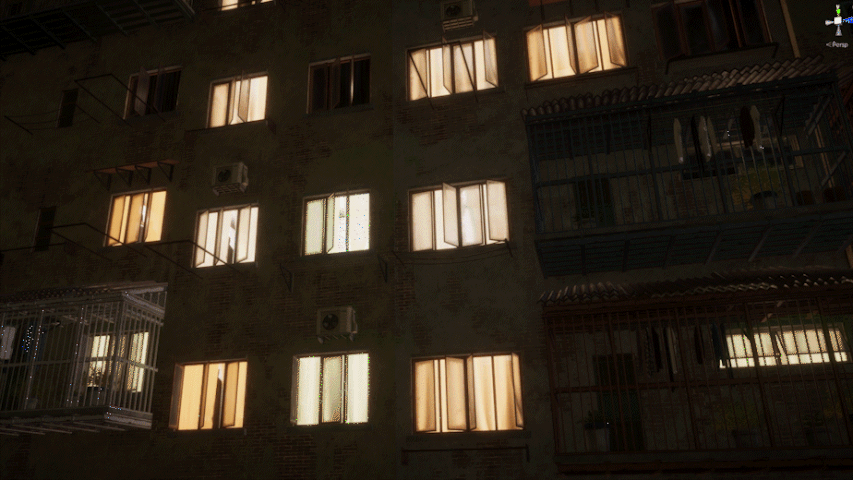
Lighting & Composition
Compositionally, I experimented with dozens of different alley, building, and interior arrangements, each with a unique lighting setup and several camera angles but I ended up only choosing the best.
My lighting is often extremely simple. For the exterior, it’s fully real-time, I didn’t bake any lighting. I also use physically-accurate values and temperatures.
For example, in the alleys, the fluorescent lights are 5000K kelvin temperature with 2300 lumen intensity. The sun is 4500K kelvin with a 120k lux intensity. I used free HDRIs from Polyhaven. The best advice I can give is to consume as much artwork as possible to improve your artistic eye.
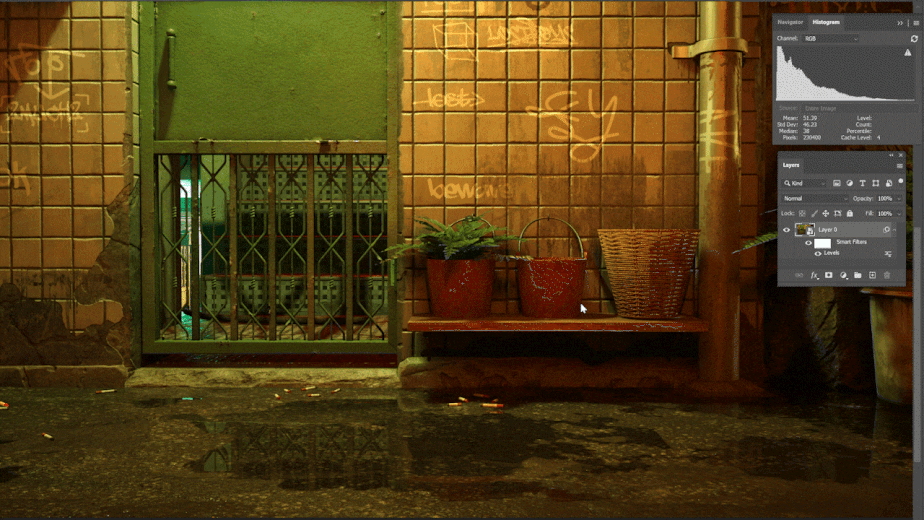
When determining my light angles and post-processing, the histogram in Photoshop is a nice heuristic. A smooth, balanced, curved slope is my goal. This is oftentimes difficult to perfectly achieve, but it can help me visualize the distribution of values and colors.

I also often refer to the color wheel for color schemes. Adobe Color is an excellent tool to choose one. Plenty has already been written about this but here are some examples:

Composition and lighting are very iterative processes. Early on, this image compositionally favored the left side.
After flipping the image horizontally in Photoshop (a trick most 2D artists are already familiar with), I realized it felt off so I widened the shot.
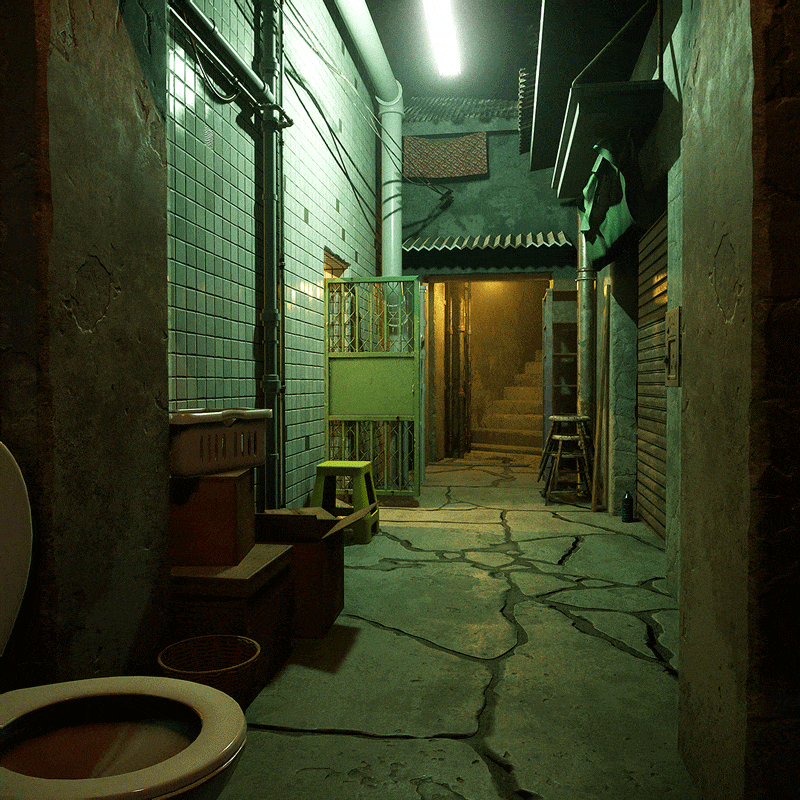
Breaking ‘laser lines’ can also greatly help an image’s composition. Lasers lines are any unbroken line in an image.
Here you can see I broke the floor-wall line through clutter and props, like trash bags, bowls, pots, baskets, and buckets, while also contributing to the storytelling of the environment.
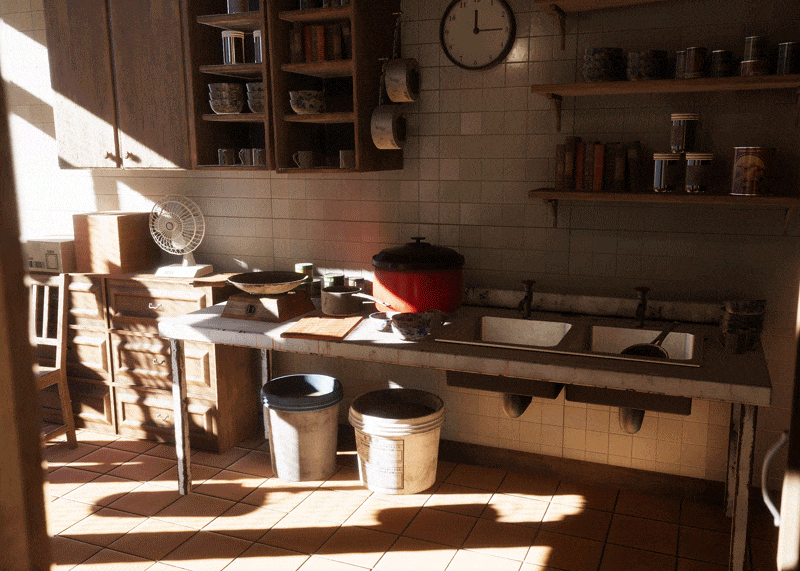
This interior image has a lot of storytelling.
For example, the water leak running down the wall into the puddle on the floor, the dirty and chipped wall tiles, kitchen utilities, clock, wires, broken floor tile, fan, plant, lightswitch, and the nearly overflowing sinks all inform of the place, condition, time, utility, temperature, and inhabitants of this environment. Although you can’t see the windows on the left side of this room, the plant tells us there is likely one nearby, for example.
Optimization
In the exterior scene, performance became an issue early on. Because the buildings were constructed modularly, there were 50k+ wall, window, and awning pieces, which contributed greatly toward the draw call count. Strangely, I couldn’t get Unity’s native static batching to work, so I had to manually combine meshes.
Fortunately, this was extremely easy to do with the help of a simple script. I went from unpreferable stutters to smooth, 4k 60fps on my RTX 3080.
Rendering
I rendered the final images in around 15k (5k times 3) and then downscaled them to 4k. Before screenshotting, I adjust the post-processing, sun angle, sky angle, shadows, and depth-of-field for the best look. Afterward, I bring them into Photoshop and apply a levels filter to maximize the value range in case I hadn’t properly set the exposure.
Here’s an example:
Conclusion
Overall, I’m quite happy with the project. Although I’m not exceptional in any particular sect of 3D, I’m always learning new things and growing as an artist.
I’d like to shout out the DiNusty Empire discord community, which really helped me along the way with suggestions, feedback, and critiques. I hope this breakdown gave some interesting insights toward creating environment art and I want to thank the GamesArtist team for providing this opportunity. You can expect to see my latest work on Artstation and Twitter, so follow me!
Thanks,
Sherman Waffle.
Read more articles
You might also like these articles.