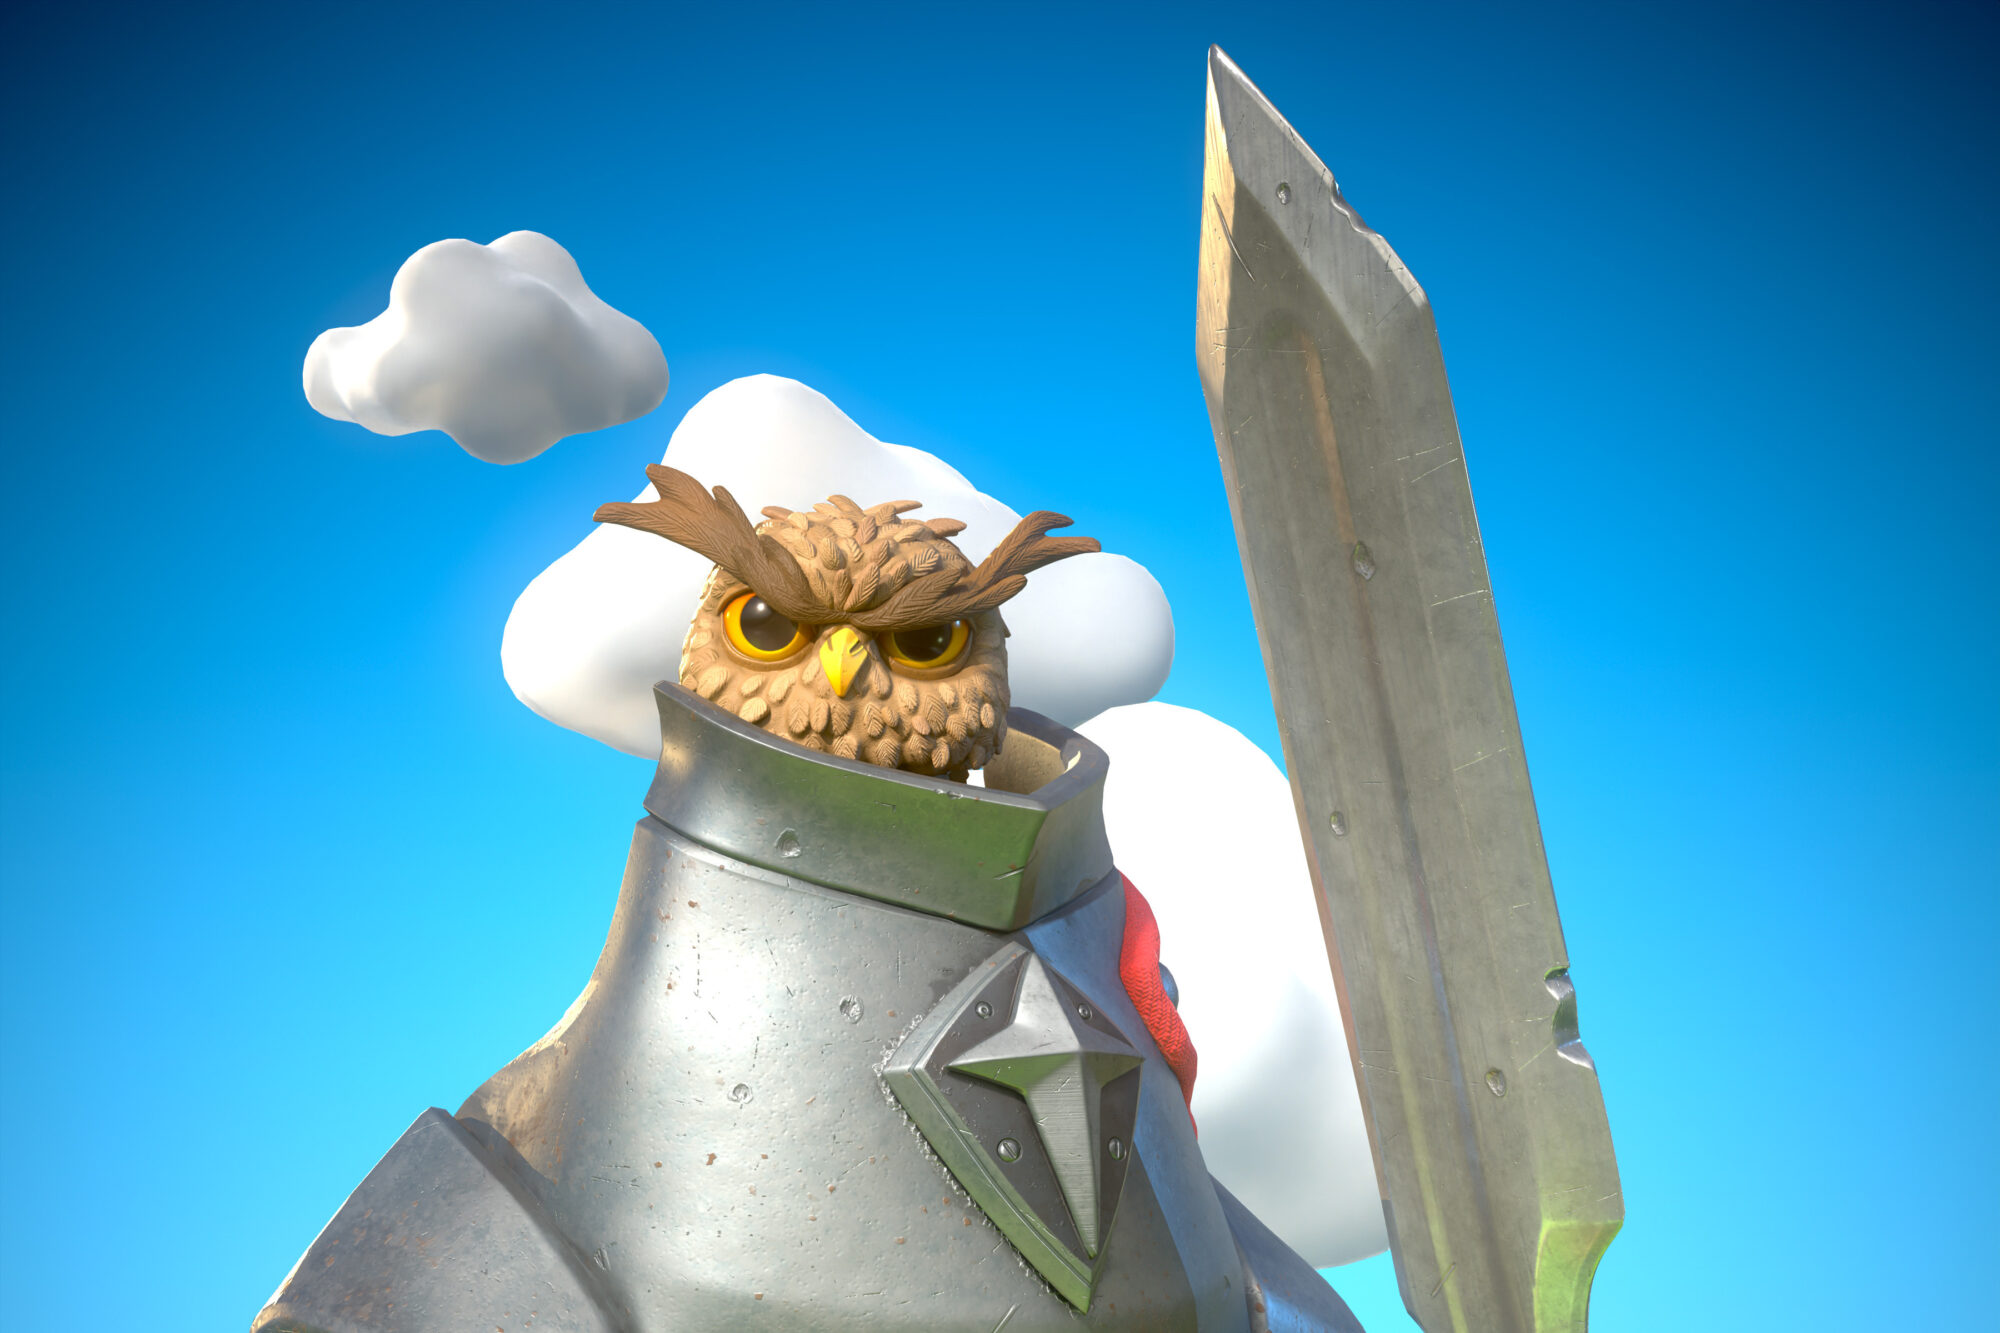
Knight Owl
Introduction
My name is Guillaume Tiberghien and I’m a 3D character artist living in Canada.
I’m really passionate and always strive to improve my craft through personal projects.

Goals
One of my goals on this project was to keep pursuing more richness in the rigging and animating of my characters. Another goal was to introduce an environment to give context. I will not elaborate on the background as it is fairly simple and new to me but inspired me to push it further in future projects.
Concept
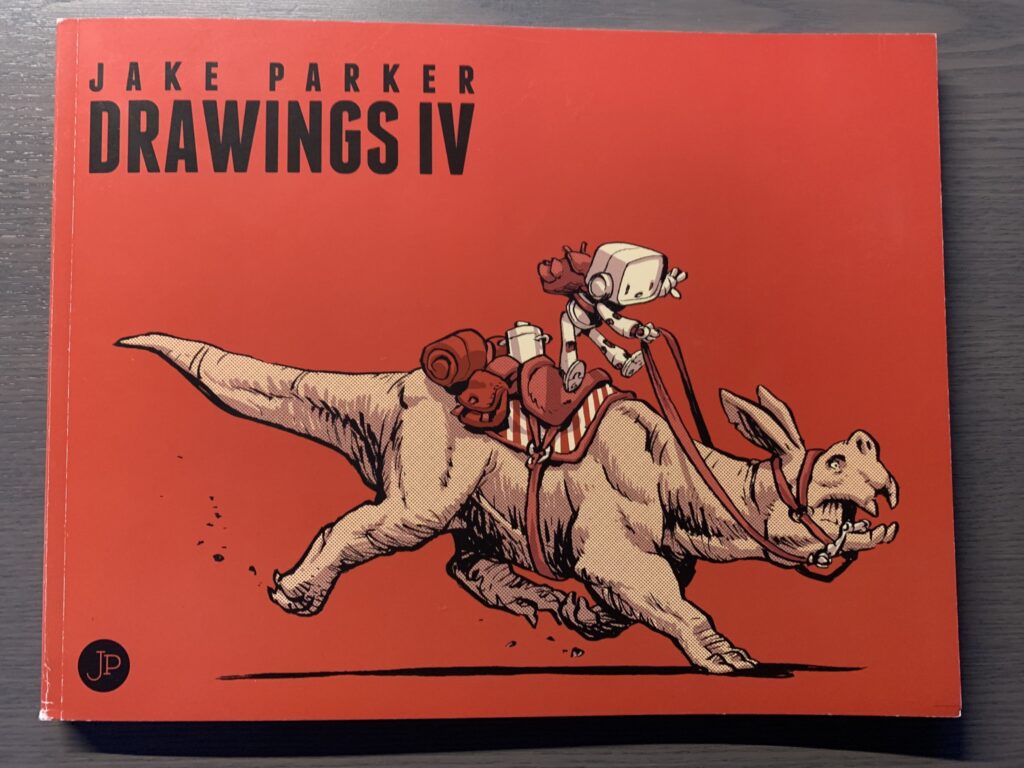
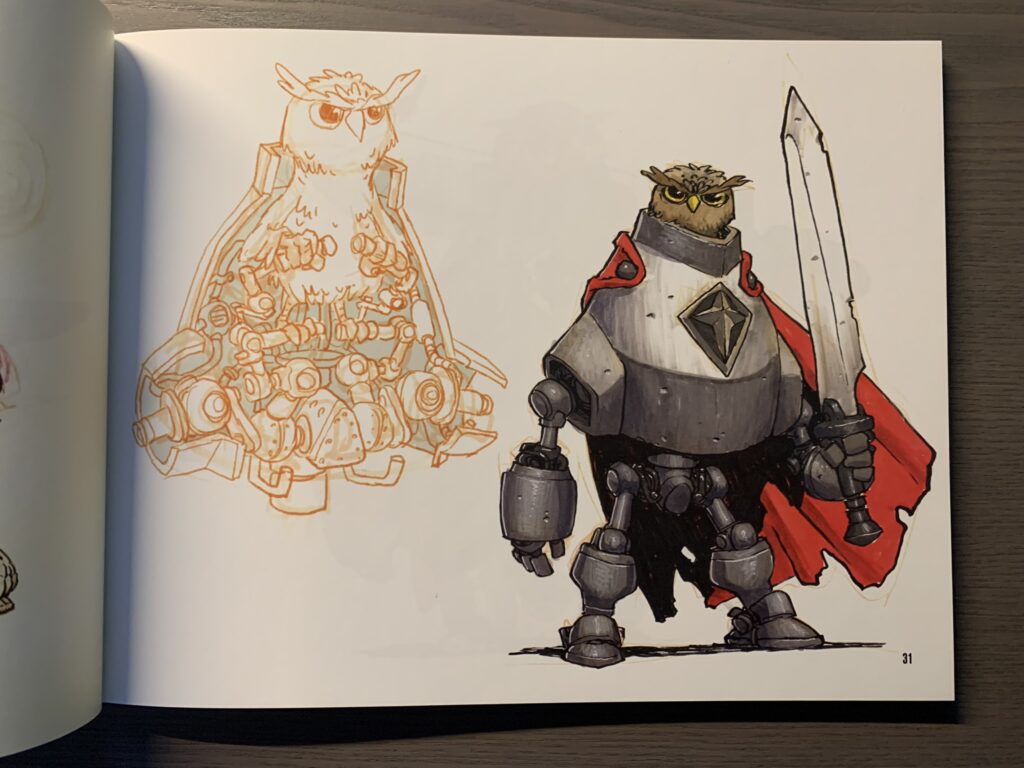
This project is based on a concept by Jake Parker. I have always been compelled by his work which I find vibrant and positive. Here is his concept from his drawing number 4 book that I bought on his website.
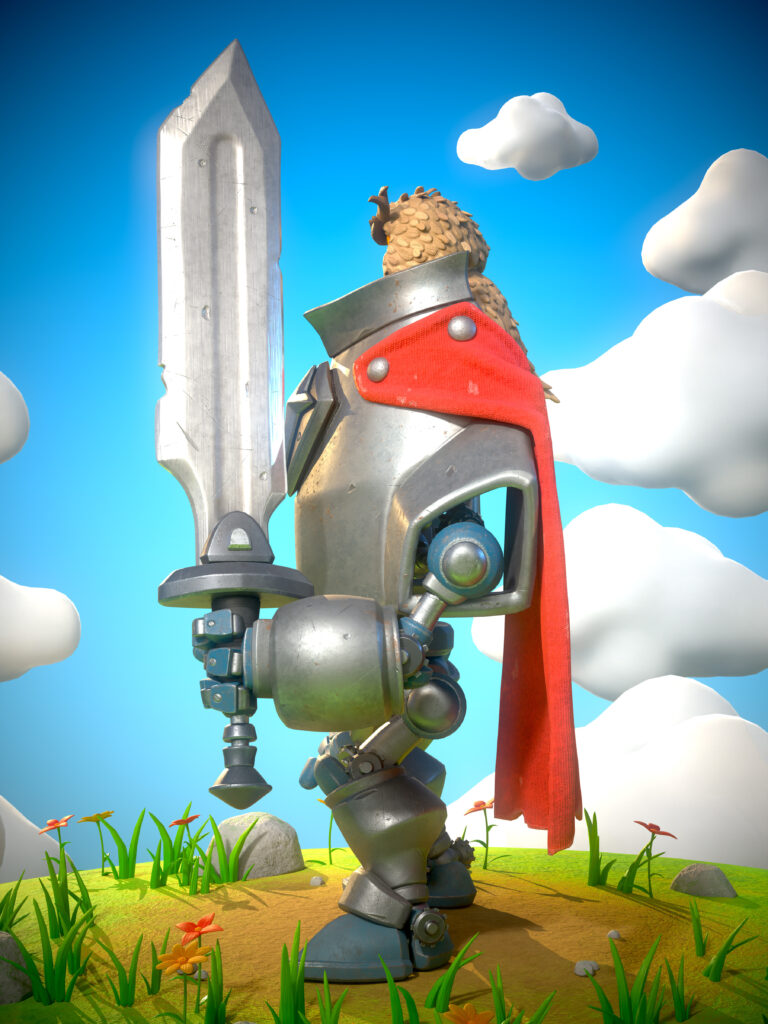
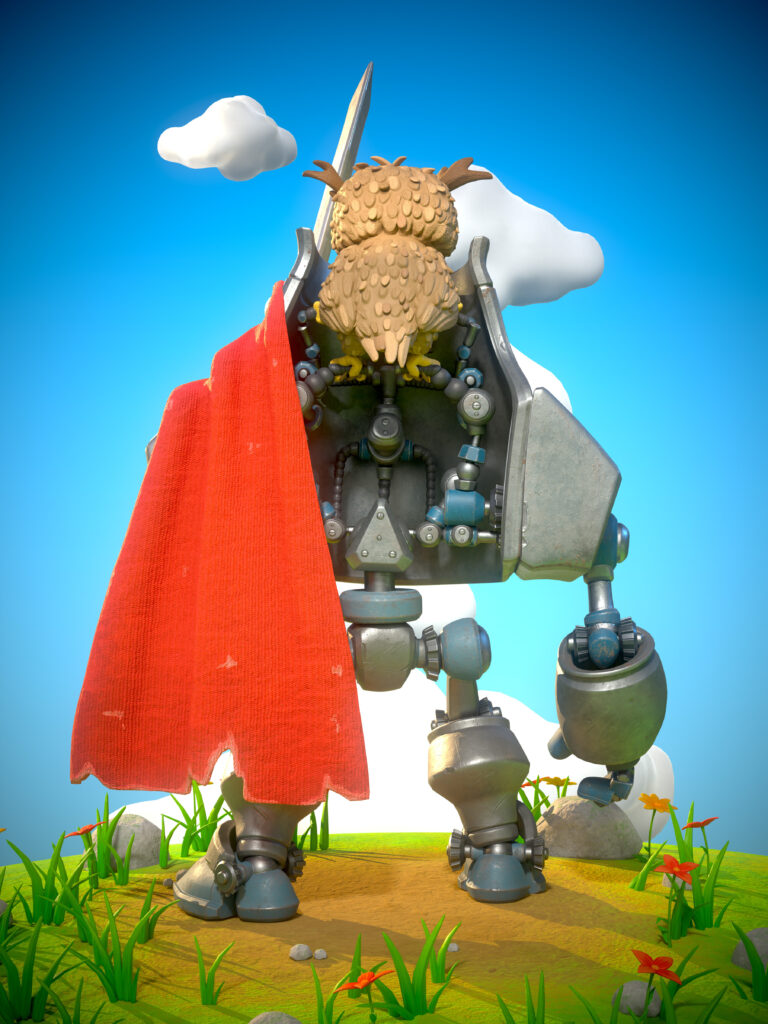
The major change I made to the concept was to split open the back of the torso so as to see the mechanical underlayer. The cape also had to be moved only to one side to not hide the details.
References
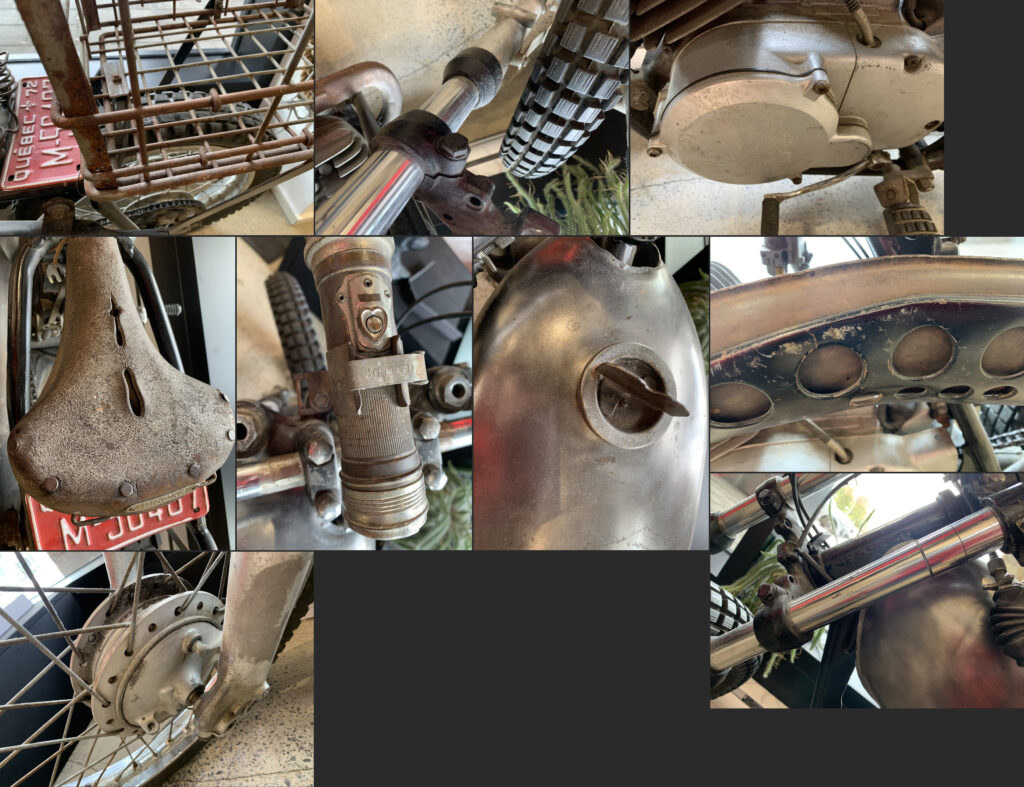
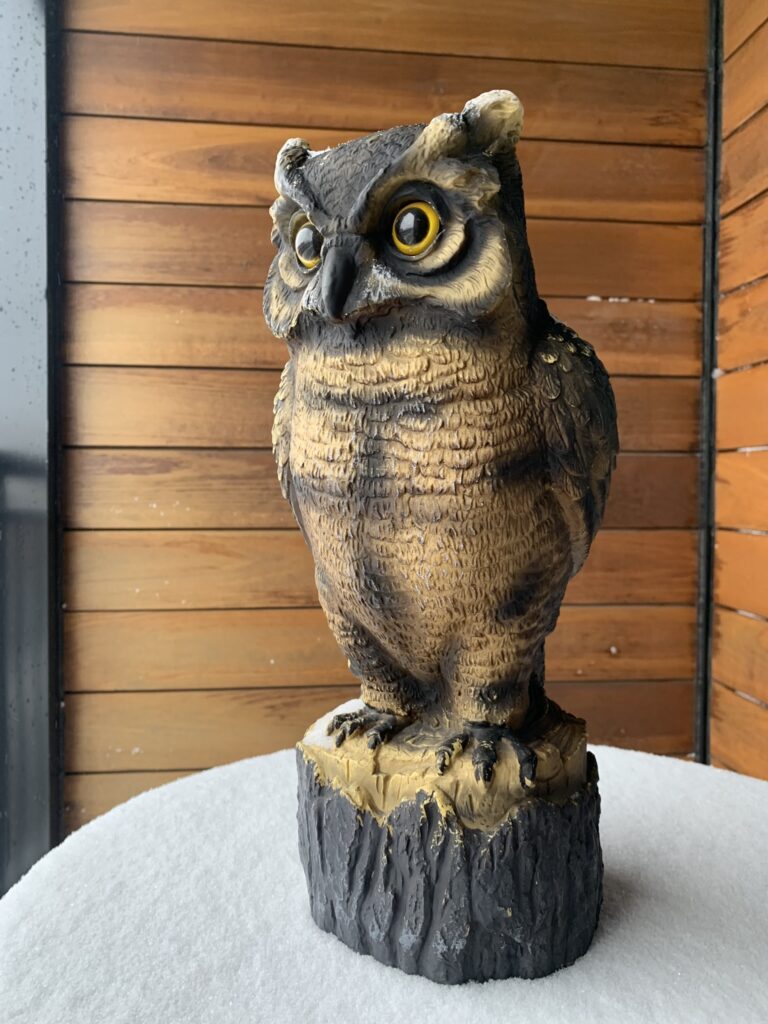
Other than the usual gathering of images I had 2 unforeseen l inspirations from this project.
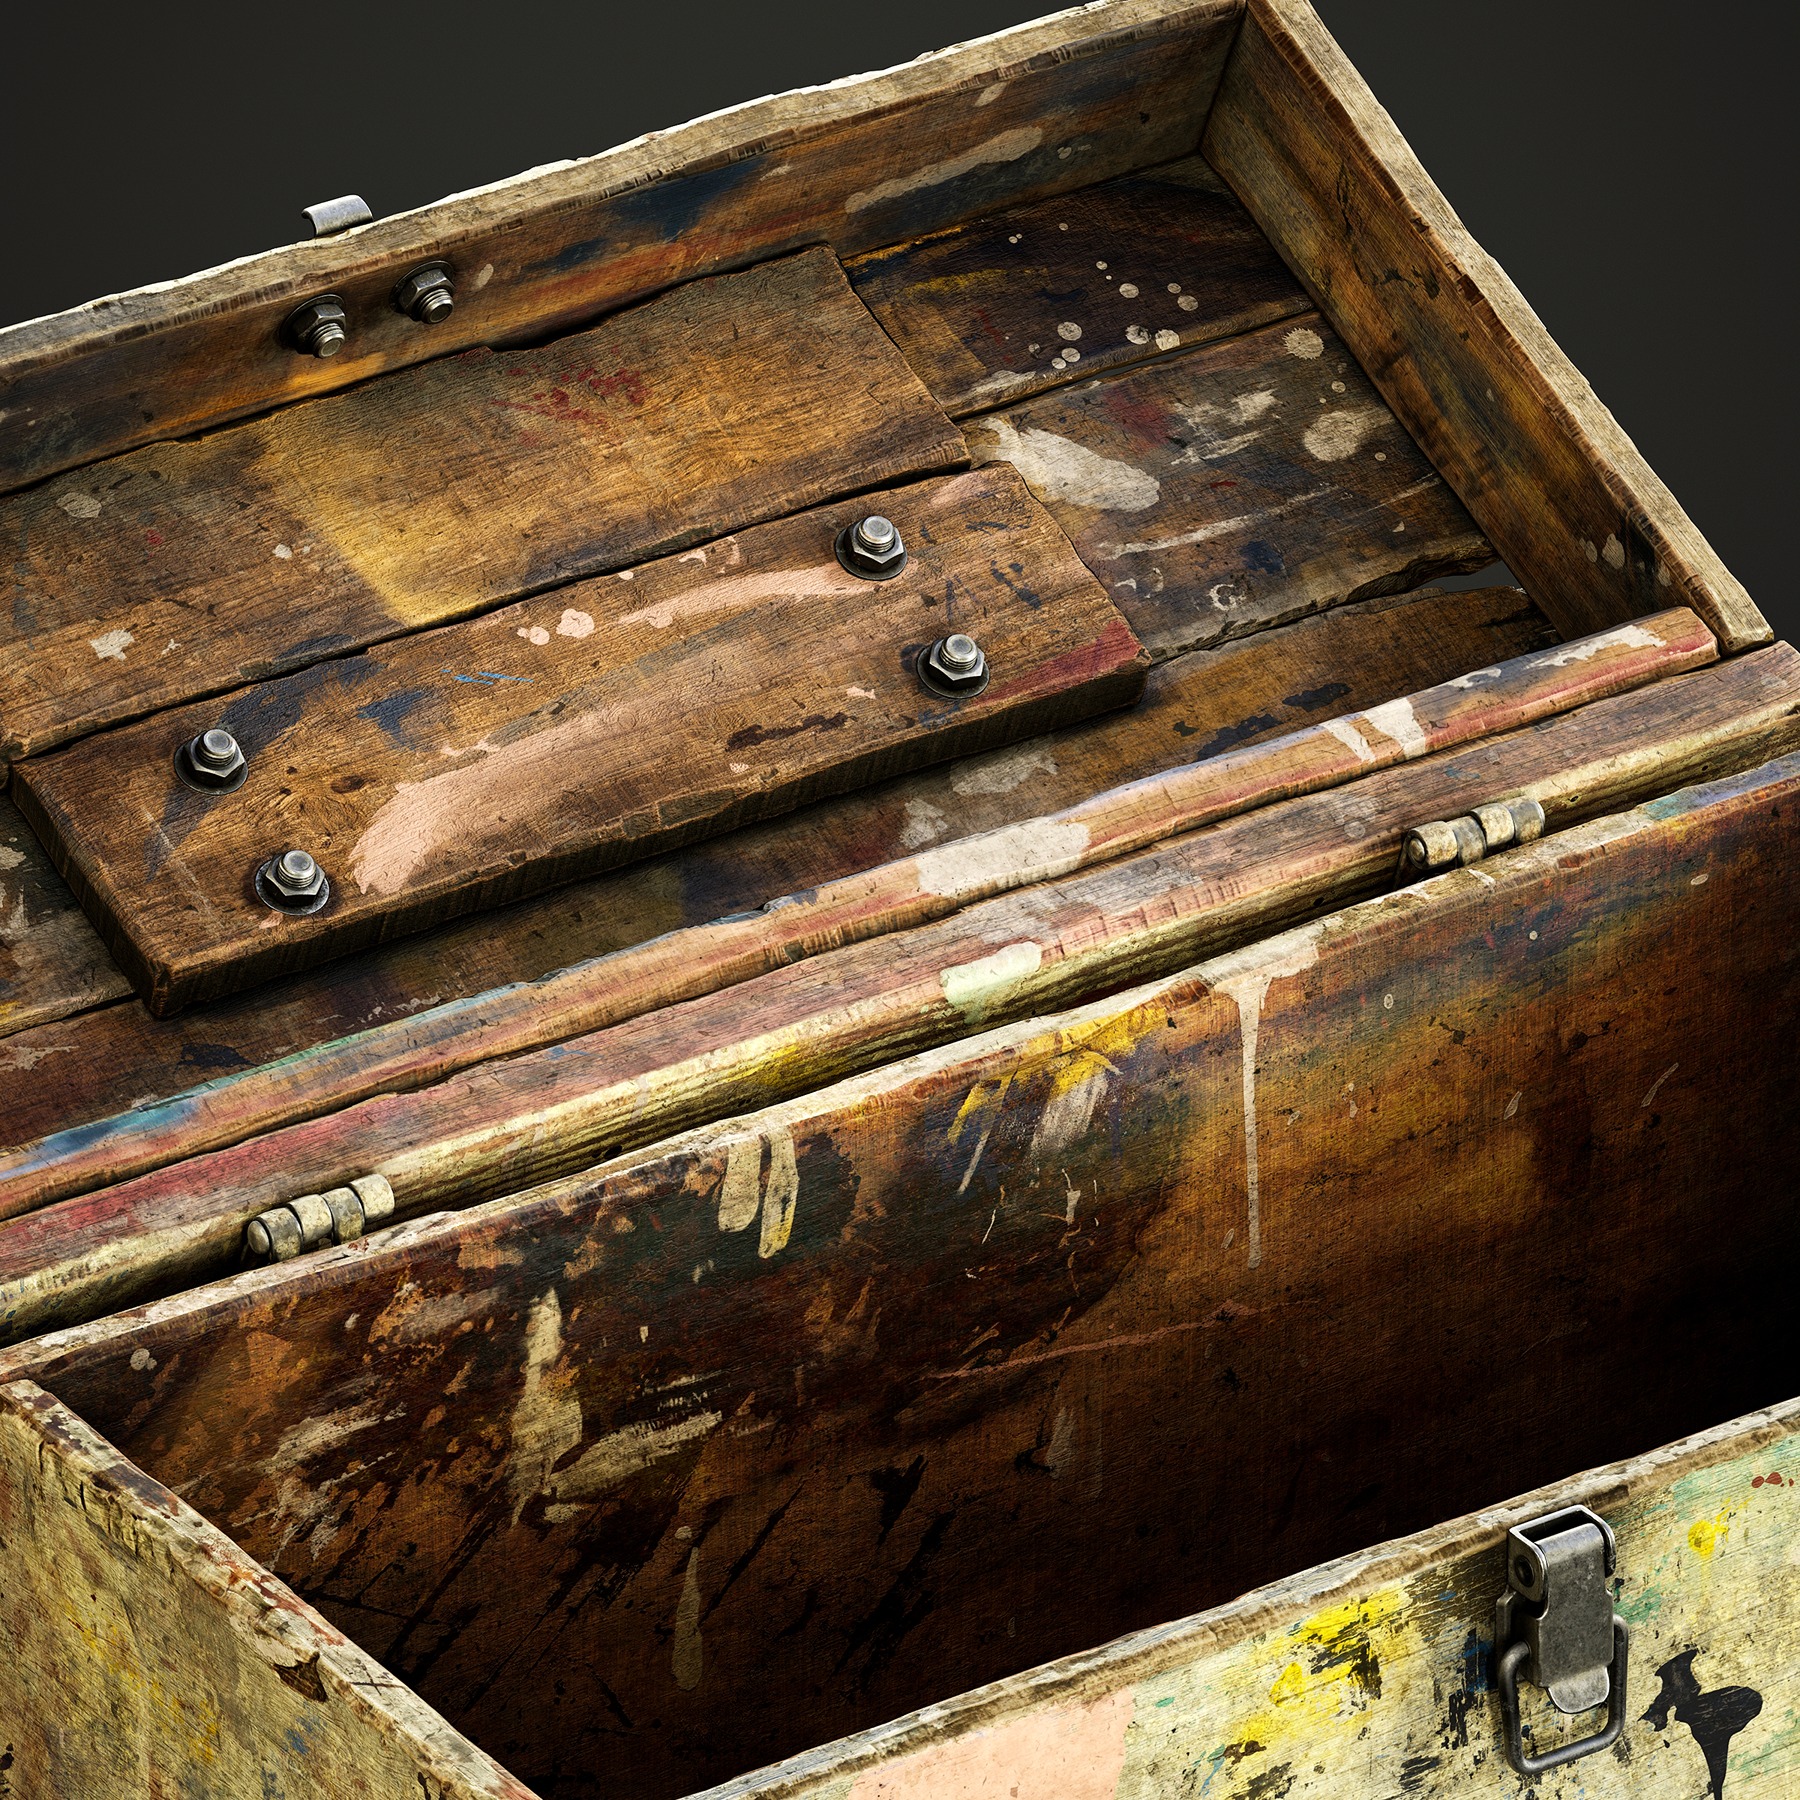
One is the owl sculpture I bought to scare away pigeons from my balcony and the other is an old motorcycle displayed in a store in my neighborhood that helped me with the material references.
Blocking
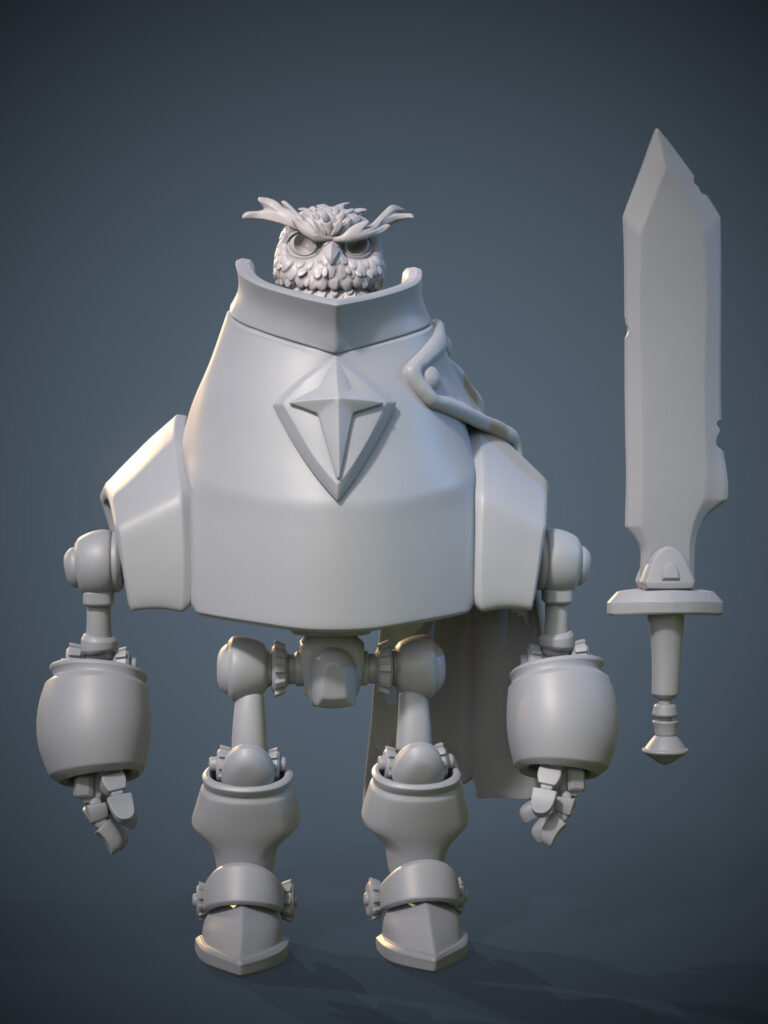
The first step was to have an idea of the entire composition made of simple geometrical shapes to set a clear goal. Then I blocked the entire character roughly.
You can see that even if character form and function are all there, It’s missing the dynamism and organized chaos that will come later with many iterations on my part.

High Res
The high res of the owl feathers was rather time-consuming. Because of their flow and irregularities of them, I sculpted them one by one with the nagging feeling that I should have found a way to be more efficient. Maybe using alphas or copying them.
Anyway, live and learn….
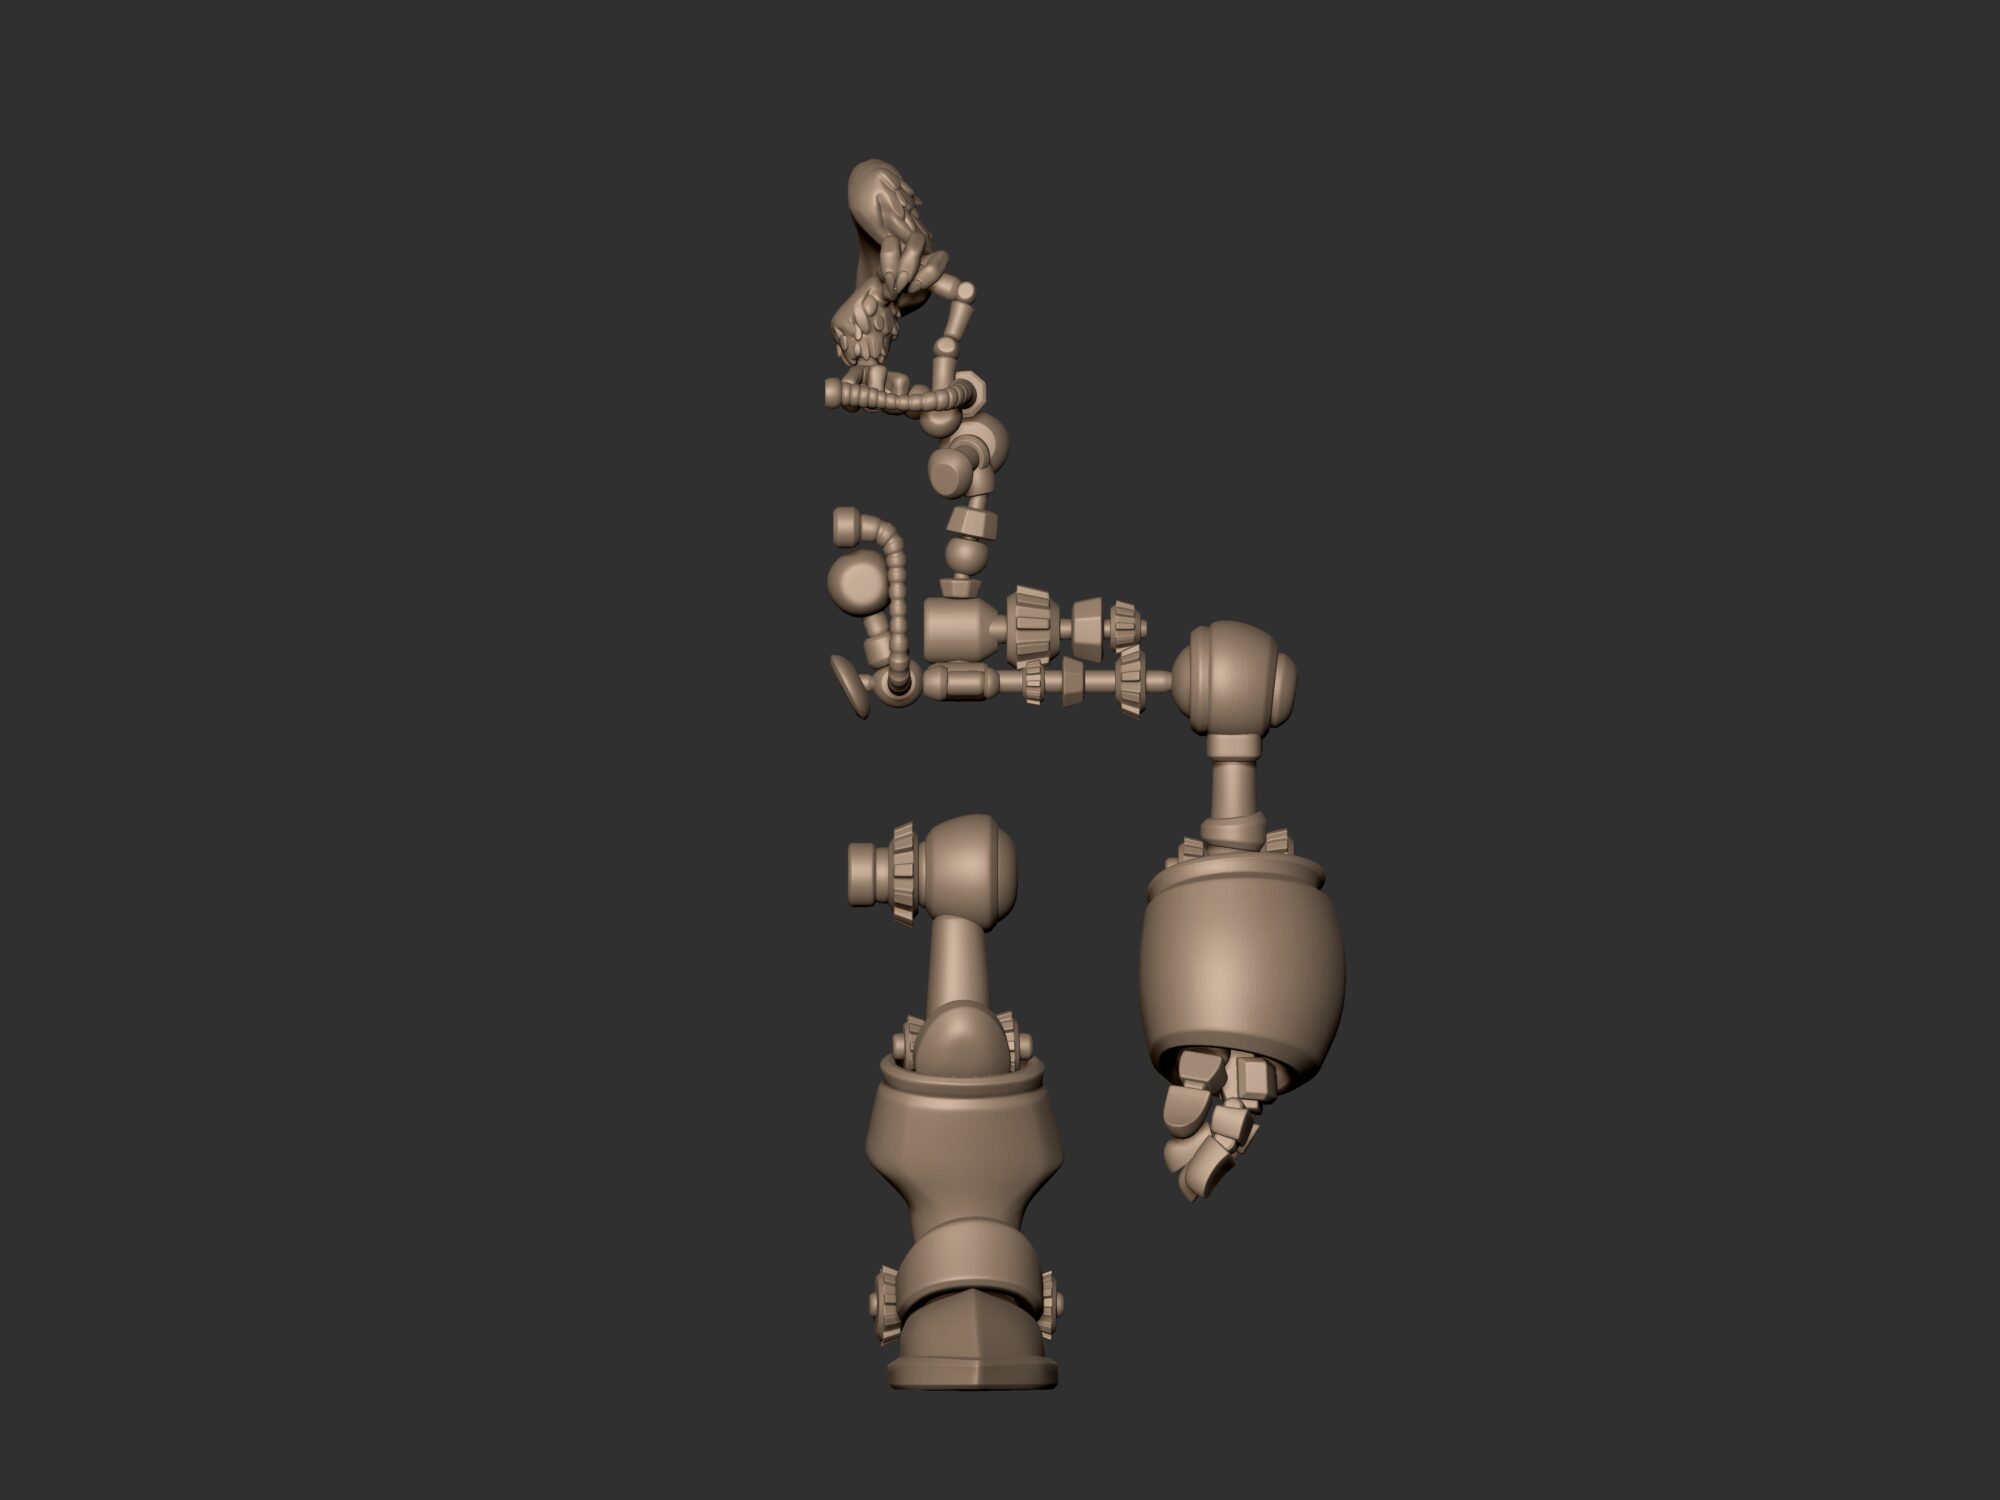
Another challenge on this sculpt was to make sure the levers would be able to be pushed and pulled. I remember making a quick rig and readjusting some elements.

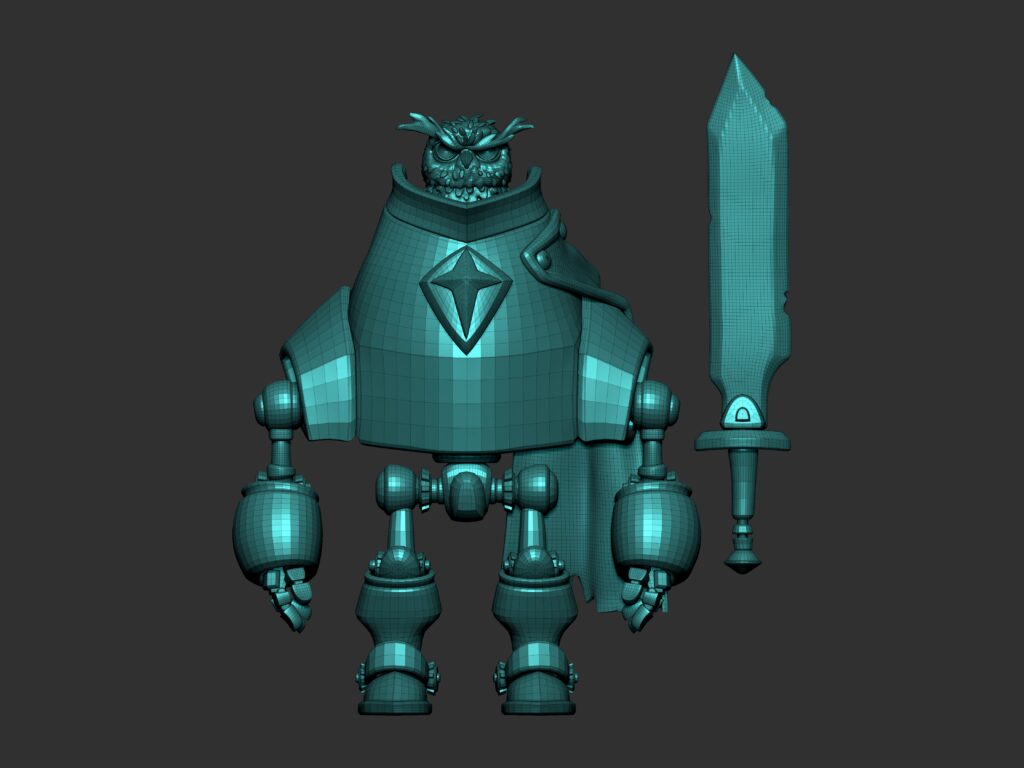
Animation Ready Mesh
Since this was not a production model It did not need to be optimized. As long as the mesh retained the silhouette and the topology was acceptable for deformation I could move on.
The entire mesh is simply level 1 or 2 of the high-resolution mesh.
The UVs on the other hand need to be fairly straight and clean because a lot of the information will be painted in the texture itself.
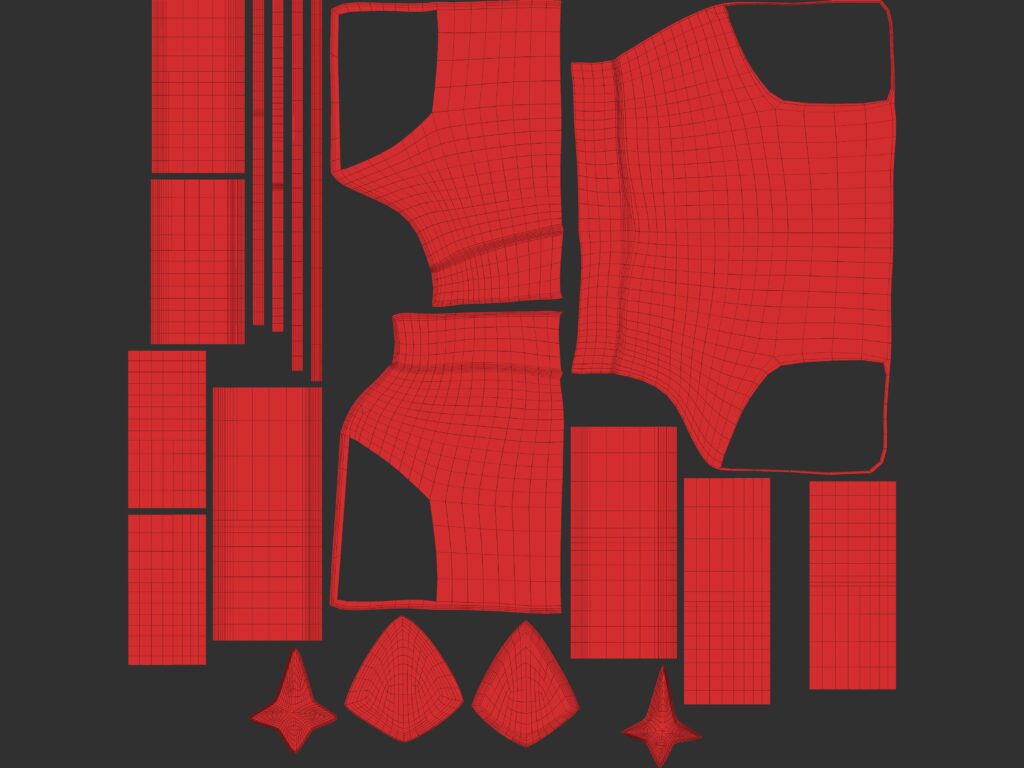
Time Saver
A major time saver on this project was that there was a major part of the character that was symmetrical and could be flipped over and reused. The downside was that there could not be
Anything very distinctive so as not to bring suspicion to the viewer that both sides were the same.
Texturing
I first had to establish each part of the model and how I was going to spit them
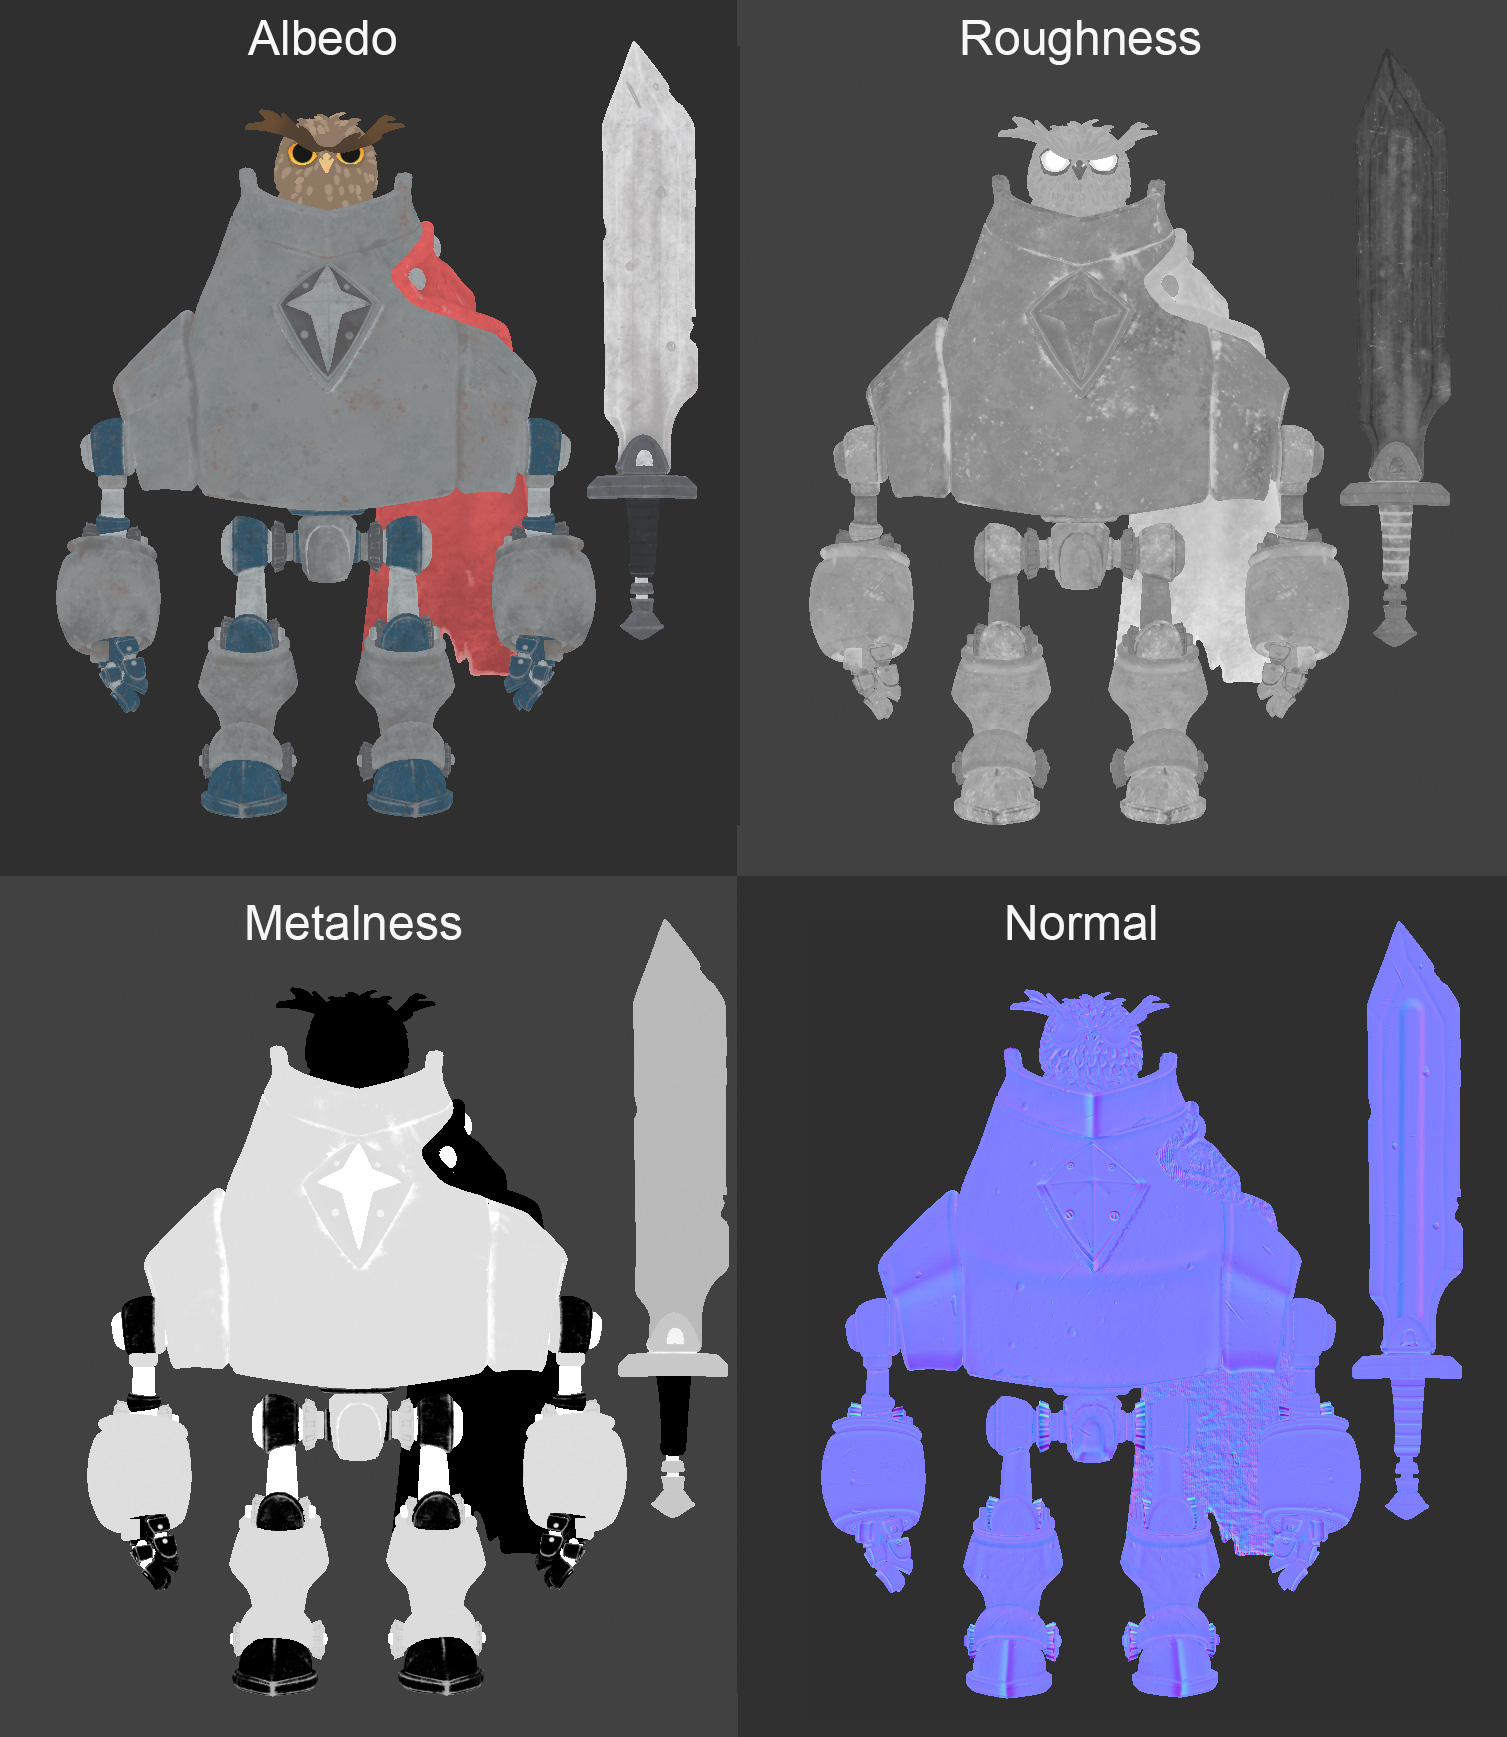
At this stage, it’s important for me to establish a simple color and material palette and not get overly complicated.
This was textured using the PBR method. It’s important to keep an eye on each of the maps and
Understand how they react together. If you are not getting the result desired it might be a good idea to isolate each map at the time. You may find the culprit.
Lots of height details were painted in like the bolts, scratches and panel lines. As long as the detail is small and does not affect the silhouette I find that it’s better for me to paint them at this stage and not include them in the high res model.
Rigging
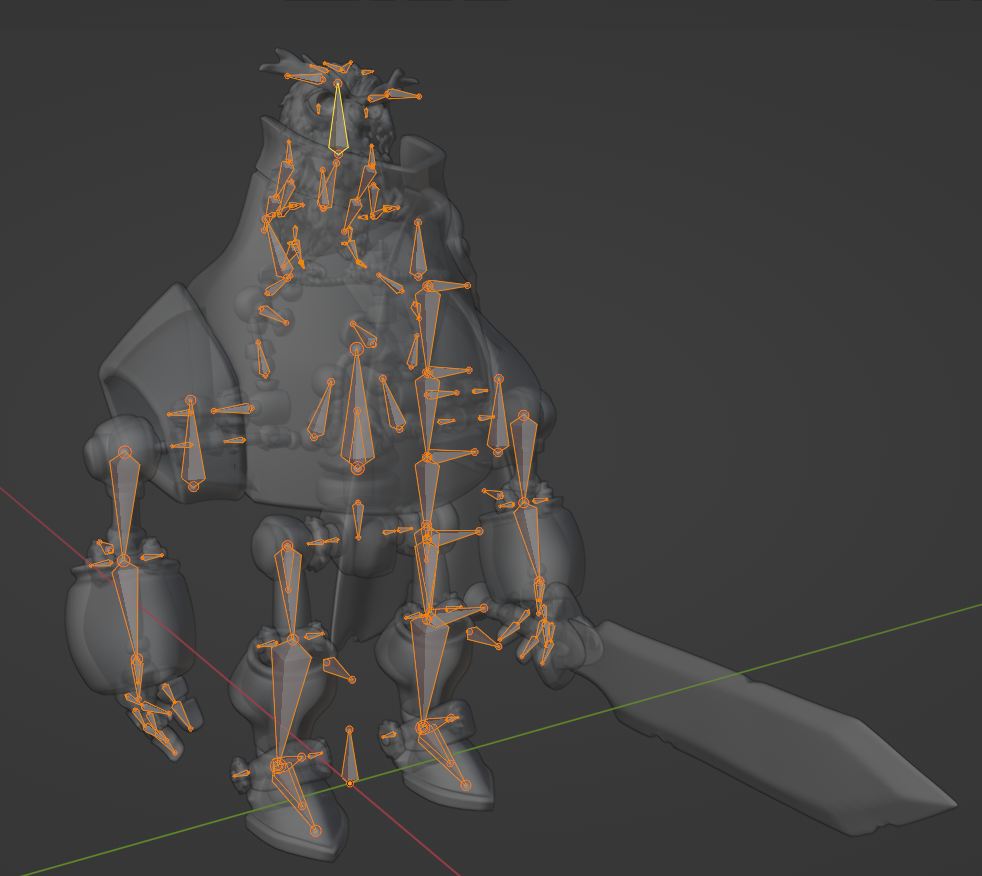
I am not a professional rigger so my rigs are pretty basic. I make it by hand and apply an IK to the limbs when needed. Learning to rig made me much more conscientious of keeping my files cleaned with layers and having a clear naming convention to keep track of everything.
Here you see the complete rig. It contains bones, controllers and targets. I have not gotten into
Giving them different colors or shapes depending on the function since I’m the only one working on it but I might give it a try in the future as it is the norm in the industry.
Animation
Animation is fairly new to me and I am still learning but I want to learn properly. I try to apply the 12 Principles of Animation whenever I can.
I’m trying to remain simple in my approach as I know that a bad animation would ruin the project overall. The little story I told myself is that the owl is proudly standing guard.
I merge both animations with and without armor to show a cutaway of the inside mechanism.
Lighting
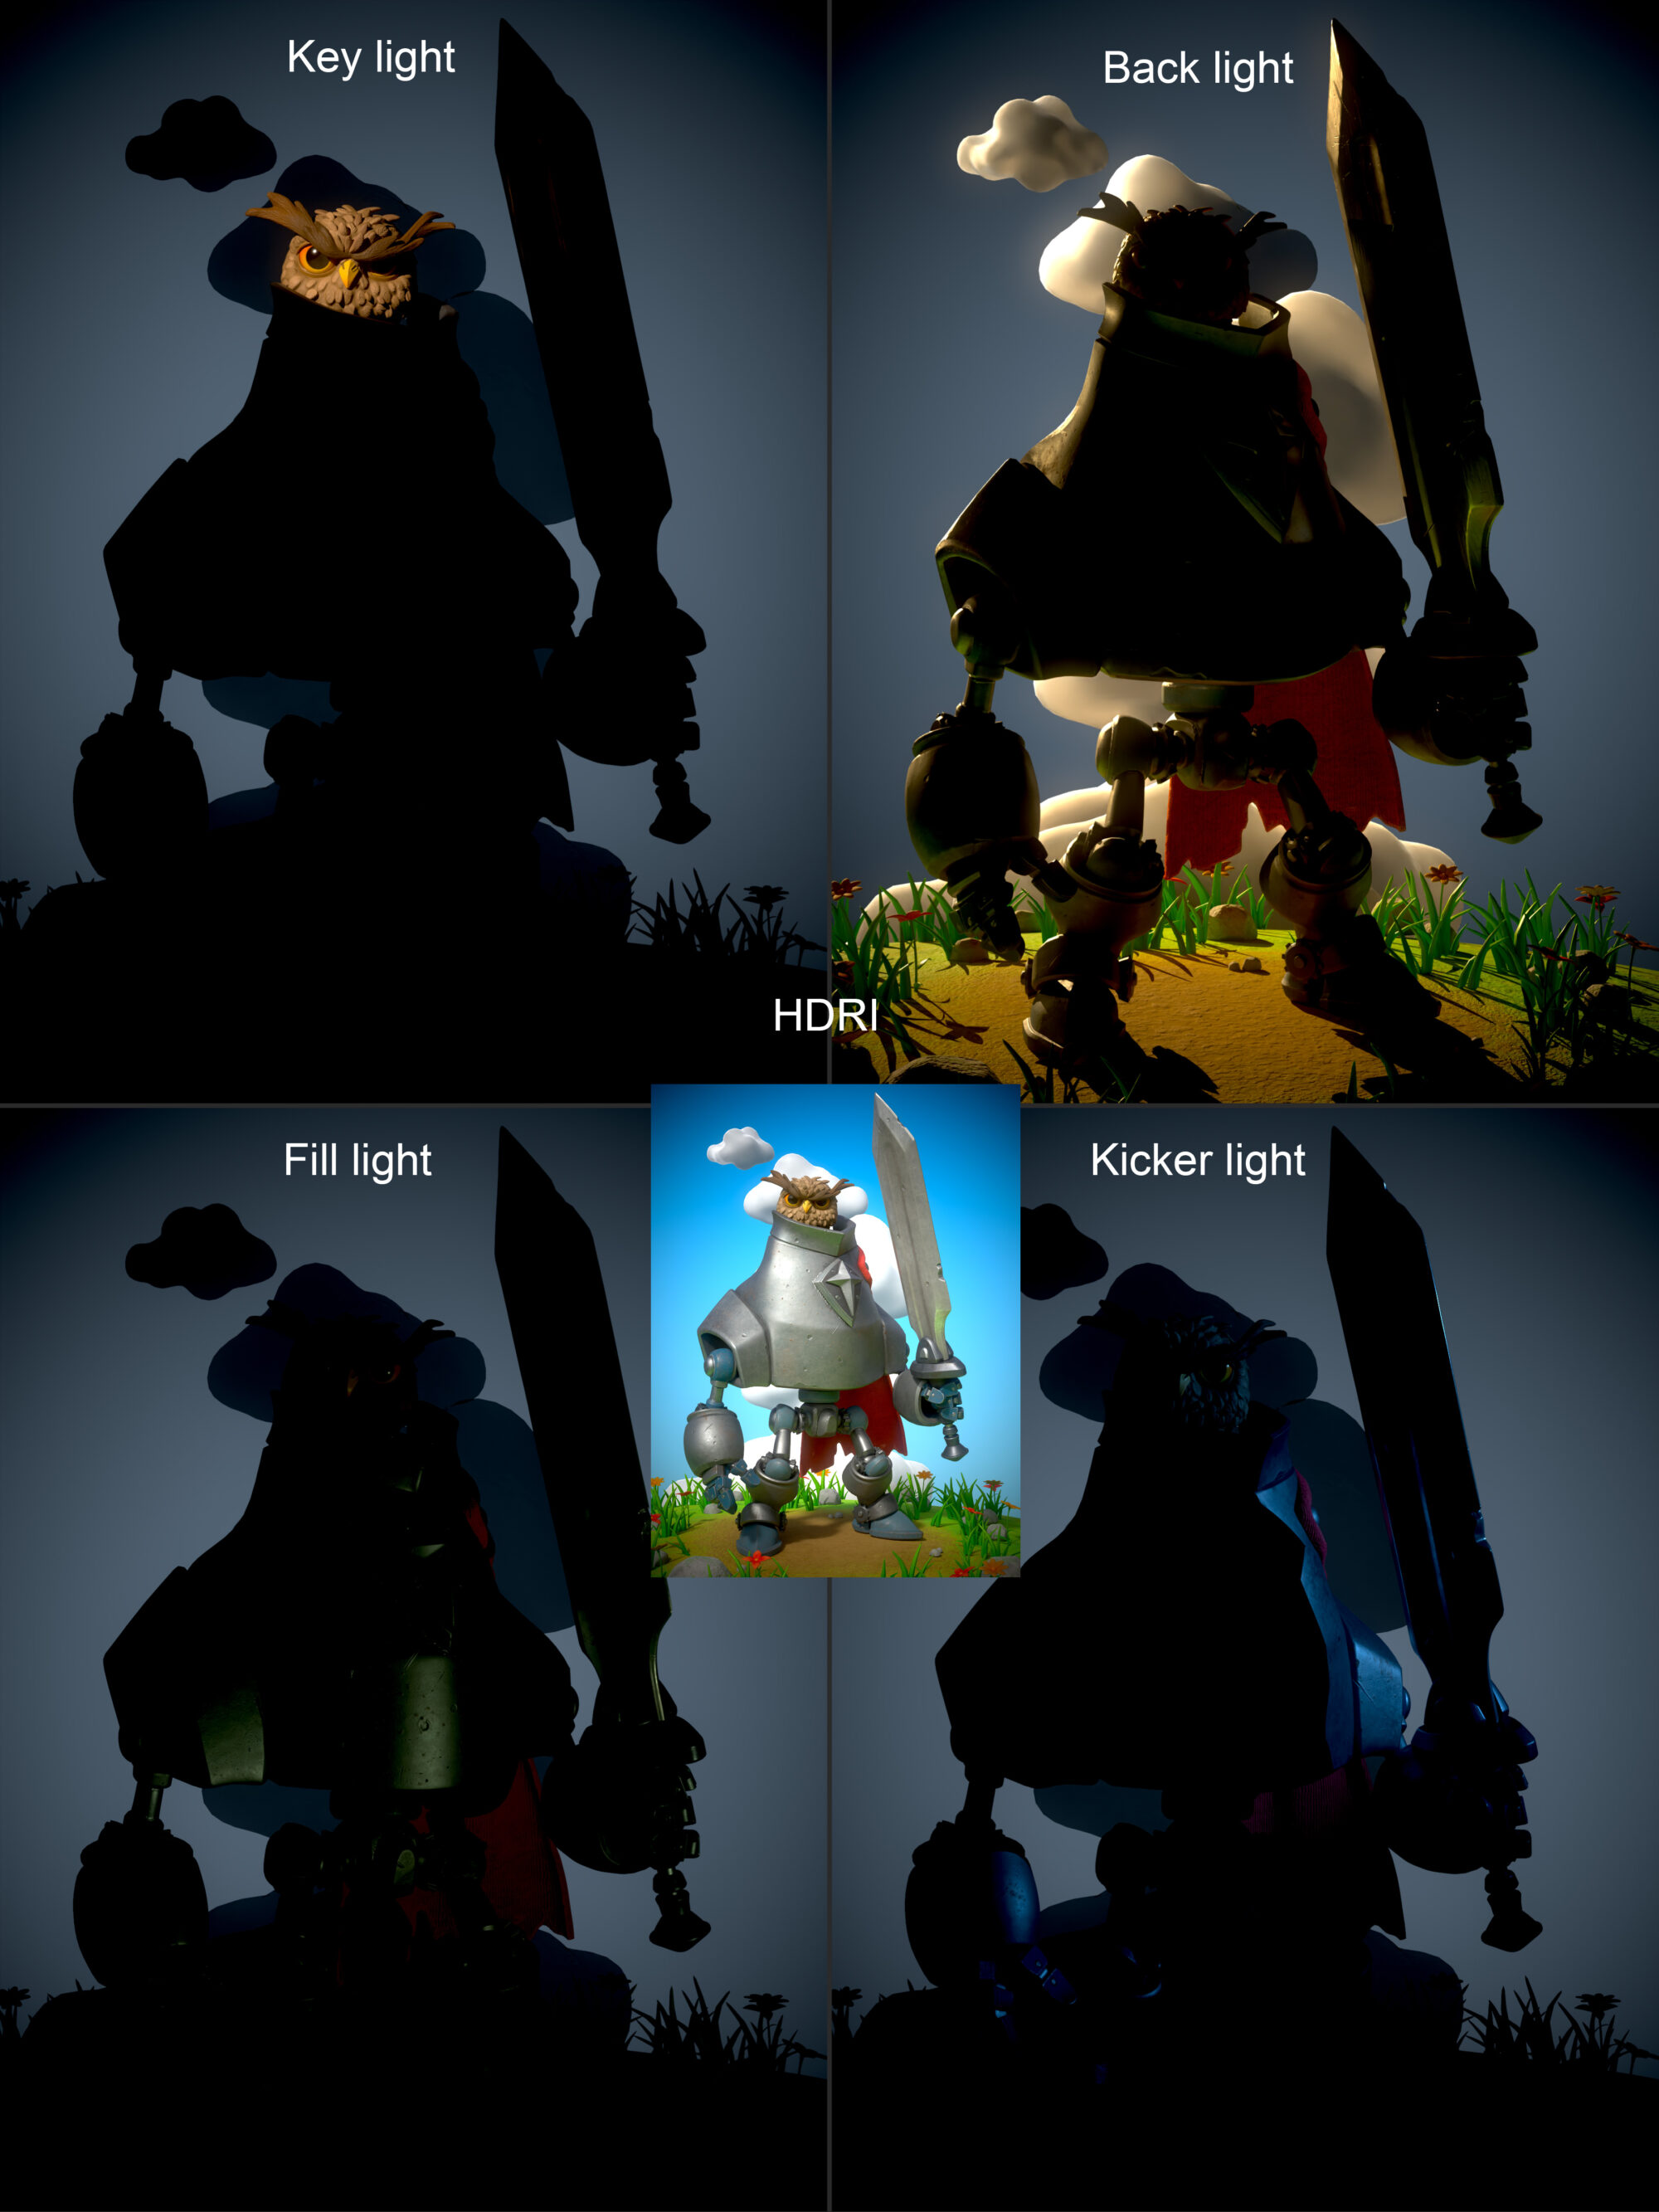
I usually base my lighting setup on a key, fill and backlight based on the technique of real-life studios. I am becoming more and more daring by adding color temperature to them.
Here the lights will be colored blue, yellow and green to emulate the sky, sun and grass reflection. With an hdr that gives you a general environment ambient lighting
Composition
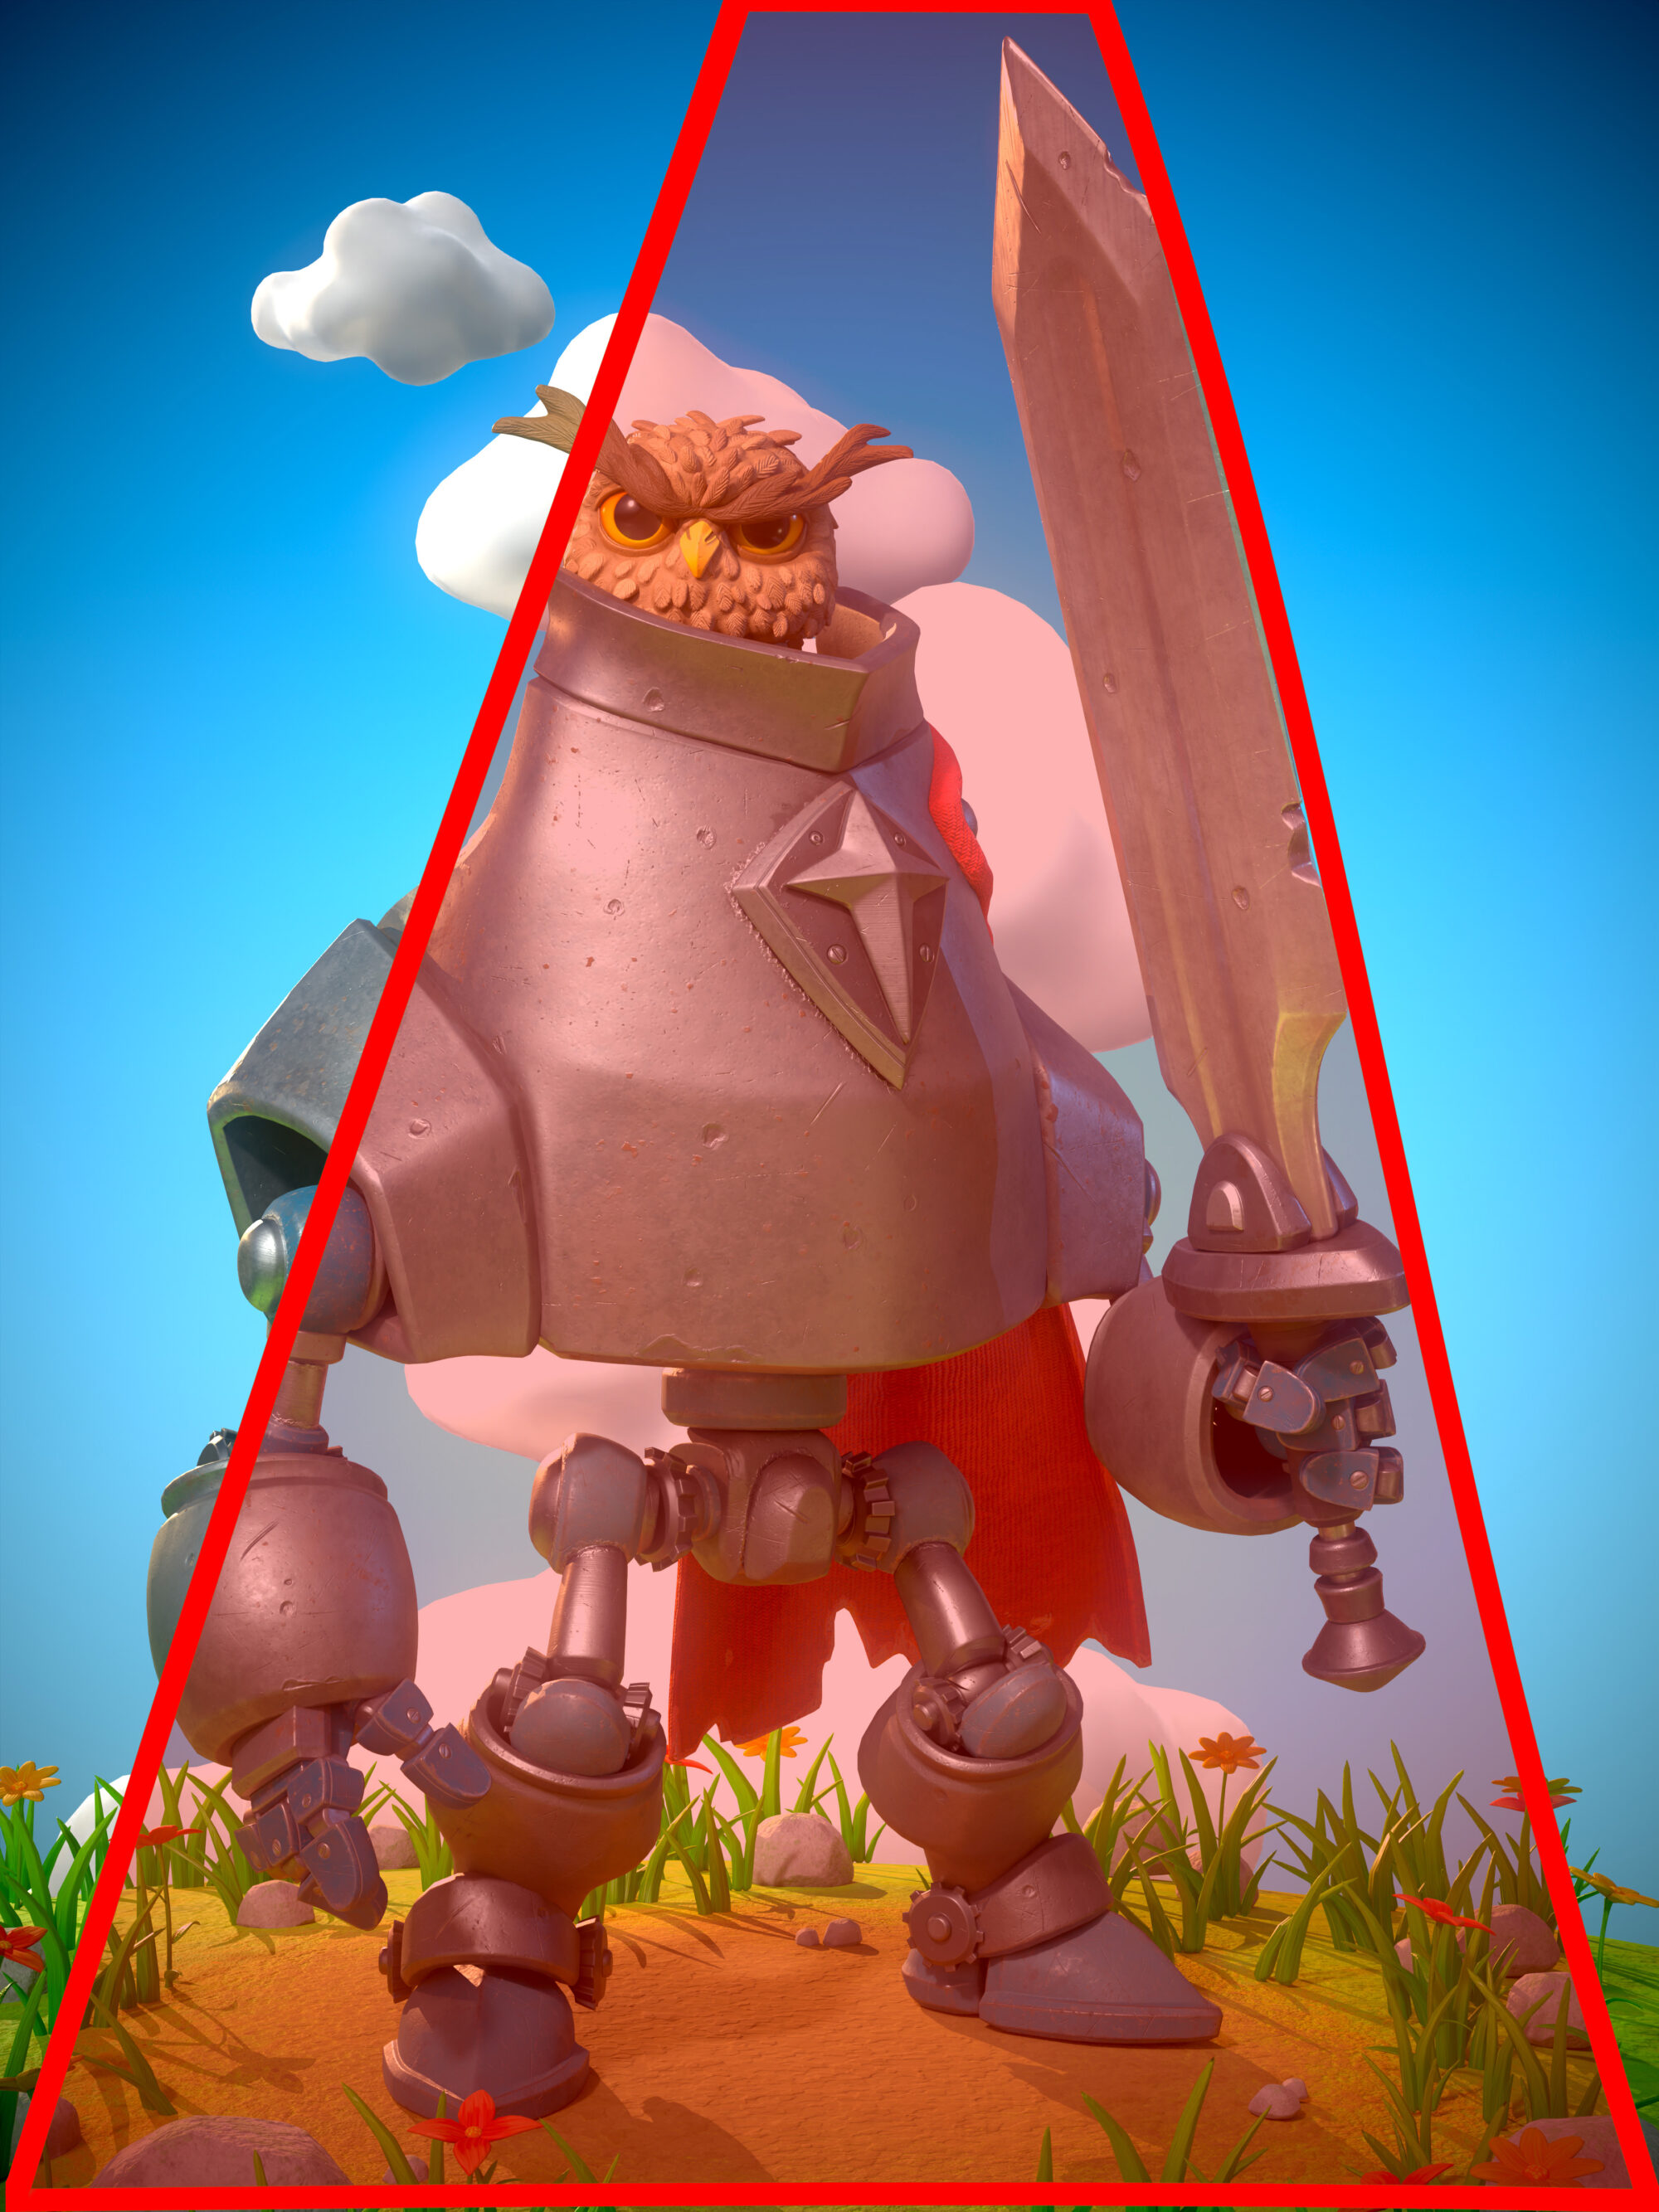
Here you will see that I tried to get a strong tapering from the bottom to the top of the image.
Triangles evoke stability and force. I’m compelled by compositions that retain a simple and strong geometrical shape throughout.
Post Mortem
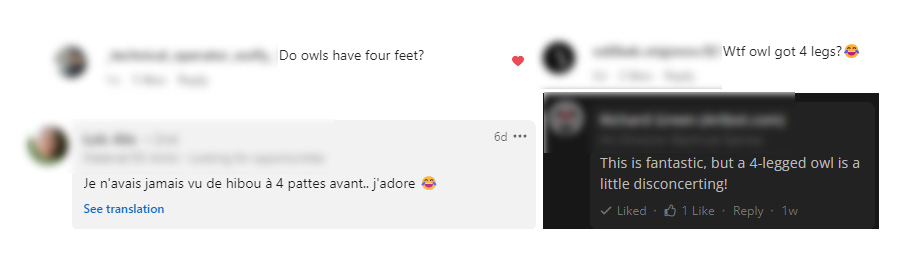
I knew some people would realize we played with the owl anatomy and made it with 4 sets of feet. This was the way to handle the top levers.
It’s funny how we can buy a sentient owl controlling a mechanical armor but draw the line of disbelief to playing with the anatomy. In the end, I don’t think most people cared or at least found it weird, interesting, or funny.
Read more articles
You might also like these articles.