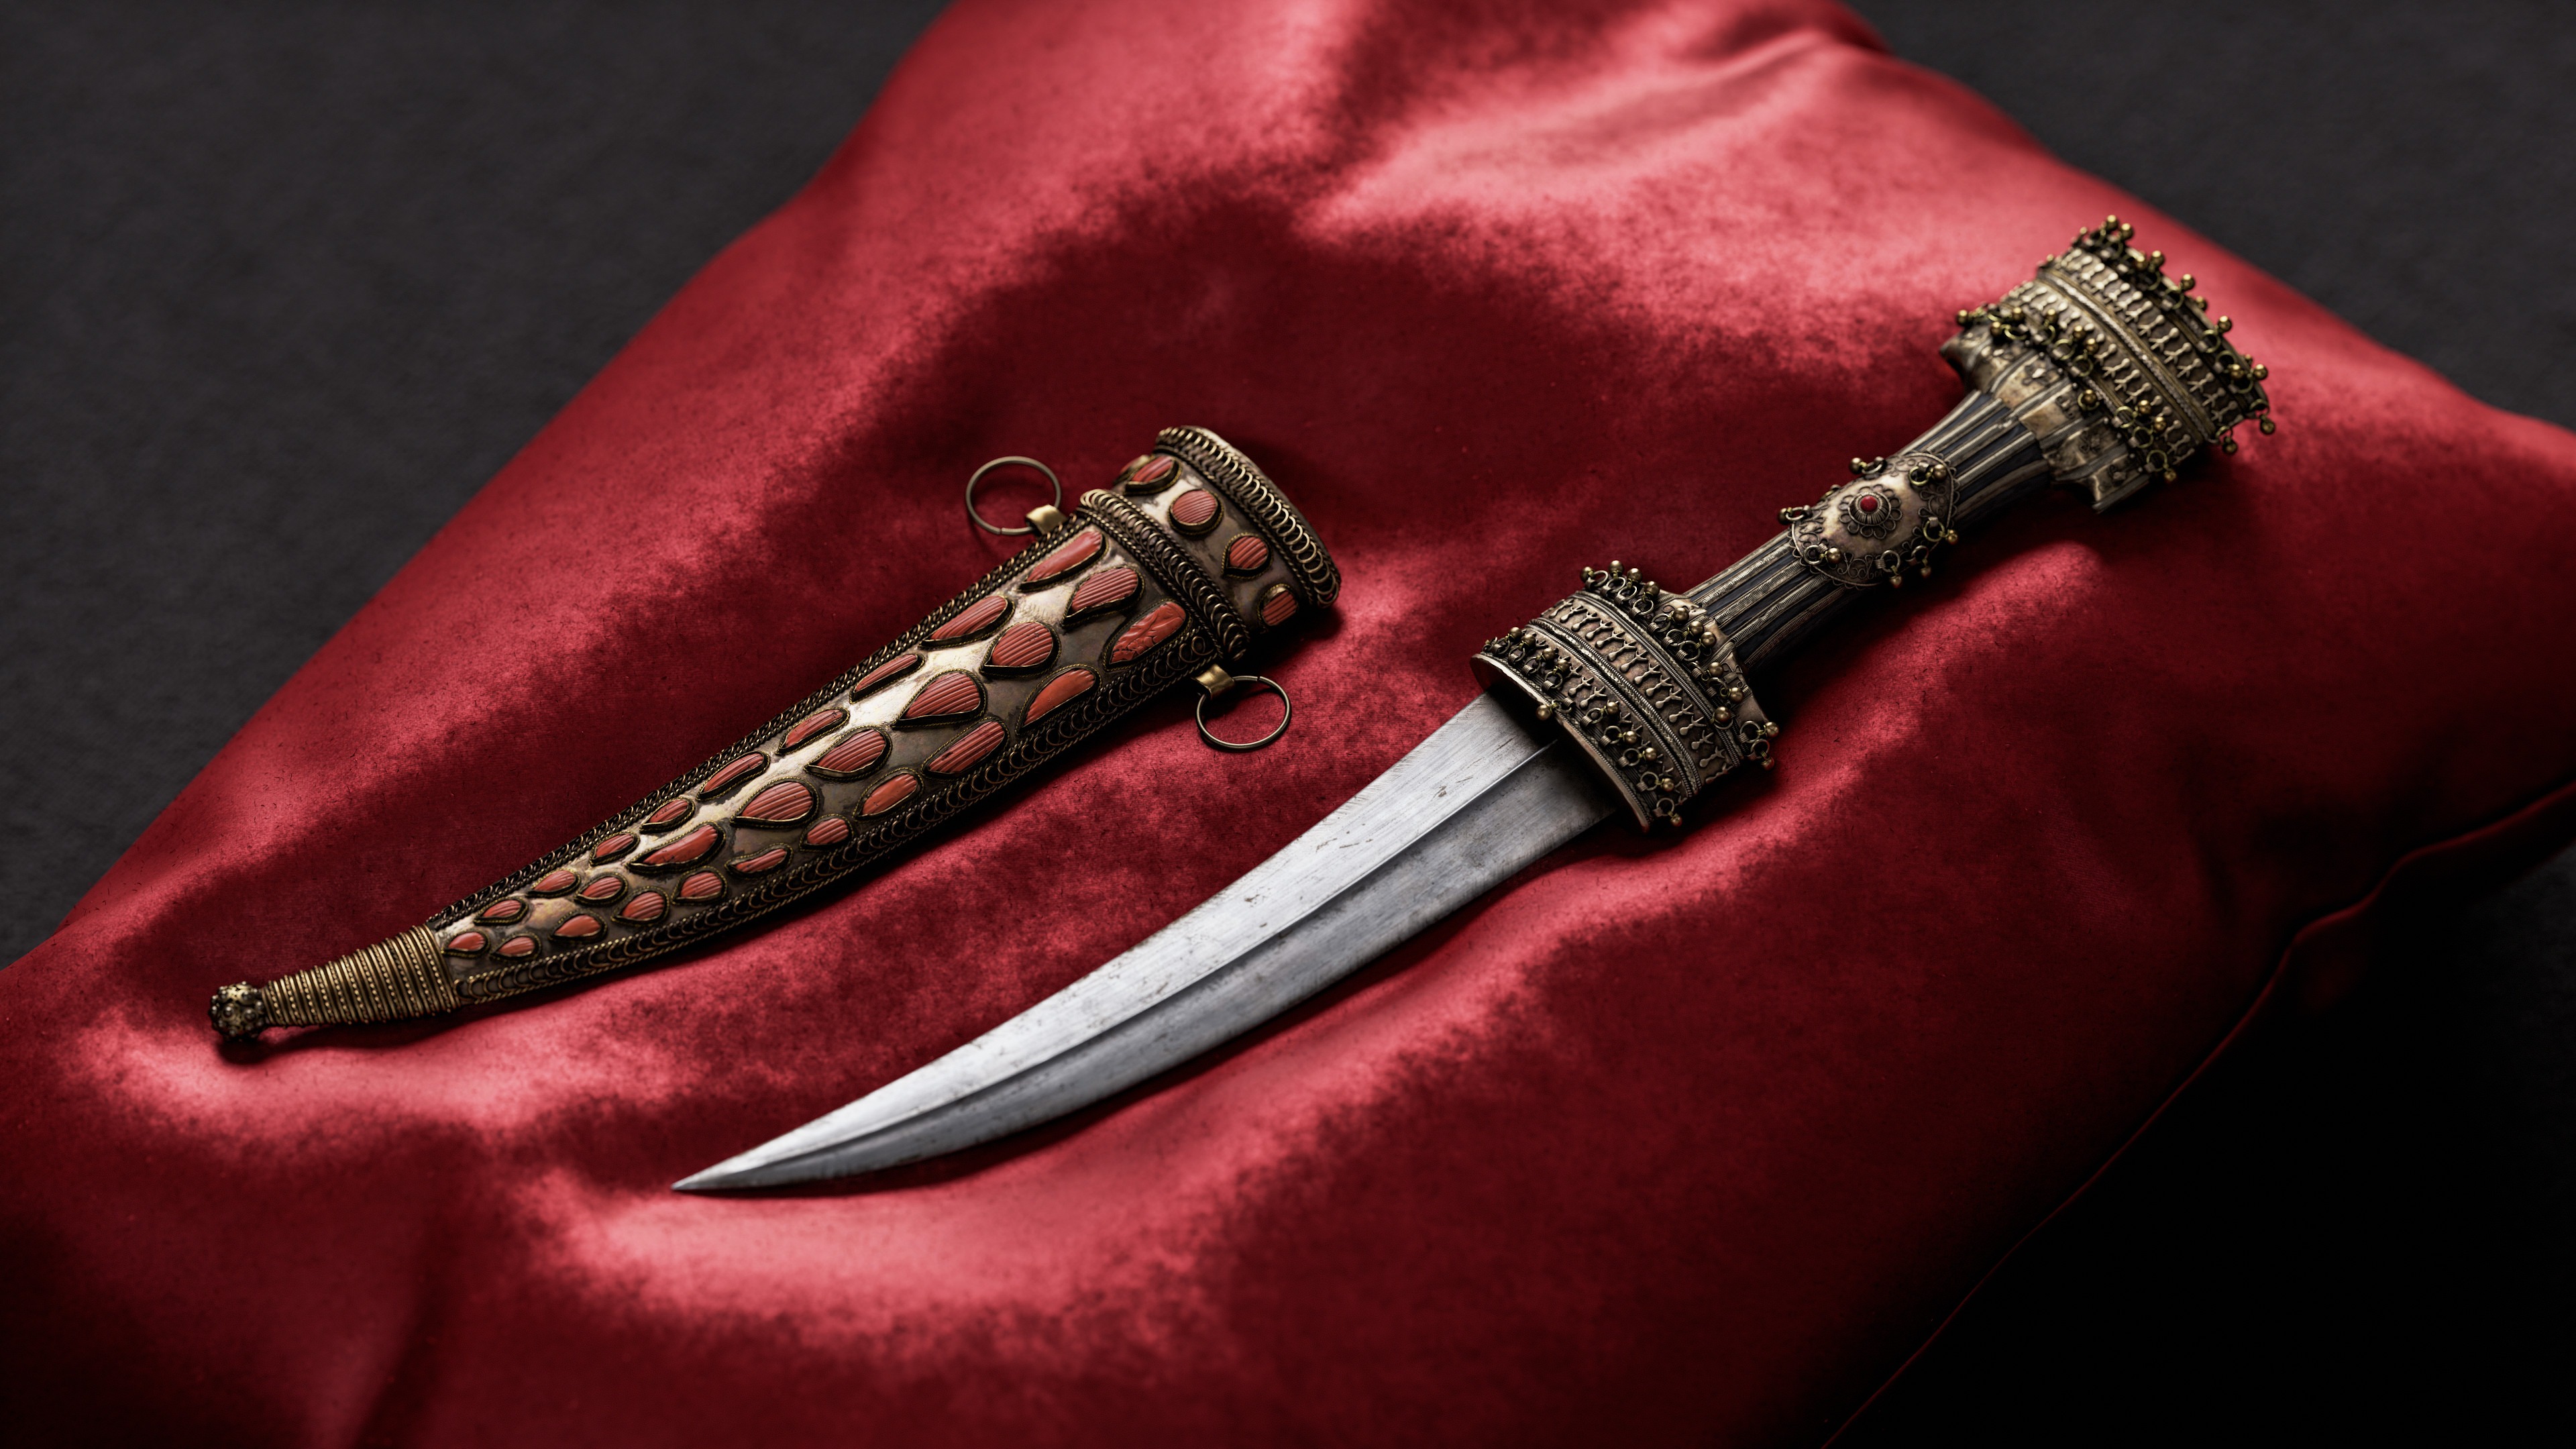
Jambiya Dagger

Introduction
Hello everyone, my name is Oleksandr Yavorskyi, and I started learning 3D more than seven years ago, the last three of which I have spent working in the industry.
In general, I create props, buildings and vegetation for game purposes.


Project & Goals
I have always been interested in the medieval period, so I wanted to add something related to it to my portfolio.
My main goal was to create a unique, realistic 3D model that would catch the eye. As this was a personal project, I did not set any restrictions in terms of polycount or texture size.


Tools
- Blender — modeling
- PureRef — reference board
- ZBrush — sculpting
- RizomUV — UV unwrapping
- Marmoset Toolbag — baking and rendering
- Substance Painter — texturing
- Topaz Gigapixel — upscaling references
- Photoshop — creating stencils and final color correction


References
To find good references, especially for old items, I use museum or auction websites.
In addition to references for the model itself, I looked for references that have the specific details I need for texturing, such as unique scratches or damage on metal, interesting patina, etc.
Later, you can extract a mask from these references and use it directly in texturing.

Modelling Workflow
The blocking stage was only to estimate the approximate size of the model with all its elements, so there’s no need to focus too much on it.
The same situation with the base shape of the handle, blade, and sheath: standard modeling by reference.
At this stage, I also worked on the dents/folds and places where the metal overlaps, so I can only sculpt the damage later.
The tricky part was creating the ornamentation.
Basically, it was all created using a single pipeline:
Creating a seamless pattern for the decoration, repeating it using the array modifier, and using the curve modifier with a previously created curve, so that this element takes the shape I need.


For easier manipulation of curves, I first extruded vertices with magnetic snapping to the faces of the handle, then added a subdivision surface modifier and converted this mesh into a curve.

This knife had several types of ornamentation, some of which were made entirely with modifiers, and some with the use of a seamless pattern.


For wrapping the sheaths, I used the same pipeline but with the addition of the Lattice modifier to bend the spiral in the direction I needed.

Creating ornamentation using modifiers greatly facilitated the work because I could make changes at each stage.
The next thing I would like to emphasize is the imperfections.
For example, the rings that hold the sheaths on the belt should not be perfectly round with even rings, but slightly deformed.
The same applies to the ornamentation on the handle, which is not perfectly even and round, because over time this item has been deformed by environmental factors, or was created that way from the outset due to inaccuracy.
Such small details add more realism and history and make the work more vivid.
High Poly
During the sculpting stage, I simply added damage to the edges, worked on dents and unevenness on the metal in some places, and added wood texture to the handle.
The surface of the stones was created using a simple default brush with a line stroke method.


Low Poly
I did the low poly manually on top of the high poly. It’s a melancholic process that simply takes time.
At this stage, I had already planned which elements I wanted to bake.
During the test bakes, I determined which details looked flat on the texture and needed to be highlighted in the geometry, and which could be left entirely on the texture.

UV & Baking
UV was split relative to the knife parts, resulting in a total of 8 texture sets to maintain the texel density I needed.
Baking was performed in Marmoset. I baked two AO maps: one with ignore groups for general renders and one without ignore groups for animation renders.
I also baked an ID map from the high poly to make it easier to create masks.


Texturing
I textured on UDIMs, which puts more strain on the system, but you don’t have to copy one material to different texture sets.

When texturing, you also need to understand the physical properties of the material you are working with. For example, the knife handle was made of brass and gold.
These are two different materials that change differently over time. Brass does not oxidize like iron; it does not rust, but is covered with a layer of patina, which has its own characteristic color.
Gold, in turn, does not oxidize at all; it can only wear out and tarnish.


The metal material roughly consisted of the base color, normal and height details on the metal, color variations, lightened edges, darkened cavities, and a layer of patina.
It is very important to make color variations.
It cannot be that the entire model is made from a single piece of metal that is all one color. Each detail is a separate element that needs to be highlighted.
Slightly changing the saturation, slightly changing the tone.
It may not be very noticeable at first, but in the end, it will give the desired result.
In open areas, as a color variation, I used a regular image with noise, to which I applied color and twisted the saturation with filters to create a gradient noise, then twisted the opacity so that this layer was barely visible.

Masks
Creating the right mask is perhaps the most important stage in texturing. You may have a well-made metal layer and a beautiful patina layer, but if the mask that blends them is poor, it will ruin the work.
For my masks, I use a dirt generator as a base and then paint over or erase the mask with different grunge and alphas using projection stencils. By using different overlay methods, you can achieve the desired result.

I also created masks from references in Photoshop using the color range tool to create a black and white mask.
This method is even better because it is much more difficult to repeat the mask manually. But such a mask still needs to be edited with other grunges.

Color Correction
At the end of texturing, I add a color correction filter with a dirt generator in the mask for some extra color variation and add a sharpen filter to add a little edginess to the texture.
Animation
The animation was created in Blender using Rigid Body simulation.
To do this, I divided the model into separate elements and assigned properties to each rigid body: the handle had a passive type, and the rest of the moving parts had an active type. For the simulation to work correctly, the elements must not intersect with each other, and all elements must have a scale of 1 and a rotation of 0.
Also, in my case, for the simulation to work correctly, I increased the model by 100 and applied scale.
When I was satisfied with the simulation result, I transformed the physical simulation into animation keyframes, after which I exported the entire model to an Alembic file (due to the number of objects) for rendering in Marmoset.

Render
I rendered in Marmoset Toolbag. The renders were in 4K with the following settings.

For lighting, I used the same HDRI map imported from Substance Painter.

The final color correction was done in Photoshop using the Camera Raw filter.
Conclusion
Well, that’s all. Thank you for you reading! I hope you enjoyed.
Read more articles
You might also like these articles.