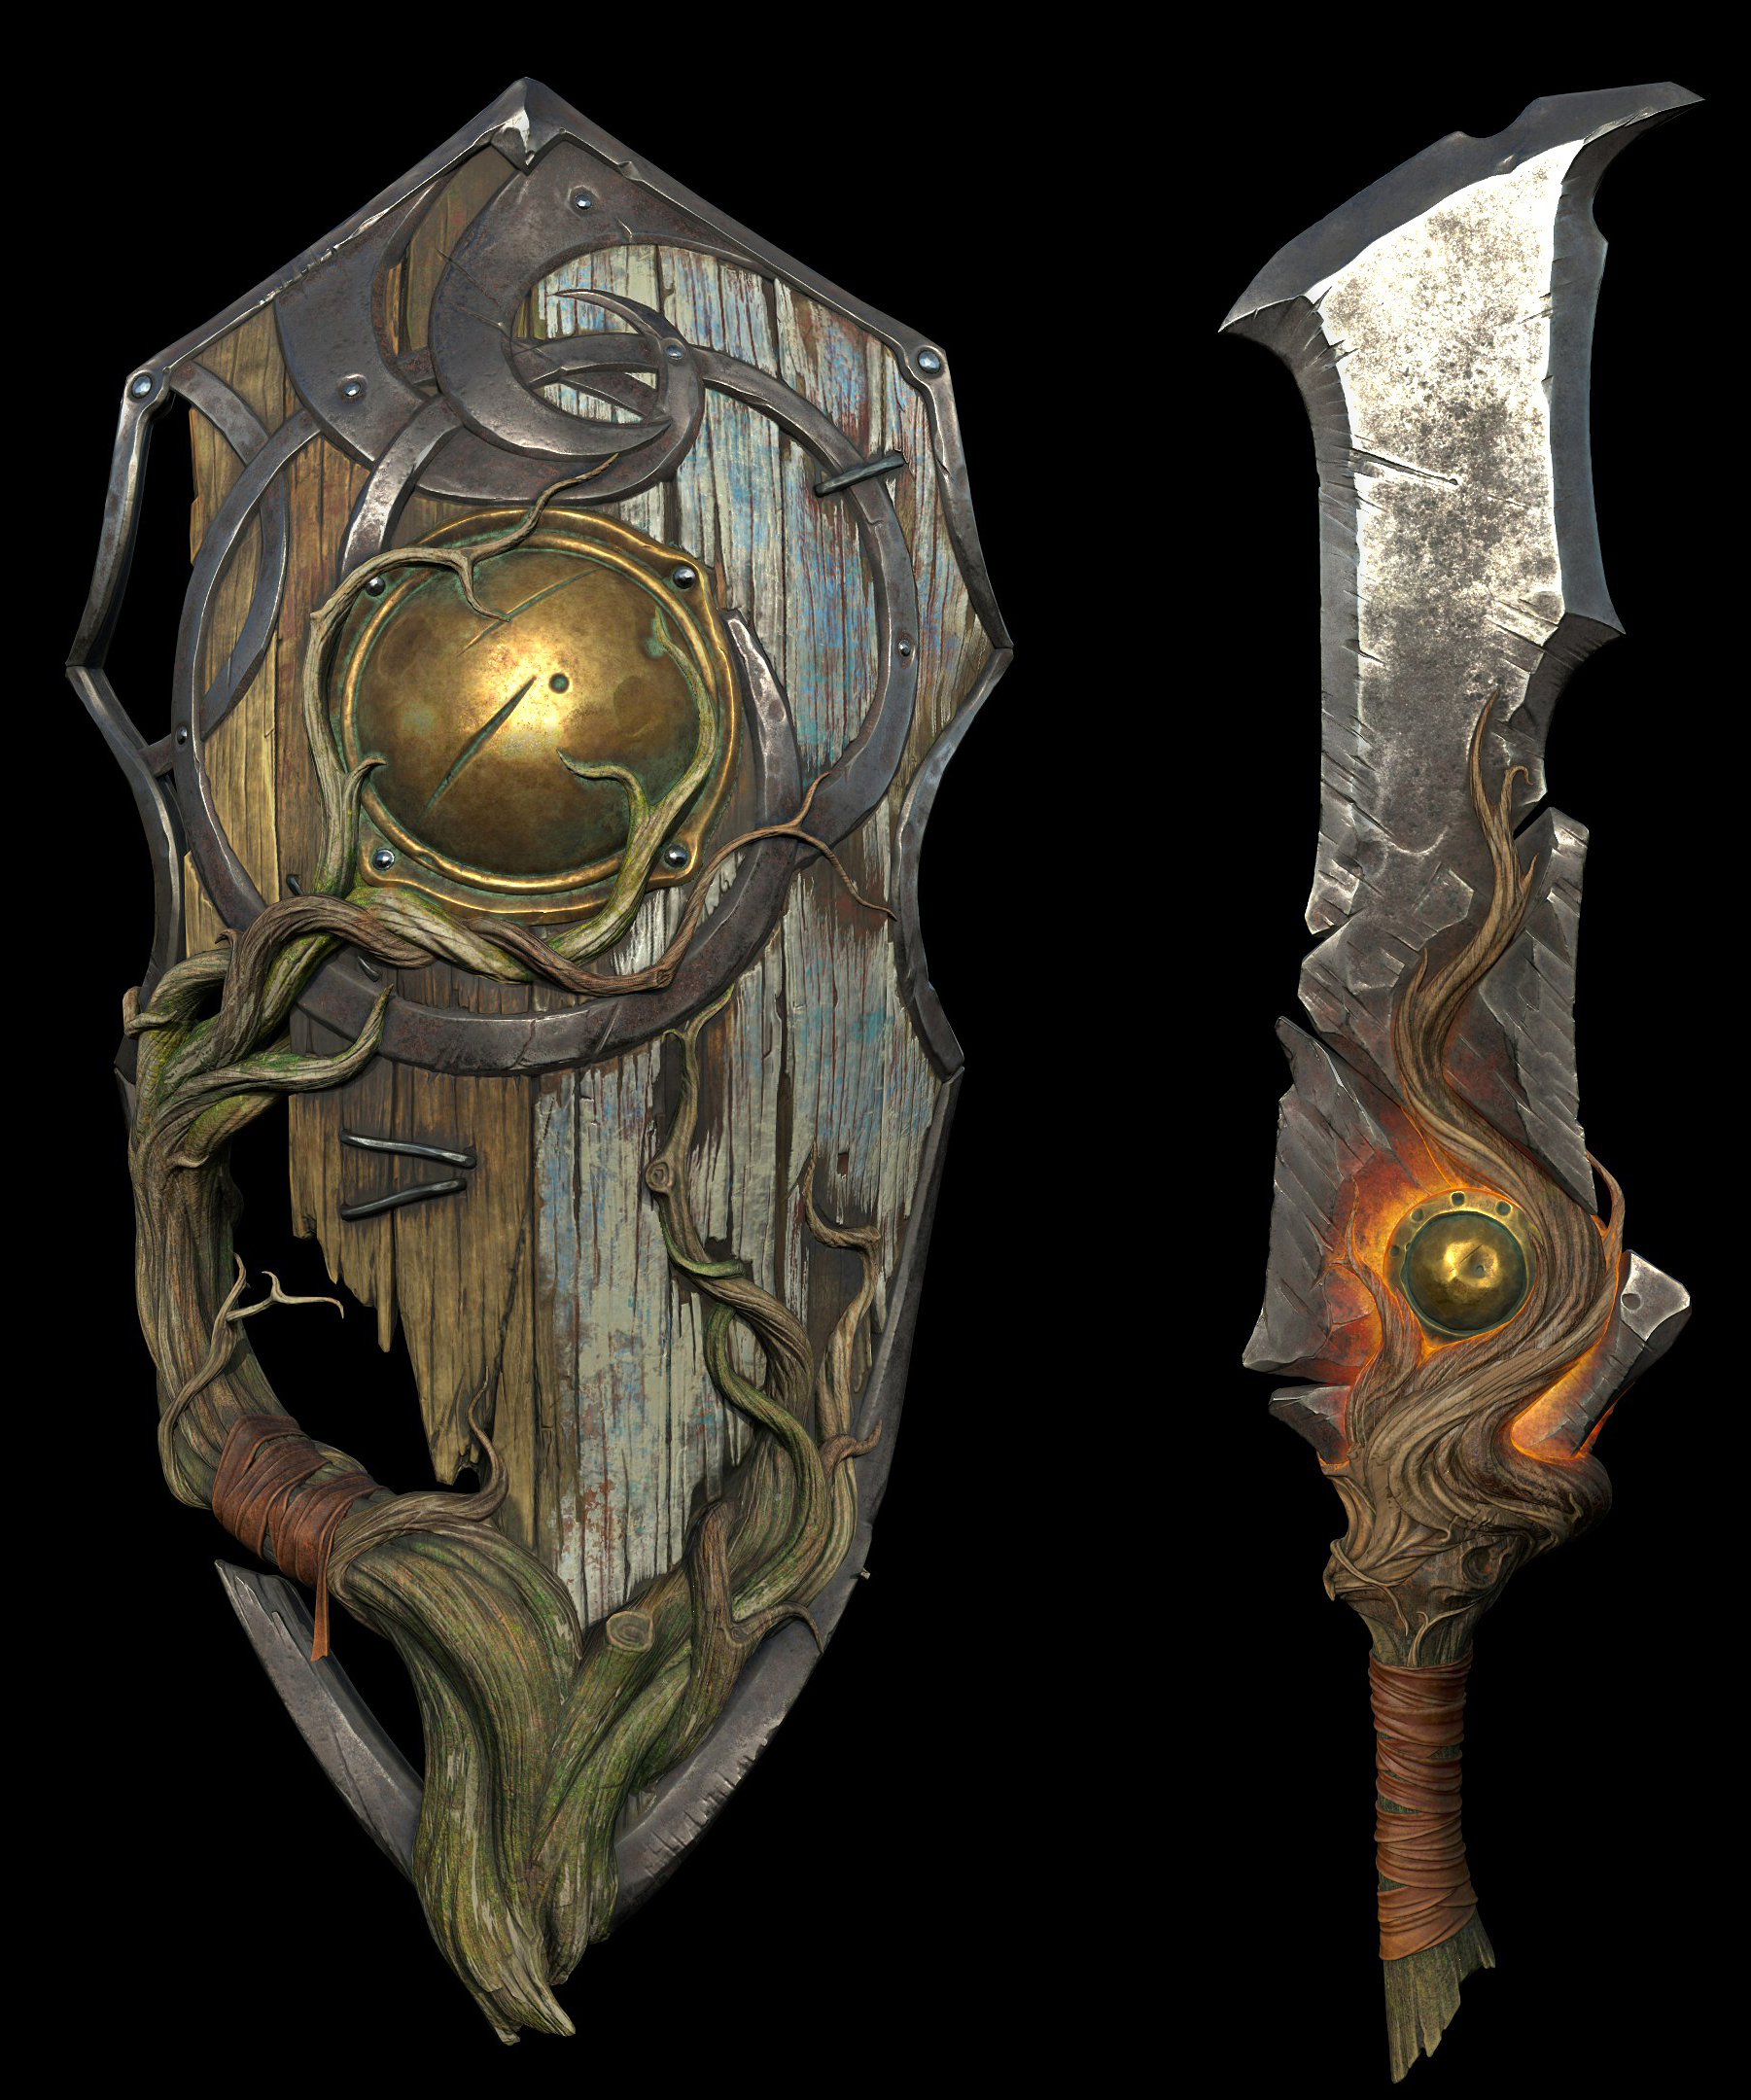
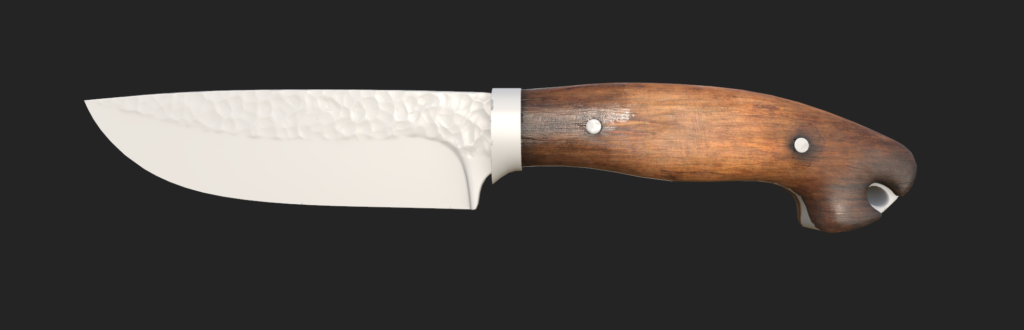
Handmade Knife

Introduction
Hello my name is Levochko Boghdan, i'm a Strong Junior 3D Artist from Lviv, Ukraine.
I have been doing 3D for more than 3 years, I learned everything myself and achieved excellent results, I create 3D models of various complexity.
Inspiration & Goals
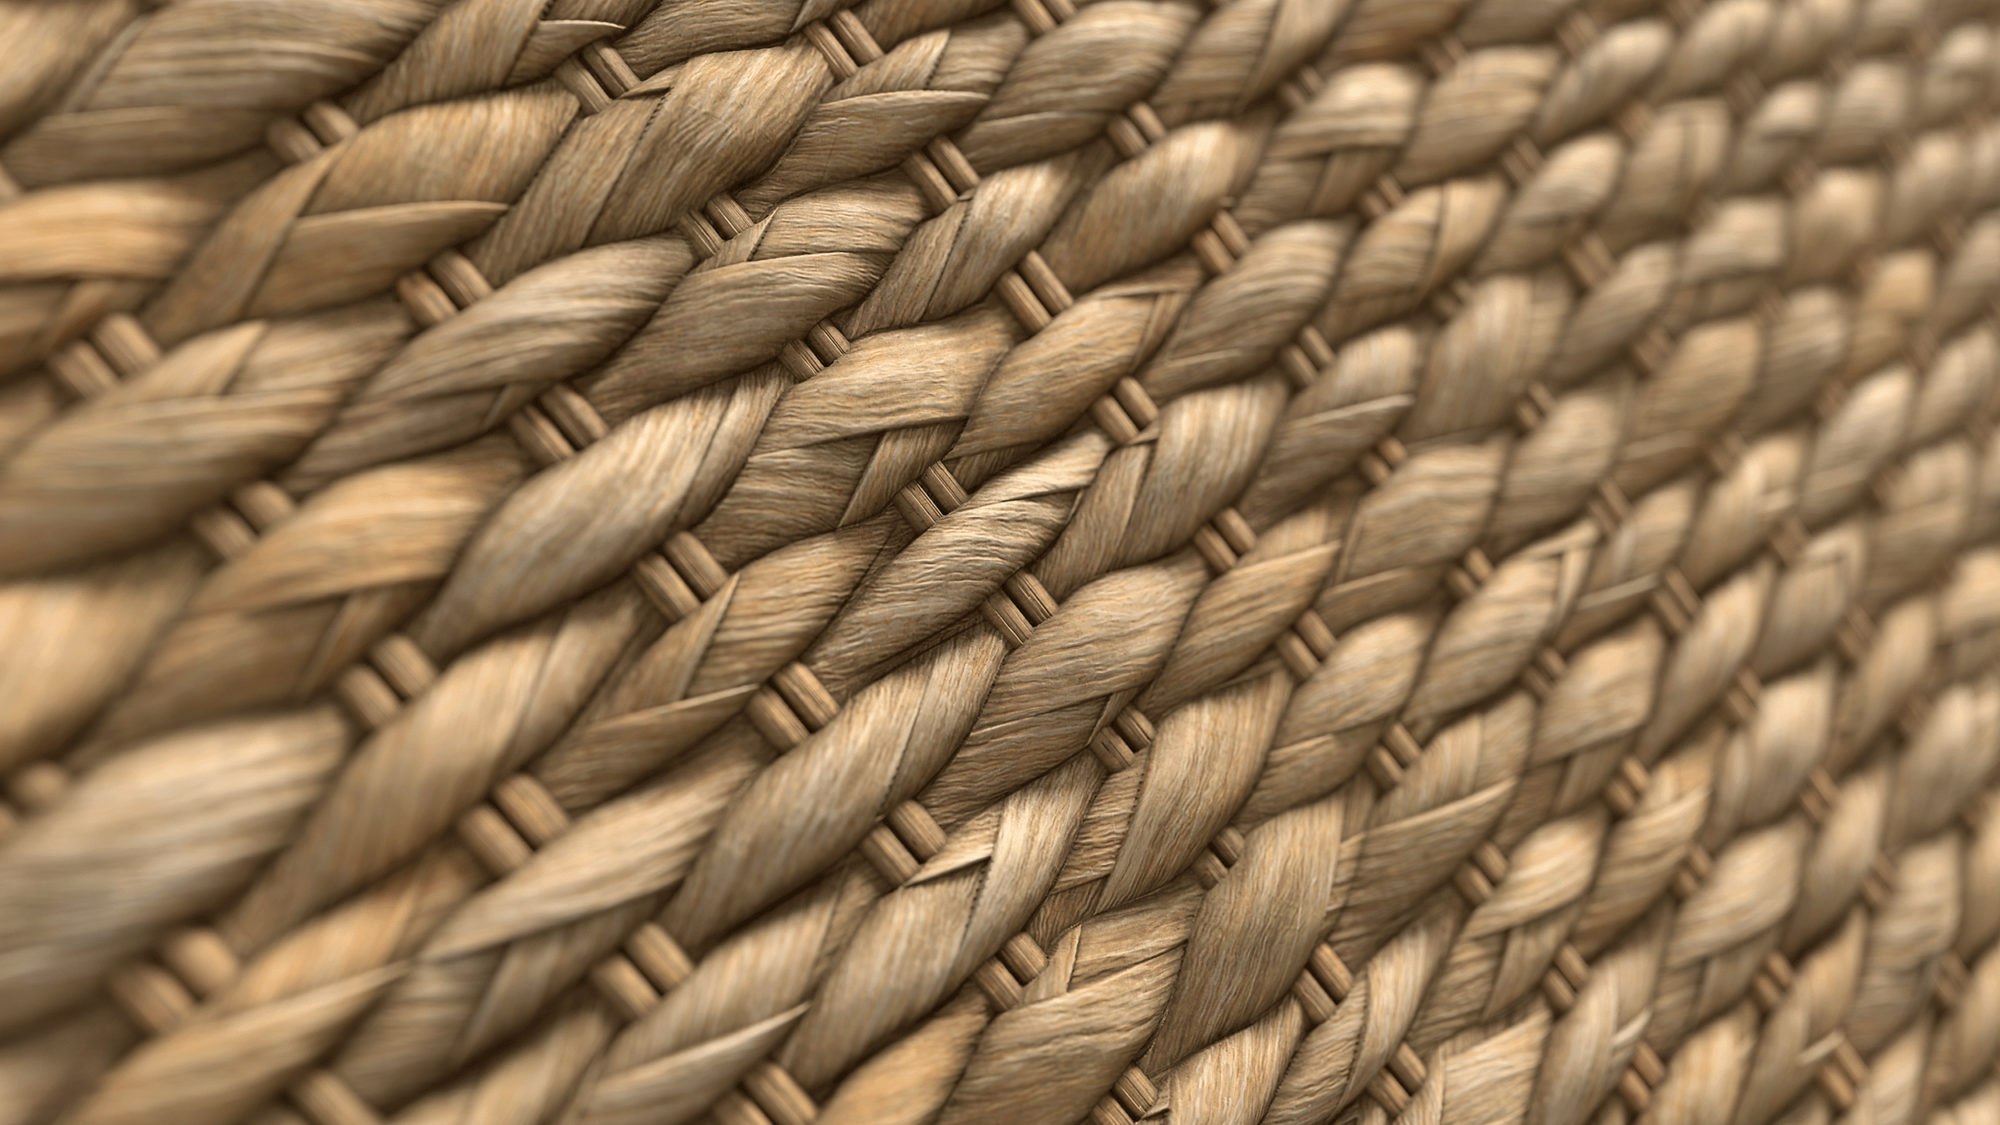
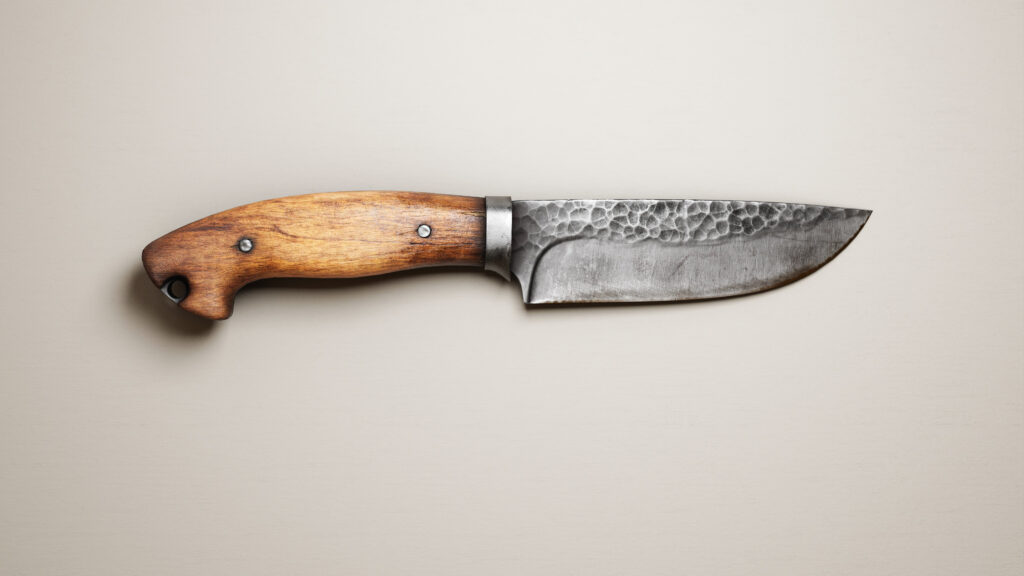
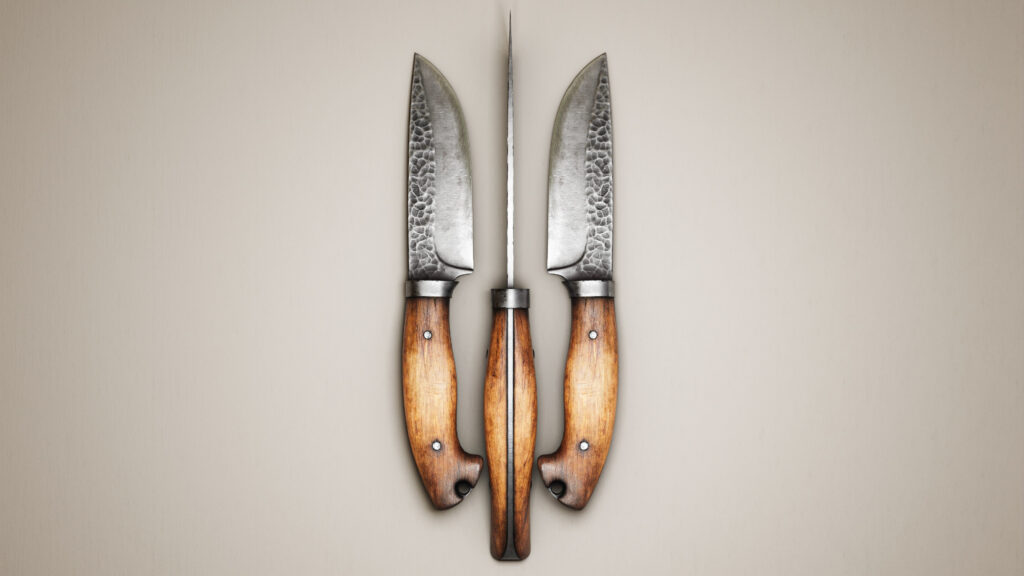
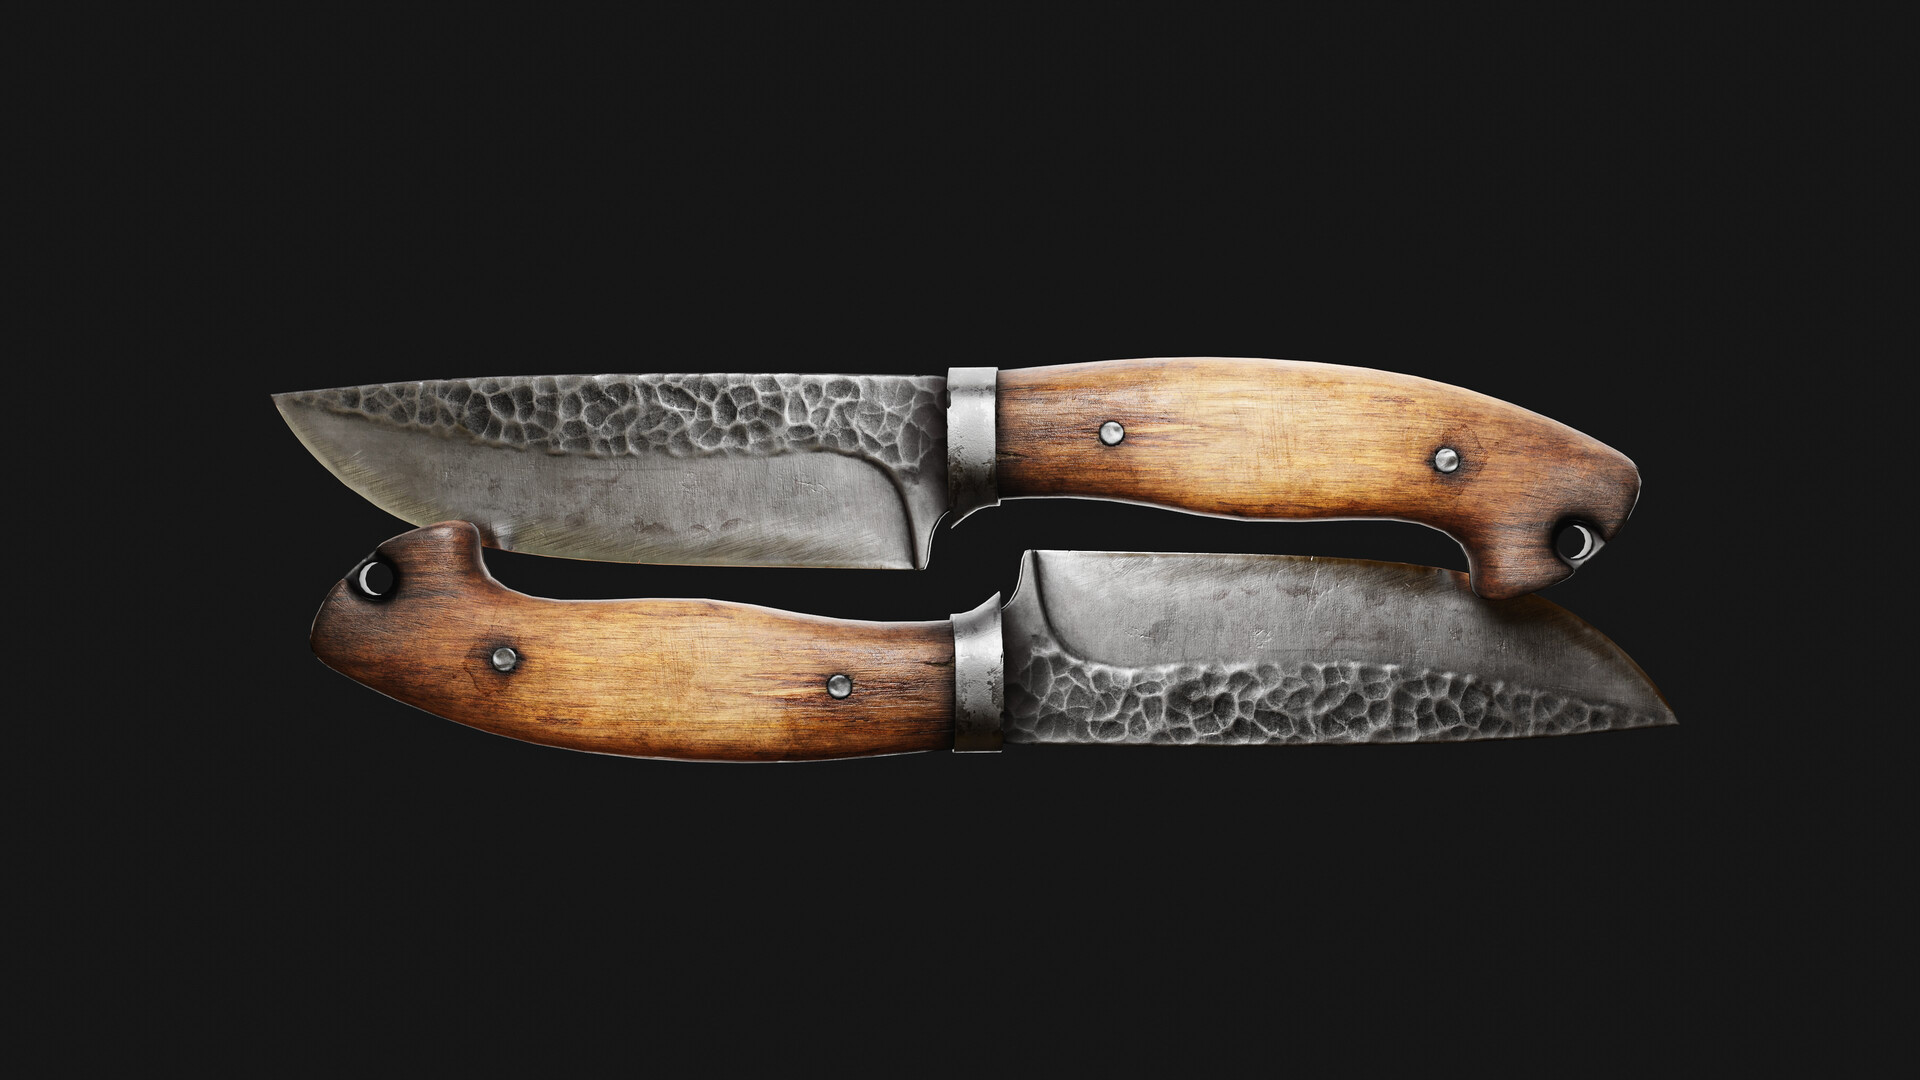
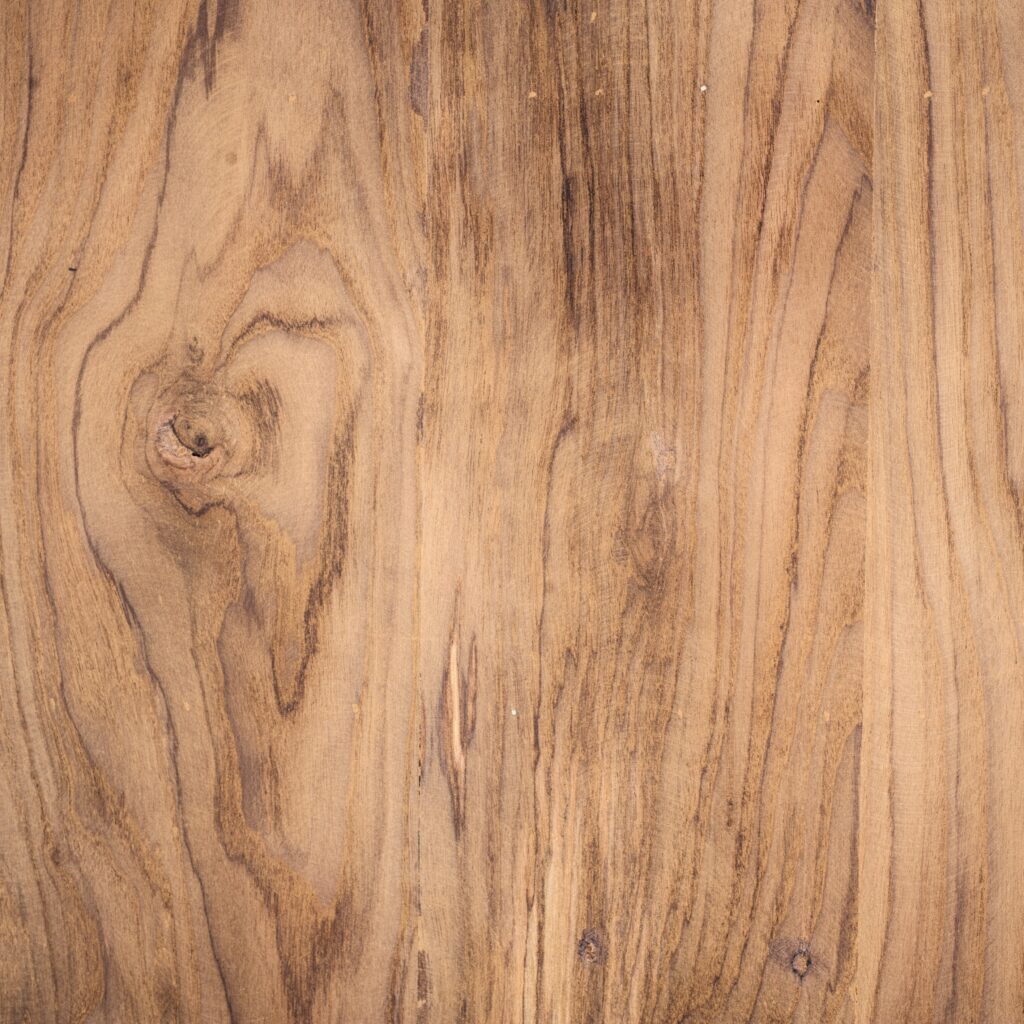
The goal of my project was to create a beautiful wood texture. I spent a considerable amount of time deliberating on which object to create in 3D. This decision-making process took longer than actually creating the object itself, including textures and renders.
Overall, I crafted various scenes in Blender, dedicating minimal time to other programs such as ZBrush, Substance Painter, and Marmoset. Thanks to these software tools, I achieved significant results and success in my field.
Software
- Blender
- ZBrush
- Substance Painter
- Marmoset
References
For me, sourcing references didn’t take much time as I was inspired by wood textures from other 3D artists on ArtStation.
To be honest, I had few references; I selected a few to create the basic shapes for the blade, handle, and hilt. Essentially, most of the wood textures were imagined rather than directly referenced.
Blockout
I created the blockout in Blender, which didn’t take much time. All the shapes were very simple, ones that I believe anyone could create.
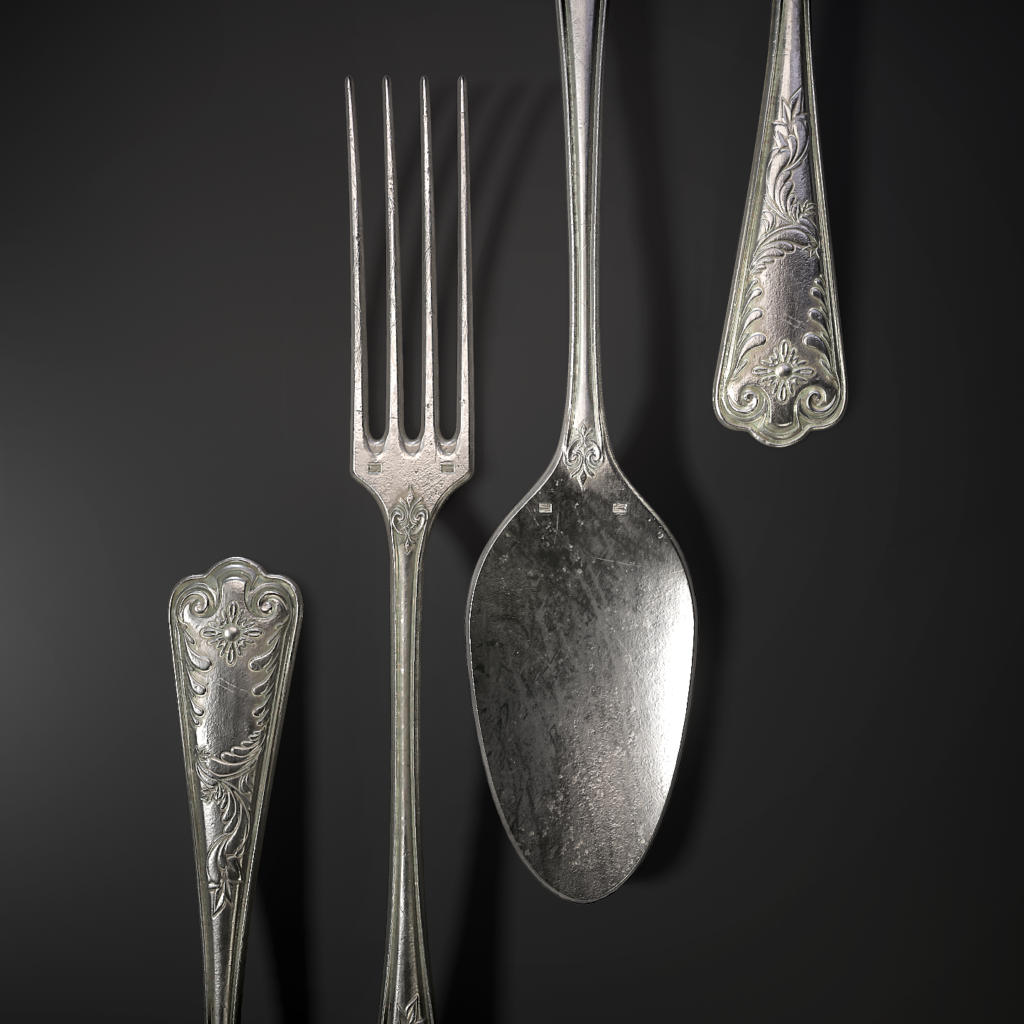
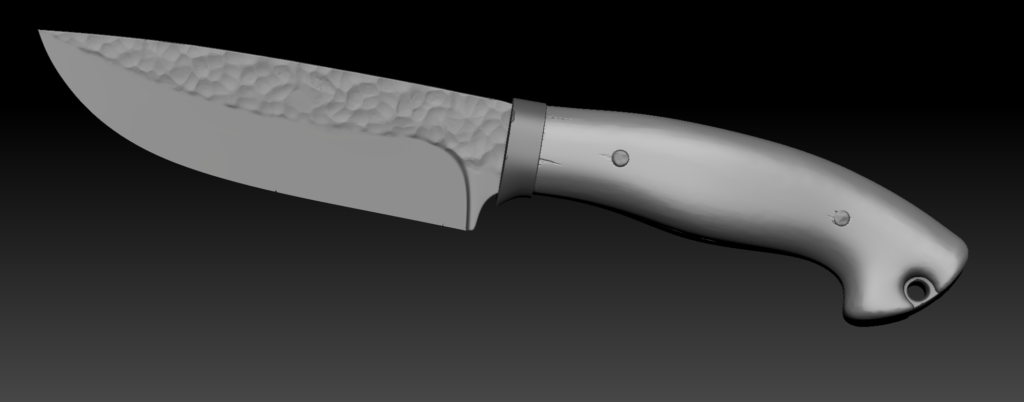
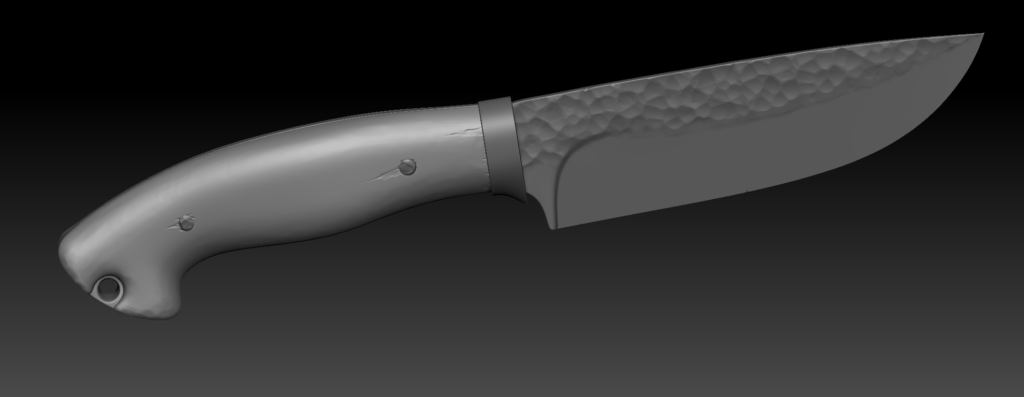
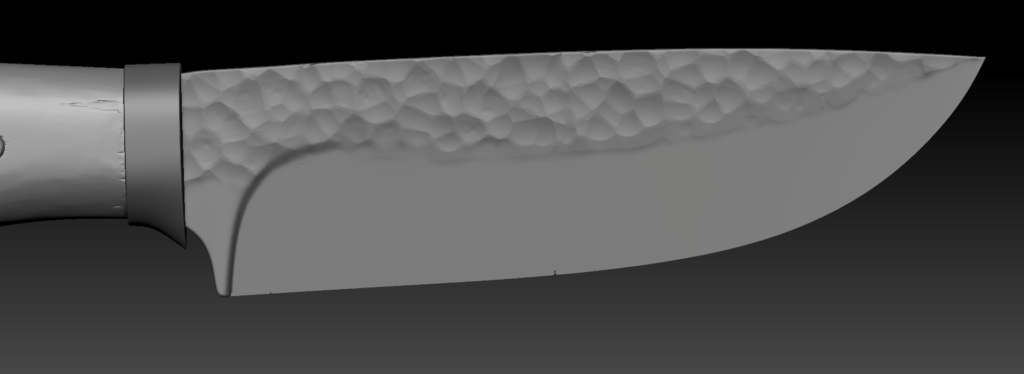
High-poly
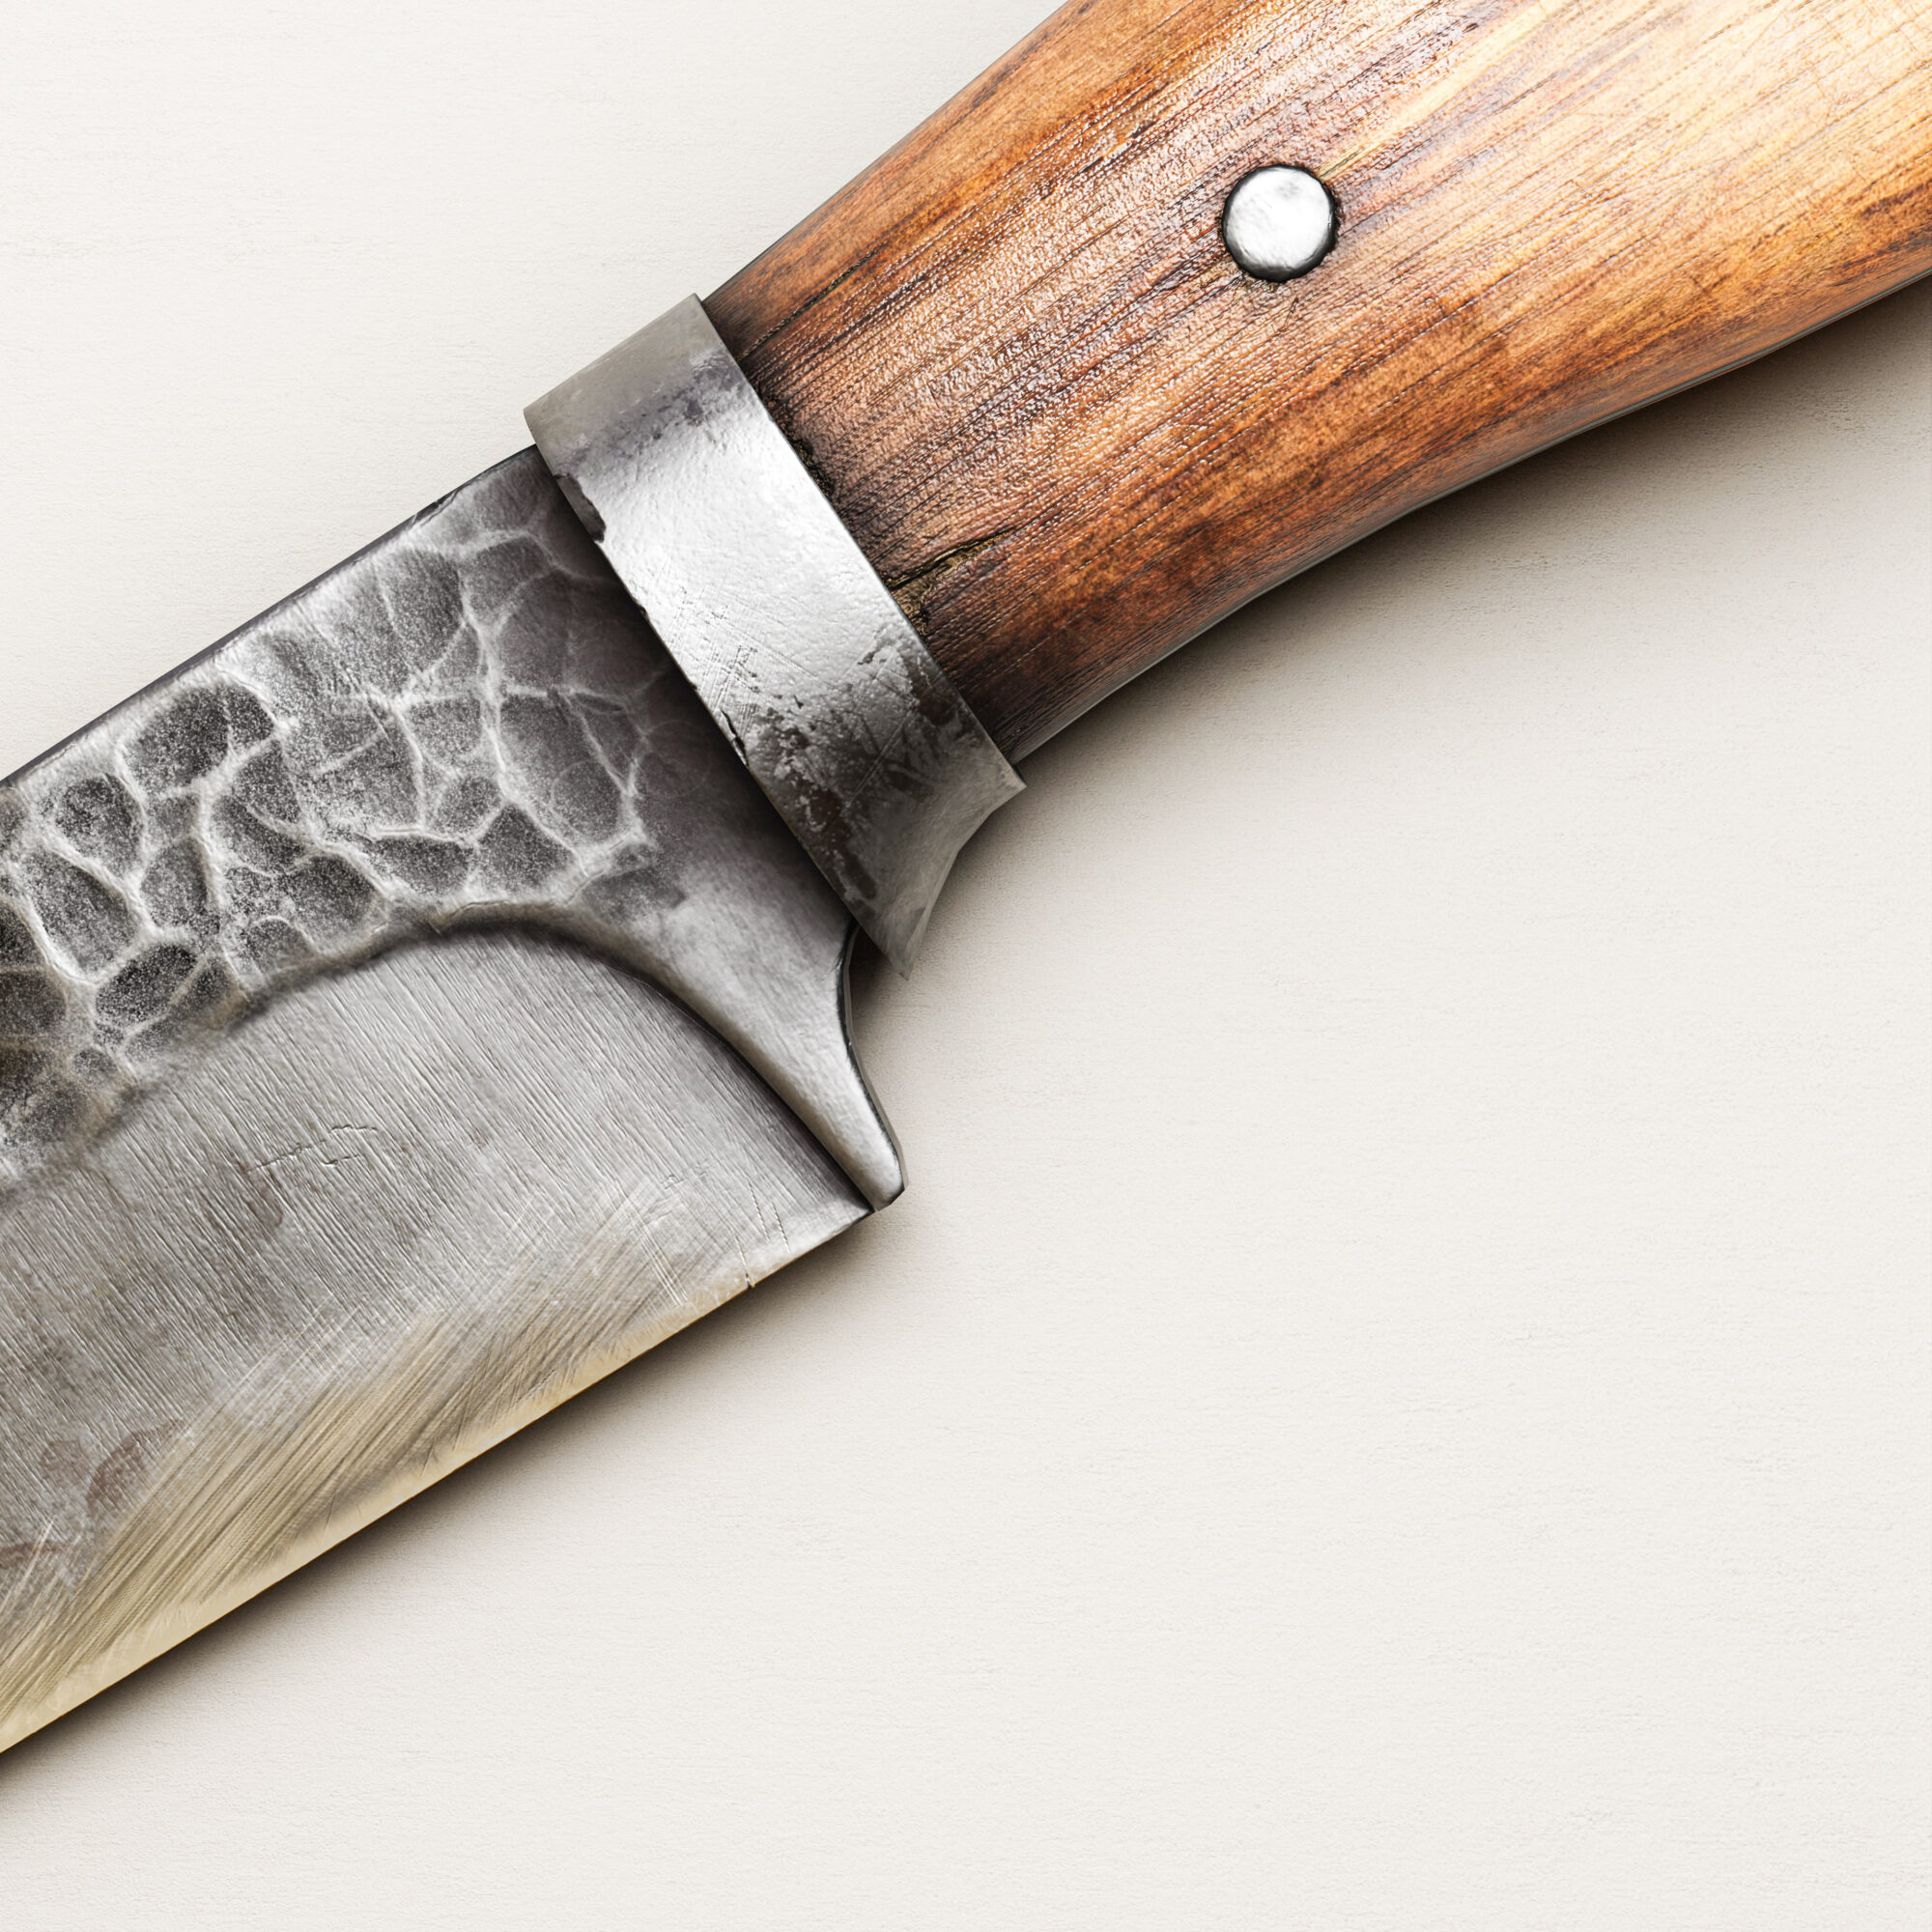
The high-polygon model was created in ZBrush. Overall, this knife was supposed to look well-maintained and not very old. I added a few chips using the Morph brush; creating the wood wasn’t very difficult.
However, the blade was trickier.
To achieve a forged effect, I had to mask the area for the forged texture. I used the LayeredPattern brush and TrimDynamic for this purpose.
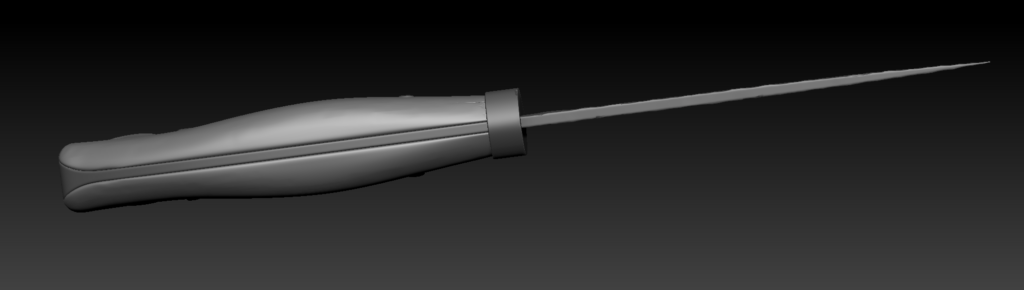
Mid-poly
I didn’t see the need to create an optimized mesh for the model.
I made the minimum number of polygons for it, but I didn’t bother making the mesh aesthetically pleasing.
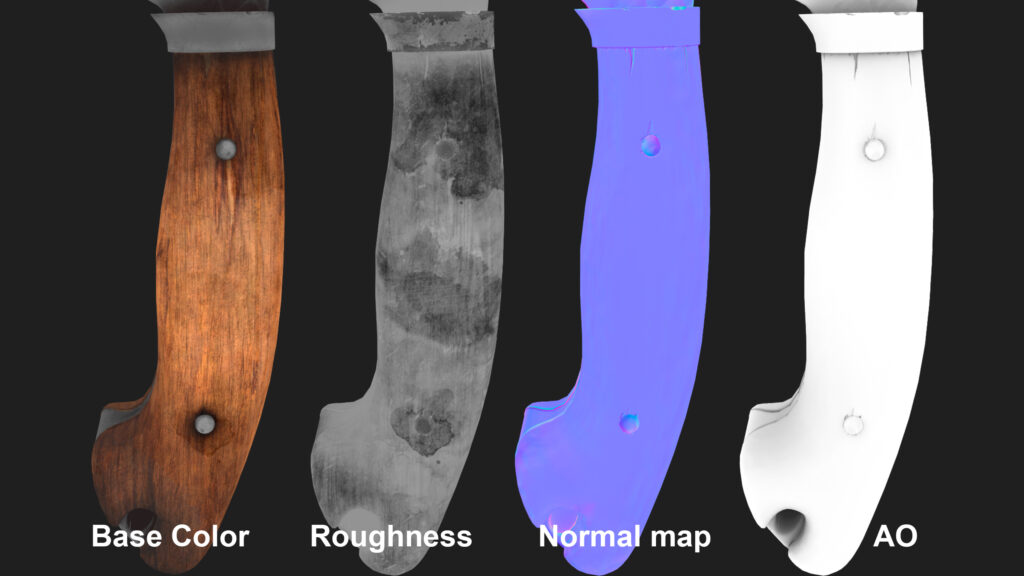
UV & Baking
I created the UV unwrap in Blender, and it was fairly simple.
I baked the textures in Marmoset at 4K resolution, including the normal map, AO (ambient occlusion), curvature, thickness, and height maps.
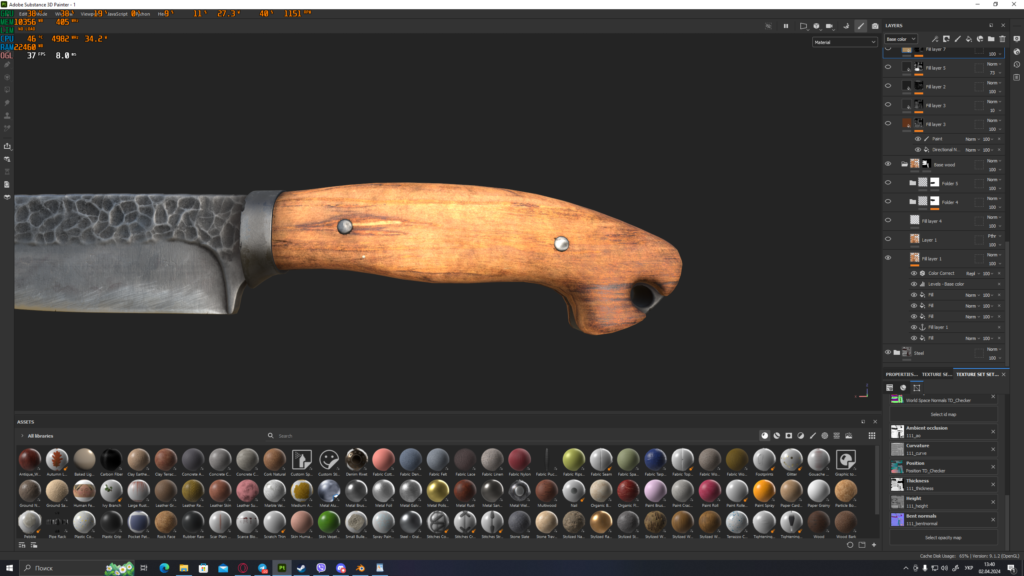
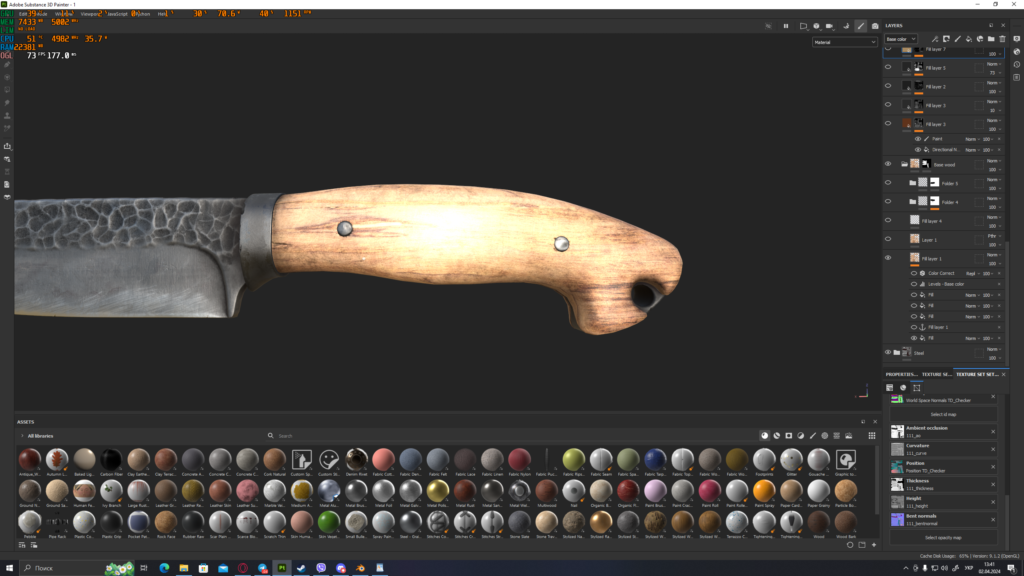
Texturing
Texturing is the most interesting part of creating a 3D model. In one day, I created a wood texture, basing it on a basic photograph. I applied a photograph to the handle, then extracted roughness and height information using the Anchor point.
Additionally, I adjusted the color levels and applied a Color Correct filter. To provide a clearer understanding of how this works, I included video and photo files.
I learned these cool techniques from tutorials by MykhailykArt, as well as from their Discord channel, where many professional 3D artists shared their knowledge to help me create beautiful textures.

Lighting & Rendering
I create all my renders in Blender. I’ve been practicing with lighting and scenes in this program for three years. While many prefer to render in Marmoset, I prefer Blender. To create beautiful renders, I used a free HDRI map from the BlenderKit add-on.
I utilize HDRI to add subtle color tones that enhance realism, and they also produce reflections on the blade, which looks incredible. For lighting, I used a single area light source.
Conclusion
I want to thank the Games Artist Team for featuring my work for critique. I hope viewers of this work can gain insights into texture creation for themselves.
I am also motivated to create future 3D models and textures.
I continually evolve and advise everyone to be inspired by great 3D artists and strive to be on par with them.
Thank you all for your attention.
Sincerely,
Bohdan.
Read more articles
You might also like these articles.