Drift
Introduction
Hello, everyone! My name is Sana Almusalli Alawadhi, and I am an Emirati Character Artist. I have recently completed my studies at Think Tank Training Centre.
Project
In this presentation, I will be showcasing some breakdowns of my latest project, which was created for my final assignment during the Mentorship term.
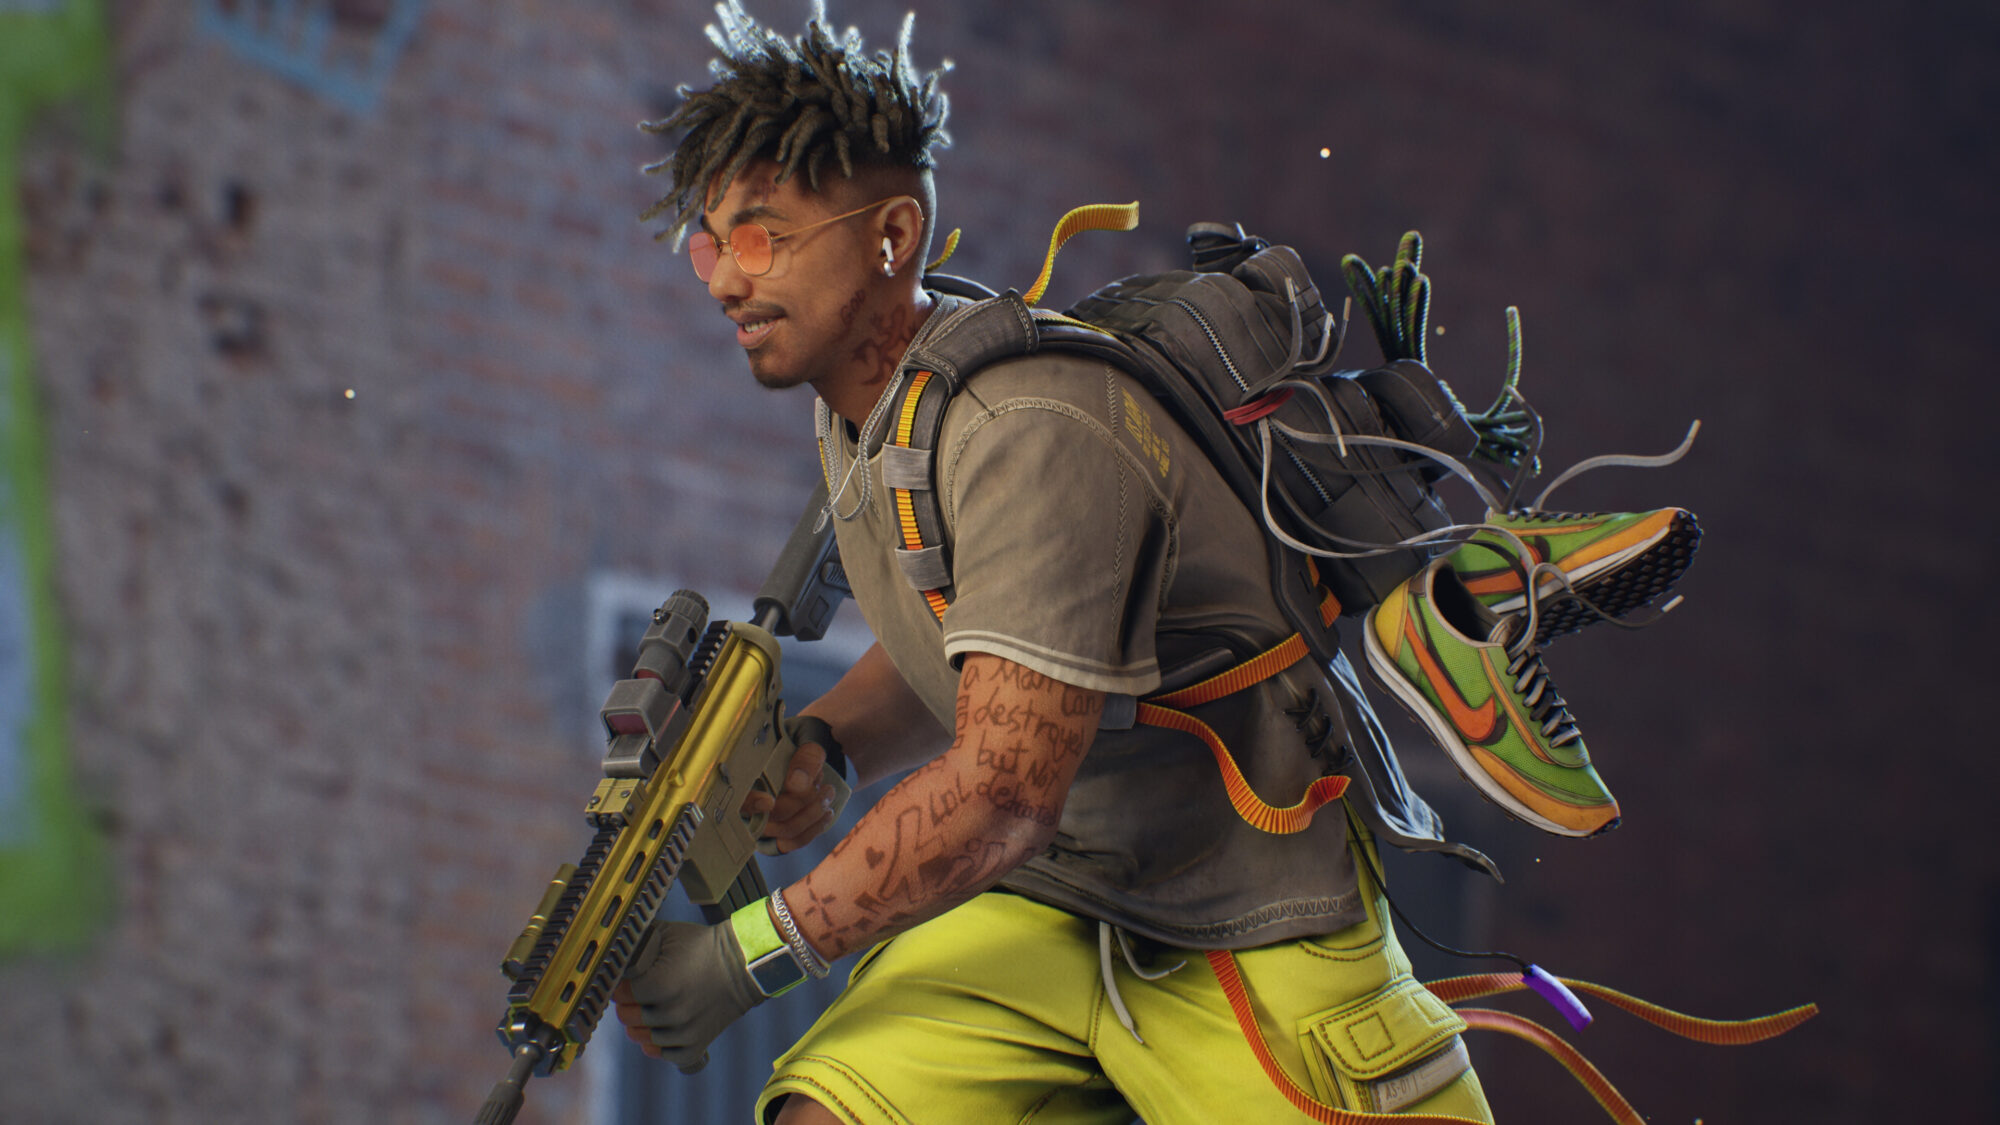
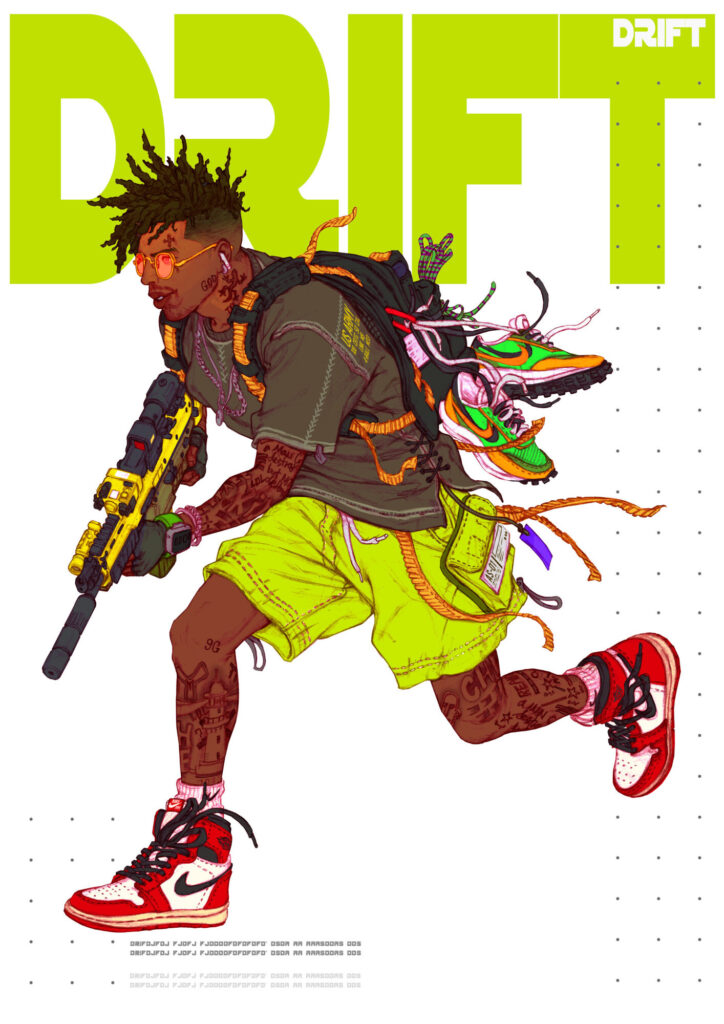
Our task was to transform a concept art into a finalized 3D character.
For this project, I selected Caboro’s concept from his “Team Drift” project and collaborated closely with my mentor, Denis Melenets, who provided invaluable assistance throughout the project.
Software
- Zbrush
- Blender
- Marvelous Designer
- Maya
- Rizom UV
- Substance Painter
- Unreal Engine 5
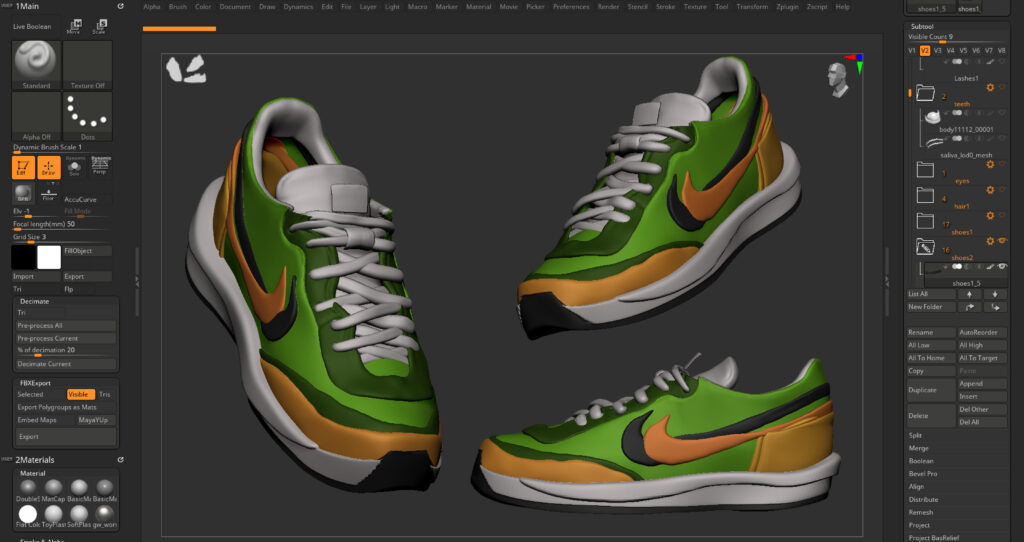
References
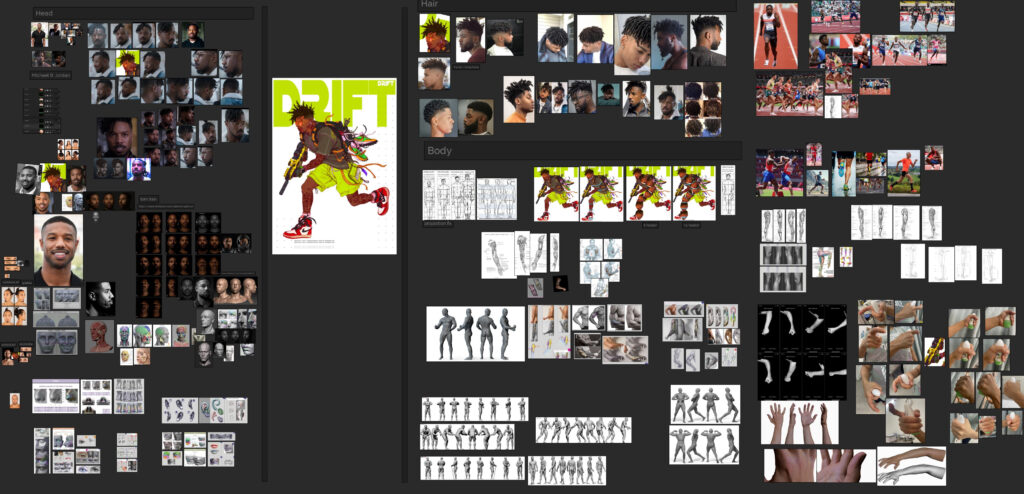
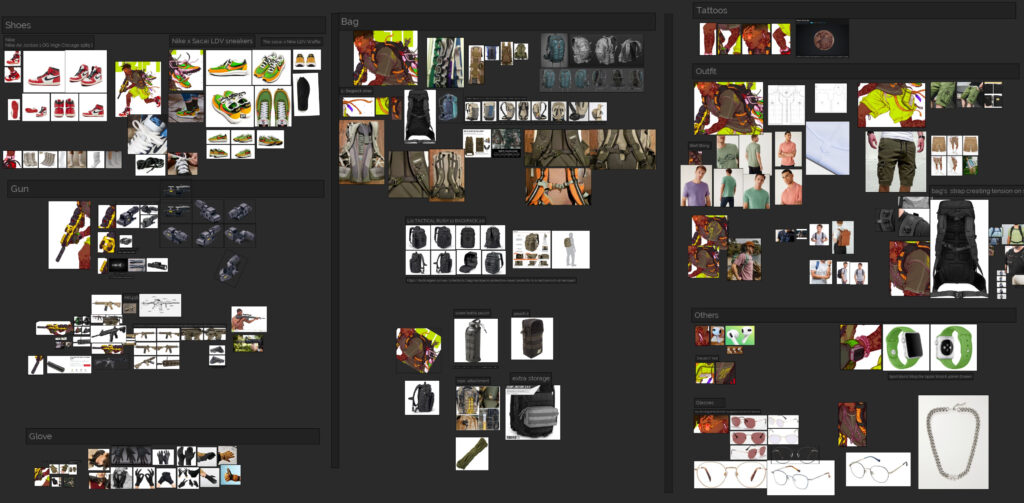
At the project’s outset, I collected references for every object present in the concept art.
These references primarily aided me in modeling, as I preferred to gather more detailed references for texturing, rendering, and mood as the project progressed.
Head & Body
I began working on the head and body using a base mesh from MetaHuman for the body and a 3DScanStore mesh for the head. I then aimed to establish the head’s proportion relative to the body to ensure the character’s height aligns with the concept.
The sizes of the head and body were adjusted to better match the concept.
For the head, I referenced Michael B. Jordan, as I found his features resembled those of the character in the concept.
The model underwent numerous variations and adjustments throughout the project, eventually closely resembling my reference.
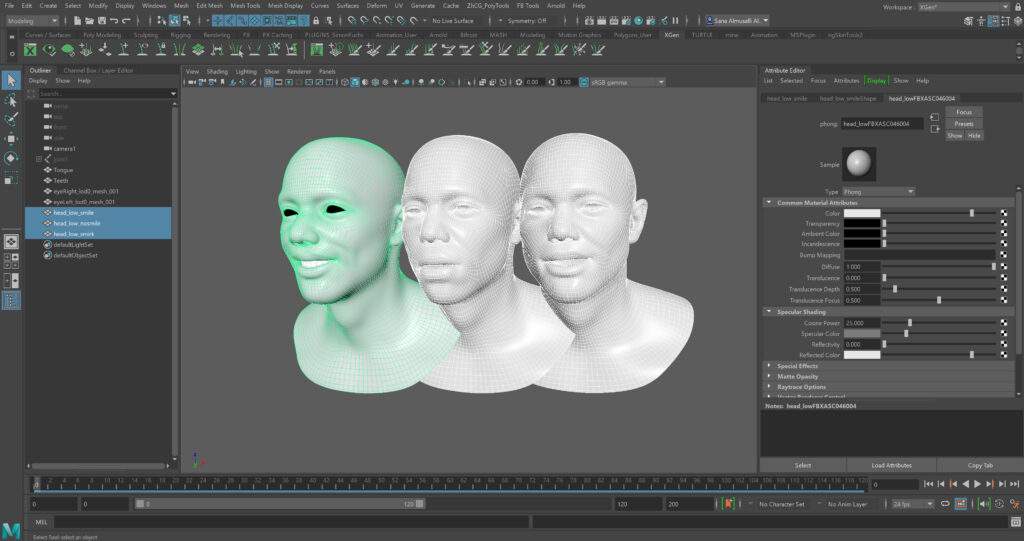
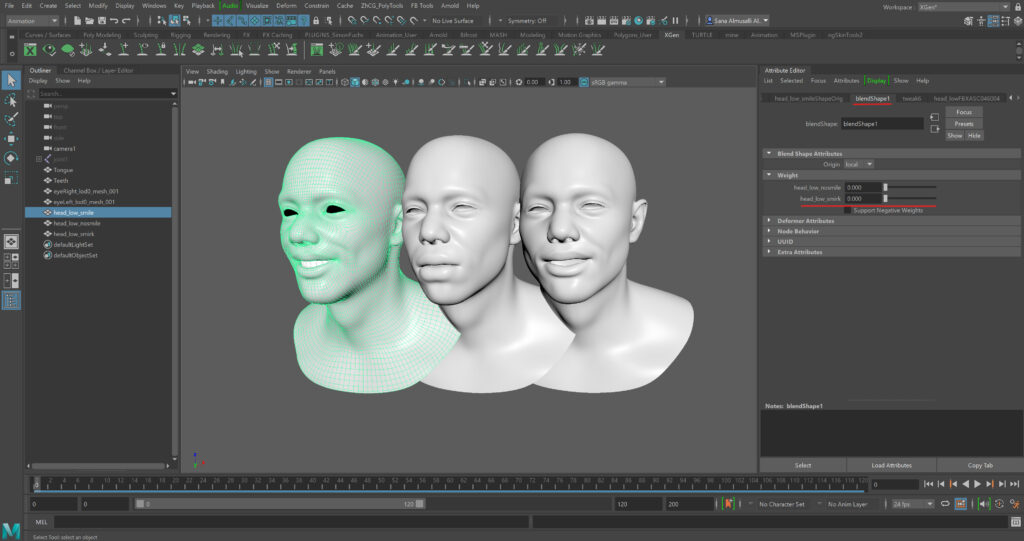
I also created several different expressions – a smiling expression, a blank expression, and a smirk – to showcase in the final renders.
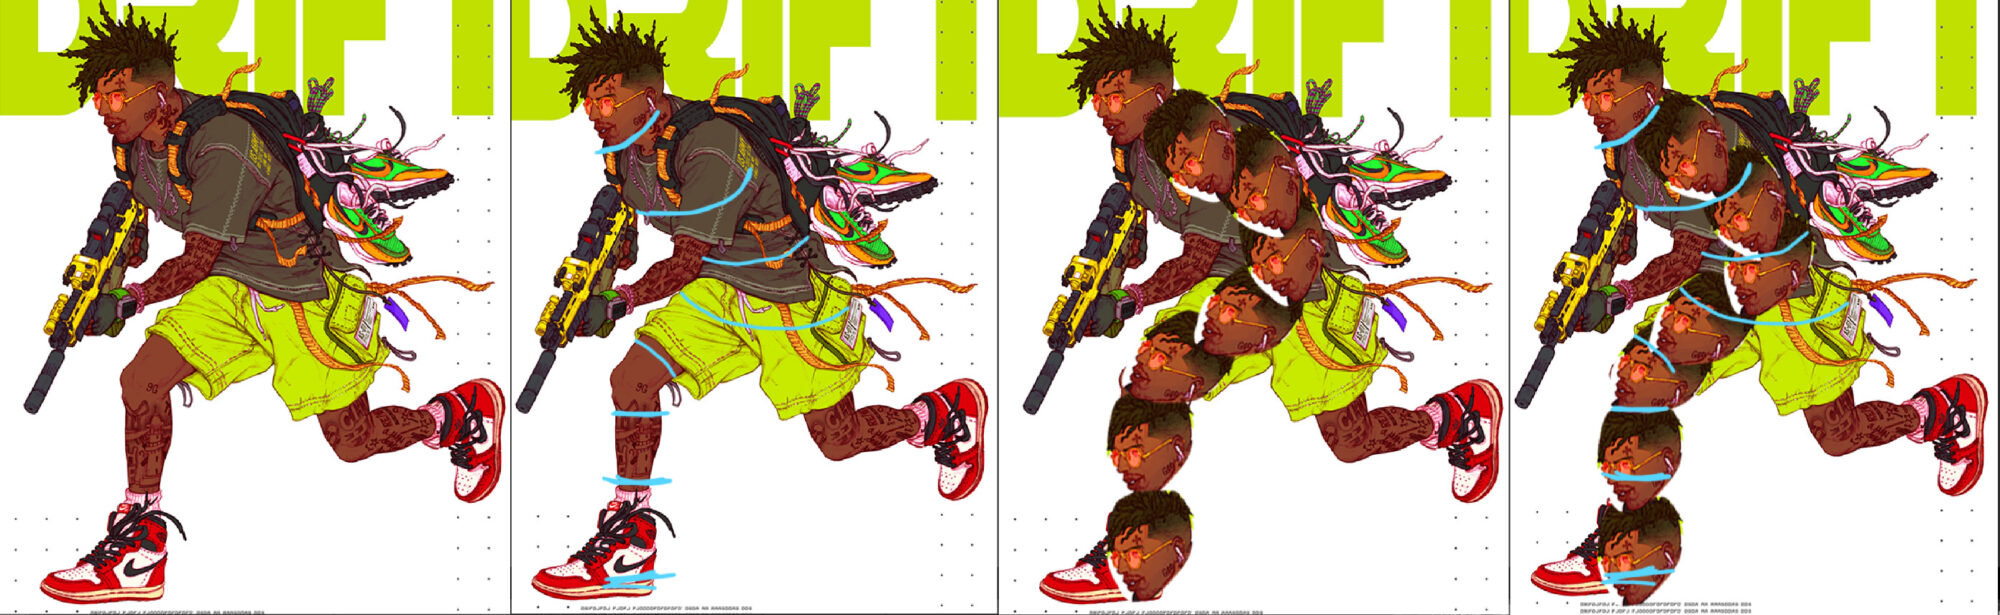
Midway through the project, we decided to pose the character’s body instead of using an A-pose. Since I had not attempted this before, I was keen to explore how to make it work. I posed the character using a rig from Mixamo in Maya to closely mimic the pose in the concept.
After achieving the desired look, I fine-tuned the pose in Zbrush and sculpted the muscles to match the active pose better.
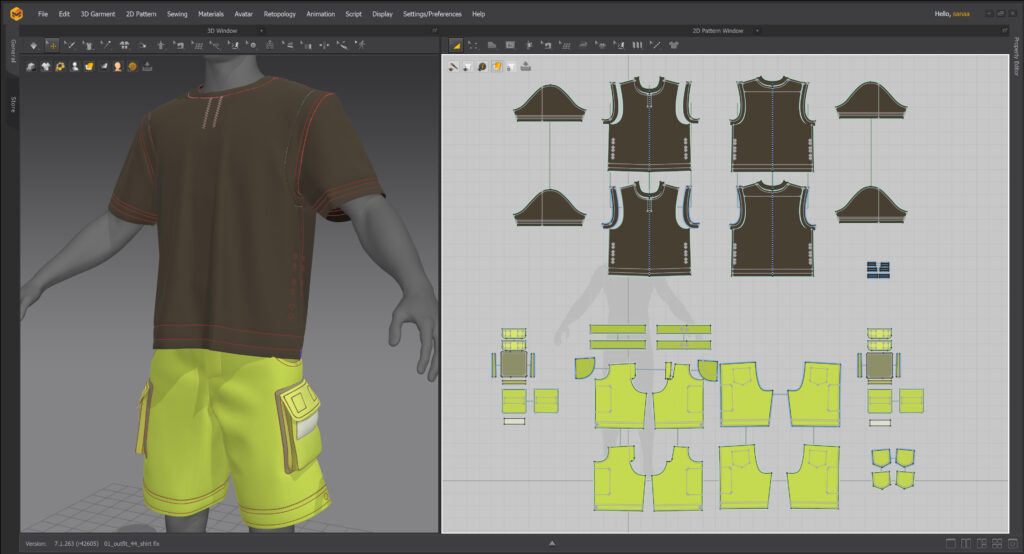
The Outfit Creation
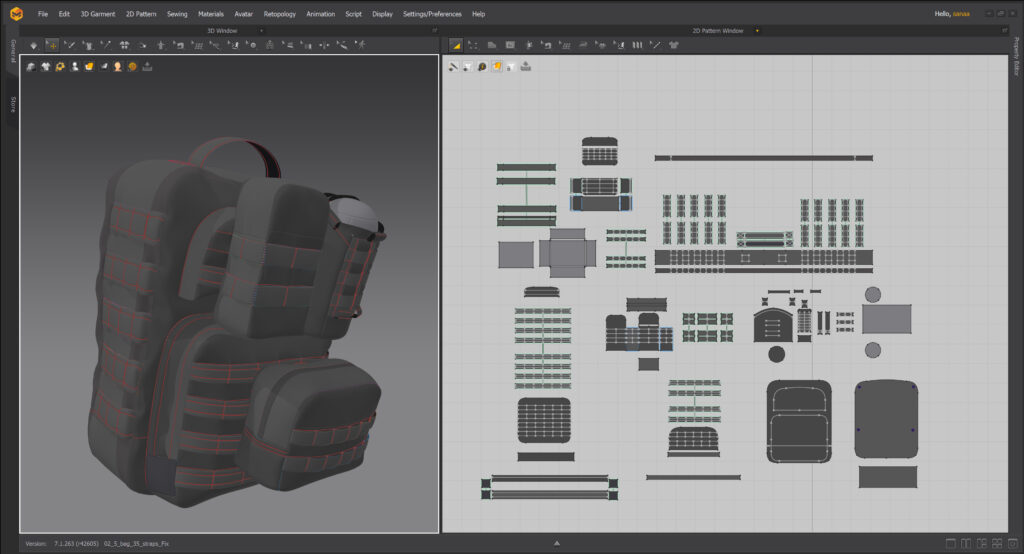
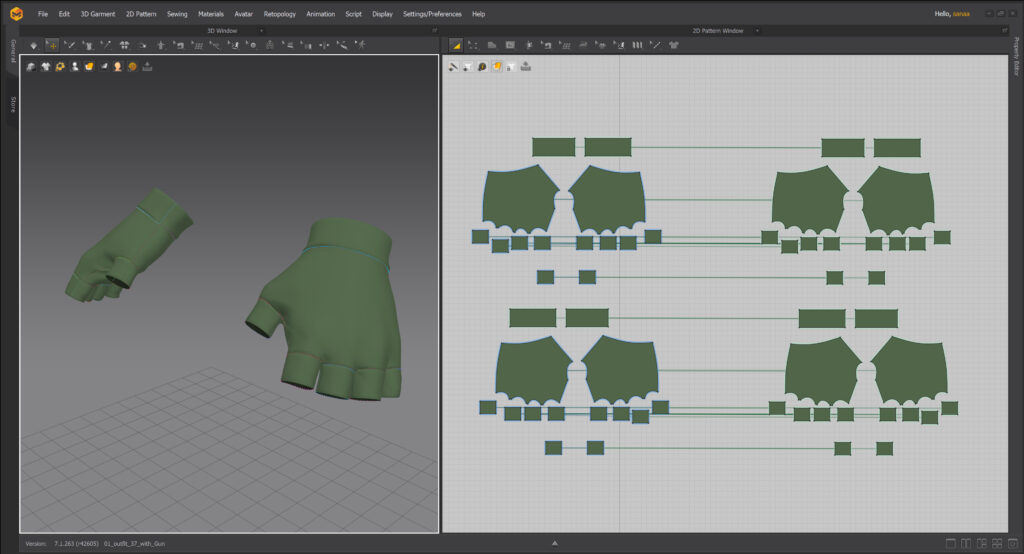
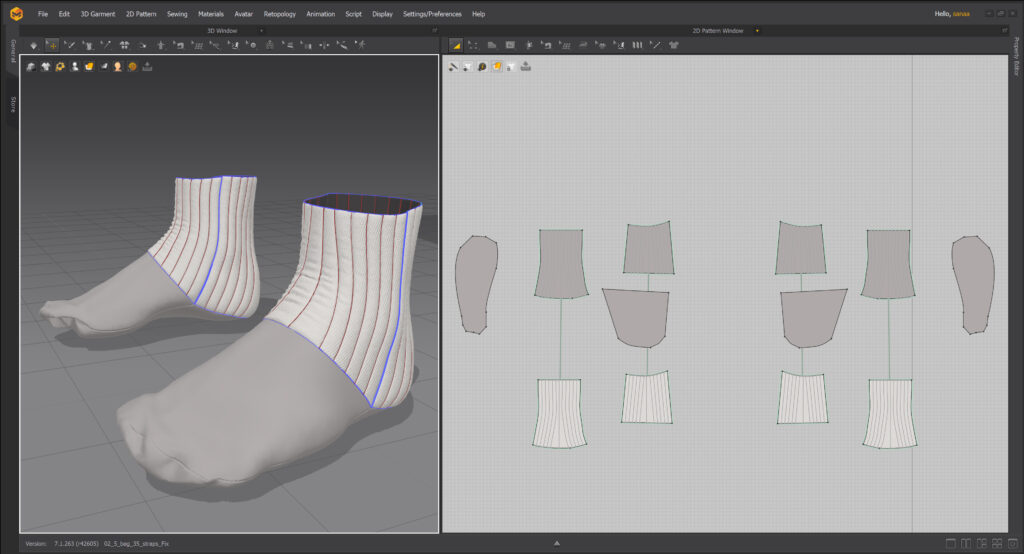
The shirt, shorts, socks, gloves, and backpack were all created in Marvelous Designer. I initially used simple blockouts in MD to visualize the final look.
I then imported these blockouts into Zbrush, adjusted their sizes and silhouettes to align with the concept, and returned them to MD as additional avatars for reference.
This allowed me to manipulate them without simulating them while working on the actual garments.
I further refined the outfit’s size and fit to match the adjusted blockouts or references. Once satisfied with the fit, I added the details present in the concept or my references
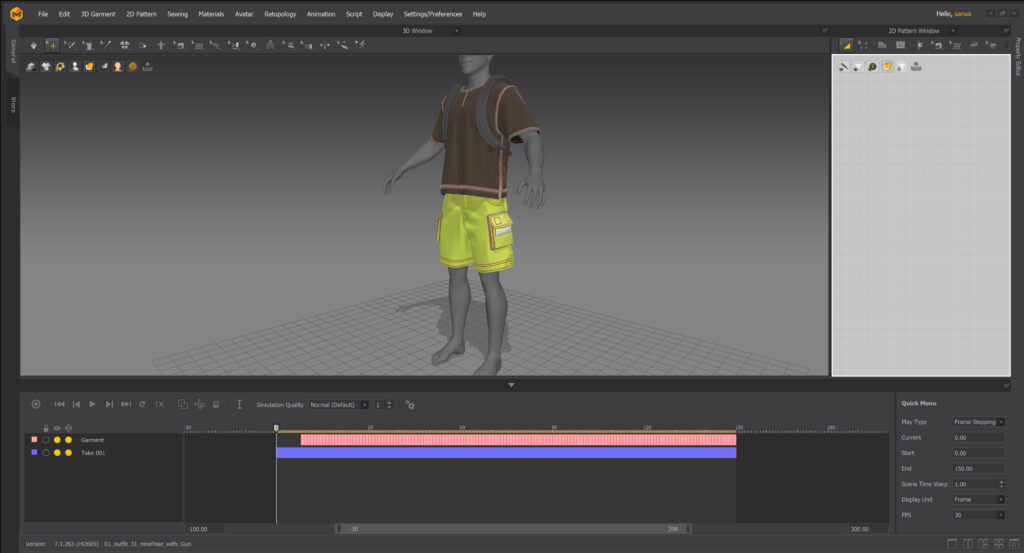
After completing the detail work, I brought the character, along with the Mixamo rig, into Maya to create the pose. I generated an animation from the A-pose to the final posed mesh over 150 frames. The mesh and rig were then exported to Marvelous as an FBX.
I imported the mesh as an FBX and simulated the animation while adding wind for additional detail.
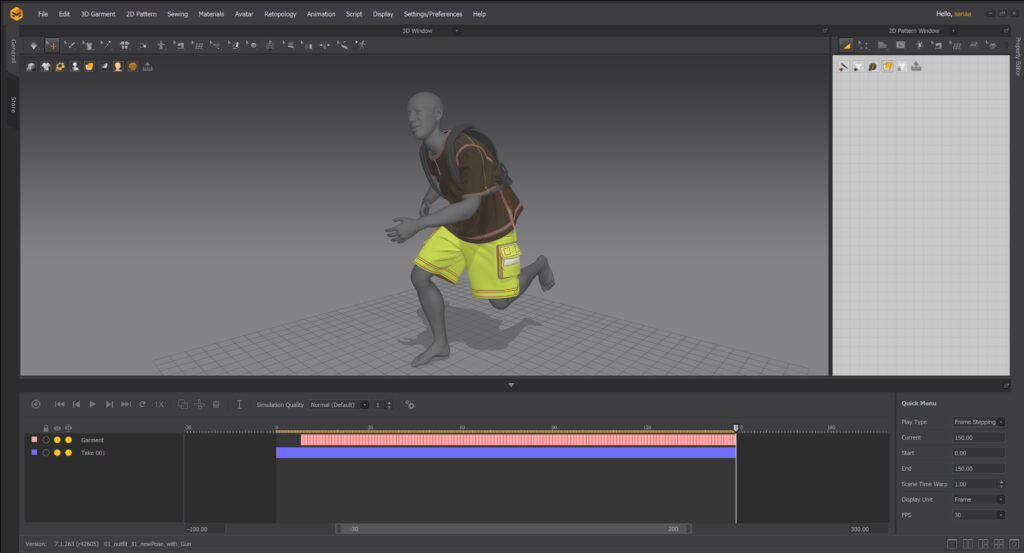
Once content with the garment appearance, I adjusted the UVs to align with the 2D window in MD and exported both the 3D model and 2D version to Blender to create topology for further sculpting in Zbrush.
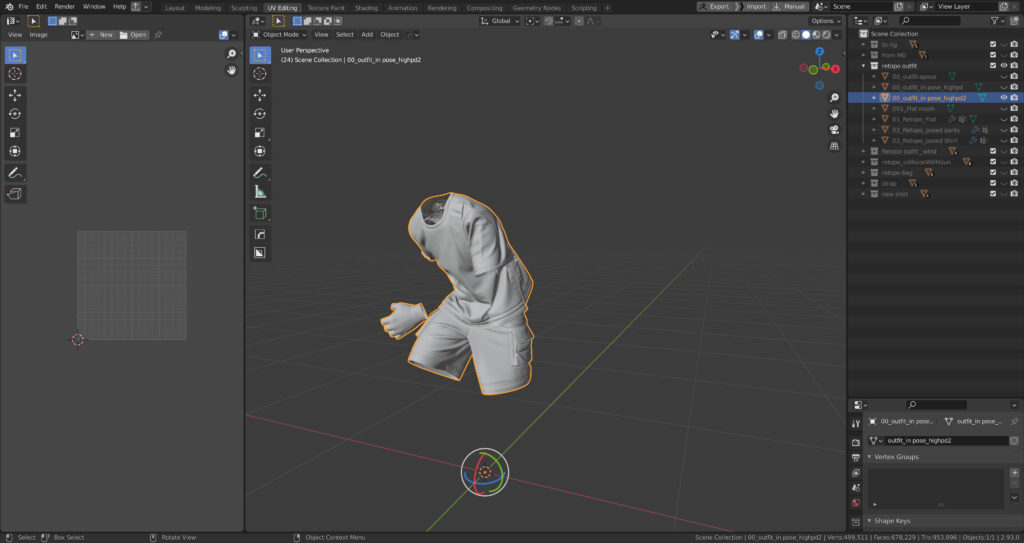
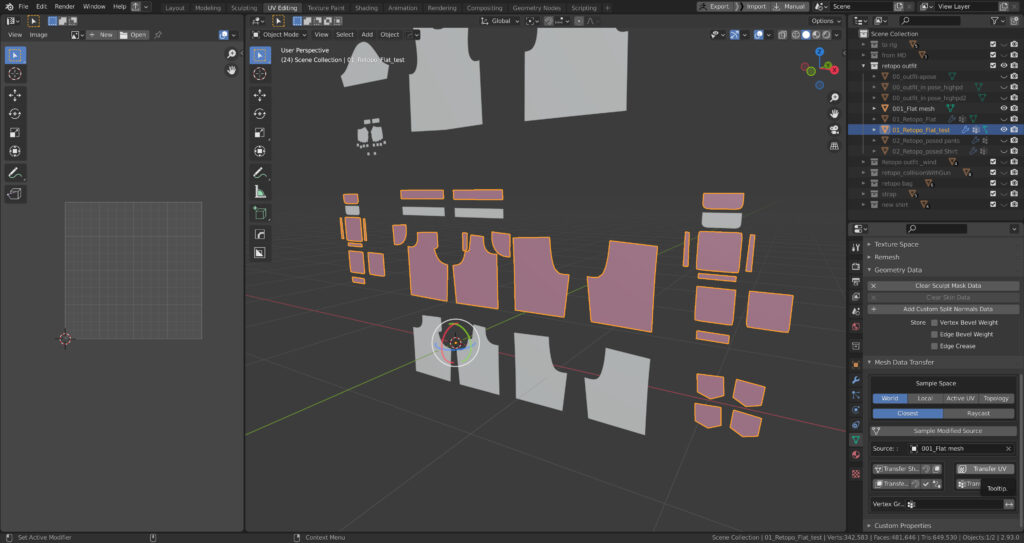

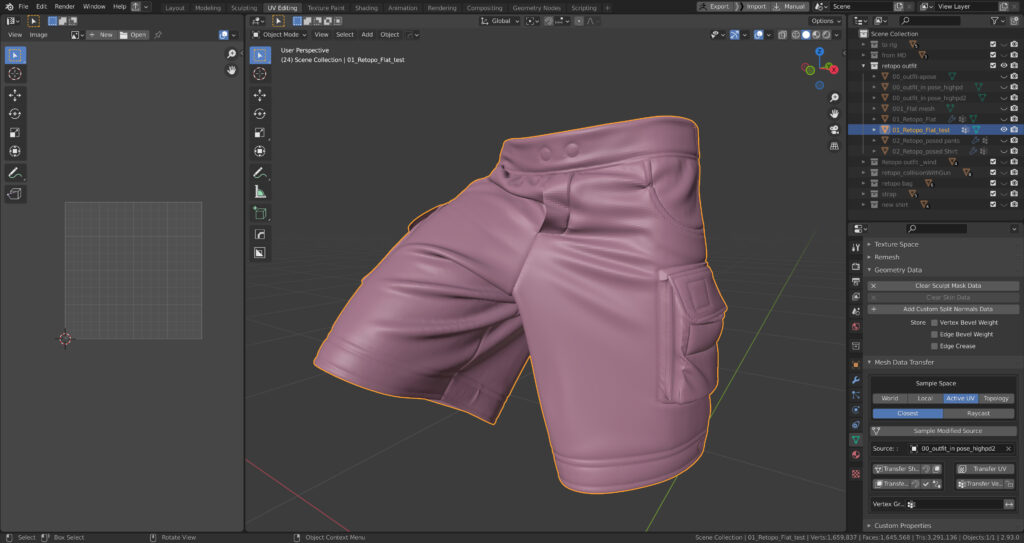
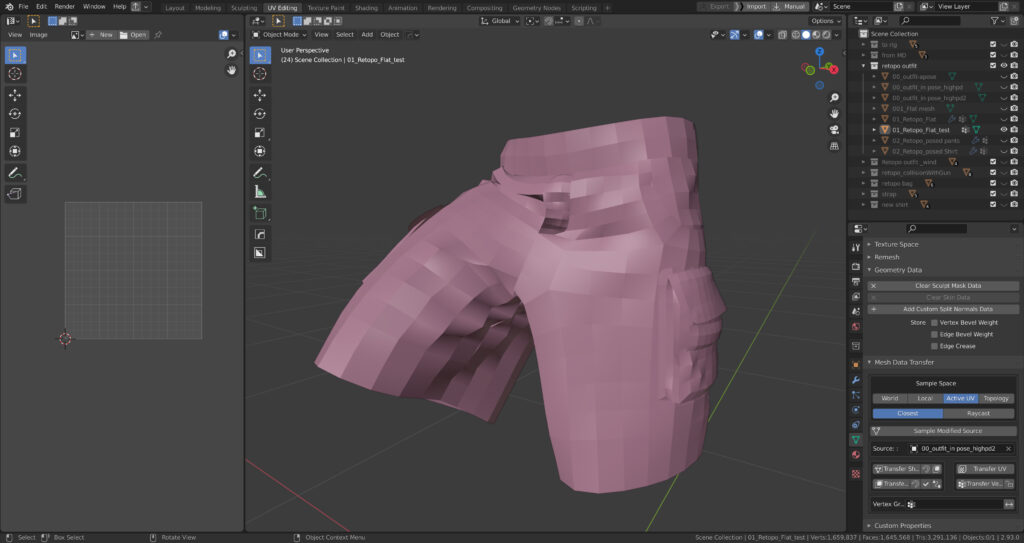
Creating Simple Retopology in Blender for Sculpting Extra Details in Zbrush
The retopology process in Blender involves several steps:
- Imported the 3D version of the MD model
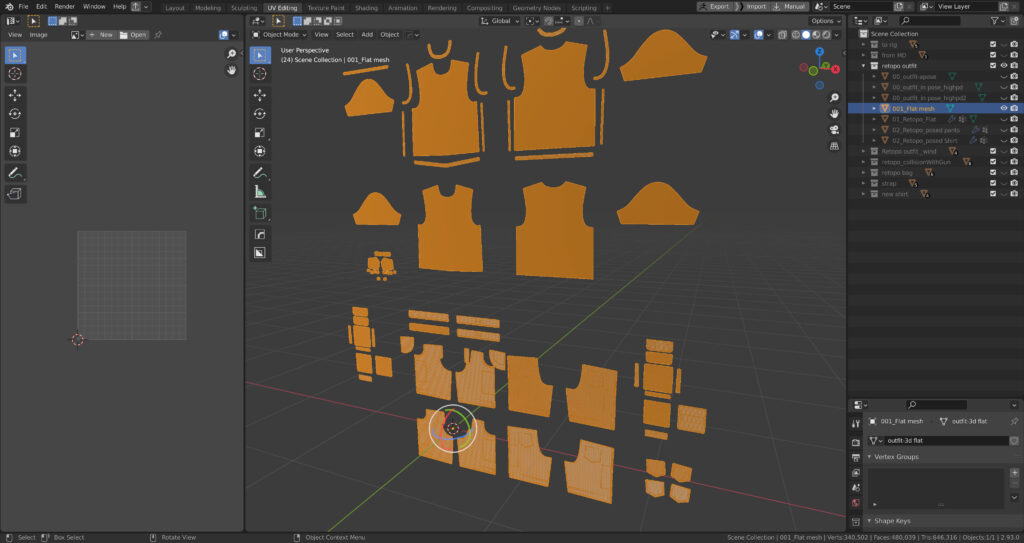
- Imported the 2D version of the MD model
- I created a retopology for the 2D MD model
- Using the shrink wrap modifier to help me stay within the bounds of the 2D MD model
- Applied the modifier once I was happy with the topology
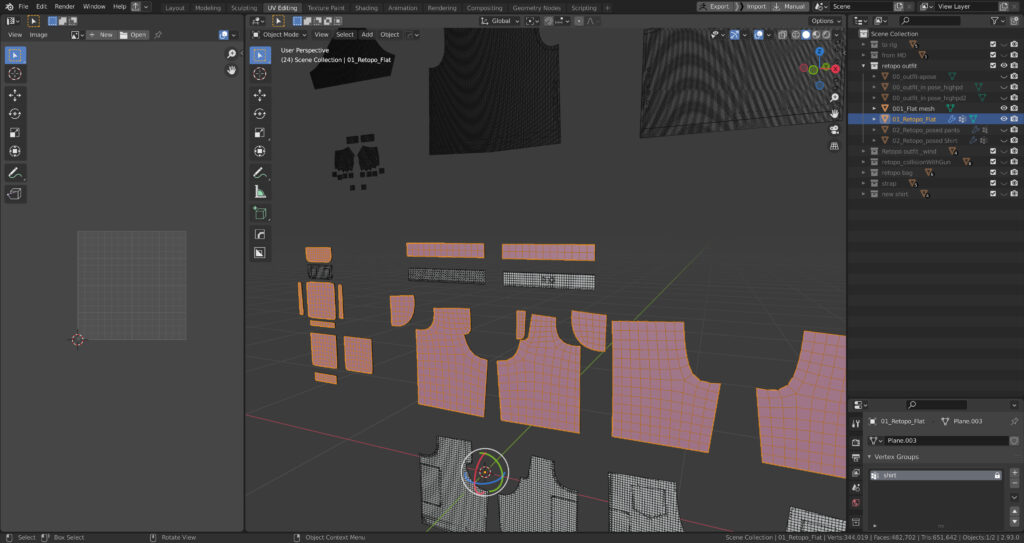
Use Maurizio Memoli’s plugin to transfer UVs from the 2D MD model, ensuring the Sample Space is set to World.
- Sample Space: World
- Source: Select the 2D MD mesh
- Click on Transfer UV
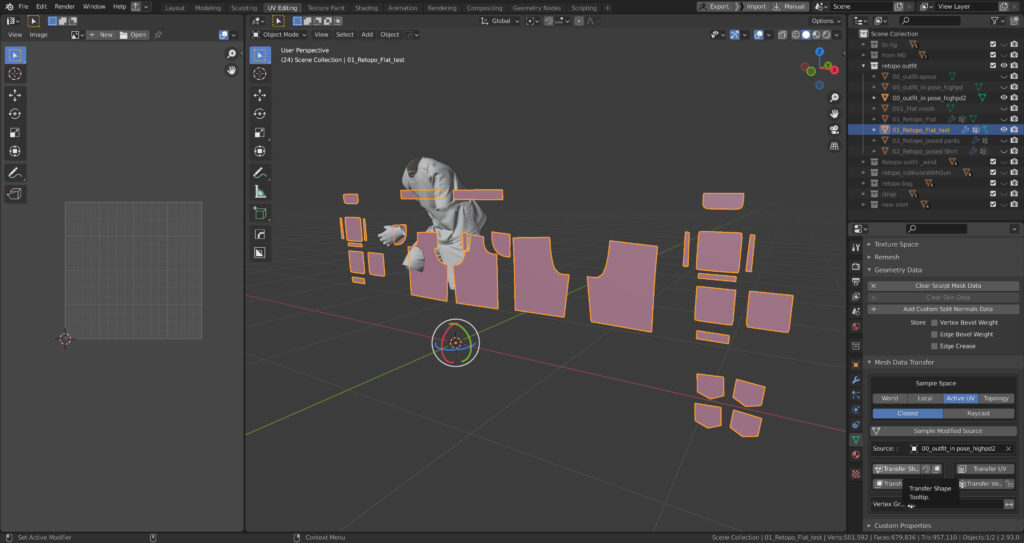
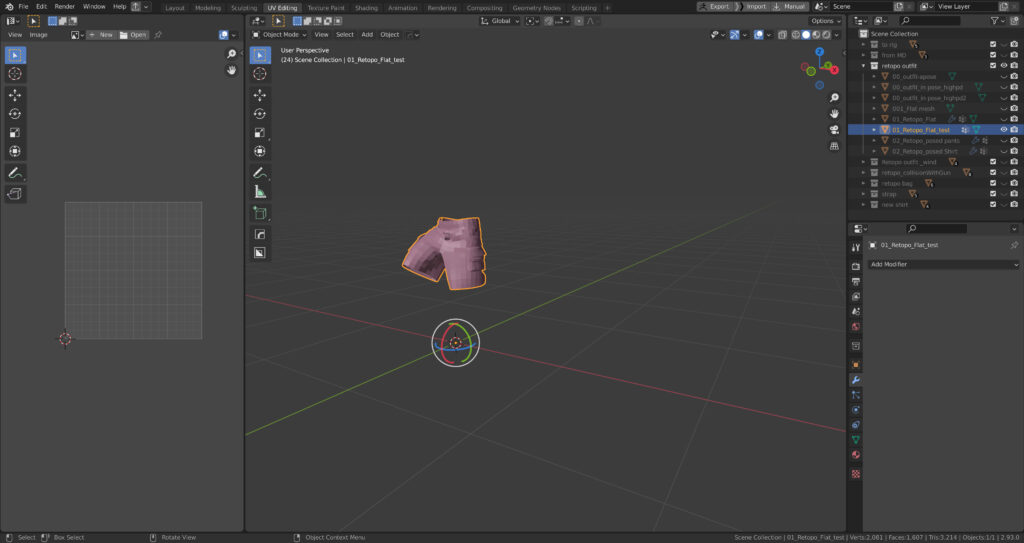
I then transferred the shape from the 3D MD model.
- Sample Space: Active UV
- Source: Select the 3D MD mesh
- Click on Transfer Shape
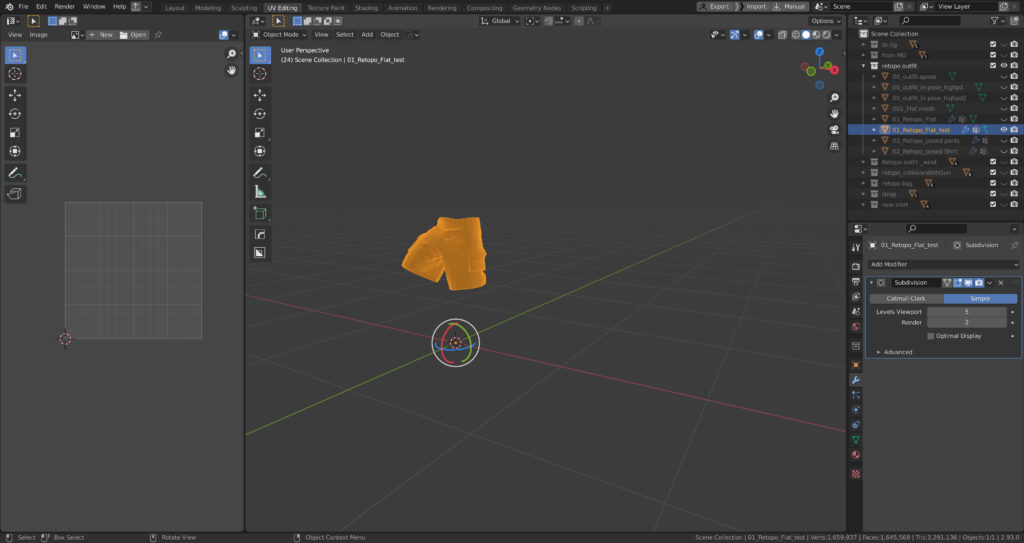
- Add extra subdivisions (4/5) to the retopologized mesh, and then apply the modifier.
- Re-transfer the shape (this might take a bit of time) to the 3D MD mesh.
- Export the mesh to Zbrush.
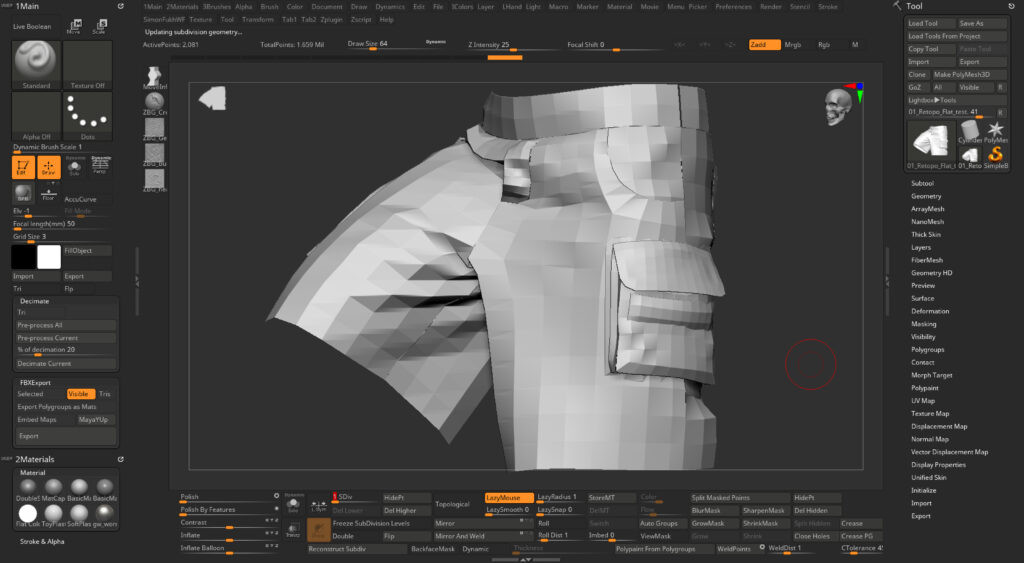
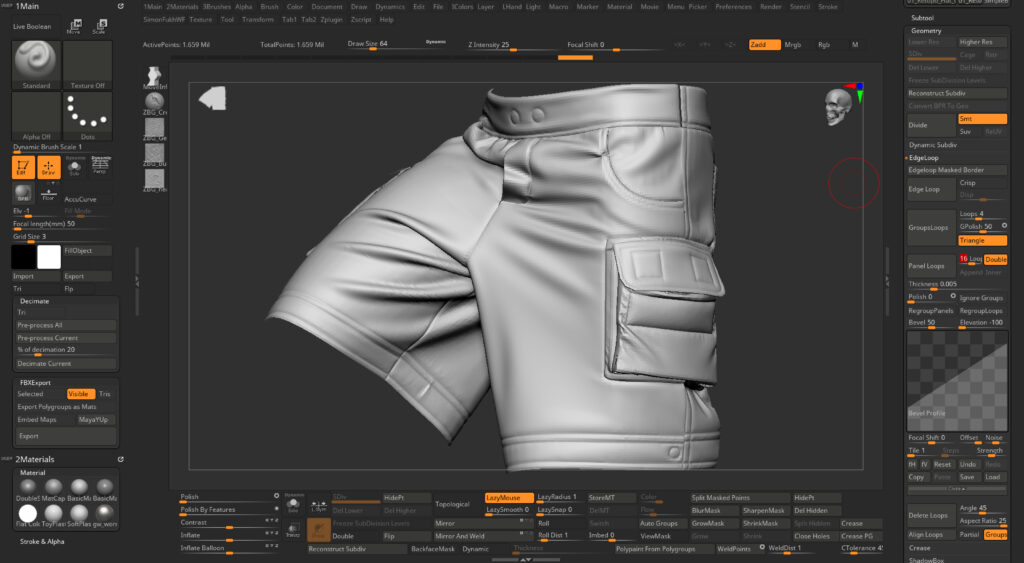
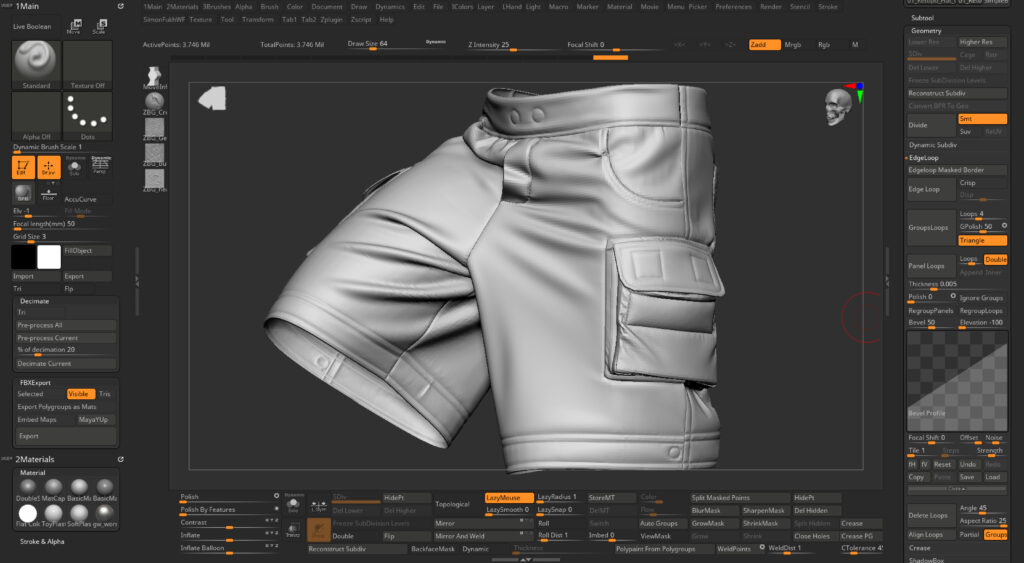
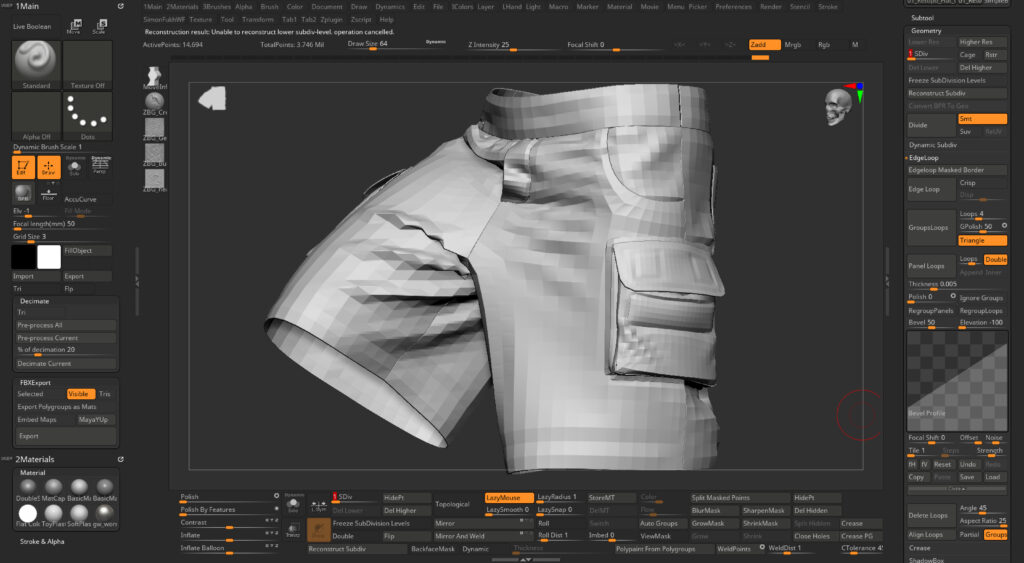

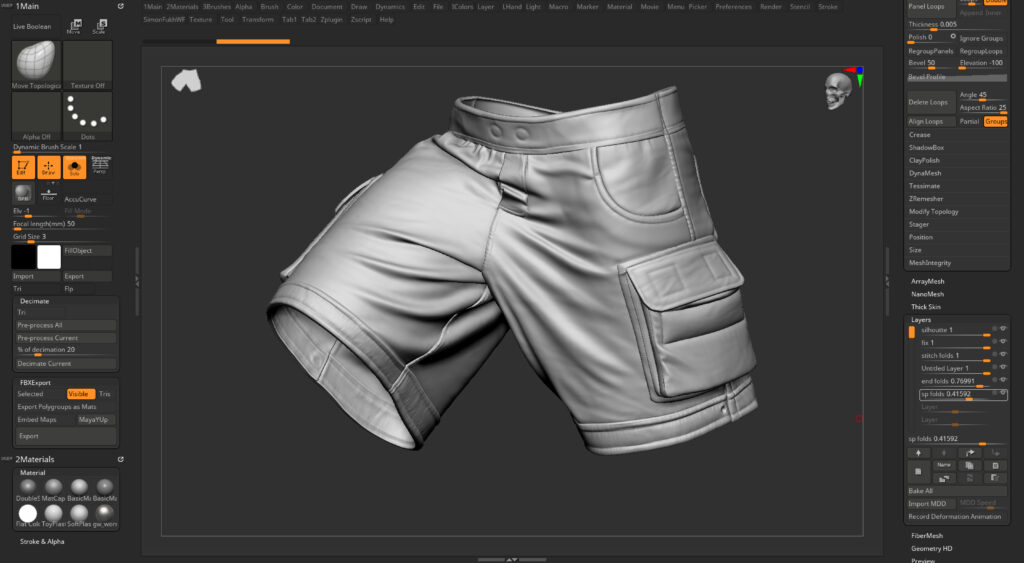
Adding Thickness in Zbrush
To add thickness to Zbrush, I followed these steps:
Once I imported the mesh to Zbrush, I checked if reconstructing the subdivision is working
- If it is working, I undo it and go back to the highest subdivision.
In the Geometry tab, I go to Edgeloops and change the following Panel loop settings.
- Bevel at 16
- No polish
- -100 Elevation
- Thickness 0.005
I then reconstruct the subdivision by 5.
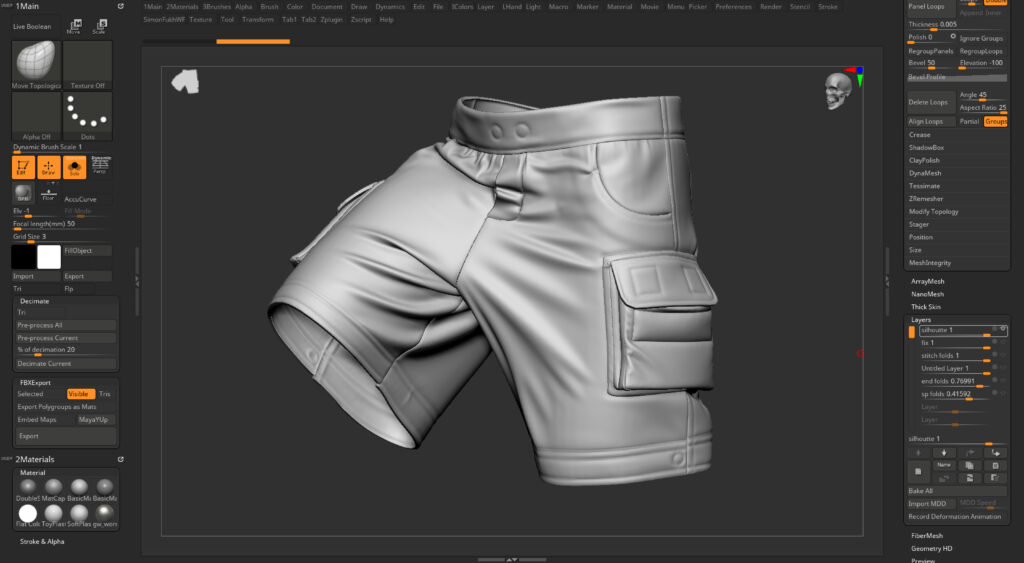
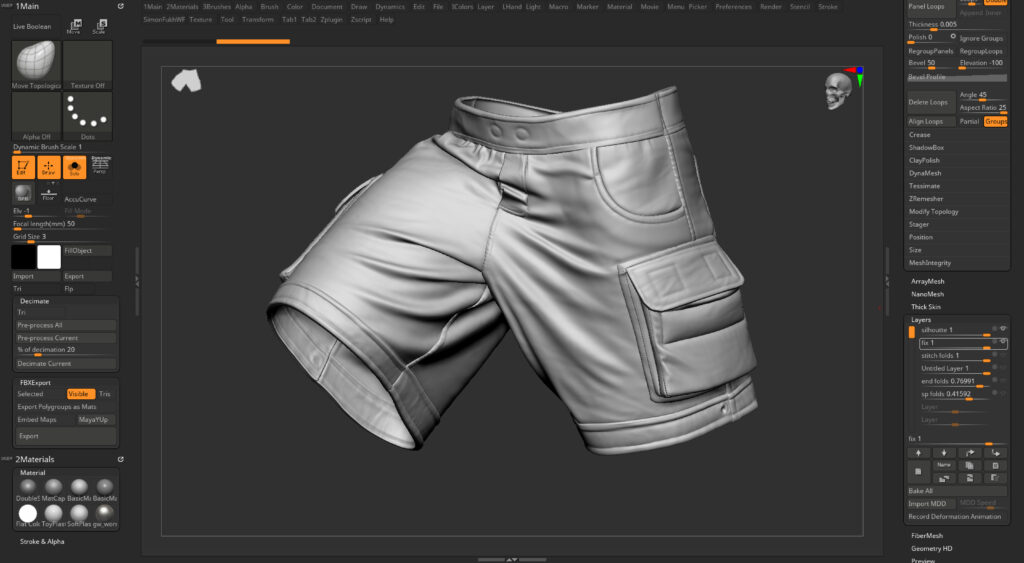
I added layers to the mesh and started fixing the silhouette to match the concept.
I added extra folds that are missing in the model that I like from the concept.
I then added some Memory folds using the layers.
- I like to use a few brushes from JR (seams, wrinkles), Poliigon Alphas for wrinkles, and Evgeniia Petrova for memory folds
- Using the layers and morph target to erase some parts or make it softer in some areas compared to others
Add stitches
Add the indents of the stitches
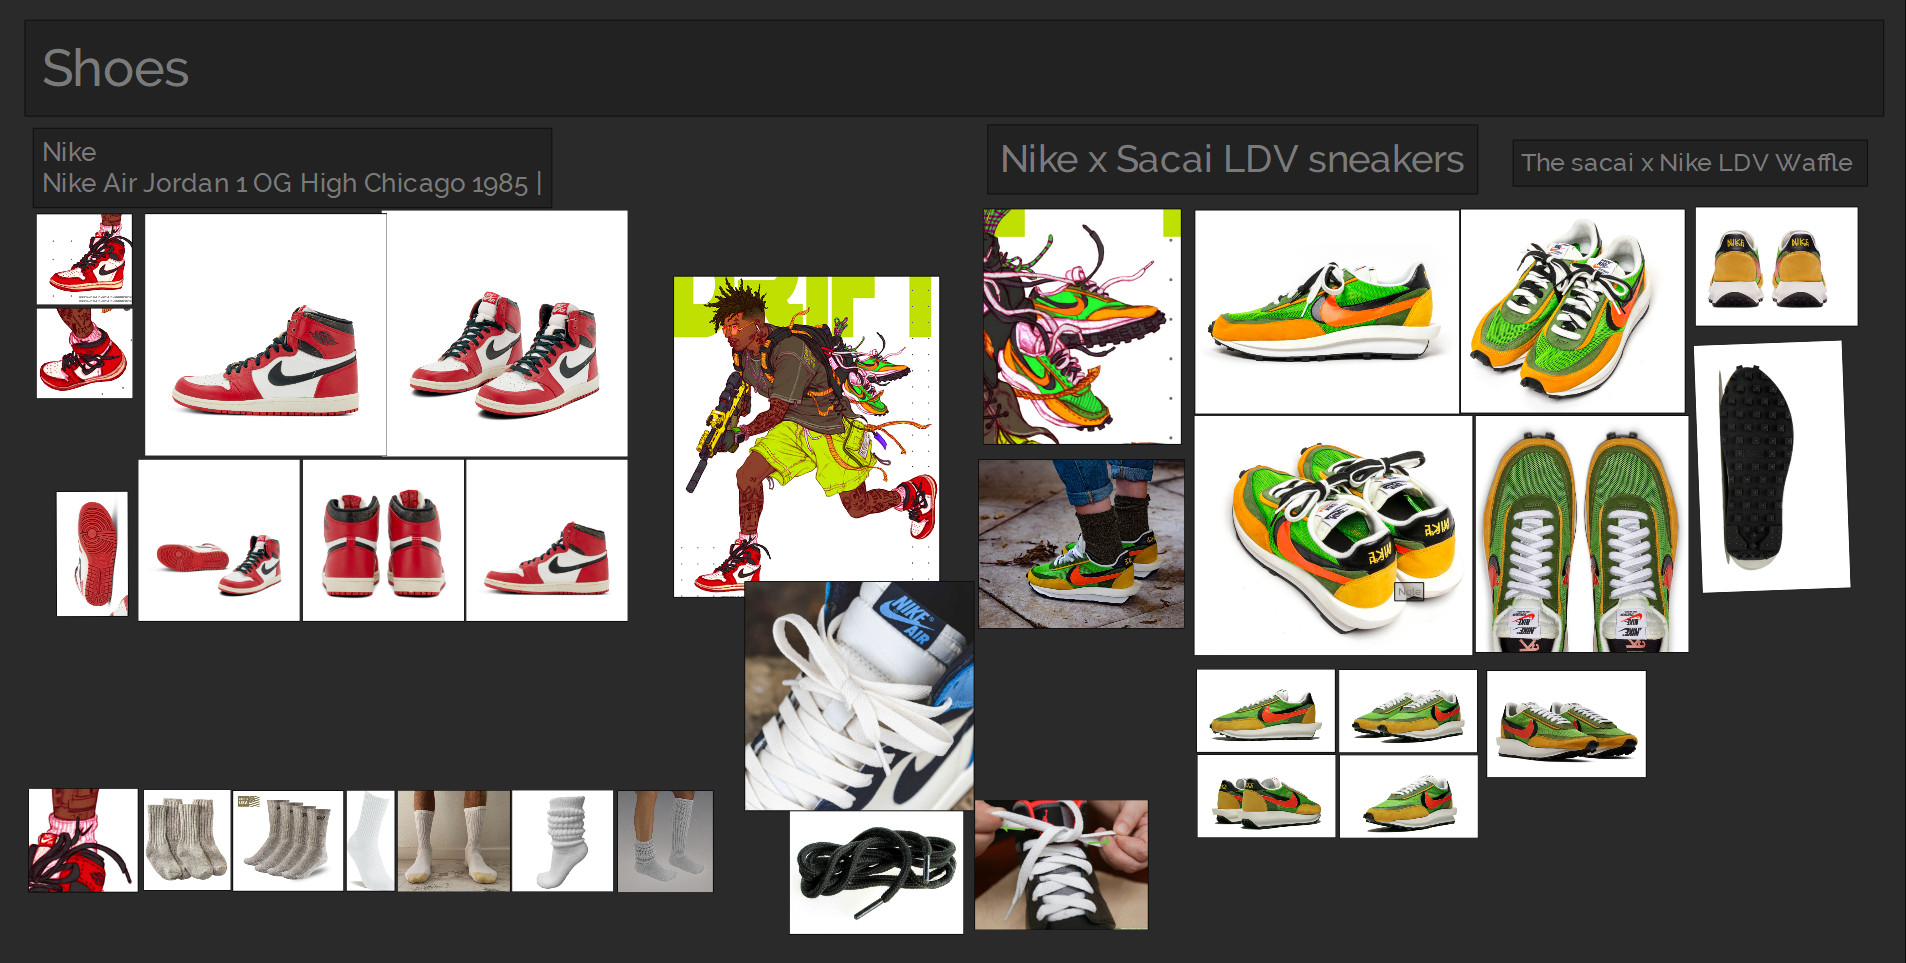
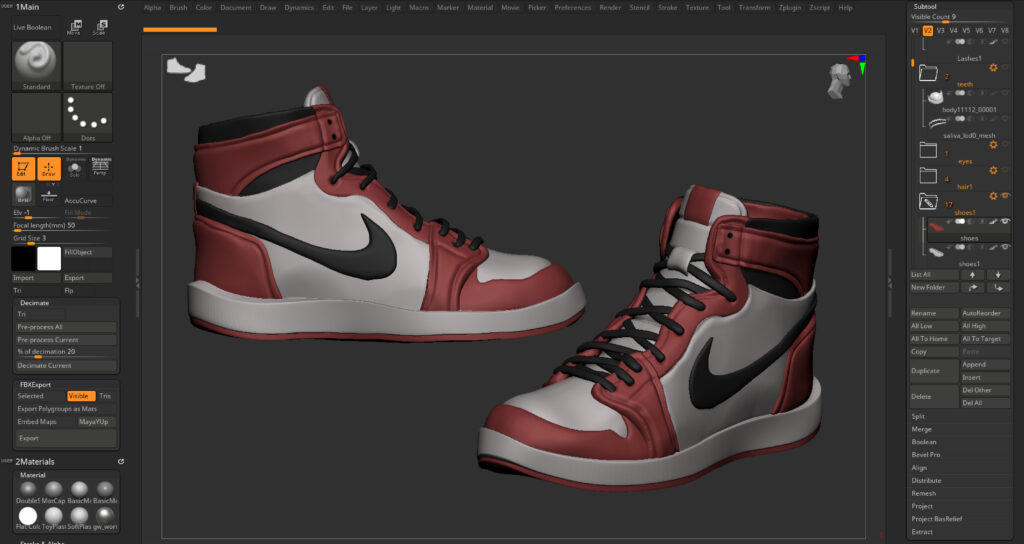
Shoes
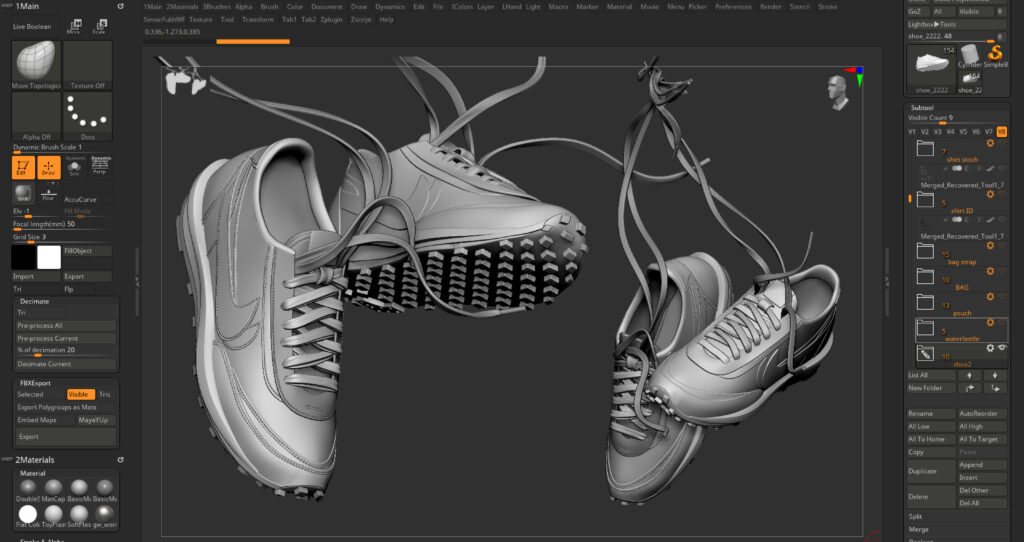
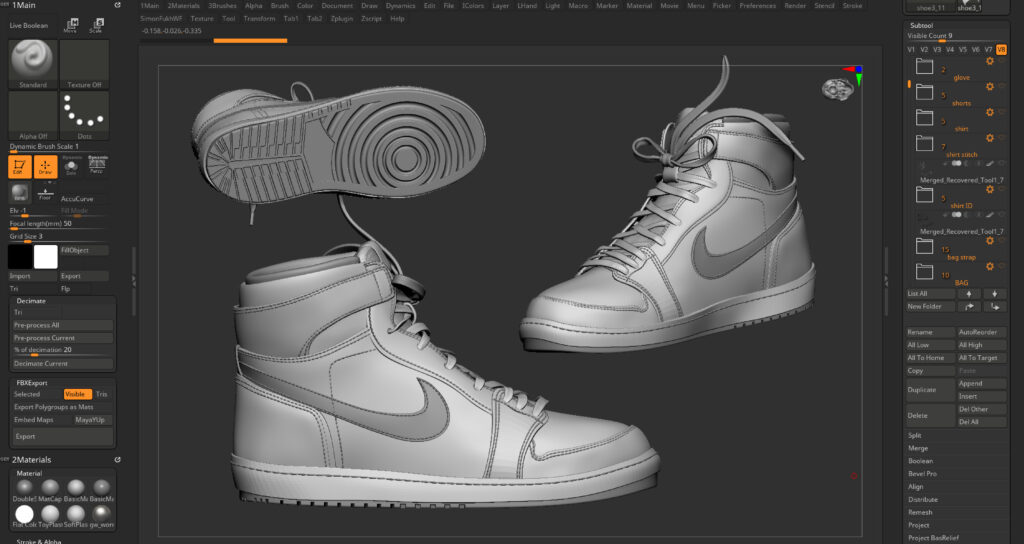
For the shoes, I initiated the process by creating a blockout in Zbrush. This method allowed for a quick and straightforward development of the shoe’s initial shape and placement of details. Once satisfied, I exported the blockout to Blender.
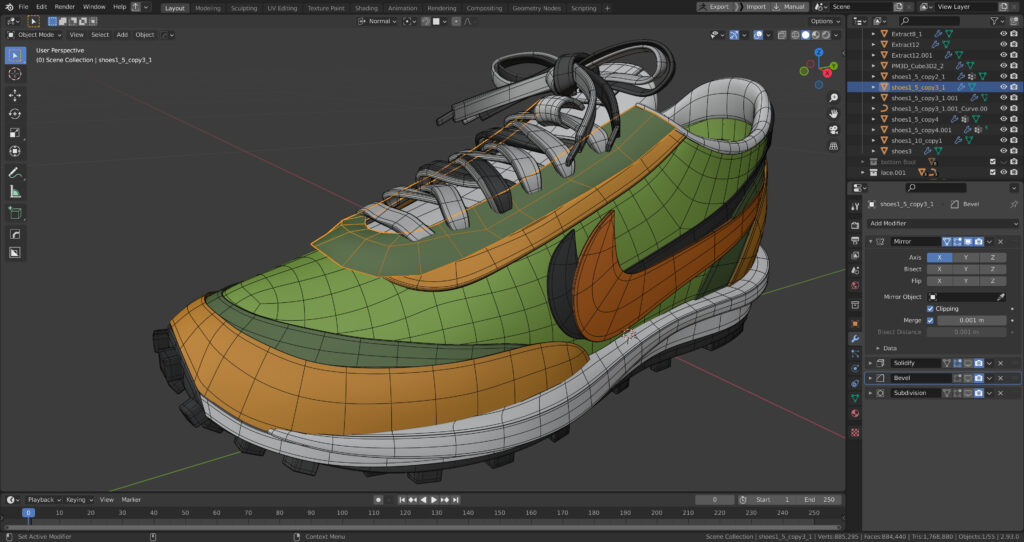
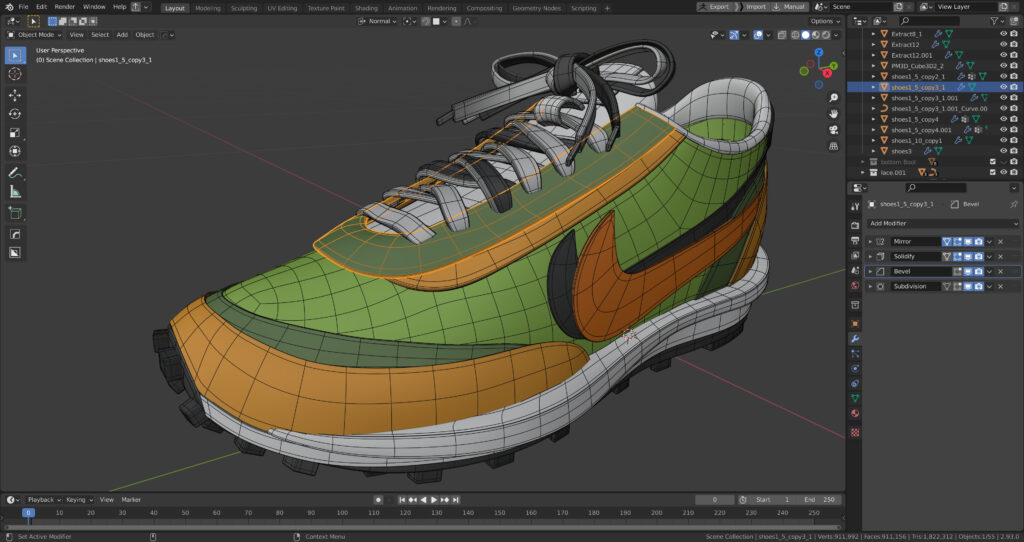
I then worked on creating separate topologies for certain parts of the shoes, such as extra patterns above the main base. After finalizing these pieces, I applied various modifiers, including:
- Mirror (for shoes that did not affect detail asymmetry)
- Solidify (thickness)
- Bevel
- Subdivision


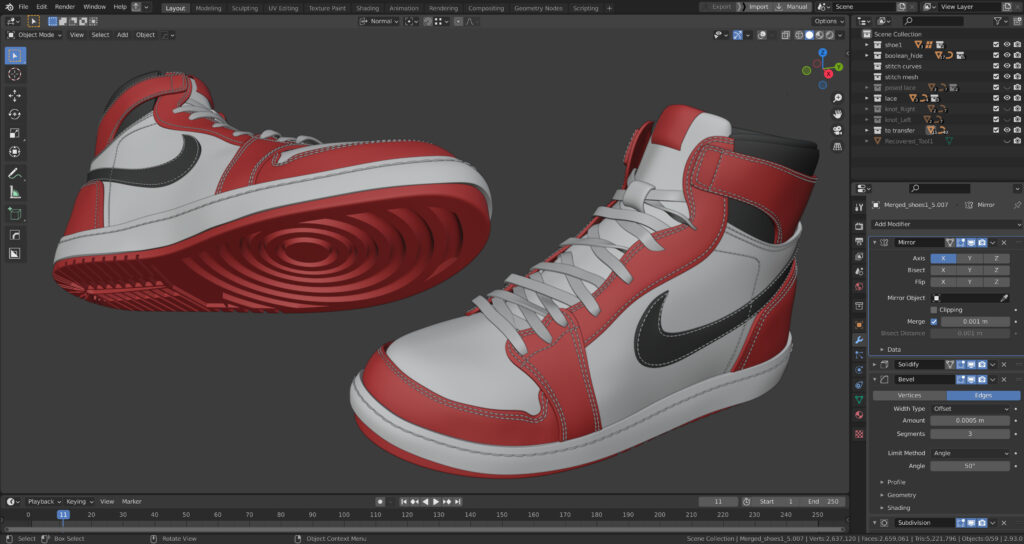
For complex details, I employed the boolean modifier. This involved creating components to cut the main mesh, sometimes incorporating bevel and subdivision modifiers as well.
Once satisfied with the look, I imported the components into Zbrush, where I dynameshed and polished them to enhance their appearance.
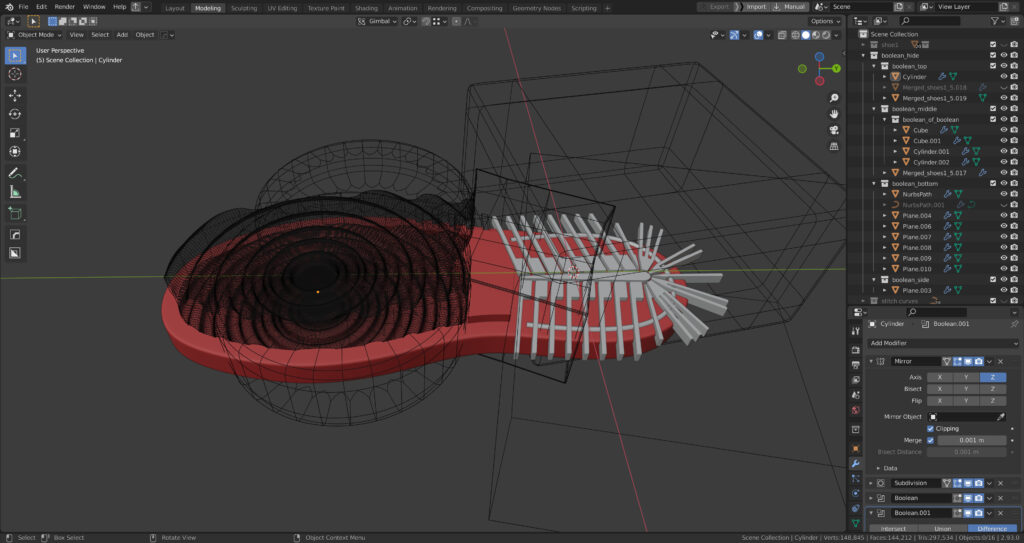
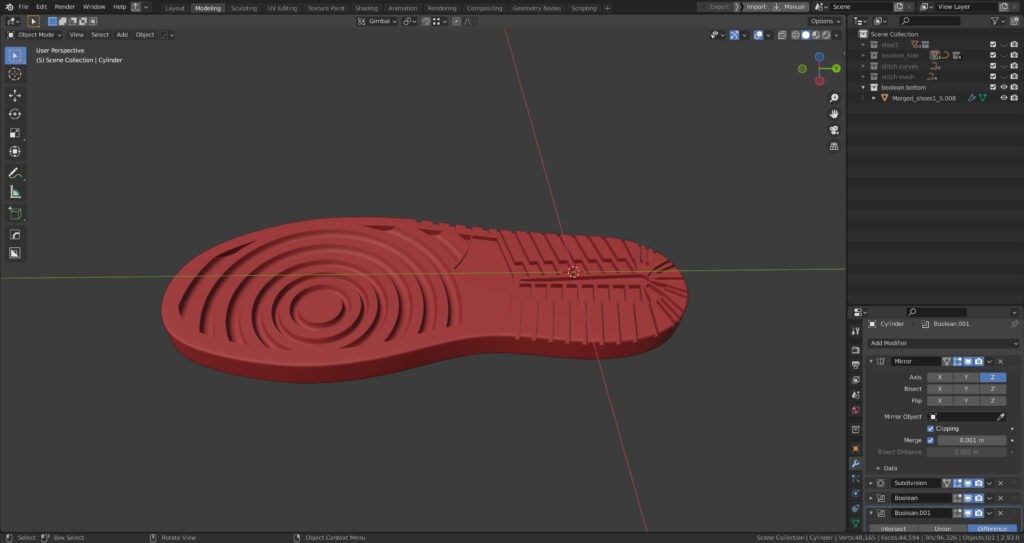
To address the bottom of the other shoe, I utilized the Shrink Wrap modifier to add planes on top of the main bottom plane. This ensured that any changes to the shoe’s bottom shape would be reflected in the added pieces.
I also employed arrays and Solidify (thickness) in conjunction with bevel and subdivision modifiers.
Subsequently, I imported the components into Zbrush, dynameshed them at a high resolution, and applied a slight polish for a smoother appearance.
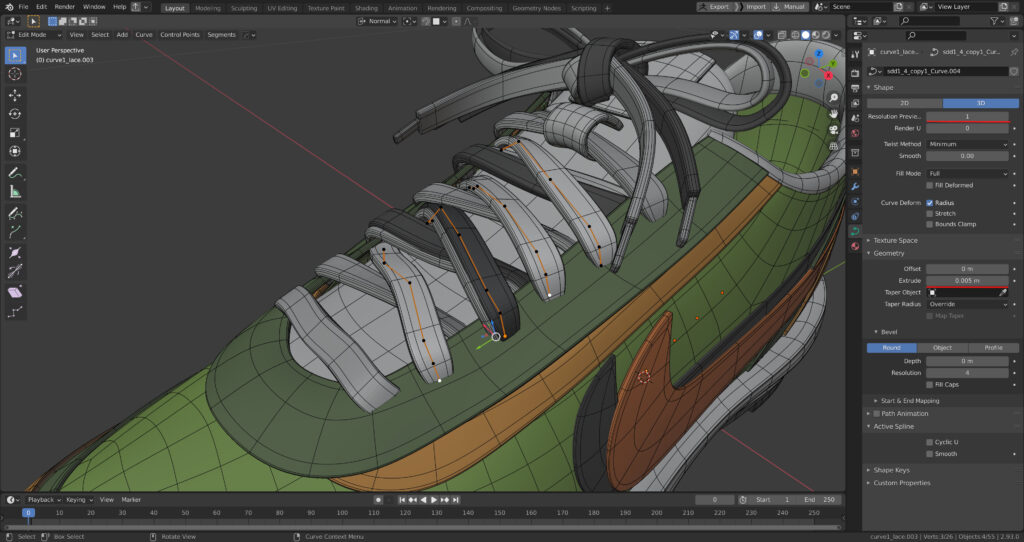
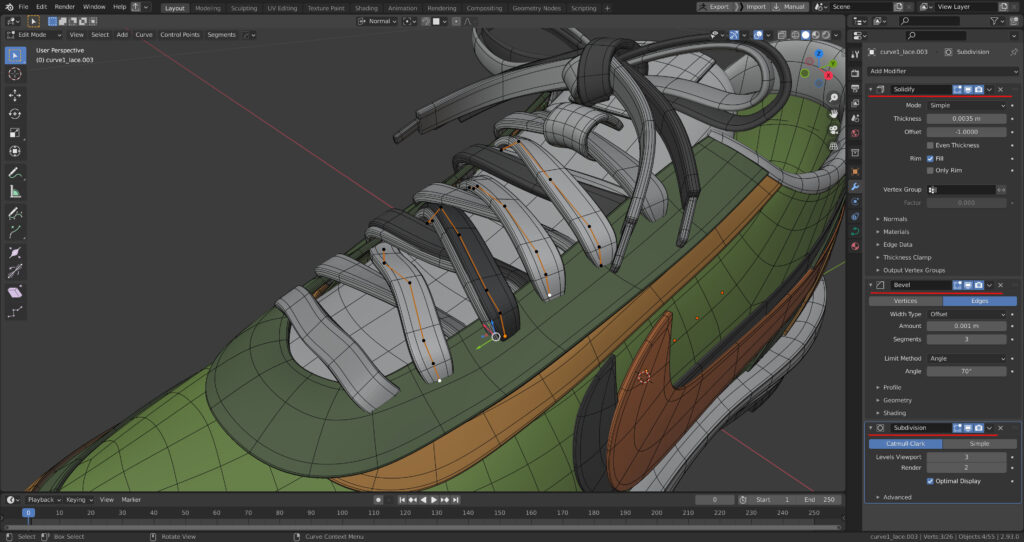
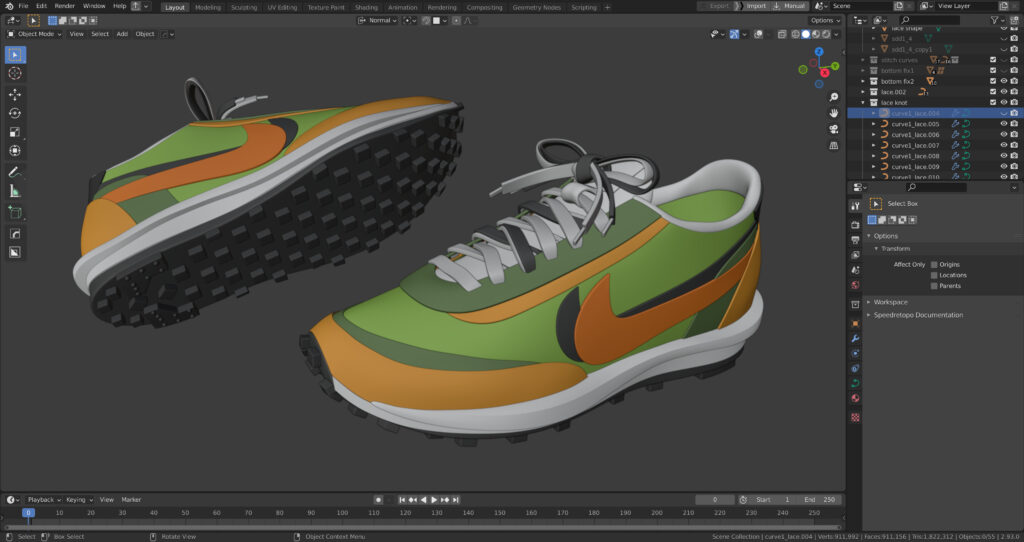
For the shoe’s laces, I used the curve (path) tool in Blender. This approach provided flexibility to adjust the lace’s shape and size without committing to a fixed size.
Once satisfied with the lace’s appearance, I imported it into Zbrush to add final details and stitches.
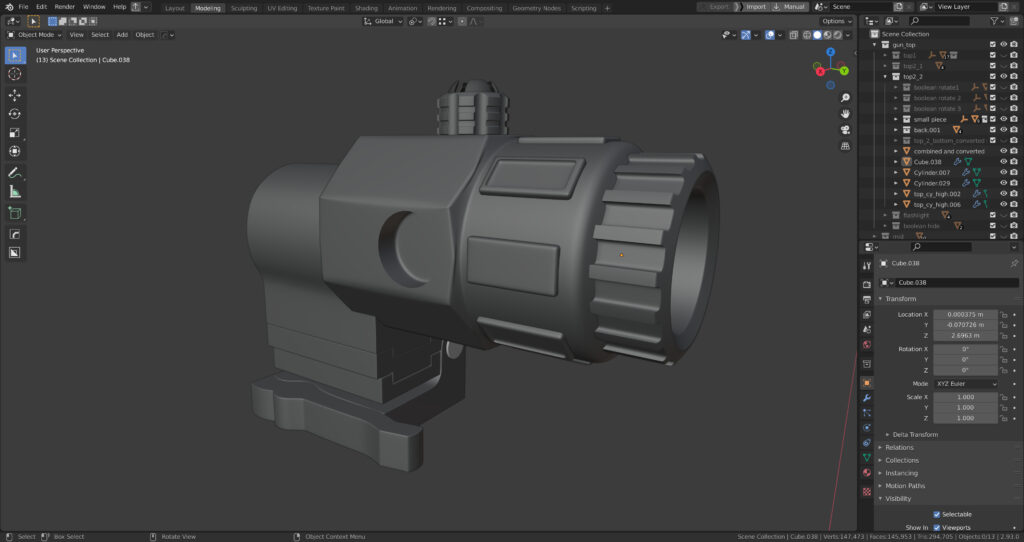
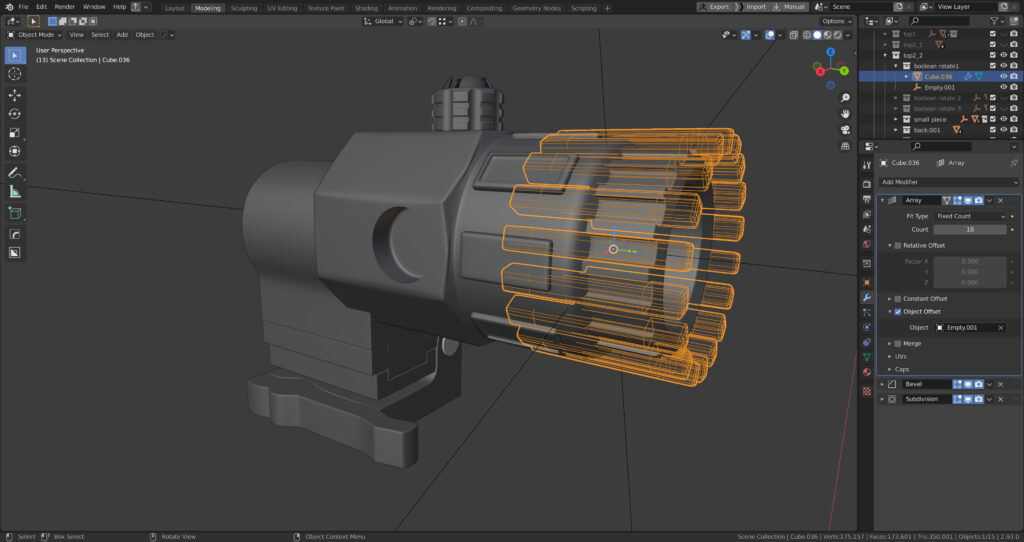
Rifle
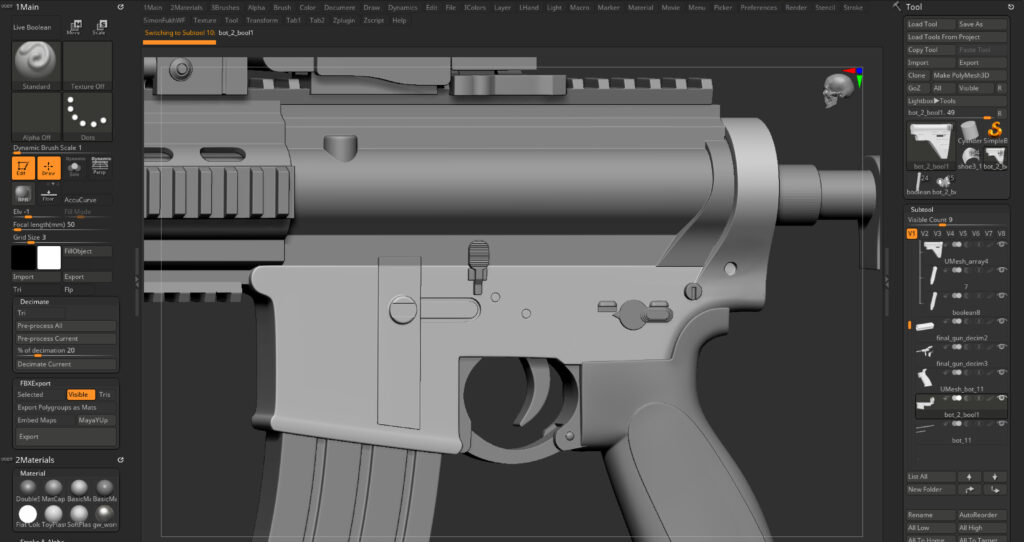
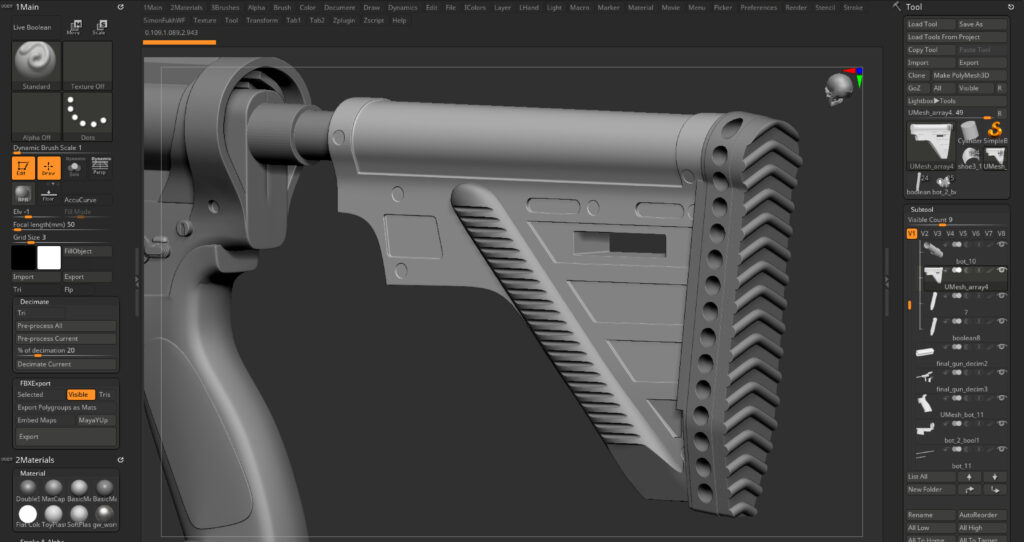
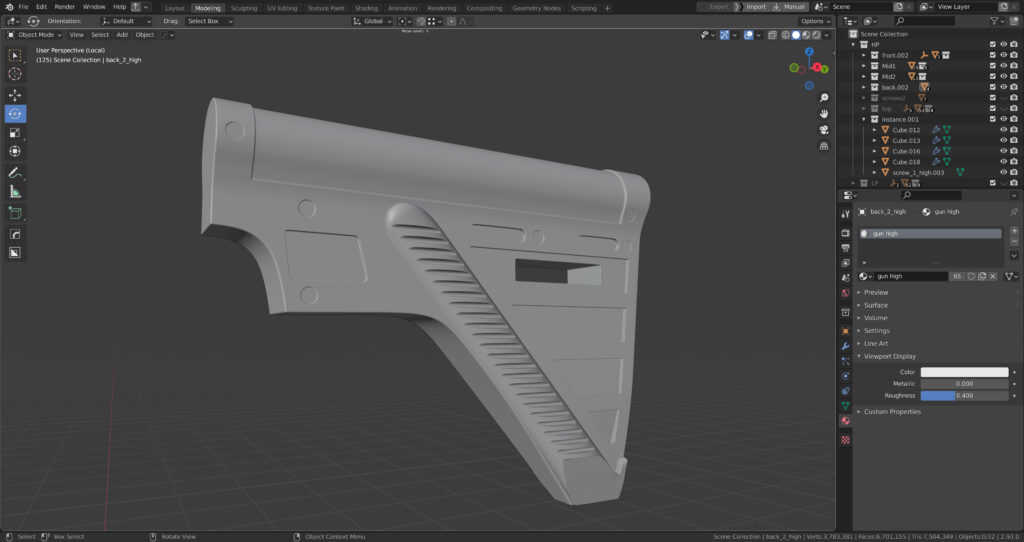
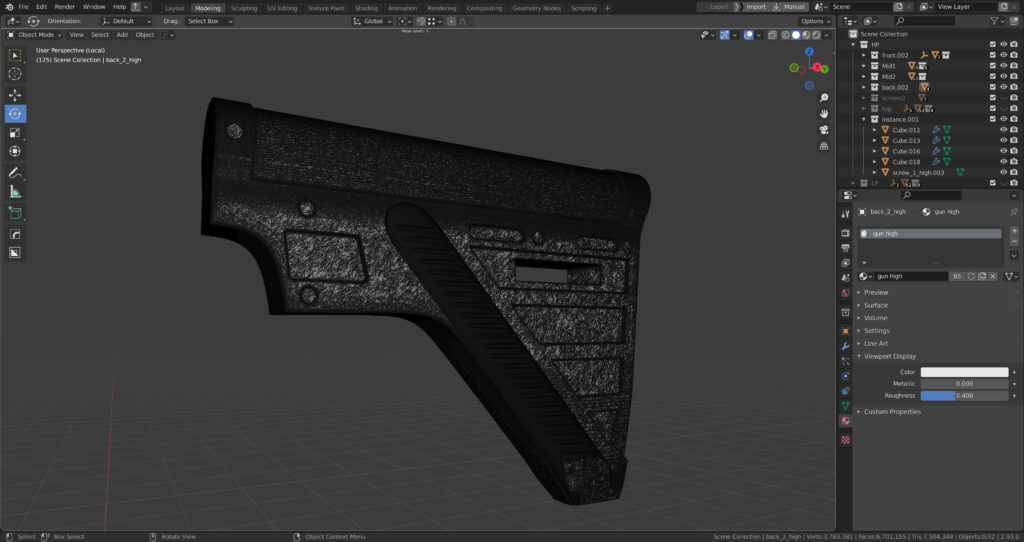
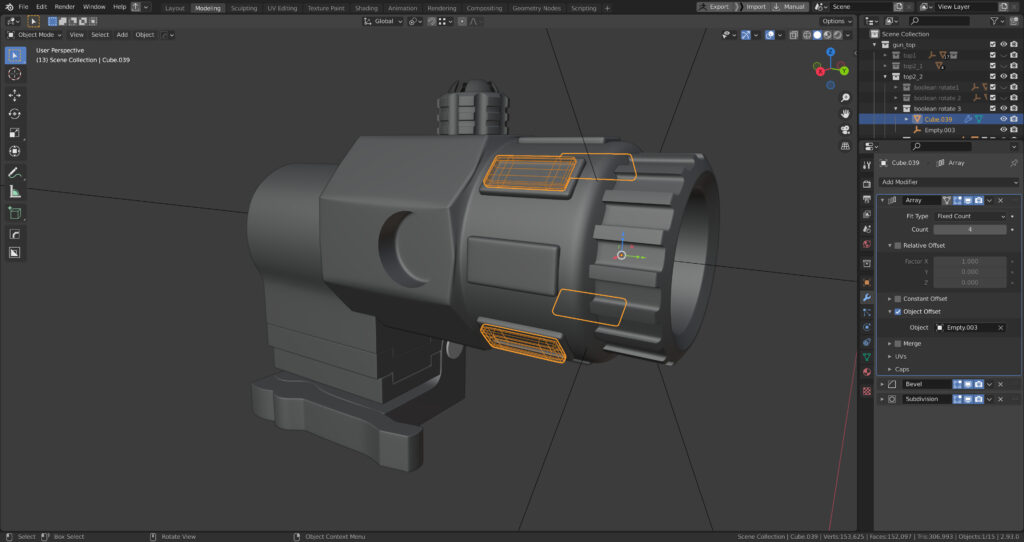
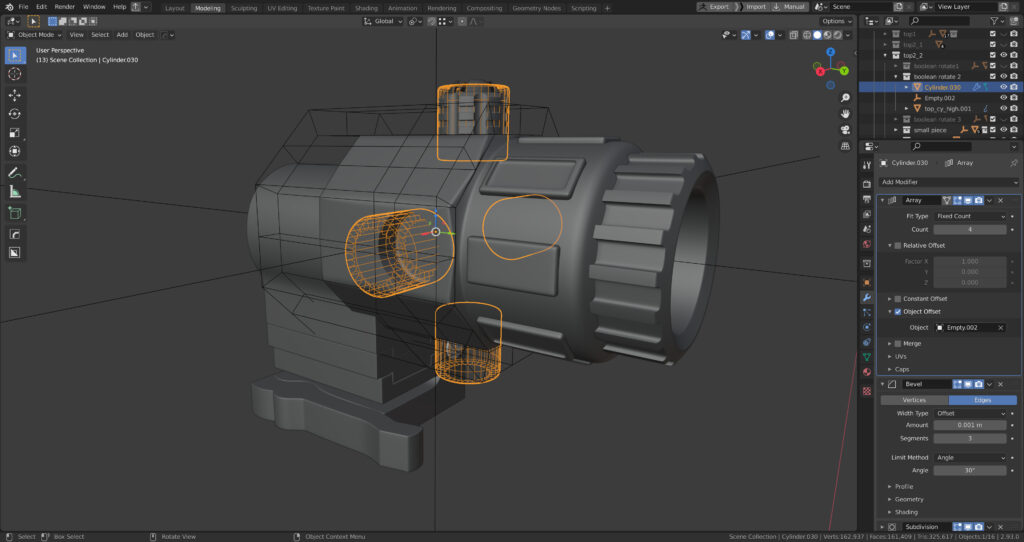
For the rifle, I employed a method similar to that used for the shoes. I began by creating a basic shape and then introduced modifiers such as Mirror, Solidify, Bevel, and Subdivision for simple parts.
More detailed components were created using boolean operations along with Array.
After achieving the desired details, I imported the components into Zbrush, where I dynameshed them and polished the edges before bringing them back into the project.
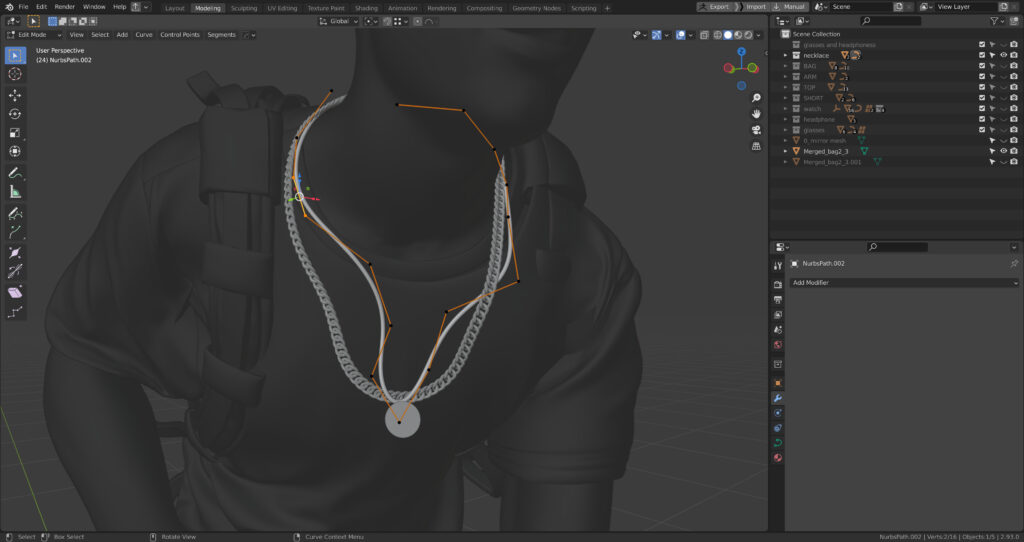
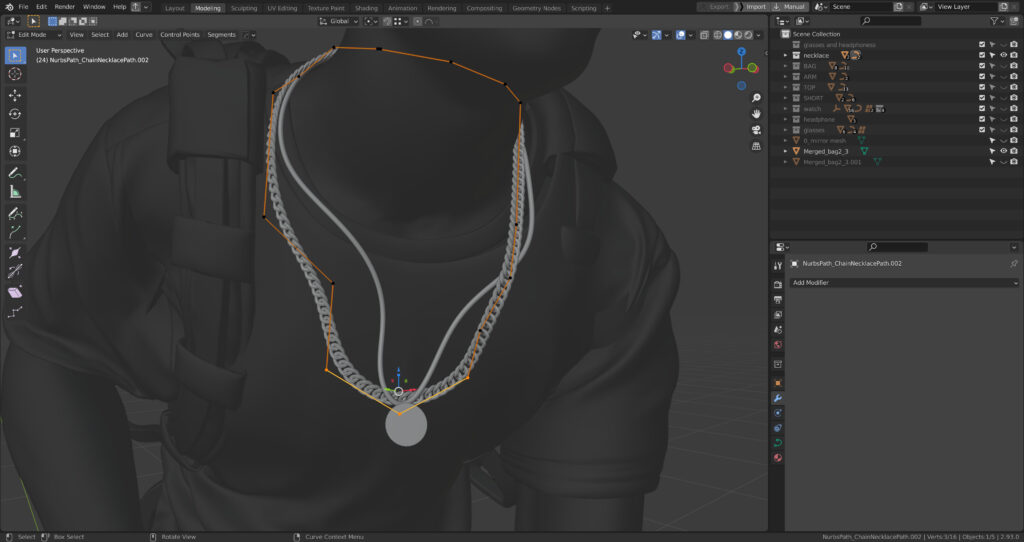
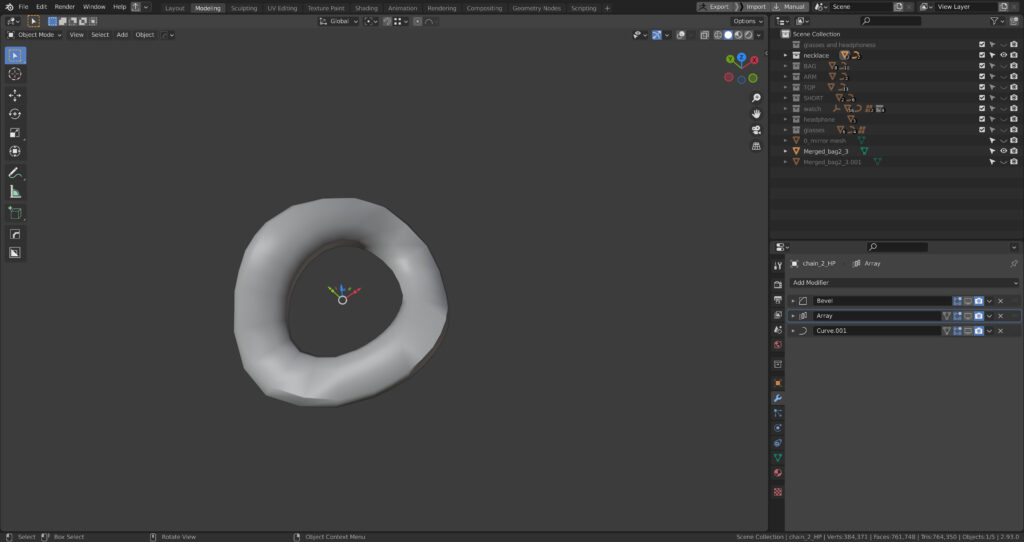
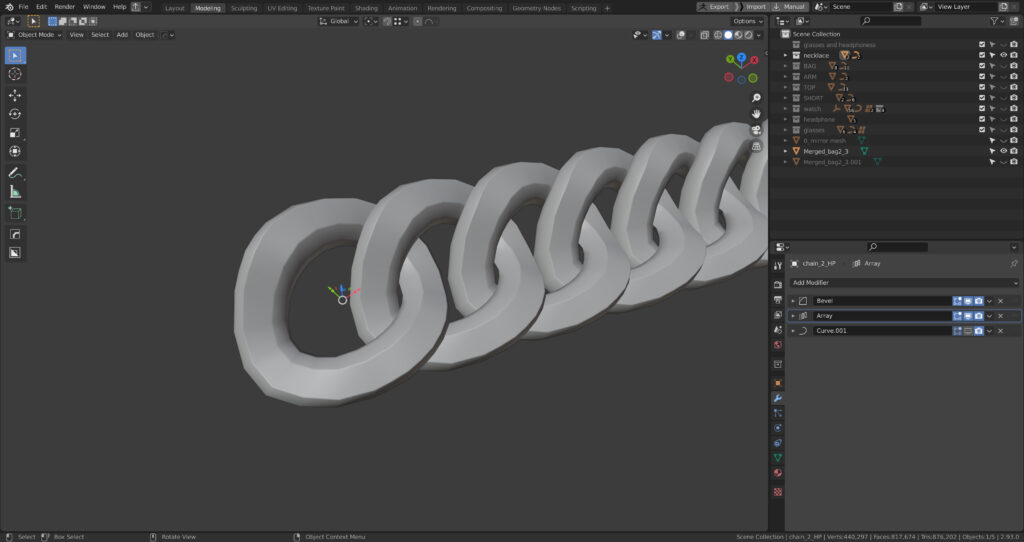
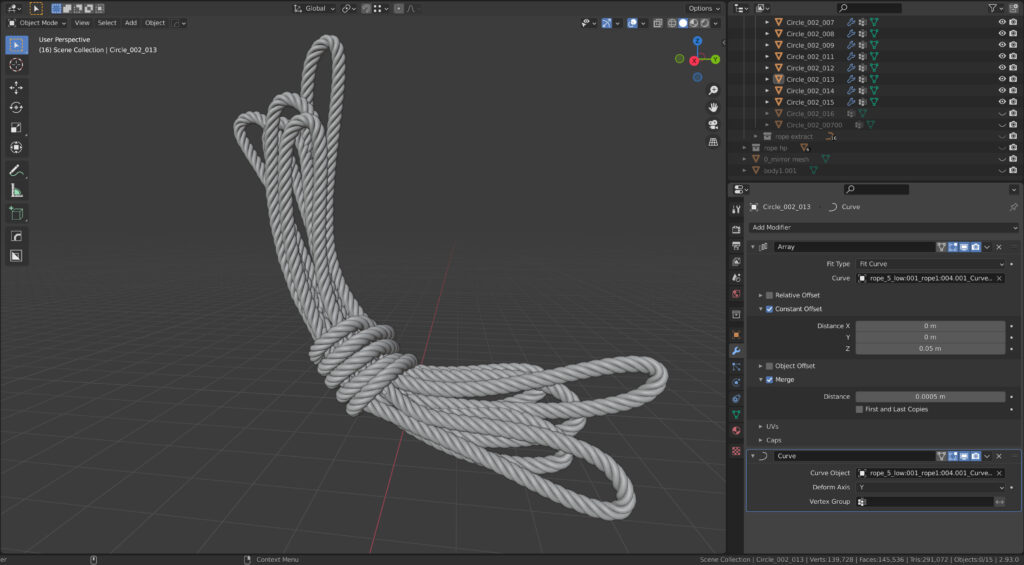
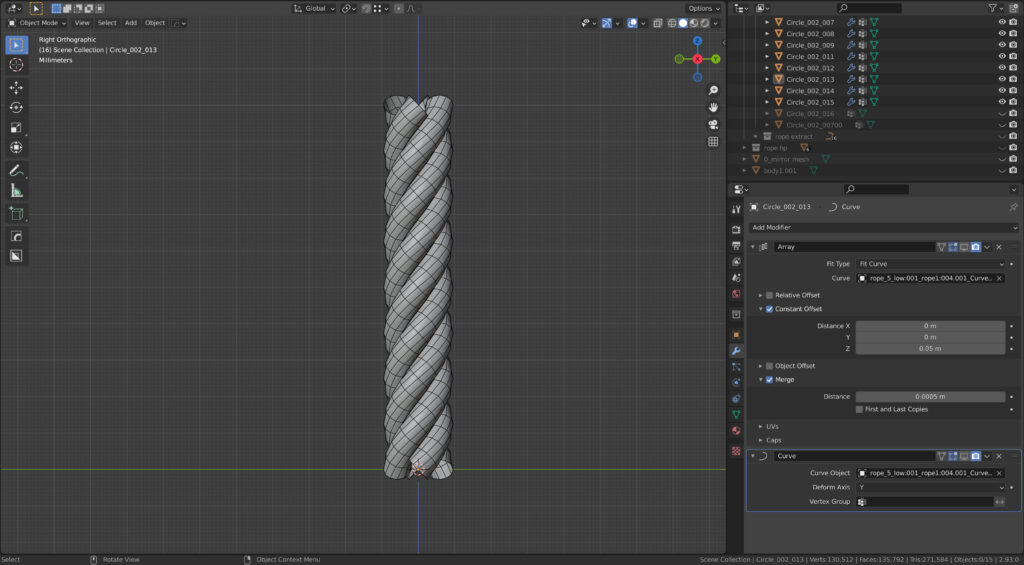
Accessories & Ropes
For accessories, I either employed the curve tool and added a bevel to it or created a mesh and used a curve to follow its path.
UVing & Baking
For the UV mapping, I used Rizom UV, a program recommended by my mentor. It proved easy to learn, and its shortcuts saved considerable time during the UV creation process.
Rizom UV also offered multiple packing settings, further streamlining the process and minimizing unnecessary UV space.

I used this YouTube playlist to learn RizomUV. Once I completed the UV mapping, I used Marmoset Toolbag to bake the textures.
Texturing
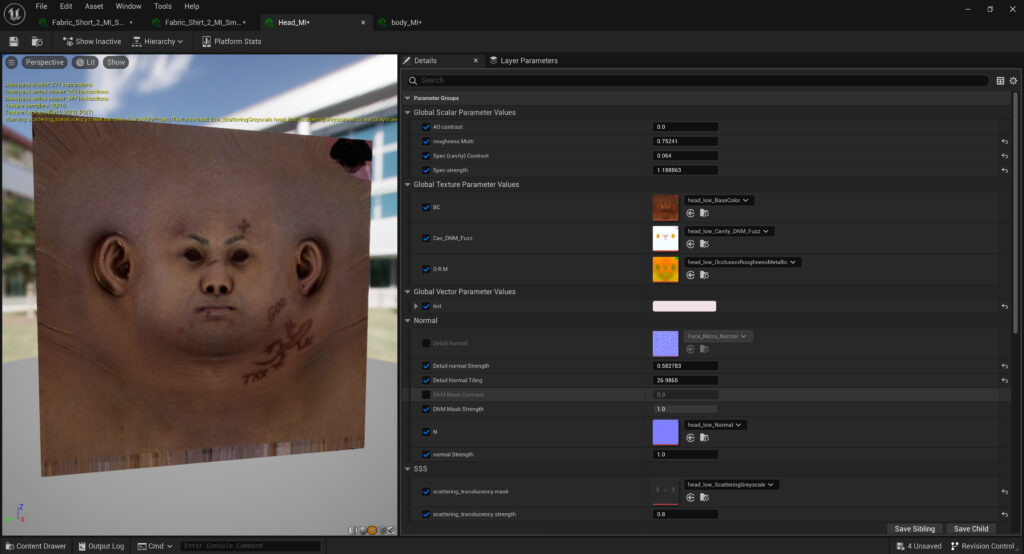
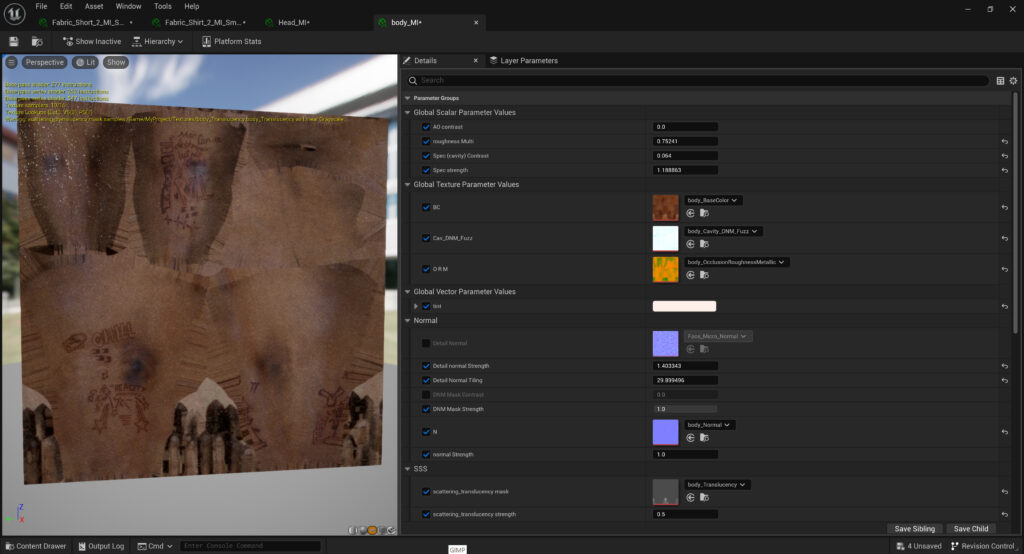
Skin Material
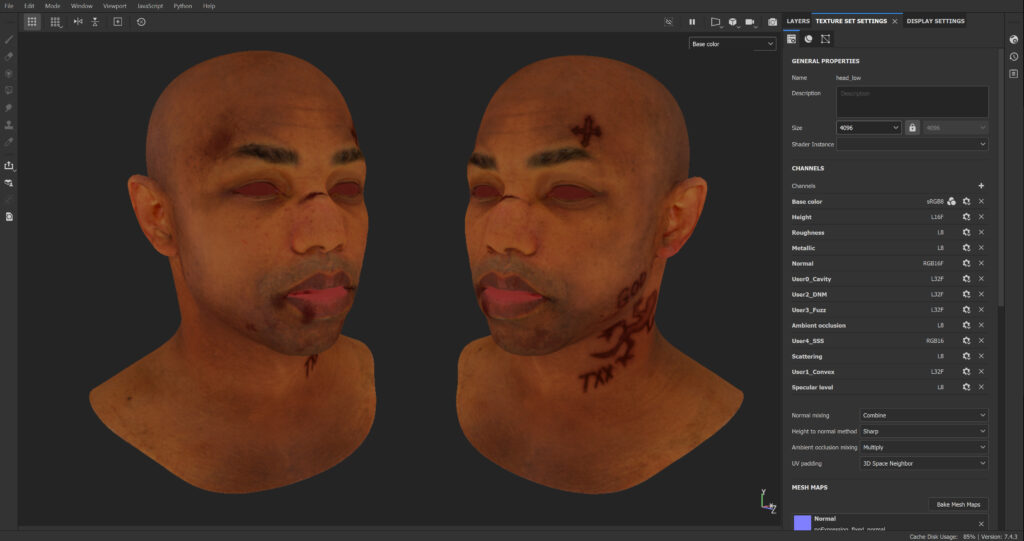
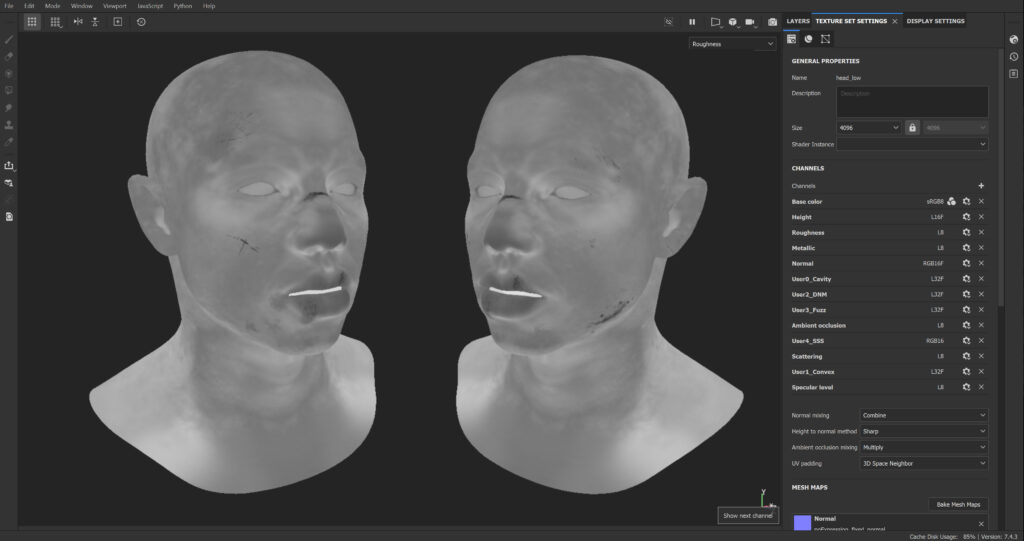
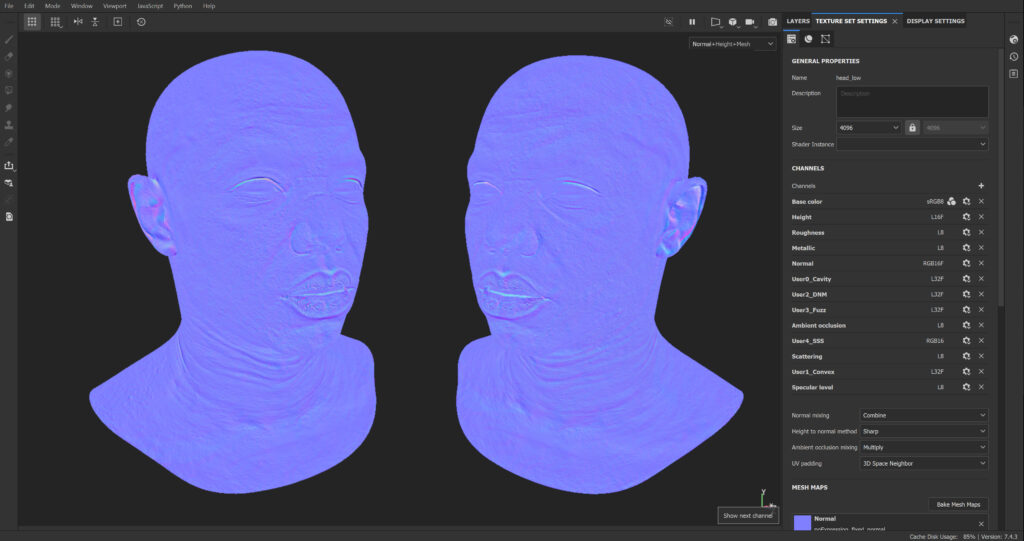
For the skin material, I incorporated 3DScan Store textures for the base color, roughness, and certain areas of the normal map, where I felt my baked normal map lacked some detail.
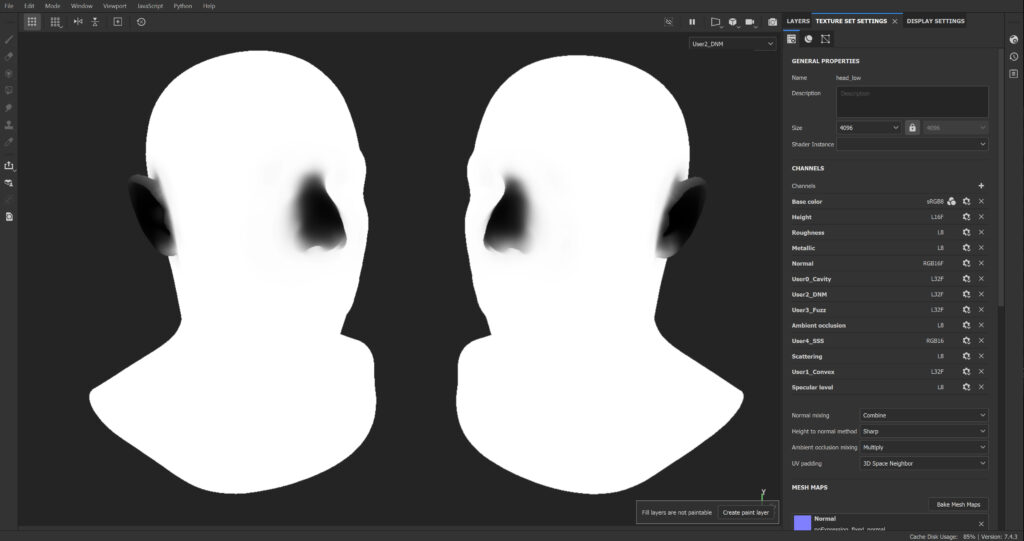
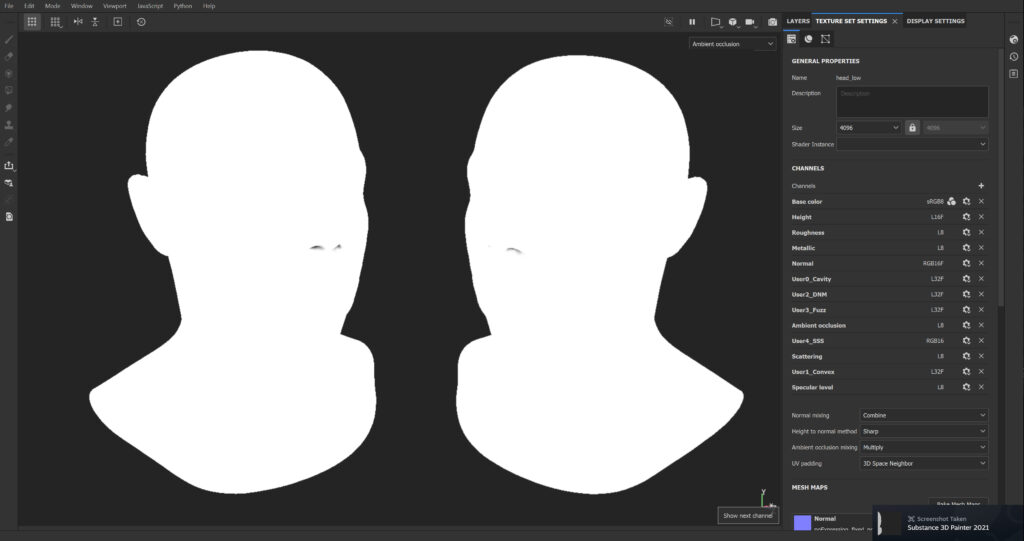
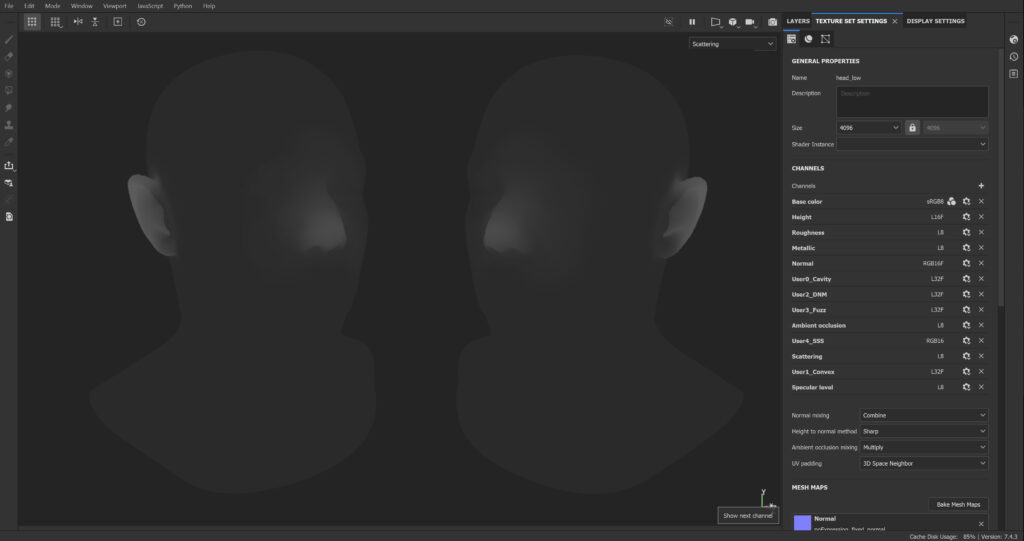
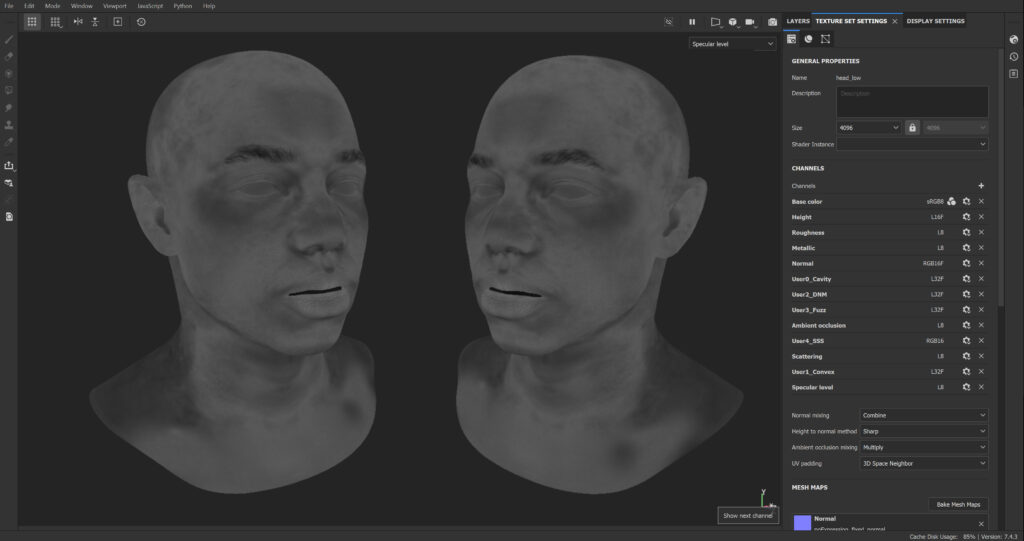
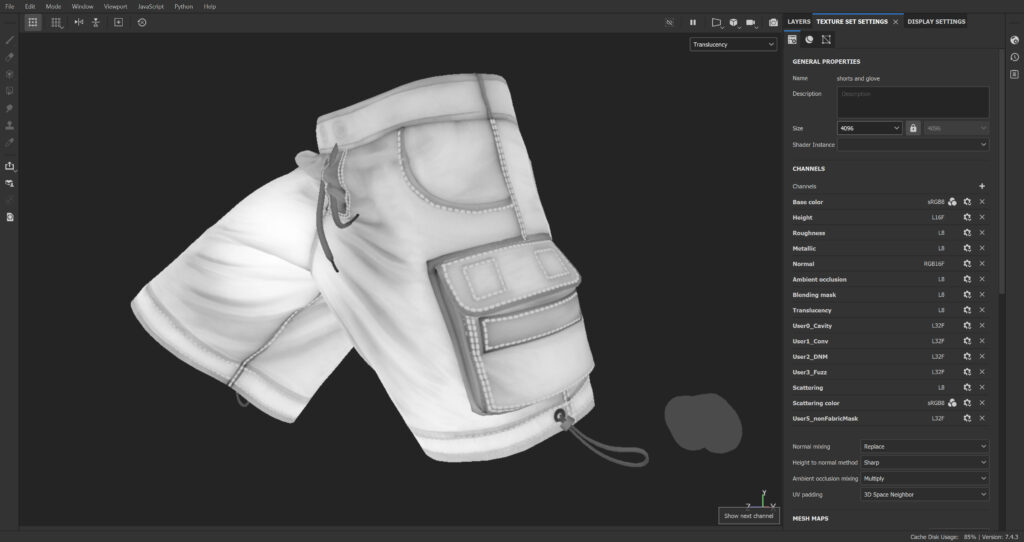
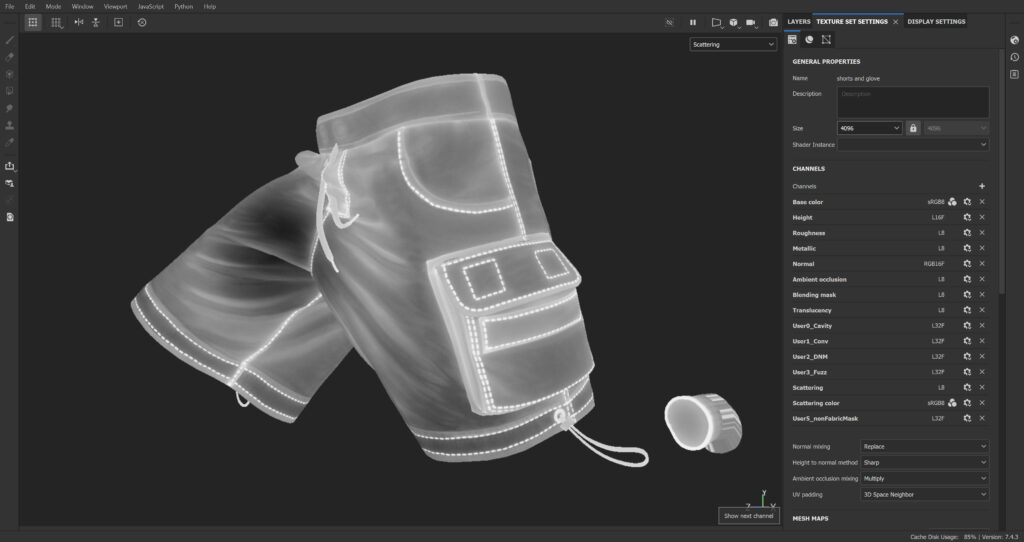
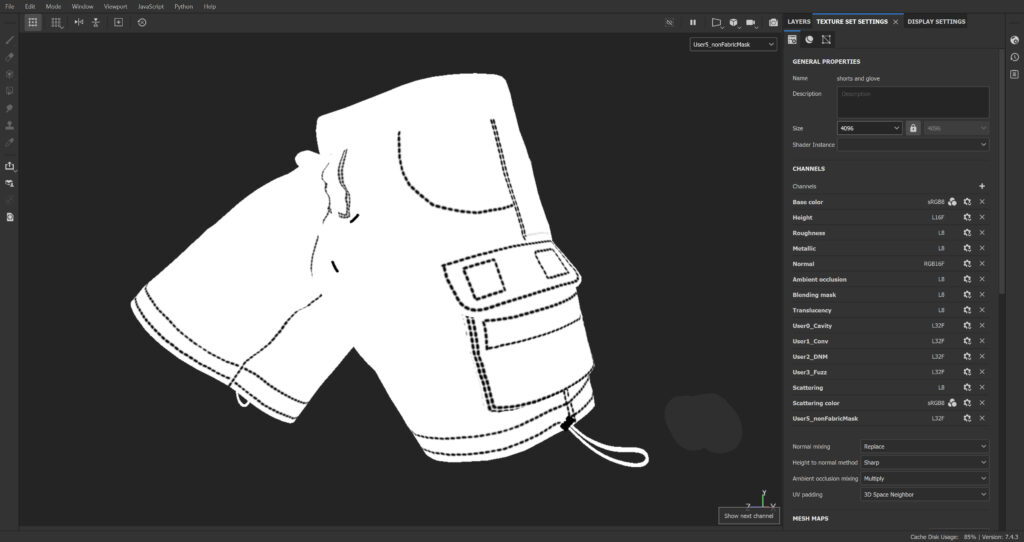
I also introduced additional channels to my material in Substance Painter, aiming to integrate them into my skin shader in Unreal Engine.
- Cavity Map
- Detail Normal Mask
- Scattering Map
- Specular Level Map
- While experimenting to create the skin material in UE, I added a few more channels, although they weren’t ultimately used.
After adding these channels, I began refining the 3DScan Store textures. I removed some wrinkles around the eyes, and extra stubble from the face, and adjusted the base color to better align with my character concept.
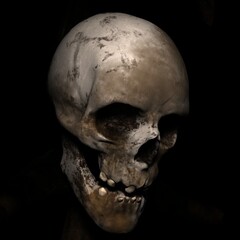
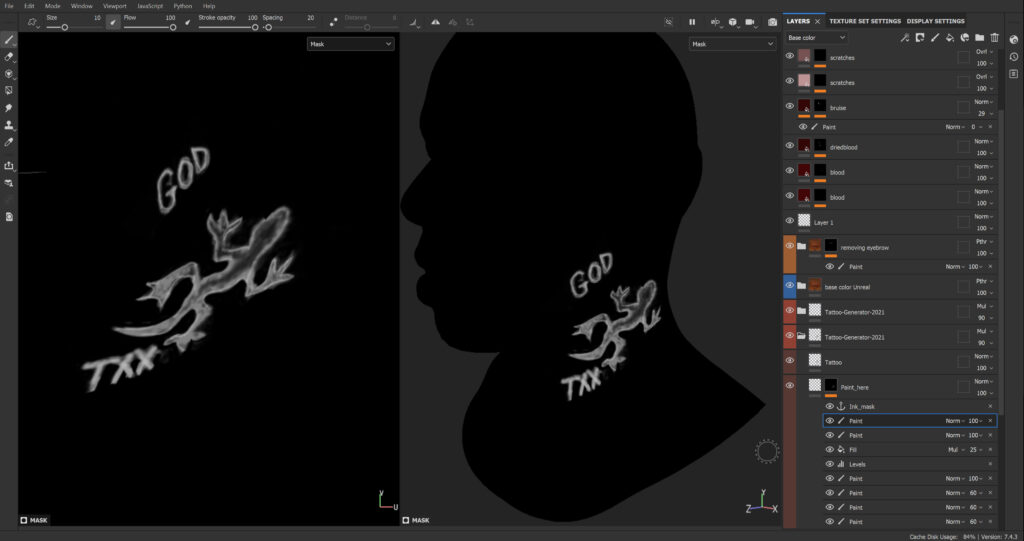
Additionally, I introduced bruises, cuts to add depth to the character, and a tattoo using the Tattoo generator by Arnaud Roy.
Recreating the tattoos involved desaturating the concept art and refining it to serve as an alpha map for projection onto the 2D or 3D windows, ensuring the final result appeared accurate and undistorted.

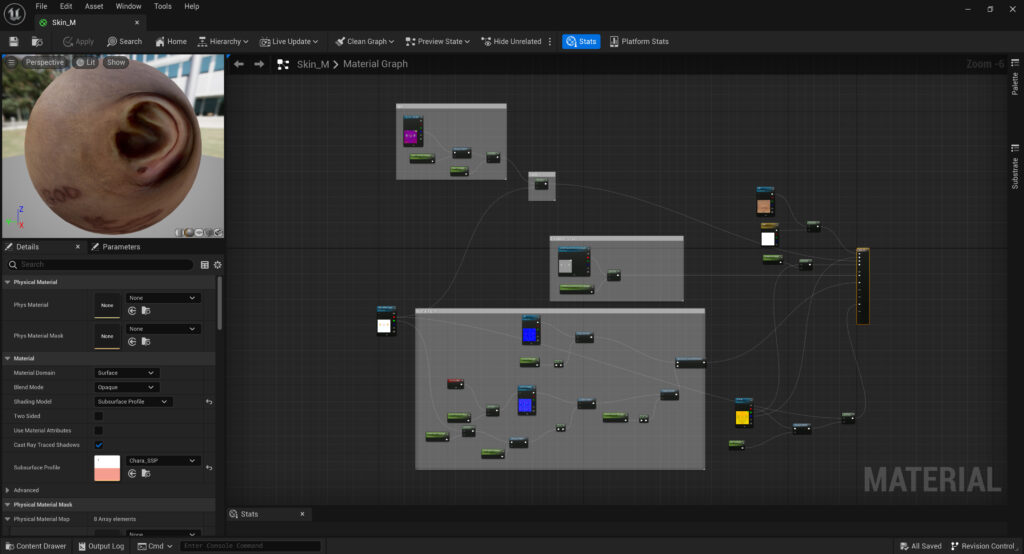
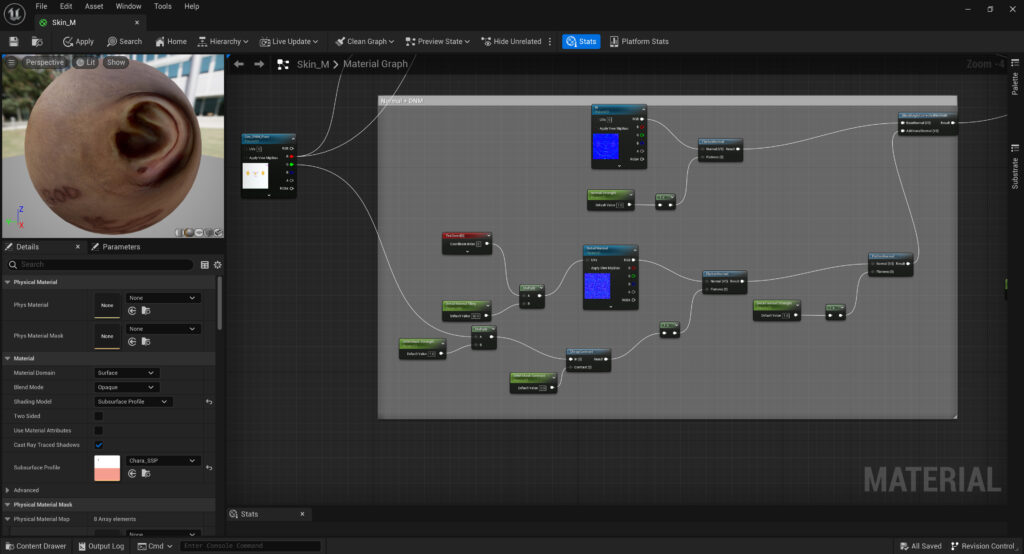
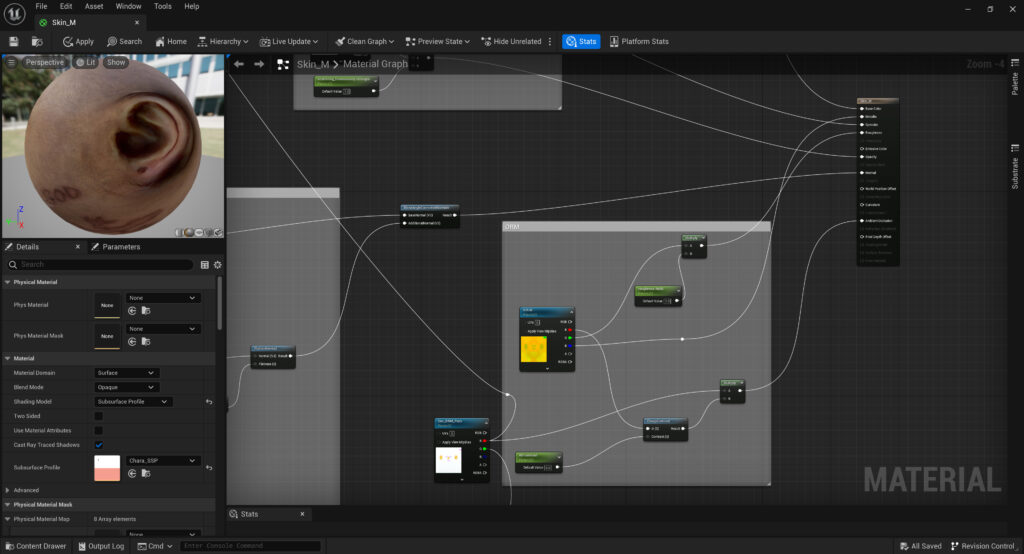
Skin Material in UE
In Unreal Engine, I configured the skin material with the following settings:
- Shading Model: Subsurface Profile, and then selecting a Subsurface profile. I duplicated an existing profile for later adjustments.
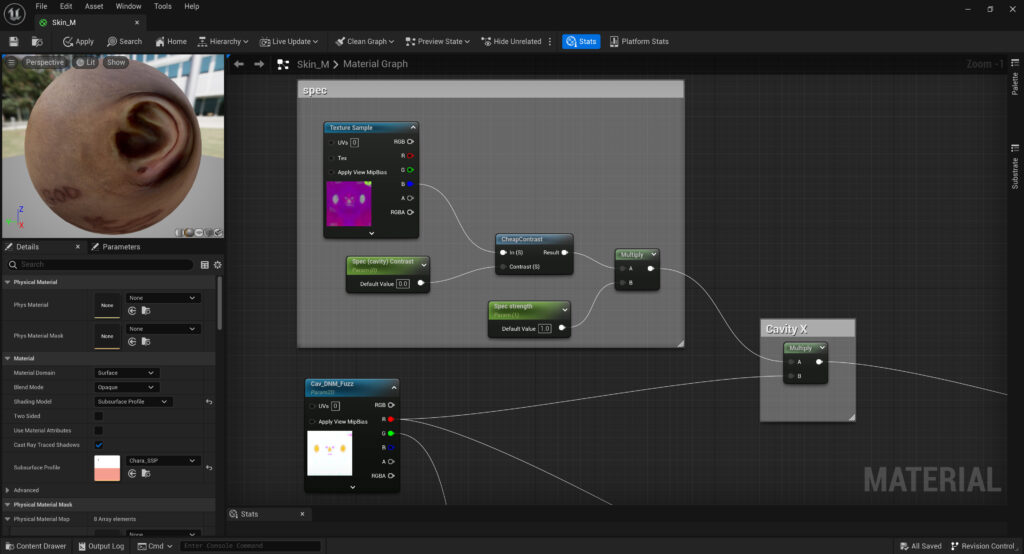
- Specular: I used the specular map with a contrast and multiply node for texture map adjustment, followed by multiplication by the cavity map.
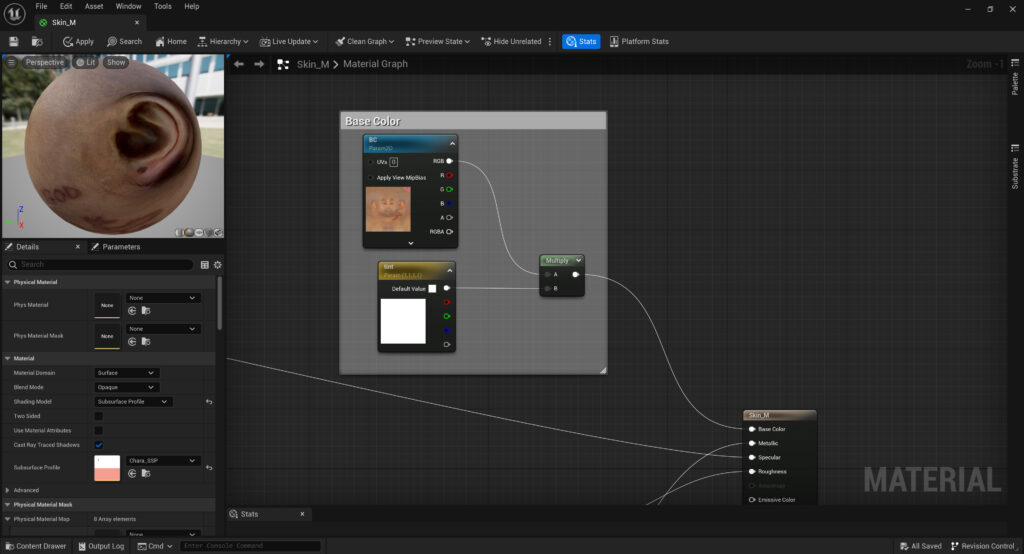
- Base color: The base color map is multiplied by a 3-vector parameter for tint color.
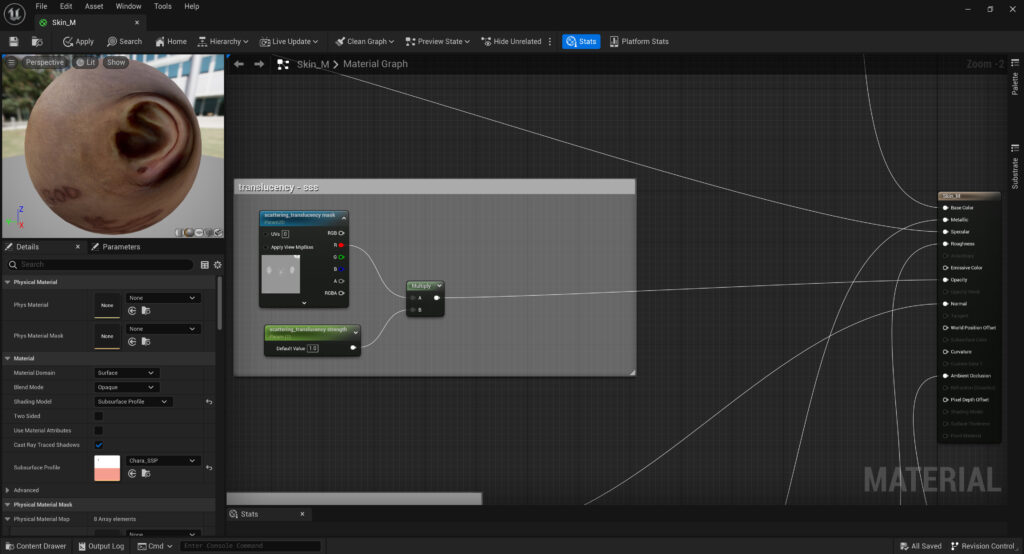
- Translucency/SSS: The scattering map is multiplied by a vector 1 for possible adjustments, connected to opacity.
- Normal map: Using the FlattenNormal node with the normal map for increased normal map intensity. I also used a Detail Normal map with a FlattenNormal node, followed by adjustment based on the Detail Normal Mask. The resulting normal map is connected to another FlattenNormal node for further adjustments.
- ORM (Occlusion, Roughness, Metallic):
- Ambient Occlusion: Adjusted using a contrast node and then multiplied by the cavity map.
- Roughness: Multiplied by a parameter for texture map adjustment.
- Metallic: Metallic map.
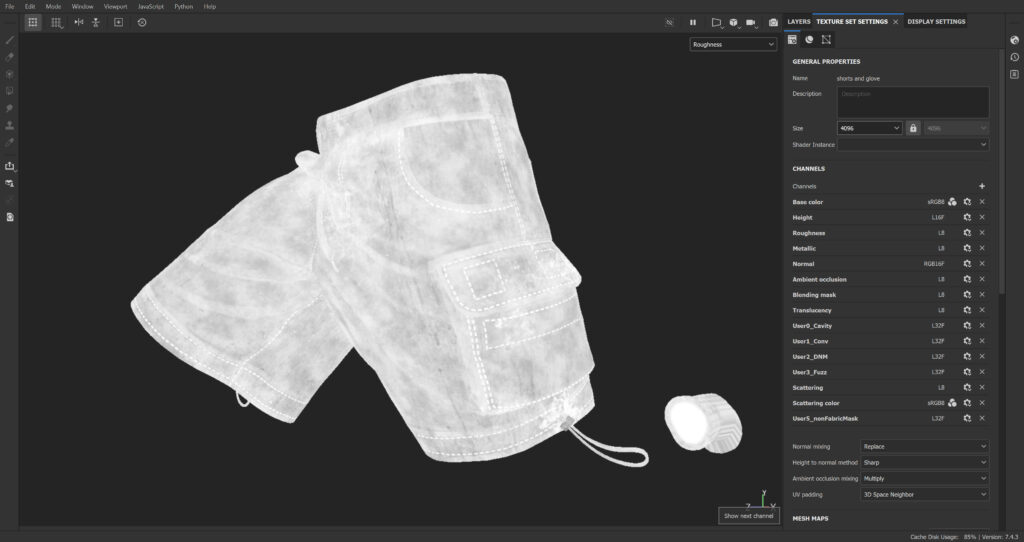
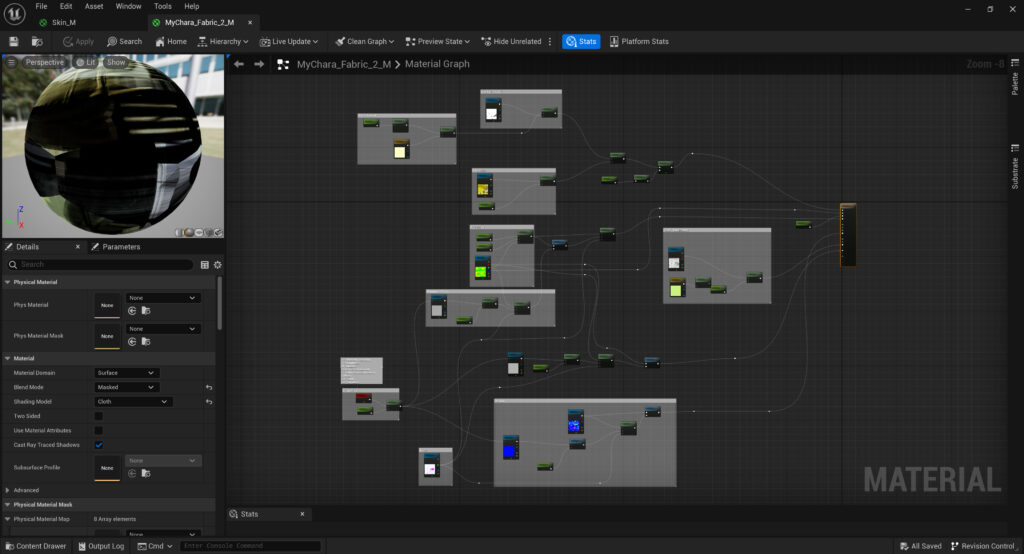
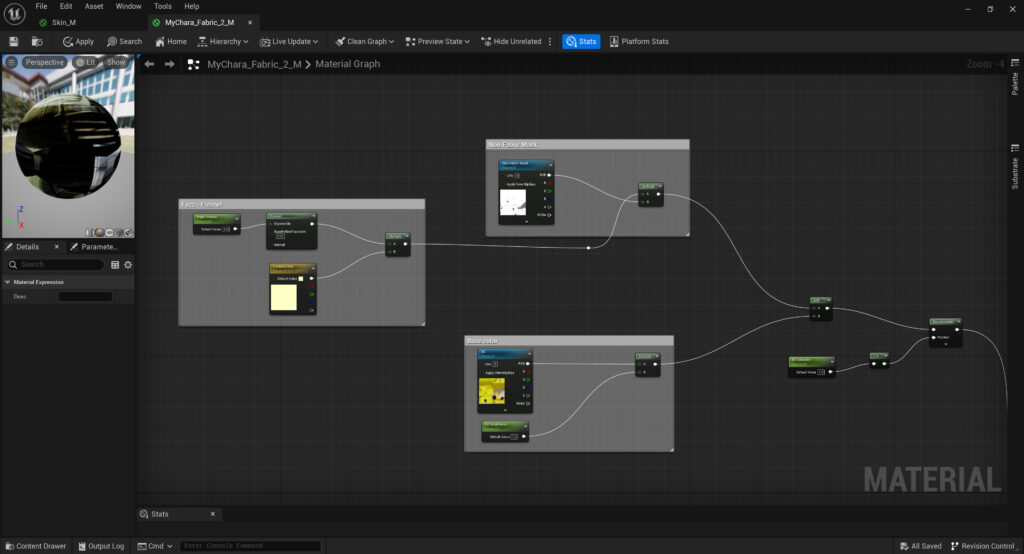
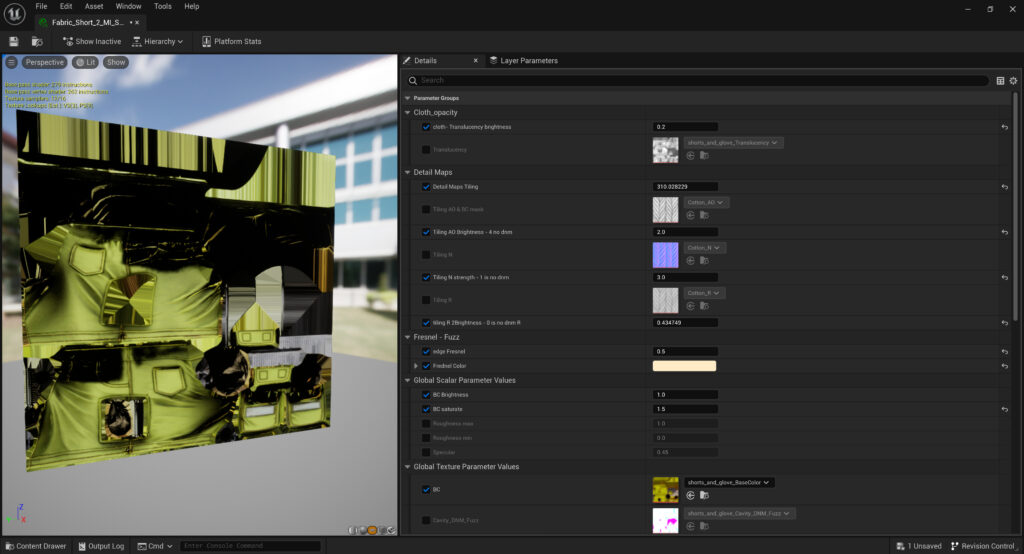
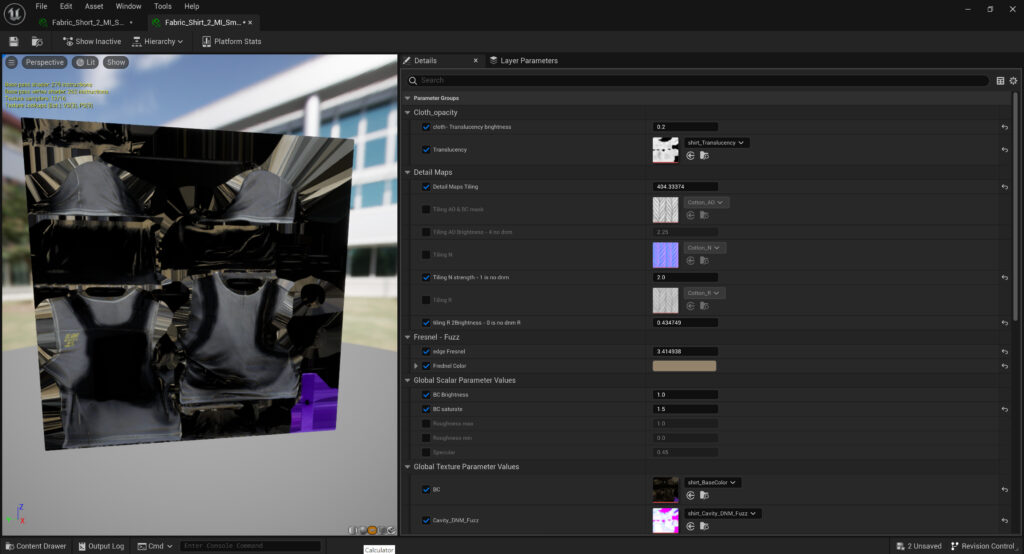
Fabric in UE Material
I configured the fabric material in Unreal Engine with the following parameters:
- Base colorI used the Fresnel node, multiplied by a 3-vector for tint, and the Non-Fabric Mask was also multiplied by the Fresnel. The base color was multiplied by a 3-vector for tint and added to the Fresnel, with desaturation to adjust the saturation.
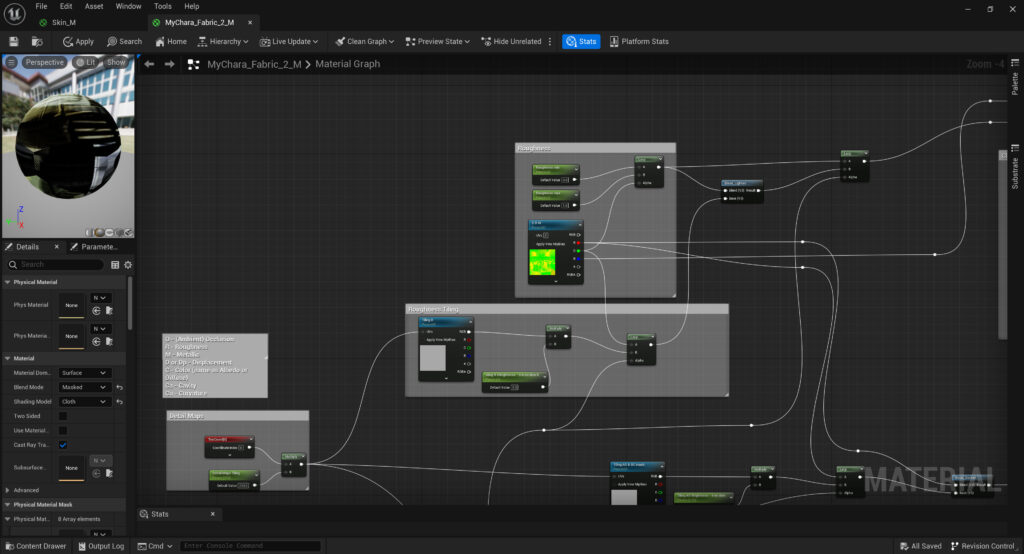
- RoughnessA detailed normal map was used for the roughness and multiplied by a Vector1 parameter. This was connected to a lerp with the roughness map, using the Detail Normal Mask as alpha. This result was added to a previous Lerp node using a blend lighten and integrated into another Lerp.
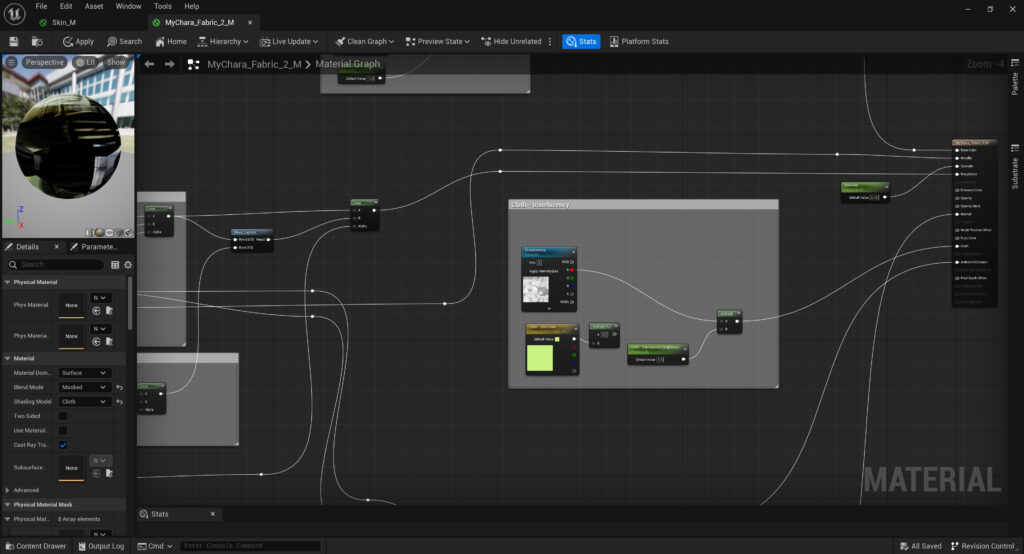
- Cloth TranslucencyThe translucency map was multiplied by a Vector 1 for possible adjustments.
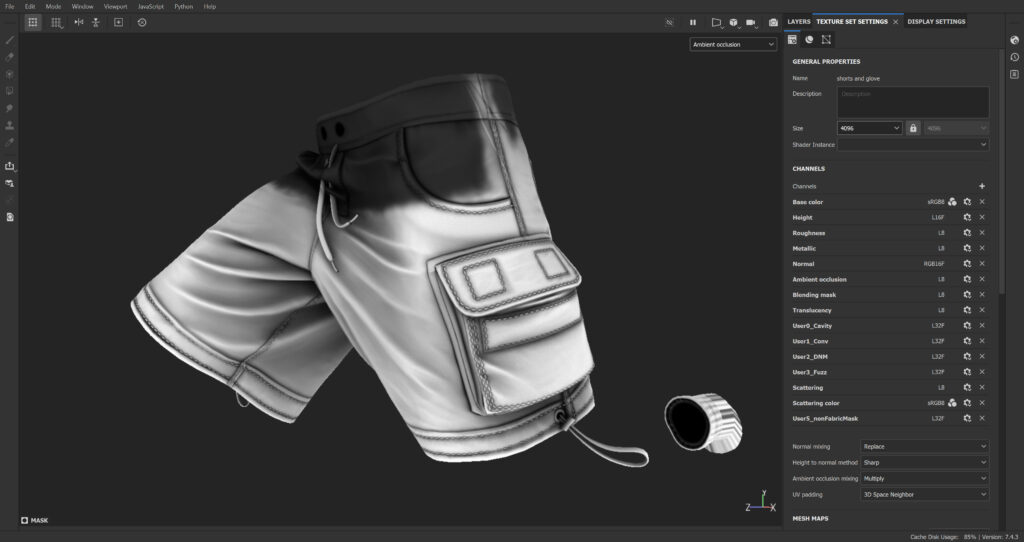
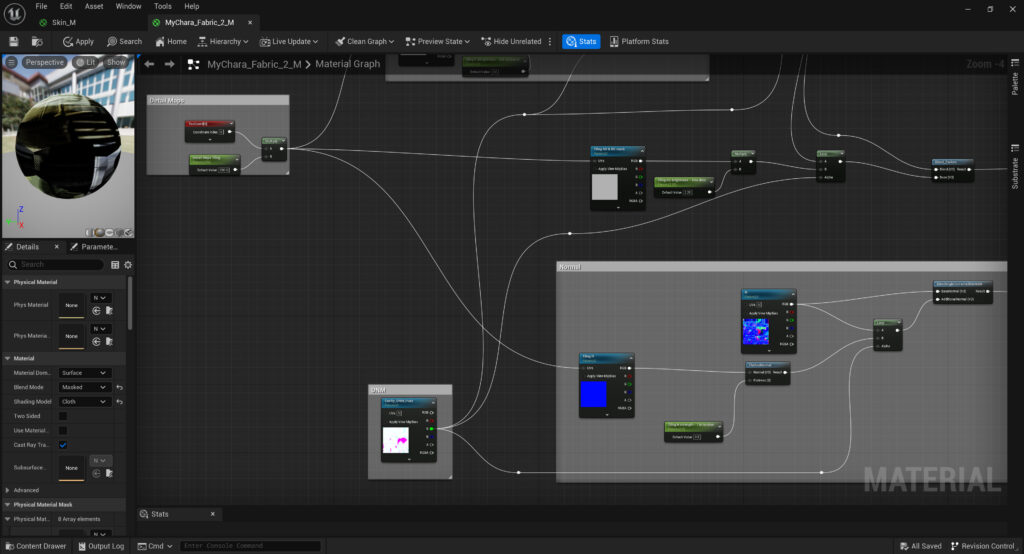
- Ambient OcclusionUsing a detail normal map to add extra AO to the fabric, this was multiplied by a 1-vector node and then lerped with the AO texture map, with the Detail Normal Mask as alpha.
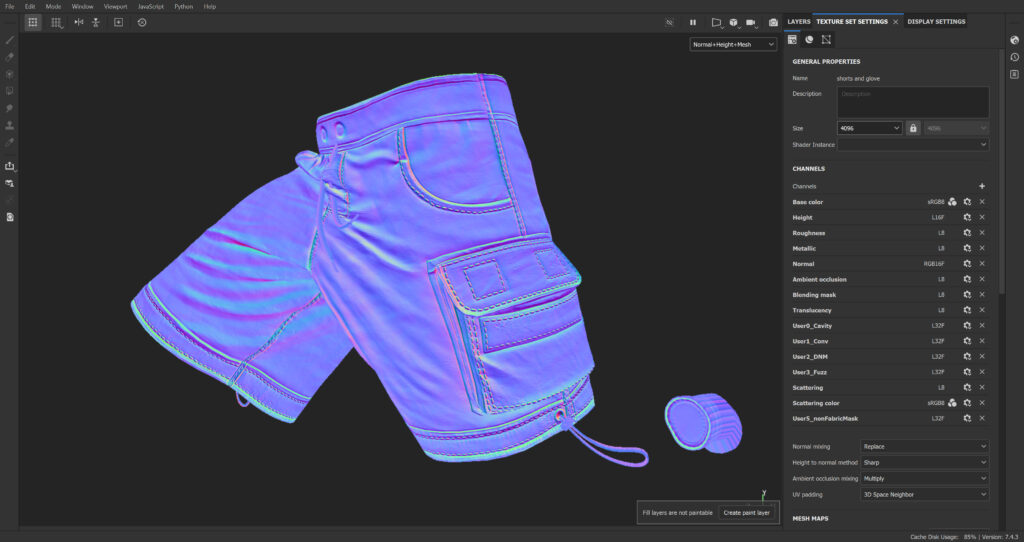
- Normal mapThe detail normal map was used with a FlattenNormal node for increased intensity.
Lerp node was used with the normal map to remove the Detail Normal map in some areas based on the Detail Normal Mask.
The Blend Angle Corrected Normals were employed to merge the normal information.
- Specular
Vector1 as 0.45


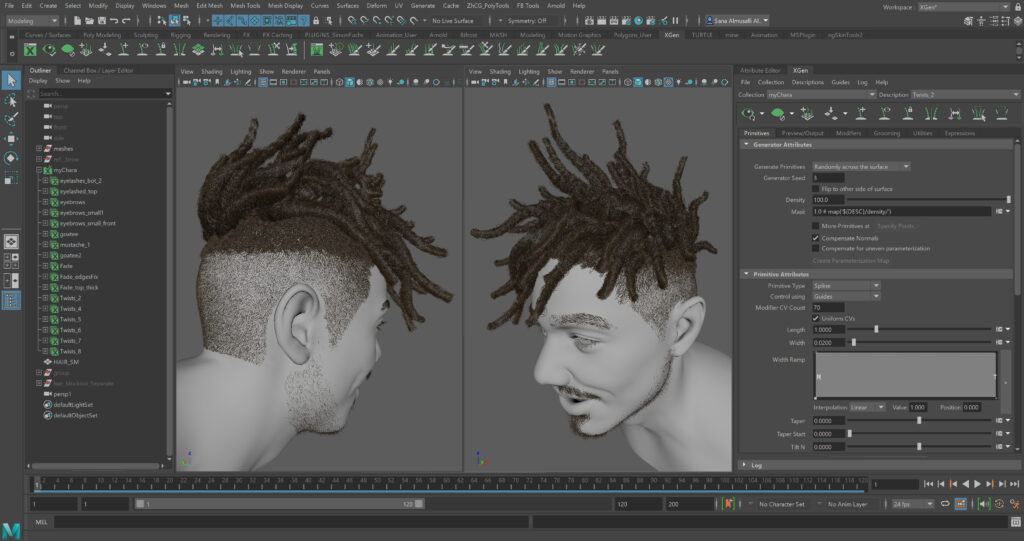
Technical – Hair Binding with Head for Blend Shape and Animation
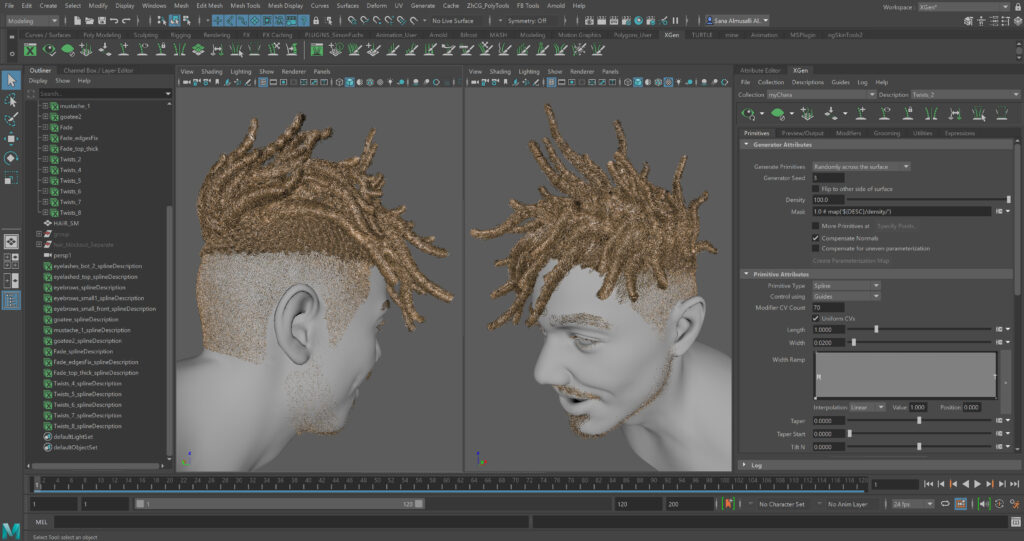
Modifiers used to create the Twists in Xgen
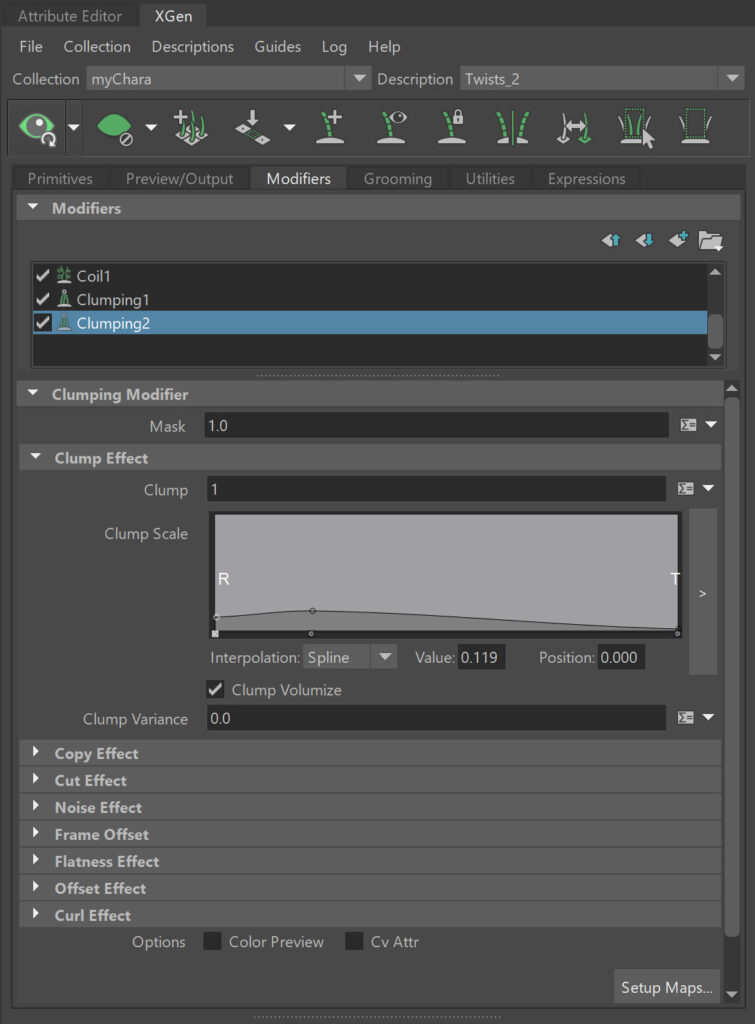
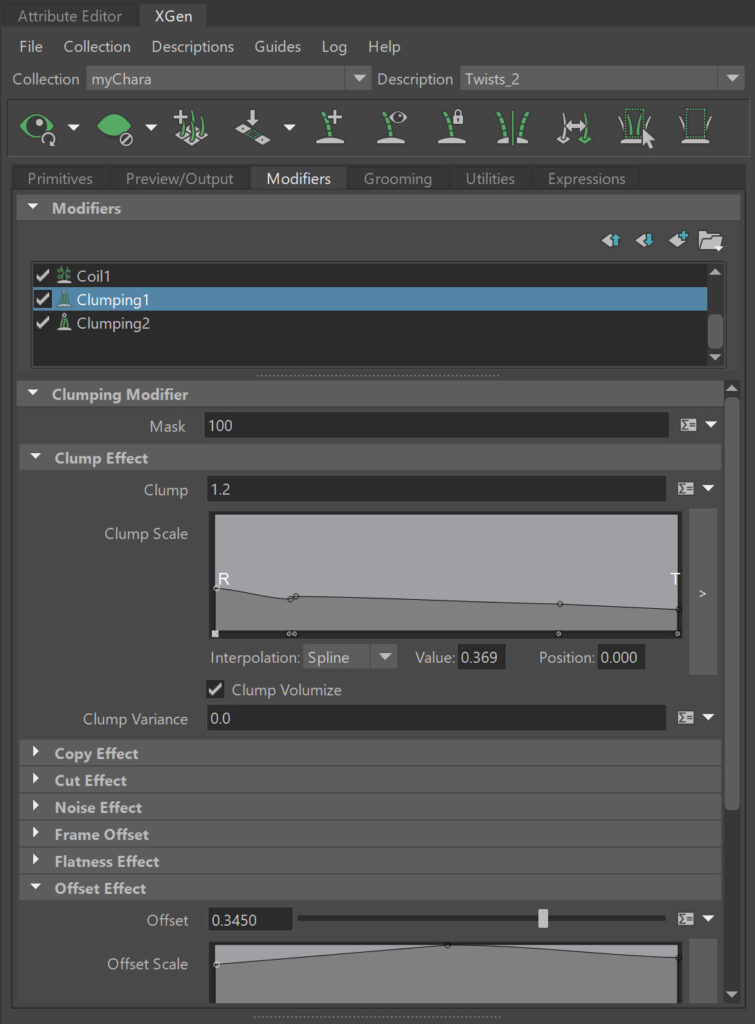
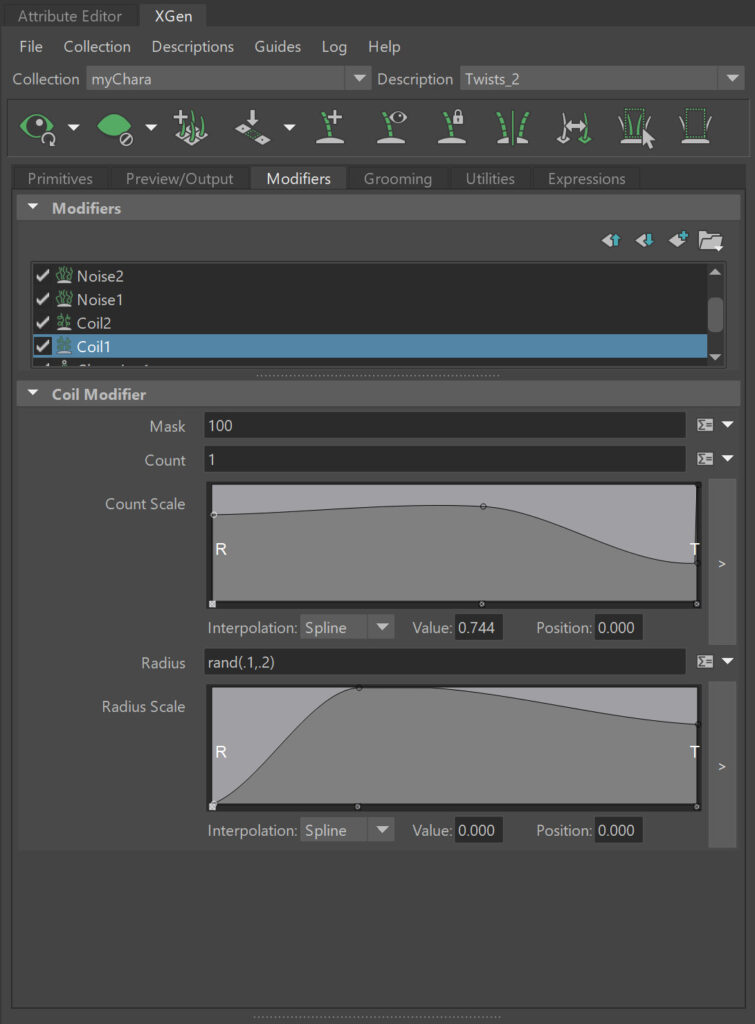
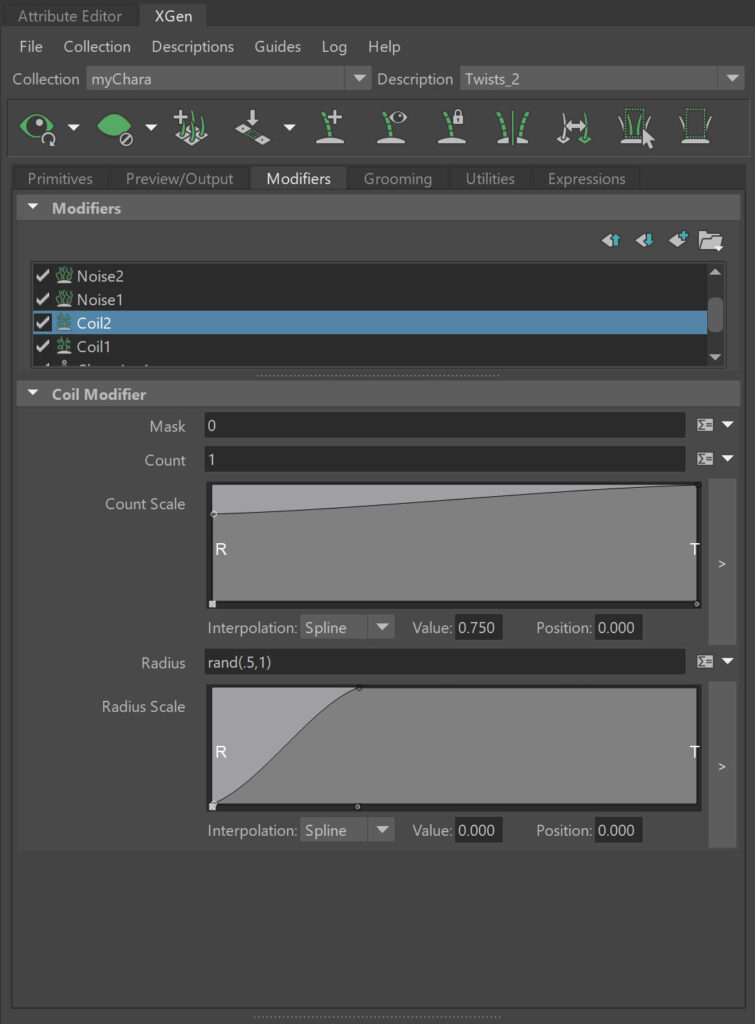
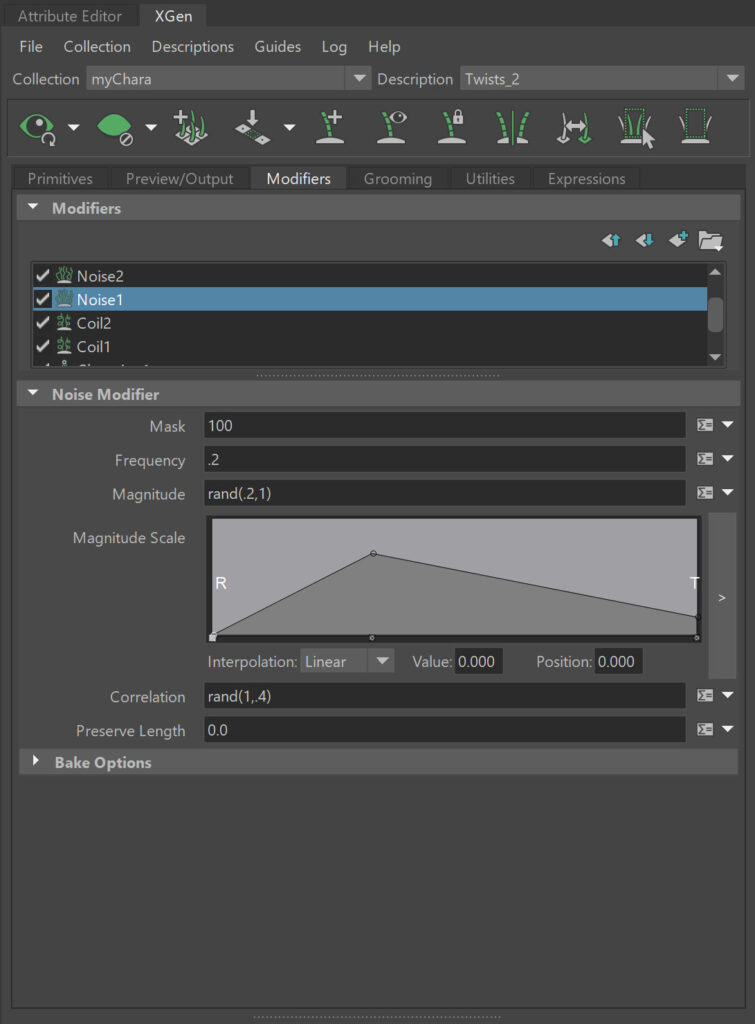
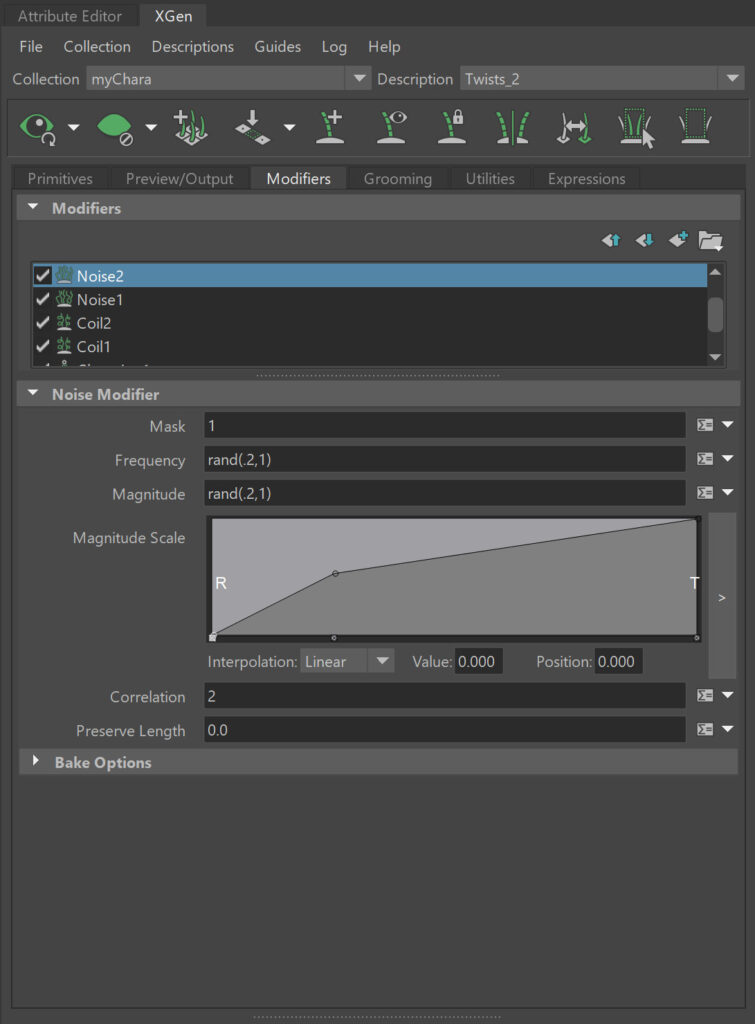
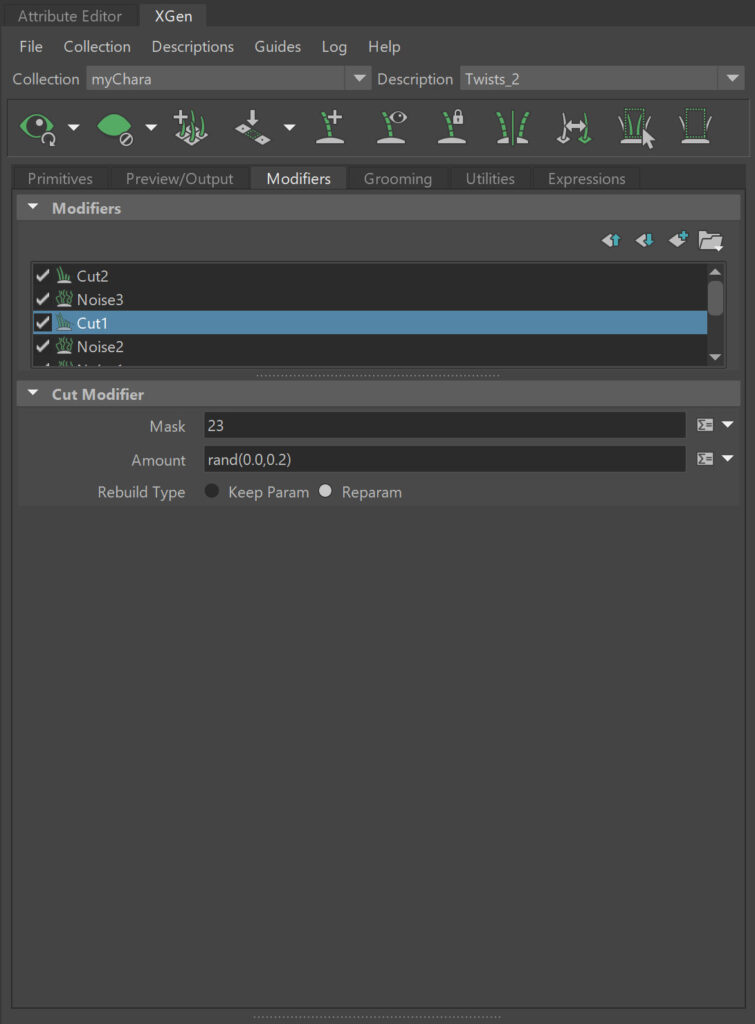
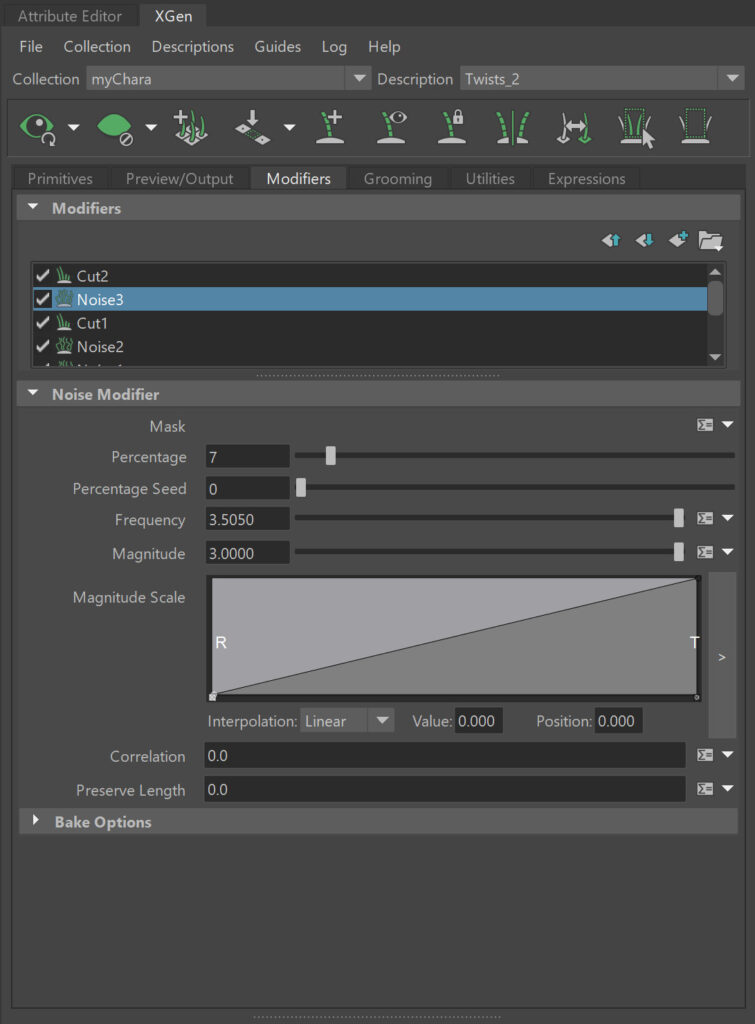
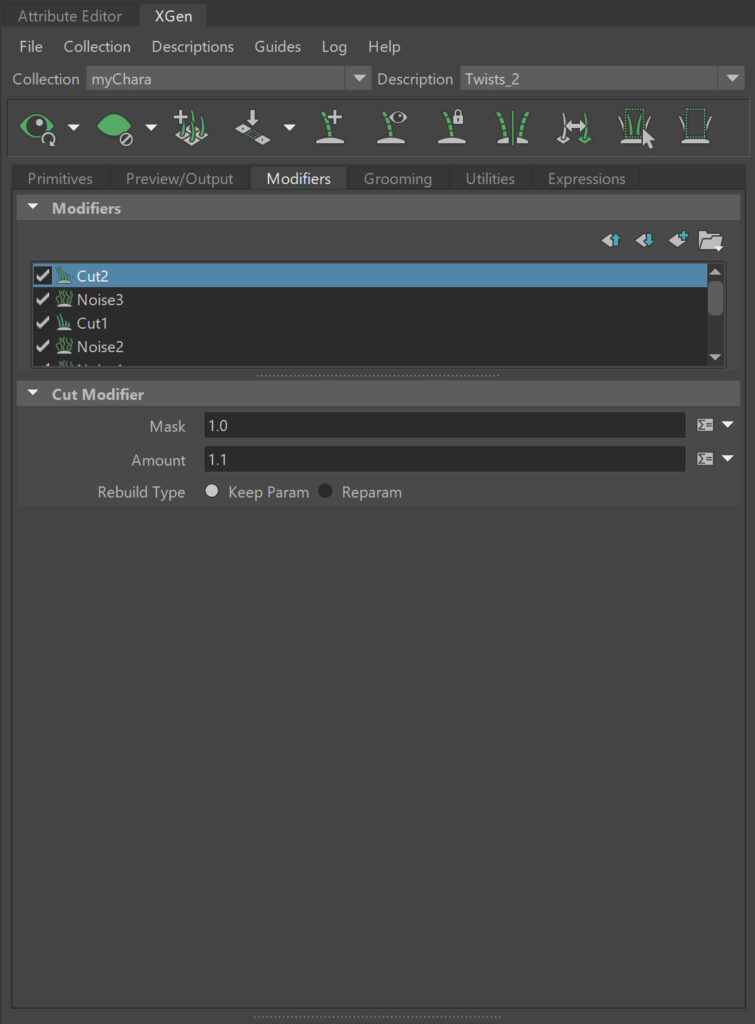
For the Xgen hair, I largely followed the Fade tutorial by Trigon and a timelapse from Hadi Karimi (Willow Smith’s dreadlocks) to create the twists. I adjusted several modifiers to suit my character’s hair.
Converting Xgen to Interactive Groom
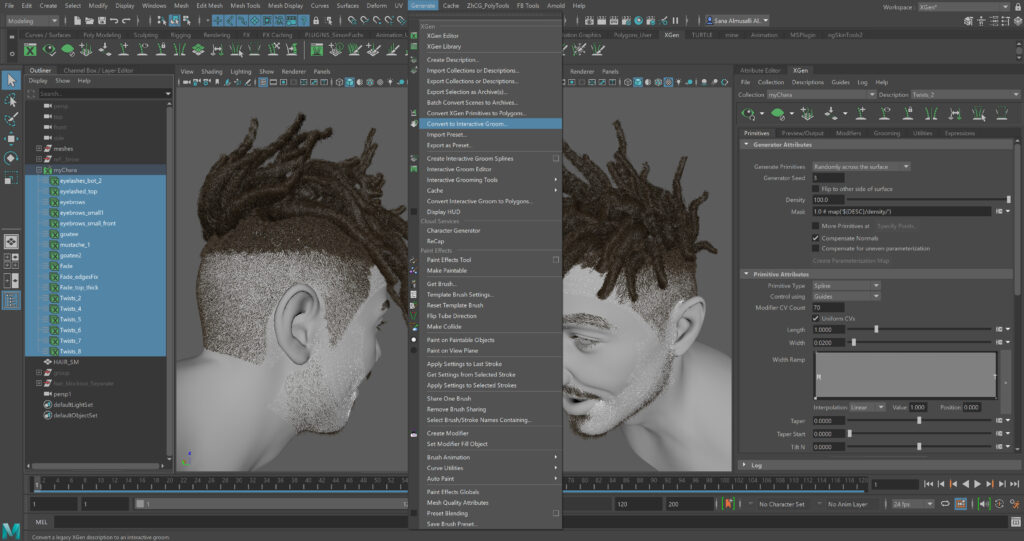
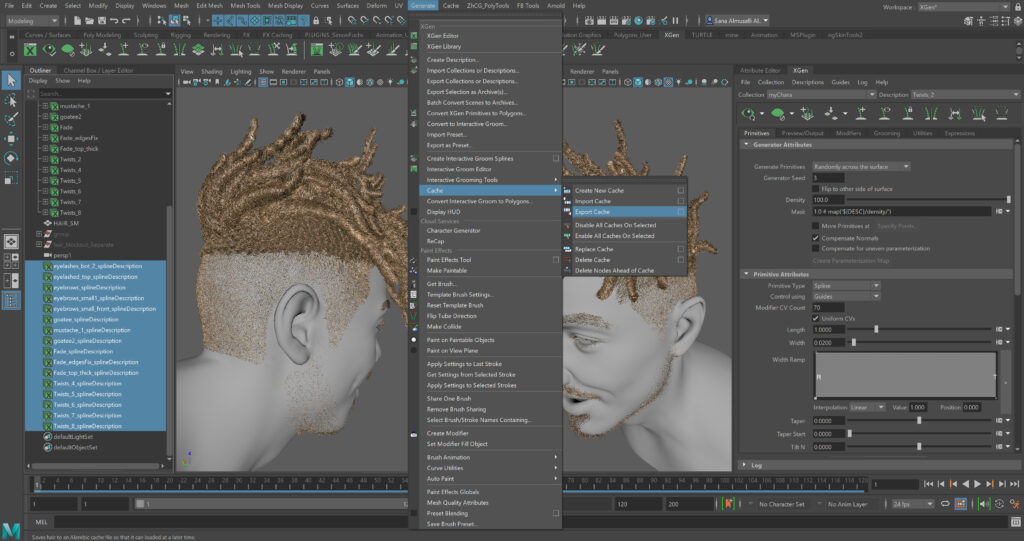

Once content with the hair, I converted it into an interactive groom to enable exporting it to UE. I followed JHill’s tutorial “How to Make Custom Hair for UNREAL ENGINE 5” for this process, and then I also used his method for creating the hair material in UE.
Exporting Blend Shape and Animation


At the project’s outset, I aimed to create a basic animation and a couple of expressions to showcase in the final render.
One of the challenges I faced was learning how to attach the Xgen hair to the character while the head was in motion or if the hair could follow any expression changes.
After watching several YouTube videos and reading forums, I eventually got it to work. Here are the steps I followed to bind the hair to the character, allowing manipulation and blend shape usage in UE:
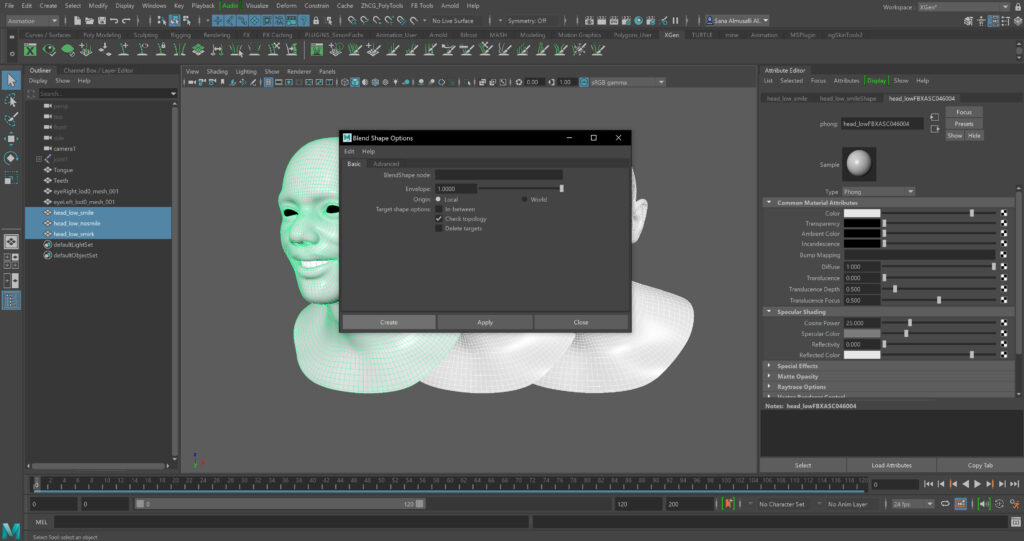
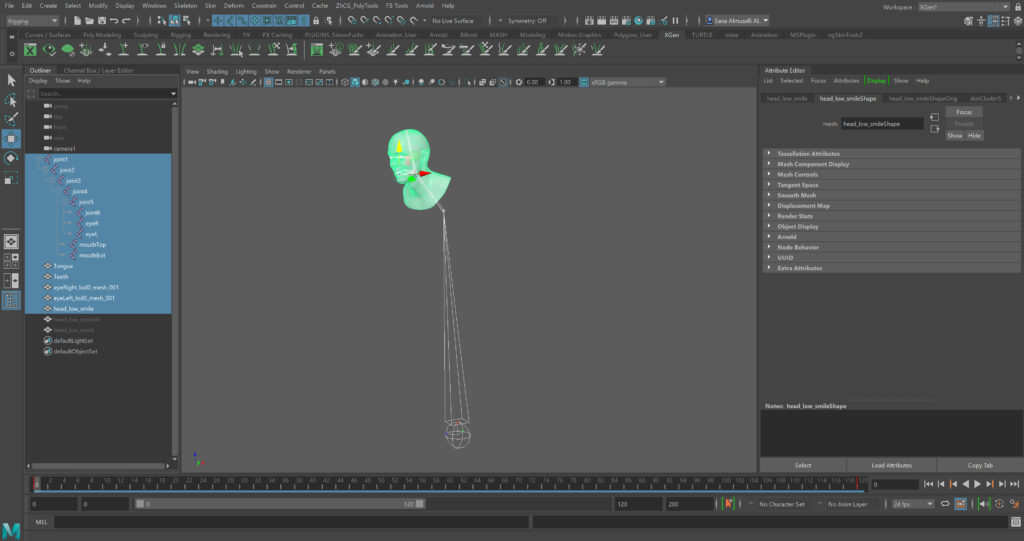
- Brought the expressions from Zbrush to Maya.
- Generated blend shapes using the expressions.
- Checked the attribute editor to ensure the blend shapes were working.
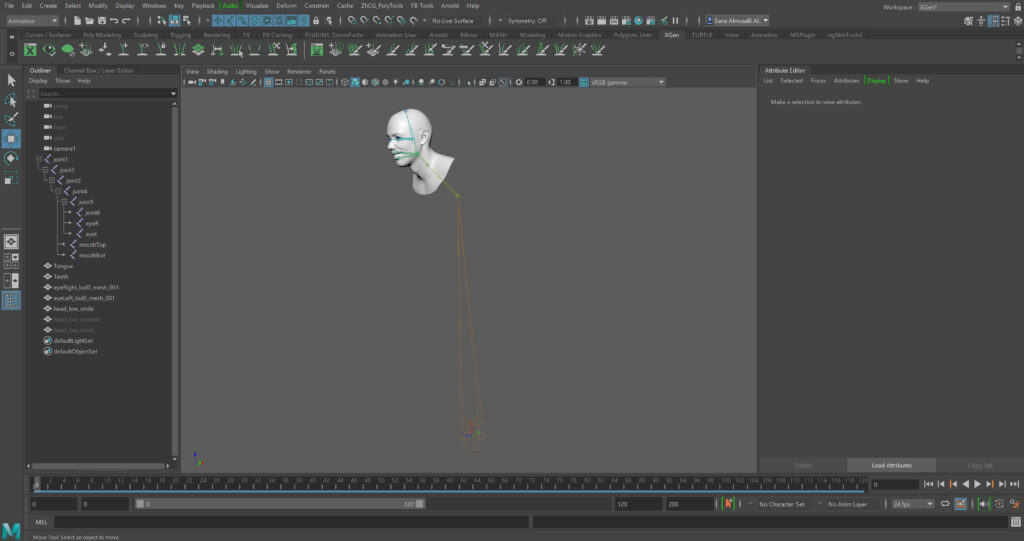
- Created a basic rig.
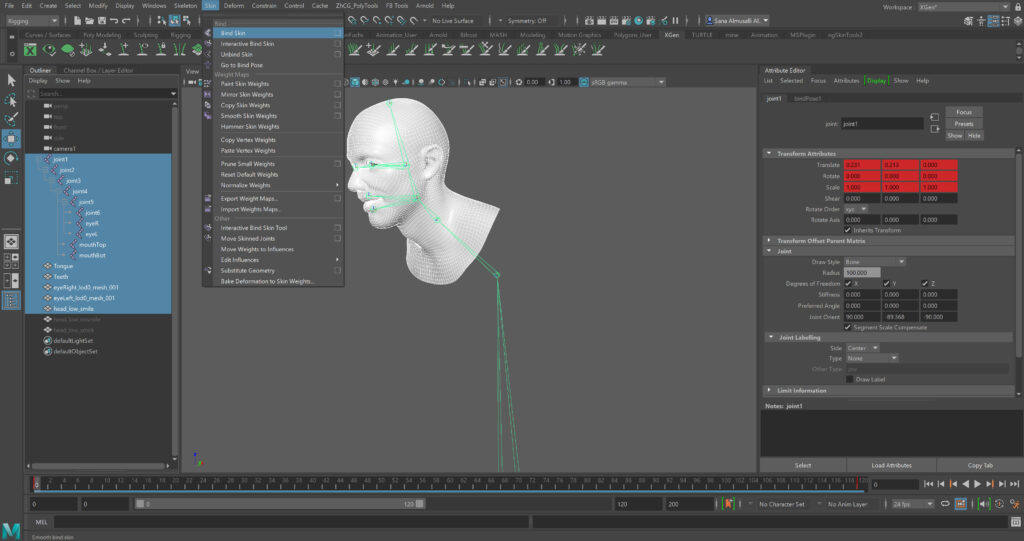
- Selected all the meshes (face, eyes, mouth, tongue, etc.) and the rig and skinned them, using automatic skinning to avoid advanced rigging.
- Created a basic animation or keyframed the frames to make UE recognize it as animation.
- Noticed the blend shapes weren’t visible in the sequencer when no animation was present for the mesh.
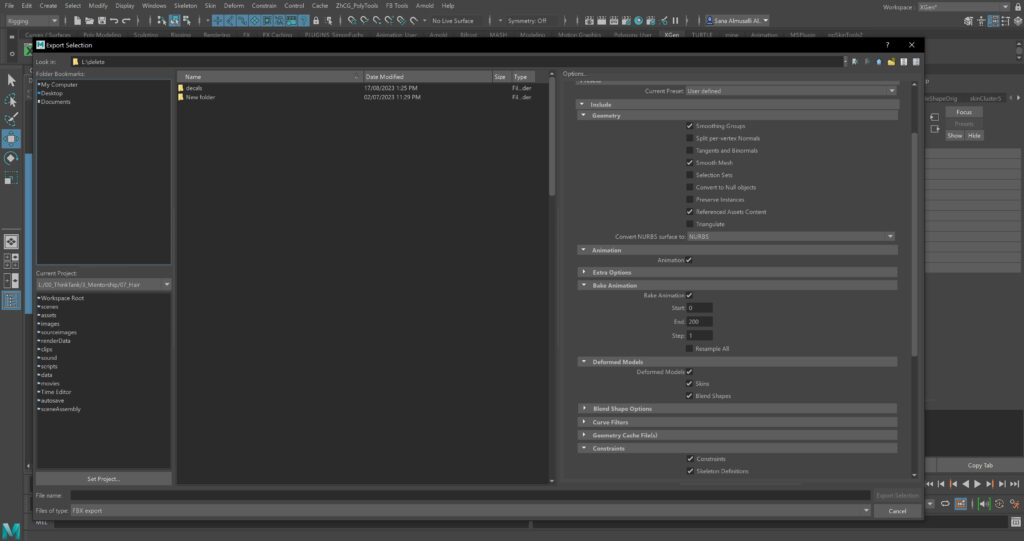
- Exported the meshes and the rig to the UE file as an FBX, enabling animation in the export options.
Preparing the files in UE
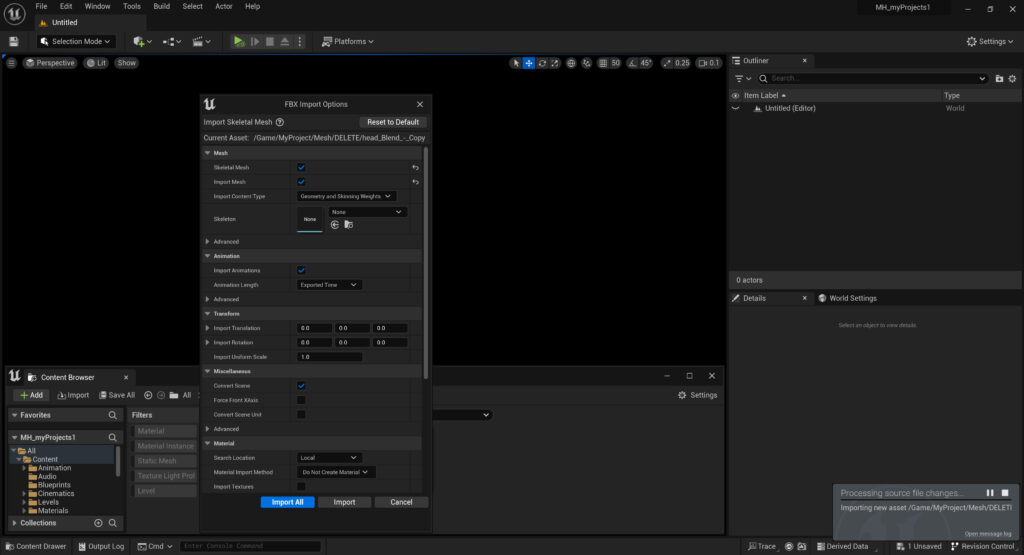
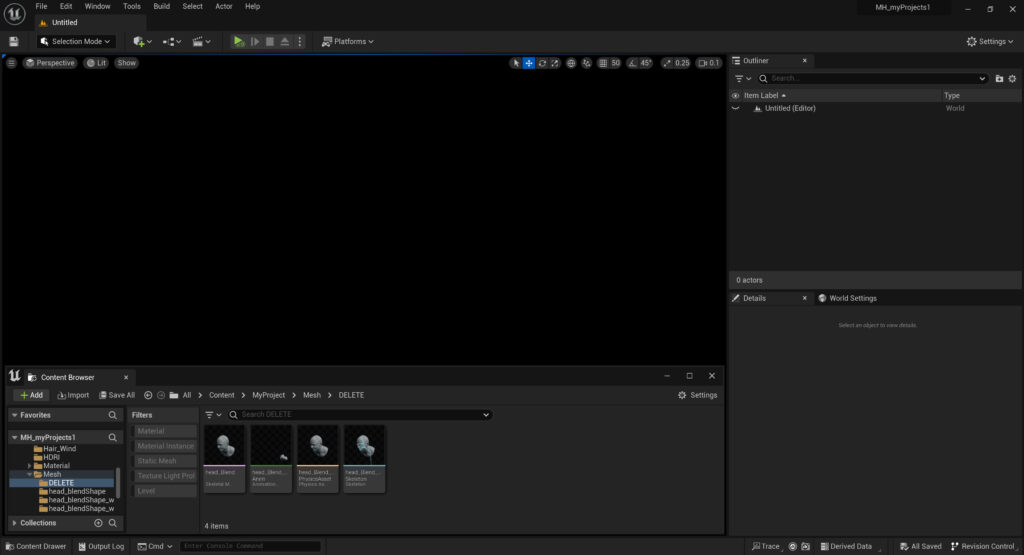
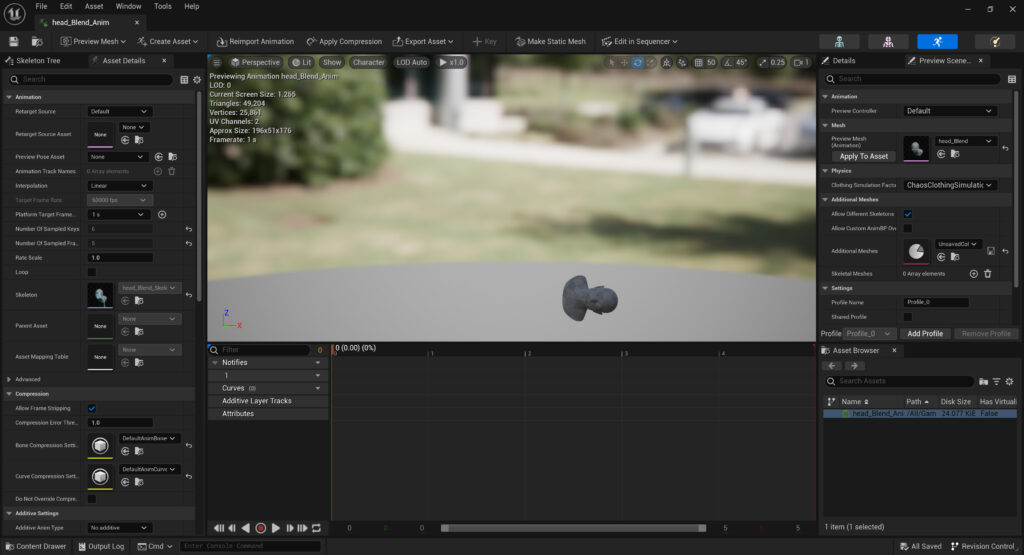
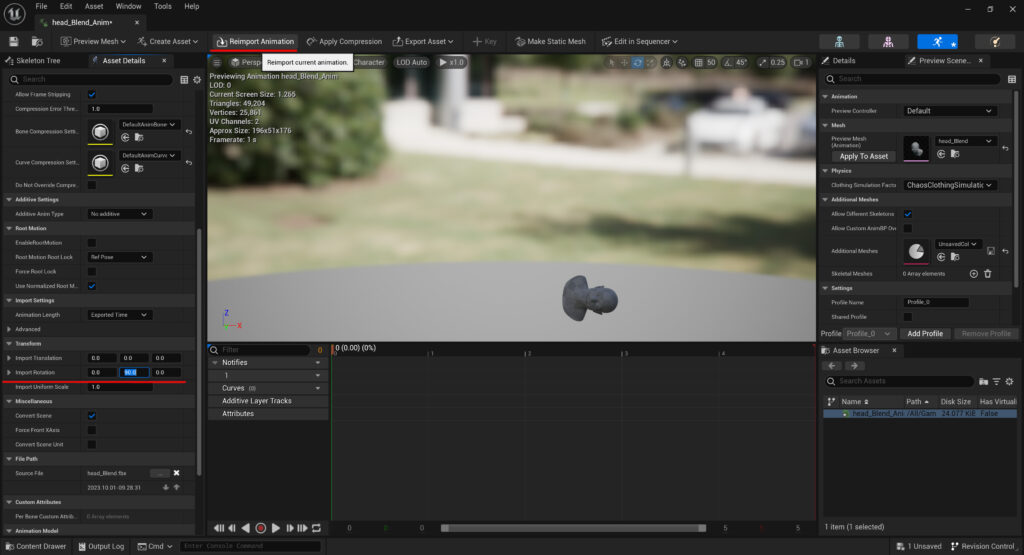


- In the import options, enabled the skeletal mesh and imported animation with “Exported Time.”
- Adjusted the import rotation in the asset details of the animation mesh. For my character, I had to rotate it by 90 degrees in the Y-axis.
- Reimported the animation.
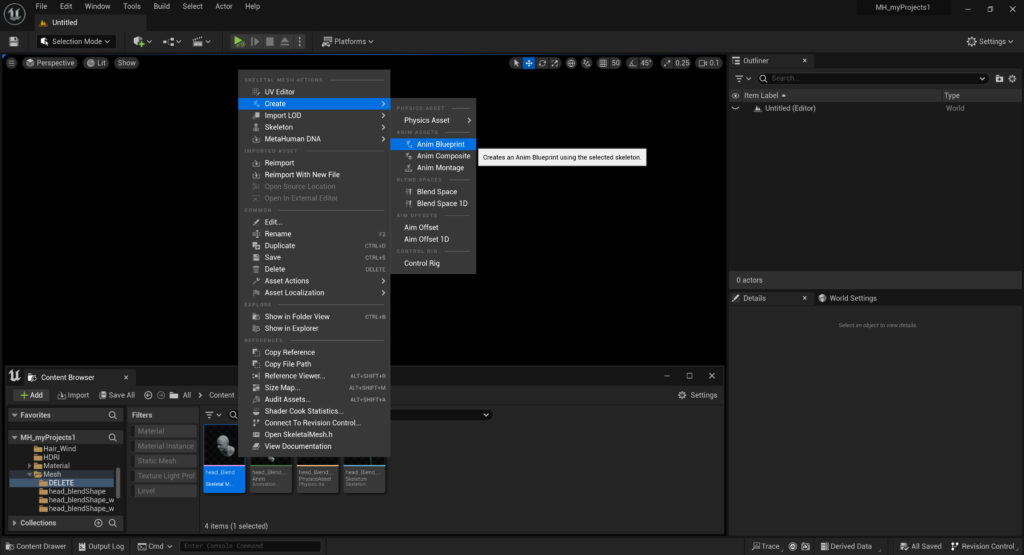
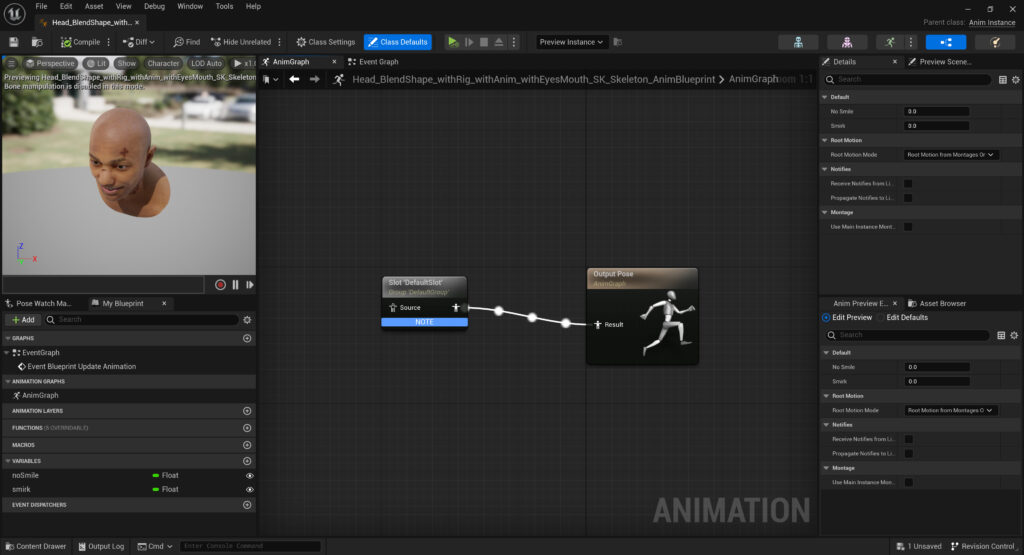
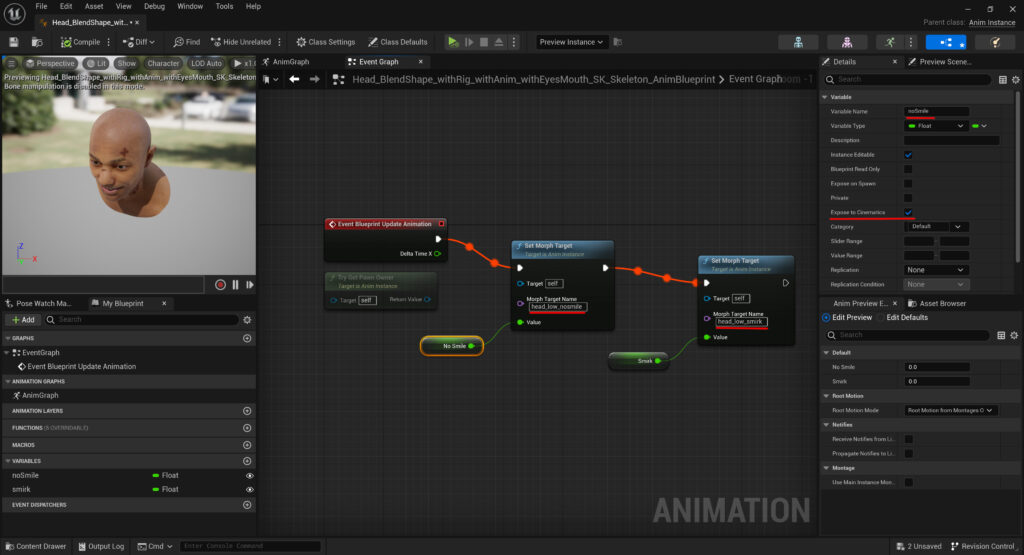
- Created an animation blueprint and opened it.
- Added a default slot and connected it to the output pose in the anim graph.
- In the event graph, added a set morph target, promoted the value to a parameter, and enabled “Expose to Cinematics.” I then added the morph target/blend shape name, which could be found in the skeletal mesh.
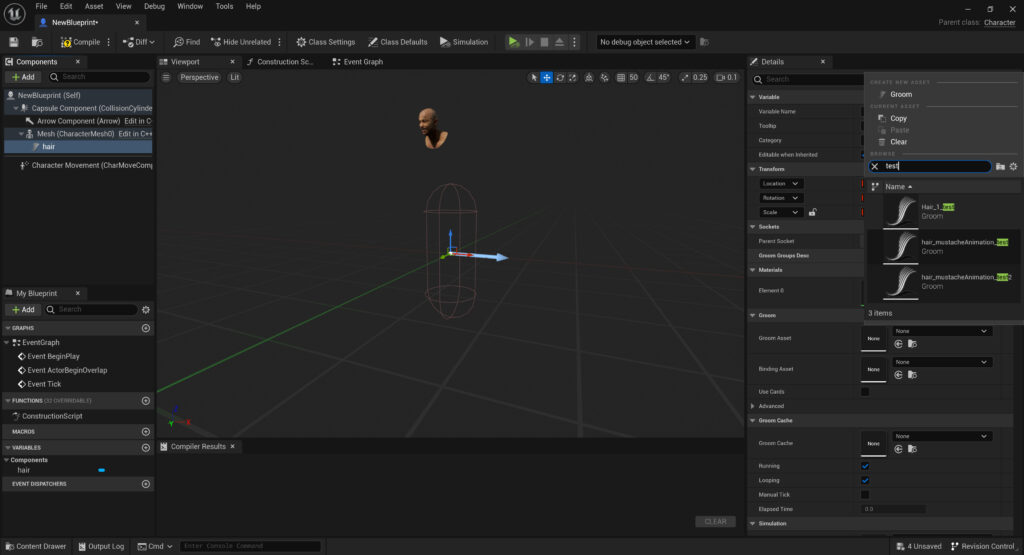
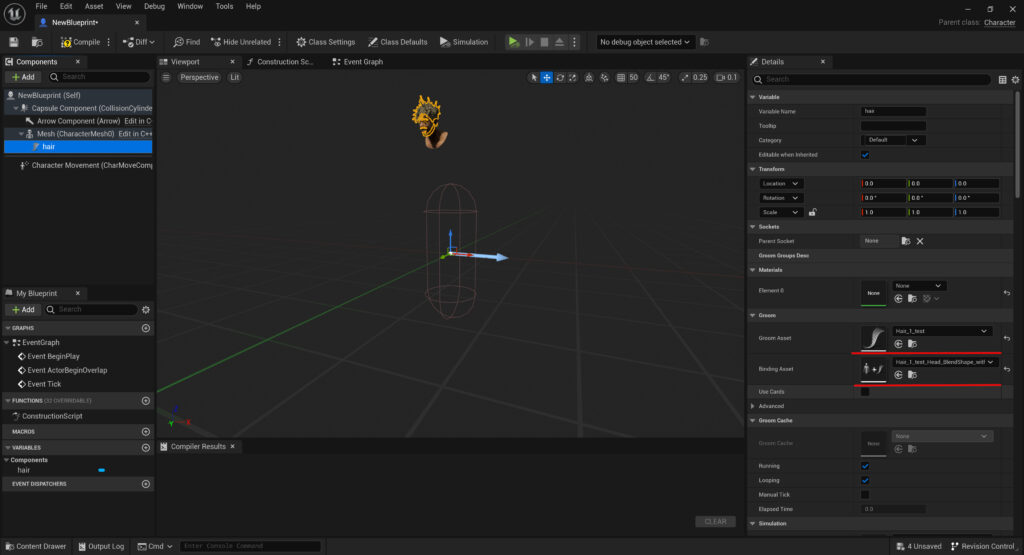
Groom Import Rotation & Groom Binding
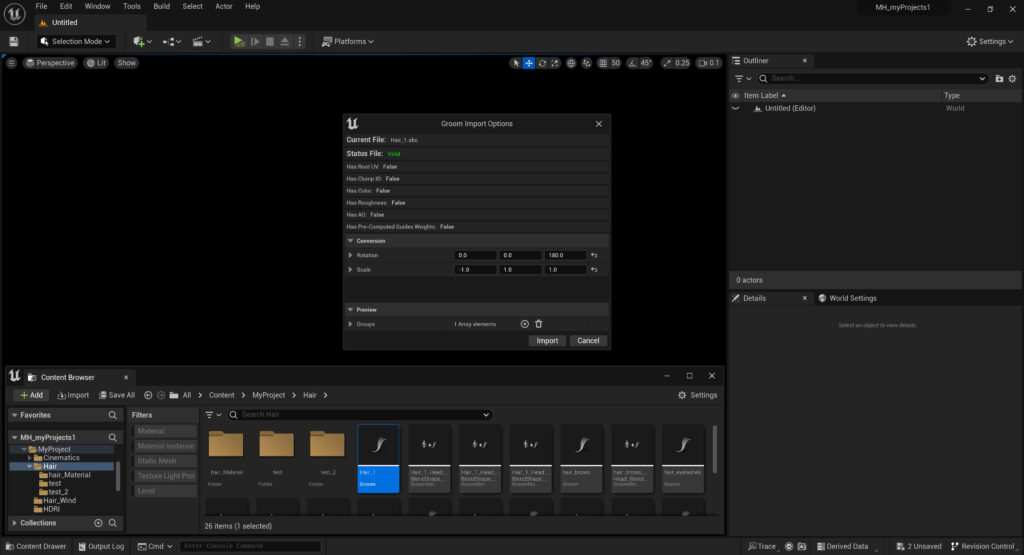

For the hair, I had to adjust the rotation and scale. I dragged the hair into the level with the character to determine the necessary rotation and scale. In my case, I had to rotate it by 180 degrees in the Z-axis and scale it by -1 in the X-axis.
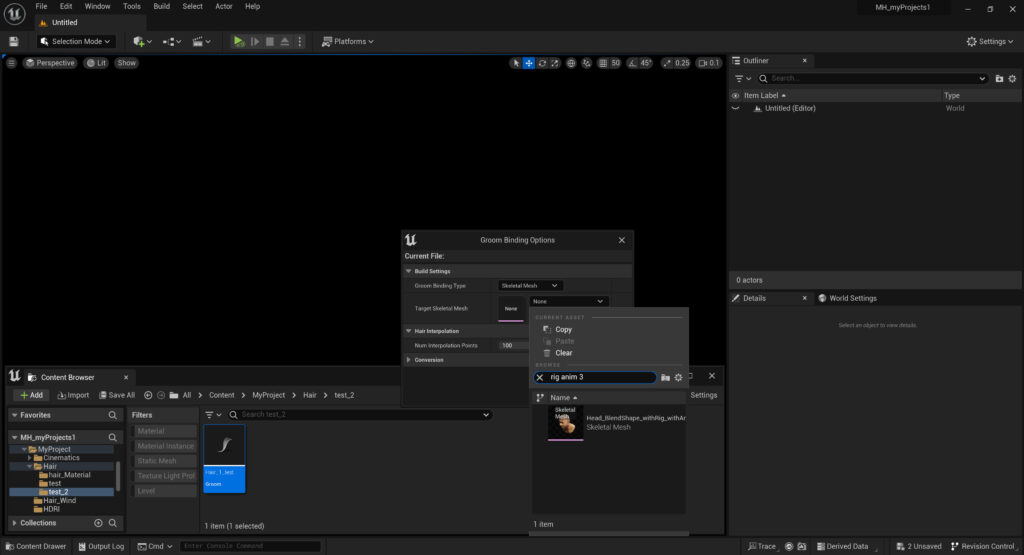
Once I determined the correct rotation and scale, I right-clicked on the groom mesh, clicked reimport, and applied the proper rotation. Incorrect rotation and scale could lead to issues in the blueprint.
Then, I right-clicked on the hair and selected “Create Binding,” selecting my skeletal mesh and applying it.
Character Blueprint in UE
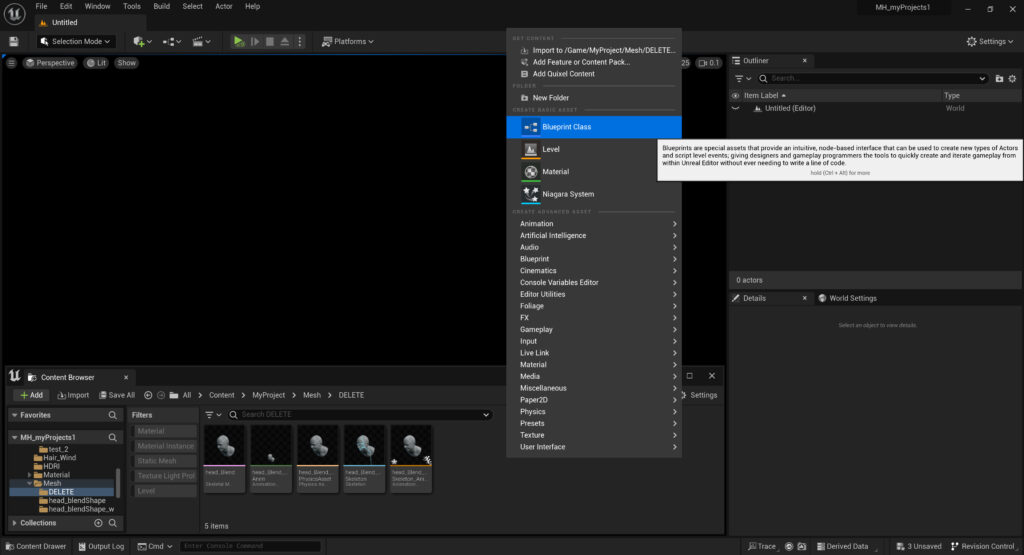
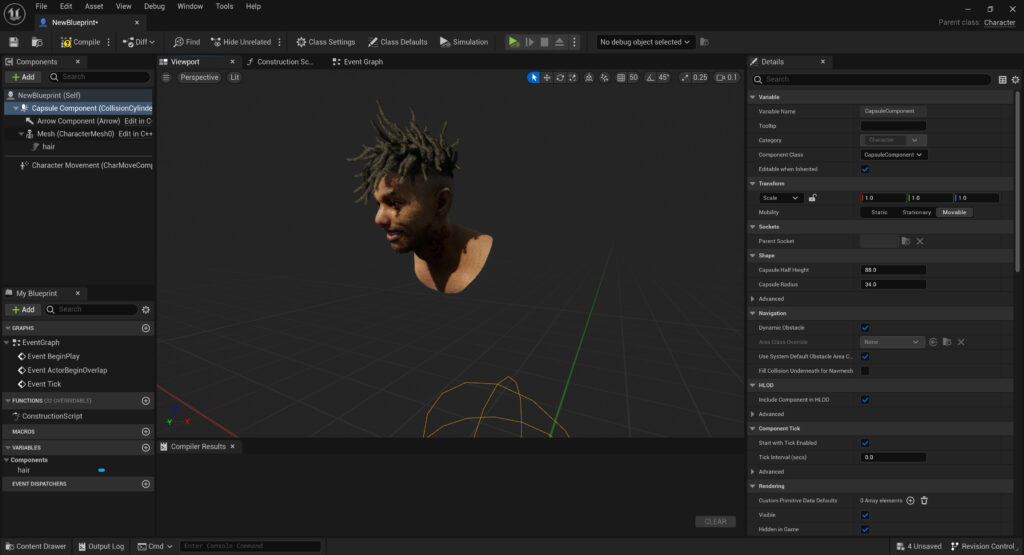
- Created a character blueprint by right-clicking on the character folder and selecting Blueprint, then Character.
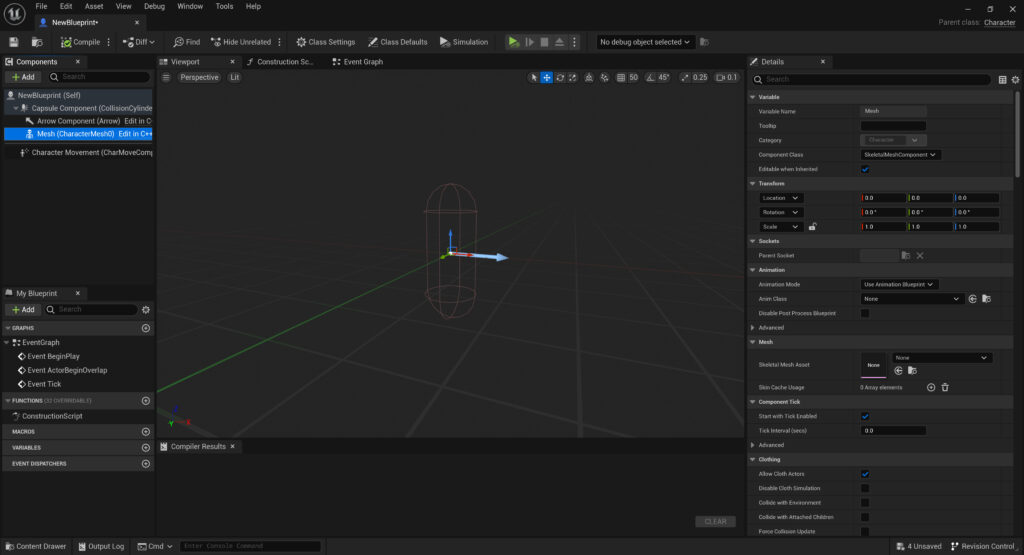
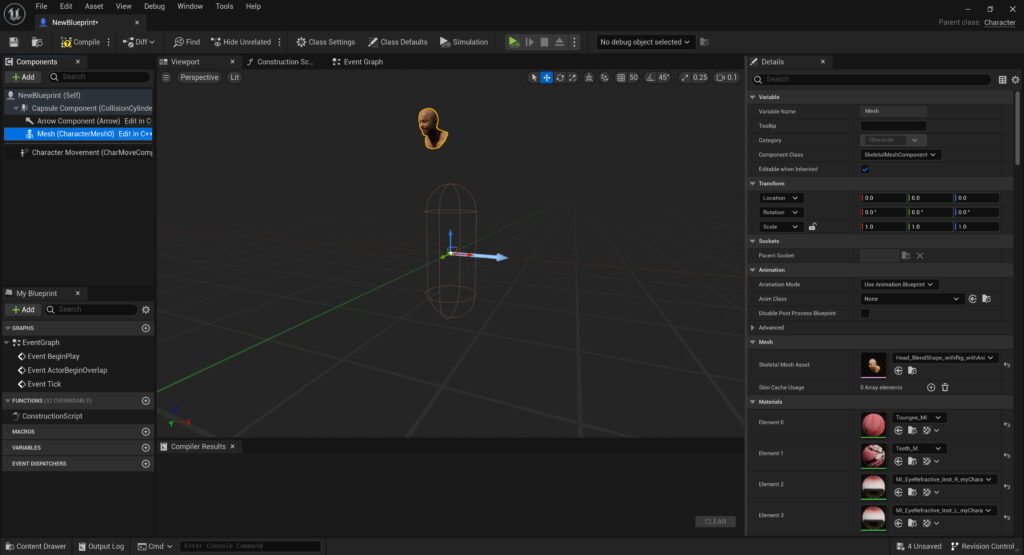
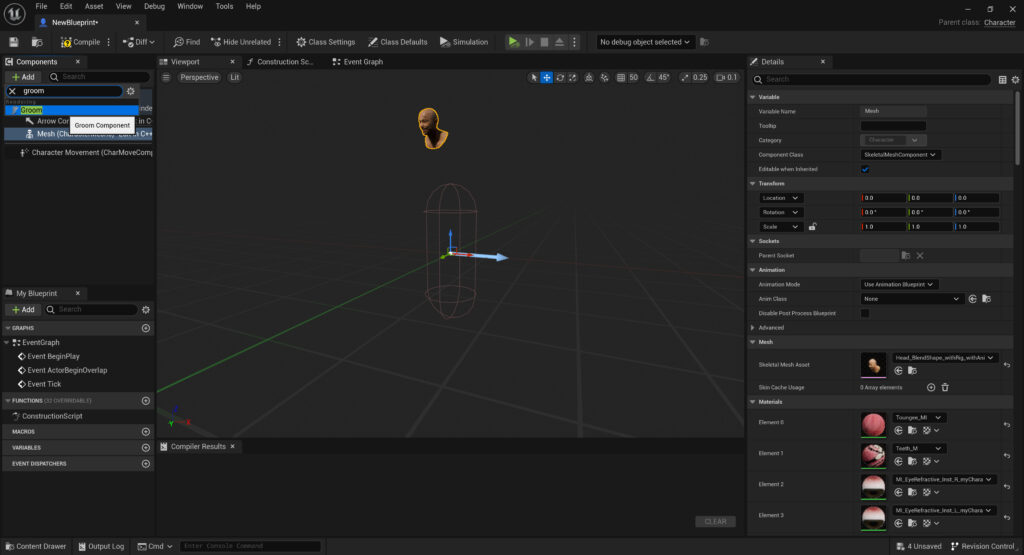
- In the character blueprint, added the skeletal mesh, materials, and groom under the components tab.
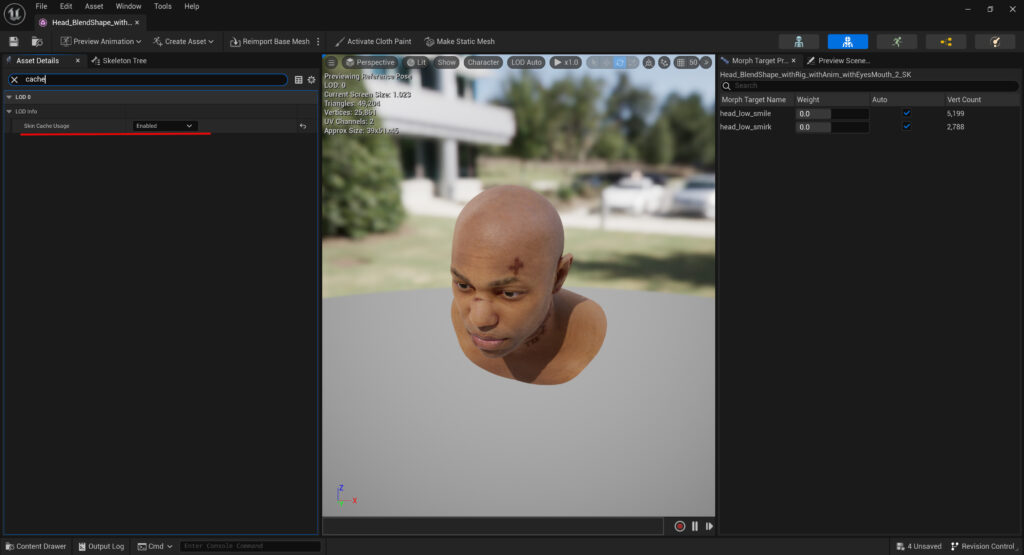
- To prevent hair from disappearing, I changed the skin cache usage option to “Enabled” in the skeletal mesh’s asset details.
UE Sequence & BlendShape
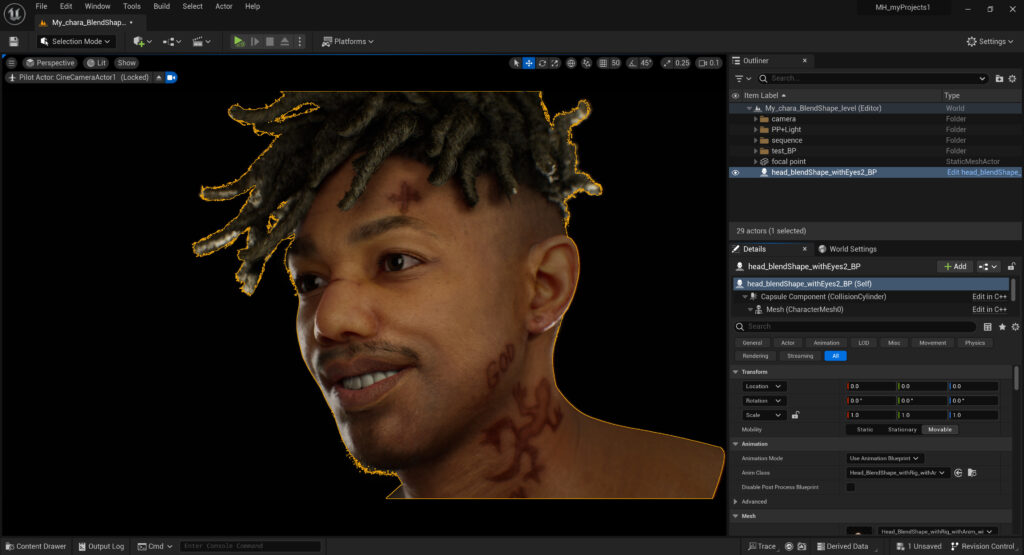

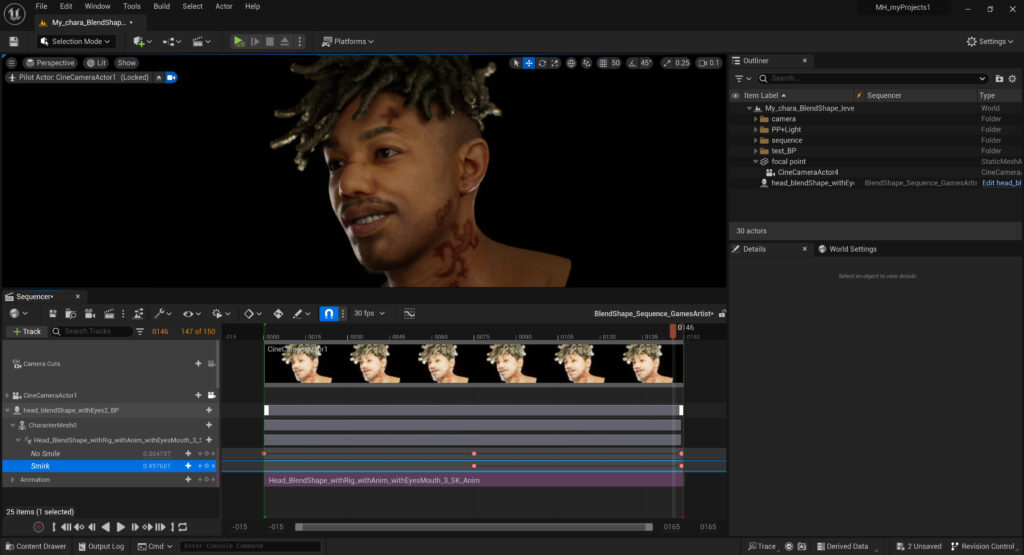
- Added the character blueprint to the level.
- In the details panel under the Animation tab, change the animation mode to “Use Animation Blueprint” and the Anim class to the animation blueprint.
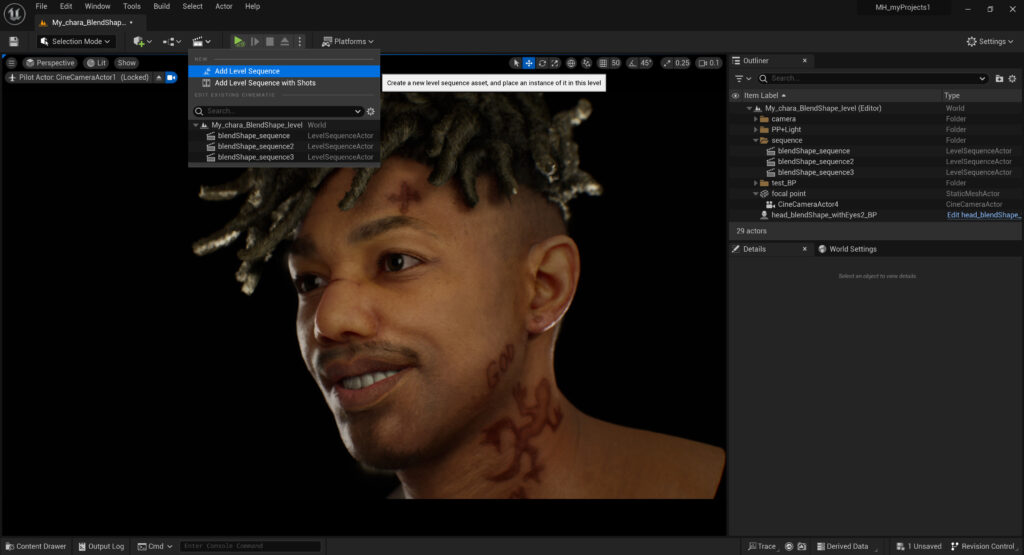
- Added a level sequence to the level.
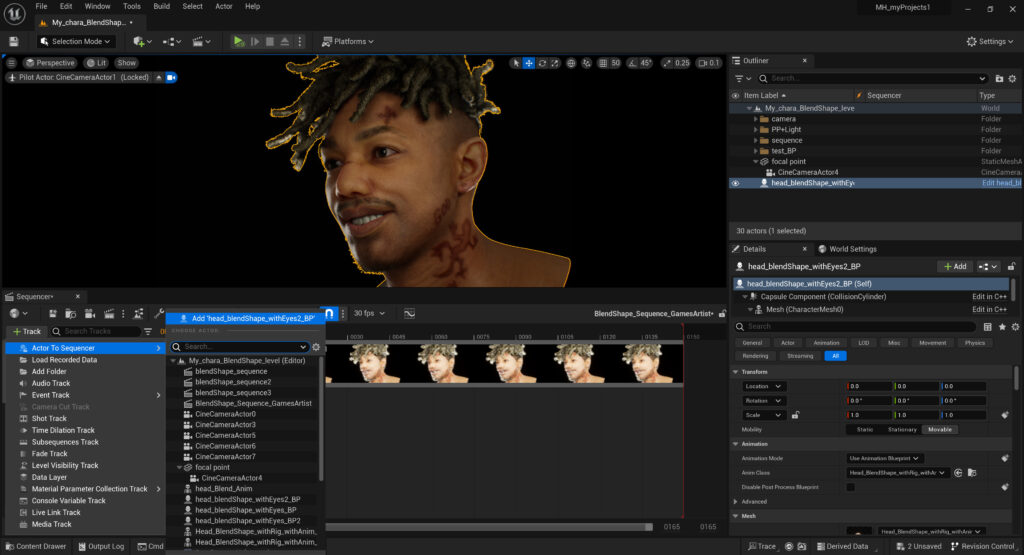
- Dragged the camera to the sequencer.
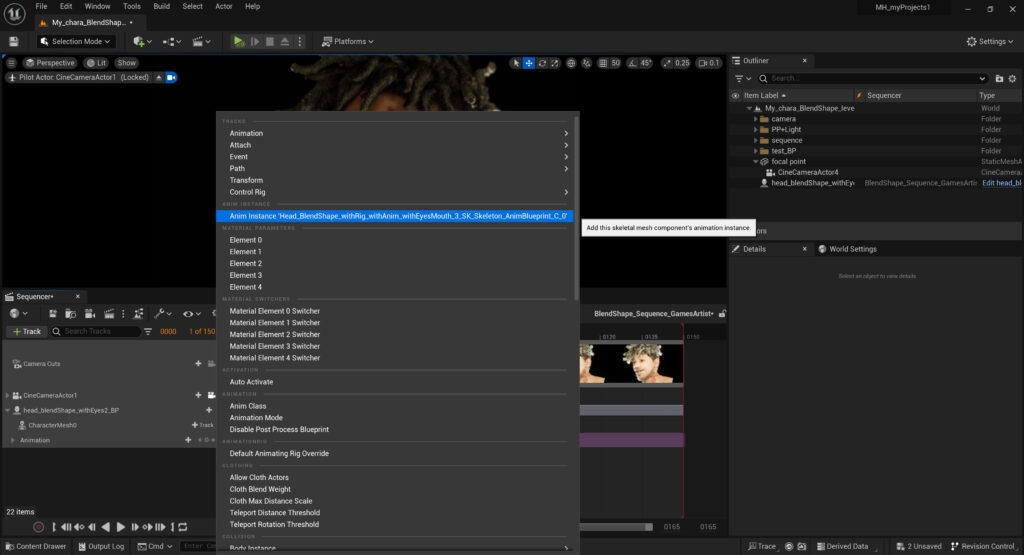
- Selected the blueprint character in the level, then in the sequencer, selected Track, Actor to Sequencer, and added the blueprint.
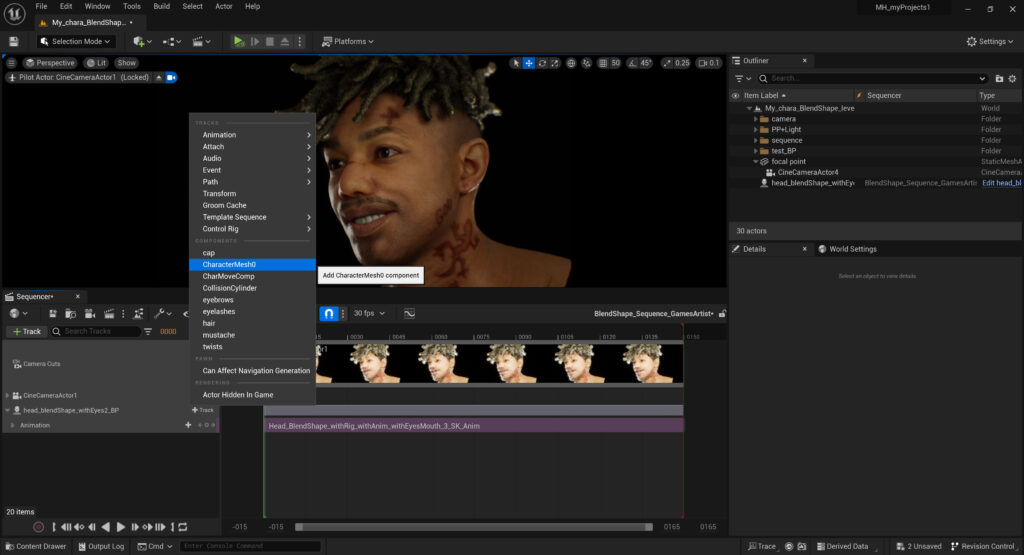
- Added the animation track.
- In CharacterMesh0, select the anim instance.
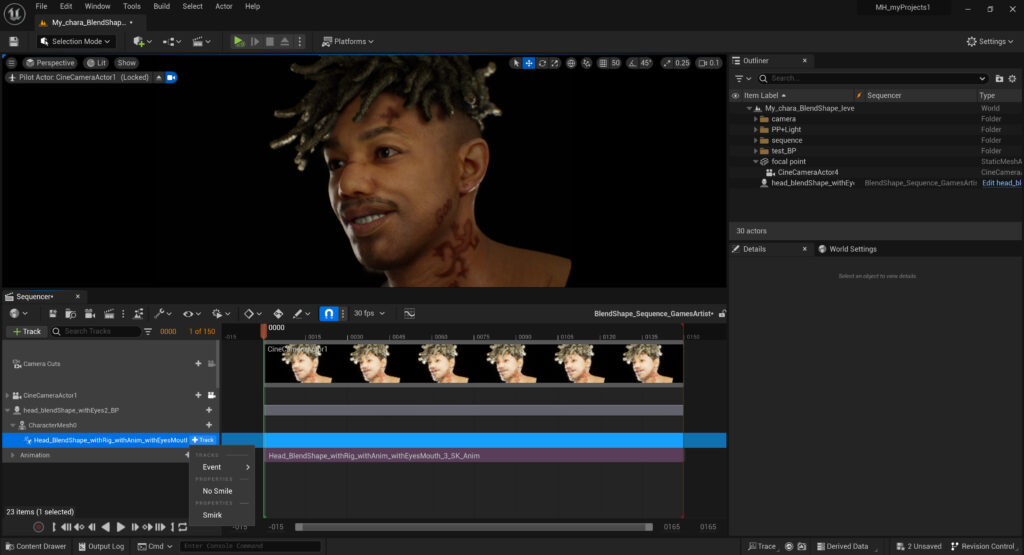
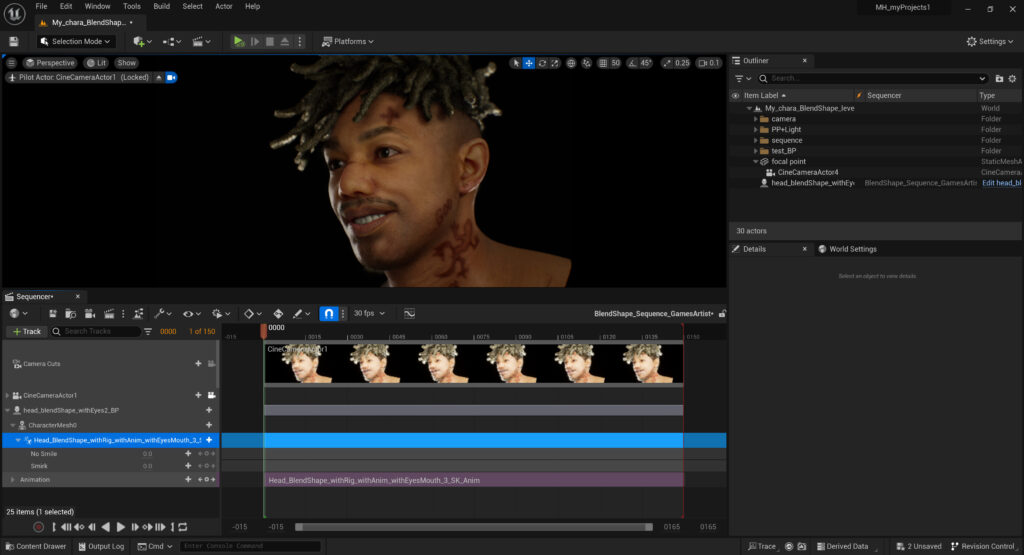
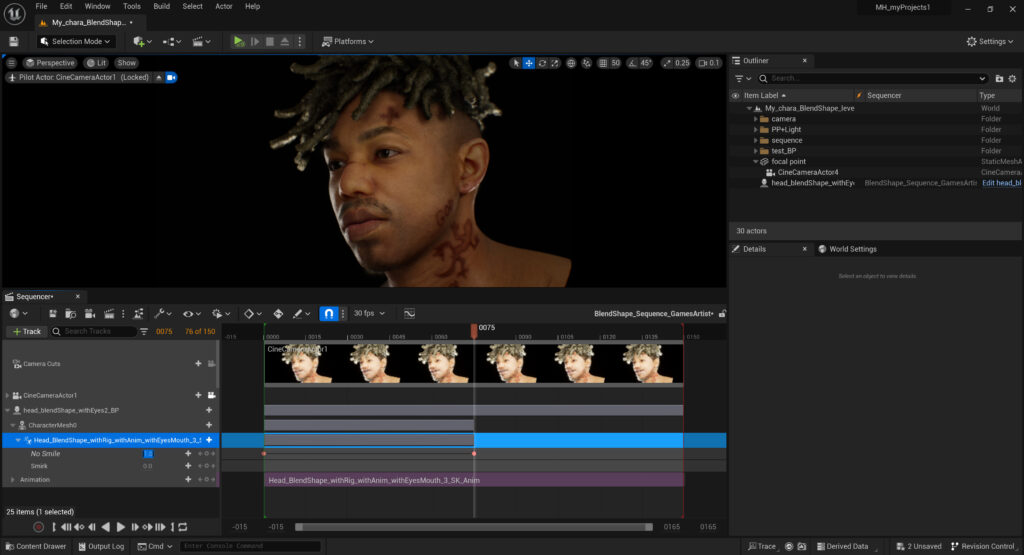
- Added the blend shapes.
- Keyed the expressions and created animations with the expressions while the hair was bound to the mesh.
The videos I used to help me create the hair binding and the blend shapes in sequencer:
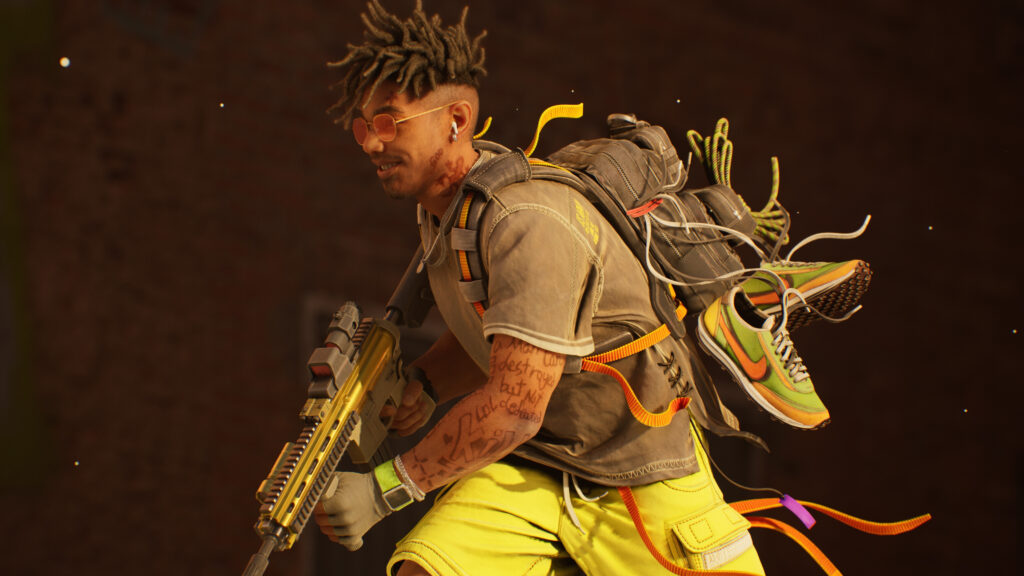
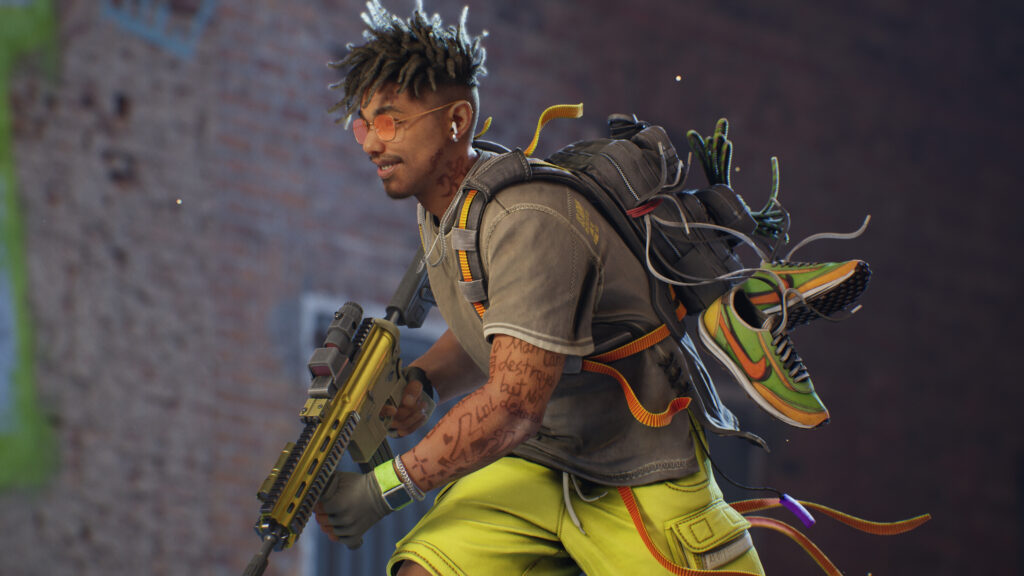
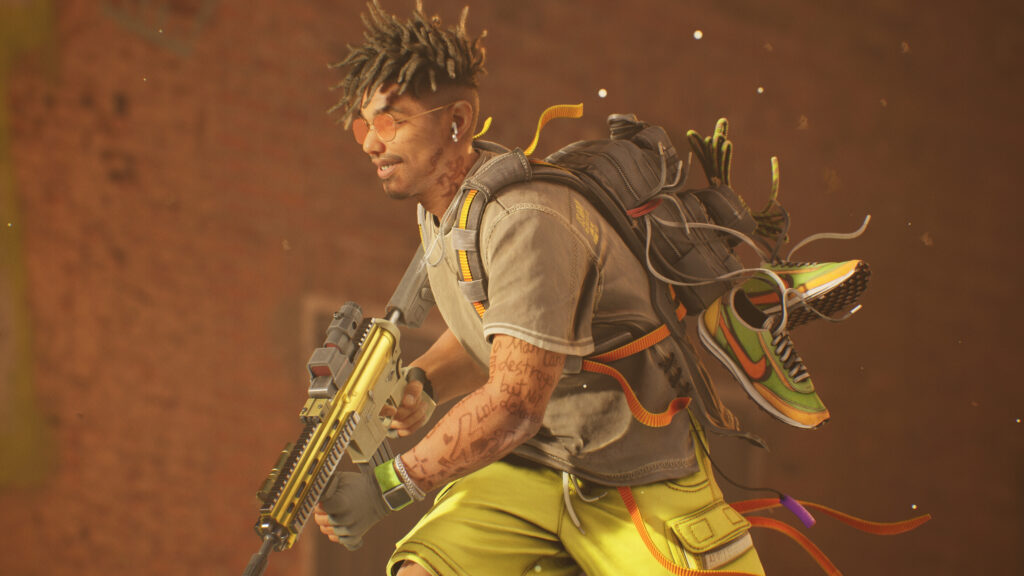
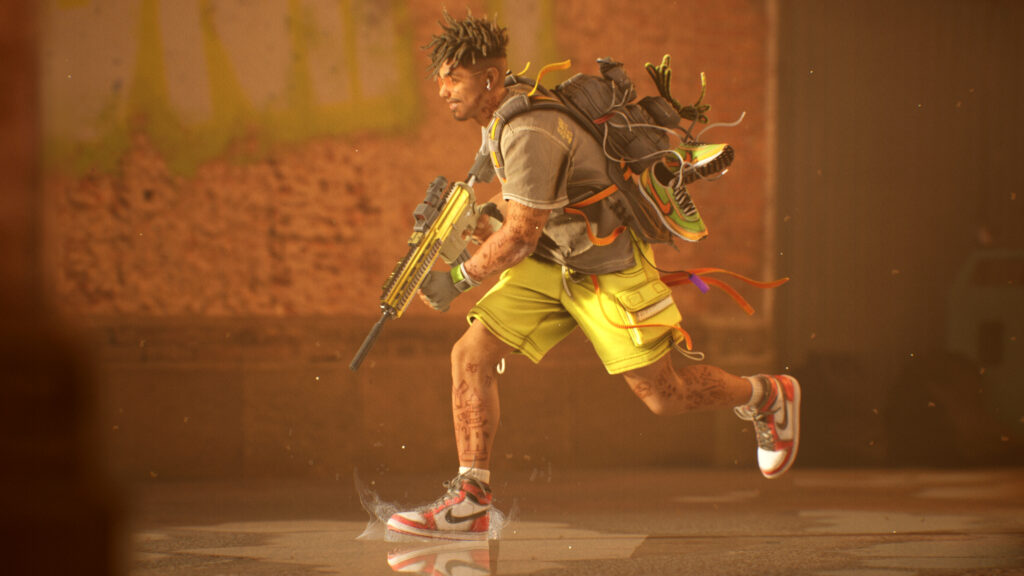
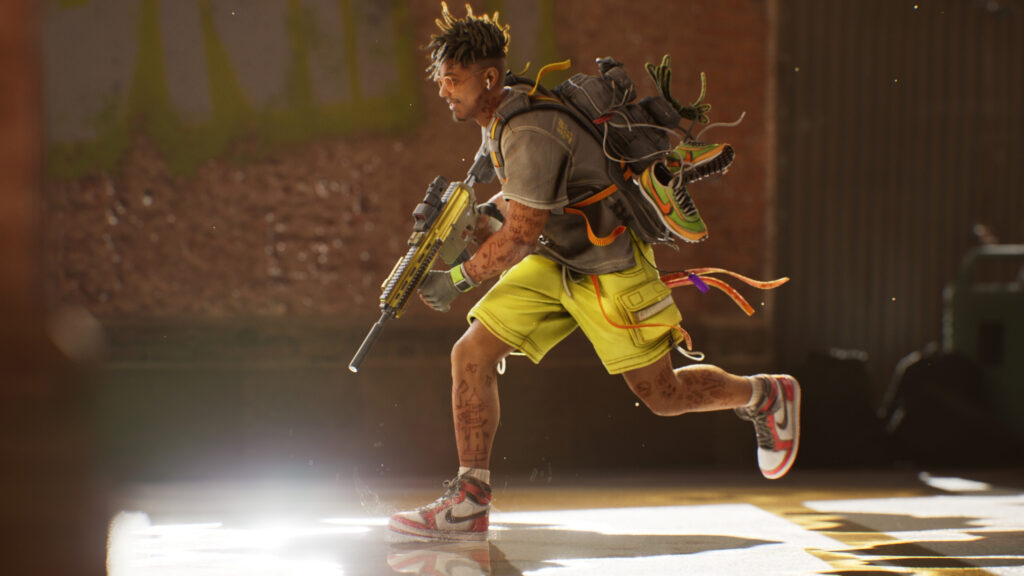
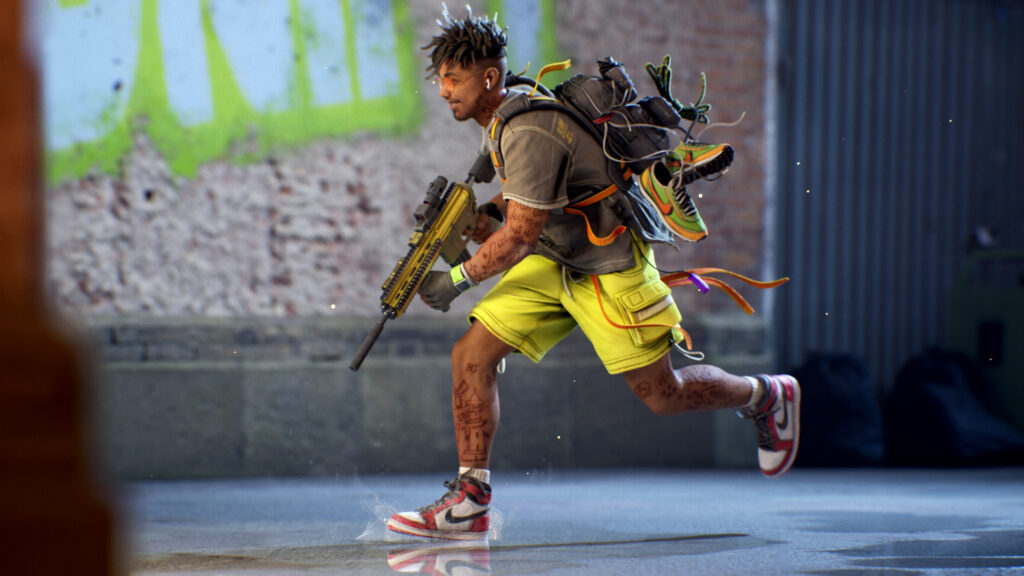
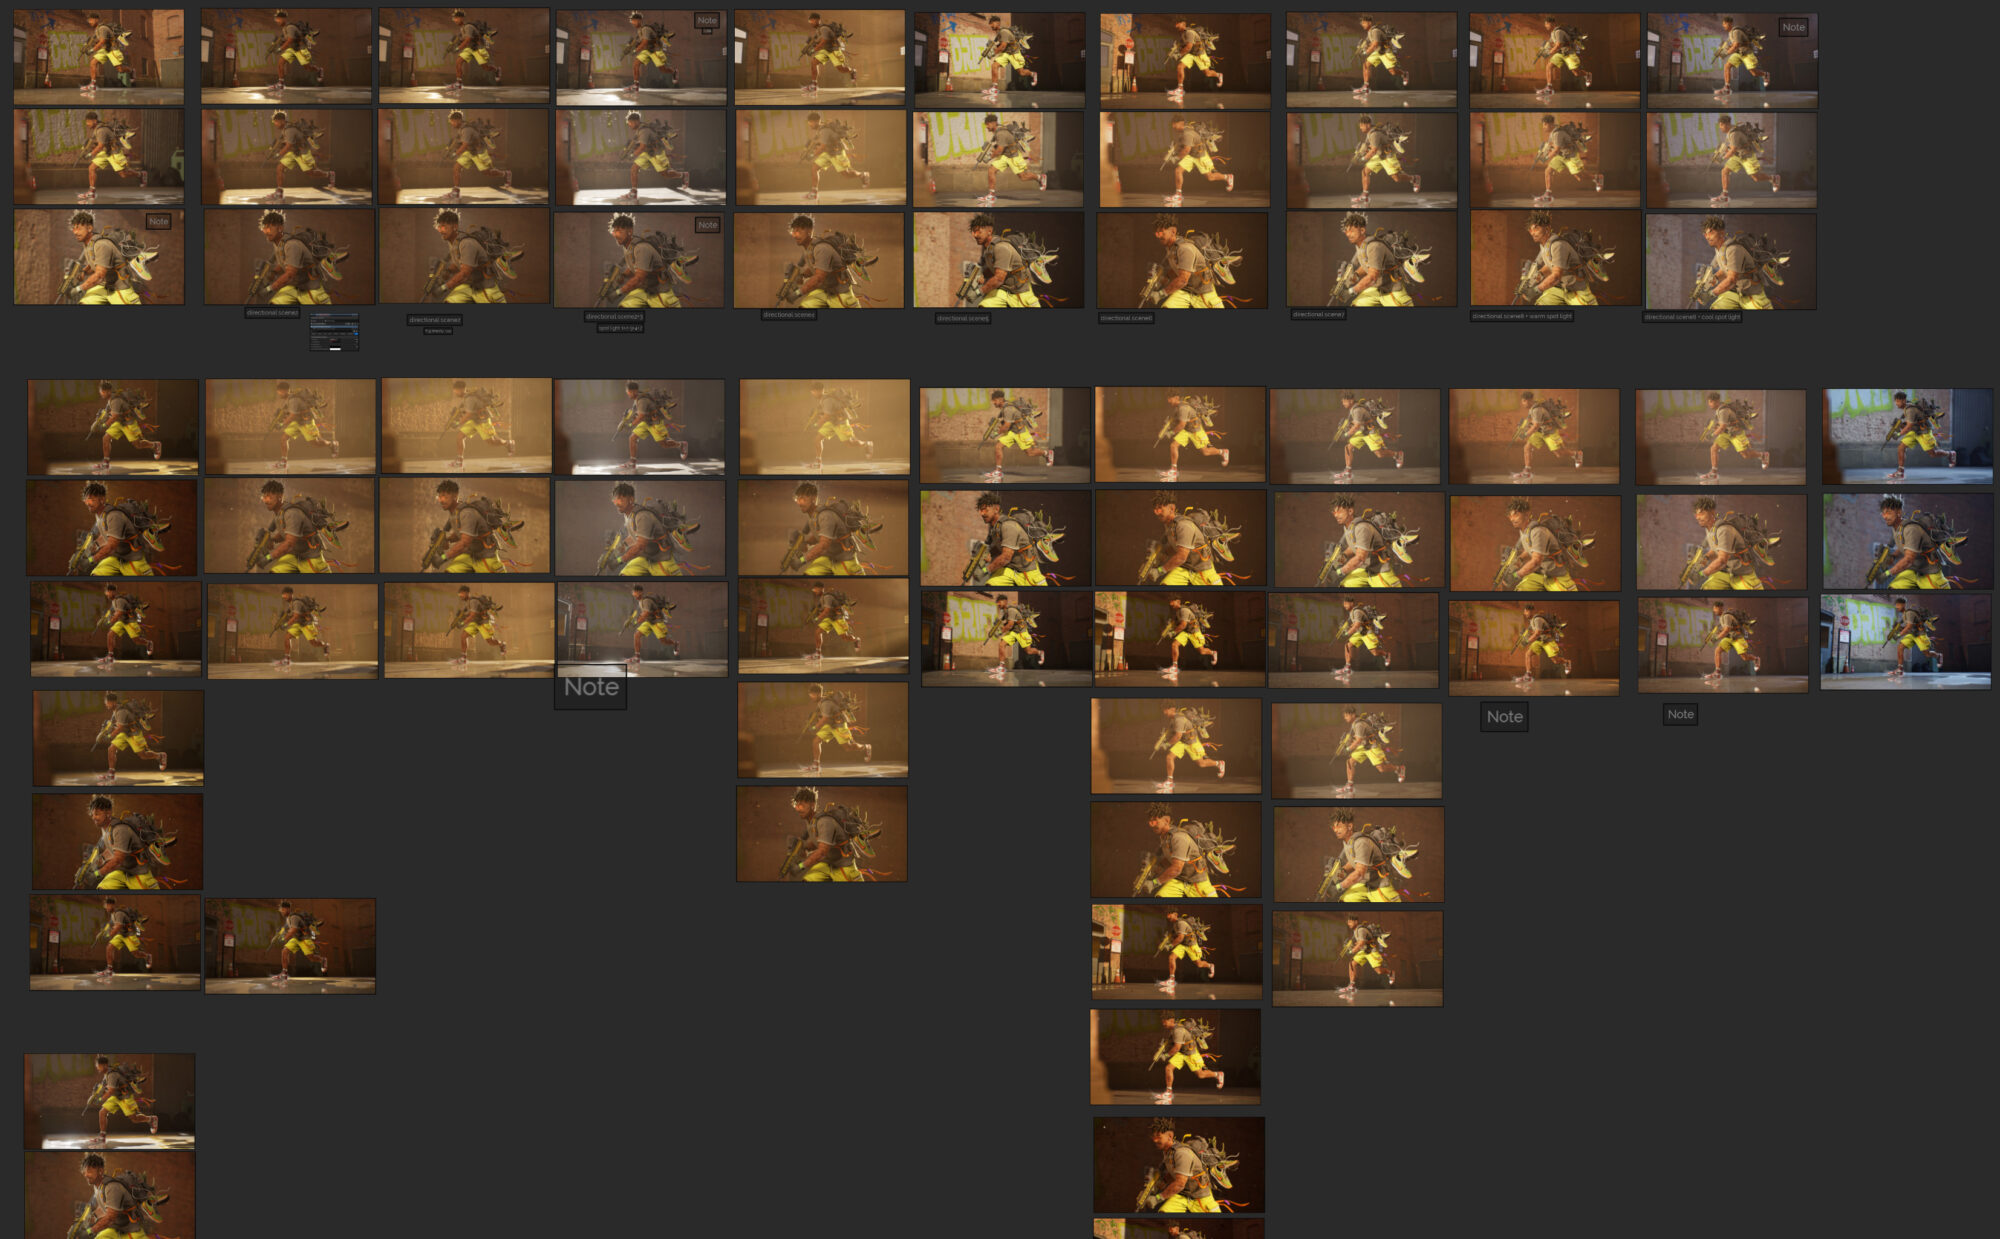
Final Render
For the final renders, I decided to experiment with lighting, presentation, and composition, as these had always been challenging for me. After referencing various sources for lighting, mood, environment, and composition and discussing with my mentor, I opted for an alley scene.
I used Quixel Bridge to create an alley environment, experimenting with several lighting options and appropriately labeling them for later reference.
Conclusion
Thank you for reading, and I hope you found this information informative. Feel free to message me on Artstation if you have any questions. Lastly, I want to express my gratitude to my mentor, Denis Melenets, for his invaluable help and feedback, which enabled me to learn and grow during the project.
Read more articles
You might also like these articles.