
Introduction
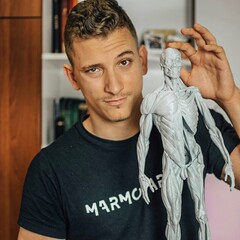
Hi! My name is Srdjan and I live in Novi Sad, Serbia. I have been in 3d modeling for more than 7 years.
I got interested in VFX and 3D art when I first saw LotR in 2003, but I started pursuing my passion in 2016 and learning since. I'm currently working as a freelance Character Artist within my studio Marmo Arts.
Inspiration
Inspiration for this character came a long time ago. When I first started with 3D art I was making characters for months in ZBrush and tired to push myself. I made Penguin from Batman, Cave Troll and a few more, but I wanted to save Gollum for one day when I have more experience and could make him look as good as possible, as he is my all-time favorite CG character.
My main goal was to try to make him in his natural surroundings Misty Mountains before he lost the ring, and I tried to depict his misery and sadness as well as happiness due to his bipolar personality in the best possible way.
References
For reference, I had some scans for Andy, also some Shots from Weta, and I even took some screens from movies. Also, a huge inspiration and reference were Hossein Diba Gollum, that gave me some good angles that I couldn’t get from the movie.

Likeness
My first step was to get proper likeness as that’s the trickiest part to get nailed. I used many references, starting from Andy Serkis UE shots, with Scans as well I used some of the Gollum Hobbit and LotR shots from posters and movies.


It was hardest to get the shots with the same FOV as it can distort likeness if you are not careful with reference choice.
My biggest advice to get a good likeness is PRACTICE, make 10 likenesses from scratch, learn anatomy, get some good courses, and get as many as possible shots, some of the characters you are making, from all possible angles, anatomical references, and some close up for later.
Think about forms and do it from foundations to the roof, don’t skip steps, because they will crumble and get you back on the step you missed.
Body
So after I got the likeness right forms I started getting some Anatomical and proportional base forms. I used mostly Anatomy for Sculptors book as well some Anorectically shots from Google along with Gollum sculptures from Weta Workshops.
My main struggle was to get the proportions right and not to get him too bulky as in my experience anatomy sculpting can get over the edge.
It was important to add some scars in secondary forms in order to have an easier time doing texturing later on.
Getting the body right is all about forms, rhythm, and anatomy. Think how the body works, get shots from both bodybuilder and skinny guy, and examine.
Some good books are:
- Anatomy for Sculptors
- Anatomy of facial expressions

Details
For details, I used Hybrid between Texturing XYZ Multichannel maps and 3DScanStore models along with ZWrap. The face was an area with the most importance so I used Multi-Channel and 3DSS as a base to go over with Kris Costa pore for some parts, as well as adding wrinkles on top of it tracing real character Refs.
Brushes I have used:
- Pore Brush (Kris Costa) – better-defined pores and on specific places
- Bumpy Brush –Skin imperfection forms
- Dam Standard – Wrinkles and forms
- Slash – Deeper wrinkles
Gollum’s body had really specific texture and bumps on the skin, so it was a lot of work capturing all wrinkles, bumps and imperfections. But having 3DSS bumps as a base really helped out, as you won’t face a “blank canvas wall”.
My all-time advice does not to rush it to details, if you don’t have good primary forms, anatomy, or likeness, details won’t magically fix it, you need to get all things at 90% before details.

Retopology & UVs
For Retopo I have used Maya and I have mixed existing basemesh with the new topo I did for certain parts.
Texturing
For texturing, I decided to use the 3DScanStore color map as a base. It was really important to have basic texturing knowledge to get the best of it.
Adding the right color on specific areas of the face gave a much more realistic feel to the character.


To make real skin it’s important to use many layers blending on top of each other, creating realistic end results. In order to learn the best approach, it’s good to get back to the basics, looking at airbrush sculptures and just after that learning SP tutorials.
It was important to use some other maps as a Cavity and some other Maps I exported from Knaled in order to transfer sculpt details on this map.

I used as well some SP materials for skin cracks, rashes and scars, as Gollum’s skin is really unhealthy, he lived without sunlight, so it’s a good thing to keep in mind when texturing, back story of the character can really help you understand you how to make certain parts of the character.
Try to get all his moles, pimples and all other stuff in this phase as well.
Hair
Hair textures were done using small software called “Hair Strand Designer ” and I can tell you it’s one Hell of a little piece of software.
It’s really strong and it can give you great-looking hair strands in a matter of minutes. It’s almost as good as the XGen approach but much faster!

Software generates you bunch of Textures you might or might not use, but it’s a good thing to have these in case you need them.

Hairs for Gollum were really tin, with just few hairs in one hair strand, but it was important to make as much variations of strands as possible, in order to get a good and realistic groom.
For Eyebrows and Lashes I drew strands my self in PS and used them as an alpha.

Rendering & Shading
I did shading and rendering in UE5, I mainly used workflow using Digital human Skin material and adapting it to my needs.

It was important to make a few other maps such as SSS, Occlusion and Spec in order to get good results and a lot of tweaking under different lights.
I used the eye from digital human and adapted its size and other elements to Gollum. I as well tweaked Textures and added Veins, changing the color of it a bit to match my needs.
It’s also important to get decent lighting, in this case, I have used a mix of everything Three point light and Environment lighting and added some fog to get more realistic results. It’s crucial to get good lighting, because why bother to sculpt and texture a great character if nobody can see end result, right?

Conclusion
In this character I tried to get things done using all knowledge I learned over the years, even using some workflows that you can call even a “cheat”.
But it’s important to follow the latest tools to speed up your process, but as well to learn basics, sculpt characters from spheres, do textures just in ZBrush, etc. I did it all by hand when I was starting and it helped a lot in my workflow and to get things even easier later on.
My advice for all, try to have a personal project whenever you can, even if you have an hour a day to work on it, it’s enough, remember Harry Potter was written like that, small steps are slow but they will get you there.


