Introduction
My name is Germán Zamorano, I'm currently working at Saber Interactive Madrid.
I've been working in 3D since 2006, in 2011 I started working in the Video Games Industry.
During this time I have participated in 11 published games, the most frequent one being"Evil Dead: The Game" in which I was the Lead Character Artist on the project.

Goals
I always try to have a personal project on the back burner. I use these projects to try new techniques and ways of working because in my daily work I have time limitations and I have to go more to the point I don’t have the time I would like to try new techniques.
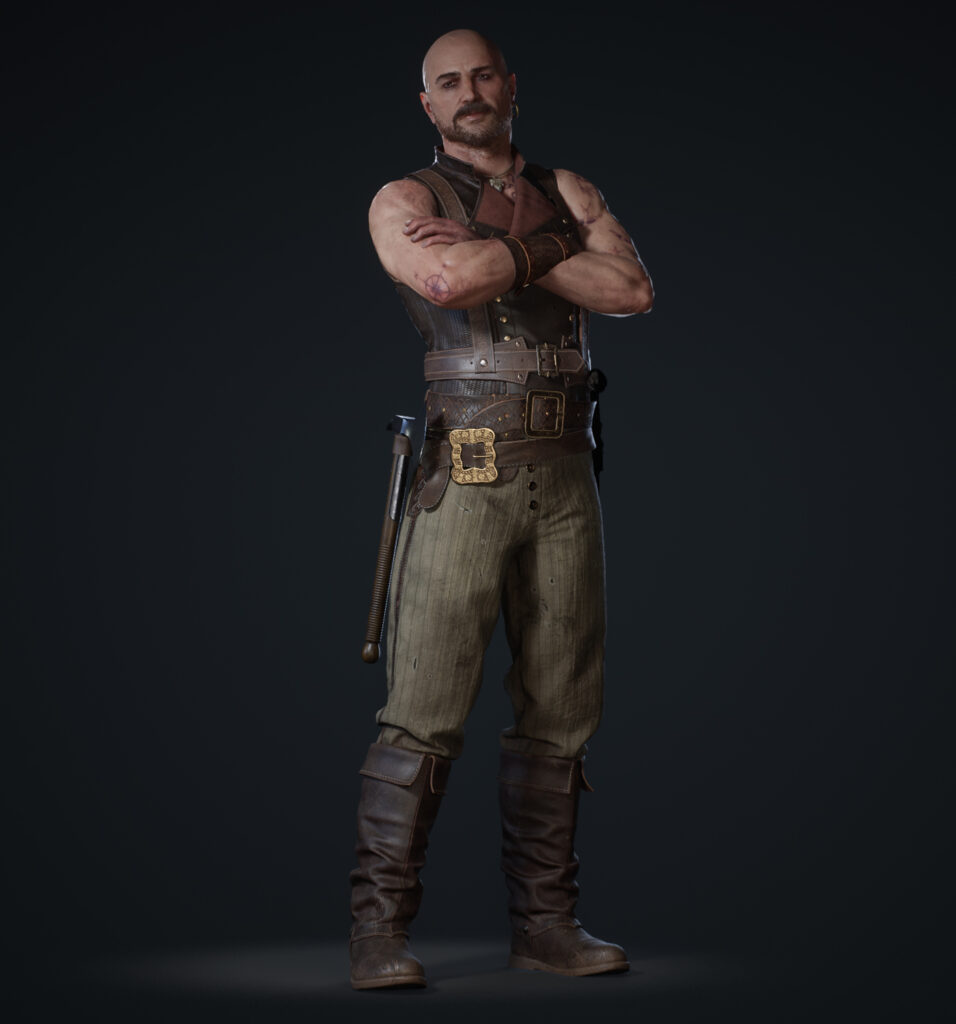
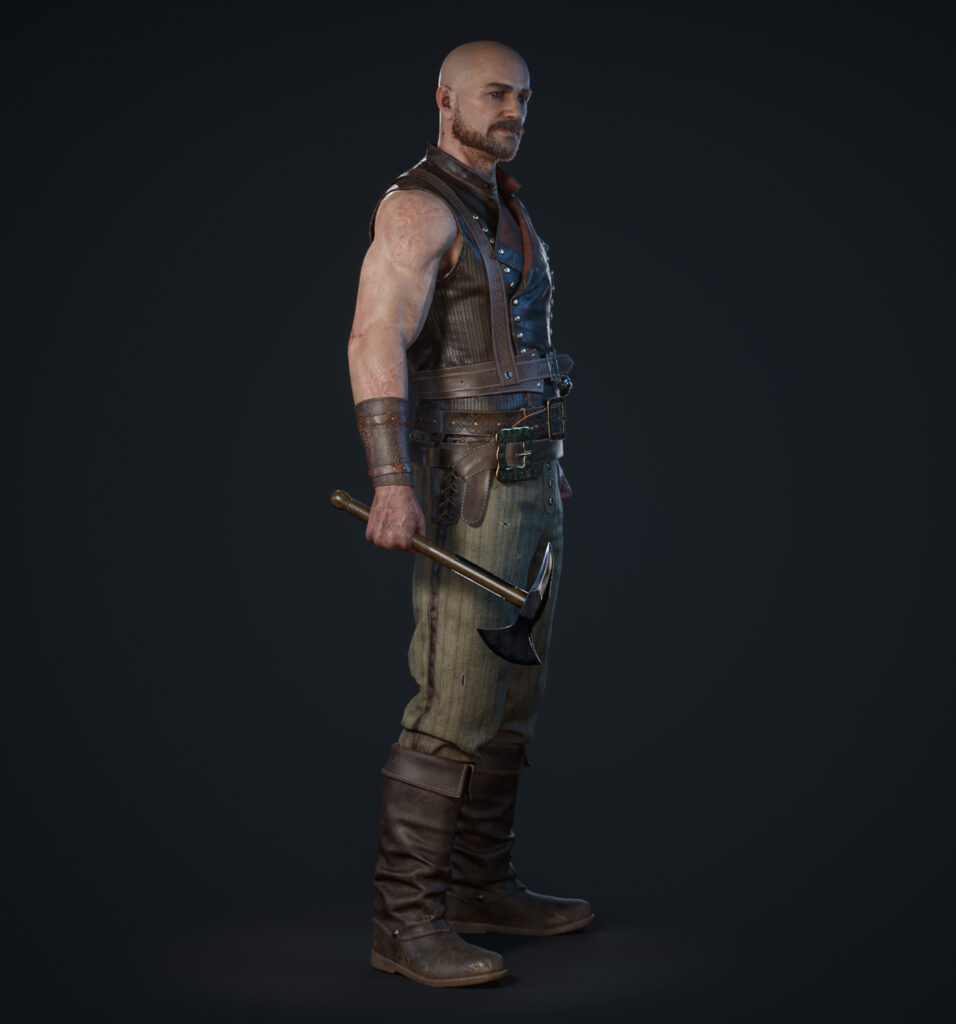
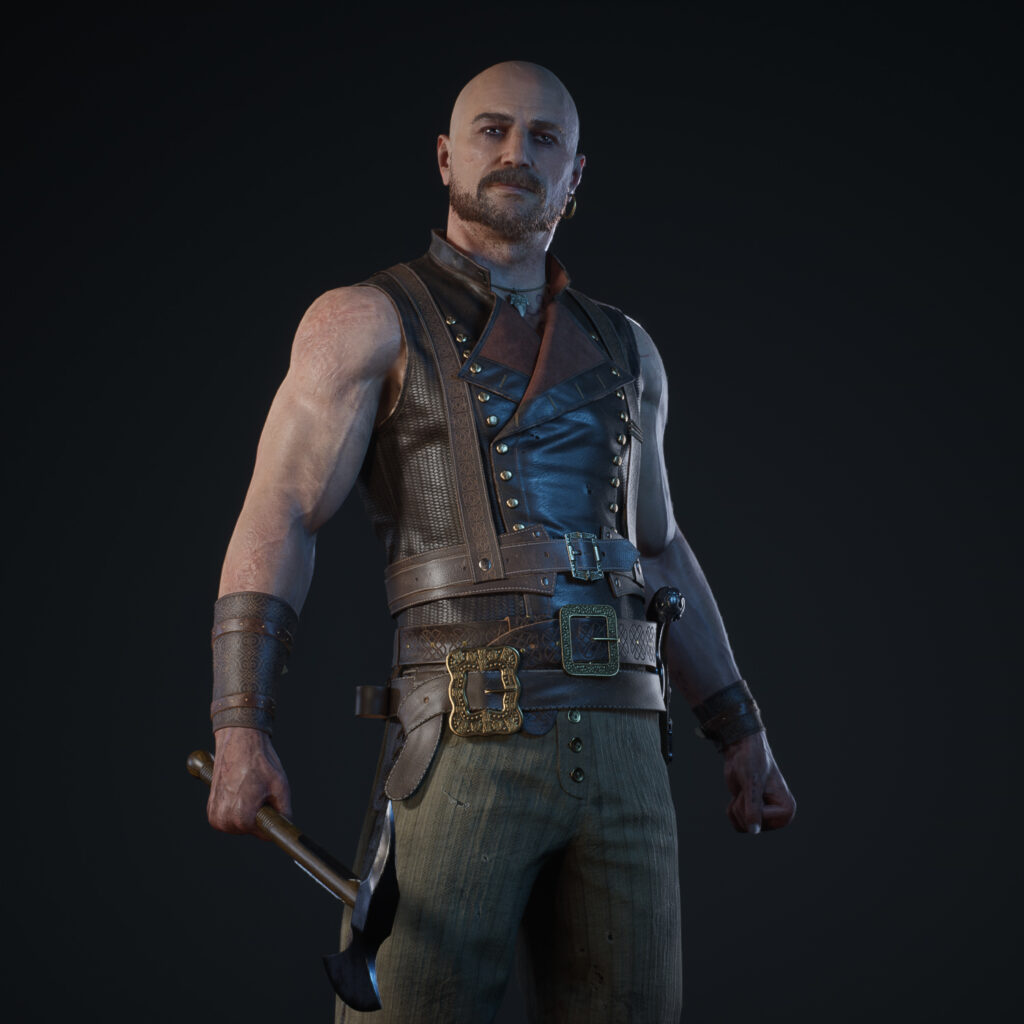
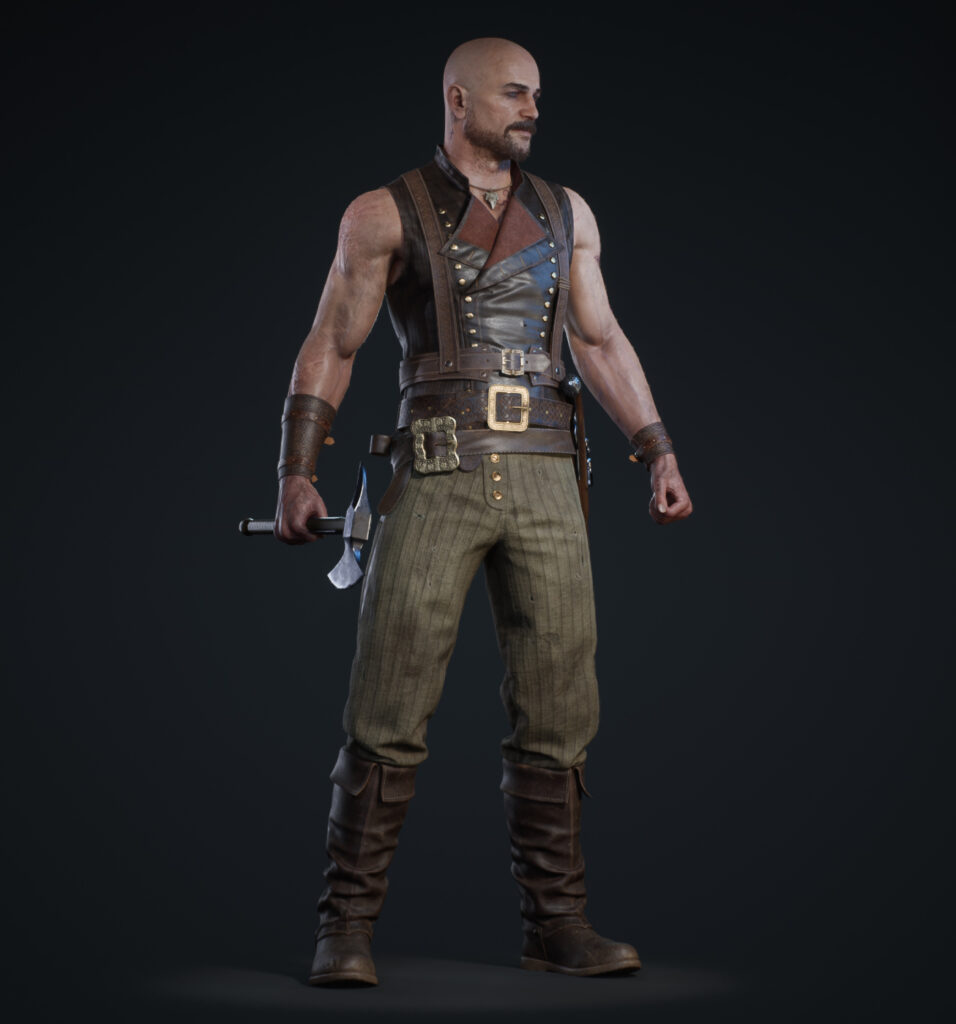
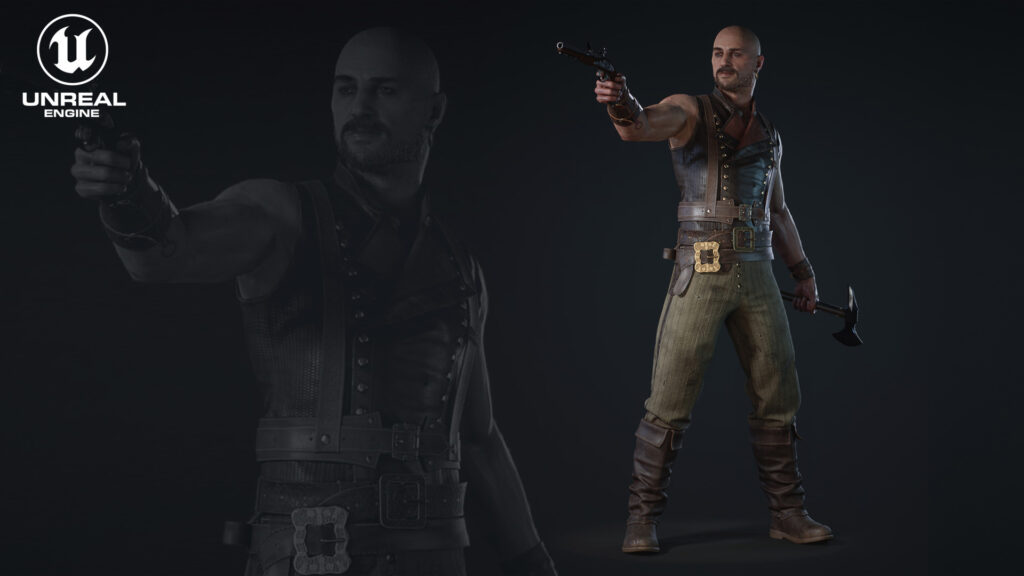
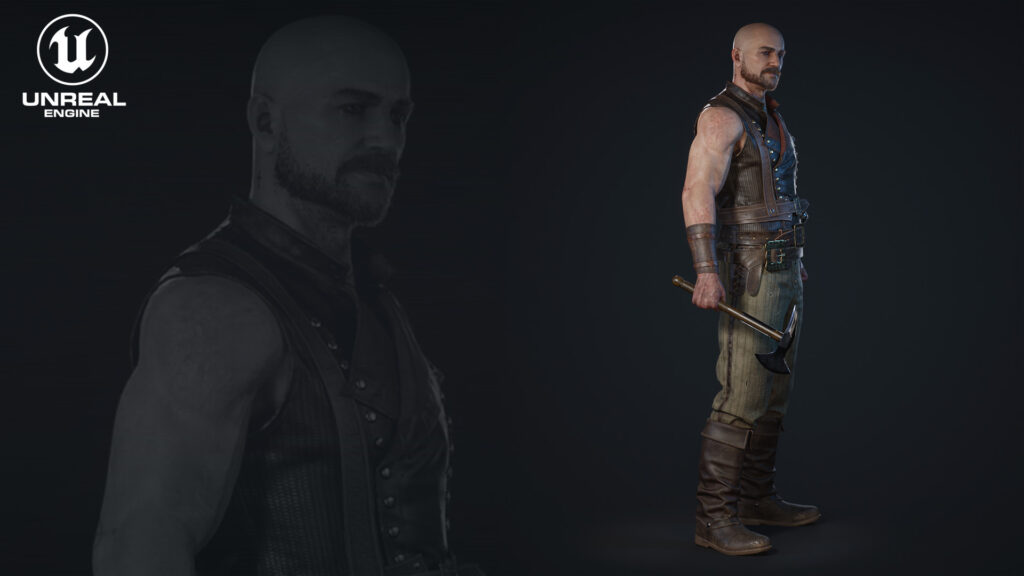
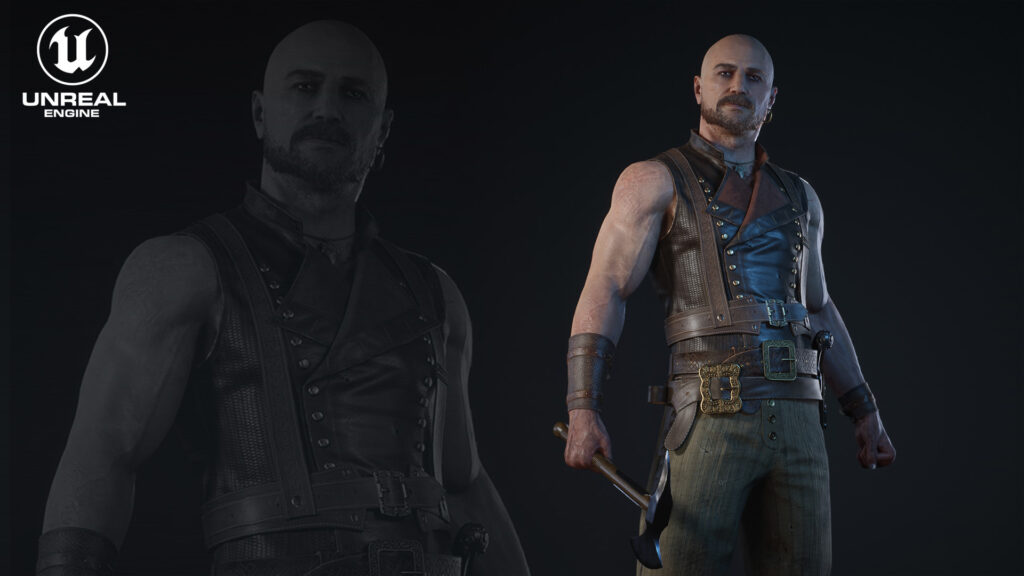
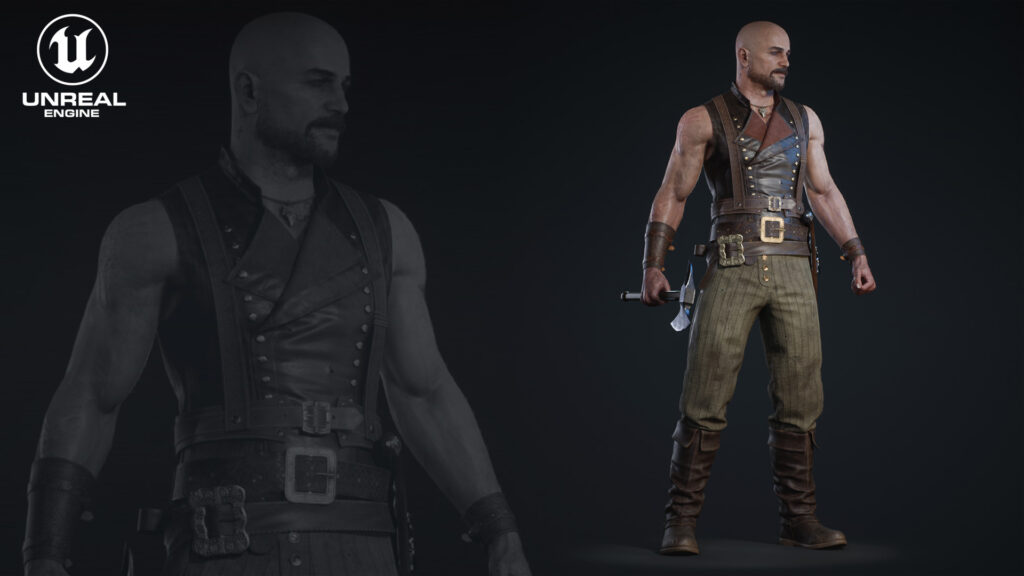
In this project, the main goal was to make a complete character from the beginning to integrate it into Unreal 5 being able to navigate through a scenario handling it.
Software
I used ZBrush for the high-poly, Marvelous designer for the clothing blockout, 3ds Max for retopology and hard-surface modeling, Marmoset Toolbag 4 for baking, Substance Painter for texturing, Mixamo for rigging and Unreal Engine 5 for rendering.
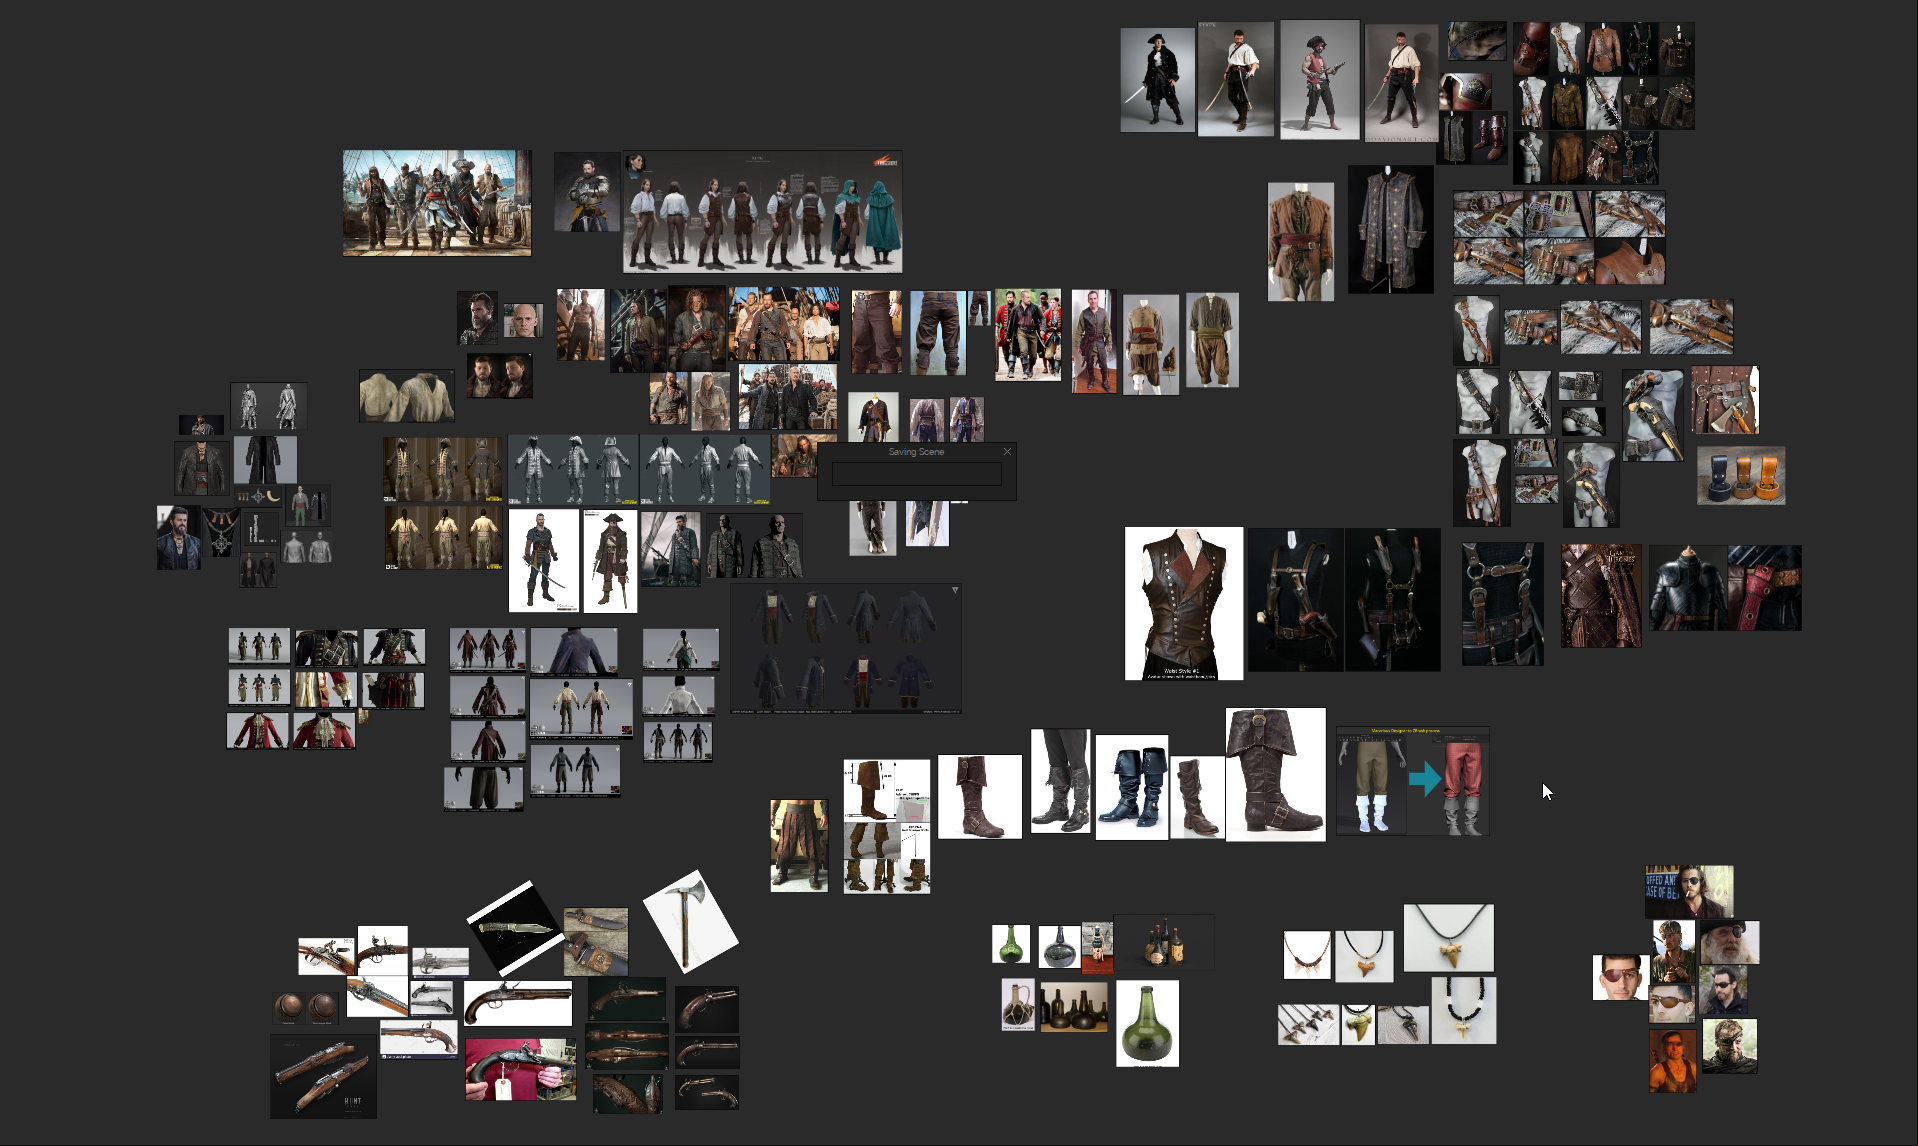
References & Inspiration
My main inspiration for this piece was Black sails and Pirates of the Caribbean.
This step is one of the essential parts of the whole project; good references will give you better direction when modeling, texturing and shading your model.
This step is one to which I dedicate a lot of time, I usually work without a strict direction and as I progress with the project I modify the initial idea, so I am constantly adding new references to my board.
Good references help you not to deviate too much, it’s good that the project is iterating and changing, but you also have to limit it because you run the risk of getting too long.
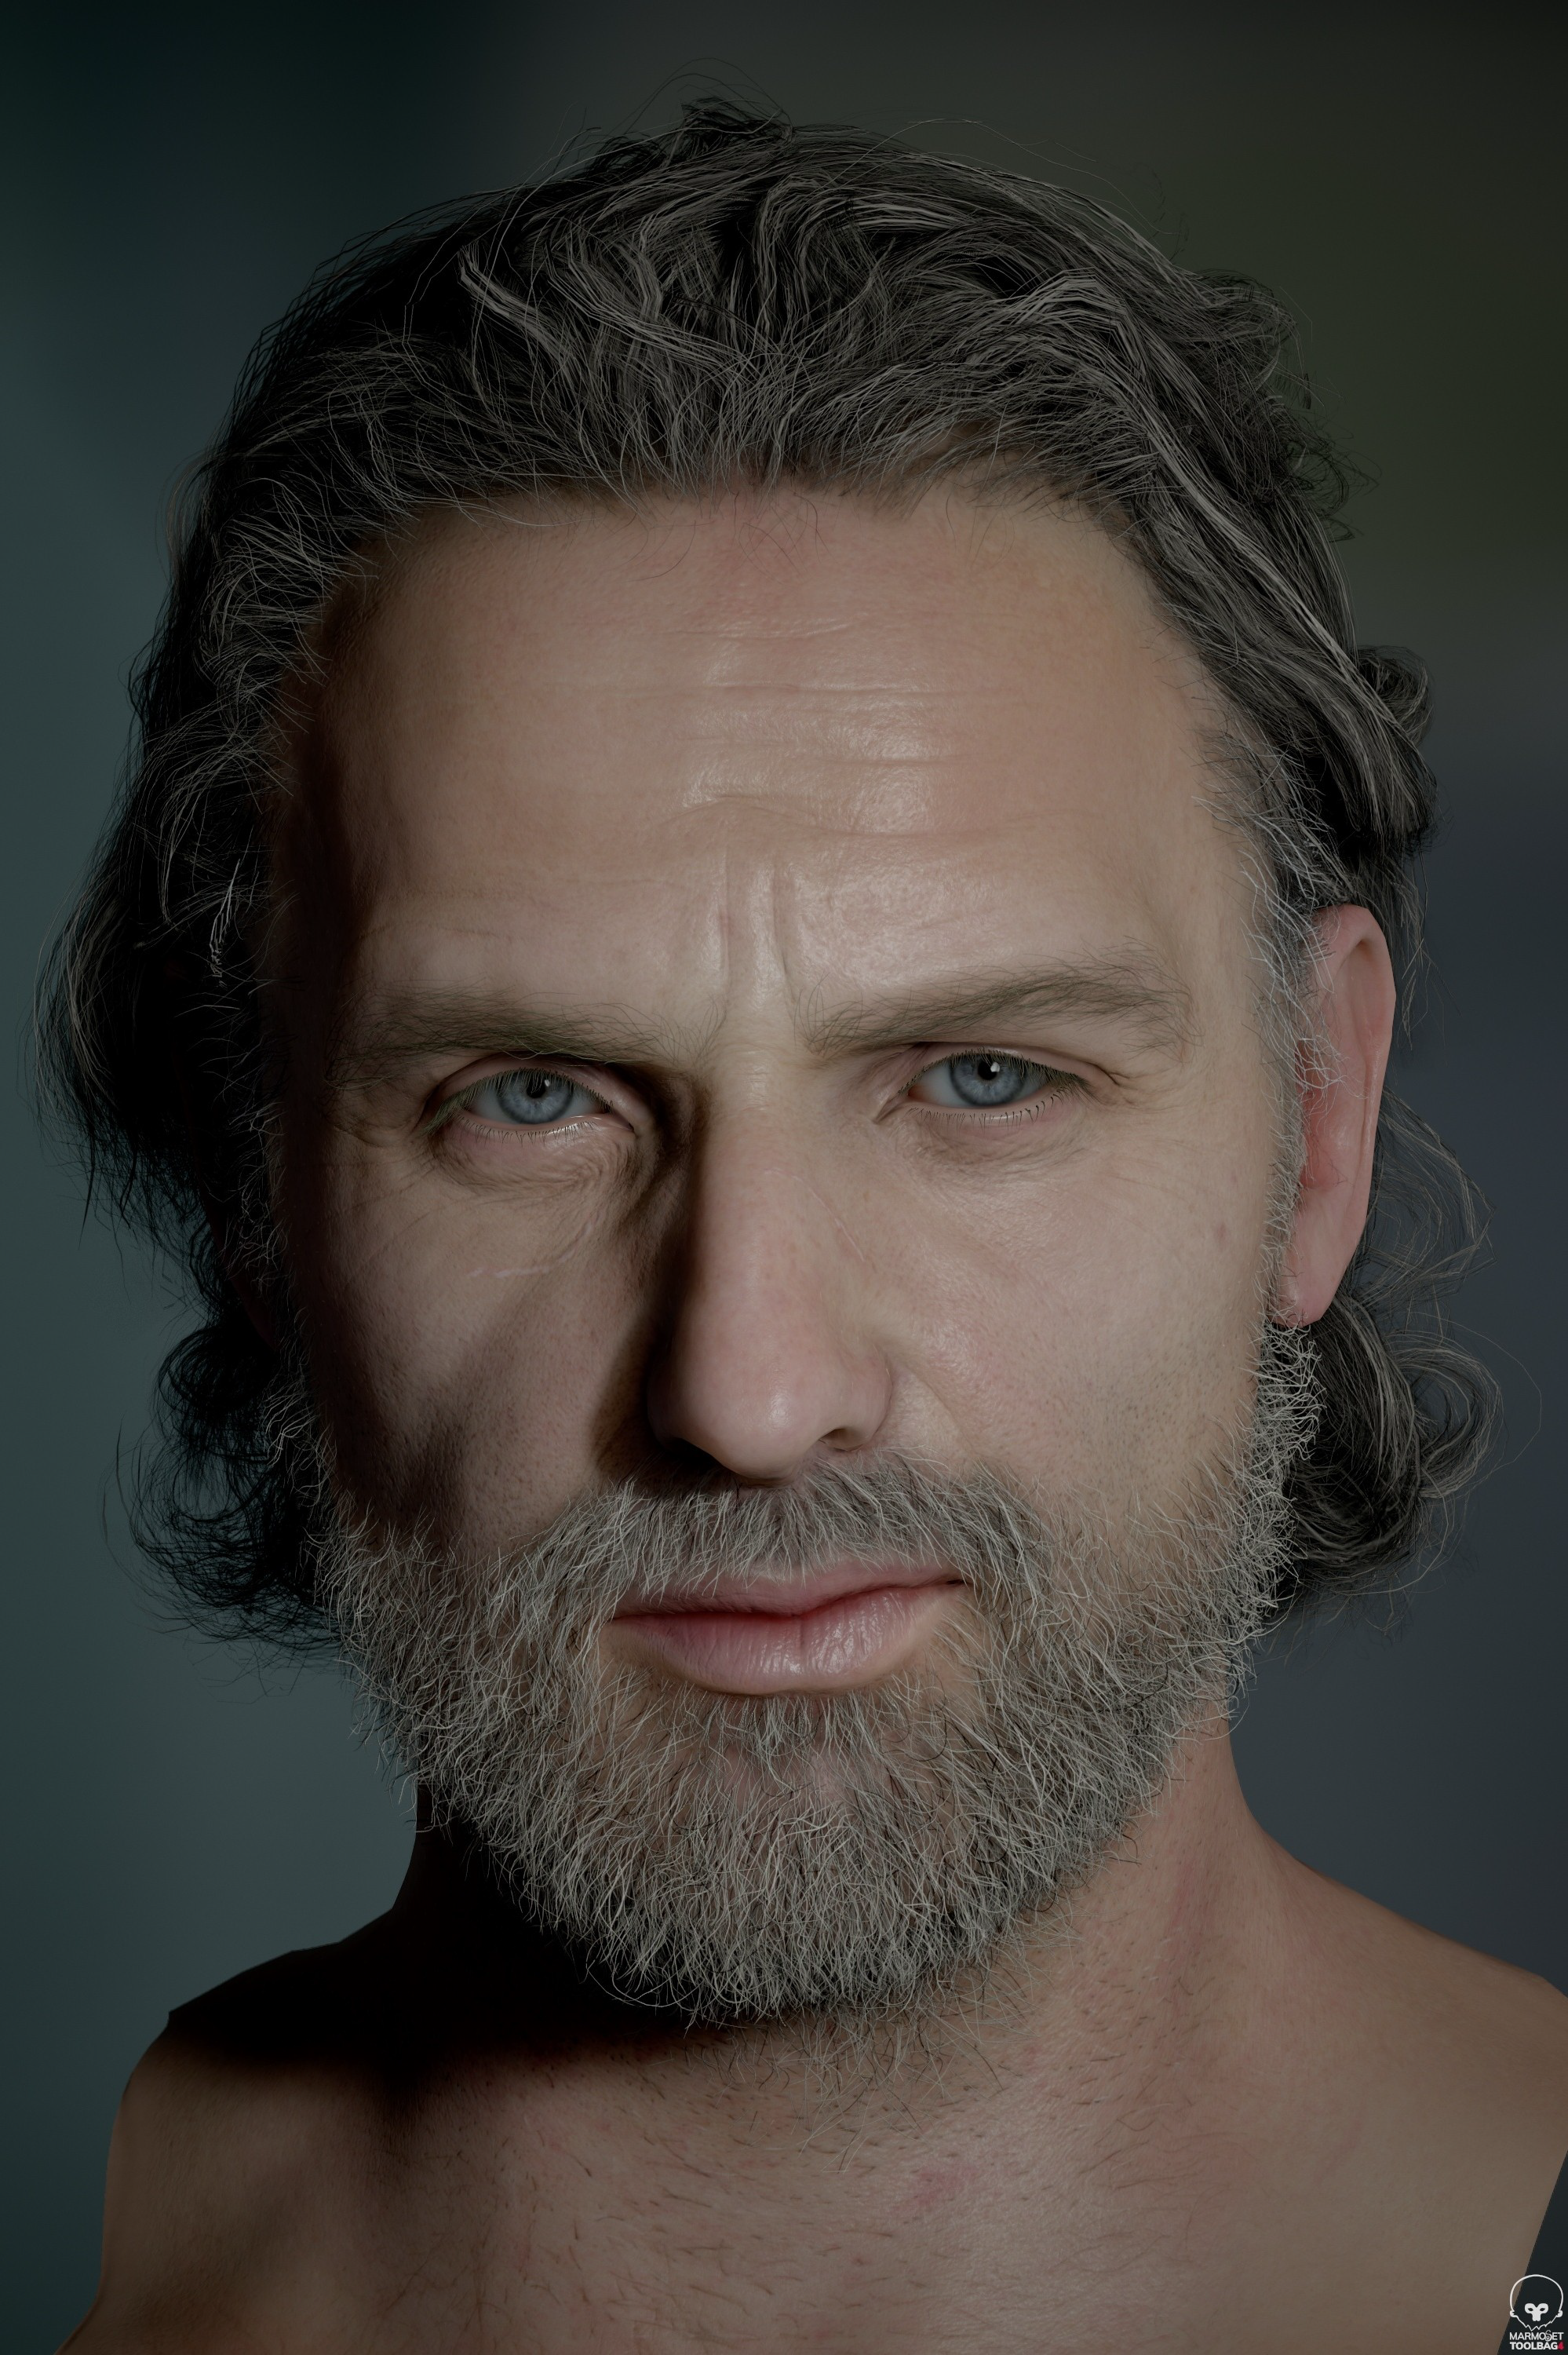
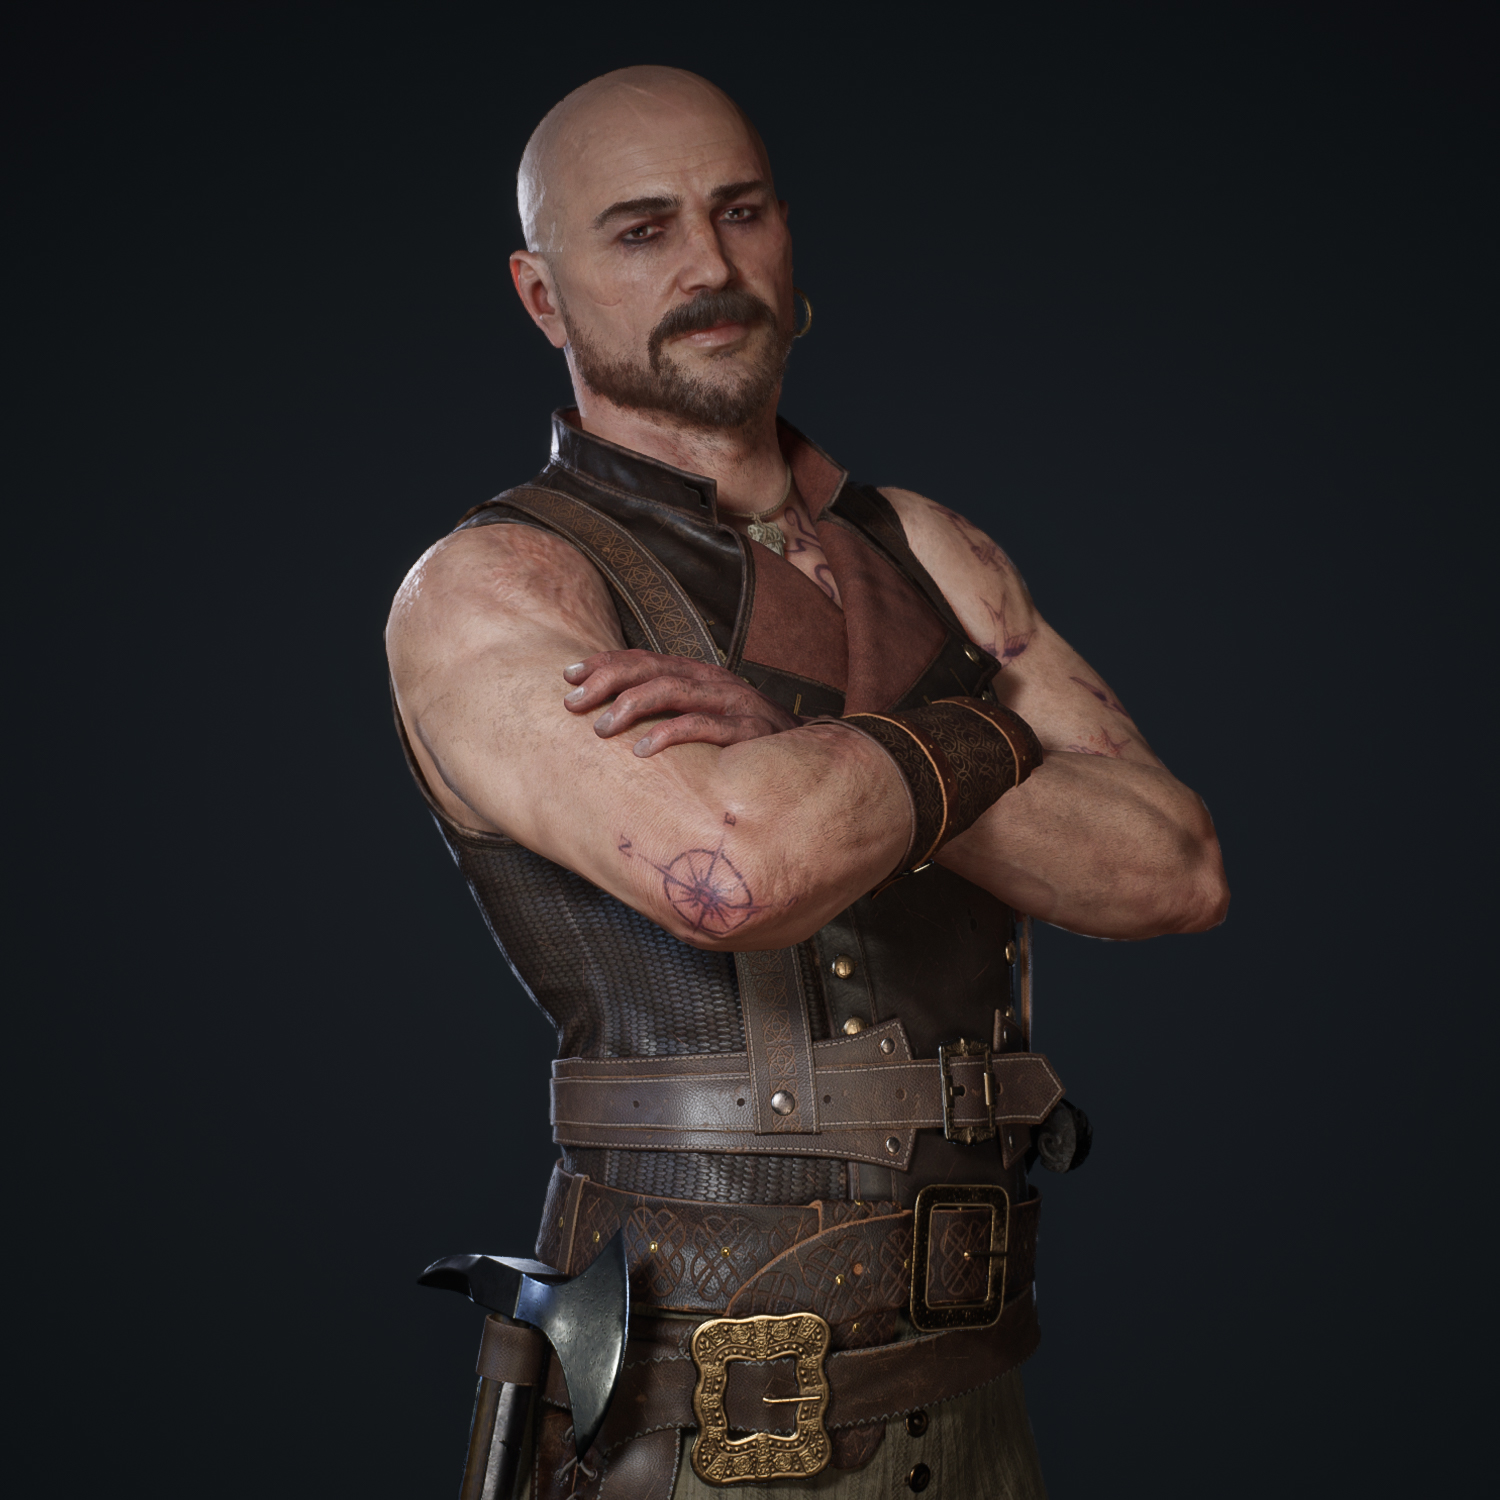
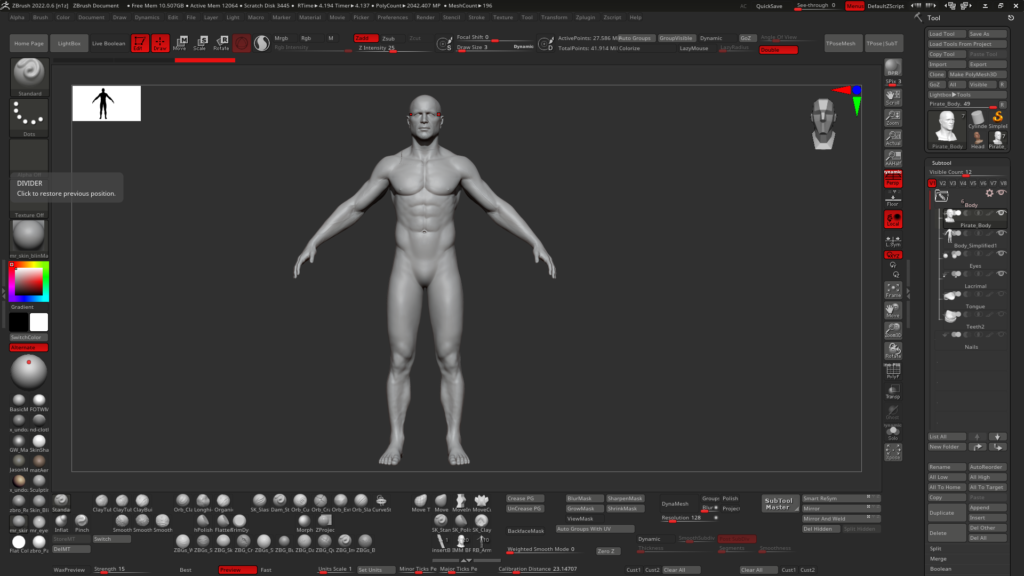
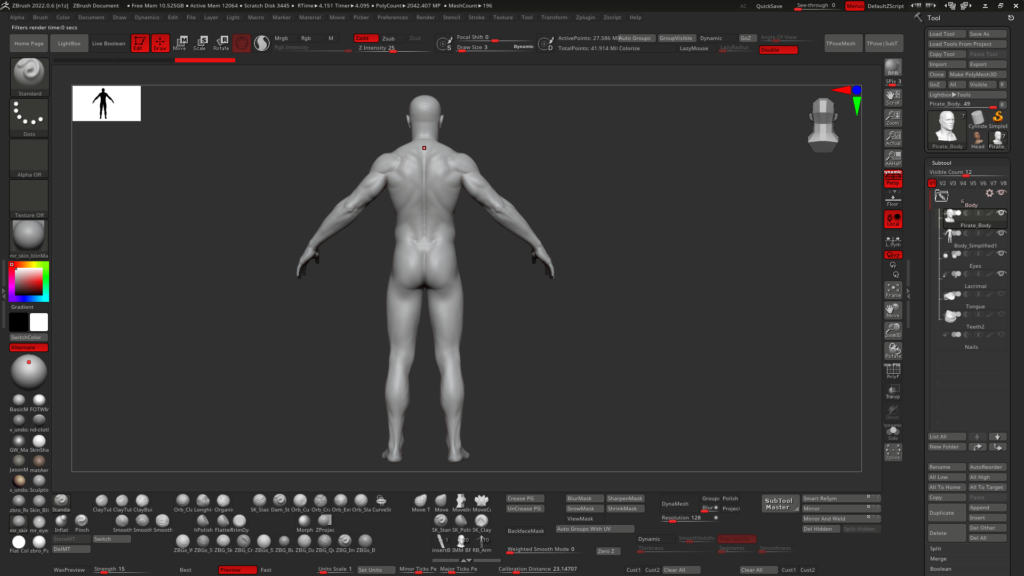
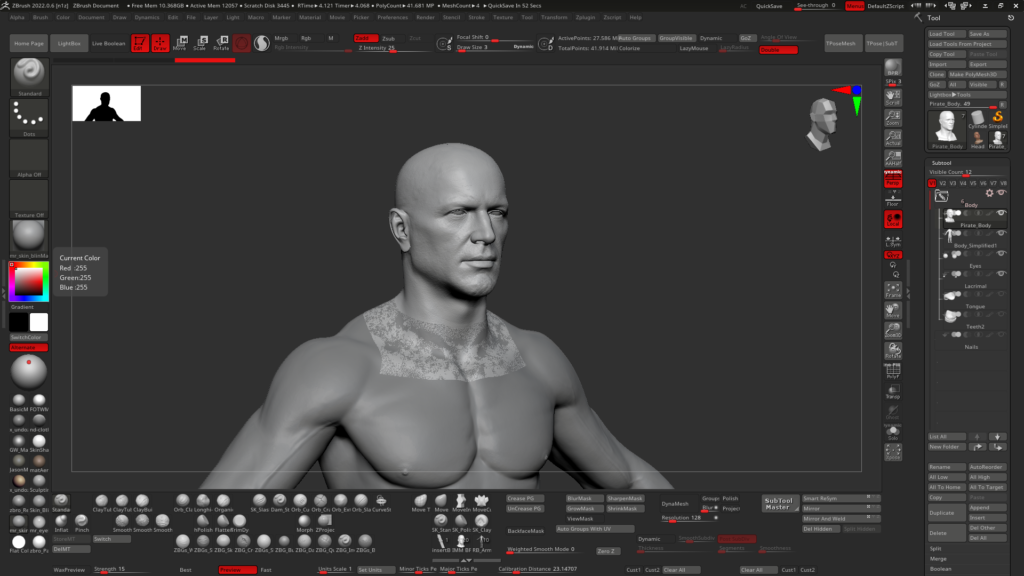
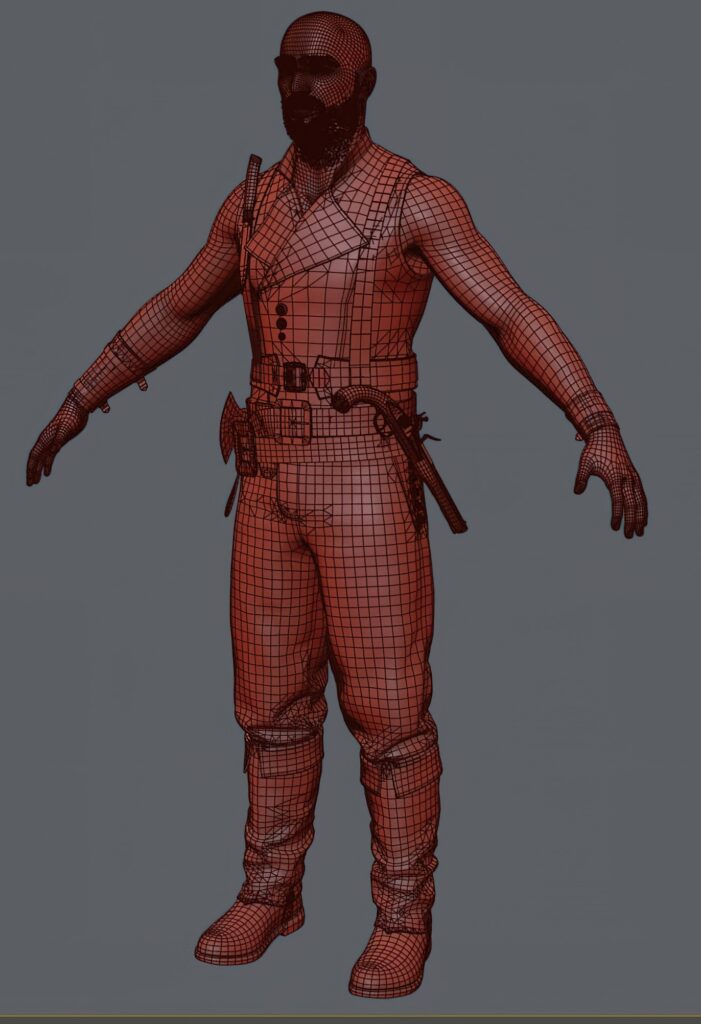
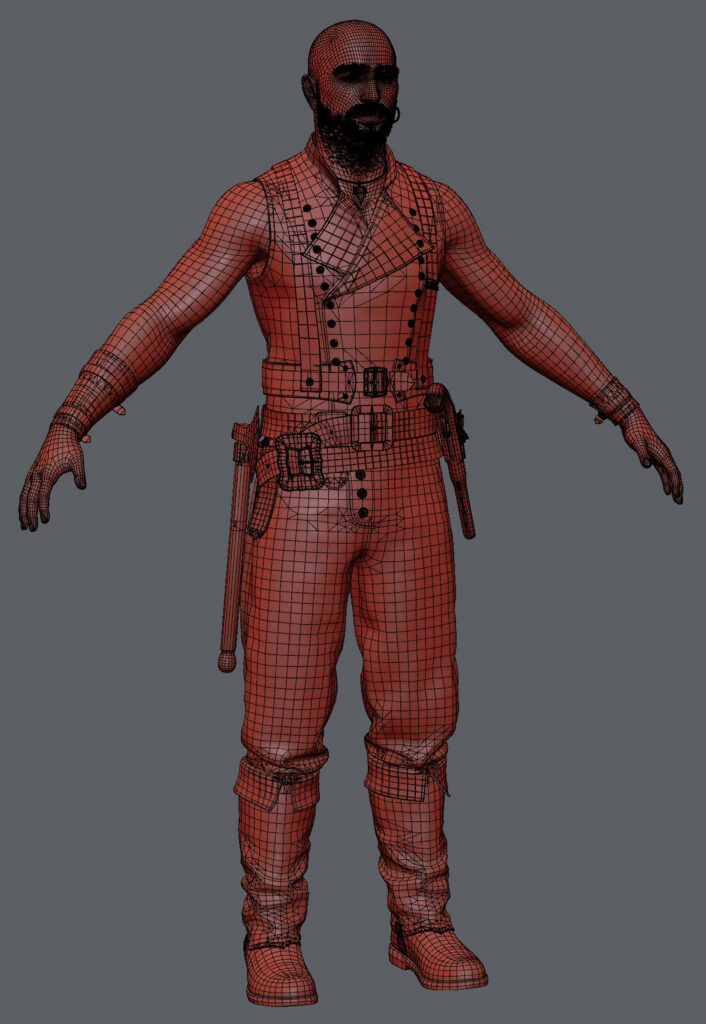
High Poly Modelling
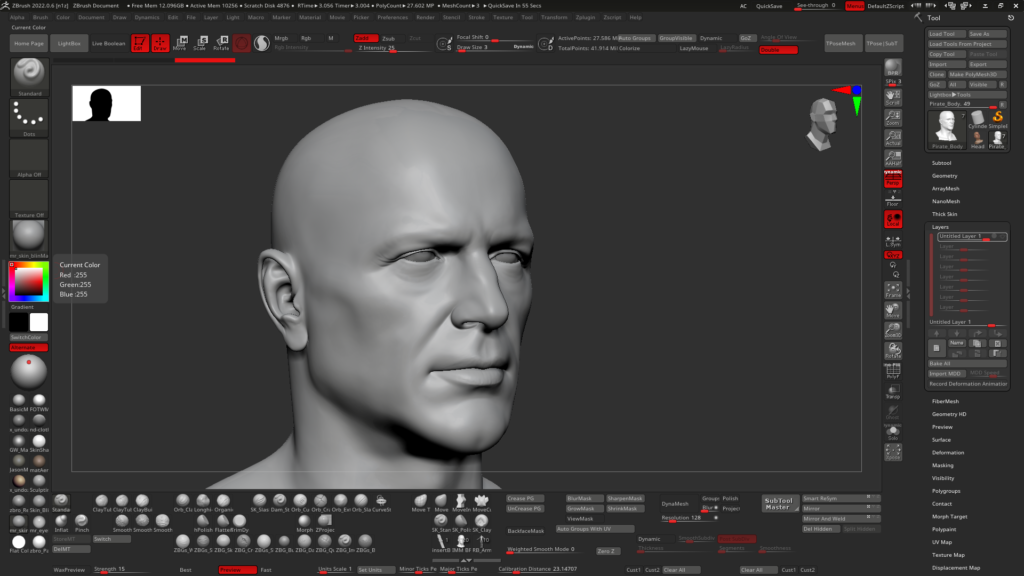
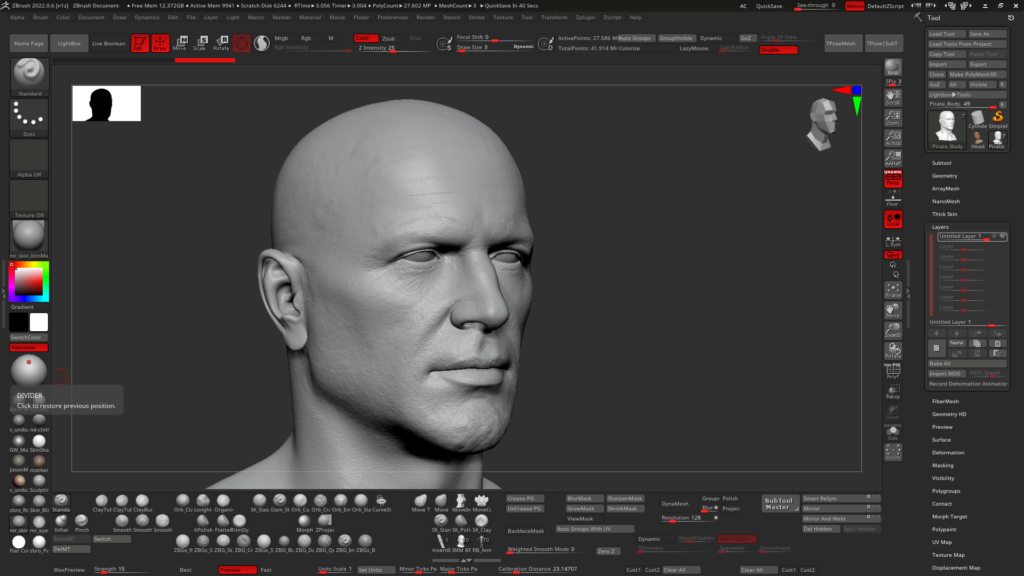
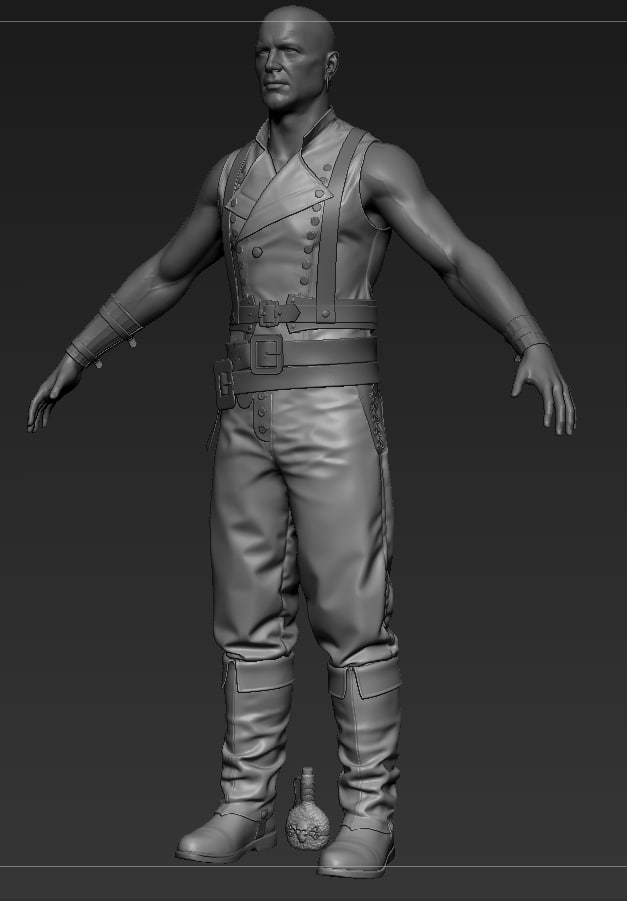
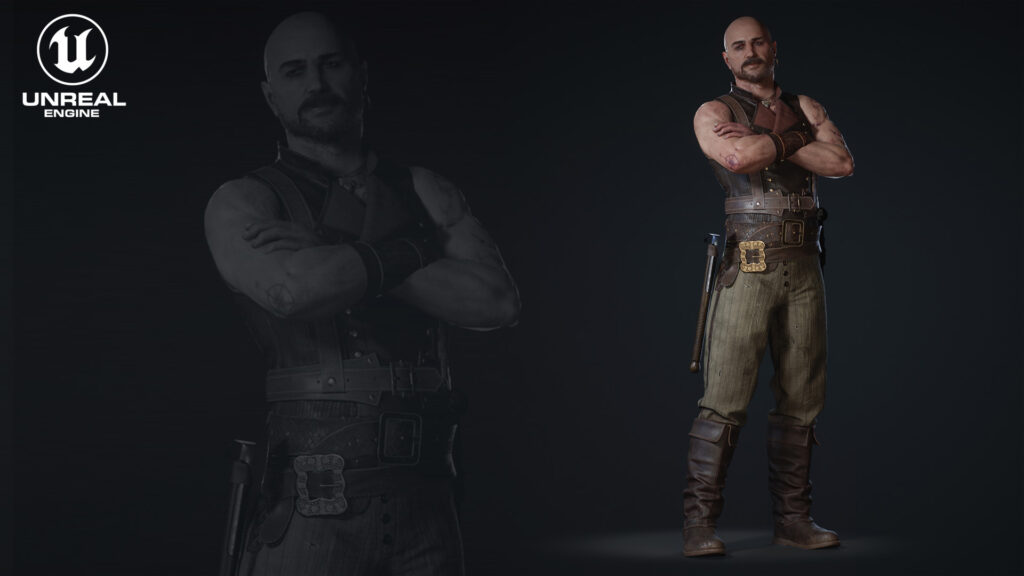
In this particular model, I started with a full body base mesh, on which I adjusted the musculature to the type of complexion I wanted and worked the face, but without going into fine detail.
Once I have the first version that fits what I want, we can start working on other pieces, like the clothes.
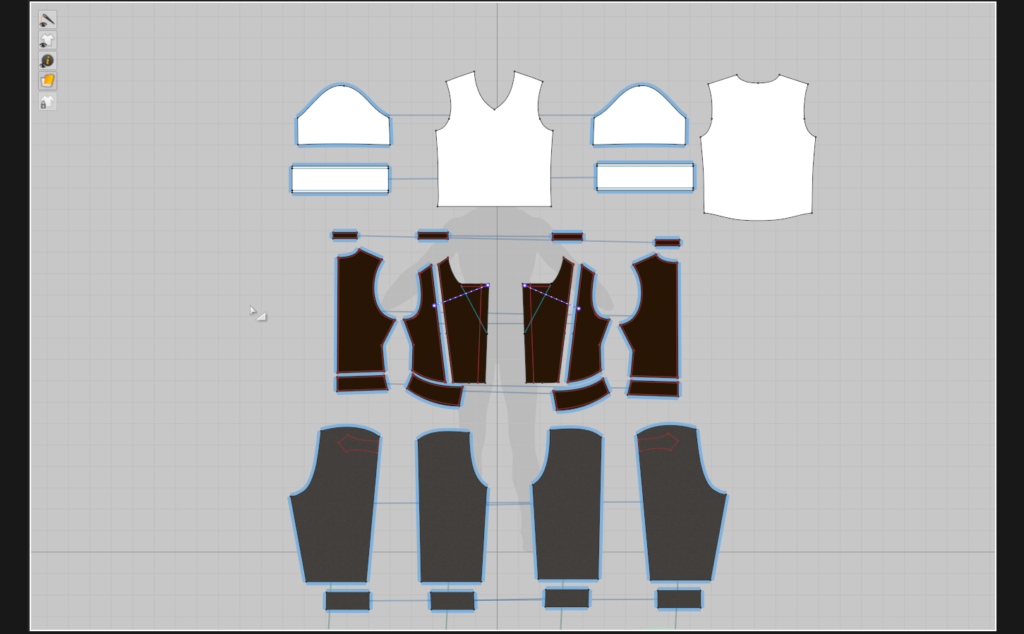
We exported a decimated version of the body mesh to Marvelous designer and started to work on the clothes. I start with high particle distances to fit them a little bit the patterns without much detail and when I’m happy with the result, I add details to the patterns and lower the particle distance to get better pleats.
Then I export the mesh without thickness or welds. I use two exports, one with the simulation and the other flat. For the flat one, I take it to Zbrush and I make a Zremesher, later in Max I clean it and adapt it to my needs, besides making some basic UVs. In Max, I use the 3D Gladiator script to adapt the retopologized mesh to the simulated one, so I can export it and sculpt it in ZBrush in a more comfortable way.
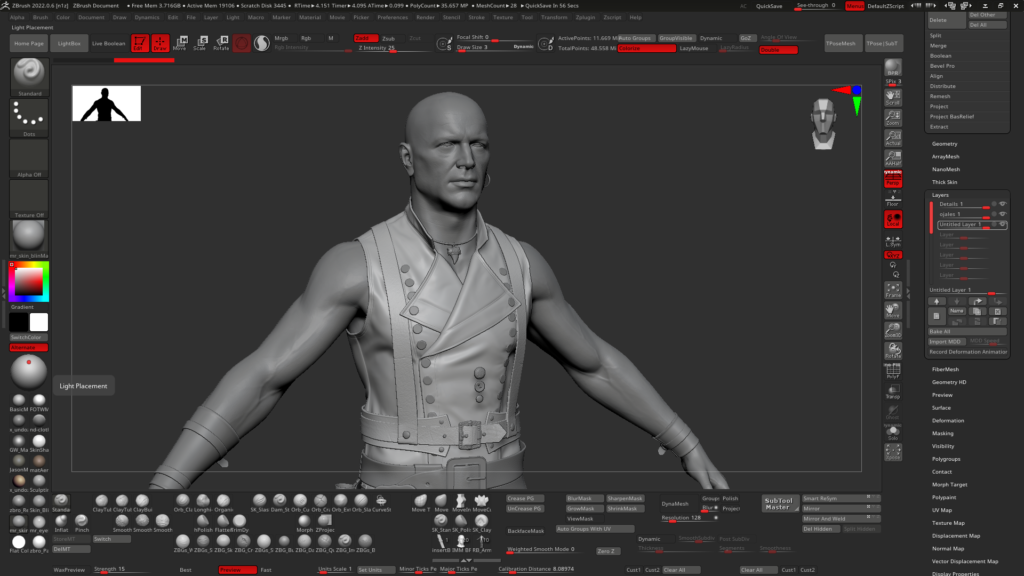
Once I had the garment with good topology and UVs in ZBrush, I reprojected the new mesh on the simulated mesh, gave it thickness using panel loops and added all the details we need.
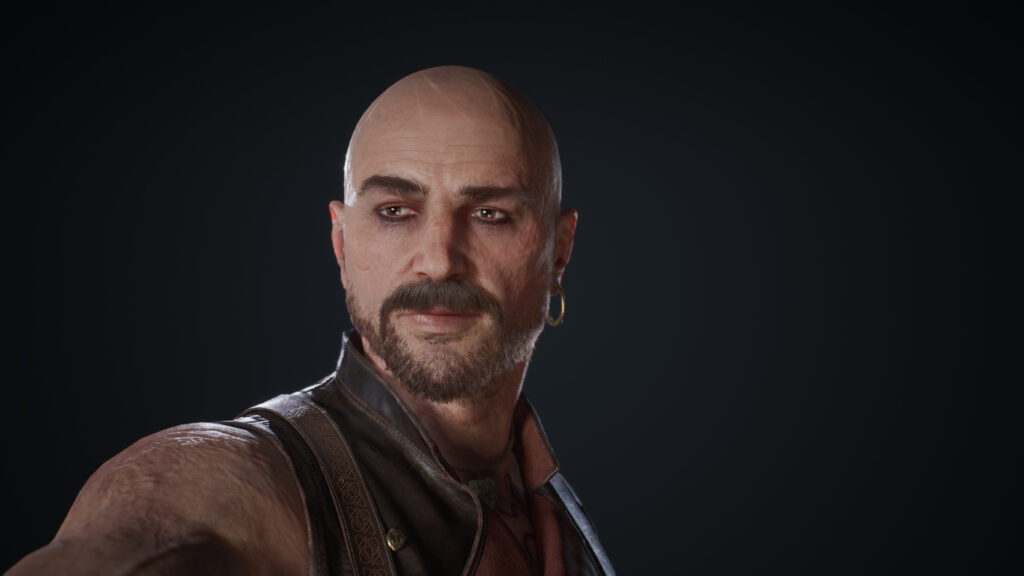
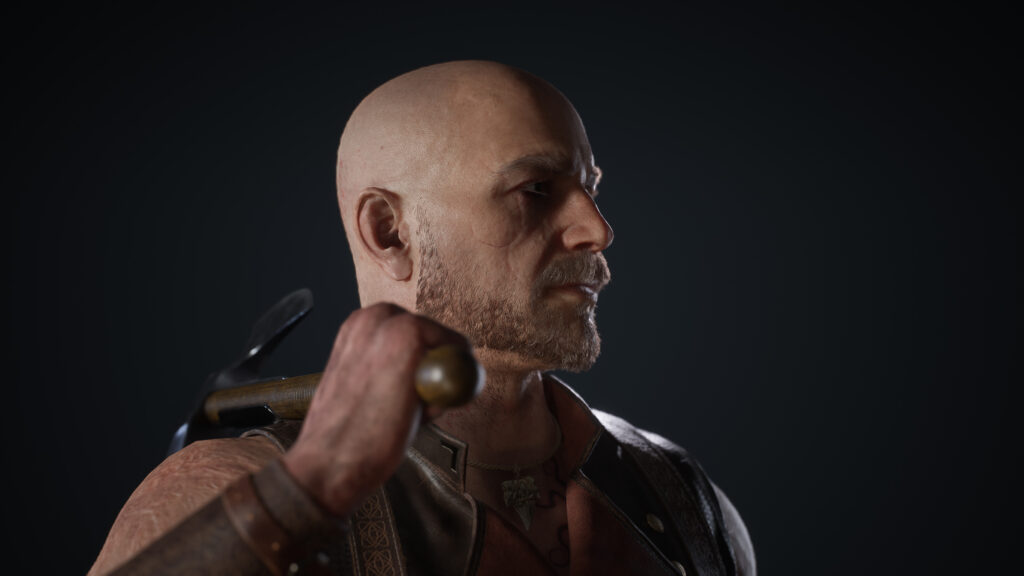
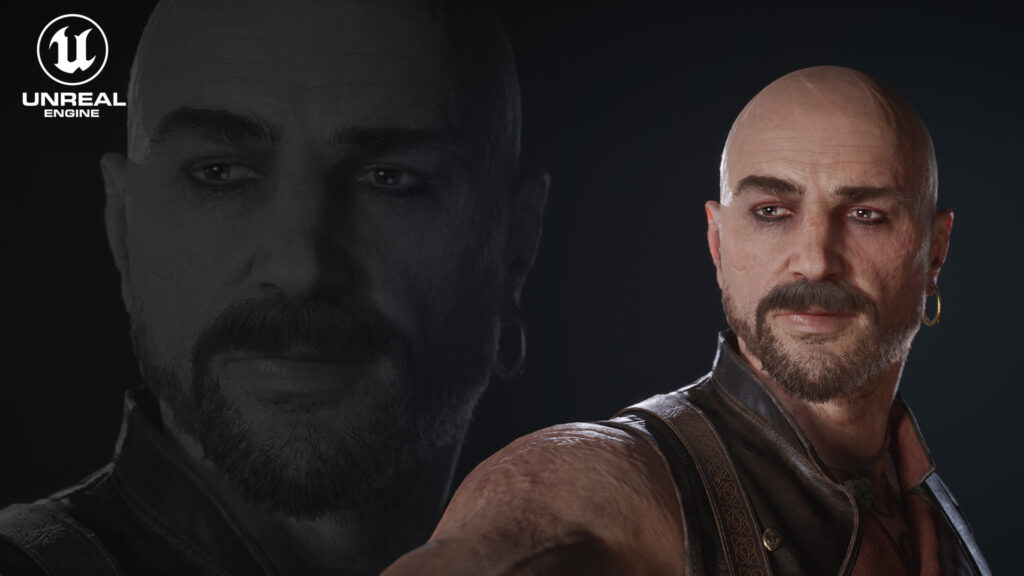
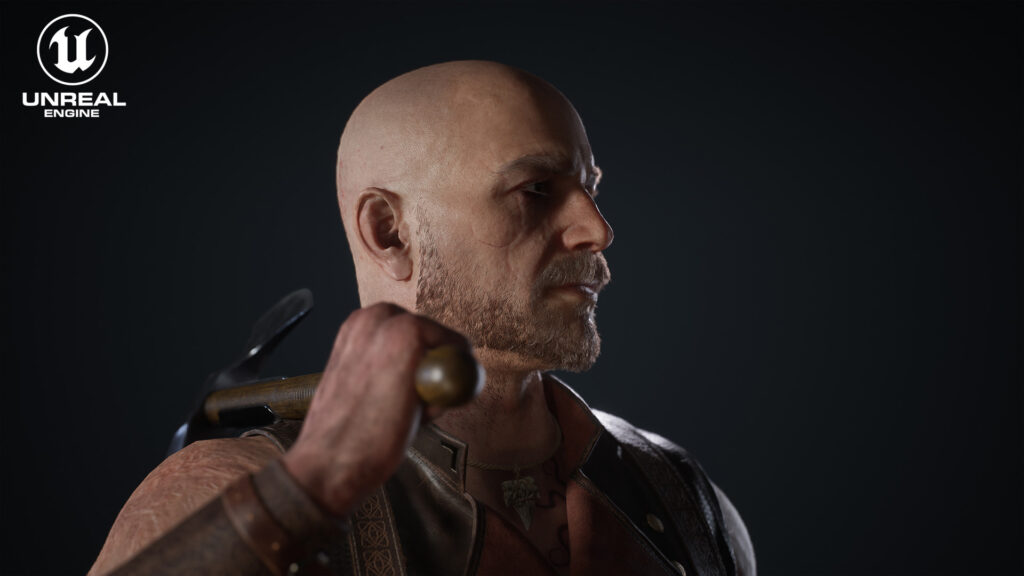
When we have this ready I detail the model, generally, for the face, I use Multi-channel Faces from Texturing.XYZ and detail alphas of different areas of the body.
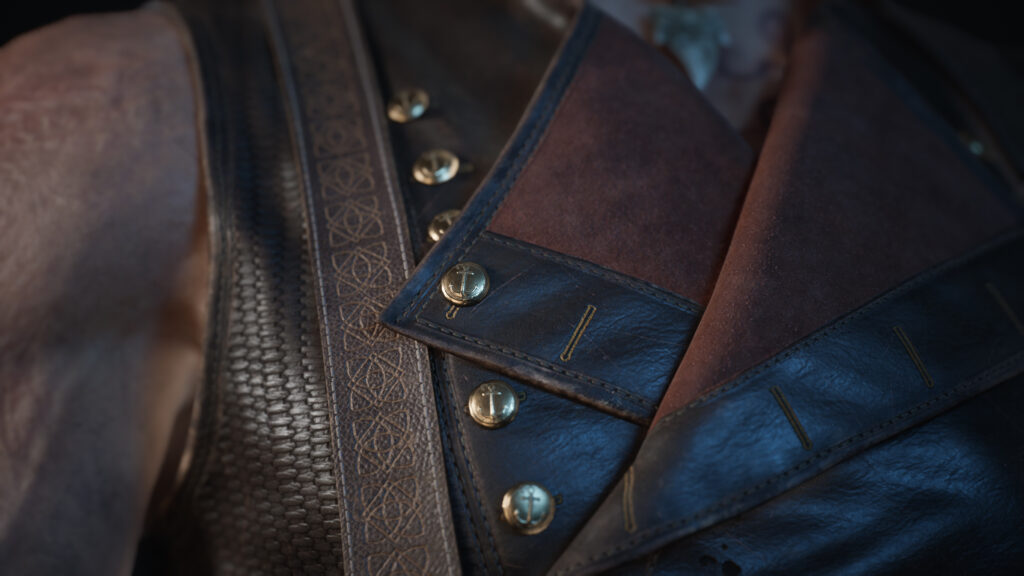
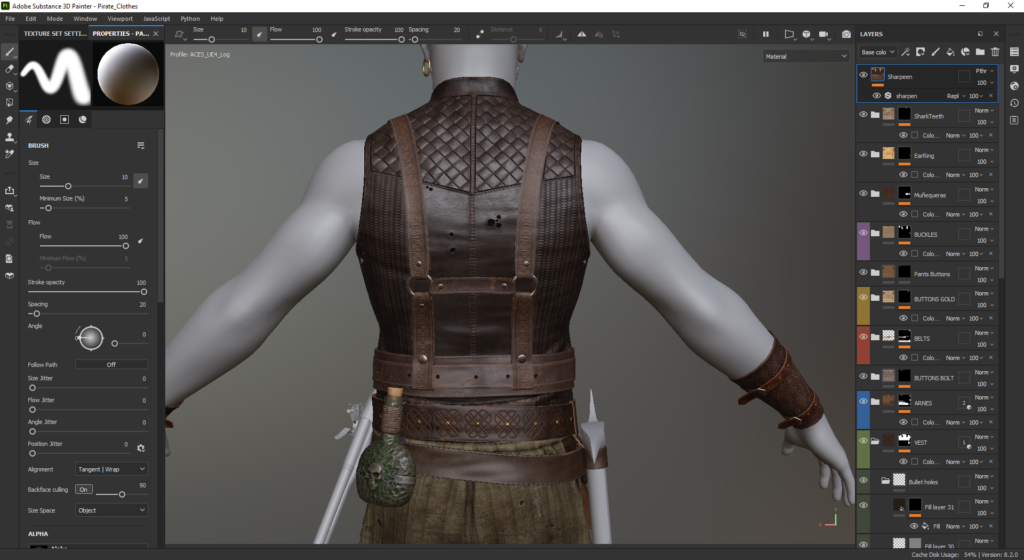
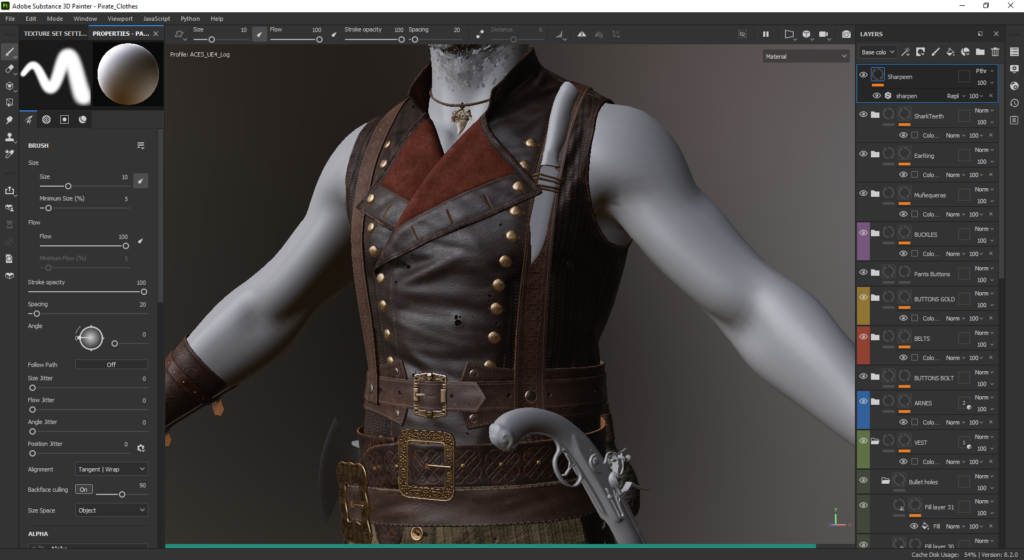
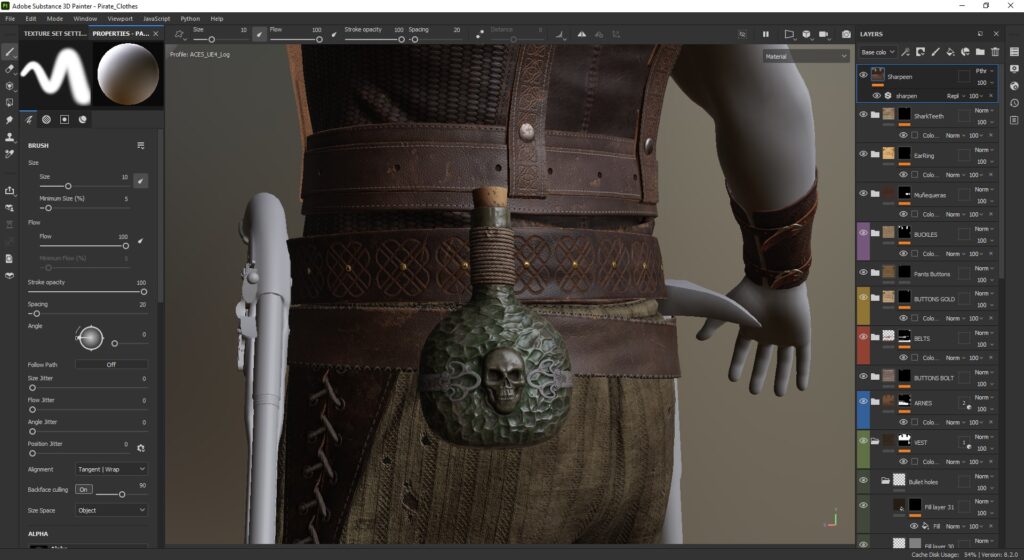
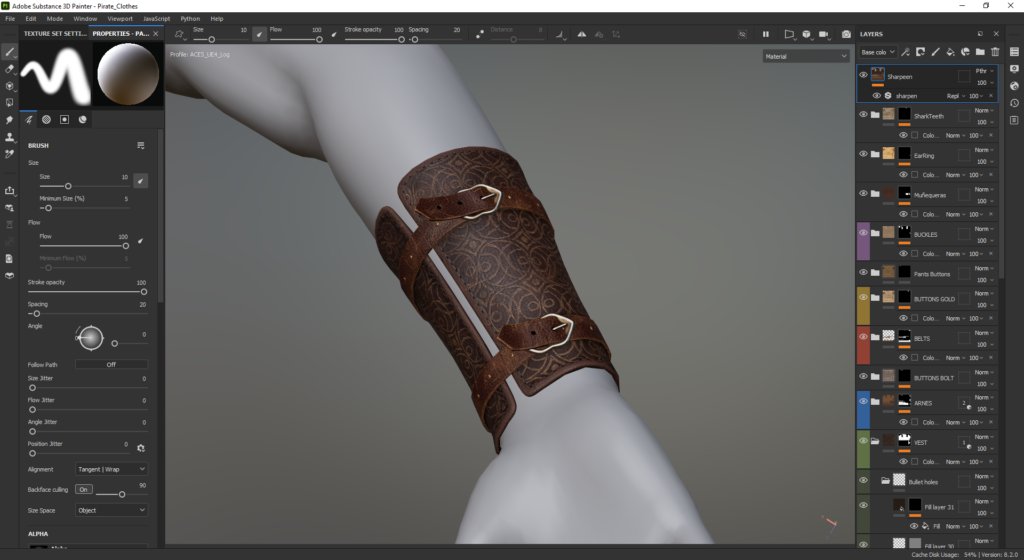
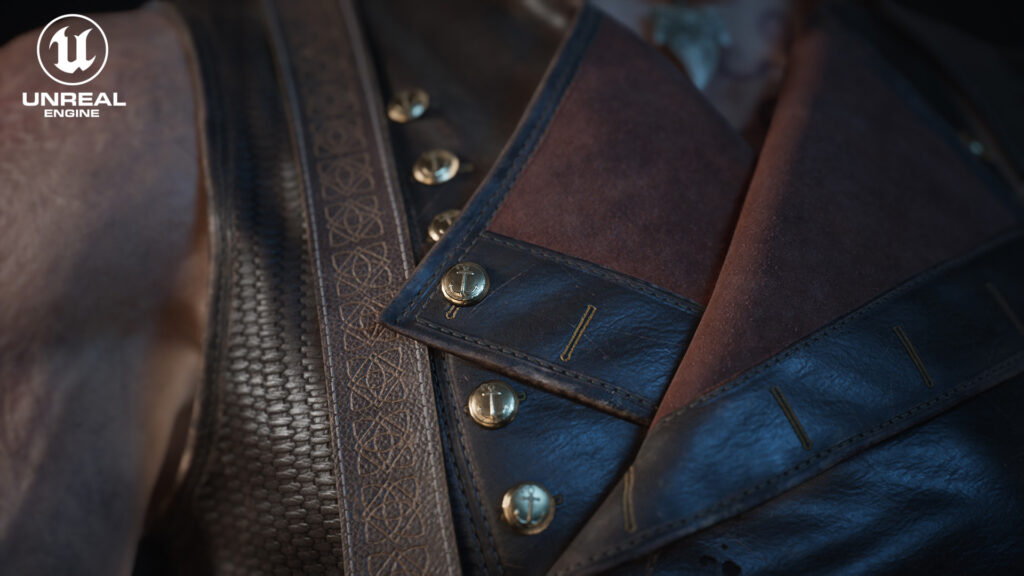
In the clothes the fine detail like the leather texture, I prefer to leave it for the texturing phase.
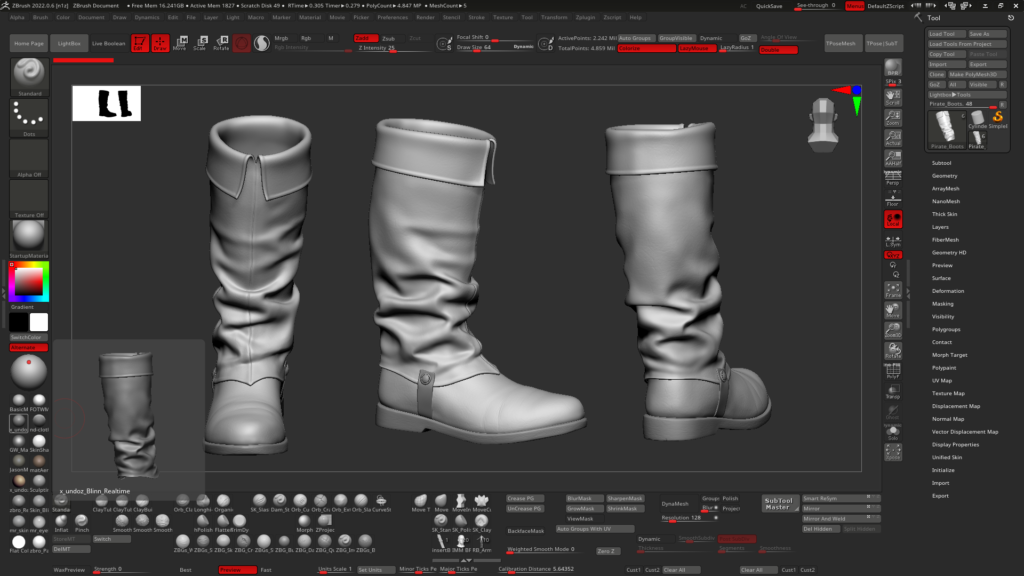
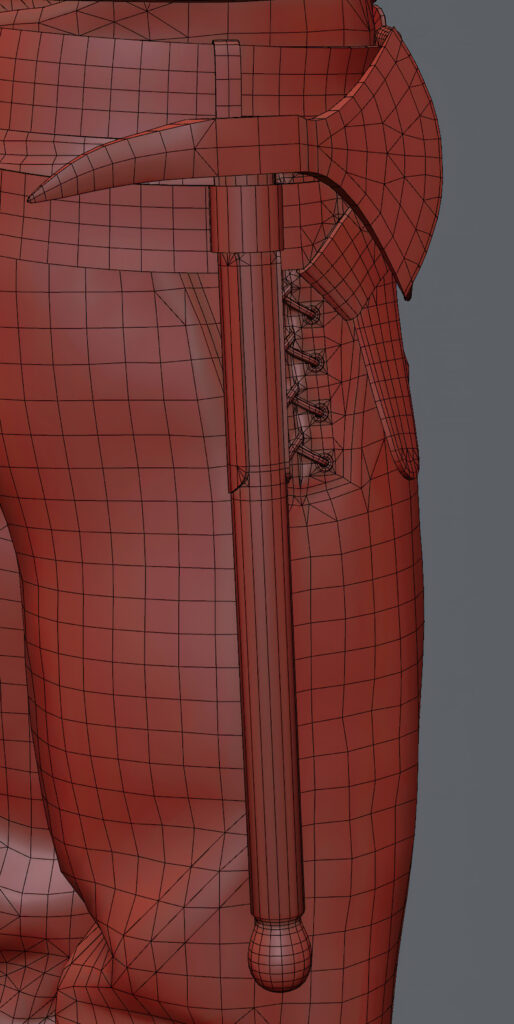
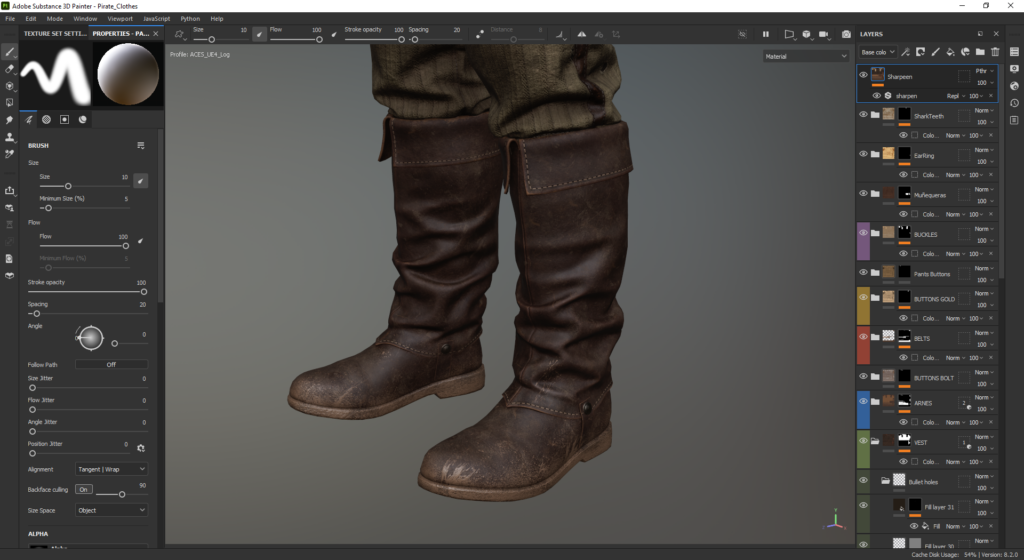
The boots started from a base made in Max to later be sculpted in Zbrush the folds and the wear of the sole. The seams I usually engrave the in a layer to see how they look, but I don’t usually export them, I think it’s better to paint them in substance, I love the flexibility it gives me to do them there.
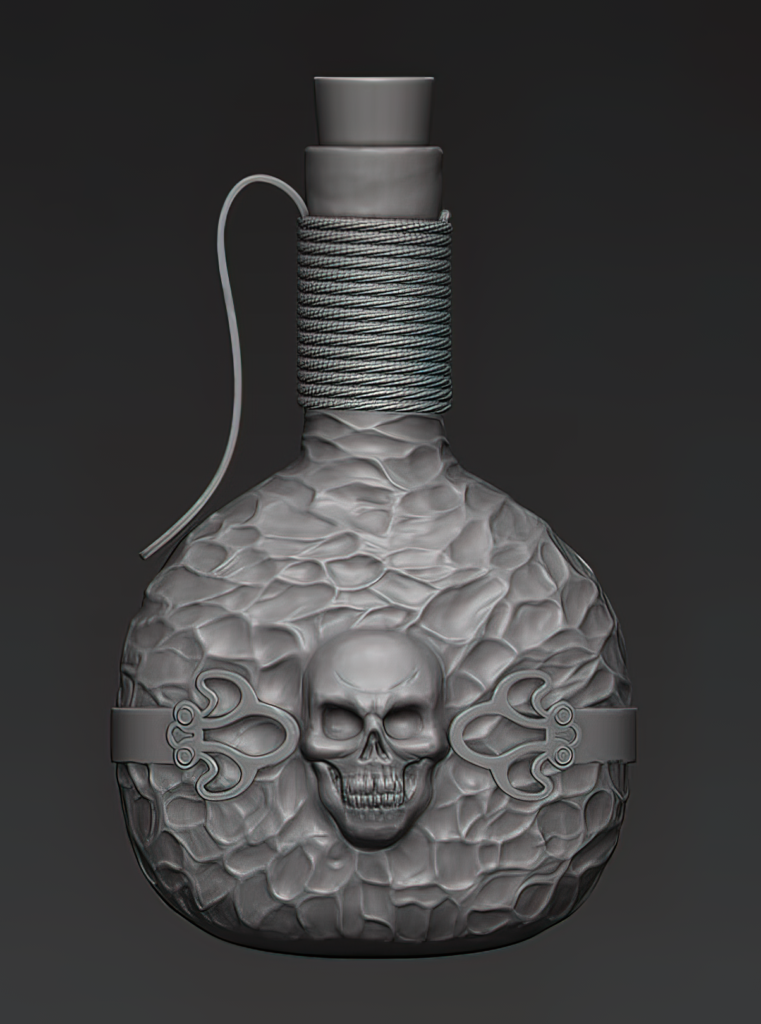
The buckles are meshes made in Max and the ornaments are alphas that I painted in photoshop and then applied by displacement in Zbrush.
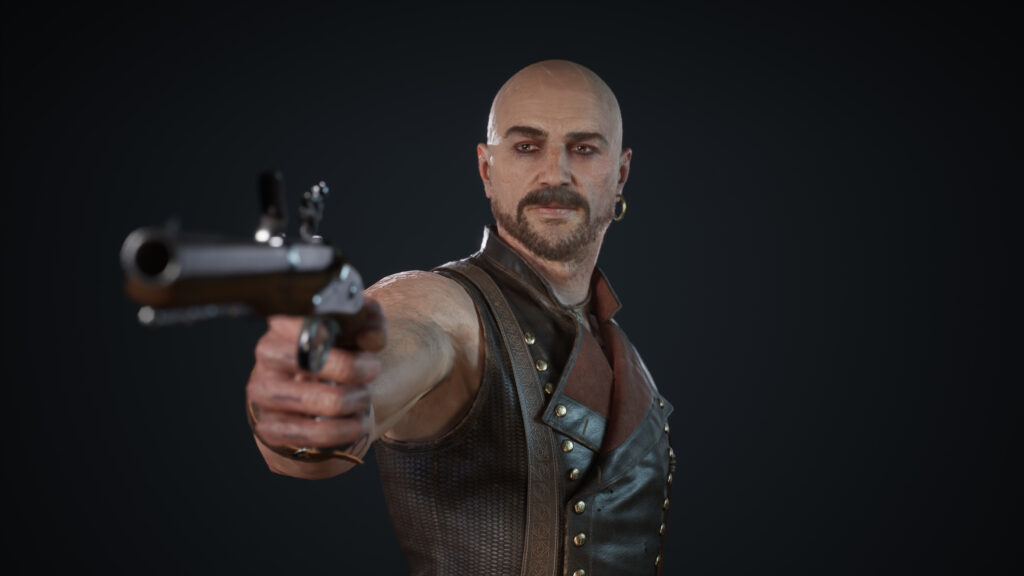
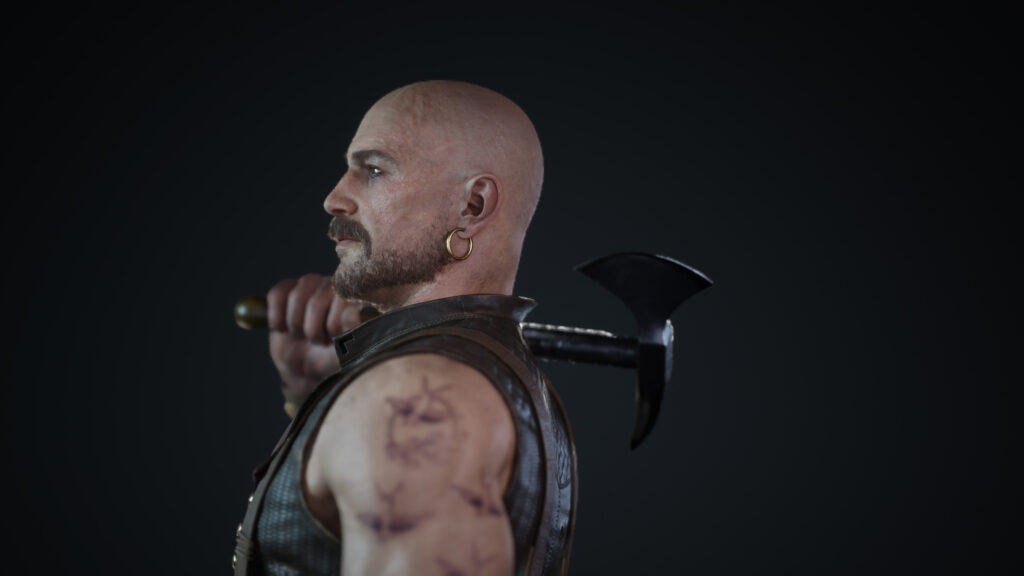
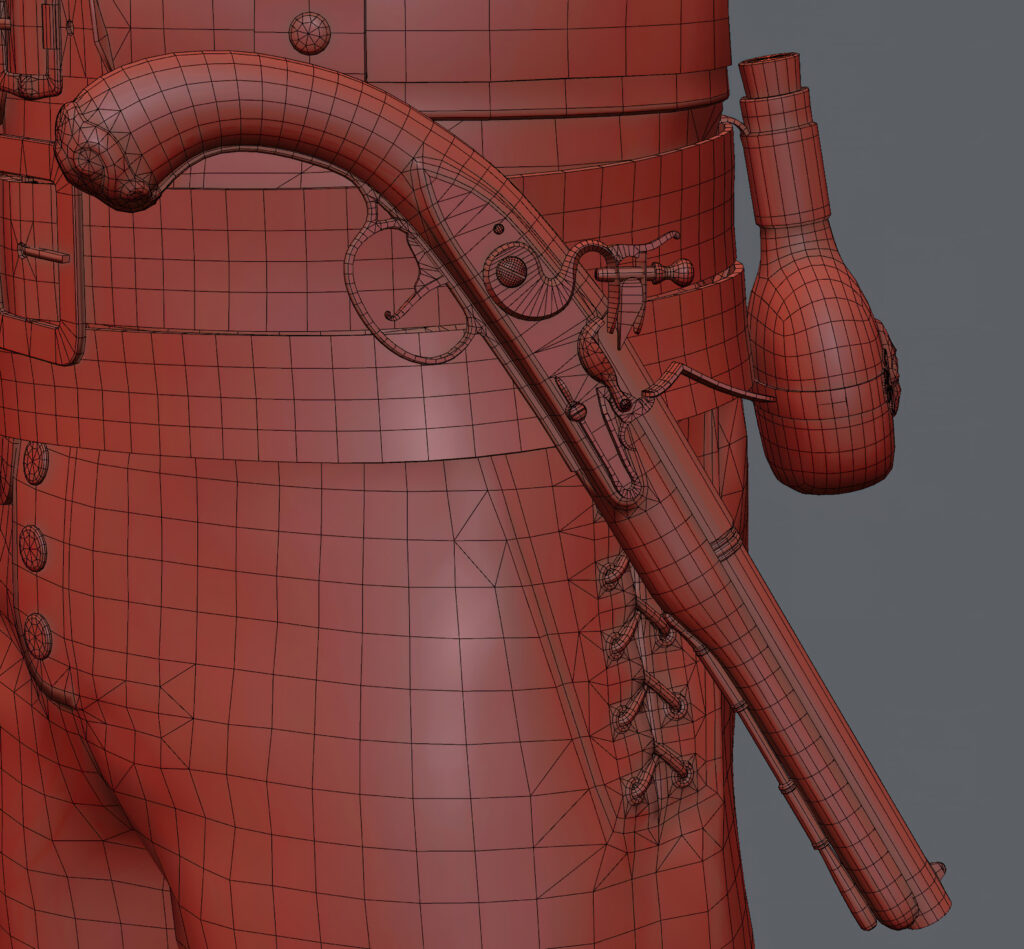
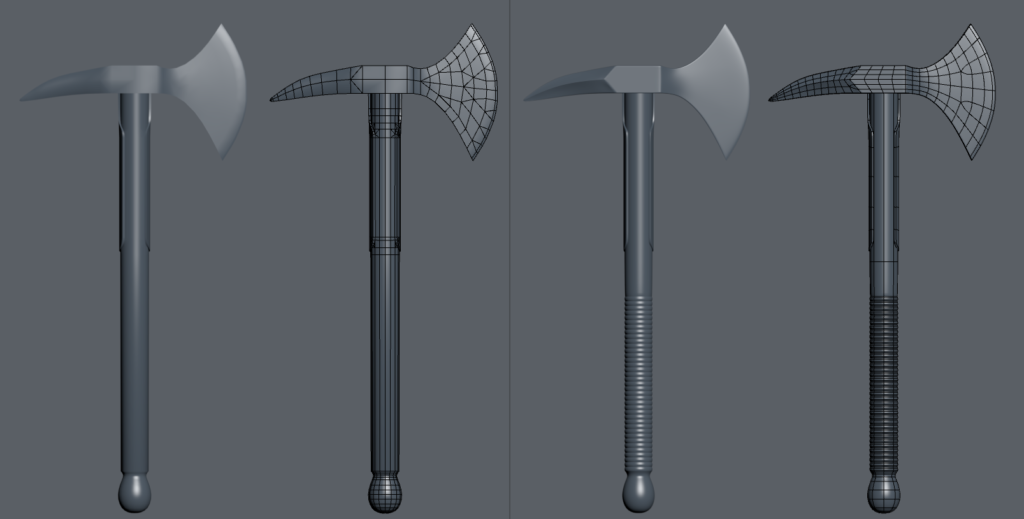
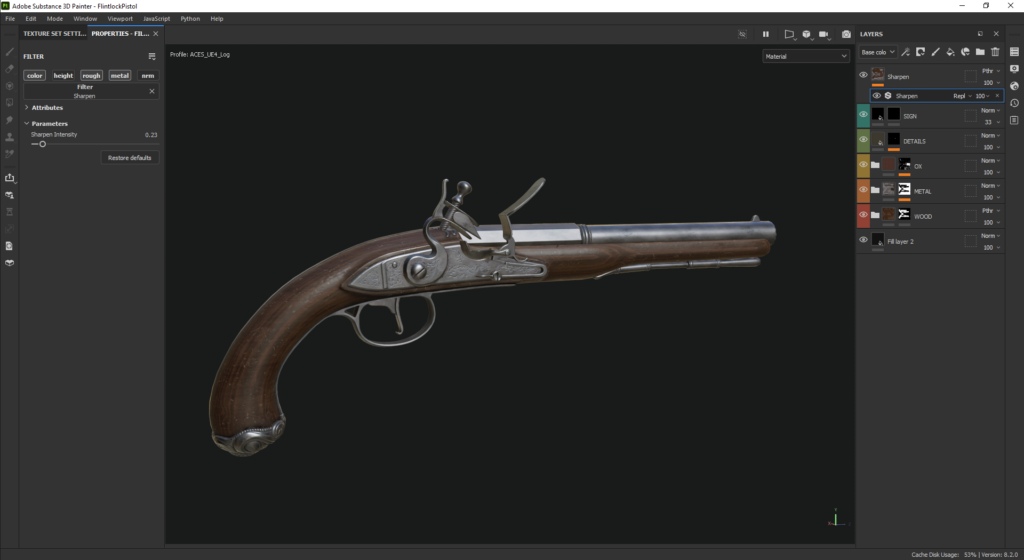
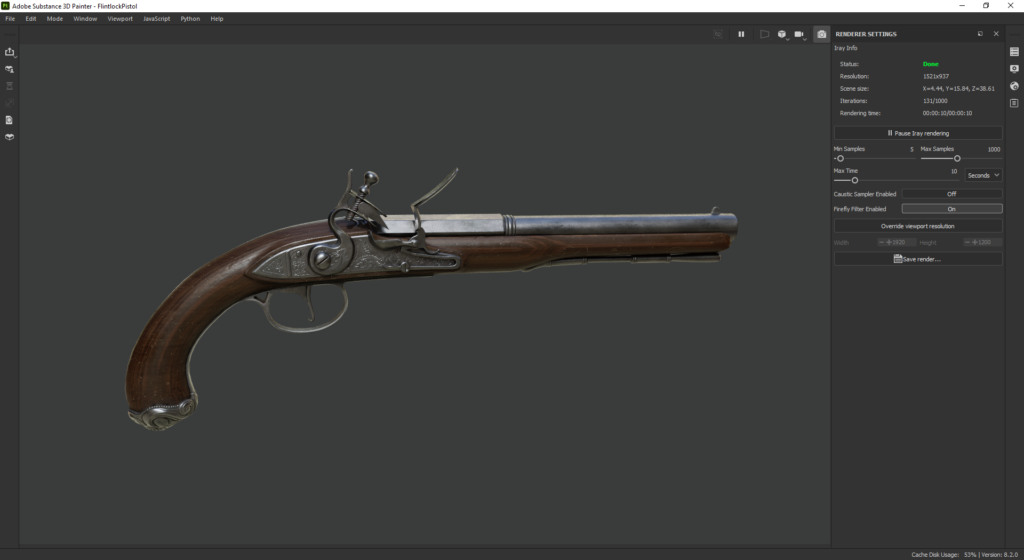
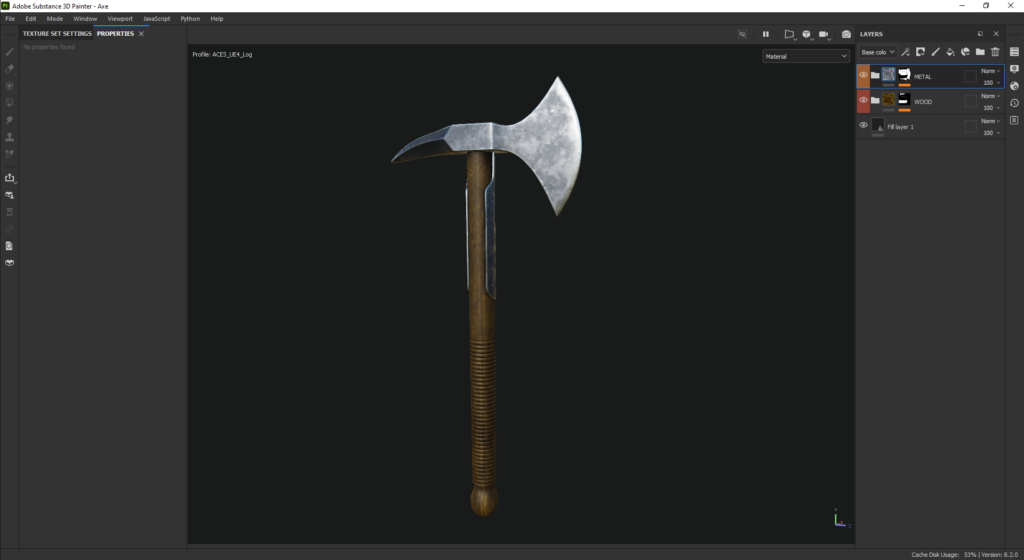
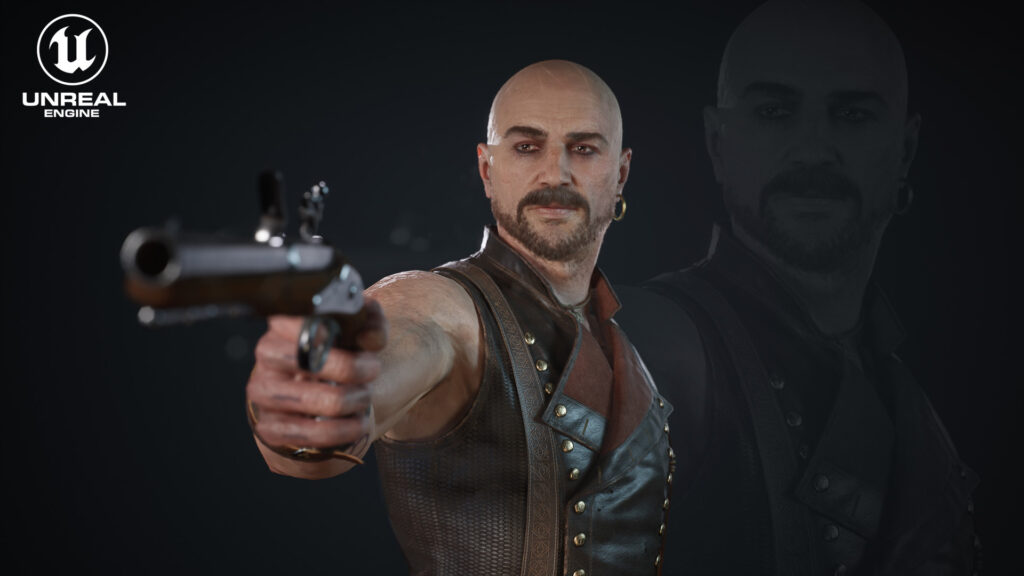
The weapons (Axe and Flintlock pistol) are classic subdivision models, being in good condition with hardly any wear and tear they have not had to go through Zbrush, all the detailing has been done in Substance Painter.
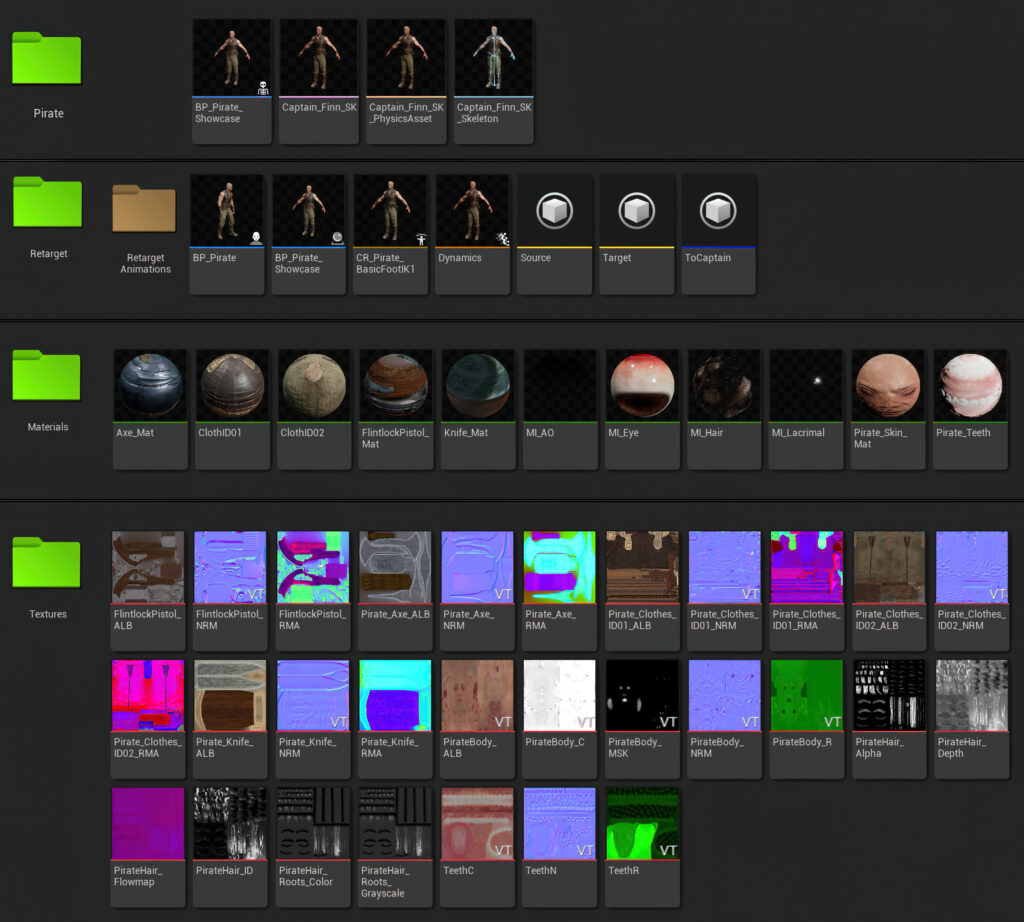
Lowpoly
Once the high-poly was done, I decimated all objects and exported them to Max which is the program I feel most comfortable retopologizing. I find Graphite Modeling Tools very comfortable to use, they have everything I need to work quickly and efficiently.


UVing
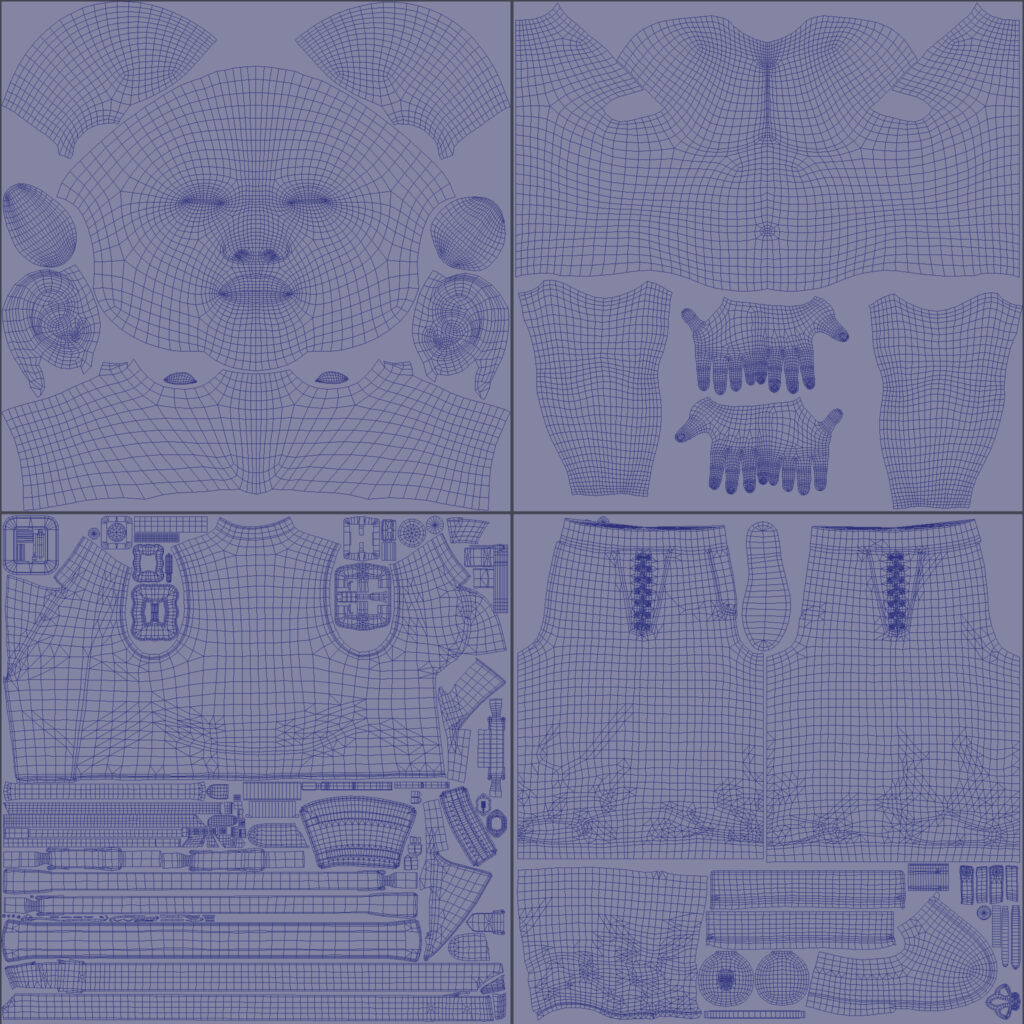
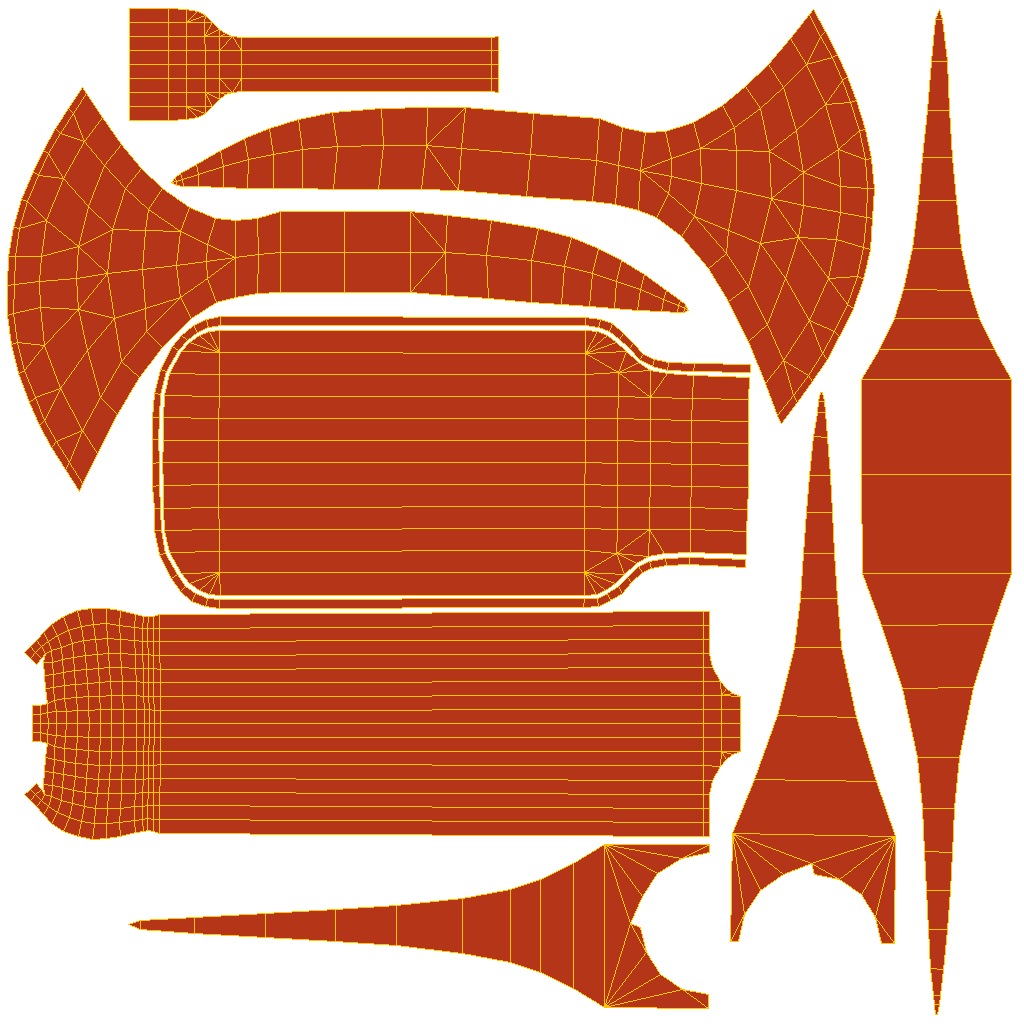
I manually unwrapped the objects, arranging them in the same direction where possible, and had the same texel density.
For the UV layout, I used Max, I tried to make sure I could use up the most UV space possible, most of the time, that is.
Besides that, I tried to make as many edges aligned to the U and V axis as possible so that they wouldn’t distort the textures too much and I tried to keep some degree of organization in mind.
Keeping pieces made of leather close to each other, buckle pieces close to each other, and so forth. Which wasn’t always possible, but it helps with the texturing process.

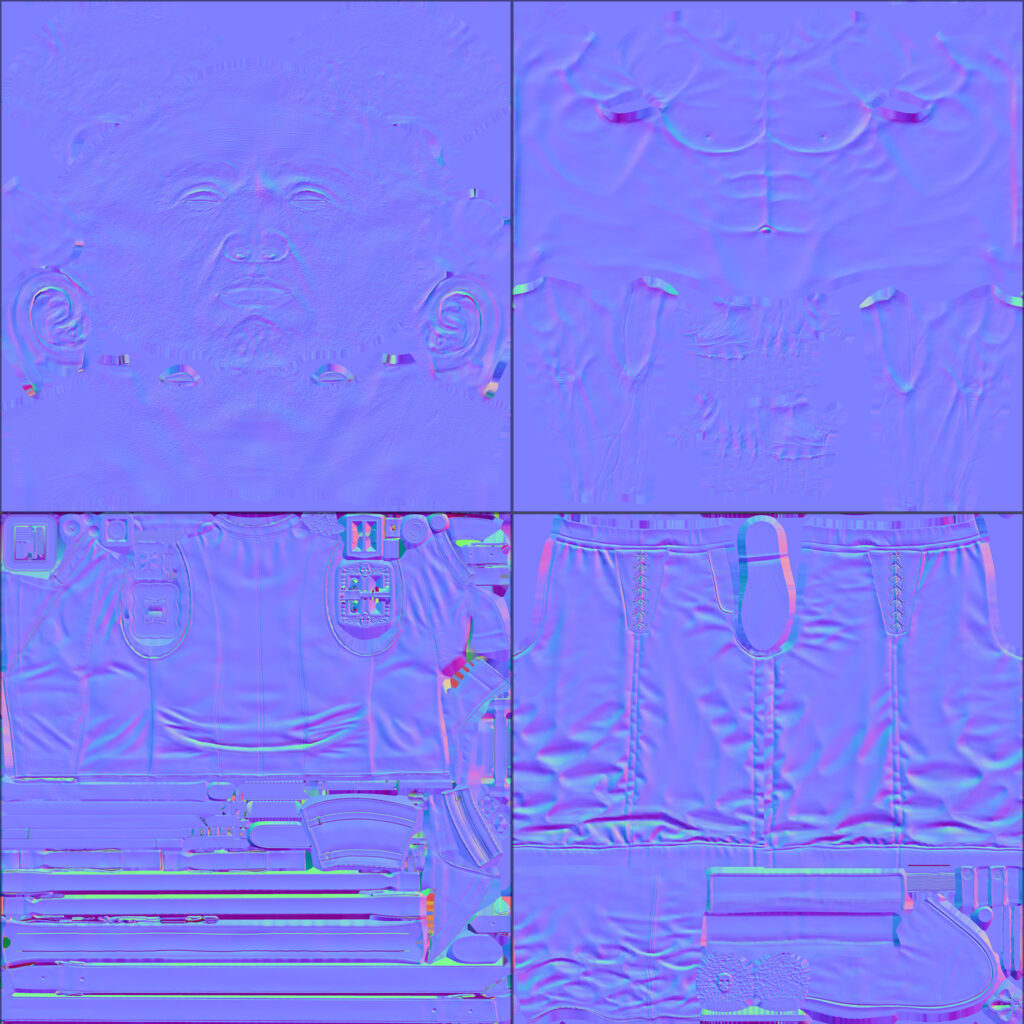
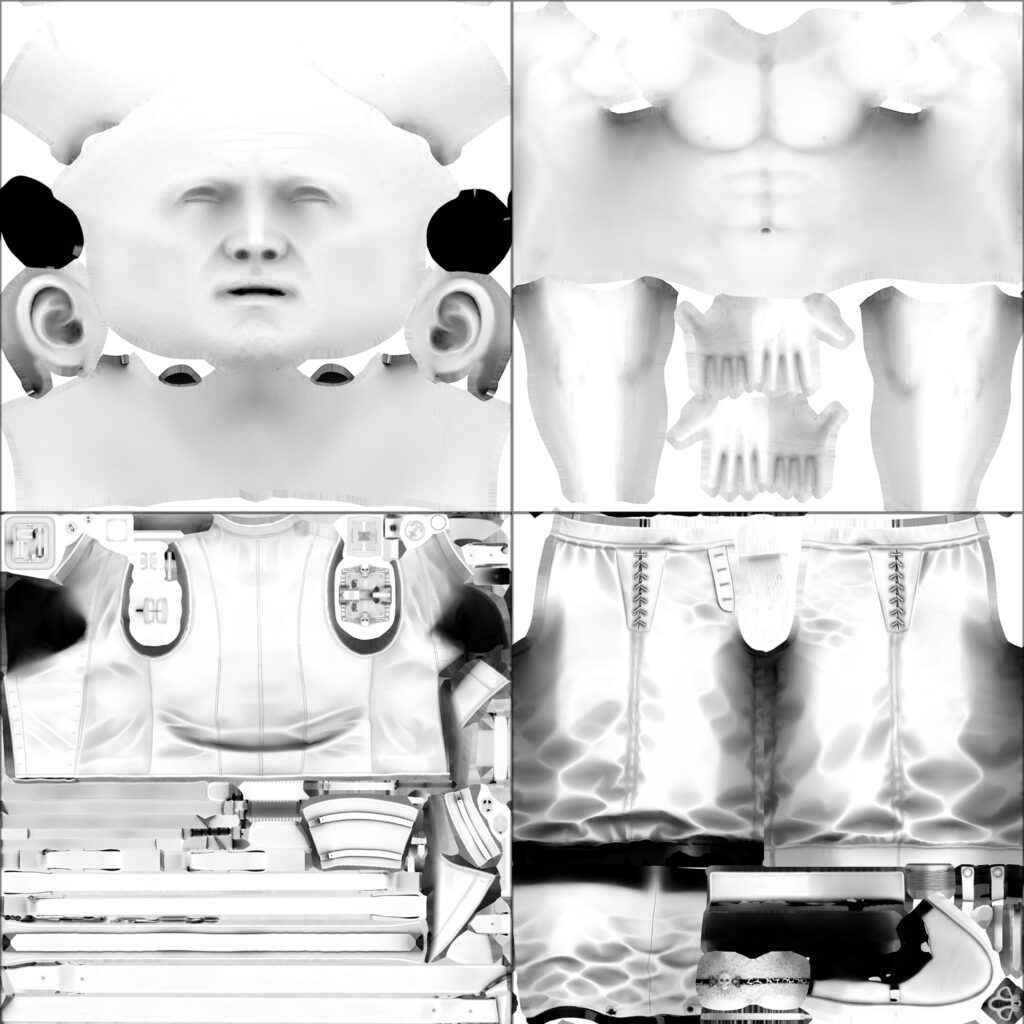
Baking
Baking was done in Marmoset Toolbag 4, where I combined the parts that weren’t touching into distinct groups to avoid intersecting projections, and other problems later.
To more easily do this, I saved each high-poly model to a different .obj and saved the low-poly model with its components separated into different parts so I could hide and show them according to what part of the model was being worked on in each group.
I only bake Normal and AO in Marmoset, the remaining maps are generated in Substance Painter from these two and the low poly mesh.
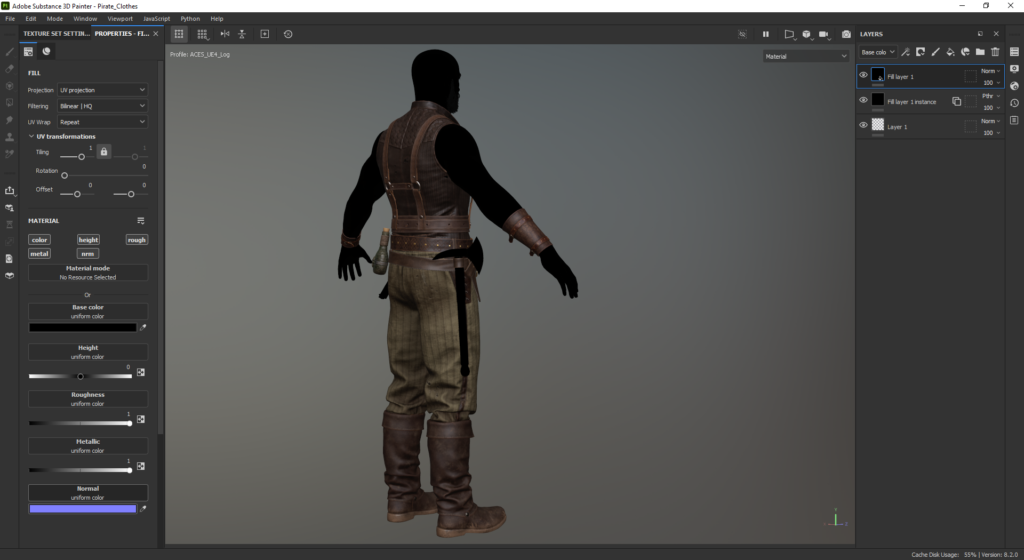
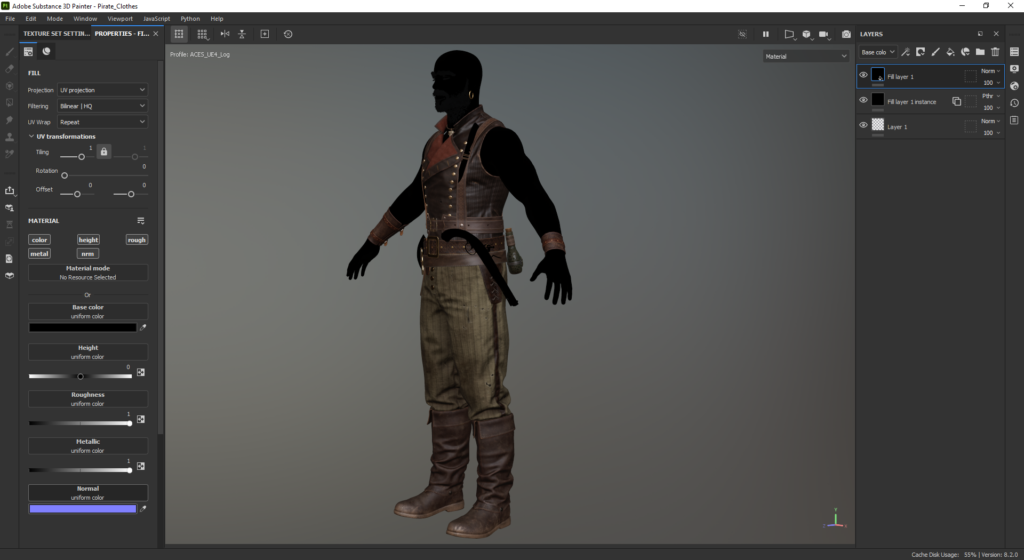
Texturing
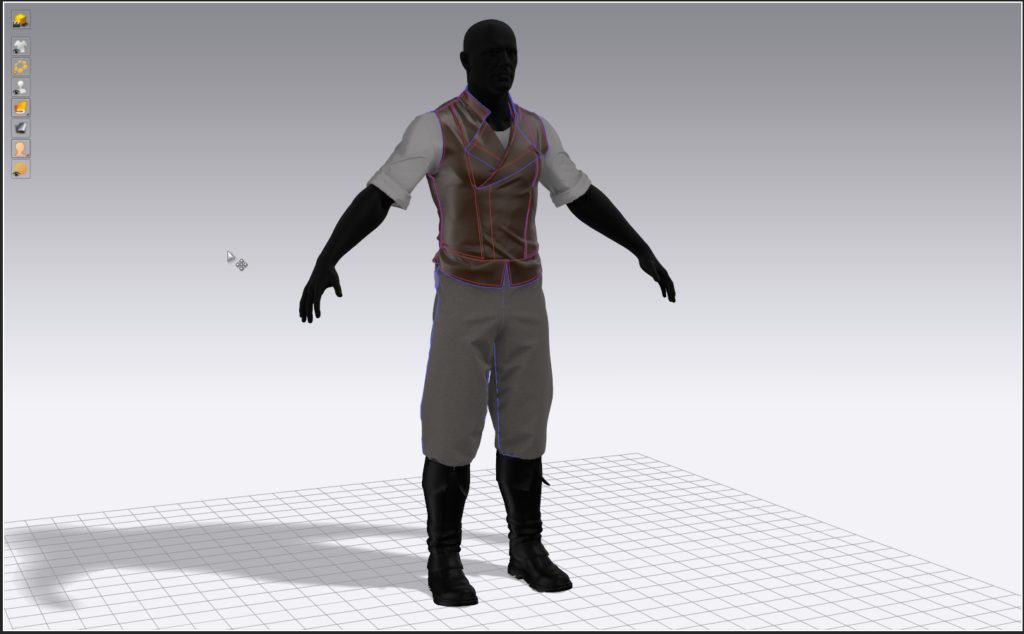
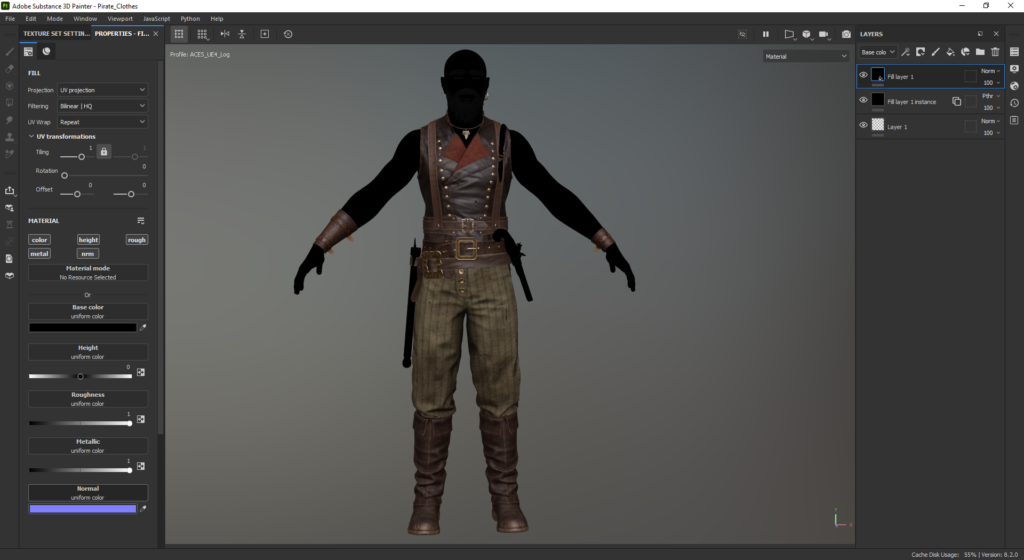
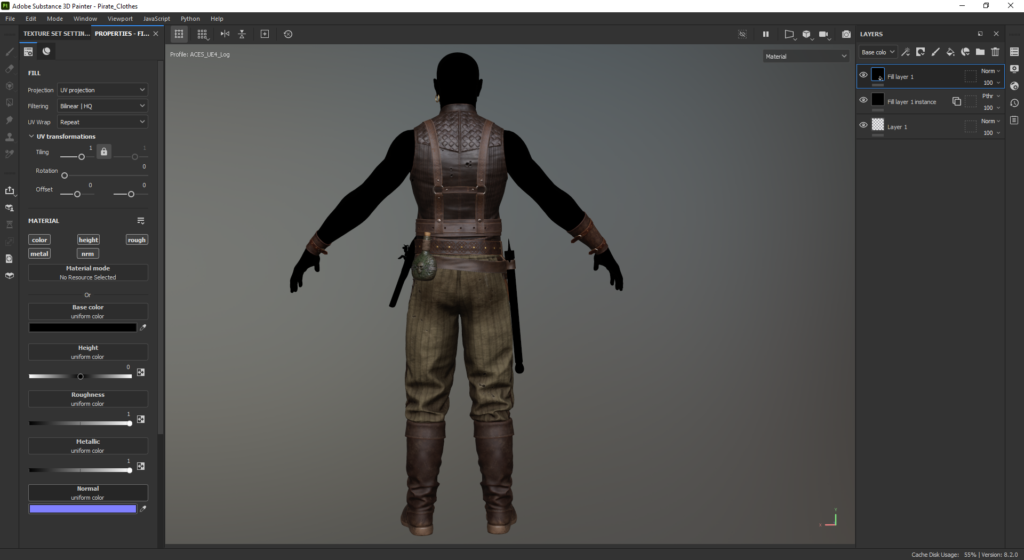
In this case, the program used is Substance Painter, I have divided the model into different files to work more comfortably.
The division has been a file for the clothes, another one for the skin, and another two for the weapons.
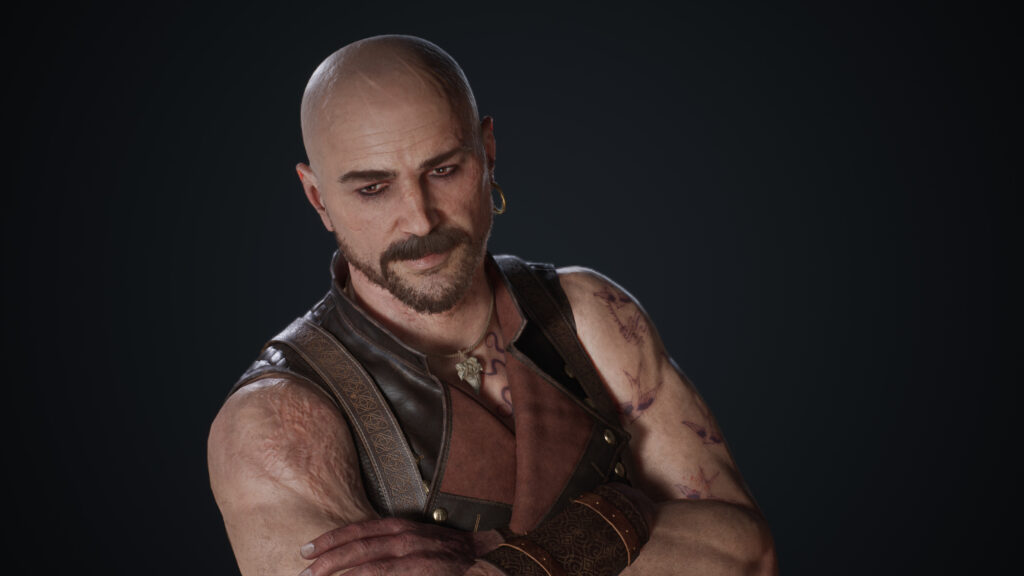
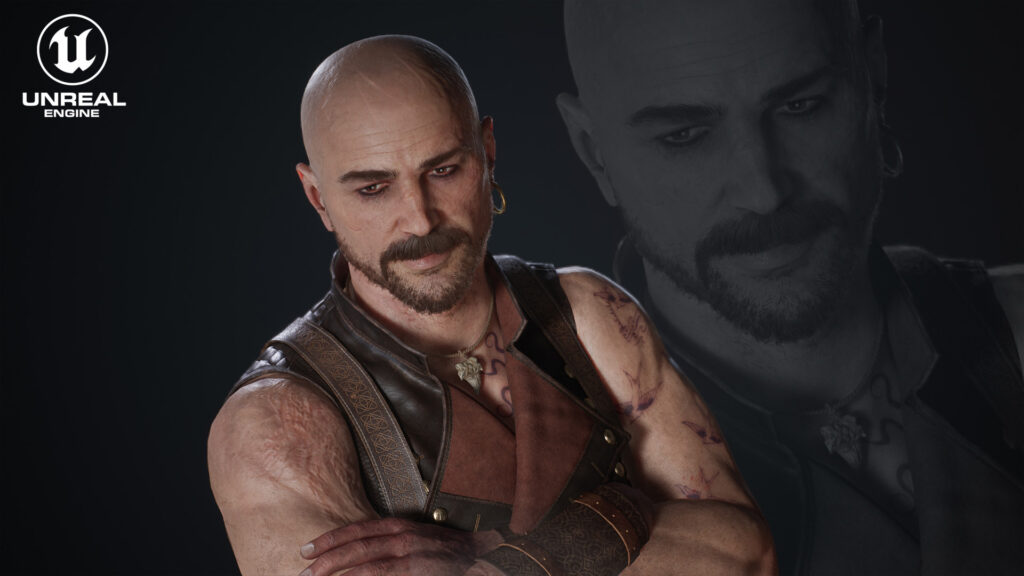
For the skin I usually start from the XYZ map that I used in the sculpting, I load it as a Color, roughness and SSS map, then I overlay layers of hand painting (blemishes, tonal maps, veins, arteries, freckles, and sunspots) to achieve the desired look. However, I tried to keep the natural look of the skin.
Later I create folders to separate areas or details, such as nails, lips, eyes, etc.
Once I have a solid base I add dirt and adjust the material’s properties, especially the roughness.
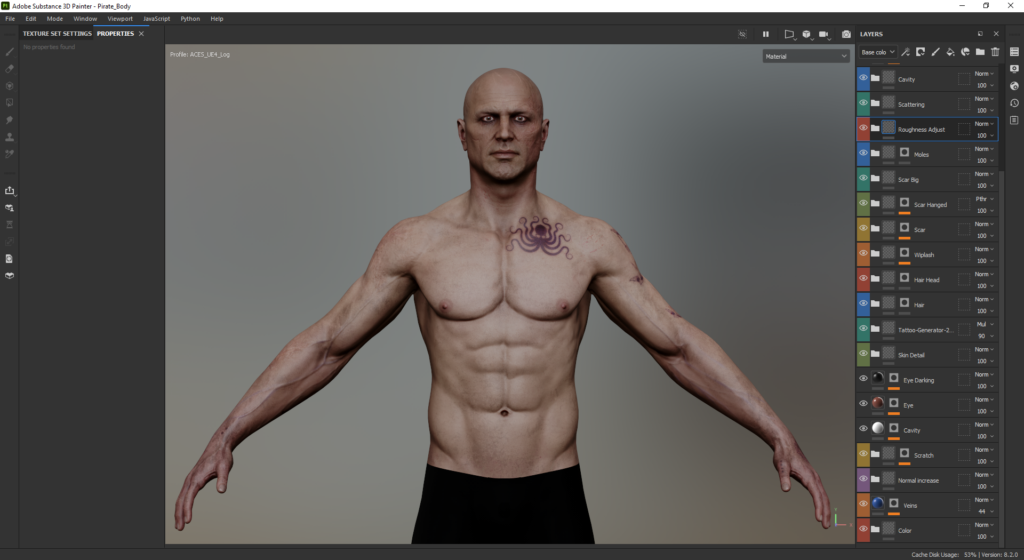
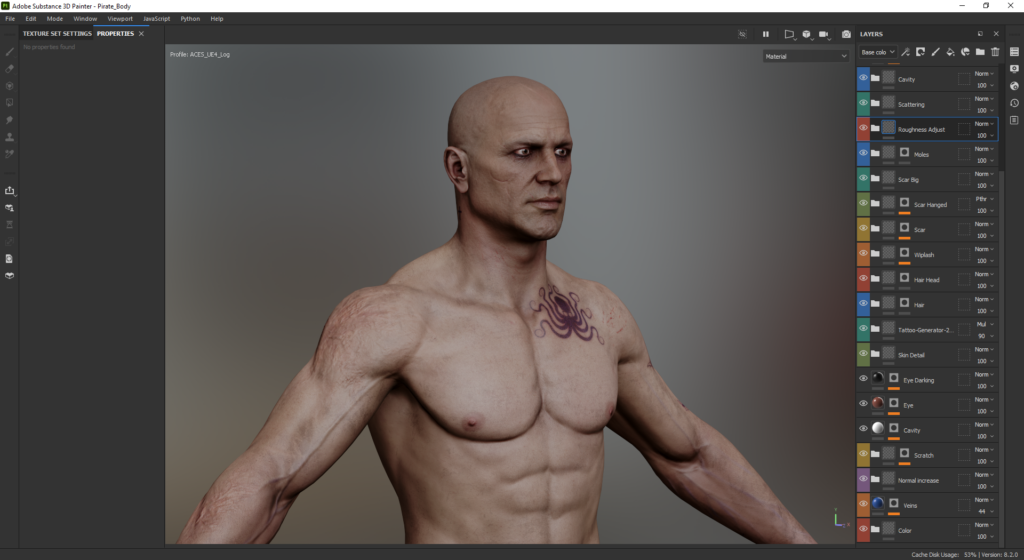
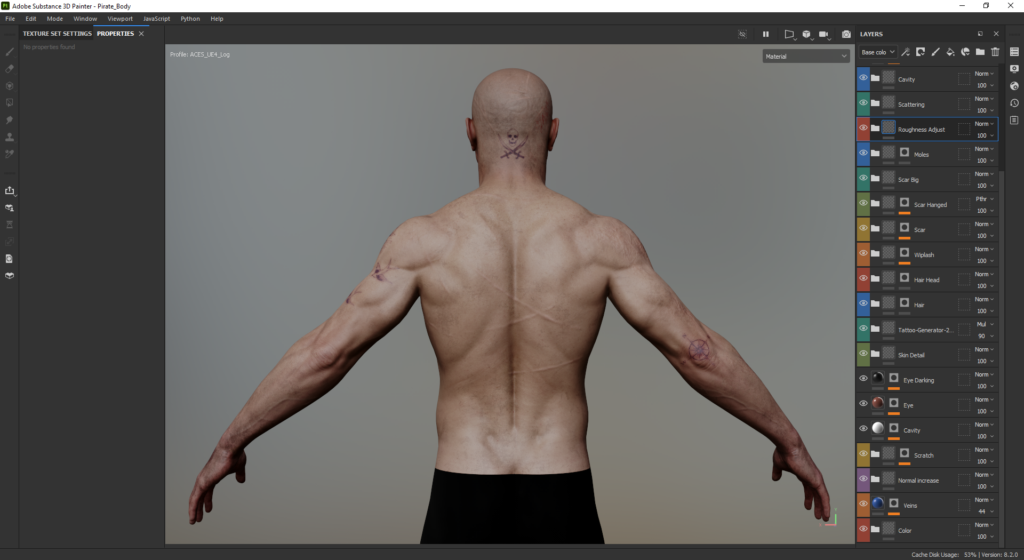
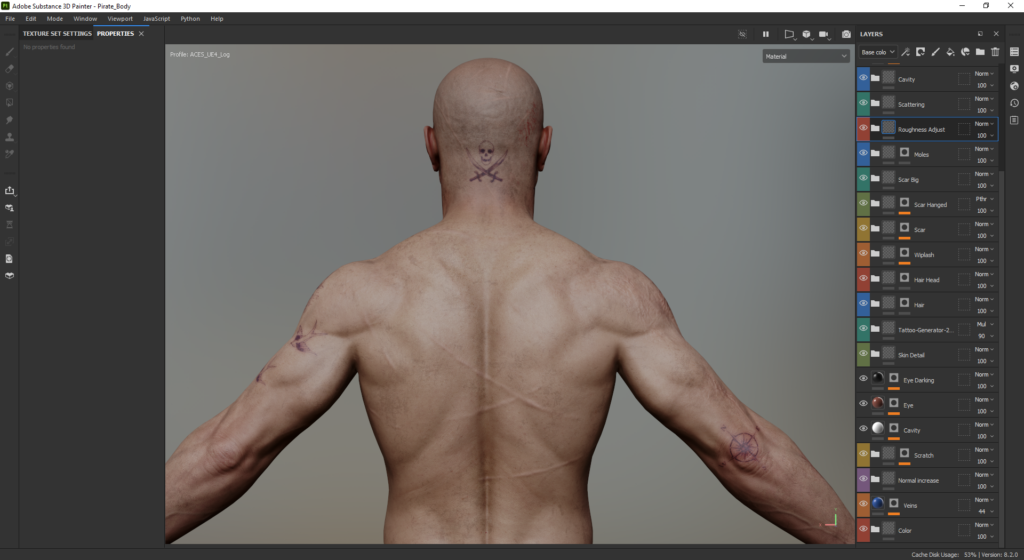


For the scars, I projected them from photos that I prepared by making montages of real scars.
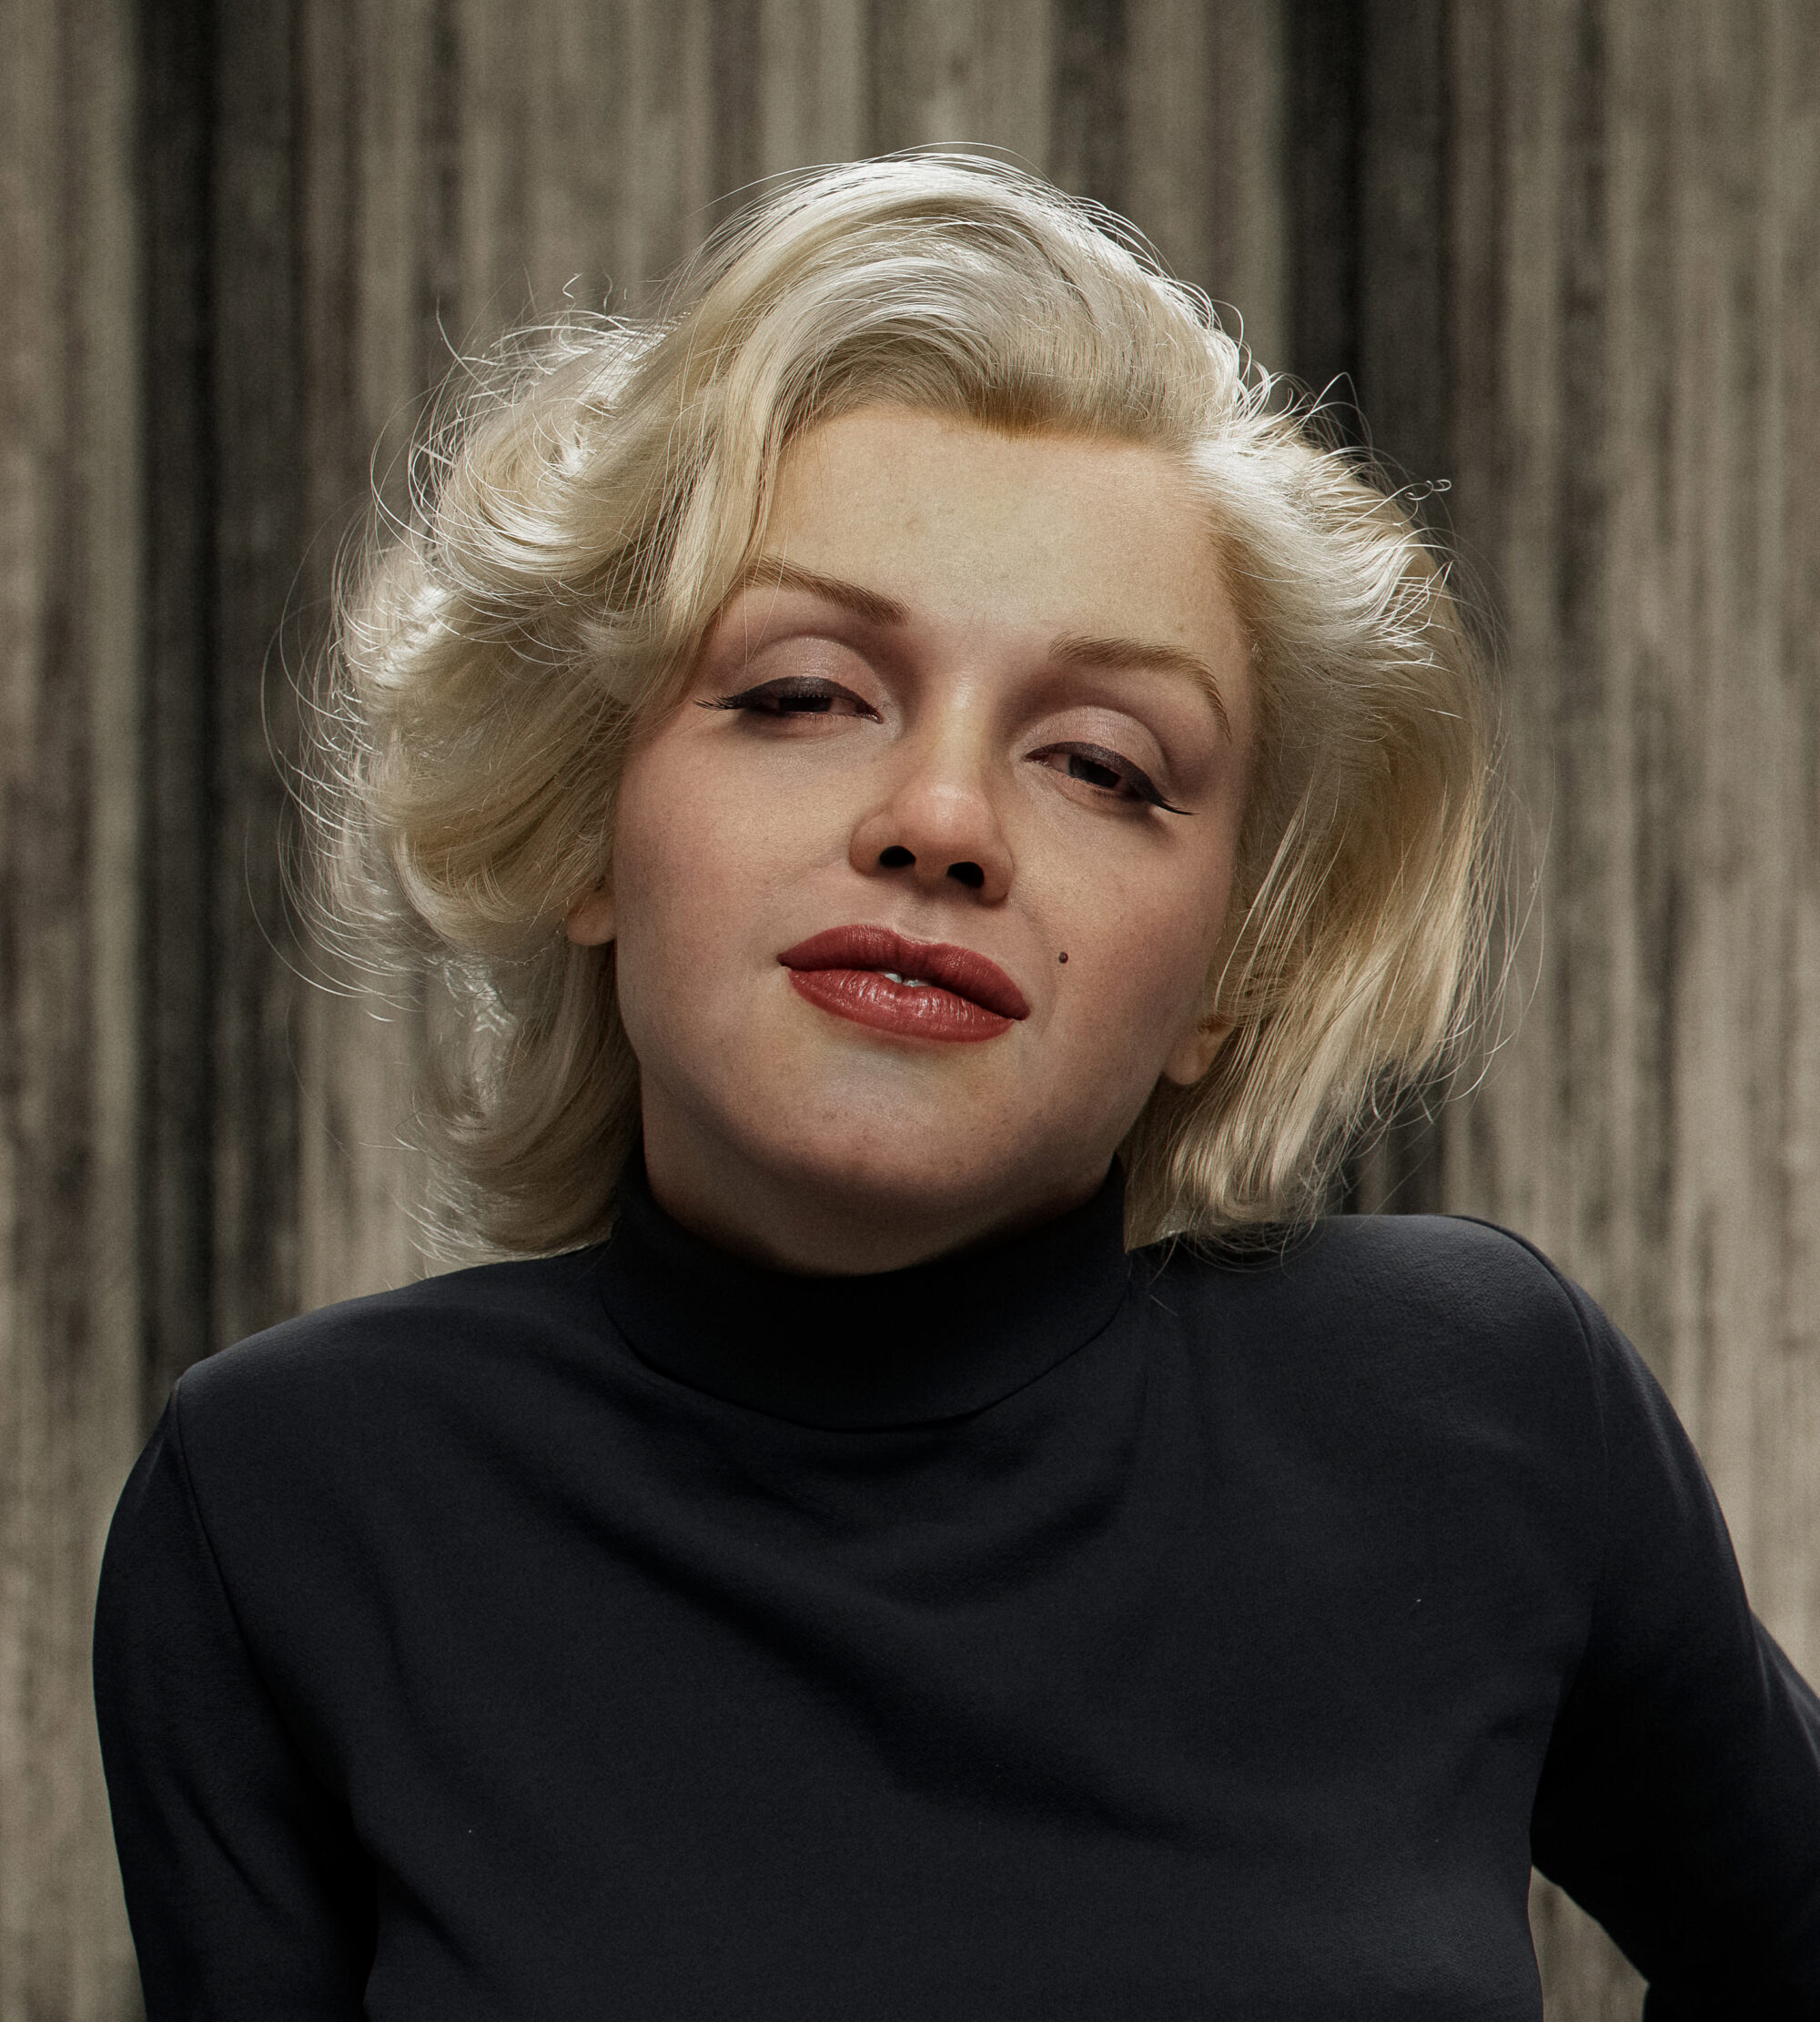
For the tattoos, I tried to find period motifs, although it was difficult.
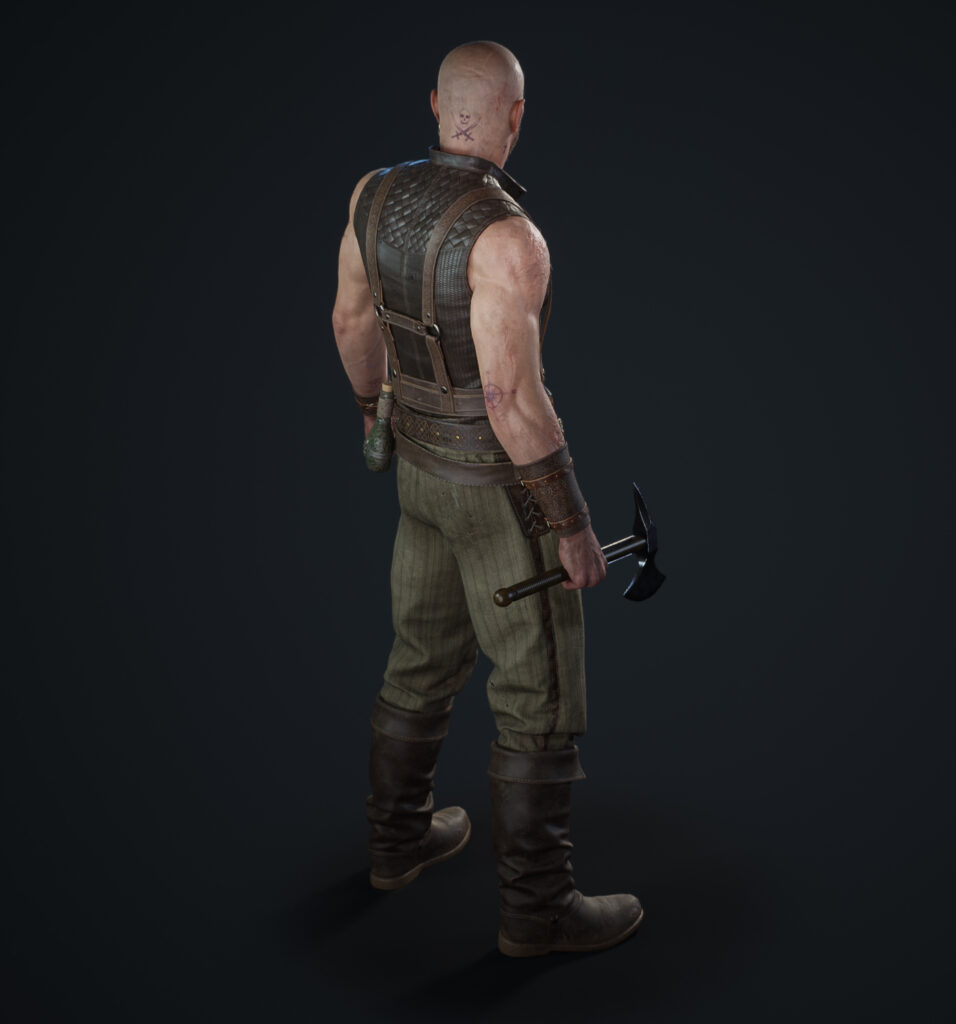
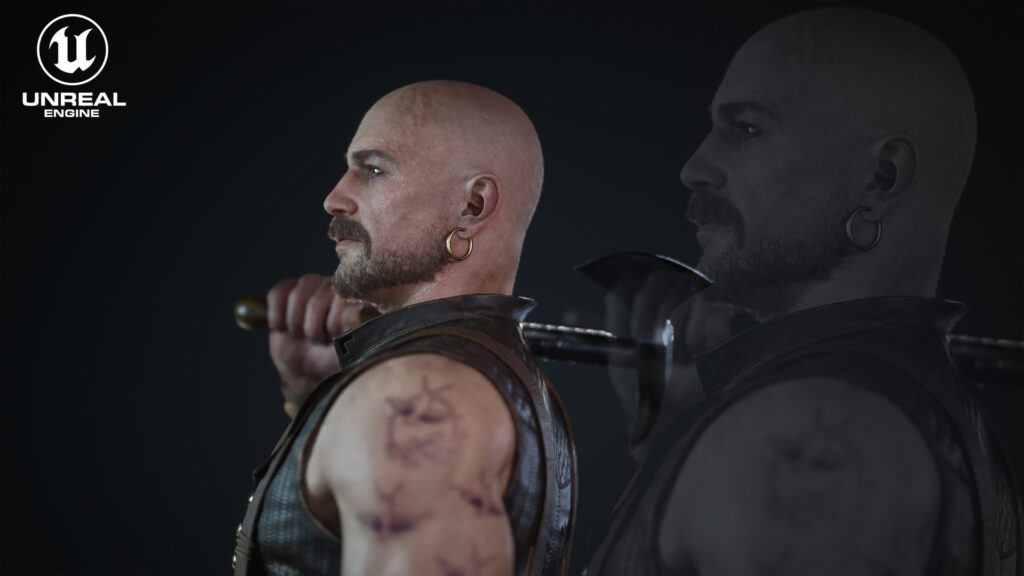
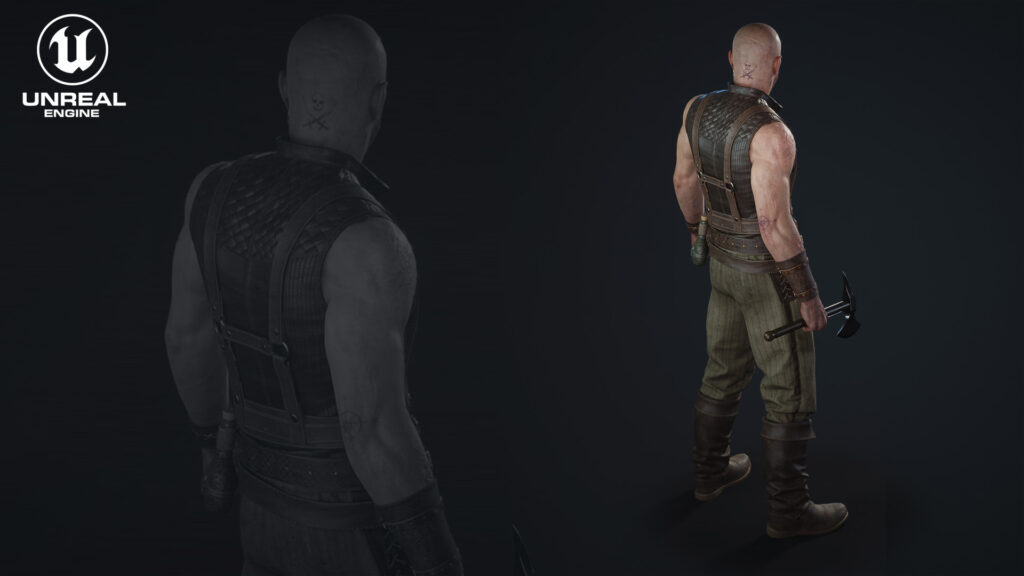
The tattoos symbolize the stories of their voyages at sea from their hands to their feet.
For example, the swallow signifies that they have traveled 5,000 nautical miles, while a nautical star represents the hope of always finding their way home.
Rigging & Posing
For the rig, I started from Mixamo, then used a script named AutoBiped to generate a biped from the exported Mixamo FBX file, then checked the skinning and adjusted the vertex weights by hand.
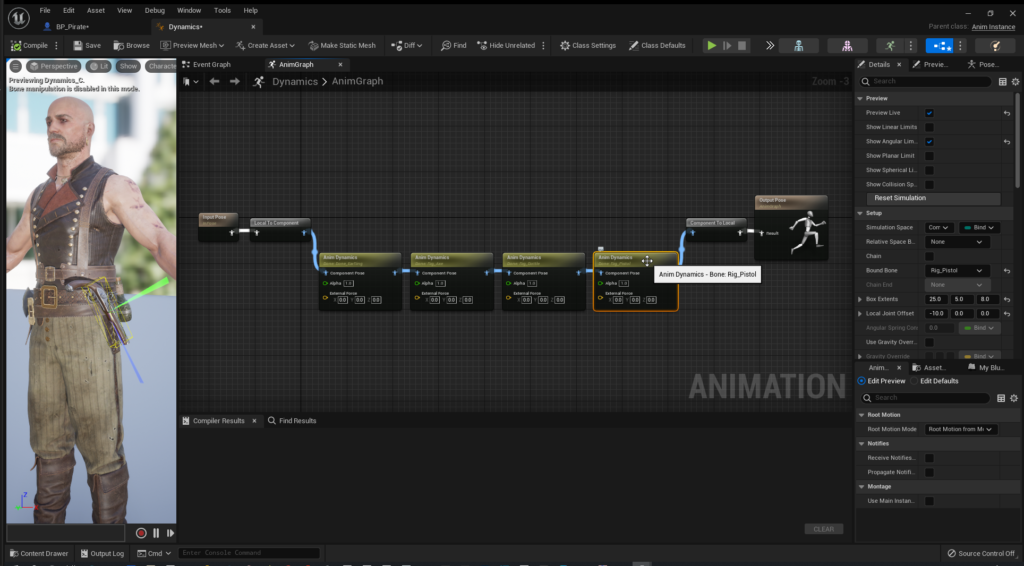
For this particular model, having Props that I wanted to react to the character’s movement, I had to add extra bones to the rig in Max, in the axe, flintlock pistol, rum bottle and earring.
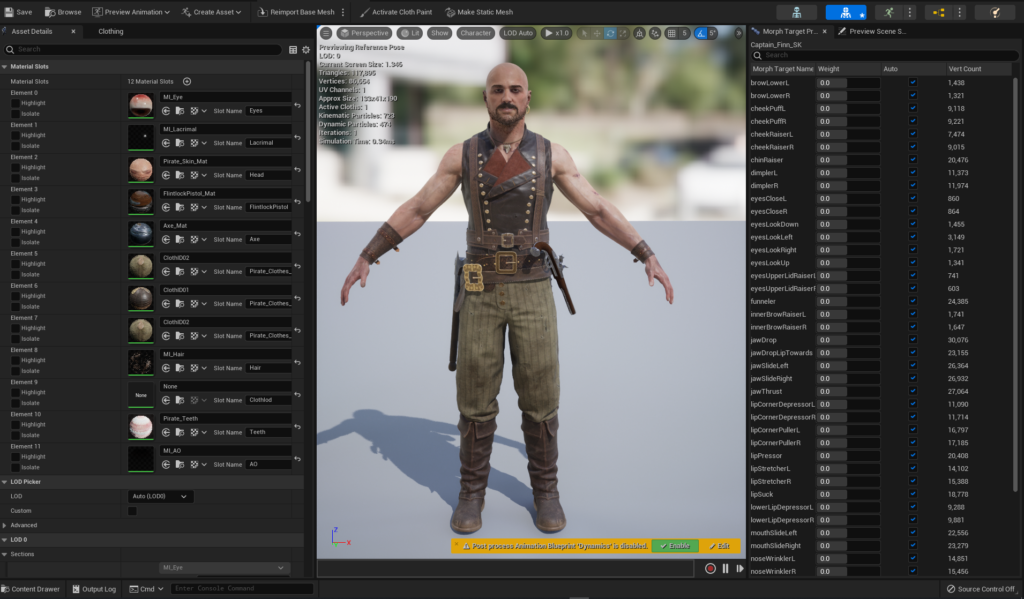
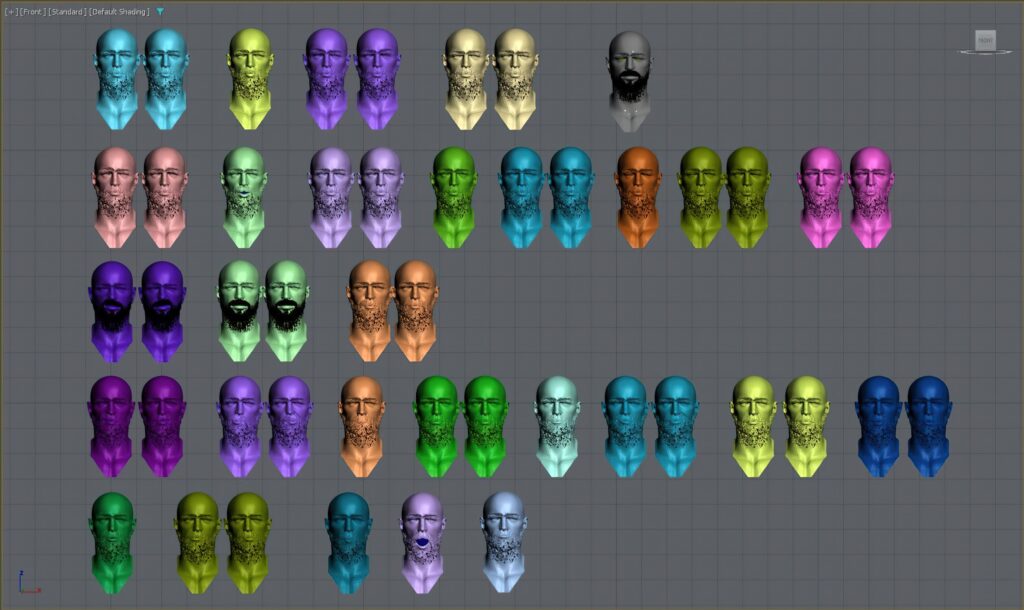
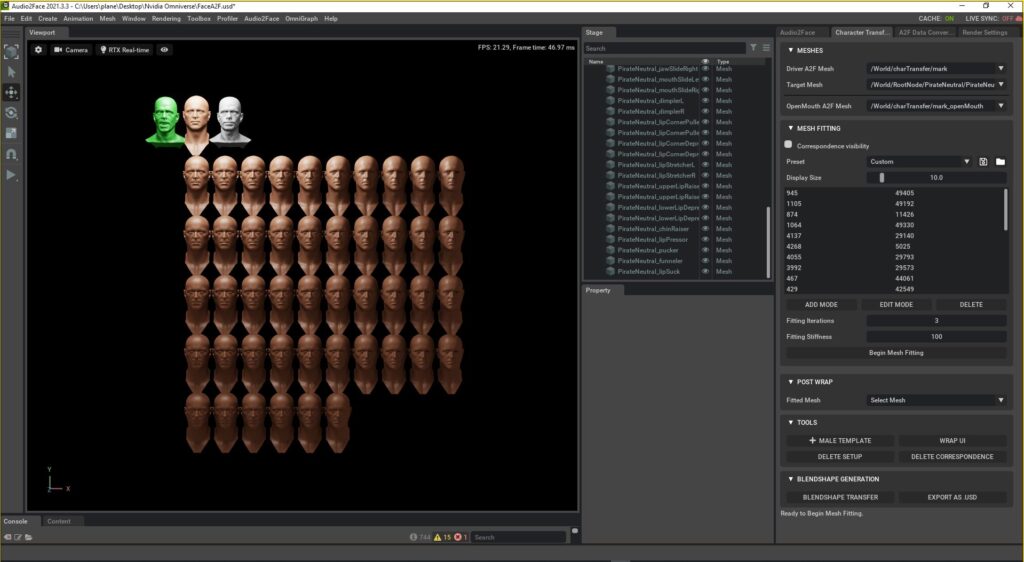
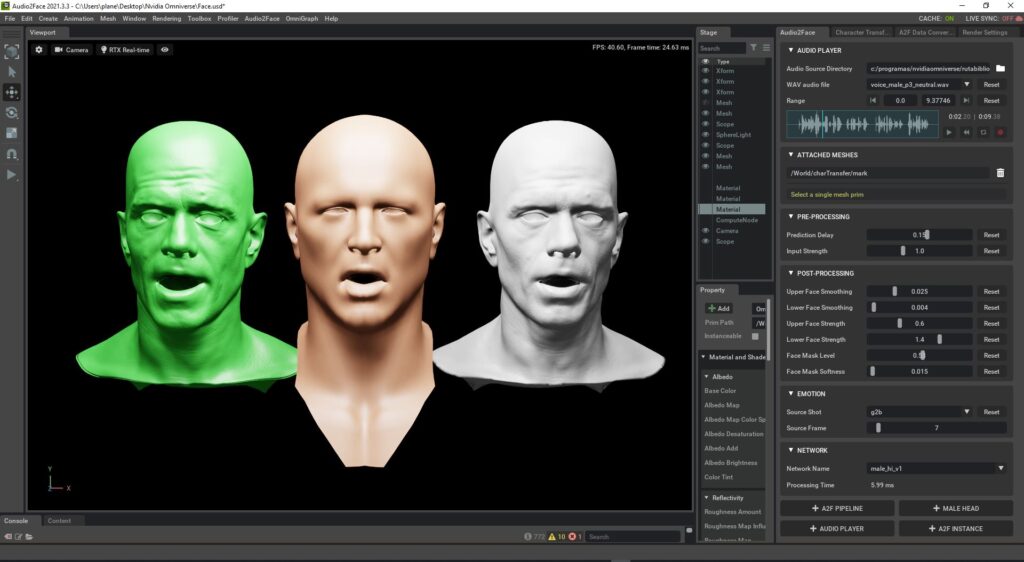
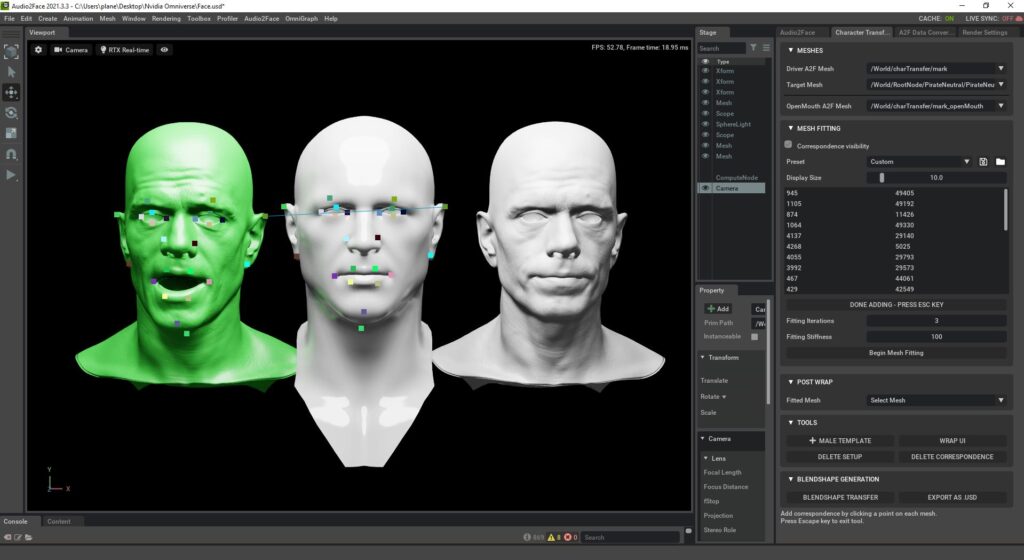
In this project, I also wanted to explore using Nvidia Omniverse Audio2Face to generate all the morphs automatically. It brings a face on which you mark your correspondences and generates a series of morphs. I found it very useful and it saved me a lot of work.


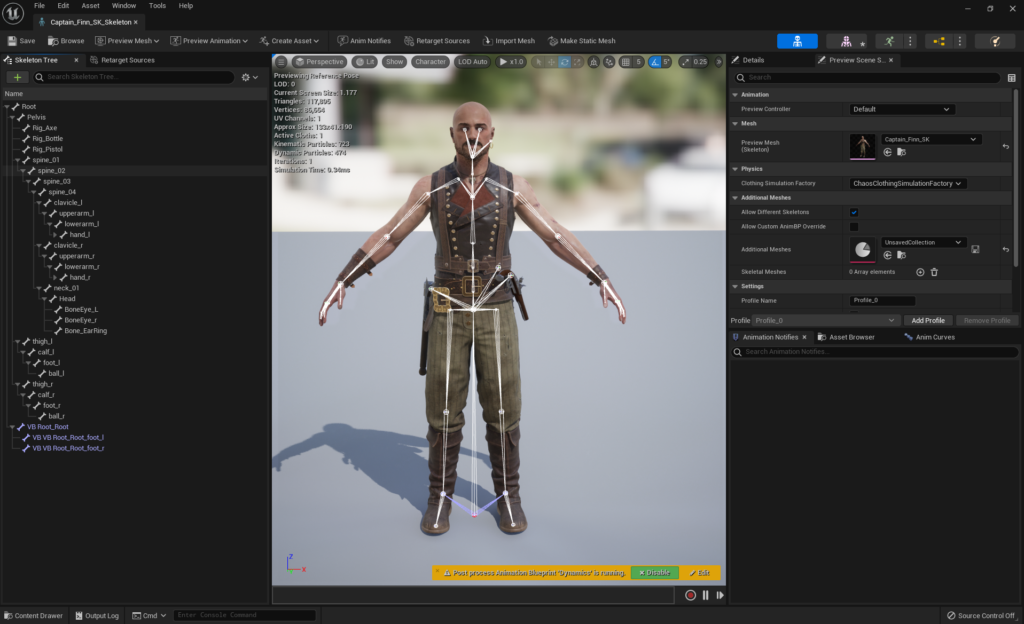
Then I export it to Unreal and add IKs in the feet so that when walking on uneven terrain the feet adapt to it.
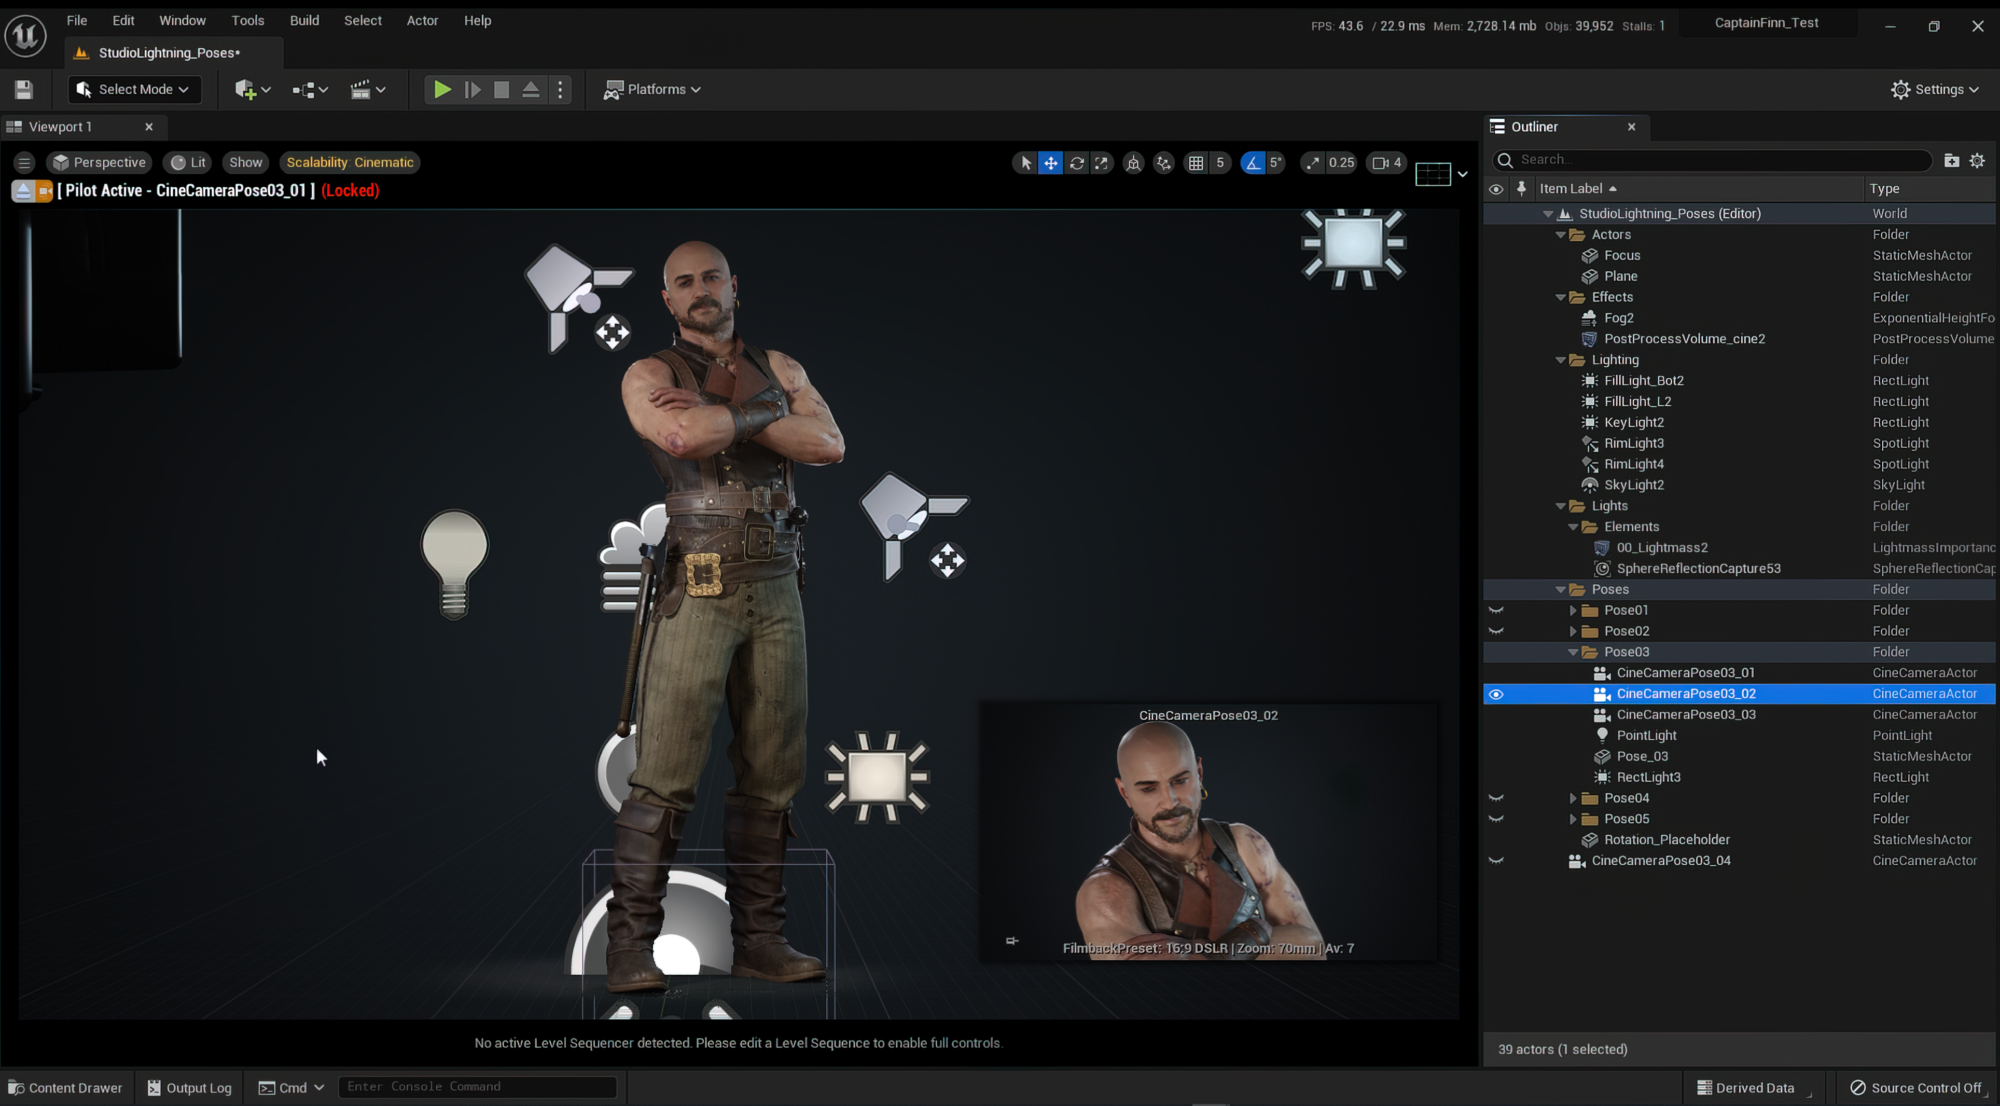
One of the things I wanted was to test the character in Unreal and be able to navigate it through a scene, so I exported the model in an FBX file, imported it into Unreal and retargeted the mannequin animations to my own rig.
For the dynamic props I used physics assets, I created an animation Blueprint to set the rotation limits of those objects.
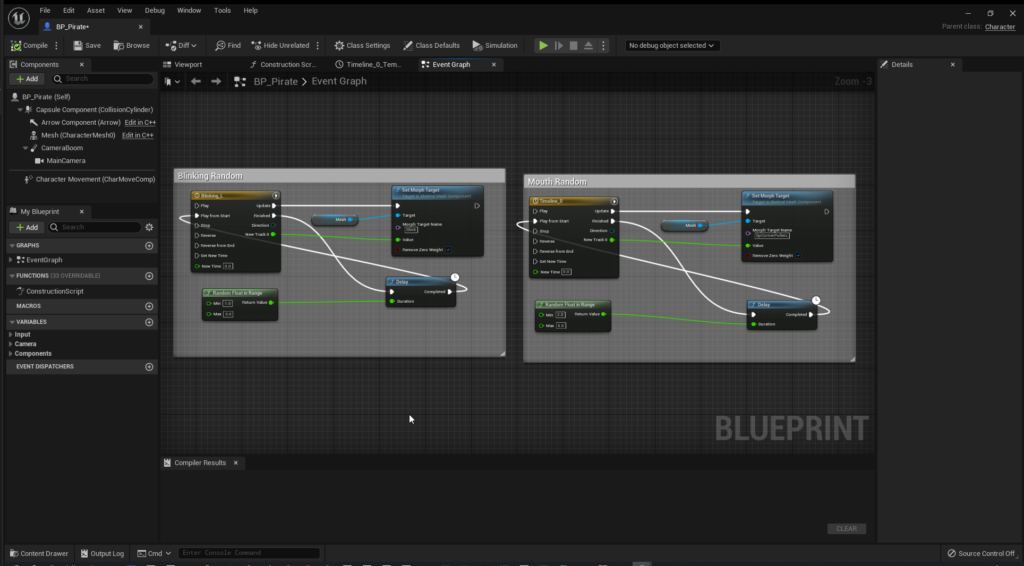
Finally, in the Blueprint of the character, I added some nodes so that the character blinks and makes a grimace every so often while you control it to make it more natural.
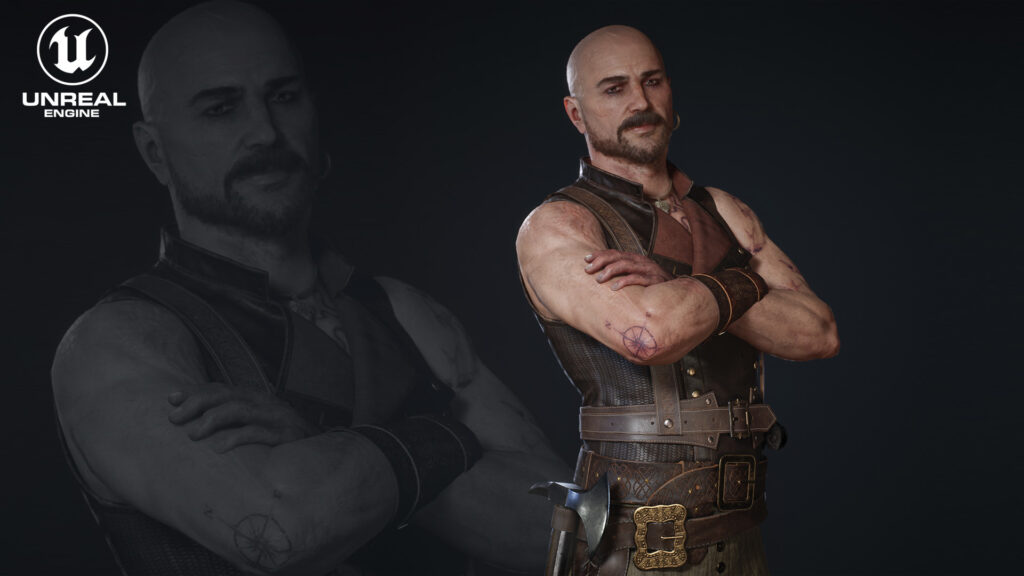
For the poses used to present the character, I started with some poses made by my colleague, Daniel Gonzalez.
Lighting
For the final renders, I brought everything together inside Unreal Engine 5.
For lighting I made a few renders on a studio setup, to separate the character figure from the background, I added two bright rim lights coming from the back of my character, one to the left and one to the right. I wanted them to show the side volumes better, but I made sure they weren’t too prominent to draw too much attention to them.
Rendering
The renders I have had to take them at less resolution than desired because Unreal crashes due to the GPU memory. Right now I’m using a laptop with an RTX3060 for my personal work.
Conclusion
I learned a lot and I’m glad to have finished a personal project. I’m especially happy, it’s the first time I’ve done the whole process by myself from model creation to integration into the engine, plus setting up blueprints, it’s been a bit of a learning curve for parts I’m not normally involved in on a day to day basis.
I consider all the time invested in this project as an investment.
Read more articles
You might also like these articles.