Boxing Gloves

Introduction
Hi, my name is Karen Khachatryan. My online friends know me by the nicknames Sinteo or Medyza.
I'm a freelance 3D Artist and have been working as one of the curators at Kaino 3D Graphics University since February 2022.
Project
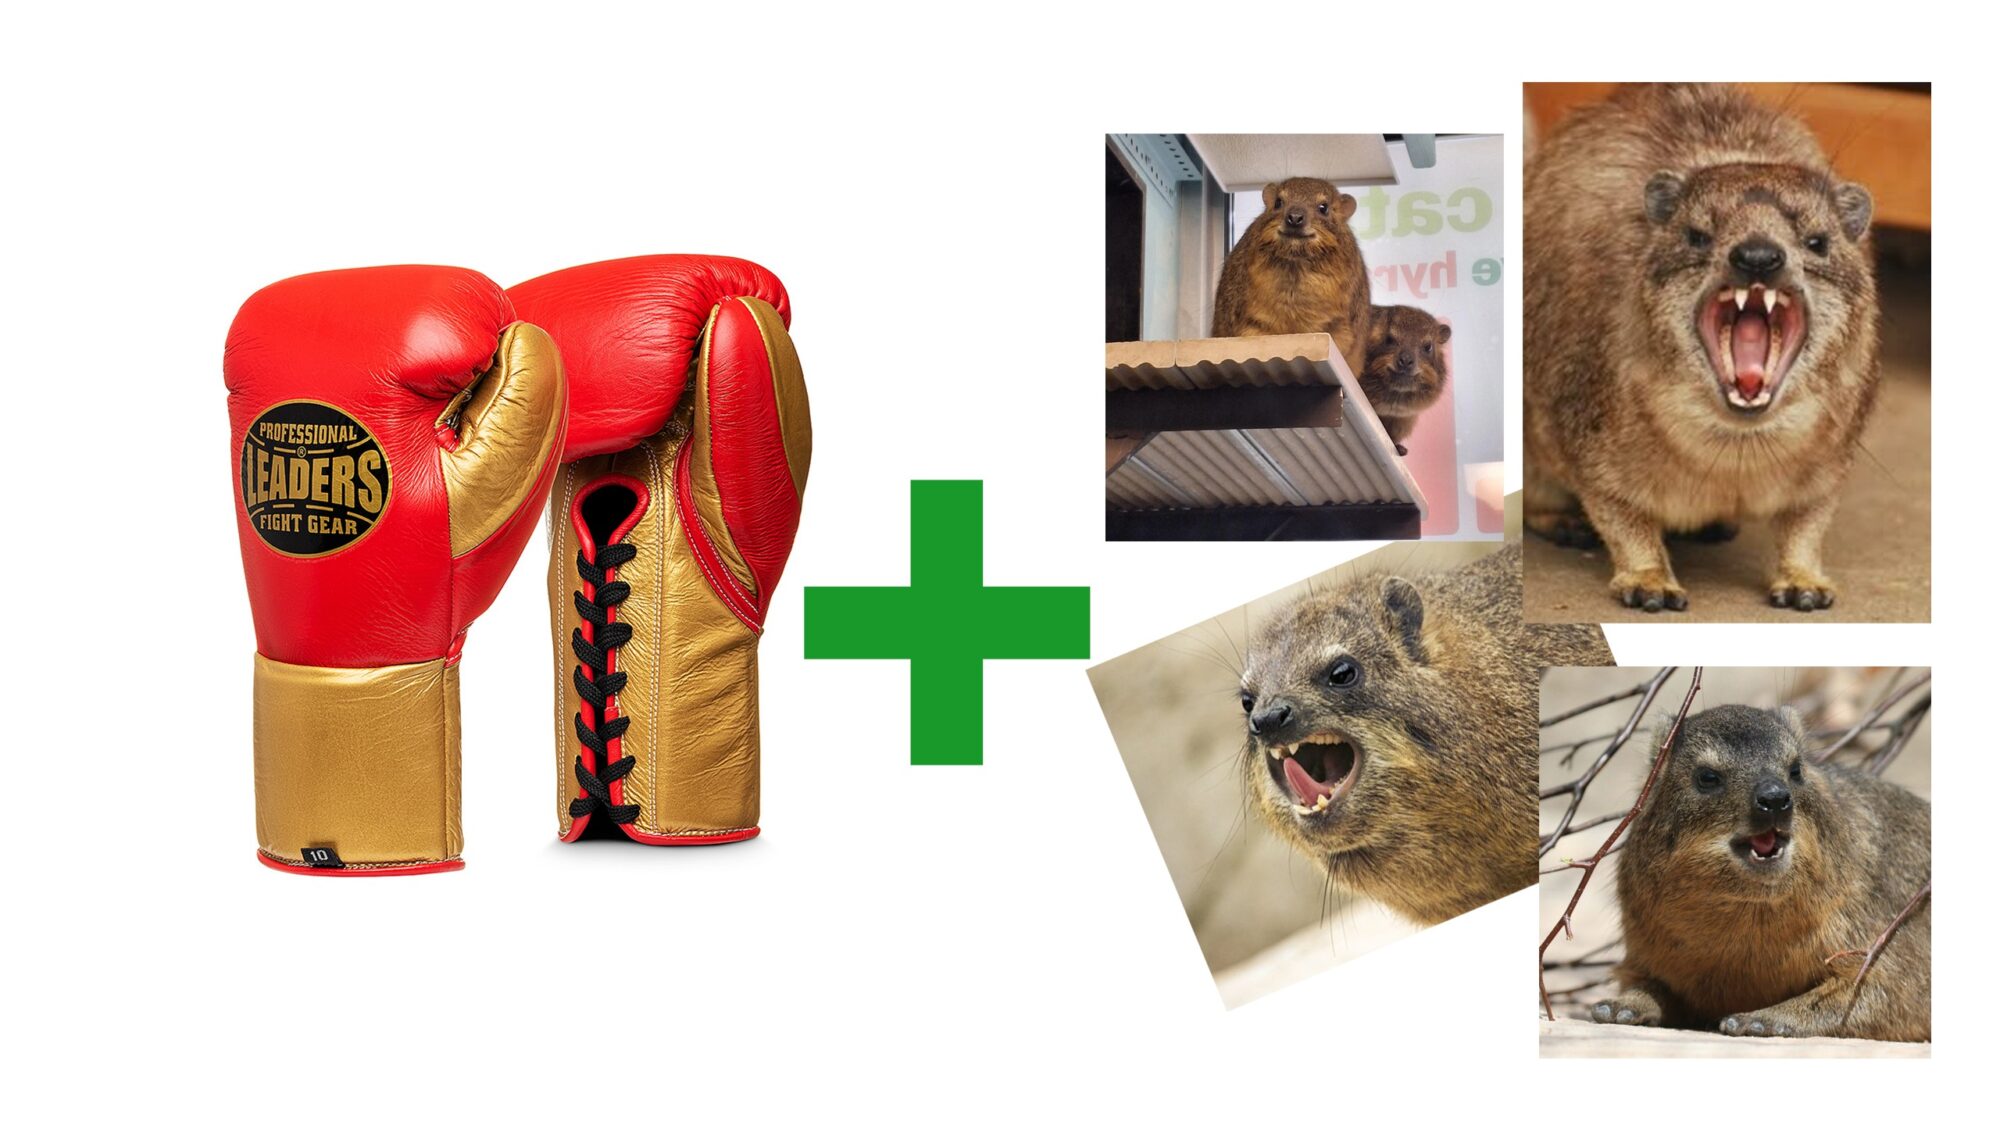
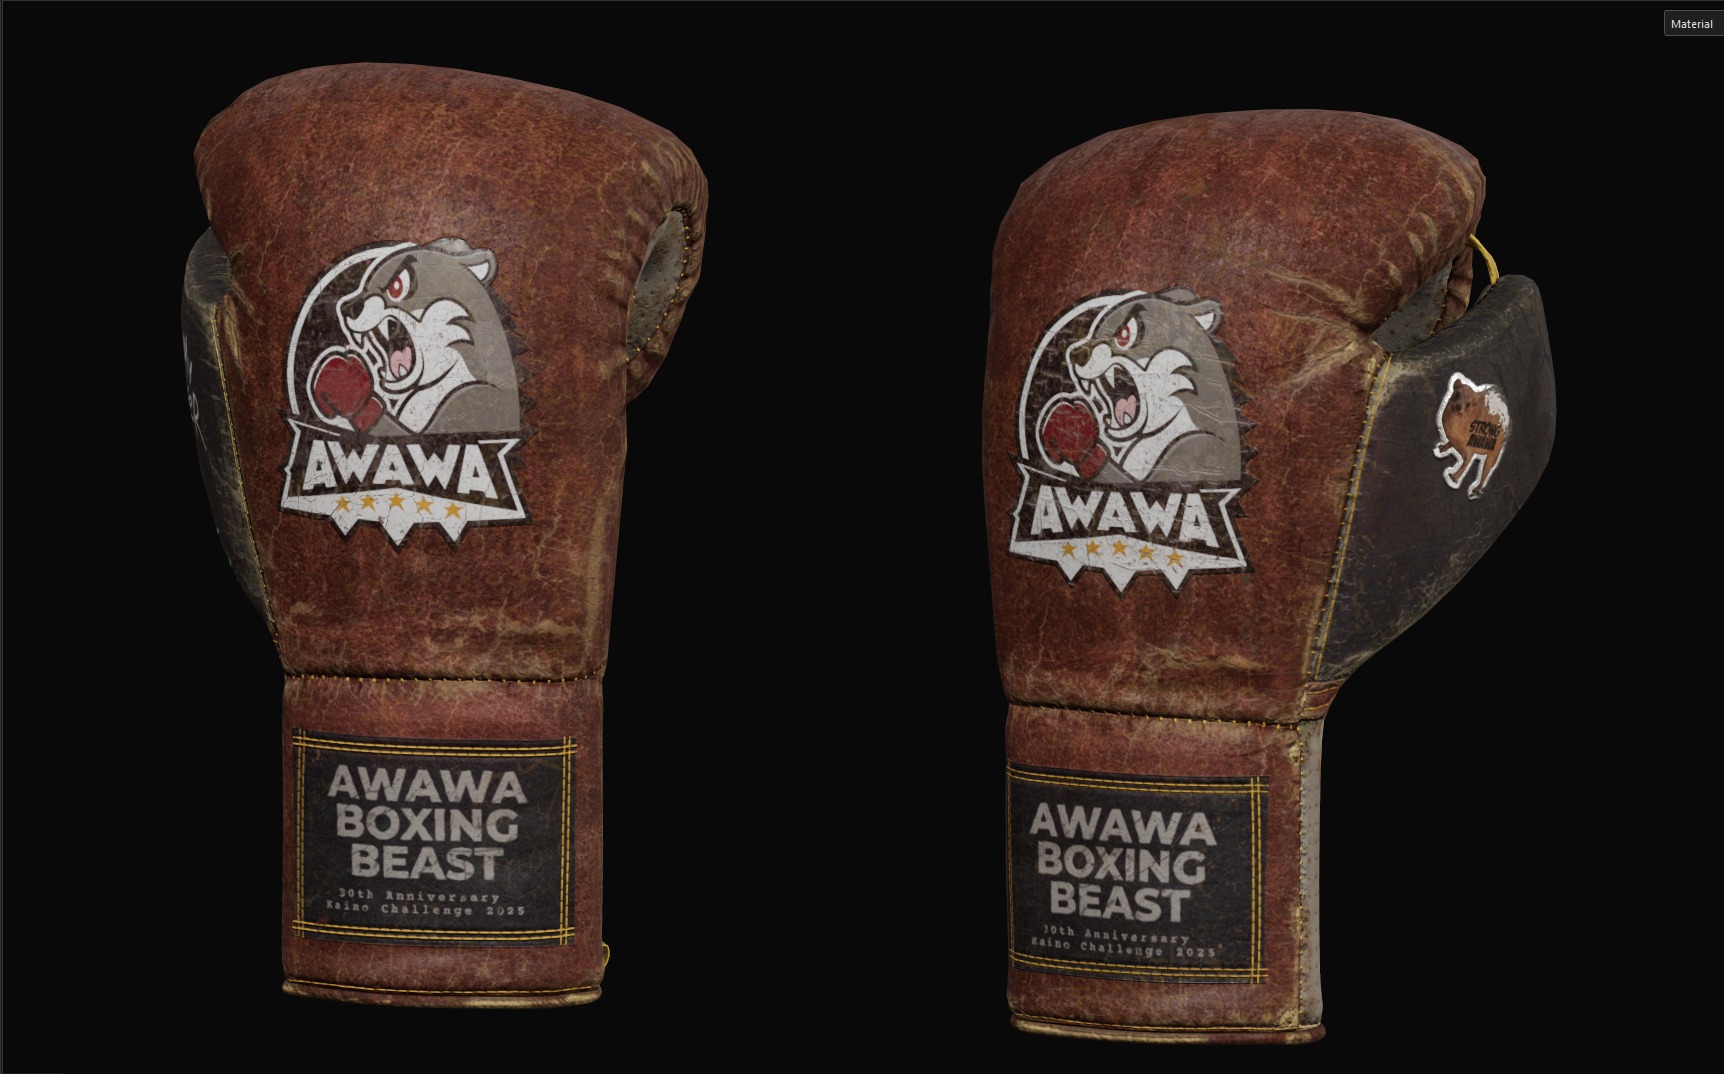
Today, I’d like to share the creative process of my project, the AWAWA Boxing Beast gloves.
The idea was inspired by the Street Fighter universe and the animal known as the hyrax (lat. Procavia capensis), more famously as the “Awawa meme.”
The name comes from the squeaky sounds these animals make, which sound like “wawa” or “awawa.”
I found this funny and decided to make it the central idea of the project.
Goals
- Challenge myself to create all modeling, UV, and presentation with Blender
- Practice leather texturing
- Make the model look clearly and even exaggeratedly worn and used
- Include a sense of humor in the final design


Software
- Blender – Modelling, UVs & Rendering
- Marmoset Toolbag – Baking
- Substance Painter – Baking and Texturing
- Photoshop and Procreate – Drawing & Editing stickers
References
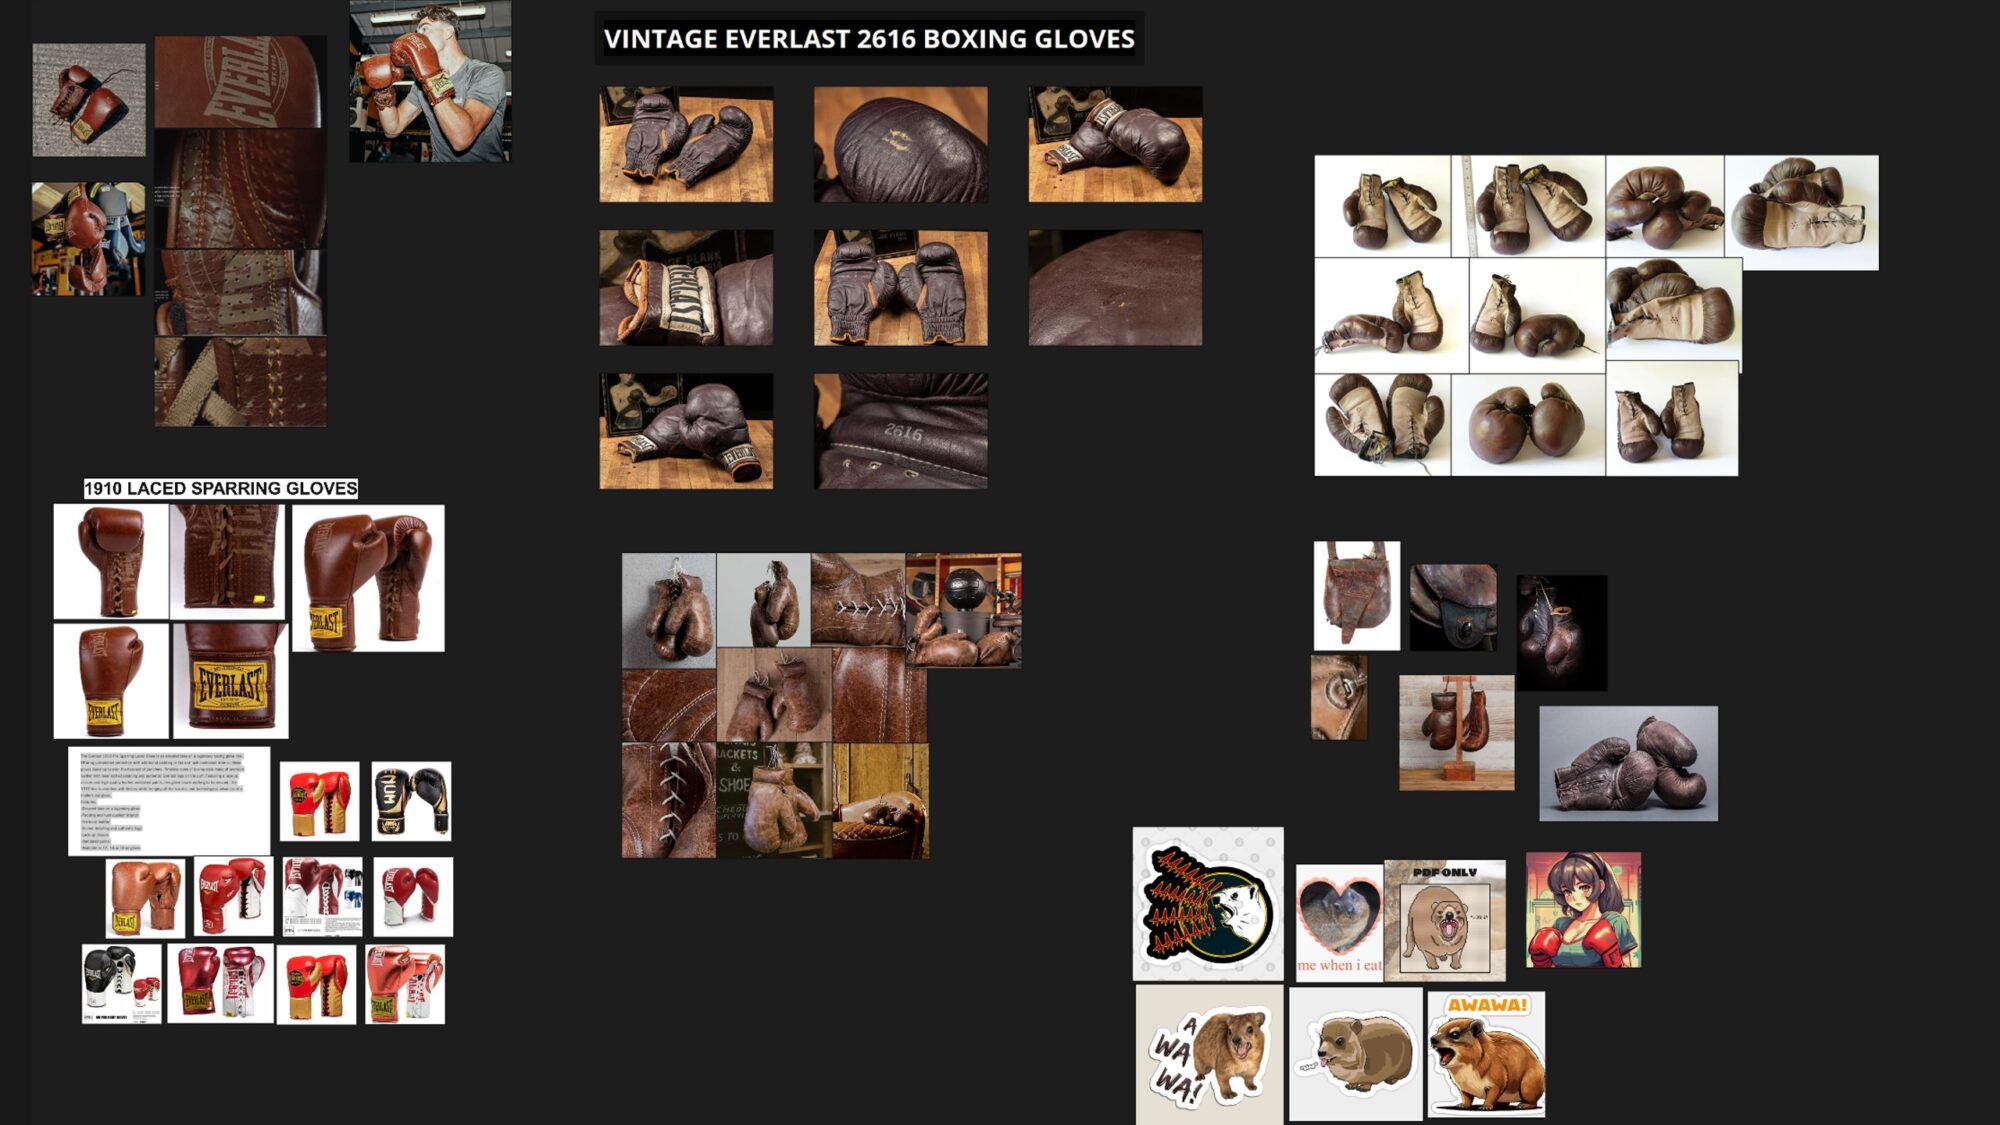
I compiled a moodboard in PureRef with references for glove shapes and leather textures, which helped me form a concept before starting.
Modelling
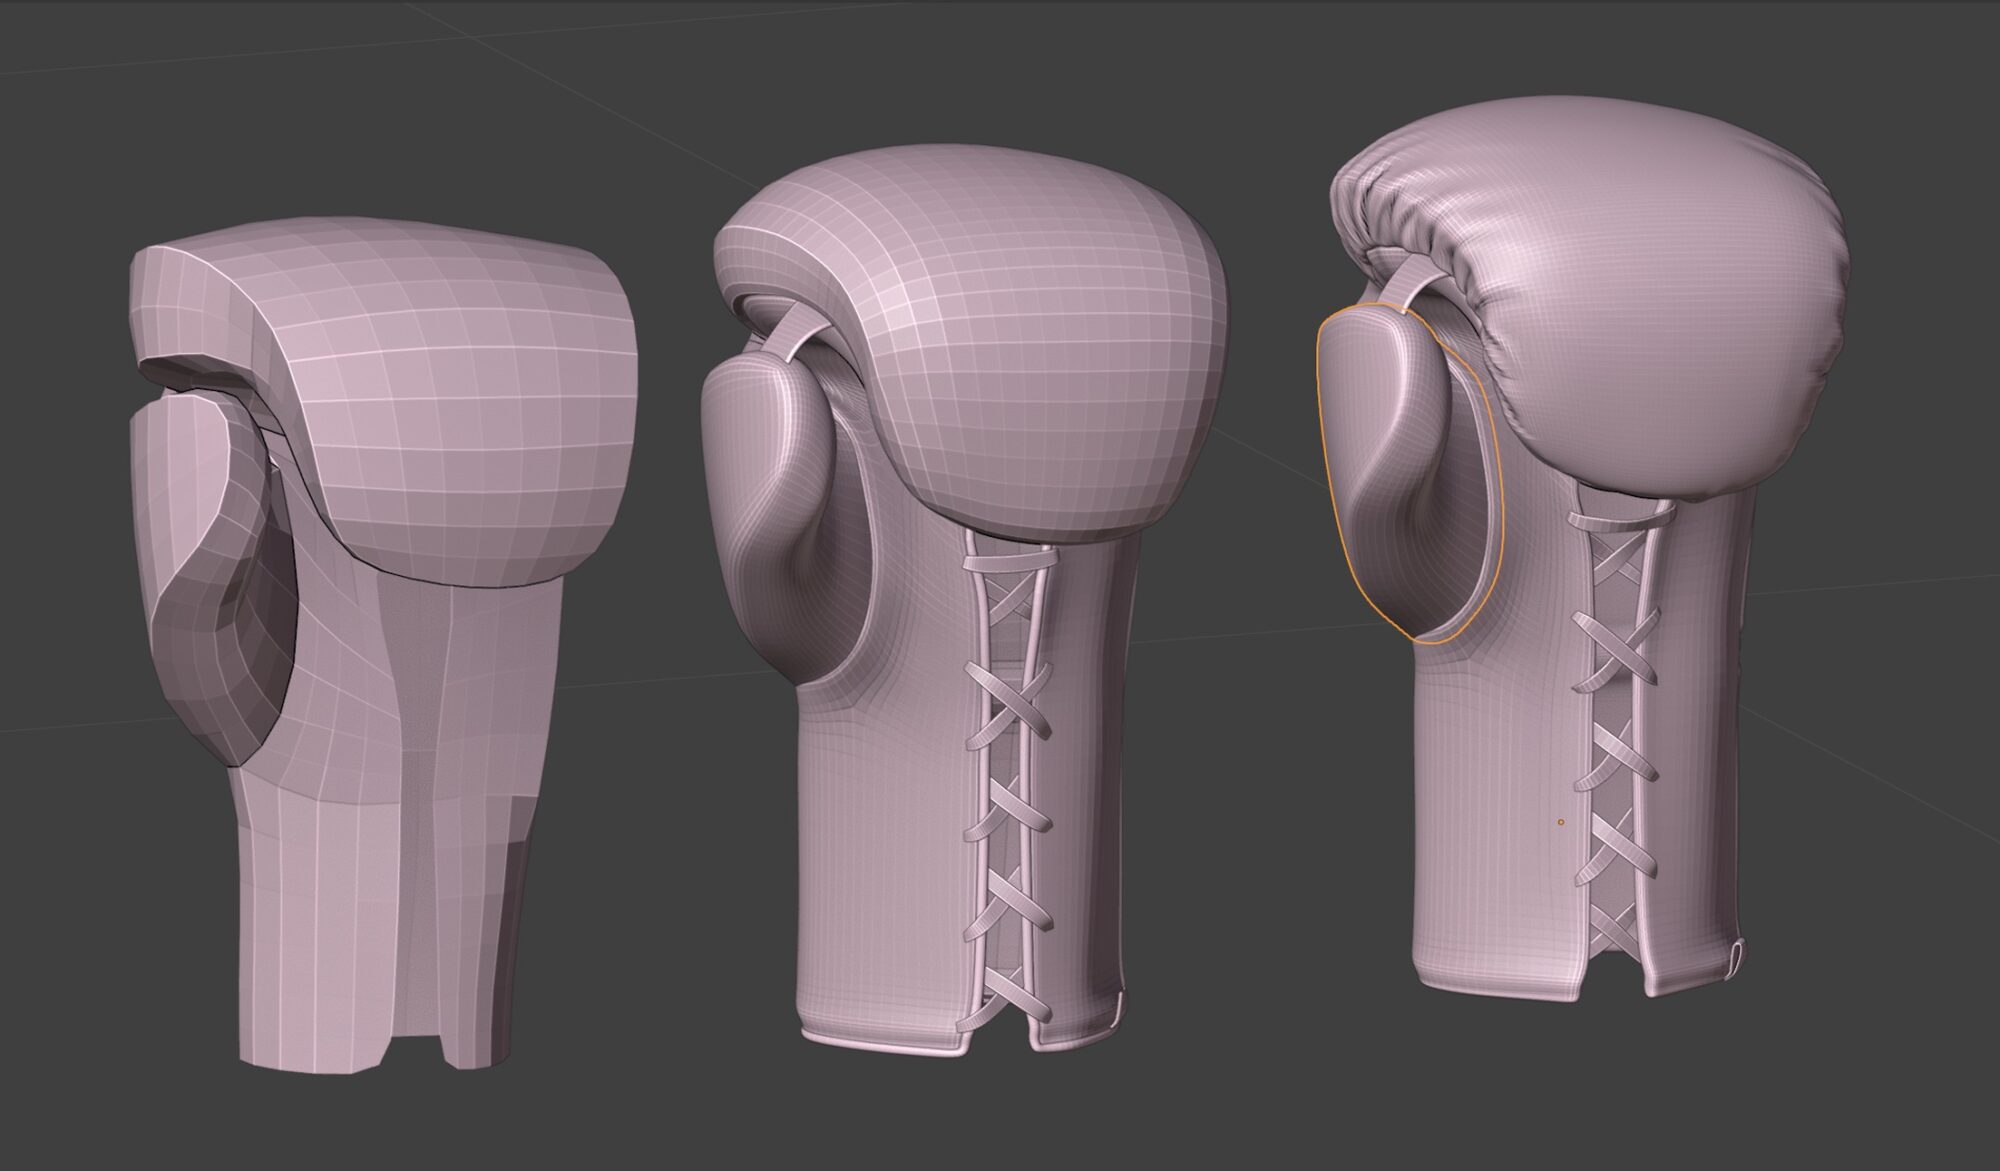
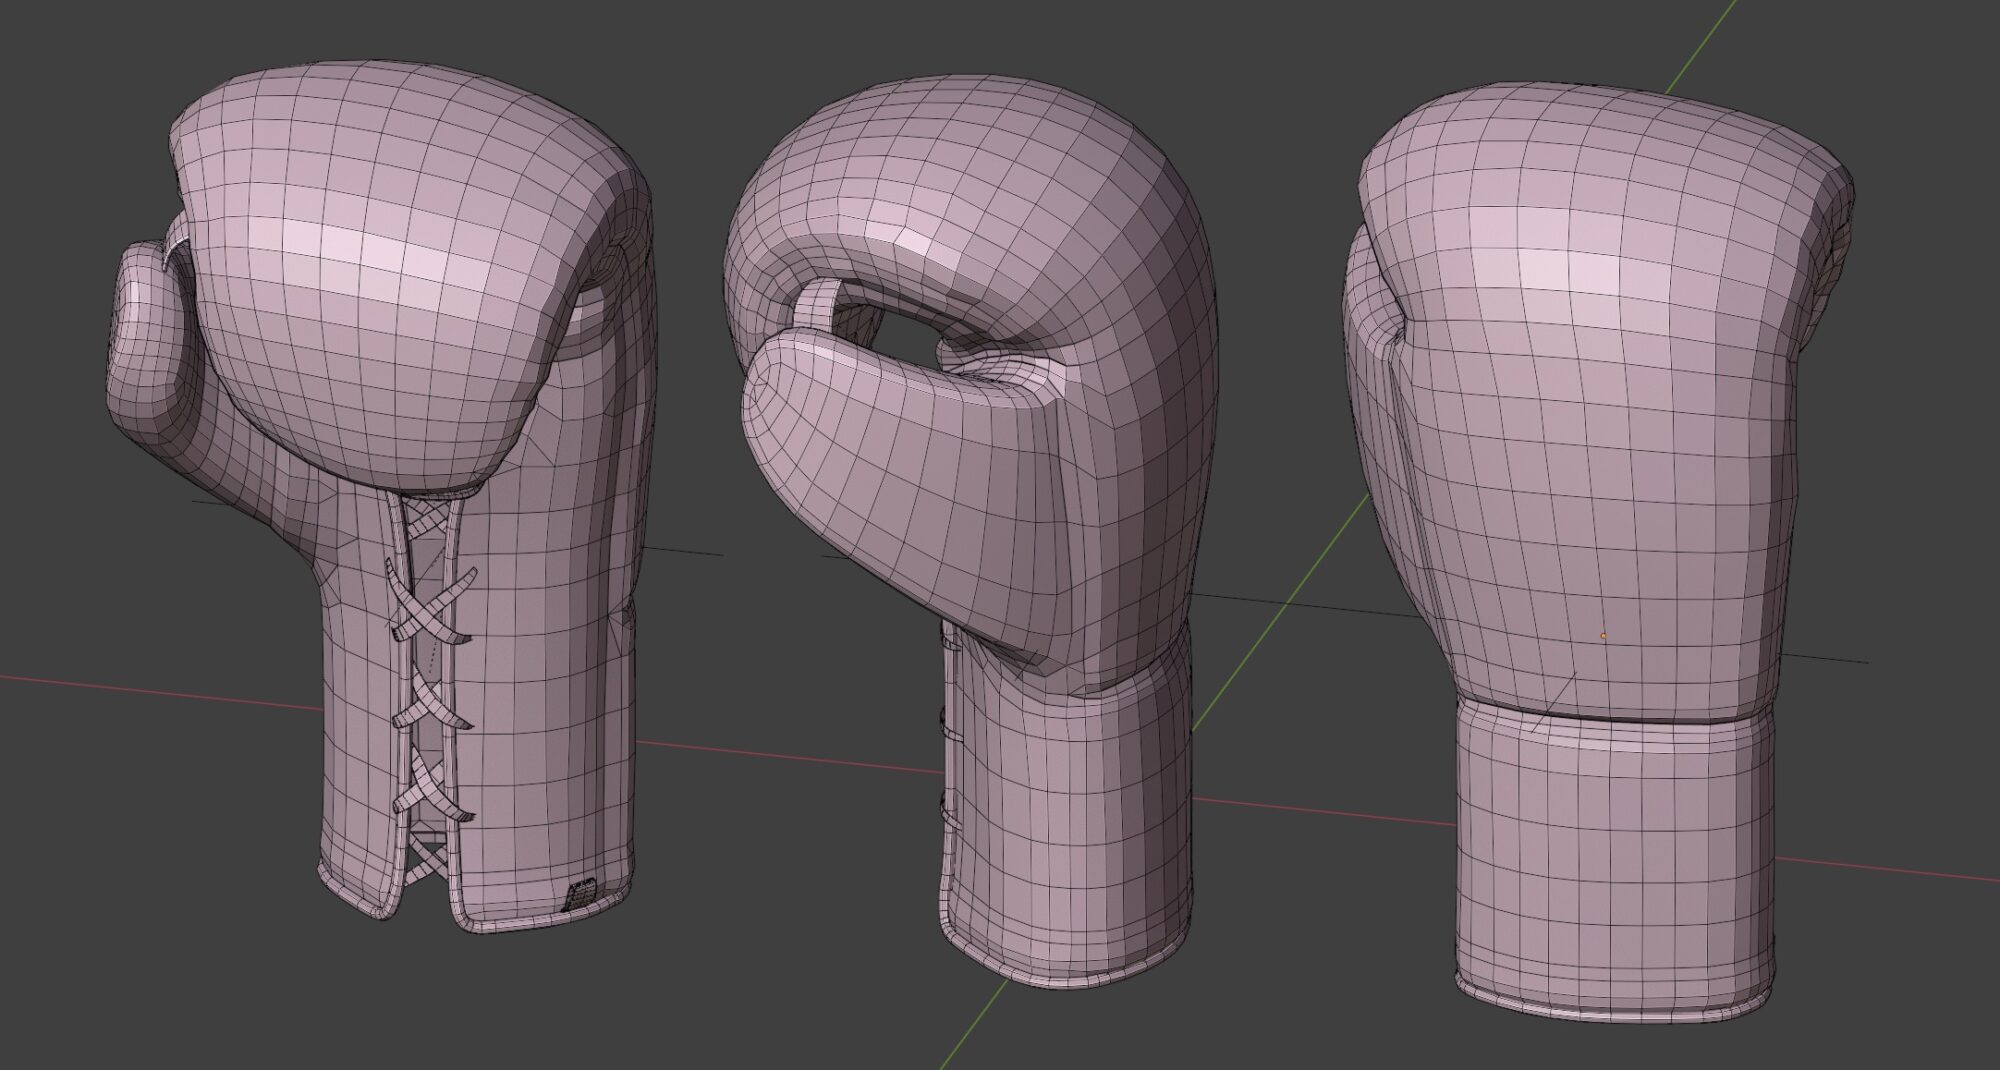
I am using polygonal modeling and the Subdivision Surface modifier for the basemesh.
Once I was happy with the proportions, I sculpted additional details using the Multiresolution modifier in Blender.
I intentionally left some of the finer wrinkles and stitching for the texturing stage in Substance Painter to maintain flexibility.
Retopology
Even though my focus was on texturing rather than optimization, I followed a game-ready pipeline with low and high poly versions, slightly simplifying the geometry while preserving the silhouette.
I used the RetopoFlow add-on to speed up the process. I tried to align edge flow with natural seam lines, creating UV islands that mimic the patterns of real boxing gloves.
This also helped to reduce unnecessary mesh density.
UV Mapping
Recent Blender updates include the “Minimum Stretch” UV algorithm, which works well for soft surfaces.
Combined with the Live Unwrap option, pin groups, and useful add-ons like Mio3, UV Toolkit, and Packmaster, it allows for the creation of a functional UV layout.
This may not be the best approach for everyone, but it works well for my current workflow and needs.
For tricky UV islands, I used pin groups to resolve layout issues.
Texturing
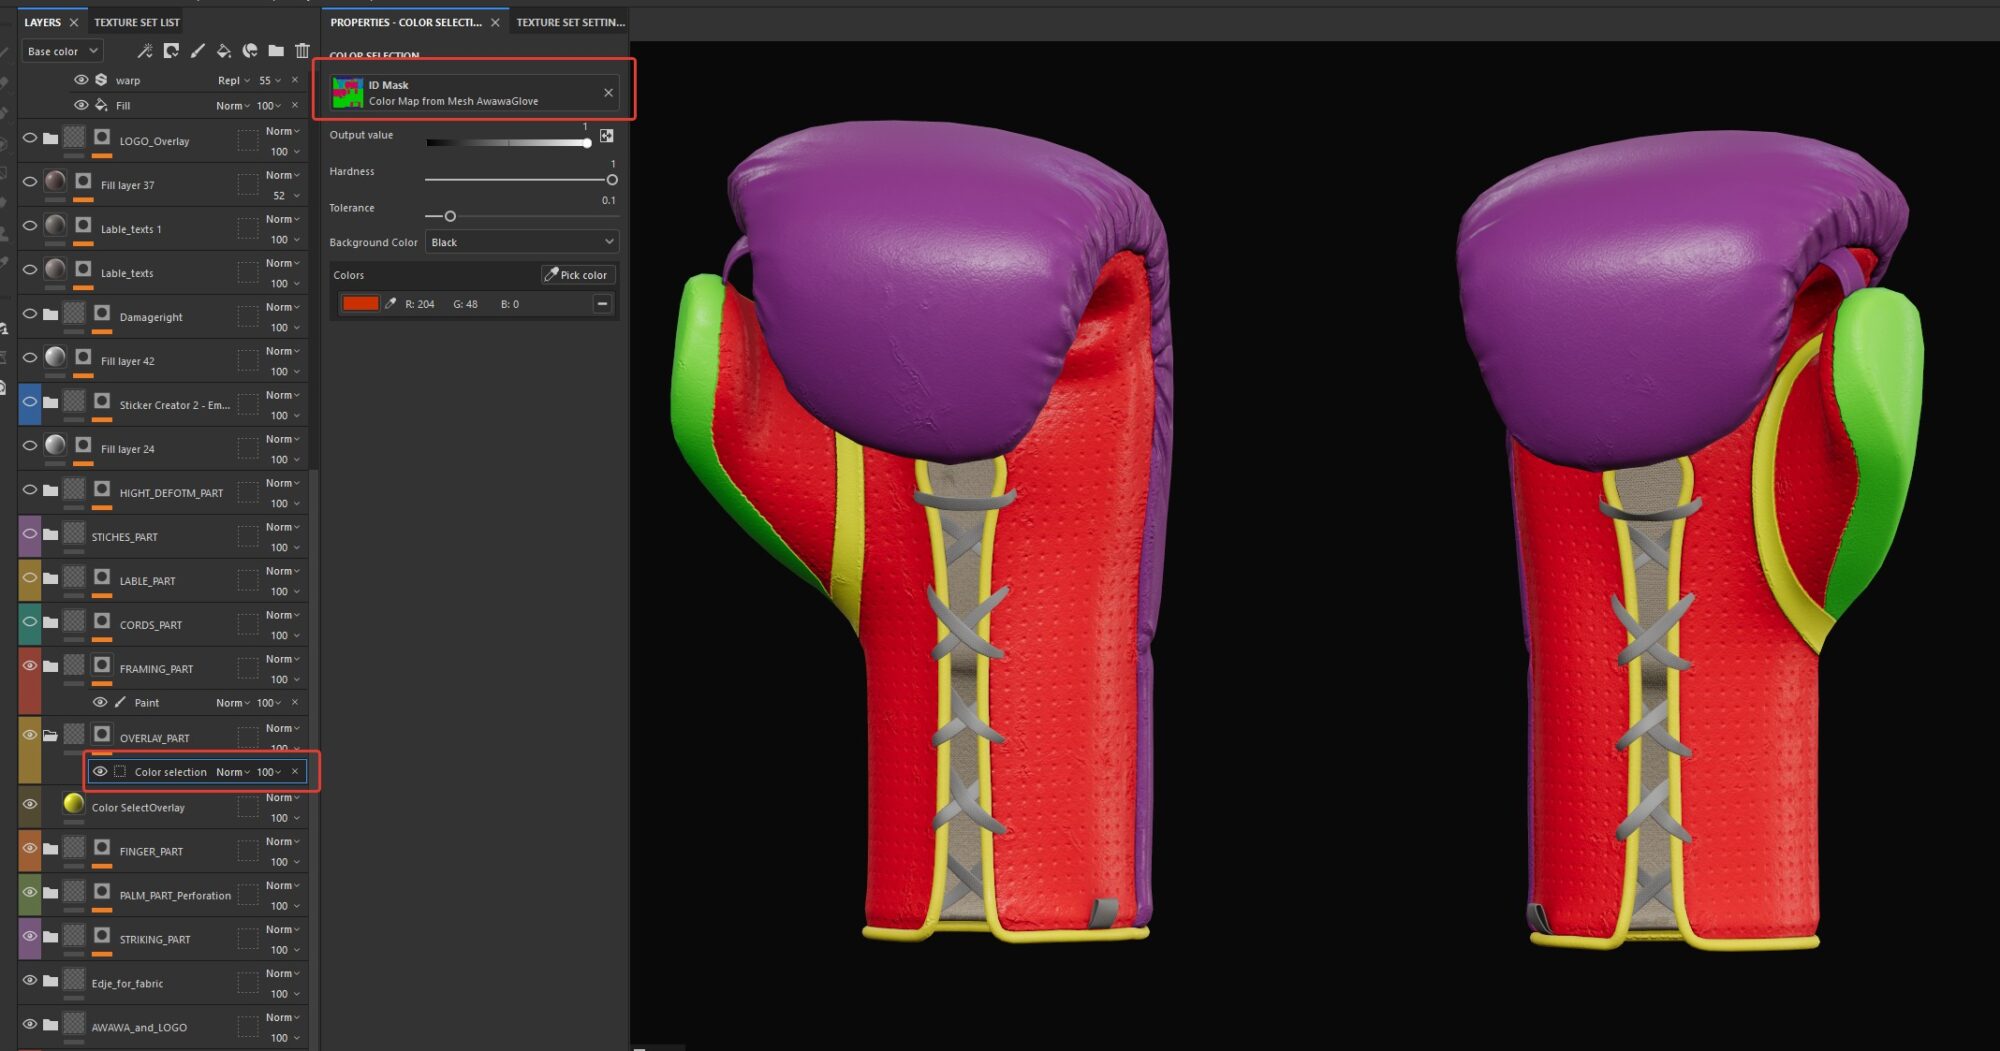
The first step is to block out the main material zones that will differ in color or texture. For this, an ID color mask is extremely useful.
With color selection, I can quickly isolate the necessary areas for convenient painting.
To generate this mask, I assign distinctly different and highly saturated materials in Blender to each high-poly part, especially where surfaces touch, and then bake the ID map.
Next, I move on to layering additional details through the height channel, things like small wrinkles, stitches, base material color variations, and of course, stickers.
The internet community has already created tons of Awawa-themed memes and images, which served as great reference material.
For the main sticker, I drew inspiration from various sports team logos and images, overpainted them in Procreate using web-sourced references, added a few custom elements, and applied the result using a fill layer.
After that, I dive into more refined detailing, following a few personal guidelines that help add depth and nuance to the textures:
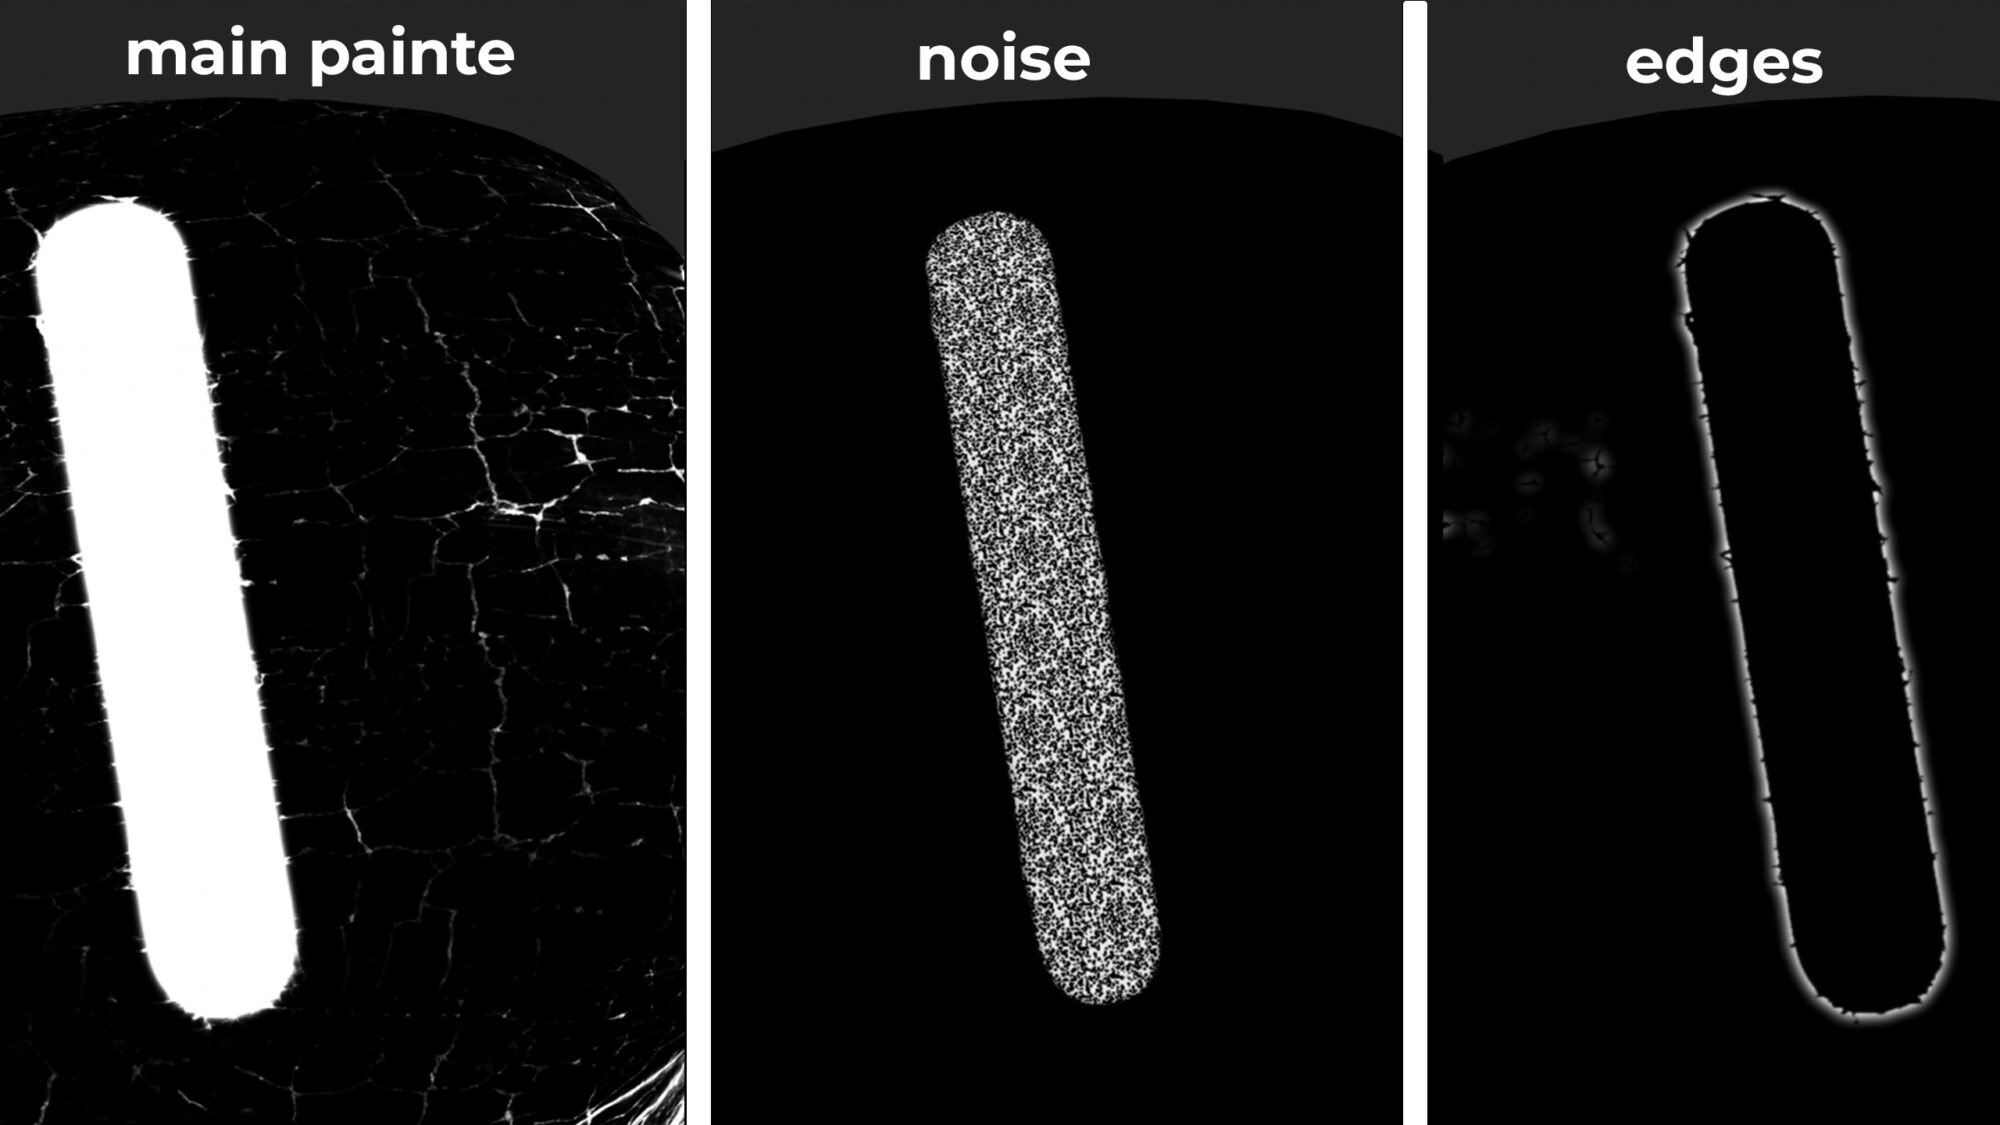
- Each detail should be broken down into at least three zones: base, edge, and center, across all relevant channels (color, roughness, etc.). Even subtle differences between them help make the forms visually distinct.
- Always add a layer of barely noticeable noise to each detail to avoid overly flat surfaces.
- Avoid using overly saturated colors or pure black, especially tones that sit at the extremes of the color palette.
- Try to name all folders and layers (okay, I don’t always follow this one).
Of course, the detailing doesn’t stop at just three layers; they serve as the foundation, with each base layer having its own set of additional sub-layers.
I apply damage effects using anchor points, and once the masks are properly set up, all that’s left is to paint the wear using a brush with varying pressure sensitivity and custom stamp alphas.
At that point, texturing starts to feel like a game.
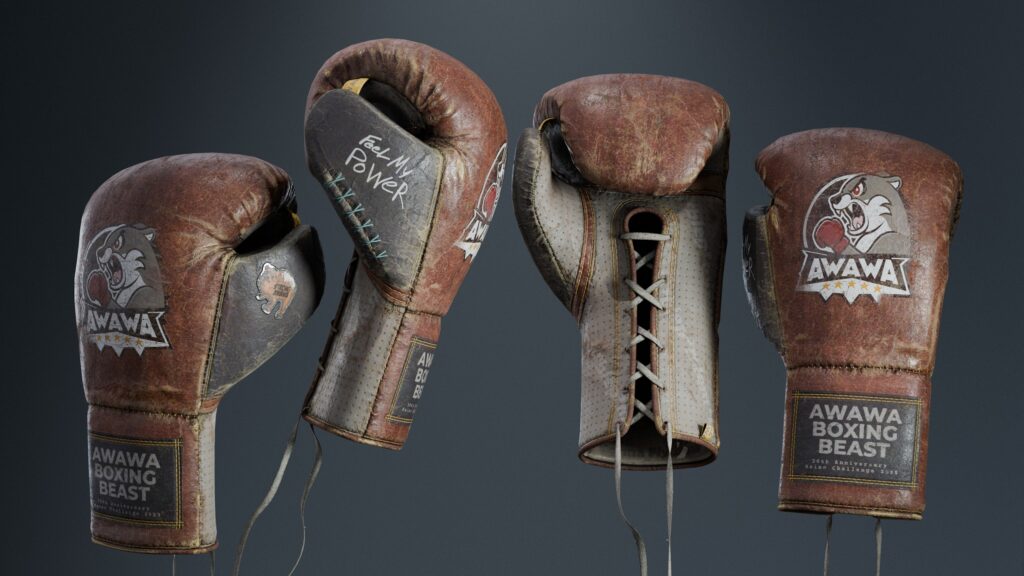
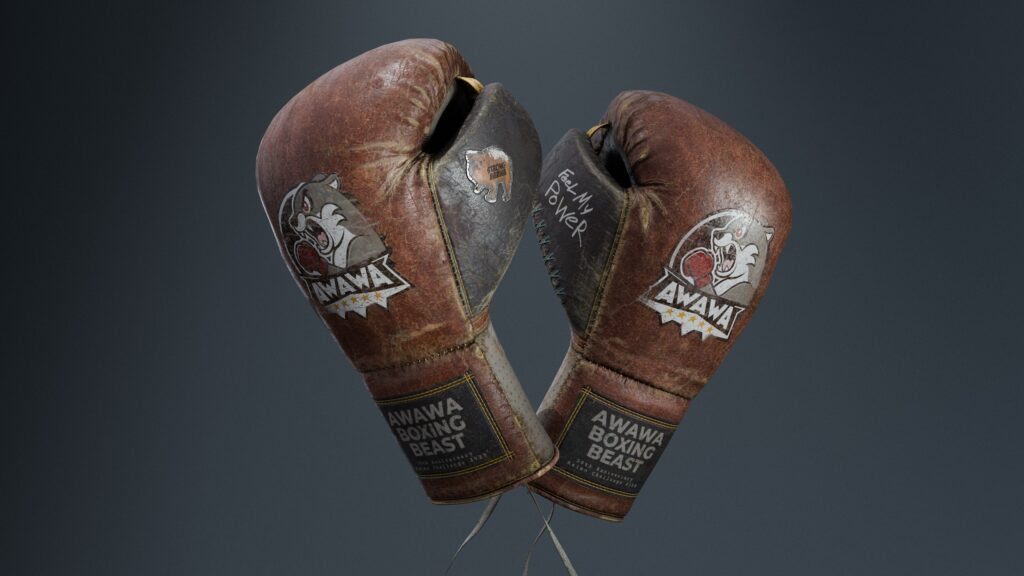
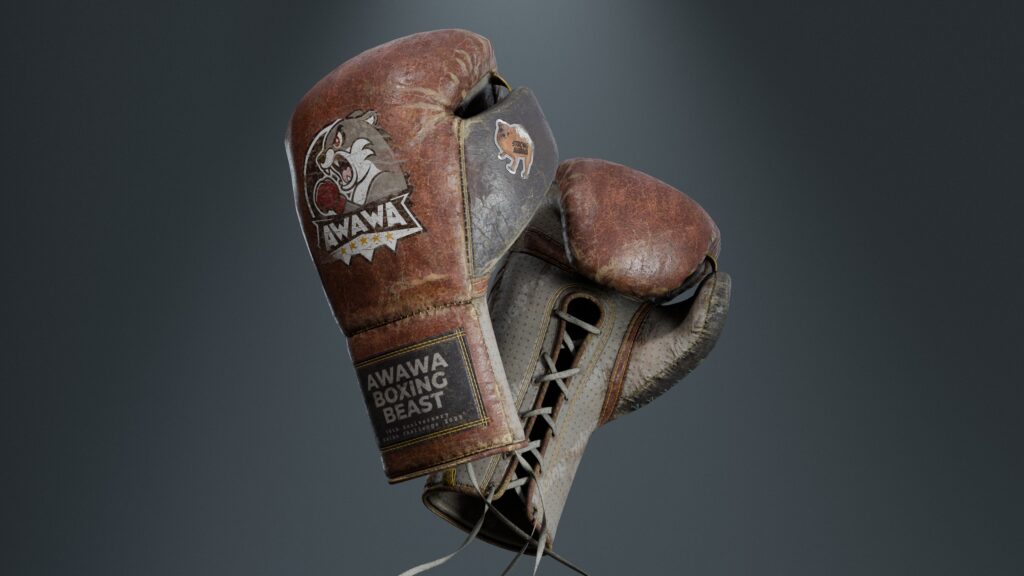
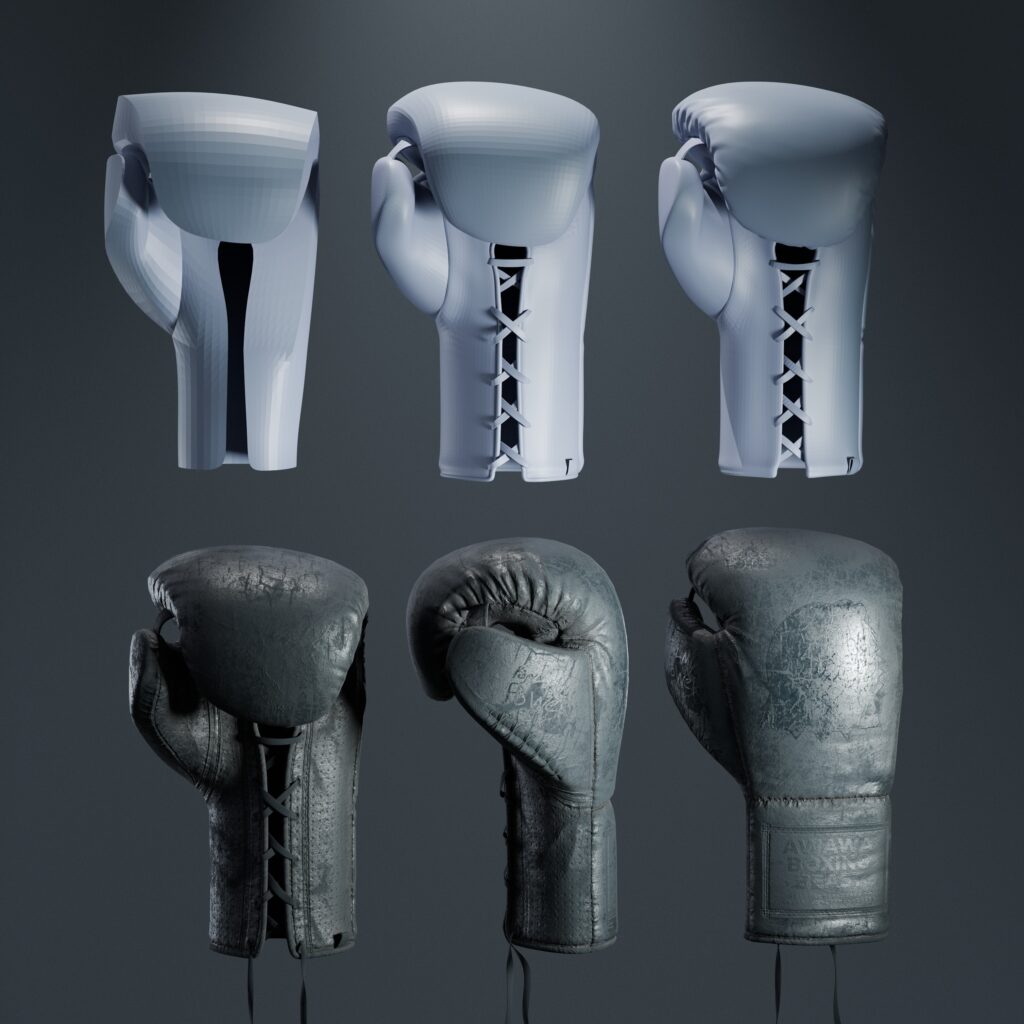
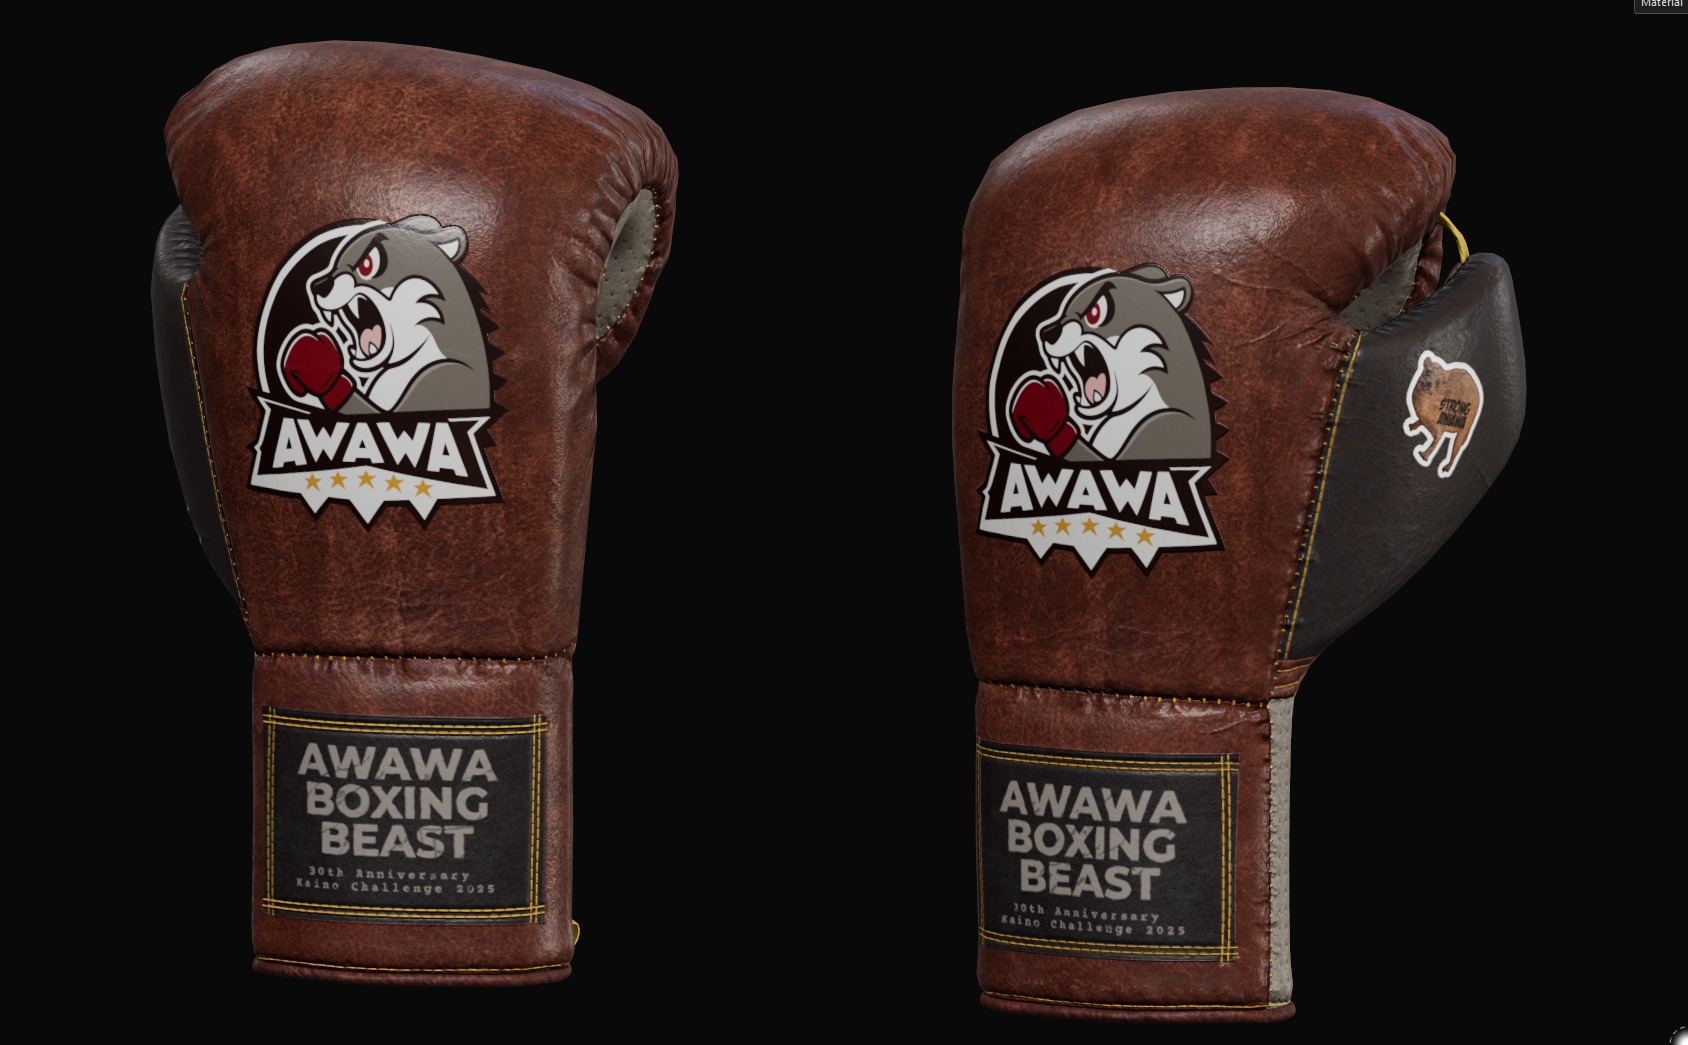
As you can see, the gloves ended up looking extremely worn out. In real life, they’d probably be falling apart.
I got a bit carried away with the painting process, trying to squeeze every last bit of character out of a single material, especially around the seams.
But I don’t think exaggeration is a bad thing. To me, it’s a way to present ordinary objects in a more artistic and expressive light.
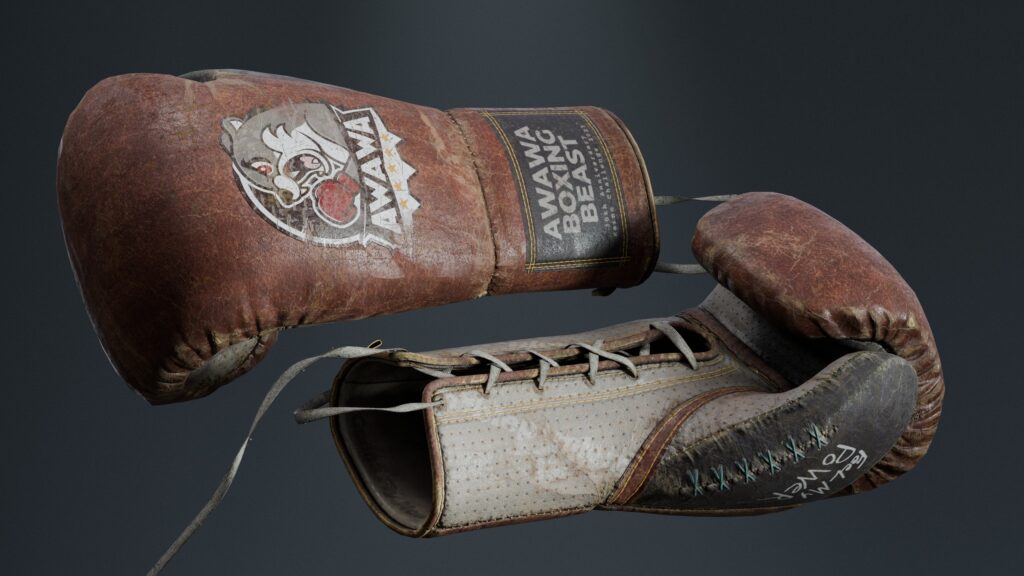
The labels and stickers serve a humorous purpose, adding a playful tone to the piece.
On the outer part of the glove, there’s also a subtle nod to Kaino’s anniversary weekly challenge, for which the project was originally created.
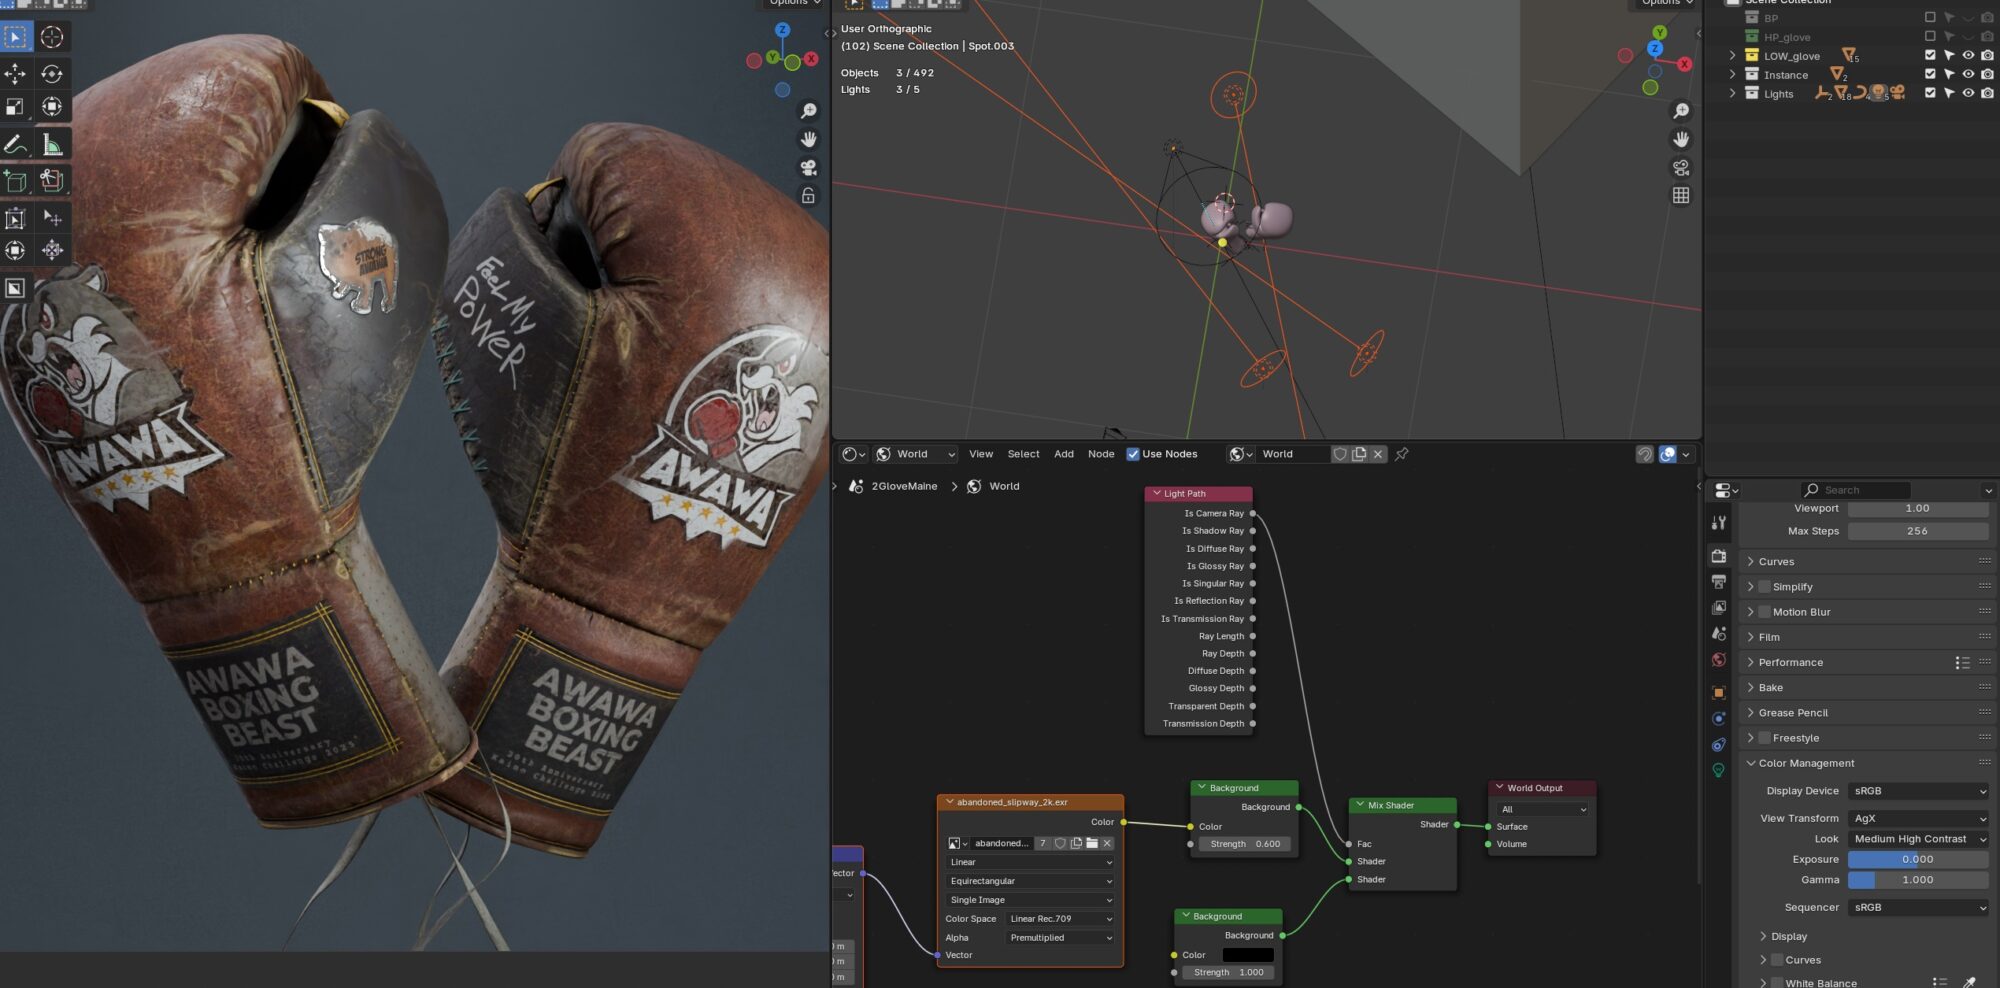
The scene was assembled in Blender. To make it feel a bit more real, I added some stray fibers using a simple particle system setup.
It’s a small, almost unnoticeable detail, but I think little touches like that really help make a project feel polished and believable.
Lighting was set up using an HDRI along with a couple of additional light sources.
The final render was done in Cycles, using the ACES color profile for better color grading and dynamic range.
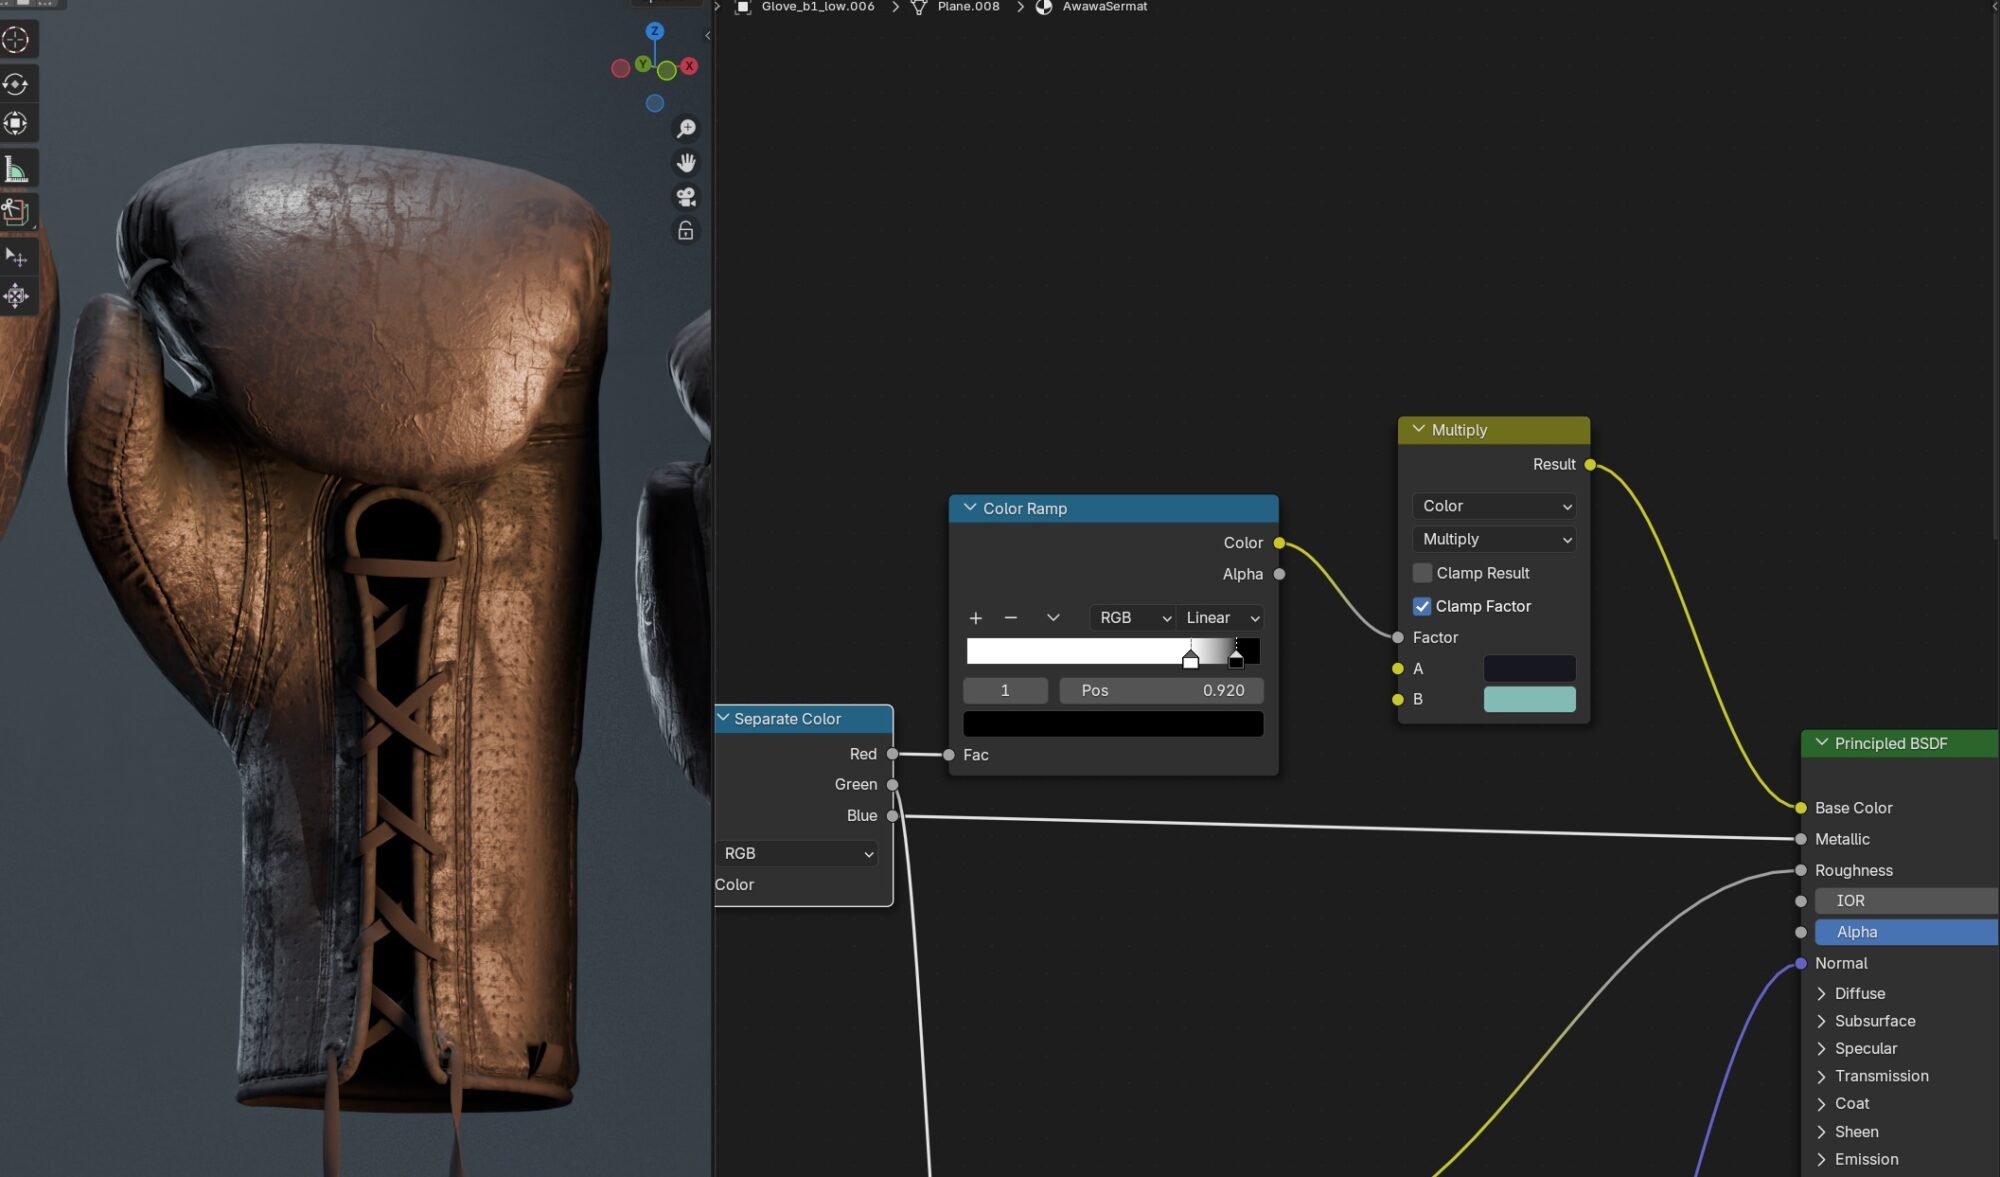
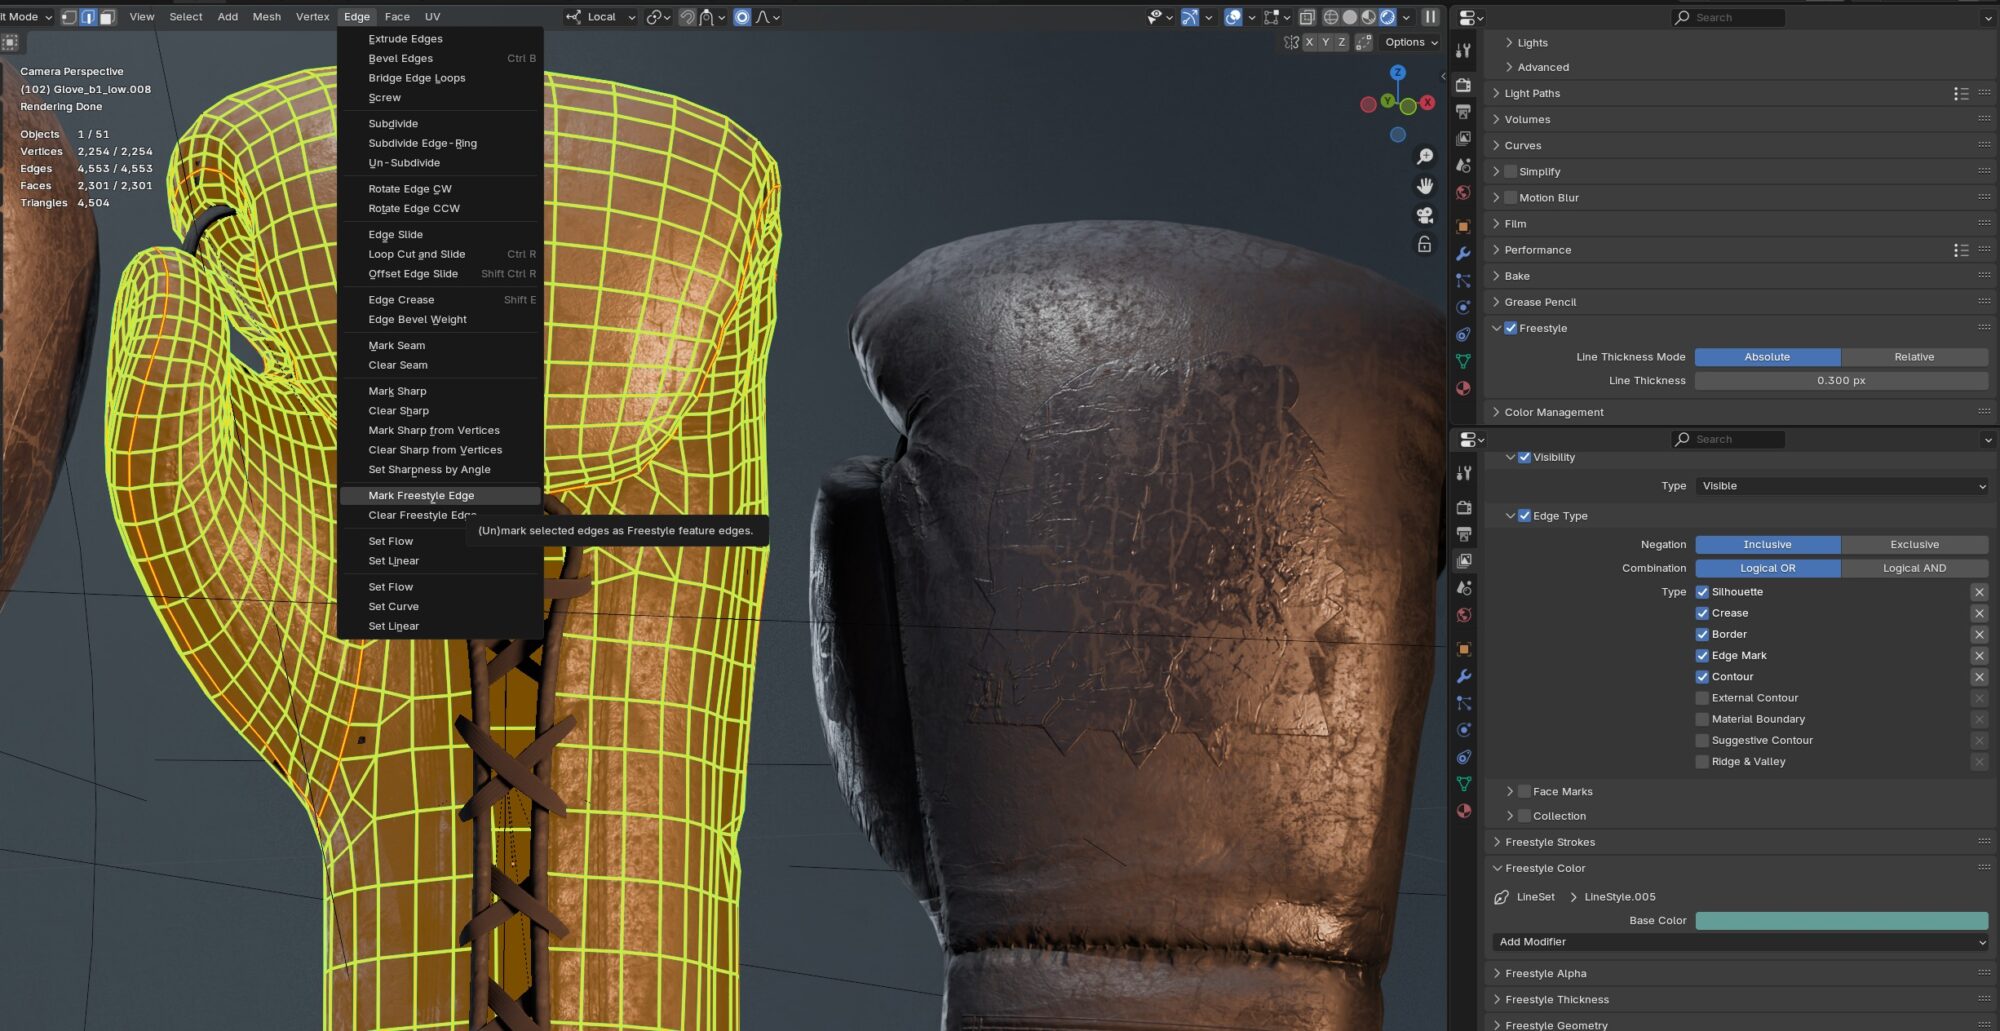
In addition to the main frames, I added this version of the grid rendering.

To get this clay render effect, I just disable the base color texture and control the shading with a shader setup using either an ambient occlusion or curvature map.
I also tweak the lighting to fit my personal taste or match a reference I’m working from.
I show the visibility of the grid through the freestyle marker and then send it to render.
That’s everything I wanted to share. Thank you for reading all the way to the end!
I hope this was helpful or at least interesting, whether for learning more about the project or just enjoying the story behind some funny little hyrax.
A huge thanks to Games Artist and Alfred for the opportunity to share my project. Wishing everyone success, inspiration, and a great mood!

Read more articles
You might also like these articles.