

Introduction
Hello! My name is Dmytro Piatyhorets. I am an Environment Artist from Kyiv, Ukraine, currently working with Pearl Abyss.
I am a gamer and I’ve always been fascinated by how realism in 3D environments can help to set the atmosphere and build a truly immersive experience for a player. This explains my love for combining photogrammetry with classic 3D modelling and texturing approach in my work.

Project and Goals
The main goal was to have some practice in realistic materials creation. On the other hand, it was also an experiment on how I could benefit from simple photogrammetry in this process.
You won’t surprise anyone with Megascans or photogrammetry itself in our time, these are now a common part of the industry-standard workflow.
But the technologies, power and freedom for creativity that we have now as game artists are absolutely amazing, and it is very important to make them more accessible to everyone. That is why I decided to go with a simple smartphone camera for the initial photogrammetry used in this project. To show that anyone with a smartphone could theoretically re-create this material, without heavy equipment.

It would not be possible to achieve the highest quality with smartphone photogrammetry itself, but this is where Adobe Substance 3D Designer comes to help. After all, as artists, we always need to thoughtfully improve our work to make it shine, not just copy everything from the real world as it is.
I must say that this particular project was a bit spontaneous. When I was traveling about a year ago, I happened to appear in the northern part of the Netherlands at the coastline. During the low tide, water moved away revealing this wavy sand surface covered with shells and rubbles.


I found it interesting, and here I would like to add that if you have a possibility to travel – do it. Traveling, observing the great outdoors, maybe making some landscape photography – is a great way to broaden your visual library which is very important for a game artist.
I thought this wavy sand might look pretty interesting as a tiled material so I took a few photos of the surface (about 20-30 of them) to try and make some photogrammetry out of it later using Metashape.

I also found a few shells and took photos of them as well.

My general advice on taking photos would be:
– Take photos on a cloudy day, and avoid hard highlights and shadows if possible. You don’t need overbright or too dark areas on the texture.
– Don’t move too far between shots. Always keep some areas from the previous photo in the frame when taking the next one. This will help Metashape to find matching points on the photos and to reconstruct your footage in 3D.
– Don’t rush, give a camera time to focus when taking a shot. Blurry photos won’t work and may break the whole process.
– Take a few photos of the same area from different angles to capture the shape.
– Use the maximum photo resolution that your smartphone can take. We need as many pixels as possible.
Building initial mesh
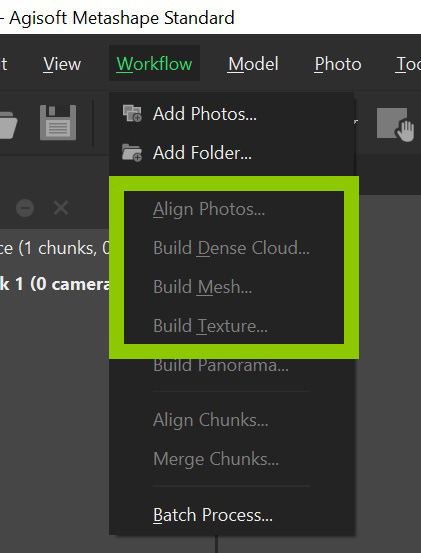
The Metashape workflow is pretty straightforward. The first thing I did was import my photos into it. For a simple shape like this, there was no need for any additional edits, the program detects camera type and makes lens calibration automatically so all I have to do is basically run through steps under the “Workflow” tab (Align Photos -> Build Dense Cloud -> Mesh -> Texture -> Export).
I generally used “High” settings for all the steps, there is no need to overload this process with “Highest” settings because the quality of the photos from a smartphone was somewhat mediocre and it would not lead to any improvements.
After the first step (Align Photos) I got the initial point cloud and deleted all unnecessary points out of the area of interest. This was not mandatory but helps to save time during the next steps.

As a final result, I hot a “high-poly” model of a sand surface with millions of polys and Diffuse texture exported at 8192×8192. The next step was to turn this “high-poly” model into texture maps: Height, Normal, AO, curvature and Diffuse. I created a plane in Blender with standard square UVs and used it as “low-poly” to bake everything onto it from my “high-poly” scanned model in Marmoset Toolbag. This is how I got the scanned “base” which I fed into Substance 3D Designer:

Preparing the Textures
The first thing to do in SD was to turn this sand island into a tiled texture. For this, I created a separate Substance 3D Designer graph and used the “Make it Tile Photo” node with a simple “Transform” node to zoom on the designated area. “Make it Tile Photo” helps to tile anything in no time, and also it allows to control of the edge and blurriness of overlapping areas which was very useful in this case.

I repeated this process for all of my initial maps with the same values, then I added a couple of “Grayscale Conversion” nodes where needed (all of the maps were RGB straight out of Marmoset Toolbag) and scaled the result to 4096×4096.

I exported all (now tiled) maps and used them as a starting point in my main graph. I didn’t want to have any connections to the previous graph because initial 8192×8192 RGB textures could take too long to process in the end.
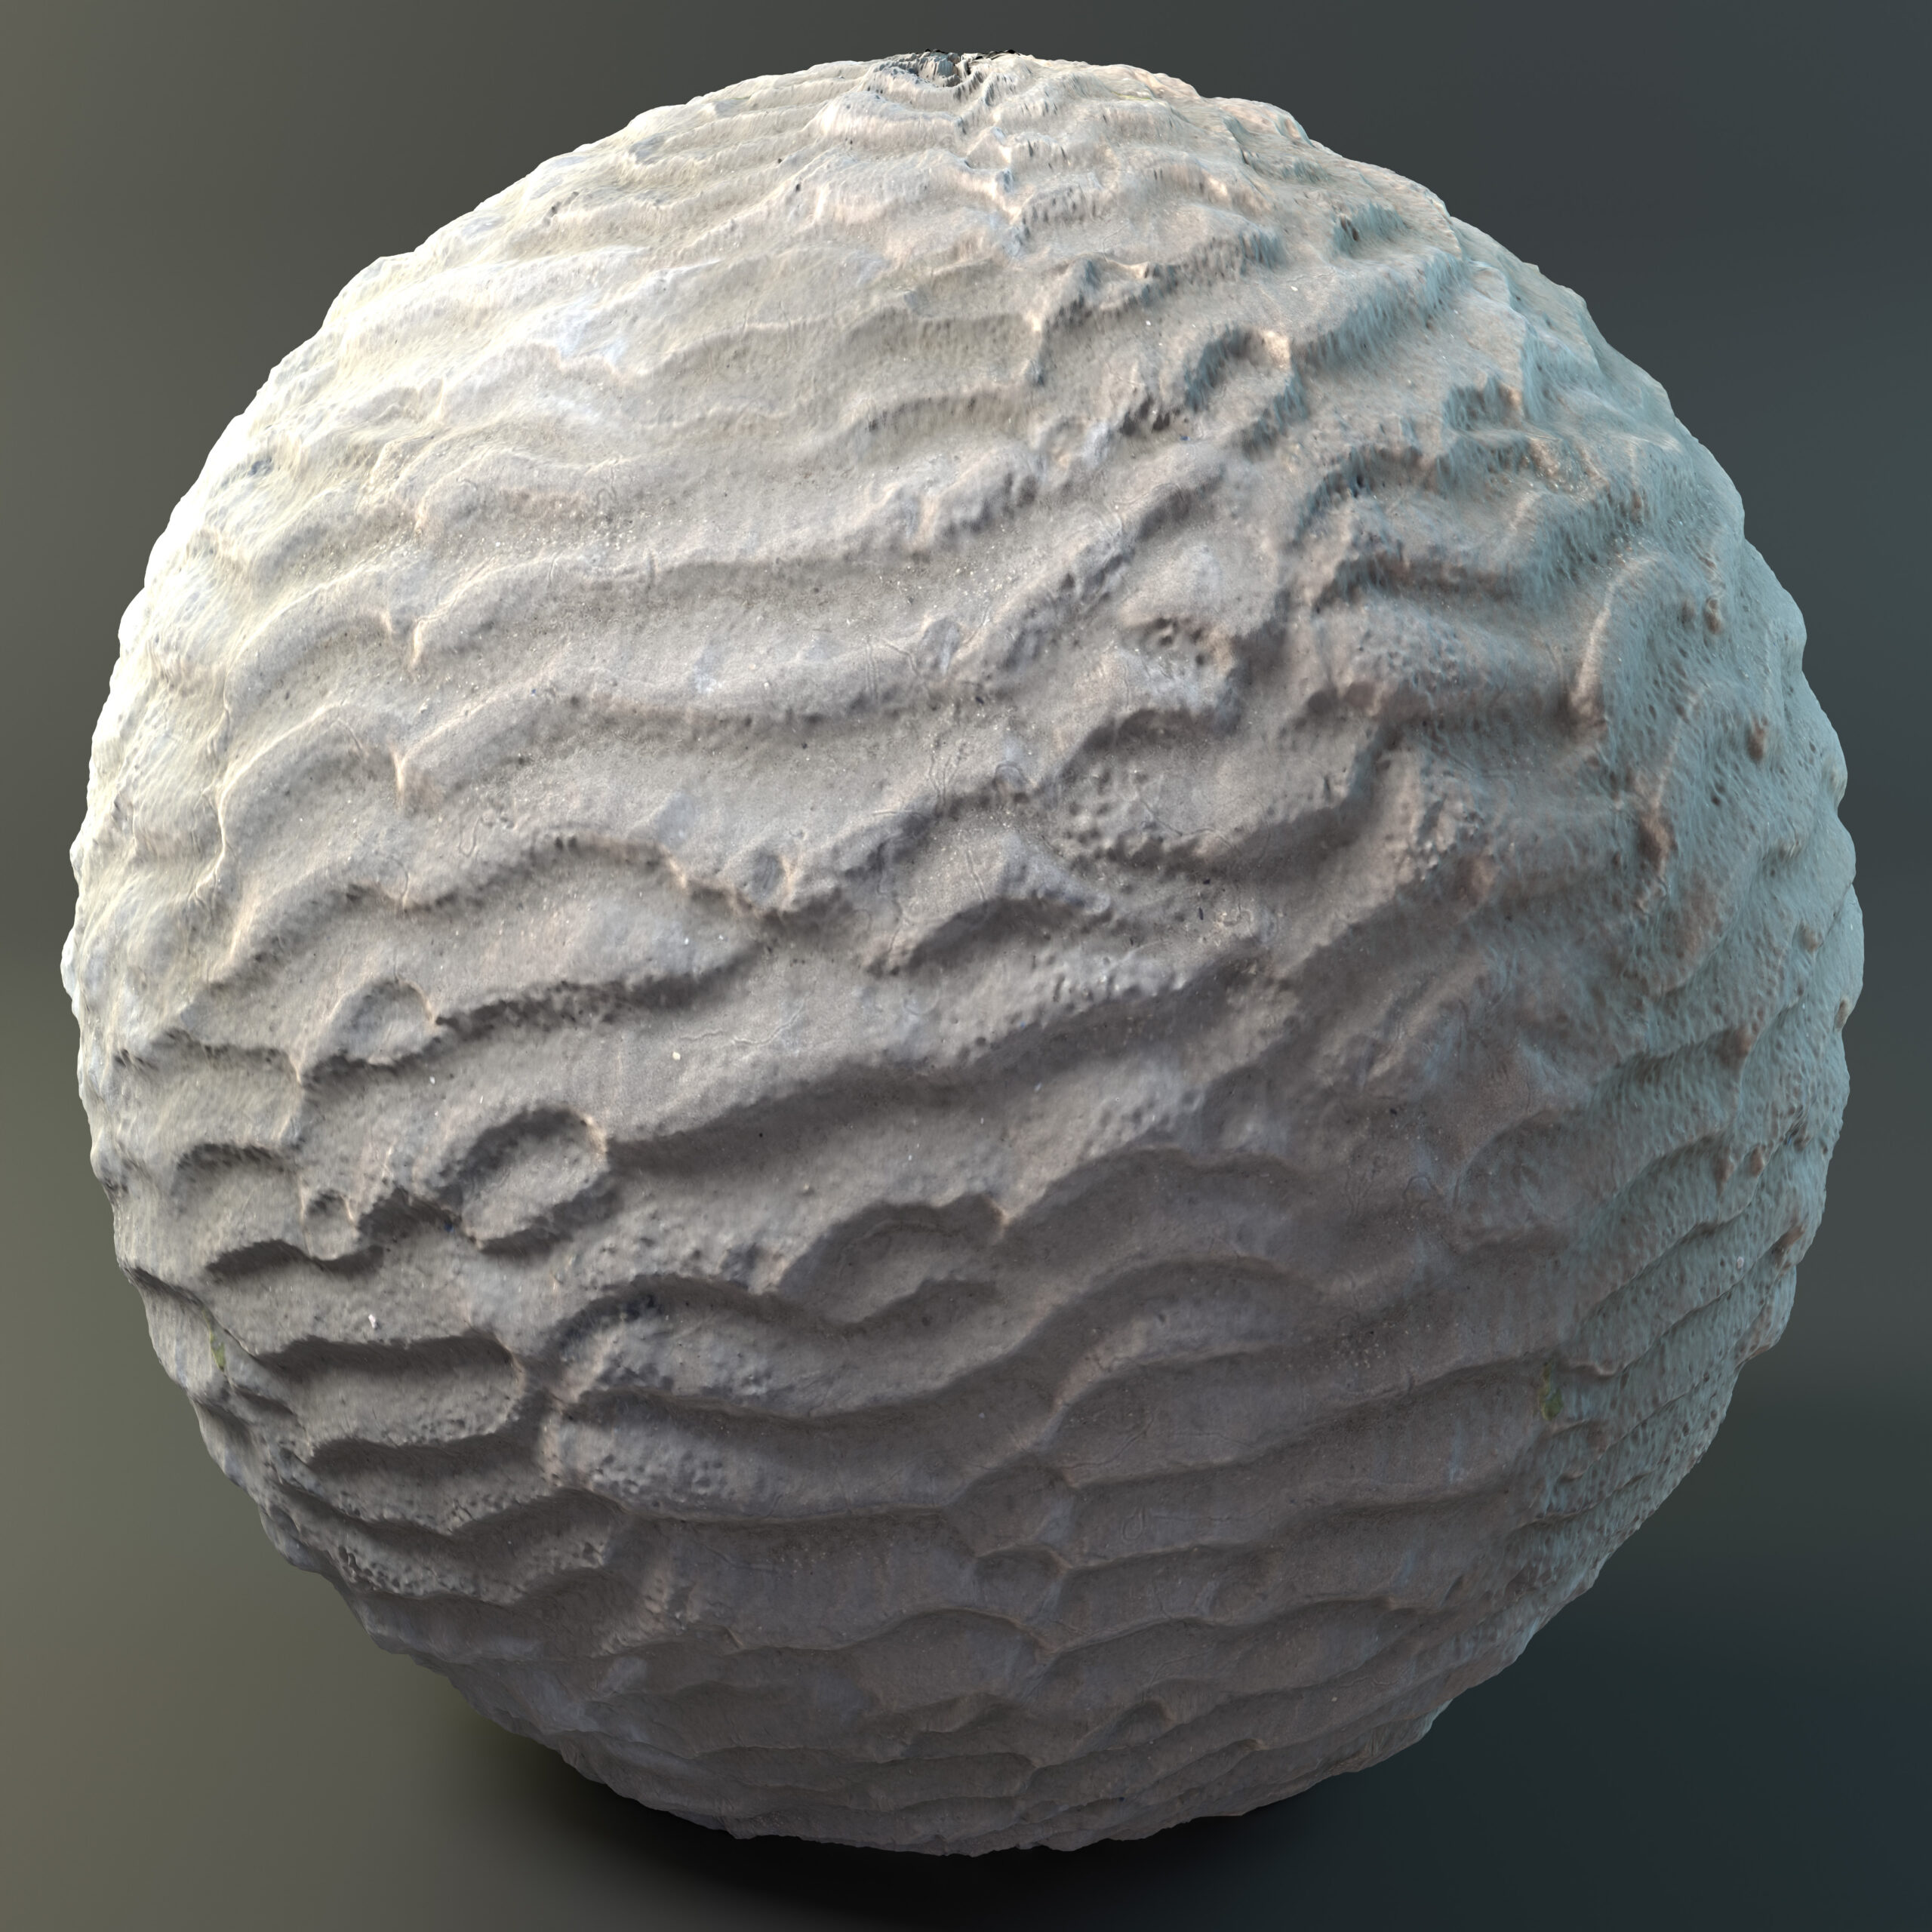
Now the base for the material was ready and looked like this:
Working on the Material
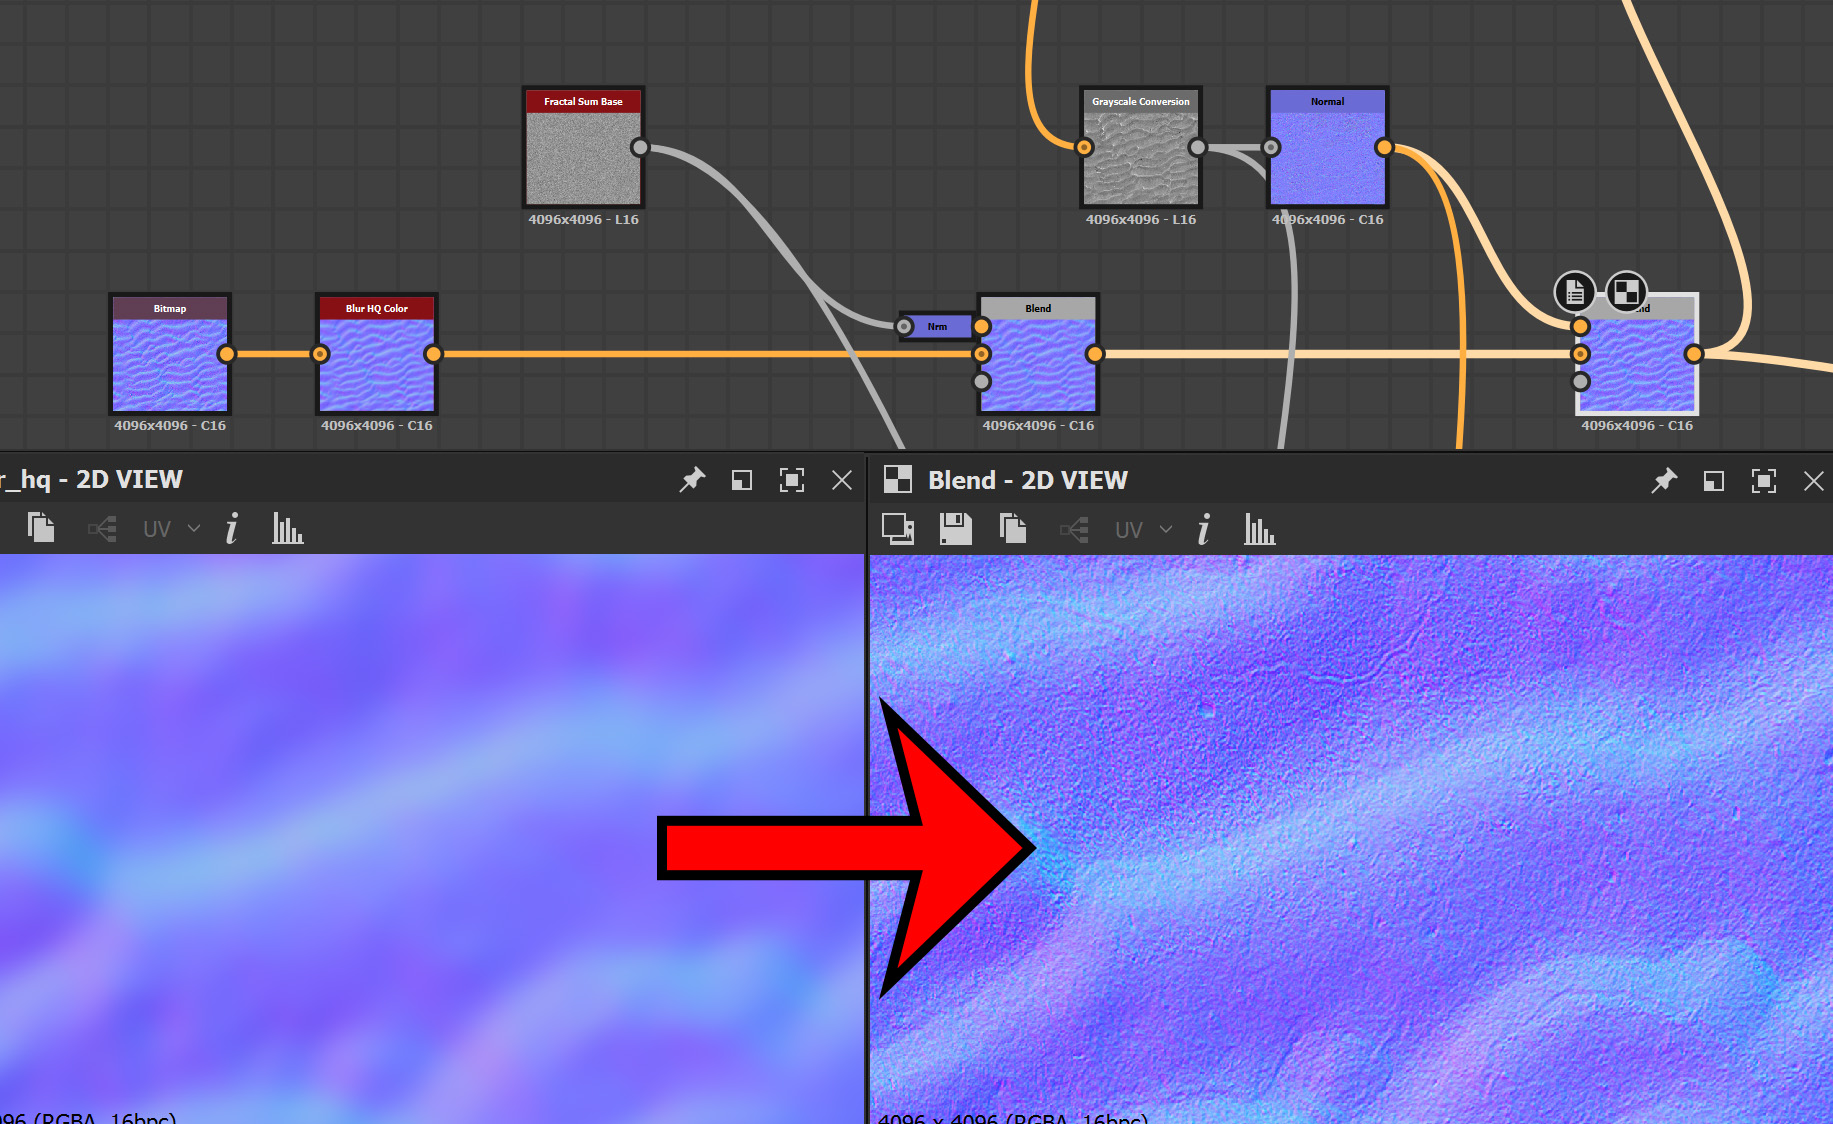
The first thing that I wanted to improve was fixing the color and adding micro-details which were lacking because of the bad initial photo quality. I used the “Fractal Sum Base” node and ran it through the “Normal” node, then I created a “Normal” from grayscaled Diffuse map and blended them together in “Overlay” mode over the baked Normal map. This already made a big difference in the quality of the initial normal map.
From this normal I created “Curvature Sobel” which was overlayed on top of Base Color to create more details. And I used simple “HSL” node to change sand color and make it more yellow.
This curvature output was also used to add variety to the roughness.

Adding Details
Next, I decided to add some shells on top of the sand. I took photos of the two shells that I found on the beach from the top. Then I turned one of them over and made another set of photos to have more variety. The process for each shell was the same: Run it through Metashape and then bake it on top of an unwrapped plane.

Then I imported those baked maps into Designer like some kind of palette of shells that should be scattered around.

As a tertiary smaller shape I created broken shell chips out of a simple “Shape” node with a couple of “Blur” and gradient “Wrap” nodes.

Then I scattered all of these with the help of a “Shape Splatter” node and here how the material looked at this stage:

At this point, I’ve decided that this surface needs some color breakdown and more distinct and catchy shapes for more believability. Adding seaweed could help with this, but the problem was that I didn’t have any photos of it. So I’ve chosen to cheat a bit and look for seaweed on Megascans.
I’ve found an appropriate seaweed atlas and loaded it to my graph. There were some interesting shapes but I didn’t like the Base Color of it, so I took the AO map of the seaweed and used it as an input for the “Gradient Map” node to color it. Then I overlayed “BnW Spots 2” on top of it for variety.

After that, I’ve scattered seaweed around the surface (with the “Shape Splatter” as well)

I decided to make one last step – add water level. This is an extremely easy step but it helps to make such kinds of organic materials even more realistic. All I had to do is to add a “Water Level” node and feed my material to it. The node is pretty straightforward and lets you customize the height of the water as well as the sharpness and wetness of the edges.

This is the final look of the graph. In general, I always try to move from left to right adding new elements sequentially one after another. This allows me to easily come to a few steps back in case I need to change anything.

In the end, I exported Base Color, Roughness, Ambient Occlusion, Metallic, Normal and Height map.

This is a simple breakdown on how the material changed during the work, from photo to final look:

Rendering
The final rendering was made in Marmoset Toolbag. I have created an infinite background by just applying a bevel between 2 polygons in Blender and imported it into Marmoset Toolbag.

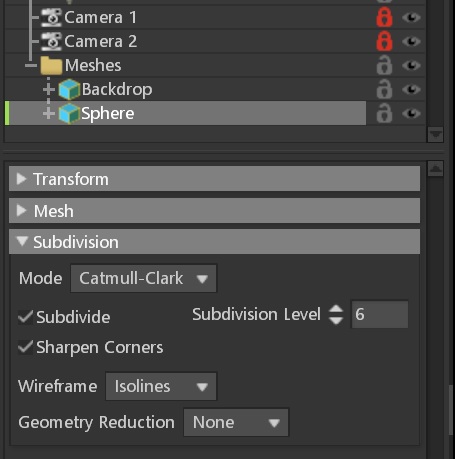
Then I imported a double-tiled sphere straight out of Substance 3D Designer “resources” folder and applied x6 Subdivision to it in Marmoset Toolbag, so it could utilize Height map properly.
I used a standard three-point lighting scheme for the final rendering:
– Main Light is the most intensive, positioned a bit on the side to keep the volume of a sphere.
– Fill light is set from the other side to cancel the hard shadows.
-Back Light is positioned behind the object to make a subtle rim of light on the silhouette.

I mostly used default camera settings, the only thing is that I turned on the “Depth of Field” for the close-up shot to give it more value.

Outro
I hope this breakdown was helpful, thank you GamesArtist for this opportunity! This was an interesting project and I am happy I could share it.
Hopefully in time photogrammetry will become more and more accessible and easily integrated, allowing us to create great things on the fly.
Feel free to check more of my works or contact me using the links below:
ArtStation: https://www.artstation.com/shab42
Linkedin: https://www.linkedin.com/in/dmytro-piatyhorets-aba61b113/
Instagram: https://www.instagram.com/shabnaaak
Software used: Adobe Substance 3D Designer, Agisoft Metashape, Blender
Assets used: Quixel Megascans “Seaweed, relkb2a2”
Read more articles
You might also like these articles.


