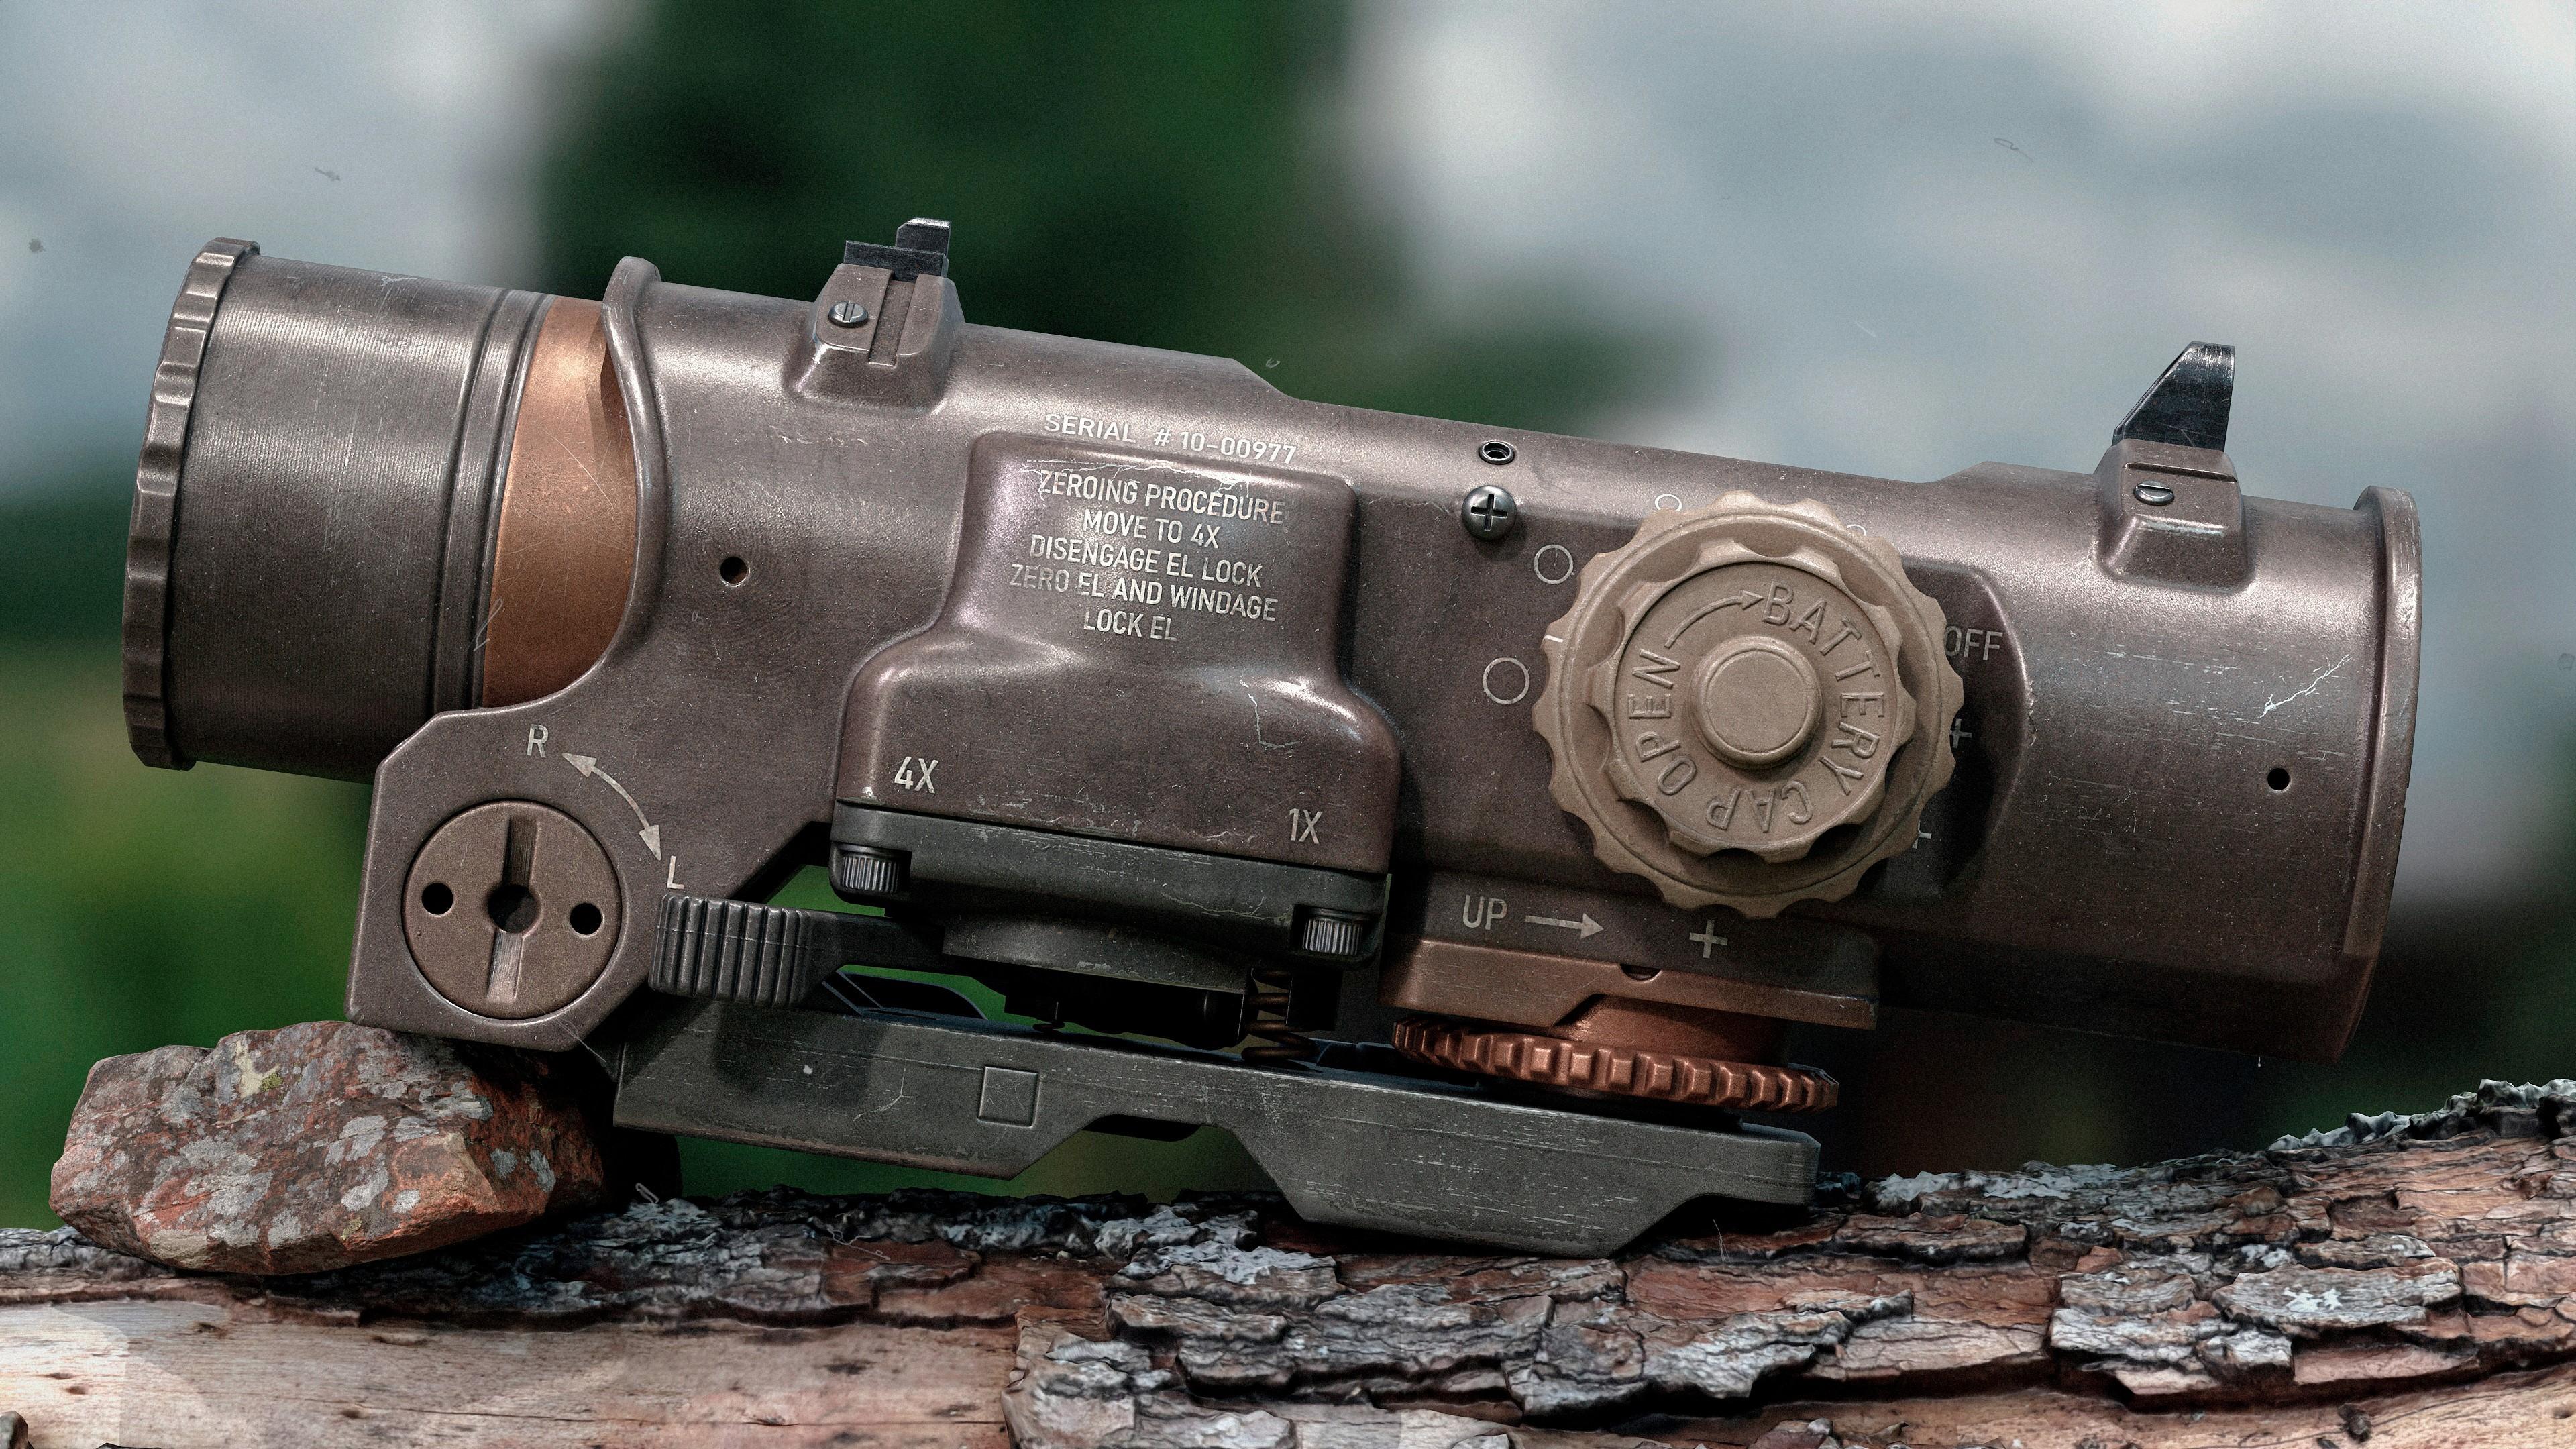
Elcan Specter

Introduction
Hi! My name is Ilya. I’m a 3D Artist specializing in hard-surface assets.
Project
In this article, I’ll walk you through the process, some of the methods, and workflows I used while creating the Elcan Specter DR sight. This asset is part of my personal FN P90 project.


Software Used
- Blender
- ZBrush
- RizomUV
- Substance Painter
- Marmoset Toolbag 5
- Photoshop
Collecting References
As with most projects, I started by gathering references. My main focus was on real photos of the sight, so I primarily looked at auction sites and marketplaces – these often have “real-world” shots with natural wear and usage marks, without studio lighting. For example, resources like Wikimedia Commons and FN Forum were very useful.
Additionally, I used Google and Pinterest to get a general understanding of the shape and color variations, and YouTube mostly for video reviews, which show how the sight looks in hand and how materials behave under different lighting.
While reviewing photos, I tried to note interesting details for myself (scratches, wear, surface characteristics) that I wanted to reflect in the texture. These observations became the foundation for the rest of the asset work.

Modelling
High & Low Poly
The main modeling tool for this project was Blender. Even though the industry is gradually moving toward Plasticity, I’m still in the camp of people who keep promising themselves to “start learning it next Monday.” Nevertheless, Blender fully covers my needs for preparing geometry.
I worked on the shape in stages. First, I did detailed blocking under subdivision, setting the main proportions and overall silhouette of the model. At this stage, I didn’t focus on clean topology – getting the right shape quickly was more important. In areas that required hard edges or sharp breaks, I applied creases immediately.

Boolean objects were prepared in parallel, also with creases applied. Then all the geometry was moved to ZBrush for further refinement using Live Boolean. The final combination, Dynamesh, and polishing were done there.
The low-poly model was created based on the same boolean bases as the high-poly. Essentially, I needed to remove subdivisions, perform boolean operations, and clean up the mesh. Since this project was portfolio-oriented, I didn’t focus on strict optimization.
The priority was given to the quality of the silhouette and accurate form display in close-ups, rather than minimizing polygon count.


UV Unwrapping
For UV unwrapping, I used RizomUV, as it allows precise control over distortion and shell alignment.
The model uses a UDIM workflow (2 tiles) to maintain high texel density. Final UV packing was done in Blender using the UVPackmaster add-on.


Baking
I baked maps using Marmoset Toolbag 5.
The main reason for choosing it was native UDIM support – the program automatically recognizes multiple tiles without additional manual preparation.
In earlier versions of Marmoset, the process was much more complicated: each UDIM tile required a separate material and manual adjustment of all tiles to the coordinates of the first tile to perform baking.
In version 5, this step is fully automated, which significantly simplifies and speeds up the workflow.
Scene Setup
(Substance Painter & Marmoset)
Before texturing, I set up the scene in Substance Painter based on final render conditions. For the main HDR, I prefer using Tomoko Studio HDRI – it provides neutral lighting, doesn’t distort model colors, and creates medium-hard shadows without excessive contrast or “washout.”
During work, I regularly switch to other HDRIs to understand how the asset will look under different lighting conditions.
For tone mapping, most artists today use ACES, but for me it feels too contrasty and aggressive. So I went with Sensitometric, which gives a calmer, softer result.
To better control the final result, I also set up the scene in Marmoset Toolbag. Throughout texturing, I frequently transferred the asset between Substance Painter and Marmoset, as the visual differences between the programs are noticeable.
This approach allowed me to keep materials under control before the final render.
Texturing
Texturing was done in a Metallic / Roughness workflow. I try to avoid perfectly clean and uniform surfaces, even if the asset isn’t meant to look heavily worn.
I start by forming a base layer. This is a combination of grunge maps, noises, and gradients in the Base Color and Roughness channels, which helps remove the “digital sterility” and create surface variation.
Next, I add details like engravings and wear marks. More prominent damage is worked on – scratches, chips, and scuffs. All damage was hand-painted using stencils, which gives more control and variation compared to procedural methods.
Details in Roughness were done separately: fingerprints, oil stains, and local reflectivity variations. Dirt and dust were also added manually, allowing logical placement of grime across the model and avoiding a repetitive, procedural look.
For the anodized body, I used intermediate Metallic values, achieving a denser, satin-like reflection characteristic of this type of surface.
The video below shows the layer structure and step-by-step activation – from base surface to final grime. My goal wasn’t to make the asset heavily worn or “destroyed.”
I deliberately kept it in a medium state – with neat signs of use but without extreme damage. For comparison, I included another project of mine with more pronounced wear. The damage workflow is the same; only the surface character differs.
A separate note is the method of creating the central seam on the body. Instead of using the height channel, I opted for Normal Painting.
This approach gave more variation and control over the seam shape – achieving the same result with height would have been much harder and required multiple masks.
The video below shows the process and final result.
Rendering & Presentation
For rendering, I created simple scenes in Marmoset using Fab resources.
I aimed to keep a natural look, using linear Tone Mapping and minimal curve adjustments for contrast; other post-effect settings were left untouched.

Lighting was based on a classic three-point setup. When needed, I added extra lights to highlight the shape, emphasize materials, and improve readability of details.
For one shot, I used a combination of two HDRs: one for lighting, the other for background. This allows more precise control of scene atmosphere.
Often the background looks nice visually, but its lighting doesn’t work well with the object’s form. By combining HDRIs, I simplified the lighting setup.
For the final render, I also output Object ID along with the main frame.
This greatly simplifies Photoshop post-processing – allowing quick selection of individual elements and color/contrast/brightness adjustment without affecting the whole scene.
This saves time and gives more control over the final image.
Post-Processing
Final post-processing was done in Photoshop. Usually minimal adjustments: adding slight noise, a little sharpening, and correcting individual elements if needed.
Using Object ID allows me to work on specific parts of the frame without touching the whole scene.
Conclusion
I’d like to thank the Games Artist team for taking the time to look at this project – I really appreciate it.
And thank you to everyone who read this article; I hope you found it helpful, even if just a little.
Link to work: https://www.artstation.com/artwork/4NZNPn
Read more articles
You might also like these articles.