Atomic Twins
Introduction
Greetings! My name is Alex Gray! And I absolutely love creating characters!


Goals
My goal is to practice in this project low poly modeling as well as styling the form and posing and to form an effective present.
Analysis
Now I will tell you how “Atomic Twins” was created. In this work, sculpting was practically not used, mainly only polygonal modeling in ZBrush.
References
There are no special tricks here, but I am often asked, for example, how I make such smooth and clean forms, and this is what we will consider.
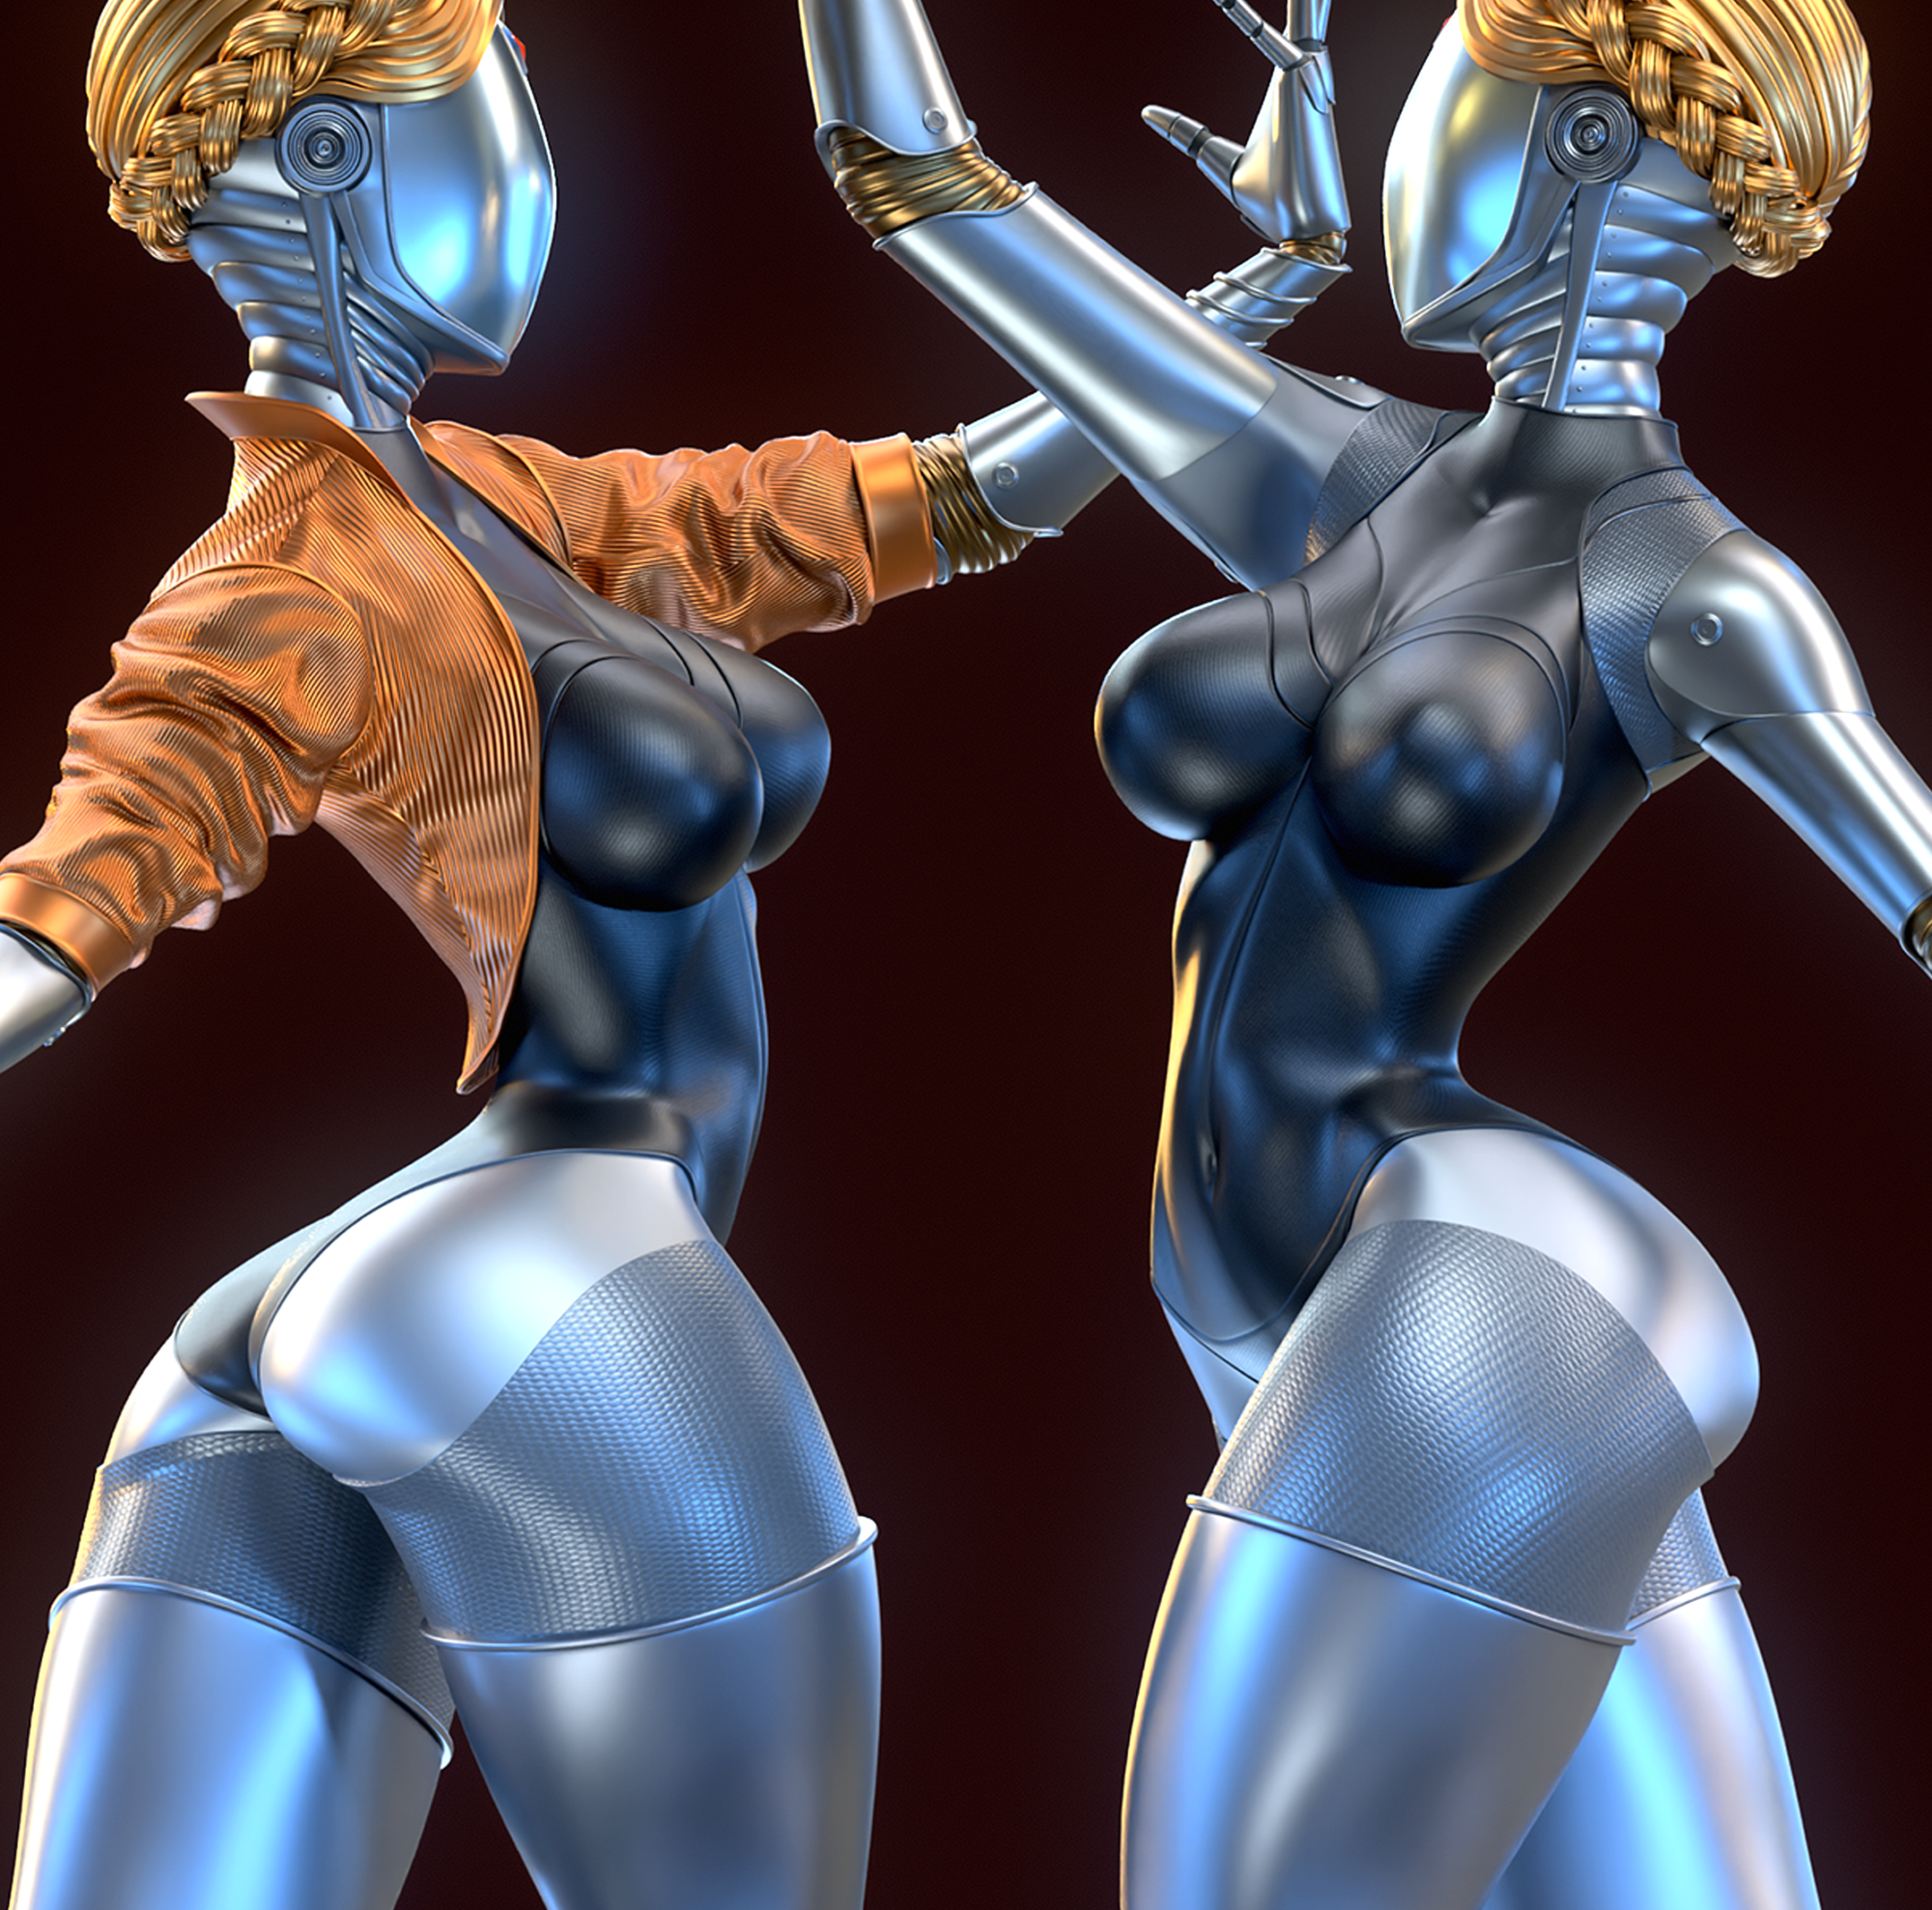
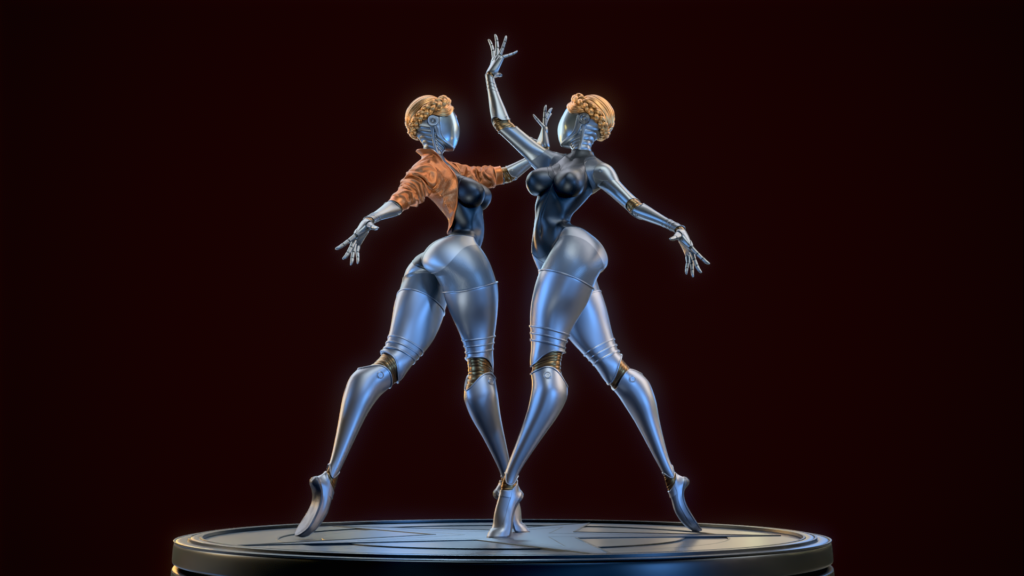
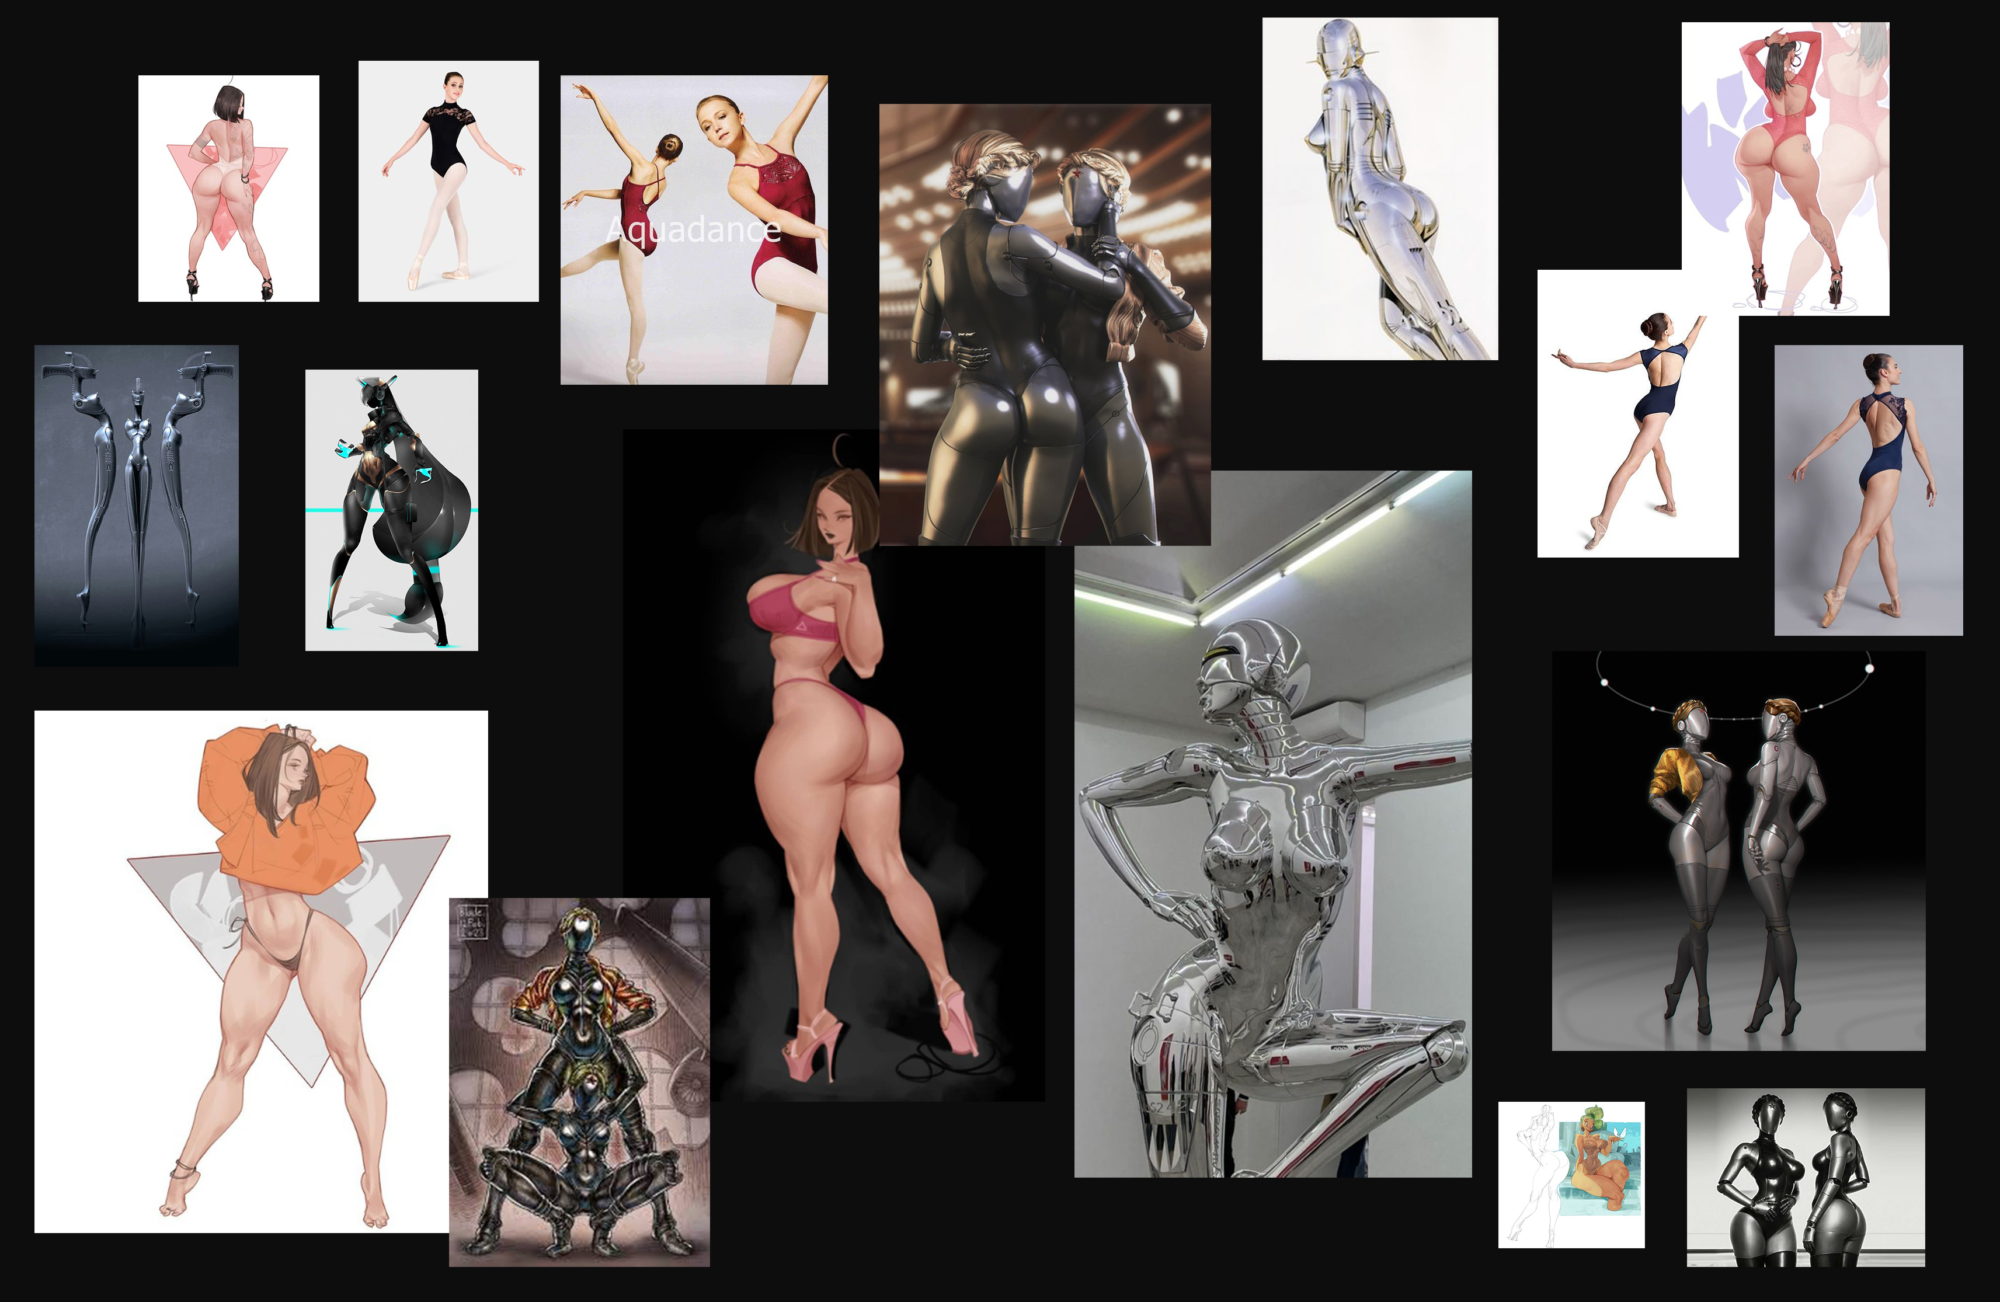
So let’s start with the fact that I’m a fan of the game “Atomic Heart”, there is an amazing atmosphere, and memorable characters, especially the “Ballerina twins” robots, I chose them for my work because it allowed me to practice forms and posing so non-standard for 3d characters like ballerinas.
Since, I was practically not familiar with this culture of dance as ballerinas and how correctly and expressively the pose should look, I looked through Pinterest to find references.
Blockout & Armour
I made an approximate figure with primitives. In this work, I was guided by the artist Myinputwo, I really like his works and they became the main references for the forms of my ballerinas.
Yes, ballerinas are not so thick, but we work with a stylized character, and they are also robots in general, and in this case, we can do everything (but on the condition that we harmoniously fall into the style).
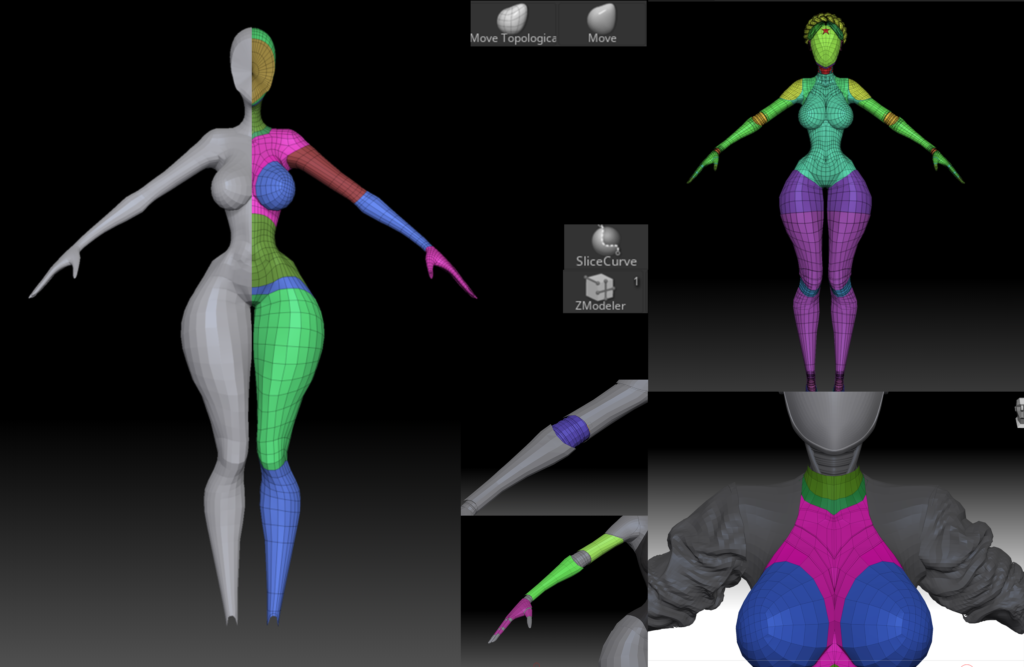
So, the primitives and the general outline of the figure are ready, then we use dynamesh to merge all the primitives into one.
Since in the future, we will mainly work with low poly, we use Zremesher in order to bring the mesh into an acceptable form, we modify the mesh a little through Zmodeler in order to get the correct loops in the places we need. Speaking of such places, I mean the body, arms, etc., all parts must be looped.
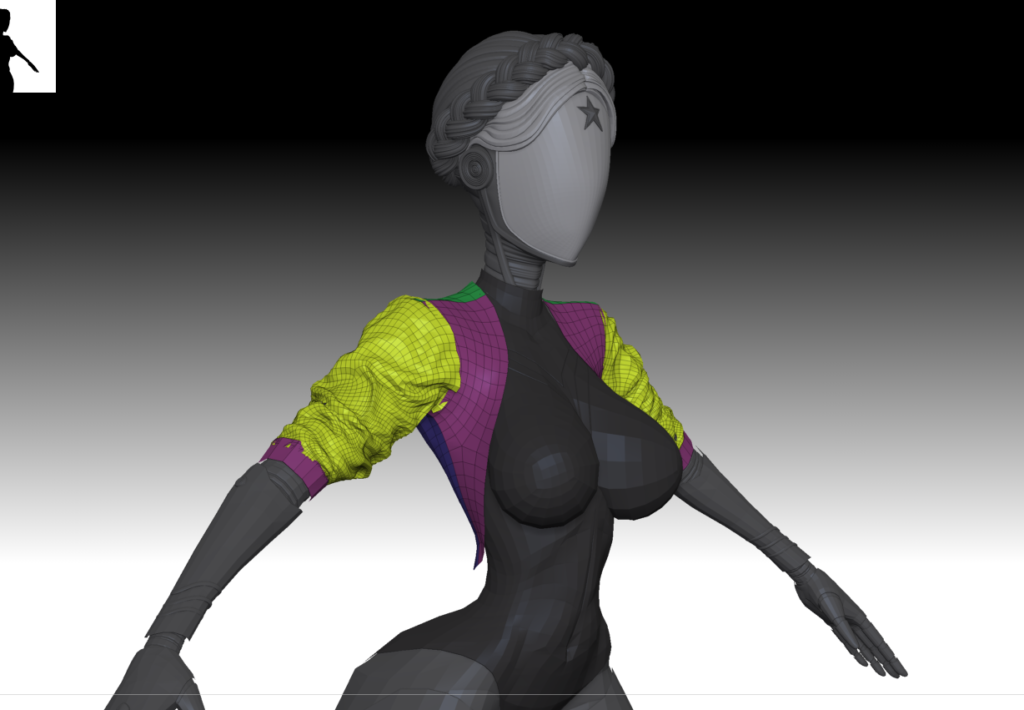
When everything is ready and the mesh is in the state we need, we spread the polygroups into body parts, this will be useful to us in the future to make clothes, and so that it already comes out in the same mesh as our main figure.
Some people will say – “Why do you bother so much, you are not making a game ready model, why lowpoly, do a sculpt and that’s it!”, maybe these people will be right, but I feel comfortable when the mesh is relatively adequate, and in the future, it’s easier from it” pull out” all the elements we need.
So, the mesh is ready, the polygroups are ready, then we work with the move and move topology brushes to give the figure the characteristic proportions from the references, and since we have everything in polygroups, it is very convenient to select the desired part of the body and mask it with ctrl + left click, scale, move, etc.
Clothes
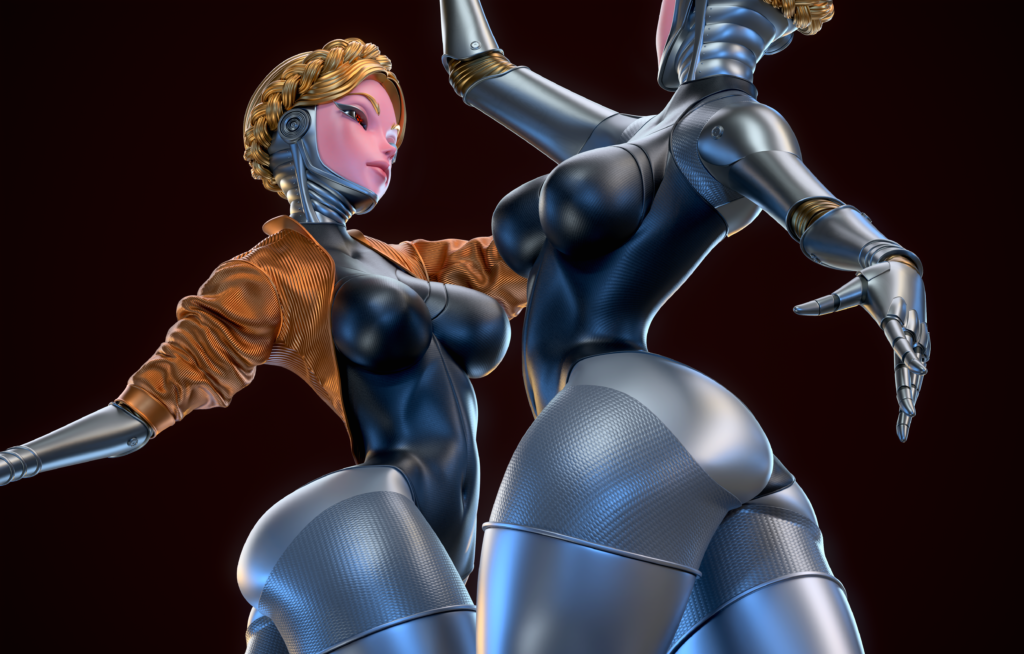
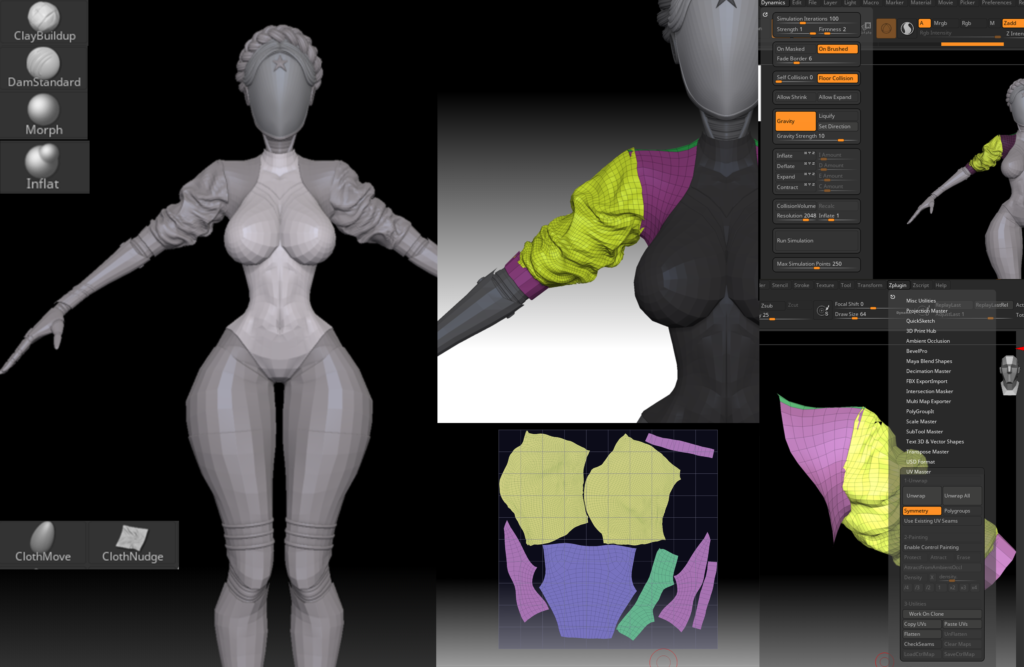
Already from the blank prepared by us, through subtool duplication and selection of the groups of polygons we need, we draw out a jacket, a swimsuit, work on metal parts such as shoulder pads, etc., all this is already in low poly and sits in places, which is very handy.
We divide the jacket into polygroups at the seams and apply Zremesher, we will need this for UV, and further texturing in the marmoset toolbag. Next, we add folds through the dynamics tab and adjust the expand \ inflate \ deflate parameters, it is also necessary to remove gravity to a minimum.
Next, work with the clothmove\clothnudge brushes and the same Zmodeller to change the mesh a little if necessary and work with the same move and move topology brushes.
In order to work in this way, it is naturally necessary to test all the functionality of Zmodeller and generate folds of clothes in ZBrush, of course, this could be done in marvelous designer or draw folds manually with standard brushes, but it seemed to me that ZBrush dynamics would be enough for my purpose.
We unwrap the jacket by polygroups in order to set the correct direction of the texture stripes.
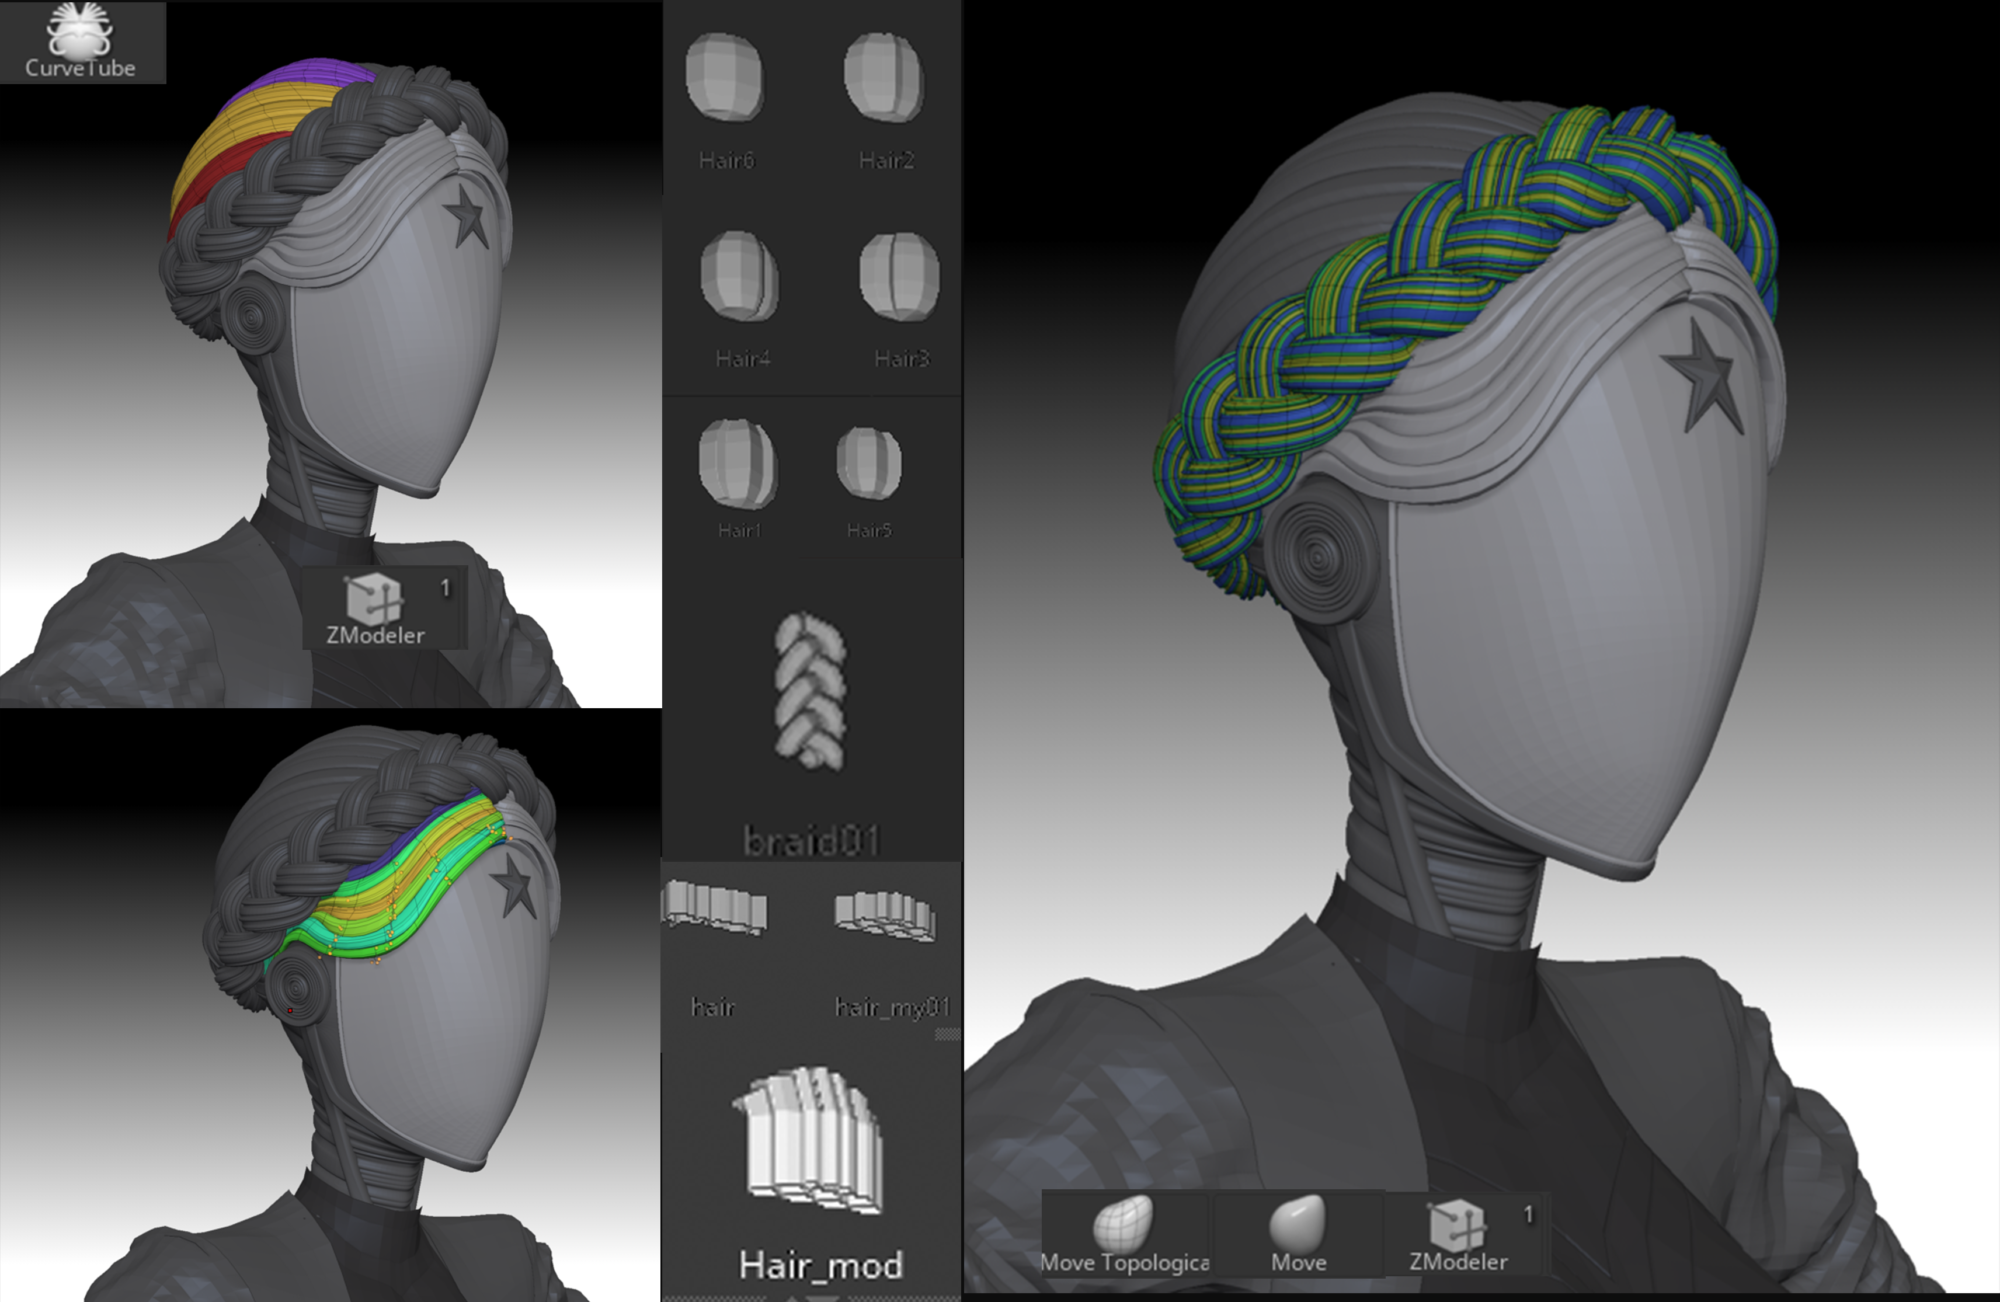
Hair
The clothes are ready, then we make a mask and a star. It’s hair’s turn. We make the main mop of hair through the curve tube brush, give it the appropriate shape, and remove the caps from the top and bottom of the resulting curve so that there are voids at the ends (this is how to remove the caps-circles from the cylinder and leave the pipe).
Next, we reduce the polygons in order to get a smooth geometry on the sub-divs without dents and bumps due to further deformation, and it will most likely always be, so it’s better to have fewer polygons than more.
We select the loops we need in polygroups and pull them out into separate subtools, these will be our auxiliary curls, and so on until they match the concept.
Part of the hair, of course, is best done through special hair brushes. Let’s get to the braid. To do this, we need the curl brush, which can be found in the public domain, in the same way, we remove caps and reduce polygonation, then select crease using Zmodeller with the edge loops button active.
We go to the curves tab and look for curved functions and click creased edges and frame mesh, ZBrush will draw curves for us by crises, then we break the resulting curls into polygroups.
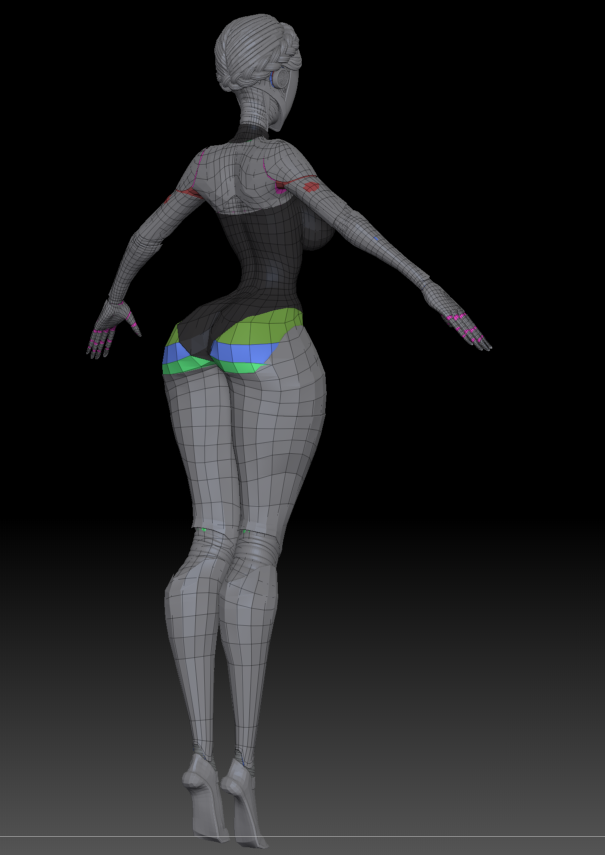
Posing
So, in general, we have already got a character in A / T-pose, it remains a mere smallness to put him in a pose. But in fact, it is quite difficult and requires some observation and reference to references, surprise, isn’t it?
I focused on these, and a whole bunch of poses, because on the original references I was not entirely satisfied with the expressiveness of the pose, I had to reach it.
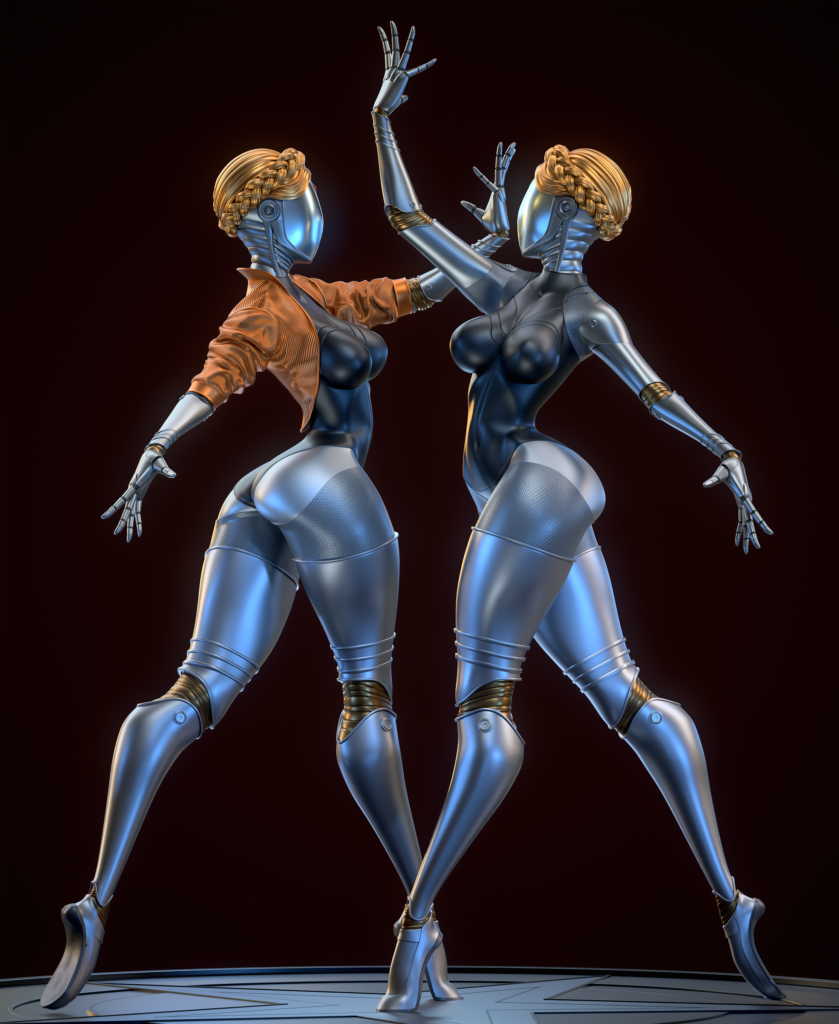
By the way, in reference to ballerinas, the dynamics and character are very clearly visible. We choose a pose in the context of contrapposto, it simply perfectly conveys the character of our ballerinas.
The idea was to show them dancing in motion, how they interact, to capture emotions, provided that they are robots, but movements can show this just as well as faces.
And this, of course, turned out to be much more complex than making one static figure, but it was much more interesting, many poses were rejected and I stopped at the next one.
We pose using the TPoseMaster plugin built into ZBrush. We mask the necessary parts of the body and put them in a pose, both the standard brush gizmo and the ruler help us with this.
I’m attaching an example of an initial draft/draft pose and working on it further.
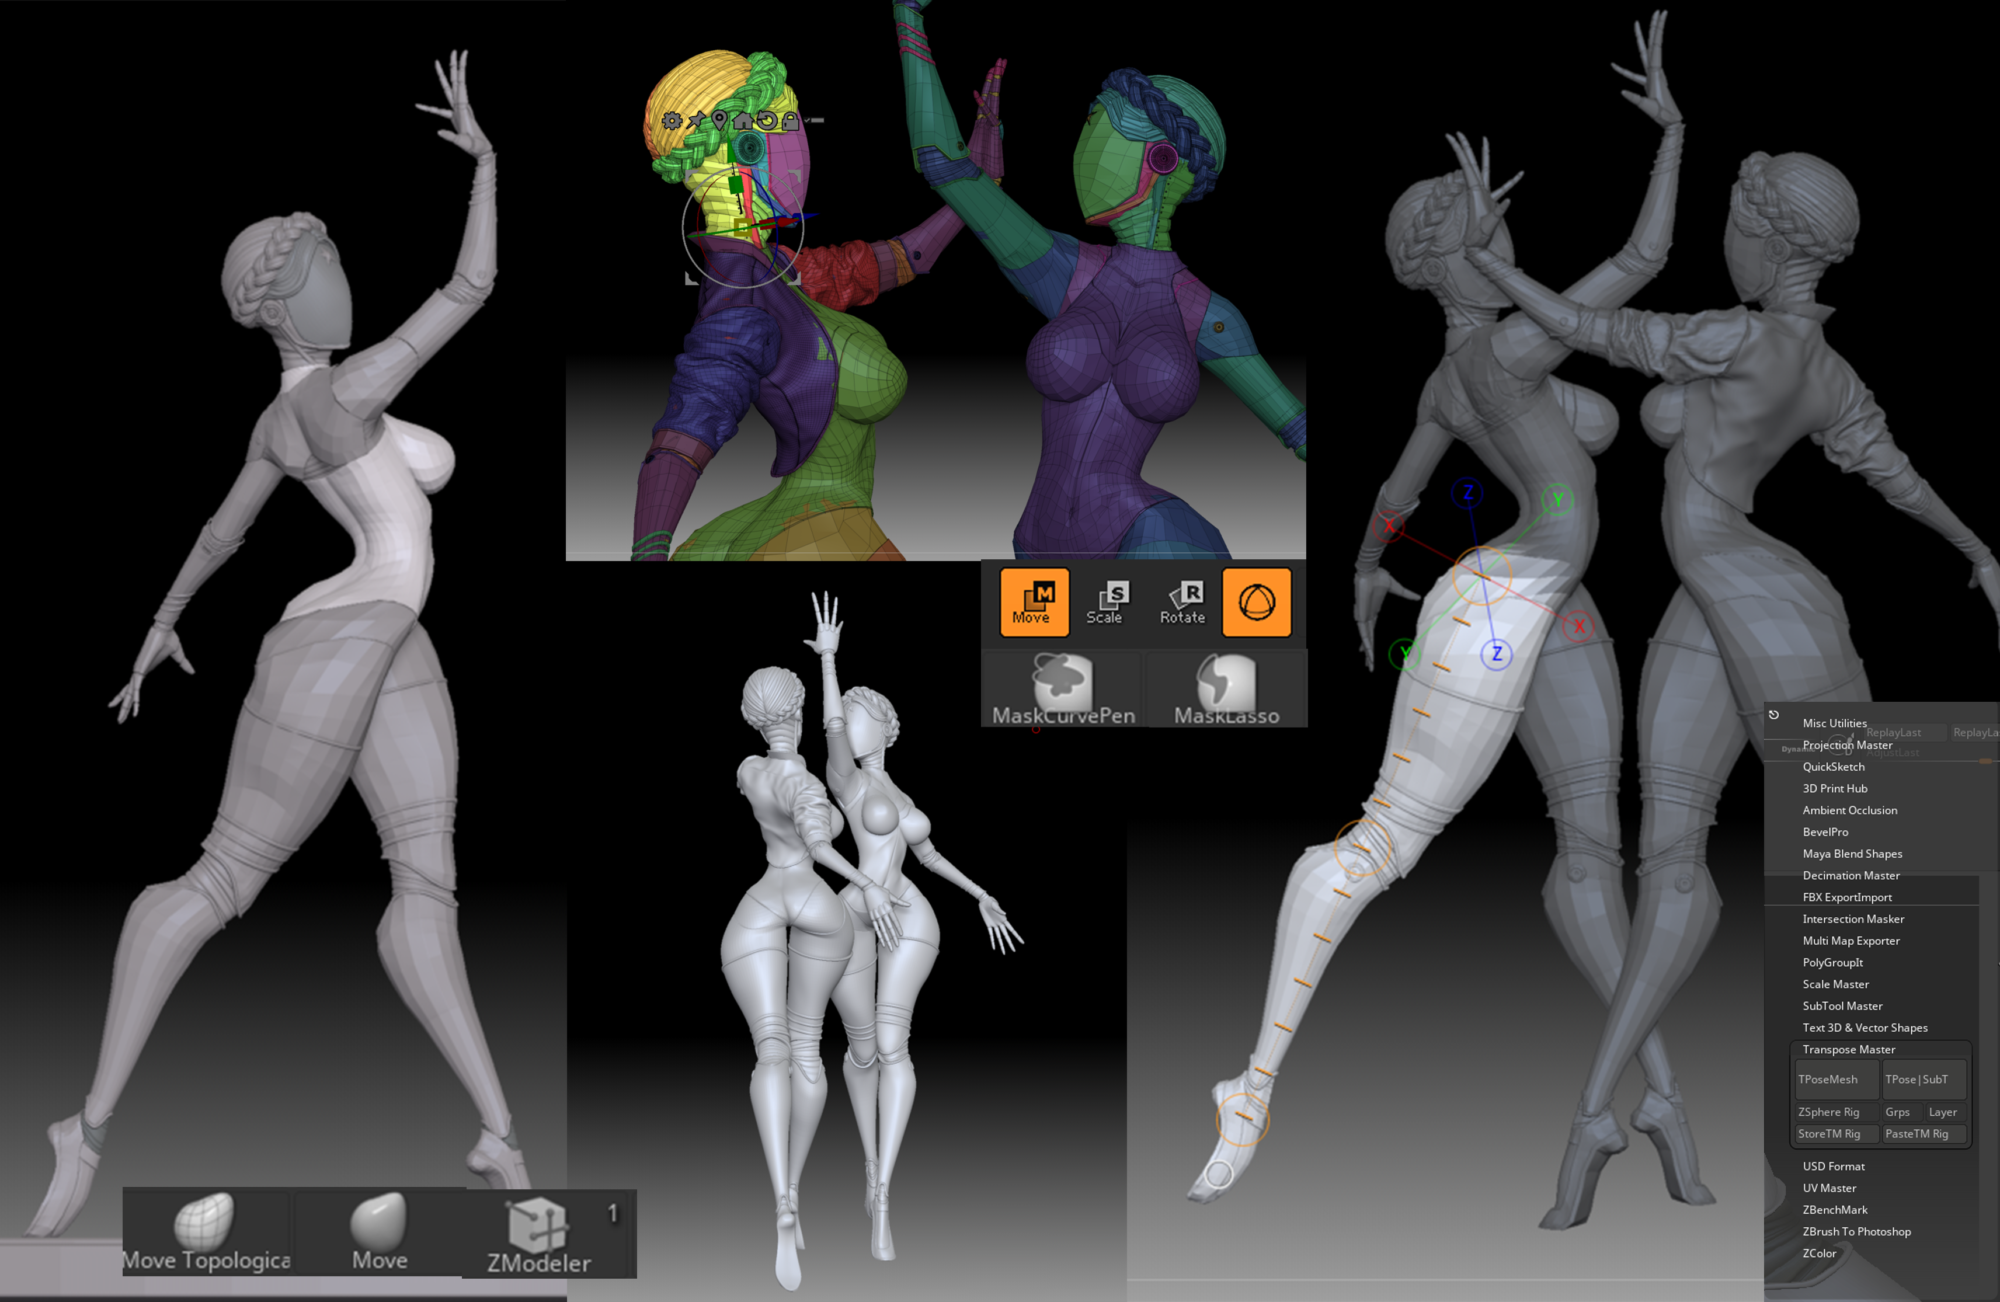
This is how the rendering of posture adjustments looks like for me, it would be great to call a person from the side to check the anatomical jambs and who can, with a fresh look, suggest some nuances.
I’m writing this because feedback from a knowledgeable person is really very important, and if you have someone who can help you with this, even if he hits you hard with a skating rink, it’s still very useful, cry-cry.
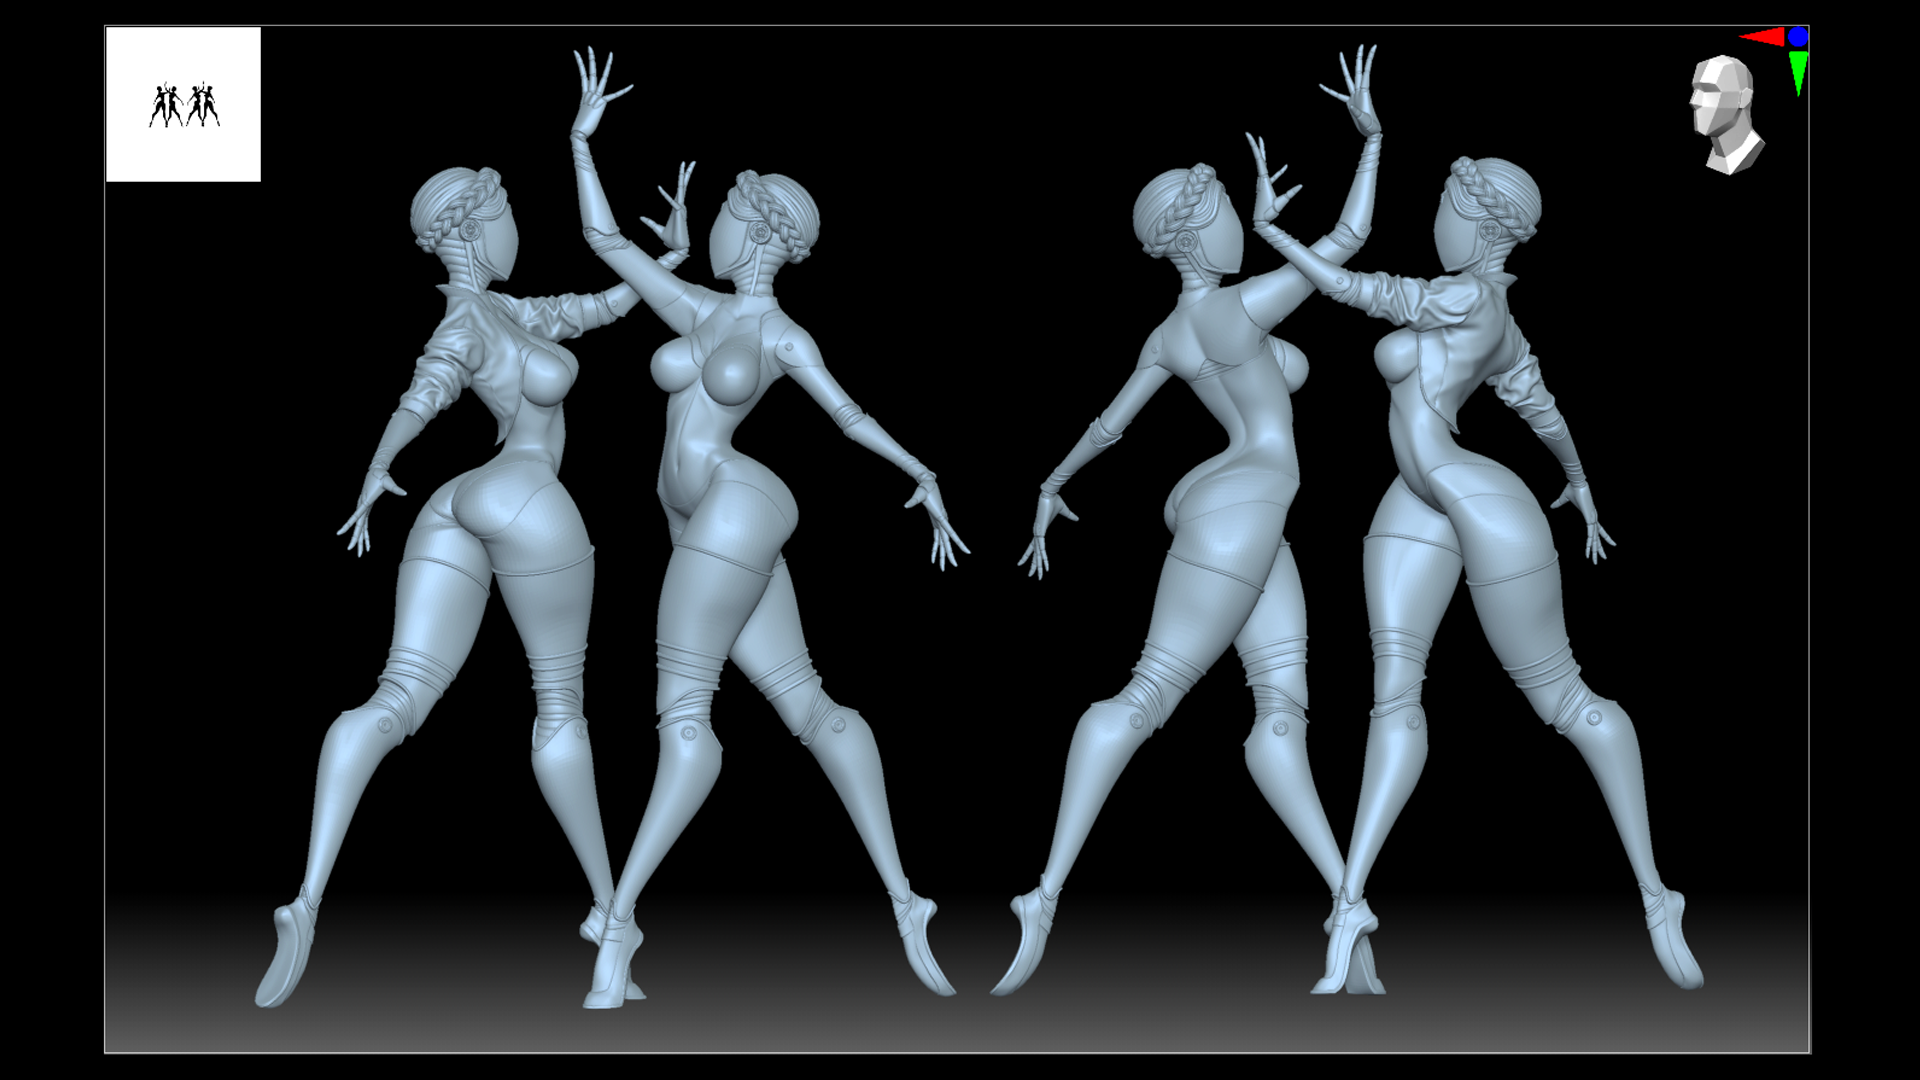
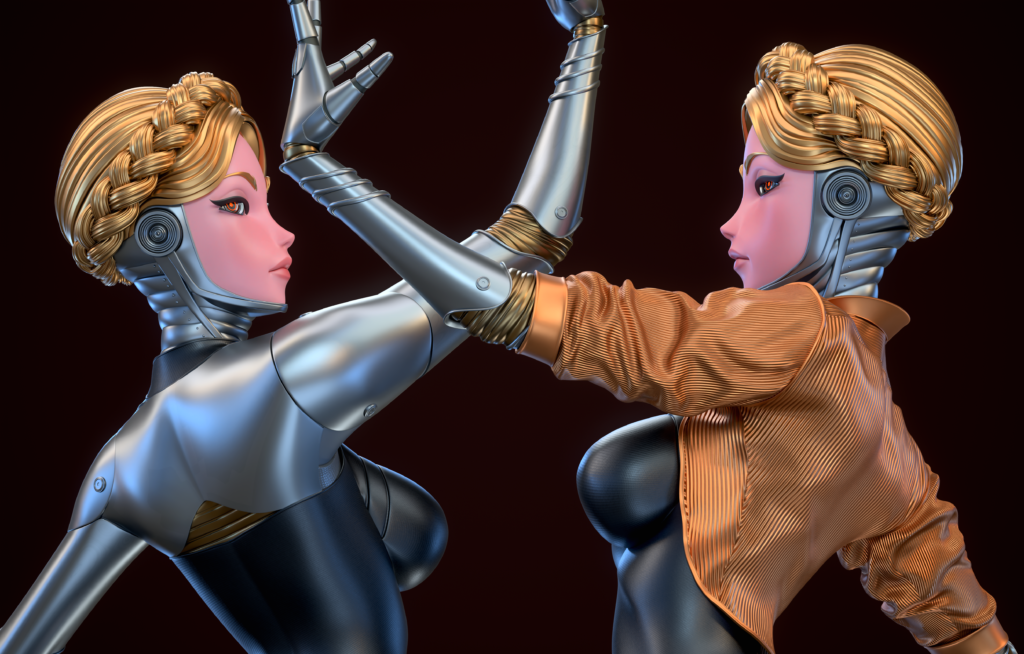
So, after some time, the pose that I conceived emerges, here we already add emotions to the character, a slight arch of the fingers, elongated toes, and a slight turn of the head, do not forget to look at the references!
Rendering
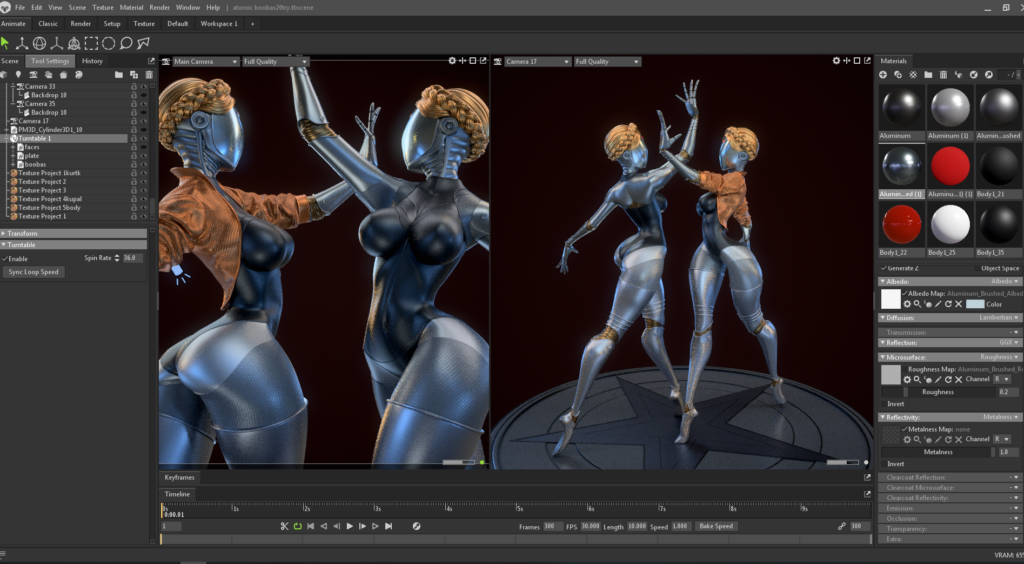
The model is ready, the pose is set and it’s time to load it into the marmoset (I work in marmoset4 with RTX), so the model is in lowpoly and the marmoset will not freak out from millions of polygons.
Regarding the material settings, you can load the UVs from Zbrush, for more flexible texture settings through the Marmoset itself and Photoshop, or simply use Vertex paint, with which Marmoset will load your polypaint from Zbrush without UV. I almost always use the first option, but in general, polypaint is often enough for stylized characters.
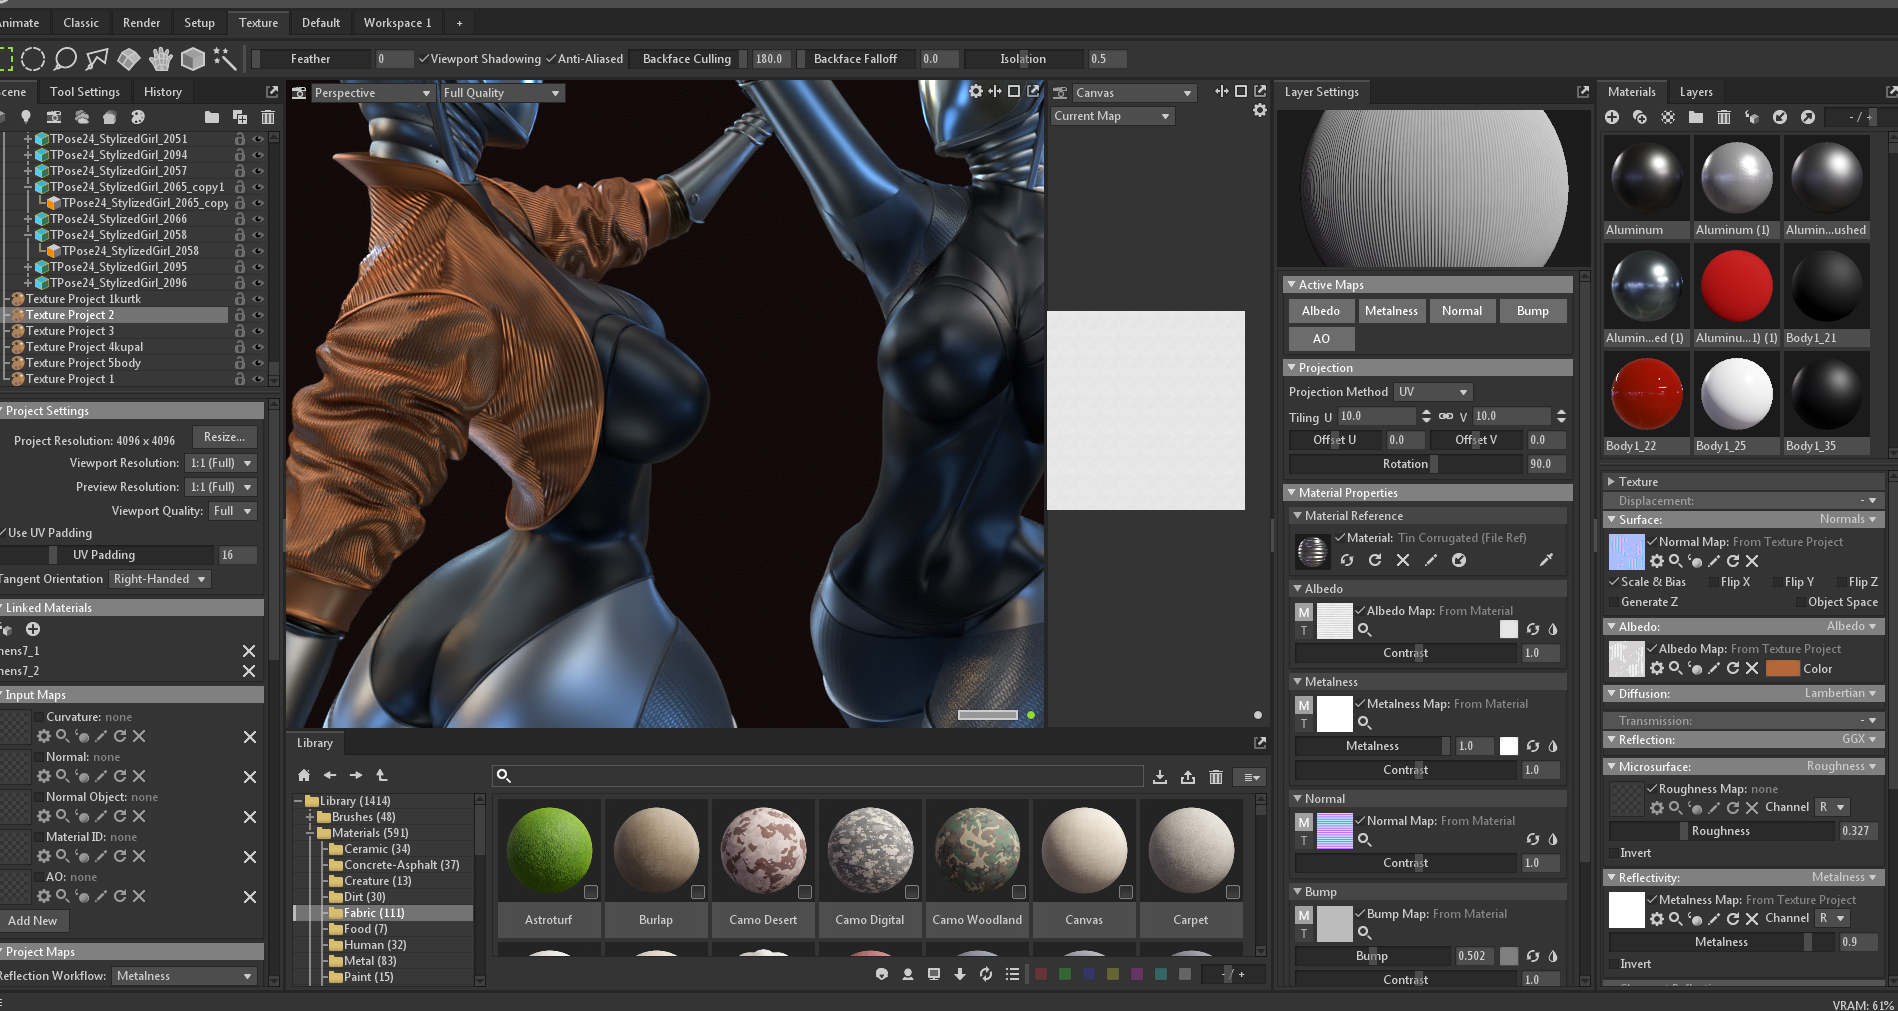
But in this case, we have unwrapped the jacket because we need a texture project in Marmoset.
I practically did not set up the materials here, except for the jacket and pieces of the body with a mesh.
We create a texture project on the jacket and connect our material to it, our UVs made in Zbrush will already be built in, and we use the built-in corrugated metal material in marmoset, for the most part we only need it for normal bump, well, or load a third-party normal map.
Lighting
Next, we arrange the light sources, I mainly use a skylight with an HDRI map, which can be rotated immediately for a better choice of light, additionally set the main light by adding a Spot with a wide angle of illumination, and a couple of backlights.
If you have a scene with basic warm lighting, then set cold sources of counter light, but if the scene is with a cold main light, then, on the contrary, warm ones.
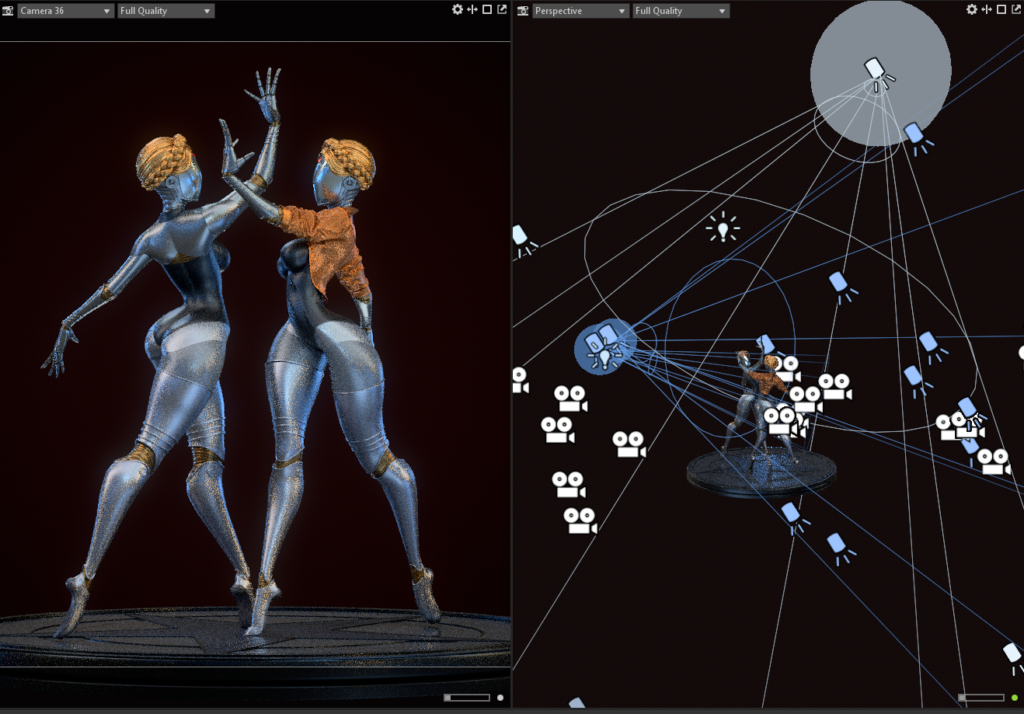
We finish by arranging a bunch of cameras and connecting the turntable to the main model for the turntable.
Conclusion
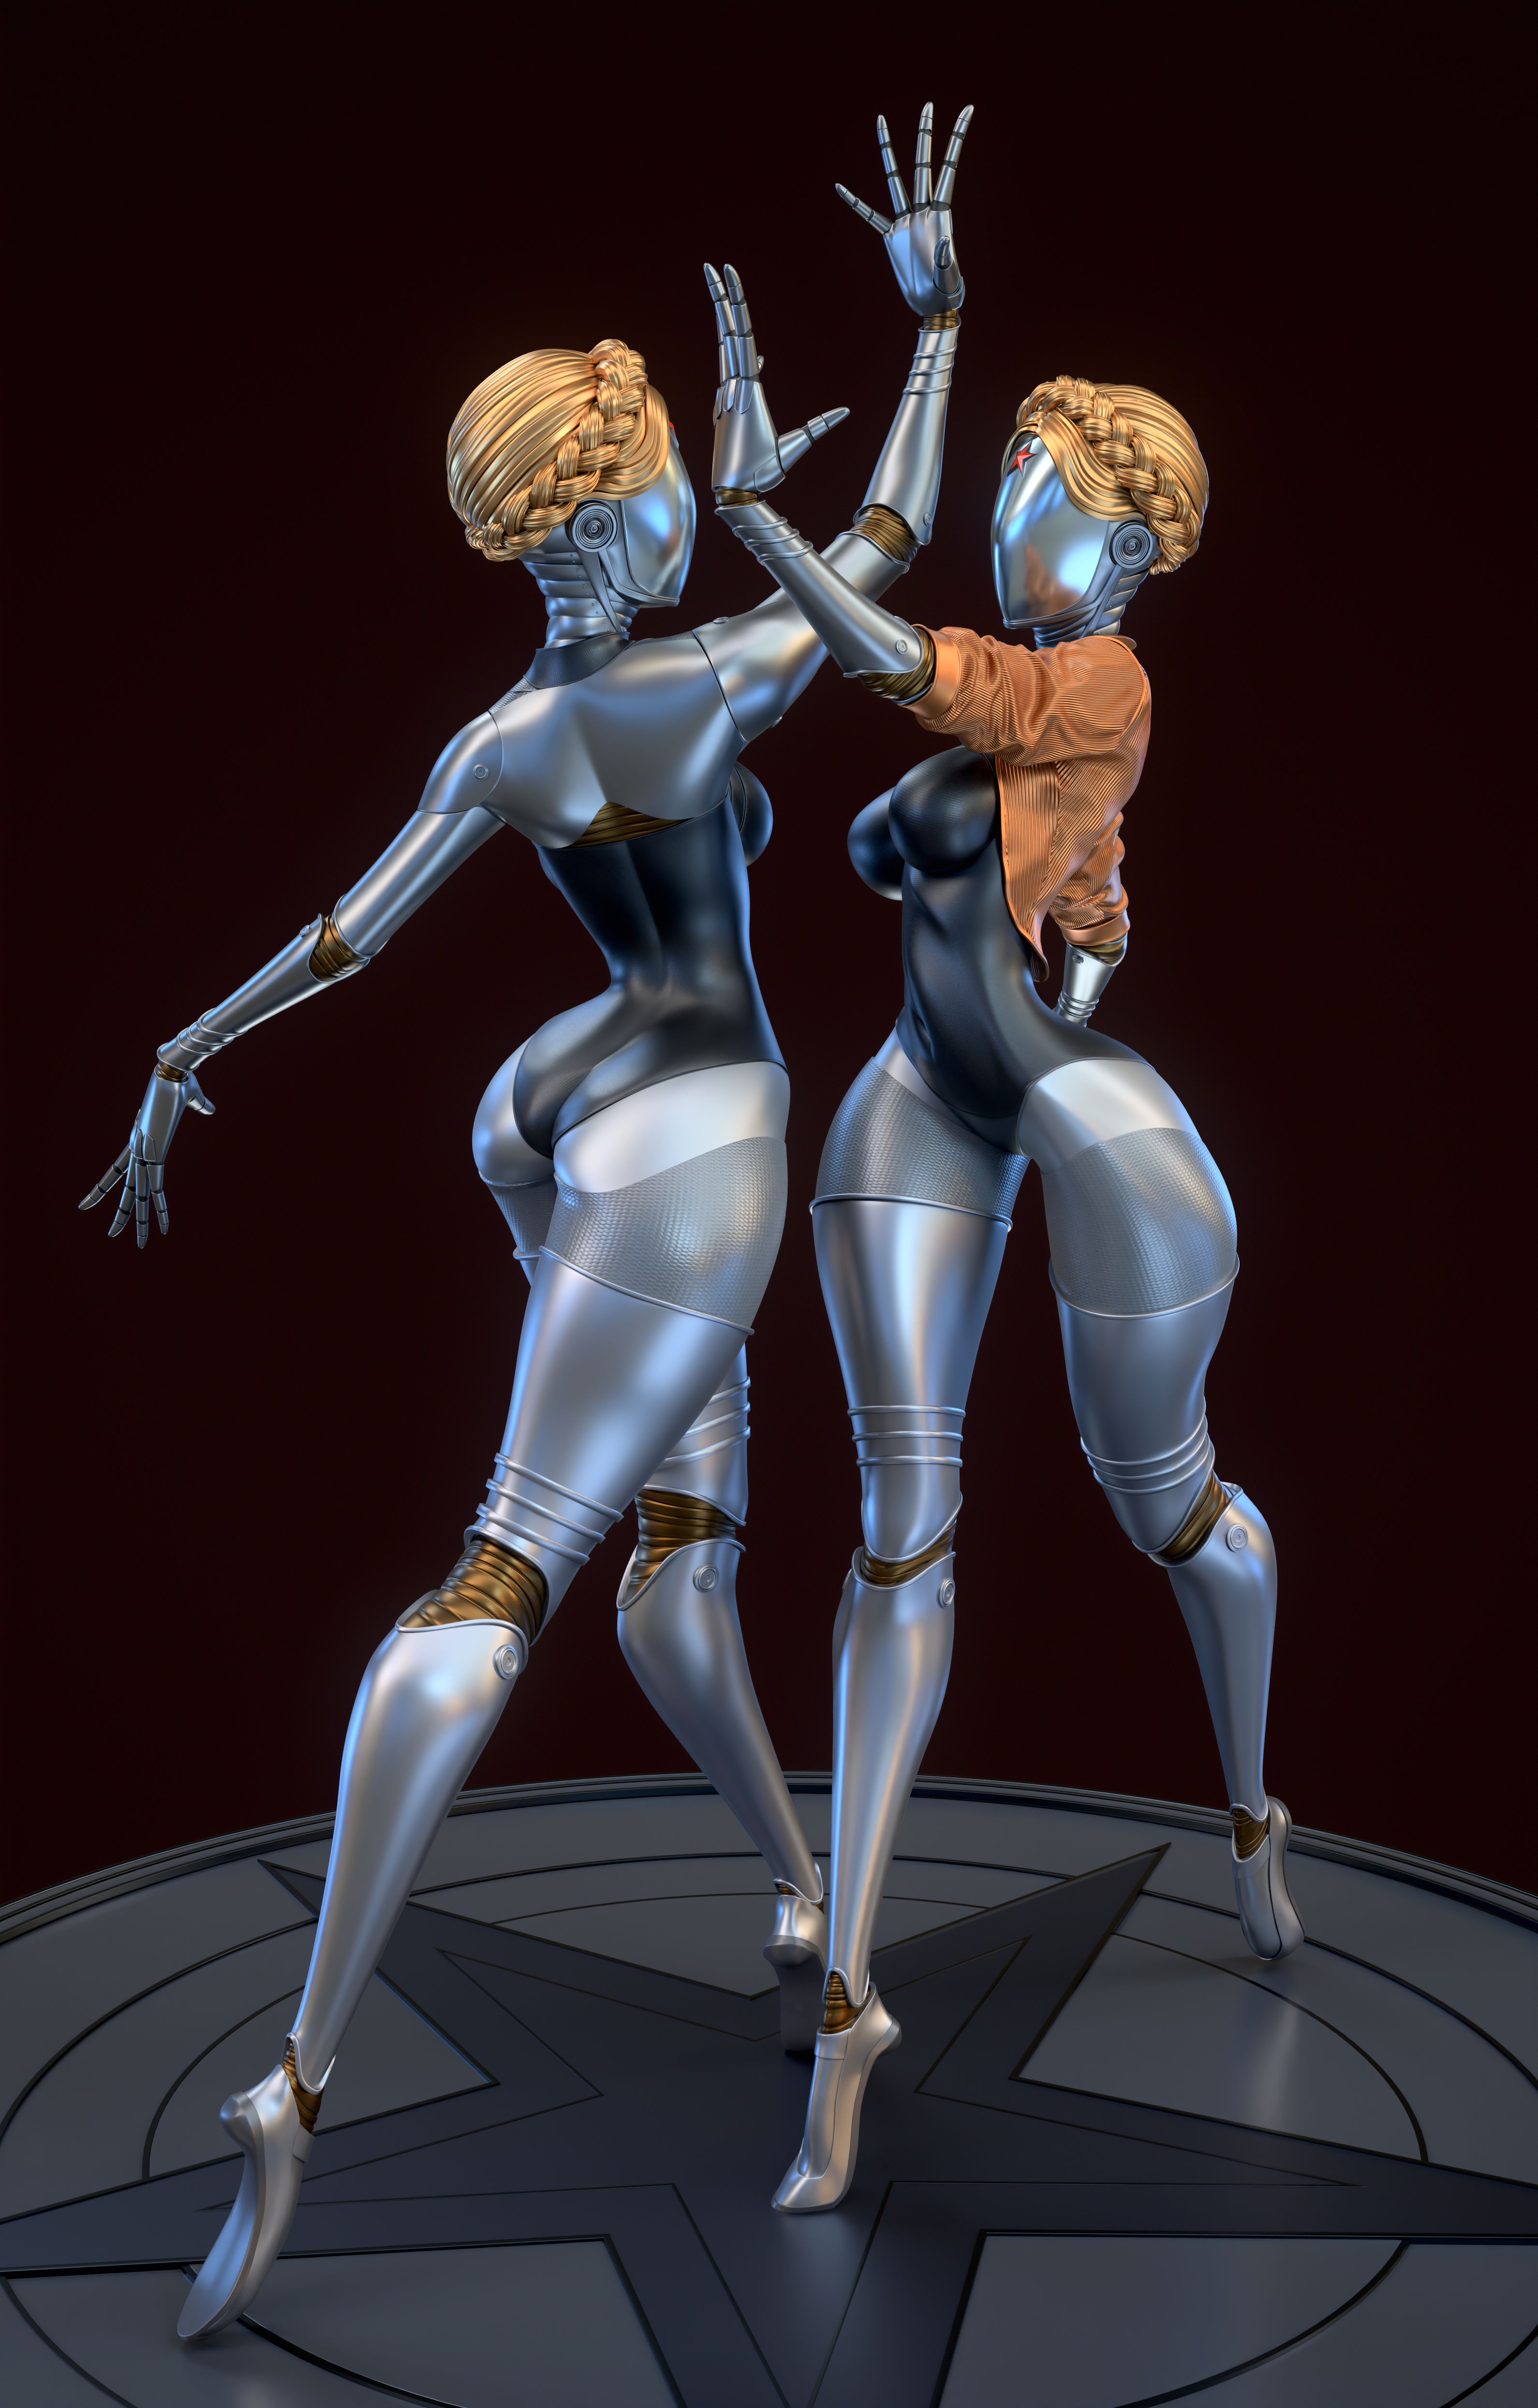
As a result, I got an interesting experience, because I did this work in a short enough time to catch the Atomic Heart hype train, and I think I still managed to jump into the last car… and I had a good time making a character I liked.
Here are links to the work itself:
Thanks to everyone who read to the end! I hope you enjoyed it.
Read more articles
You might also like these articles.