Ancient Temple

Goals & Plans
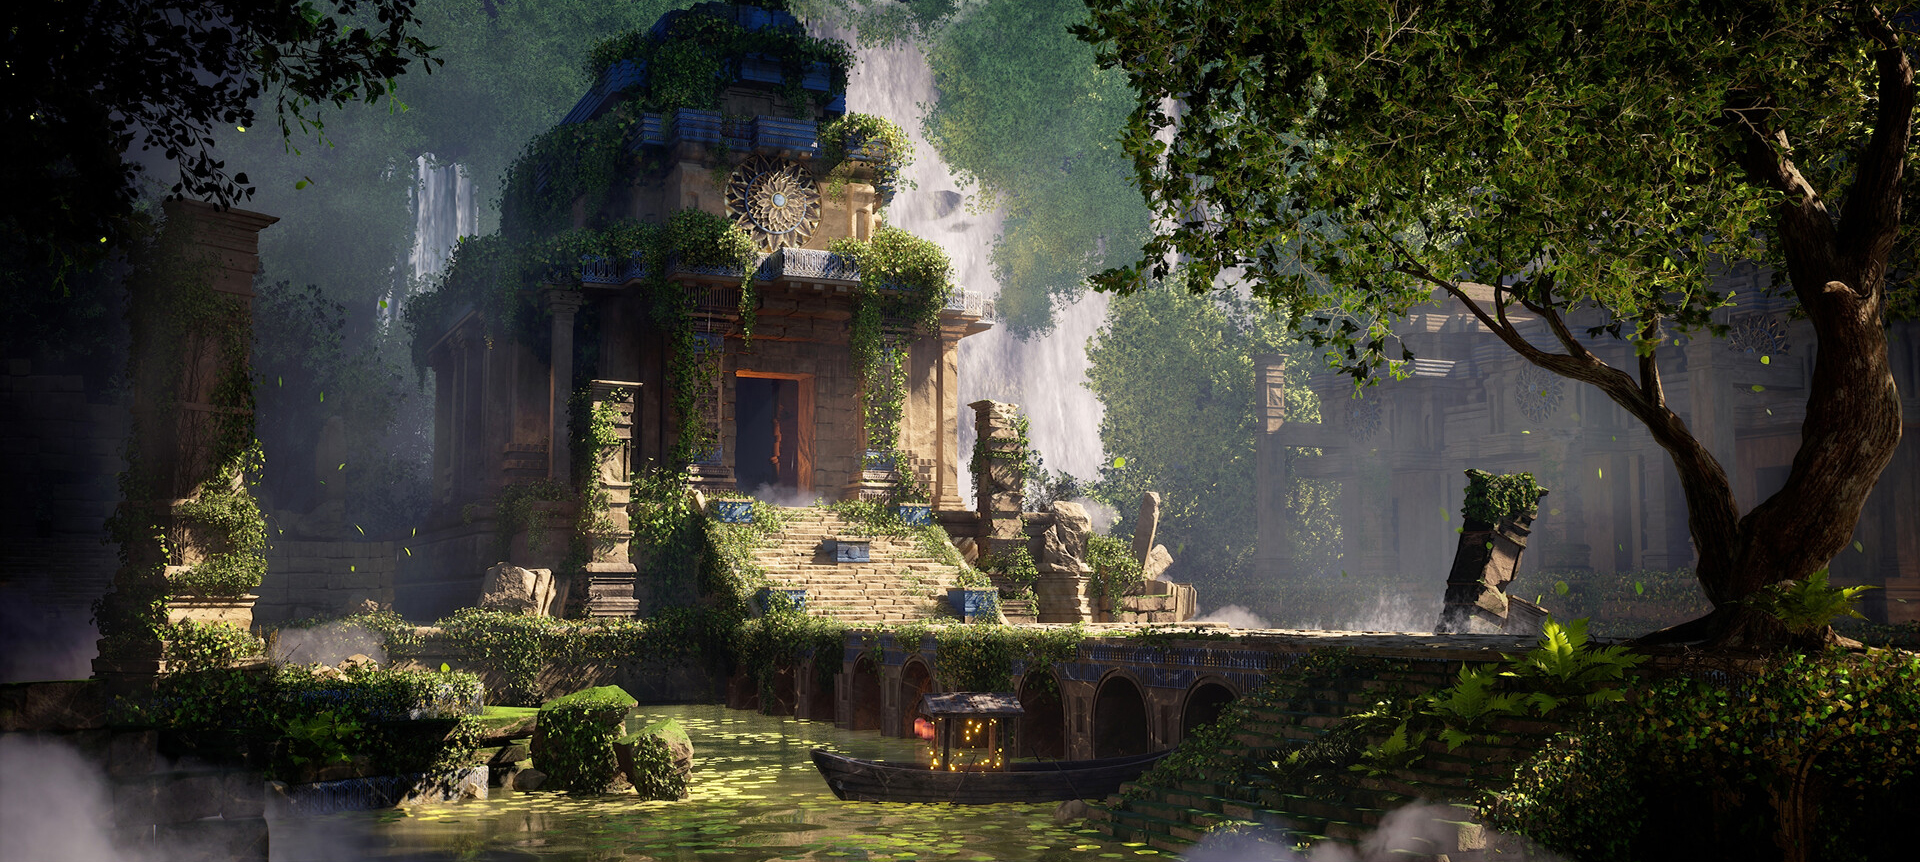
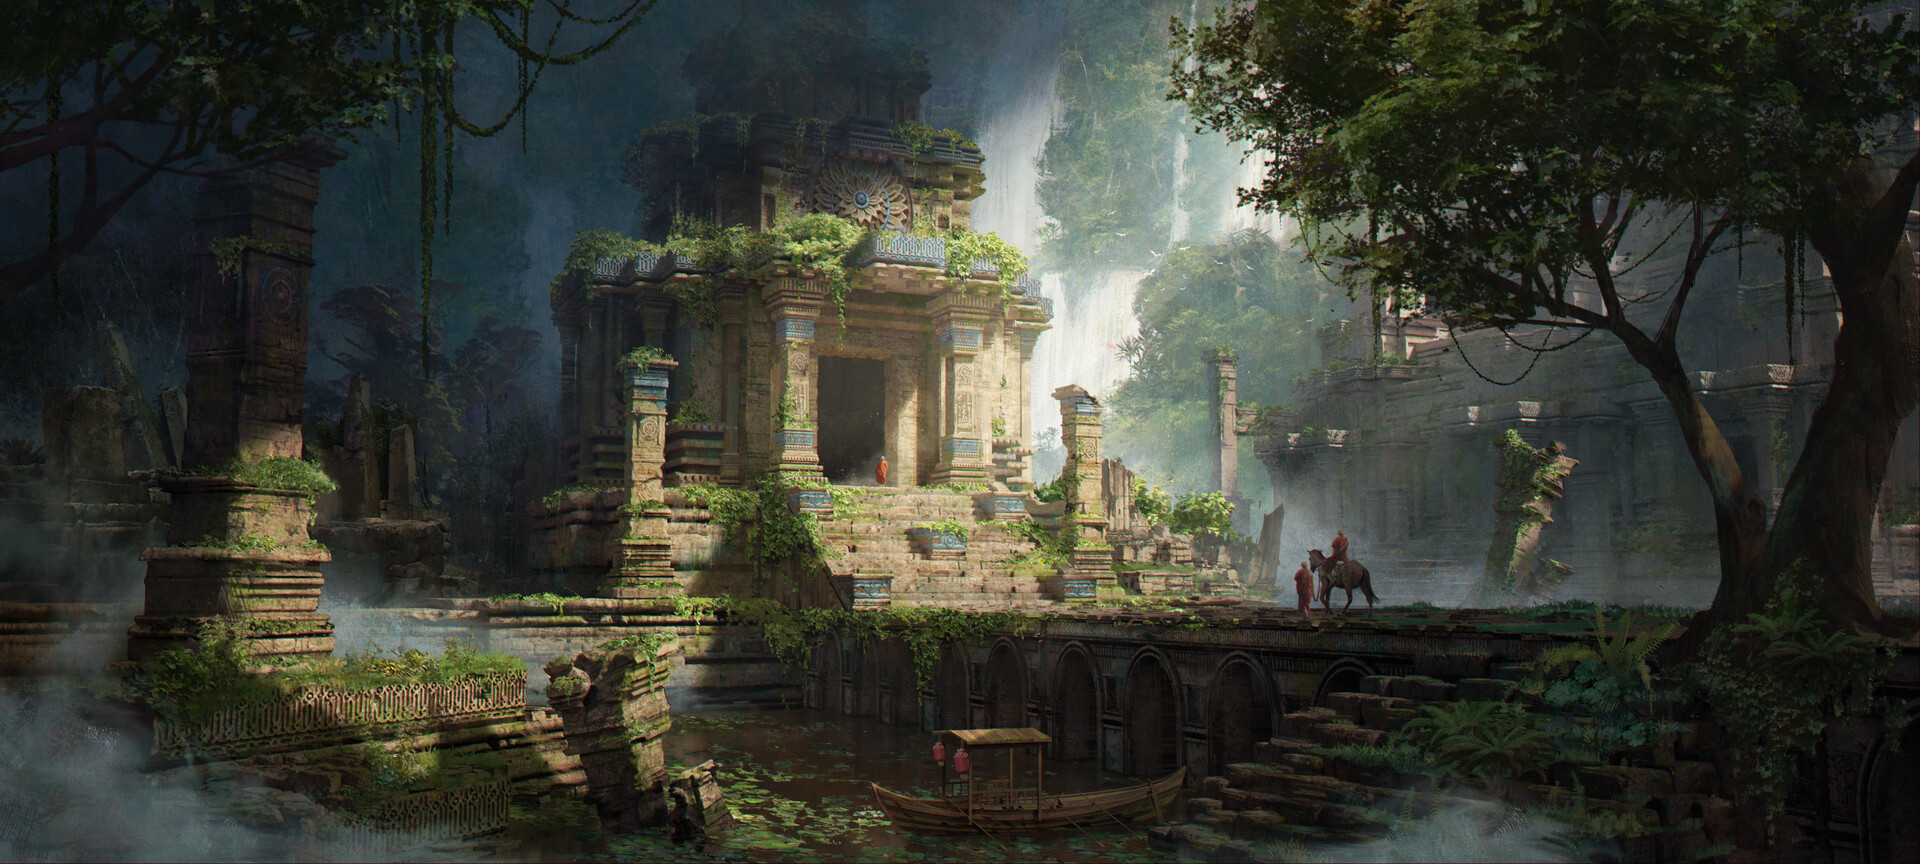
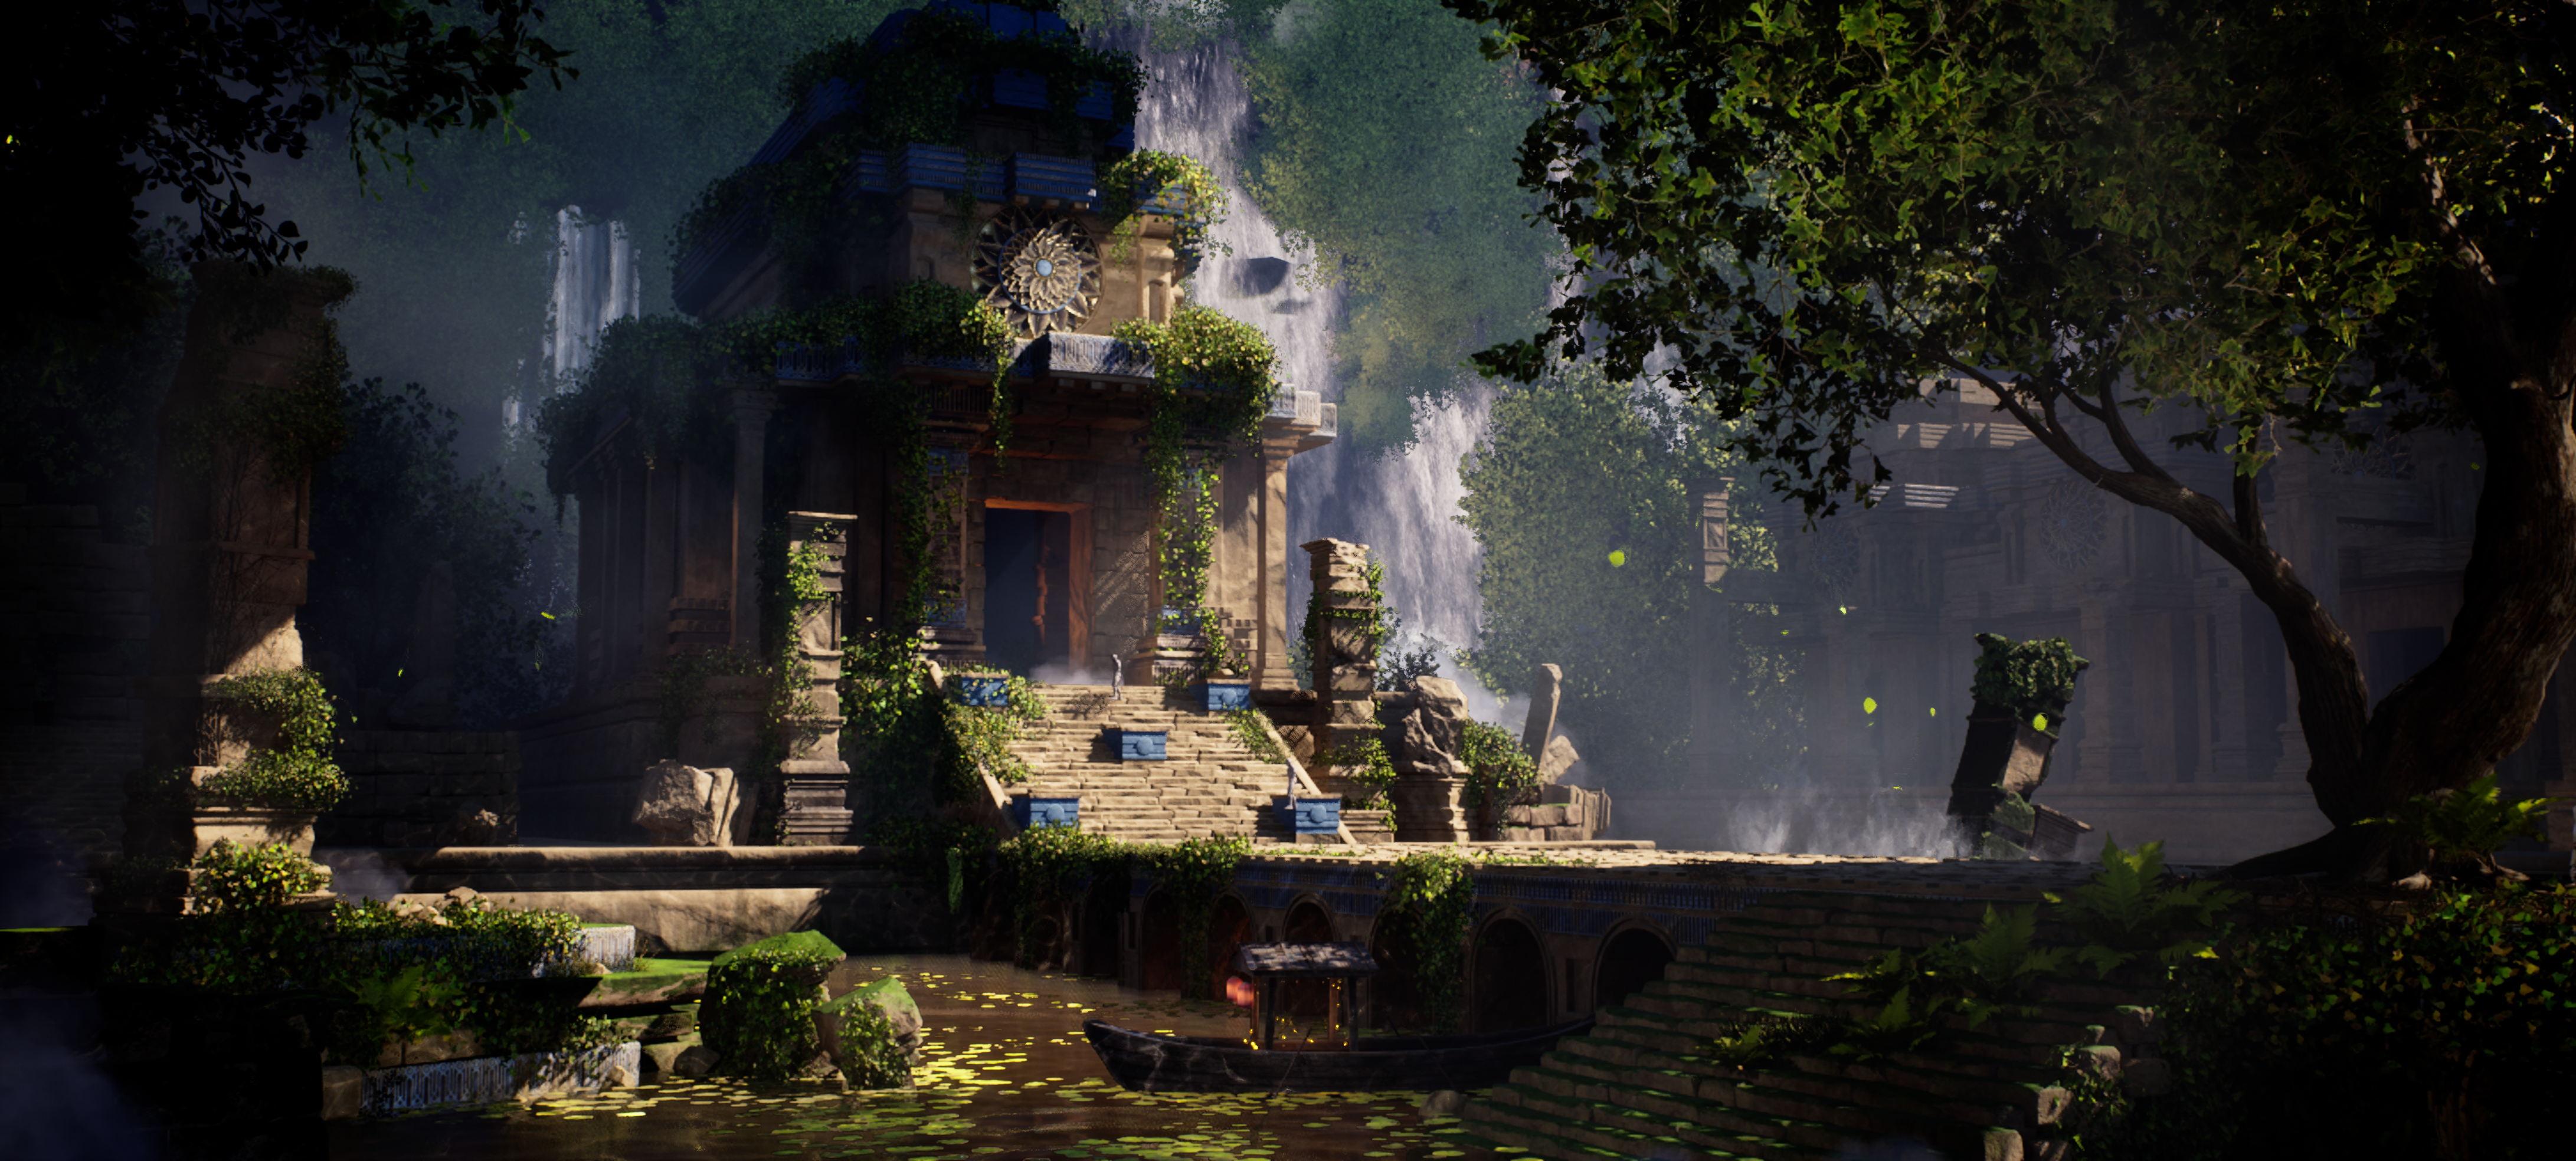
I chose The Ancient Temple concept by Shusei Sasaya since it will strengthen my knowledge in sculpting and give me an intro to foliage planning and creation. I planned to build it in Unreal Engine to experiment with Nanite and Lumen and test the strength and limitations of these new techs.
Software used:
- Unreal Engine 5
- Maya
- Zbrush
- Substance Painter
- Substance Designer
- Marmoset
- SpeedTree
- PureRef
- Adobe Illustrator
- Adobe Premiere
References and Inspiration:
After finding a concept, I started looking for more references for Mayan architecture, ruins, and foliage. Then, I researched the dimensions of Mayan architecture, including temples and columns. When I was done with the research, I wrote a paragraph story for the scene to help make this place suitable for a playable game. First, I had to write down the player’s path and experience, including gameplay and mechanics. This helped me in planning and building the scene. After that, I researched Mayan instruments and their uses for future reference.
As you can see in the PureRef file’s screenshot, I had many references to ruins, architecture, foliage, CG examples, and more. This does not just help in understanding the shape and form of what you are trying to build but also trains your eyes to achieve something believable and beautiful.
The CG examples I had are from scenes I think are incredible and for the level of quality, I want my scene to meet.
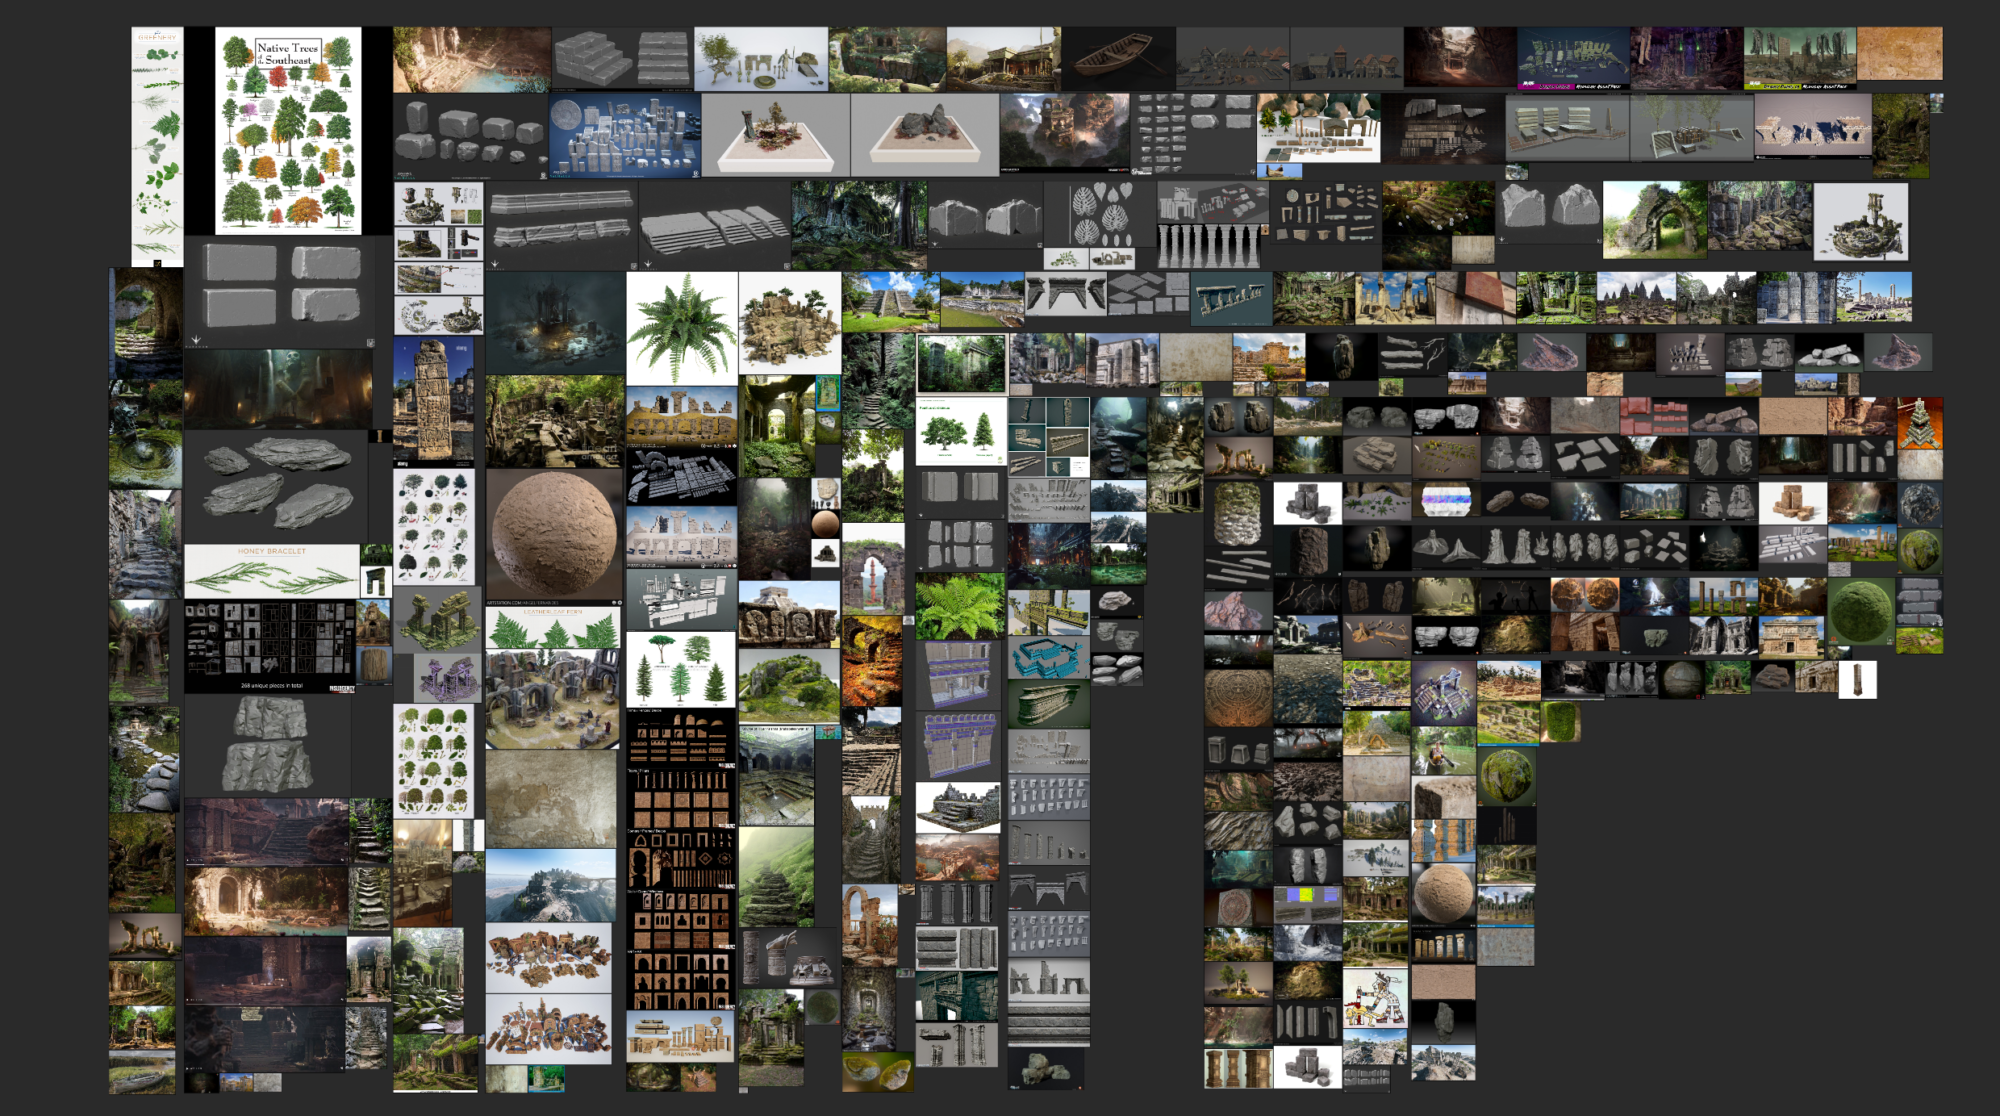
This is a crucial part of the process, especially for beginners, because it teaches us what is possible, pushes our work to better quality, and encourages us to learn and improve.
I also had foliage examples; they were not just foliage from the real world but also foliage from CG references. This helped me understand the limitations and helped me in trying to push the foliage’s quality further. It was my first time touching foliage, and it was an exciting yet challenging experience.
You can see in the image above that I also had sculpting references since I chose this scene to practice sculpting too. Looking at good sculpting references and understanding how the artists achieved excellent quality results in their sculpts is immensely helpful later in the process.
In addition, I had references for materials, trim sheets, and modular kits to look at how artists approached creating materials and modular kits and study them.
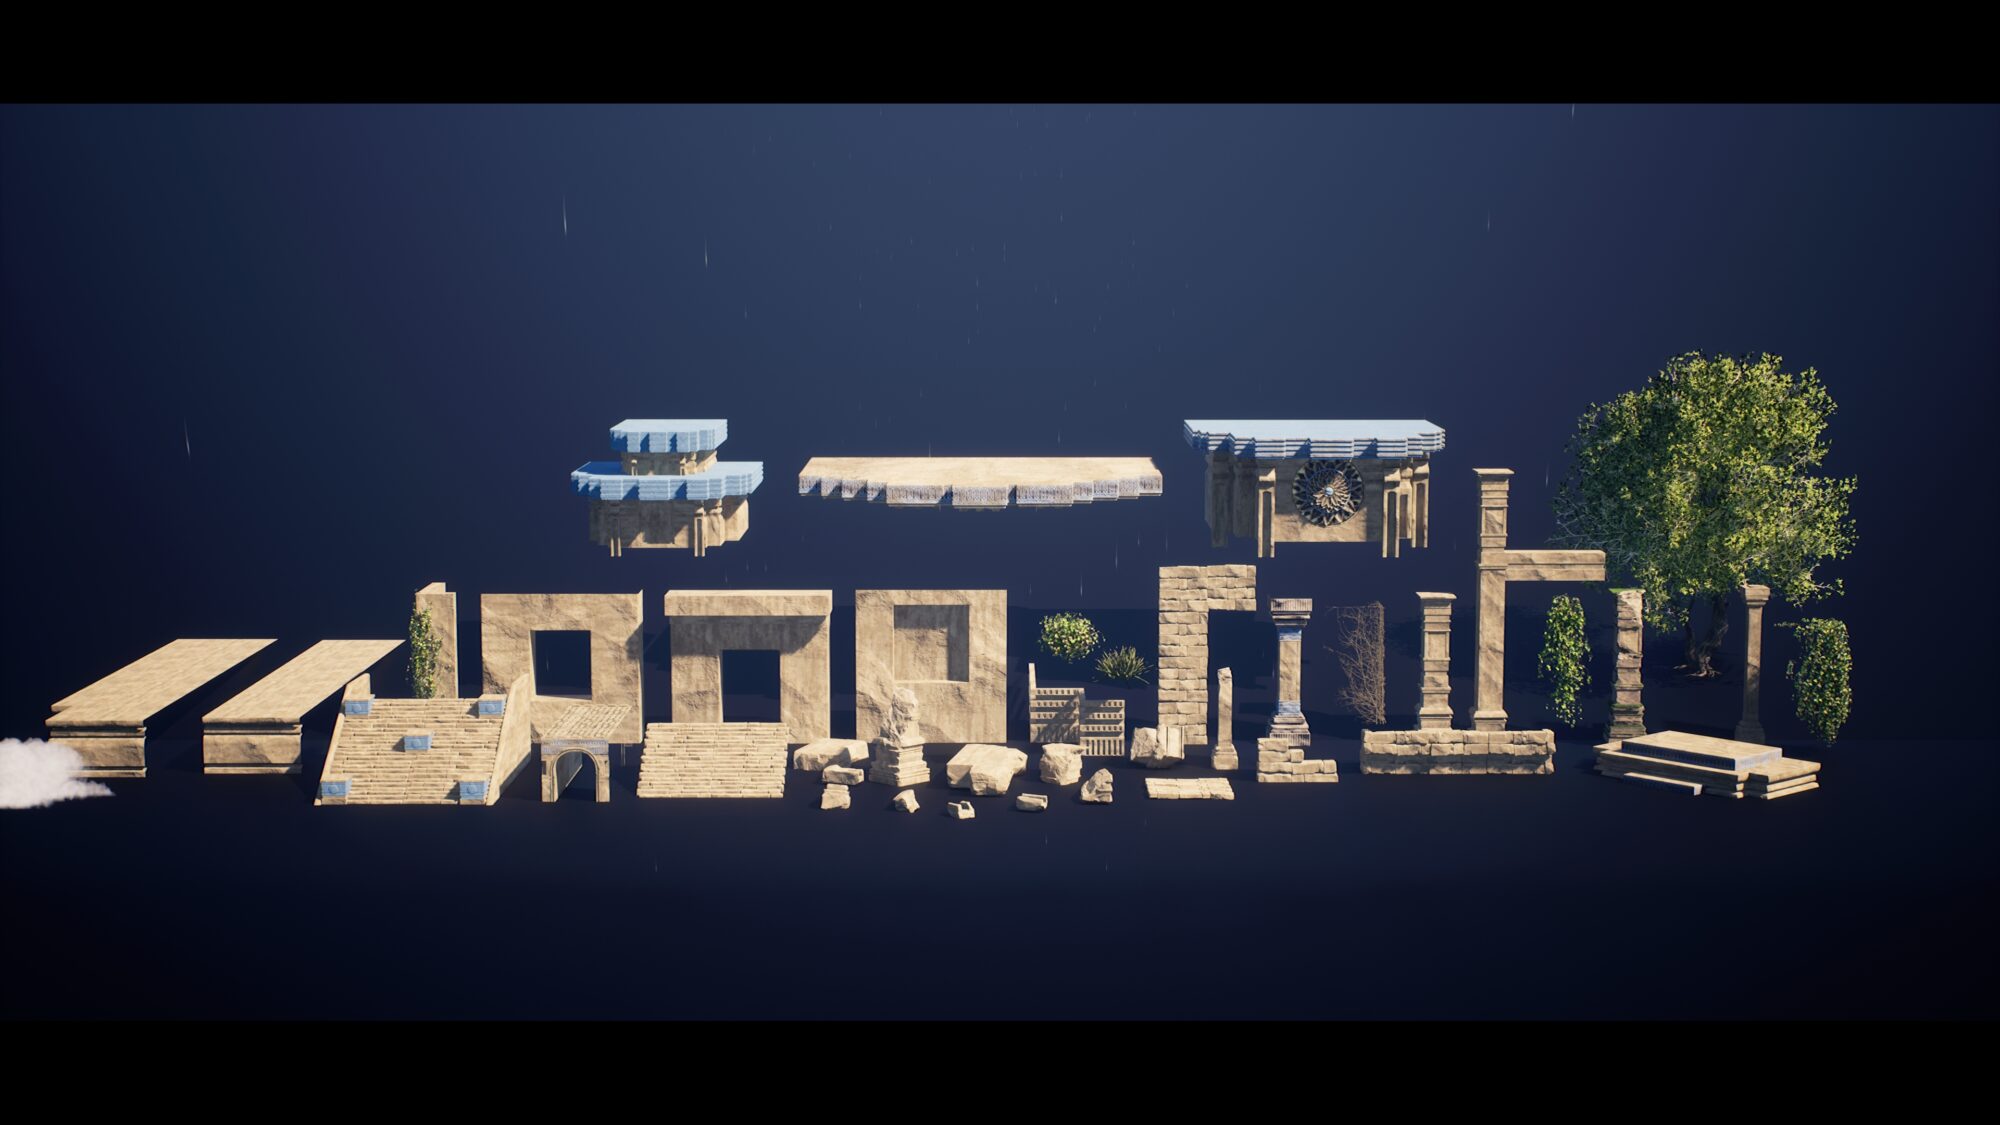
In the reference stages, I usually start planning the modular kit for my scene by bringing the concept and treating it like puzzle pieces. As you can see here, I started marking everything I thought was part of the modular kit, and from there, I started modeling those assets separately.

Modeling:
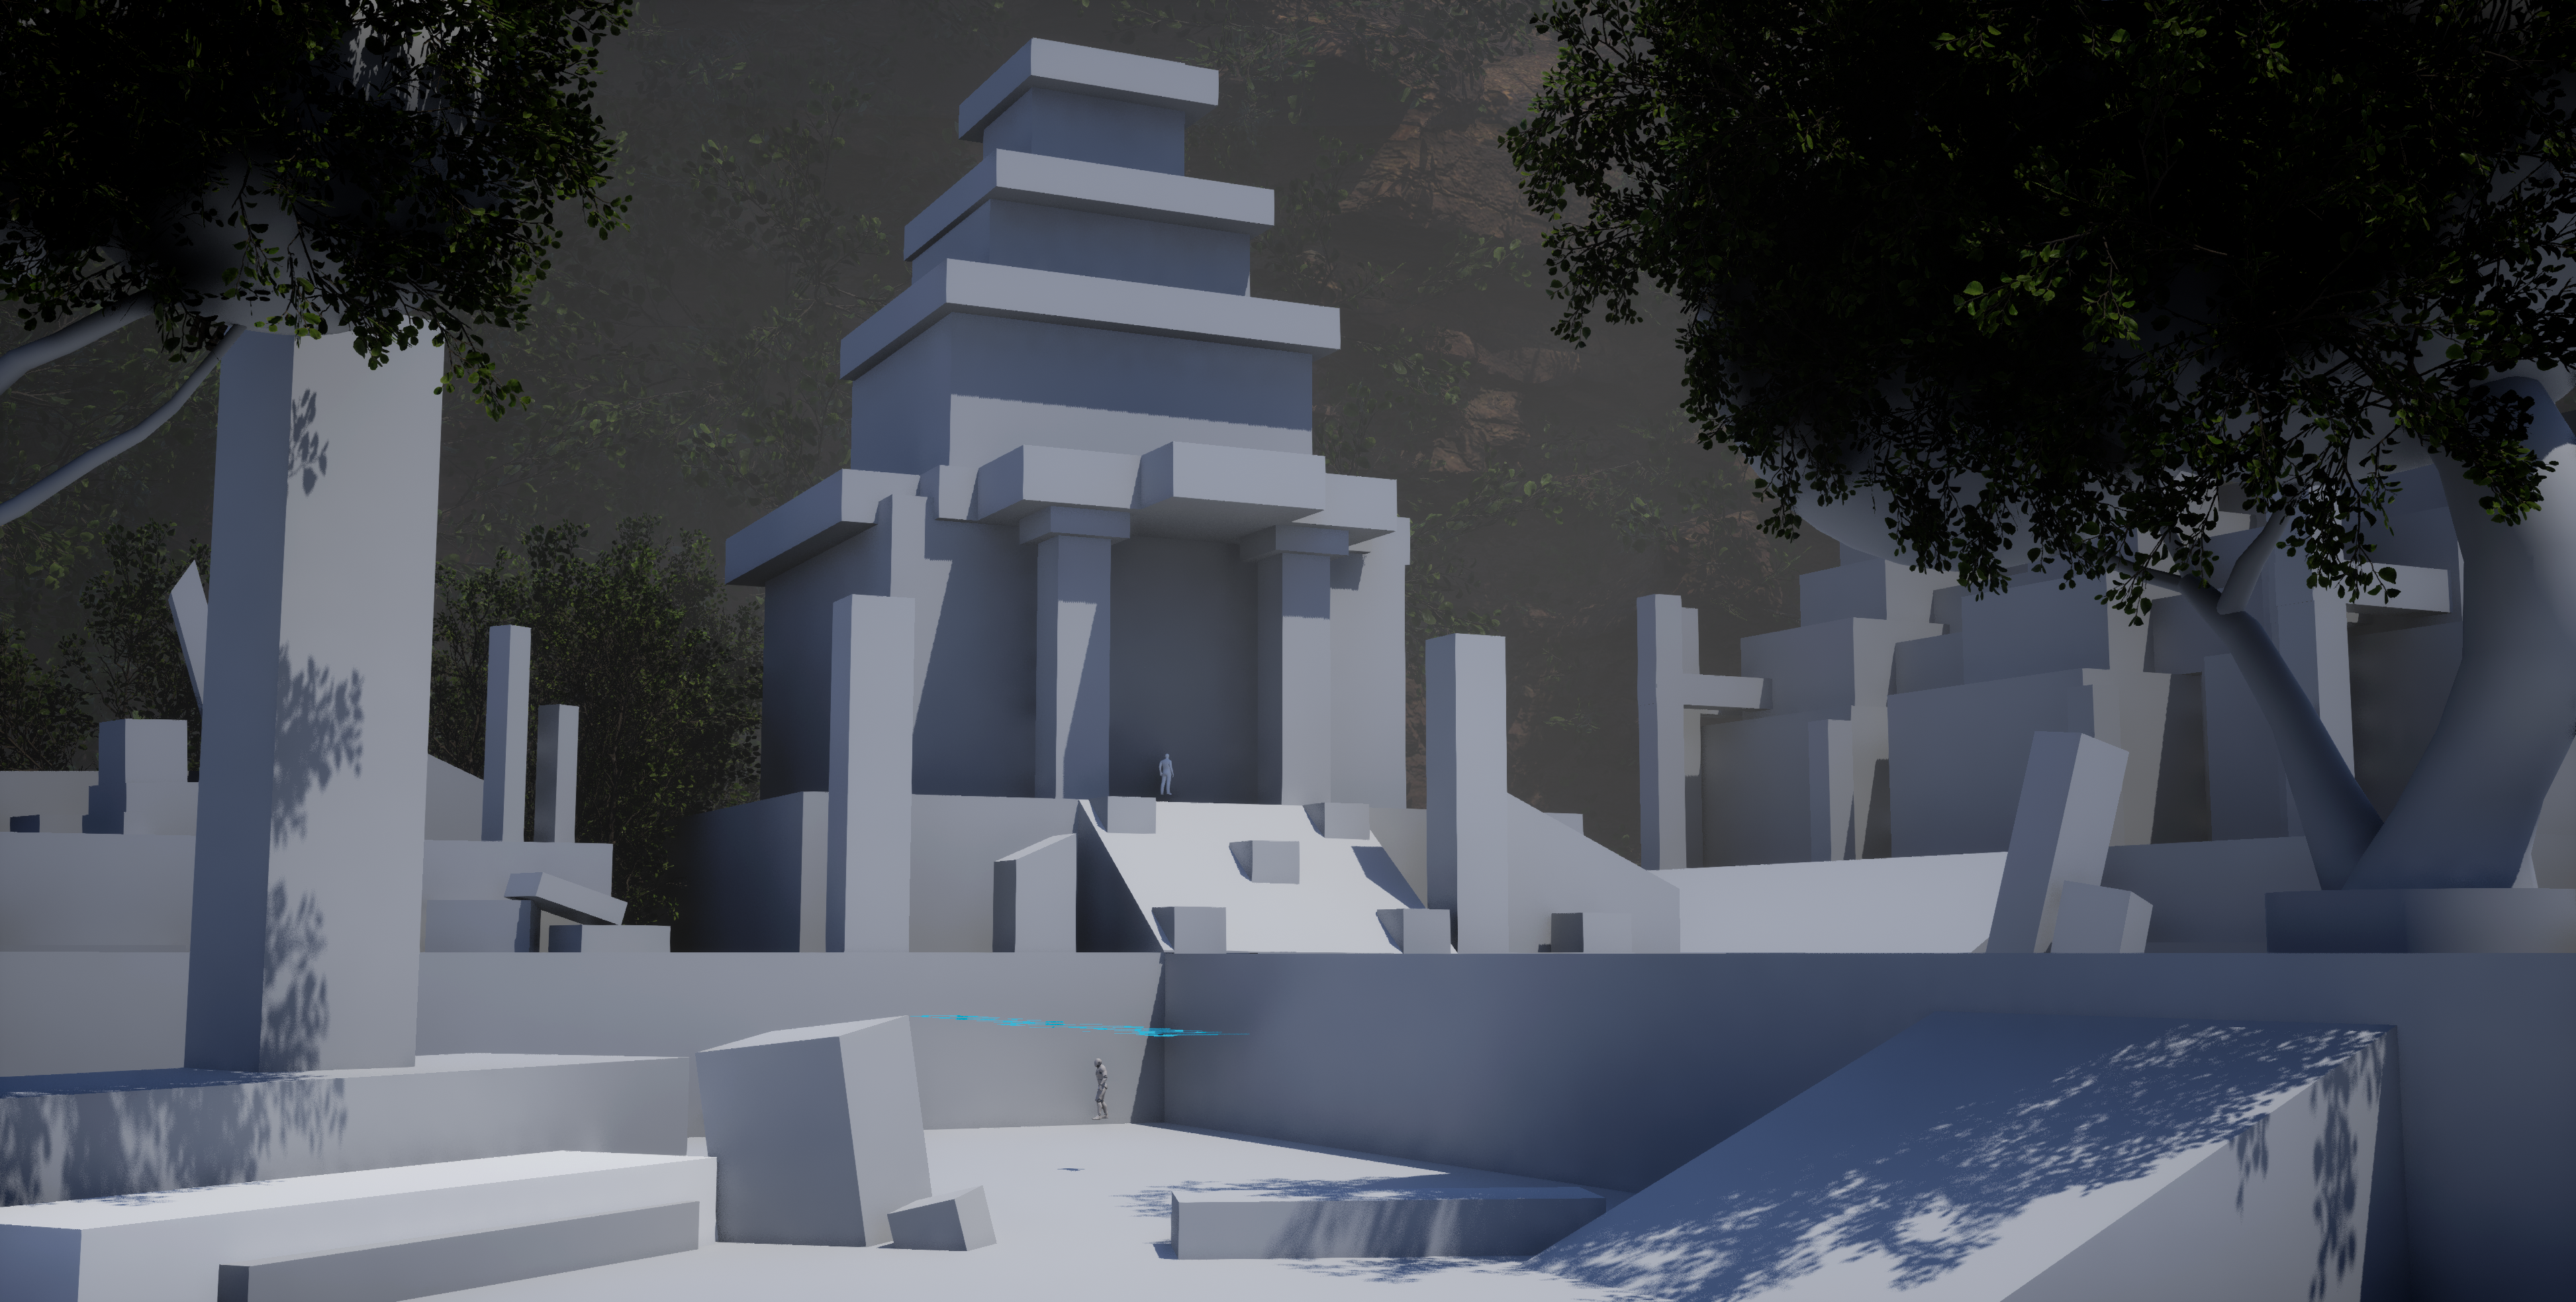
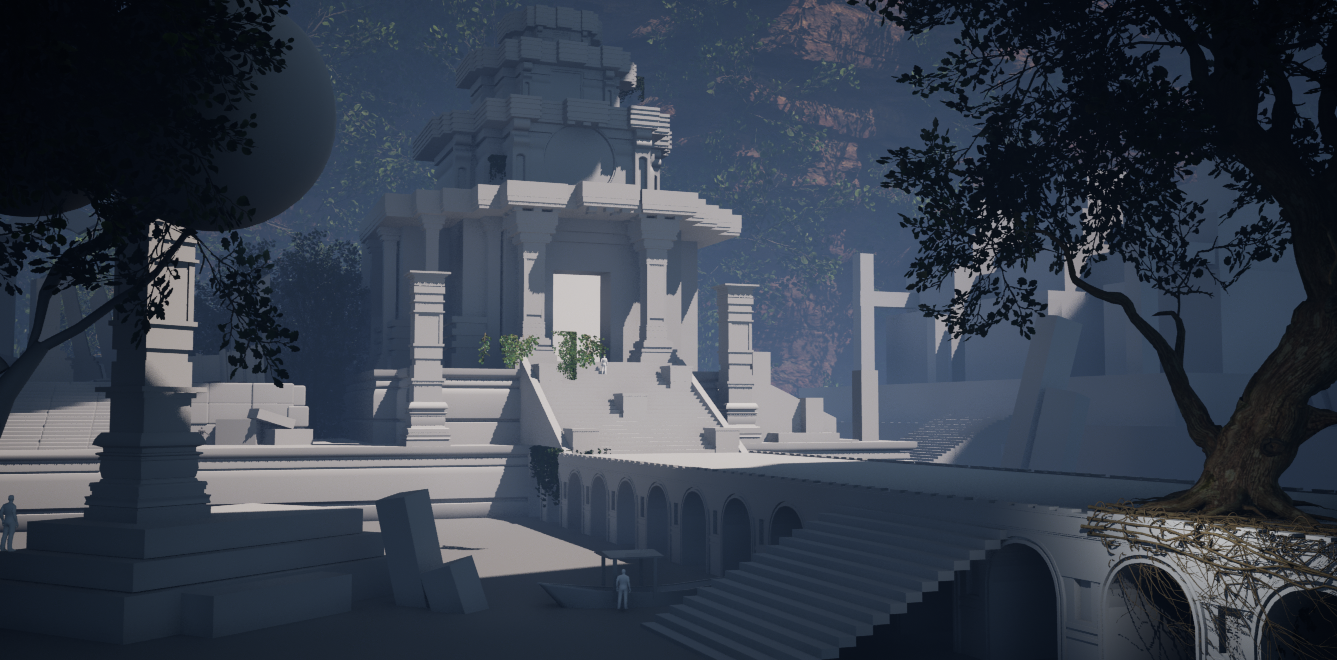
In the modeling phase, I started using boxes in Unreal Engine instead of complex shapes to plan the scene. This helps in determining the dimensions of all the assets and the placement of those assets. It gives flexibility in moving things around without breaking anything in the scene.
During this phase, I added a bit of lighting to have a sense of the scale because shadows and lights can trick the eyes and take away or add more to the size. I also spread some MegaScan trees to get a feel of the placement of the trees and what foliage will need more details, and which will be hidden or not as visible as I thought they might be.
After finishing the blockout, I checked my PureRef file to start modeling the kit. During this phase, I realized some of what I had planned were unnecessary pieces that could be merged or even unmerged and have them separated. It is imperative to understand that it is normal to change some of the plans while creating a scene or developing anything.
To ensure the modular kit was successful, I had to have all dimensions perfectly calculated and free from decimal numbers. This will help in making the tileables tile perfectly and will help in making sure everything snaps easily in Engine. Of course, this rule can be broken in some cases, but in mine, I had to keep them that way to make things easier and optimize my time as much as possible.
After blocking out the scene, I gradually added more details and switched some of the models throughout the process to ensure everything looked up to the quality I was looking for.
I also worked on foliage first pass during this phase to have an idea of how the vegetation will spread and how many variations I will need, including Ivys, trees, branches, grass, and more. After finishing with the first pass, I started working on the second pass, and here is when I began to add more intricate details and added the material ID. Adding a material ID to the scene is important to give a first look at how the scene and the materials will look and what colors might bring more life to the assets, and it provides a head start on what materials the scene requires. In addition, it helps in planning trim sheets, tileable and unique textures.
In this phase, I started sculpting some of the assets and changing their silhouettes to make each one look more alive and show the asset’s age by adding more interest and storytelling to them.
In the third pass, I gave my eyes a break to get a fresh look at the scene in the Engine, and I started improving on the quality of the models and the sculpts.
UVing/Baking
After finishing modeling and sculpting, I started UVing the scene. In this phase, I troubleshoot mesh issues and ensure everything is clean and ready for export. I deleted everything I did not need and was an extra or a duplicate and started organizing assets under categories. For example, assets in group 1 will require the same base material. Assets in group 2 will need patterns in the trim sheet. Assets in group 3 will require unique texturing.
Understanding which assets fall into what category was essential for me to make UVing smoother and more accurate to my needs.
As for the sculpted decimated assets, it will be hard to UV them the traditional way, so I used RizomUV instead. RizomUV allows you to select an edge and have all the other edges following the same path be selected too. This saved me much time due to its flexibility. There are many ways to UV decimated meshes, but this one was the one I went for.
Texturing:
As for the materials, I used a tileable and a trim sheet for the whole scene except for the boat and parts of the column. I used Illustrator to create the patterns, Substance Designer to add more details (edgewear, damage, and more), and then substance painter for extra and unique hand-painted details. After finishing the textures, I added a detailed normal map to use as a second normal map in some assets. I had the second one to add more depth to rocks and ruins.
To plan a good trim sheet, I had to have a good base. After UVing the scene, and making sure it is all modeler, ready for tileable textures and trim sheet, and the texel density is sat, I started planning the trim sheet UVs in a 0 to 1 UV space. After finishing the UVs for the trim sheet, I had the measurements for the patterns, which made it easier to start developing the patterns. I had a different plan for the other column parts that were not in the trim sheet. For the extra details in the columns, I used another 0 to 1 UV space to fit some damaged areas and some patterns in 1 UV space to have additional control and space when texturing. In the end, I had two different texture sets for the scene, excluding the boat and the foliage.


Foliage creation – Ivy/Bushes/Trees
This project was my first time tackling foliage, and I had to learn SpeedTree in less than a month to keep up with the deadline. Hence, I watched SpeedTree tutorials on YouTube and Flipped Normals (Link: https://flippednormals.com/downloads/foliage-for-games-using-speedtree/).

The tutorials gave me the fundamentals of using SpeedTree and how to create my foliage. After that, I experimented with the tools to create the trees and the ivy.
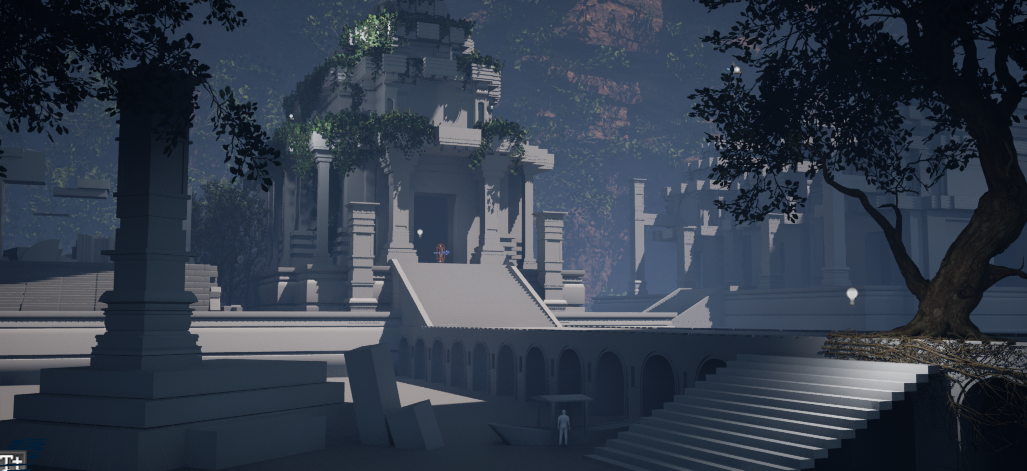
The foliage went through three passes. The first pass served as the blockout phase where I had foliage scattered around the scene and planned in a way I thought was good in silhouettes and a guide for the eyes. The second pass was when I added more colors and details to the foliage and changed the foliage placement all over the scene, especially the temple top.
The issue in the temple top was that the foliage was scattered in a way that takes away from the temple’s silhouette, and I wanted to keep the shape of the temple visible, so I re-planned the foliage. I also experimented with the leaves’ size and form to get the desired results.
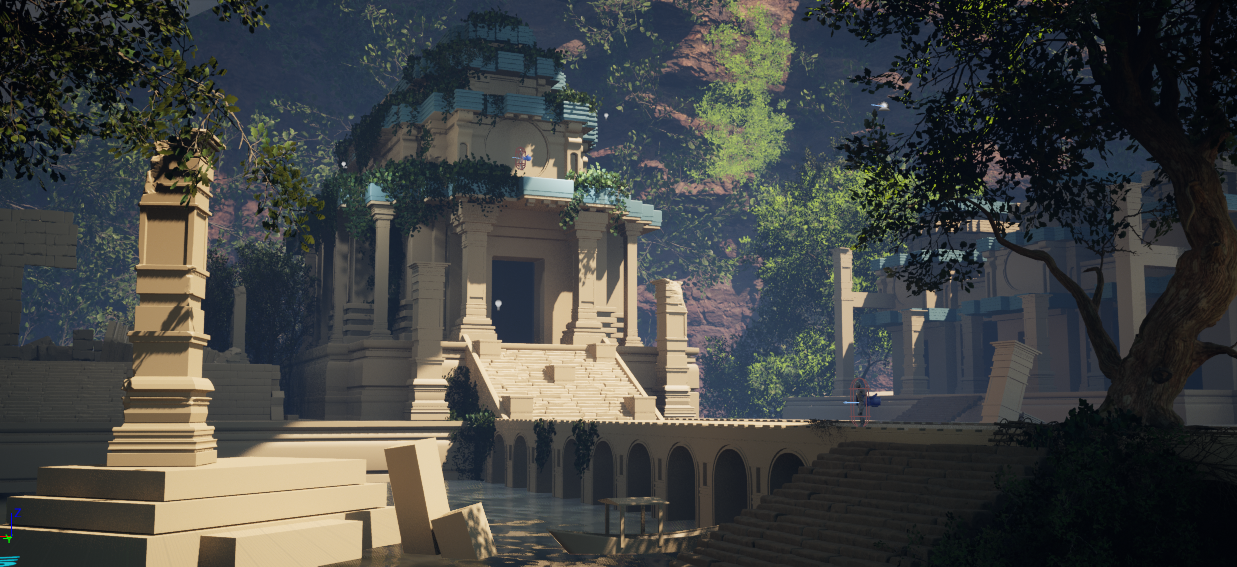
Finally, in the last phase, I recreated some of the ivies, narrowed the number of variations I had for foliage, added more vegetation to the scene to have everything balanced, and optimized the shadow depth to ensure the fps did not drop less than 30fps.
During the process of scattering foliage around the scene, I had my second screen displaying a flipped version of my scene, so I can look at it every now and then to refresh my eyes and have a different view of the scene.
Unreal Engine:
I used Unreal Engine 5 to experiment with Nanite and Lumen in this project. Using Nanite is great; however, there are some things that you cannot achieve when using Nanite, such as Vertex Painting. This was a challenge since I wanted to add variations and paint moss. In This phase, I started experimenting with shaders.
During this phase, Joe Crowford helped me understand each node function better, taught me a lot during this journey, and helped me with most of the technical issues.
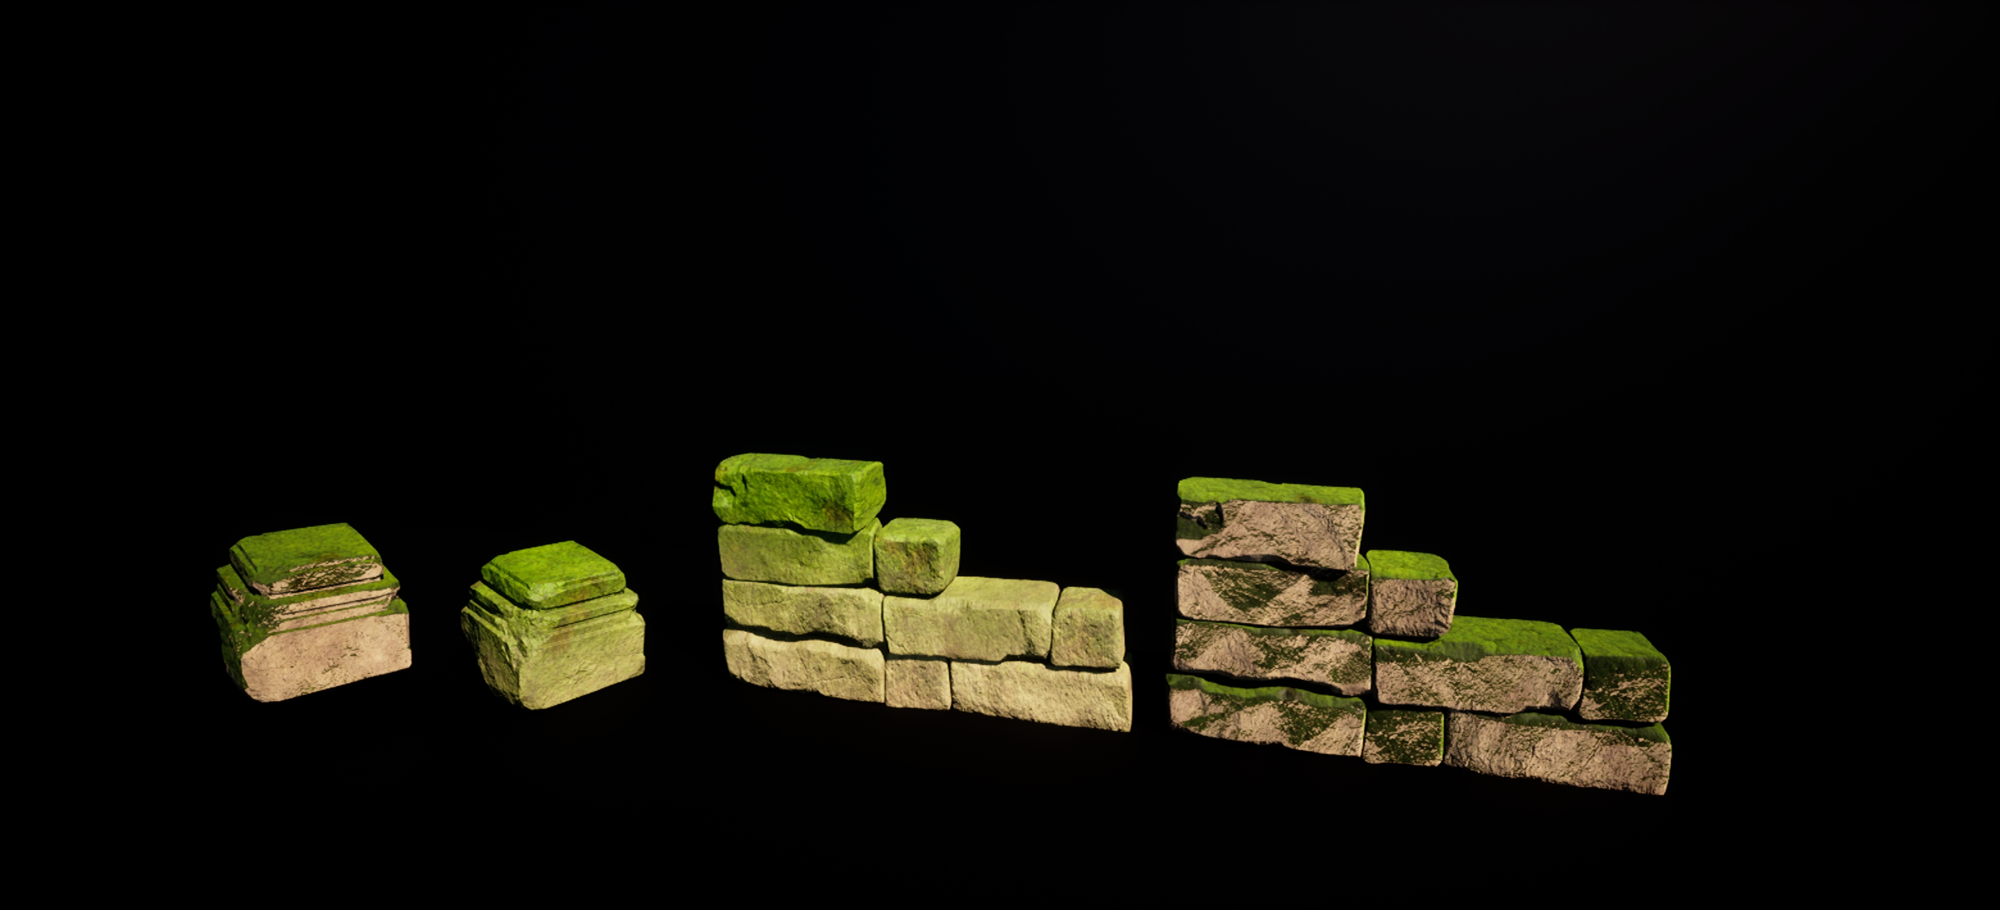
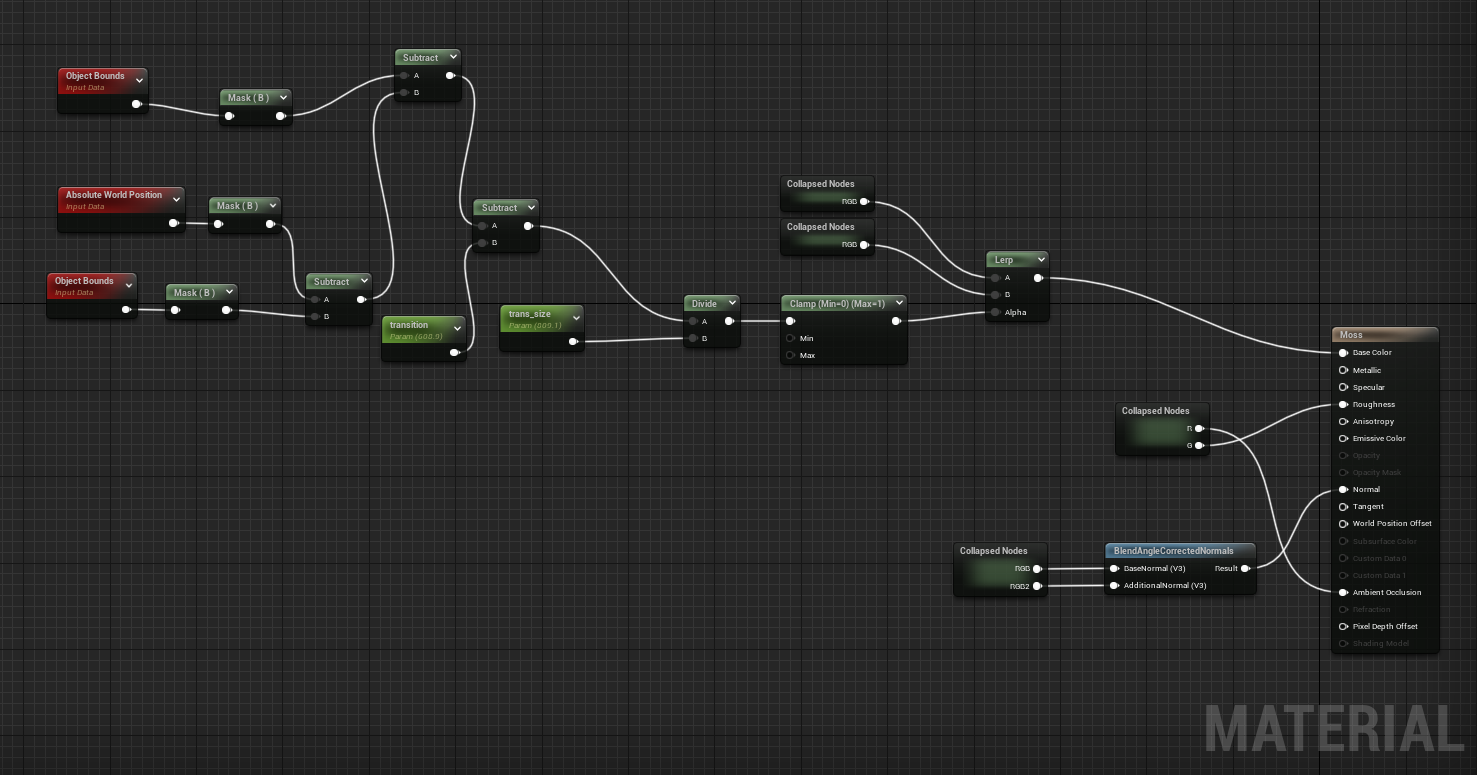
For the moss, I did a material layer. It is a procedural shader that has the moss in the world position, so it gives every object a mossy surface or dirt. In this shader, I had the World Aligned Normal in my shader, which caused the shader to react with the normal maps of the damaged area and resulted in issues like the moss not covering the entire surface of an object. The second issue I faced was the moss not transitioning smoothly on an object.
So, I experimented with the material editor to avoid having the moss react to the vertices or the normal map. Hence, I used Object Bounds, Absolute World Position, and Object Position. This gave the moss shader a smooth transition and gradient that does not leave a peeling-like effect from following the normal map.
Object Bounds get XYZ from an object center to the corner of the object bounding box, and The Absolute World Position gets the world space position of the location on the object’s surface. Finally, Object Position gets the world space position of the object’s bounding box.
As for the water shader, I used depth fade and vertex painting for some areas to fake depth. I also used the UVs for animation and added a caustic effect.
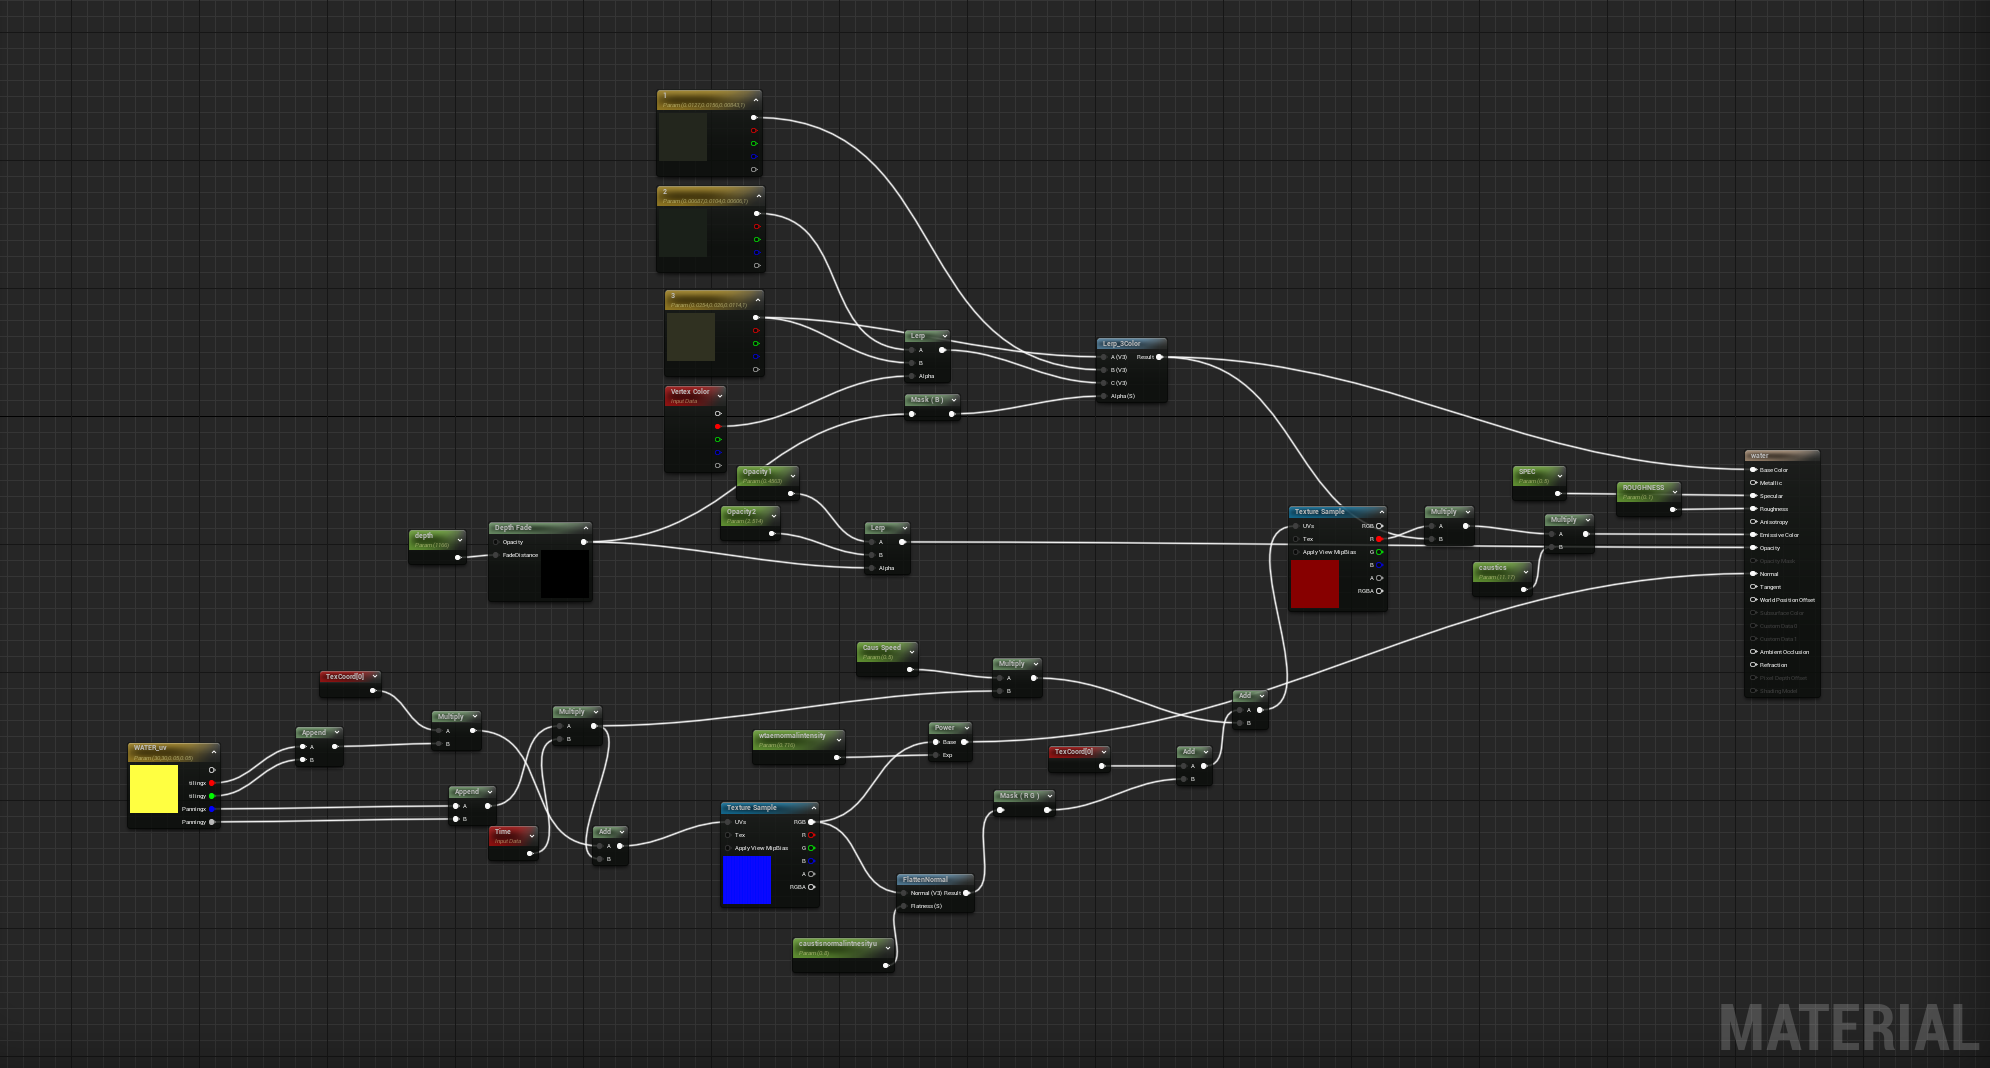
After finishing the materials and shaders, I used decals to add more to the scene. Some of those decals were dirt, leaks, a change in roughness, and more.
Lighting
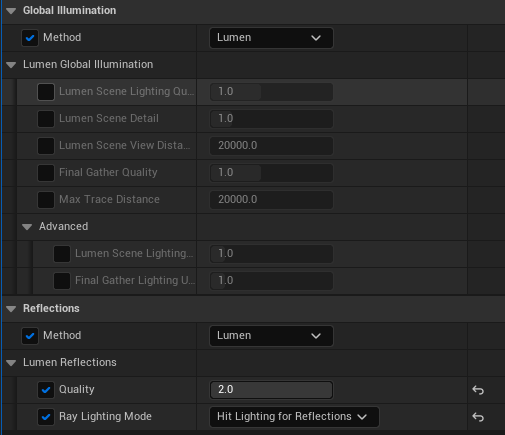
I used Lumen to light the scene and then used some spotlights, rect lights, and point lights in some areas to add more depth and focus. During this process, I realized a drop in the fps and checked the radius of those lights and which light is more expensive than the other.
Rect lights are more expensive than point lights, and the cheapest is the spotlight. Hence, I tried to balance the types of lights I was using and reduced the unnecessary radius on them. In this phase, I looked at what assets in the scene need to cast shadows and which assets have a minimal effect when adding depth and shadows in the scene to ensure the shadow depth is optimized.
Using Lumen will limit the artist from using static lighting, so understanding how to optimize any additional moveable lighting is important.
To achieve the best Lumen results, I watched a tutorial by William Faucher.
As for the caustics, I created a caustic map in Substance Designer and used the map as an emissive for a light function.
As for lighting the foliage, I faced some issues using Lumen and moveable lights. At some point, the leaves looked so dark in some areas and bright in others, so I had to figure out a way to fix it. Since I will not be able to bake lights into foliage, I used spotlights from down up and had it cast no shadows, which worked well!
This might not be the ultimate solution for forest scenes, but it worked well in my case. All we know for now is that Lumen does not work well with foliage yet.
Fog
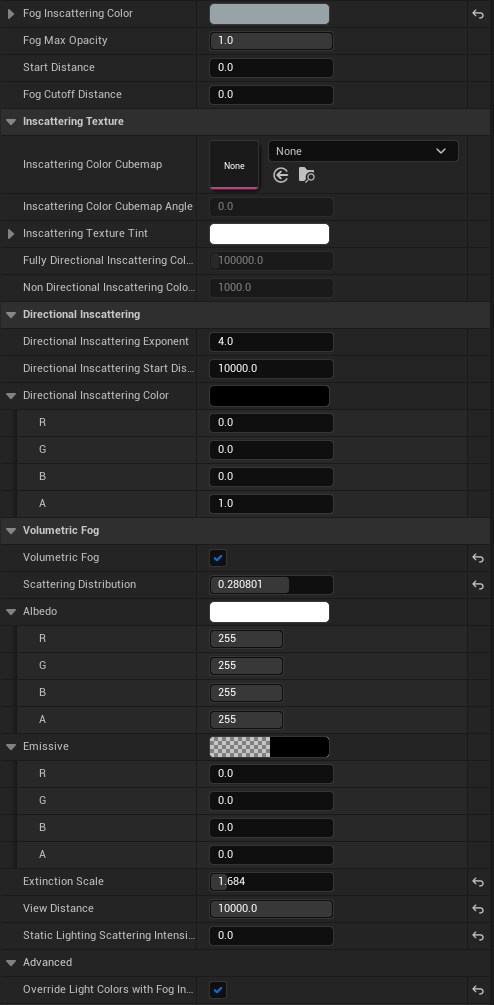
Adding volumetric fog will add more lights to the scene and light up areas that are meant to be darker than others.
Using fog can add so much to the scene or take away a lot from it, and that was something I kept in mind while working on the scene. At first, the fog made the scene look flat, and it was taking away the center of attention in the piece, which is the temple. So, I tweaked the settings to this:
And then, I added more fog cards around the scene to reach the final look I planned for the scene. There are many methods to create fog, such as using a depth mask in the post process, creating material for fog, or making particles. Choose whatever suits your needs best.
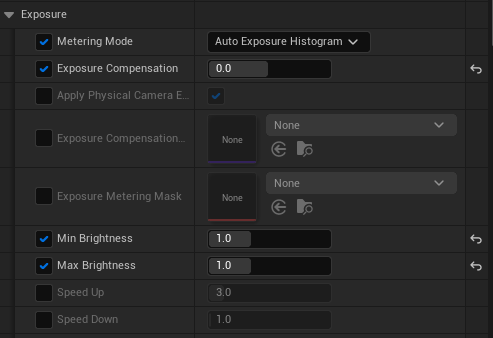
In the post process, I tweaked some of the settings, and you can see them here:
Rendering:
As for the rendering, I used Movie Render Queue and followed these two tutorials by William Faucher to achieve the desired goal.
Part 1:
https://www.youtube.com/watch?v=FxvF3zncClA&t=808s&ab_channel=WilliamFaucher
Part 2:
https://www.youtube.com/watch?v=2U1wP8sJgfU&ab_channel=WilliamFaucher
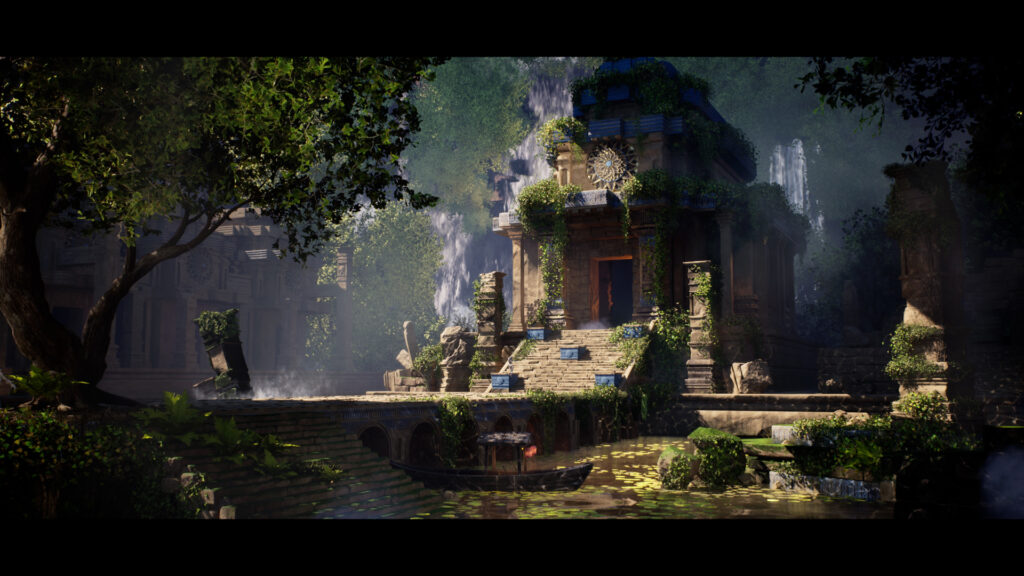
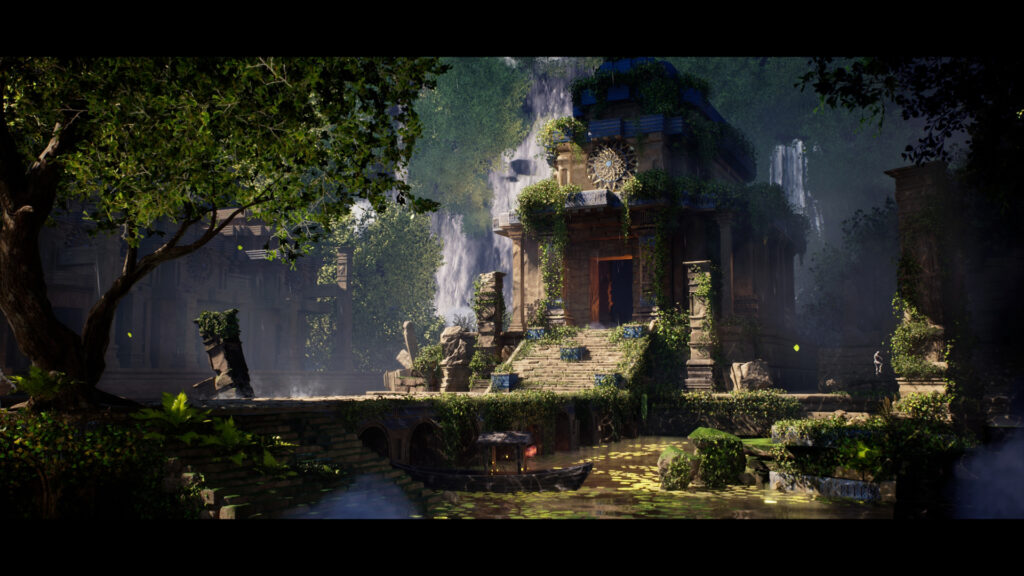
Final
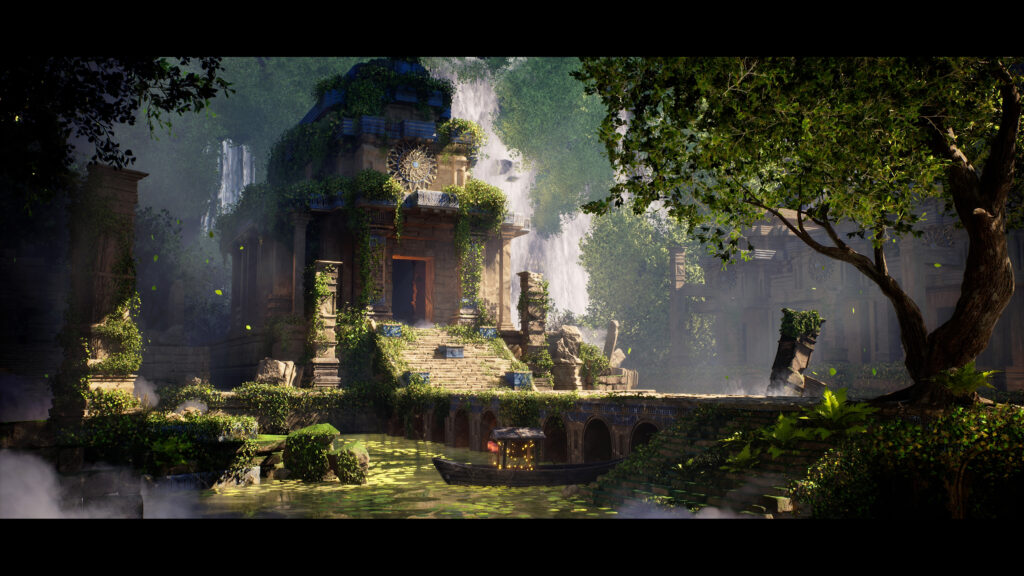
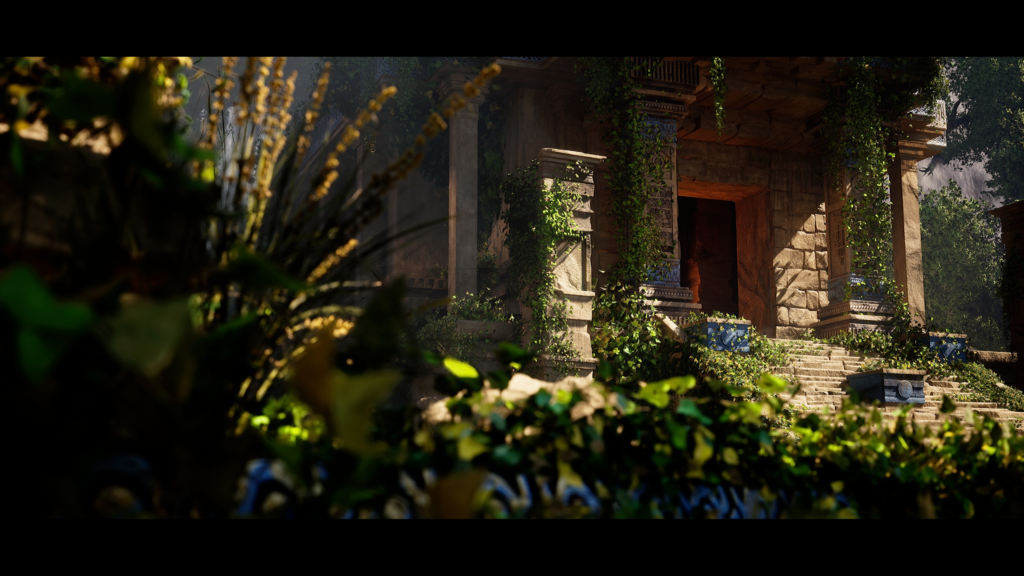
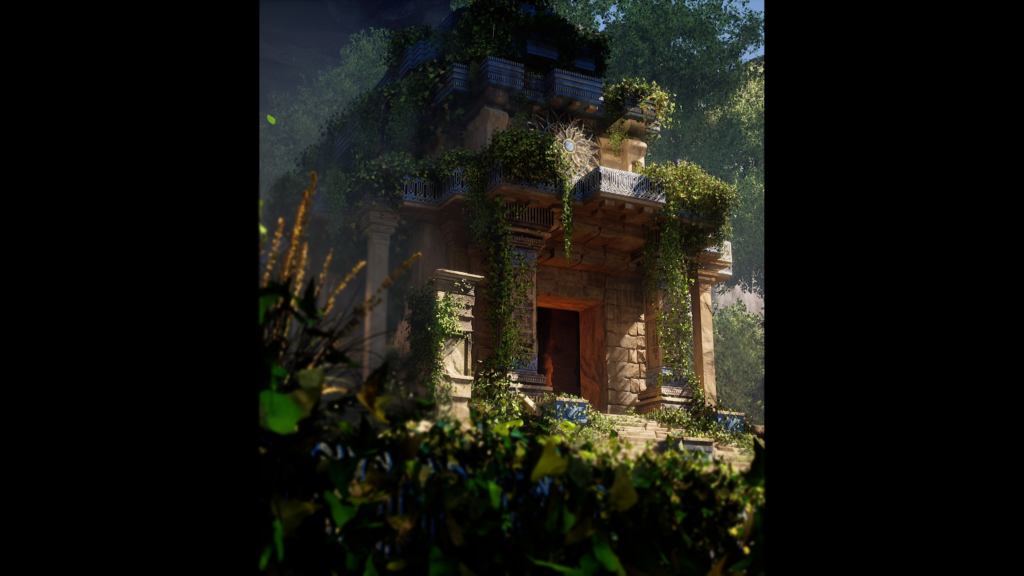
It’s noteworthy to say that the process of doing this scene taught me a lot about troubleshooting major and minor issues, sculpting, and VFX, and it boosted my knowledge in Unreal Engine and SpeedTree.
Thanks to Kacper Niepokólczycki, who was my mentor during the four-month journey.
He was super helpful and knowledgeable. His feedback guidance in the past four months has always been valuable and full of new and inspiring information.
Read more articles
You might also like these articles.