Vampire Crossbow


Introduction
Hi! My name is Alex Savelev, and I’m a 3D Artist specializing in game characters.
In my work, I strive to combine realistic visuals, technical precision, and expressive aesthetics.
Project
While working on this crossbow, I was mentored by Alexander Sheynin, an artist at Crytek working on Hunt: Showdown.
Huge thanks to him for his invaluable feedback and support; I’ll include some of his comments in this article, as they might be useful to you as well.
Goals
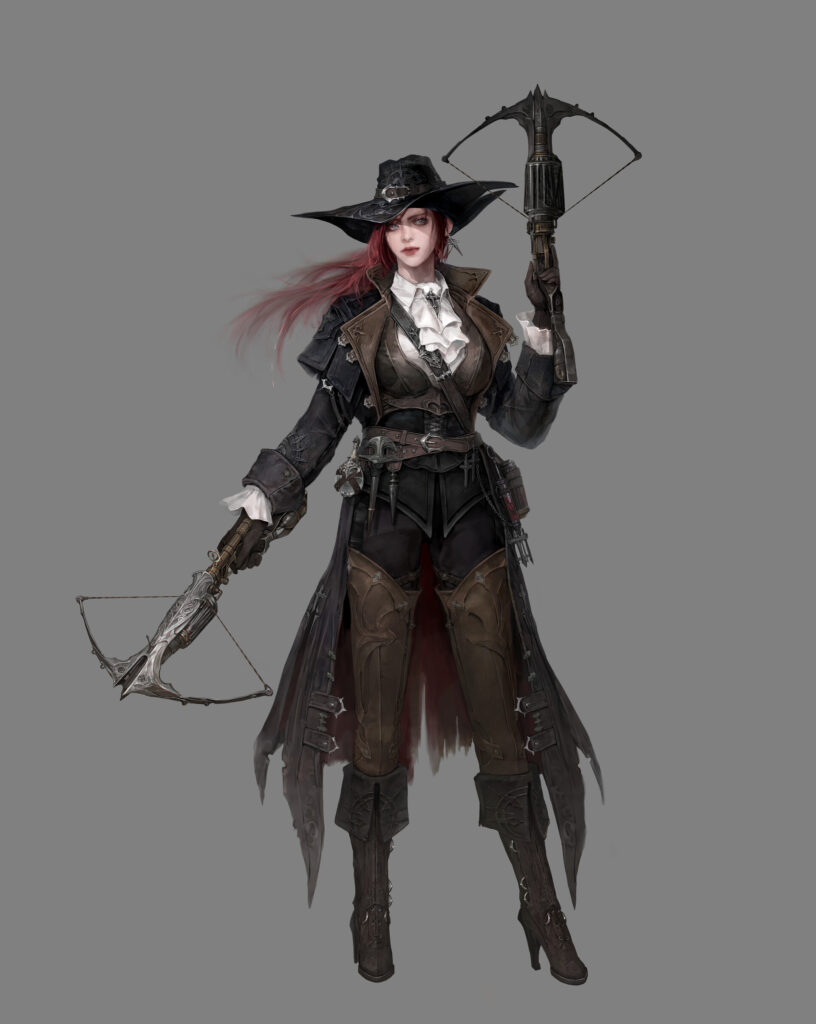
This crossbow is part of a larger character project: a vampire huntress based on a concept by HURY art.
As seen in the concept, she wields crossbows. I decided to separate the weapon into its own project in order to:
- Hone my hard surface modeling skills,
- Refresh my weapon creation pipeline,
- And receive professional feedback.
As mentioned earlier, I worked under Alexander’s mentorship, and his guidance significantly influenced the final shape and pushed me to improve my attention to detail.
References & Inspiration
I drew inspiration from late Victorian aesthetics, steampunk, and the movie Van Helsing.
The design of the crossbow loosely echoes the weapon from that film but includes several decorative and stylistic changes.
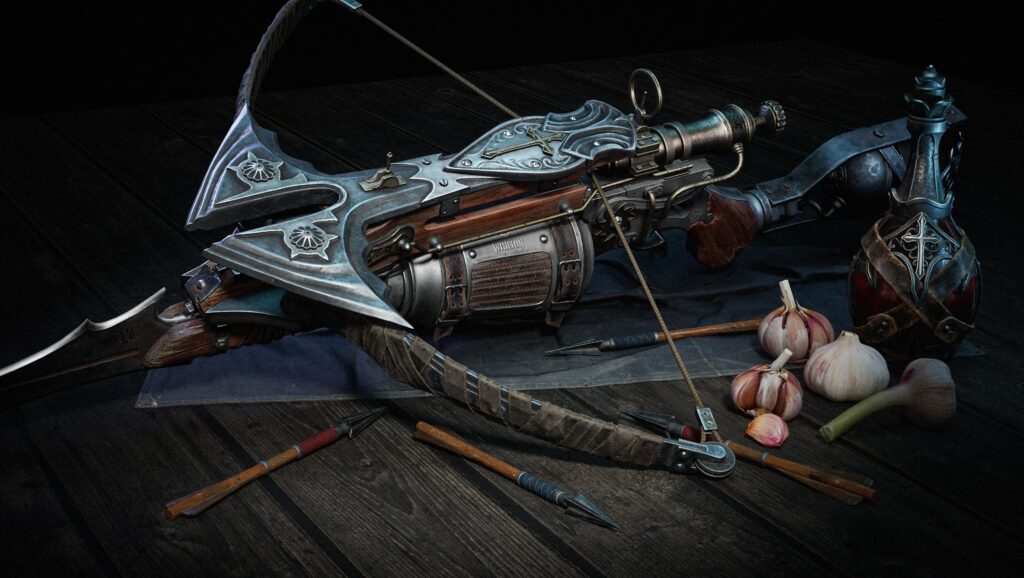
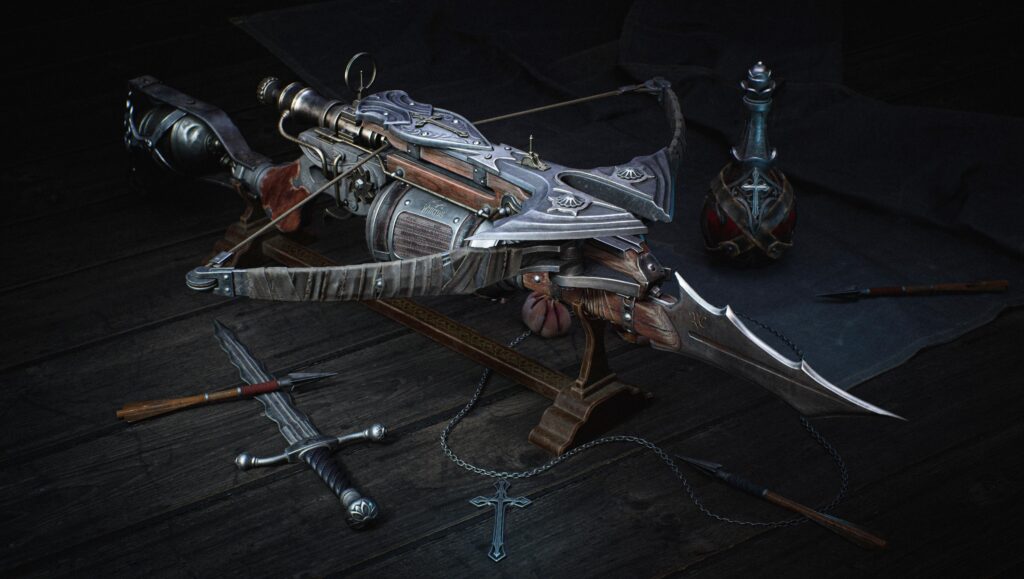
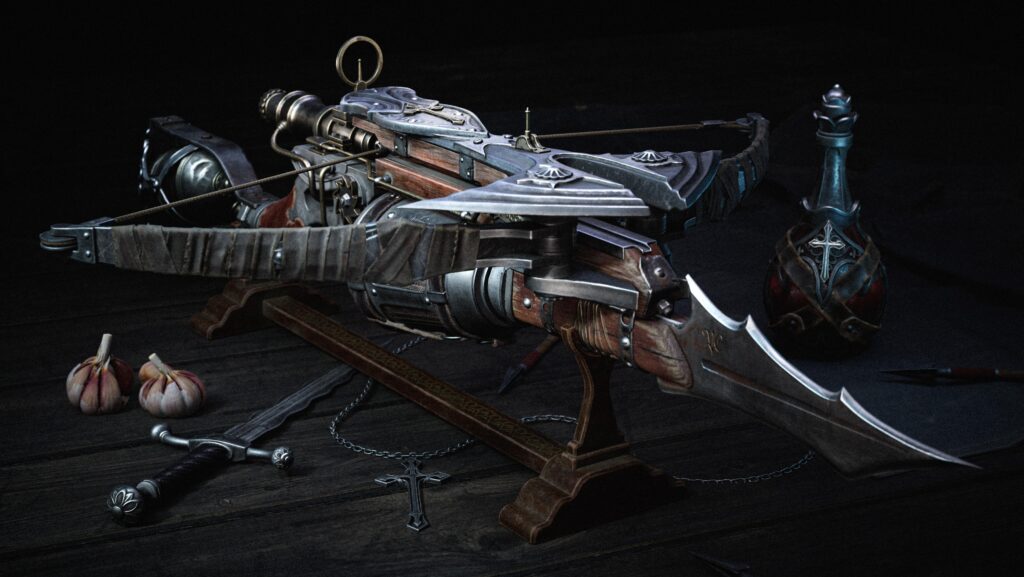
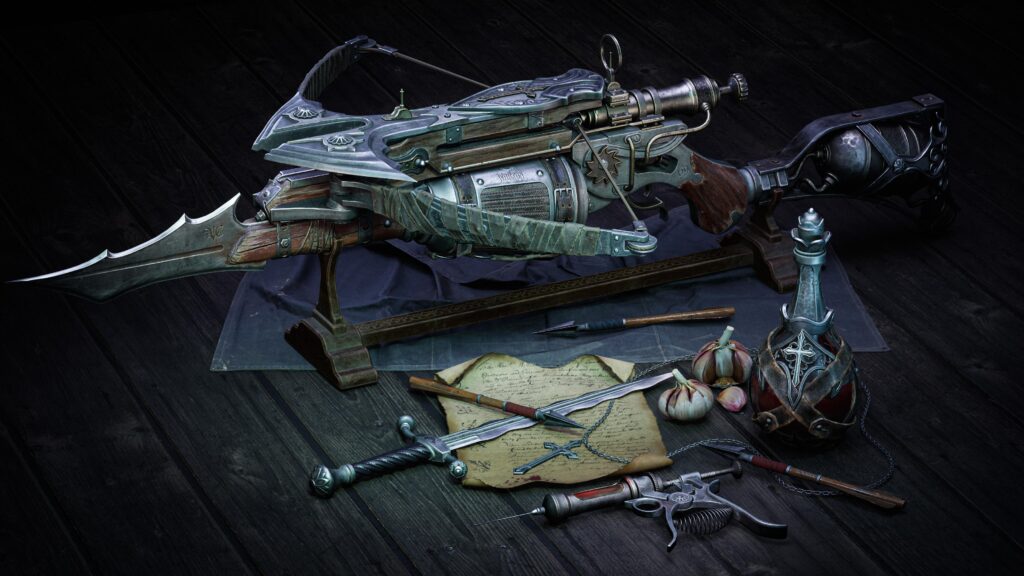
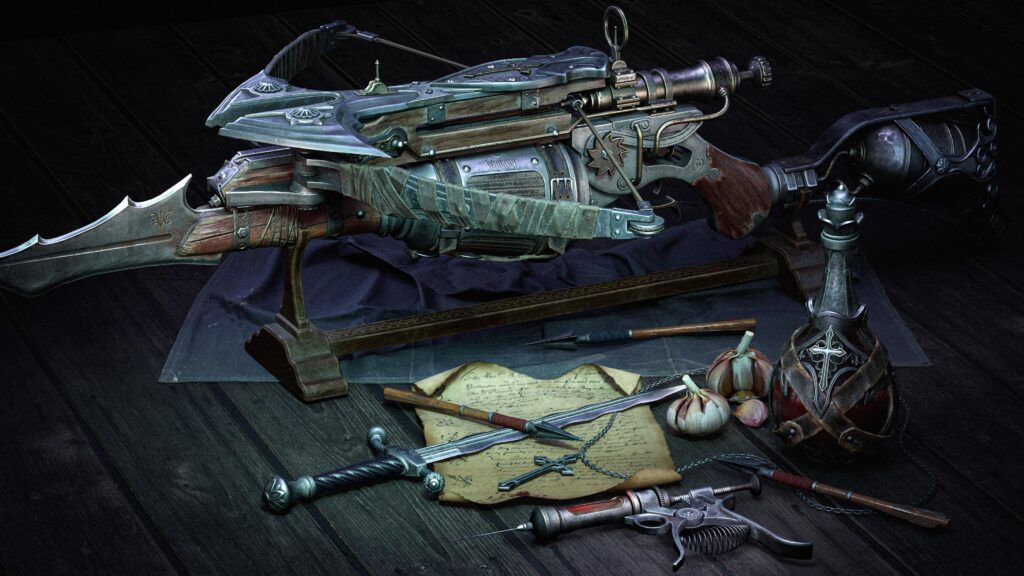
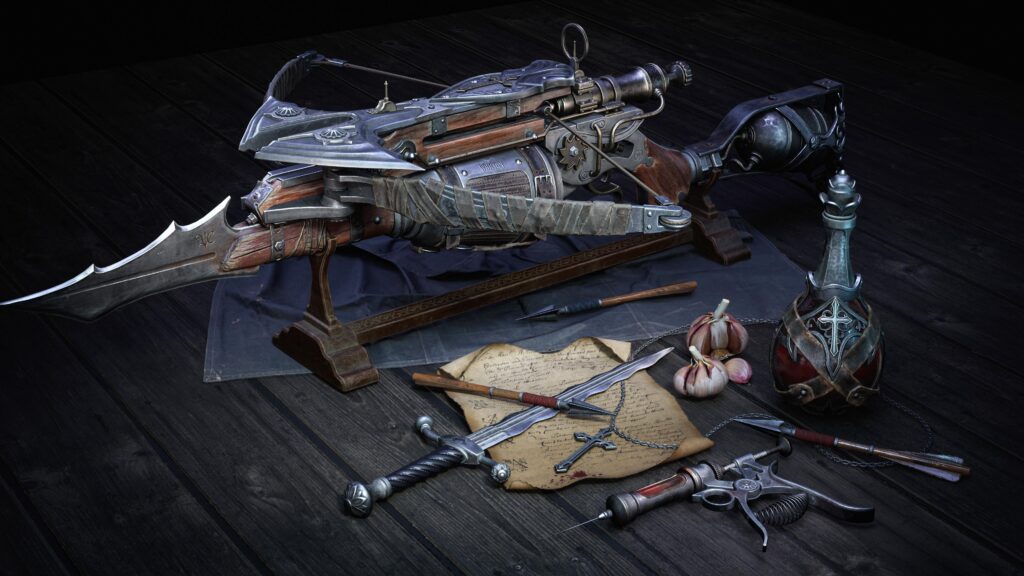
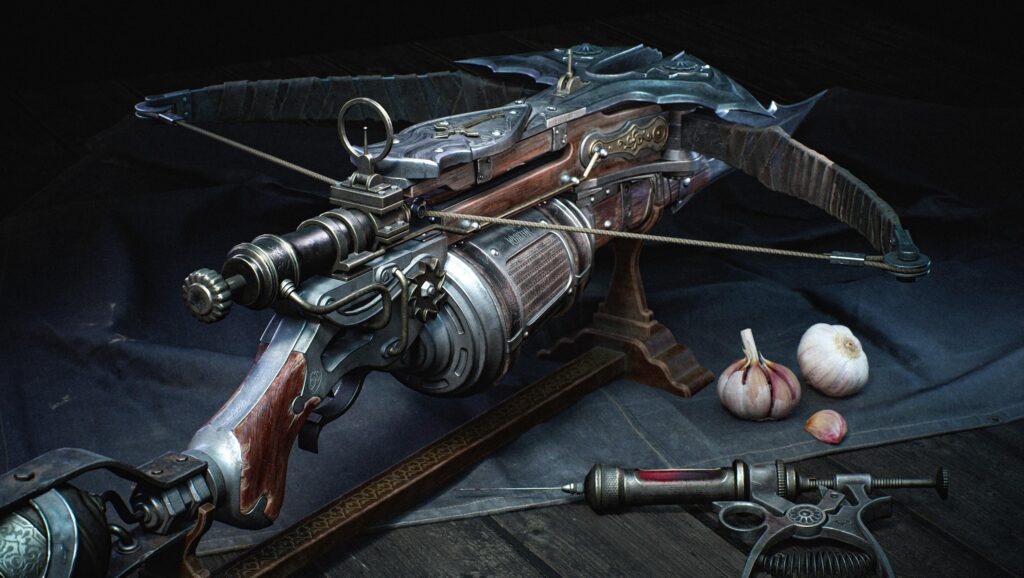
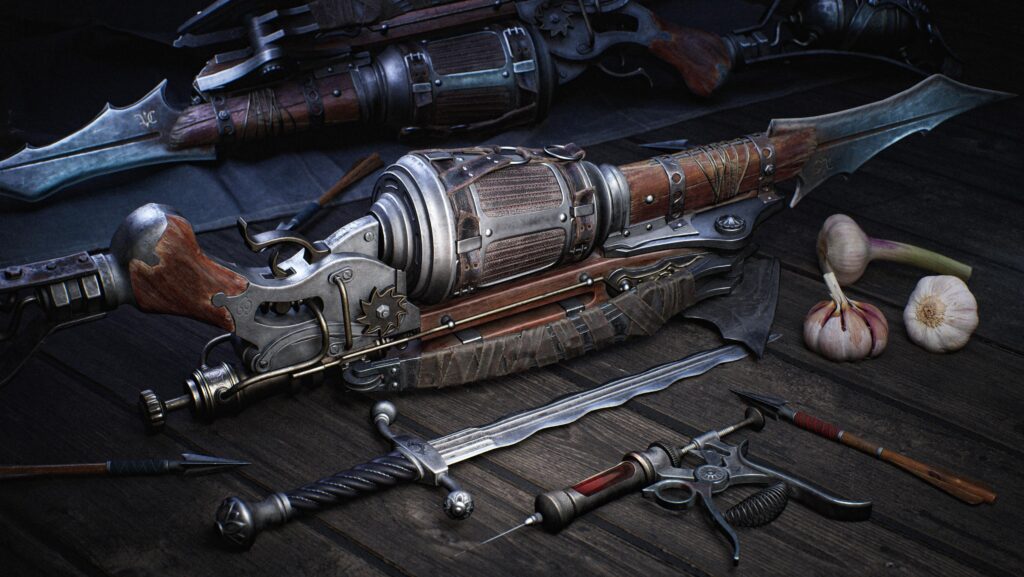
I aimed to create not just a functional weapon, but an object with character: worn, partially repaired, with cracked wood, aged silver, brass elements, and gothic motifs tied to vampire hunting.
Key references:
- Van Helsing‘s crossbow
- Antique weaponry
- Hunt: Showdown’s arsenal
- Hand-operated hydraulic tools
- Gothic wood and metal carvings

Blockout & Modelling
I started with a rough blockout in ZBrush to establish basic proportions and the spatial relationships between parts: the stock, gas canister, mounting brackets, string, trigger mechanism, and decorative components.
It’s important for the weapon to look not only aesthetic but also functional: every part should read as a logical and working piece of the mechanism. Avoid adding elements that break the internal logic of the design.
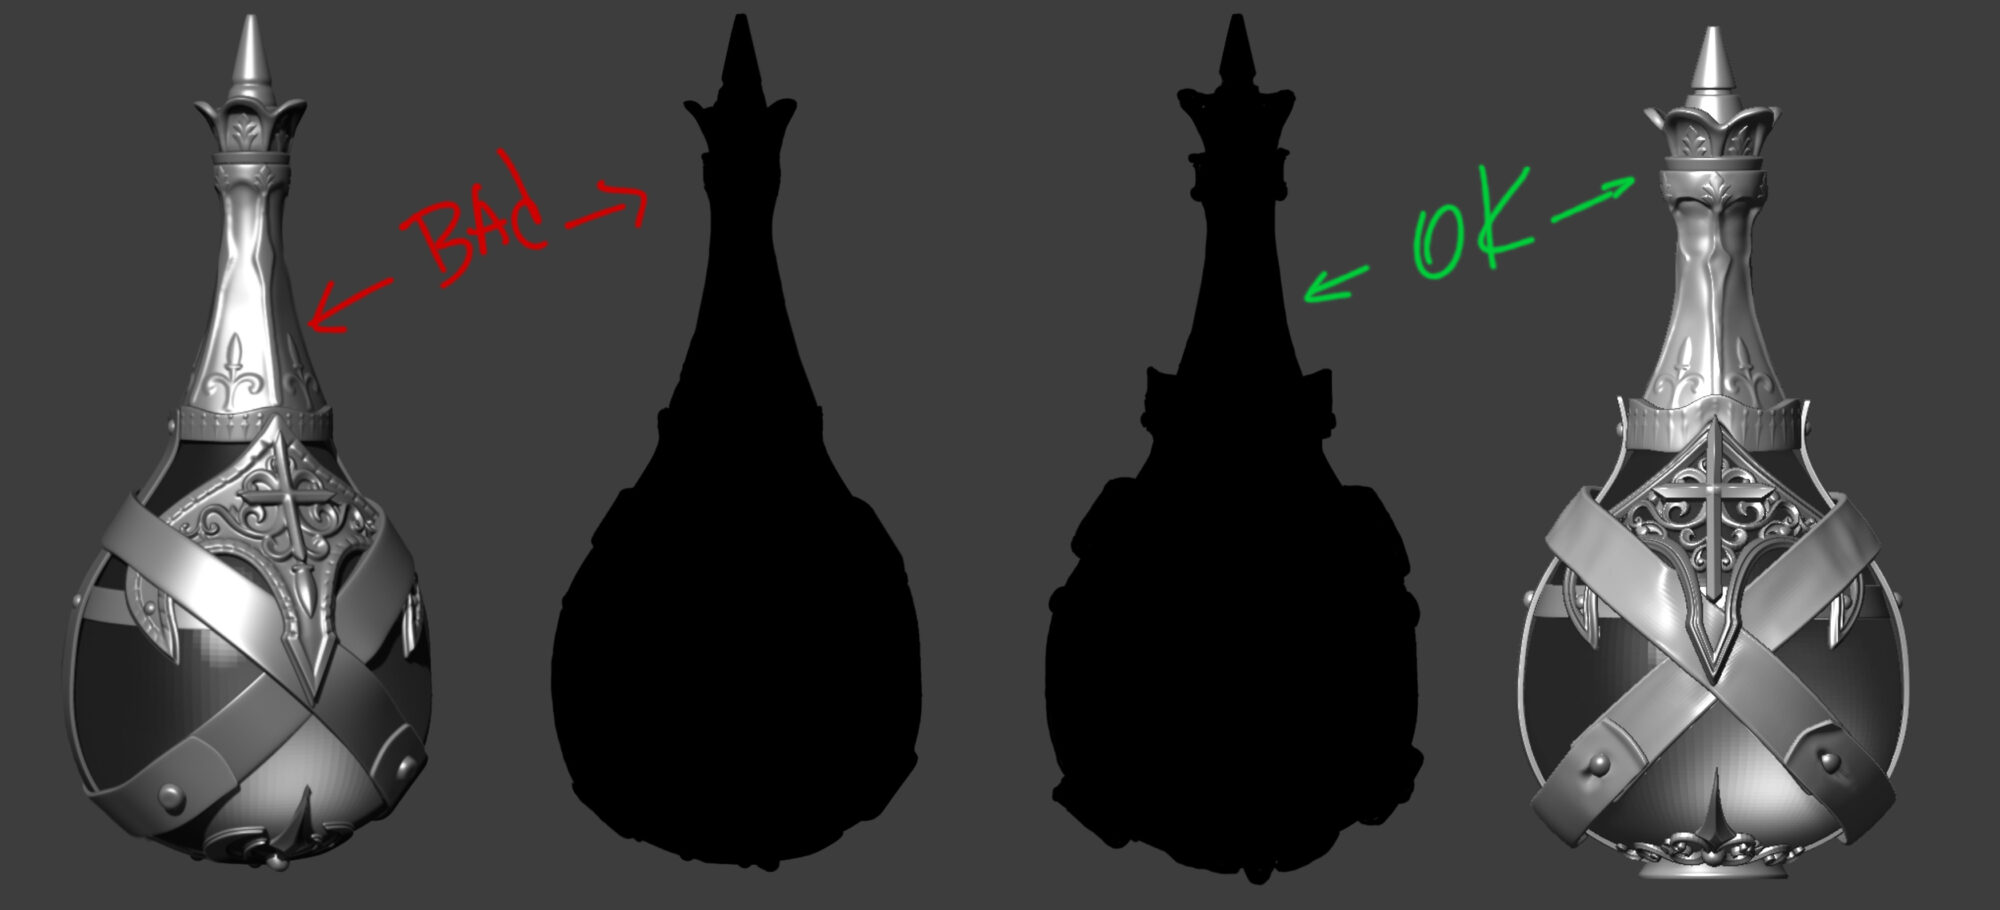
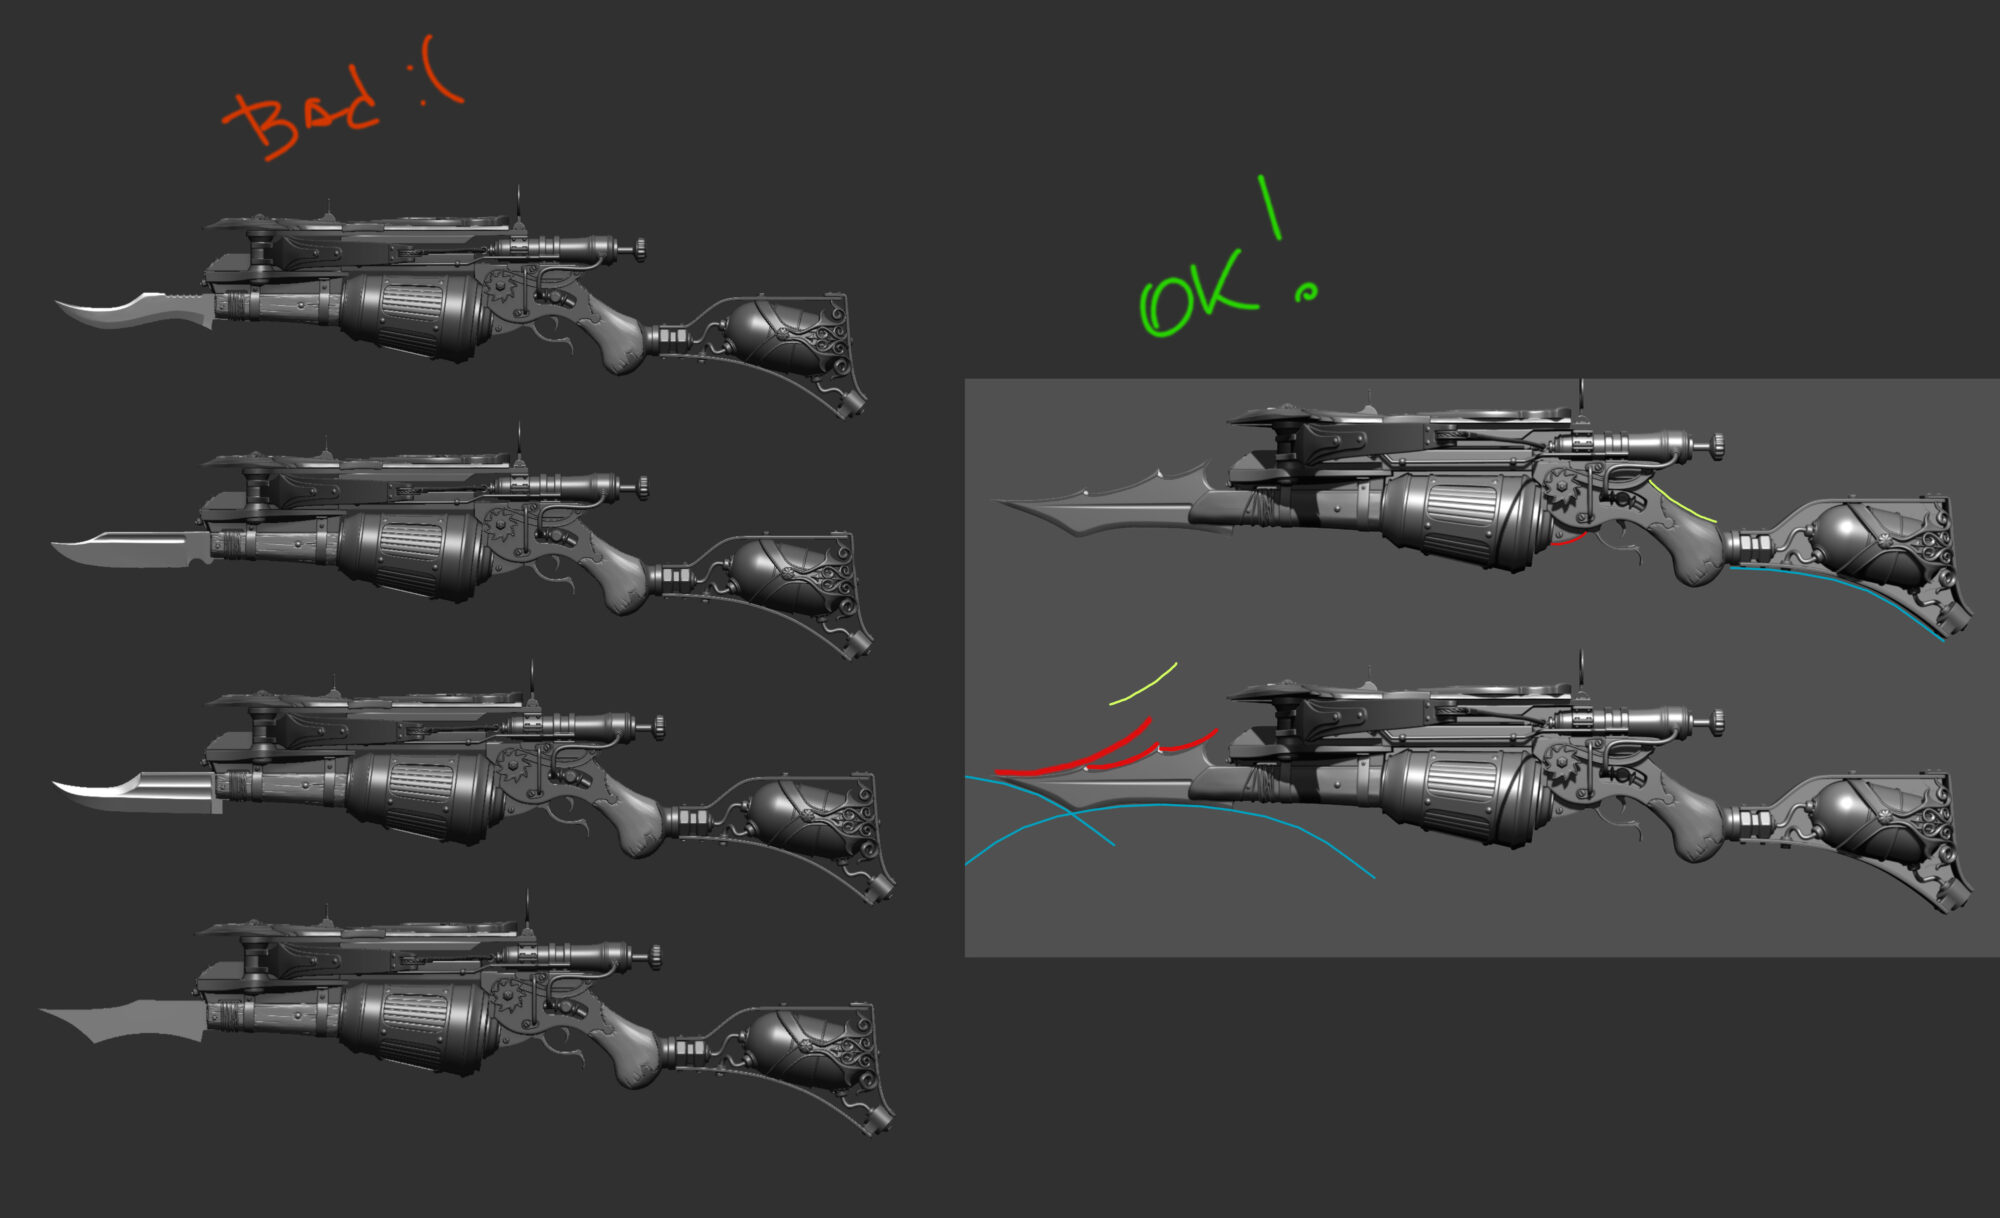
It’s also essential to achieve harmony in form: emphasize and repeat motifs, and create a recognizable style even in the small details.
The 30/70 Rule
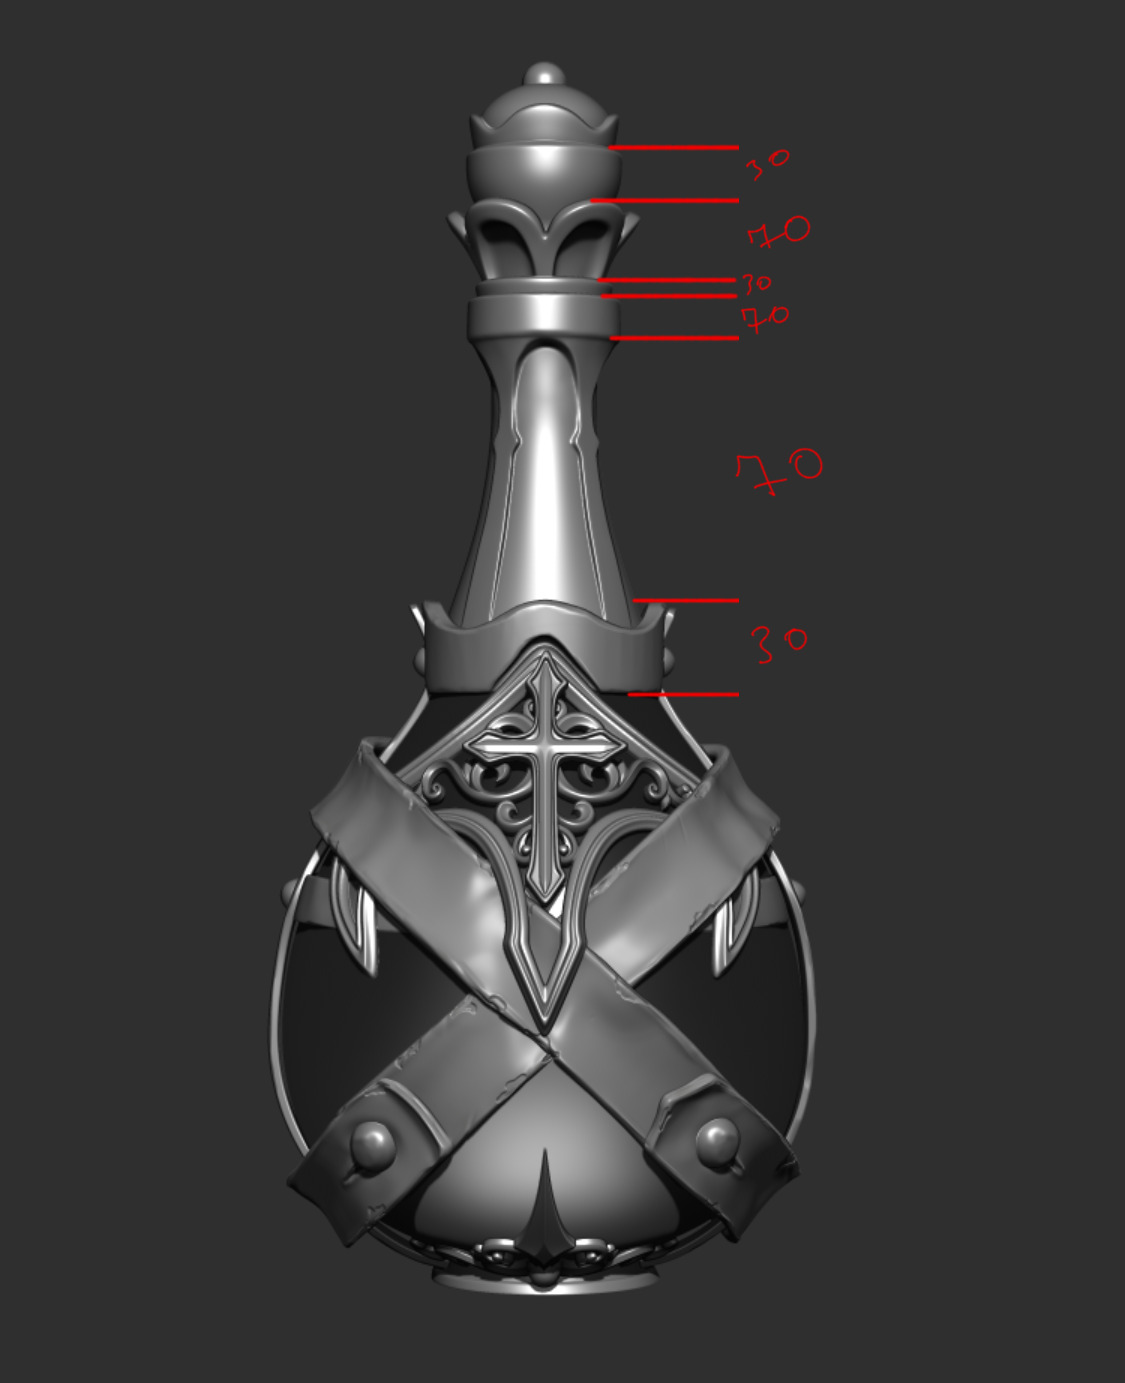
When working with form, it’s helpful to apply the 30/70 rule: a ratio of large to small shapes. When two forms are adjacent, one should take up roughly 30% of the space and the other 70%.
This kind of visual imbalance creates a more appealing and dynamic design.
Highpoly
All modeling was done in ZBrush, mainly using the ZModeler brush, boolean operations, polygroups, polishing, and built-in retopology tools.
Sometimes it’s convenient to sculpt a base shape and use ZRemesher with guides or the Topology Brush to create a clean mesh over the sculpt.
In my experience, and that of many colleagues, it’s more efficient to avoid jumping between different programs (Maya, Max, Blender, ZBrush) and stick to one software.
This noticeably speeds up the process and makes the pipeline more stable.
When creating the highpoly model, it’s important not to cut corners: each element should be thoroughly refined.
Every part must be shaped with equal attention to form, logic, and realism.
A common beginner’s mistake is to add details just “for looks,” ignoring structural plausibility: missing bevels on joints, disconnected elements, decorative features without any physical reasoning. The result? The model ends up looking toy-like.

Cloth Wrapping
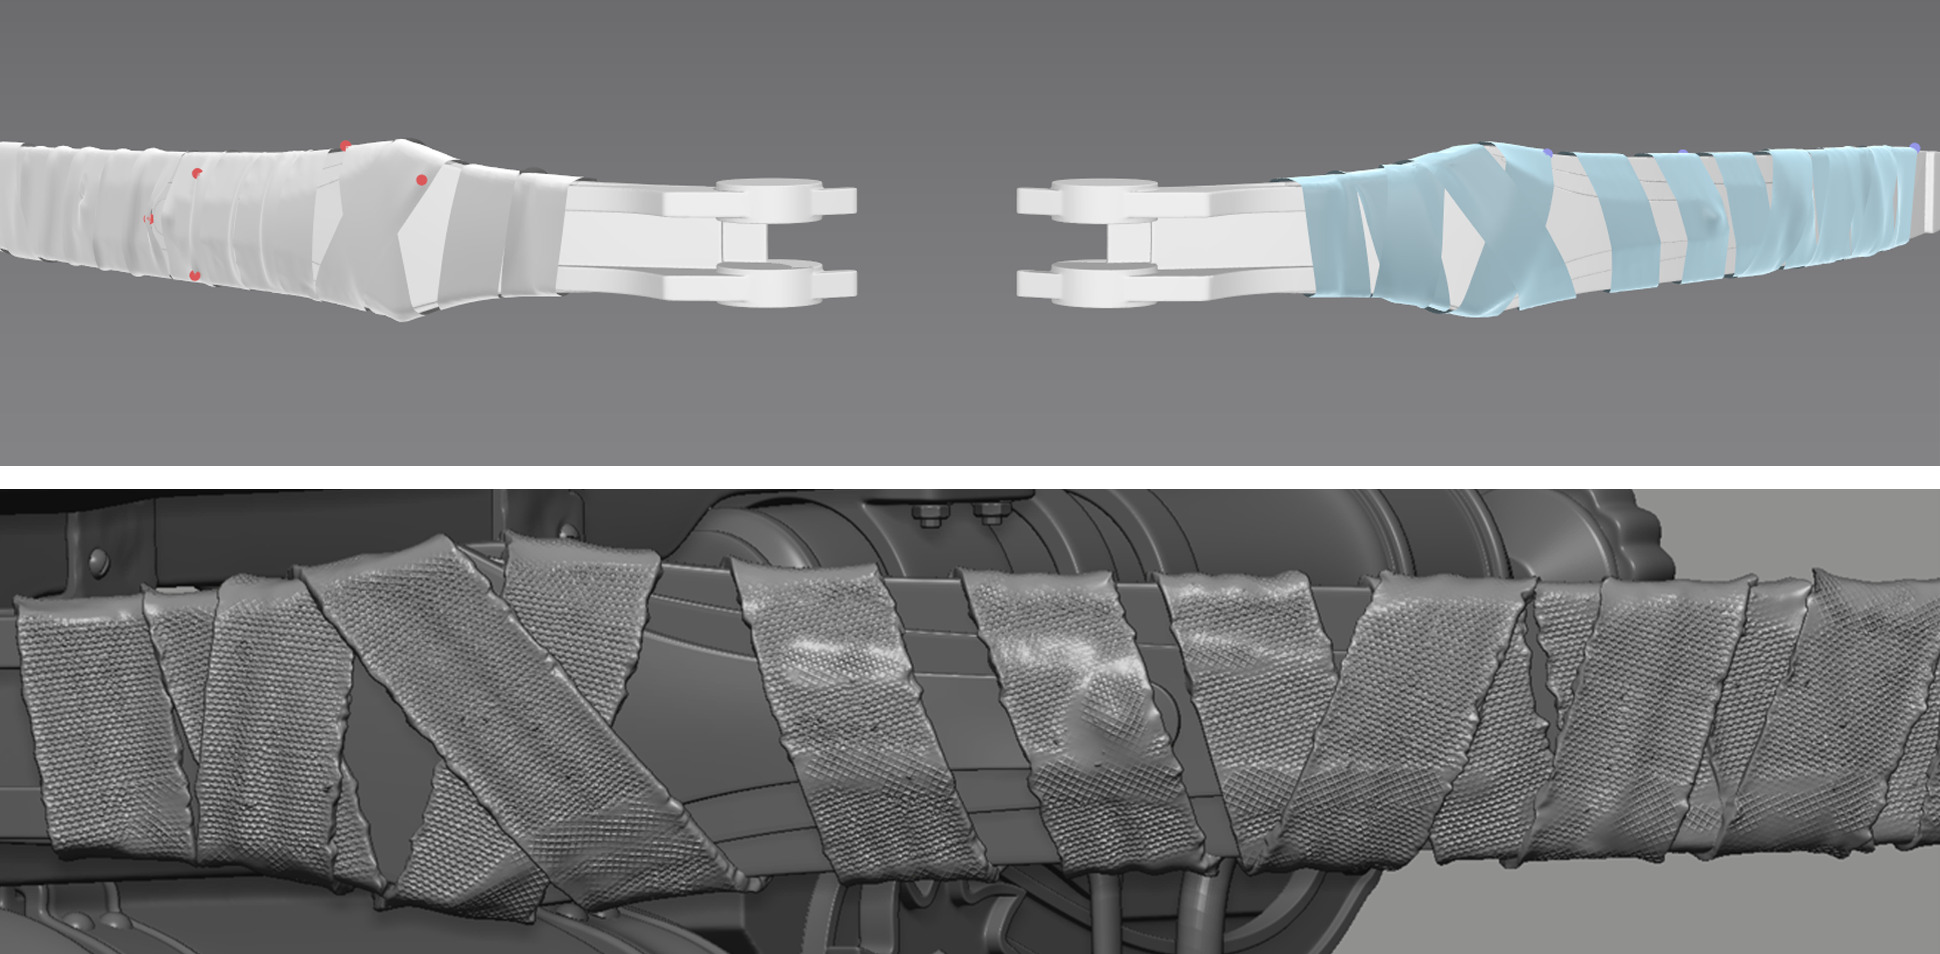
The fabric wrap on the crossbow limbs was made in Marvelous Designer. I tried to create a strong rhythm in the folds, leaving some gaps so the metal beneath could peek through.
During export, I preserved the UV layout so I could later apply a pattern along the winding direction; otherwise, I’d have to paint it manually after retopology.
To add variation and wear, I used several textile patterns. In some places, the pattern is intentionally missing to emphasize damage and signs of repair.
Detailing & Logic
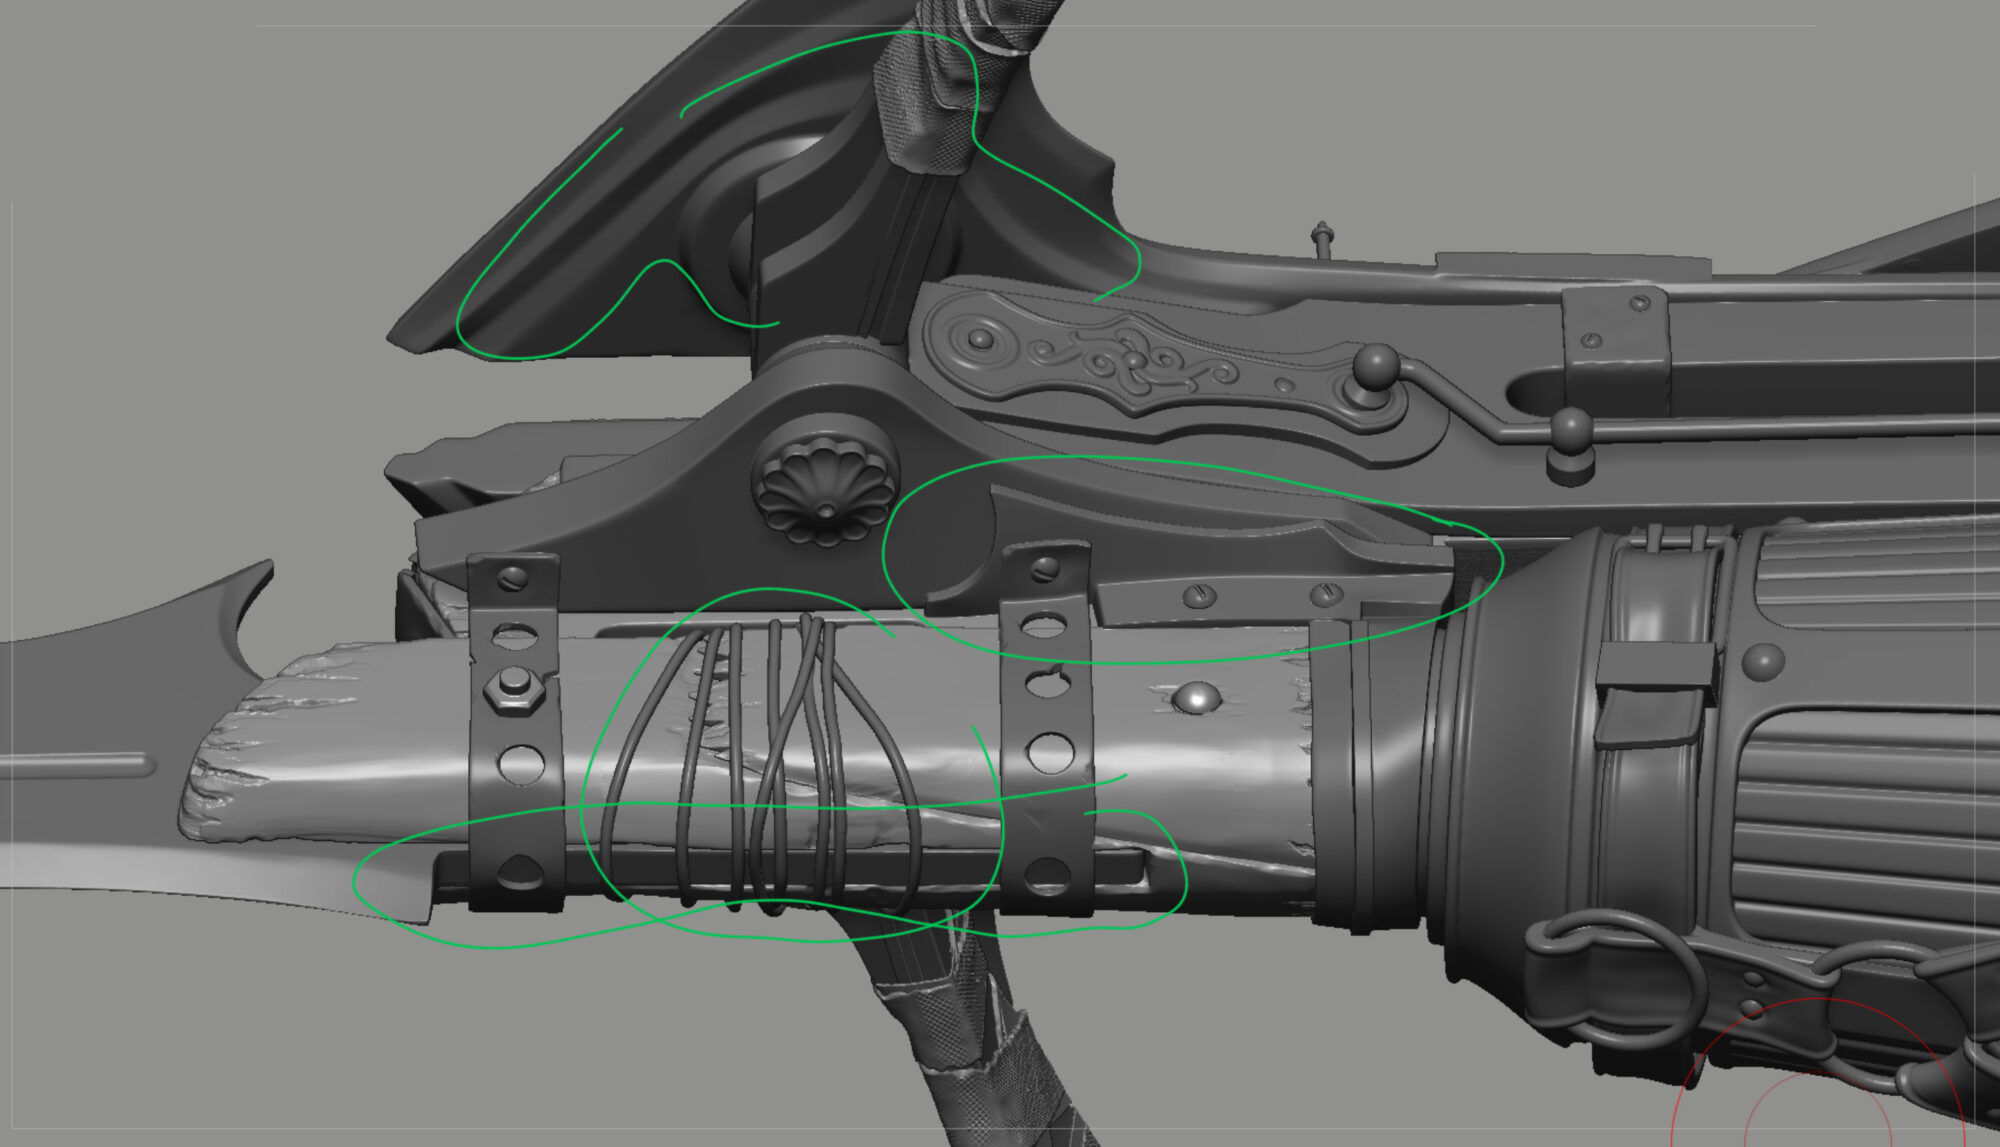
Even in less visible areas, it’s worth designing interesting shapes and staying true to realism. For example, if you add a wire wrap, give it a function.
In my case, the wire is clamping a crack in the stock as a temporary fix.
Stick to the principle of functional design: every element should serve the concept and the construction.
Lowpoly
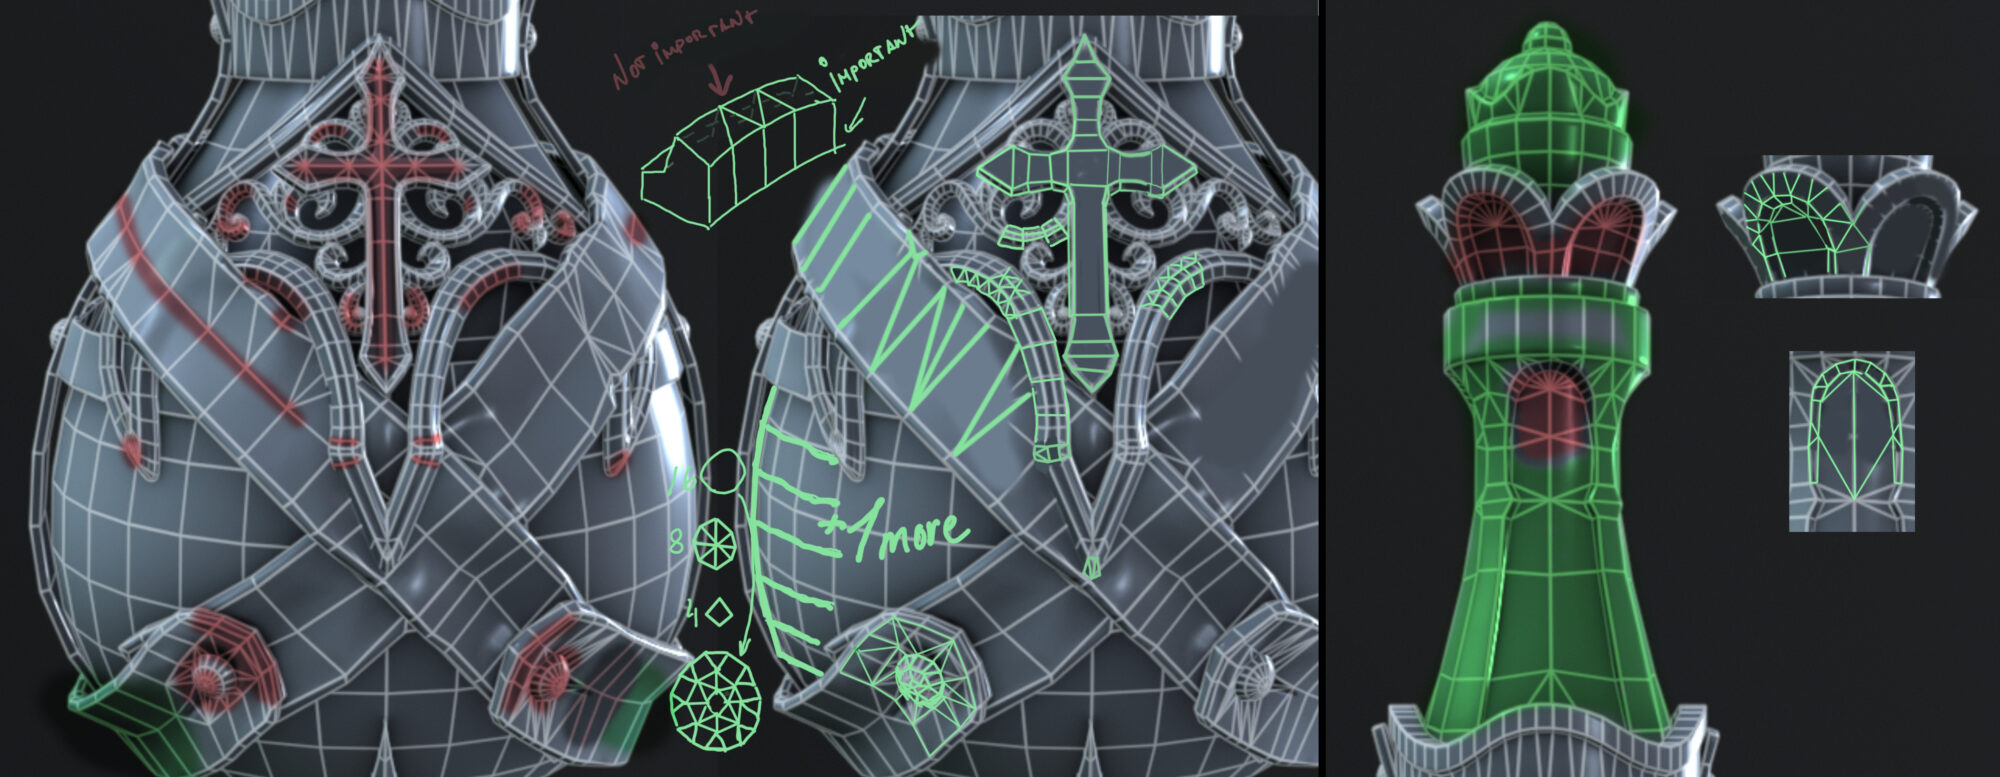
Even though modern engines allow for higher polycounts, smart optimization is still important. Aim for the lowest possible polycount without sacrificing shape or readability.
My approach to hard surface retopology differs from character work; it requires more meticulous geometry, smoothing logic, and density control.
I received a lot of feedback on my topology and kept refining it, especially around bolts, bevels, tech gaps, and seams.
UV & Baking
I unwrapped the UVs in Maya and baked the maps in Marmoset Toolbag 4.
When creating UVs, I aim for straight, rectangular islands — they pack tighter and waste fewer pixels.
This is especially important for curved elements: unwrapping them into straight strips helps maximize texel density (see example in the image).

In Marmoset, I usually bake the following maps: Normal Map, Curvature, Thickness, ID Map, Ambient Occlusion.
The rest of the maps I bake in Substance 3D Painter.
Texturing
Texturing is one of the most engaging and creatively rich stages of the workflow. At this point, it’s especially important to:
- Gather high-quality references.
- Define the base materials and color palette.
- And establish a visual logic for wear and tear.
I usually start simple: assigning base values for Base Color, Roughness, and Metalness to all elements. Then I add a Curvature map to bring the materials to life a bit, and from there I begin experimenting. After a few test renders, I make final decisions for each material.

Researching and analyzing references often takes a significant amount of time, sometimes even several days. This is particularly true for small details.
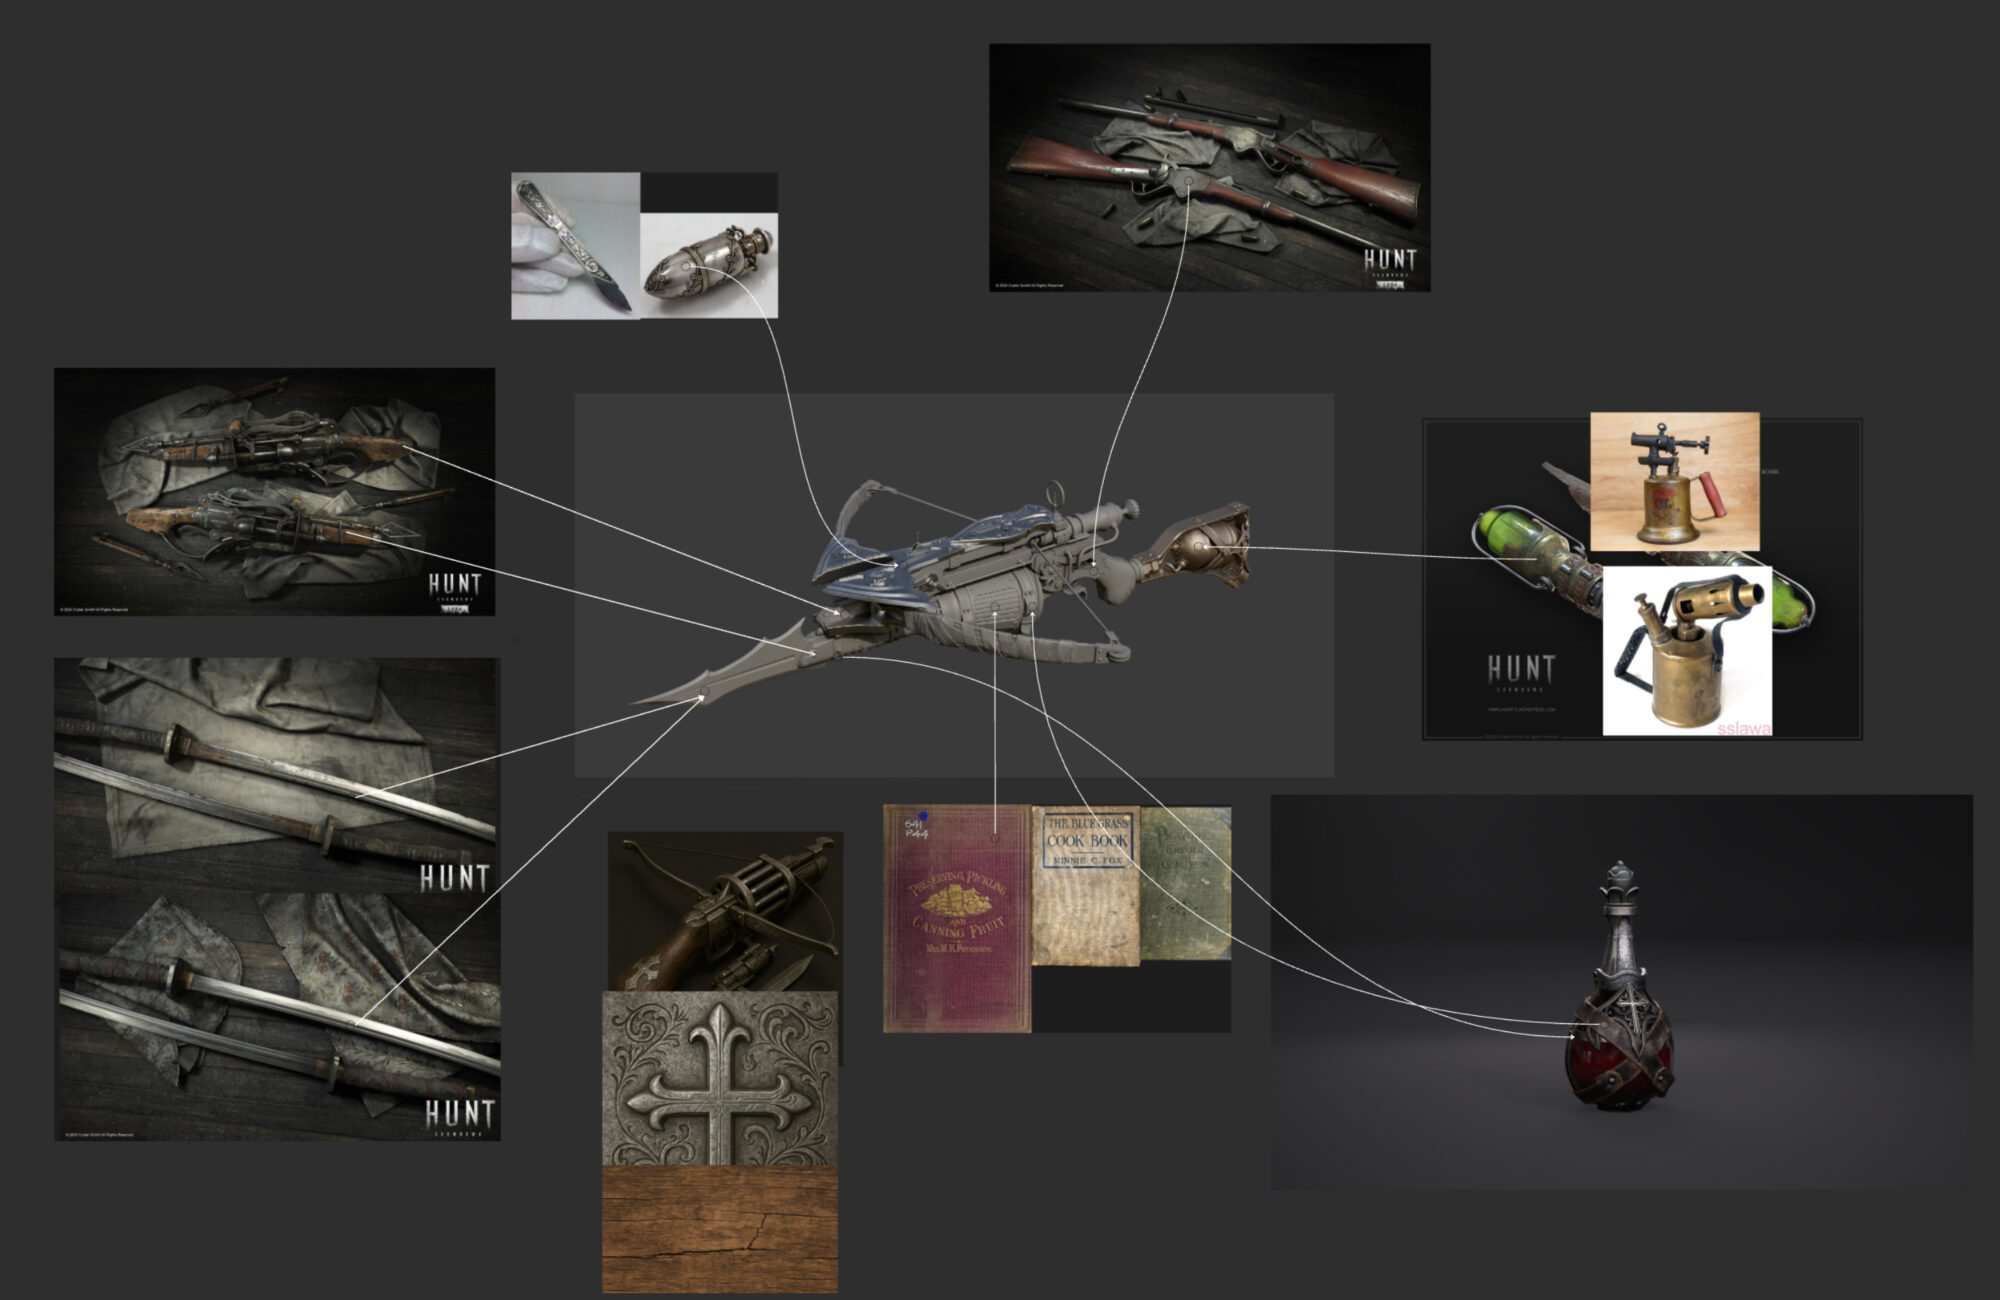
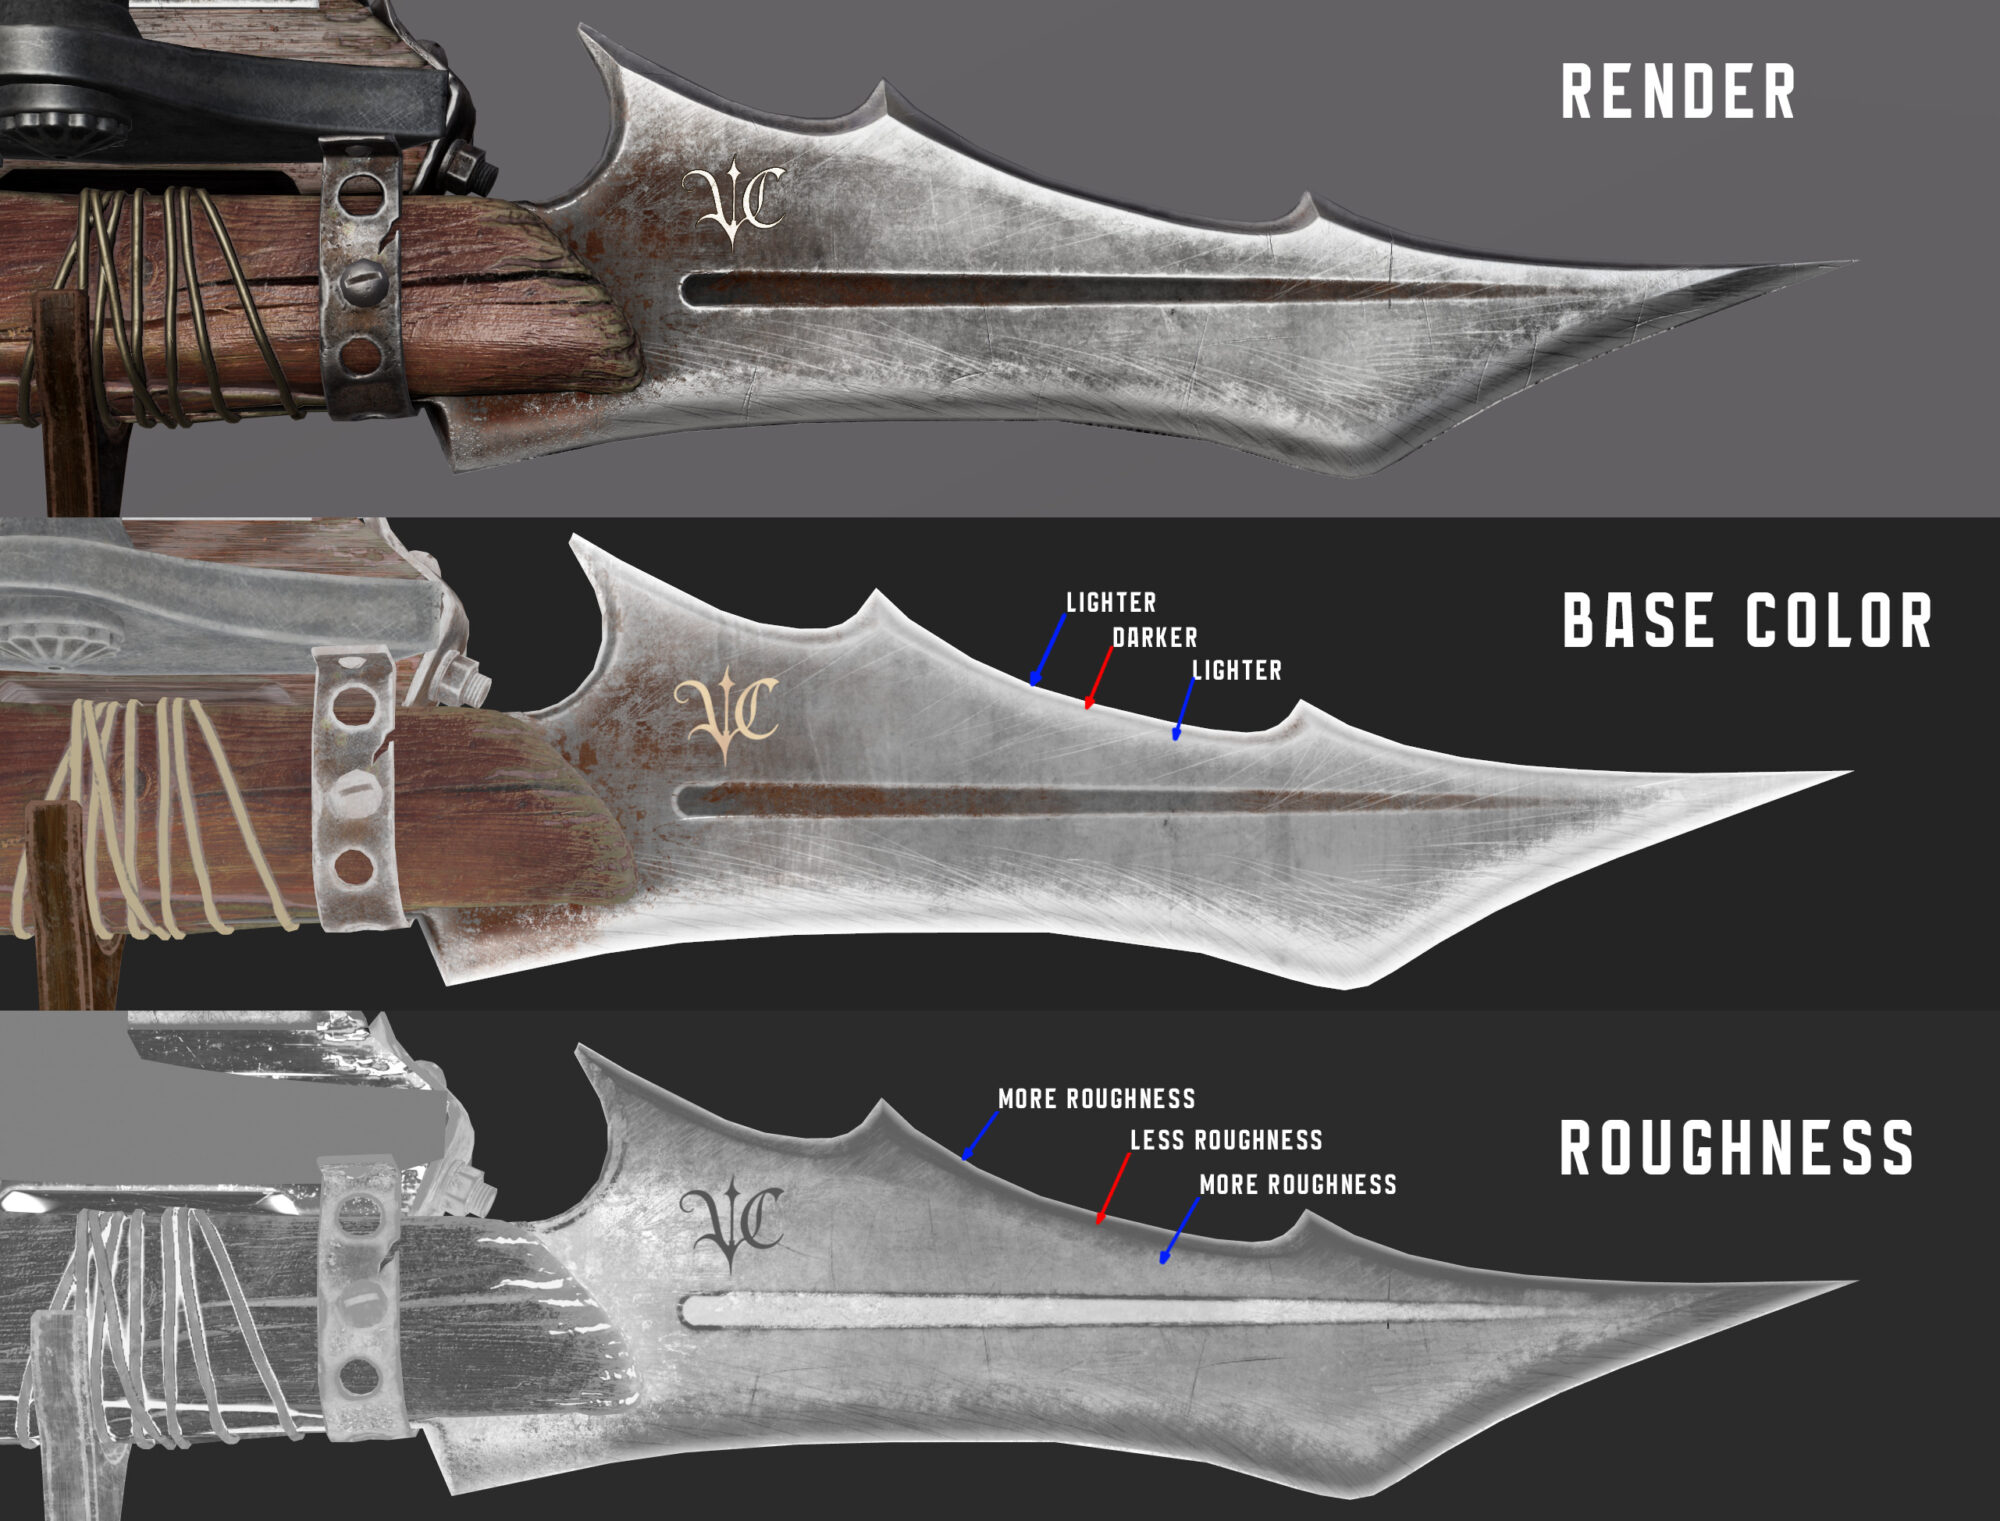
For example, when texturing a knife blade, reference analysis shows how important the micro-surface variations are:
- The cutting edge is the brightest and roughest part,
- Behind it is a darker area with a smoother texture,
- And closer to the base, the metal brightens again.
This gradient of wear and light reflection results in a much more realistic look.
To achieve a believable wood texture, I sculpted large and mid-size details directly into the highpoly. During texturing, I used materials from the Unreal FAB library, including:
- Crack and split textures,
- Micro-details for wear,
- Noise and irregularities in the Roughness channel.
The accompanying image shows which details were built into the highpoly and which were added during texturing.

Shaders & Technical Details
The final asset was built with Unreal Engine 5 in mind.
During the texturing phase, I constantly switched between Substance 3D Painter and Unreal Engine to check how the textures looked in the final environment. As I made changes in Substance, I regularly reviewed the results in-engine to ensure accurate visual consistency.
Wherever possible, I made adjustments directly within the Unreal shader; this is especially important for complex or sensitive materials like glass.
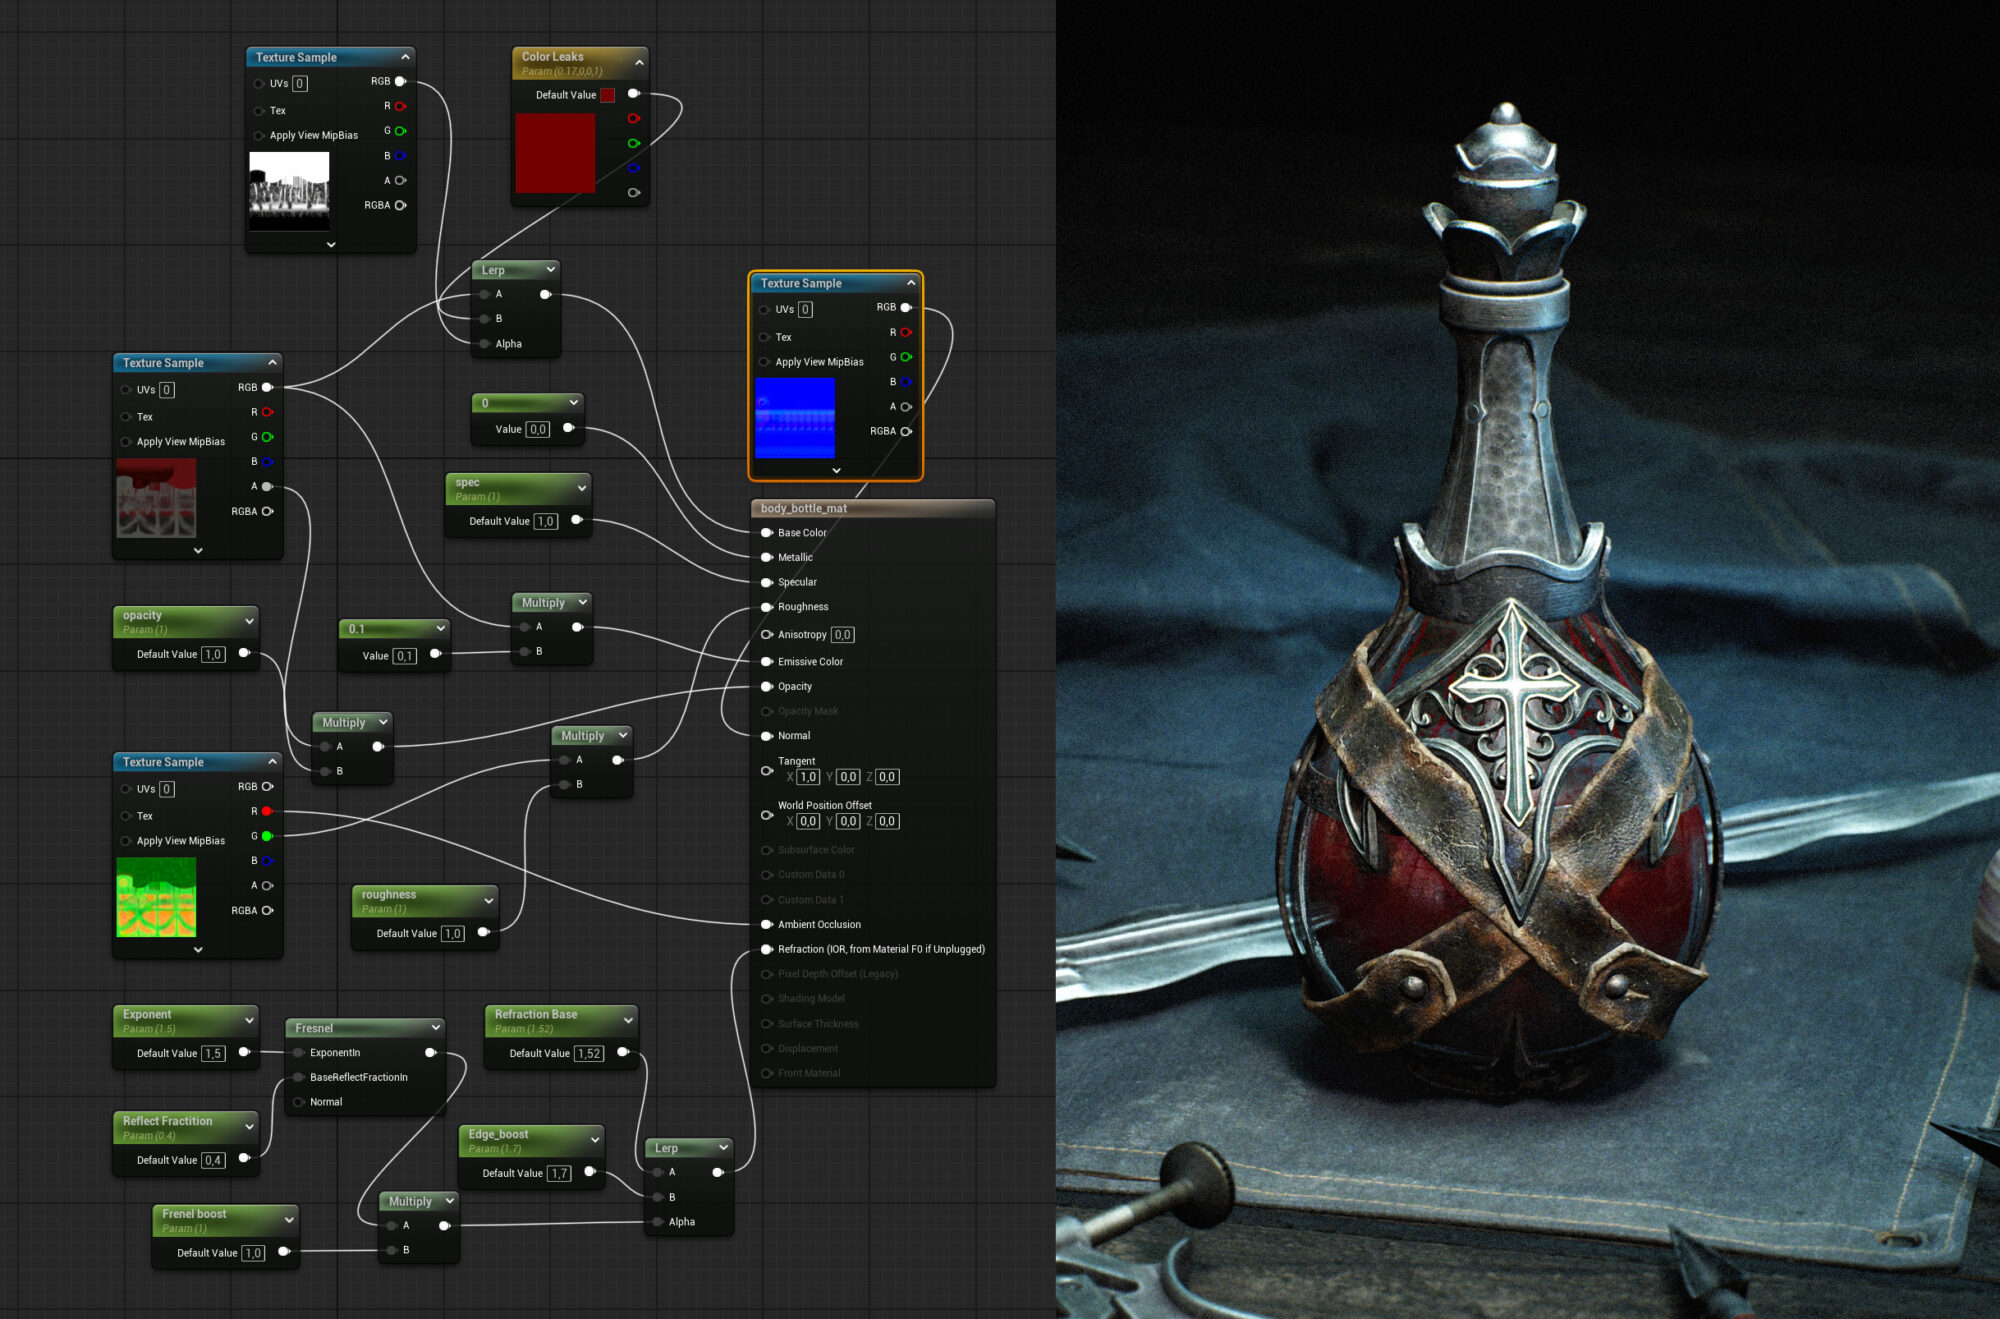
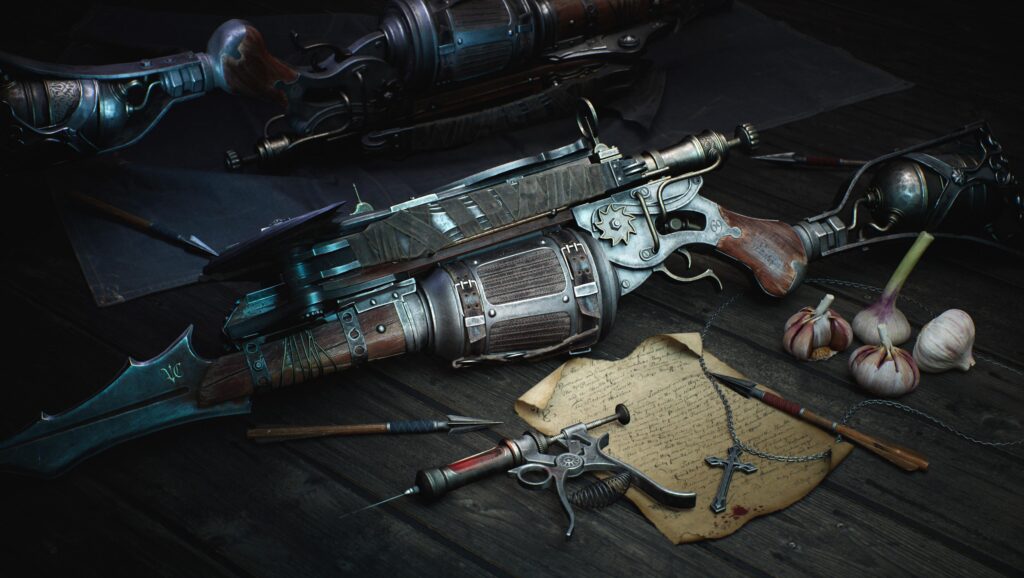
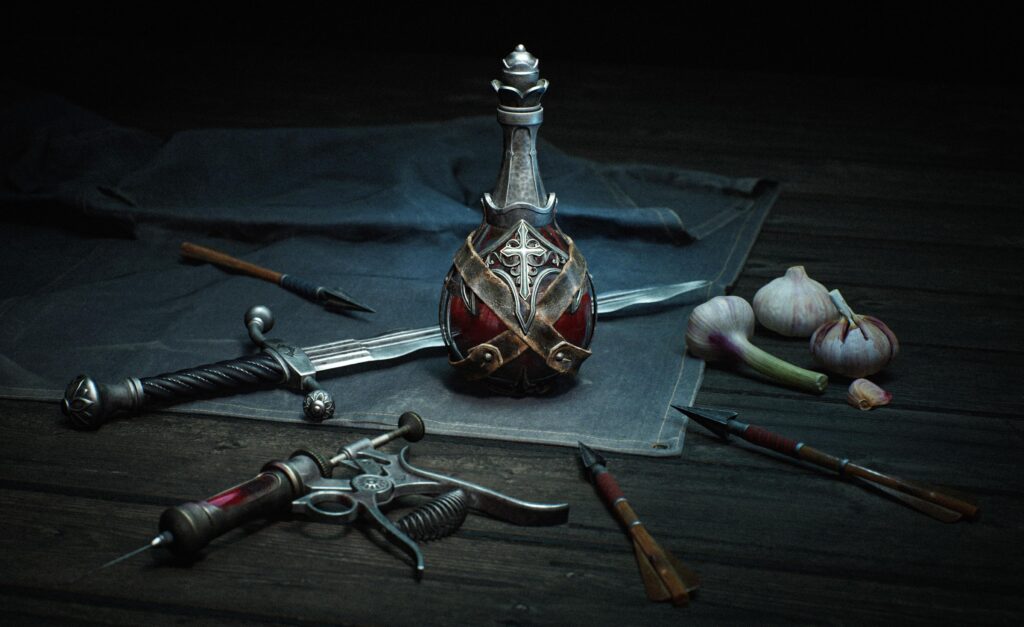
One of the unique features was the use of Emissive in the glass shader to simulate blood streaks. This creates a realistic effect: the blood appears semi-transparent, deep, and slightly glowing.
To control the glow, I used a mask and blended it with the emissive color via a Lerp node, allowing me to highlight only selected areas of the surface without overexposing the entire object.
Rendering & Post-Processing
The final render was done in Unreal Engine 5.5. In my opinion, Unreal delivers a more cinematic result than Marmoset, especially thanks to its in-depth lighting setup, atmosphere tools, and post-processing capabilities.
That said, some materials — like glass — require more detailed tuning directly in the engine.
An additional advantage of Unreal is the ability to build complete scenes with environment assets, atmospheric effects, fog, VFX, complex lighting setups, and post-processing layers.
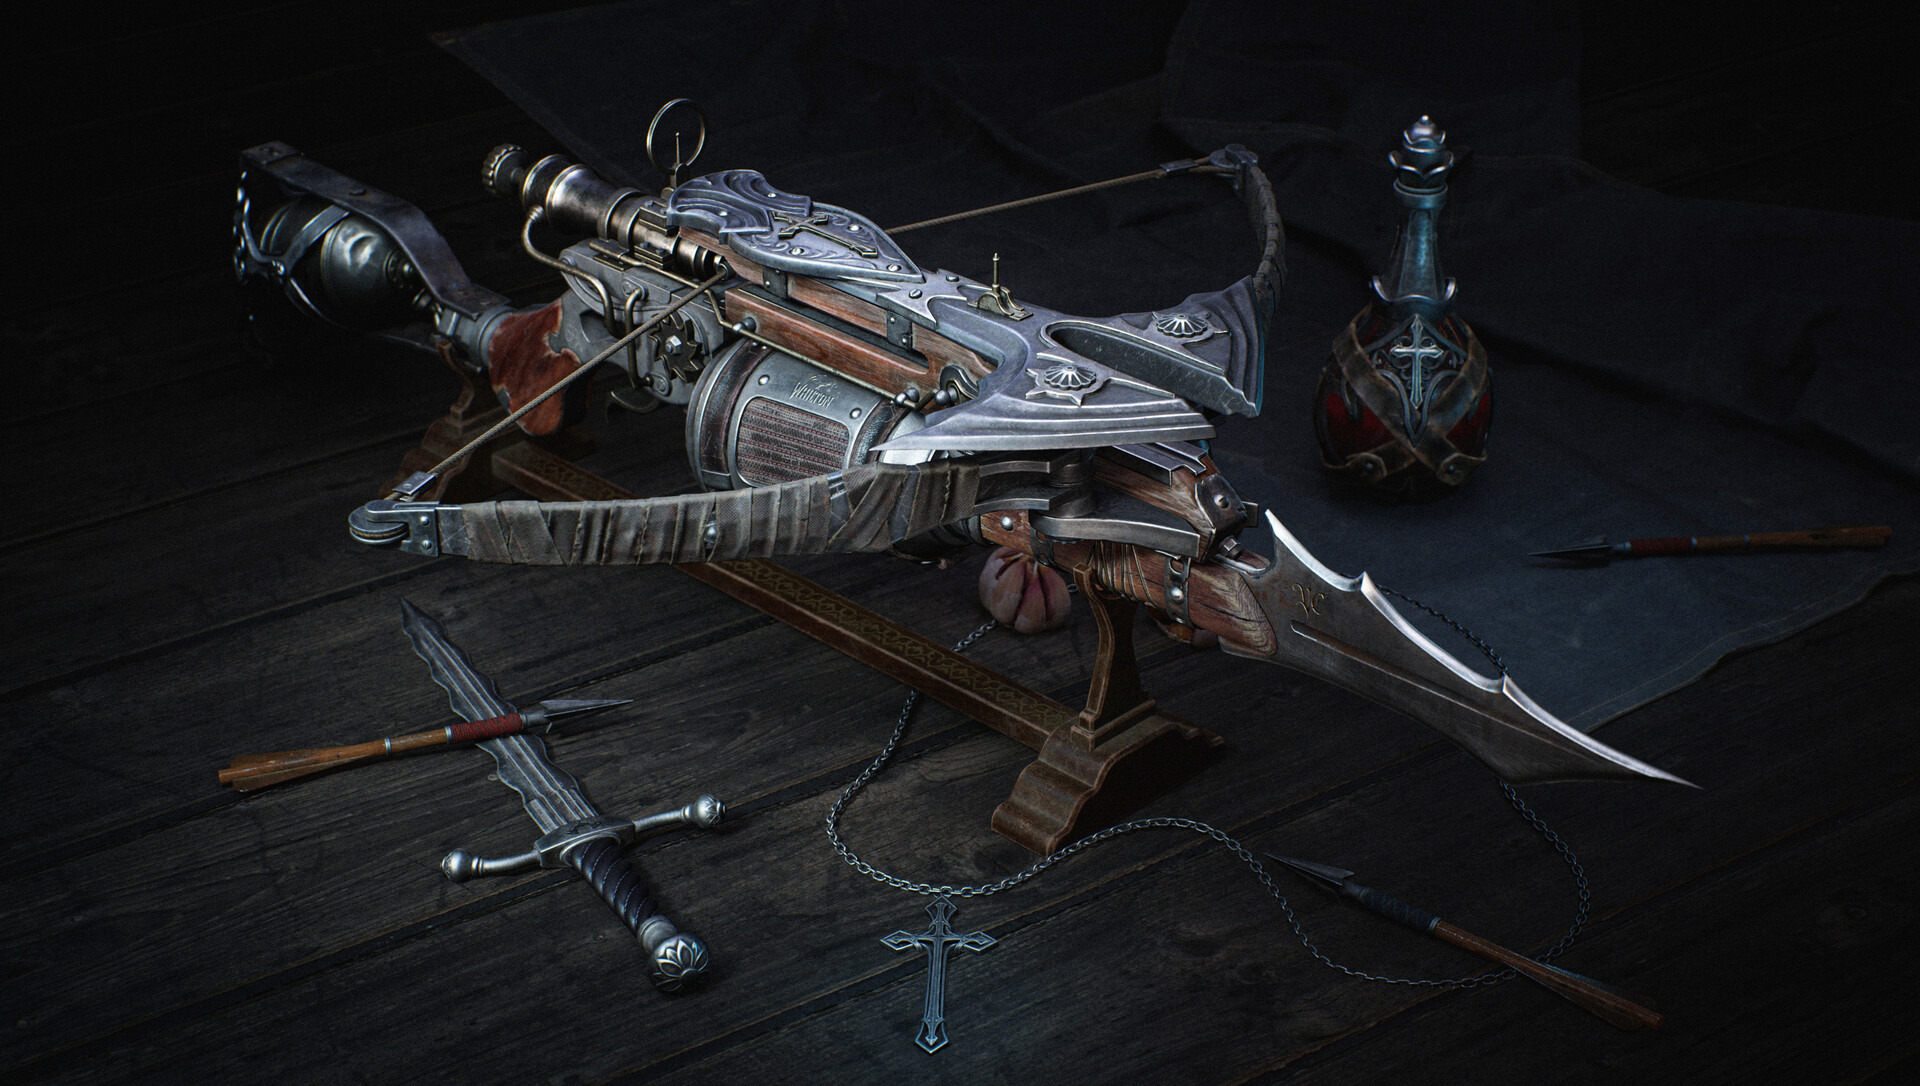
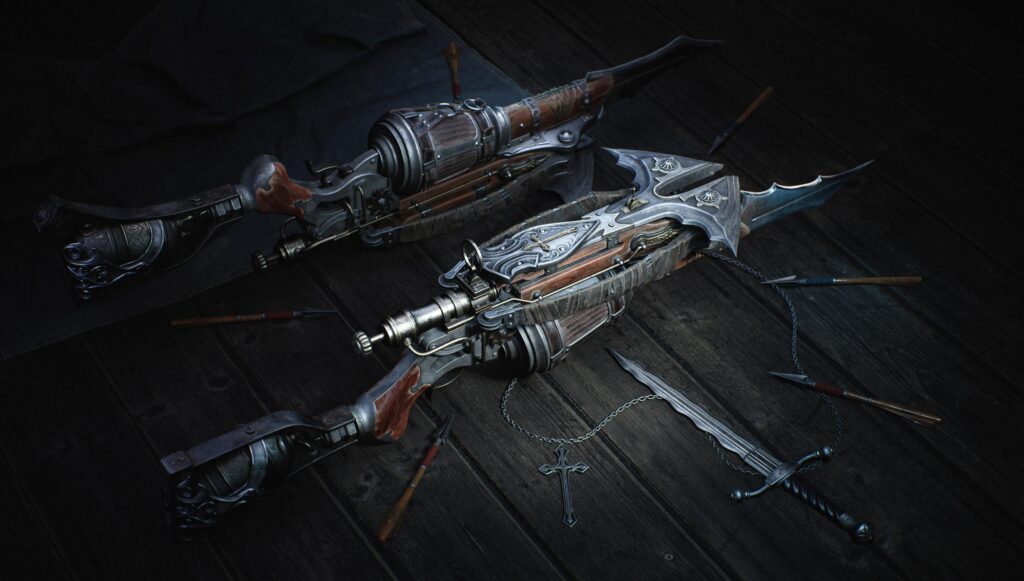
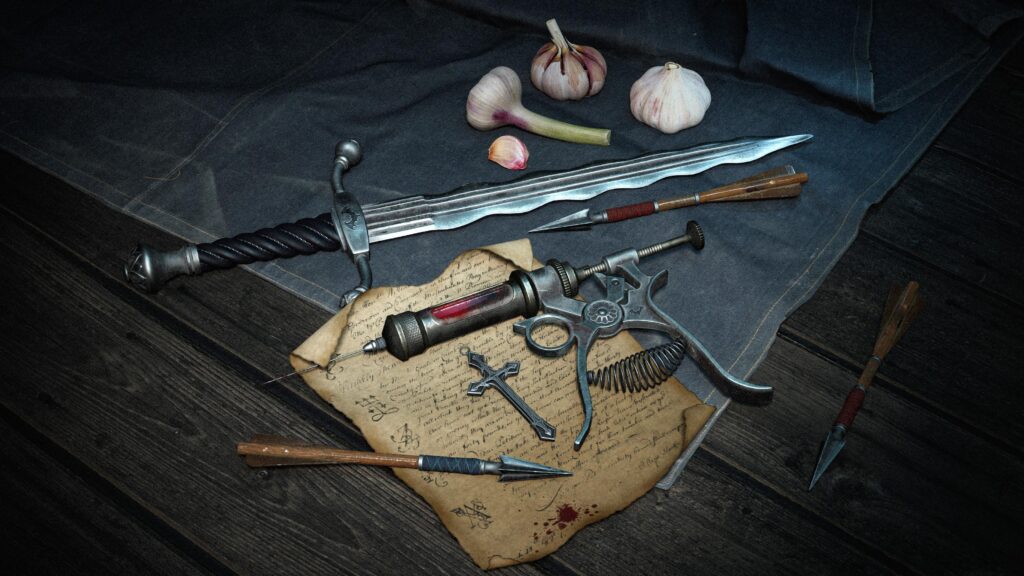
To enhance the composition and immerse the viewer in the scene, I added several supporting props: a knife, a syringe, a crucifix, paper sheets and a blood vial.
These elements helped set the mood and gave the frame a sense of completeness.

To achieve a cinematic visual style, I used a Post Process Volume with the following settings:
Exposure
- Min Brightness: 1.0
- Max Brightness: 1.0
- Exposure Compensation: 0.5 – 1.0
Color Grading – Global
- Contrast: +0.3
- Gamma: 0.95
- Gain: 1.05
- Saturation: 0.95
Color Grading – Tones
- Shadows: blue tint
- Midtones: warm tint
- Highlights: neutral or slightly warm
Film
- Toe: 0.5
- Shoulder: 0.6
- Crush Shadows: 0.2
- Expand Gamut: enabled
Depth of Field
- Method: Circle DOF
- Focal Distance: set according to the scene
- F-Stop: 1.4 – 2.8
- Blade Count: 7+
Bloom
- Method: Convolution
- Intensity: 0.5 – 1.0
- Threshold: 1.2
- Dirt Mask: optional
Vignette
- Intensity: 0.3
Chromatic Aberration
- Intensity: 0.4
Conclusion
Working on this crossbow allowed me to step outside the usual character art pipeline and focus on weapon design as a standalone artistic challenge.
The project helped me structure my approach to hard surface modeling, improve my understanding of form, and refine my work with materials.
I’d be happy if my experience proves useful to other artists, especially those looking to level up their skills in creating complex game-ready assets.

