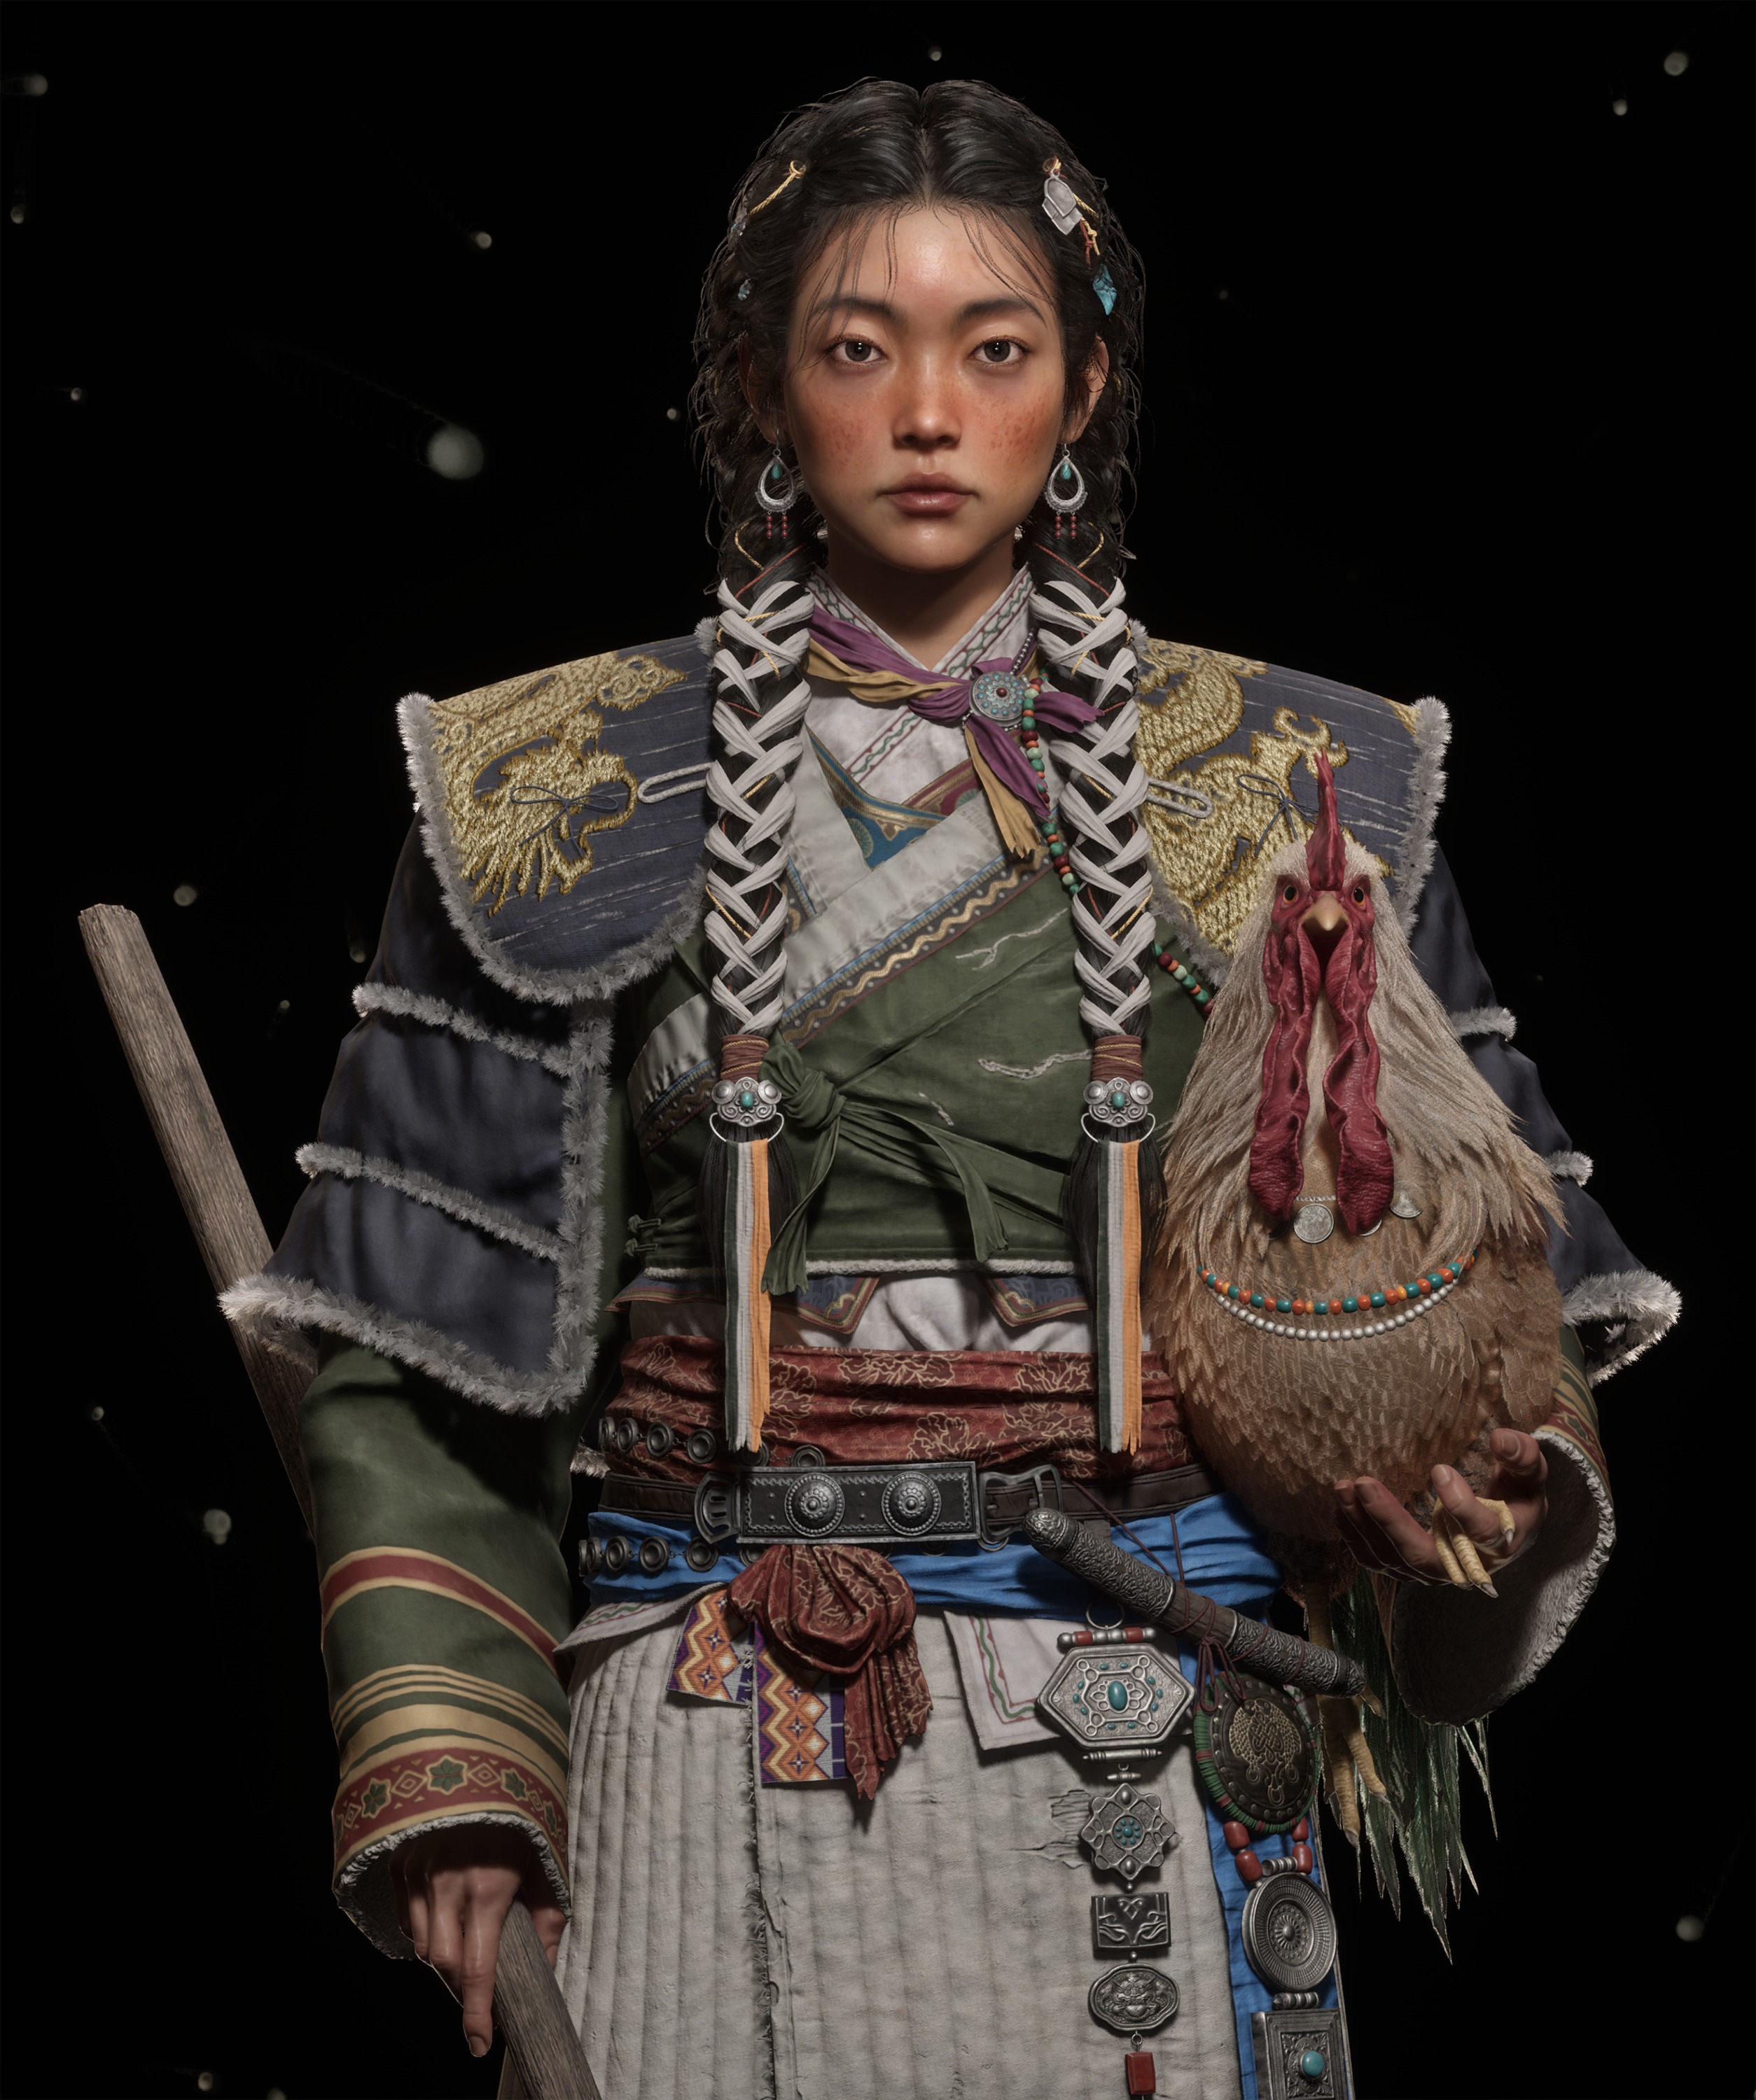
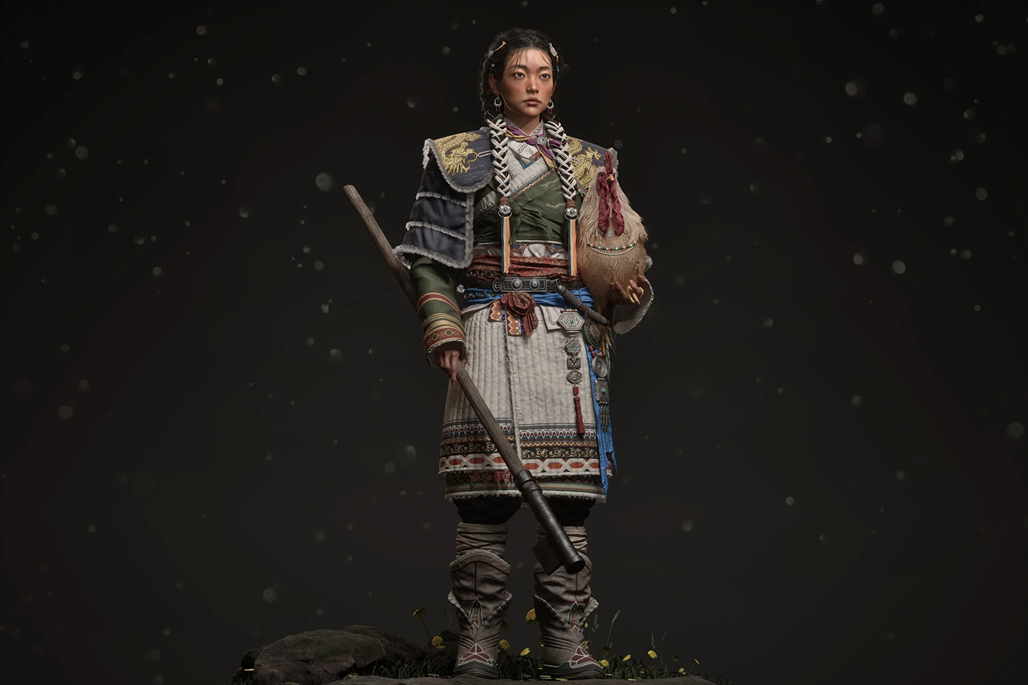
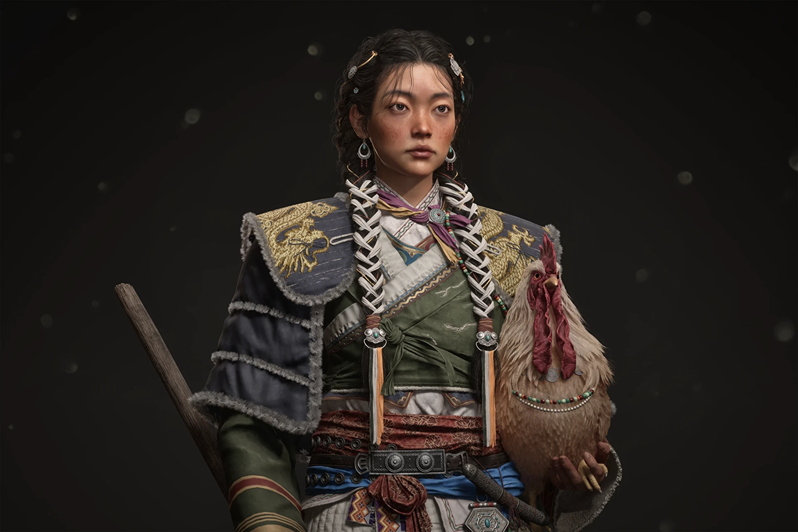
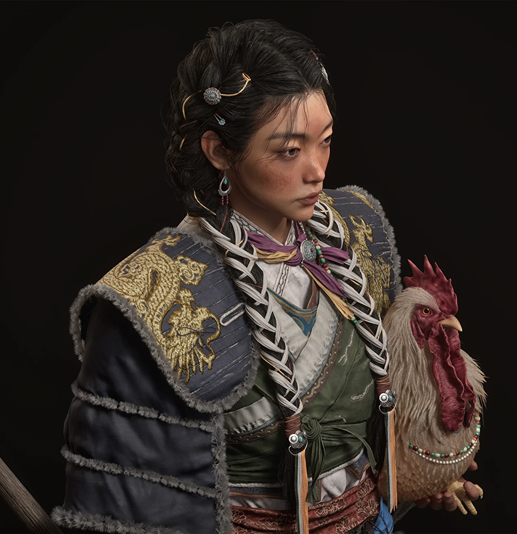
Steppe Nomad


Introduction
Hi, I’m Hee-mang Park, a 3D character artist based in Seoul, South Korea.
I’m passionate about crafting characters that convey a project’s worldbuilding and overall mood. Currently, I’m dedicated to refining my skills as I work toward a career in the games industry.
Project
I chose this work for several reasons. I’ve always had a personal interest in creating characters with an Oriental aesthetic, and I was particularly drawn to this character’s traditional attire and cultural details. I also saw it as an excellent opportunity to study complex layered clothing, diverse material expressions, and fur textures.
Beyond just replicating the look, I wanted to reinterpret the textures, mood, and emotional narrative of the original concept.
References & Inspiration
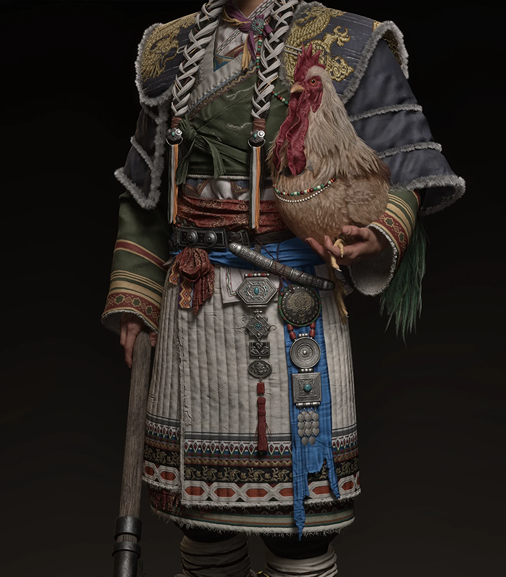
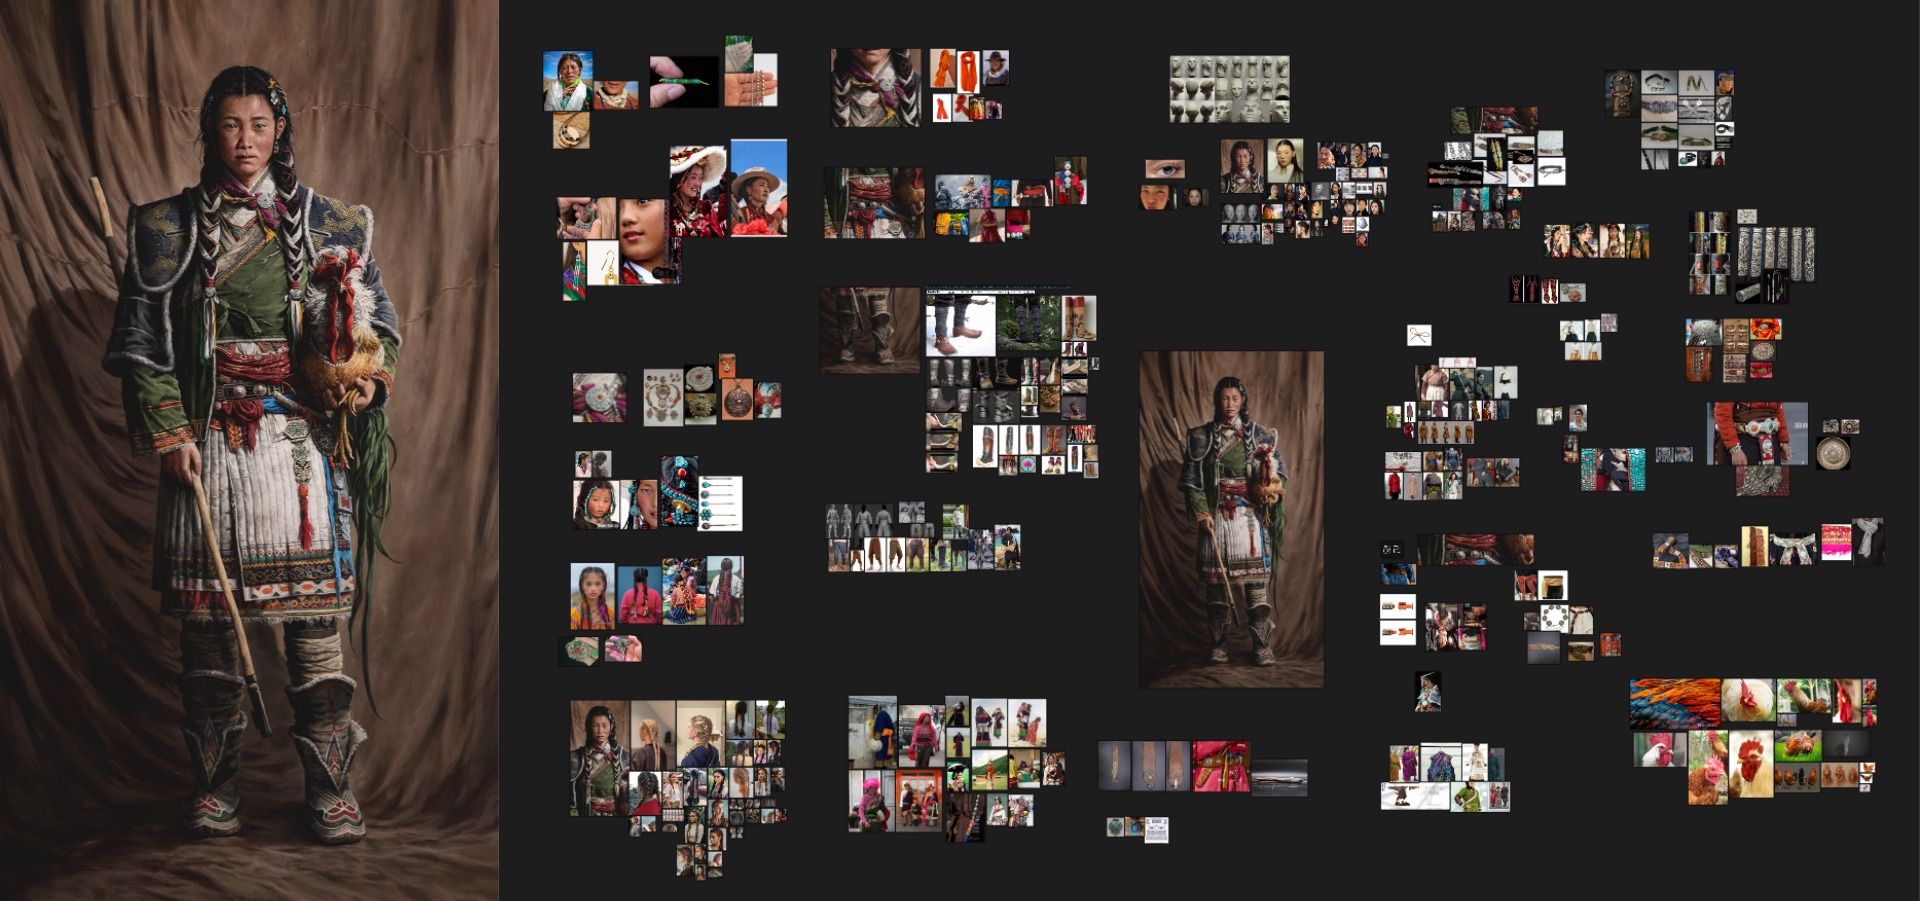
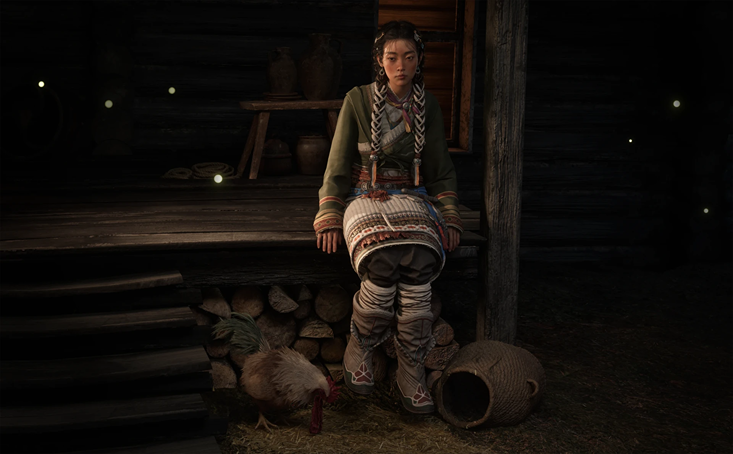
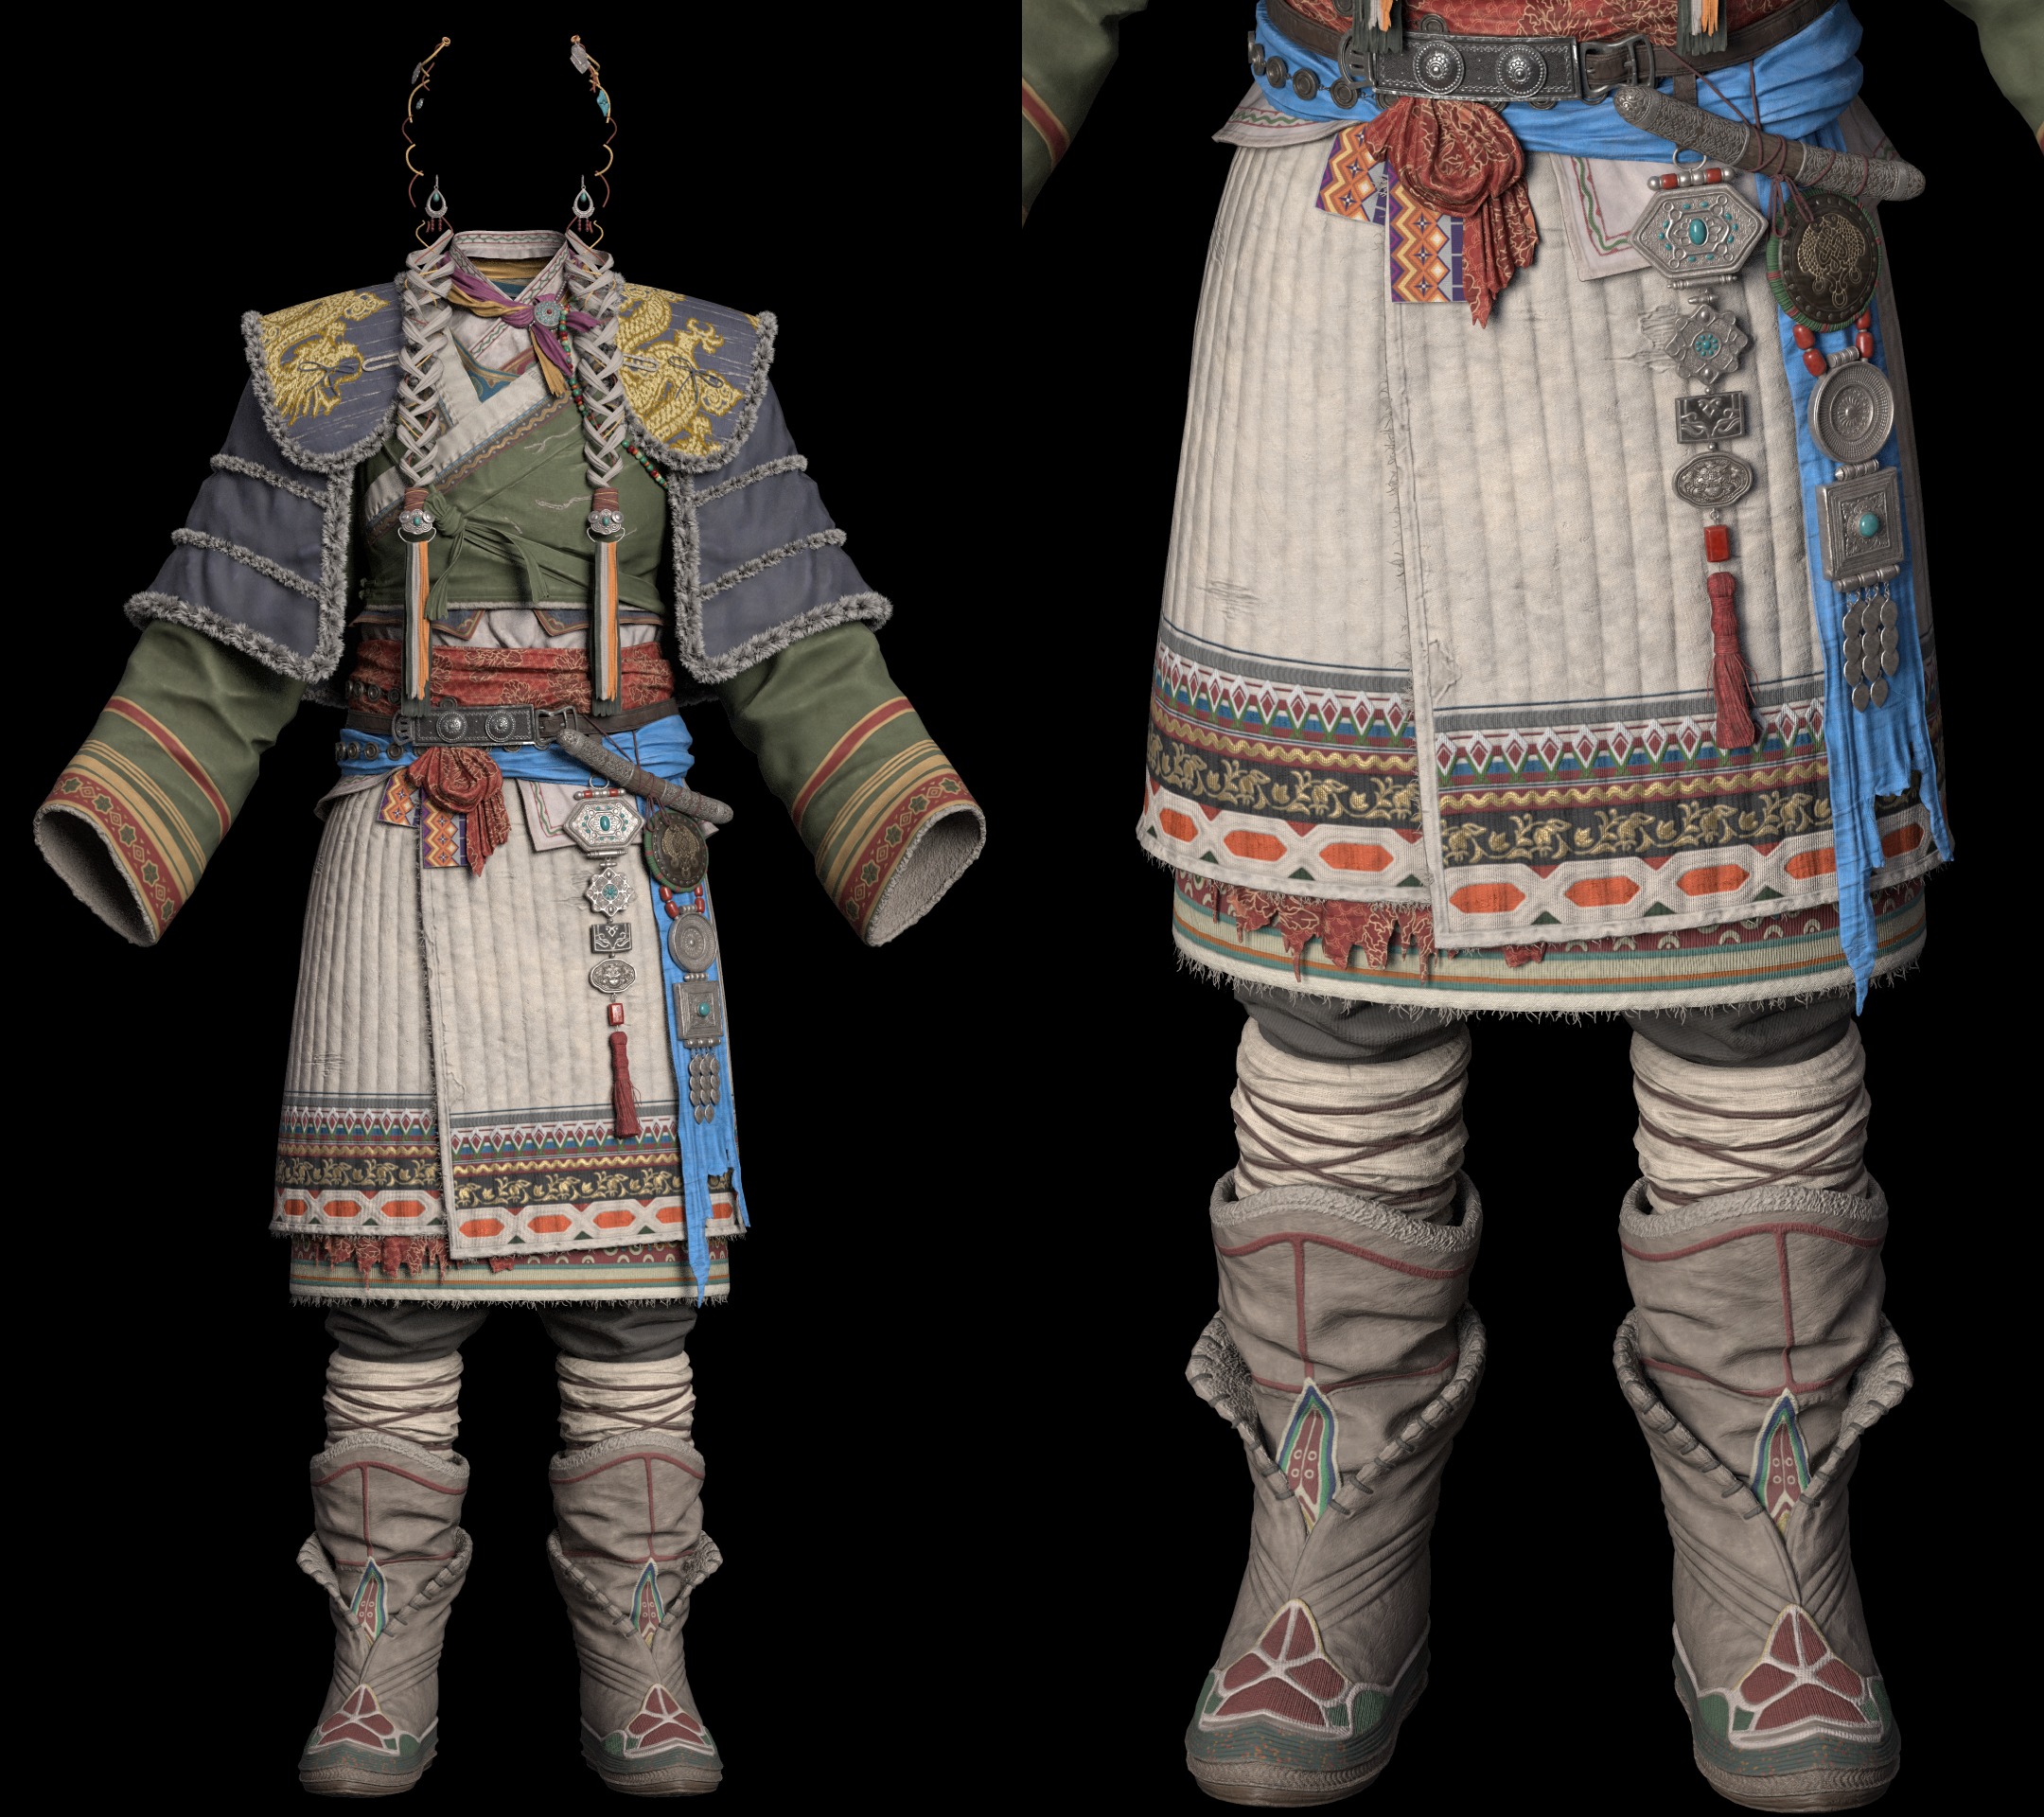
My primary goal was to preserve the authentic atmosphere of a nomadic aesthetic while pushing the realism of the details through thorough research. Because the character represents the rugged yet energetic life of a high-altitude environment, I gathered a wide range of reference material on traditional Tibetan and Mongolian attire.
I specifically focused on how weathered leather, hand-woven textiles, and tarnished metal ornaments evolve over time through wear and environmental exposure.
To ensure a structured workflow, I deconstructed each element of the concept into individual components, which I then meticulously organized using PureRef.
Software
- Modeling & Posing: ZBrush
- Modeling & Retopology: 3ds Max
- UV Unwrapping & Packing: RizomUV
- Baking: Marmoset Toolbag
- Texturing: Adobe Substance 3D Painter
- Assets & Environment: Quixel Bridge
- Real-time Rendering: Unreal Engine 5
- Post-processing: Adobe Photoshop
- Reference: PureRef
Blockout
I began by creating a blockout, focusing on capturing the primary forms and the overall silhouette.
Most of the sculpting was handled in ZBrush, where I frequently utilized Transpose Master to refine the proportions and ensure a well-balanced foundation before moving into the high-poly details.
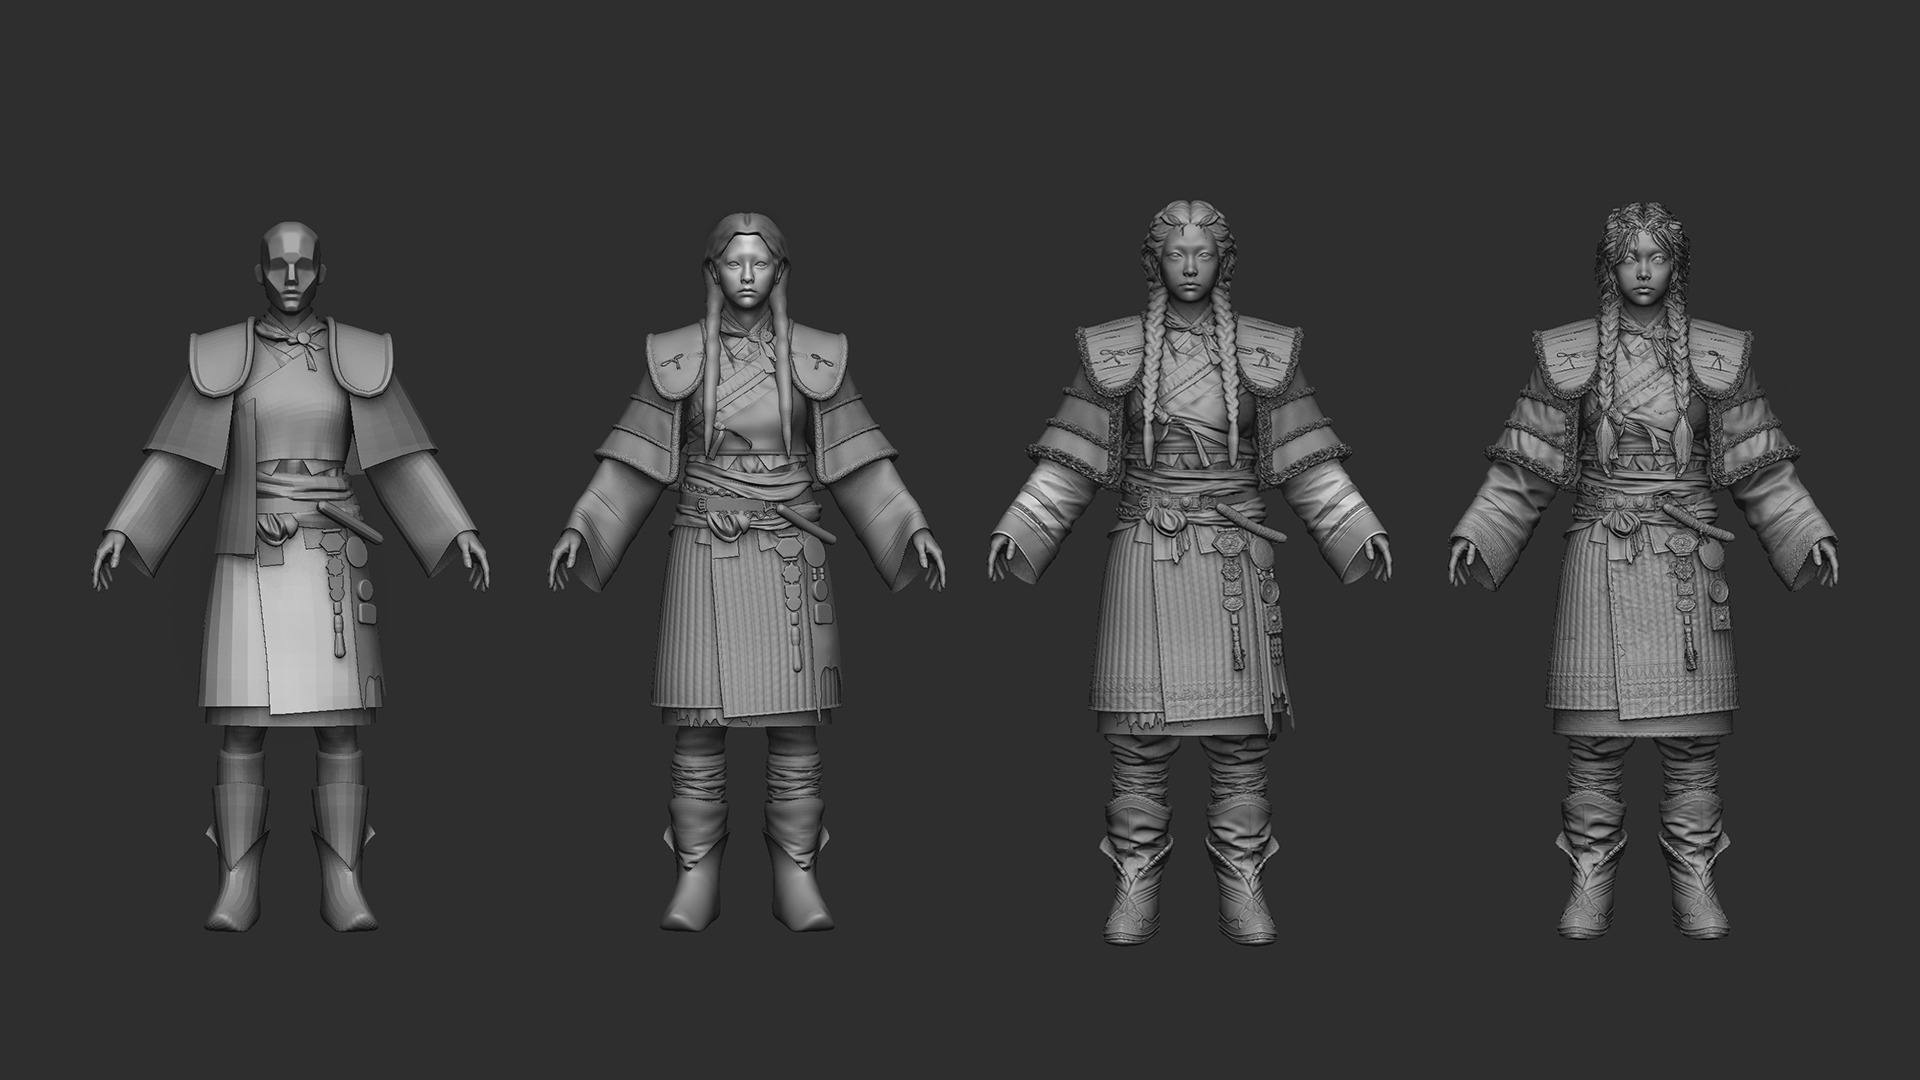
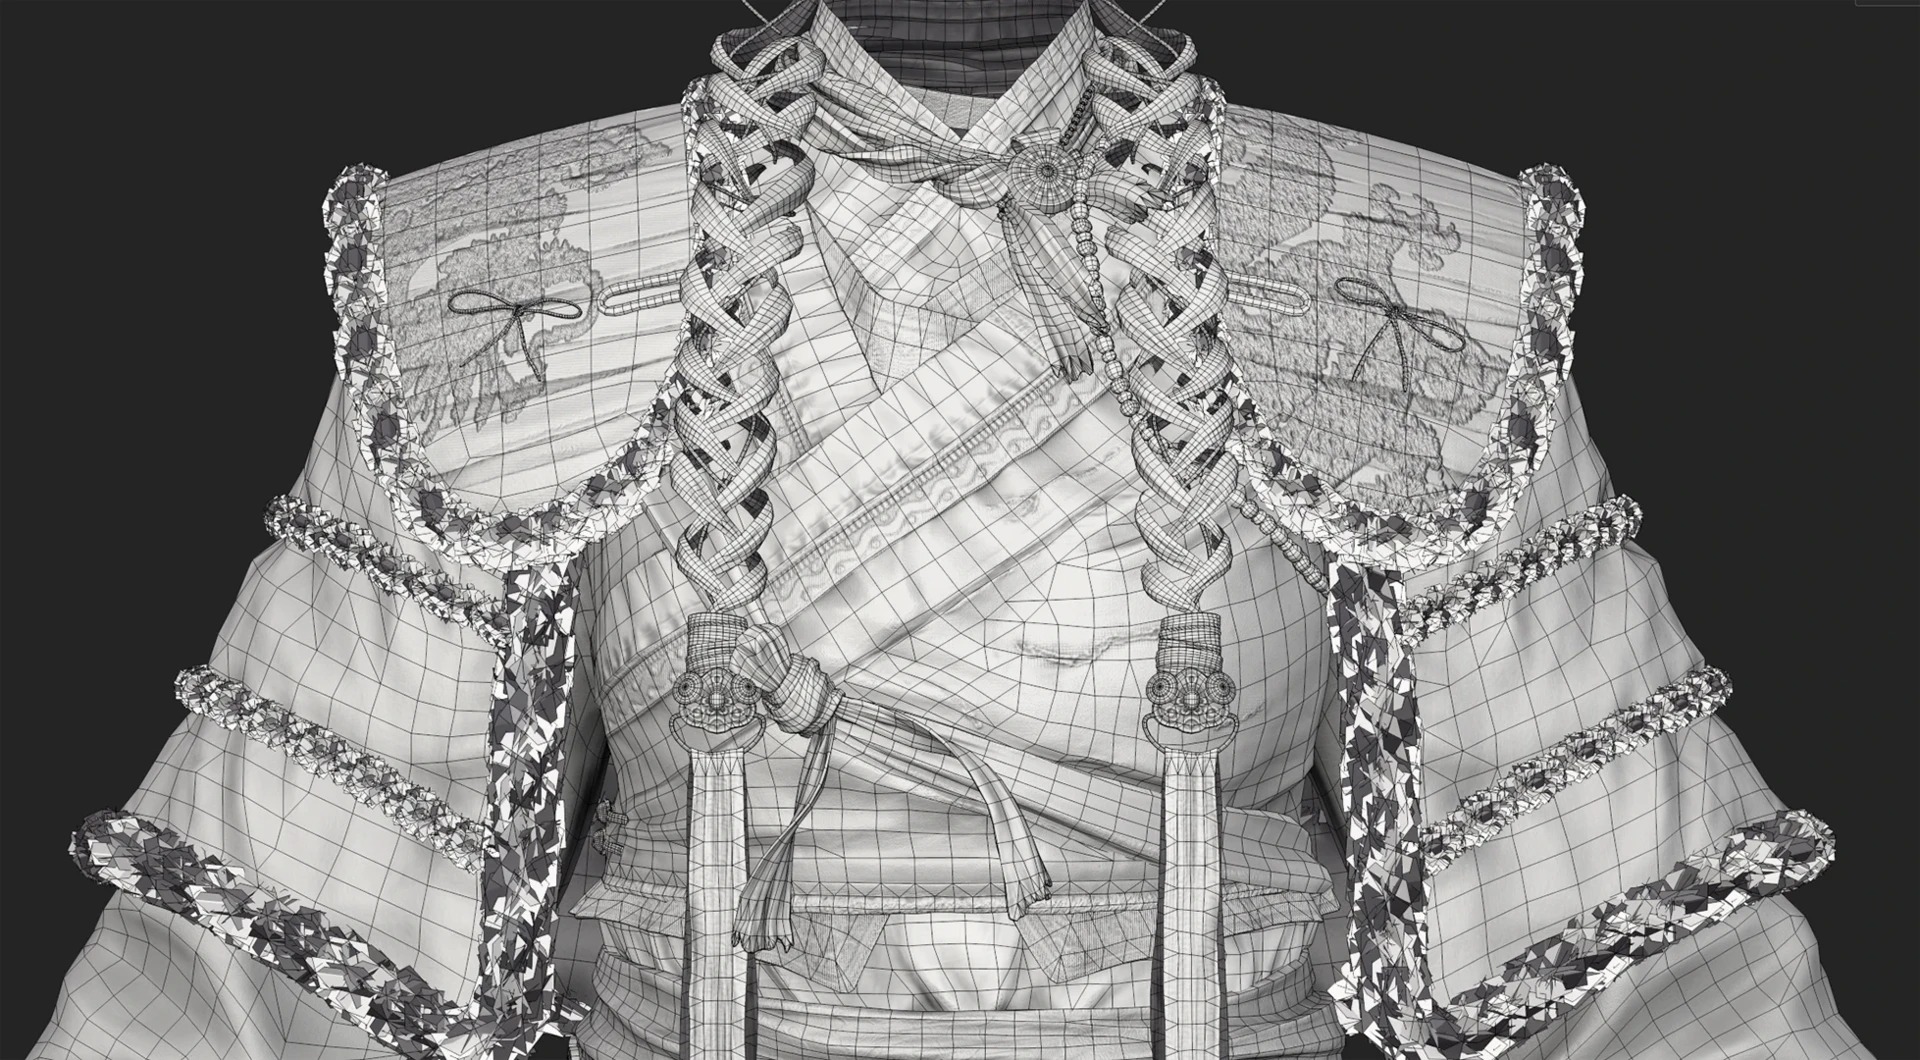
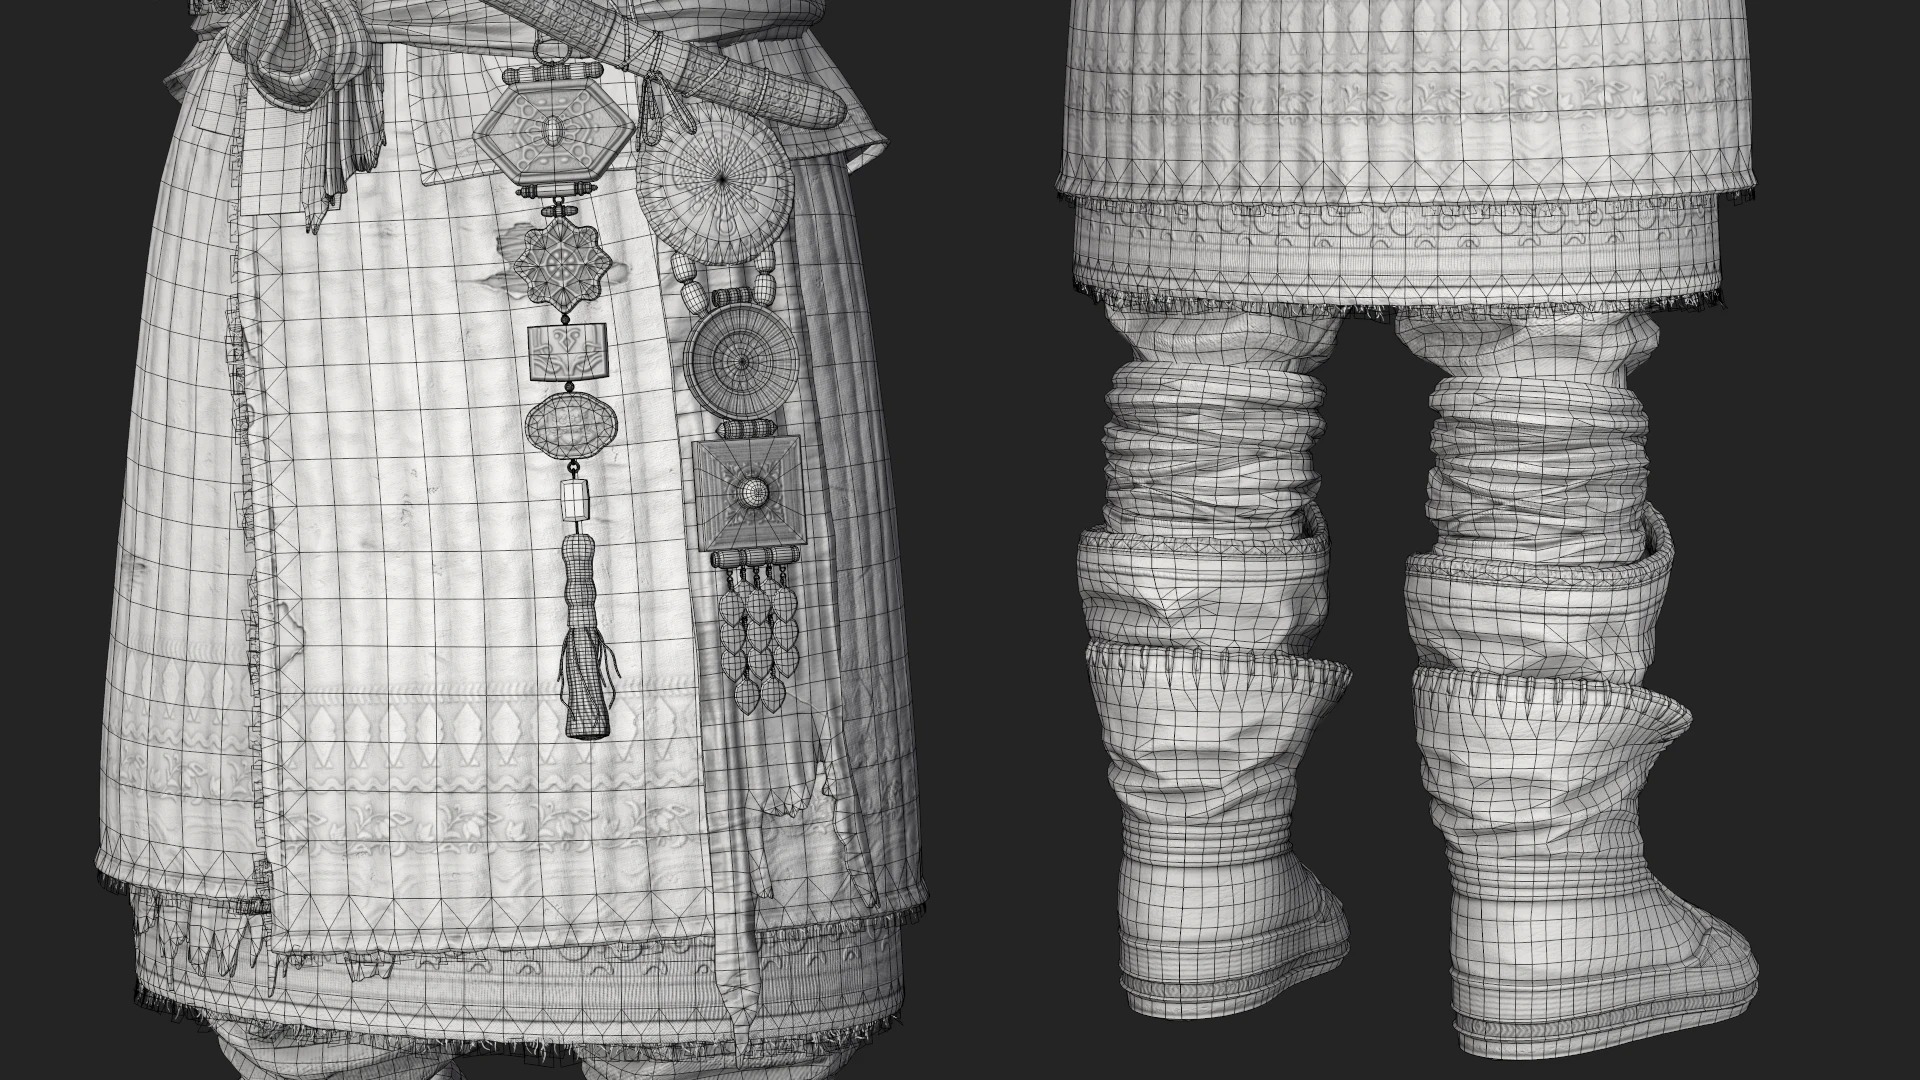
High-Poly
Work begins from a base primitive, or by deriving forms from that initial shape.
I start from a low-poly foundation and block in smoothing groups with Polygroups.
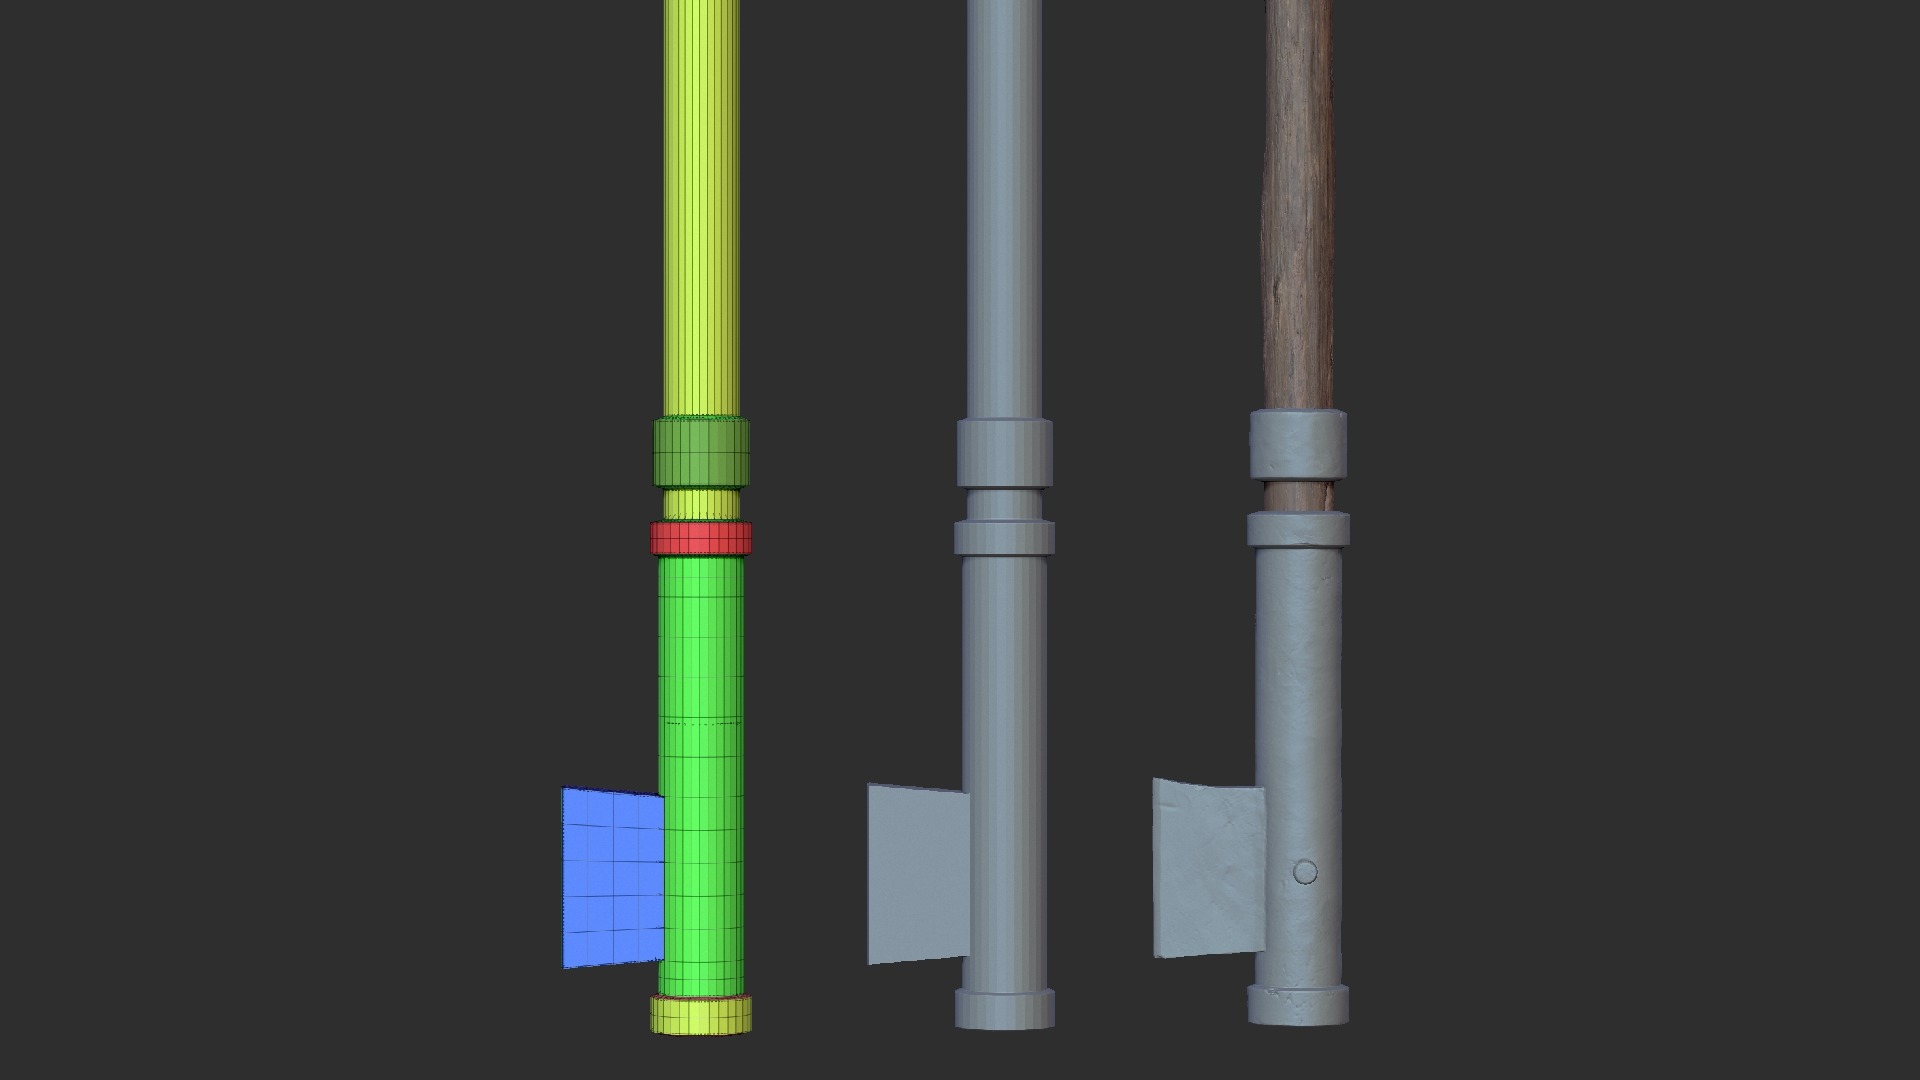
For the hoe tool, I used Quixel Megascans as a base for the wooden handle and added extra weathering where needed.
To achieve a variety of weathering effects, I used brushes such as ClayBuildup, Standard, DamStandard, and Move.
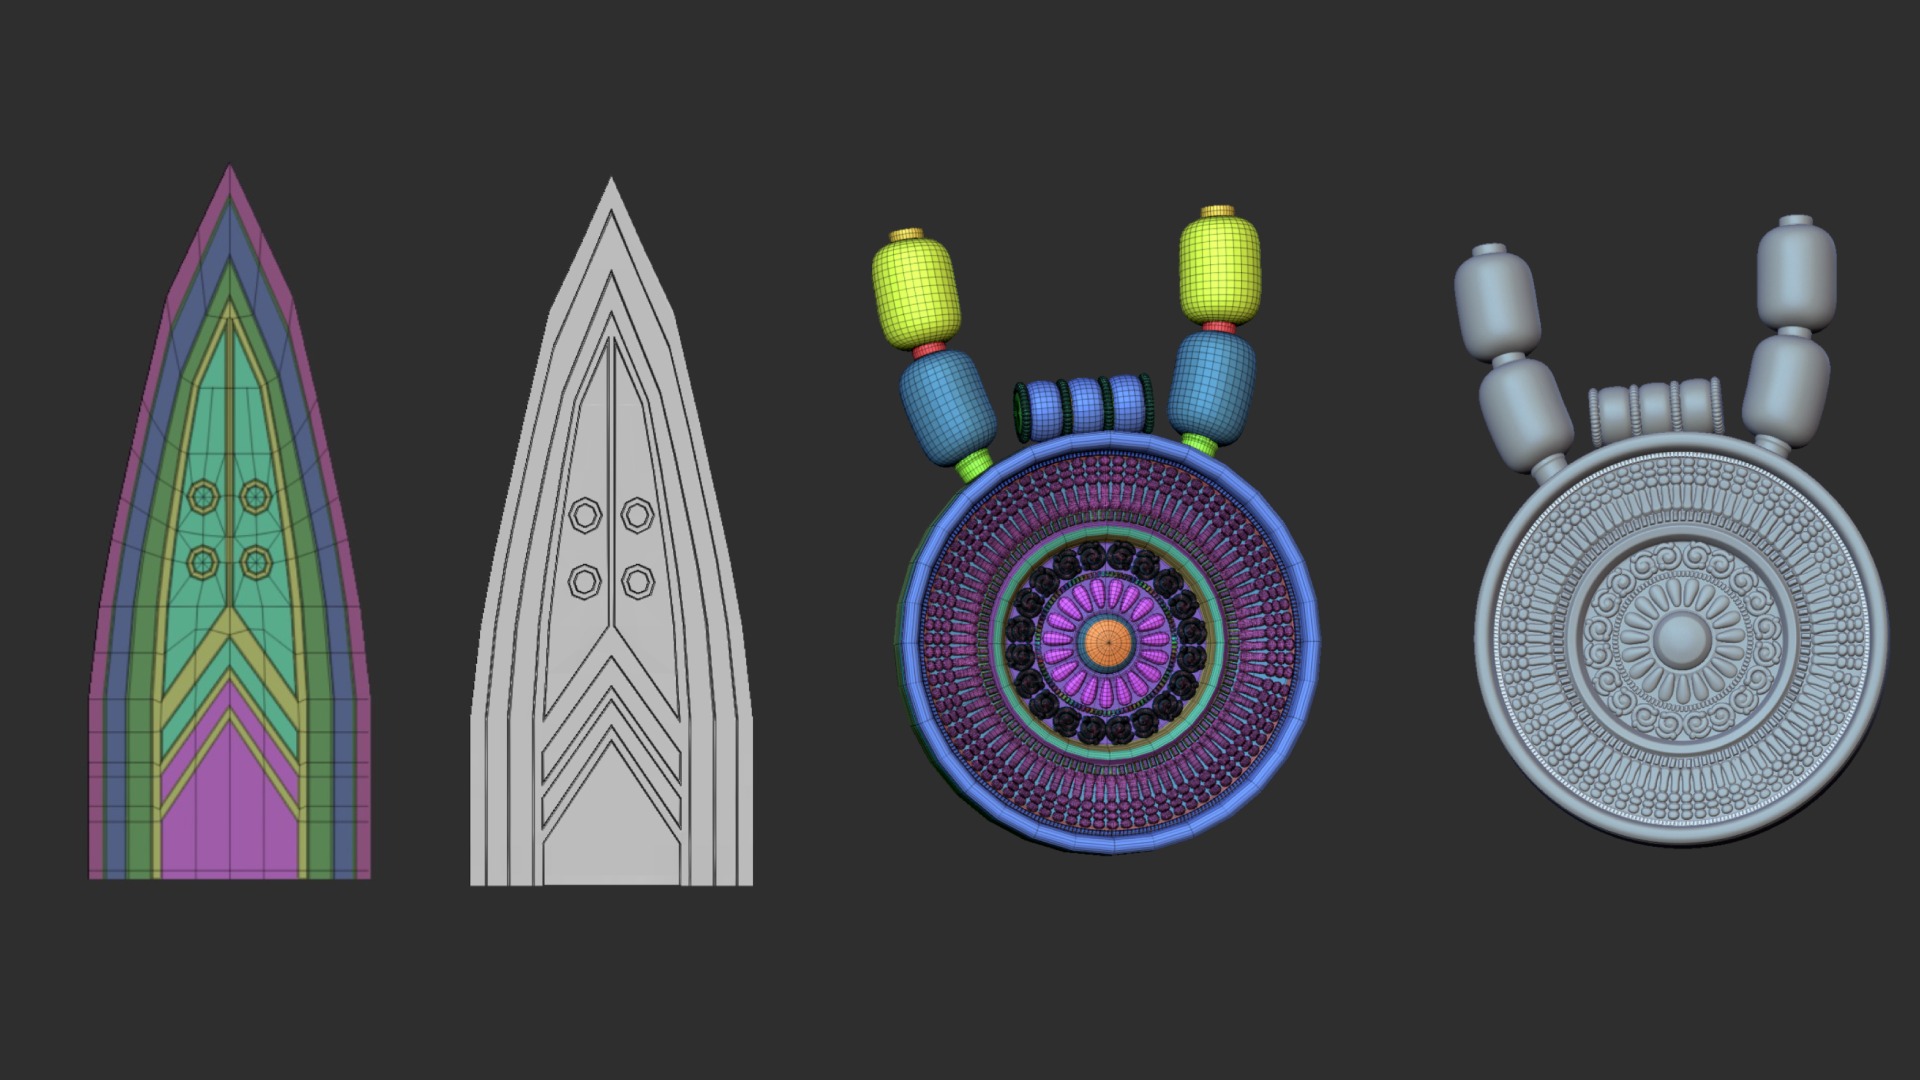
For repeating elements, I prepare them as separate SubTools and convert them into an IMM brush.
Then I create a curve where they will be placed and repeat the elements along that curve.
For areas that were difficult to describe due to limited polygon density, I duplicated the subtool and cropped it down to only the necessary section, allowing me to add higher-detail sculpting.
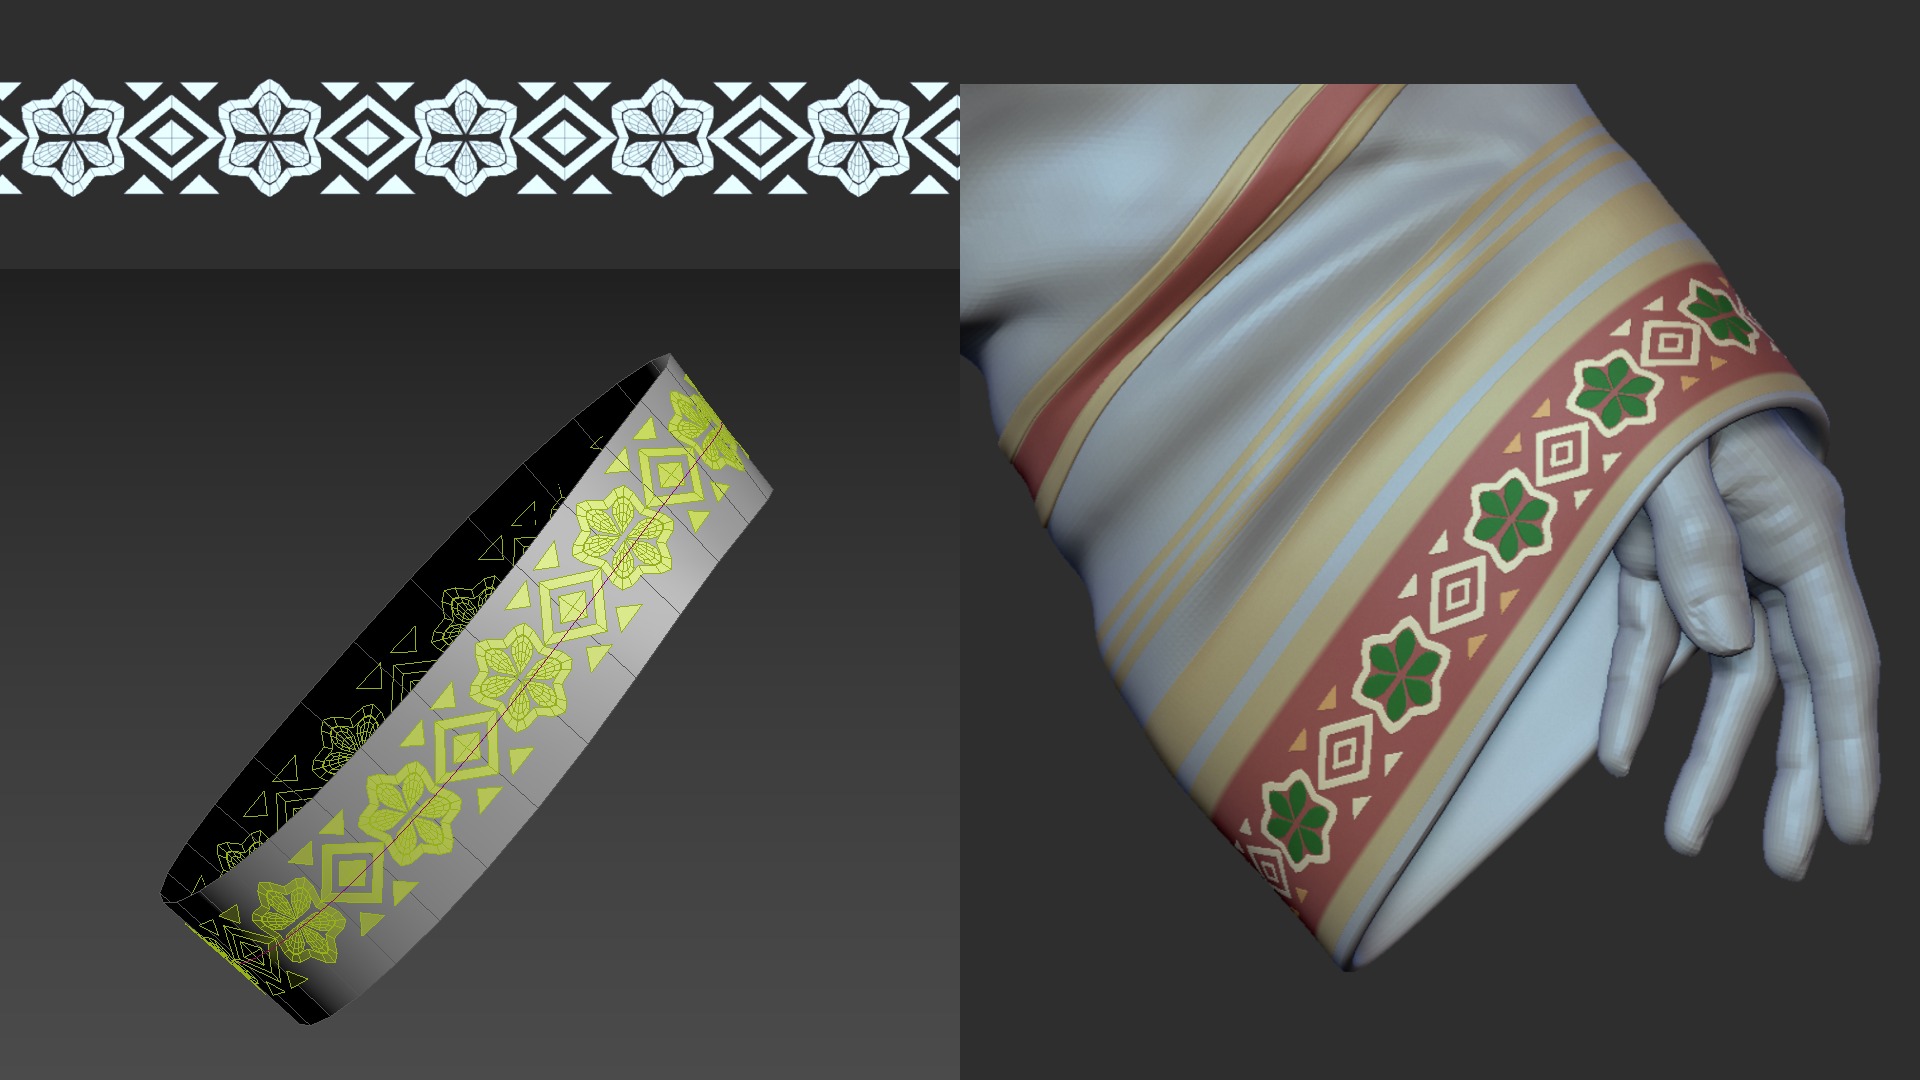
I also polypainted the patterns in advance to make the texturing process more efficient.

For the primary folds, I mainly used the Standard and ClothMove brushes, and I also utilized Dynamics Simulation when needed.
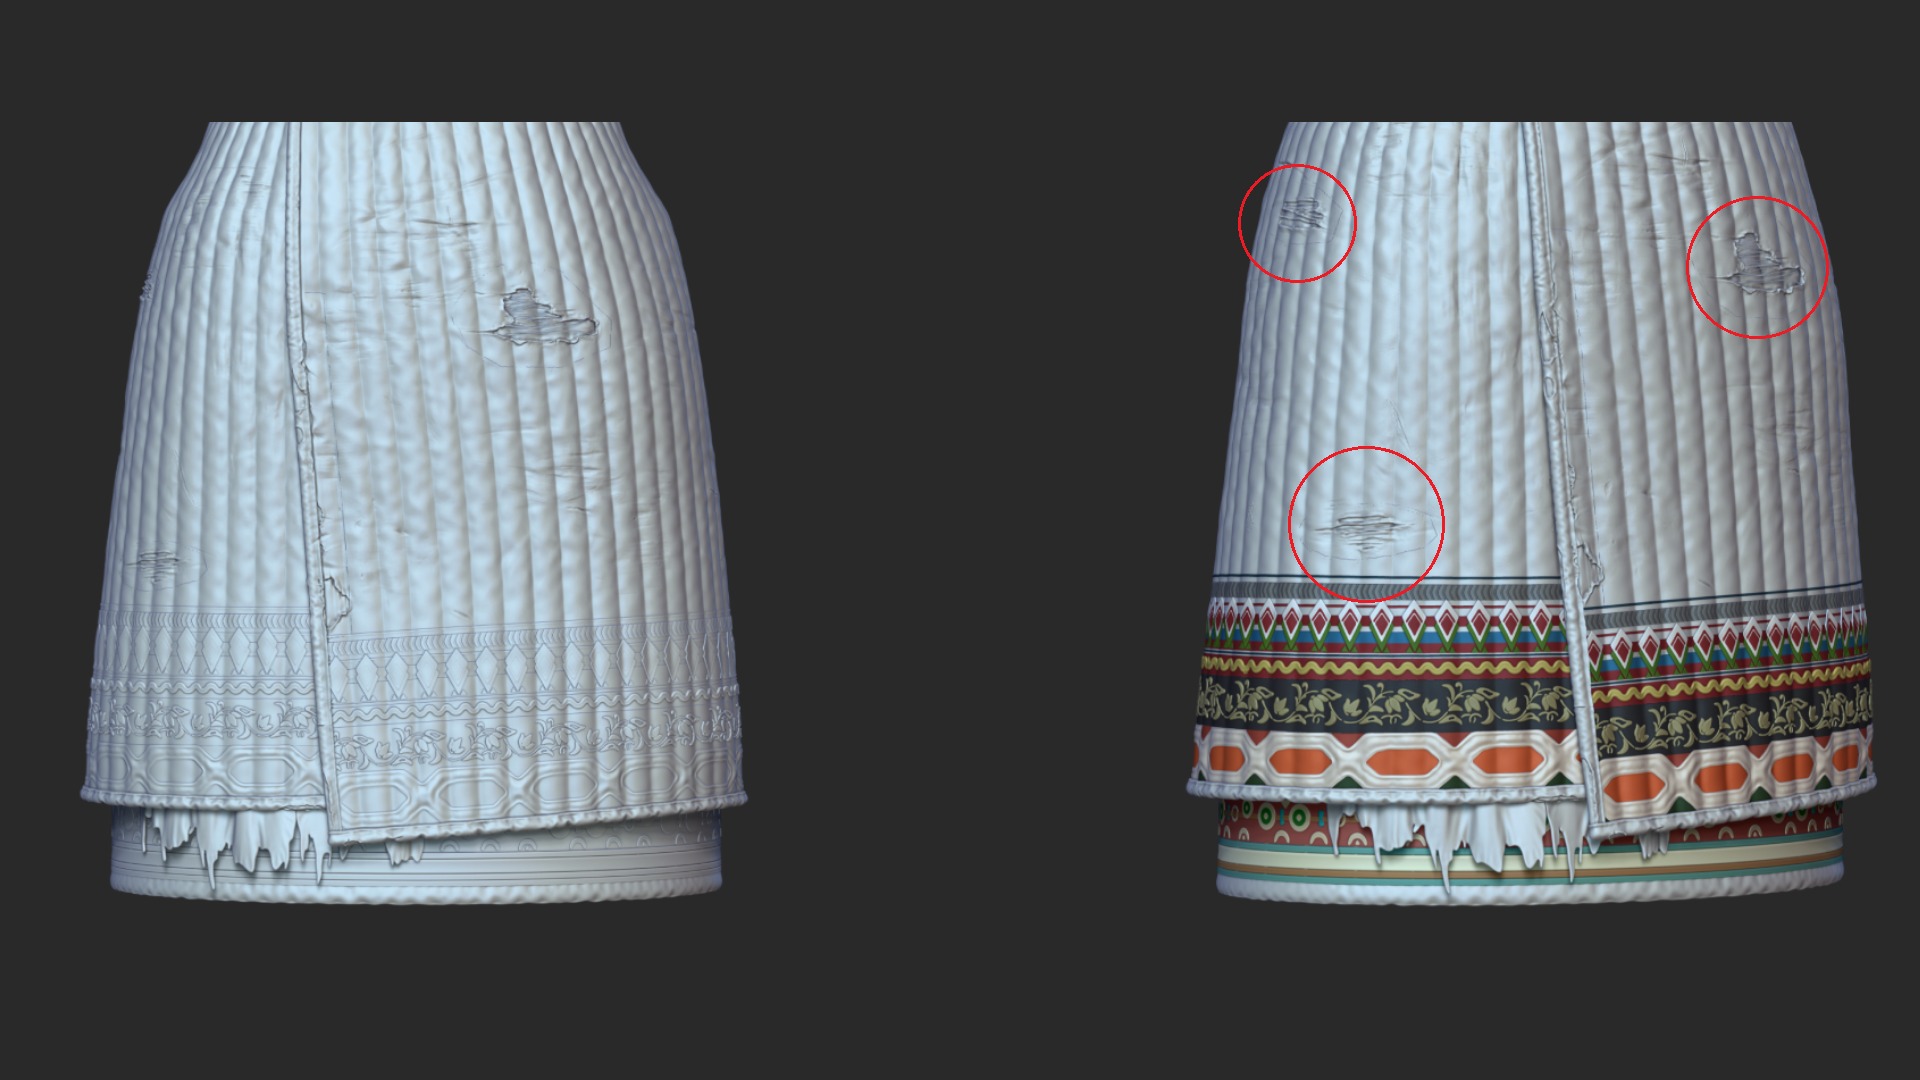
To add wrinkle memory, I applied an alpha through Surface > Noise, building subtle, persistent creases into the fabric.
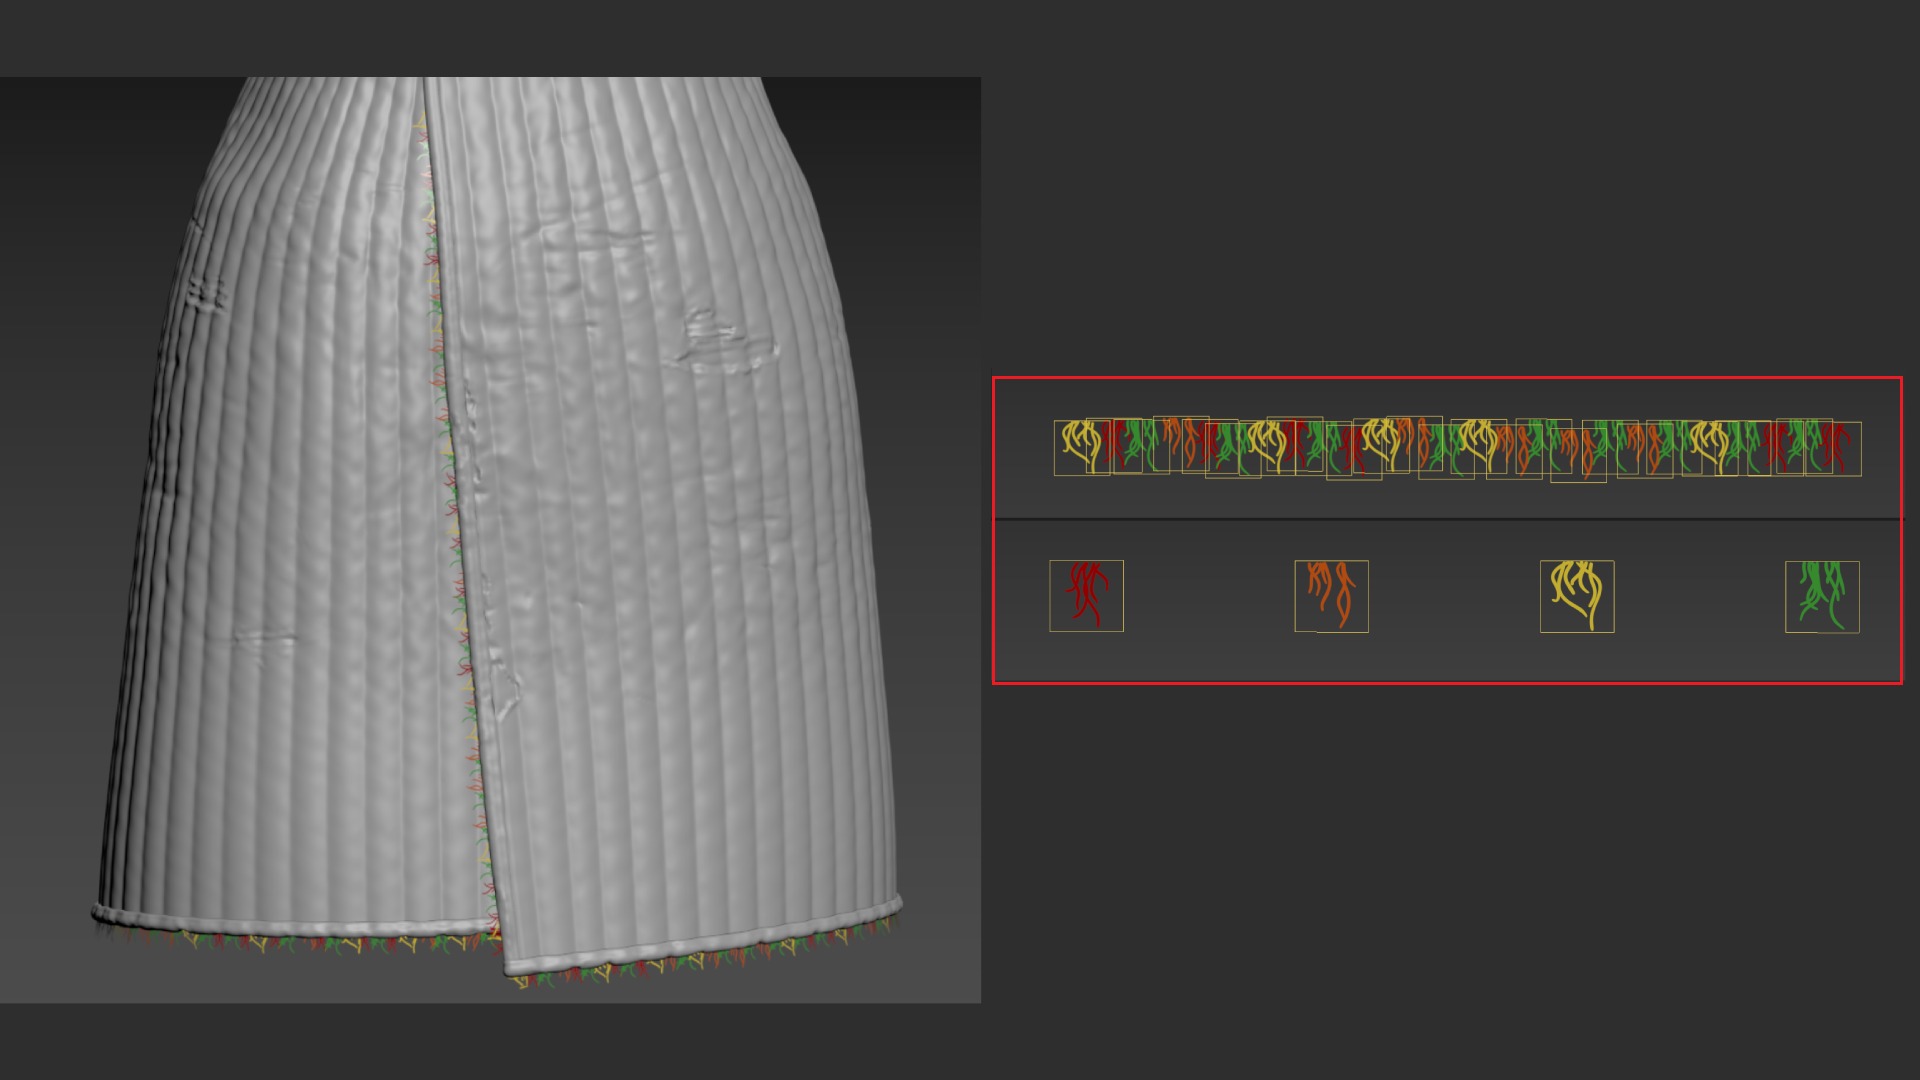
For the frayed thread detail, I baked a thread-shaped plane and created four variations.
I then combined these planes into a larger pattern and placed them where needed, primarily along hems and seam edges, to add a worn finish.
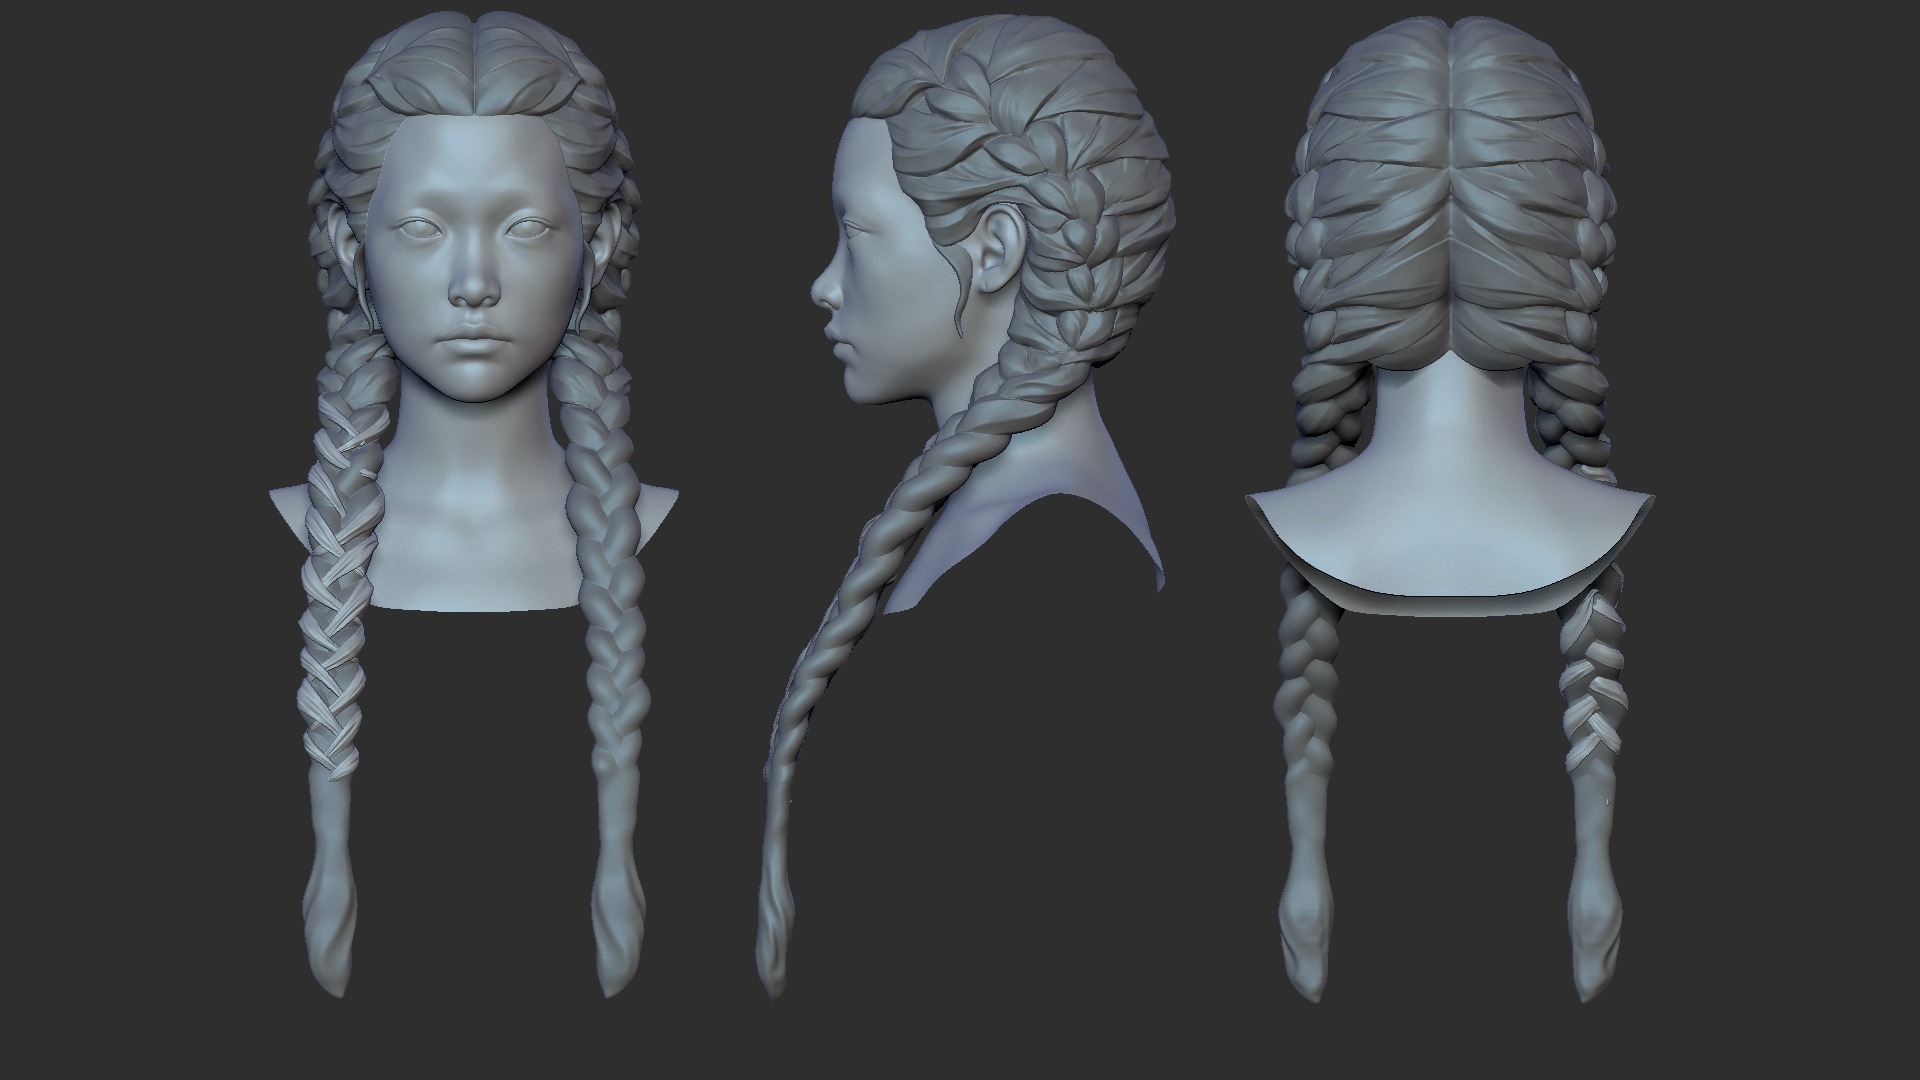
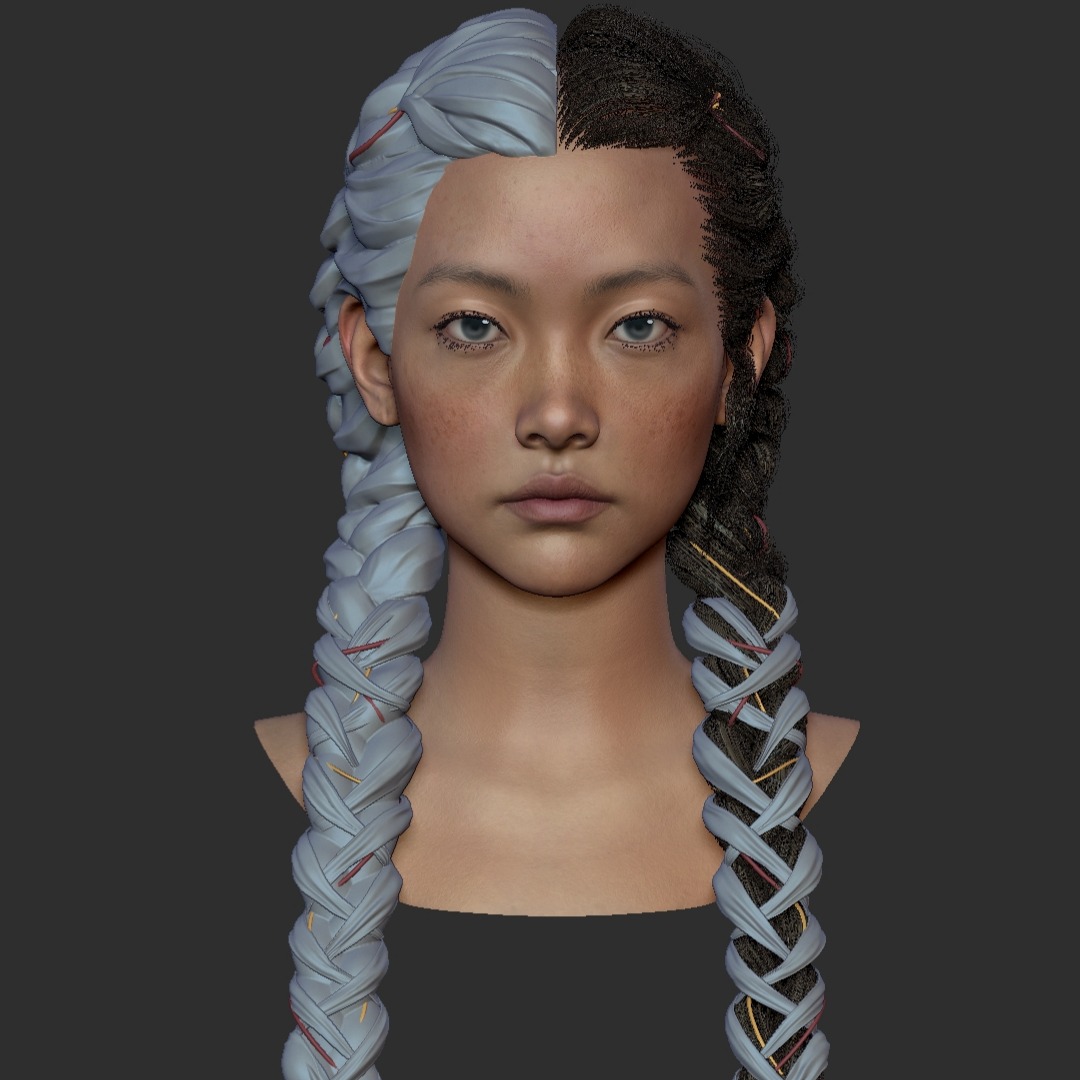
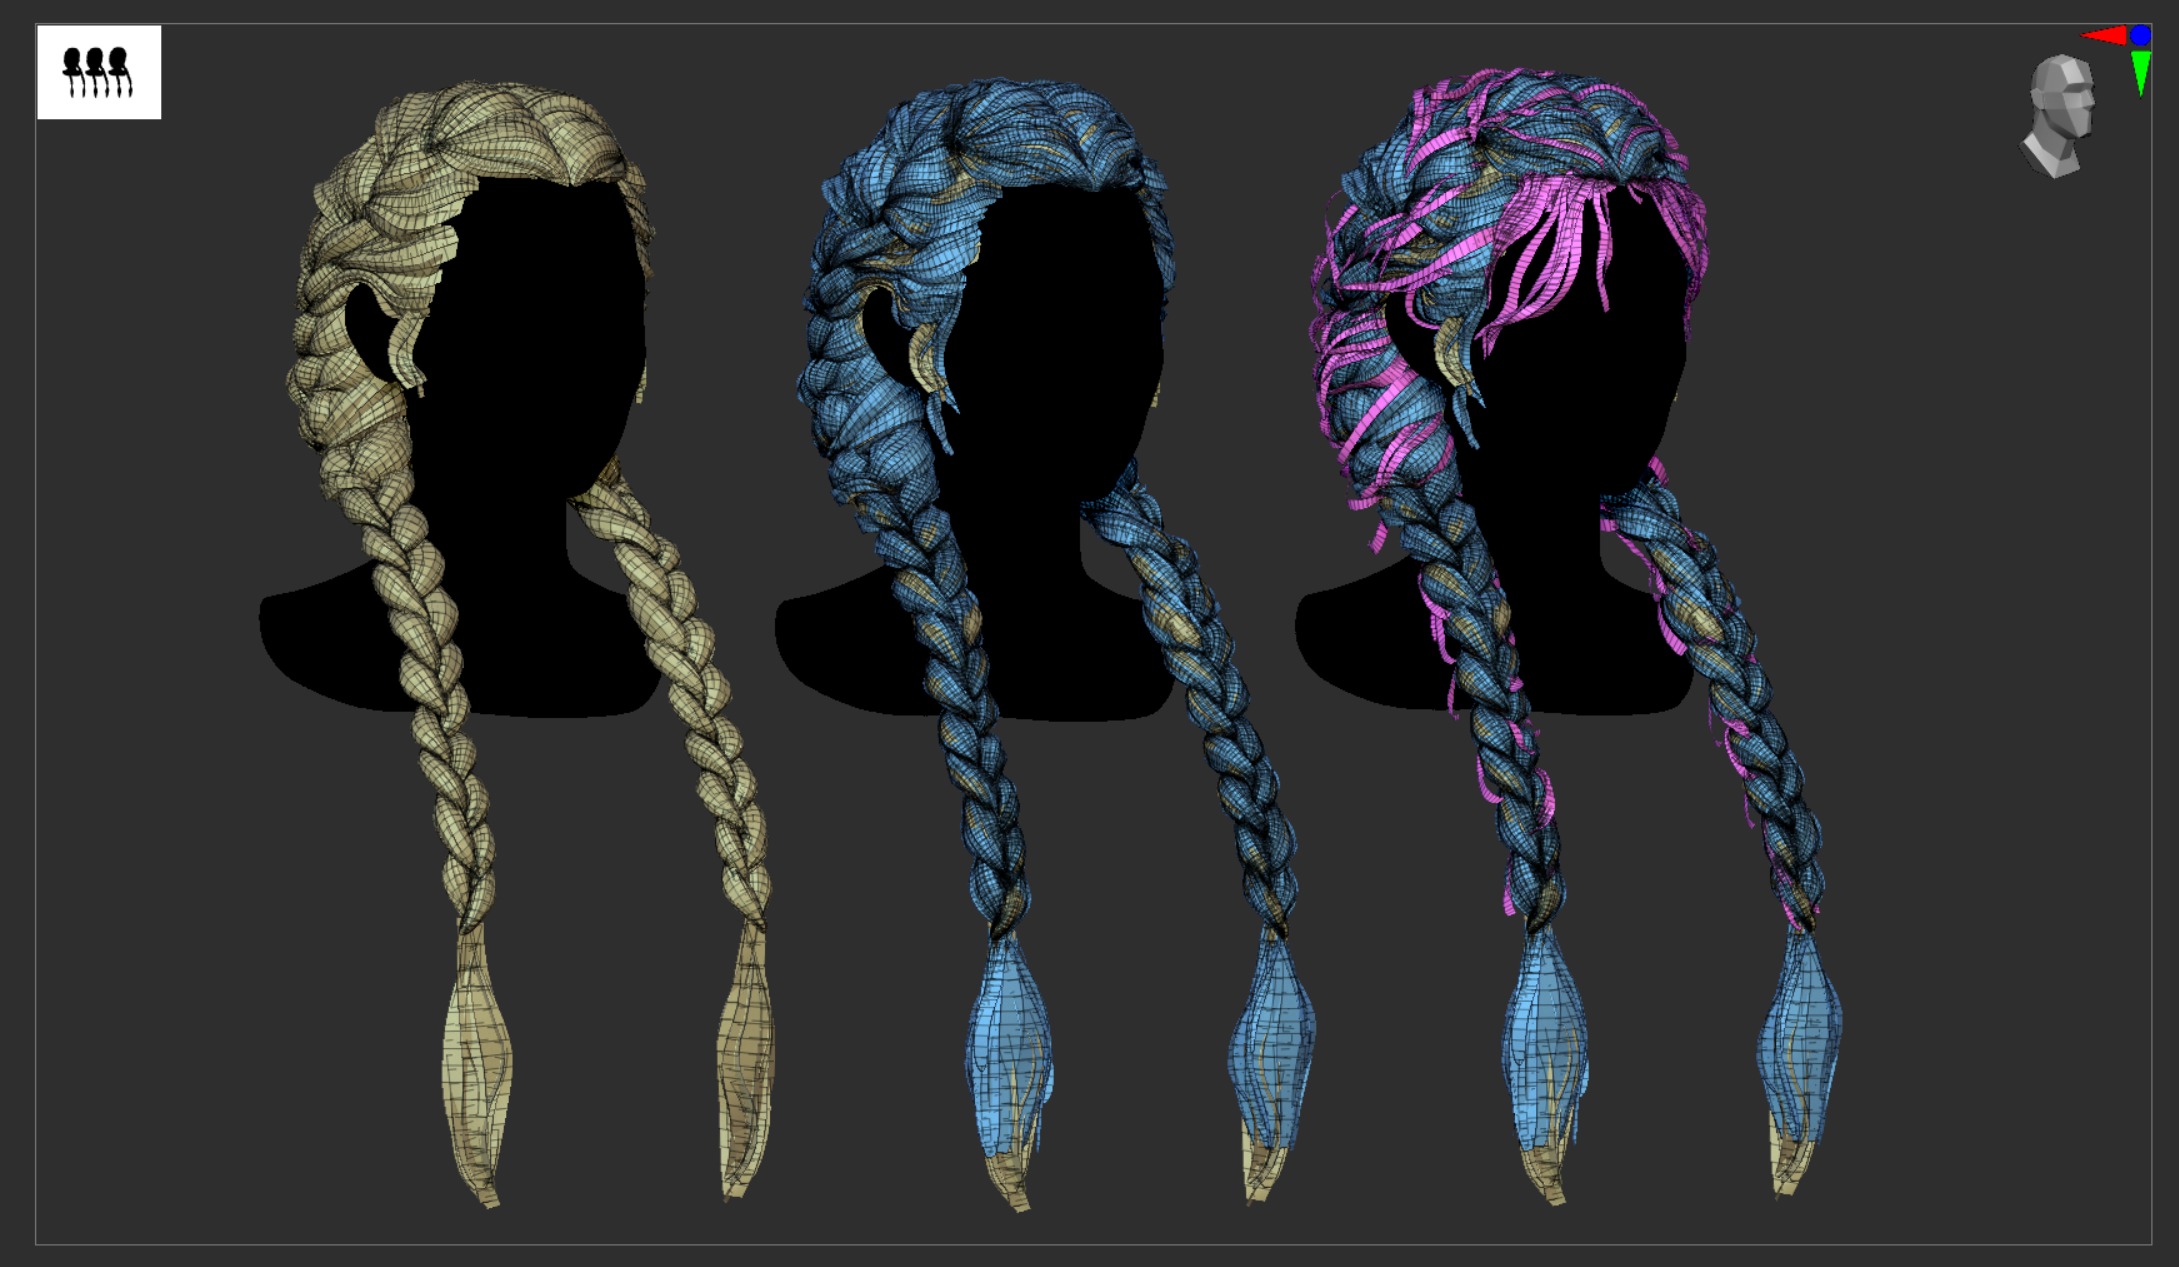
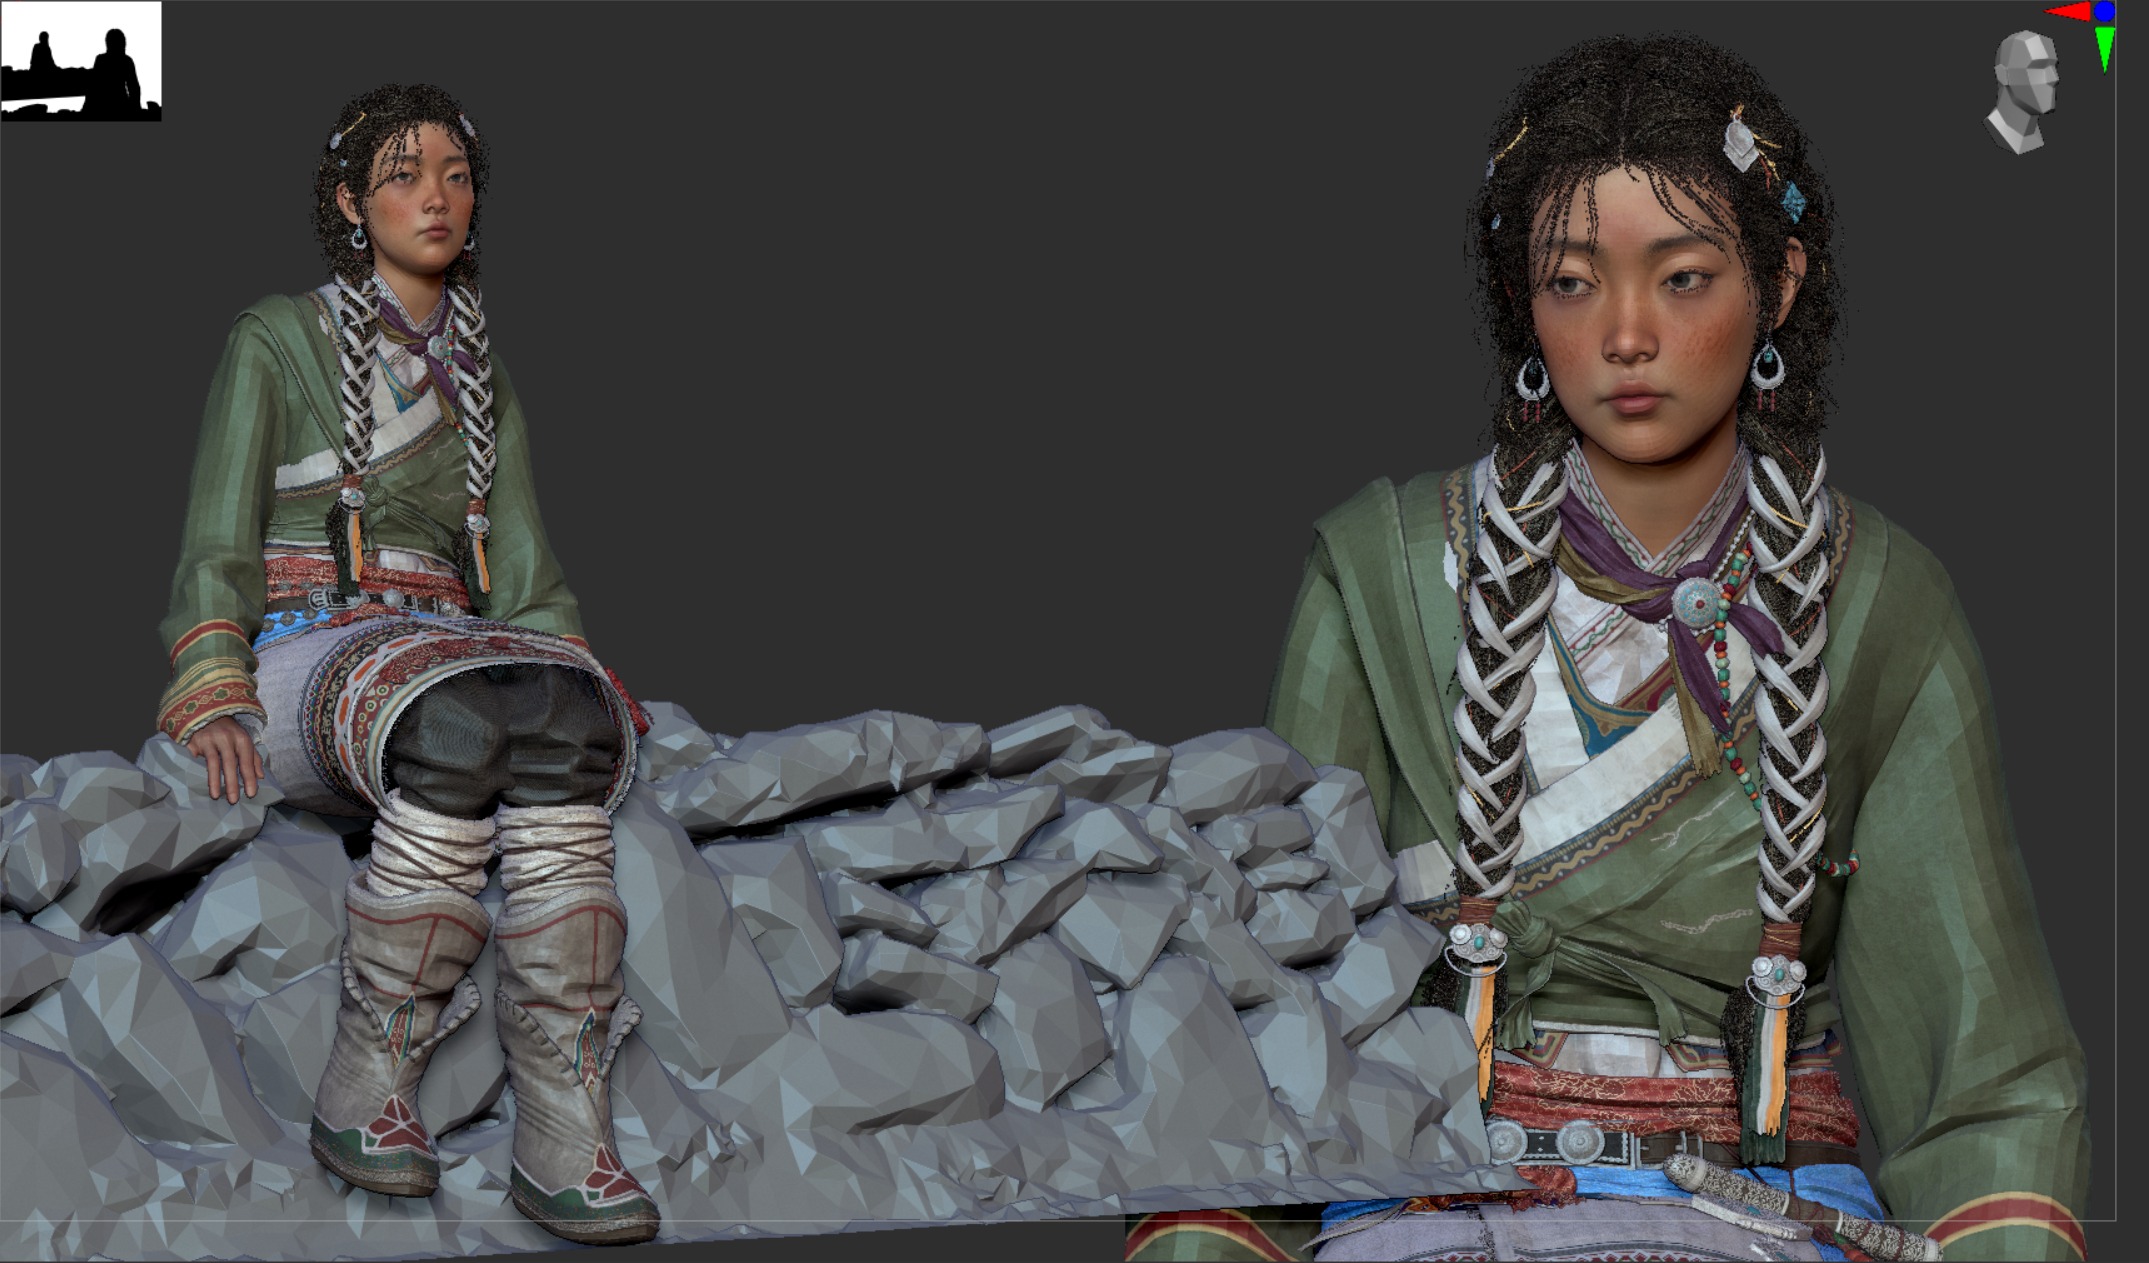
Hair
When creating hair, it’s important to focus on the overall volume first. Even with only the major clumps, the hair should clearly describe the flow and direction.
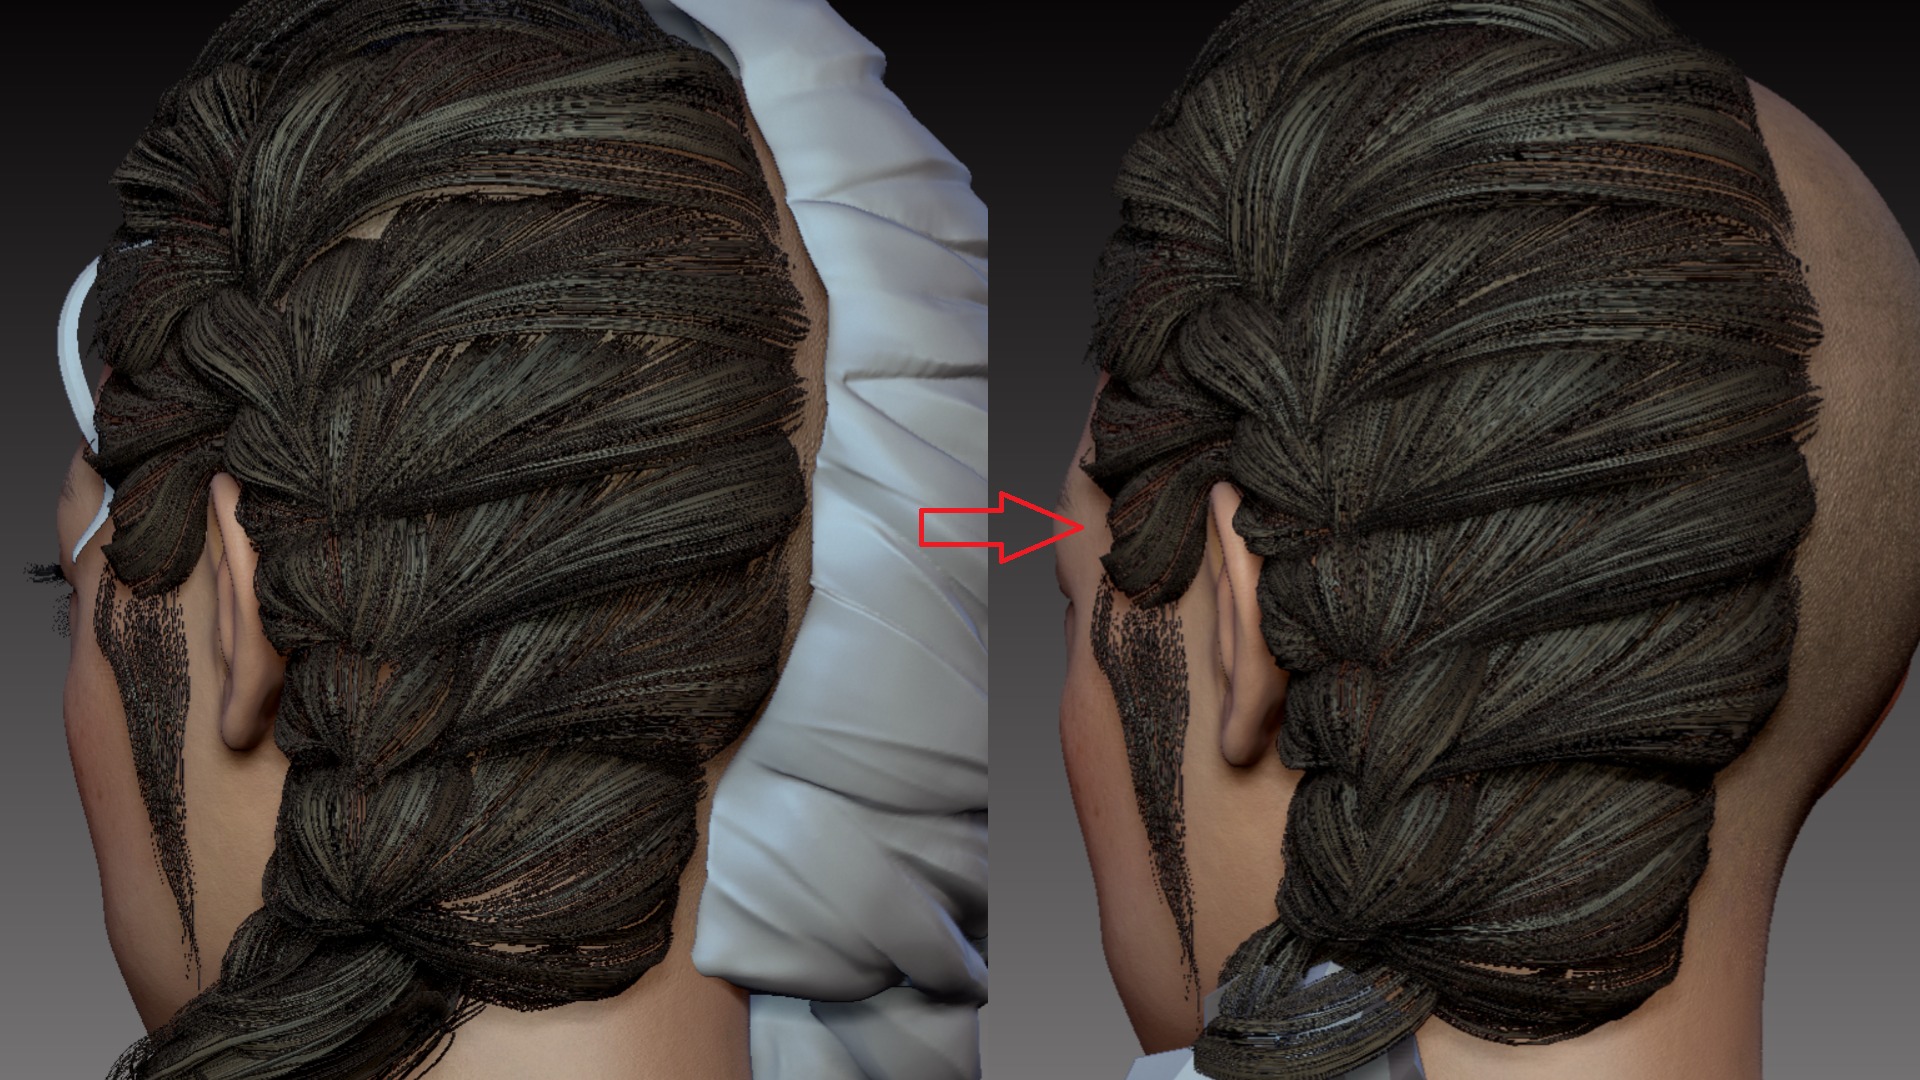
Once the flow was clearly established, I masked along the sculpted hair direction, extracted the mesh, and used ZRemesher to generate clean, optimized topology.
Throughout the process, I regularly applied test textures to check the read and made adjustments as needed.
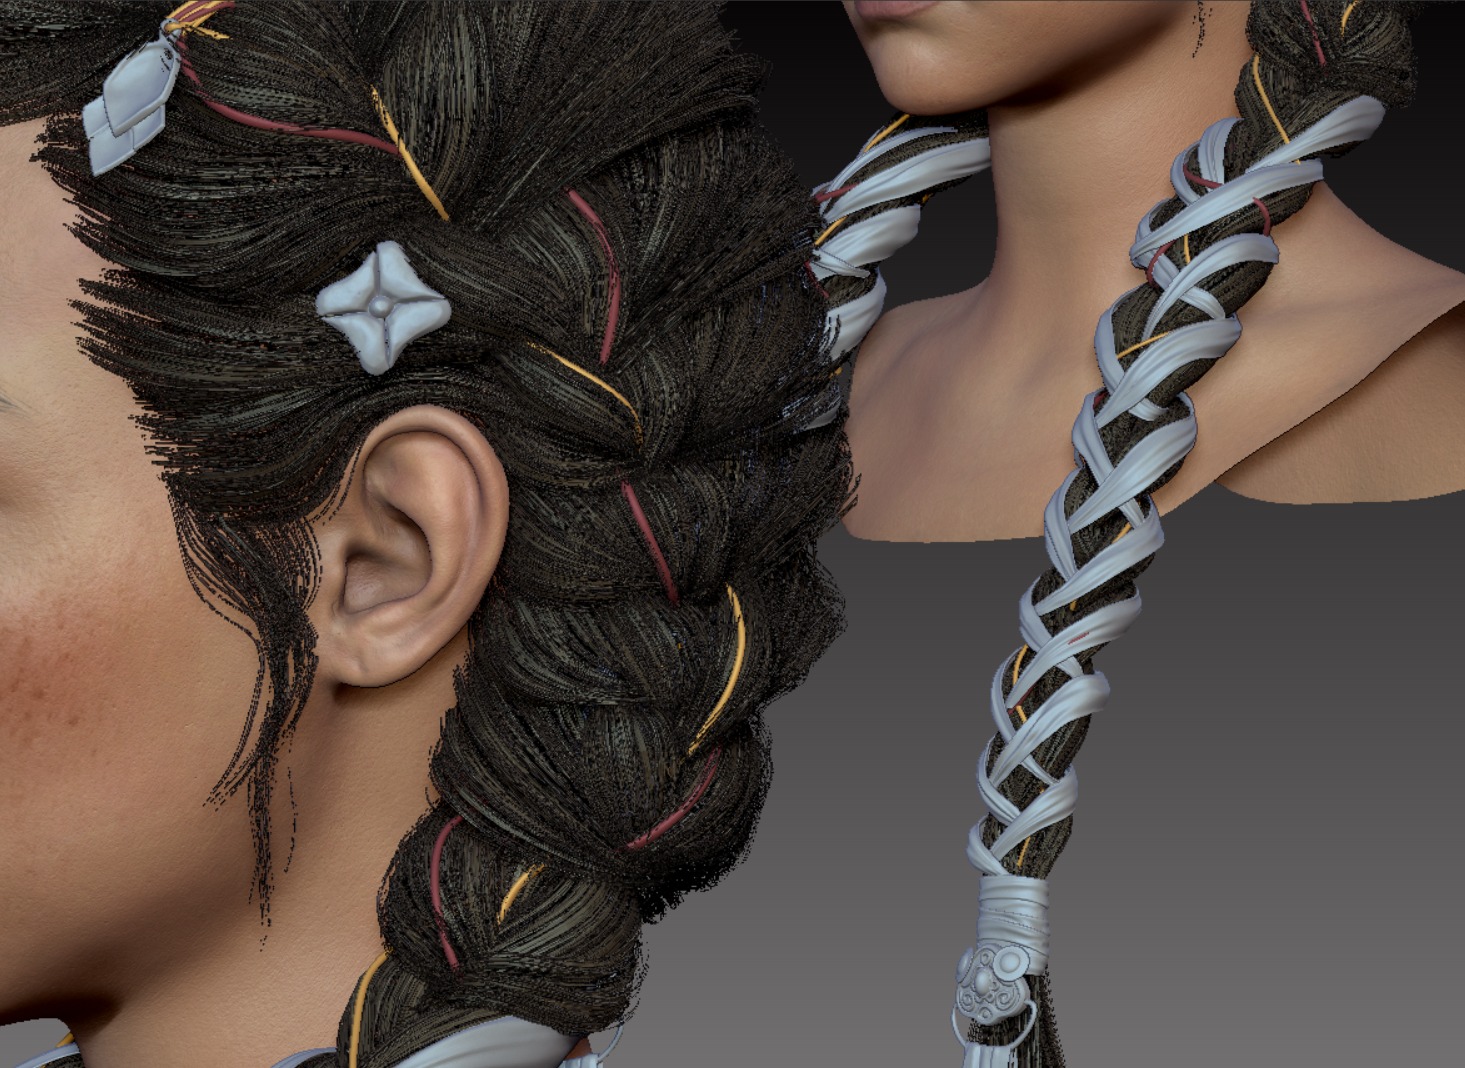
Based on the initial layer, I added an extra layer and used Dynamics to break up and loosen the flow.
Rather than relying entirely on the simulation, I also refined the result with manual sculpting and adjustments.

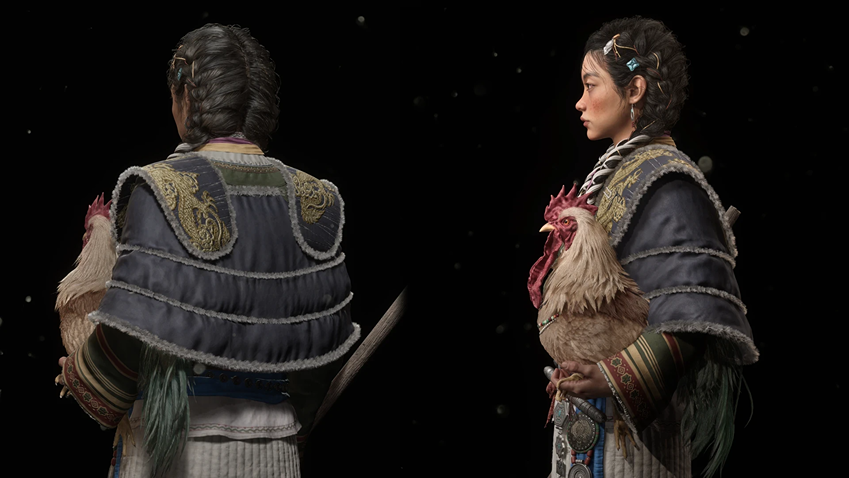
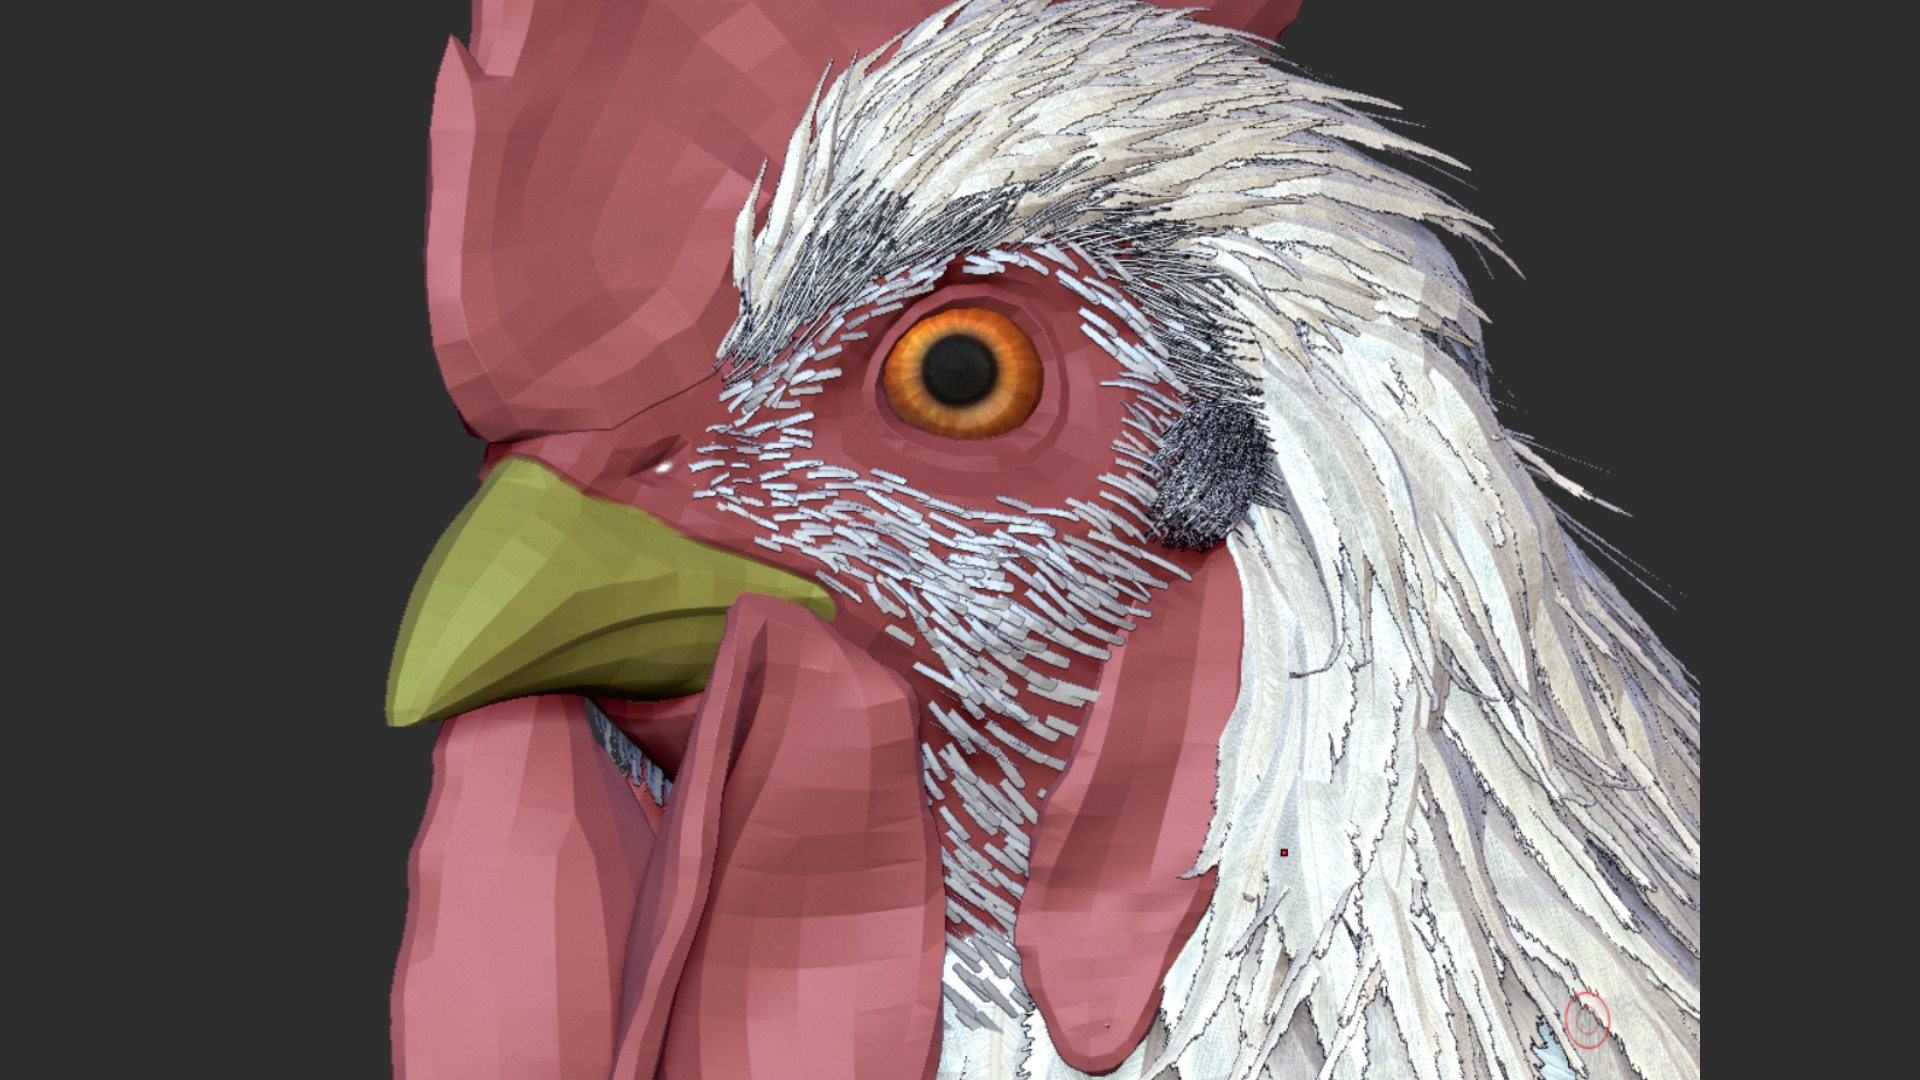
Face
For the character’s face, I aimed to capture a calm, grounded expression while keeping the features consistent with a highland silhouette:
Strong cheek structure, a soft but defined nose bridge and subtle eyelid volume.
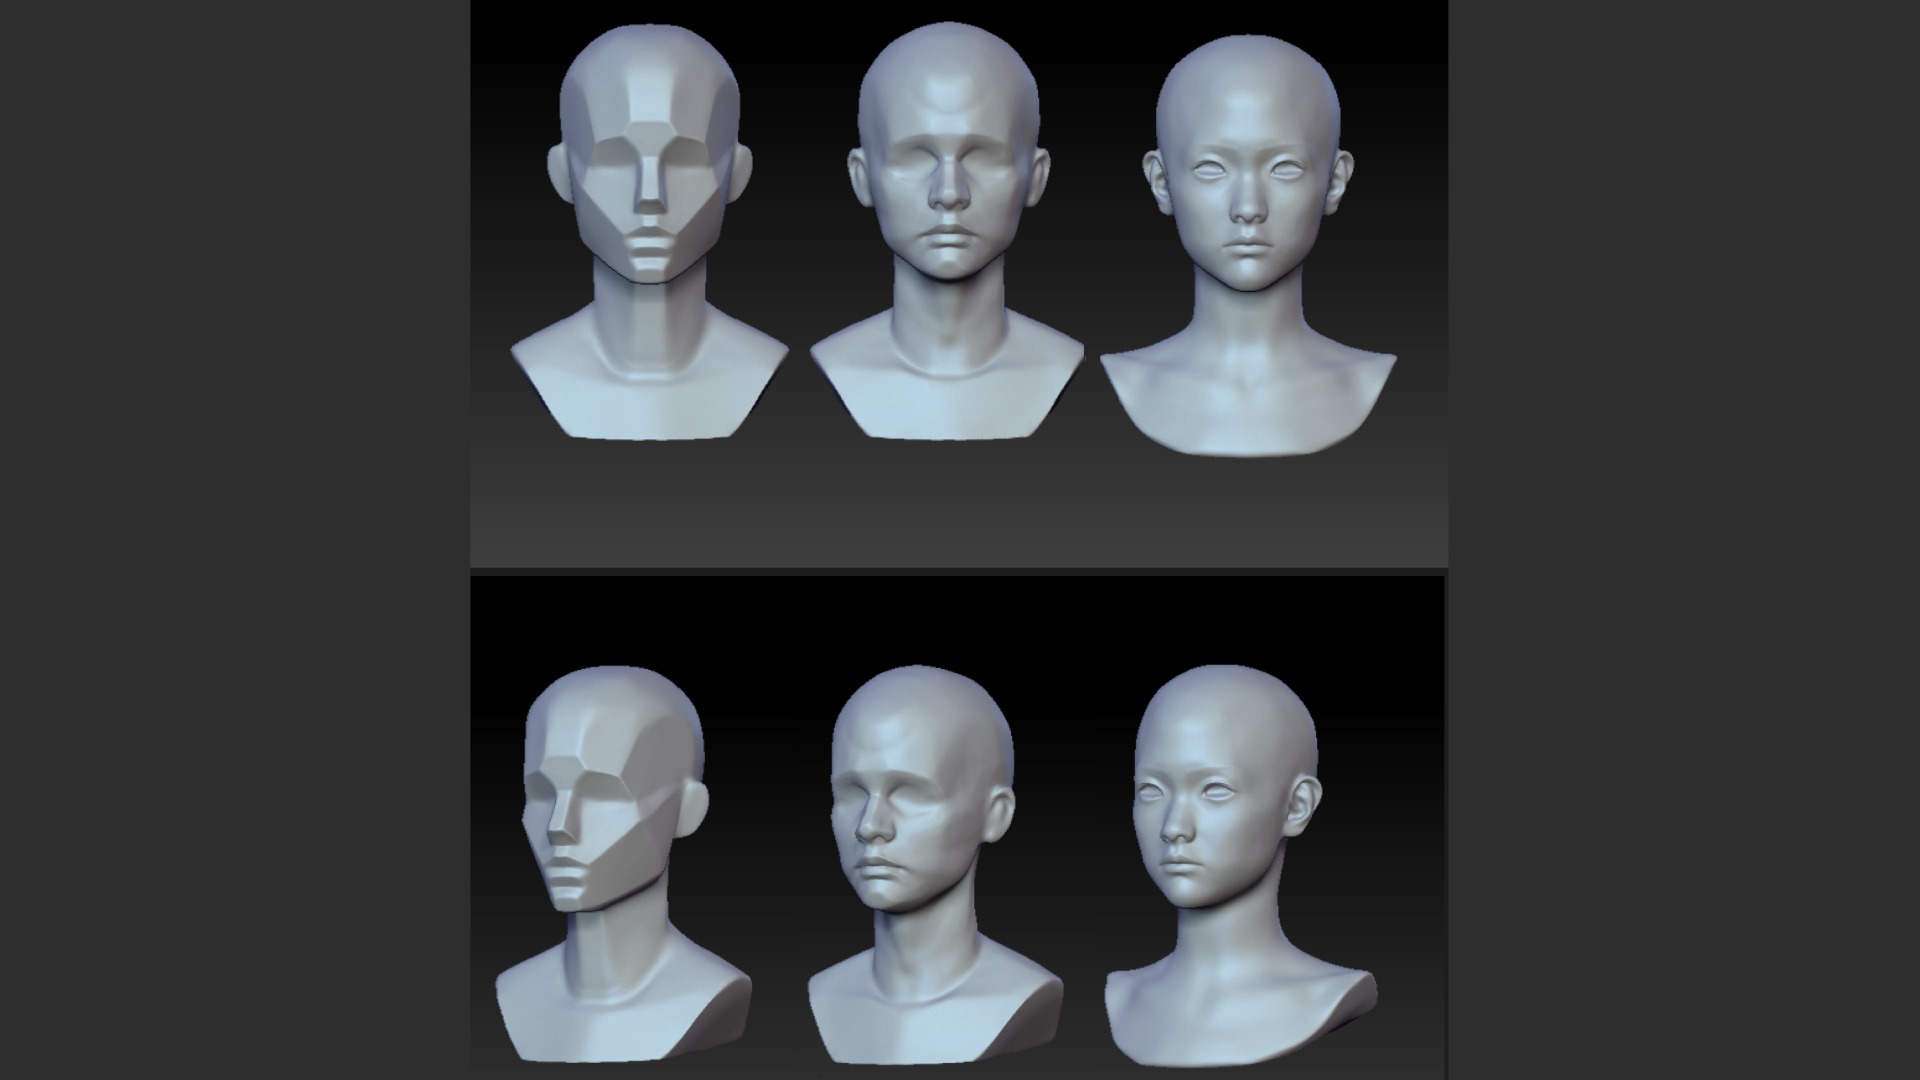
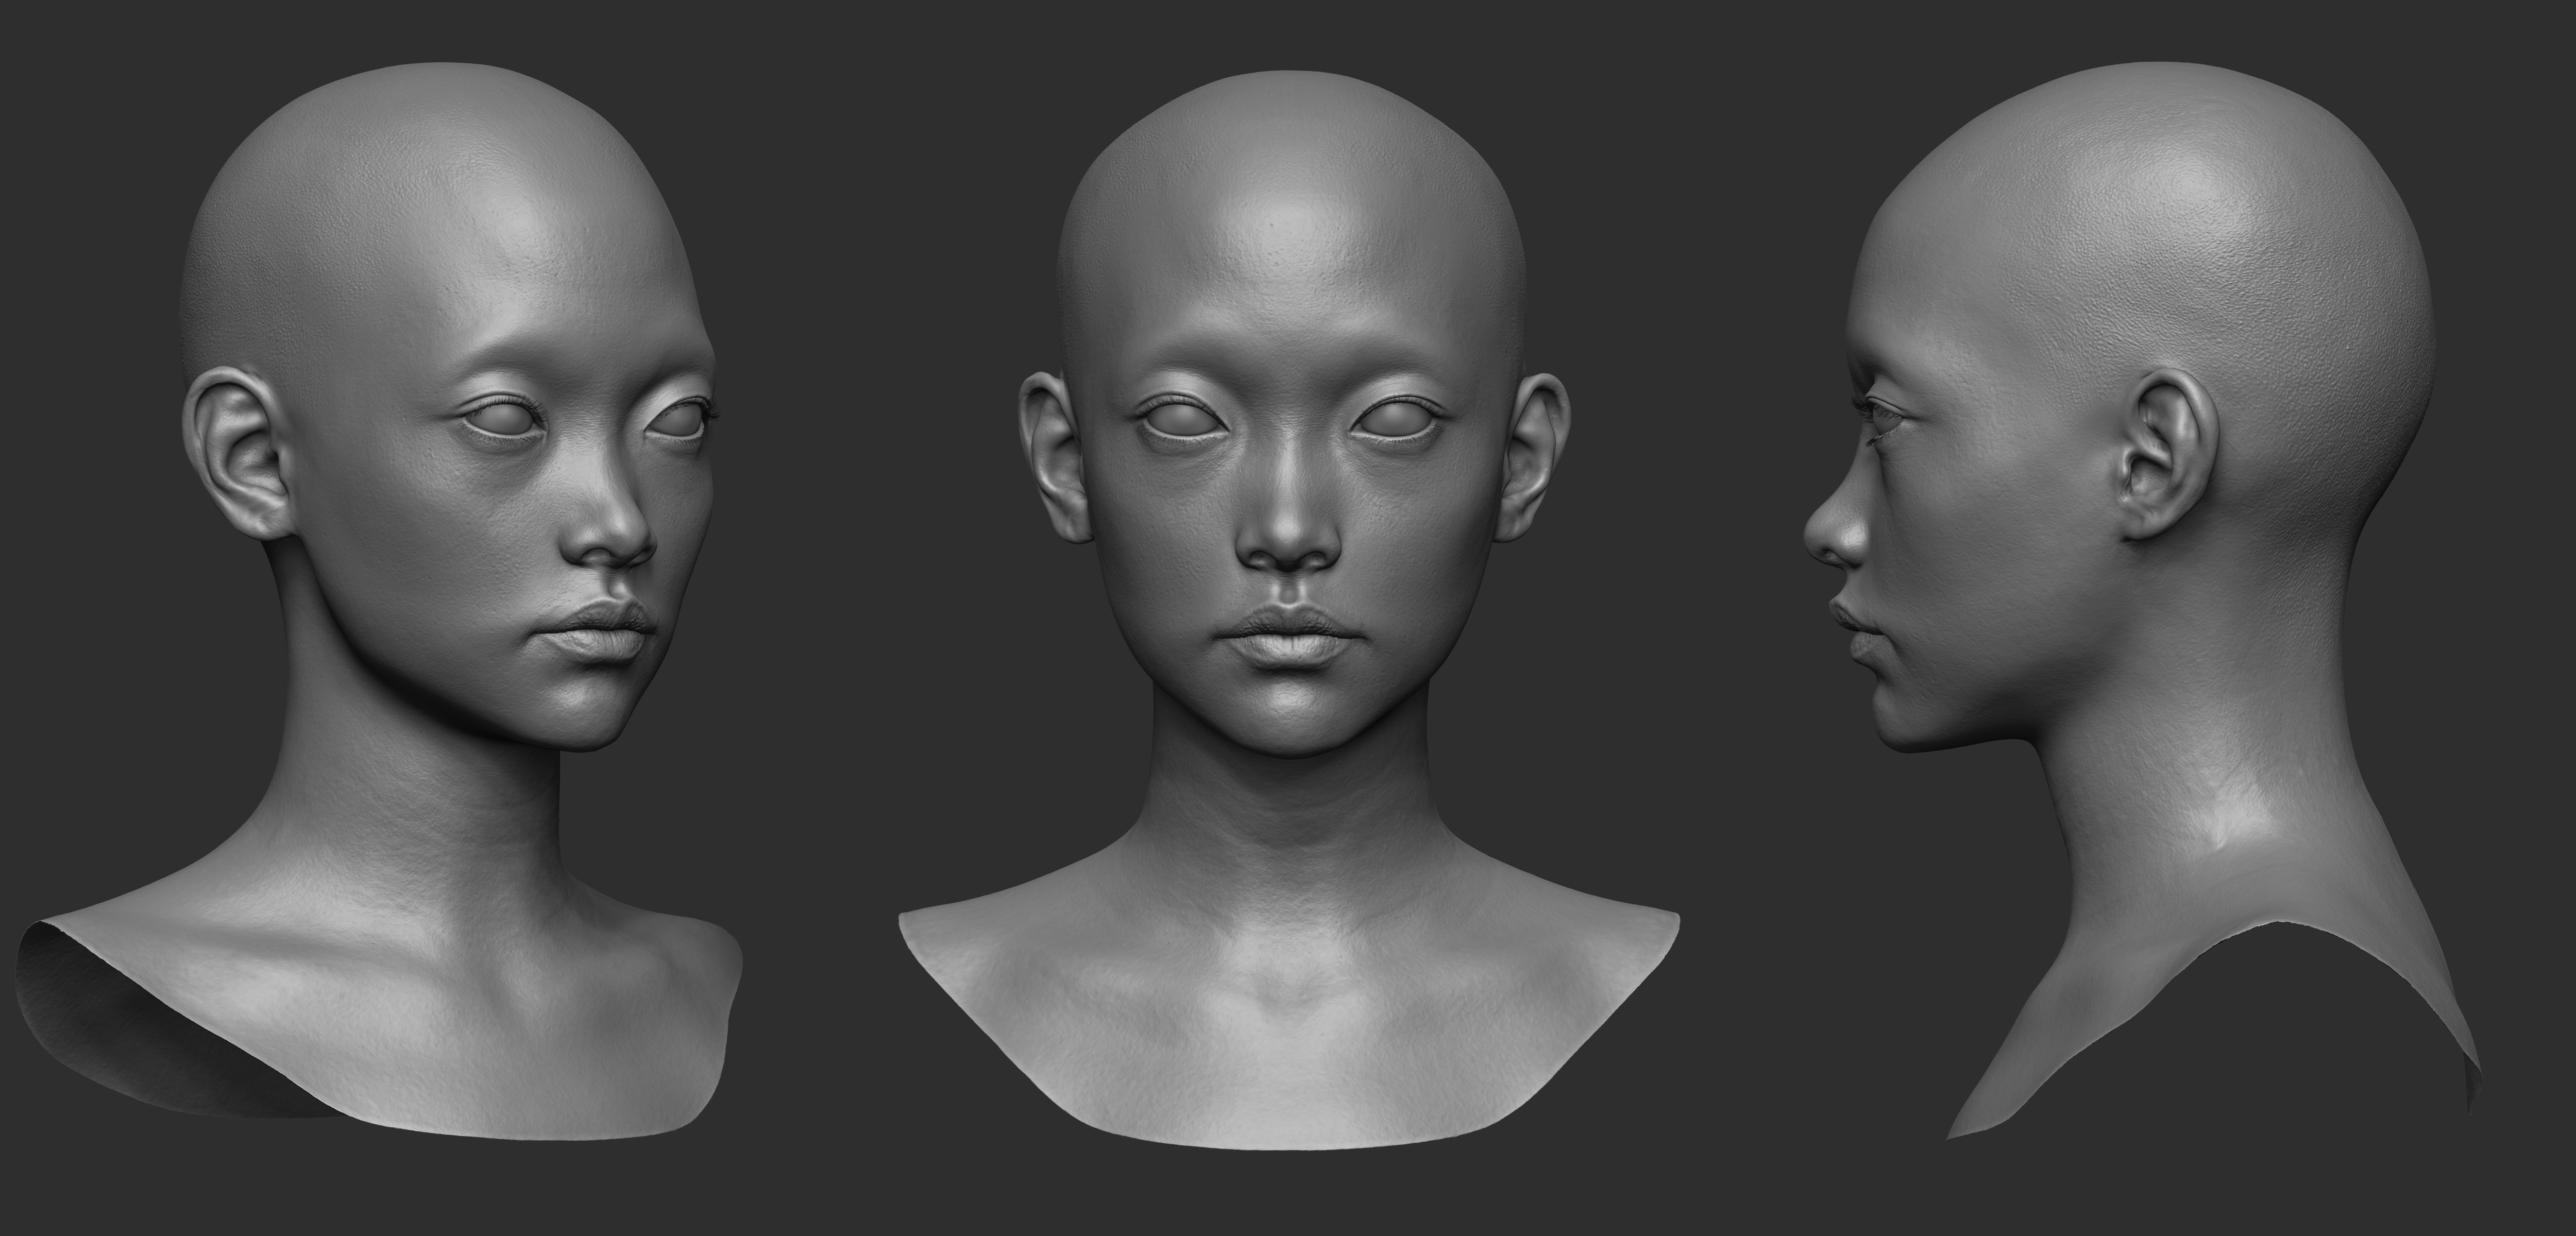
I started the face from the underlying skull structure to build a solid foundation.
Once the overall likeness and expression were established, I used ZWrap to transfer and refine the skin details.
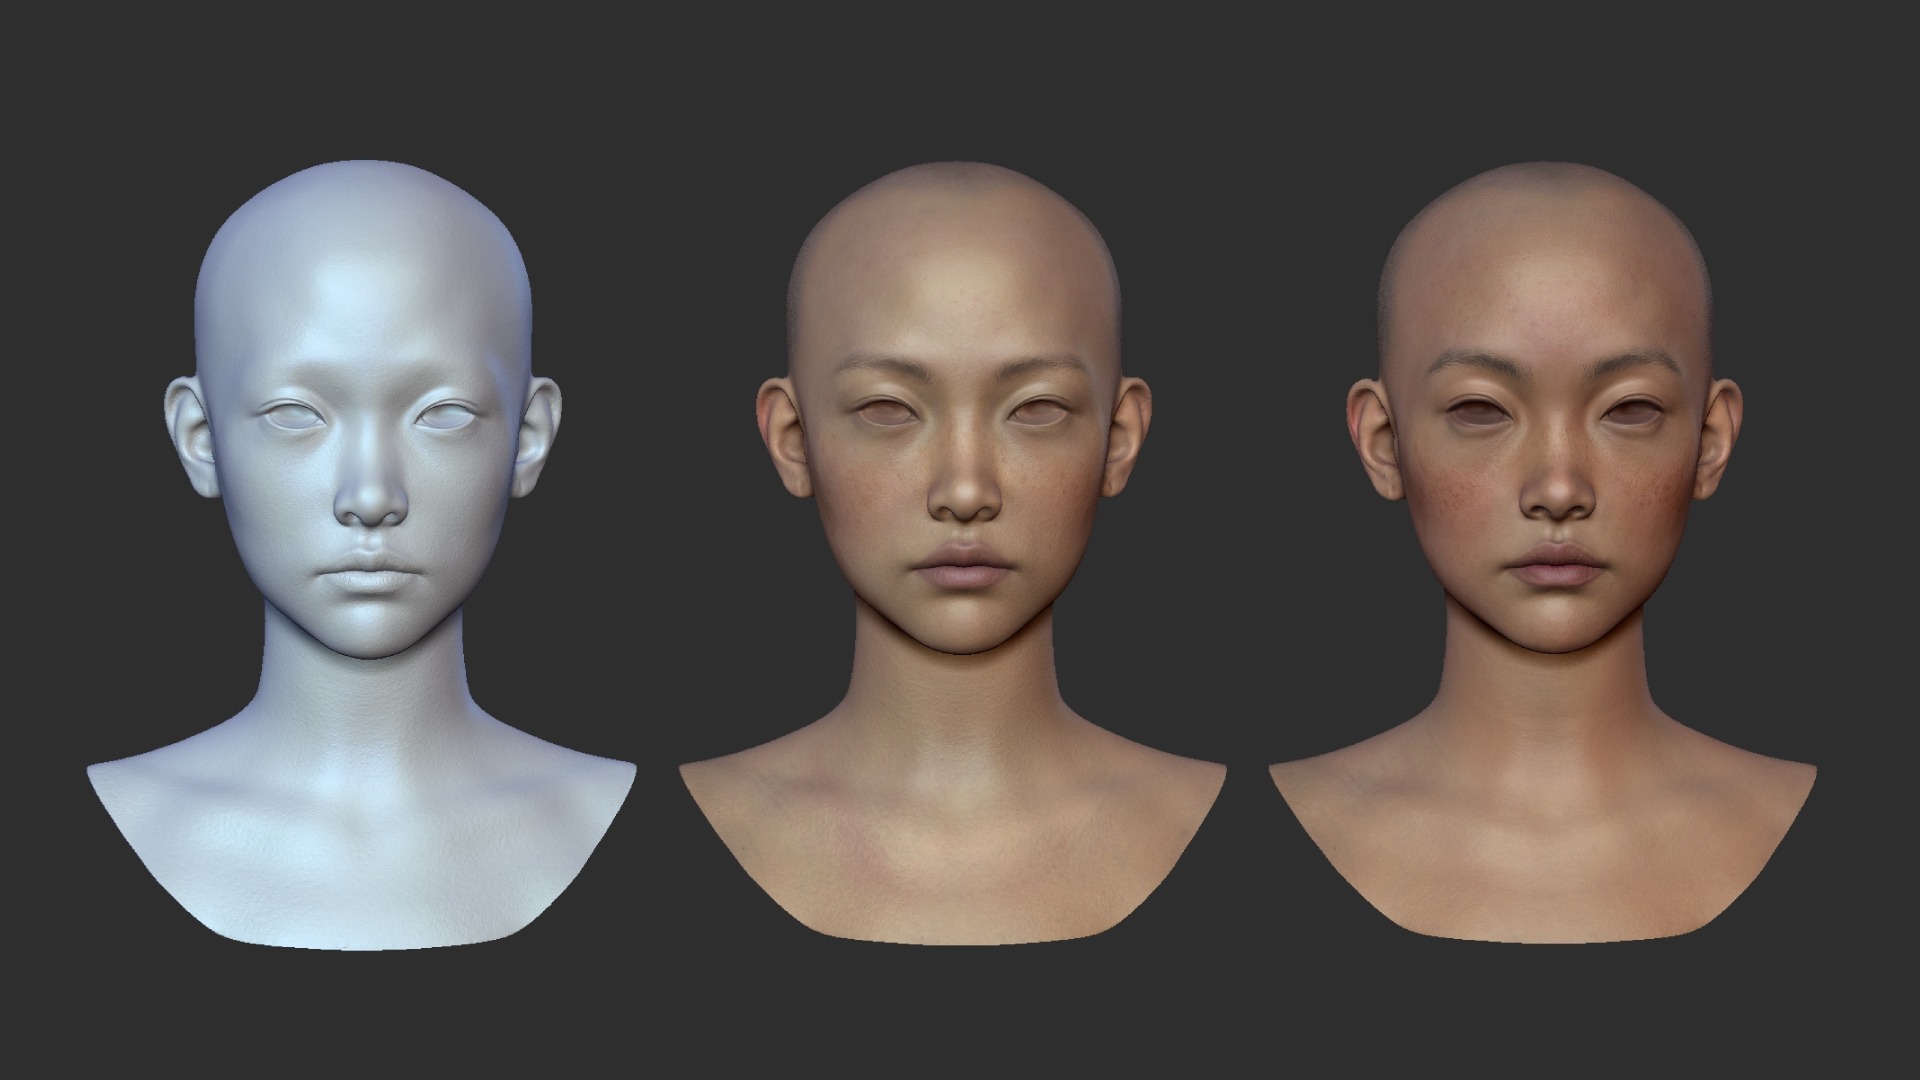
After that, I enhanced the overall mood by blending painted details in ZBrush.
I also added finer eyebrow and freckle details in Photoshop.
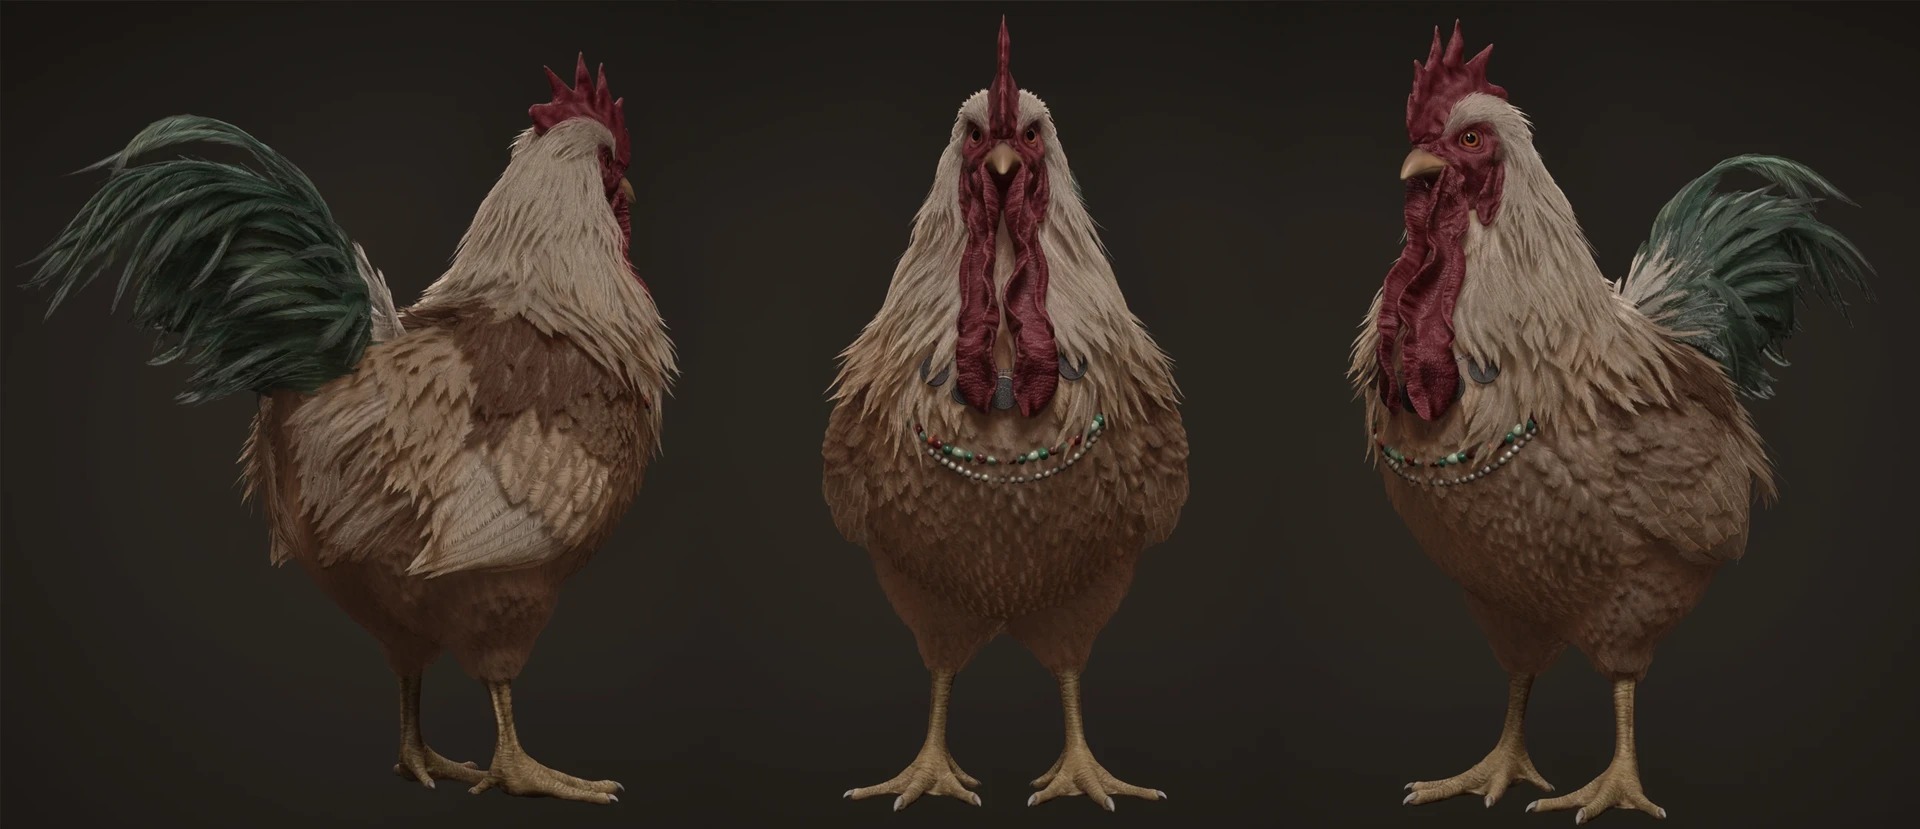
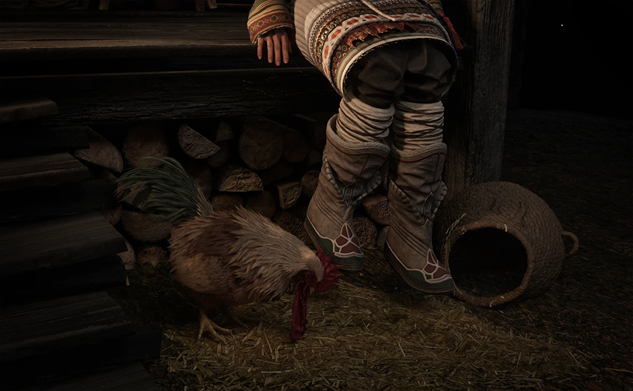
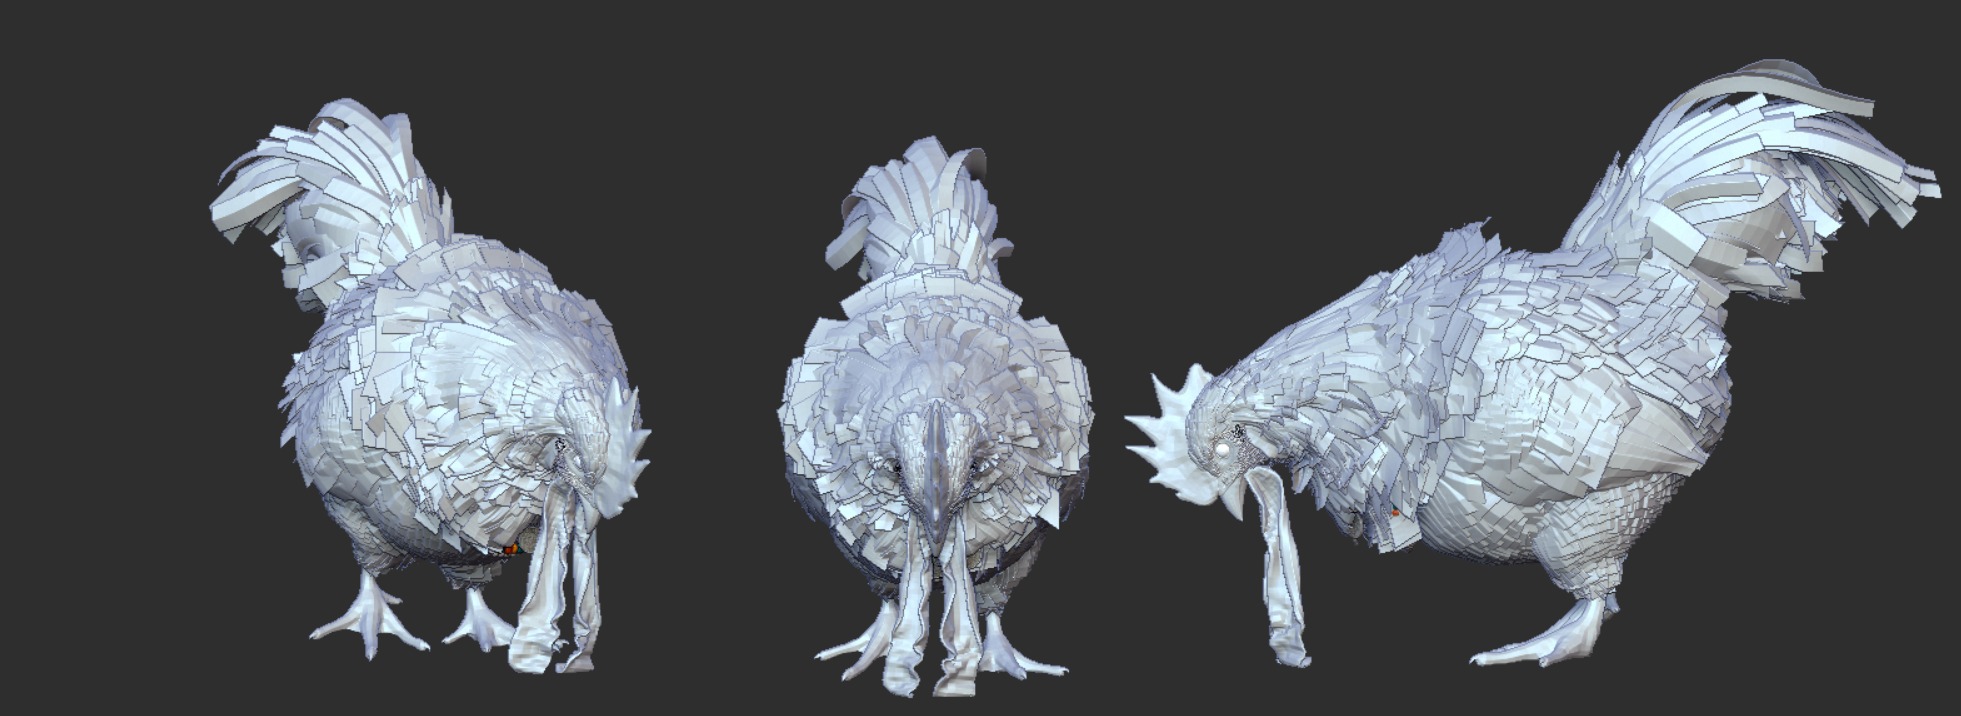
Rooster & Feathers
I quickly blocked out the rooster’s main volumes in ZBrush.
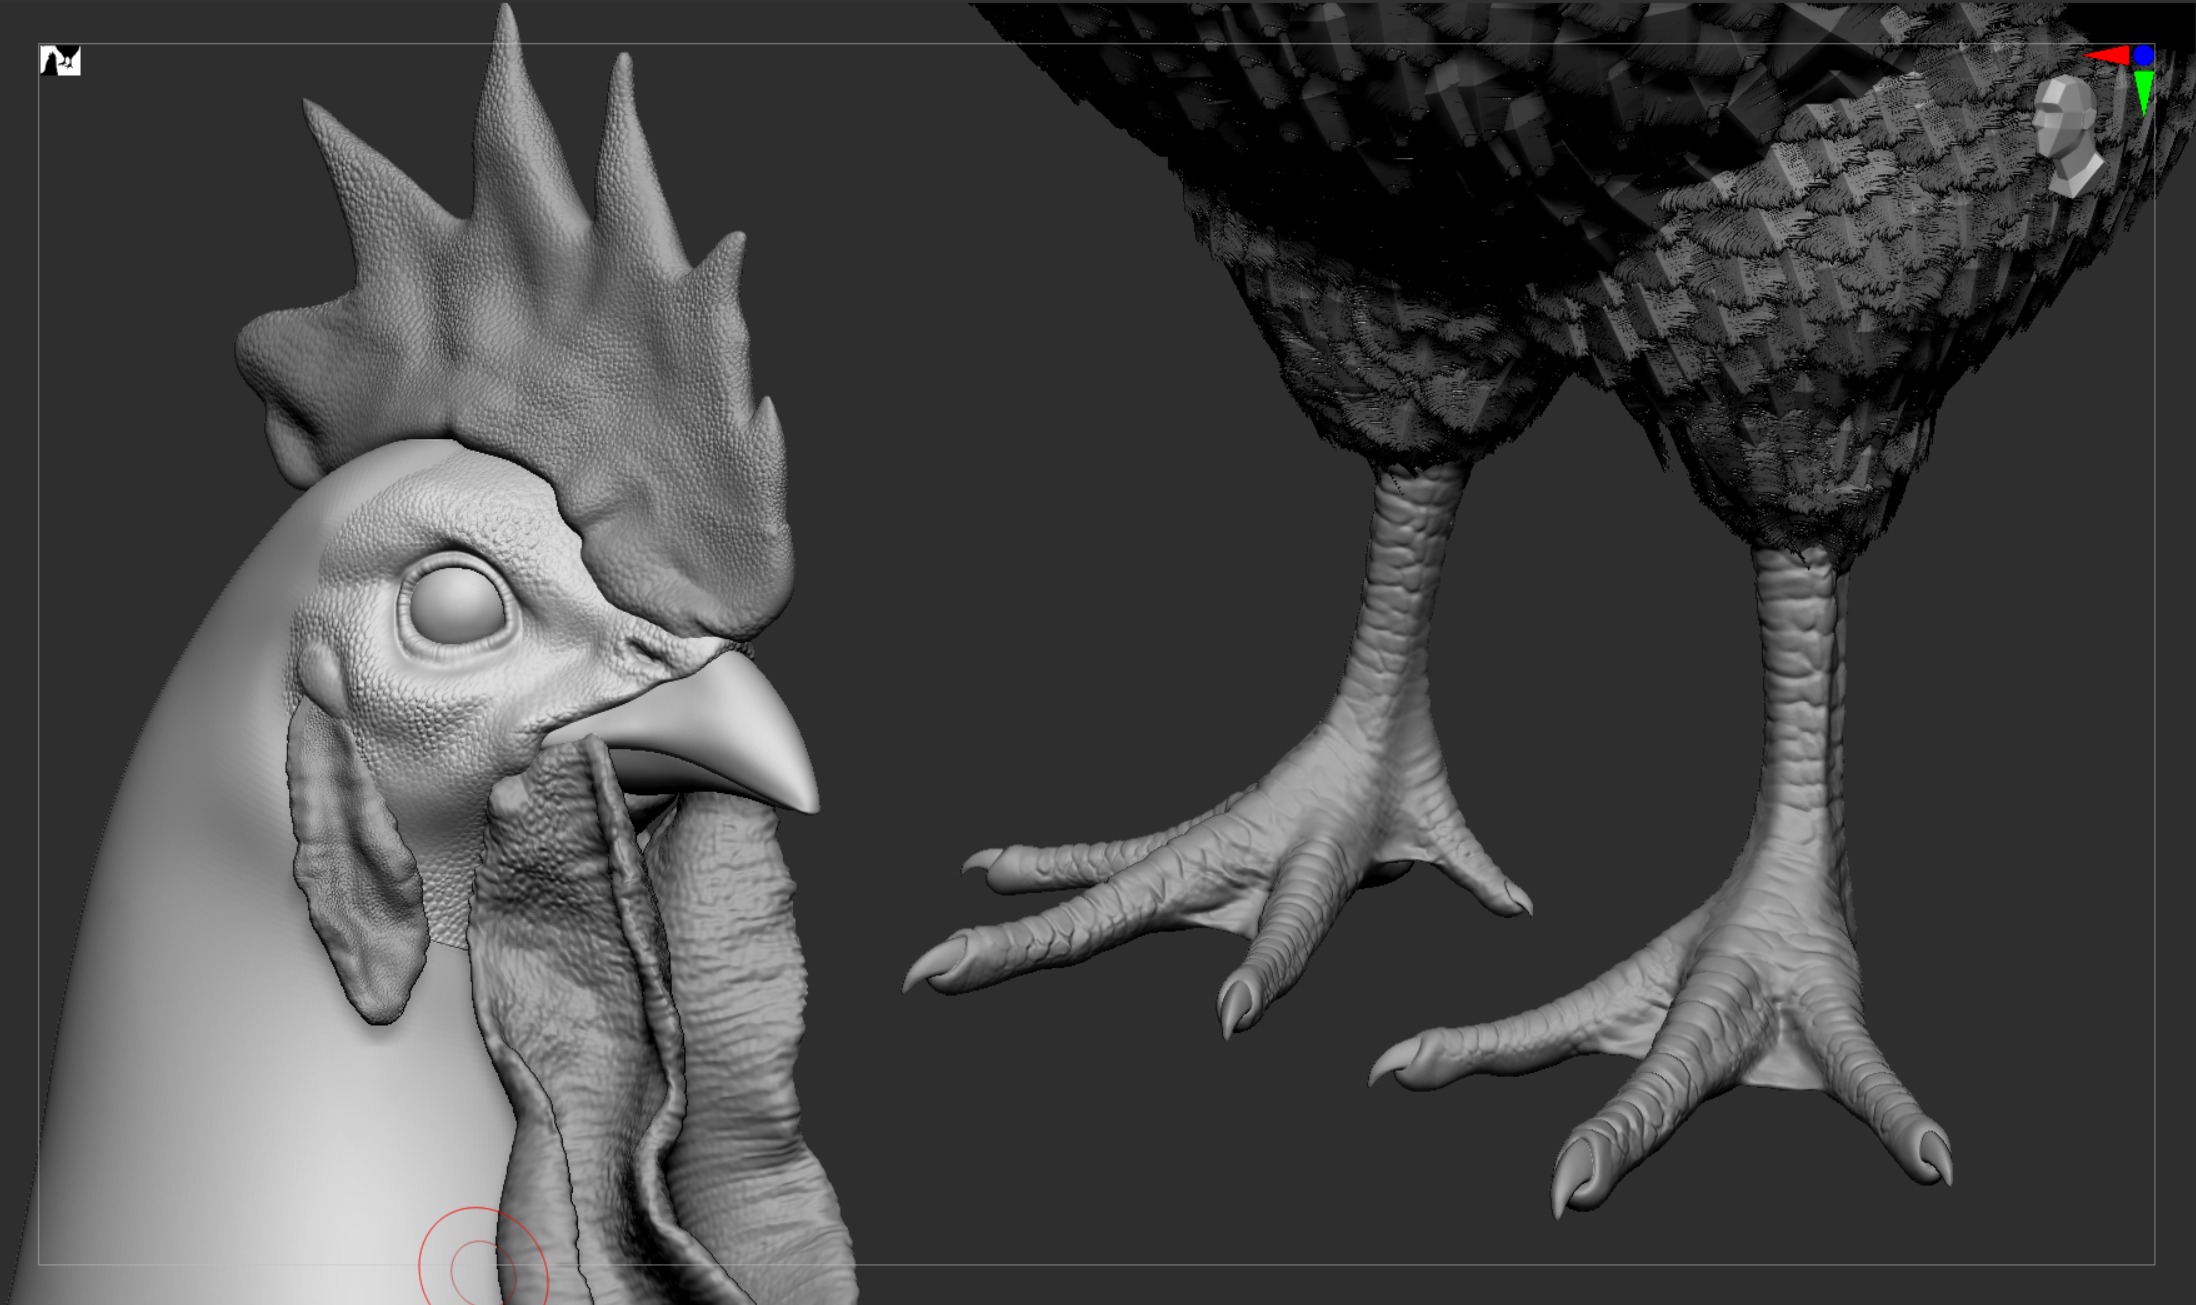
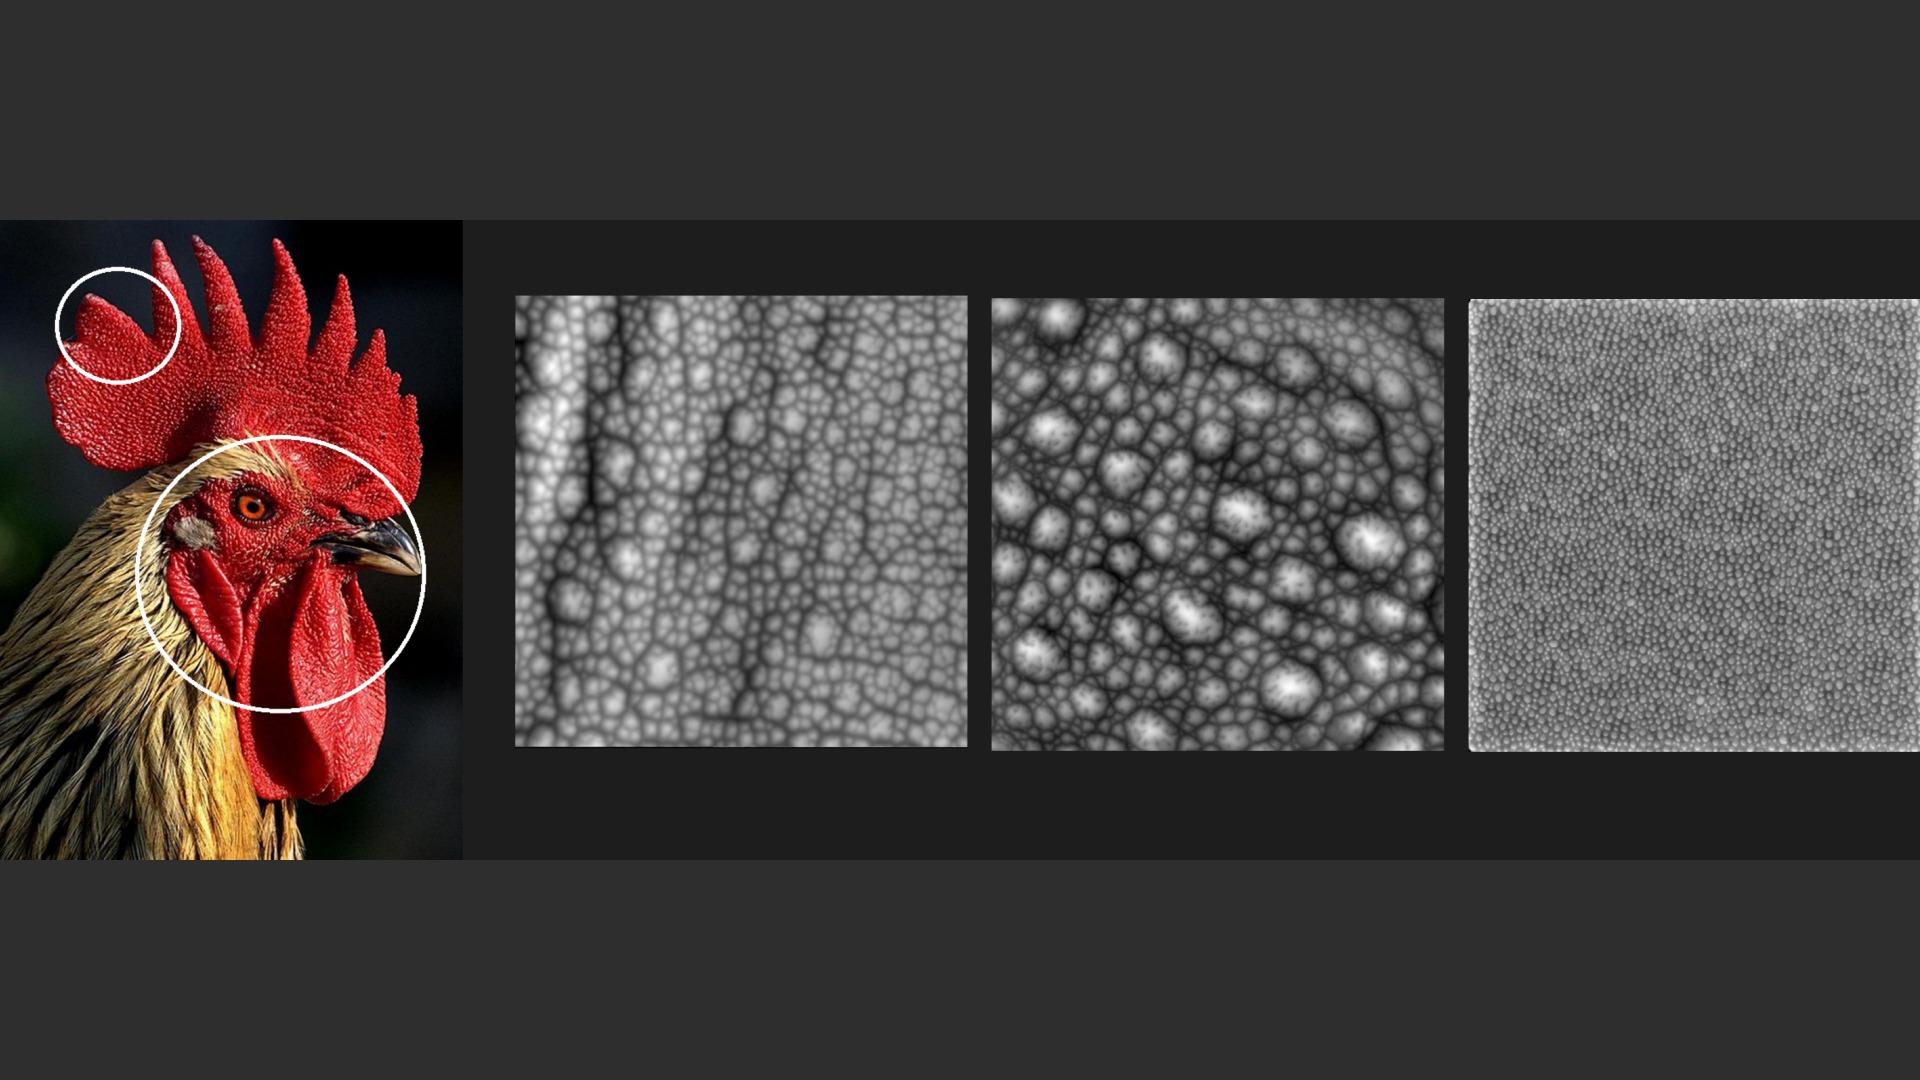
For the feet, I defined the forms using DamStandard, and for the comb, I used an alpha map to add surface texture.
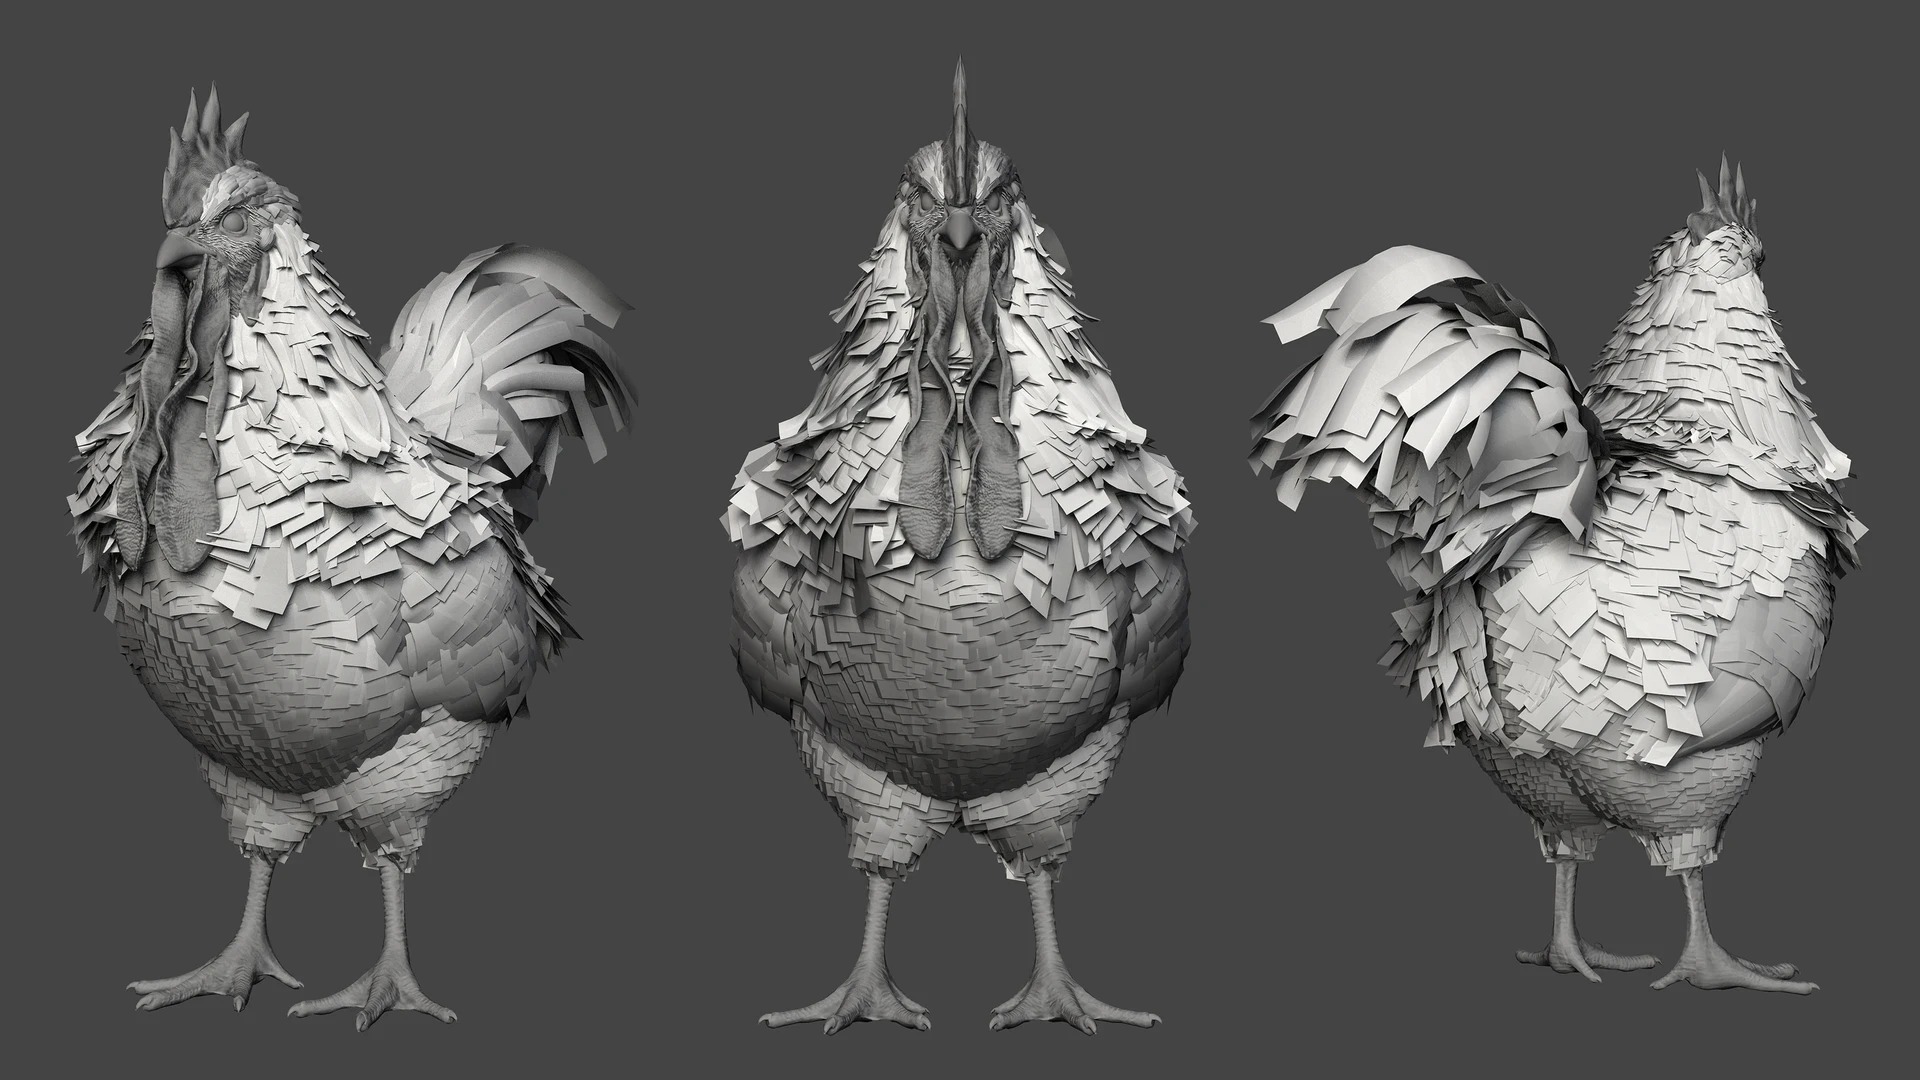
To create the feathers, I separated the rooster into groups that would share the same feather type (head, body, legs, and tail) and used FiberMesh to quickly scatter broad feather planes.
Afterward, I manually refined them by adjusting their position and orientation with Move and rotation to achieve a more natural flow.
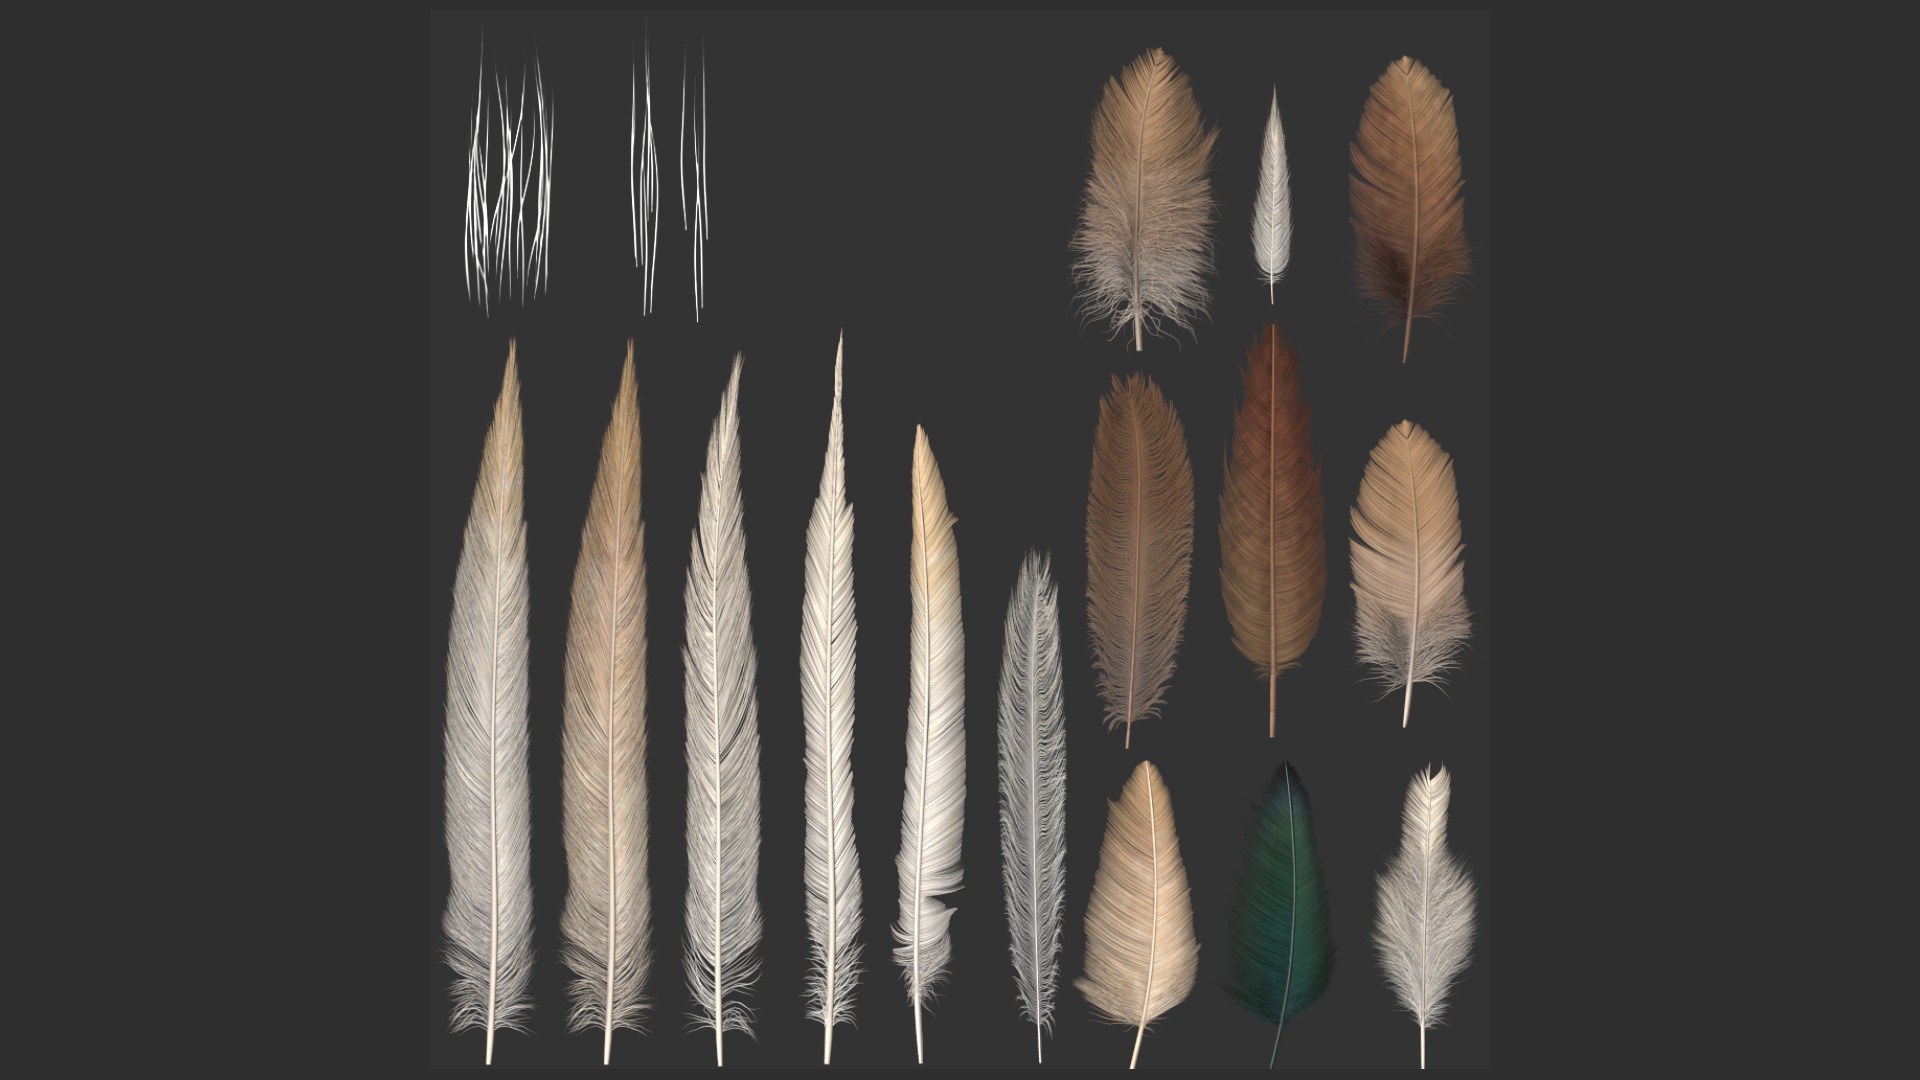
Just like with the hair, I applied test textures throughout the process and adjusted the volumes accordingly.
The feather textures were created using Morteza Shateri’s Feather Tool, which makes it easy and intuitive to generate convincing feather patterns.
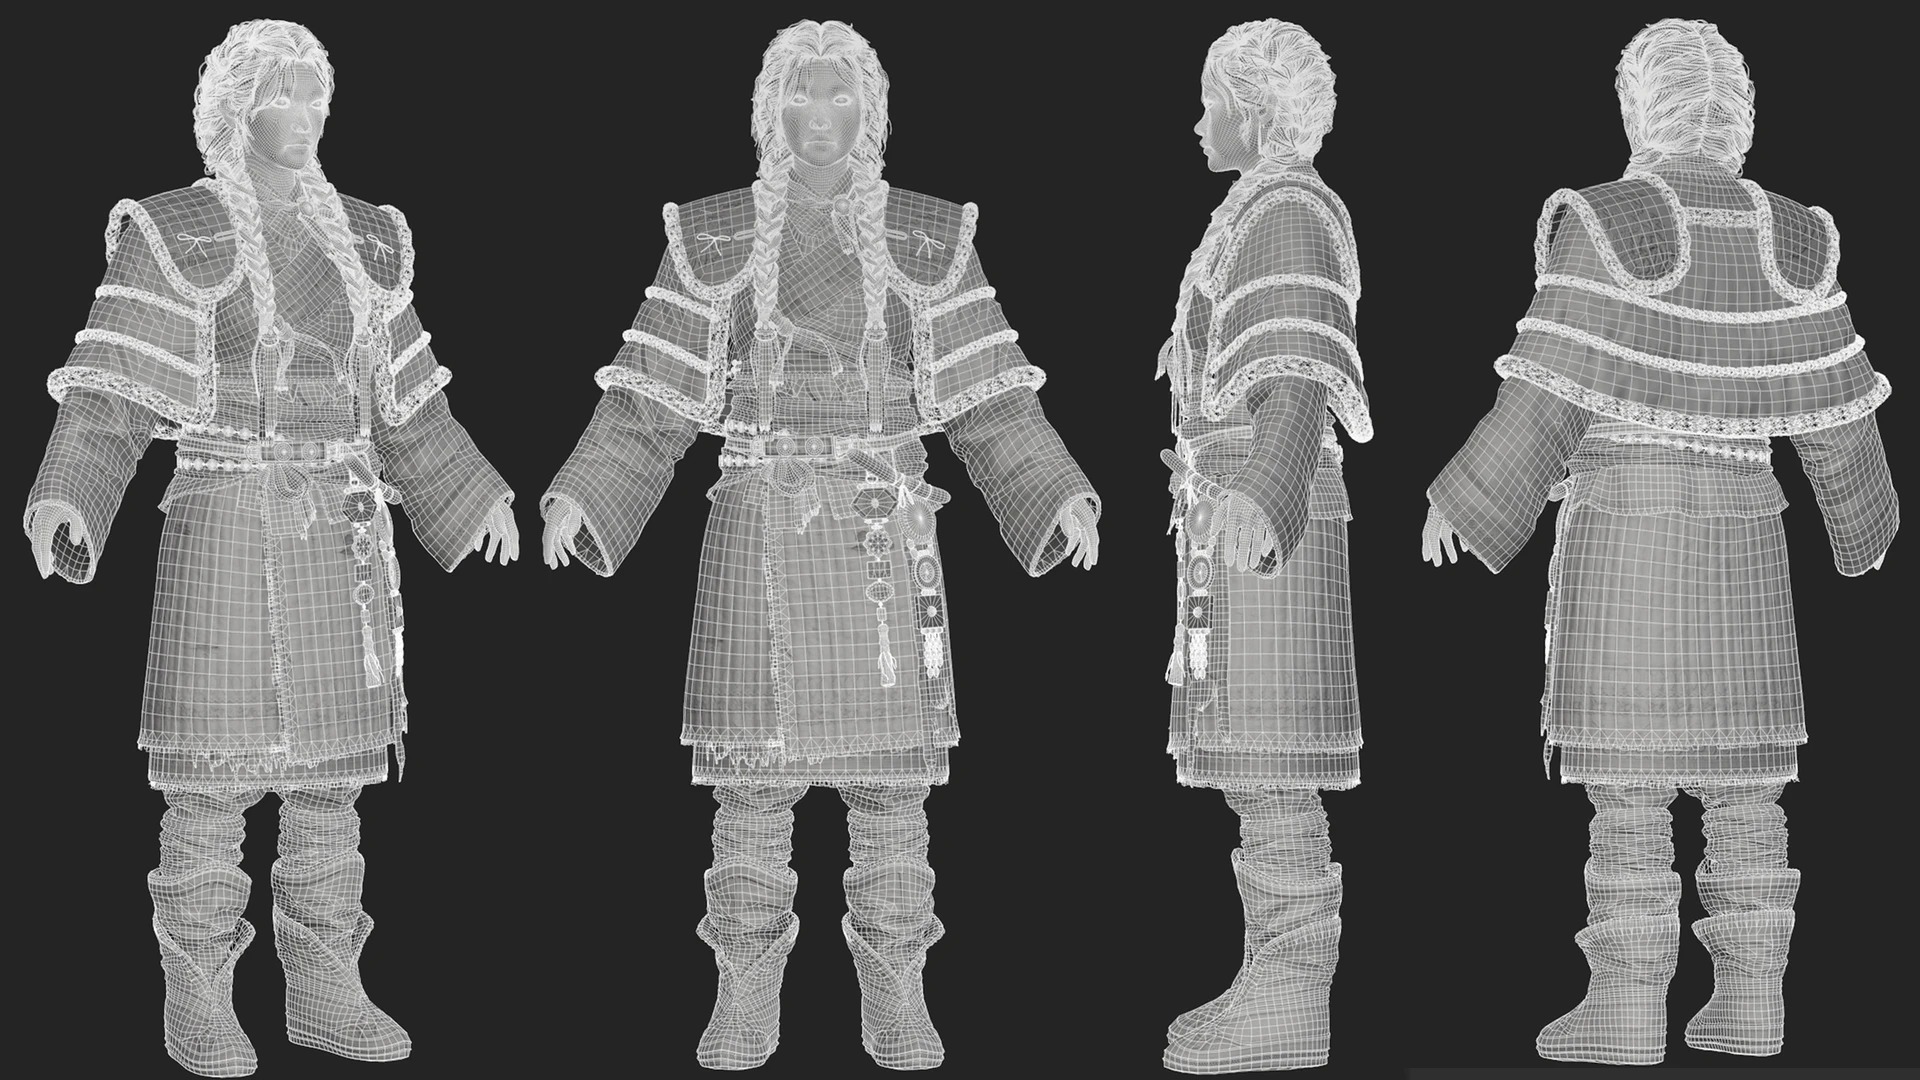
Retopology
I handled the retopology in 3ds Max.
My focus was on building clean, production-ready topology, preserving the silhouette while carefully designing edge flow around the joints for stable deformation.
UV
I handled UV mapping and layout in 3ds Max and RizomUV.
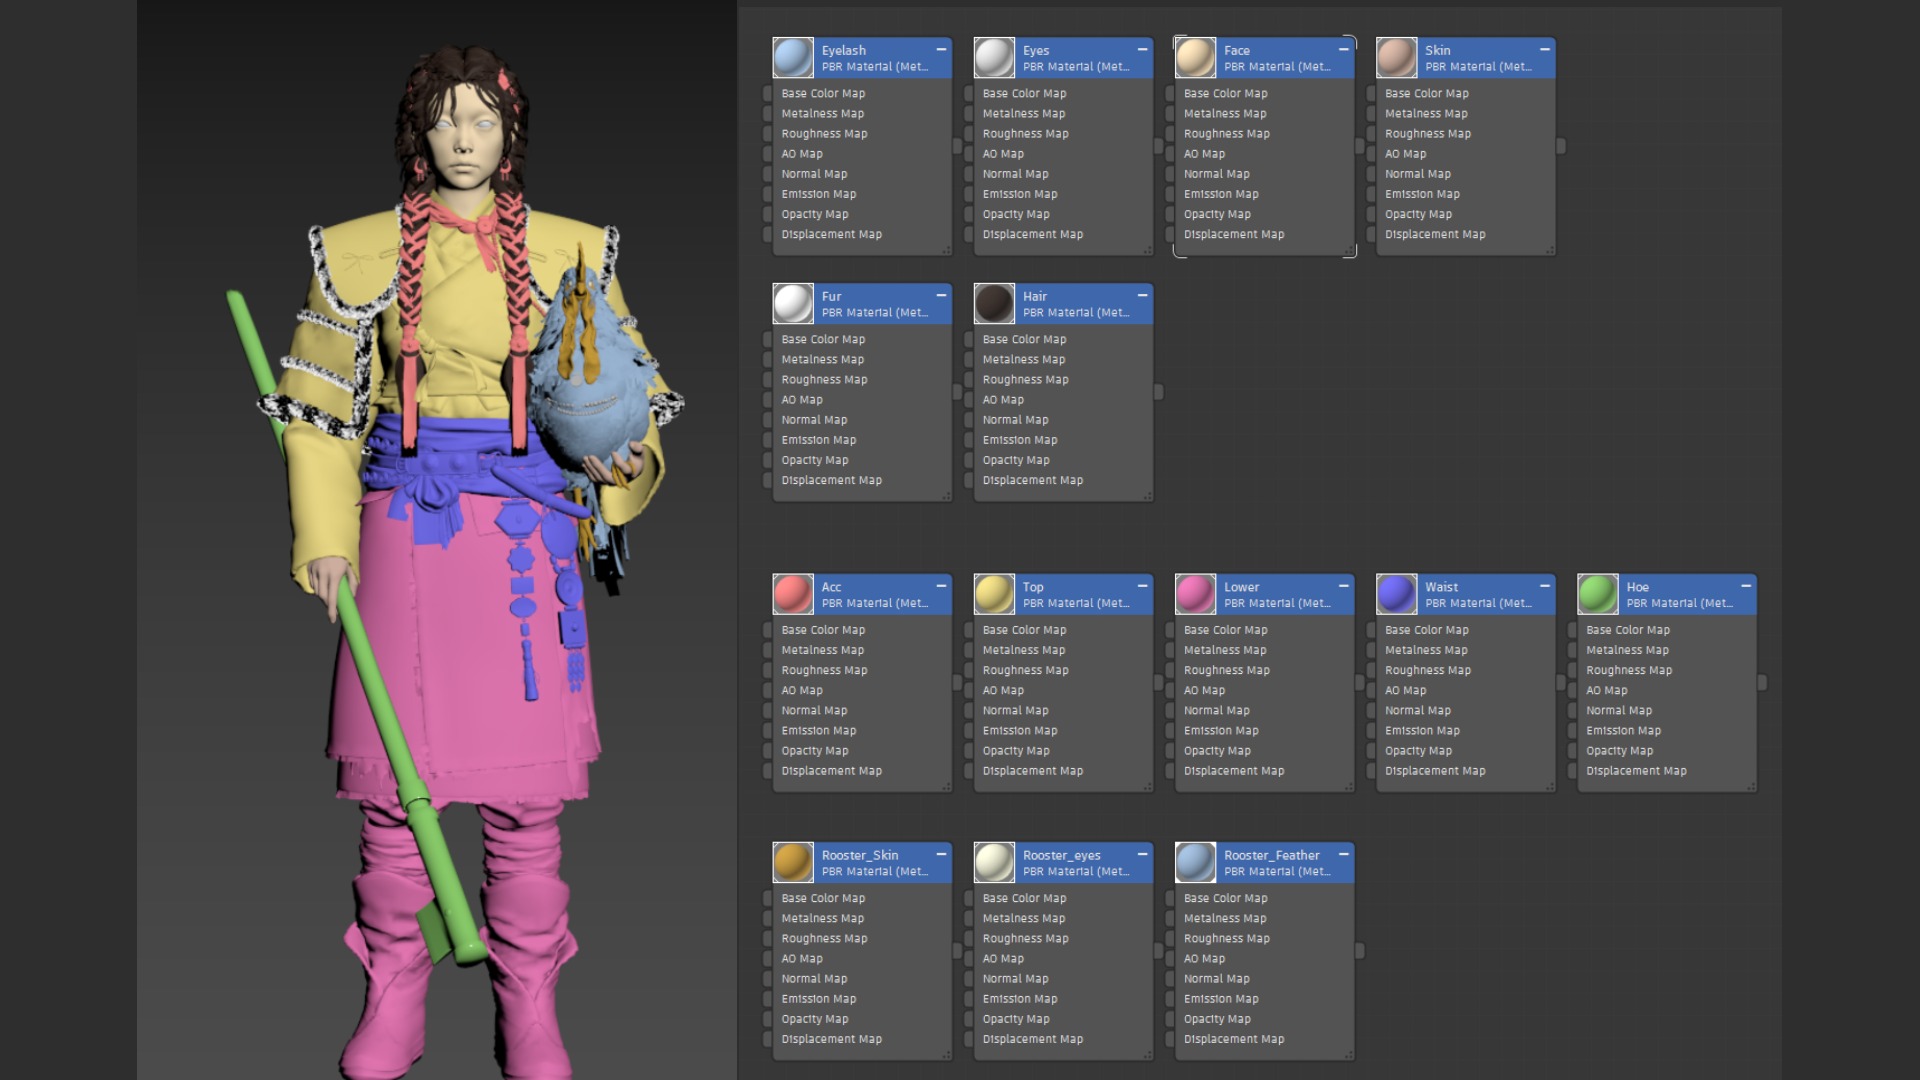
I separated the materials that needed independent control, such as hair, skin, and fur/feathers, and organized the layout into dedicated texture sets, as shown, to preserve fine detail and maintain consistent texel density.
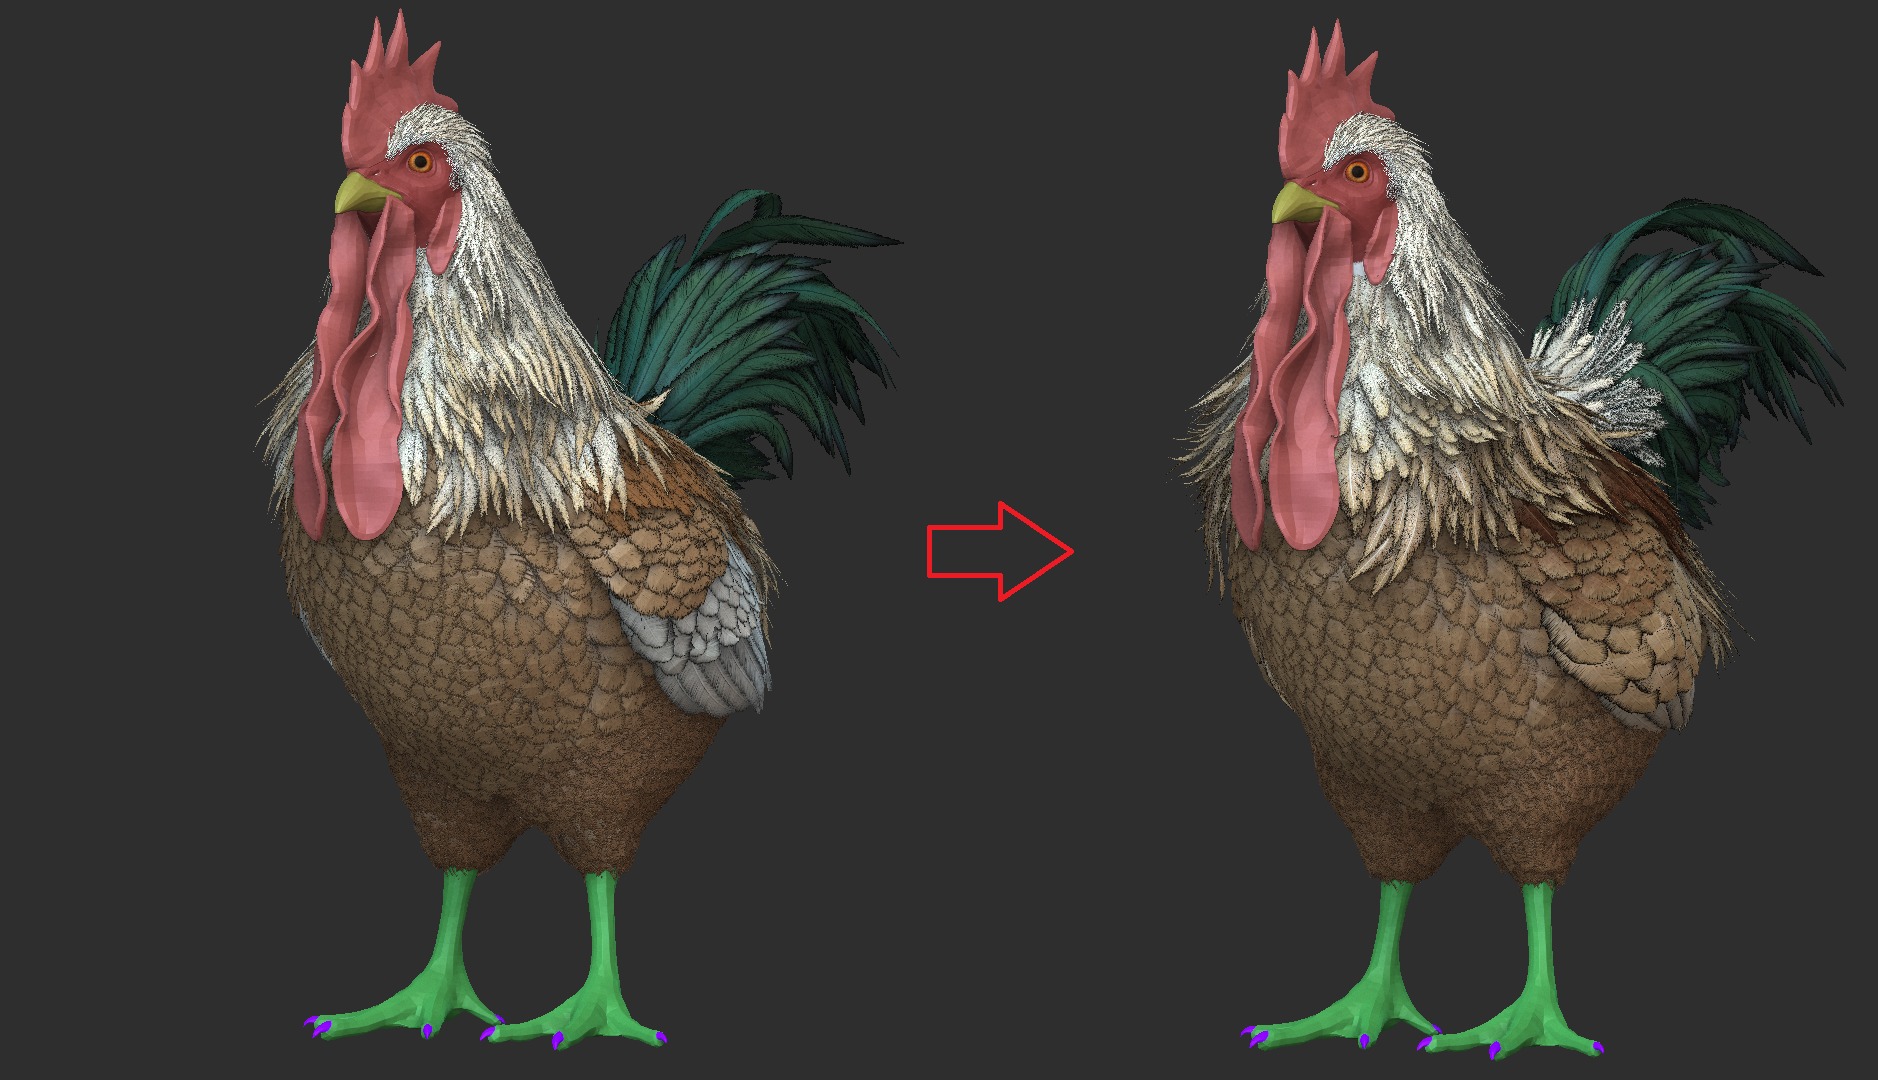
Texturing
After completing the baking process in Marmoset, I imported the assets into Substance 3D Painter for texturing.
I researched the physical properties of real garment materials, then collected and tested various material references from the Substance community to apply the most suitable material combinations for each outfit part.
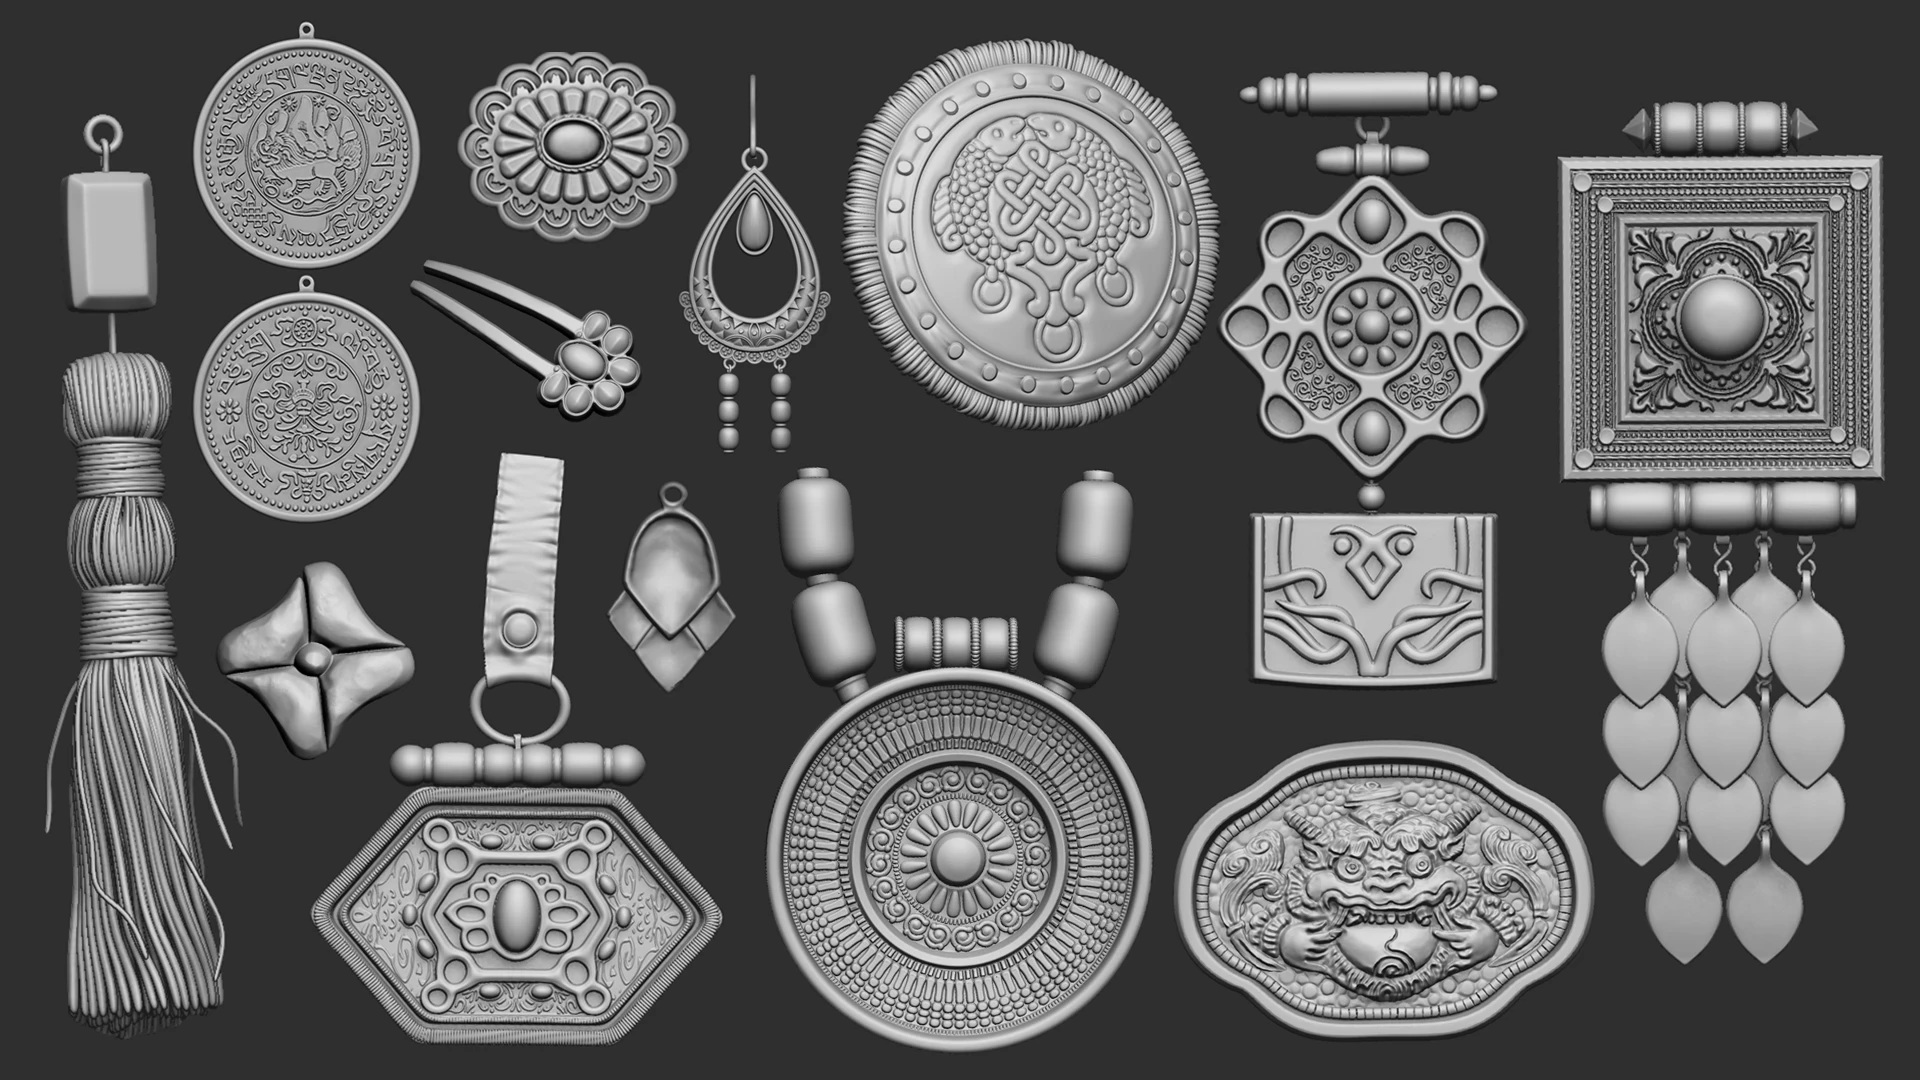
The embroidery details were created using an ID map, and the shoulder embroidery was achieved using the Embroidery material in Substance 3D Painter, with the intended pattern image applied to it.
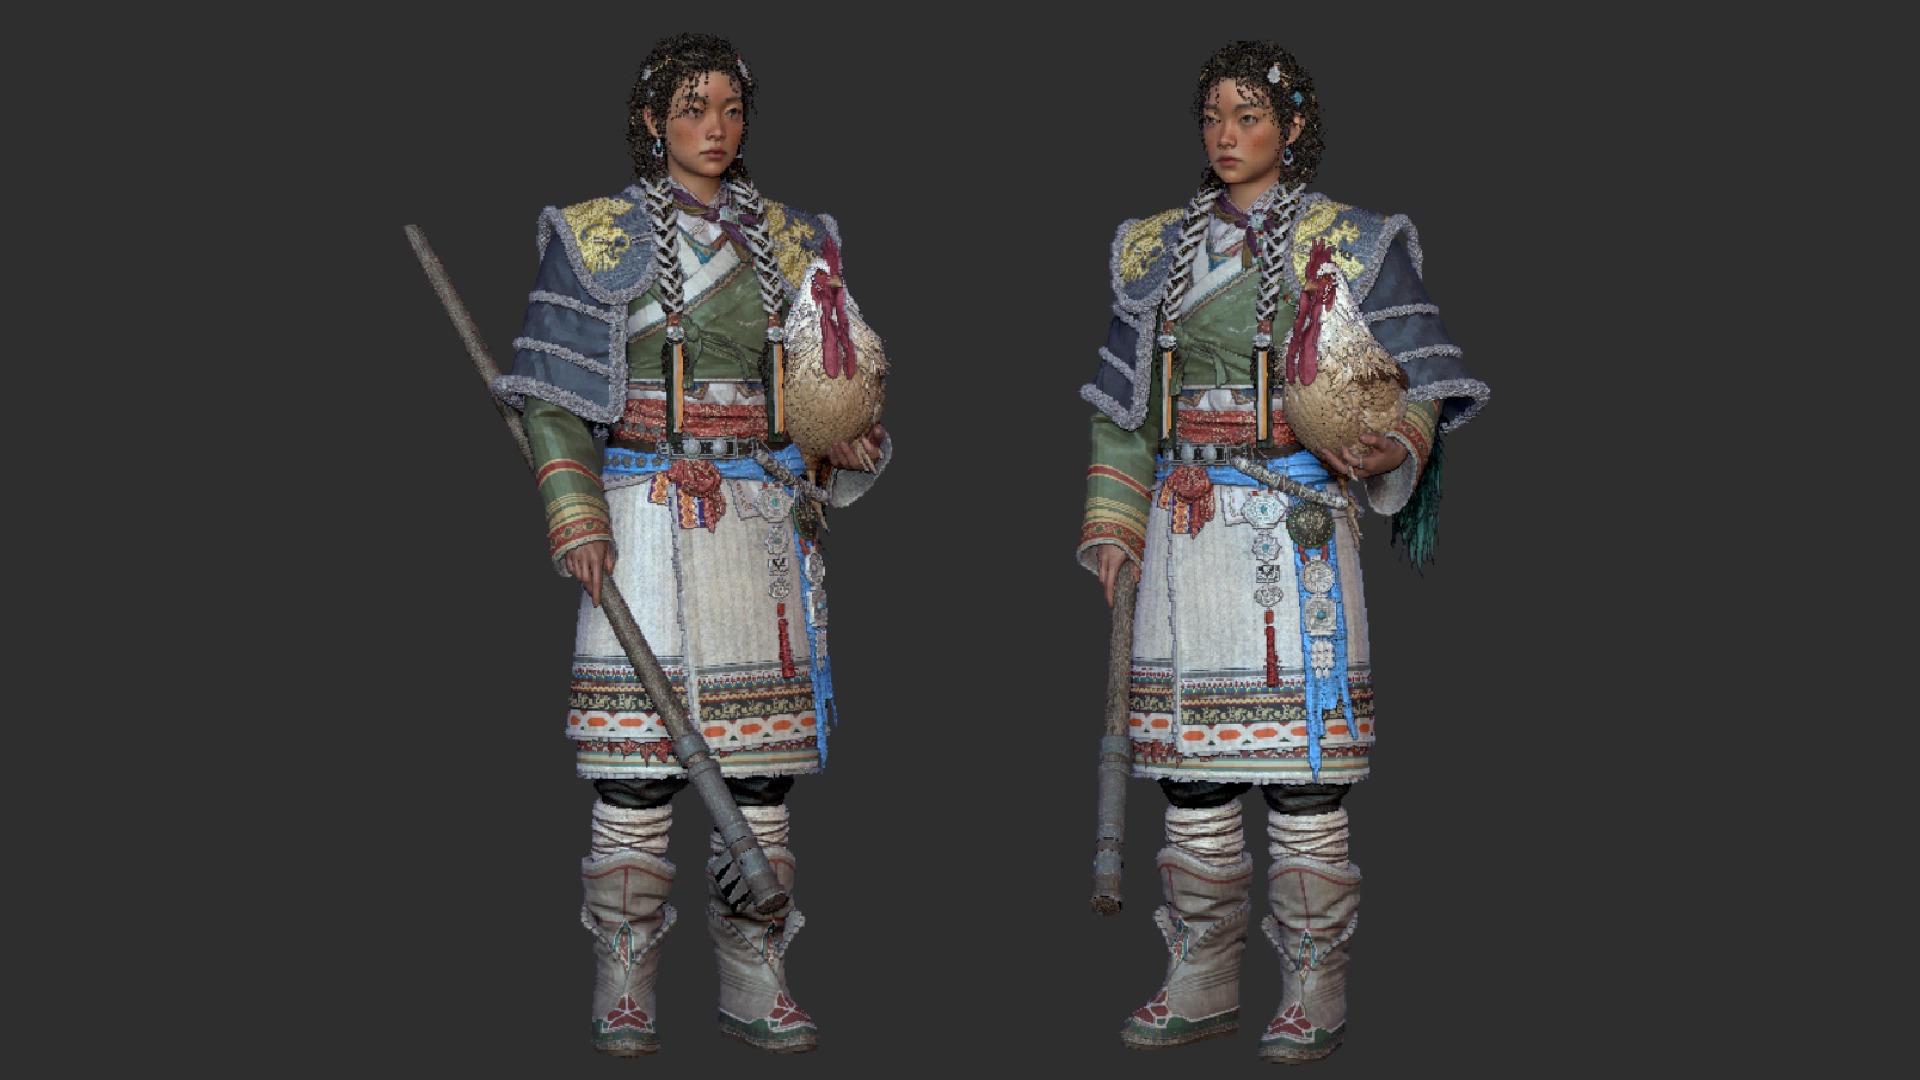
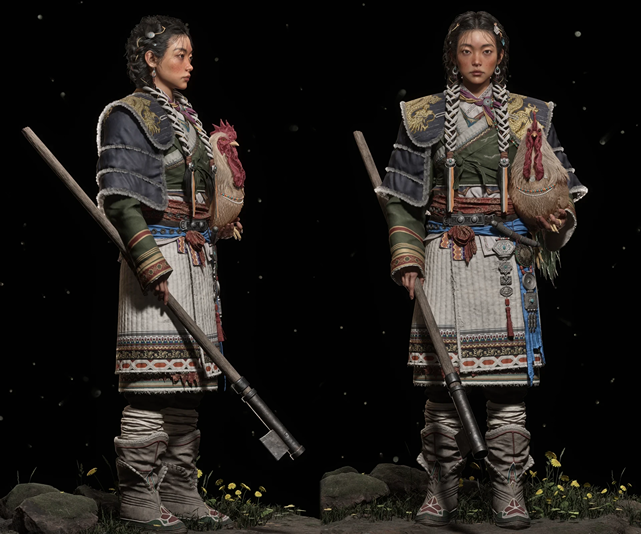
Posing
I posed the character directly in ZBrush without using a separate rig.
For this, I used Transpose Master to manage the pose while keeping the proportions consistent across subtools.
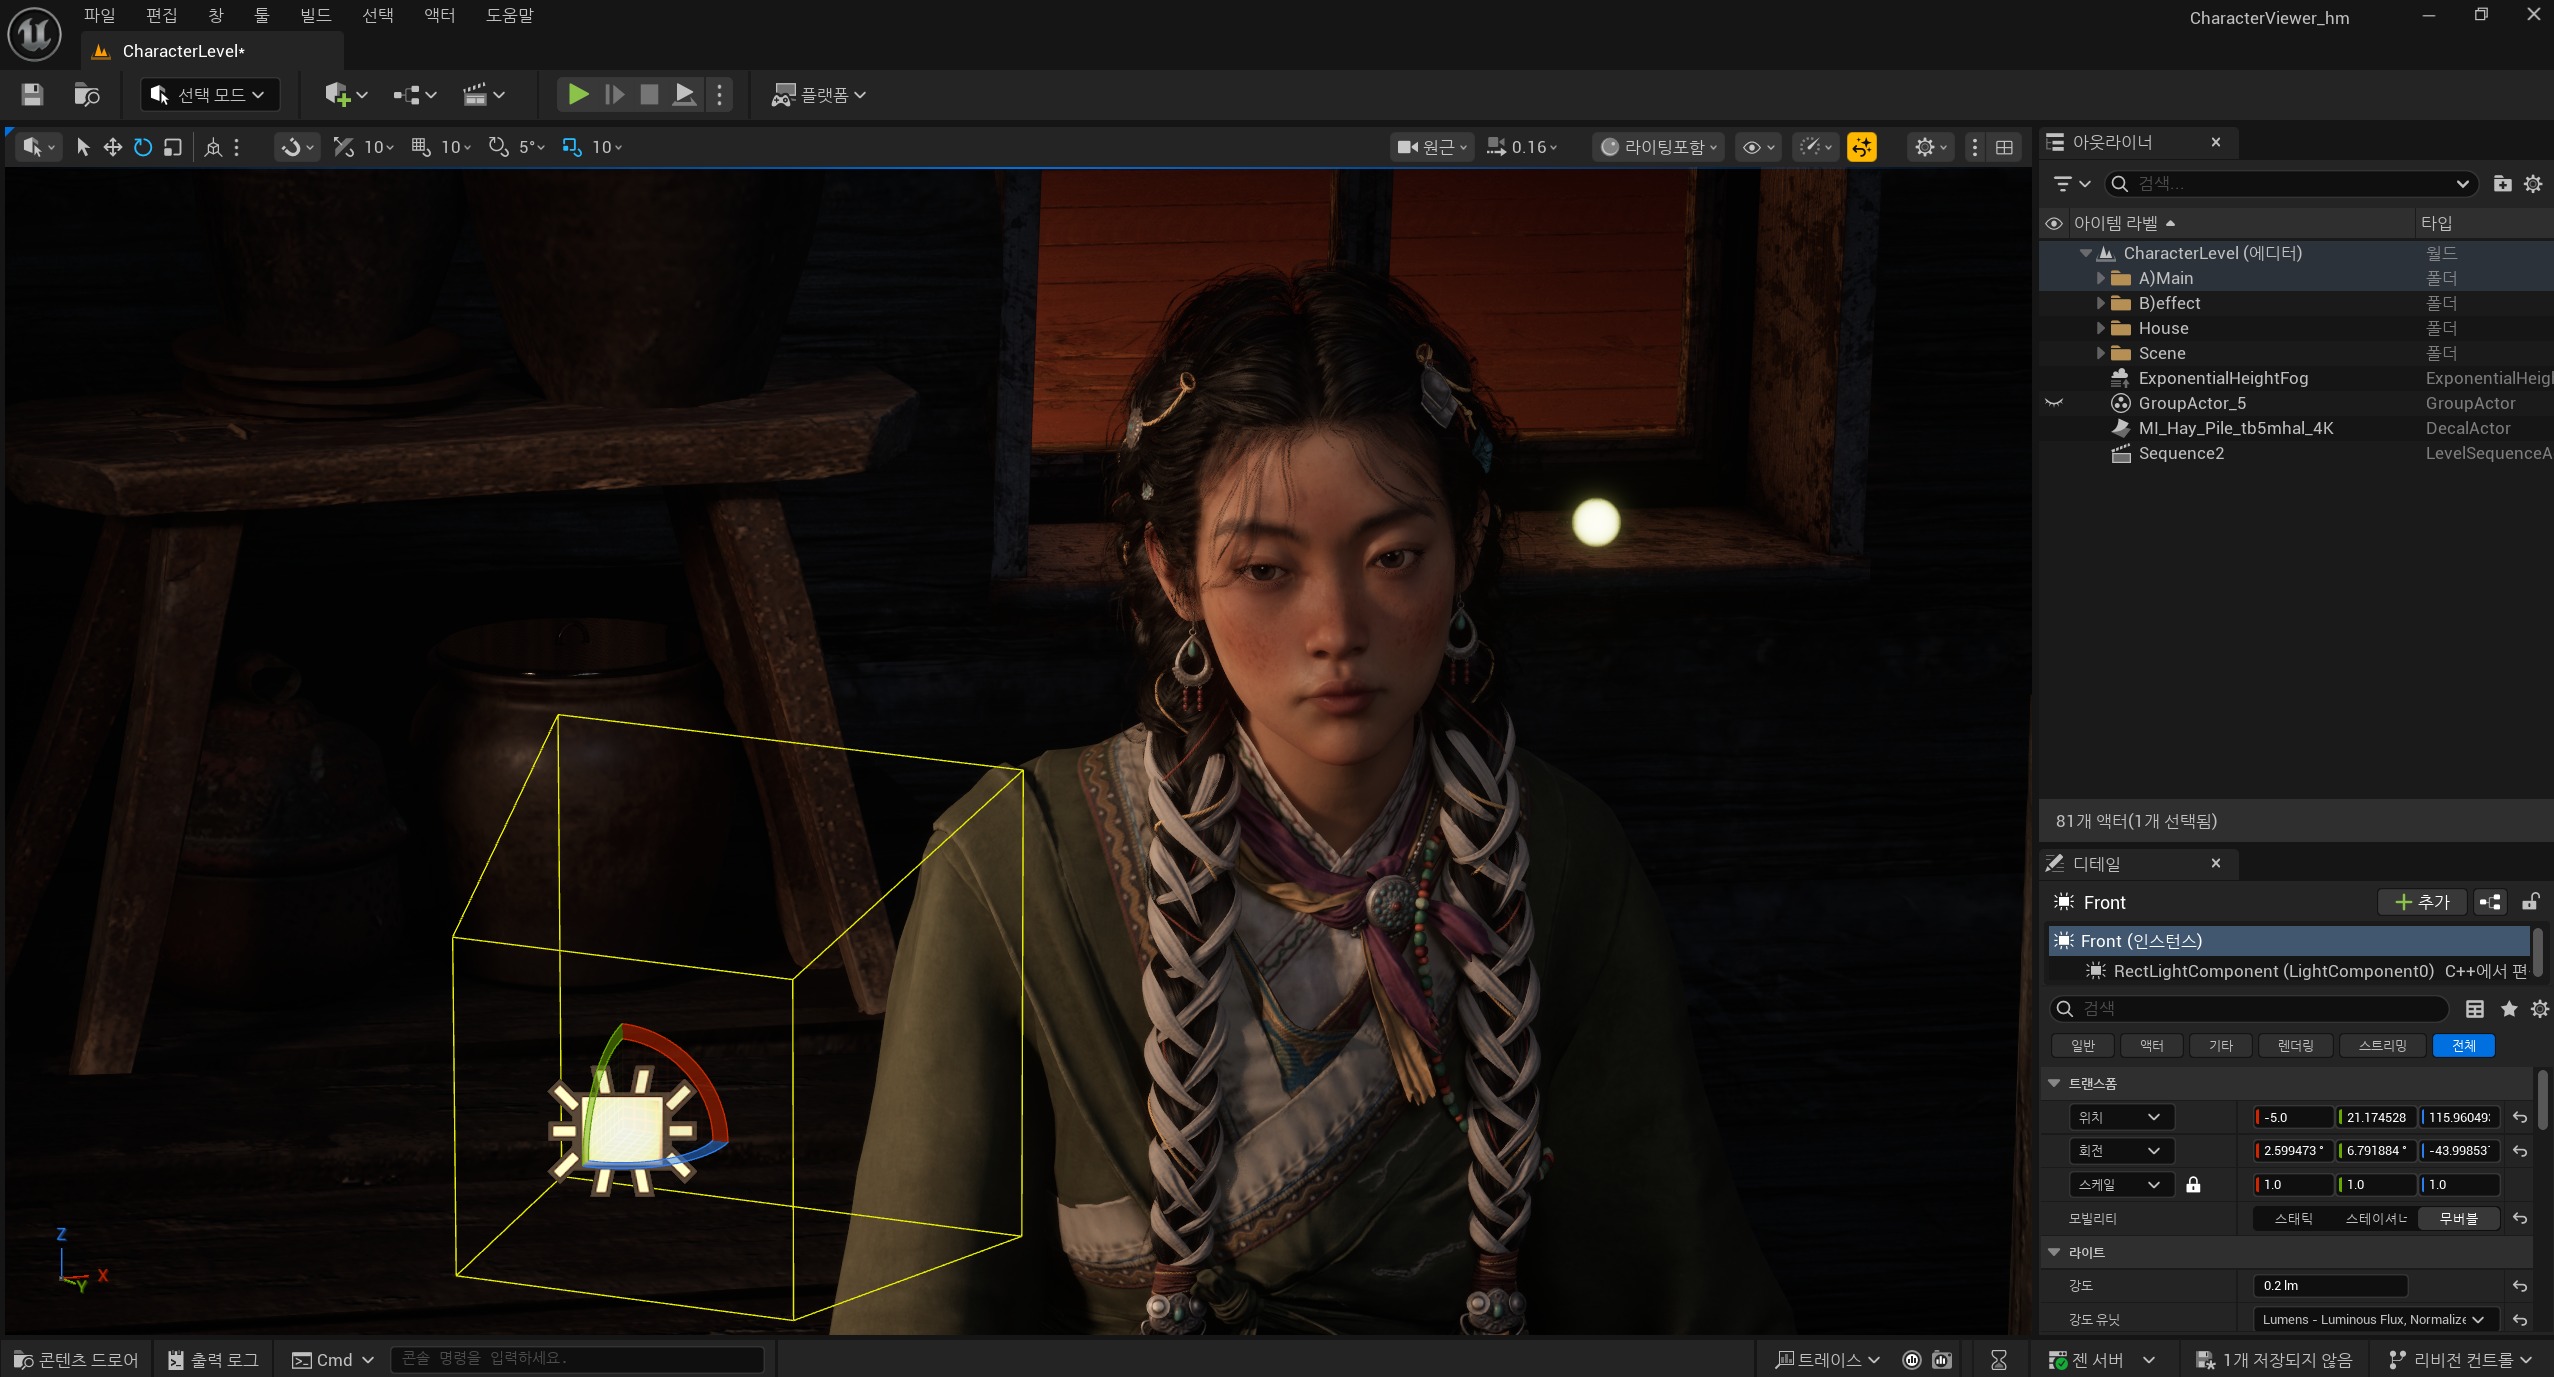
Lighting & Rendering
All lighting and rendering were done in Unreal Engine 5. I used a warm key light to enhance the character’s mood and to bring out the richness of the costume’s color palette.
To keep the face readable, I added a softer fill to control shadow density, while a subtle rim light helped separate the silhouette from the background.
For the environment, I populated the background with Megascans props to quickly establish a believable set and support the scene’s overall atmosphere.
Conclusion
This character project was more than simply finishing a model; it was an intensive exercise in translating culturally grounded details from reference into a believable game-ready character, and pushing the full production pipeline all the way through.
From sculpting and retopology to texturing and finally lighting and rendering in UE5, working through each stage as close to a real game workflow as possible became a valuable learning experience for me.
I still have a lot to improve, but I hope this breakdown can serve as a small reference for anyone studying character art.
Thank you to GamesArtist.co.uk for the invitation, and sincere thanks as well to my mentor, Ui-joo Moon, for the guidance and feedback throughout the process.
Read more articles
You might also like these articles.


