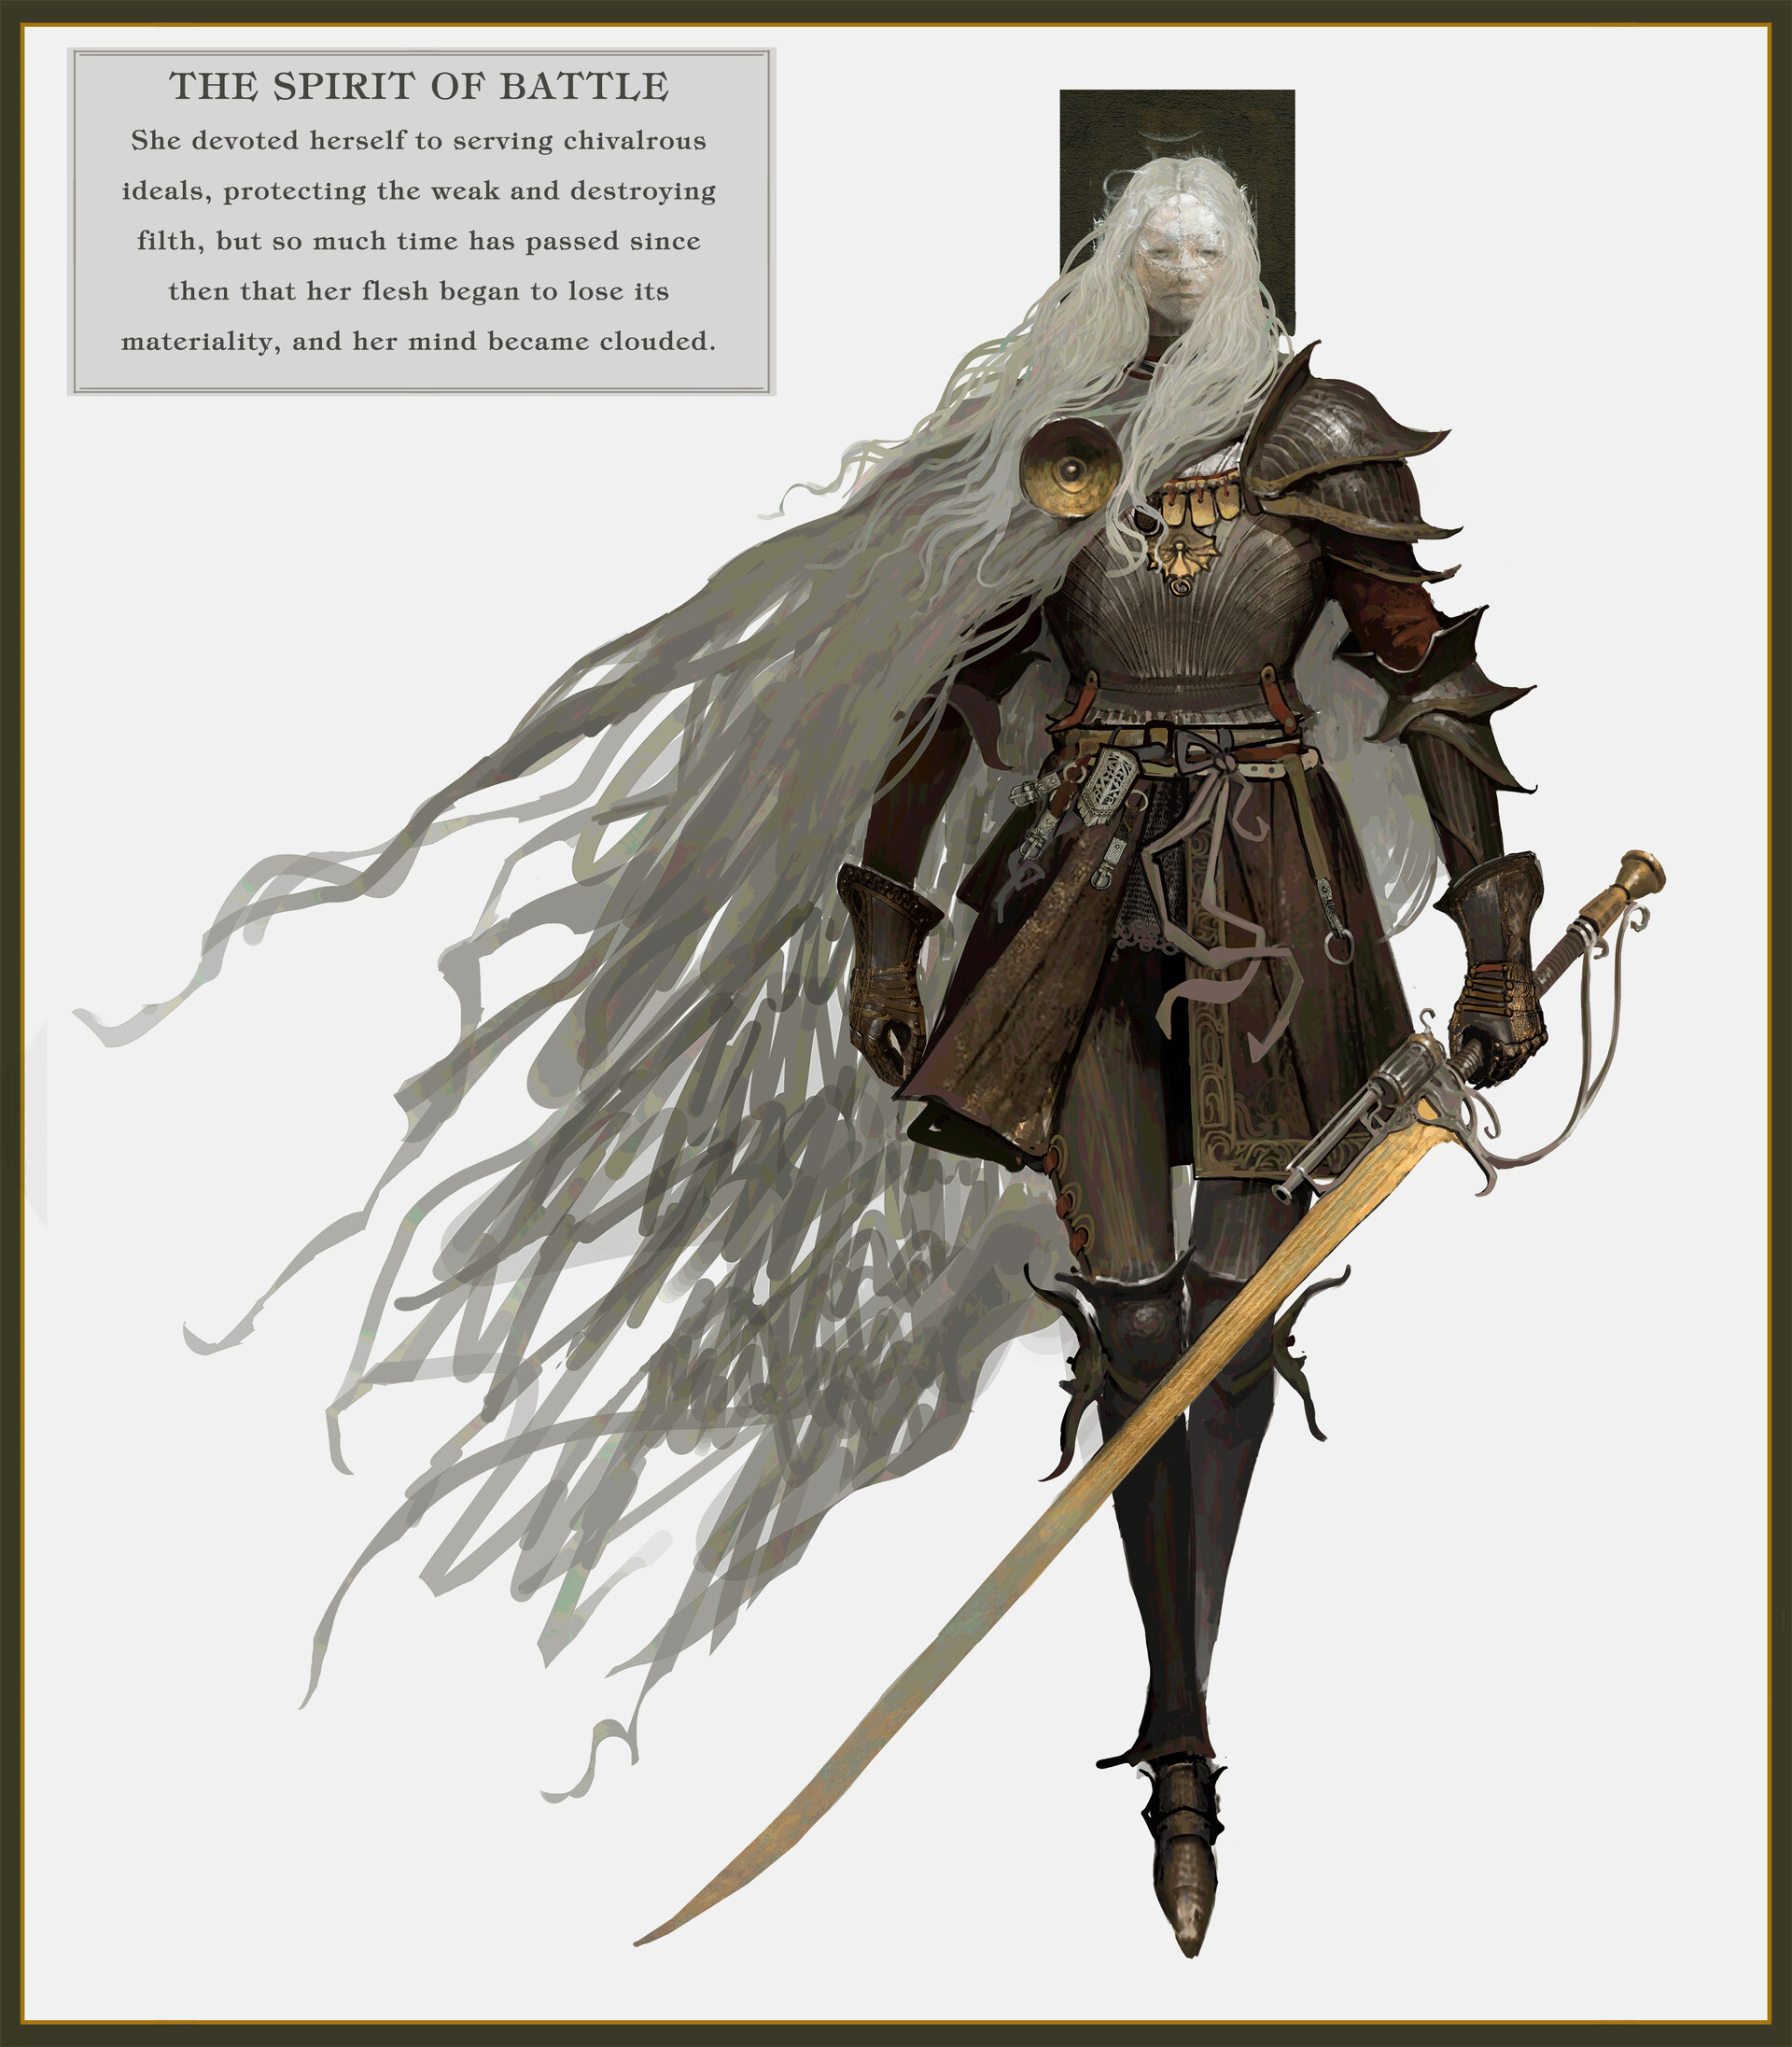
The Spirit of Battle

Introduction
Hello! My name is Pedro García and I'm a Character Artist from Spain.
I have been in the industry for around 3 years and I worked on Total War: Warhammer 3 and a few unannounced projects.


Goals
Working on personal projects is something that I have always enjoyed and I think they are a must to improve your skills or learn new techniques.
In this case, my goal was to update my portfolio with a new piece that showed my current skills.
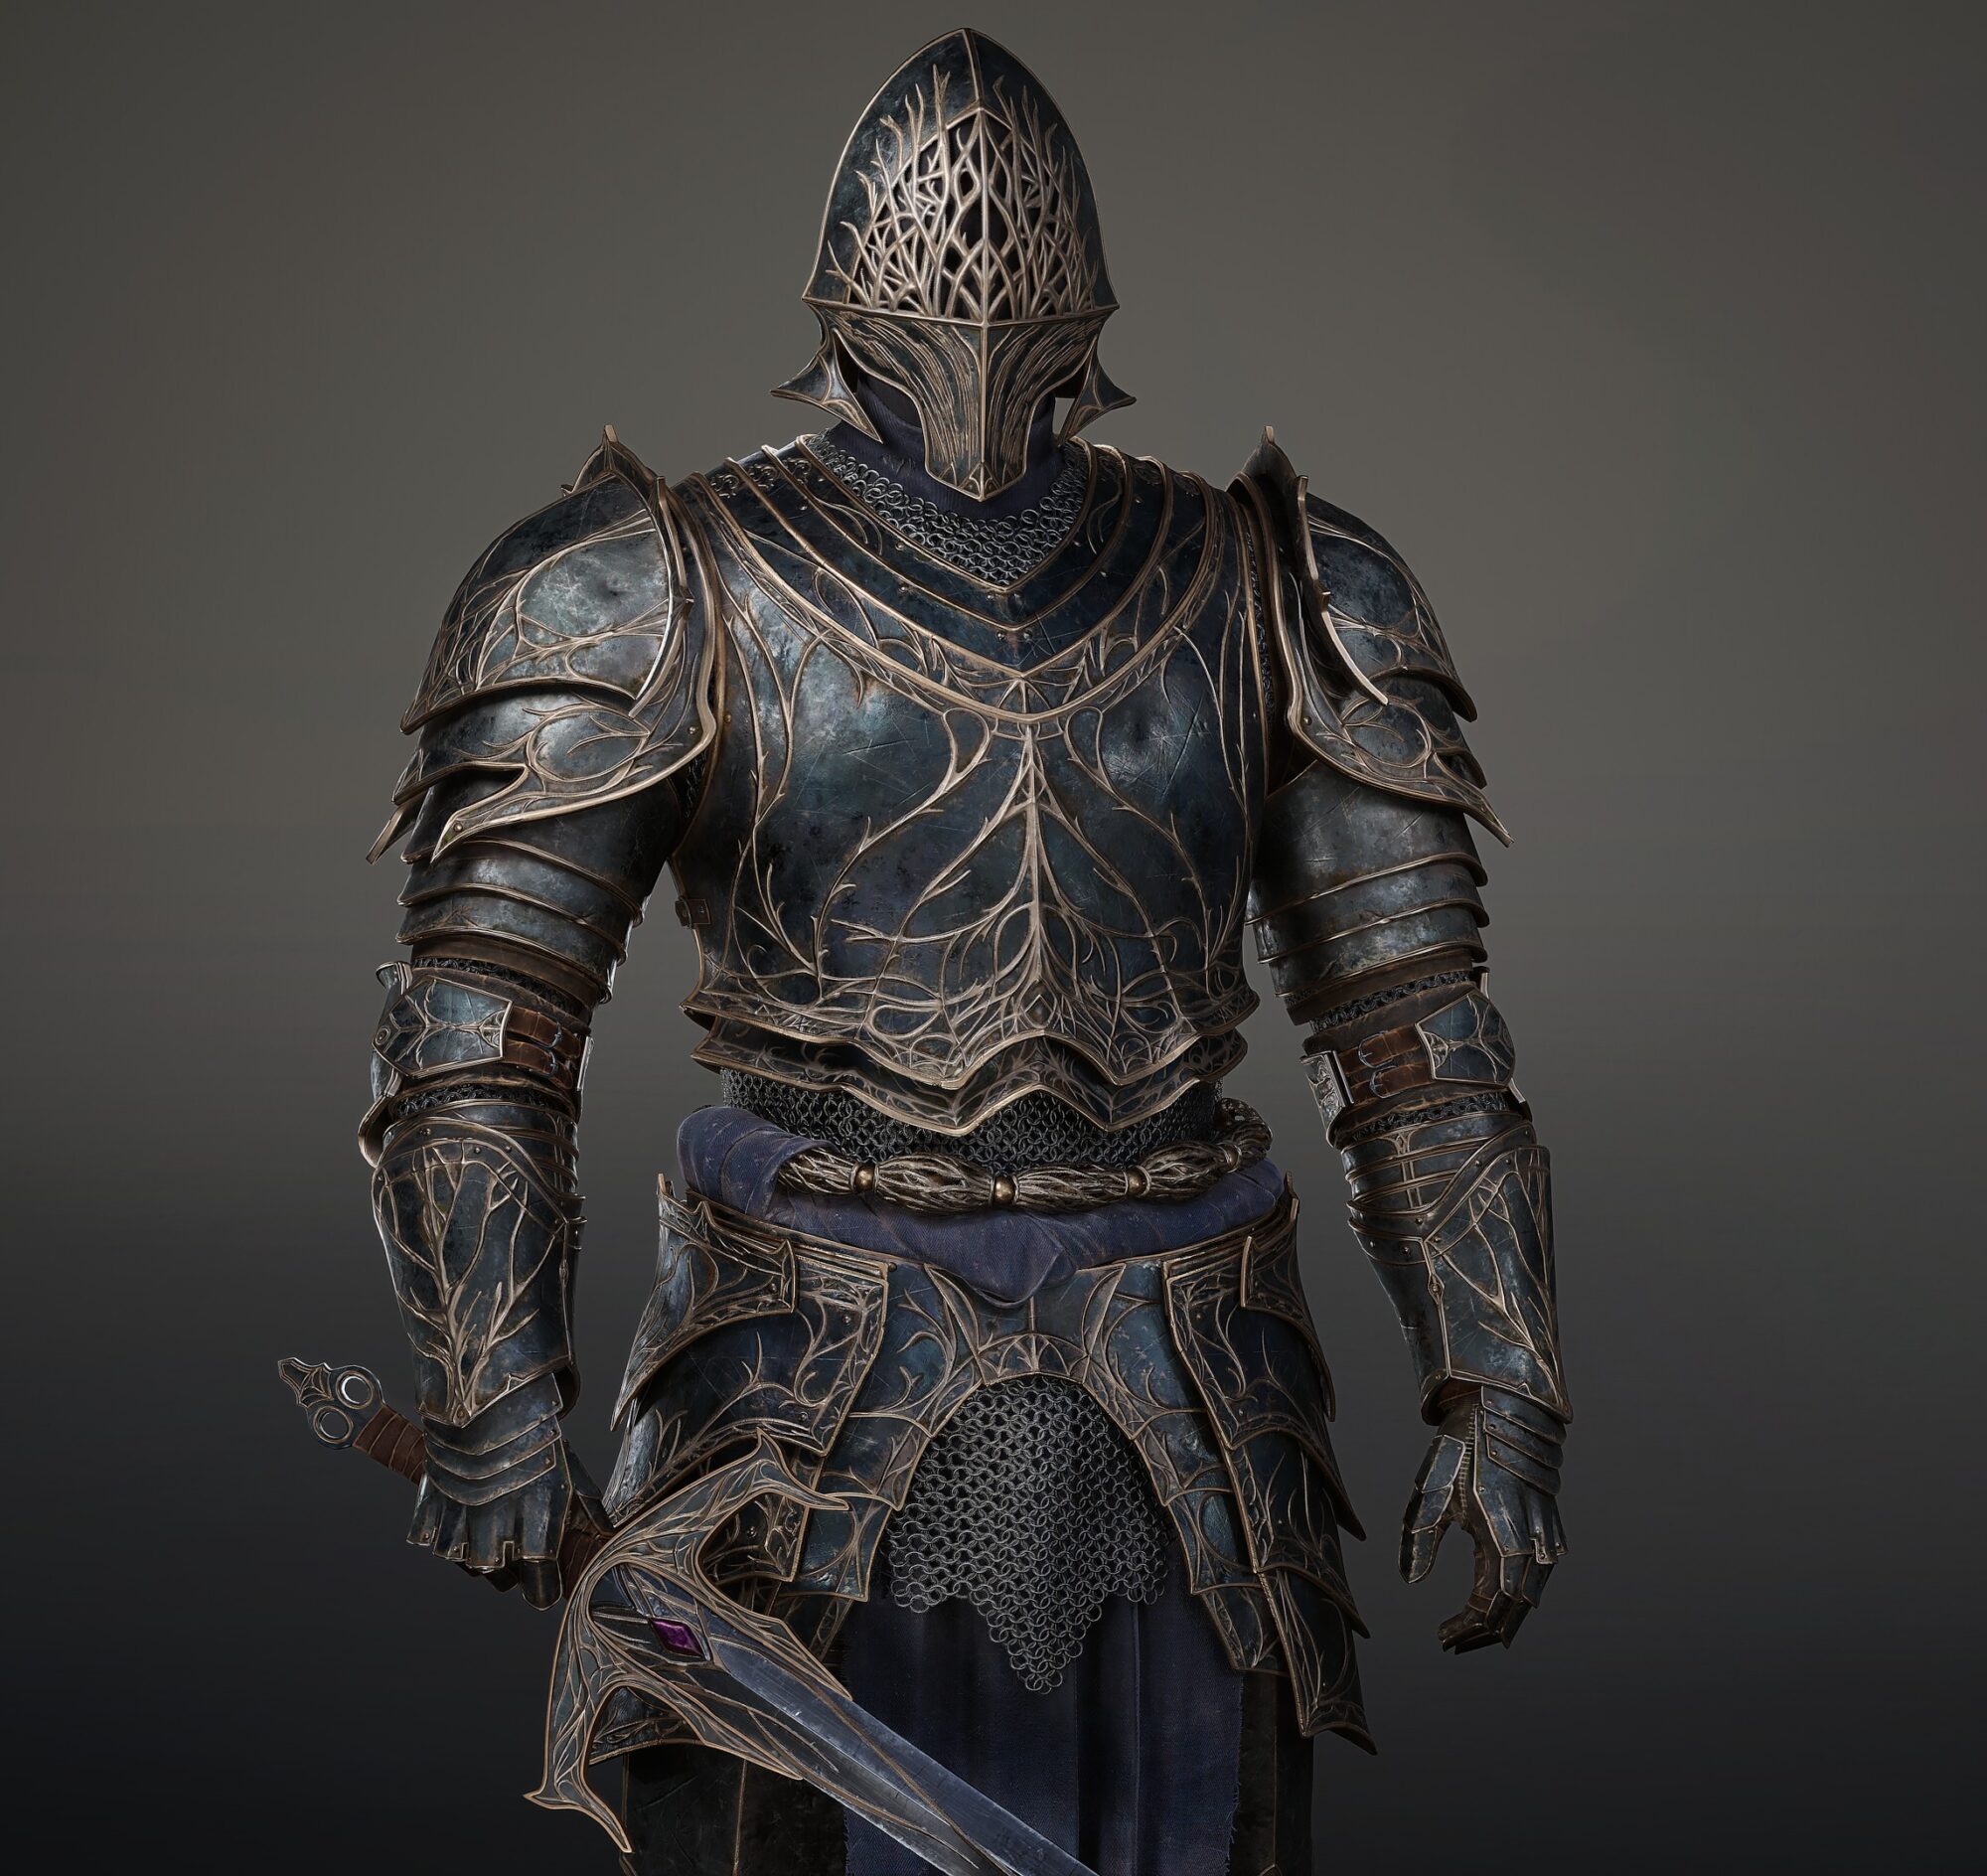
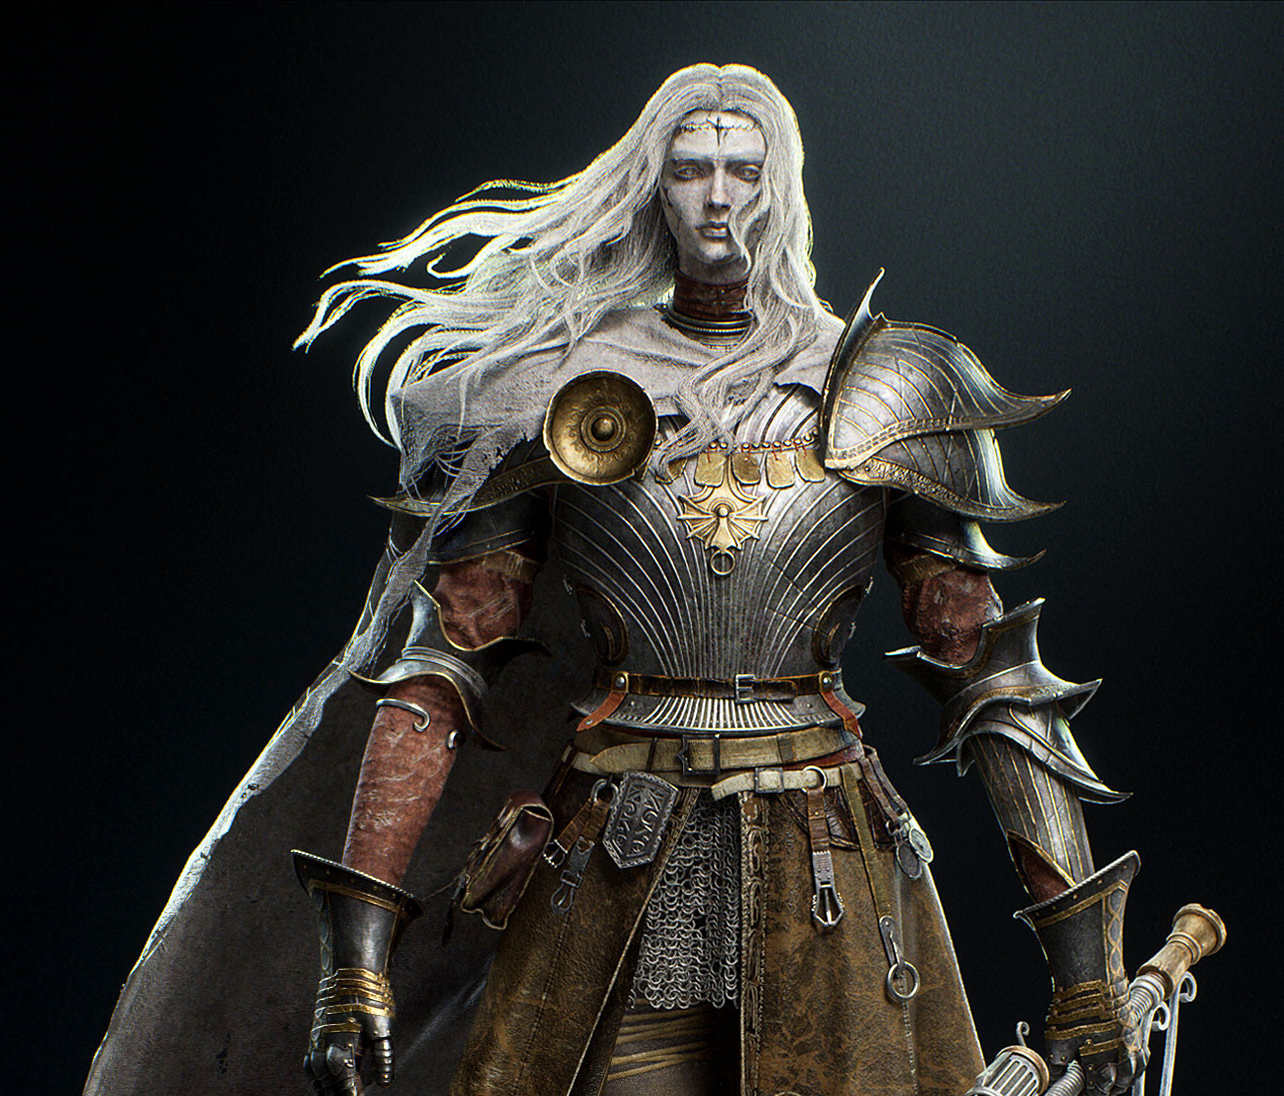
I chose Taras Kuznetsov concept art because I always wanted to create a dark fantasy character and I think his designs are so cool.
Tools
• Zbrush – Modeling and sculpting
• Marvelous Designer – Cloth creation
• 3DCoat – Retopology
• Rizom UV – UVs
• Substance Painter – Texturing
• FiberShop – Hair textures
• 3DS Max – Hair card placement
• Photoshop – Pattern creation or texture tweaking
• Unreal Engine 5 – Rendering
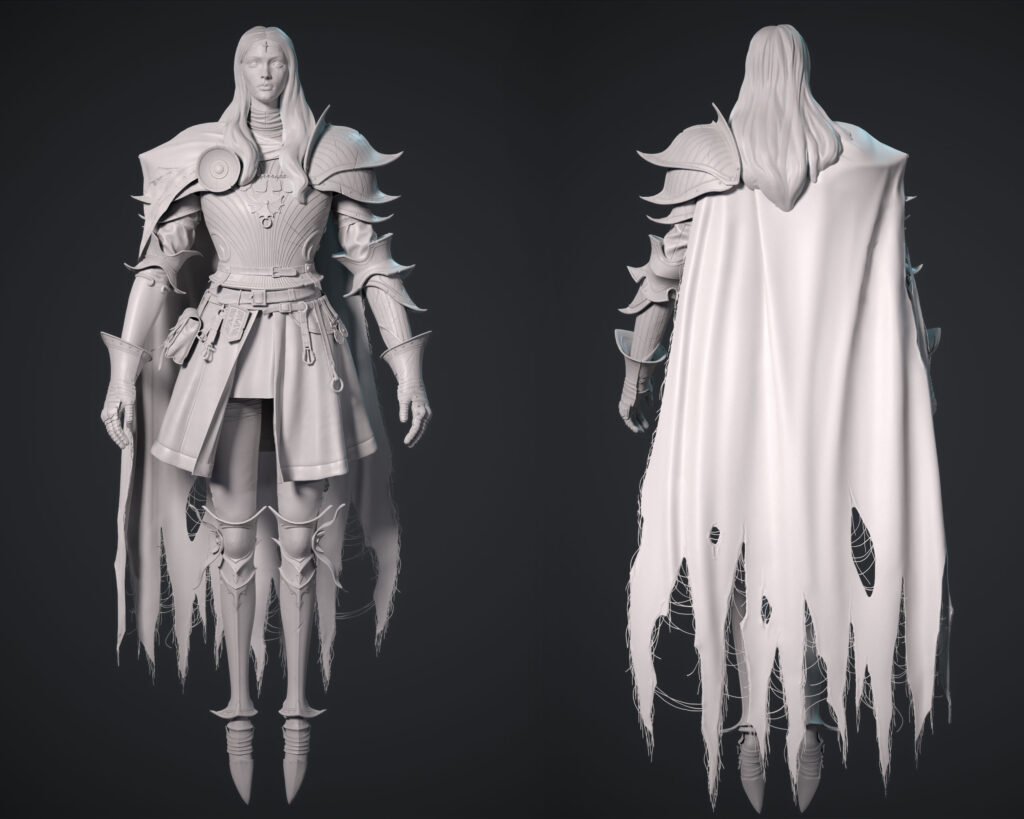
Sculpting
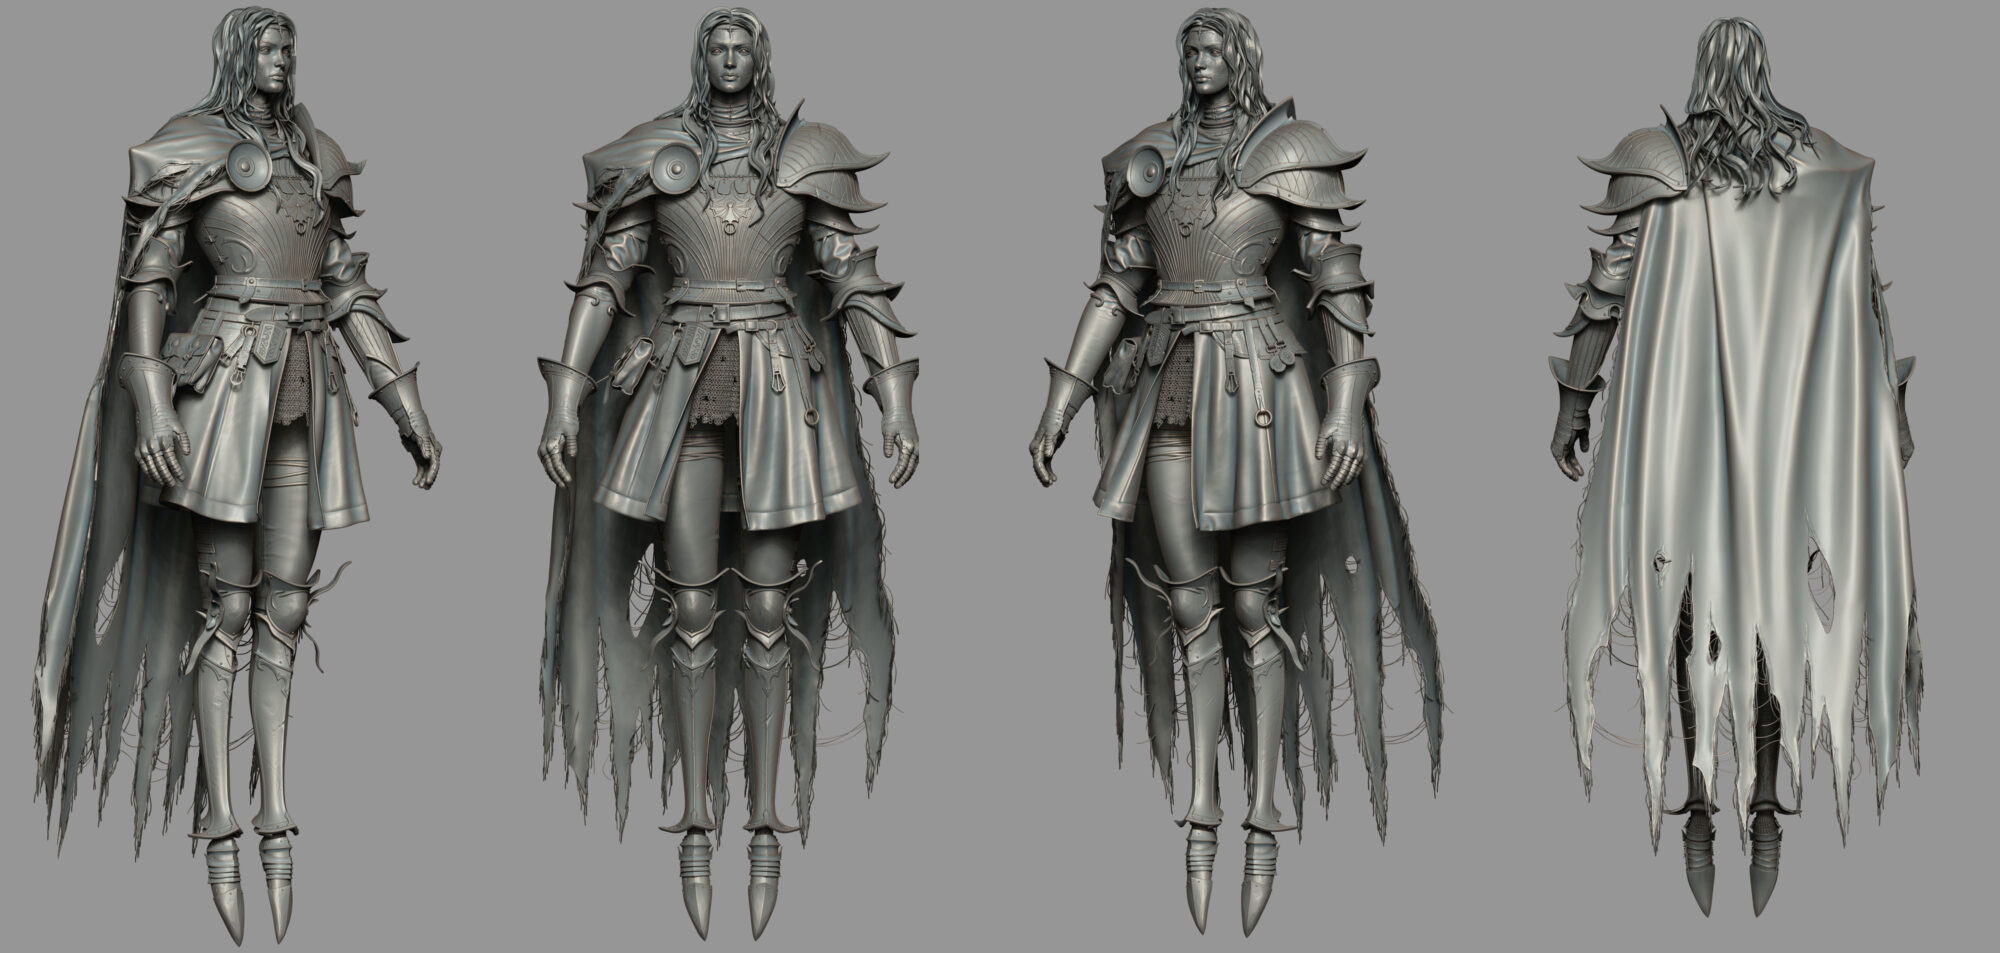
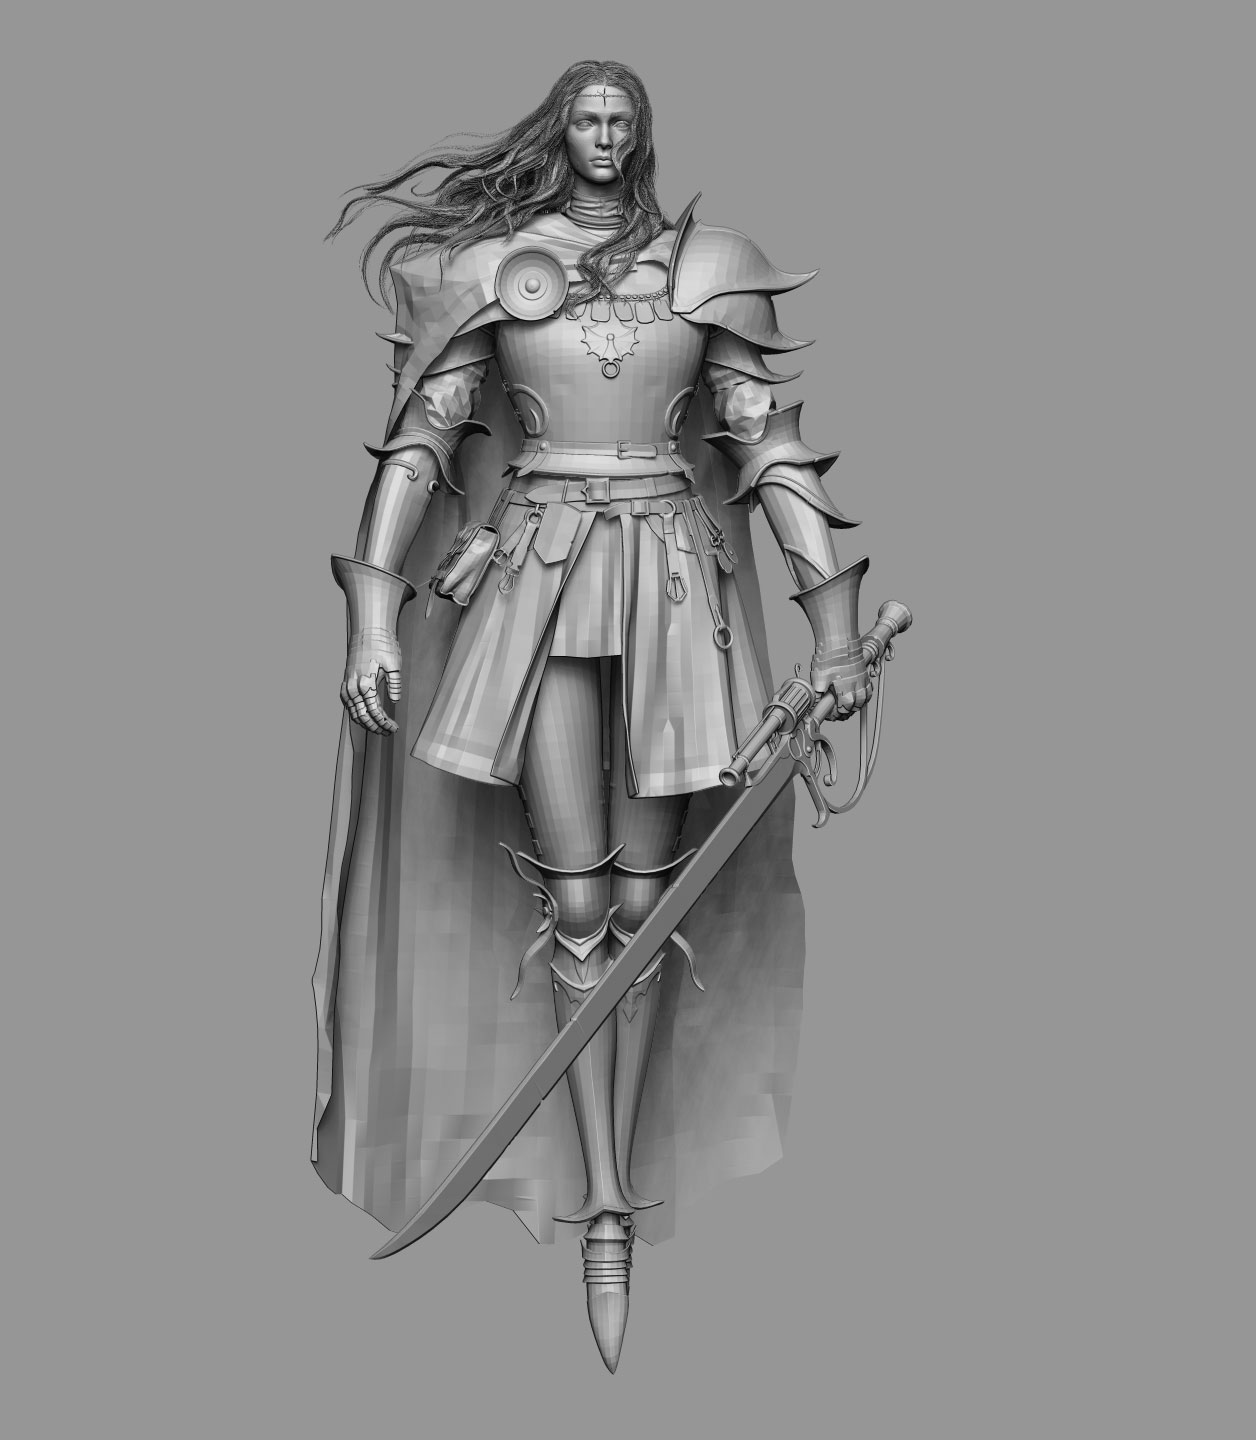
I always open the concept in Photoshop to check proportions before starting to sculpt. This step is quite important because nailing the proportions for a character like this is key to making it look correct and natural. Making the head a bit too small or too big, or the arms too short or too long, can change the overall appeal of the character.
In the beginning, I focused on proportions and the silhouette of the whole character, so I worked on everything at the same time to have an equal level of progress all around.
I used a human base mesh that I moved around quite a bit and then I began to add the different pieces of armour and cloth.
I really like to keep the Dynamic Thickness enabled during the early stages because it allows me to pull and move meshes with the thickness being consistent. I constantly check the concept.
I try to make the different materials read well in the sculpt, with no textures or polypaint.
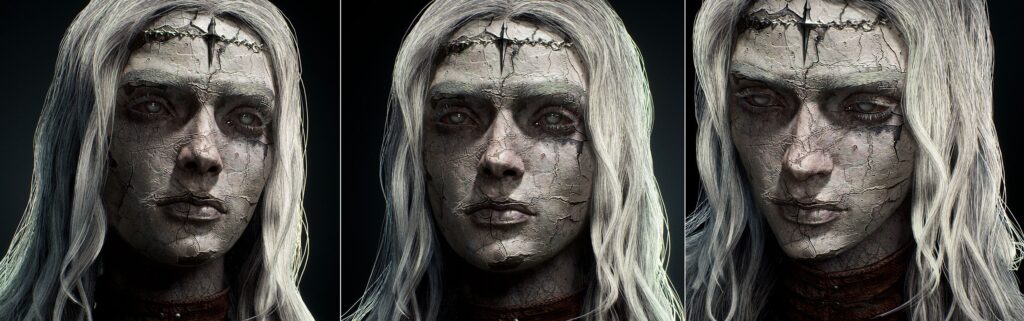
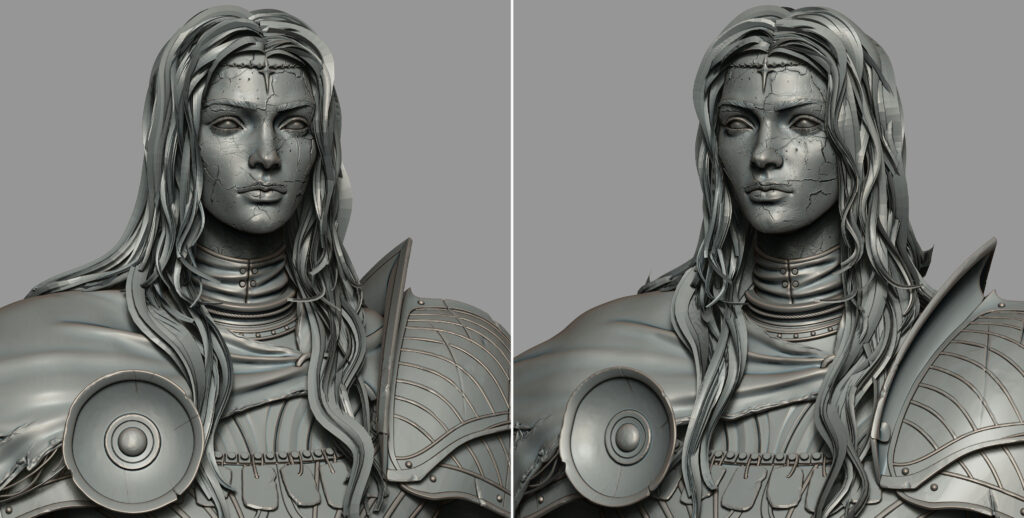
I sculpted the face by using the classic ClayBuildUp and Move brushes mostly.
I thought about detailing the face just in Substance Painter, but since the head is such an important feature of the character, I decided to start the process in the highpoly stage.
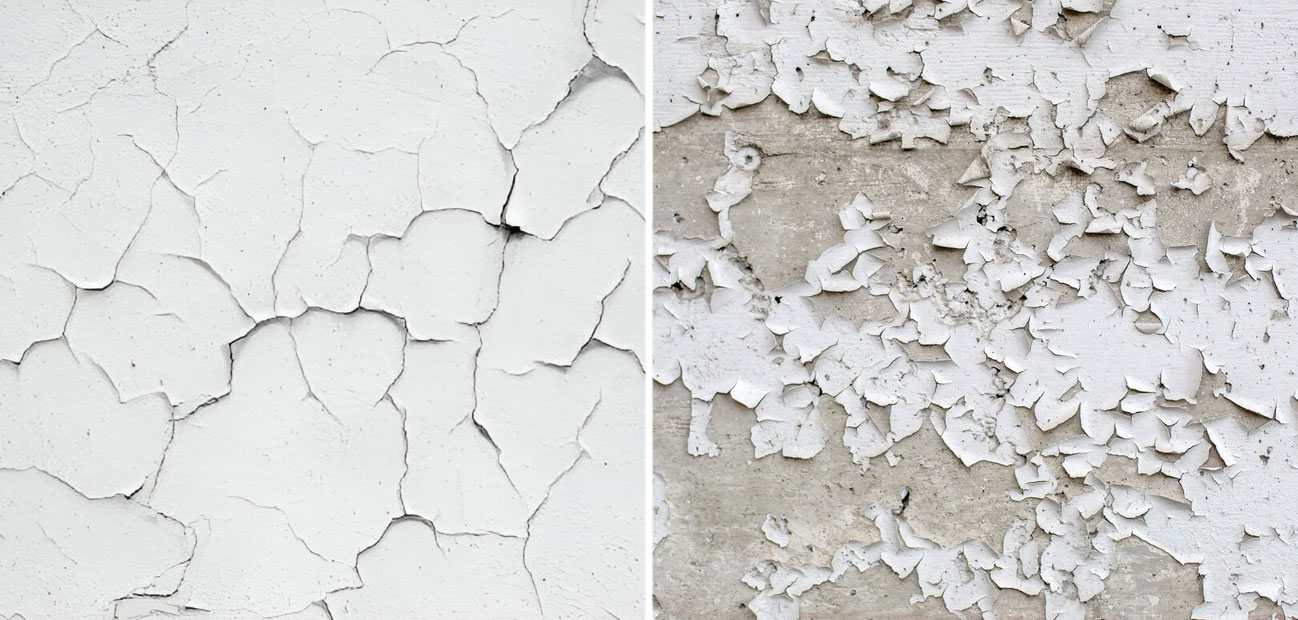
I gathered some references to make the details of the face.
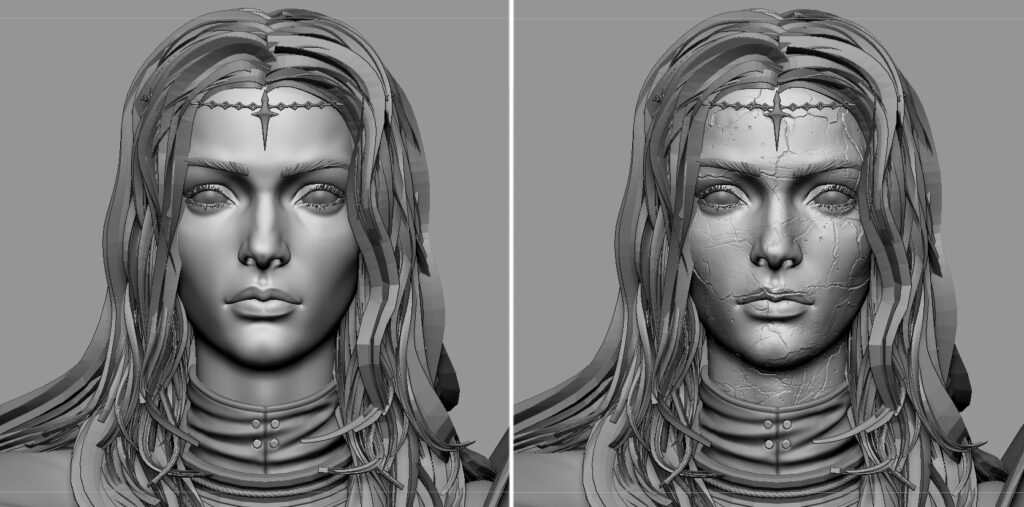
I wanted it to feel like stone cracking and paint peeling off, so I basically found some random crack textures on Google, stored a Morph target and started working on it.
I applied the textures I found around the face and removed what I didn’t like using the Morph brush.
I added new cracks and details by using the Slash2 brush (found in the Lightbox under the “slash” folder) and the DamStandard brush to lift the borders of the skin a bit.
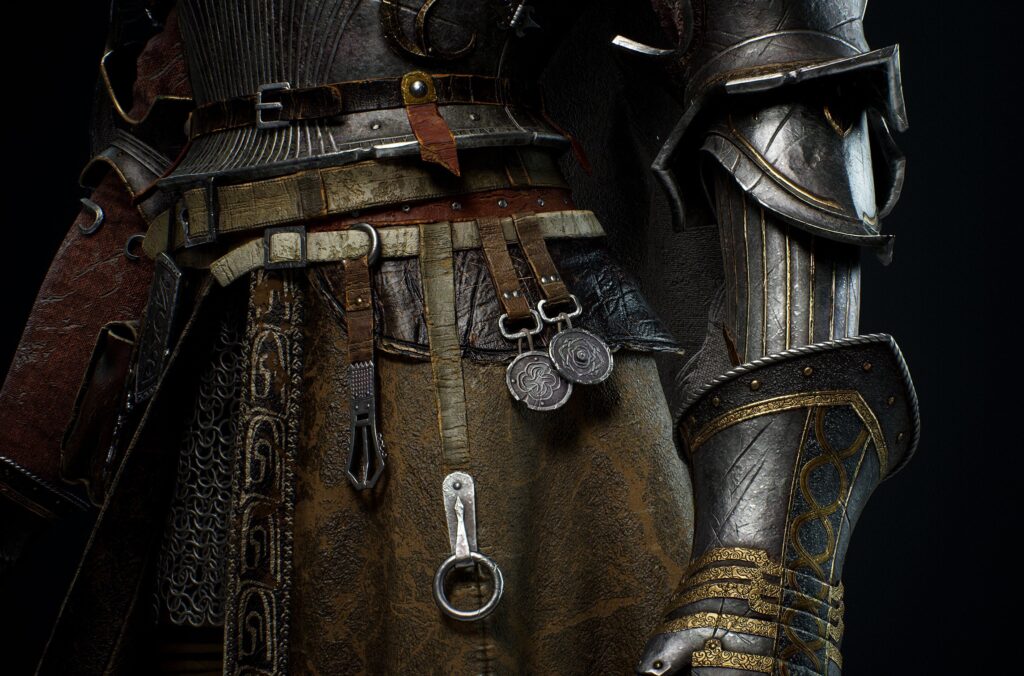
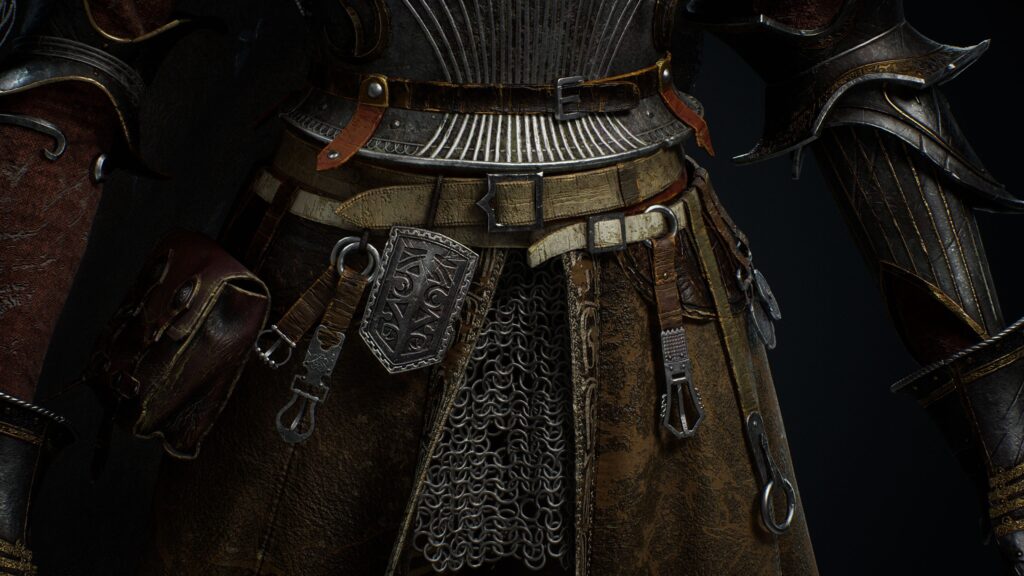
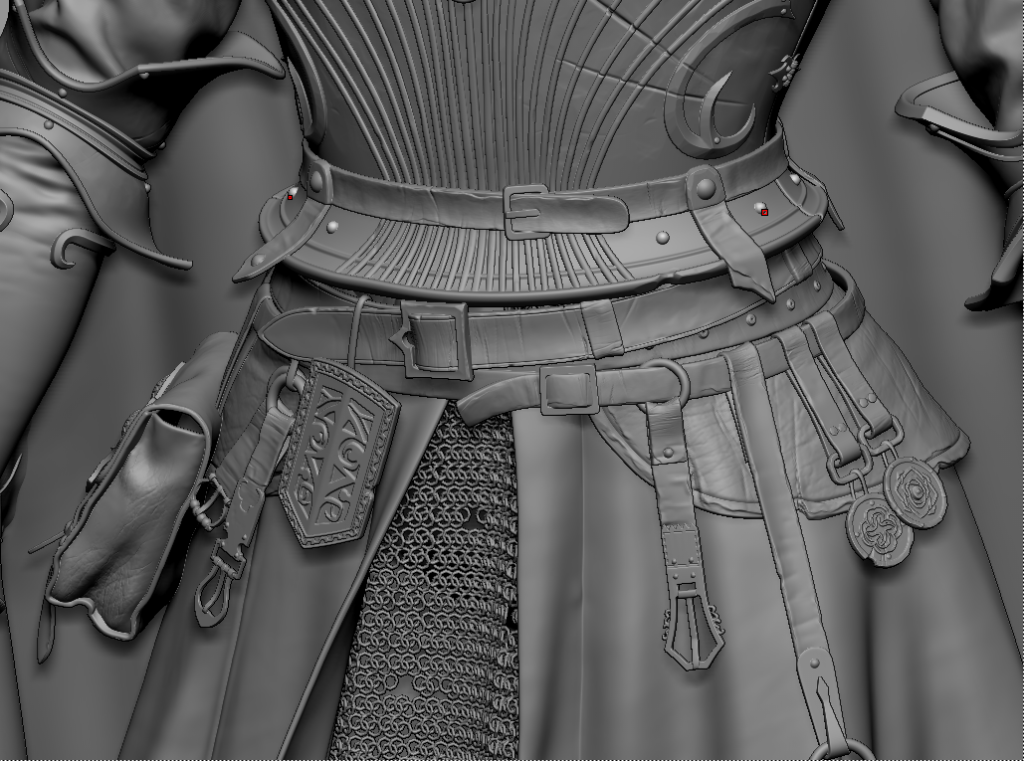
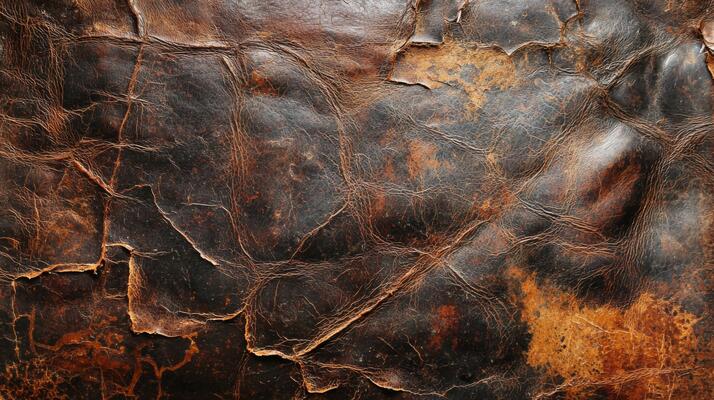
Leathers
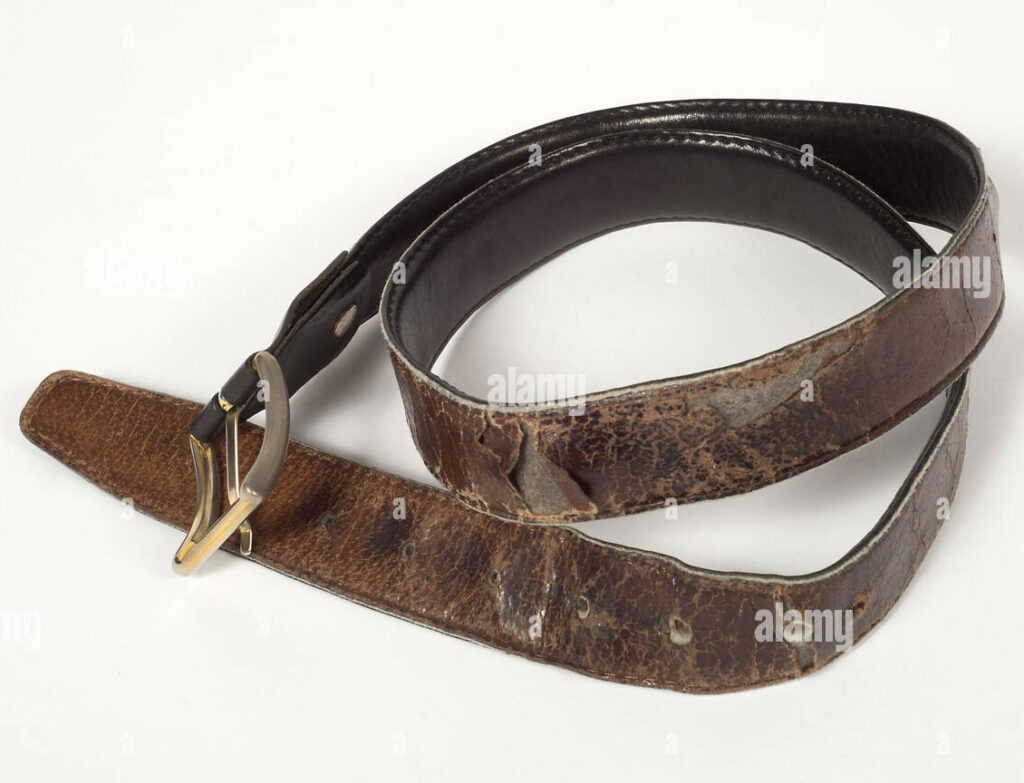
I looked for some leather references to make the skirt, belts and bag feel different (I would use them for the texturing stage too). I mostly detailed them by using Slash2 on the borders and Standard and DamStandard brushes where they bend more.
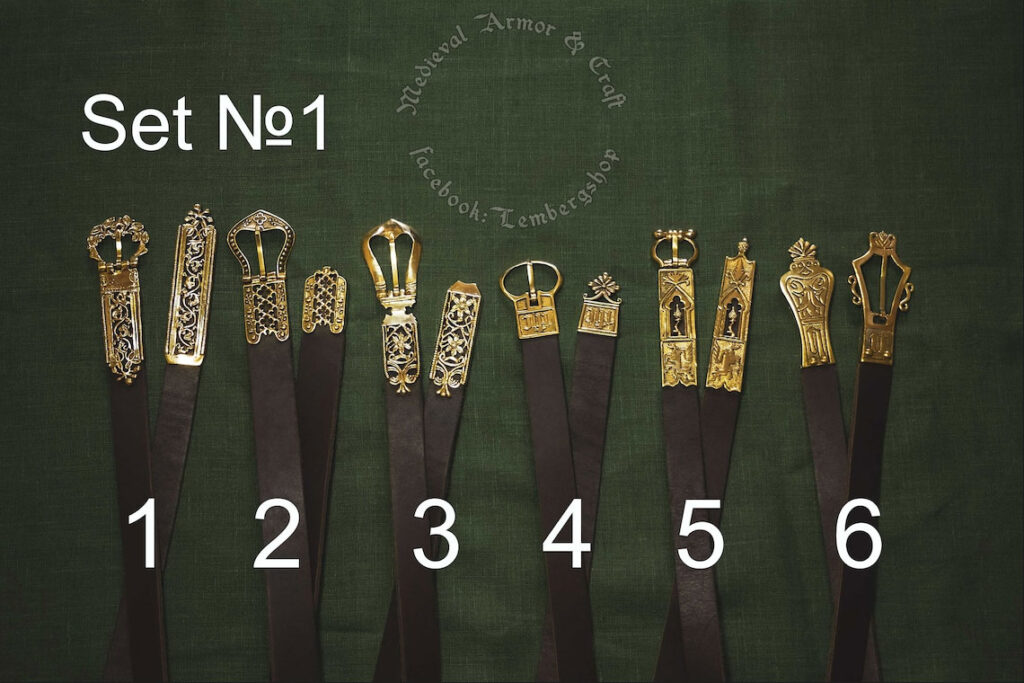
Depending on the age of the piece, I would make it more or less worn out. Also found some buckle references to have some variation among them.
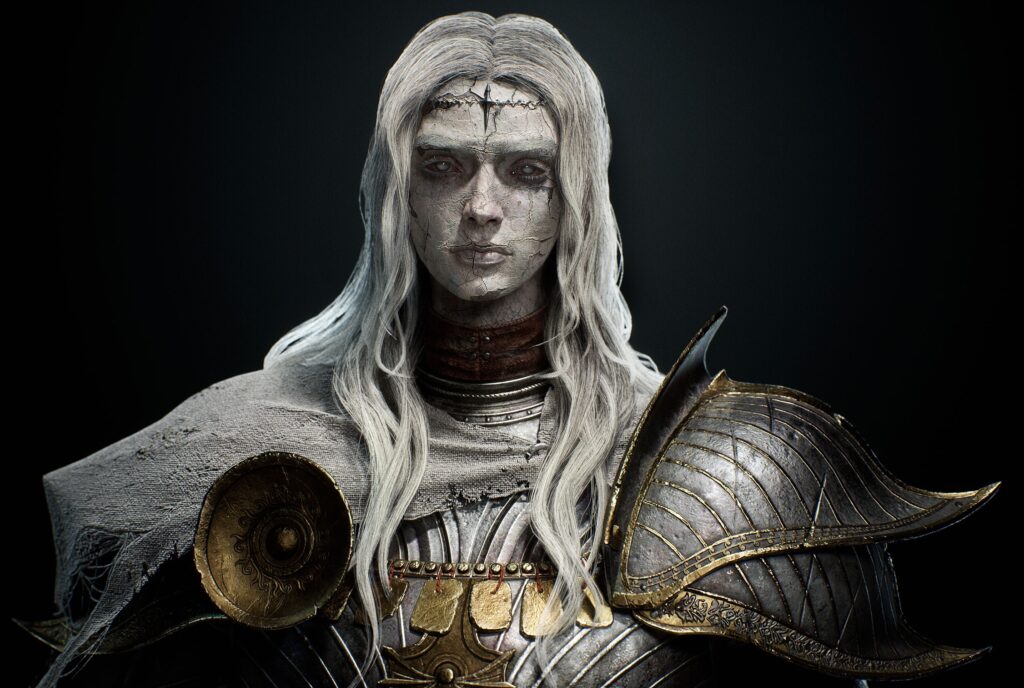
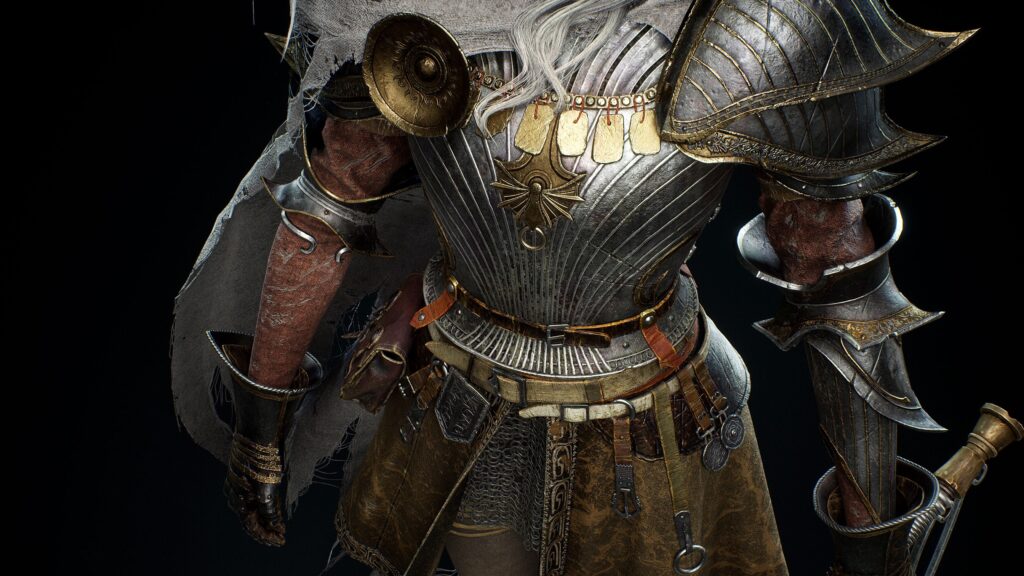
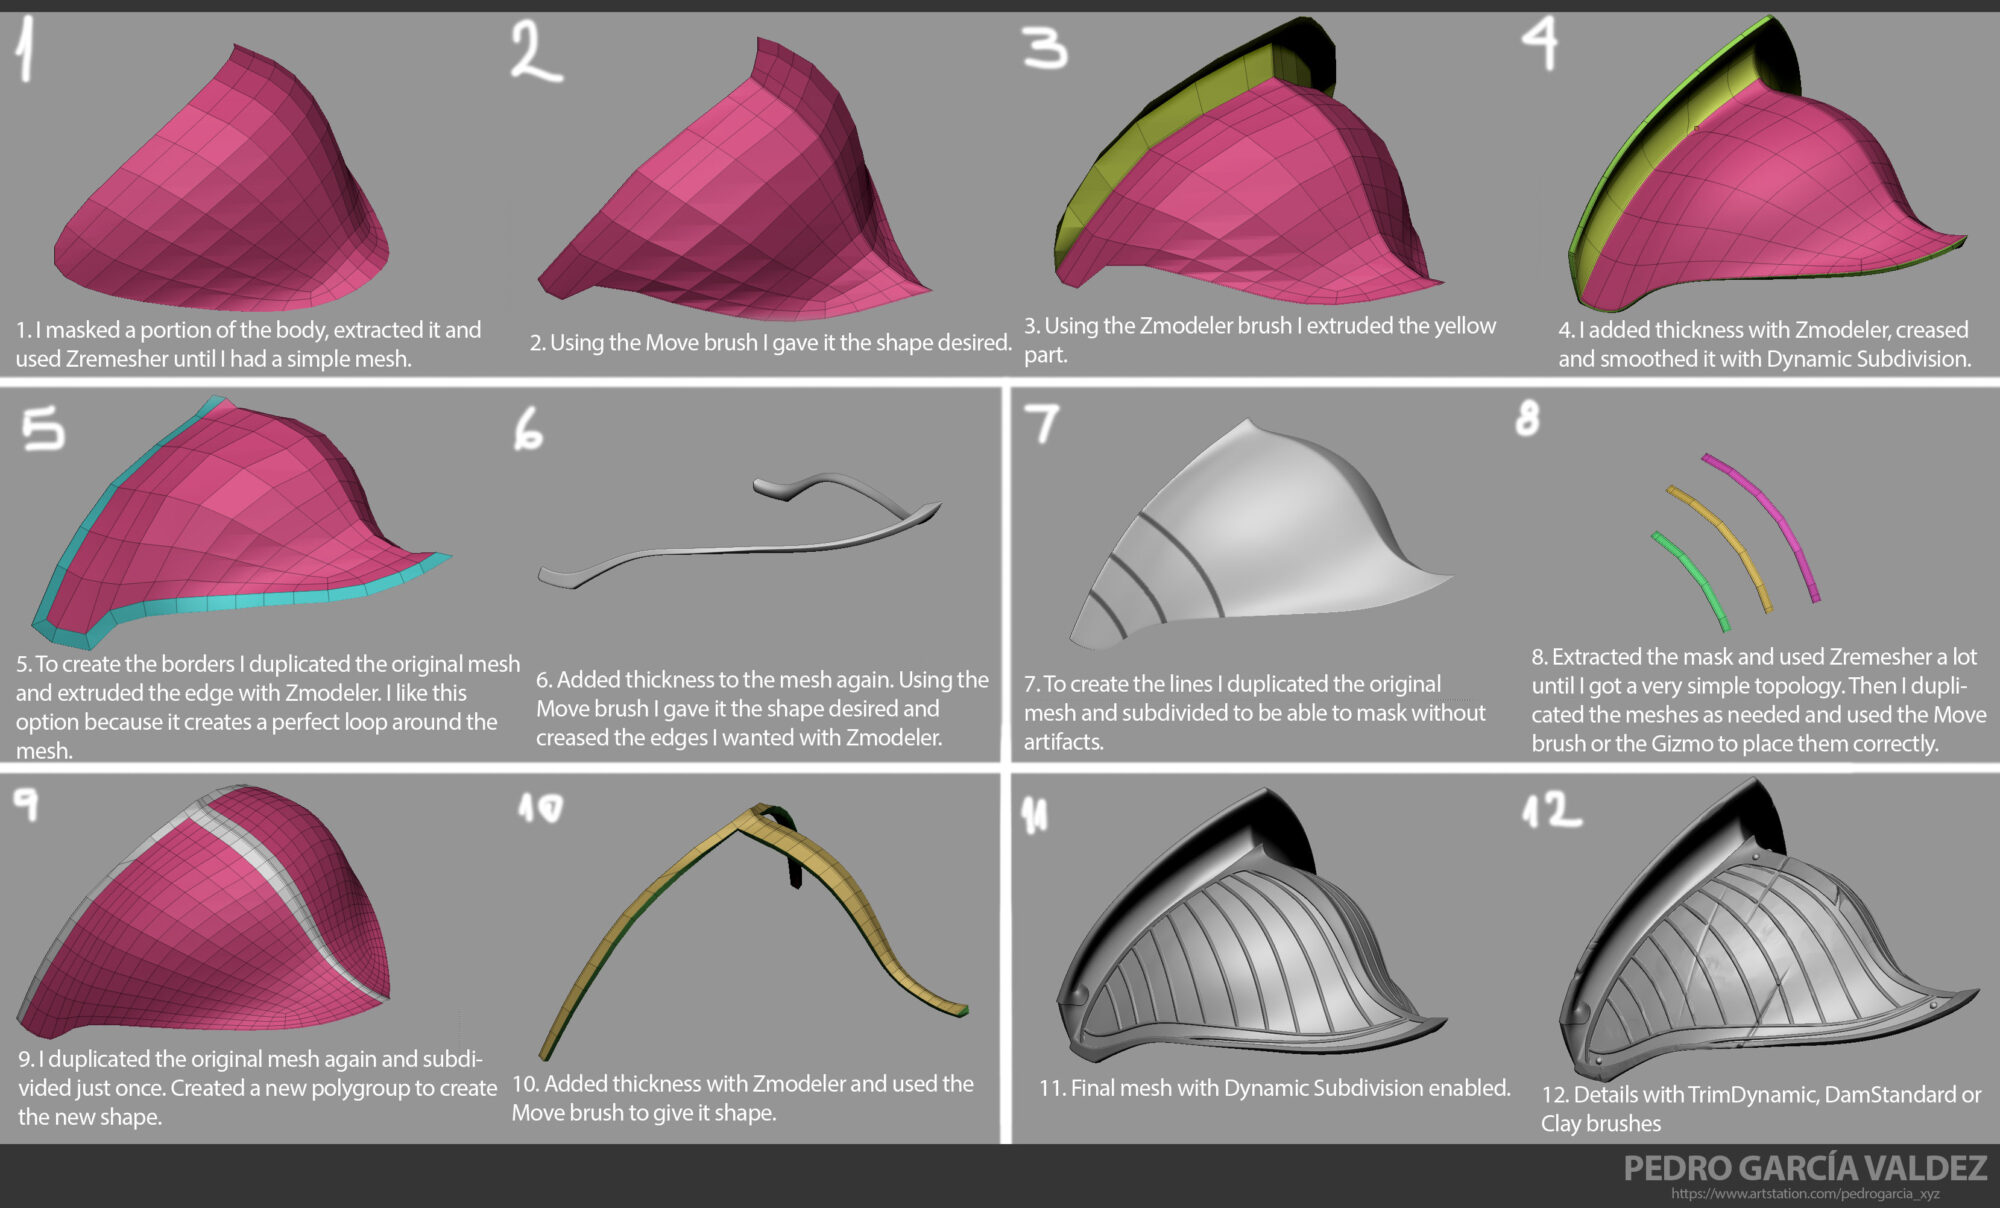
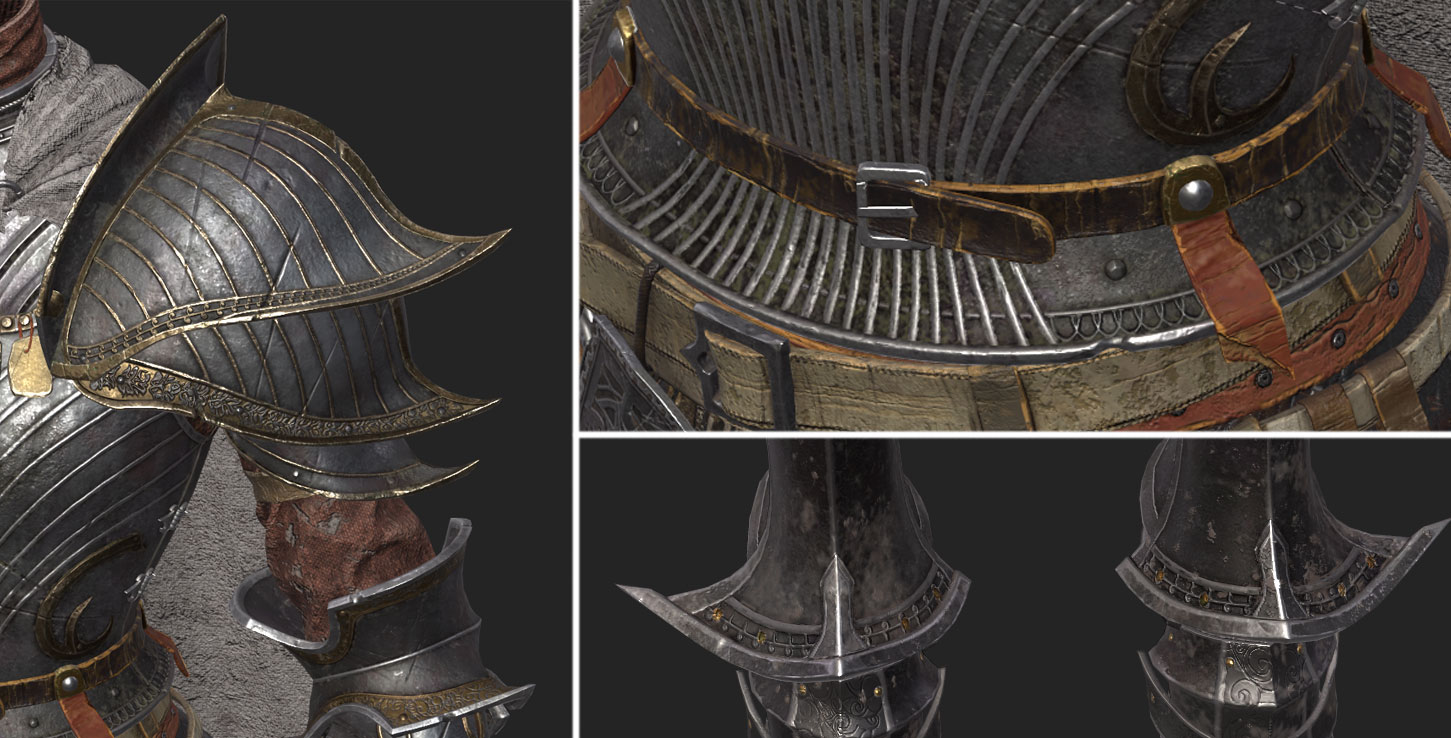
Armour
I made every armour piece the same way:
- I masked a portion of the body and extracted a mesh with no thickness. I gave it the shape I wanted using the Move brush and used “Zremesher” as many times as I needed, but I usually like to have very simple/low topology to have more control.
- Once I have the shape desired, I give it thickness with the “Zmodeler” brush, to keep the angles I like I “crease” them with “Zmodeler” (and if the mesh is a bit high in densit,y I like to play with “Polish by Features” a bit).
- I used “TrimDynamic” and “DamStandard” to break the light a bit.
- I masked a portion of the body, extracted it and used Zremesher until I had a simple mesh.
- Using the Move brush, I gave it the shape I desired.
- Using the Zmodeler brush, I extruded the yellow part.
- Added thickness with Zmodeler and then creased and smoothed it with Dynamic Subdivision.
- To create the borders, I duplicated the original mesh and extruded the edge with Zmodeler. I like this option because it creates a perfect loop around the mesh.
- Added thickness to the mesh again. Using the Move brush, I gave it the shape I desired and creased the edges I wanted with Zmodeler.
- To create the lines, I duplicated the original mesh and subdivided it to be able to mask without artifacts.
- Extracted the mask and used Zremesher a lot until I got a very simple topology. Then, I duplicated the meshes as needed and used the Move brush or the Gizmo to place them correctly.
- I duplicated the original mesh and subdivided it just once. Created a new polygroup to create the new shape.
- Added thickness with Zmodeler and used the Move brush to give it shape.
- Final mesh with Dynamic Subdivision enabled.
- Details with TrimDynamic, DamStandard or Clay brushes.
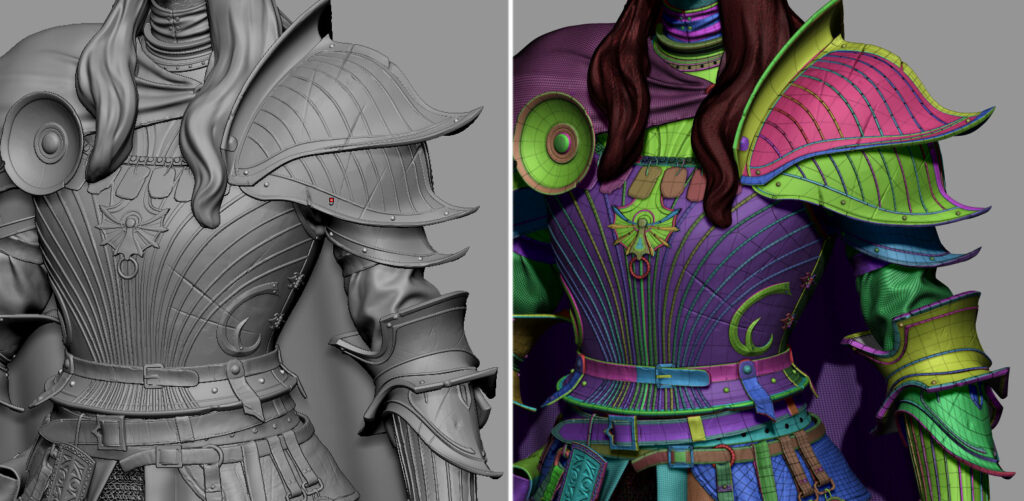
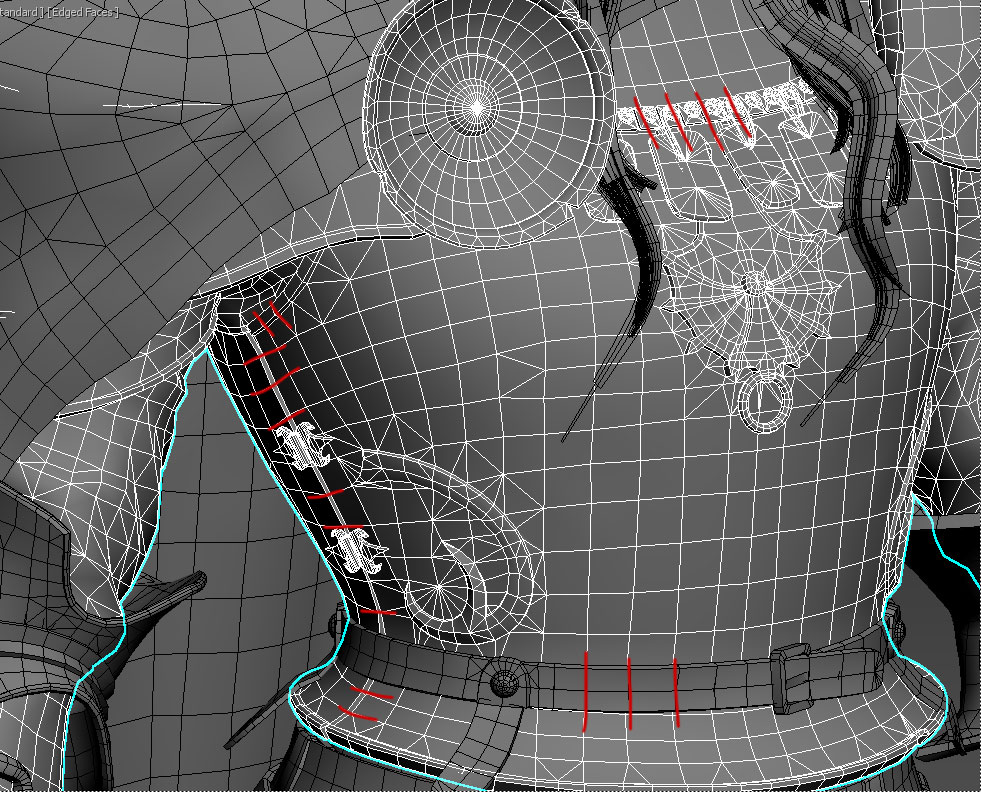
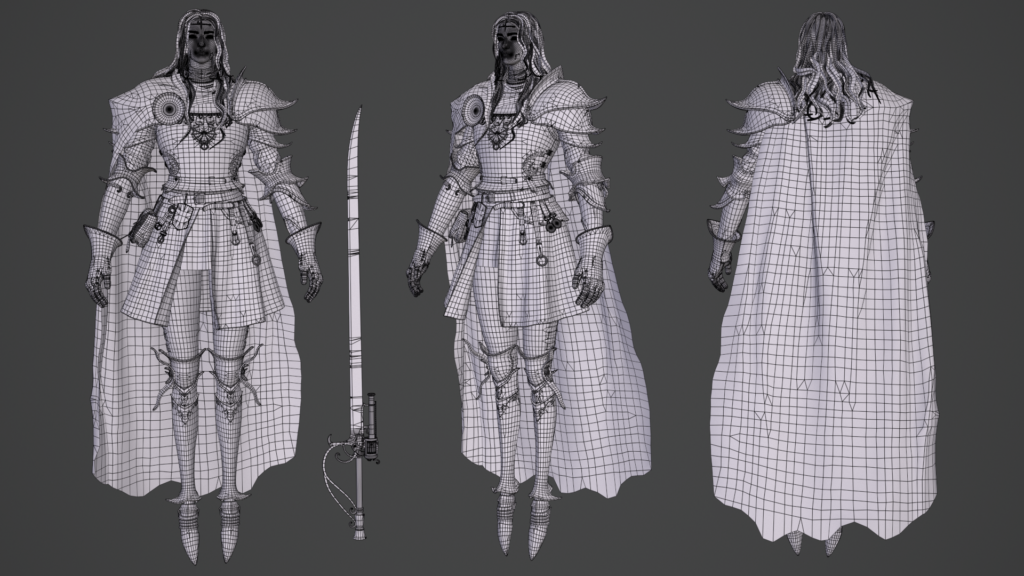
Retopology
I usually use 3DCoat for retopology and 3ds Max if I need to fix something at the end.
Since this is a real-time character, the topology must be ready for animation, so I basically added edge loops around the joints that will bend when the character moves (elbows, shoulders, knees, etc.).
Something else I had in mind was to keep the silhouette of the high-poly model as intact as possible.
It’s good practice to align the edges from different meshes that are close to each other so they deform better during the animations.
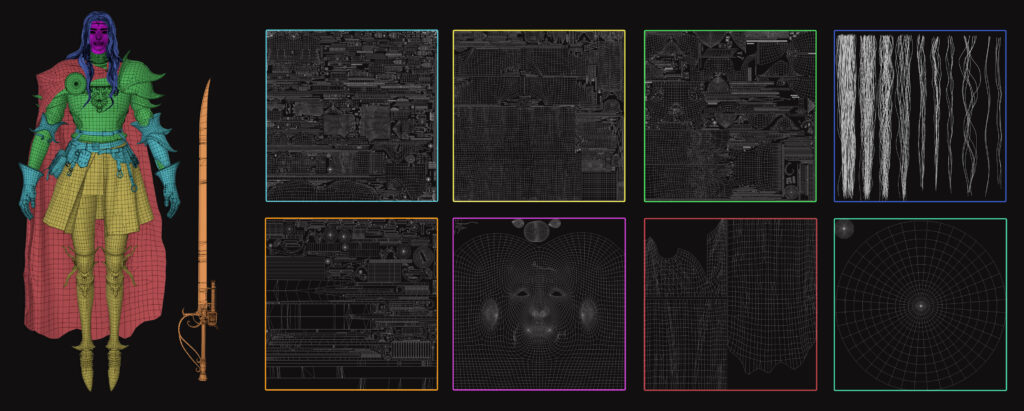
UVs & Baking
RizomUV is my software of choice when it comes to UVs.
I used Marmoset 4 for baking because it’s incredibly fast and gives you a lot of control when baking your maps. Something I find very powerful is that you can create folders and group your meshes as you please.
I re-used some meshes in order to save texture space. For example, her left shoulder pad is duplicated and mirrored on the X and Z axis since the other side is hidden by the cape.
Texturing
Head
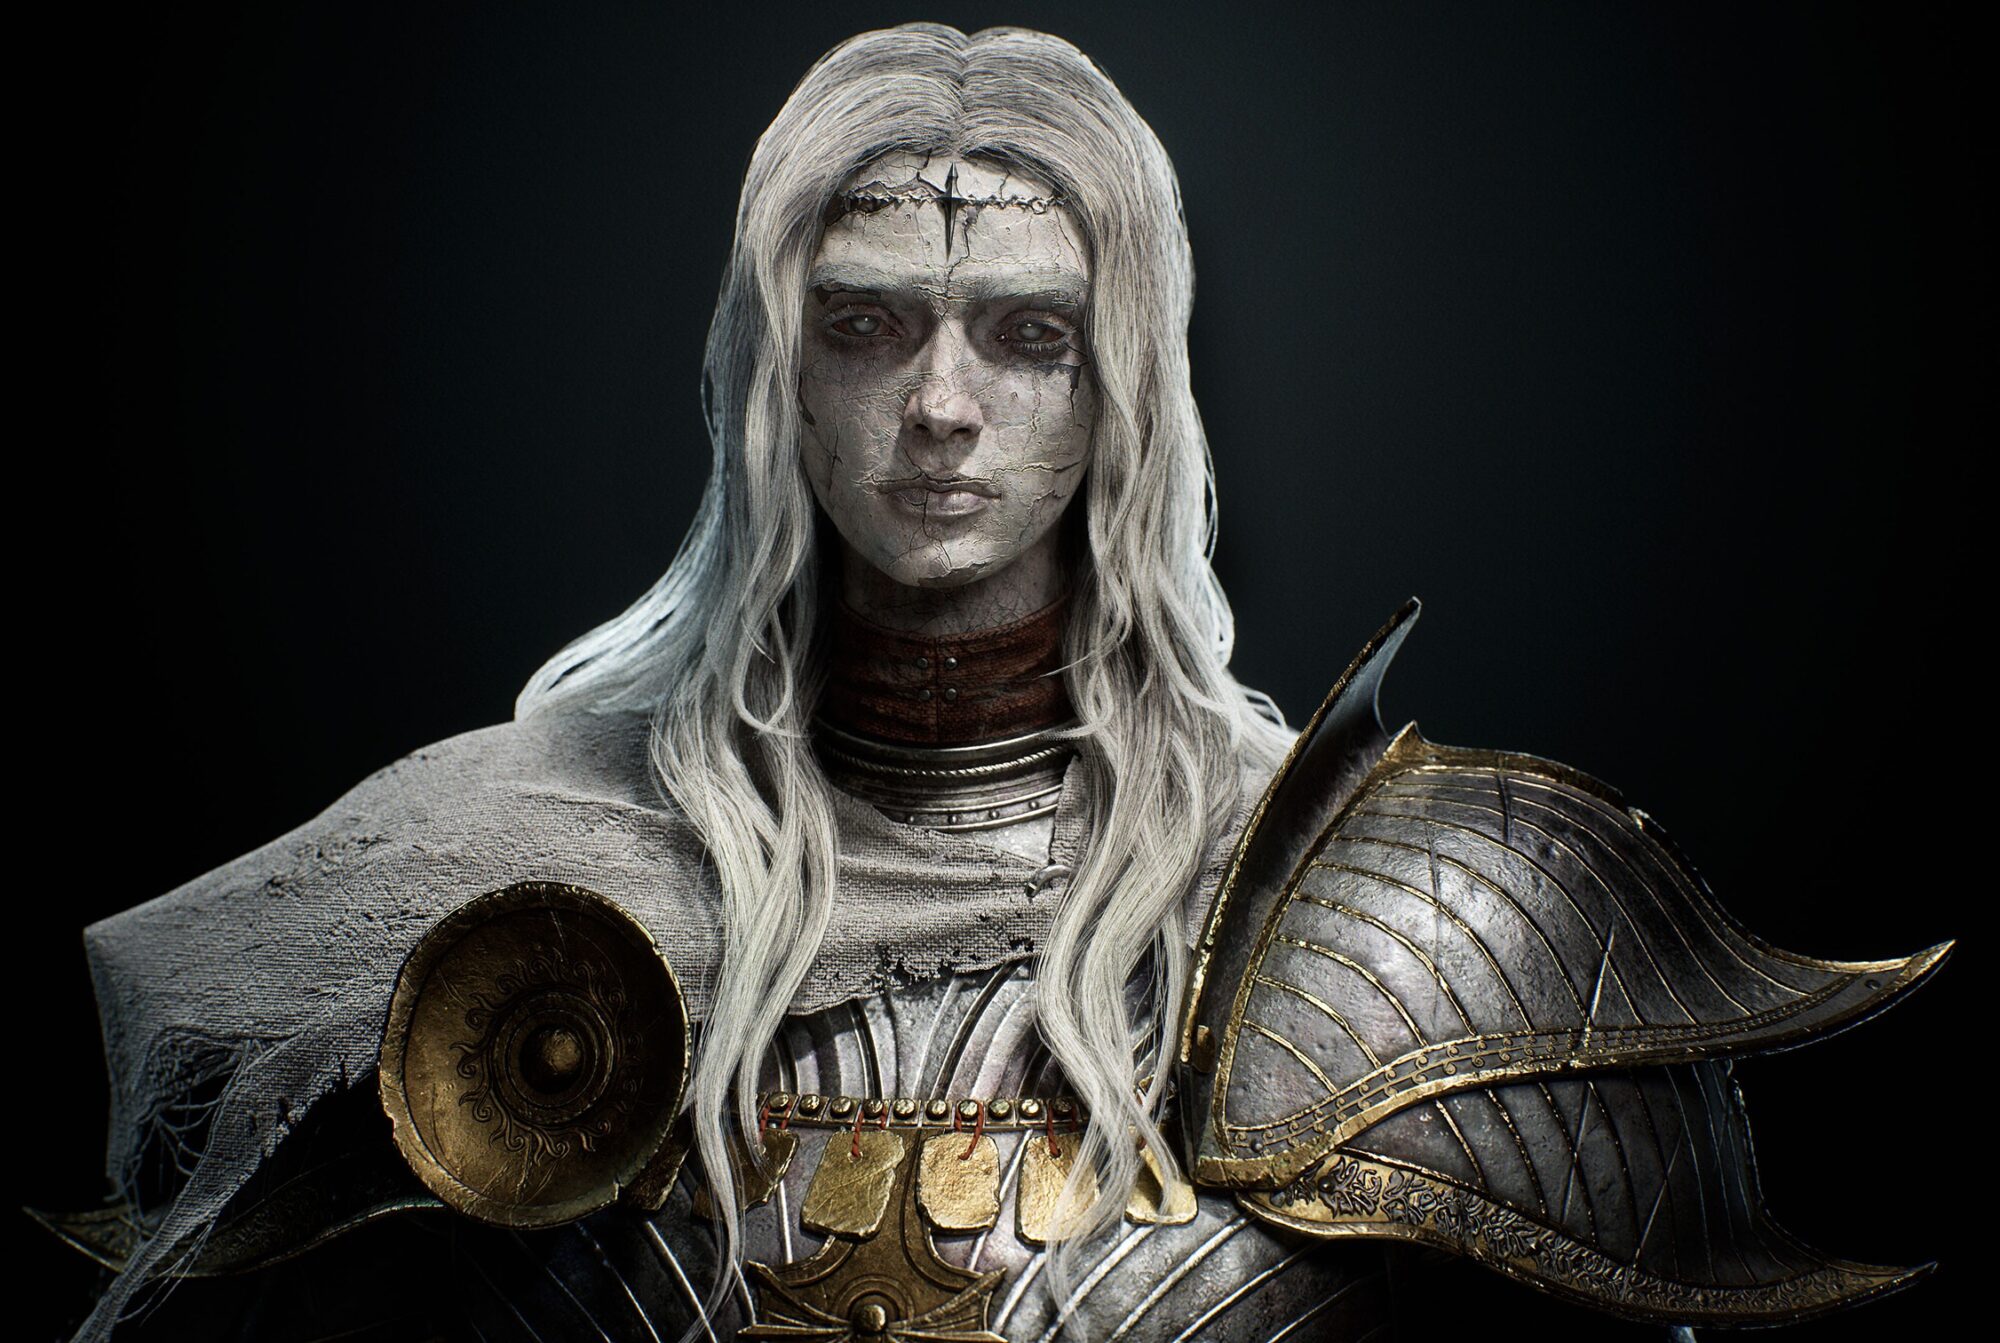
I looked for old statues on Google to use as reference, mainly for the colour variations on the diffuse and the cracks detail.
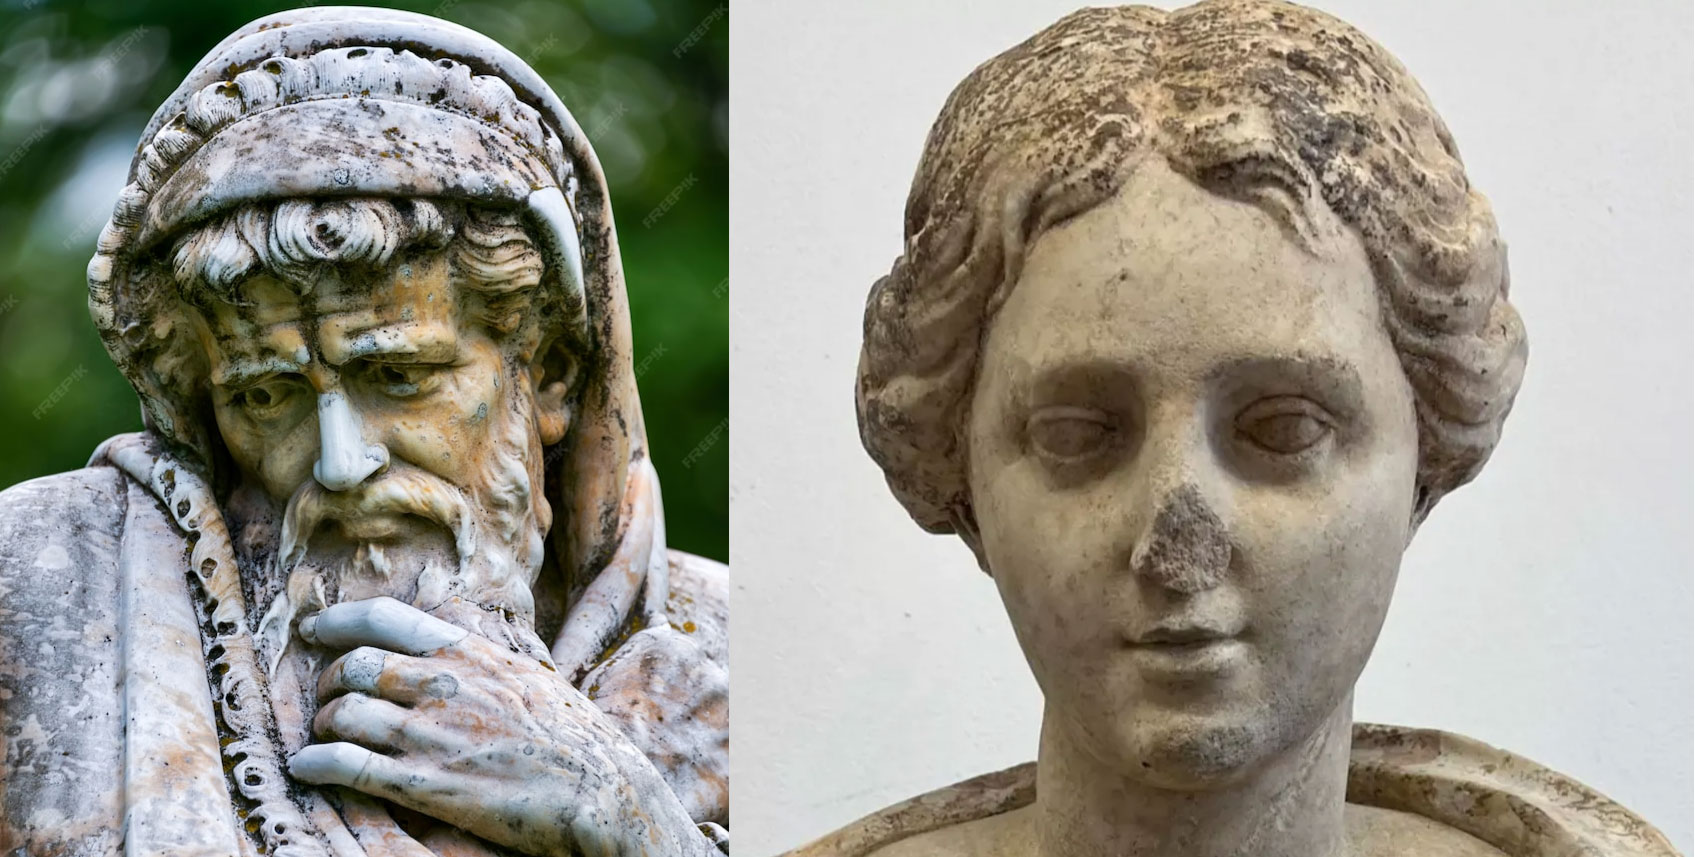
I created all the textures in Substance Painter. I started by using a Marble smart material as a base and started adding colour variations so it didn’t look just pure white. I added some colour to her features as if I were texturing a regular face.
Then, I started playing with the dirtiness to show age by using the Curvature and AO maps.
To give her the “horror” or “corrupted” look, I darkened the cracks and the skin around her eyes so her white iris pops. Exaggerating the height channel negatively on the cracks helped achieve this look too.
I added some values on the Metallic channel because I thought it gave her a nice soft touch.
I was exporting the textures and checking them in the engine at all times.
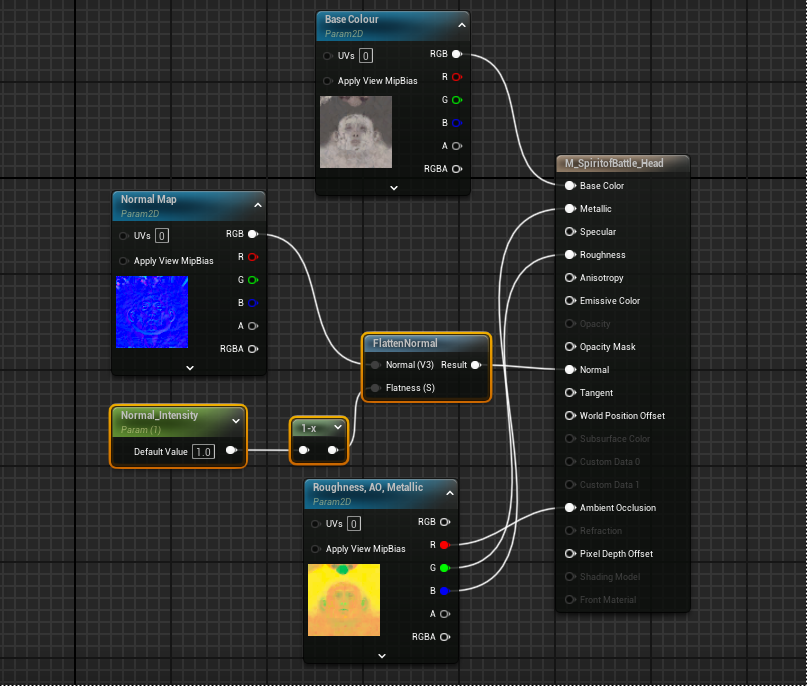
I set up a new Material Instance in Unreal Engine 5 to make the Normal map of the face more or less intense, depending on my preference, by just moving a slider.
I think it’s nice to have it and just try to tweak the values and see how it looks.
Leathers
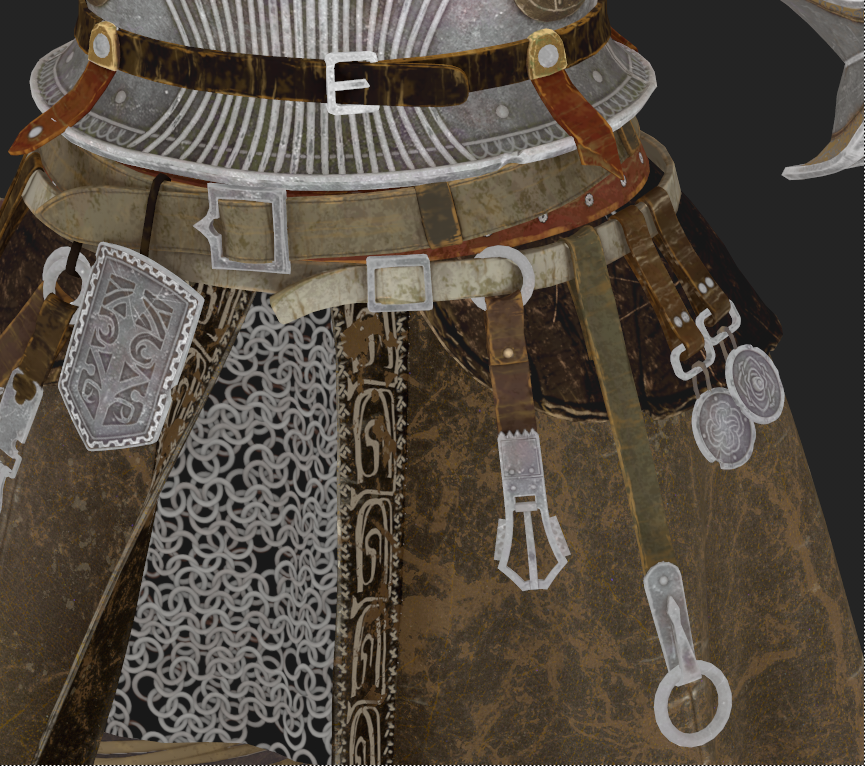
The biggest challenge here was to separate all leathers from each other, otherwise, everything would look the same. I played with colour and tones and different values on the Roughness channel to create that separation.
Also, I added some dark gradients around the border of the skirt.
Fabrics
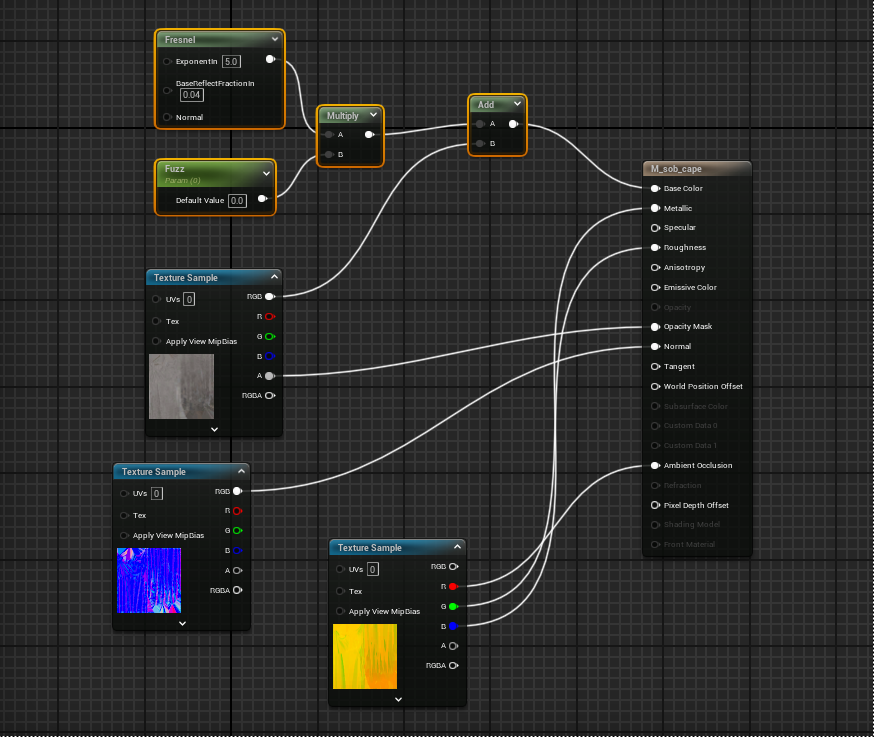
I created the fabric textures by using a smart material as a base and adding some colour variations- nothing fancy.
However, I added some Fresnel to my material in Unreal to add the fuzziness that fabrics have.
Patterns
Something I wanted to try for a long time in one of my projects was the Path tool inside Substance Painter. I used this tool to create some of the stitching and patterns on the whole character (in some other cases I used the regular Fill Layer – Black Mask – Add Fill workflow).
For the metal, I also used this cool tool by Javad Rajabzade.
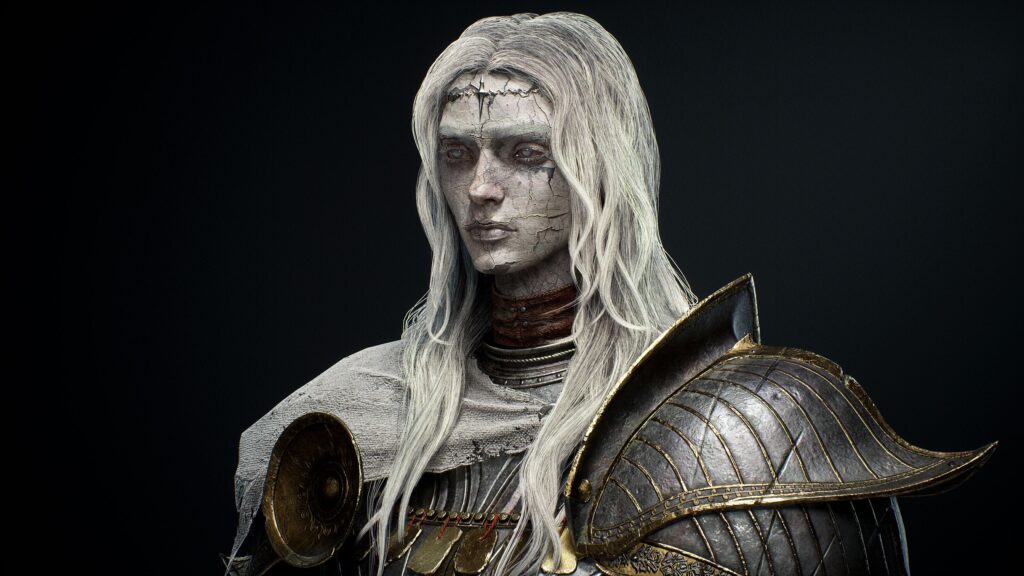
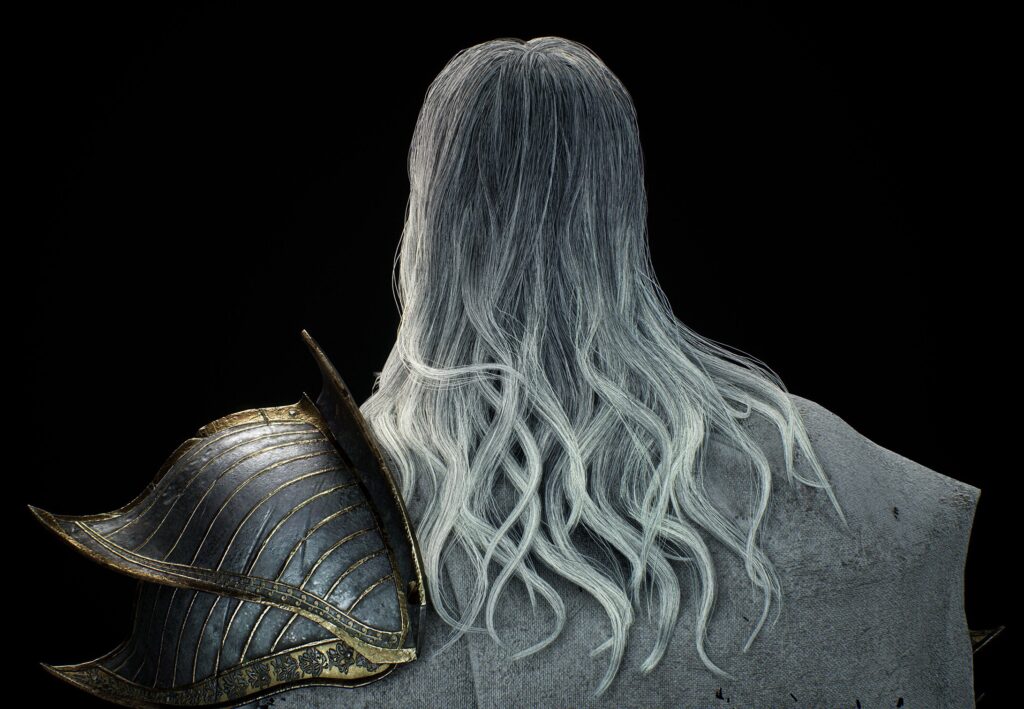
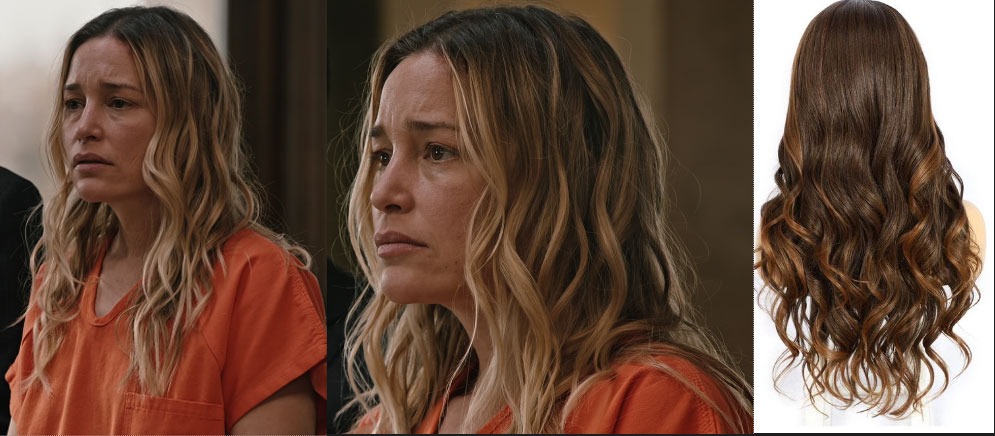
Hair
Looked for references online before starting to work on the hair. I was looking for some waviness, a couple here:
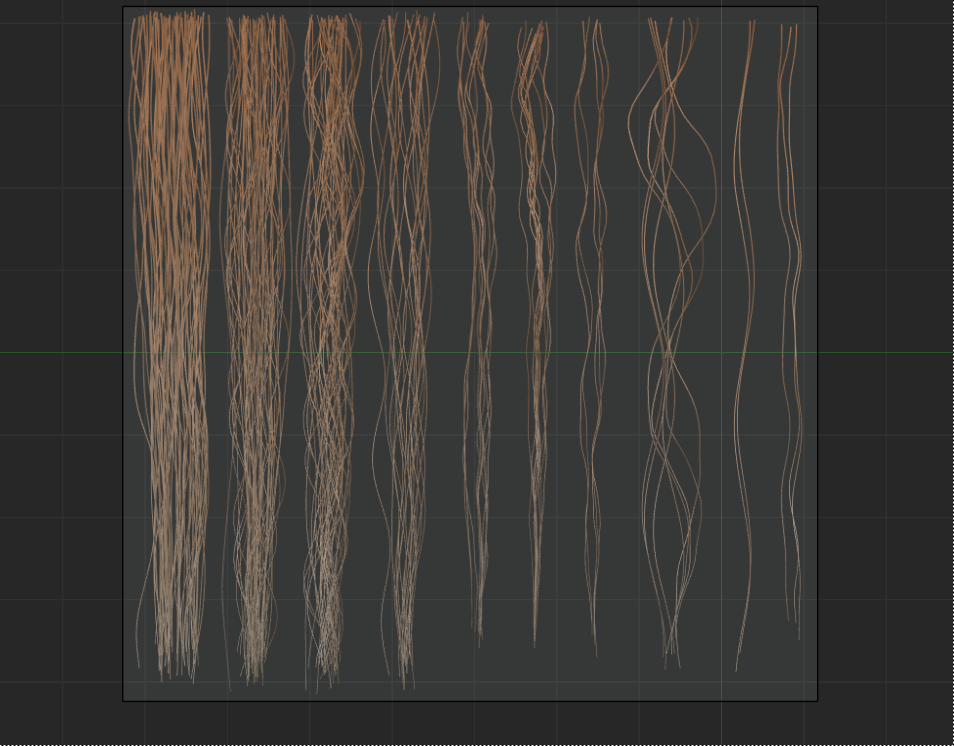
I created groups of cards and placed them by hand in 3DS Max using a spline and the “Path Deform” modifier.
This is a very manual and time-consuming phase. In the end, I moved the cards a bit in Zbrush.
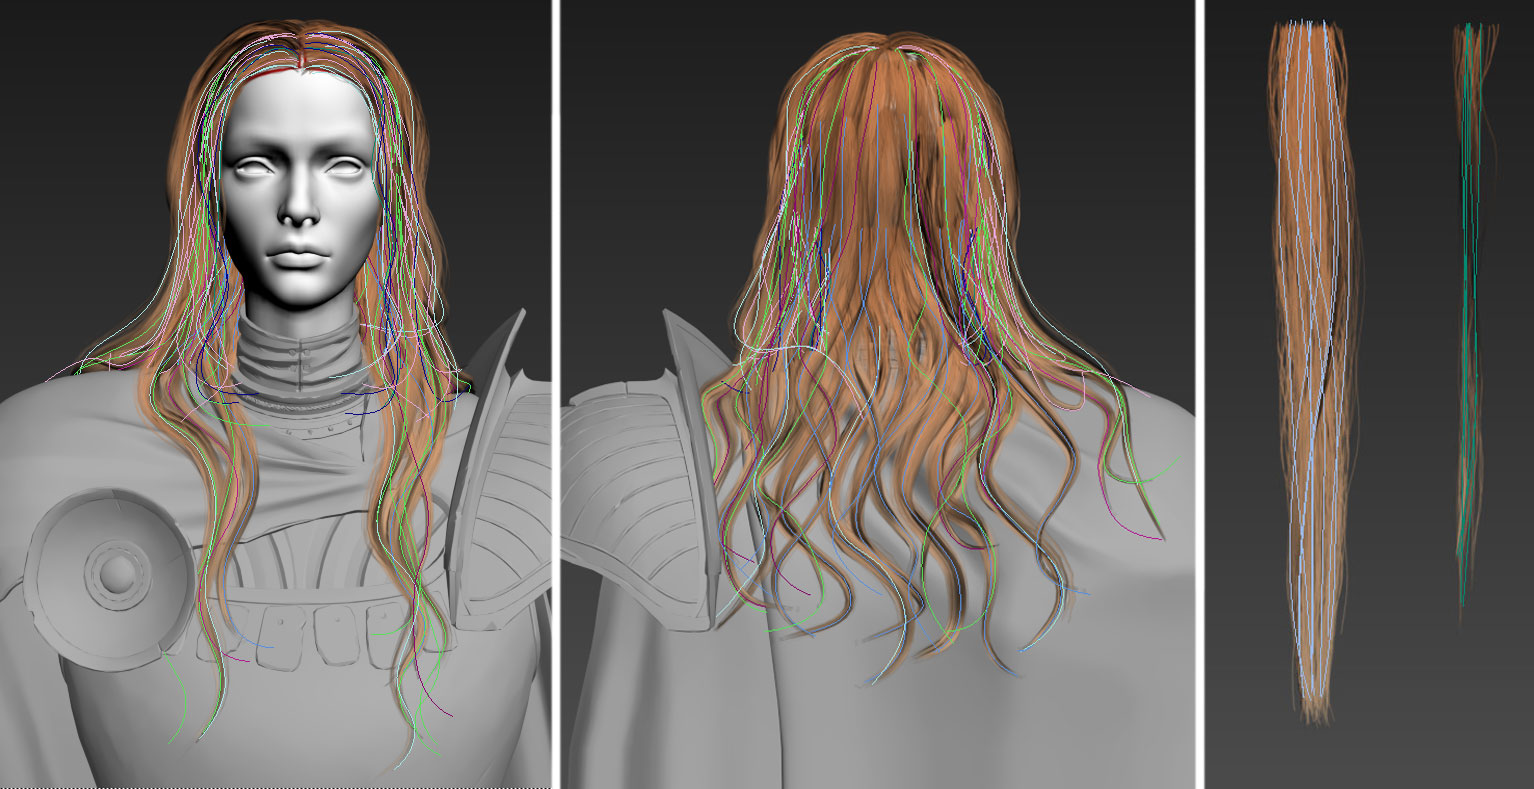
I used the Hair Material that comes with the Paragon characters that you can download for free in the Epic Game Marketplace and migrated it to your project (here you will find the eye shader too!)
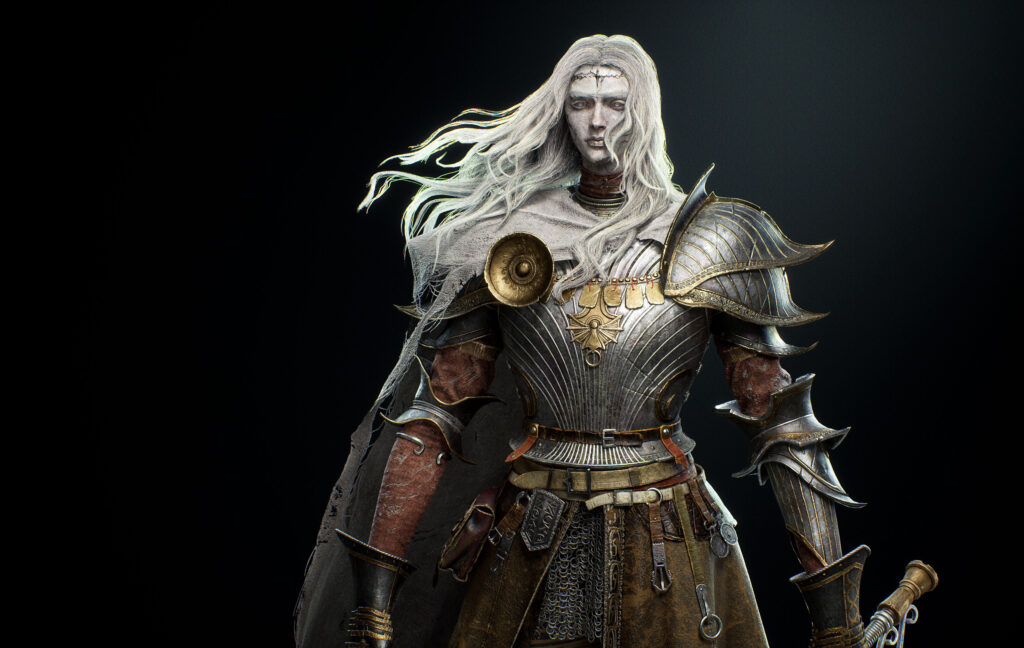
Posing
This is a very crucial step to make your character come alive. I imported the whole character in Zbrush and used the classic “Transpose Master.” I masked the parts of the body I needed to move and I used a combination of the “Transpose” tool and the “Gizmo”.
I moved the hair cards using the Move brush to give it a wind effect. I tried to simulate it in Unreal, but I preferred this way to have more control.
However, I simulated the cape in the engine to make it look natural in the renders. I followed this tutorial, where this very simple process is explained.
Lighting & Rendering
I started my scene by importing half of a ChamferBox I made in 3DS Max to use as my simple background.
My key light was a “Rect Light” because it creates softer shadows. I continued by adding some rim lights to separate the character from the background.
I also used an “ExponentialHeightFog” and a “PostProcessVolume” to help me with the final look of the scene.
In the beginning, it always looked a bit too dark, so I added some fill lights and a “Sky Light” to make the subject a bit more visible. I don’t want my character to be lost in shadows.
This is a long process of trial and error, to be honest, but be patient because this is one of the most important parts of the whole process; this is the moment when your character has to shine.
I also used some “Point Lights” to highlight some pieces of the character I wanted to highlight.
Finally, I took the renders by using the “Movie Render Queue” feature.
Conclusion
I always try to finish my portfolio pieces because I don’t like having lots of projects in progress that I will never come back to.
I feel like they make my mind busy for no reason. I wasn’t so confident in the beginning when working on this one, but I’m happy I completed it and how it looked at the end!
I shared more links and tips when I broke down my Dark Elf project here a while ago, just in case you want to check it out: Dark Elf Breakdown.
Thanks for reading!
Read more articles
You might also like these articles.