Solar Punk

Introduction
Hello everyone! I am Leo, an Environment Artist from Shanghai, China.
I am currently working on my portfolio and looking for a chance to break into game industry.
Goals
I found out that The DiNusty Empire was holding a bi-monthly challenge with the theme of Solar Punk, which was very attractive to me.
I did some research and fell in love with it instantly. I love how humans imagine the future in such an innocent way, where nature and high-tech are perfectly mixed.
The feelings are so pure and warm.
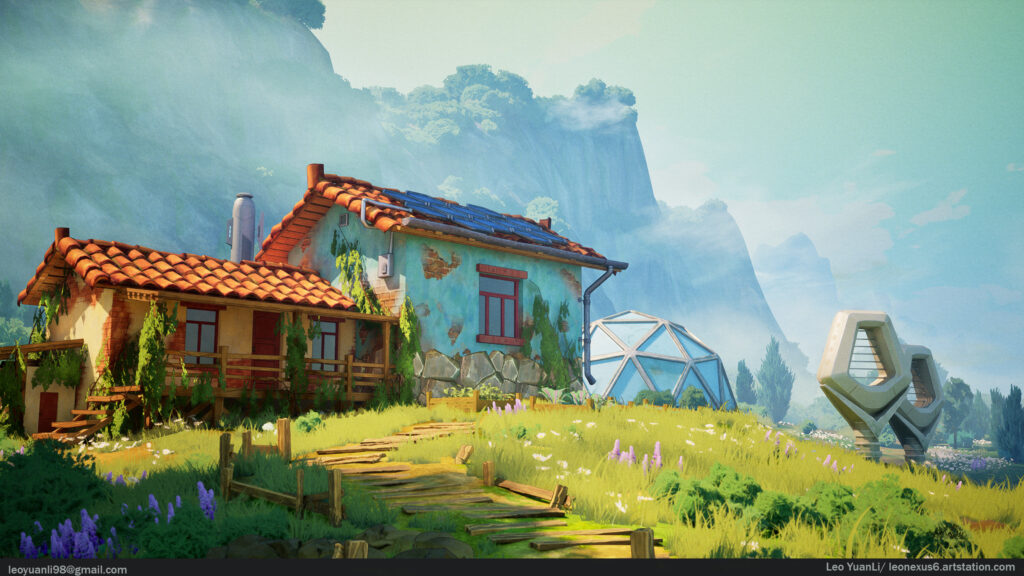
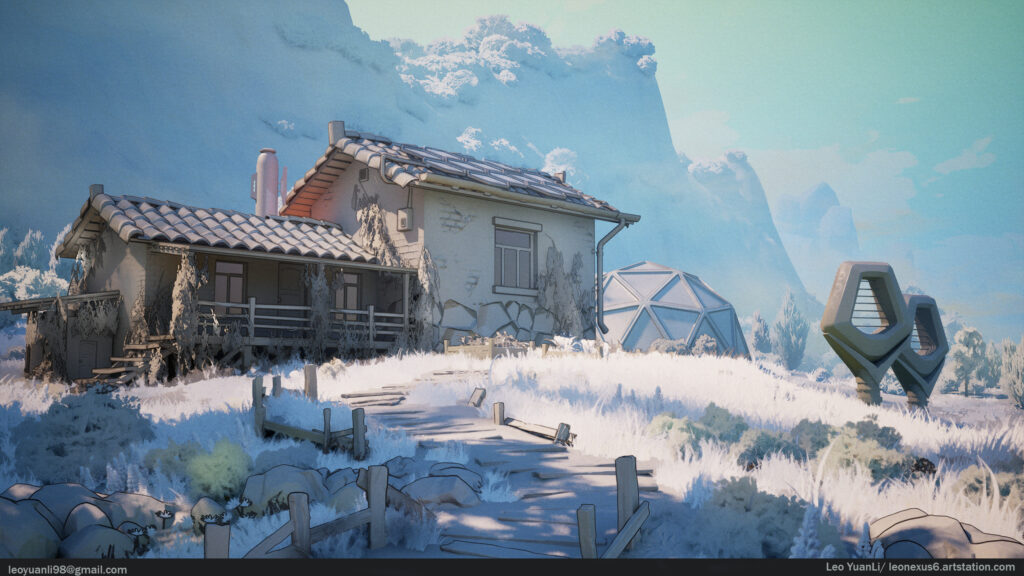


I wanted to recreate not only the concept itself but also bring the emotions of Solar Punk to life.
This inspired me to redefine the style: fresh, warm, bright, and peaceful. Finally, stylization seemed like a good direction for me.
I started gathering references and making my feelings more concrete.

References
I believe the reference phase is very important for a project, as it helps me to clarify my thoughts and break down the entire project.
I’m always quite thorough about it. I prefer to keep my reference board clean, meaning the references should be precise instead of bulky.
For vegetation, I was greatly inspired by Jasmin Habezai-Fekri’s work, which has the right amount of detail without being too noisy.
Software
- Maya: Modeling and UVs
- ZBrush: Sculpting
- Substance 3D Designer: Creating materials
- Substance 3D Painter: Texturing
- Photoshop: Creating masks & Presentation
- Unreal Engine 5: Level Designing, Lighting & Rendering
- CapCut: Video editing

Blockout
In this phase, my goal was to get closer to the concept’s composition and establish approximate proportions using default meshes in UE, while also setting up the camera and lighting for the first pass.
Speaking of cameras, I recommend trying fSpy. The program can easily help you determine the camera position.
Later, I exported the main building to Maya, started modeling, and named everything more precisely.
I then exported the static meshes as .fbx files to Unreal Engine until I was satisfied with replacing the rough block. After that, I started working on Substance Designer.
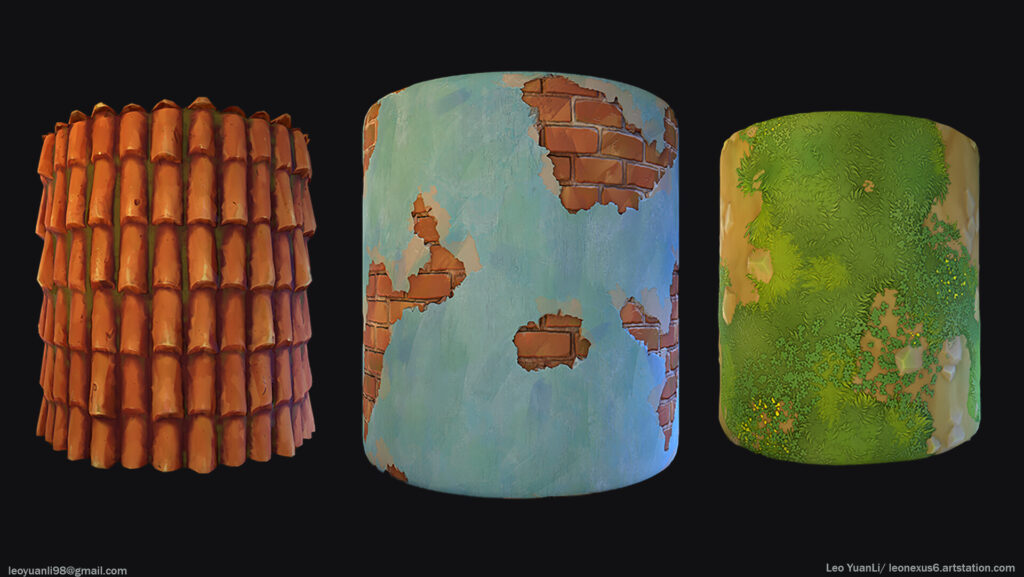
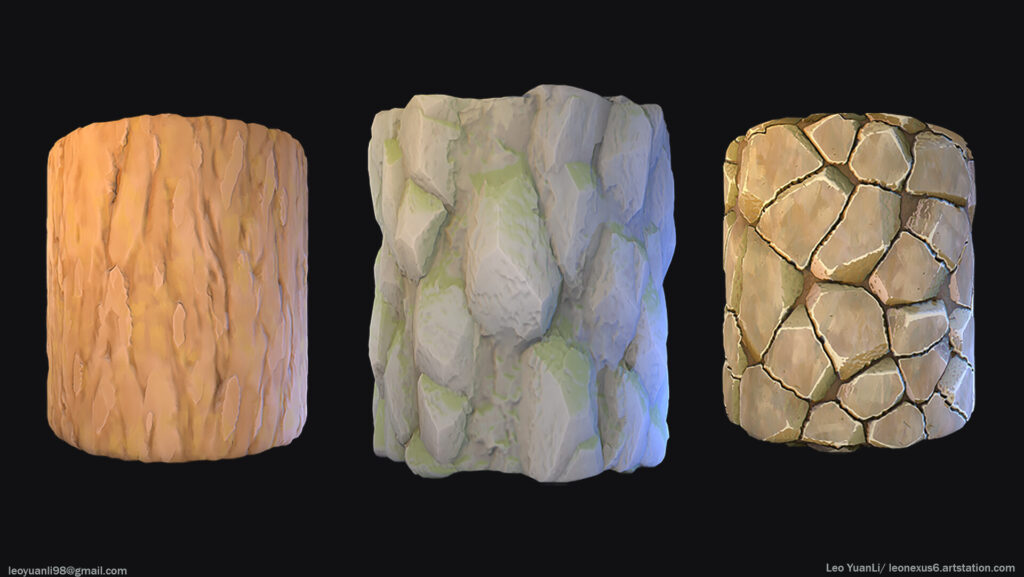
Tileable Textures
Working in Substance Designer is always the most enjoyable part for me. All I need is a laptop and a mouse, and I’m good to go.
I stuck to two keywords when gathering material references and creating materials: “Ghibli” and “hand-painted.”
Let’s take the roof tile as an example of how to achieve stylized material. I’d like to share some tips:

Sculpting
I didn’t want to overwhelm it with too many details since it should be stylized.
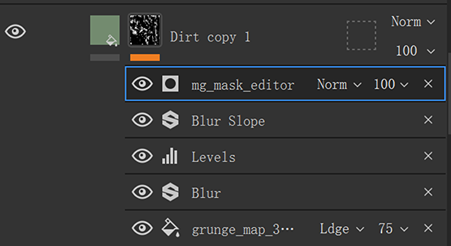
So, I simply created two shapes, connected them to a Tile Sampler, and added some damage details using Dirt + Blur HQ + Histogram Scan nodes.

Colouring
I personally spend a lot of time on coloring; I enjoy experimenting with colors. For this project, I got inspiration from Impasto, one of my favorite painting techniques.
I always like to enrich the details through color rather than sculpting.
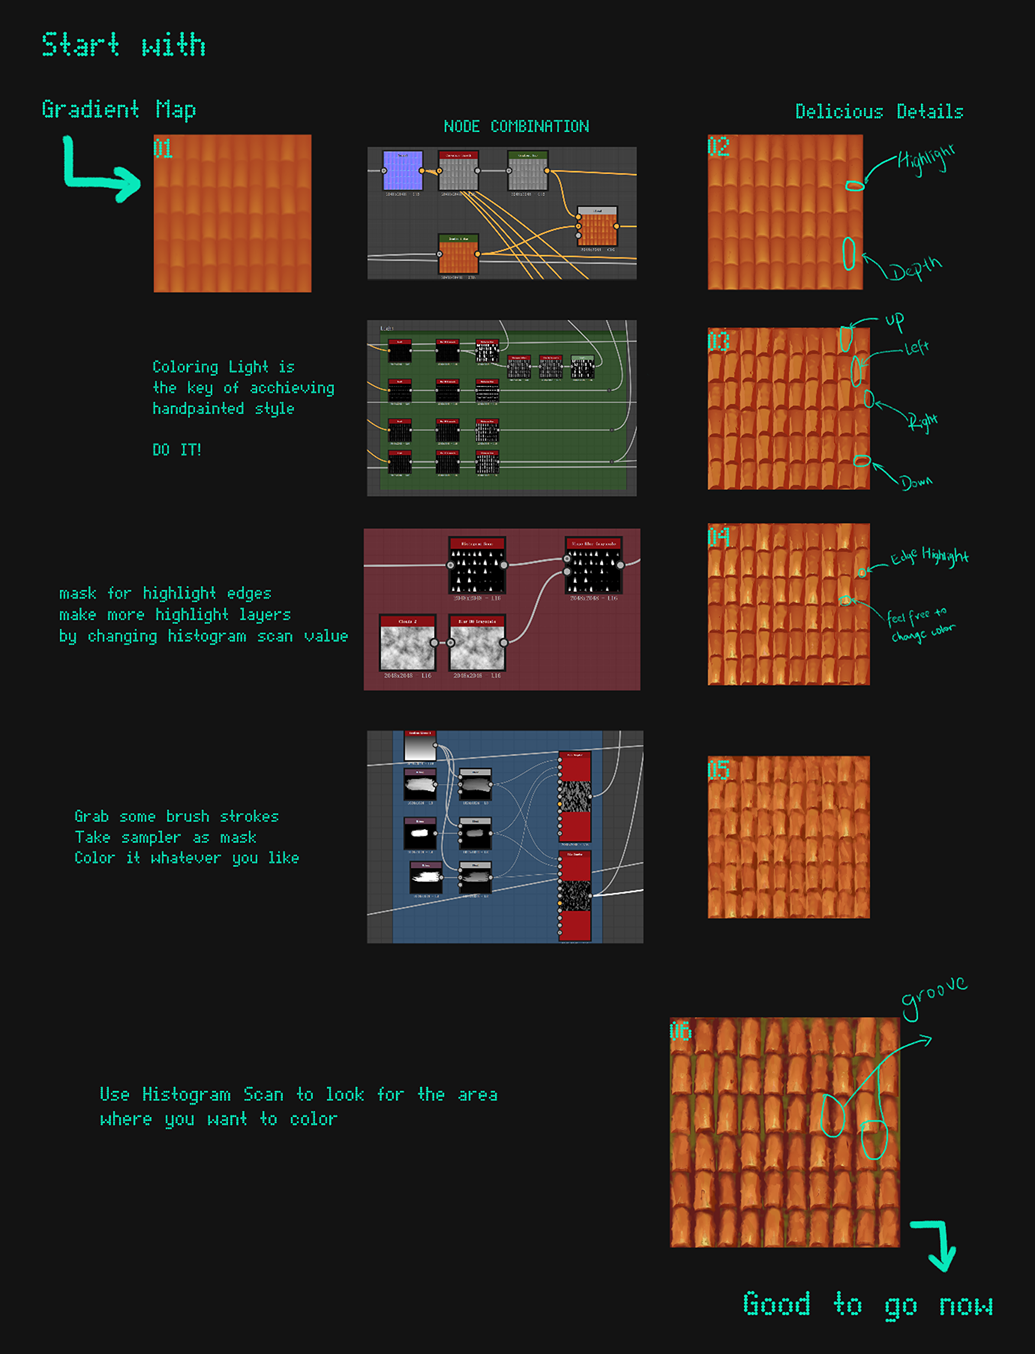
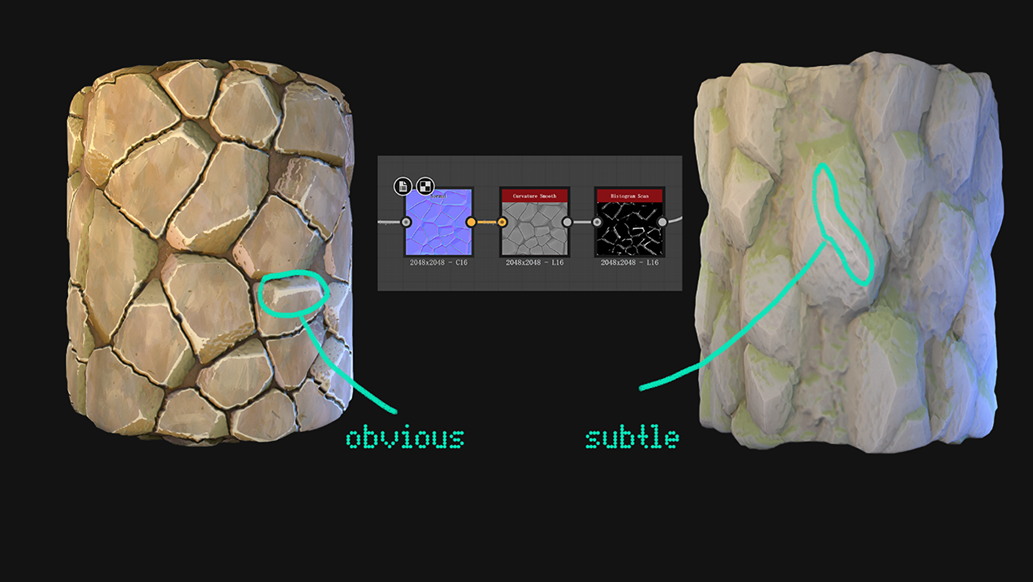
Normal + Curvature Smooth + Histogram Scan
This combination helps to define the edges, which can then be colored to enhance the hand-painted style.
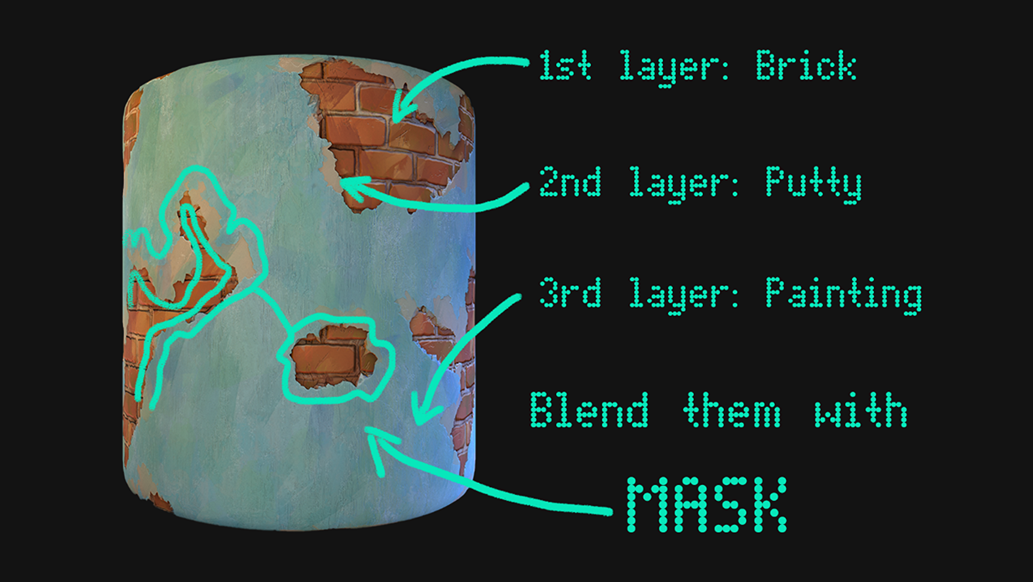
To achieve better blending, I used both vertex painting in UE and Substance Designer.
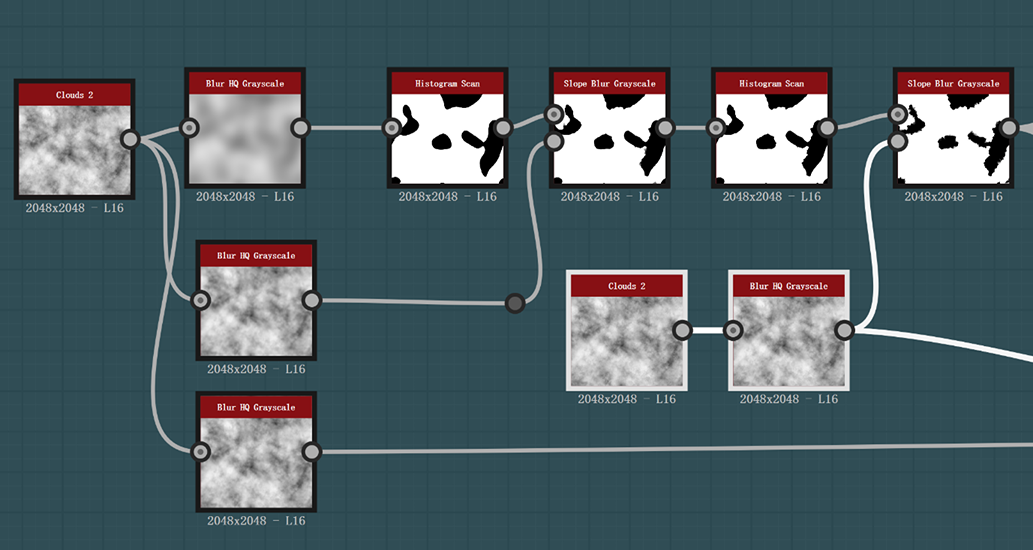
Texture + Blur HQ + Levels / Histogram Scan + Slope Blur
This combination creates nice stylized details. I recommend this for any beginner artist like me to try out.
Modelling
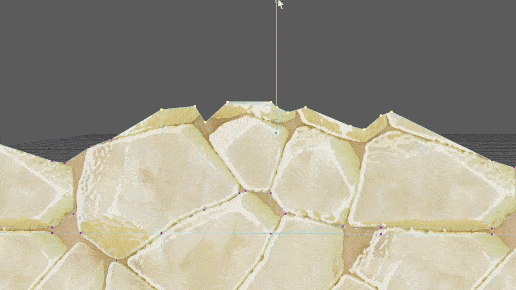
Once the materials were done, I went back to Maya to address some modeling issues, mainly with the roof and stone wall.
Some artists DM’d me earlier asking about the roof. I started with a plane, then added loops to extrude better while following the texture.
You might notice the roof tile is different from what I created before — I changed the XY amount in Substance Designer.
That’s why I like procedural workflows so much; changes are not costly anymore.

One thing to keep in mind is to ensure that “Preserve UVs” is checked.
This allows you to move vertices freely without affecting UVs.

Vegetation
The trees, bushes, and ivy were done in SpeedTree. I created leaf alpha textures and bark materials in Substance Designer, then imported them into SpeedTree to check how they looked.
I then imported the tree meshes into Maya to fix the normals.
Speaking of normals, I created a sphere to cover the mesh and then transferred attributes.
Viktoriia Zavhorodnia (akbutea) clearly demonstrated this technique.
If you want to make stylized trees, her tutorials are incredibly helpful.
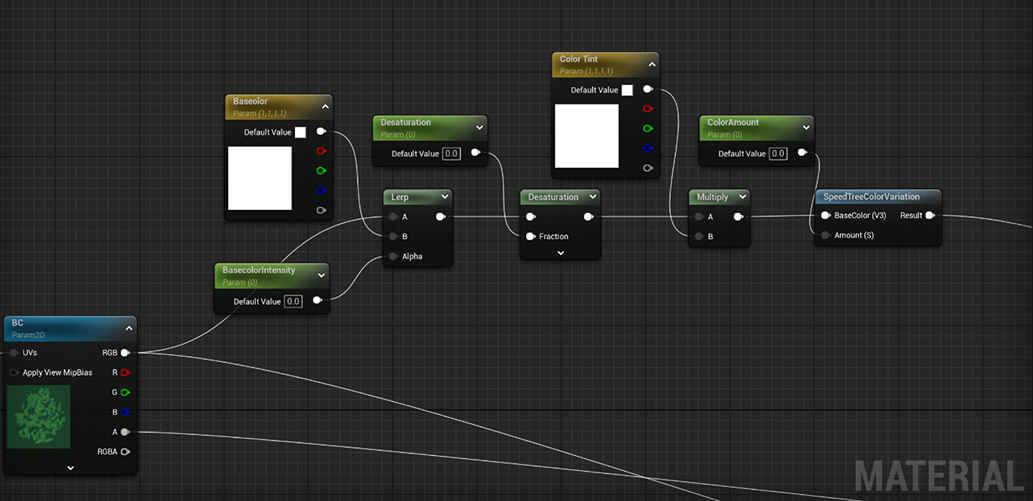
When setting up materials for vegetation in UE, SpeedtreeColorVariation is a great node for introducing more variation by adjusting parameters instead of using material instances.
It’s very handy when building large-scale environments.
Since the trees were placed far from the camera, I didn’t spend too much time on them.
For the ivy, I followed a tutorial from MOT Studio, which worked quite well for me.
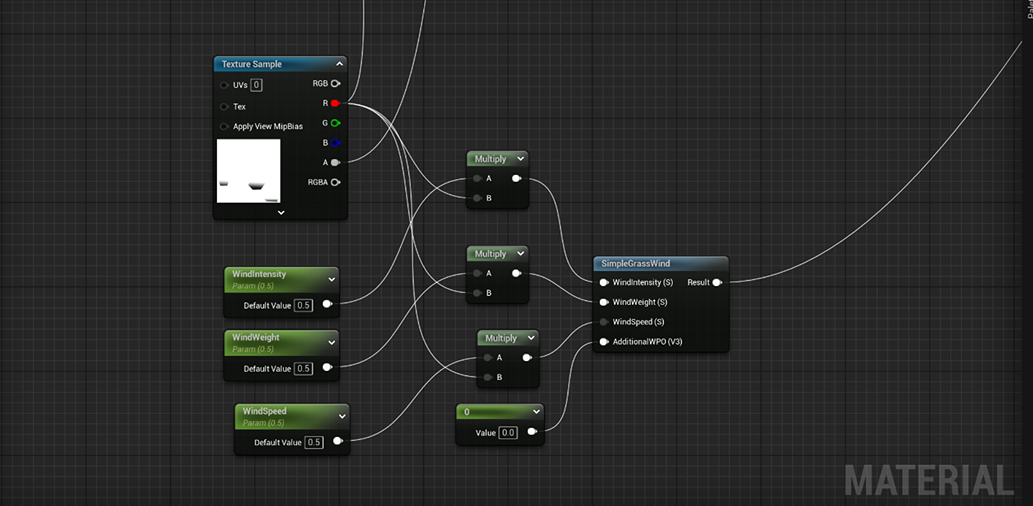
Regarding the grass, there wasn’t anything special to do except creating a mask for grass wind to make it move more naturally.
This added a lot to the scene’s realism. The mask was created in Photoshop using the gradient tool.
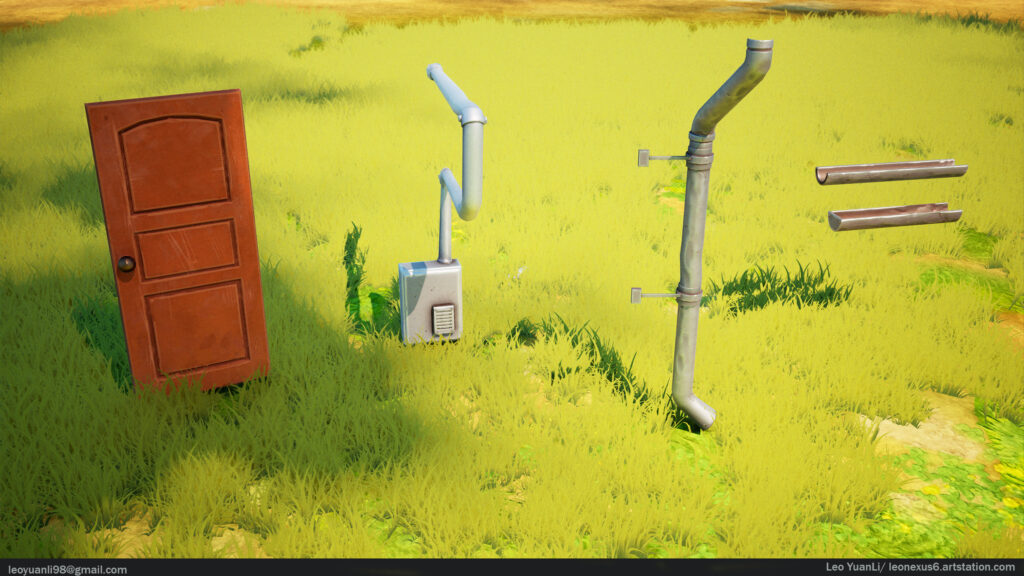
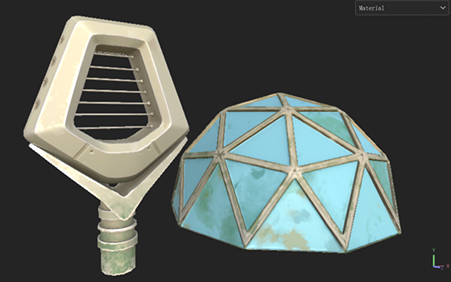
Props
- Sculpting
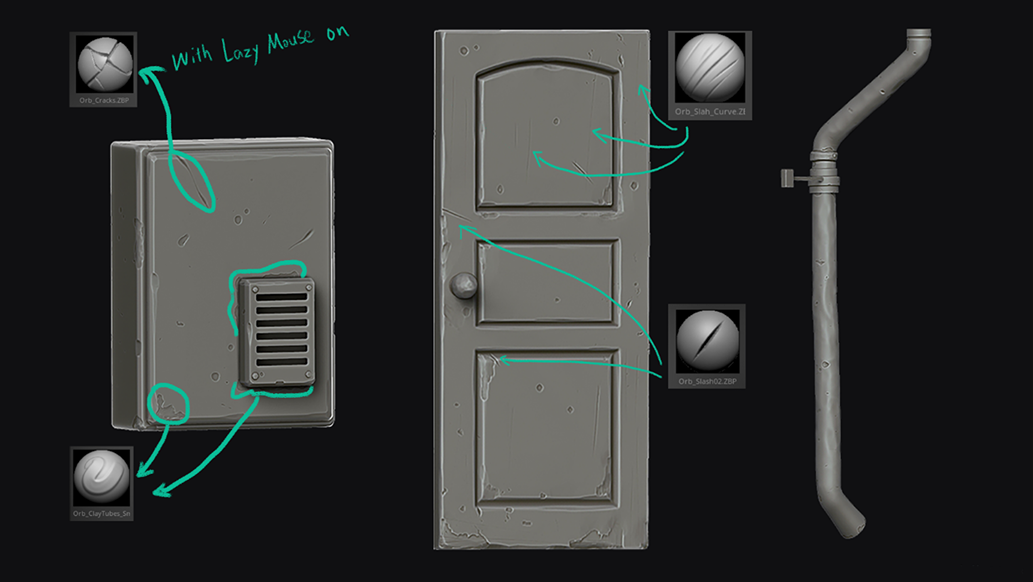
I wanted to make the house props, such as the drainage and meter box, look aged but not broken.
I imagined the people living in the house have cared for it over a long time, allowing it to age gracefully. So, I altered the shapes slightly and added some damage at connection points.
The brush set I used was from Orb. I used TrimDynamic for detailing edges.
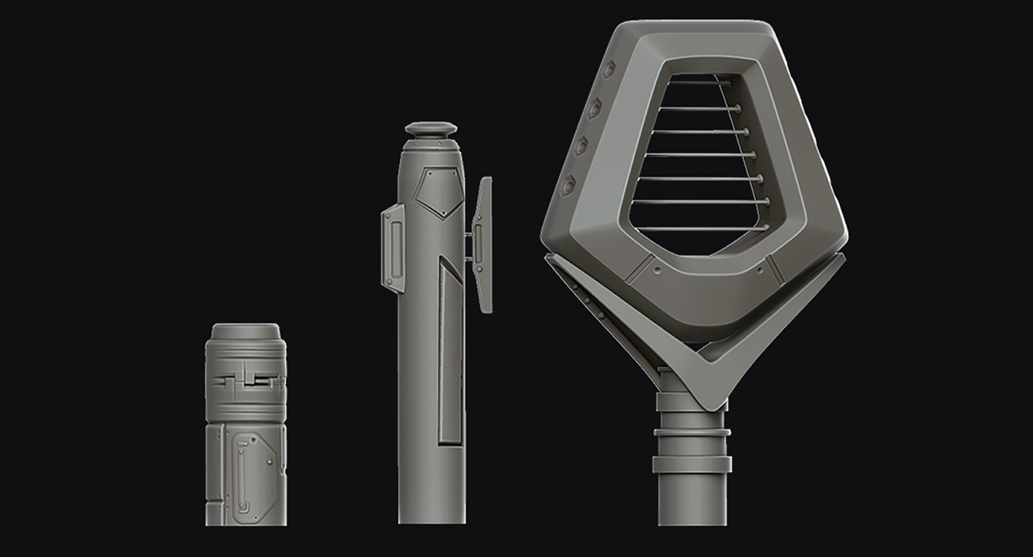
For sci-fi props, I used a subdivision workflow to make them smooth and clean, highlighting the contrast between modern and old times and between natural life and high-tech life.
The variation would be handled in texturing.
Texturing
For these two props, I didn’t want them to look flawless, so dirt and abrasion were necessary.
I kept in mind that I wanted a stylized environment, which is why some details don’t need volume.
Flat color works well to convey these details.
Lighting
The scene is lit dynamically. I used two directional lights: one with a yellow tint and one with a blue tint.
I wanted to capture a cozy, warm moment of the day — either sunset or sunrise. That’s why the main directional light is yellow-tinted.
When the main lighting is warm, it’s a good idea to make the shadows cool. I added a blue directional light to illuminate the shadows.
I also increased the indirect lighting and added point lights to the ivy, which made the environment feel more alive.
I was inspired by Jasmin Habezai-Fekri’s lighting techniques from the Bird House project, which she shared in an article.
I recommend young artists read it.

I also created a material for casting shadows dynamically, which I used in the lighting function.
It brought subtle effects similar to wind but wasn’t overwhelming for the eyes.
Here’s the tutorial:
Post-Process
Some people were curious about my post-process settings.
I have to say, there wasn’t anything special. I added a simple outline material to make the scene look more anime-styled.
I activated the CustomDepth Pass so I could choose which objects would be affected by the post-process effects.
Otherwise, the grass would appear noisy with the outline.

Conclusion
I had a great time working on this project. This is exactly what I want to see in today’s world.
I know the world is probably going crazy, but I still believe some people are working hard to build their own primitive, yet dream-like land.
Thanks to Concept Artist Ole Kristian Halstensen for creating such an amazing concept, and to everyone who has helped and encouraged me throughout this journey.
Lastly, a big thanks to Games Artist for inviting me to dive into Solar Punk and allowing me to contribute to the community.
I’ve learned a lot from Games Artist articles.
Feel free to reach out if you have any questions. I’d always love to help!
Read more articles
You might also like these articles.