

Introduction
Hi everyone, my name is Javier Osés and I’m a Freelance Character and Prop Artist.


Project Goals
In this article I will talk about my thoughts and workflow on my latest project, being more specific about the peeling paint effect.
Setting up the idea
Whenever I start a new project I take time to settle up what my goals are so I don’t deviate too far from the original idea. It’s not bad to let yourself go with ideas while you are working on it, but that could make the production time go up to infinity, so being clear with your goals will help you keep your work simple and agile.
For this project the main goal is to study metal. Not only the metal surface during the sculpting process but also how the shaders and textures behave inside a rendering software.
The keywords that were on my mind were:
➢ Helmet
➢ Old
➢ Rust
➢ Rough
My next step is to head over to Pinterest and look for these keywords. Anything I find interesting is added to the PureRef board.
I look not only for real references but other 3D props and shaders that are appealing to me as well. I feel gathering as many references as possible is one of the most important steps in the process since having them visible while working on the model helps me to keep in mind my goals.

Blockout
I start setting up a base head as a starting point on Zbrush. Then, as in every other project, you take your sphere and start moving.
At the start, I don’t give too much importance to doing a clean topology or little details. I’m just looking for the right silhouette and a nice overall feeling of the main shapes. I do take my time blocking out so later I don’t have to mess things when the shape gets a bit more complex.
High Poly
When I’m done with the block out and I have everything the way I want it, I continue cleaning everything up. That means it’s time to think a bit about the topology. Although I try to use zremesher first, if the topology is not as clean as I want I always do a retopology inside Zbrush with the help of the Zmodeler brush. It’s very easy to use and will help to speed up production time as there is no need to switch softwares.

The moment I get it all clean I can start adding other small parts like the chain or the metal nails as you can see in the pictures.
As with the process describe for large parts, if it is a complex shape I simply block a dynameshed mesh and then clean it up. The best case would be to start directly with a clean shape and topology.
Detailing
Here comes the fun part! First I make sure every piece is well-placed and with enough subdivisions to have nice and clean details. I am used to work within the range of 2 million to 5 million.
Whenever I start detailing I use two main tools: Morph Target and Layers tool, which allows you the possibility to erase any error or unwanted details and to control detail intensity by layers. Really powerful combination.
I don’t like really noisy surfaces in the highpoly because I will be adding more details and noise during the texturing process, so I make them as readable and “clean” as possible.

Tip #1: During this process, I find it useful to think about a background story for the object. Where it has been, what could have happened, where it could have been hit…
Retopology/UV’s
As this project is meant to be a study I don’t try to make the topology as low as possible, just enough to keep the shapes and details I want. My process of unwrapping is pretty simple, I try to hide the seams as far as possible and make cuts whenever there is a plane change.
The key point is to keep Texel density as uniform as possible to avoid texture discrepancies. Using a checkers map will help you out immensely to see any weird texture errors and artifacts. In this project, I use 1 UV space for each of the big parts and 1 for all the small parts and the leather.
Baking
Even though you prepare everything for the bake to go smoothly, it will never happen. Be ready to be back and forth between your baking software, your retopo and the UV’s.
I do my baking inside Substance Painter and I usually use standard settings, only changing some options inside the Ambient Occlusion and thickness, depending on my needs.
Texturing
Prior to the start of the texturing, I like setting up the scene a little. Then I make a rough grey base for all of my objects to make them homogeneous. I change the HDRI to Tomoco to have as little less coloured light as possible and I change the field of view to around 30/35.

Now we are ready to start with textures!
I first start with the biggest parts, so I make the metal texture from scratch and I instantiate it across the texture sets I need. This way I only have to work on my material in only one of the texture sets and any changes I make afterwards will change all the others.
My work process is going from big to small, which means I won’t dive into details until the end, for now, a good base is a priority.
It is important to understand that keeping everything in layers will help you out with having a clean texture to work with. I make the base colour and colour variations, with the metallic value set to 1, and change the roughness of each layer slightly. My only concern at this point is to have good tone variations of warm and cold tones to make the surface interesting.
This part doesn’t need to be definitive so I can come back and redo some of your layers or add more if needed. The results of these steps will look similar to this:

Tip #2: To make sure I’m liking the colours I work with just the Base color active.
Tip #3: Take the time to clearly name your layers. This will help you later if you are looking for a specific layer that you want to tweak or change an option.
Then I start to break the surface by layering surface noise and roughness using grunge maps.
Some of the grunge maps have colour information but others only have rough and height information because too much color mixing can end up making really messy and unclear textures.

As you can see, the surface imperfections add very subtle changes that make the light behave differently, thus making the metal texture more believable.
I continue with micro-details, big and small scratches, veins and flaws… everything I may need to make variations on the surface, but always with the references in mind. I finish it by adding a layer of dust and rust with the help of the smart masks.

Paint Layer
At this point, I felt it wasn’t interesting enough and wanted something else to make the whole model stand out, so I opted for a peeling paint effect resembling a kingdom banner. Adding these details adding even more meaning to the whole model.
For this objective, first I needed to work on the paint material itself.

Now that the paint has been created it covers the entire surface. This is just the first step because now I just need to mask it off to reveal the metal underneath. To make this happen I need to add a black mask to the paint material, then use a generator and choose the “Mask Editor”.
Now that I have the Mask Editor I can add a grunge noise, which can be done by scrolling down the properties window until we reach the “Image inputs” section.

At this point I need to make sure that two things are correctly set up:
The “Curvature” slider needs to be set up at 1 and the “Texture” slider must be set up at 1 as well.

I open the “Texture” group to change the scale parameter and enable the tri-planar projection. This will improve the effect.
Finally, I need to contrast the mask and invert it to make the Paint visible everywhere except on the edges of the geometry.
To do so, I have to reduce the “global balance” parameter and crank up the “global contrast”, then enable the “invert” setting.
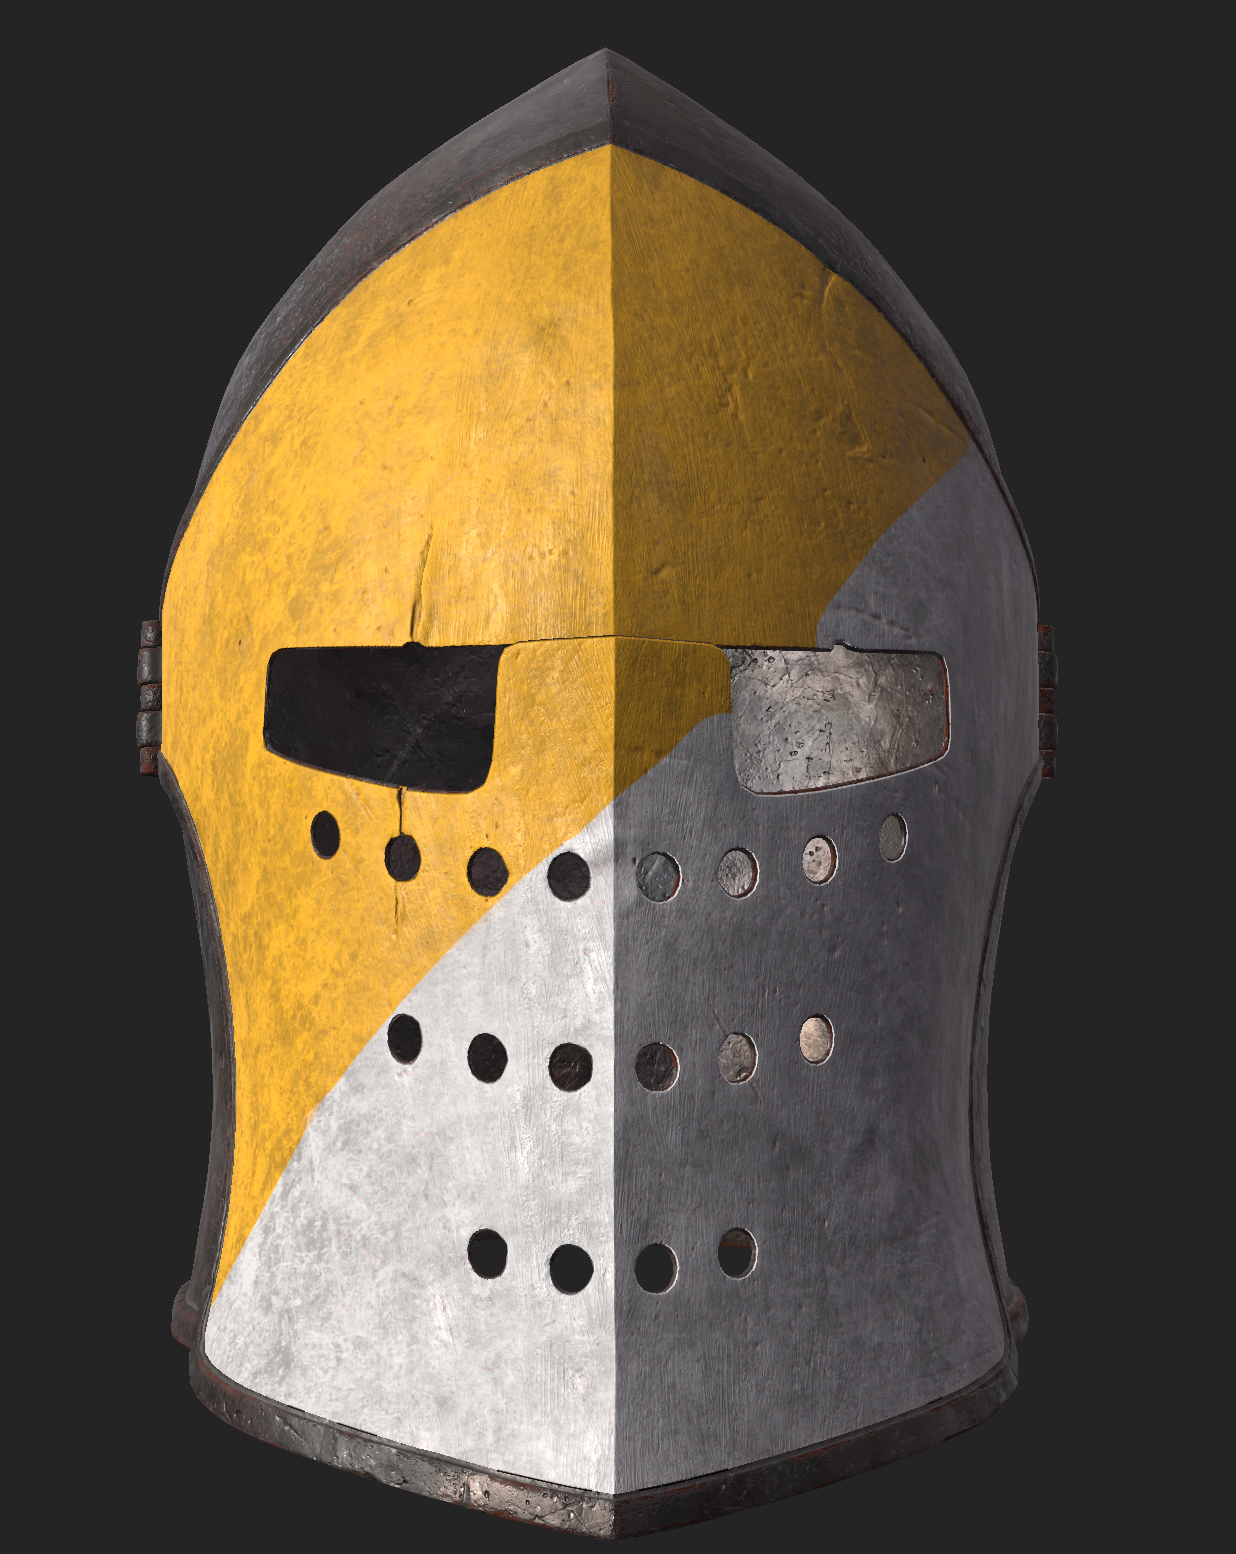
After tweaking and setting it up as you want the results will be something like this:

To create the peeled effect around the holes of the paint surface I have to access the mask of the paint layer via other layers. This is possible with anchors which allow creating links between elements of the layers stack. So right-click on your paint layer black mask and add an “anchor point”.
A new layer is needed to give the Height information to the peel, but to achieve it, the “Anchor point” has to be added to the paint layer. For that I create a layer called Paint Peel Bump with height values around 0.2, add a black mask and also a fill effect.
The fill effect will be used to load the paint mask that has been exposed via the anchors from the previous step. Click on the fill effect to open the mini-shelf, but this time click on the “anchor points” tab to select the paint anchor I created earlier.

I use a filter effect to apply a blur, adding a level to contrast the result generated by the blur and to invert the mask and finally, add another fill effect.
In this fill I load again the Anchor mask from the Paint layer, then I change the blending mode to “Multiply”.
The effect in multiply mode will basically remove the original mask from the new one, allowing to only have a mask at the border of the paint. Because the first Anchor mask is blurred, they are not identical anymore, therefore the border is the difference between the two masks.
Now I can tweak the masks or the intensity of the height in the bump layer to adjust the final result.

To make the same peeled effect around the borders I add a paint layer in the paint texture layer where the first anchor point is placed. Now with a good alpha its the moment to start “peeling” all the paint excess. It is important that this paint layer is under the “Anchor point” so that the height values affect the “paint layer” too.
After these steps, here is the final result inside Substance Painter:

Render
When I’m still texturing and I start to like what I’m seeing, I open my rendering software and set up a quick scene. I am used to working with my textures on one screen and my render on the other so I can export my textures and quickly see what I’m going to see in my render.
My preferred render software is Marmoset Toolbag, it’s fast and easy to use.
For this part, I use a 3 light setup with low HDRI intensity and colored light from above to spicy it a little. This is how it looks from above.

I enjoy playing with the tome mapping inside the camera options. I never go with the standard-setting as I want to create different feelings in each and every project.
Tip #4: One thing that I notice that works with me is that if I set up a scene with the “Noir” effect inside the “Post effect” presets, the lights will work with any other setting I use.
Tip #5: Even if you are in the middle of the texturing process, stop and play with lights and settings. Seeing your model differently will help your eyes see things that you may want to change or things that you want to show more.
After playing with the lights that I liked the most, I prepare a scenery by adding some museum elements to enhance the situation and the history of a 15th-century Barbuta helmet.

Conclusion
As you can see, the process undergoes many changes from the initial idea, but still, the evolution of my idea is not far from what I wanted to study. I am very satisfied with the result, my projects always provide me with learnings beyond my initial expectations and that makes me continue to grow as an artist.
Thank you very much for watching the breakdown of my recent work. I invite you to see my other projects and feel free to comment or contact me.
I want to thank the GameArtist team for giving me the opportunity to share some of my knowledge with the 3D community.
I hope you learned something and happy modeling!
Instagram: @javi_oses
Artstation: www.artstation.com/javi_oses
LinkedIn: www.linkedin.com/in/javier-osés/
Thanks to Javier for allowing us to have such an in-depth look at his process. If you liked this Barbuta Helmet breakdown and want to see more like it from other inspiring artist’s make sure to follow us on:
Read more articles
You might also like these articles.


