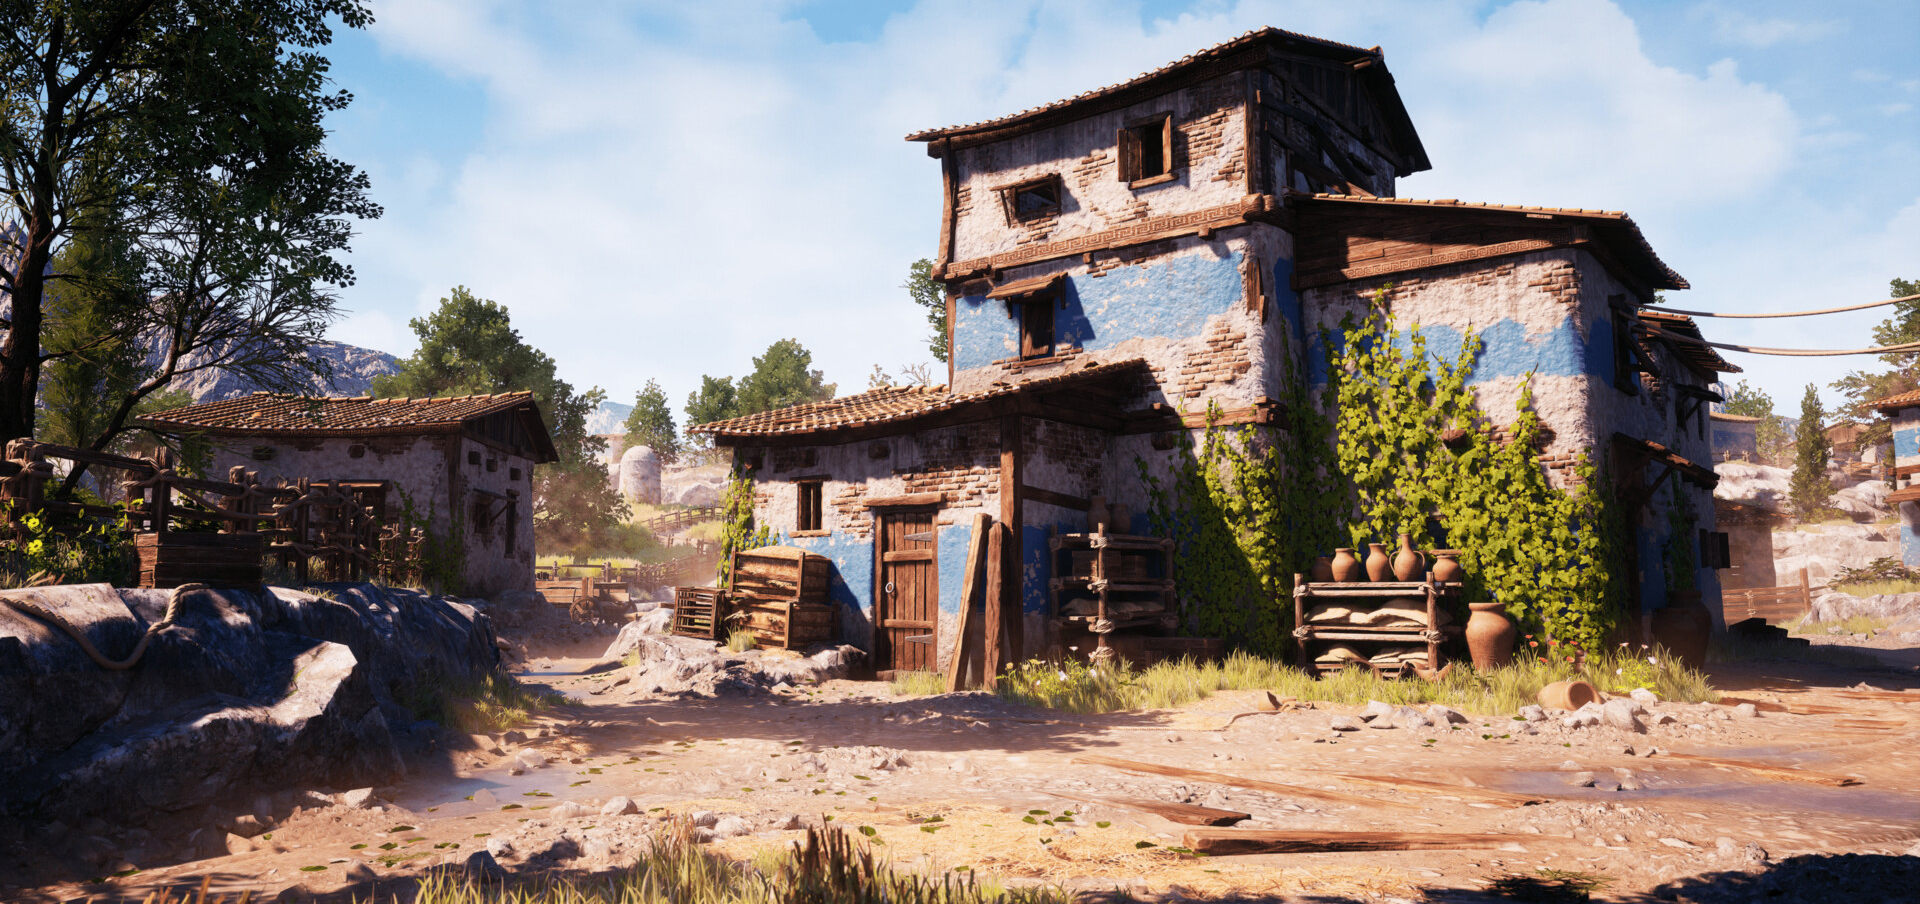
Lantern


Introduction
Hello! My name is Boban Lazarevski and I am a 3D Artist from Skopje, North Macedonia.
I first got introduced to 3D in 2017 and have been working actively on my portfolio ever since.
The decision to pursue a career in video games happened when I stumbled upon a local academy called M3DS Academy for 3D and Game Design. After graduating as a Character Artist I realized I had a deeper passion for designing props and game environments.
With so much more to explore, I decided to dip my toes and immerse myself in freelance projects which would push my creativity forward and expand my knowledge empirically.
At the moment I am building up my portfolio and aiming for a hands-on job in the games industry, preferably in London as it is a big capital of innovation and cutting edge game design studios like Ubisoft, Square Enix, Splash Damage and Rockstar Games.


Reference Gathering
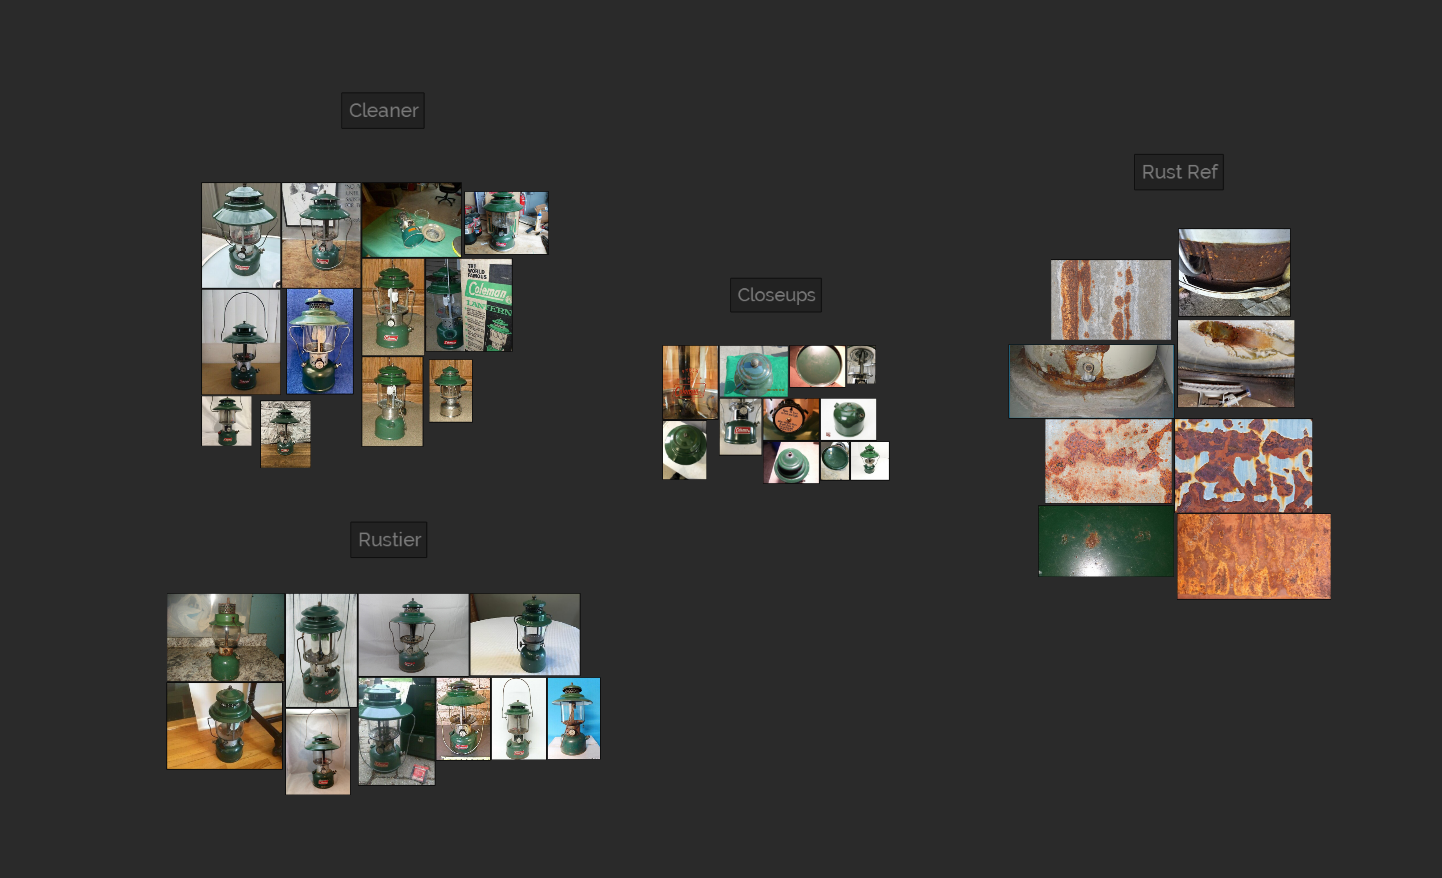
In regards to references, I prefer eBay and PicClick because they offer images from different angles as well as closeups on particular objects. Once I am satisfied with the gathering, I import them into PureRef, labeled and meticulously organized by different categories like below.
Modelling
My workflow consists of a mix between Boolean use and sub-D modeling. The combination of both really depends on the shape I want to go for. I use a couple of scripts and tools that aid me in the process. Below are my favorite ones:
DC Bool Manager
Mop Multi Object Tool
ZHCG PolyTools
Zen Tools Maya
SmartMesh Tools
For the modeling phase I use a mix of standard sub-D workflow and incorporating Zbrush to polish some of the meshes. I highly recommend watching Simon Fuchs’s Military Radio Tutorial as it covers everything you need to know about utilizing Maya and Zbrush. It is mostly helpful for polishing edges, creating polygroups, and making complex Boolean operations.
Let’s take a closer look on how I utilize Maya with using scripts to aid in efficiency and prepare meshes for polishing in Zbrush.
Firstly, I model a basic mesh using Maya. Then, with a simple script which highlights all the hard edges, I unfold the model with UV > Camera-Based option. I do this in order to use a smaller script which cuts out all hard edges and projects them in the UV space.

I import the mesh in Zbrush and create polygroups based on the hard edges we already made in Maya. Afterwards, I use the polishing functions until I am happy with the shape and finally decimate the model.
Below is the final HP/LP completed and ready for the next step.

Unwrapping
`
The UV process is pretty straightforward. I use a plug-in for UV Layout inside of Maya. Then l proceed laying out the parts using specific preferences in order to create more curated results.
I use a 16 by 2 padding which is the recommended edge padding for a 2K map. I prefer to request more iterations for my final layout which gives me a better overall packing result.
You can check this polycount article describing it in more detail.

Texturing
The texturing phase is where I have the most fun and creative freedom to express myself. The key to great textures is in the subtleties, so I try to add variations and complexity to the model through careful observation of how materials age and relate with each other.
With this particular project I used a mix of Megascans materials and my own library to create believable surfaces and tell stories through objects.
The rust layer is nothing fancy. It is a combination of Megascans materials layered with an enclosing soft rust spill for a more authentic and original feel.
I suggest looking up Jason Ord’s Tutorial if you want to take your surface treating to the next level. It includes clever tricks and tips to aid in the texturing process.
The soft rust spill effect is a simple ‘Fill layer’ with a gradient filter combined with different color variations for rust.
The trick here is that you can reference anchor points in the same color layer.
This way, in the Fill Layer I am linking the ‘subtracted fill’ with an anchor point. This way it helps me to then use a gradient filter which will give me the option to change the color of the rust if I want to.


Rendering
The rendering phase is the most important step in my opinion. I use a three-point lighting setup and a couple of lights from the HDRI itself.
For the camera, I use a setting of 7mm because I like to have orthographic FOV for my props. I also use ACES profile as my ‘post effect’ and add a bit of exposure. When I am happy with how everything looks I crank up the settings for my final renders.


Conclusion
My overall work ethic is to focus on each stage separately. This way of working brings my attention to detail to the maximum for every phase. After I am done, the final stage is taking a step back and re-evaluating the overall look of the prop as one whole. Usually the main points which I tend to play with in this stage are tones, shades and effects, so laying out strong foundations and access will assist you later in higher efficiency and quality work. This means having clearly labeled channels, groups and folders which will make those key final touches more manageable in taking your prop from a believable design to an object in reality.
I want to thank the Games Artist team for giving me the opportunity to give you insight into my design process.I hope this article helps fellow artists in their creation efforts.
Feel free to contact me anytime through the following pages. I would be more than happy to discuss feedback or any ideas you have and help in any way I can.
Read more articles
You might also like these articles.