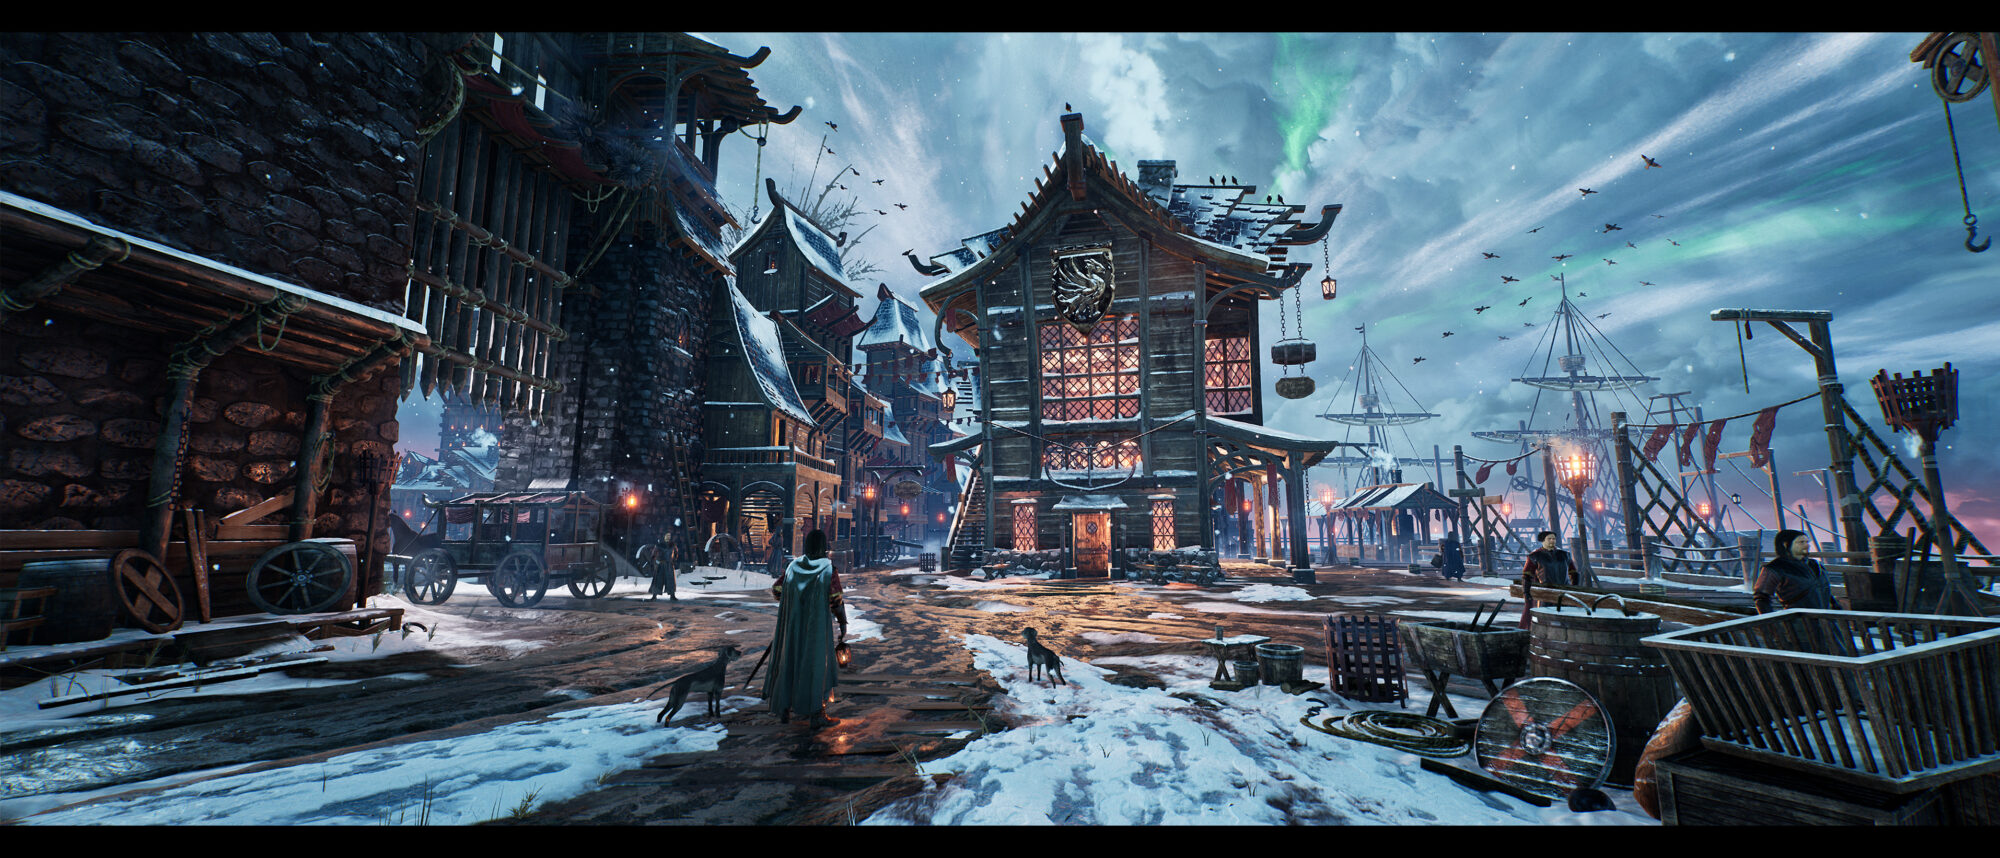
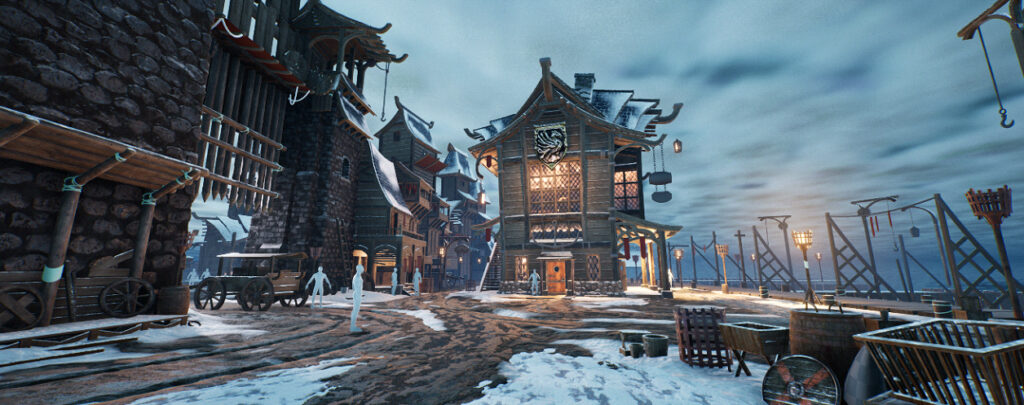
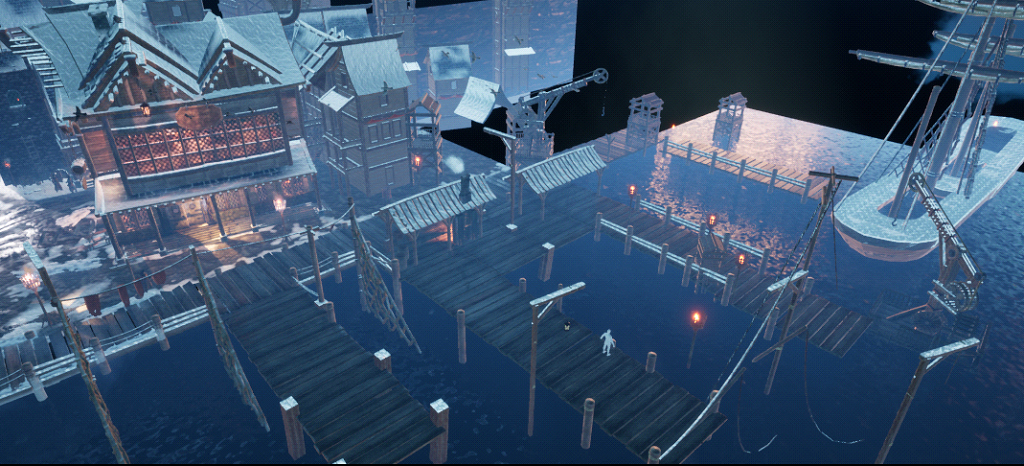
Snowed Inn Docks

Introduction
Hey everyone, my name is Rajesh Parmar, I’m 27 years old from Leicester in the United Kingdom and I’m currently an aspiring 3d environment artist trying to get back into game art after a long while of not doing 3d work.
The response of releasing my latest scene has been absolutely amazing, after putting a lot of hours and hard work into this, I couldn’t have asked for more! Thank you all so much.
A bit of history about me, I did graduate back in 2015 with a degree in Game Art Design at De Montfort University, however, I was one of those typical students who left everything till the last few weeks on every project and barely scraped by with a 2:2 at the end of the degree.
I really disappointed myself because I knew I was capable of way more than what I had to show for, I seriously lacked the drive back then. I did try 3d on and off again for the next few years after but It was a similar story, I couldn’t build any momentum and get going properly so I just stopped it all.
Skip to last year, after working several soul-destroying jobs in call centers, I felt like I had enough and I needed to escape that life, so I thought I’d try one last time in 3d and really go for it this time.
It was a massive challenge to get back into this again, I had to learn a lot of new programs and workflows but it was such a great feeling to finally complete a full 3d environment and project for the first time.
The good thing about the industry is, no matter how inexperienced you are or how many qualifications you have, all that matters, in the end, is the art.
So you can get in, at any point in your life.
Project
This project started thanks to the Dinusty Empire, who found me through a game dev discussion podcast on YouTube while trying to finish another personal project that I was taking way too long with.
That podcast introduced me to the awesome Discord community and monthly challenges.
I saw that a new challenge had just started in December on Discord and decided this was my chance to start a fresh new project in which I could participate with others from Discord.
Here’s the link to the actual challenge.
“Take the concept of an old traveler’s tavern, and show us how you think that would look if it were in your country of origin! How do the different weather, terrain, culture and other factors affect the design?”
This was perfect as I love the fantasy genre and I was excited about what I could create.
References
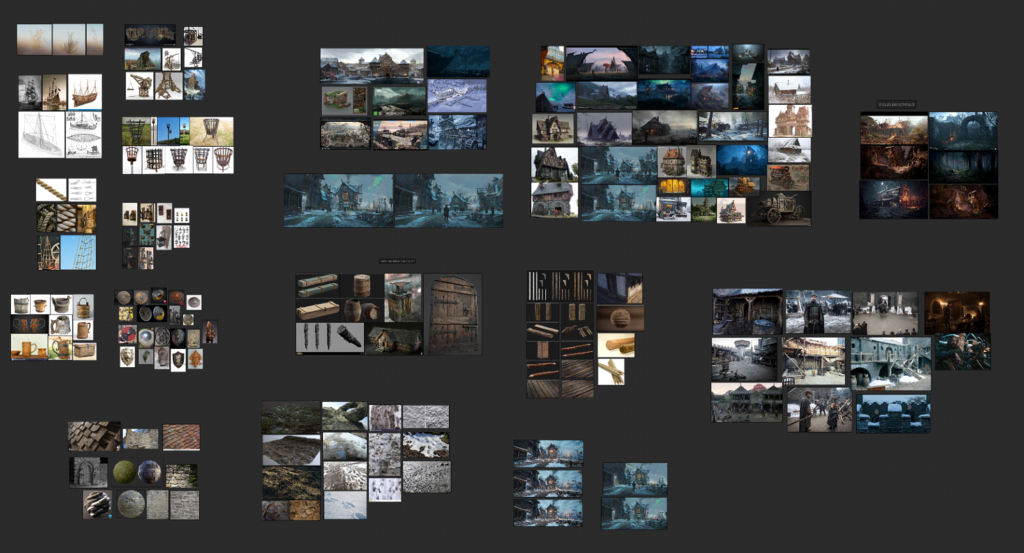
My first step was to gather a reference board and see what I could turn into a 3d environment.
I recommend using Pinterest to gather reference photos and stick them on a pure ref board, as you can stick everything on 1 giant page, which is really easy to look through.
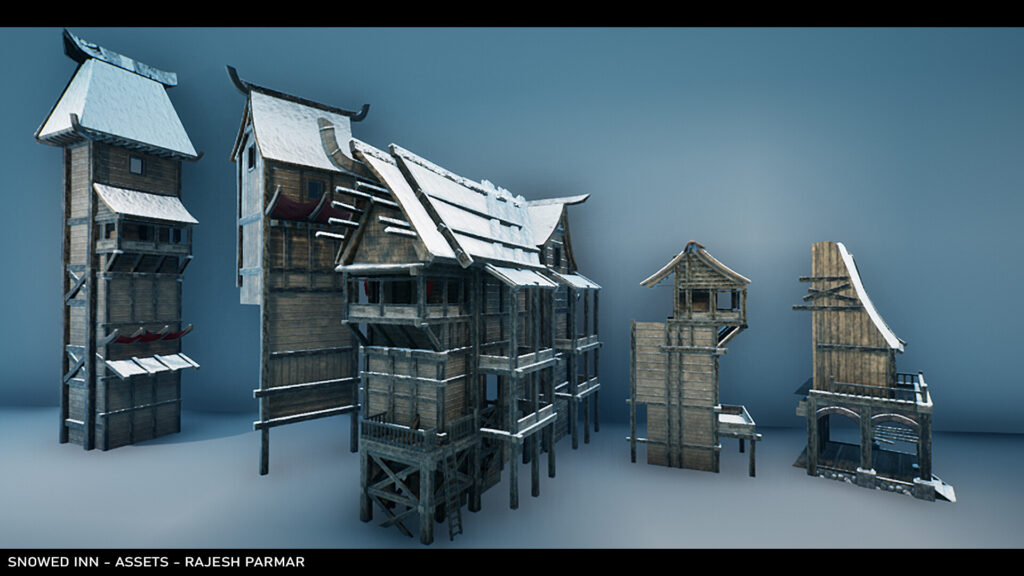
Concepting
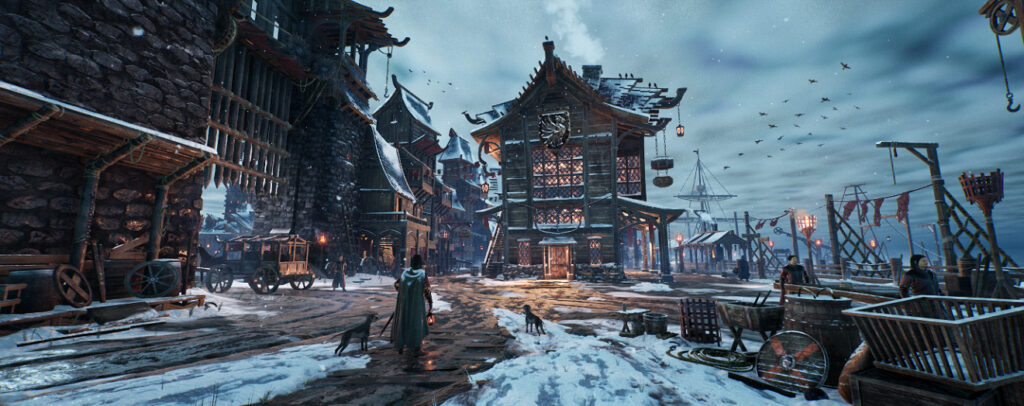
I decided I really loved the feel and atmosphere of Jeremy Fenske’s “Snowed Inn” Concept art.
As much as I loved the original concept, I didn’t want to copy it completely.
So I started to splice a few elements from the different images on my reference board together to create something of my own, for example, the pub sign hanging down from the side of the tavern and the windows from the hearthstone artwork.
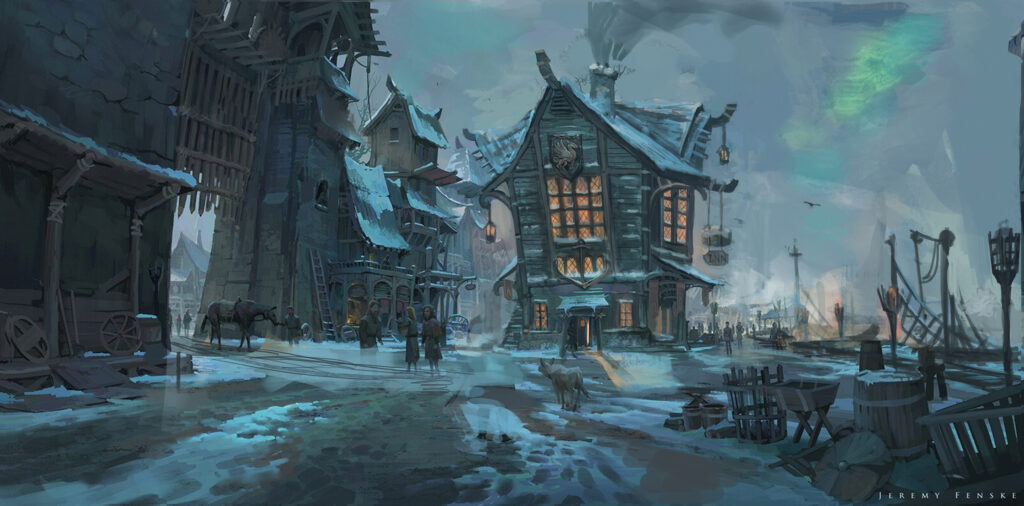
It evolved into the docks after painting over the concept in Photoshop.
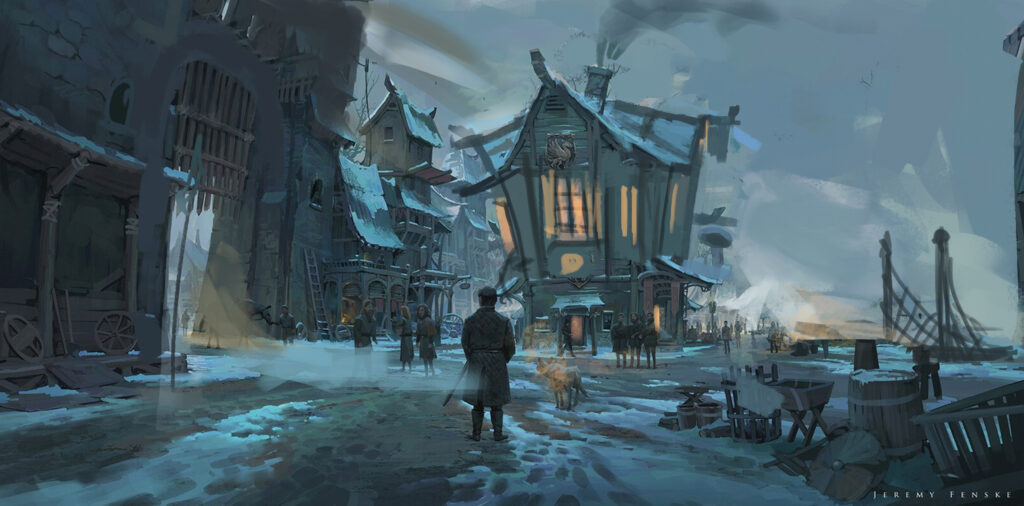
Above is a very quick paintover of the orignal concept.
After some cleaning up.
I still needed more images to find out what sort of props in the scene would look like and saw the amazing set that was created for Winterfell in Game of Thrones, which was absolutely perfect for this scene as I now had real-life reference for the scene.
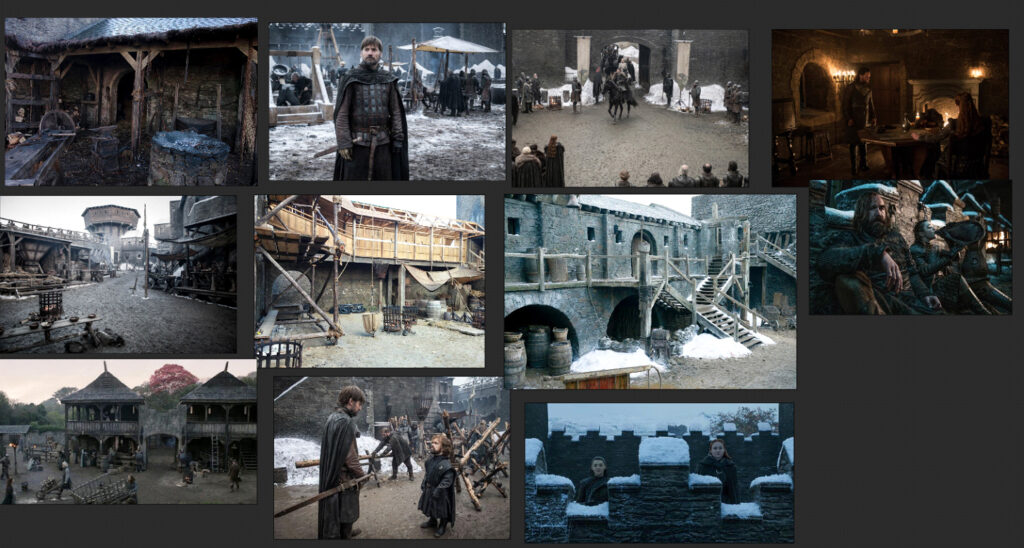
I usually kept adding extra references as I tackled different parts along the project. I didn’t need to get everything at once, but it did help to start with a large reference collection.
Visual Benchmark
Before starting this project, I had an idea in my head of what I wanted it to look like, as most artists do.
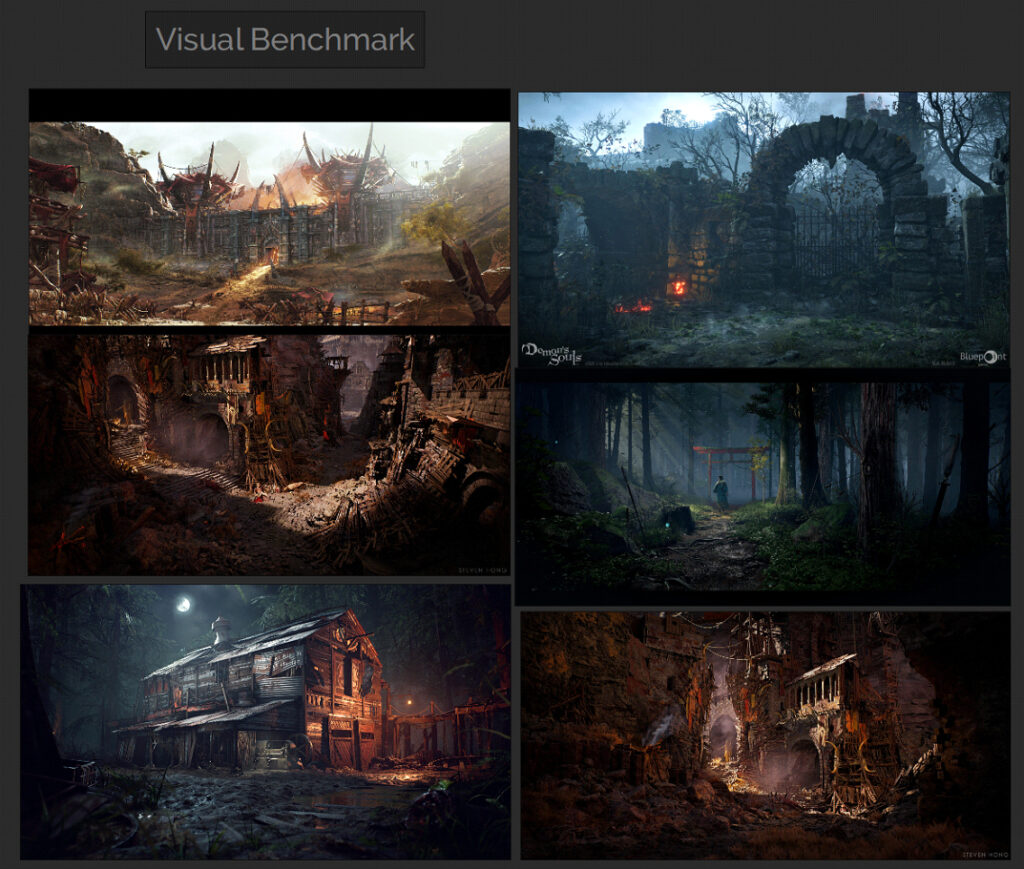
I was particularly inspired by Wiktor Öhman’s Orgrimmar UE4 scene, it looked like a cinematic but in real-time, which blew me away, that and the fact I was a huge WoW fan back in the day too!
I love how Wiktor dresses the scene; it gave me an understanding of how I build up a scene in UE4 with great set dressing.
Some other benchmarks on quality are as follows: a selection of some crisp, detailed cinematic scenes:
Feudal Japan scene Winner – Really loved the ground textures on this, it made me want to make realistic ground too.
Valley of the Fallen Grace (UE4) – Loved the detailed architecture of this scene.
Slaughterhouse – The lighting and mood of this scene, and Jay’s breakdown, inspired me and helped me a lot with my own project.
Goblin Den UE4 Goblin Den (UE4) – the whole atmosphere, mood and crisp textures of the whole project here are inspiring.
How did the other artists do it?
On the Discord during the challenge, someone linked this post by Maxim, which helped the most in terms of some easy step by step-by-step instructions on what to do next.
I would always come back to this post a lot to guide me along with the right steps.
Maxim Dorokhov – King Arthur challenge blog.
Polygon Academy Artstation challenge walkthrough by Tim Simpson.
Blockout to Lowpoly
I still remember how to 3d models objects, I really enjoyed that aspect of creating environments.
Here was one of my first basic blockouts in 3ds Max. I quickly modelled it without worrying too much about modularity and other things, as I just wanted it in the game engine as soon as possible.
That way, I could see what I would be working with, start playing around with basic lighting and sky settings and share my progress on Discord.
At this time, I still had some very basic knowledge of Unreal Engine 4, although I didn’t know anything about master materials or landscapes.
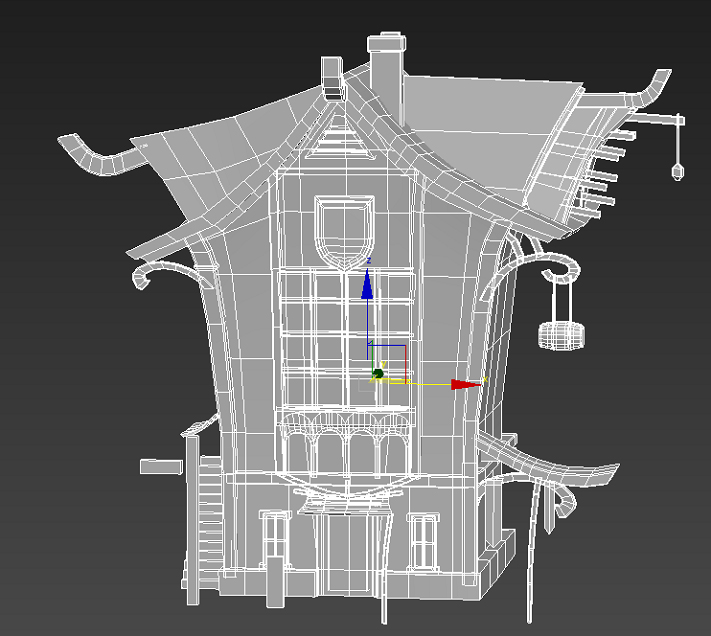
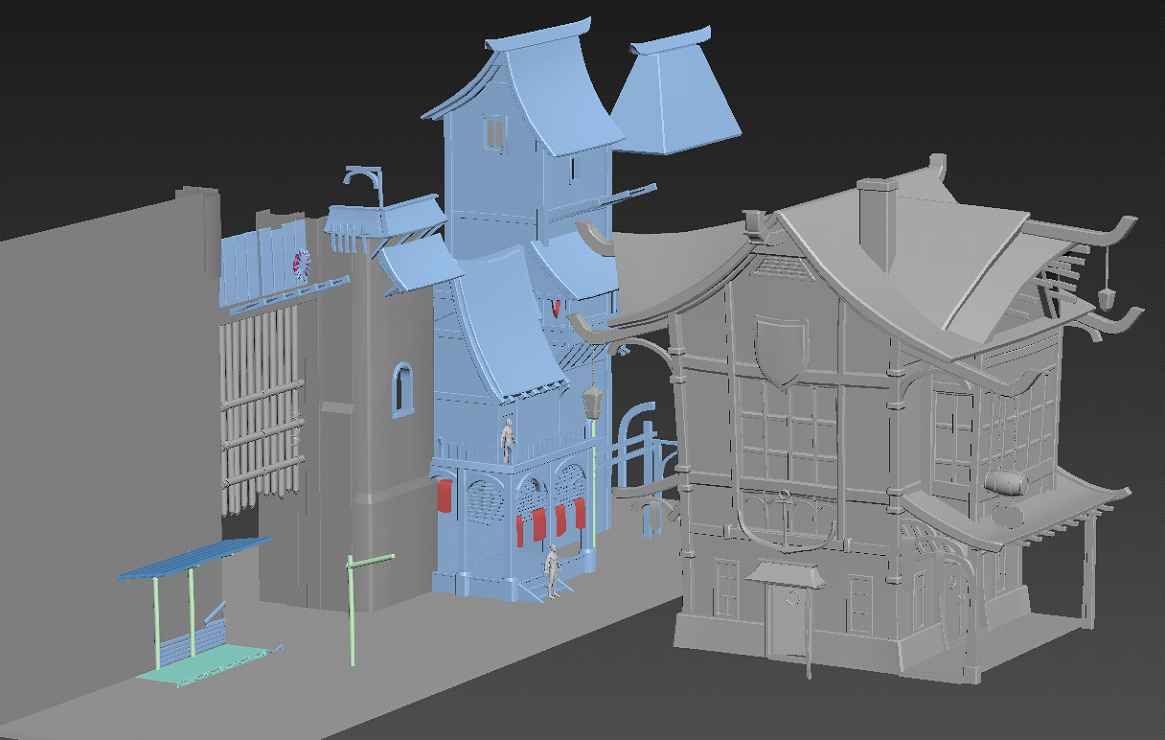
The building itself looked heavily stylised and odd at this point so I really toned back the wonky architecture and shapes into a more realistic building that doesn’t have bent walls, something that would make sense in terms of structure and architecture.

Here’s the building, improved slightly with some straighter walls and pillars. I ended up using this as my low-poly base to build from. I kept improving/updating the model as I went along through the project.
Once again, I kept referring back to my concept as well as Jeremy’s original concept and my pure ref board for the shapes of the building and what I wanted to convey. This is so important.
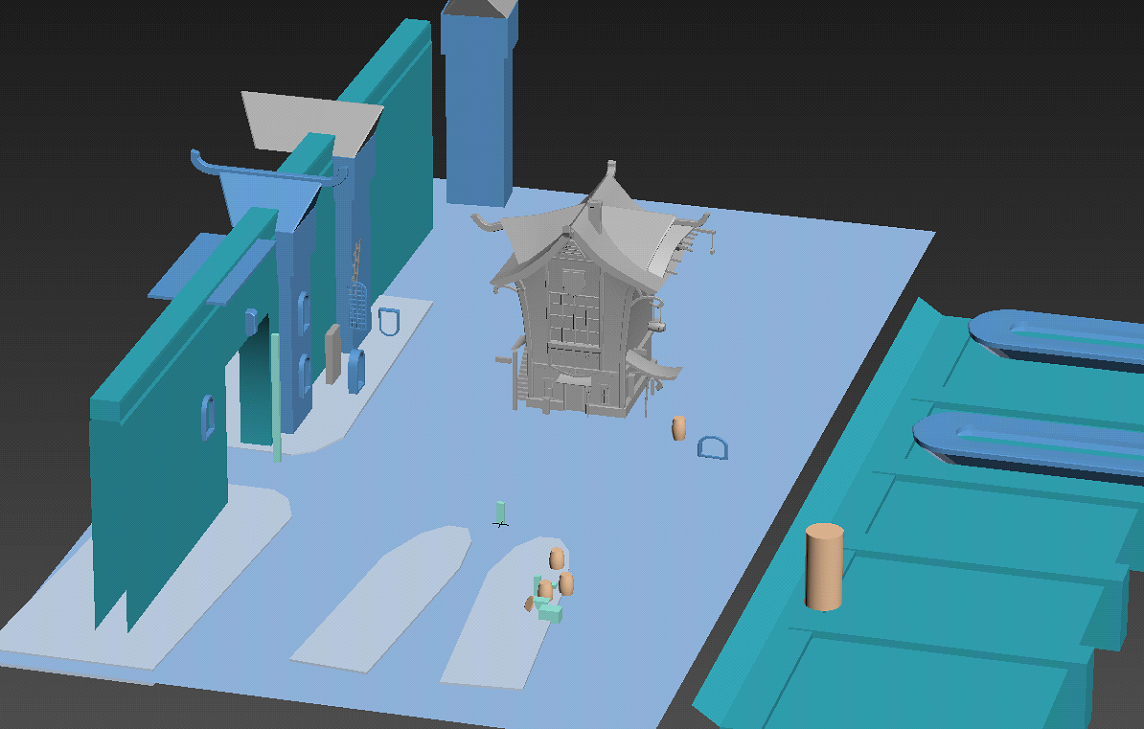
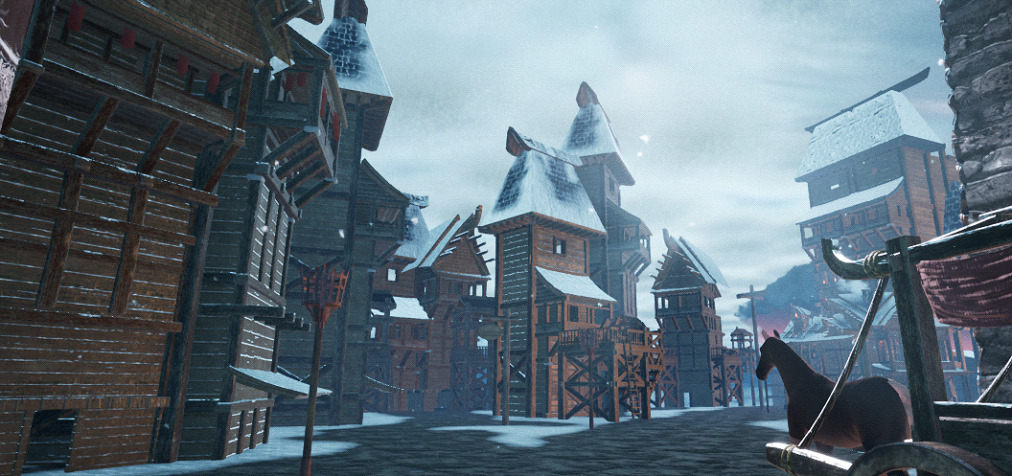
Once I was happy with that, I went into a bit more detail around the town itself, and while I was creating the town, I was thinking about pieces I could reuse for modularity, for example, the roof of the town buildings, the wooden pikes from the gates, the wooden steps, etc.
It’s always important to have a reference guide; in this case, I had downloaded a free base mesh of a 6ft reference character a while back, so I used that to measure the rough estimate for the heights of buildings.
This may not be the best way to measure things, so you may want to set up your units in your 3d modelling program and measure the height of doors, buildings and walls, if you want to be precise, but I found this worked perfectly fine for what I was doing.
Progress Shots
I cannot stress how important it is to take some progress shots from before and after, even with just the high-res screenshot tool in UE4.
It really helped me to work out what I needed to do next and if I made any mistakes or liked elements from previous screenshots.
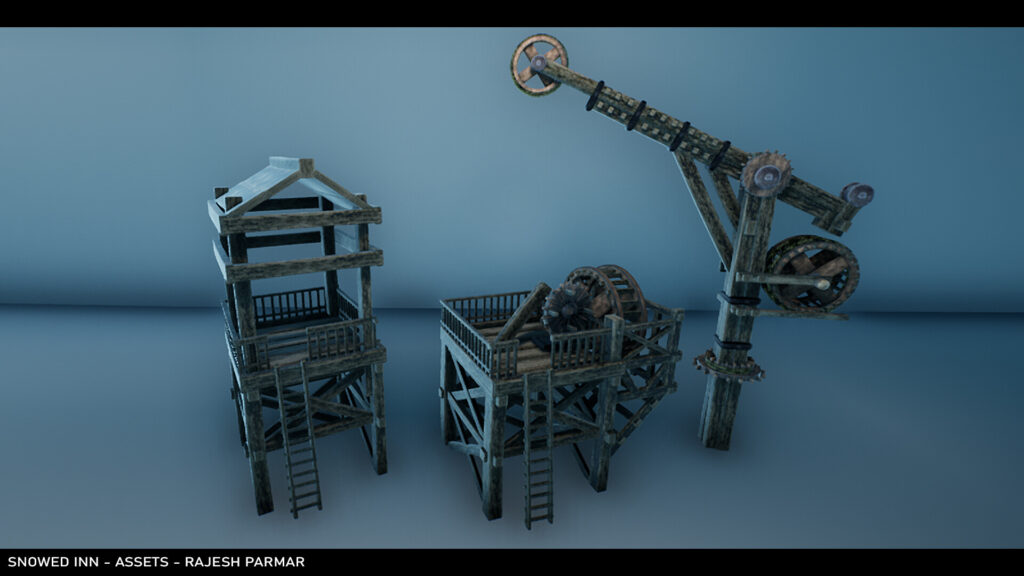
Modularity
I knew I wanted this level to be modular since I wanted to create a set of assets where I could easily fit them together to construct a completely different and new building from in-engine with the existing assets if I wanted to.
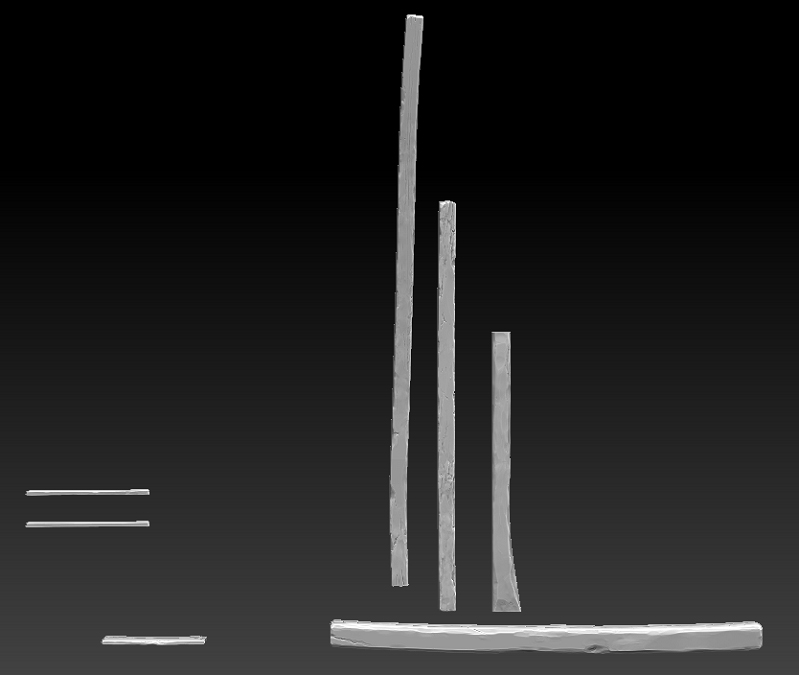
I started by just exploding out my low-poly building into multiple parts to see what I was working with and what I could reuse.
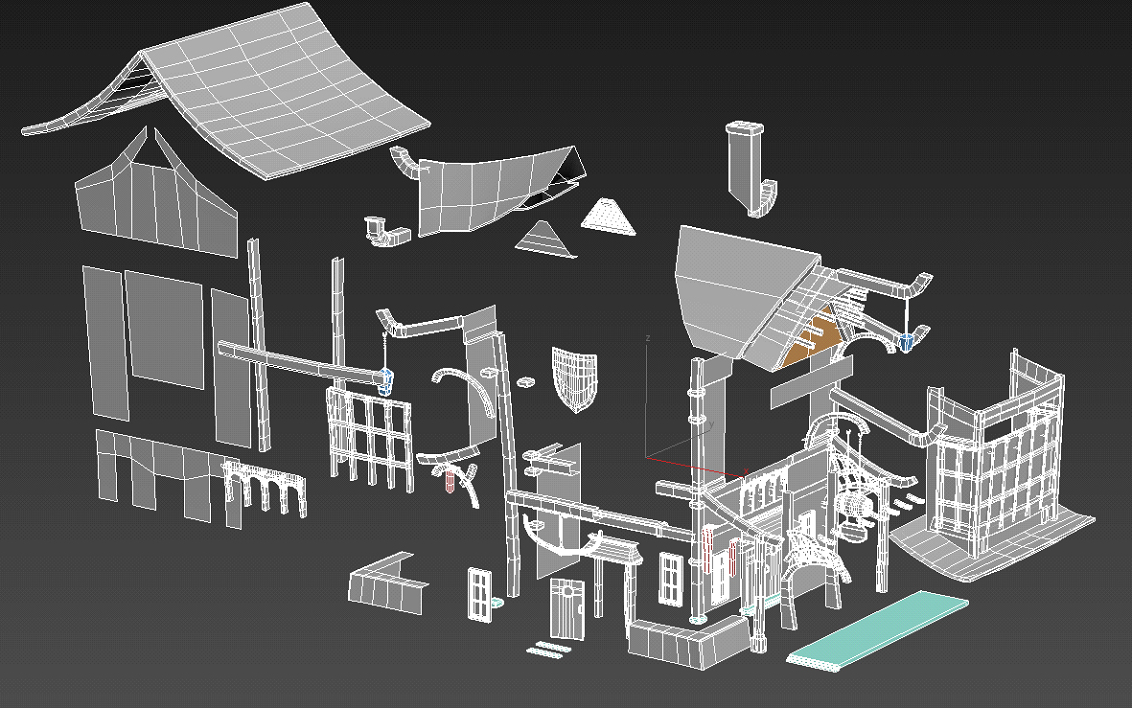
Next I started separating the reusable elements, for example I could turn 1 piece of wood into 4 separate assets, or 2 separate assets depending on which way it’s flipped around.
This bit took some time to make sure I selected the best shapes and meshes, and I had to make sure I had enough of them selected with enough variation in shapes to have my basic building blocks for the entire level.
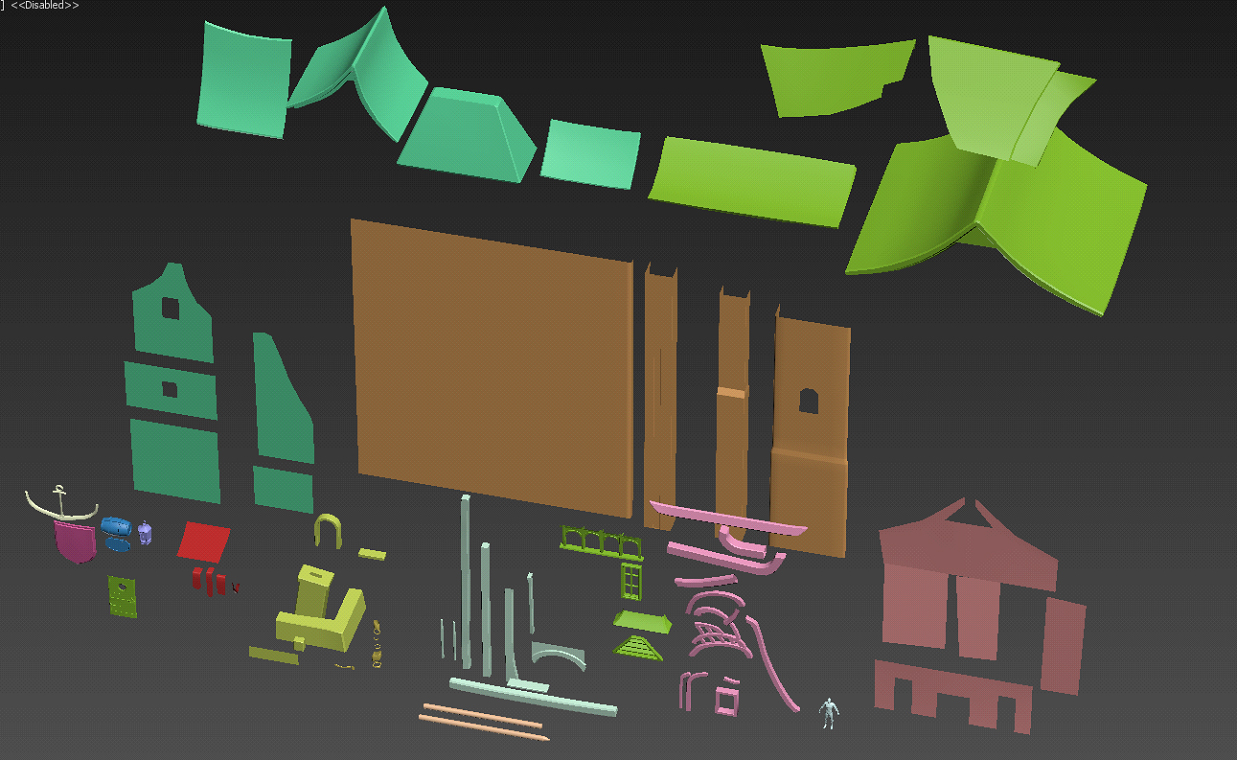
In the image above, you can see elements split up into different groups colour color-coded for better visual representation.
Some examples would be:
⦁ Long pieces of wooden pillars/beams
⦁ Wooden Stringers, hooks, and decorative arches
⦁ All the Stone parts for the chimney/archway window and base of the Inn
⦁ Castle walls
⦁ Plans for the Inn walls and the town building walls
⦁ Roofs for the Town buildings
⦁ Roof parts for the Inn
In hindsight, it might have been easier if I had made a way where I could easily snap these modular pieces together like Lego bricks.
However, with these basic pieces, I could make more than just buildings, as you’ll see further down.
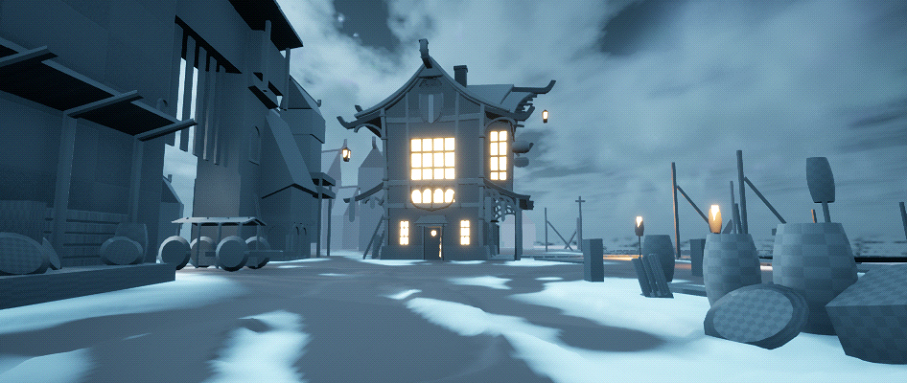
After getting everything in the engine, it was shaping up to be a nice white box level. Now comes the difficult parts where I had to watch a LOAD of tutorials.
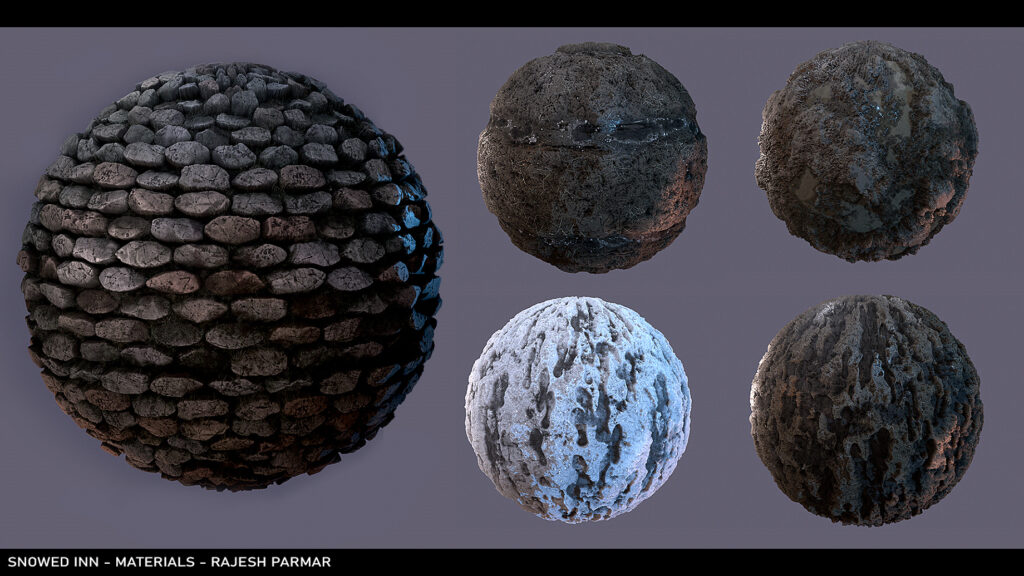
Substance Designer
From the start, in my head, I wanted to make the ground of the level really pop since it occupied most of the space in the scene.
I needed to make a few layers of the ground, including snow, mud, footsteps and snowy footsteps.
The best way I knew to achieve this was Substance Designer, especially after seeing amazing material balls on ArtStation from time to time. It was the program I always found very daunting. So this was the best chance to overcome my fear of learning it.
I just started off with some mud and snow to start things off.
The Substance by Adobe course was extremely useful and it really helped me understand the basics of everything in a nice, simple, easy-to-digest format. I really recommend going through this course if you’re starting out.
I usually 1.5x speed on most tutorials on YouTube just to save some time, too.
I also bought the entire Substance Designer Fundamentals, which helped further with understanding how to make basic patterns with Designer.
After a lot of trial and error and learning Substance Designer on separate graphs, I created the basic ground materials for my terrain.
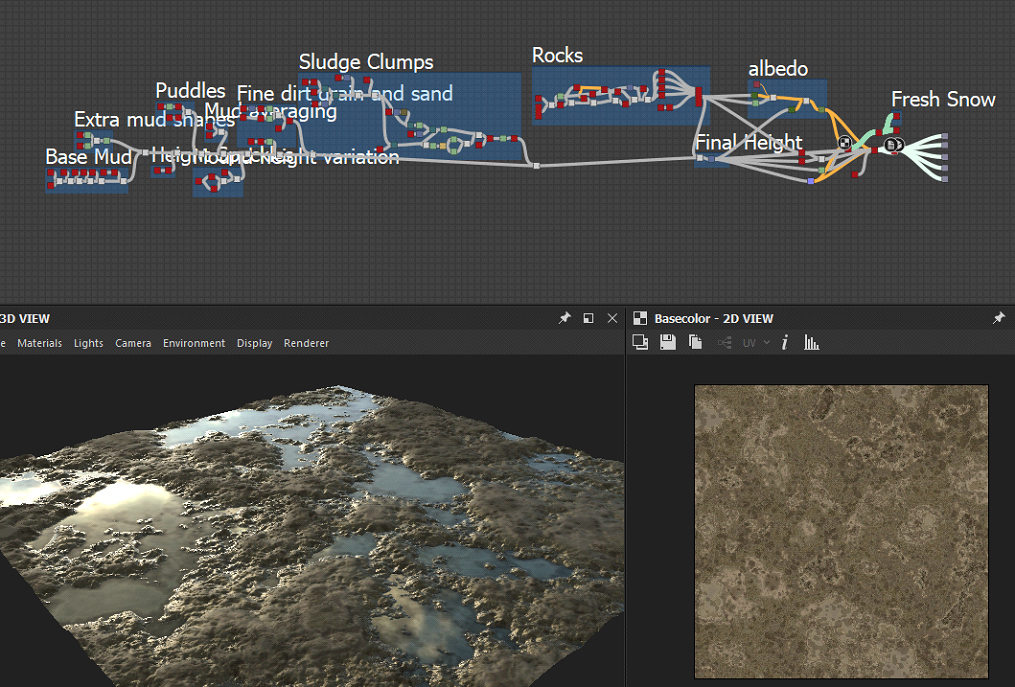
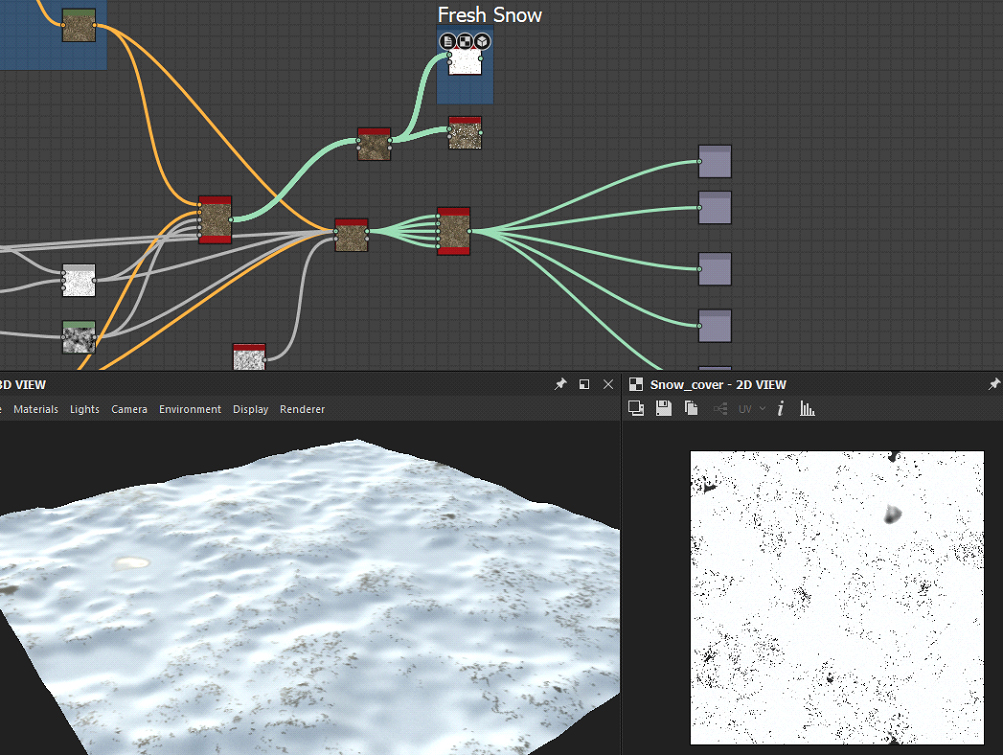
For the snow, I just used Designers Fresh snow cover overlay on top of my material which produced some quick easy results.
Unreal Engine’s Materials
This was where I was stuck.
I really wish there was a simple way to set up landscape materials where you could just plug in a ready-made material instance or 2 into a landscape actor and paint easily, but it wasn’t there. I had to set up a whole landscape material manually to get this to work.
This took a while, but after following Lukas’ tutorial on YouTube, it made life so much easier, and it taught me the power of materials in UE4
I also learned so much about material functions, using parameters to quickly make changes in instances.
We have made ground!
Next up was creating the materials for the modular assets I’d made.
I figured I needed a master material for every prop, so I can just plug in the maps easily and not have to set everything up manually.
Moss Material & Snow Material tutorial.
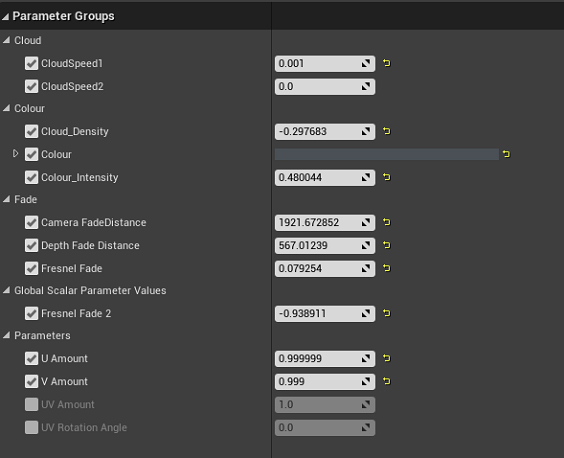
I also watched his video on creating Moss on top of materials, which I basically copied over and put into my master material, but switched the moss material out for snow and added some extra parameters.
It basically lets me control a bunch of different things like the amount of snow coverage, opacity, fuzziness, roughness, how much it is influenced by the normal map, etc.
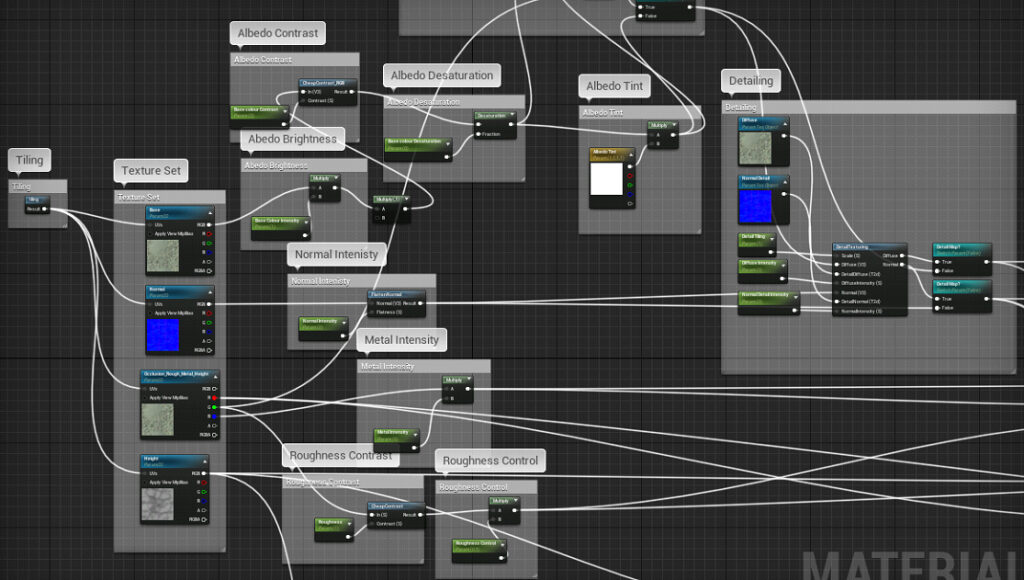
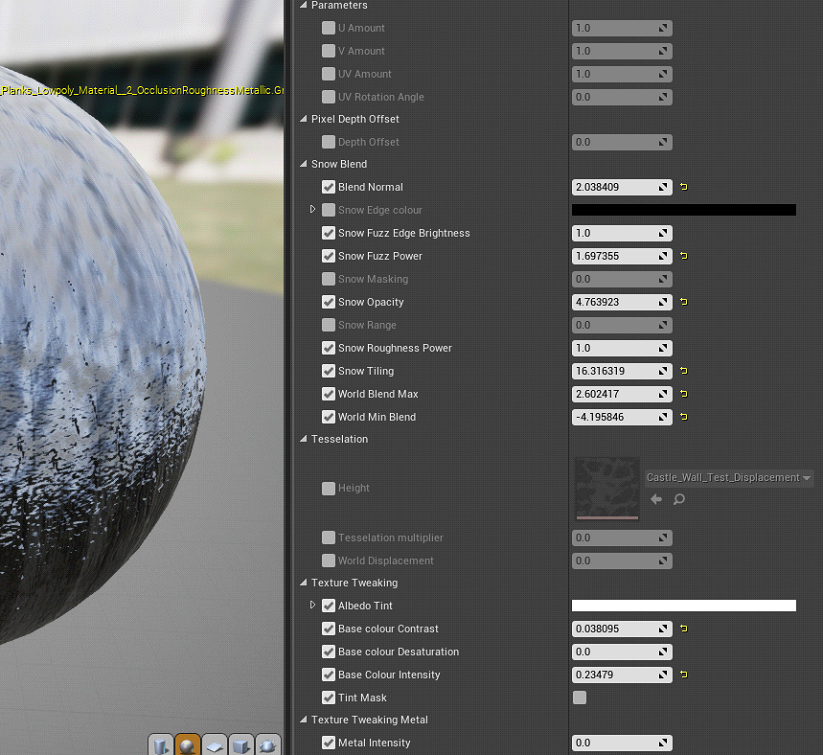
This was the basic part of my master material that controlled most of the texture maps.
I’ve put a link to the whole master material here if you wish to check it out:
<iframe src=”https://blueprintue.com/render/7qnt-1tf” scrolling=”no” allowfullscreen></iframe> Embed code
https://blueprintue.com/blueprint/7qnt-1tf/ (Note: You can copy and paste this into your unreal scene but it won’t work since it has lots of material functions linked in here, so you’ll have to delete/customize a lot of the graph)
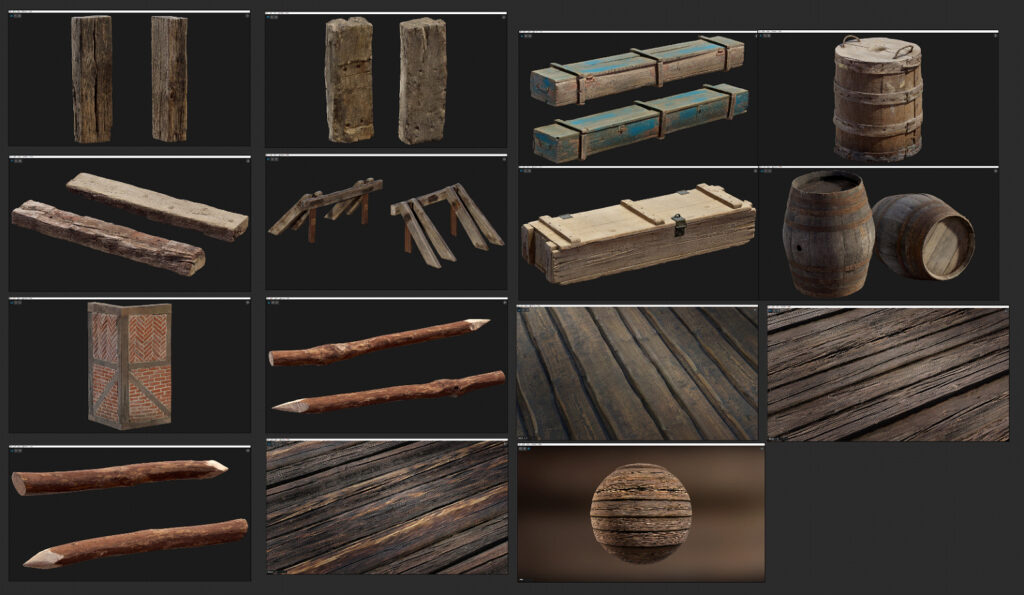
Creating the Props
I already knew how to use ZBrush to sculpt some basic details, but I have shared some tutorials below that I have used in the past.
Polygon Academy Sculpting wood
Zbrush Basic Starting tutorial
Rock sculpting Zbrush Nvidia Jonas Ronnegard
For the sculpting details, I wasn’t too worried about too much detailing within the objects since I knew that’s what Substance Painter would be for.
This was just more of chipping the sides and edges of the meshes with some damage to give it that extra bit of life with wear and tear.
“Duplicate Low poly in 3ds Max> Turbo smooth modifier > Import to Z-brush > Z-Re-mesher > Subdivide > Sculpt detail on edges > Clay build up > Trim Smooth border > Trim Dynamic > Trim Adaptive > Decimation master so it doesn’t break my PC > Export High Poly > Bake in Substance Painter > Ready for Texturing”.

I also used brushes by Orb and the JRO Tools really helped to add some extra detail and variation.
Looking back, I could have put these all on a Trim sheet or tillable material and added the sculpting details on a second texture through the detail normal and base textures in my master material instead of putting each group into a unique 2k texture.
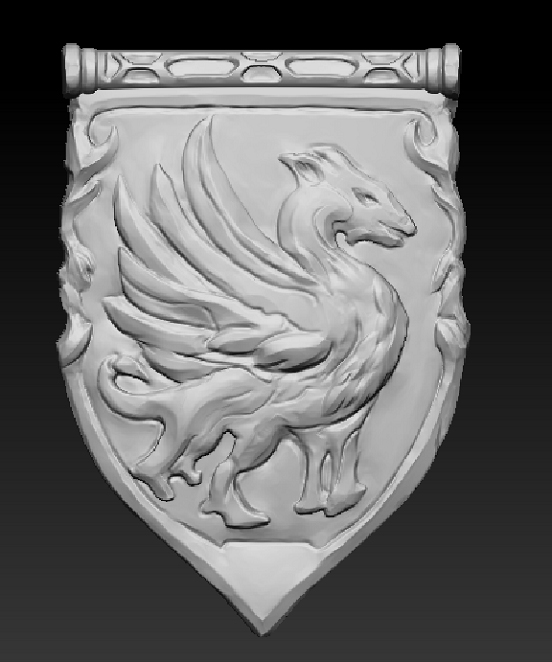
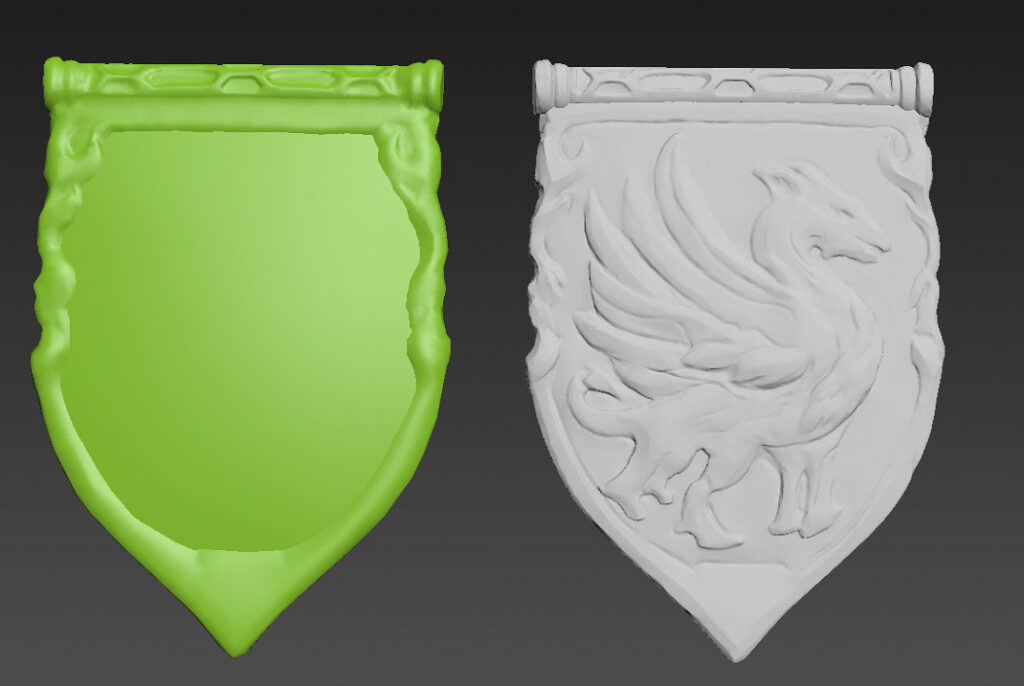
For the shield sculpt I added later on in the project, I used this tutorial and learnt about extracting details from masking.
I just made sure to trace over Jeremy’s shield in his concept and got this design. I didn’t bother modelling the intricate details in 3ds Max, I found it was much easier to just start the shield from scratch in ZBrush and retopologize it for better results.
Learning Substance Painter
Now that I had most of my props ready for texturing, it was just time to learn how to use Substance Painter properly. I had basic knowledge at the time of how to use it, mainly the amazing baking tool in Substance Painter; it’s super-fast and easy to use.
I bought the flipped normal beginner’s tutorial to get me up to scratch on what features I was missing out on.
After that, I went through YouTube and found some more fantastic ones:
Hannah Watts texturing process is a brilliant prop artist, seeing how she does things.
Brent Le Blanc Substance Painter tutorials are really useful for the wood textures.
Artruism Digital Substance Painter tutorials.
I learned a lot about the power of masks and generators, filters and little tips and tricks from these videos.
But the tutorial that really made a huge difference to my texturing was the tutorial by Jay Cummings.
Jay Cummings – Pushing the Substance Painter further.
It was the most useful in-depth one to get some amazing results. He explained how he set up Substance Painter’s viewer settings and how he sets up his materials.
Just when you think a material is finished, keep pushing for more detail and even after that, keep pushing further and further with subtle details to really make your textures pop.
I highly recommend watching this tutorial alone on Substance Painter to get a better understanding of making better materials.
Useful Videos
I found this seam hider really useful in some of my props, too – How to hide seams.
Normal baking fixes in substance.
The only issue I sometimes had was that when exporting into UE4, the textures sometimes looked slightly off in terms of brightness and roughness values.
This was easily fixed by making use of my master material and instancing, though.
I also took some screenshots from Quixel Bridge and put them on my Pureref board just to have a look at some of the amazing mega scans assets to give me some inspiration.
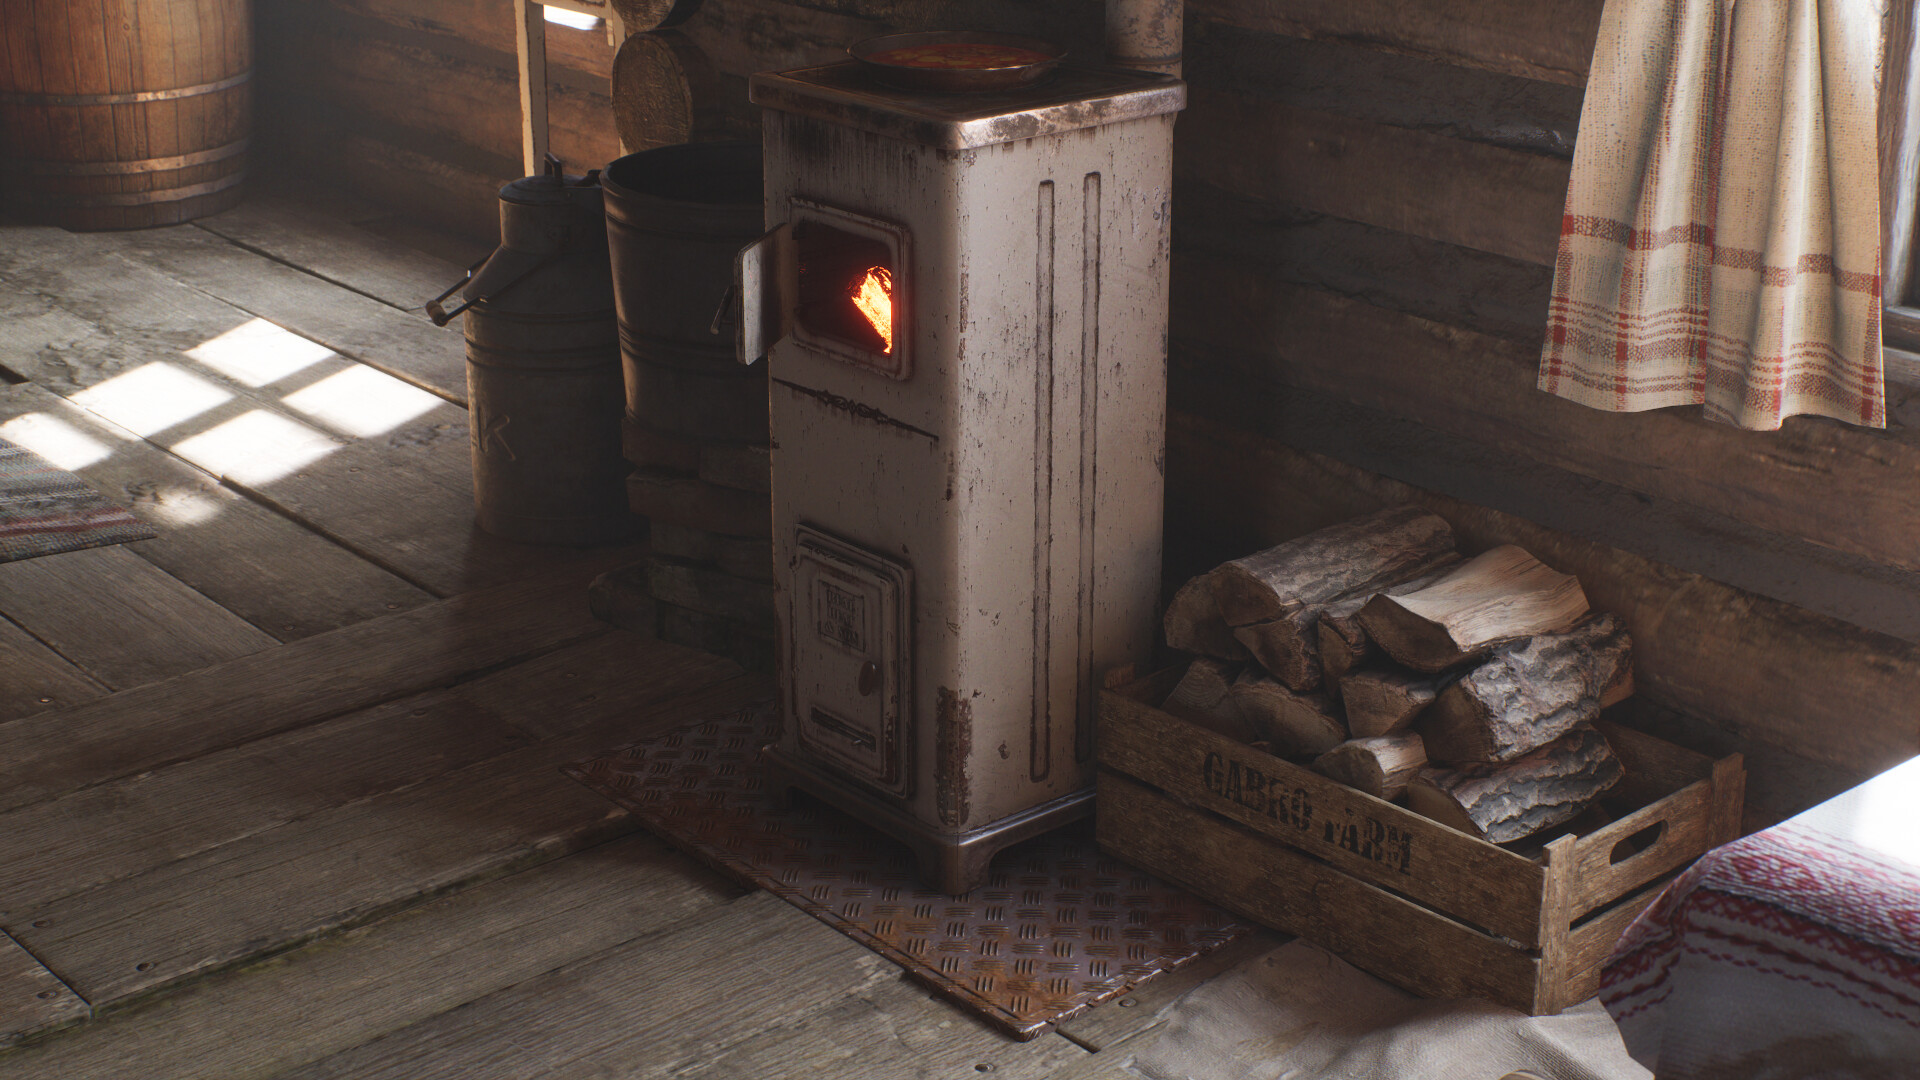
Storytelling
When creating any prop, environment, or asset, as well as lots of reference photos, it really helps to ask lots of questions about it so it can help you give a lot more character.
For example:
- How was it used? What materials is it made out of? How would it function in real life?
- Which parts would be worn down the most? Why was it worn down in that spot?
- Was it being transported and had mud/dirt on the sides from moving around?
The same can be applied to environments:
- Who lives there? What time period is this? What does it smell like? How warm is it? What’s the weather like? Is it wet? Etc
Splines
From watching Wiktor’s Orgrimmar Livestream, I saw that he used splines on his level to create footpaths and tracks, which really added some depth to his scene.
The tracks and footprints from travellers share a story in themselves and can add that extra bit of detail.
I found this brilliant tutorial by Javier Perez on creating a realistic dirt road, which also helped me become more comfortable with Designer.
He even went into depth on how to create the spline in UE4 in Part 2.
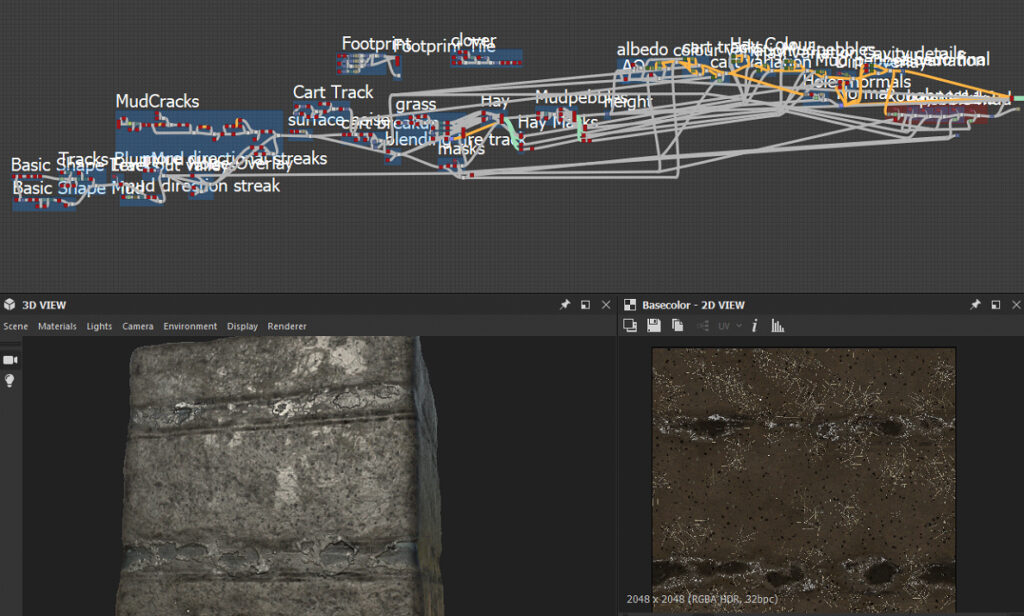
Substance can look insanely daunting, but breaking down everything into small sections really helps, and it’s so important to label your nodes so you don’t forget, or someone else can pick up and improve on it, etc.
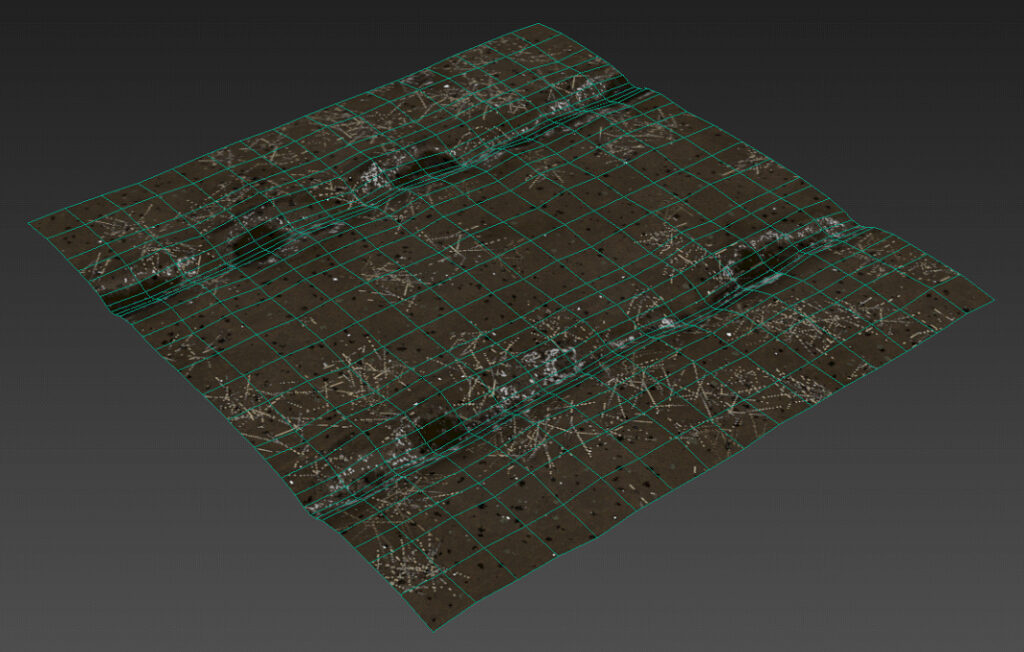
3ds Max Spline model, I made sure to subdivide it a lot so it doesn’t look odd when bending corners.
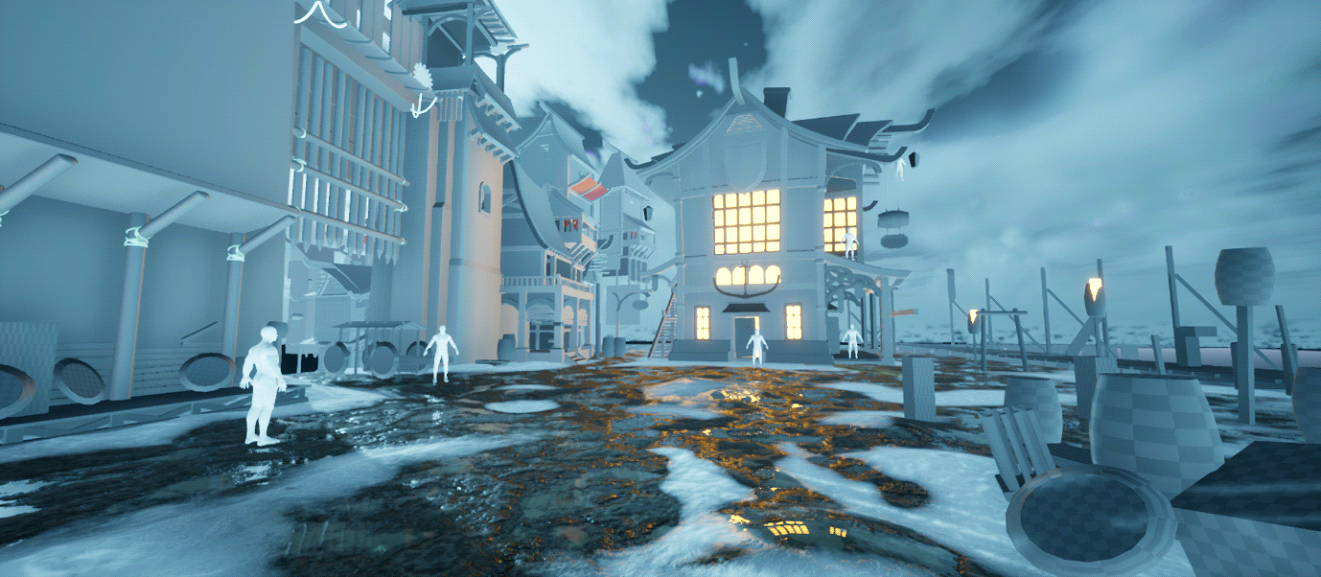
Making use of the Pixel depth Offset really helped merge the 2 ground elements together. It works especially well with things like snow and sand:
Splines added in the level.
Examples of the ground materials I used to make up the scene.
Quick Paint over
From time to time, I kept bringing the 3d screenshots in Photoshop and just painted over extra elements I wanted to add.
For example:
- Wooden planks on the mud
- Ships
- Chimney smoke
- Extra ropes and chains, throughout the level
- Tree in the background
- Birds flying past
- Foliage on the ground
- Dirt decals on the buildings
- Thicker snow clumps throughout the level
- Bunting
- Snowfall and wind gust
Halfway through the project, Quixel dropped another amazing breakdown video of a medieval village, which was perfect timing. Medieval Game environment set dressing.
Wiktor did a great job of explaining some storytelling elements, which and helped me improve my set dressing even further.

Snow Clumps
I made some pretty quick, simple assets to make snow build, and made use of material instancing and Pixel depth offset as well as tessellation to bring some extra character to my scene.
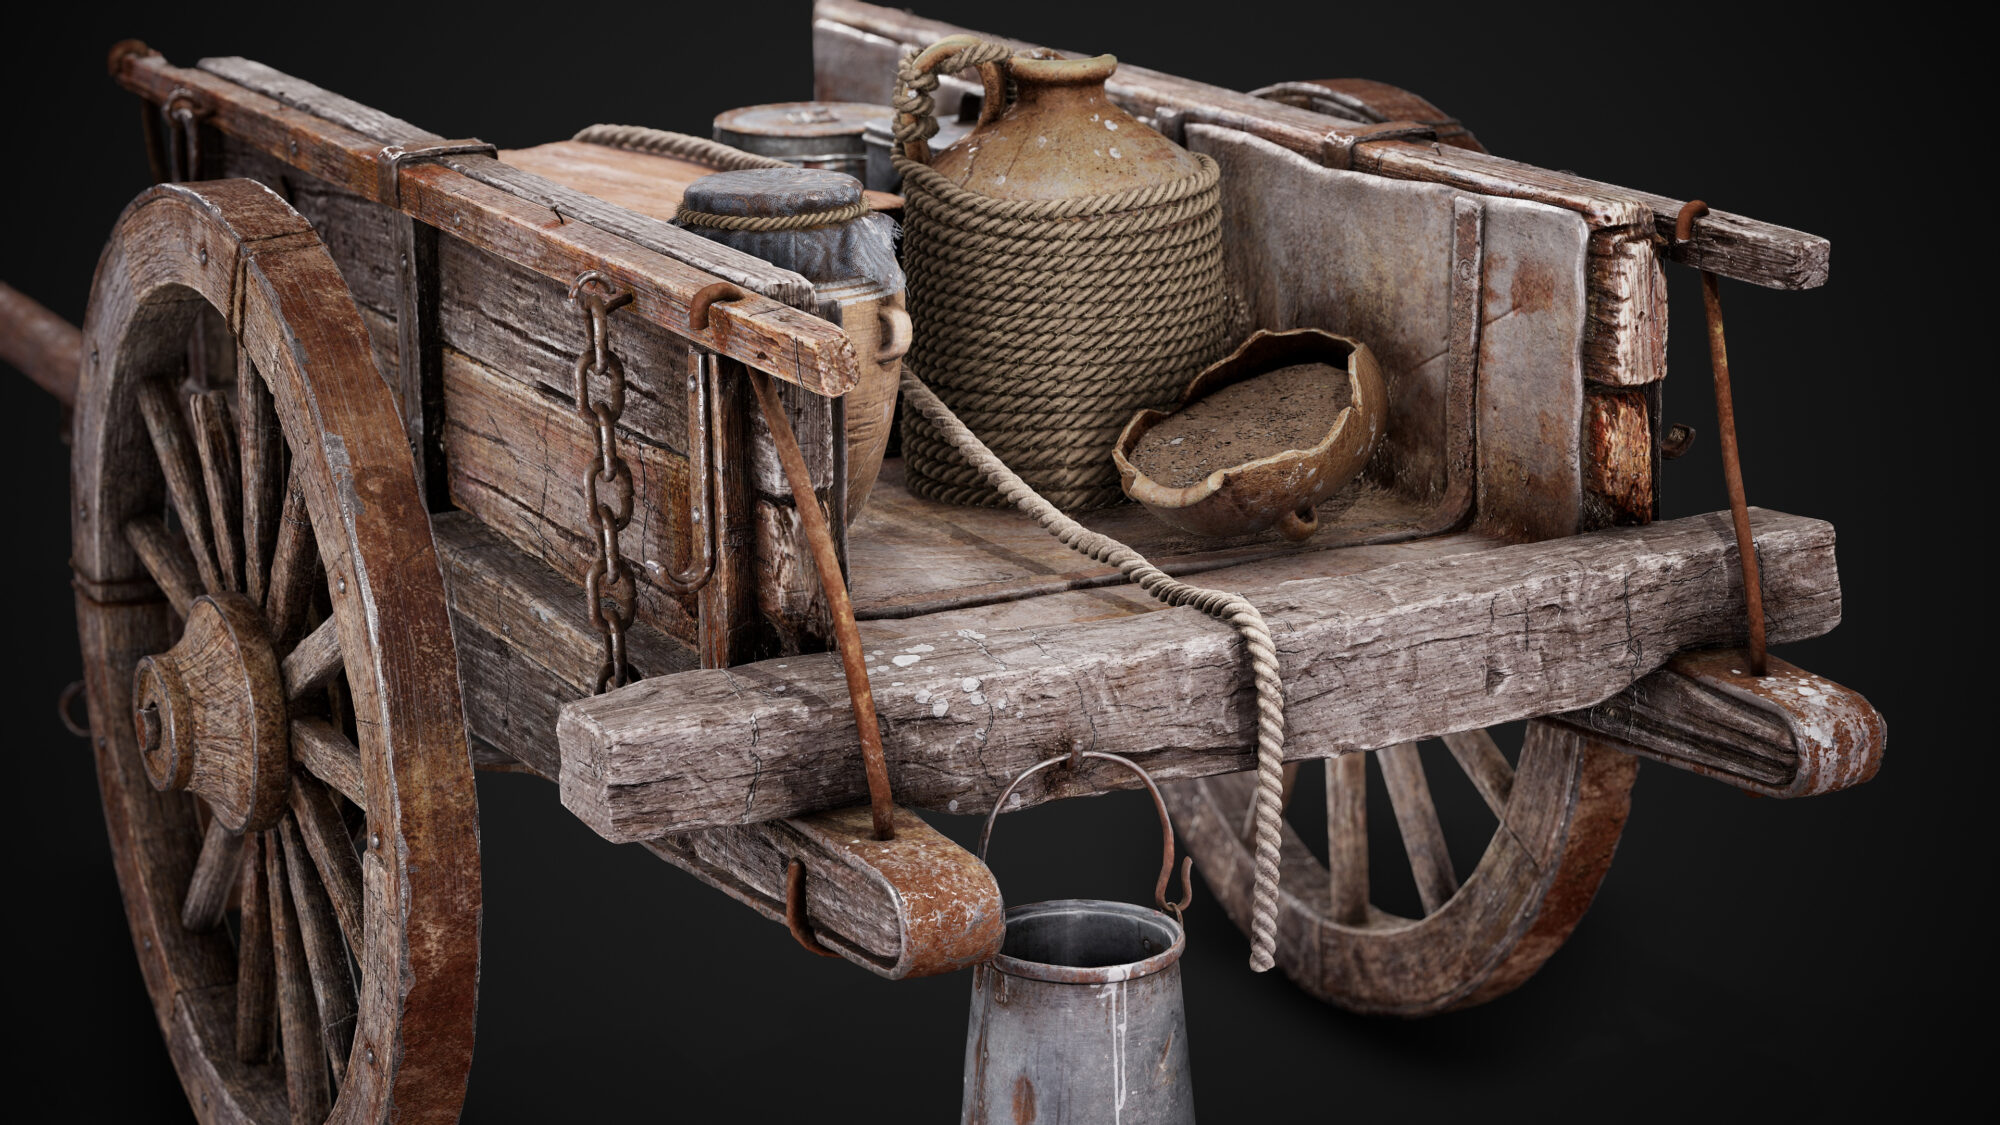
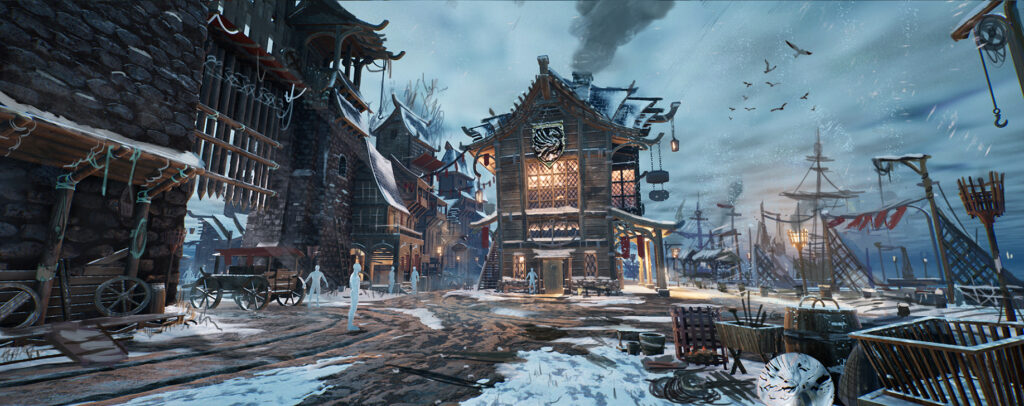
Merged Assets
With my modular assets, I could create a load of different things in the level, like a Cart, Crane, watchtower, docks, and different types and styles of buildings.
Dirt Decals
Decals make a subtle but big difference in terms of adding that extra bit of wear and tear
I downloaded some dirt decals from this tutorial and created a quick decal master material to tweak the colours & roughness parameters for some nice results.
Here are some of the decals I used:
Particles
For the Fire Particles, I just downloaded the M5 VFX Vol2. Fire and Flames from the marketplace for free.
It gave me quite a few smoke and flames particles to choose from; however, the smoke particles were too large and didn’t fit what I wanted for my level, so I just stuck to a candle flame, sparks, heatwaves and a small campfire to light my Braziers and lanterns throughout the level.
Sunshafts & Fog Planes
Back at University, I used this tutorial by Dave Wilson to create some god rays out of simple cones in 3ds Max and it really did an amazing job to give the environment a lot of depth and atmosphere.
Unreal 4 Creating simple God Rays (light shafts).
It works very similarly to the Fog blueprint that Unreal has in the Blueprints map and helped me to fake some atmosphere, lighting and depth, which I learned from Peter’s Trans tutorial of his Behemoth Ruins.
Peter Tran – UE4 environment cinematic guide
However, I tweaked this version with my new knowledge of master materials, I could easily tweak and add extra components/colours, speed of the fog & smoke and depth fade to blend it into the scene with other objects.
Niagara in UE4
Next up was making some snow blowing in from the sea. As always, I went to YouTube first for the tutorials:
Dean Ashford – Snow in Niagara.
I felt like this tutorial taught me some of the basics; however, the snow was just circles, raining from the sky, which didn’t look good.
So I searched through some more and came across some more advanced Niagara Snowfall
Snowfall tutorial –CG How – Learning Niagara.
Watching this tutorial taught me a lot about Niagara. It was daunting at first, but it really makes sense once it’s broken down bit by bit.
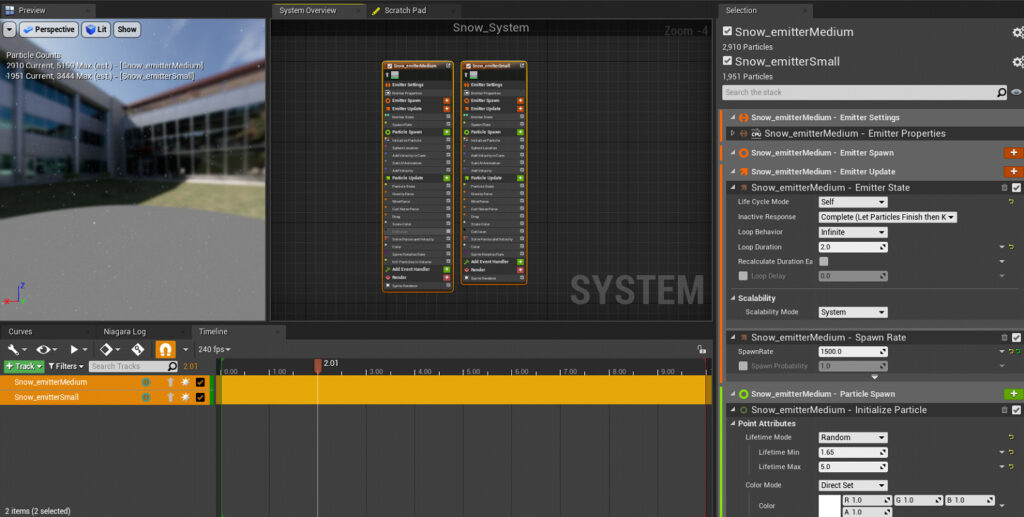
Here was the Snowfall System, pretty basic with 2 emitters at different random speeds/sizes and spawn rates as I didn’t really need any heavy layered snowfall.
Smoke
I needed to create some smoke that would be blowing in a certain direction away from the sea to give my scene more life, so I watched this tutorial to make some basic smoke with a flipbook texture.
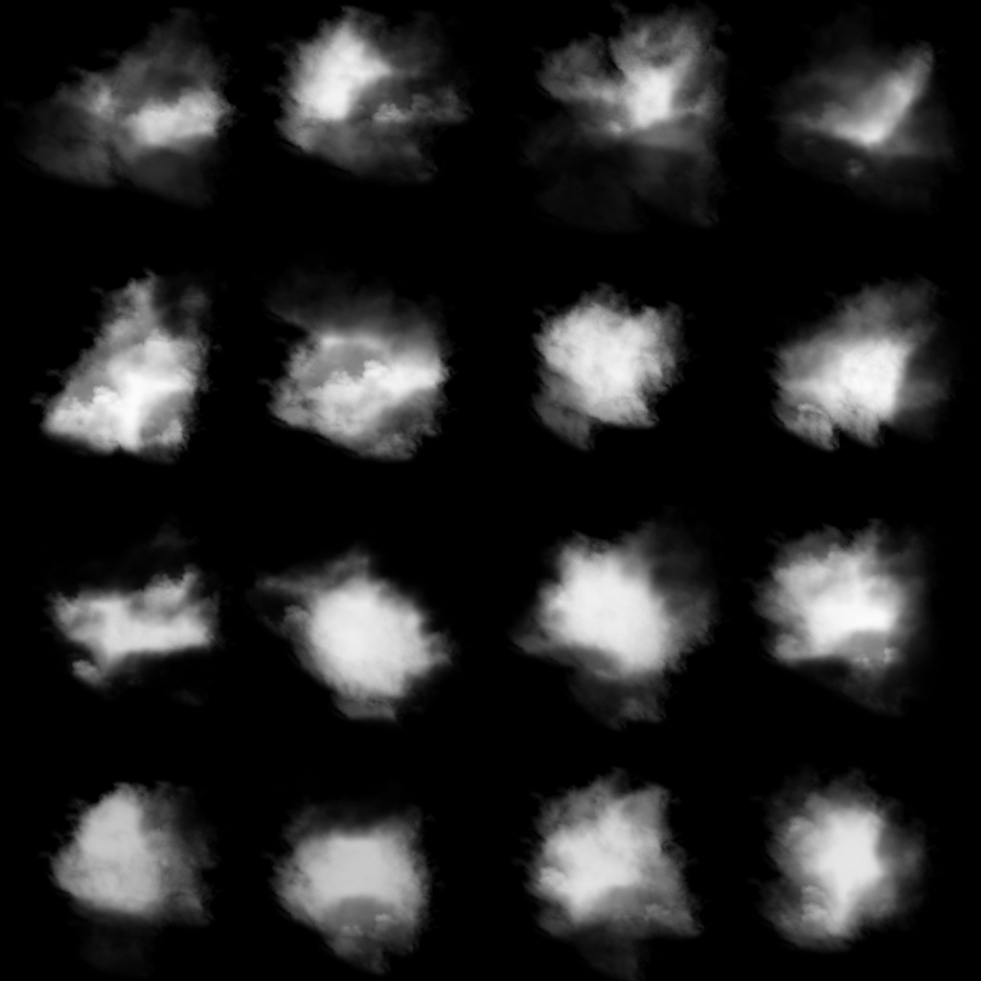
This was the 4×4 Fog card I made in a few minutes in Photoshop by using randomly dotting around some cloud brushes, this doubled up as my smoke sprite texture also,
It worked well for snowfall, as in my experience whenever I have caught snow in my hand, it never looks like a perfect snowflake, it looks just like the broken fuzzy frost you’d find in the freezer.
Wind
PrismaticaDev made a very fun video explaining how to make some great global wind, which I copied over into my scene.
PrismaticaDev – Simple Global Wind in UE4 (One weird trick! Everyone hates him!)
He uses a global parameter collection so he can control the wind for every asset simultaneously; however, I found that I wanted more control over specific small objects and use Vertex painting to control it, so I tweaked the material slightly more.
I also used this shader on the characters, for example, Boromir’s Hair, Cloak, the Dog wagging its tail slightly, and the cloth billowing inside the Cart.
Feedback
One of the best things about the University I found was the network I built up.
A lot of the people on the course who graduated are now seniors in the games industry. And we were all still friends, so I could ask them for advice or help if I really needed to, which is how I asked for the Boromir character that Hazel Brown provided.
I also had 3 similar comments about the sky and clouds from my Dad, the discord and friends about the Clouds and sky and how I could improve it because at the time, it was just static clouds that looked a bit dull.
I also had some suggestions about using the rule of thirds to capture different parts of the environment and frame them better.
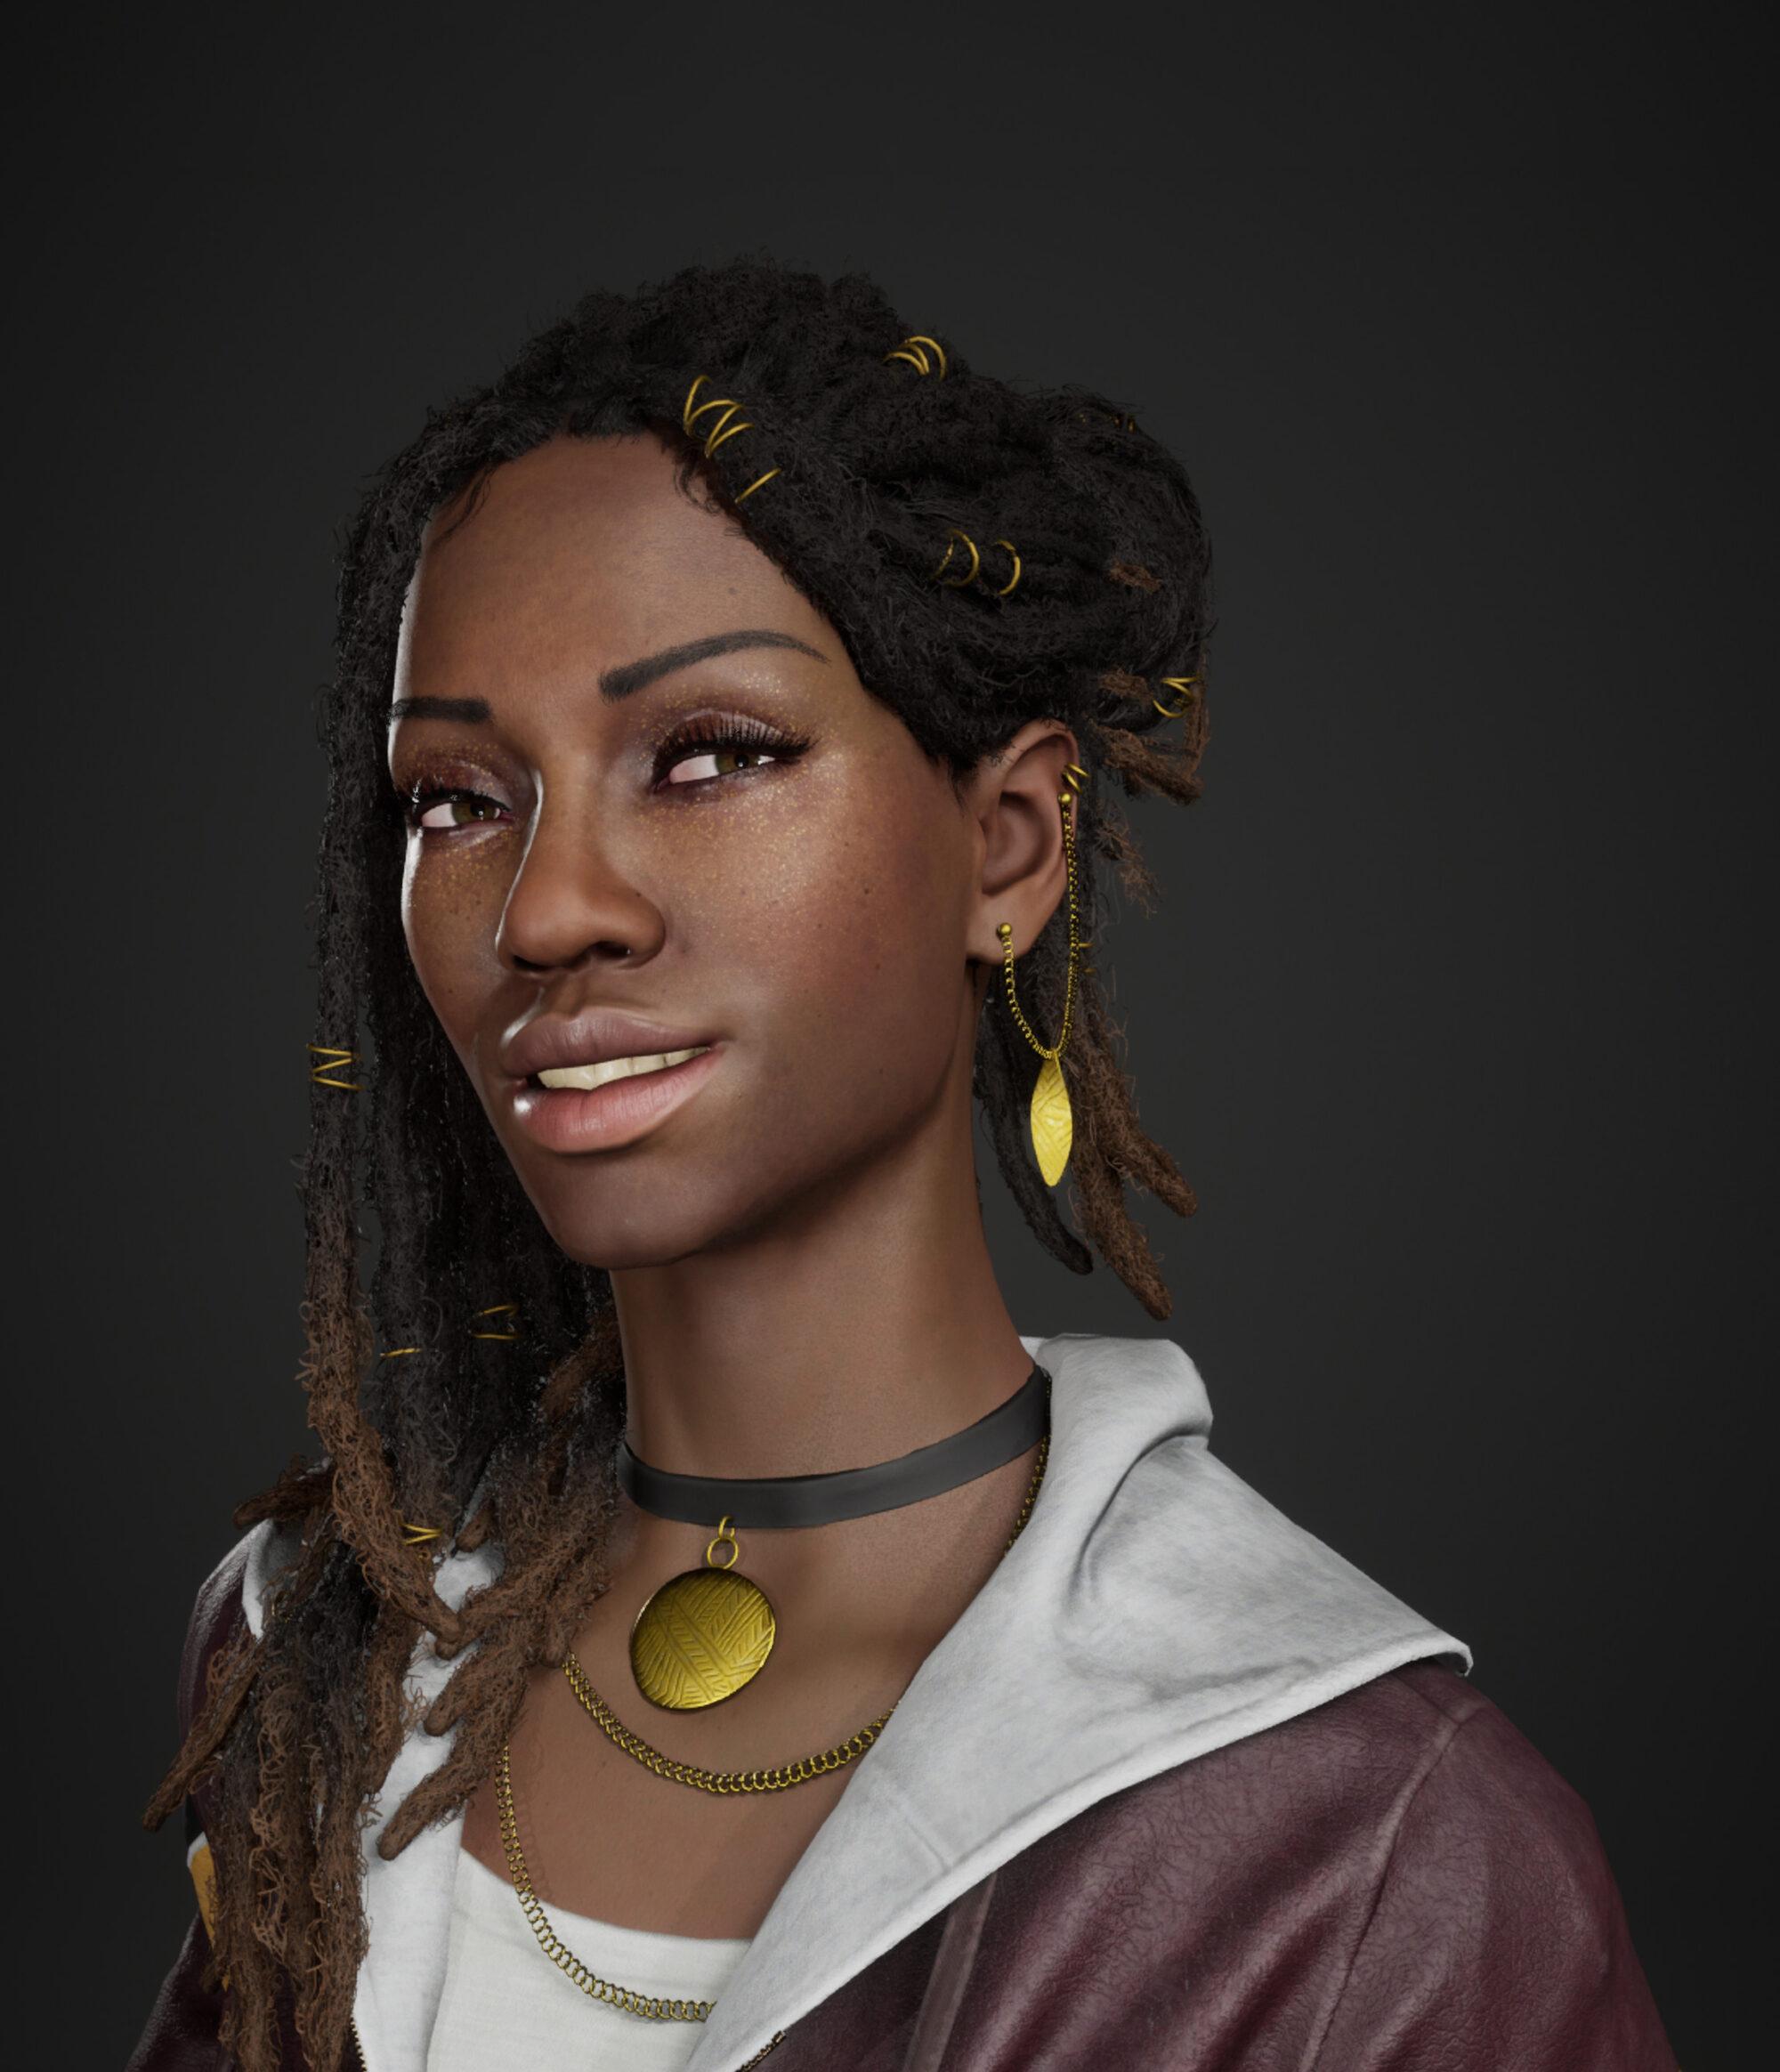
Characters
Adding in characters really brings an extra layer of life to the scene. I was initially just going to get a dog or a fox from a 3d website for free.
I saw on Twitter that Hazel had just finished her Boromir Character and it looked stunning, and figured it would fit perfectly in this scene as it’s a Sean Bean character, and this concept was inspired by Winterfell too.
The birds are actually from Debris Maker, a cool Plugin for 3DS Max, which you can download for free here.
I was going to initially animate them and make them fly, but at the time, I just found it easier to place them in suspended animation for better control of the composition of the scene. The dog was from.
I had to unwrap and re-texture this quickly in Substance Painter as it was heavily stylised with the original textures.
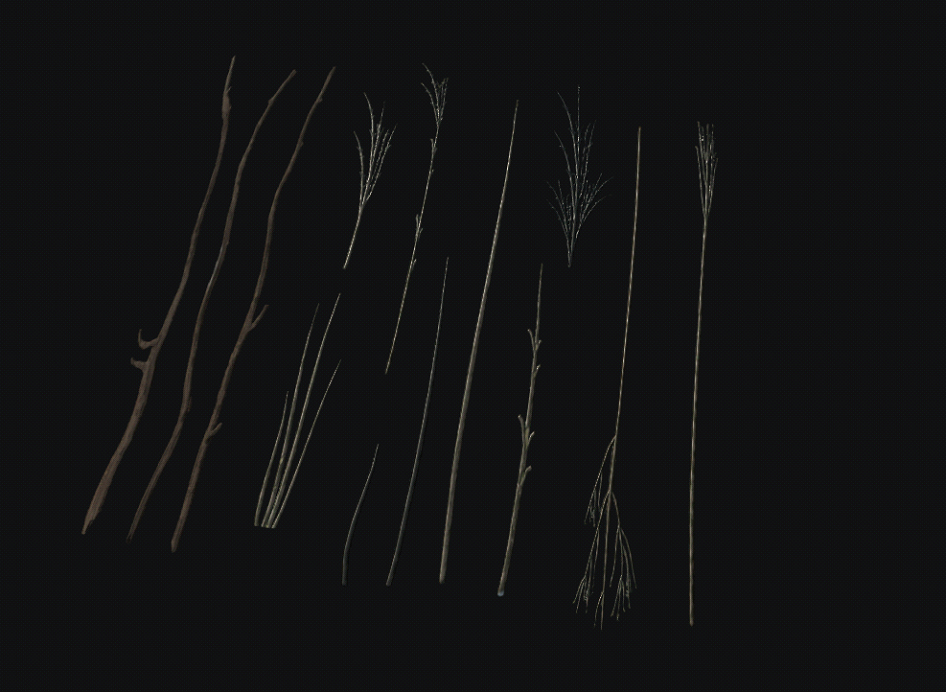
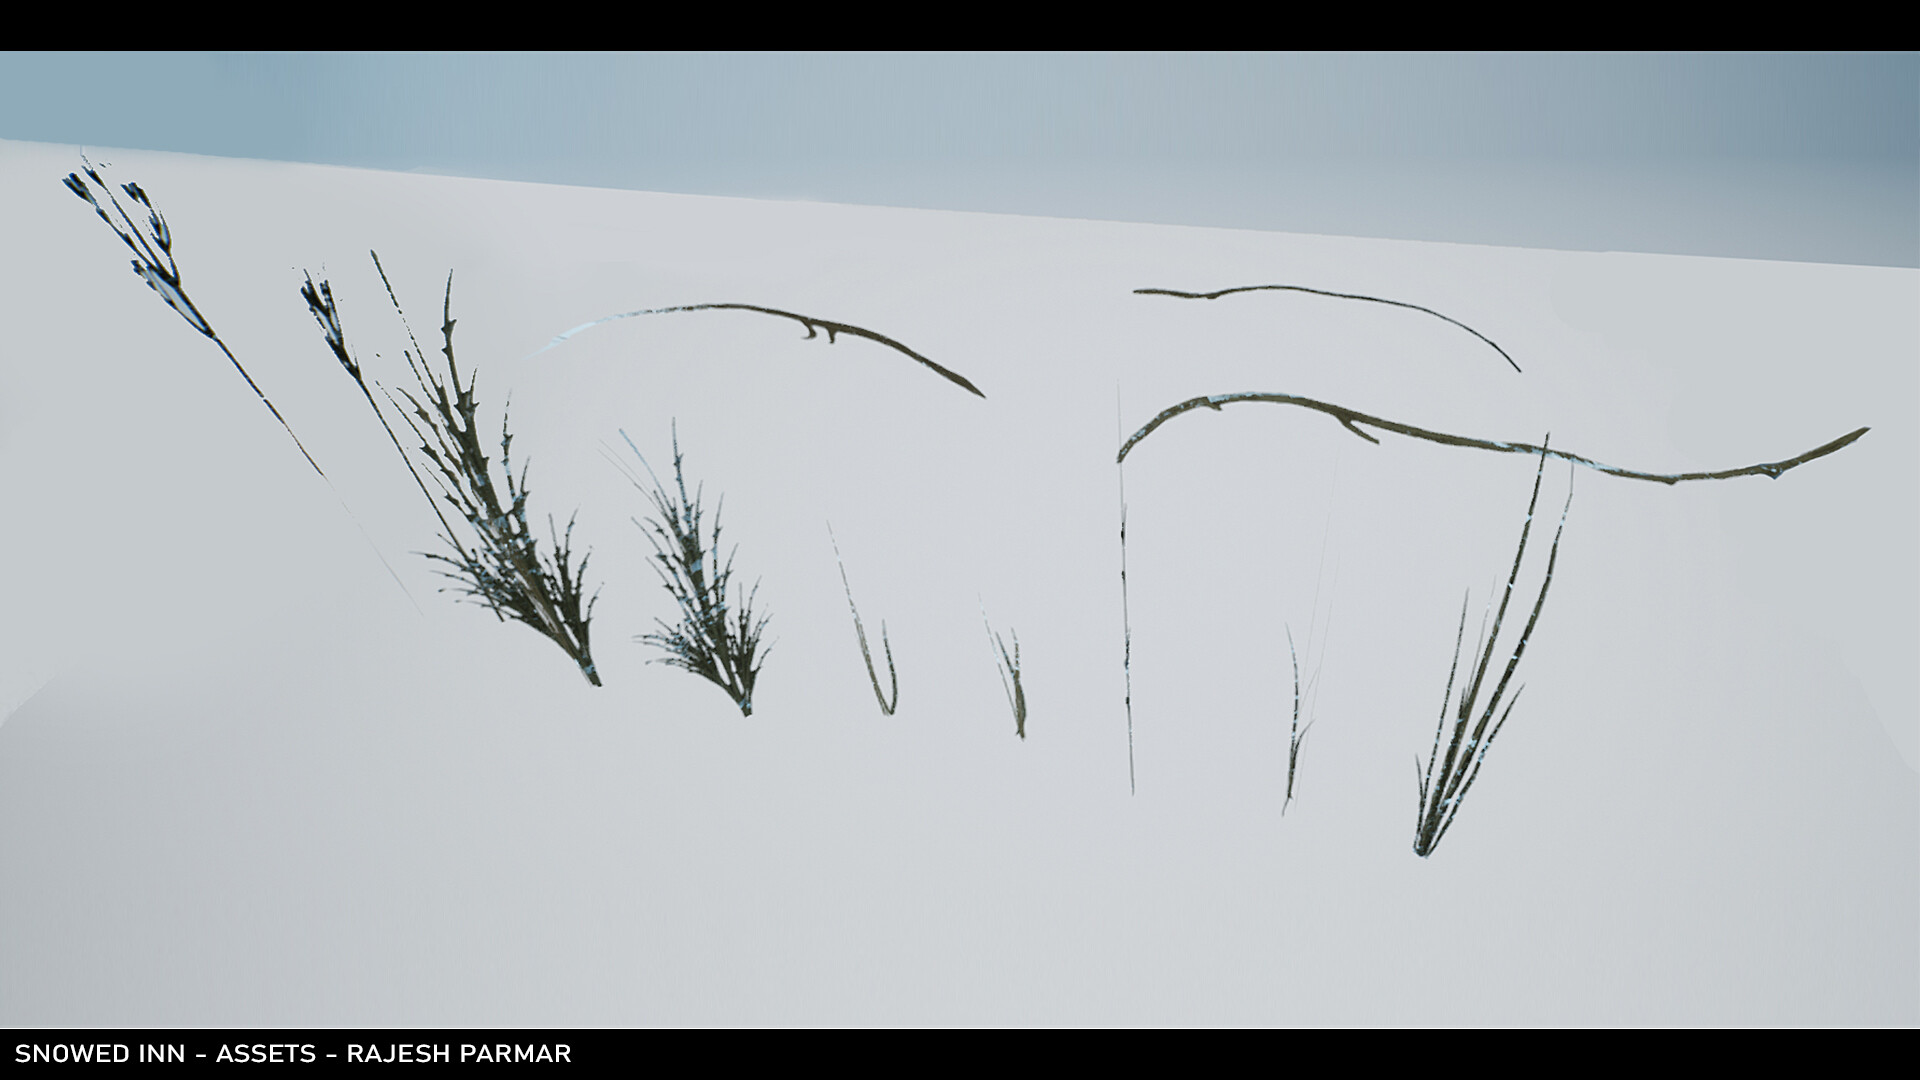
Foliage
The foliage was one of the last few things I added in. I knew I didn’t want to spend too long on this, as it’s just a few grass and dead weeds planted around the road and stable.
This was a great guide on how to texture some quick leaves in Painter.
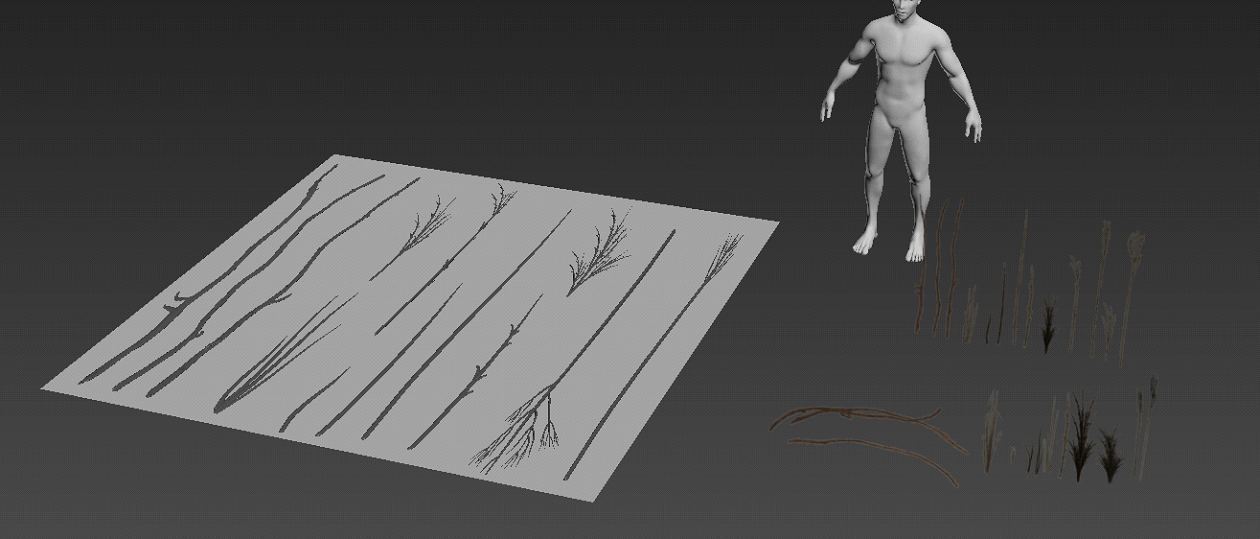
I extruded some cylinders in 3ds max and used a few modifiers like Taper and FDD4x4x4 to shape and create these quick grass shapes and twigs.
I baked it down onto a Plane and textured it in substance Painter
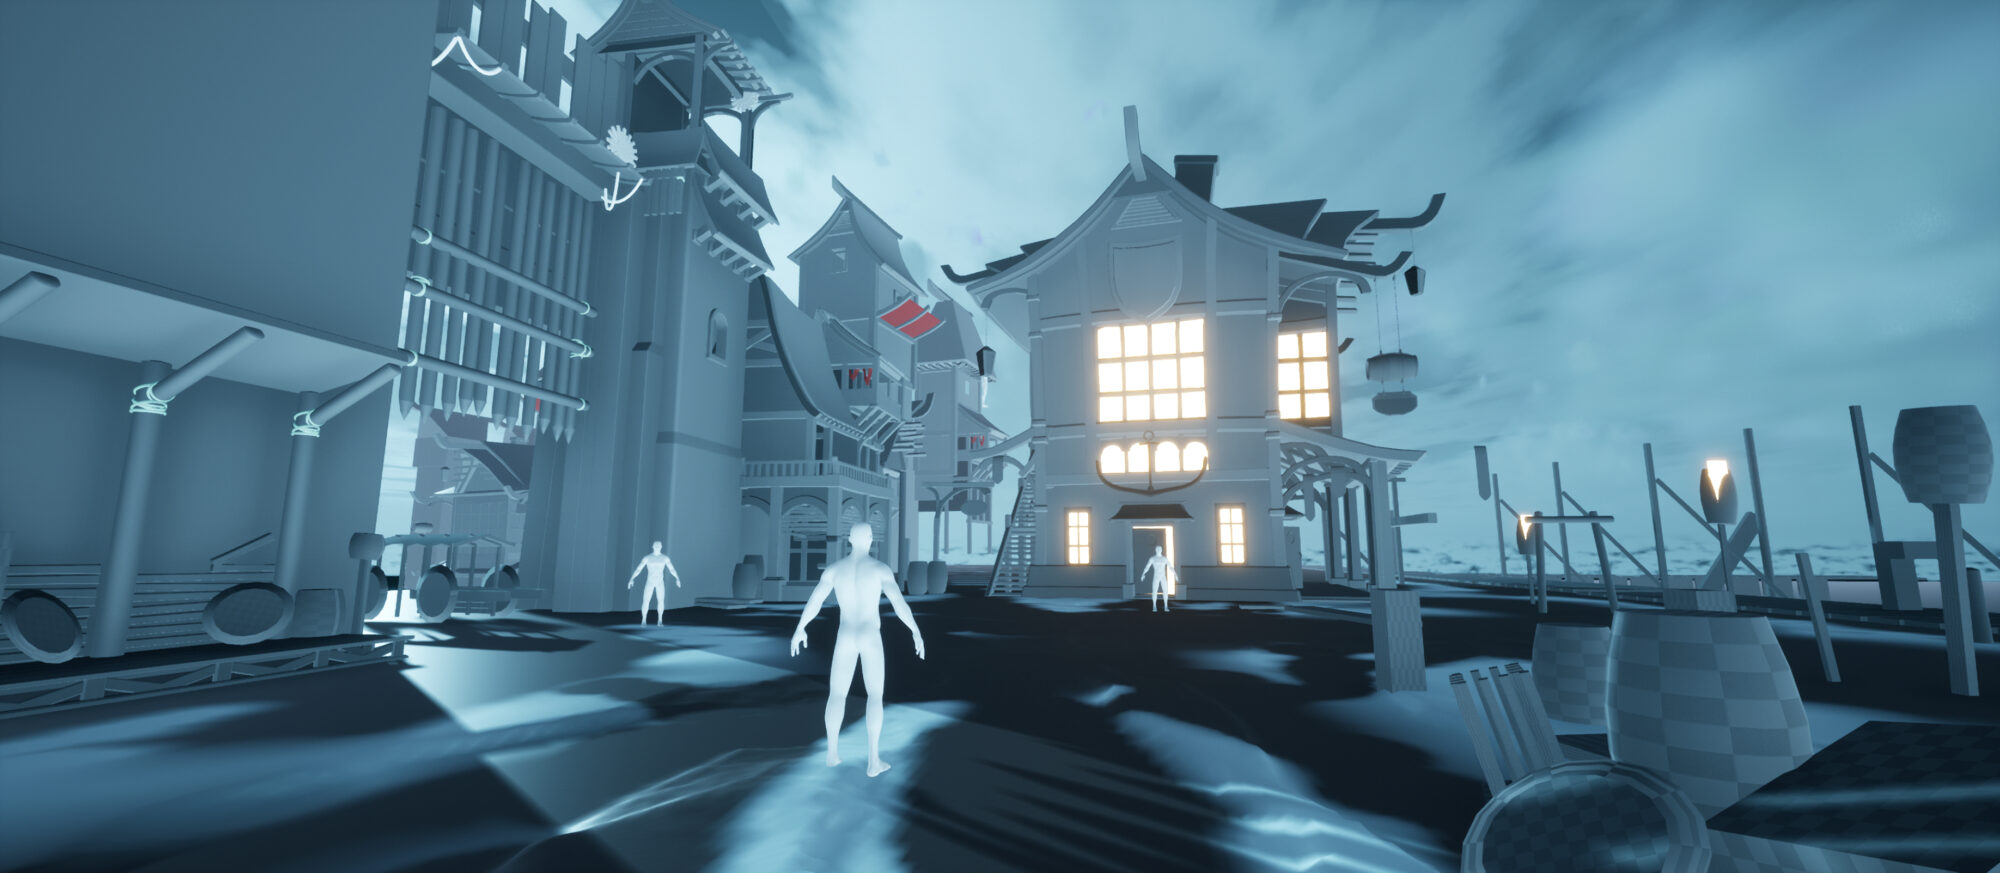
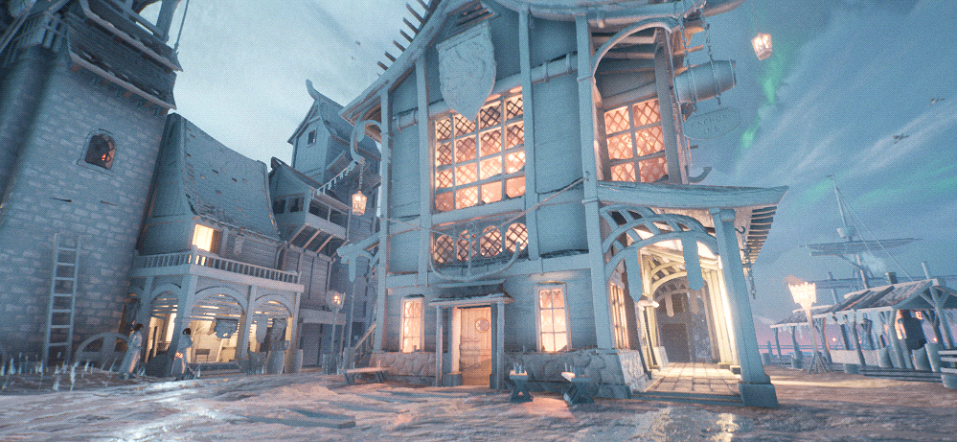
Lighting & Post processing
Lighting this scene was a very iterative process, as you may have noticed in the work-in-progress GIF, the lighting changes A LOT while I experimented with the sky settings, post-process and camera settings.
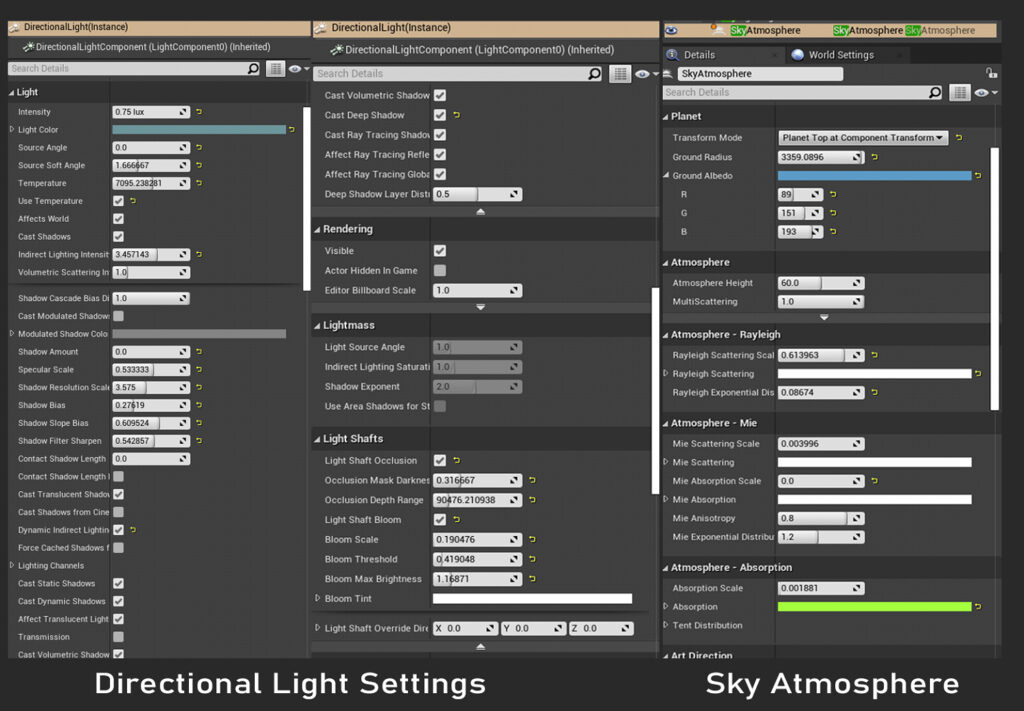
Sky lighting
Unreal 4.26 does an amazing job with its new dynamic sky and volumetric lighting features, which were really easy to tweak and change.
The Main light of the whole scene was the Sky Atmosphere and the Skylight.
With these, I really just was playing around with the settings and scalar parameters that were already built into the UE4 level; it was more of a trial-and-error iterative process to see what looked good and fit the mood that I was going for.
Static Lighting
The main way I lit the scene was just using a bunch of basic static point lights, Rectangle Lights for the windows, and 2-3 Spotlights for light coming outside of the Inn.
I may have gone WAY too overboard with the lights in the scene, looking back now.
I’m sorry, lighting artists! Although it worked to give the entire scene that contrast and also gave the windows of the Tavern a busy, lively pub mood.
Wherever there was a small torch fire or light source, I put a dim small spotlight to simulate how the light would really emanate from that source.
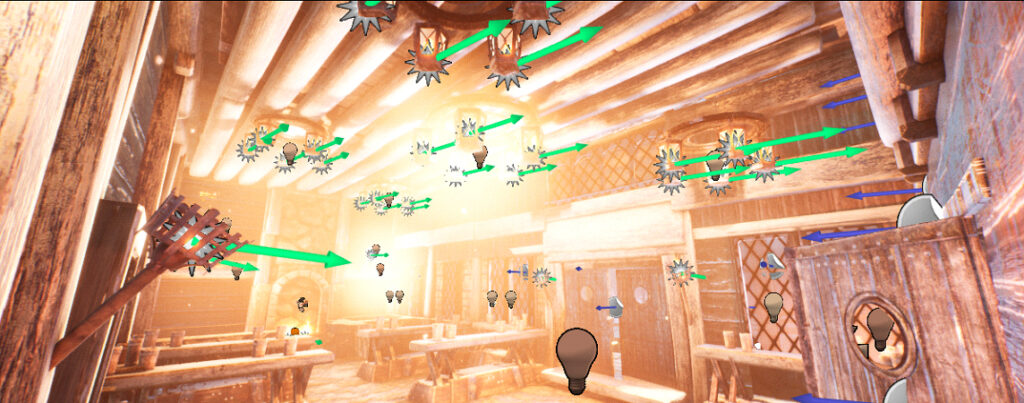
I’m sure whoever walked into this Tavern would need some sunglasses or come back out blind.
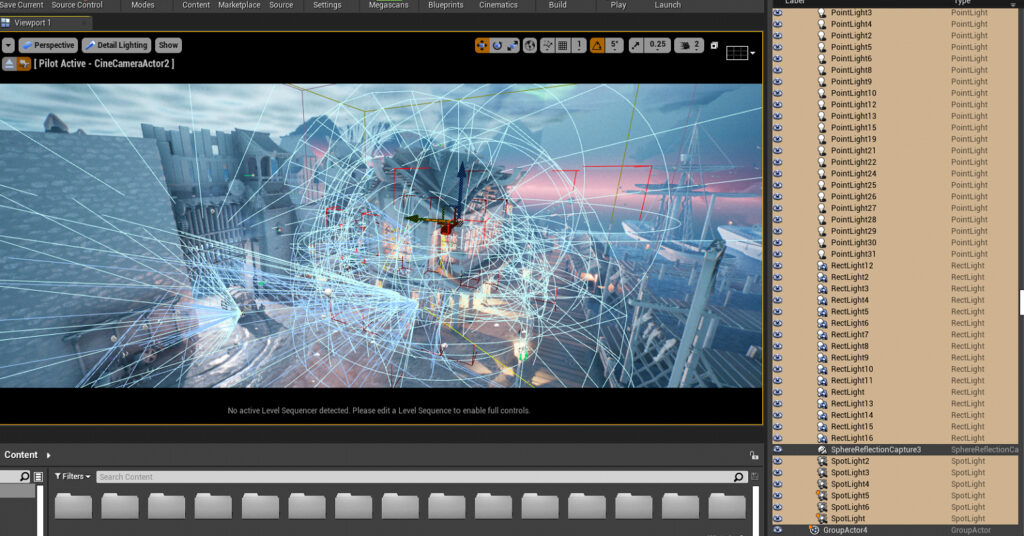
I made use of a Light mass Importance Volume so I could get better quality lighting concentrated on the Tavern section.
Sphere Reflection Captures
There are also only 2 Sphere reflection captures in the whole level. I experimented with more, however, it just ruined the feel/look of the scene.
The main one has a massive radius to cover the scene, and another closer to the stables to give the walls and floors some nice highlights with bounce light.
When it came to the final baking settings, I read the lighting and post-processing section on Jay Cummings’ Slaughterhouse scene and the fact that he adjusted the world settings so that the lights bounce more than just 3 times, I ended up using the same world settings and they worked really well.
The final lighting bakes did take a good 10-15 minutes, but it really paid off.
Post Processing
For the post-processing, I referred to an amazing tutorial about cinematic lighting from Quixel:
Creating photo-real cinematics in UE4: Rebirth Tutorial
I made a few quick sticky notes as to what I could change. For example, on the post-process settings, I would play around with the Ambient occlusion settings, changing up the intensity to make the smaller details pop out.
Lighting Art inspiration
I looked at quite a few different artists for some inspiration and guidance on the lighting:
Ellen Shelley – I saw this relight on Twitter and it inspired me to change my lighting to have stronger contrast.
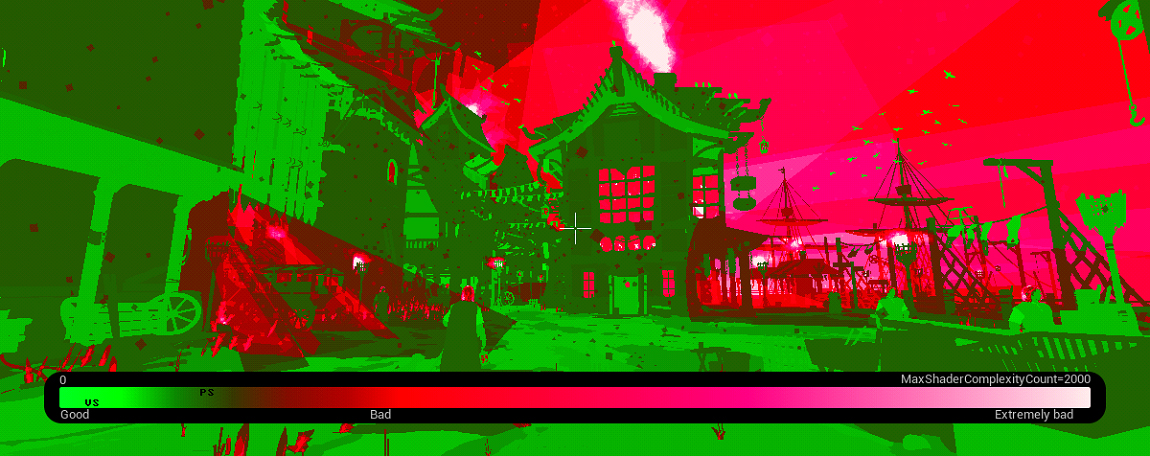
Performance
I’m using a pretty old PC I bought back in 2014, which had its RAM and GPU replaced once.
Some key specs:
16 GB RAM DDR3 @ 799MHz
Intel Core i7 4820K @ 3.70GHz
2047MB NVIDIA GeForce GTX 1060 6GB
So I have quite an average PC in terms of power compared to the newer ones.
Performance-wise, the level played at about 12- 15 FPS, which went straight up to 50FPS as soon as I disabled some of the lighting.
The Particle effects from the snow and the lighting were mainly the things affecting the performance.
I made sure I utilized a lot of merged assets to reduce the number of assets in the scene.
Since this was just a portfolio piece to display my skills, I wasn’t worried too much about drastically reducing performance. I just wanted to get something out there.
Sky & Clouds
The clouds took quite a bit of deliberation as to what exactly I wanted to do with them.
I remember the winner of the Box of Mystery had an amazing sky in his entry, which I think really helped secure the win.
Tiziano Zhou.

I was inspired by that and wanted to emulate a bit of those stylised streaking wispy cirrus clouds.
So I went into Photoshop and edited some different types of skies and clouds to see what worked best. I had about 19 iterations before landing on what I wanted to go for.
I especially wanted to bring some more colour and vibrancy to my scene as it was looking a bit too monochromatic.
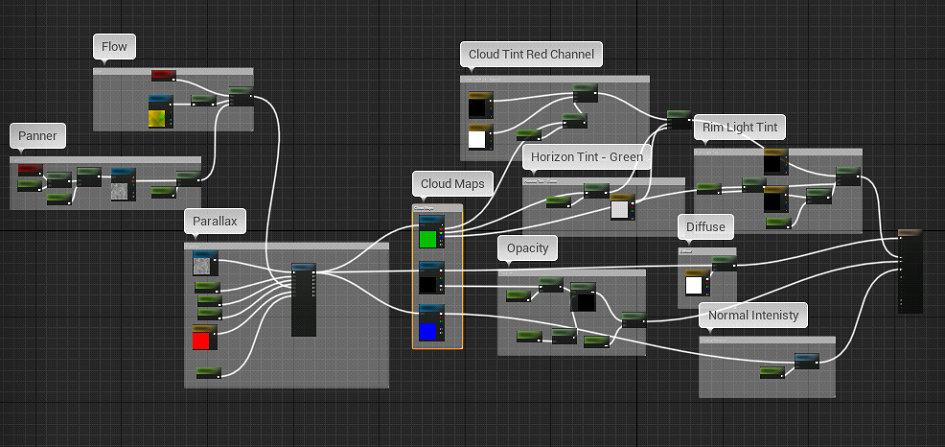
Tyler Smith Clouds
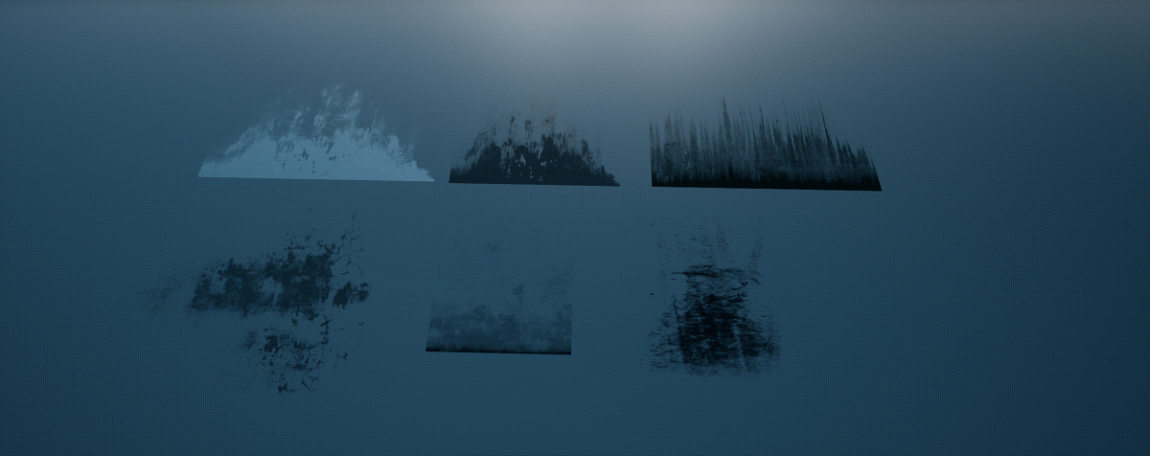
I watched Tyler’s guide on creating these amazing clouds, extracting textures from photos and splitting them into 4 channels so I could control various parts of the cloud texture.
My dad is a hobbyist photographer and also has a Flickr account jam-packed full of photos I could download and use for free, so I had an abundance of free high-res cloud and sky textures.
Also, for the flow map for the clouds texture, I just used this free program, which allows you to easily paint the directions of where you want your textures to flow, and then generate a Targa bake of the flow map you’ve painted.
Takes a few minutes, saves a lot of time. It’s much easier than doing it in a 3d program.

These clouds were just placed on absolutely massive planes stretched very far into the distance of my scene so it gave the illusion that there were actual clouds in the sky and not just floating planes.
Graph of the material I created following the tutorial below.
Filming Sequencer
Filming was another part where I needed to learn a bit more. I recommend this: UE4 Cinematic Tutorial – How to Make Professional Cinematic Cutscenes in Sequencer
Marmoset Renders
I haven’t used the new Marmoset Toolbag, but I thought I really needed to present my work well after doing all this work, so I went ahead and watched this brilliant tutorial: Mastering Portfolio-Ready Material Renders: Marmoset Toolbag 3.06
Tips & Advice
My main tip I would give is to not give up and keep pushing through the difficult times. There were numerous times during this project when I just wanted to stop and give up.
Also, just start the project, instead of thinking about it.
Sometimes I was tired of watching tutorial after tutorial, but I made sure to stop from time to time, take breaks and rest instead of stressing and burning out.
I also browsed ArtStation a lot to recharge my excitement for the project, while I saw other artists’ work being posted.
“Make sure to break things down into a checklist, take baby steps instead of looking at the mountain of work you need to do. I cannot express how important that was to the success of this project.”
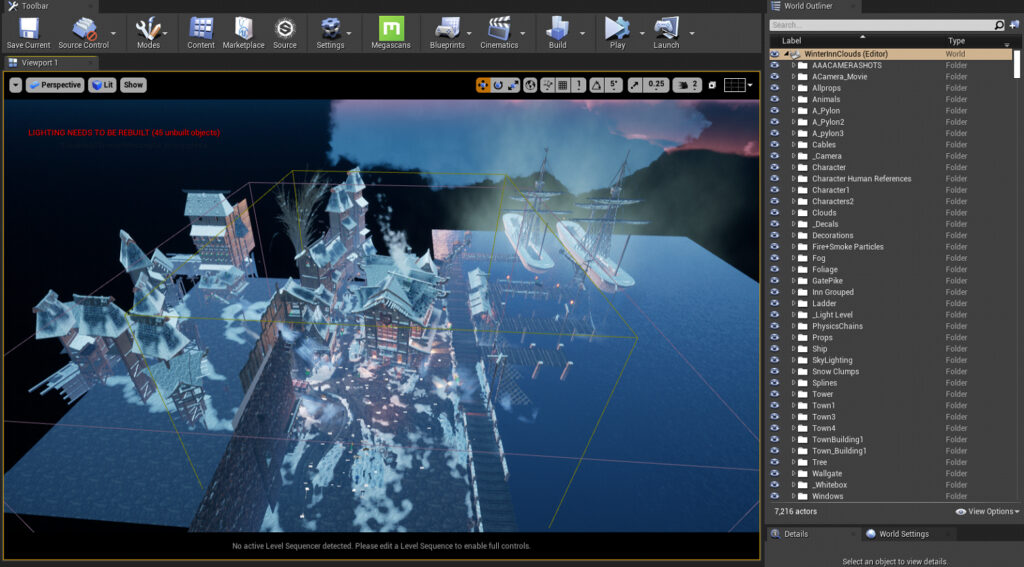
If you are tackling a big environment, please make sure you label things properly and keep assets grouped in folders for easy access.

Lastly, remember you’re an artist, you’re supposed to make eye candy.
Don’t get too bogged down in the technical details; treat it like a painting, broad strokes first, then smaller details last.
Thank you for reading. If you got this far, I know it was a long one. Good luck in creating your environments and assets!
Read more articles
You might also like these articles.