
Introduction
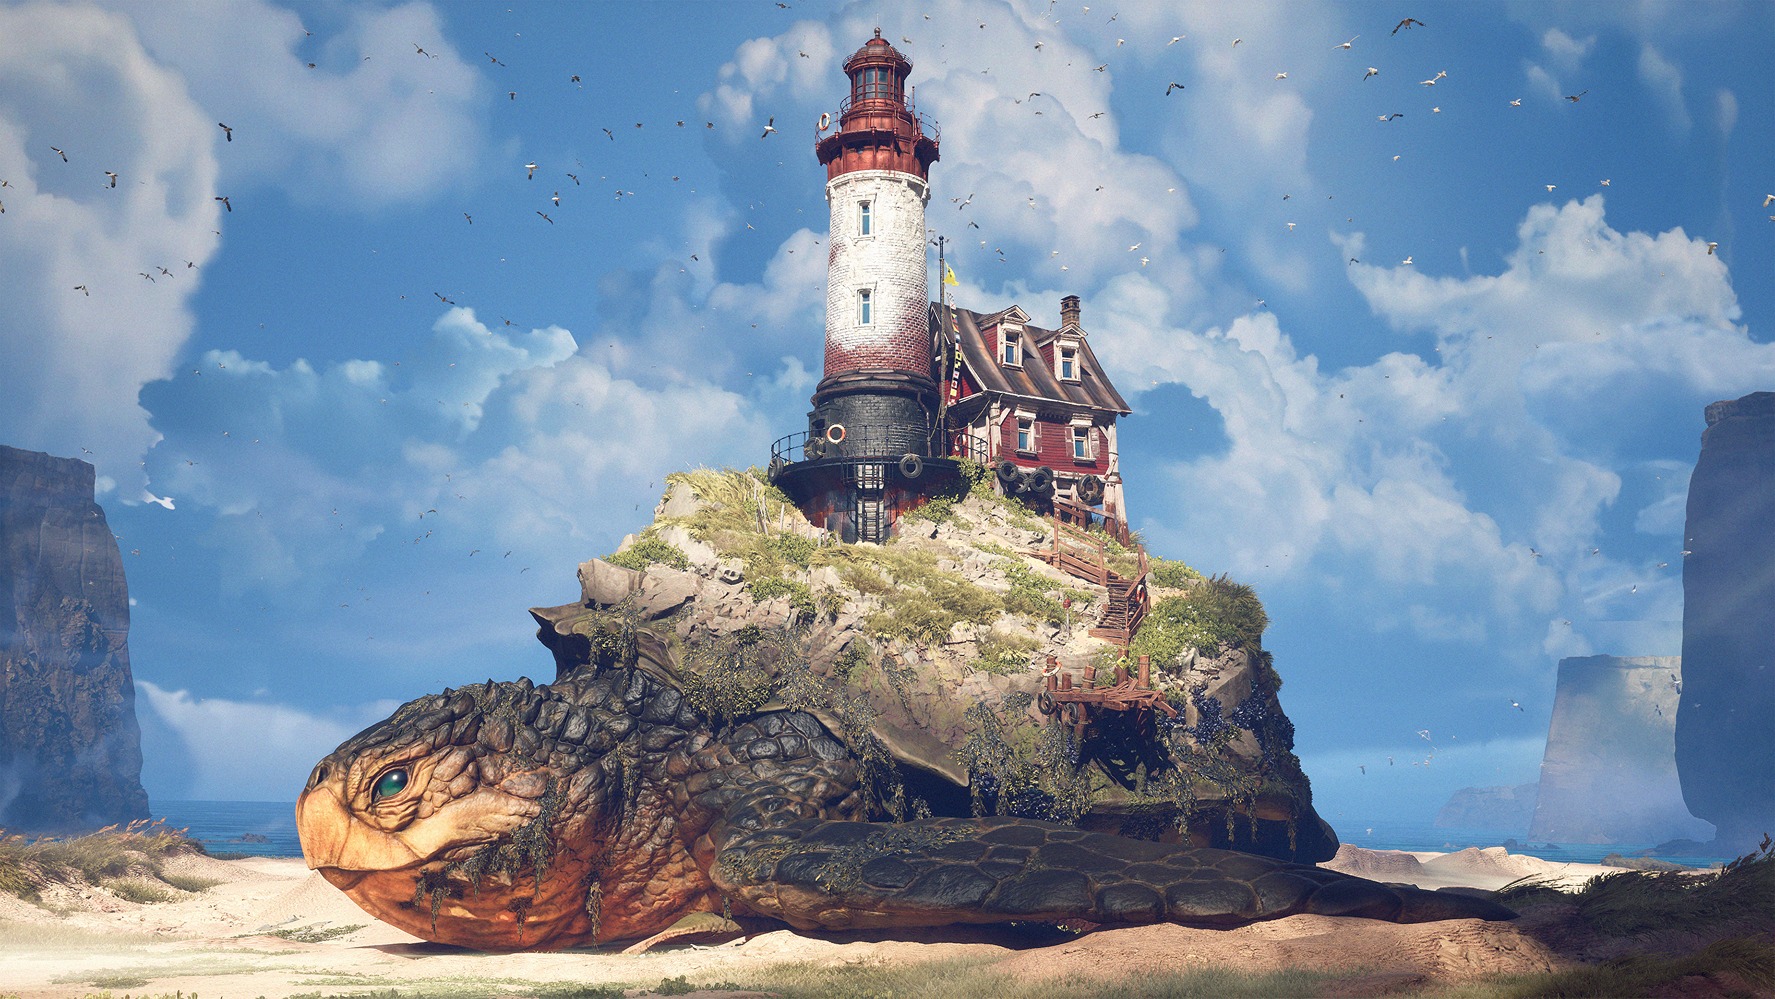
Hi, my name is Louis Monnery and I’m a 3D Environment Artist from France.
I love creating textures in Substance Designer and building shaders to use them in Unreal Engine. I recently graduated and I’m now starting my journey in the 3D industry!


References & Inspirations
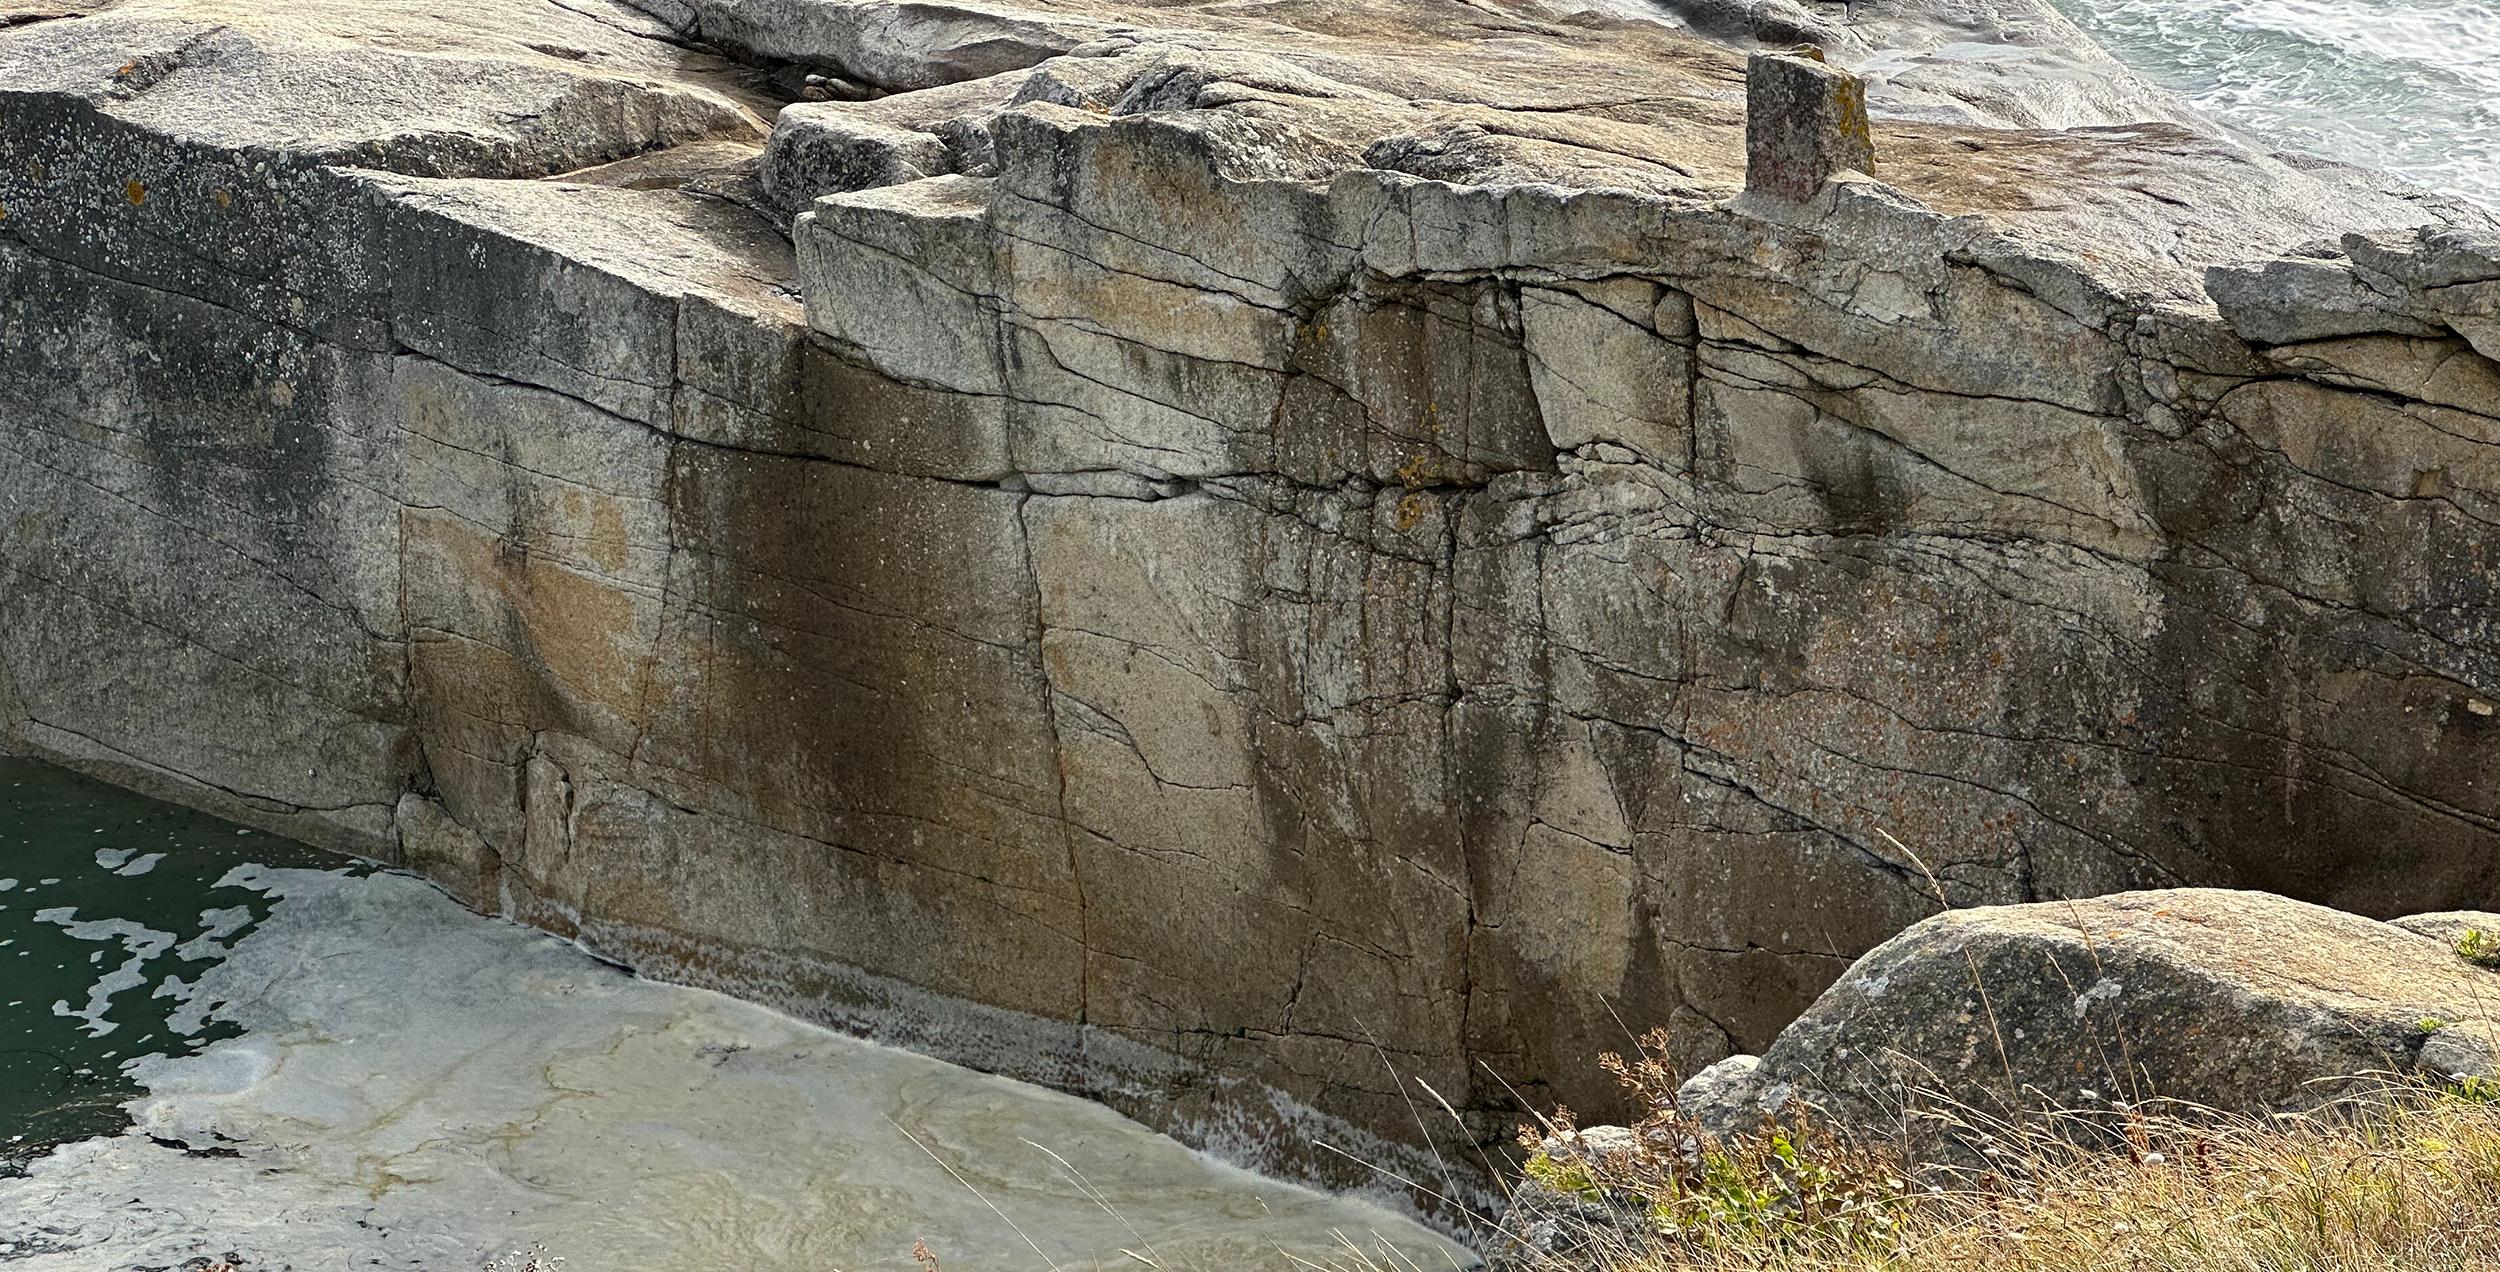
For this project, my inspiration came from a photo of a cliff I took this summer while walking by the sea with my family.
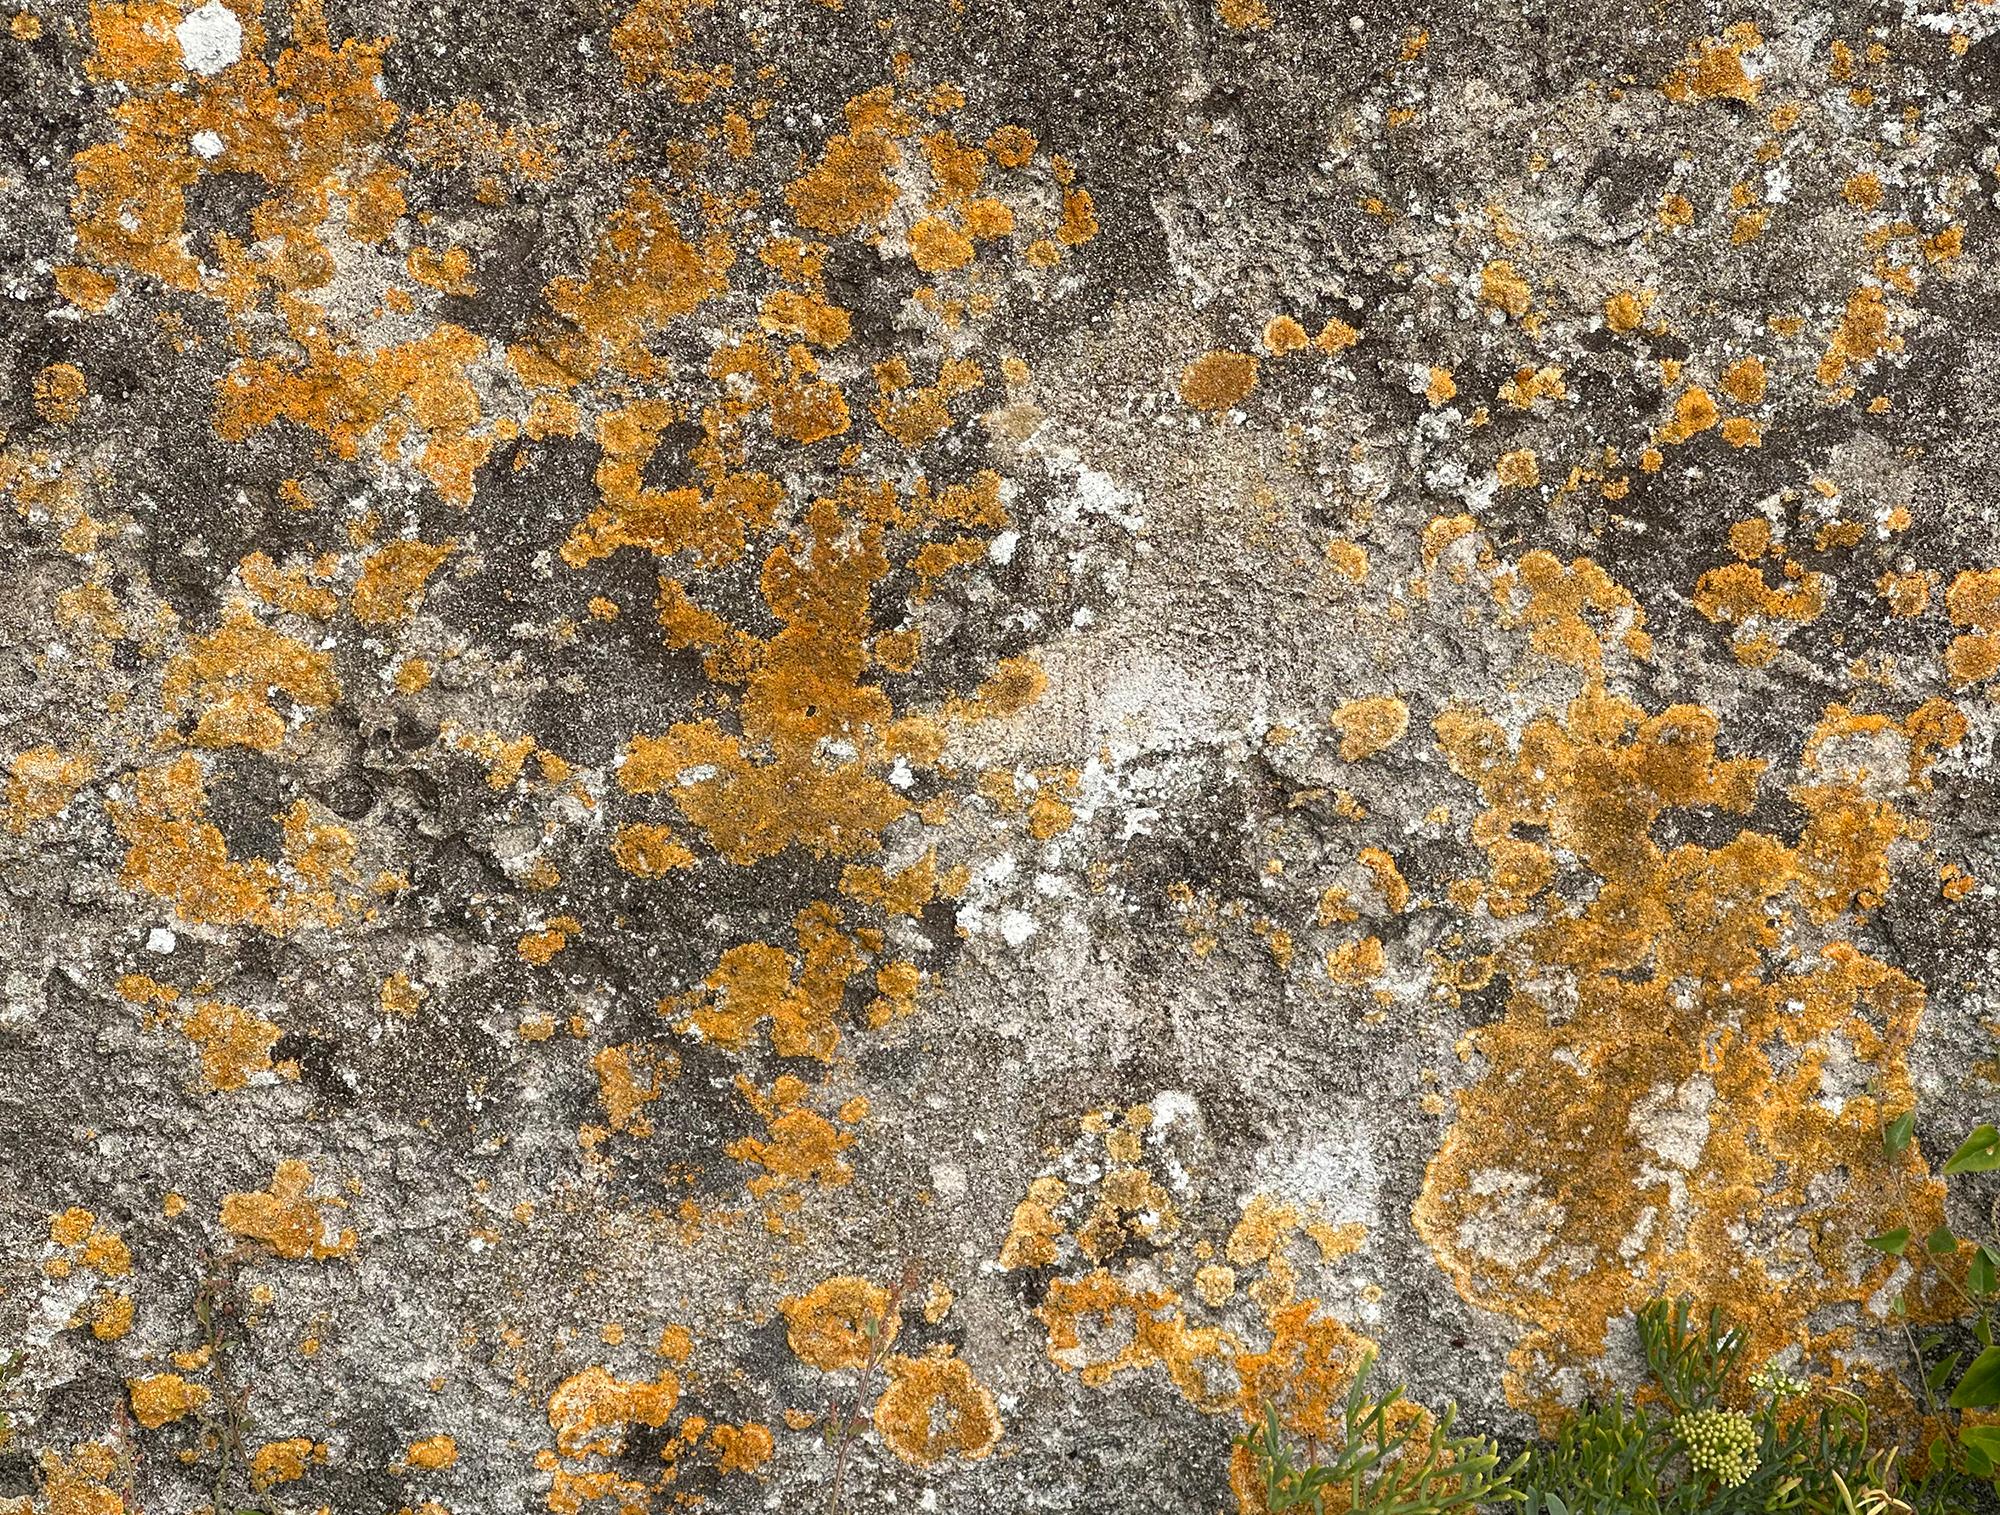
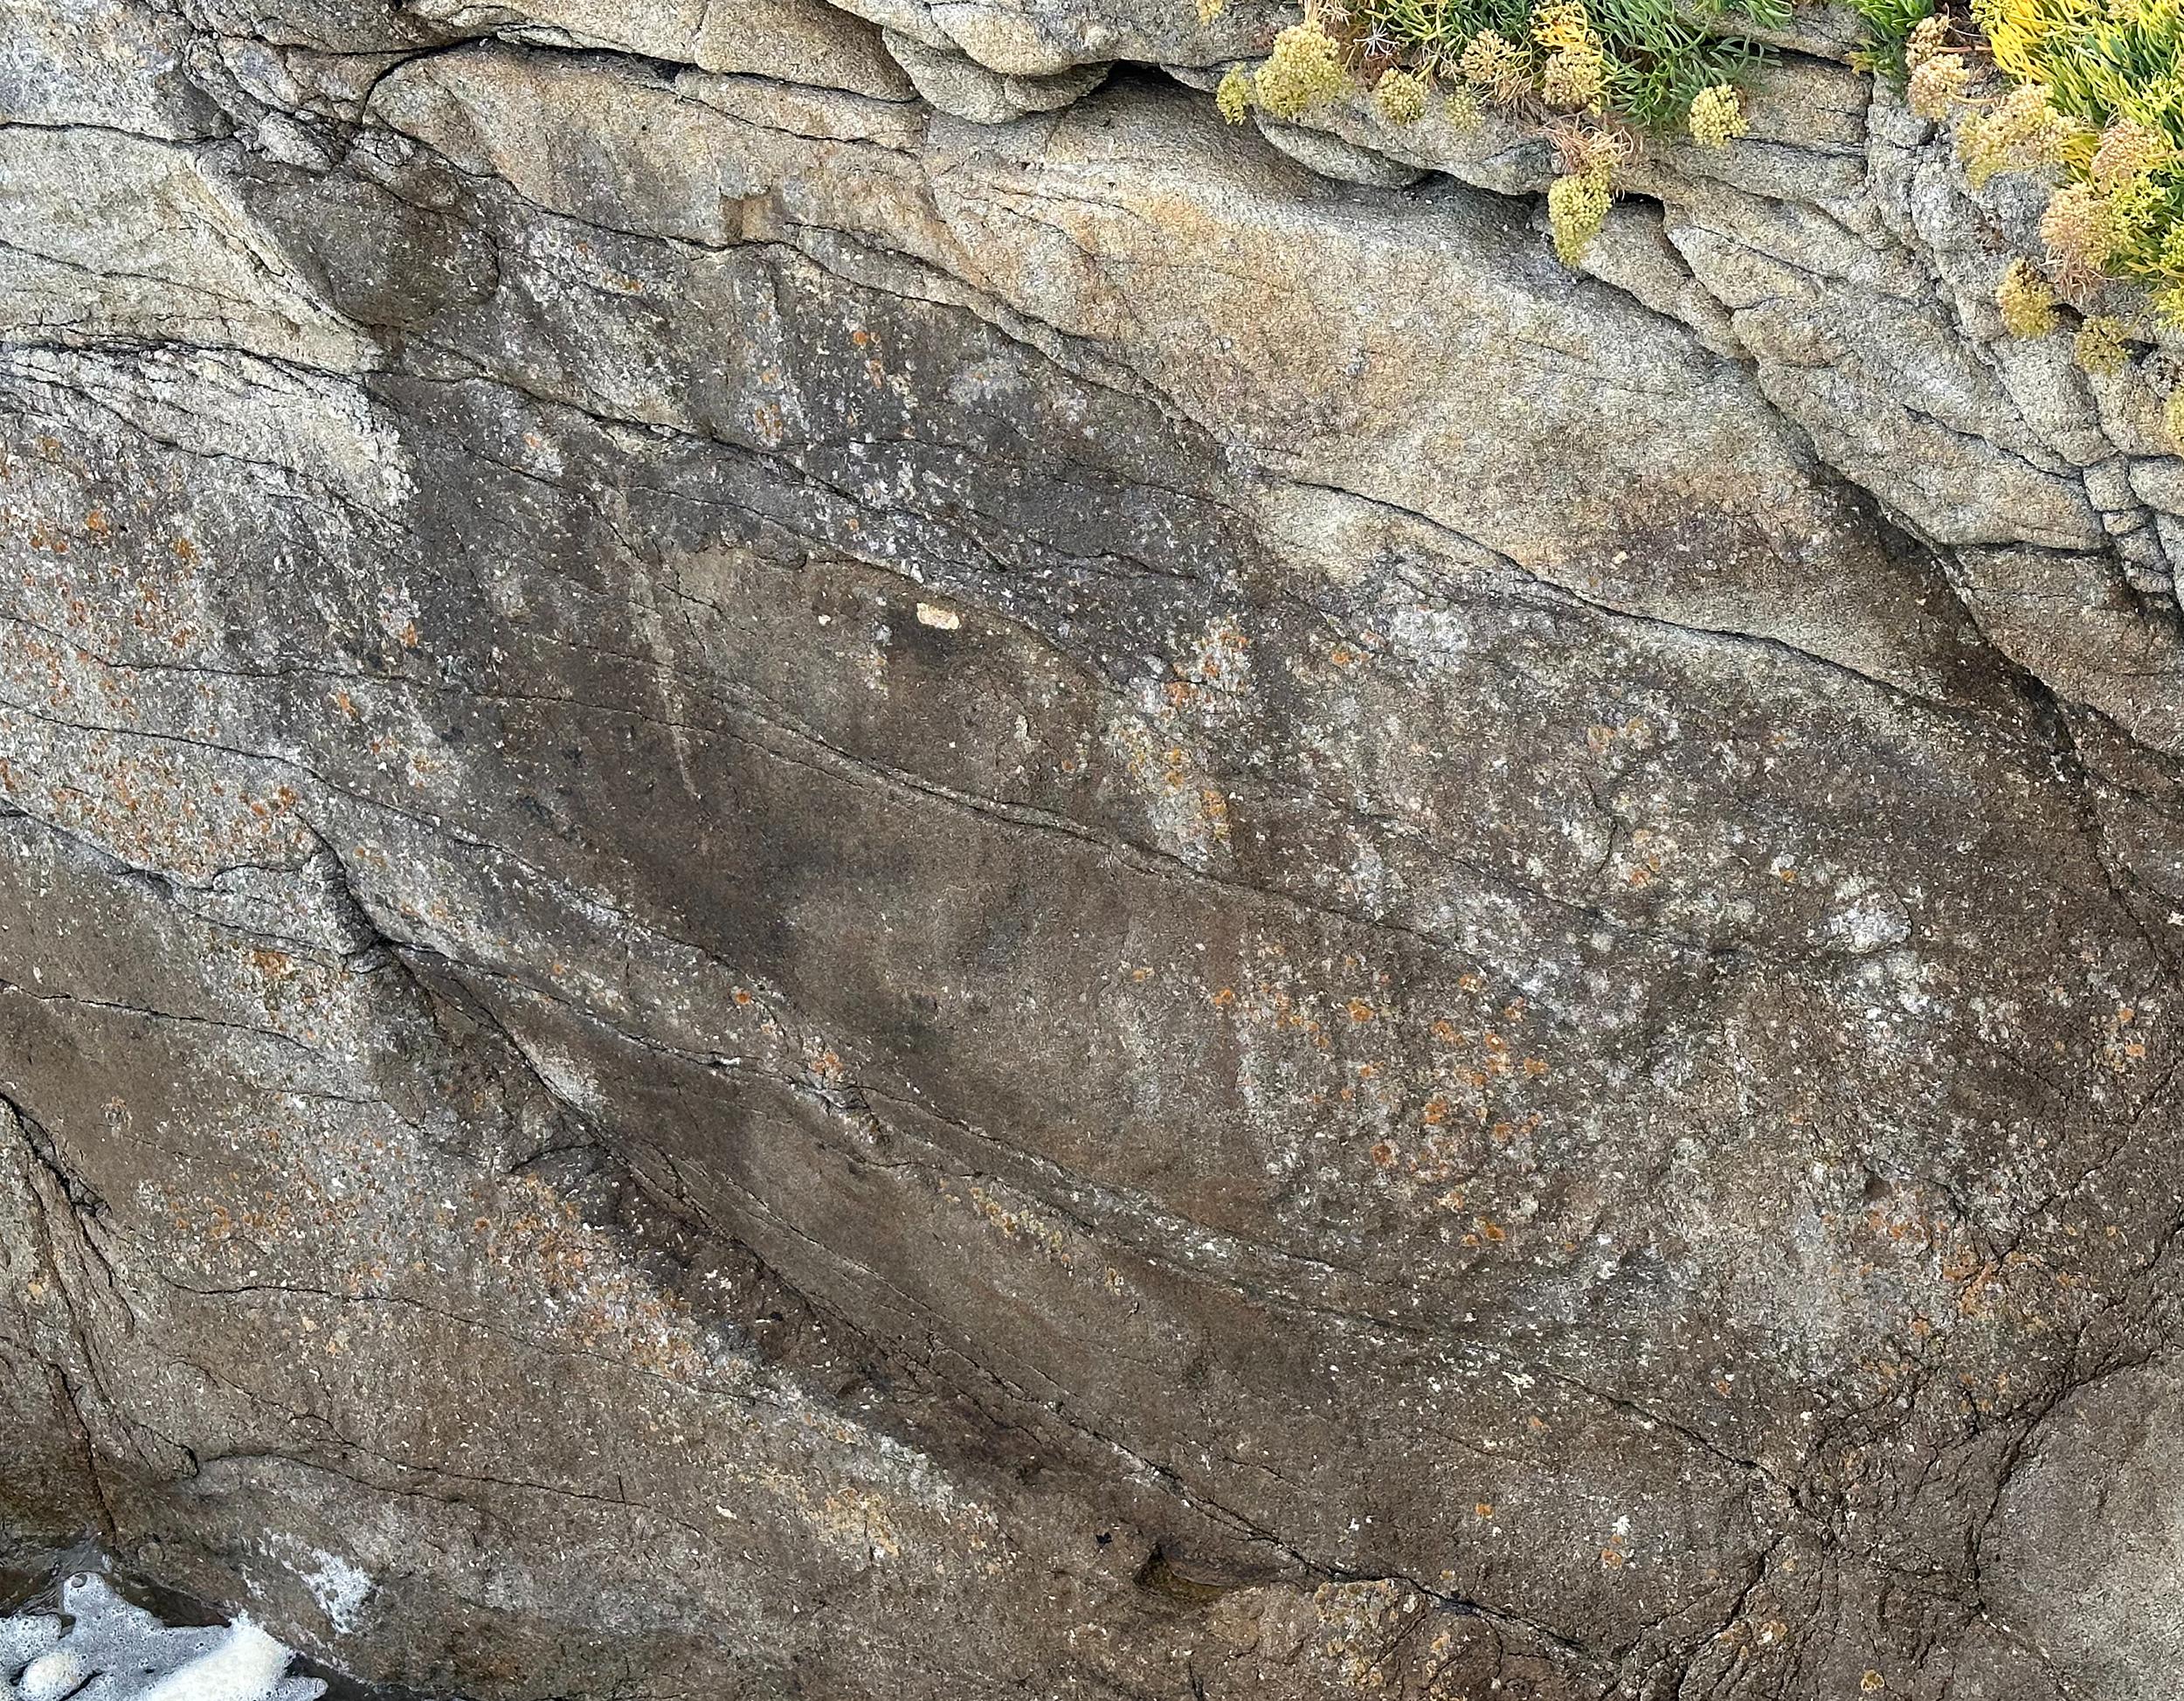
It’s been a long time since I wanted to make a stone material, and I really love the rocks of this area. All the moss and lichen create beautiful color variations. So I thought it would be a good reference to make a texture out of it.
Wherever I go, I take photos of stuff that I find interesting: ground or wall and sometimes props. Even when I’m outside with friends I’ll do this and we laugh about it. But in the end, I have a pretty big reference album that can be very useful. I really recommend everyone to do the same.
Goals
For this texture, my goal was to apply techniques that I learned recently and put them into practice here. My main focus was on crack generation and how to make them look more organic than regular Substance Designer crack generation.
I also wanted to give a rocky feeling to the surfacing and have interesting color variations in the albedo.
Tools
- Substance Designer
- Marmoset Toolbag 4
For this project, I used Marmoset Toolbag to achieve high-quality renders. You can also do almost the same things in Unreal Engine or any rendering engine; it just takes a bit more setup and tweaking to reach the same quality.
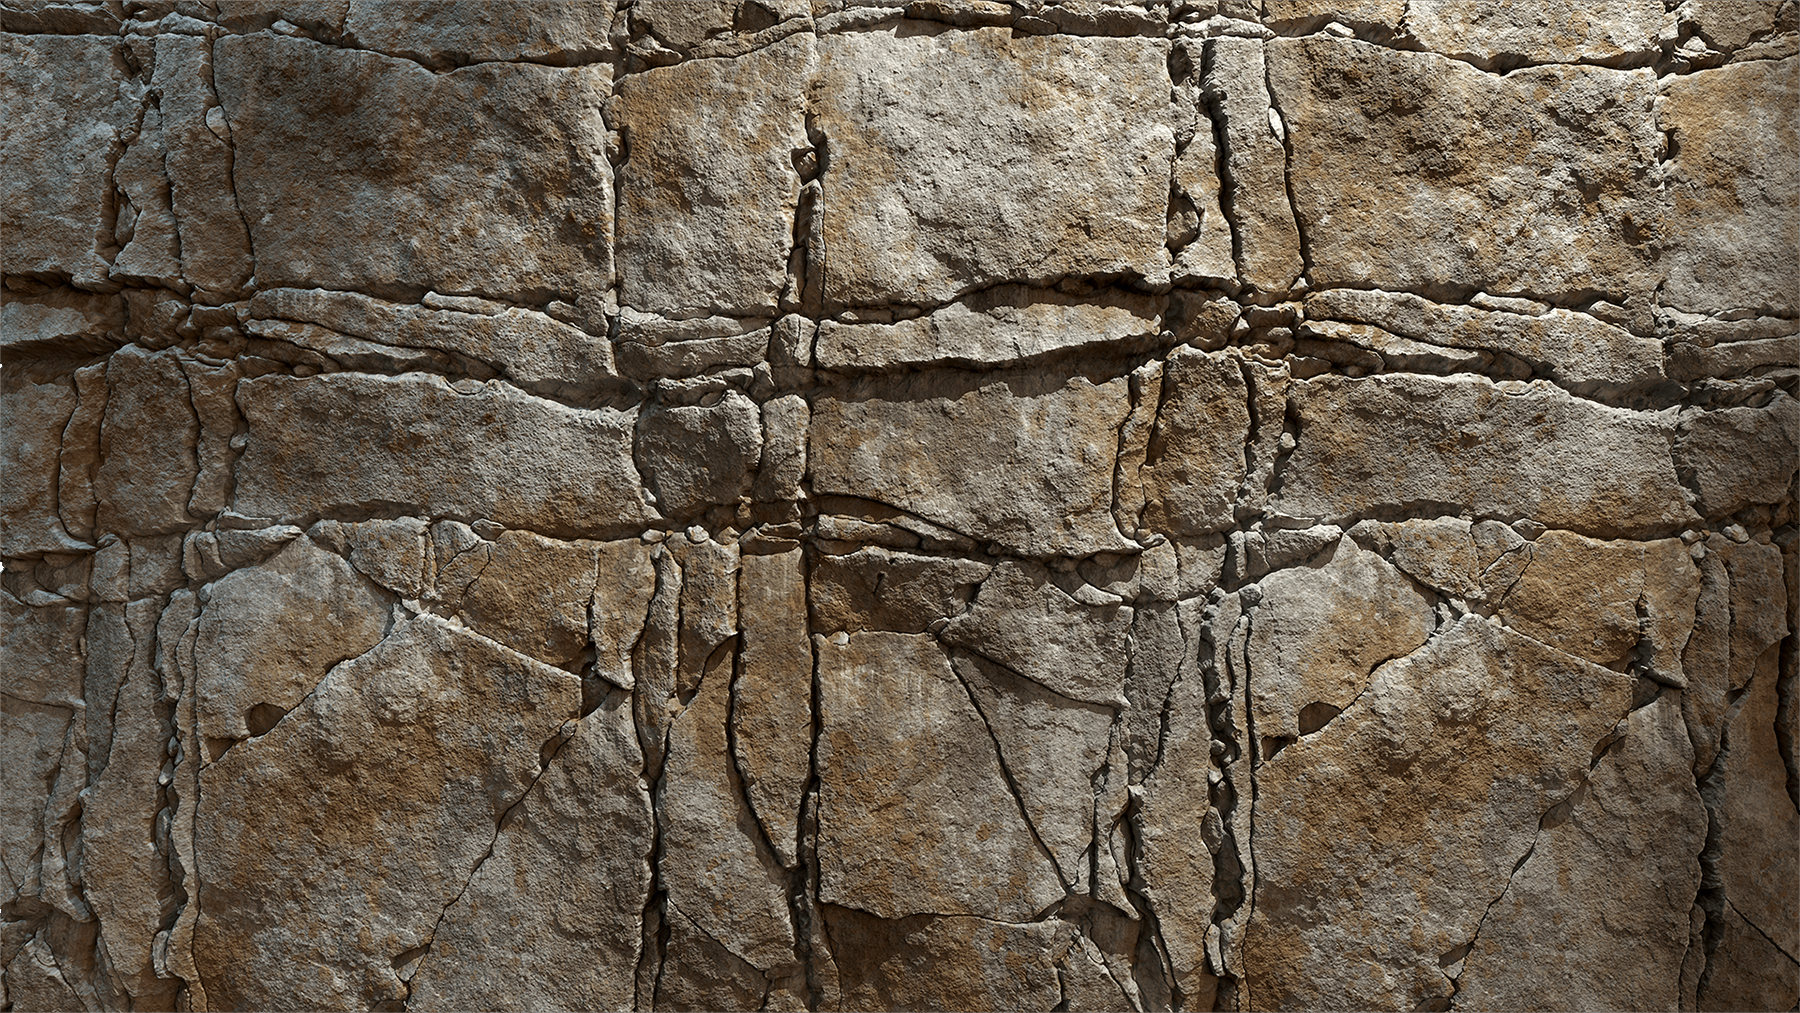
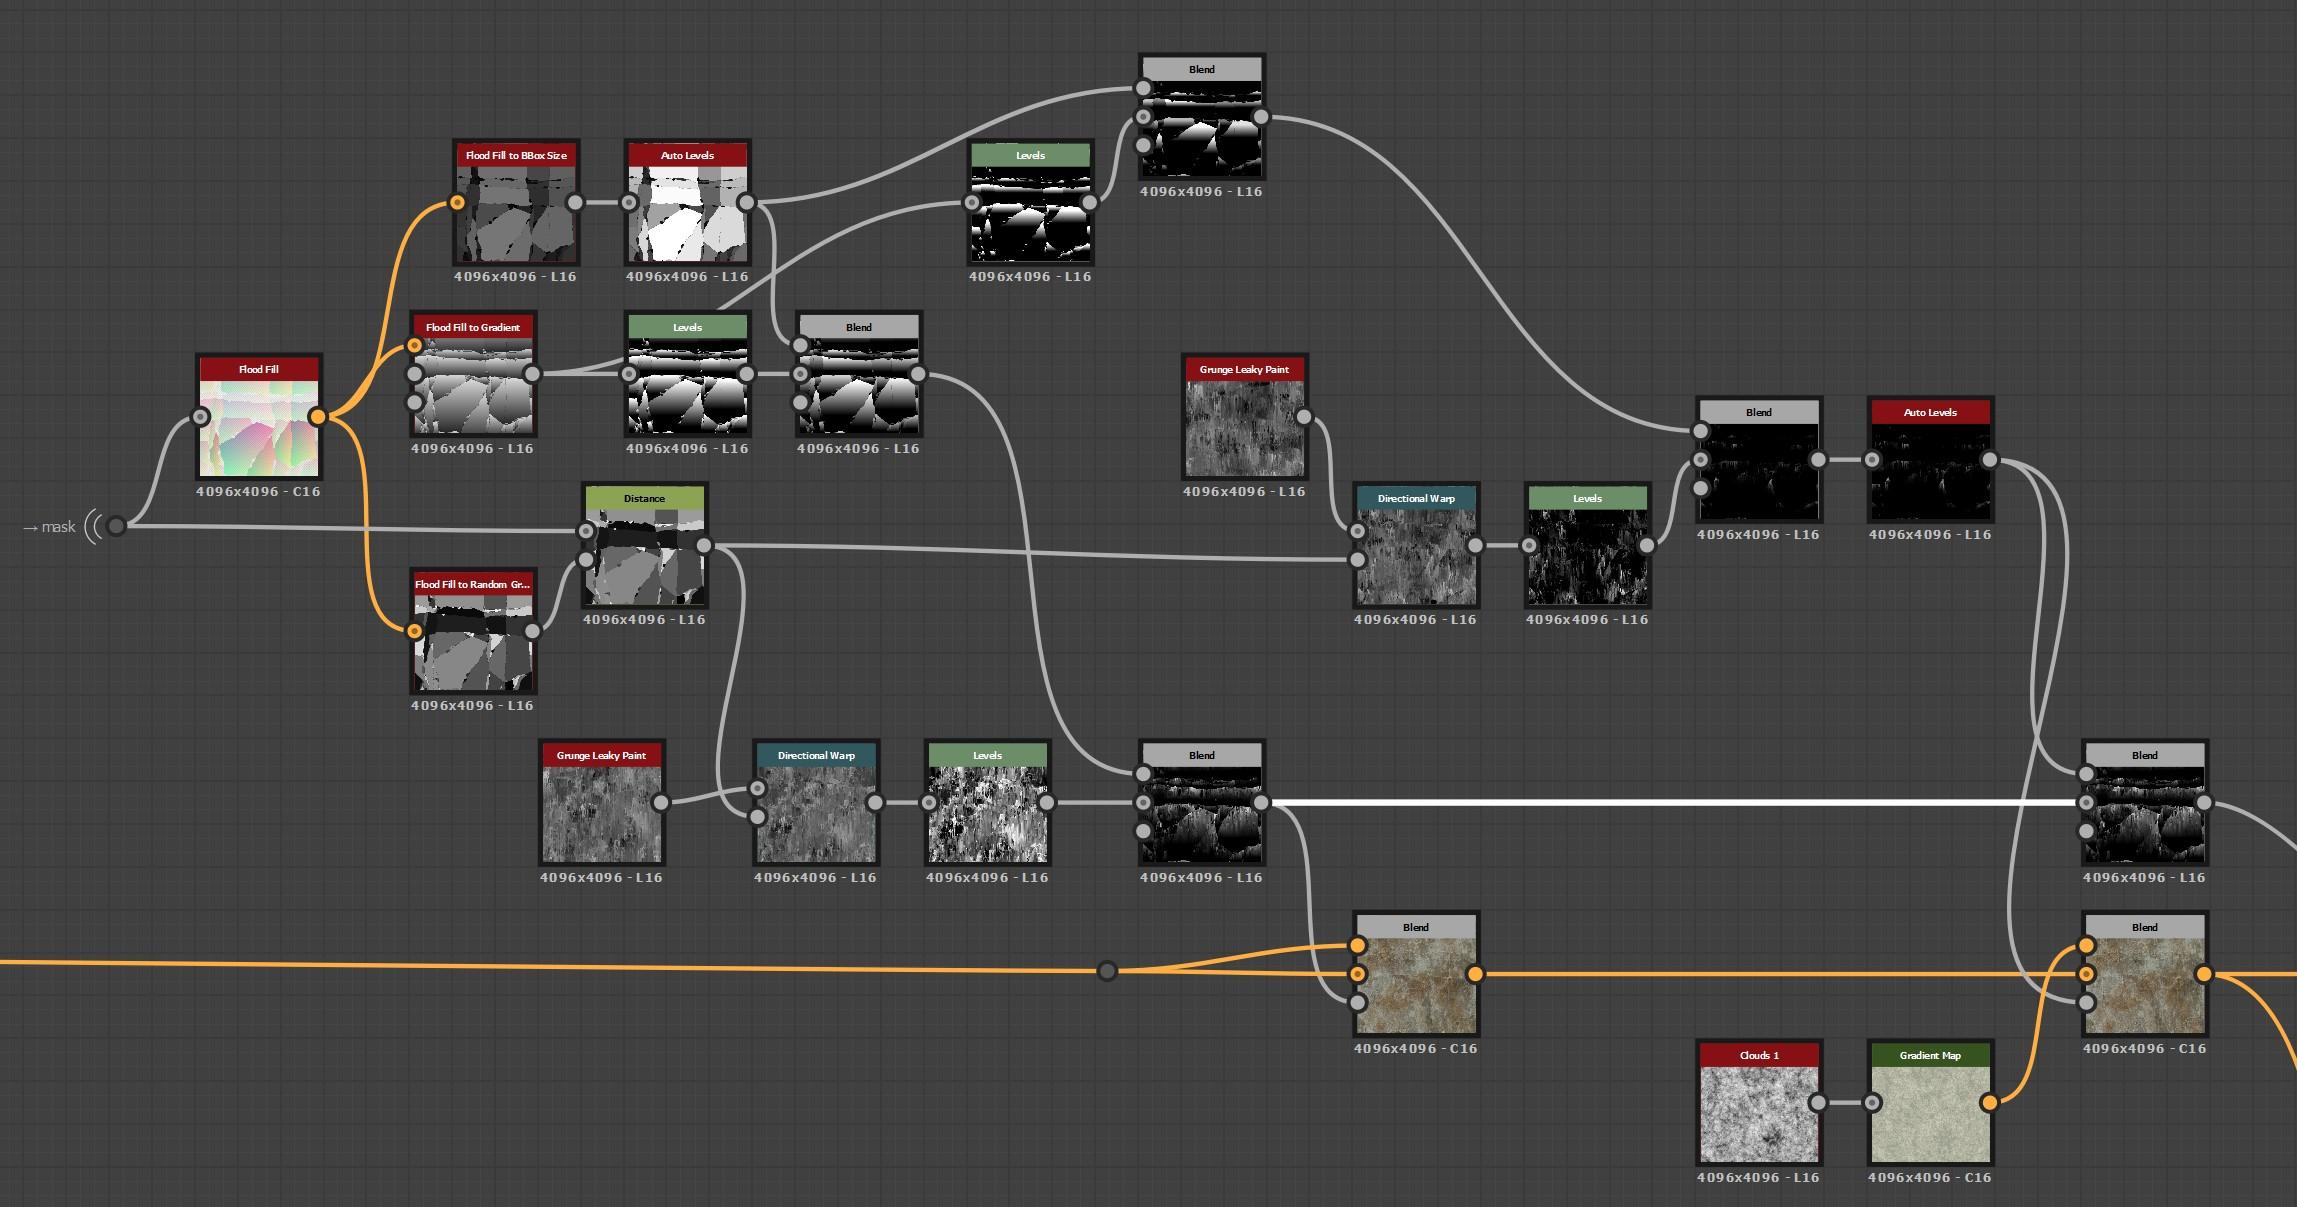
Crack Pattern
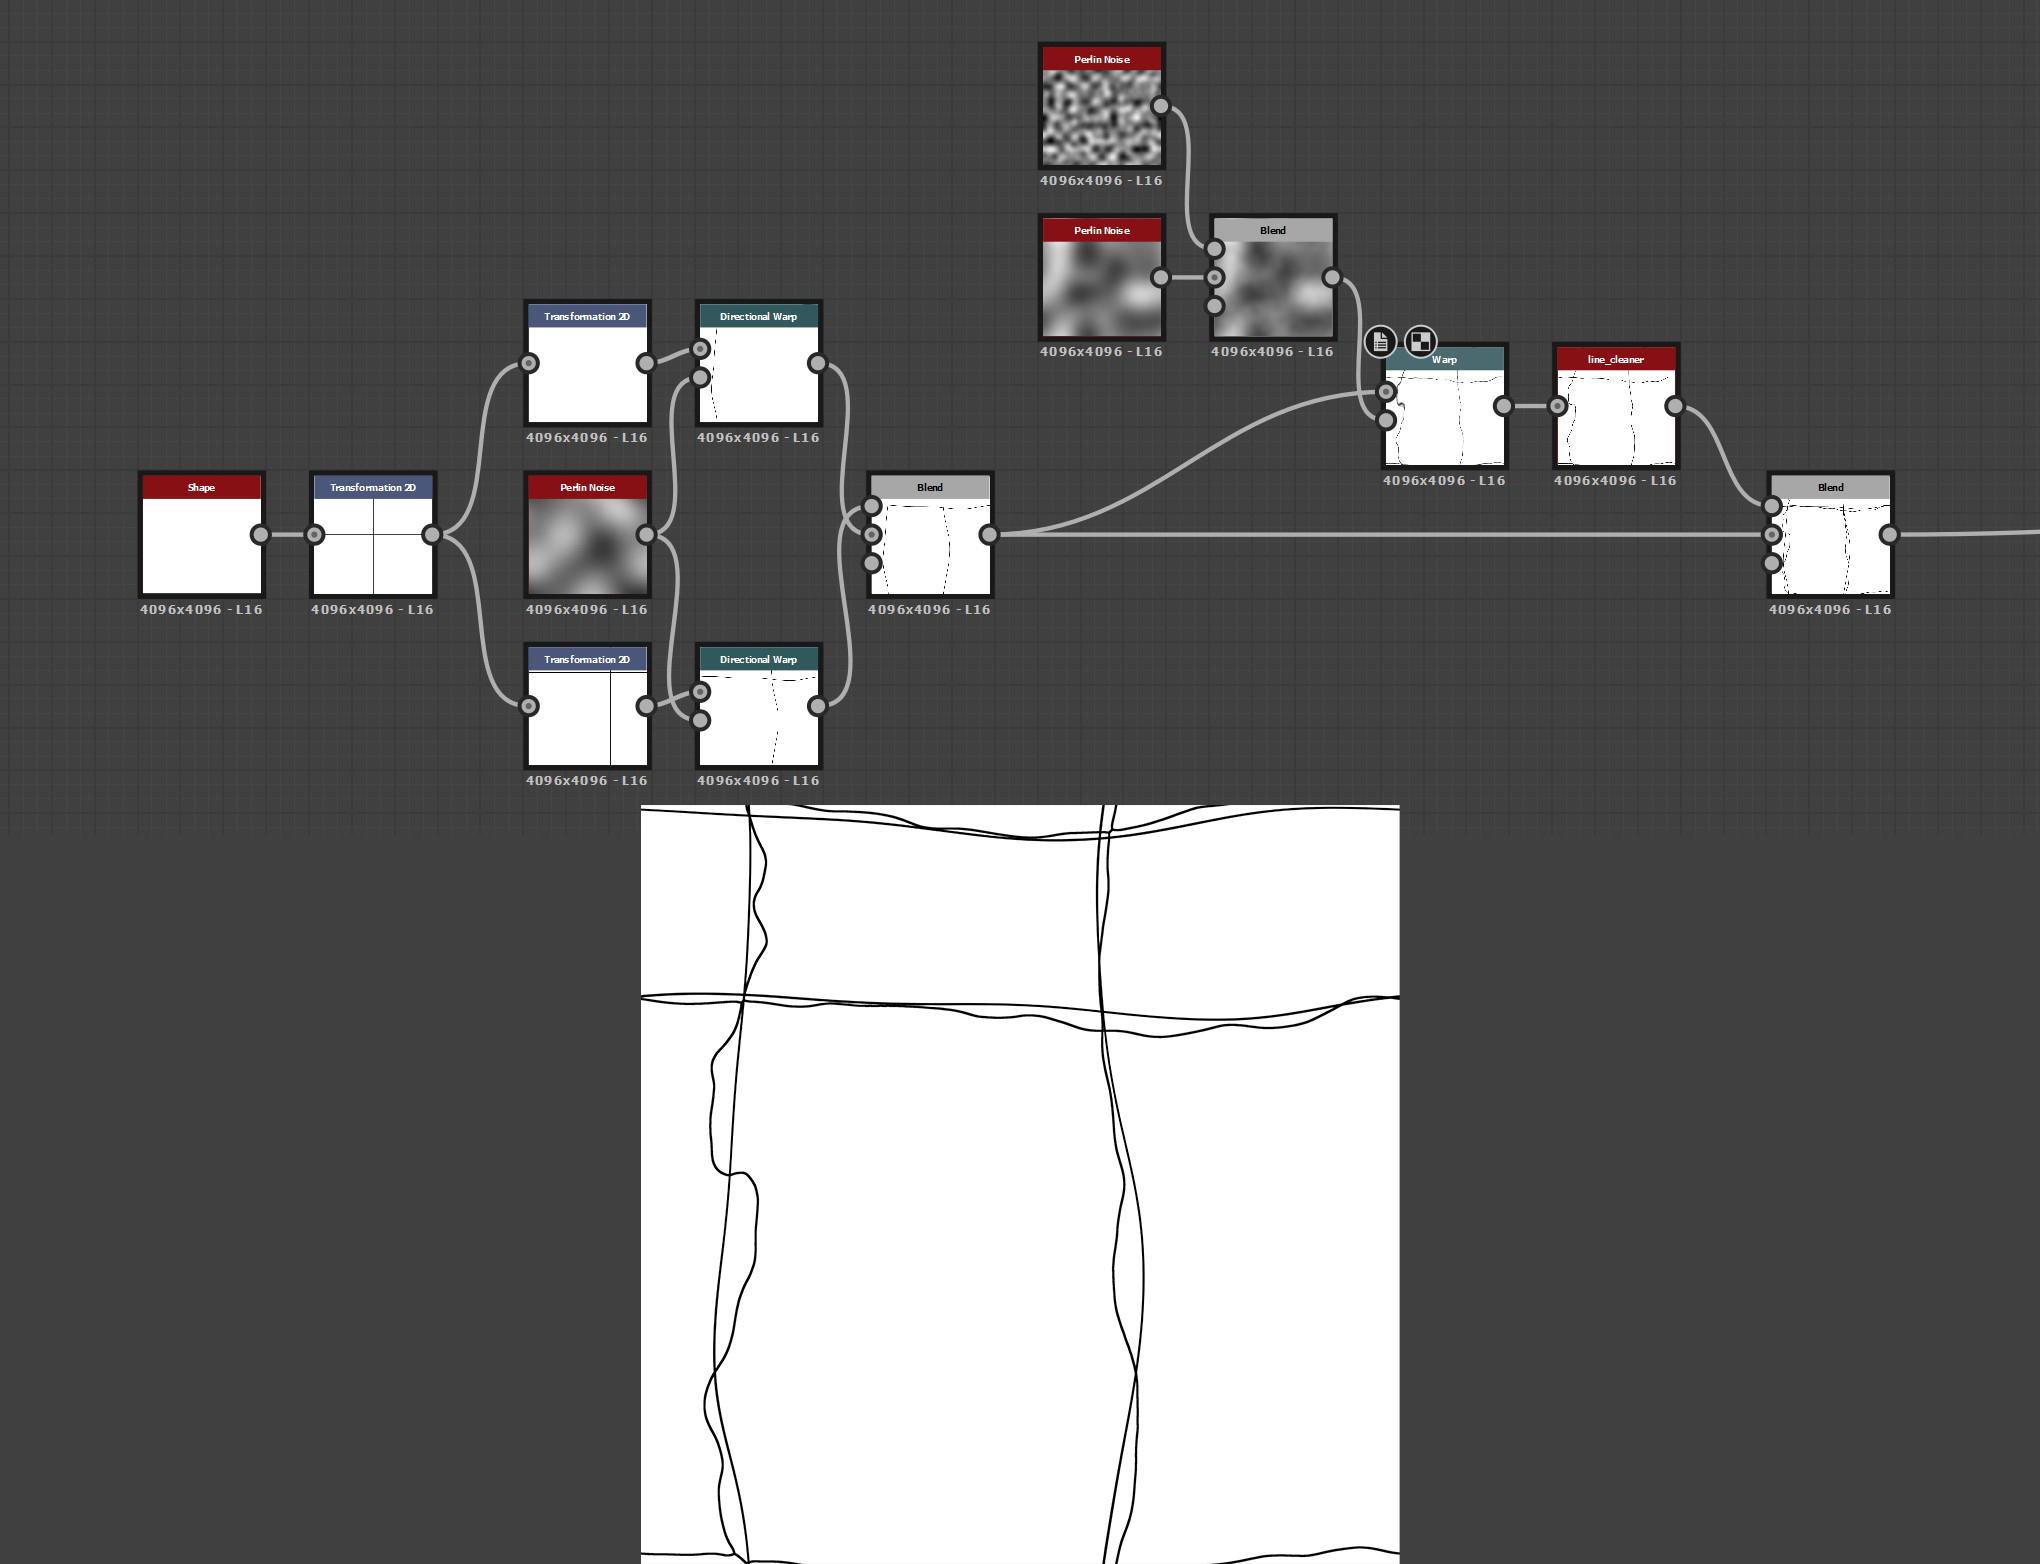
Looking at the reference, we can see two main types of cracks: vertical and horizontal ones.
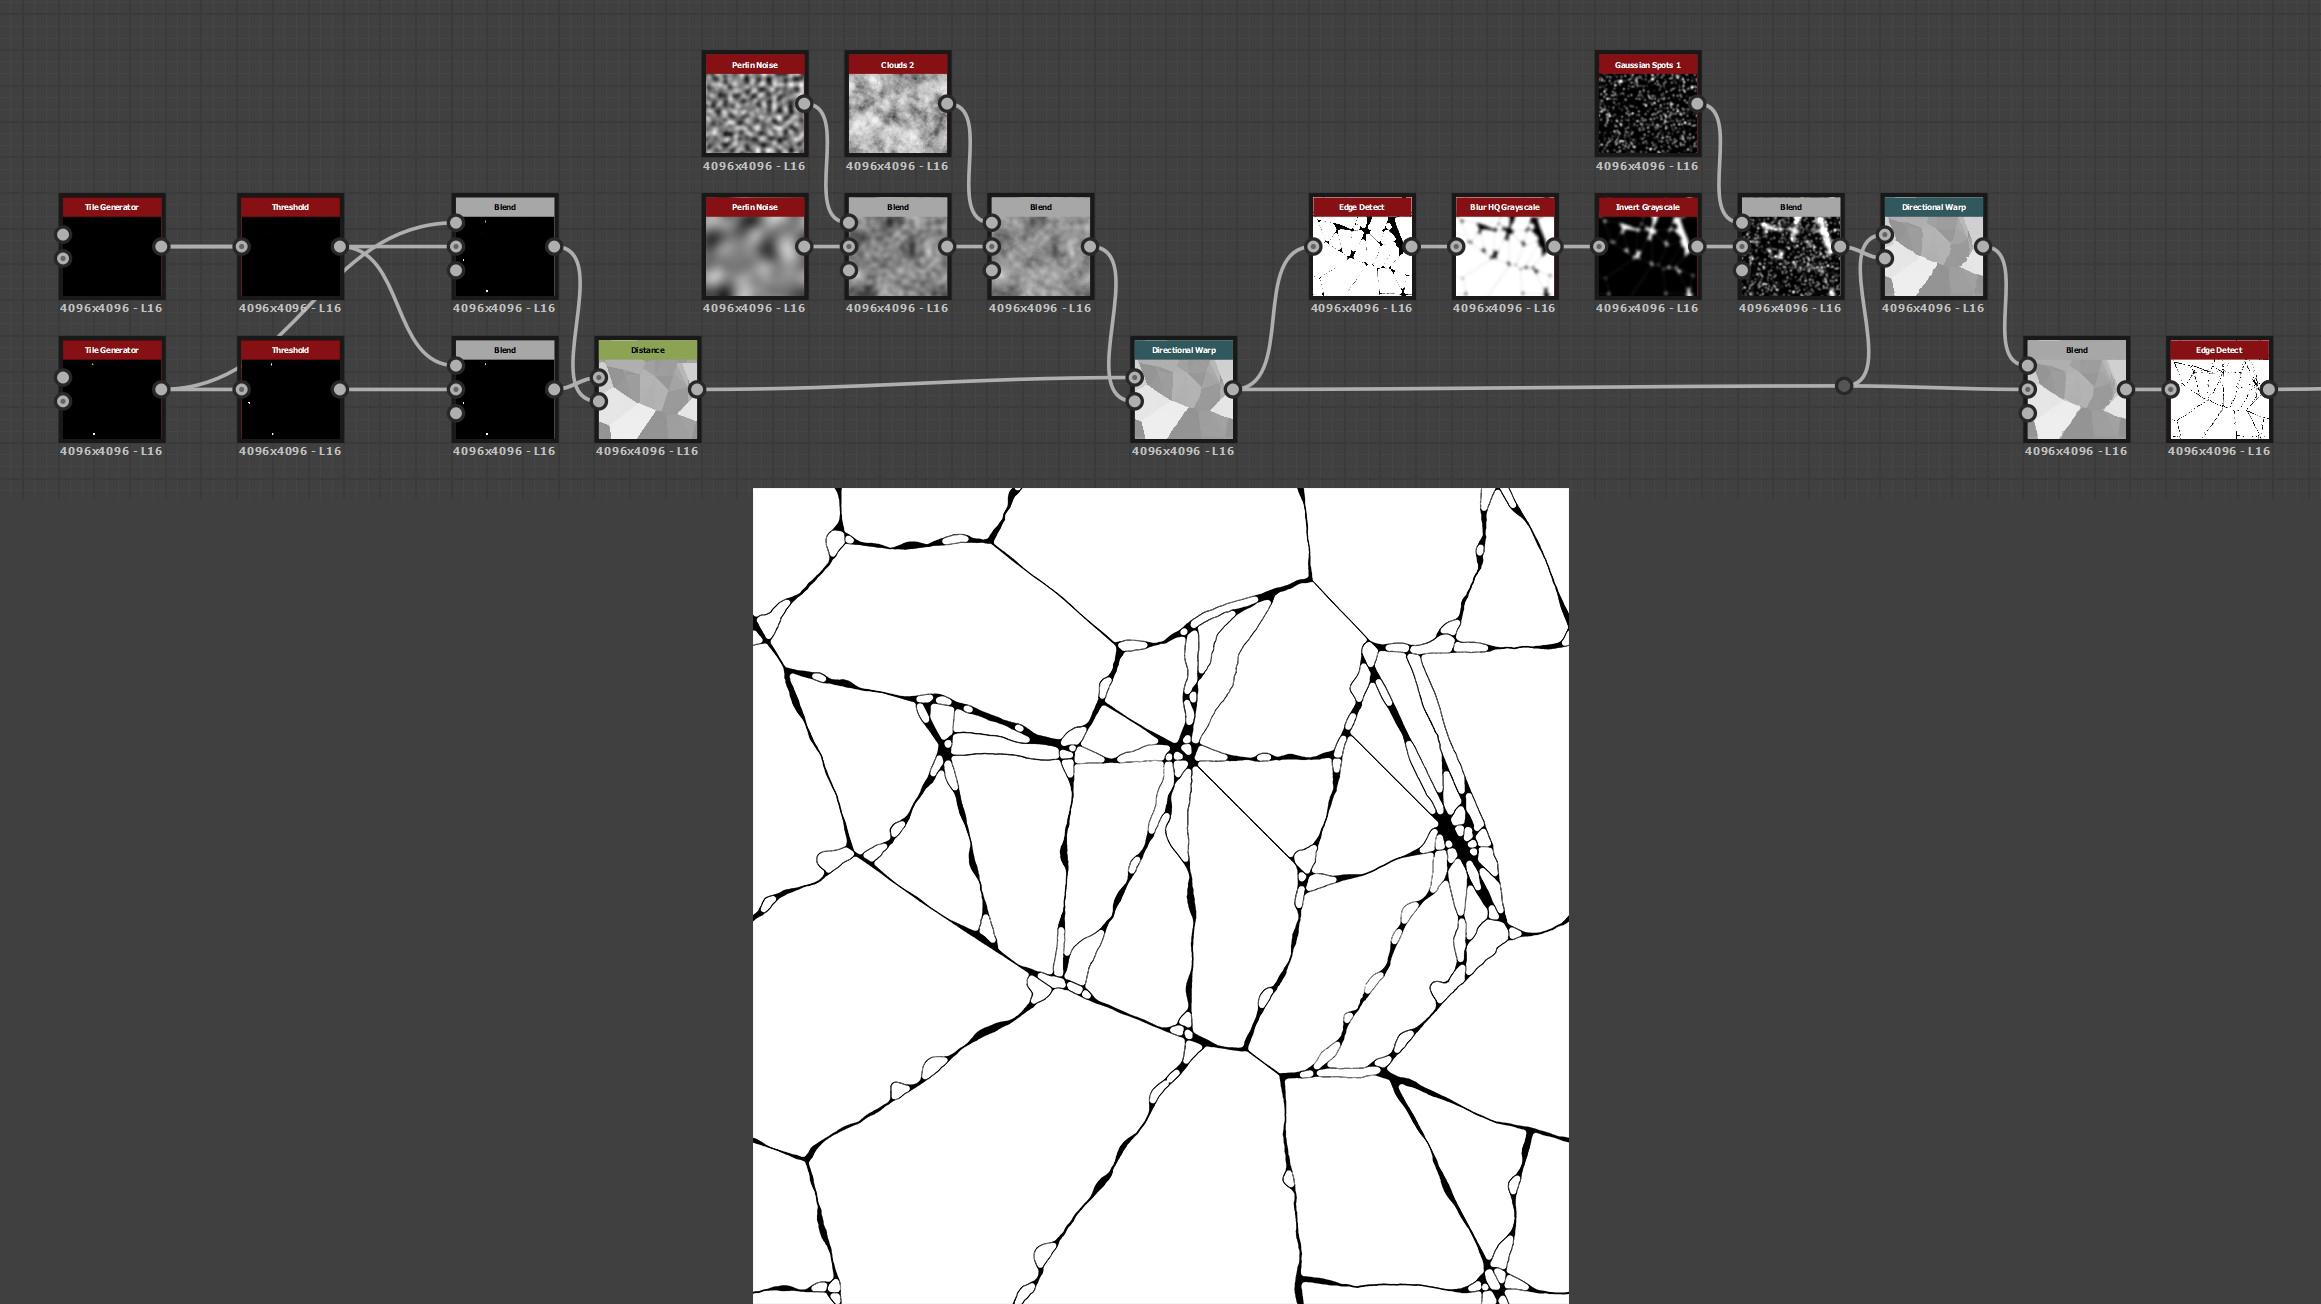
So I decided to start with some crosses that I could offset and warp to get the basic shapes for the cracks.
Edge Cleaner Graph:
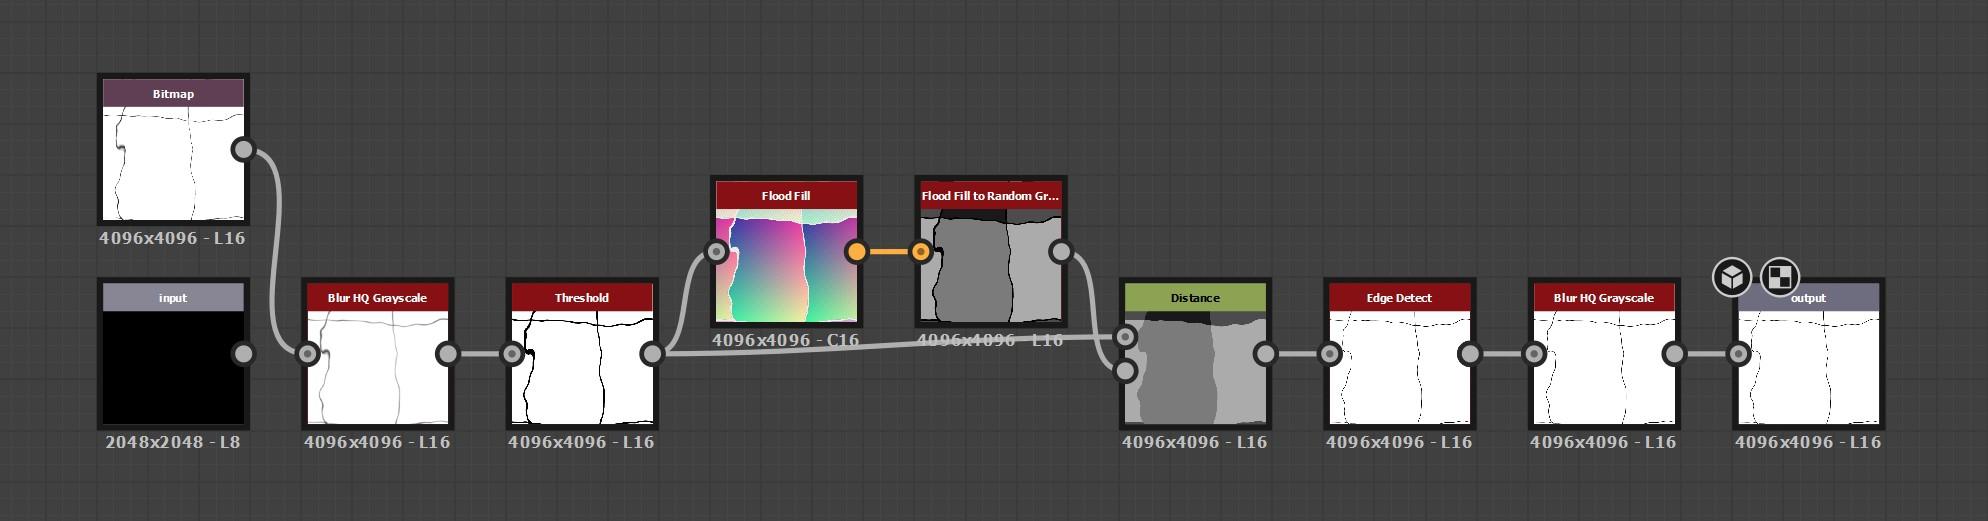
Having interesting cracks is nice, but adding smaller rocks inside them will make them look even better!
To achieve this, I used a flood fill and a distance node to convert the lines into gray shapes, then used an edge detect. I decided to warp the edges of the shapes; for that, I created a mask with an edge detect, and used it to warp the gray shapes. Finally I blended them together at about 50% opacity.
Then I just put an edge detect, and the base of the cracks was done.
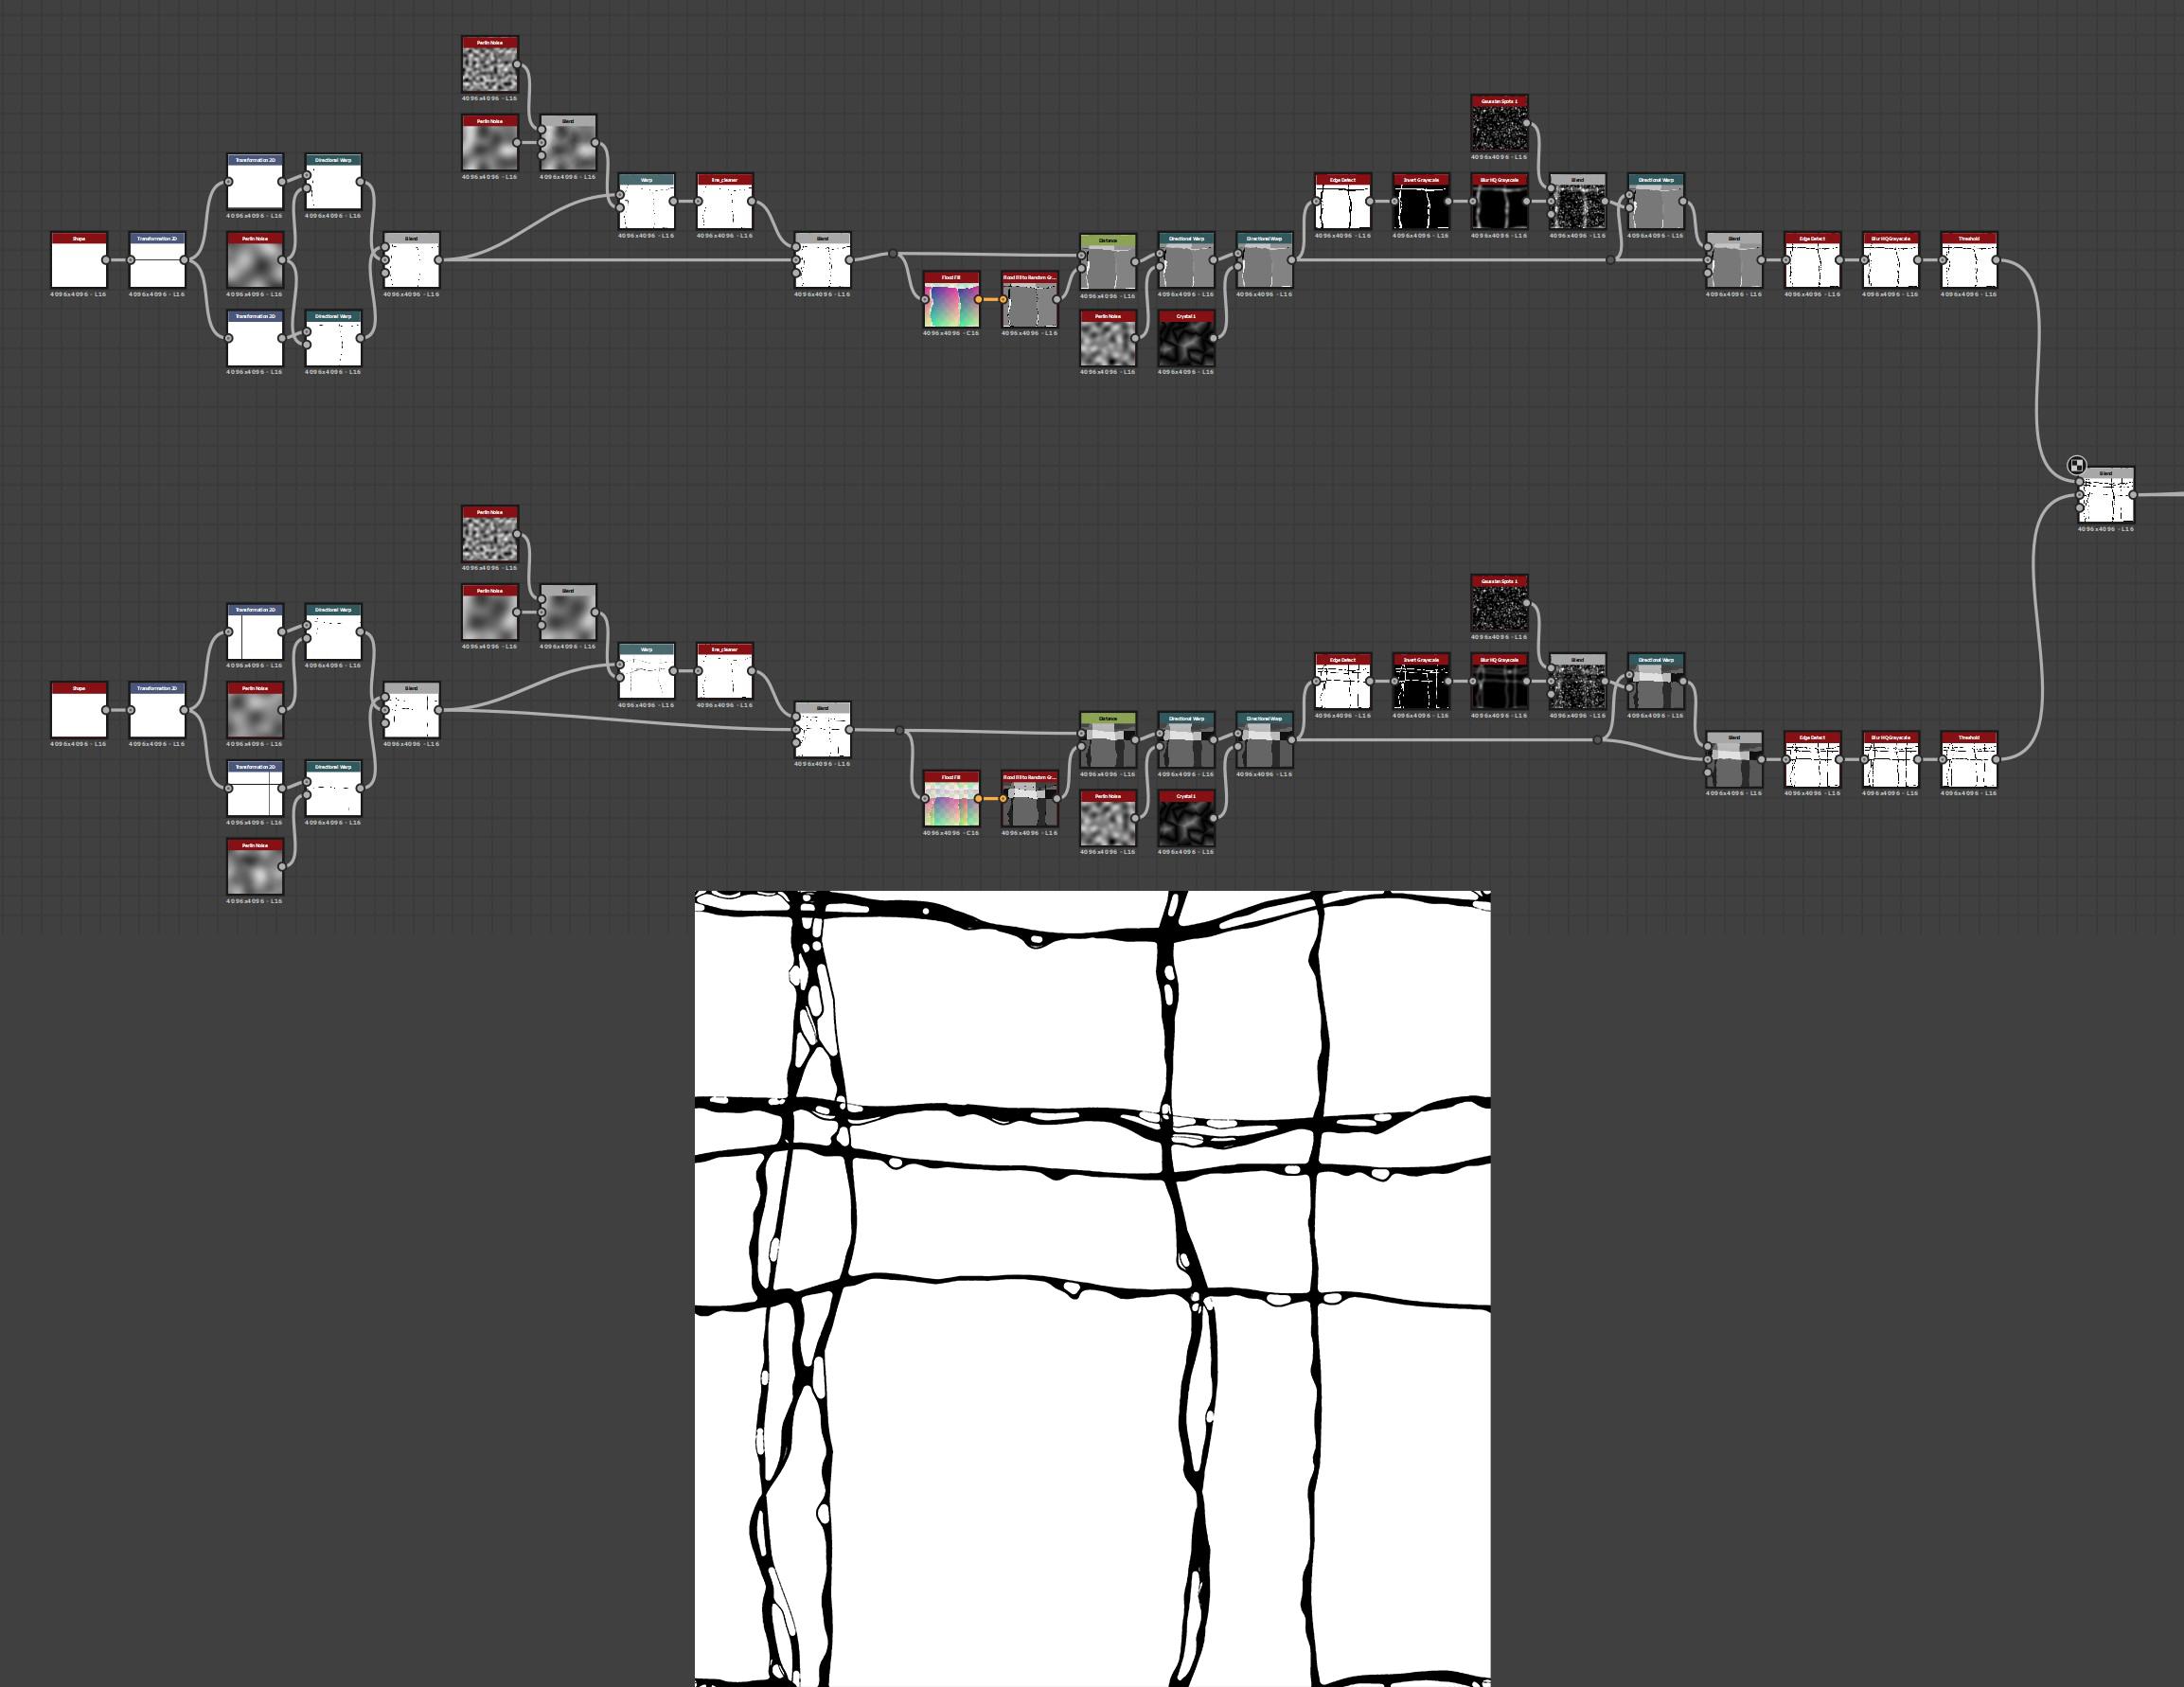
To have even more cracks and more control, I did the same process twice, then blended the results together.
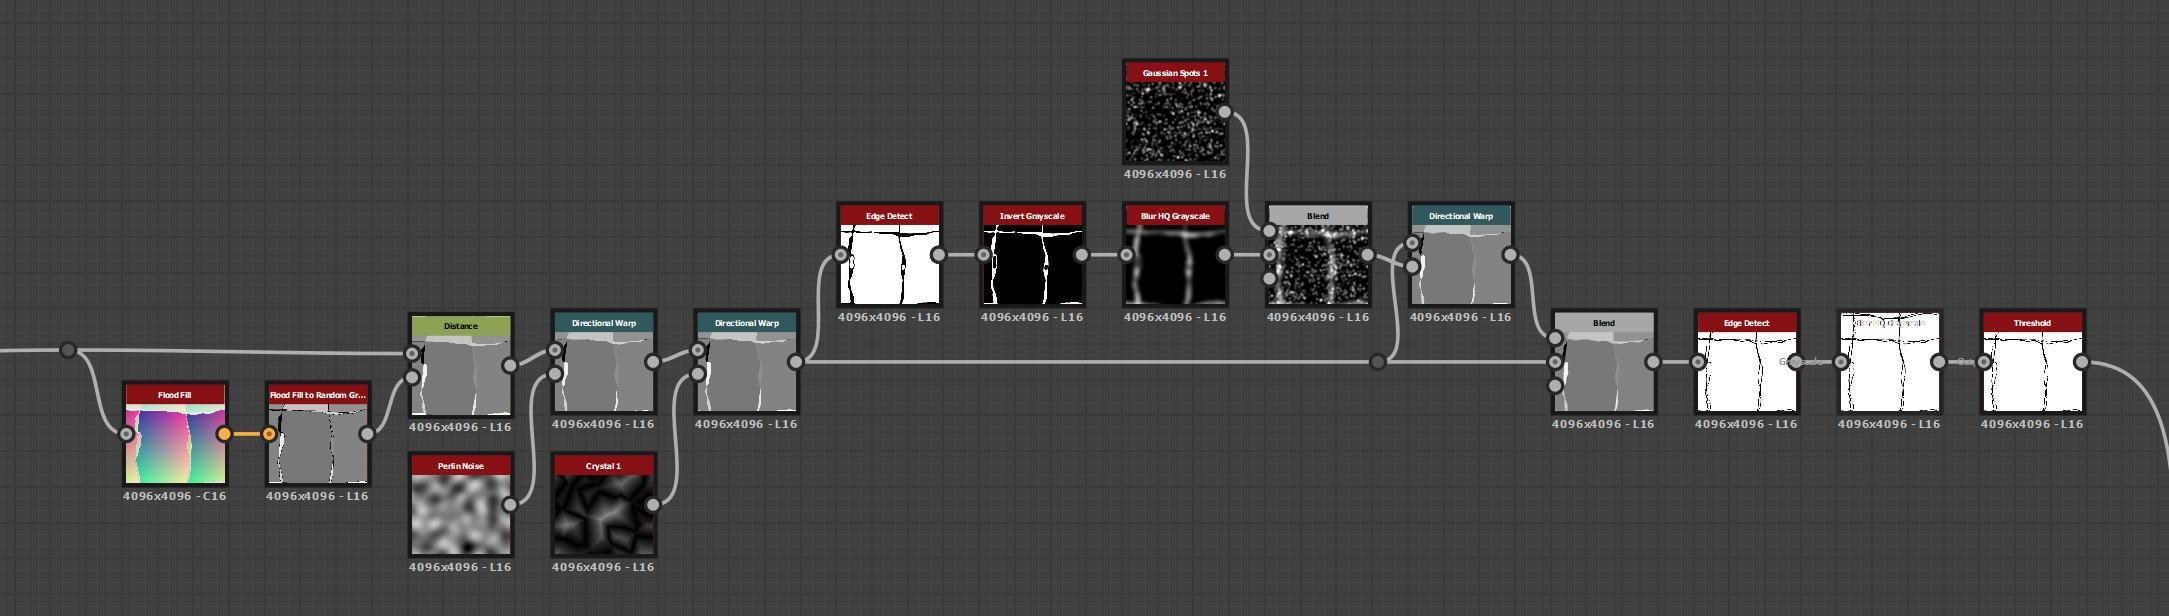
Here I was happy with the main cracks, but wanted to break some of the big shapes. So I repeated a similar process to make another crack pattern to fill the empty spaces.
First I started by scattering small squares to create large cells, then smaller waves for smaller cells. Finally, with a threshold and a distance node, I repeated the same process as before.
To finish the pattern, I added the new crack pattern to the first one with a flood fill to BBox size to select only the big shapes. With a flood fill to random grayscale, I warped the cracks so they feel disconnected from block to block.
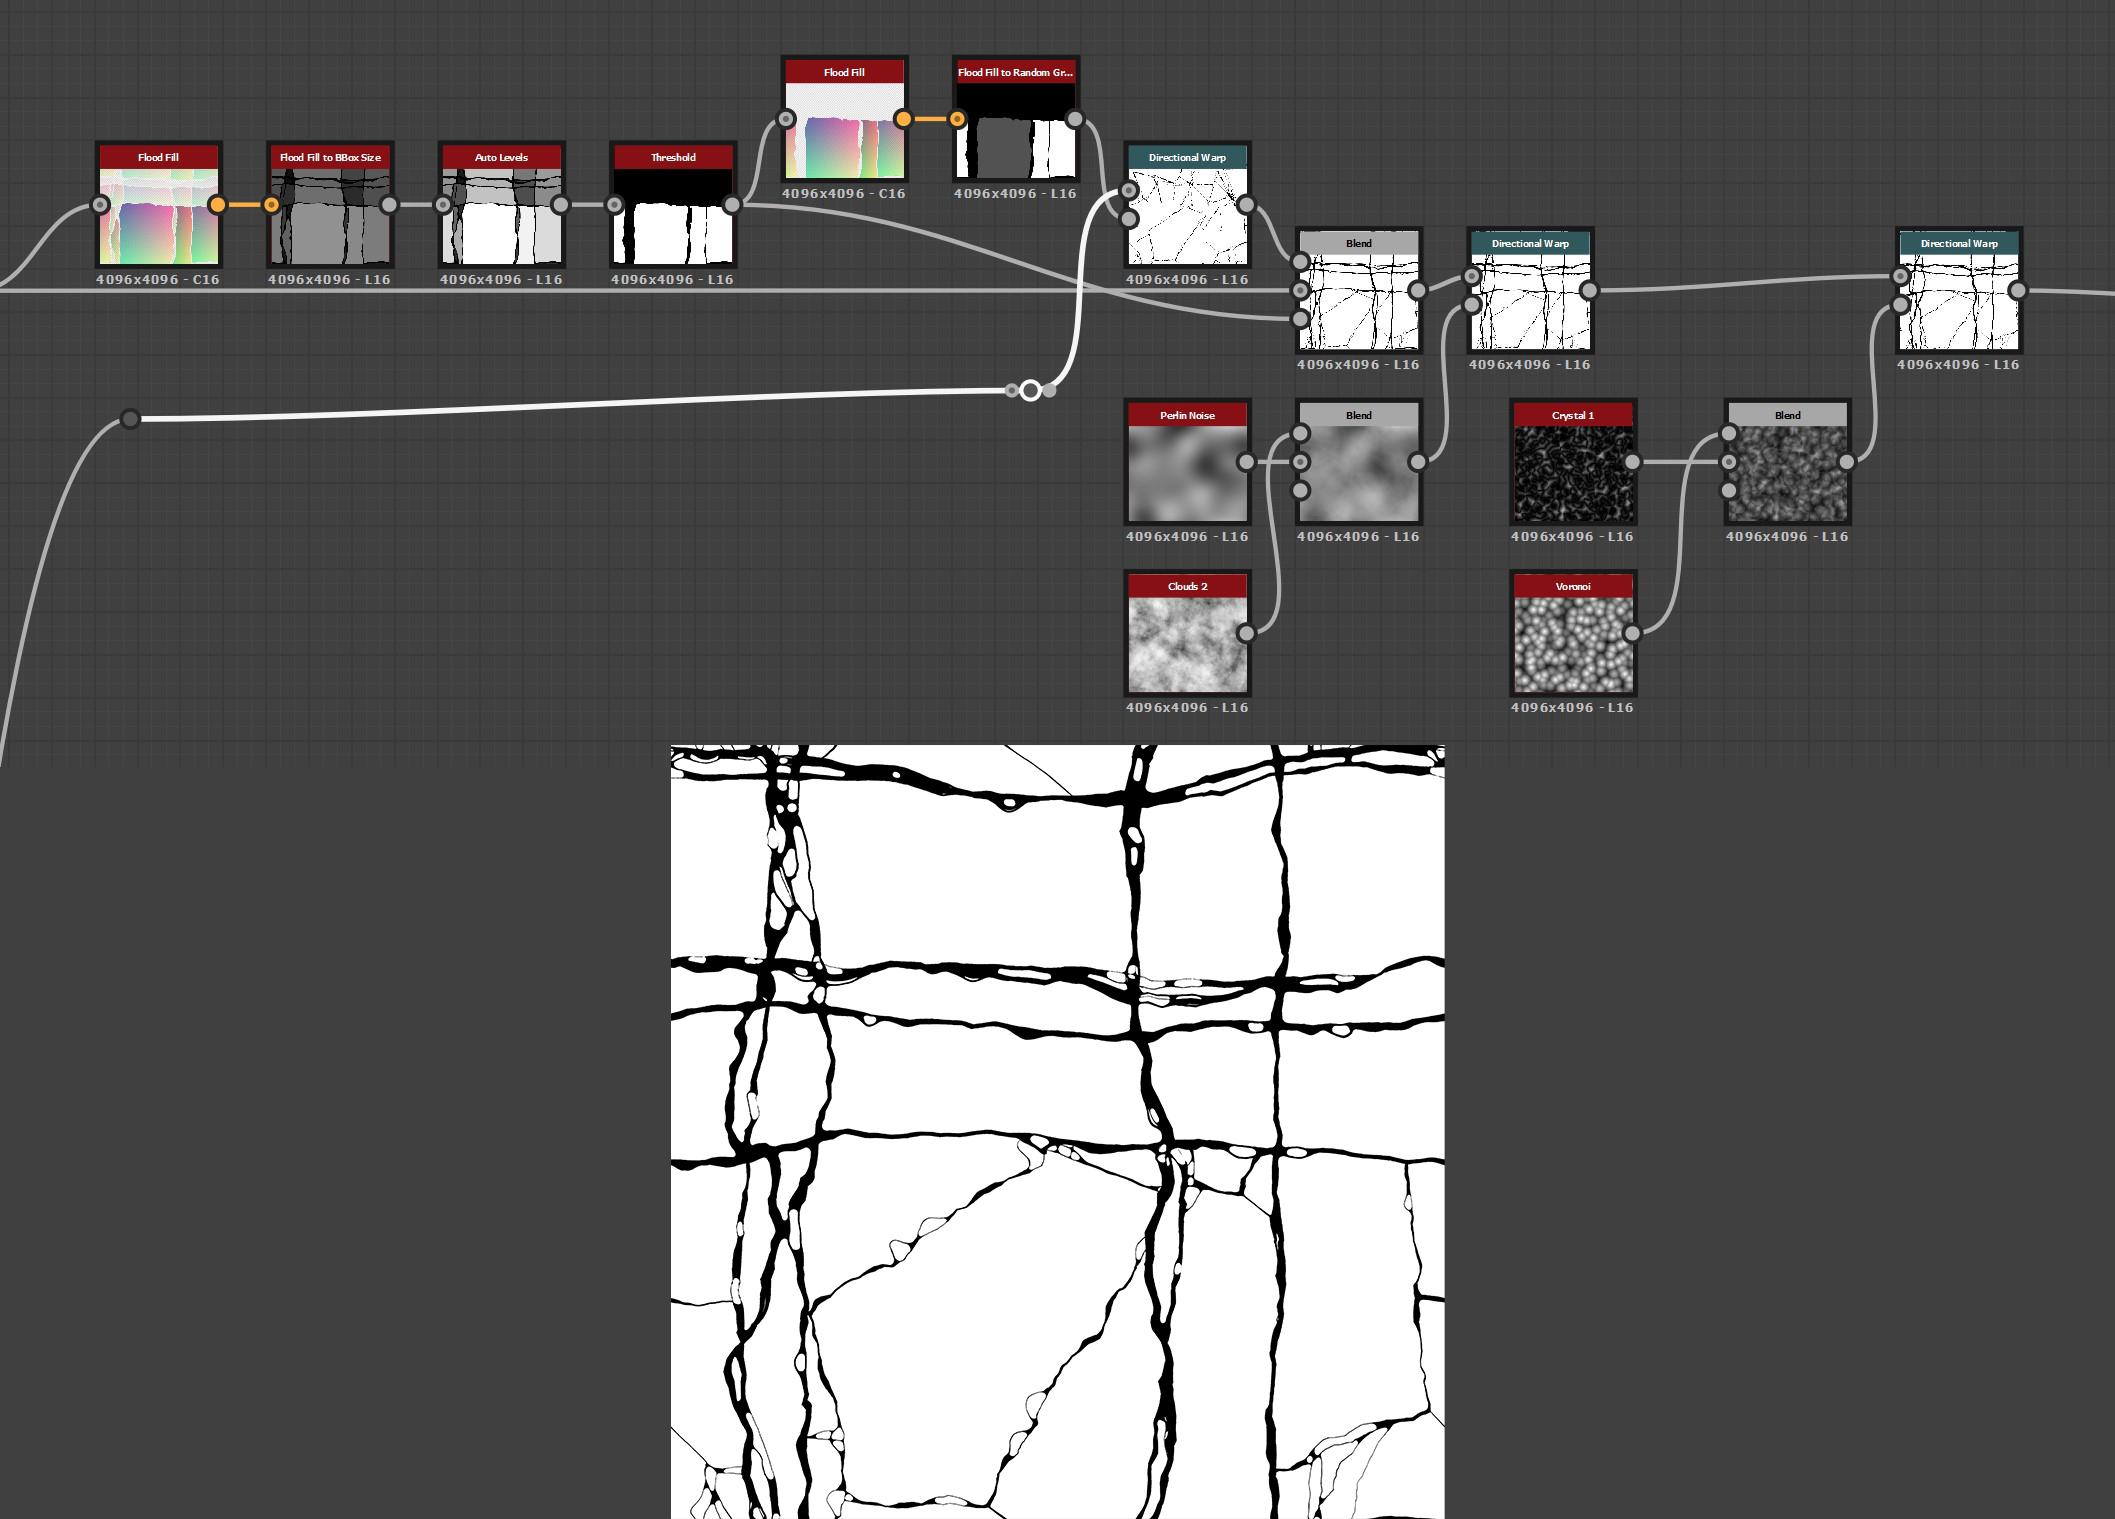
And there we go, this is the biggest and most important part of the texture, so I recommend giving it a lot of time to get it right.
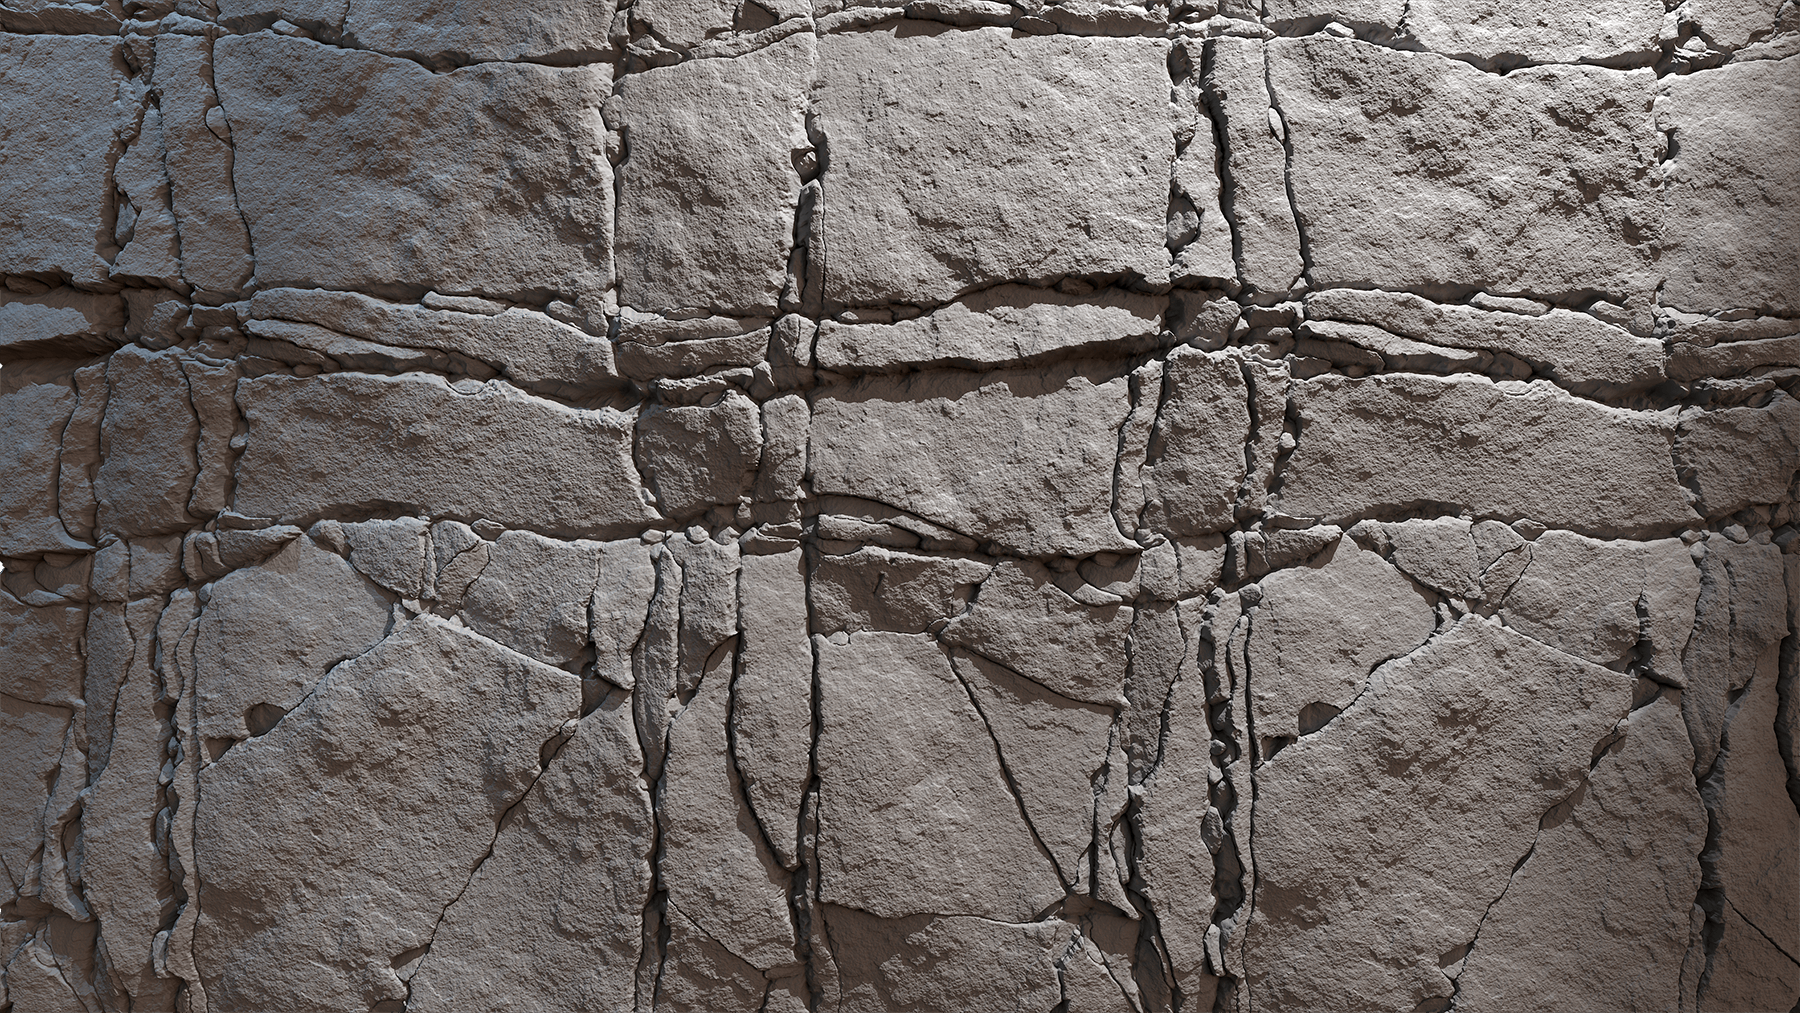
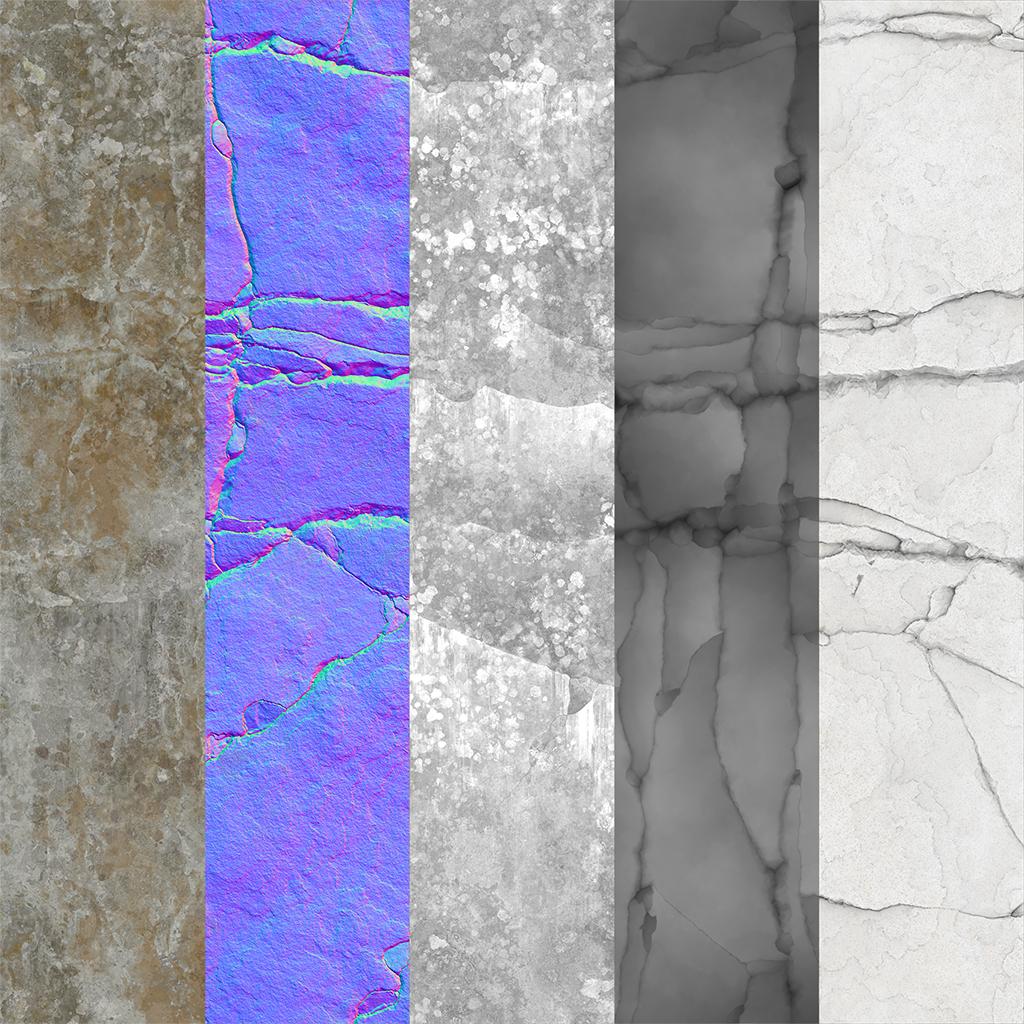
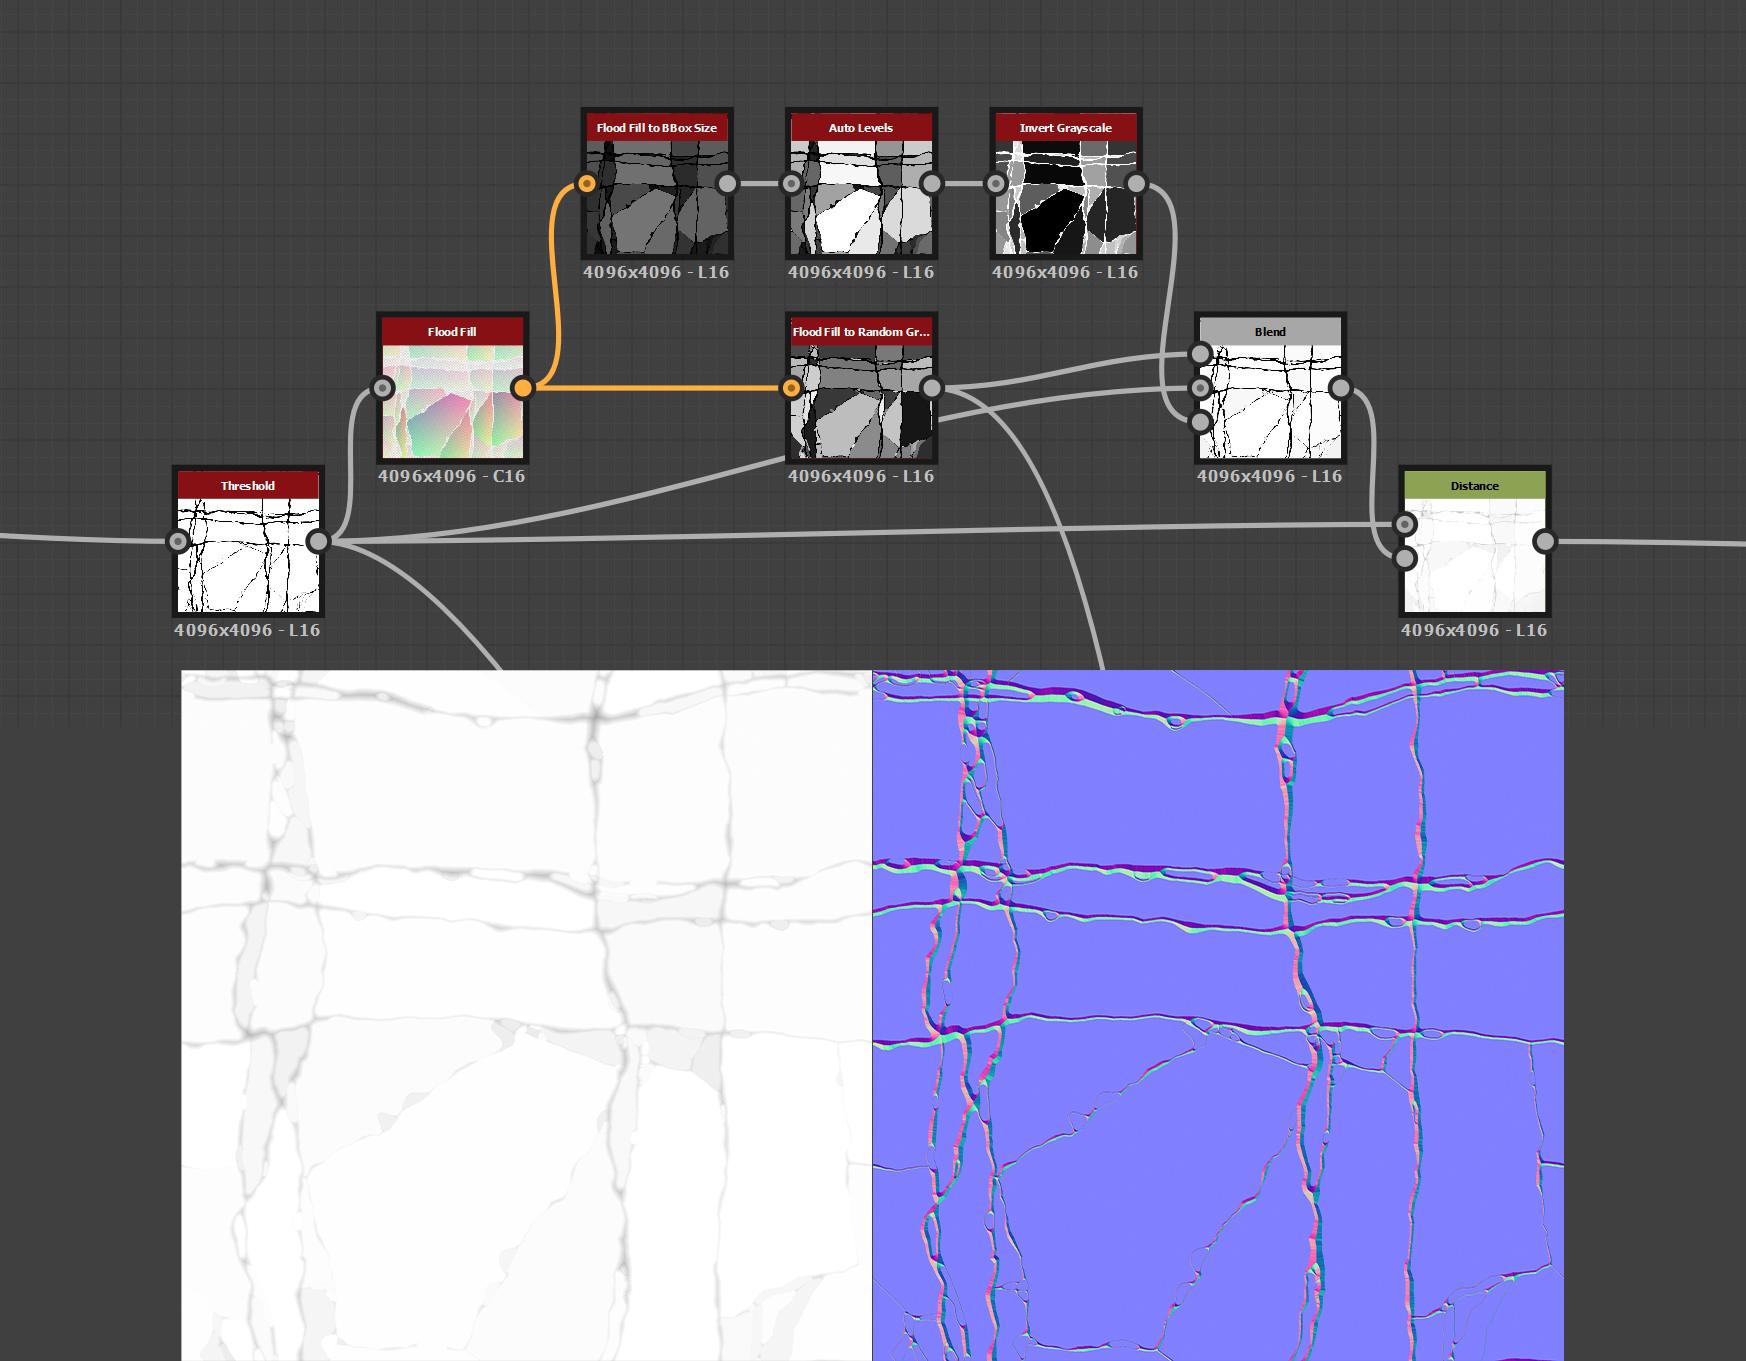
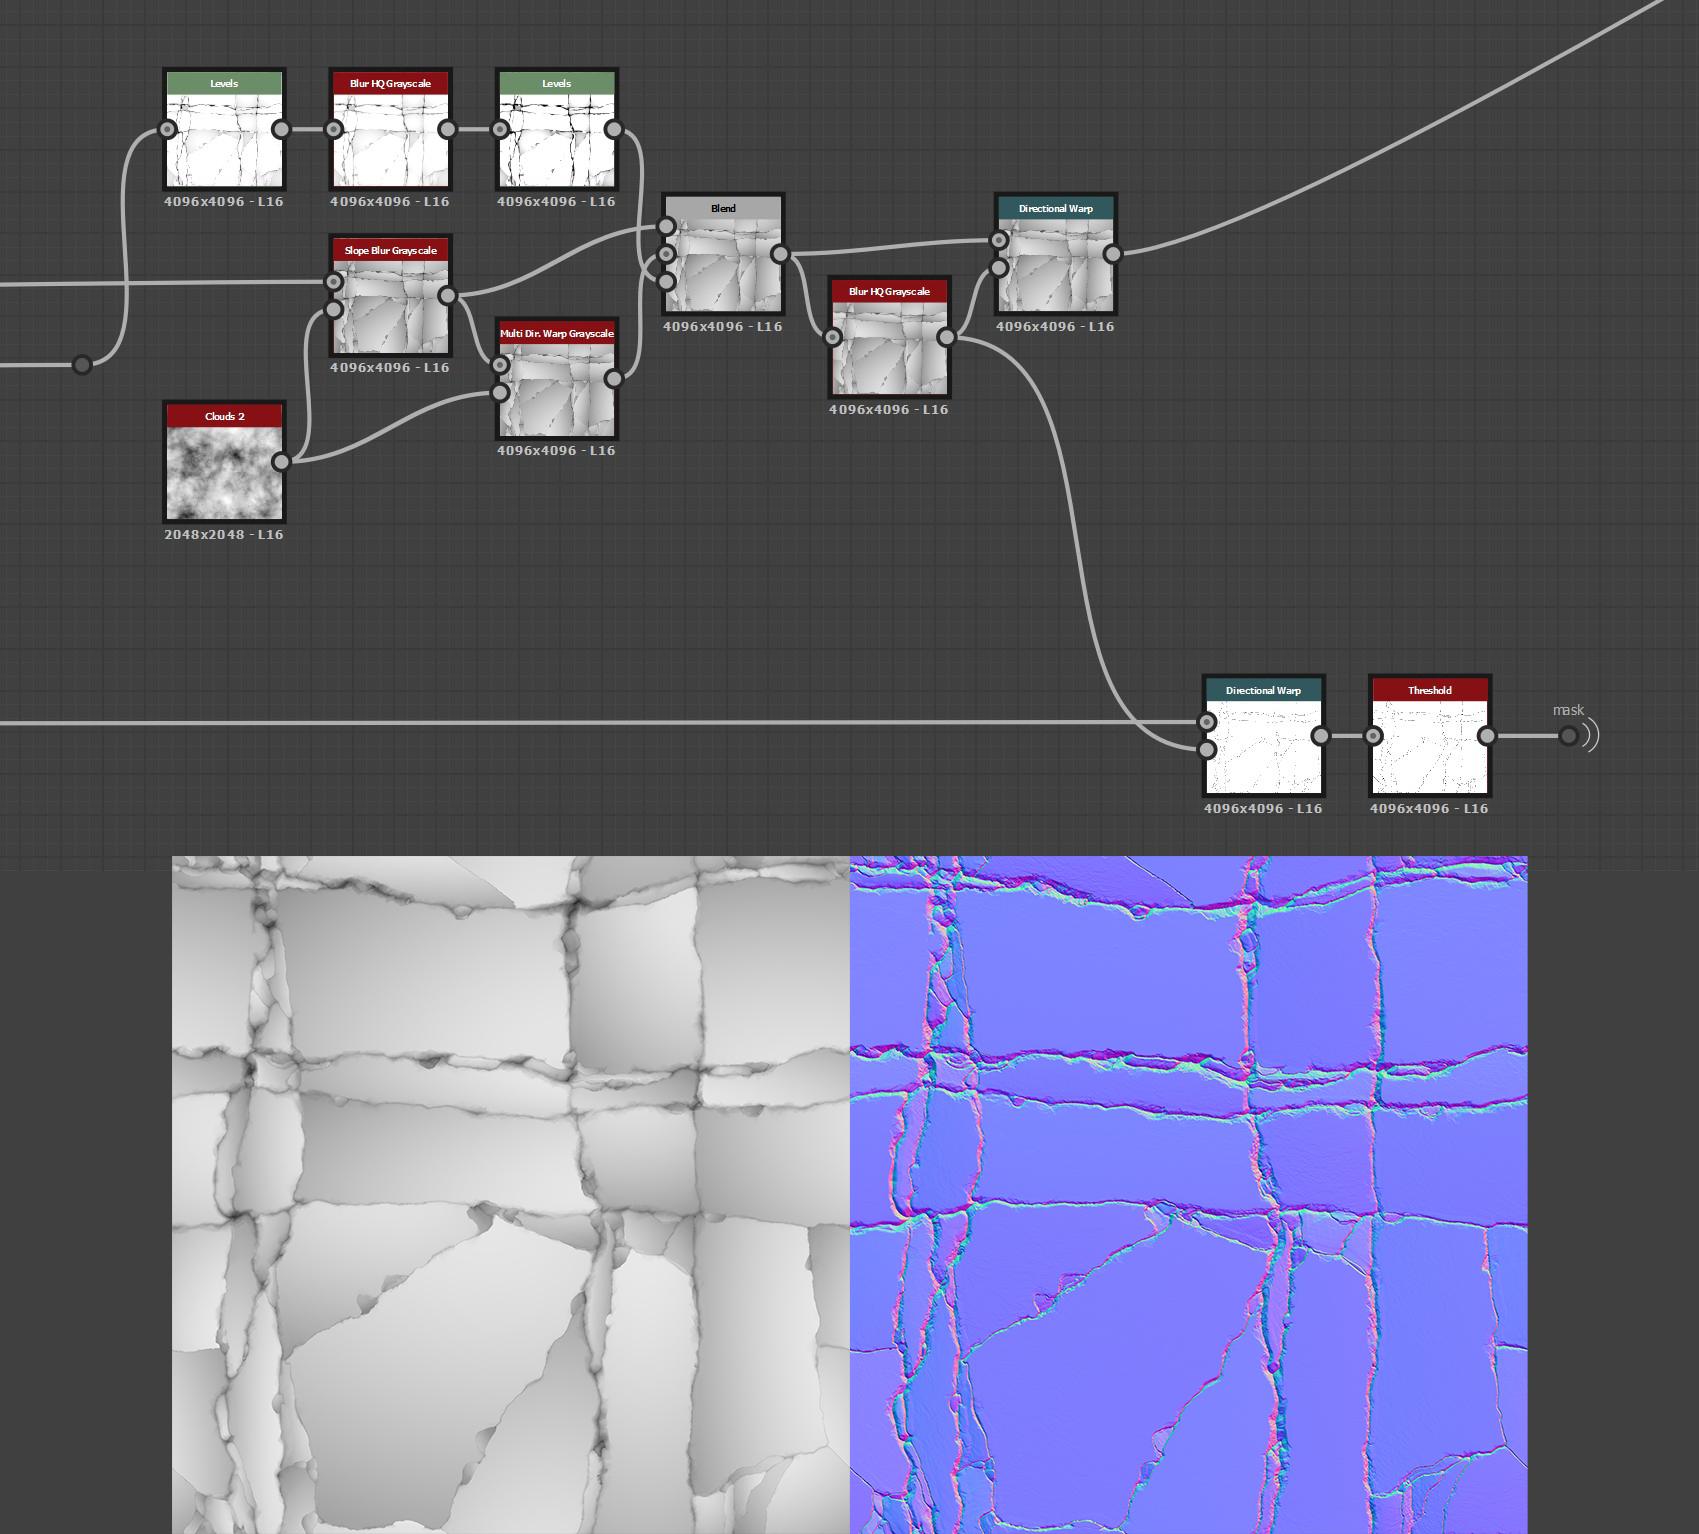
Height Map Conversion
To add volume to my material, I need to convert the mask I just made into a heightmap. Here I used a distance node to fill the gaps and avoid hard transitions. I also used a flood fill to random color to add variation to the height map.
The first steps create really sharp edges, so I smoothed and broke them up. A really useful trick is to use the curvature of the height to highlight the sharp angles.
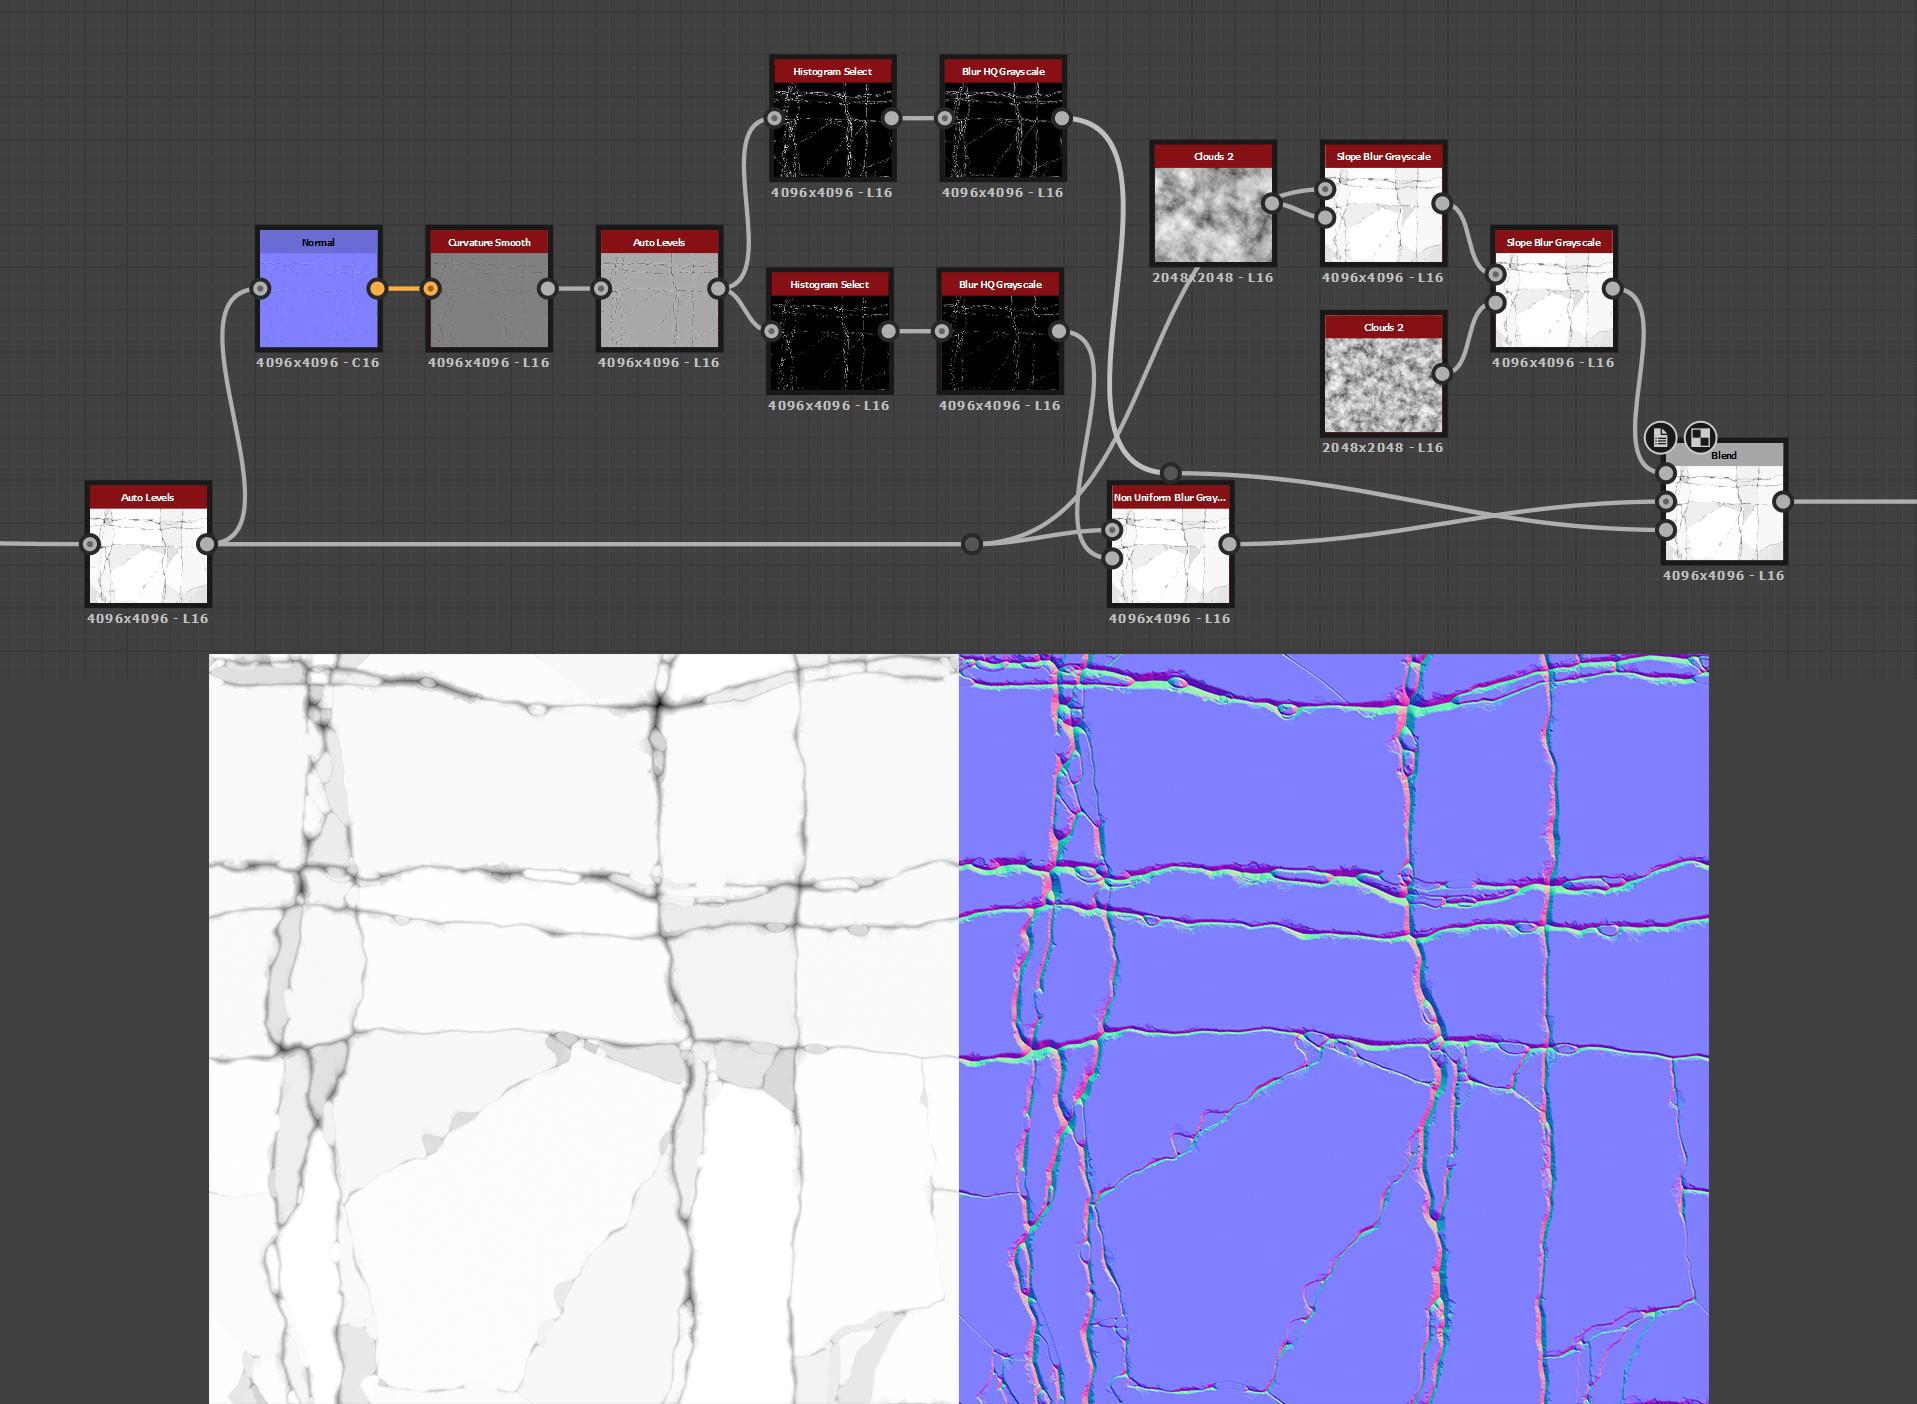
Creating a heightmap is all about variation in volume. Here I wanted every cell to have a “round” volume to make each shape stand out, and for each one to have a slightly different angle to make the lighting more interesting.
Also, try not to have too much detail/noise in smaller cells so they don’t take all the focus when we look at the final picture; flood fill to BBox is a really useful node for this.

Before going to the surfacing of the texture, I was looking to break the shapes even more to enhance the rock feeling. Cloud 2 slope blur and multi-directional warp are very powerful nodes for stone creation. Here I also made a mask for later.
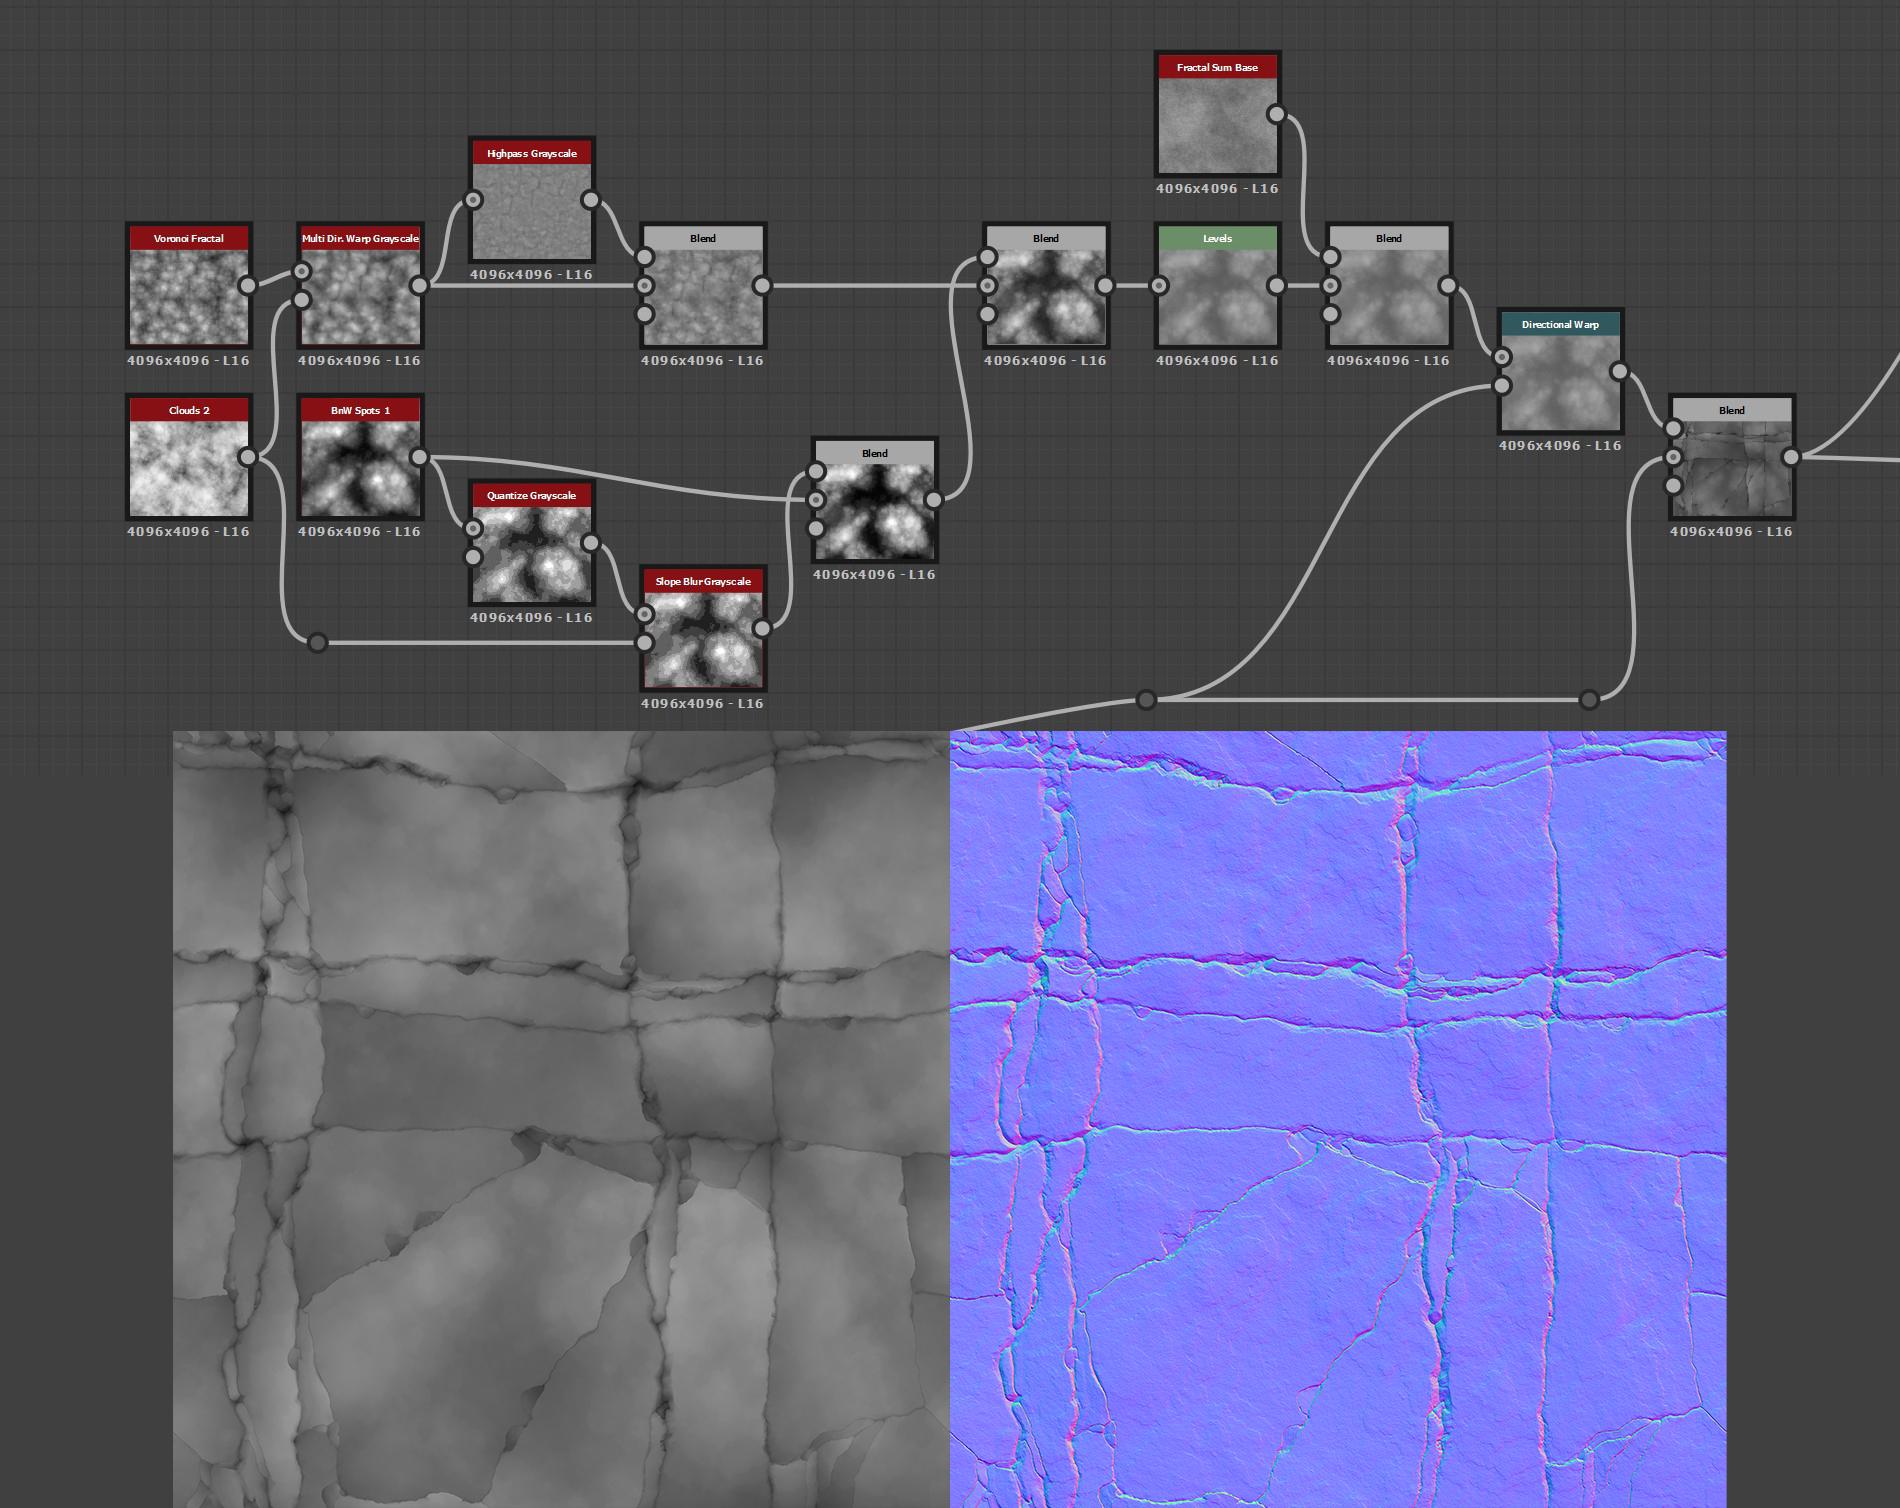
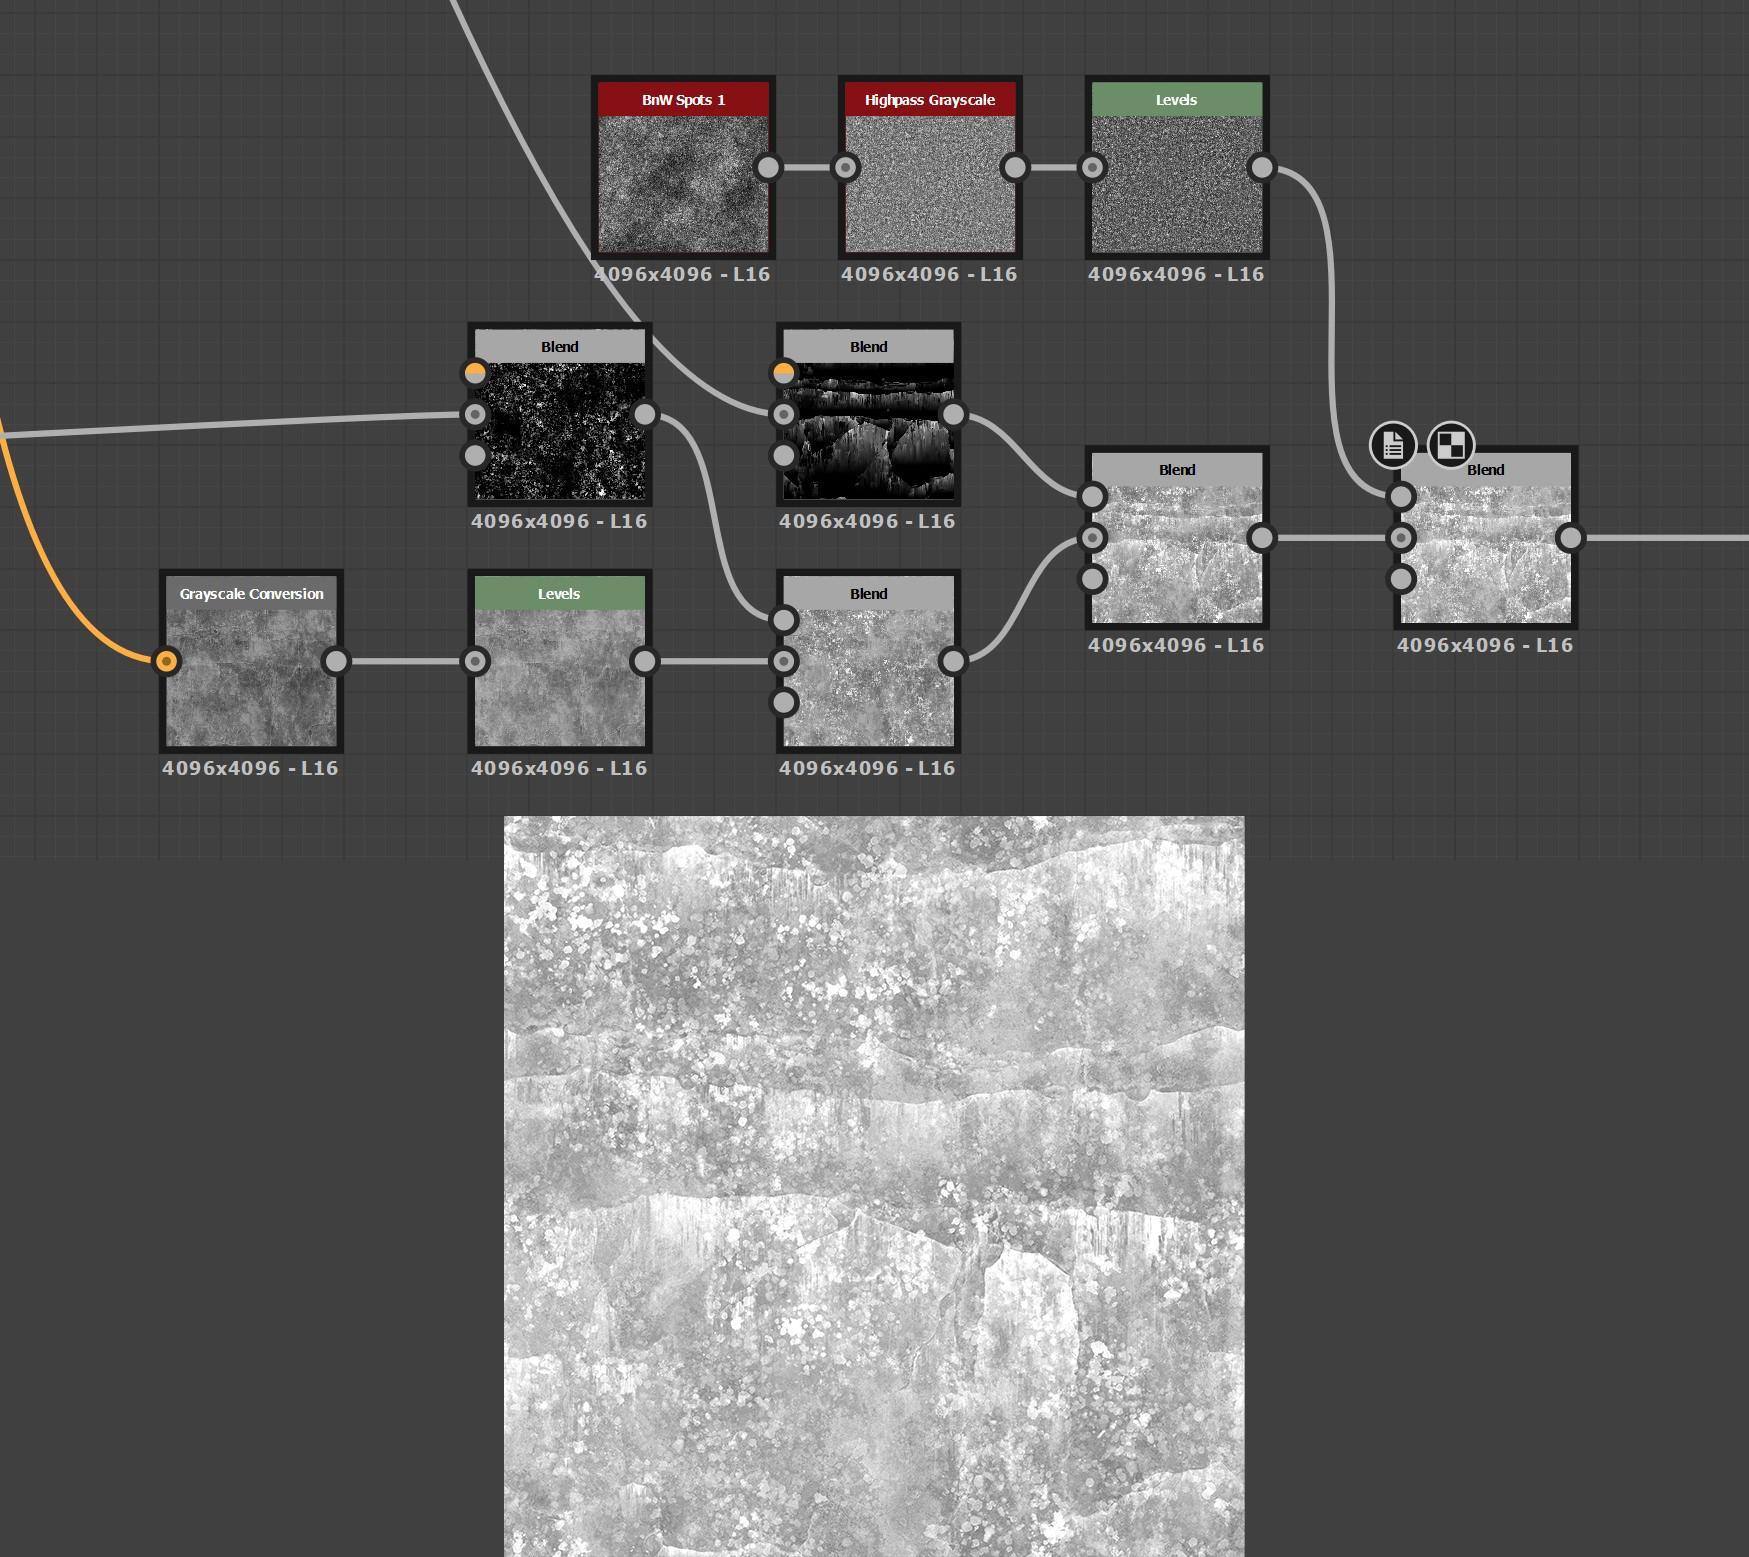
Surfacing
When I talk about surfacing, I mean the micro details/grain that will give a texture its believable and realistic look. For this texture, I was looking for a quick and efficient way to give a rocky feel, with details like stepping, grain, and small variations in volume.
Fractal Sum Base is a must for every stone material; it instantly gives a stone feel and looks great if applied very lightly. And here’s a tip from the great Daniel Thiger: warp the noise with the height map before blending it to make the noise follow the surface and give a more realistic look.
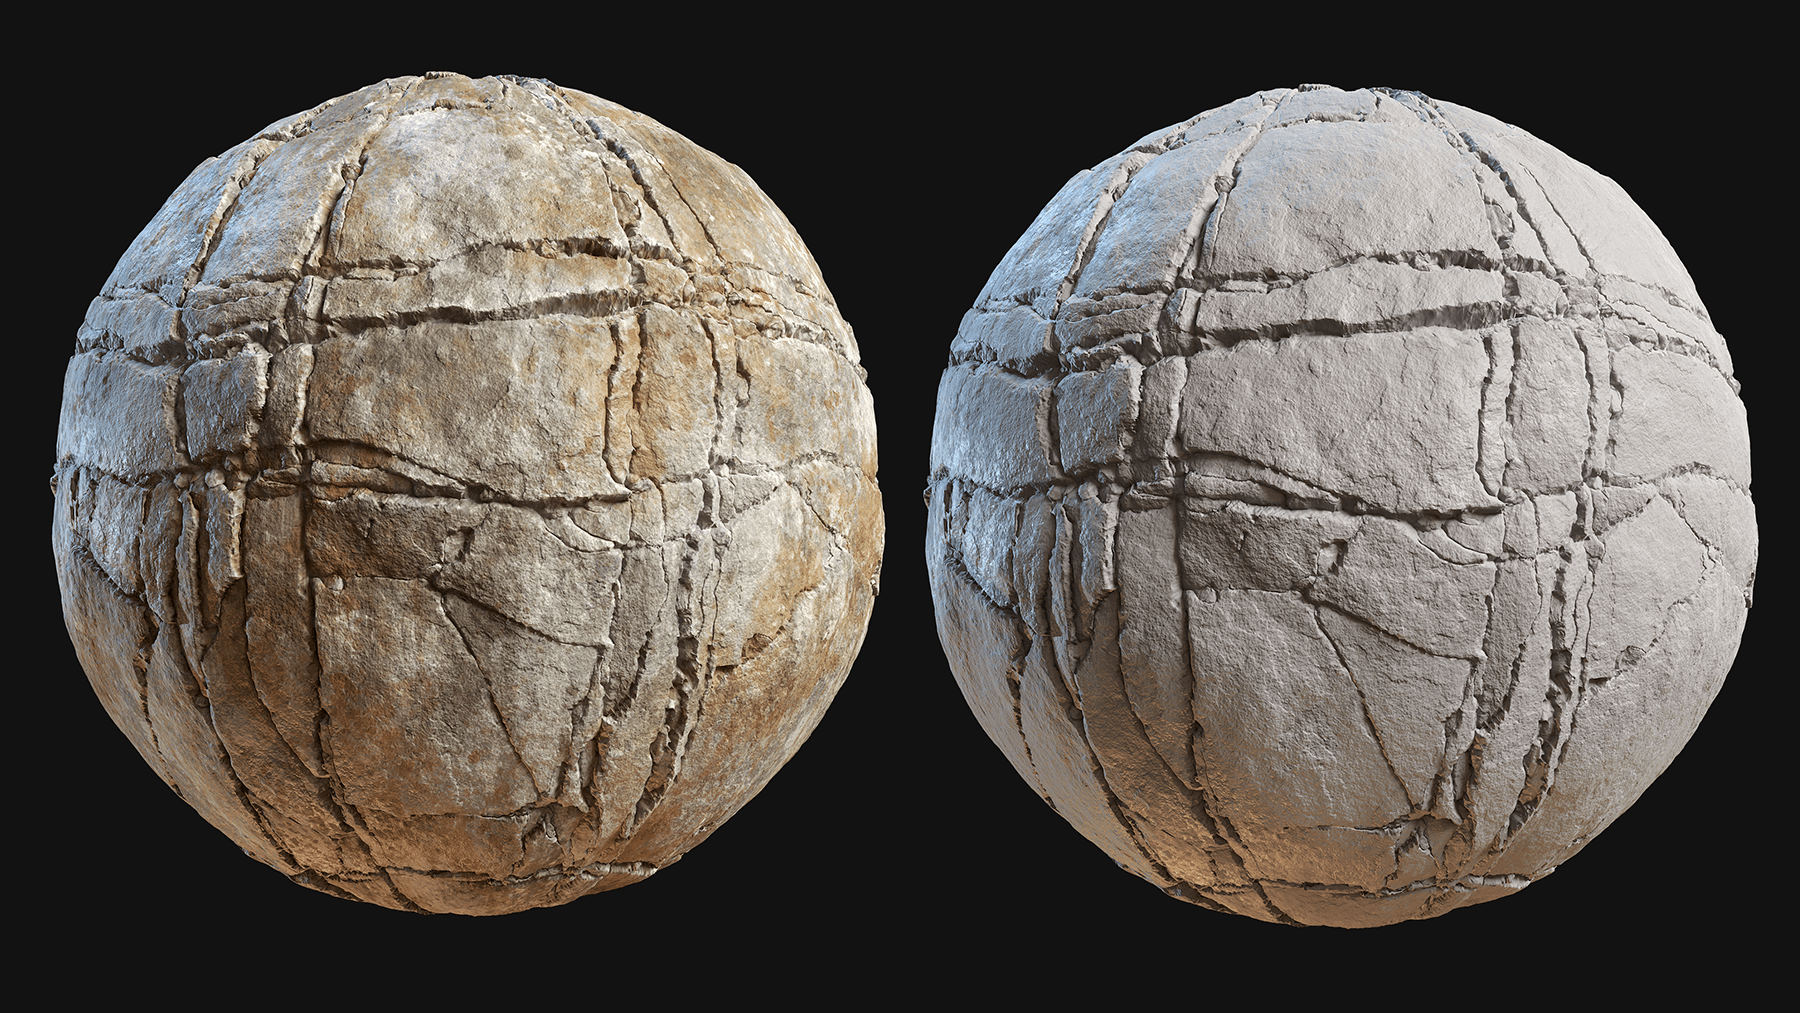
Albedo
The first thing I did for this project was to identify the main colors; here I found three. I also recommend having photo references taken under overcast light if possible.

There are a lot of ways to create interesting albedos. I like to start with noise and gradient maps, picking the main colors from my reference. This already gives a lot of variation.
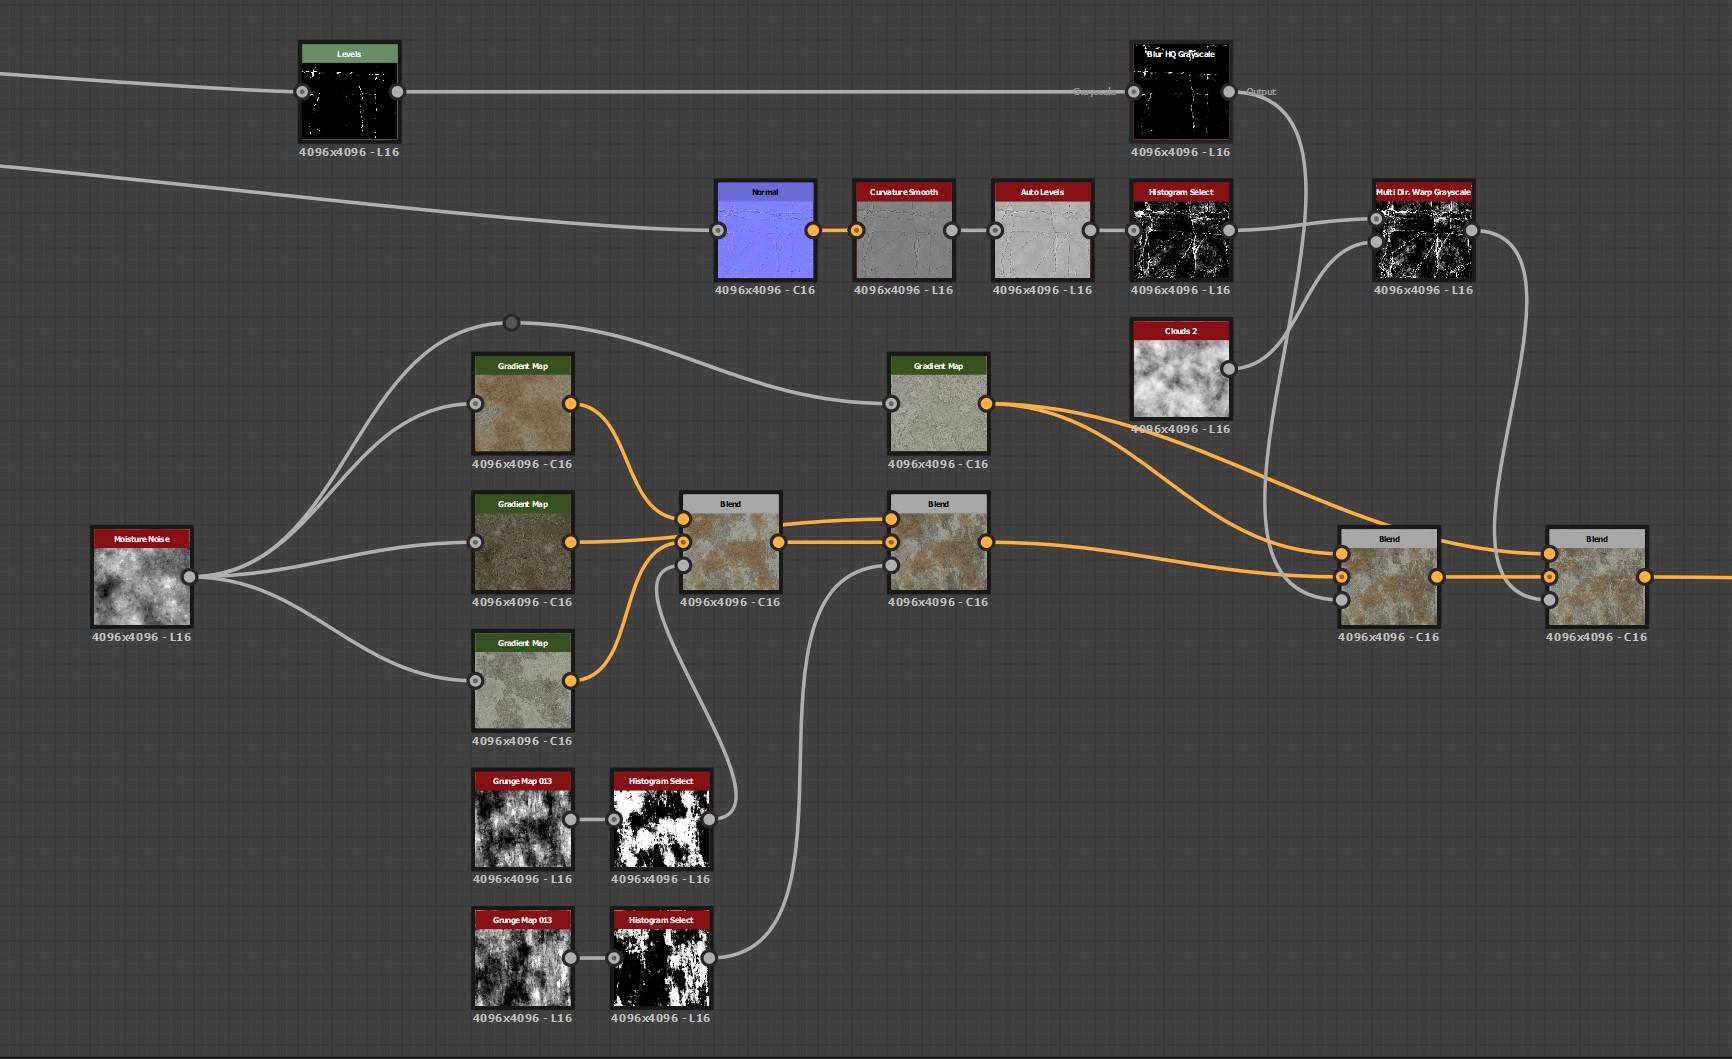
A very important step is also to use the curvature, this time to make the weathering of the rock. Edges are more affected by rain and wind, so emphasizing them adds realism.
On top of that, I wanted to add lichen, which is present on every rock of the area. I tried to follow the same rule as earlier and made three tints of lichen starting with a gradient map.
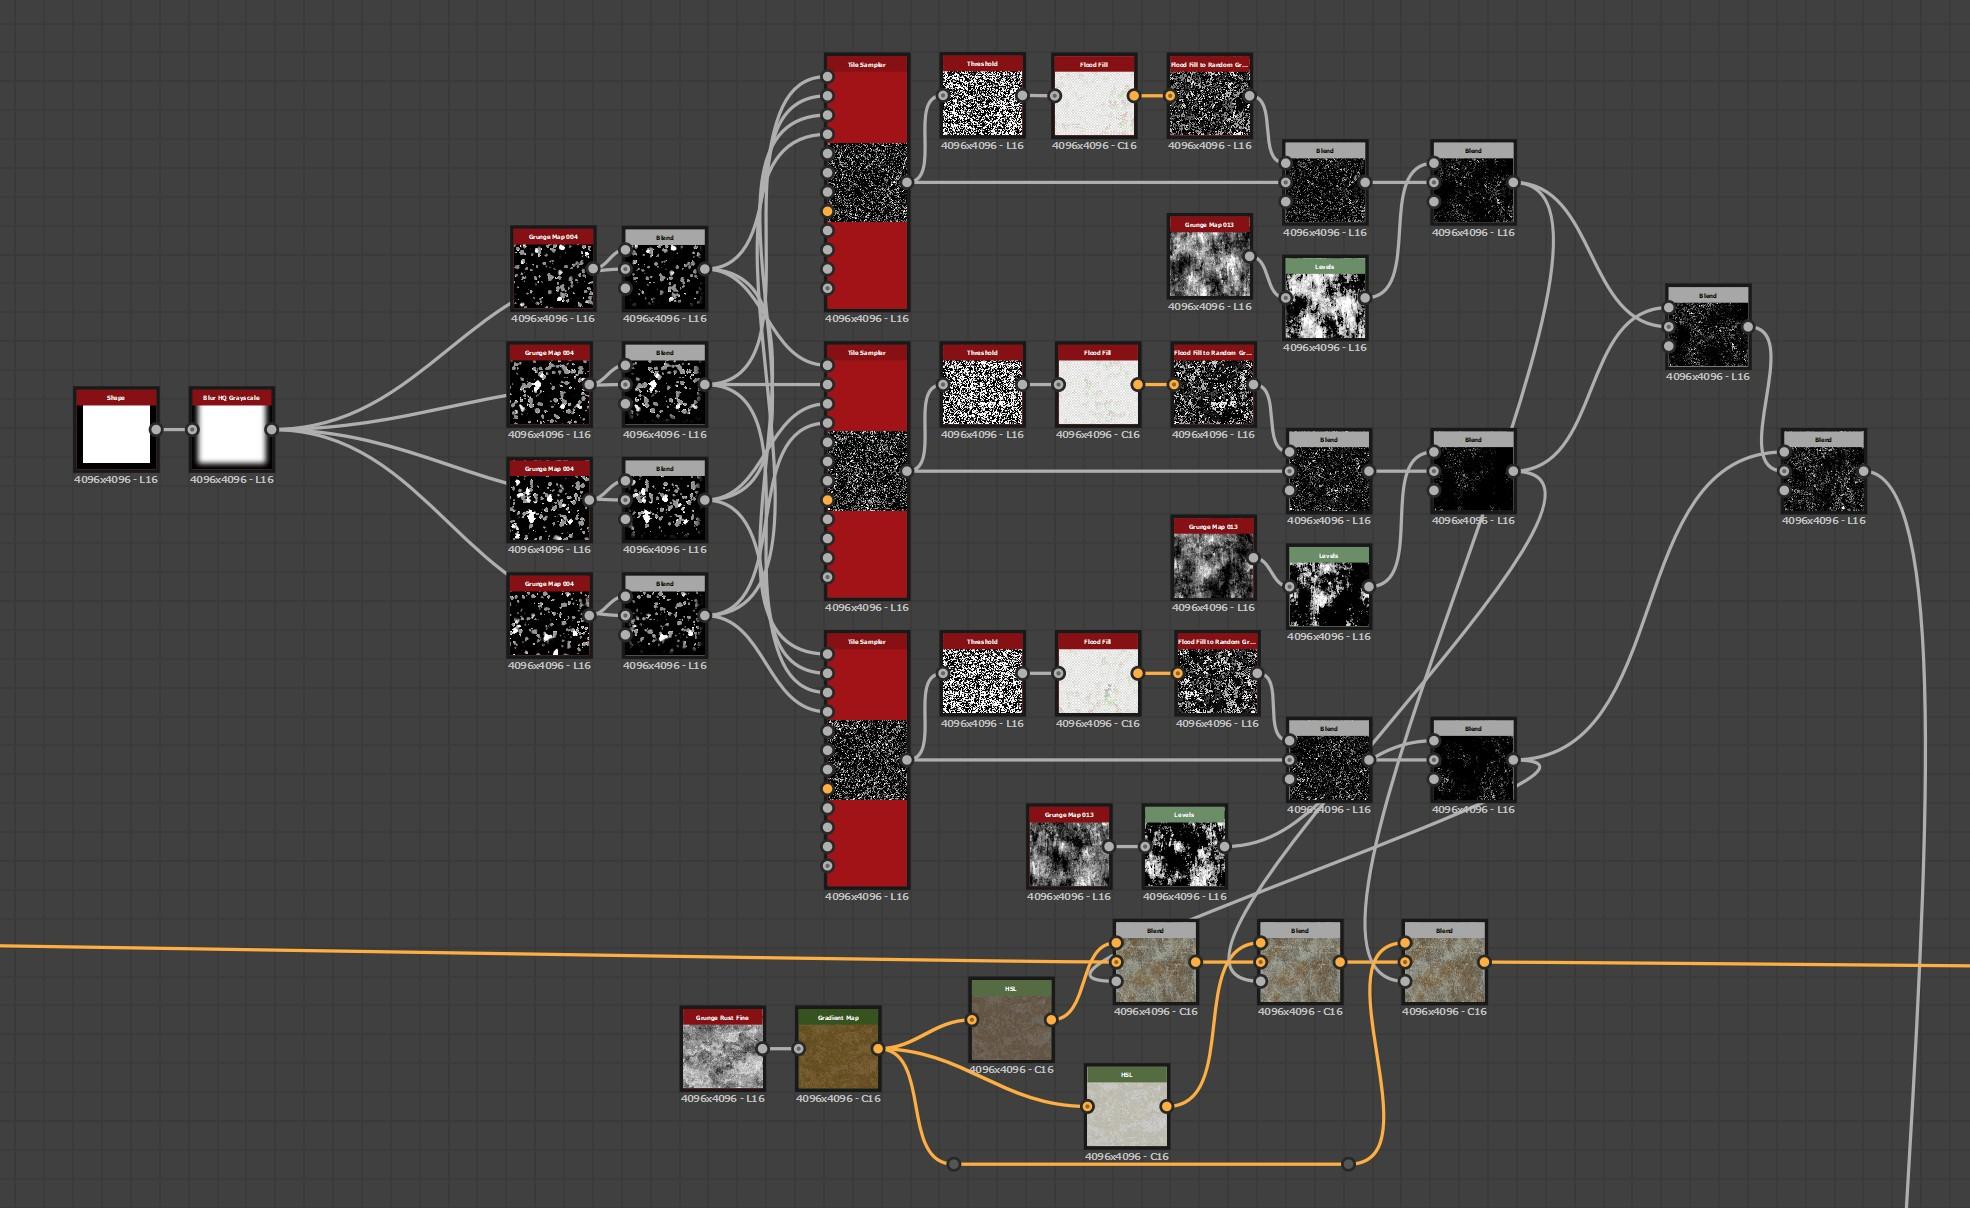
The map I found that worked the best for lichen was the grunge map 004. However, I recommend trying different maps to see how they interact with your own material.
Instead of tiling ten times, I removed the seam of the noise and used a tile sampler to scatter different variations of the noise to obtain my own.
Then, with a threshold and a flood fill, I can add randomness to every cell.
For a cliff like this, there’s always some dried leak; moisture will create darker ones, and salt from the sea will create white ones.
The flood fill gradient is very useful to create leaks that follow the cracks of the stone.
Roughness
For organic material like rock, wood, etc., a quick way to start the roughness is to convert the albedo into grayscale, because different colors often correspond to different roughness levels.
I also like to add masks I used earlier to give more logic to the map, and layer in some additional noise to make the roughness even more interesting.
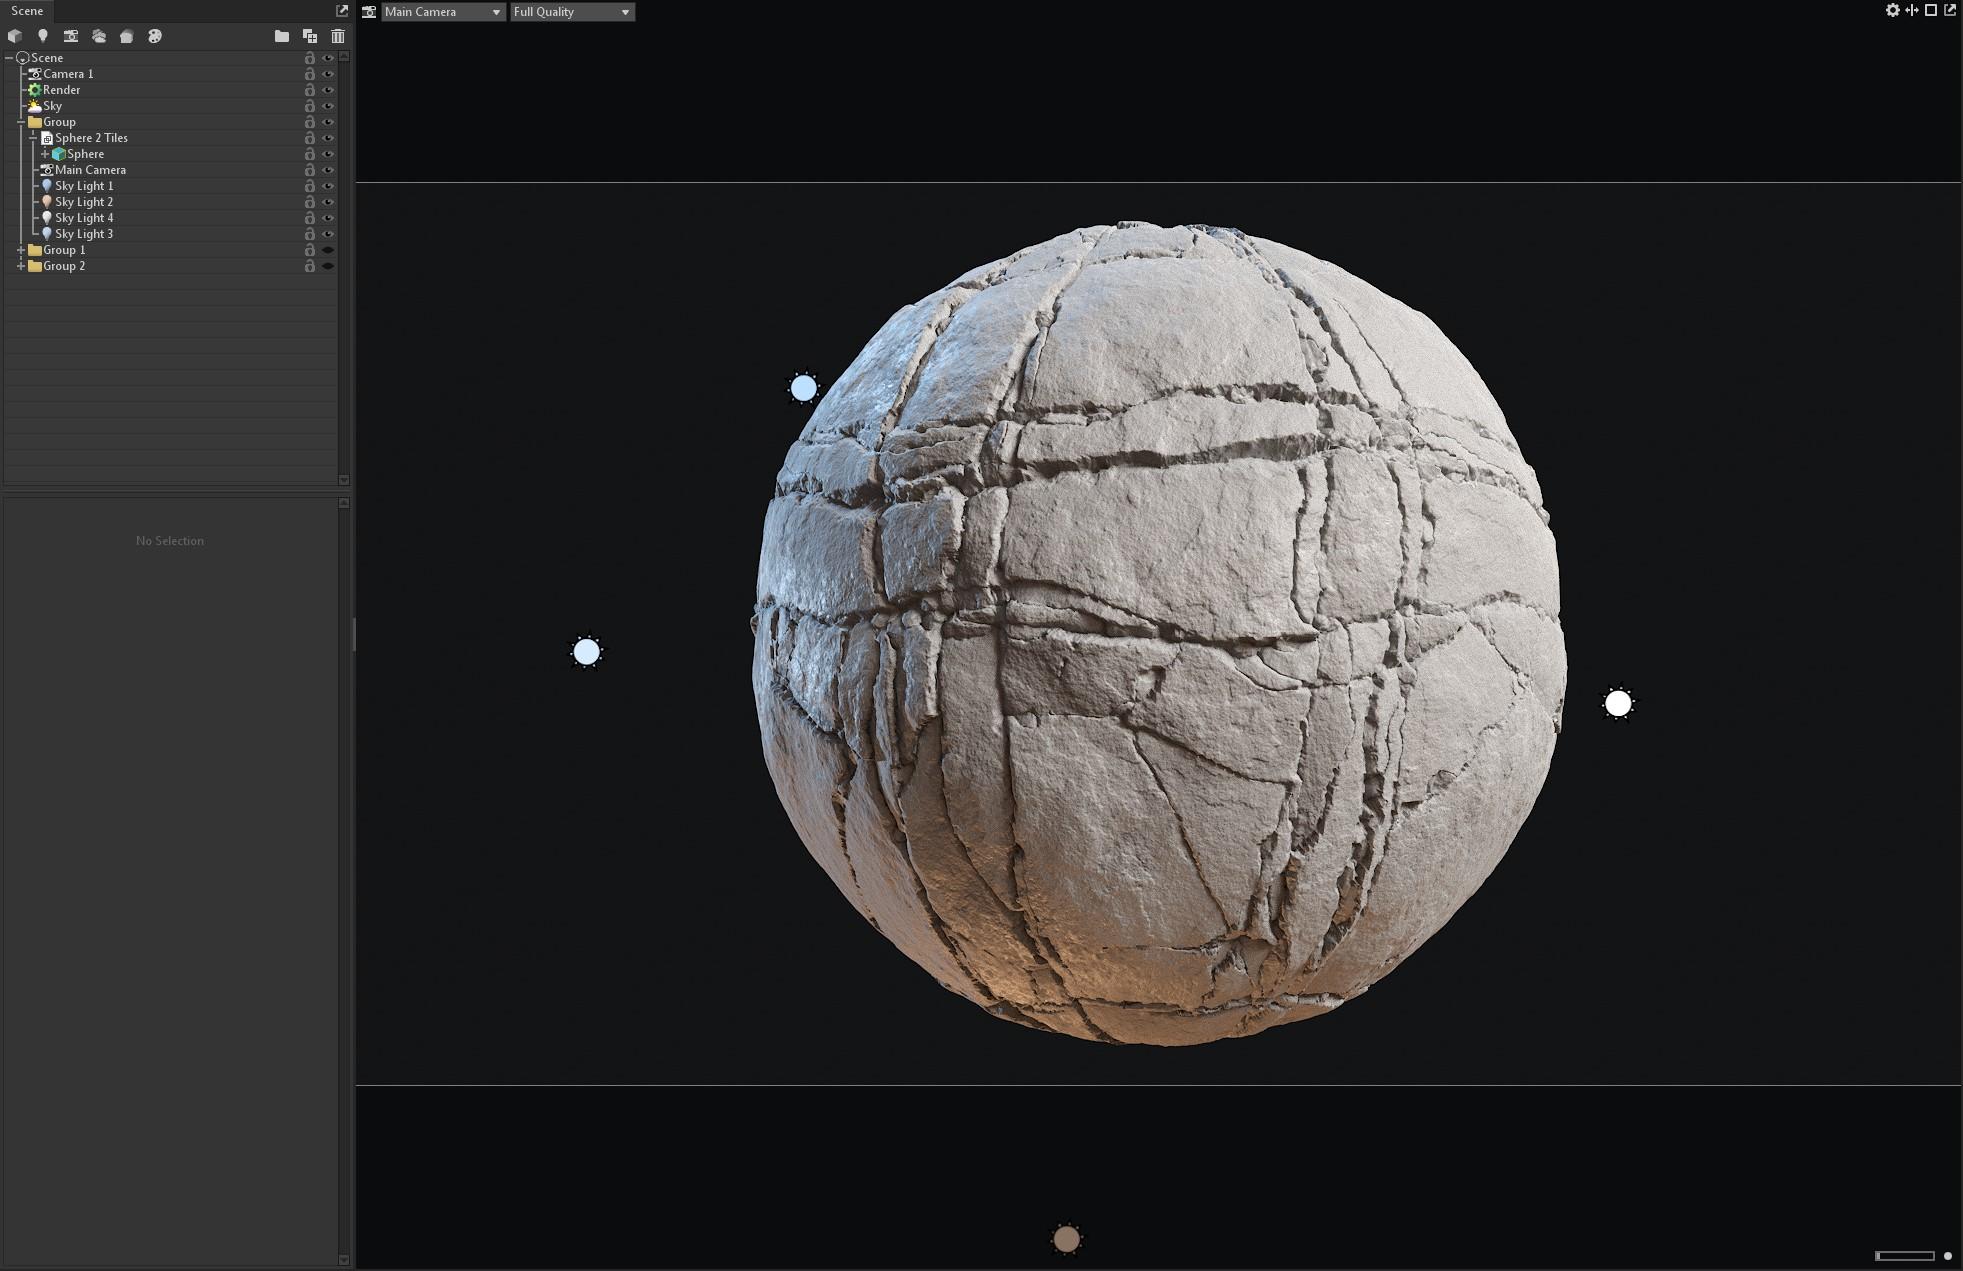
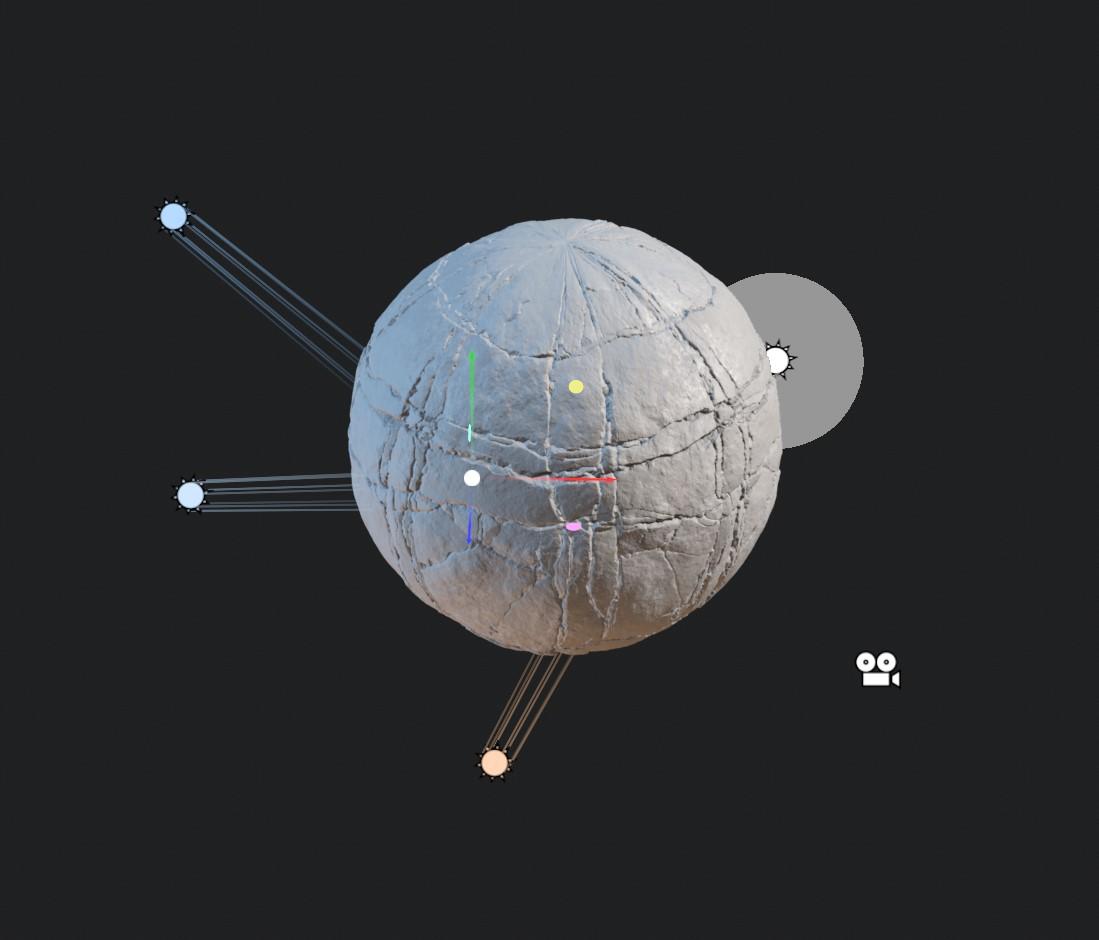
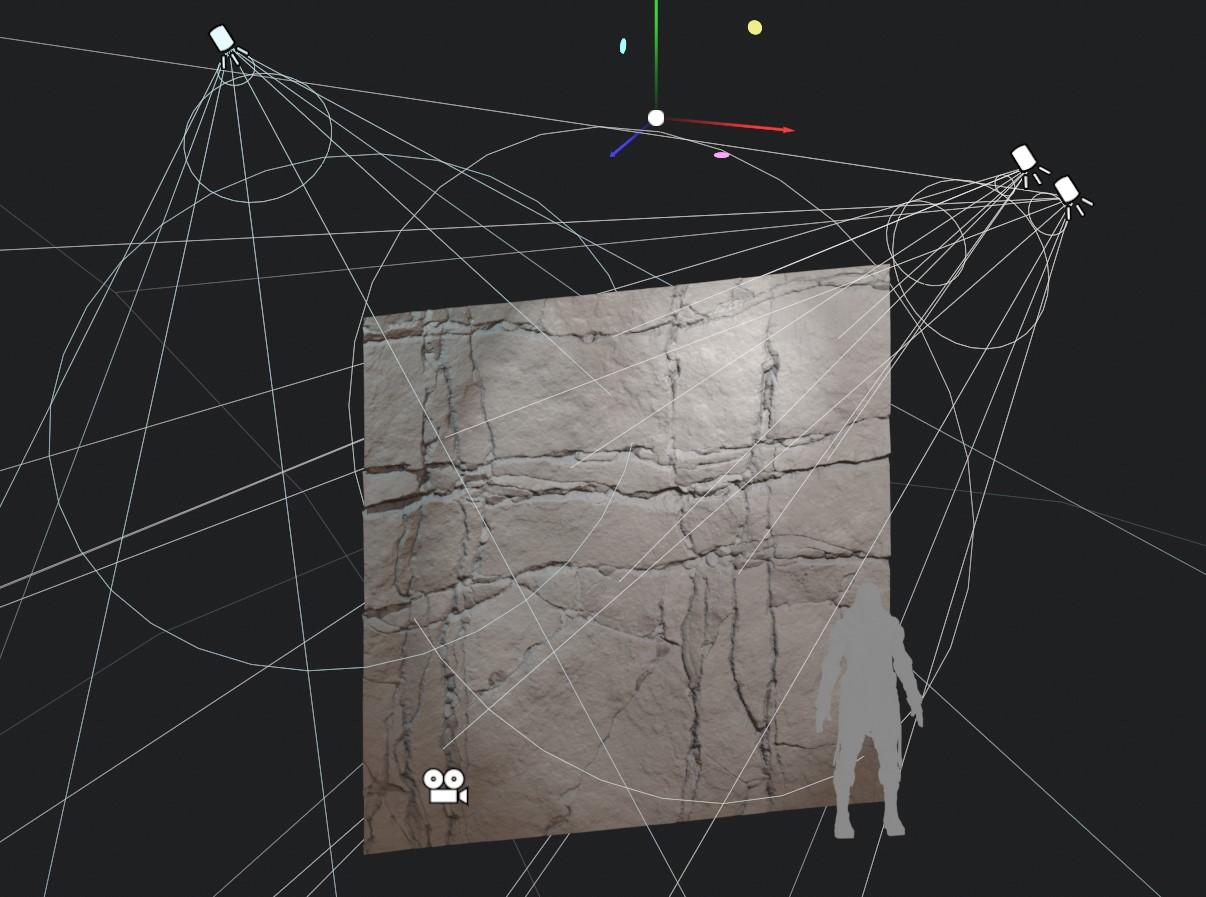
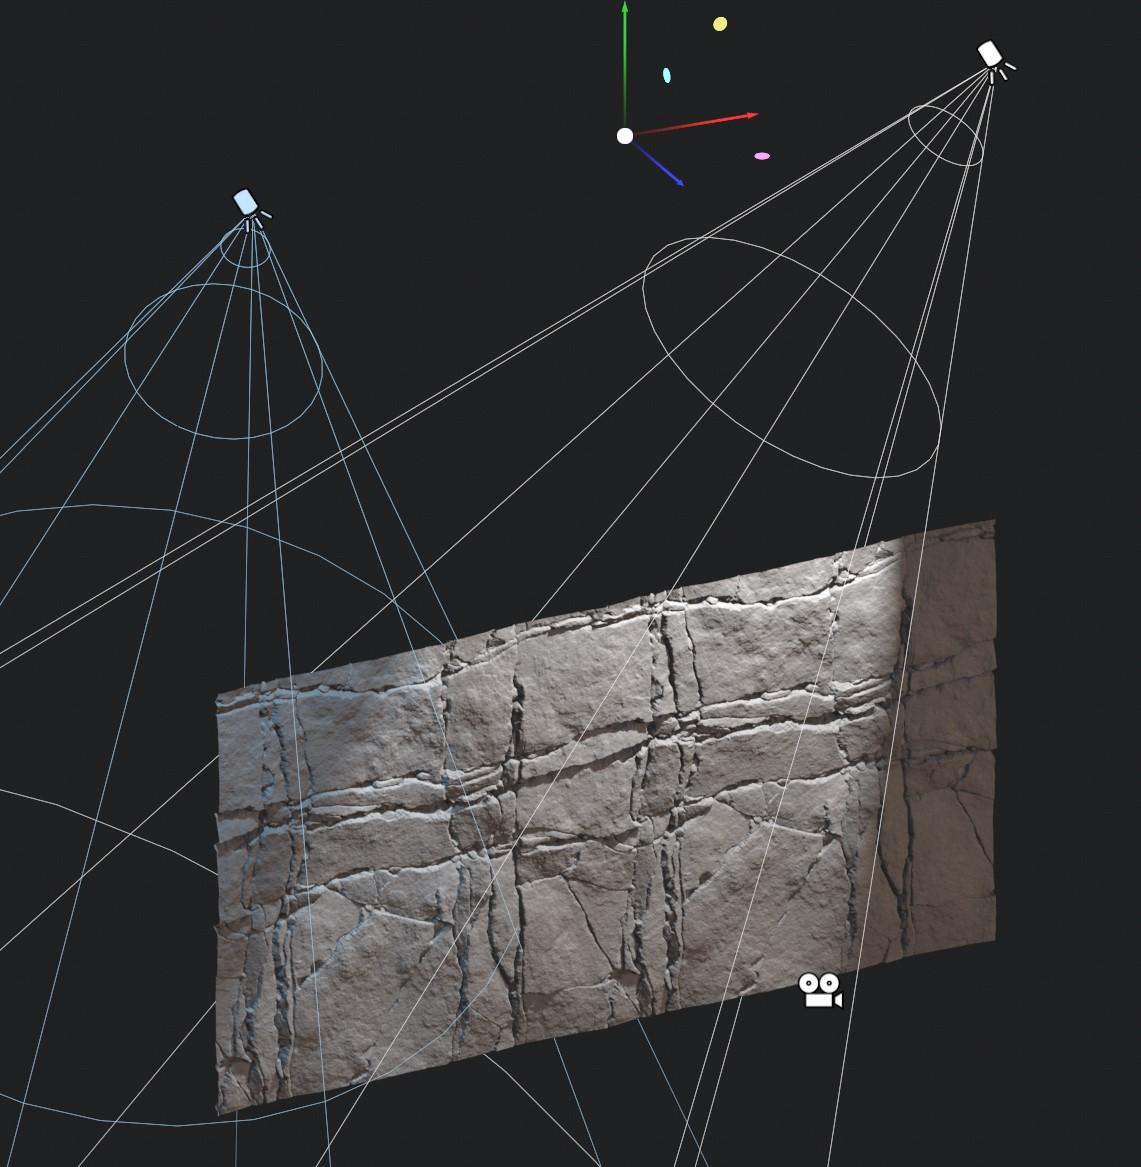
Rendering & Lighting
I used Marmoset Toolbag 4 for these renders, and for each one of them I created a specific group with lights, mesh, and camera to keep it clean. I used between three to four lights for each render to achieve what I wanted. I also used the same sky (HDRI) for all renders.
The general rule “the less, the better” works very well here: it’s better to have fewer lights that you fully control than a bunch added to cover the mistakes of the other lights.
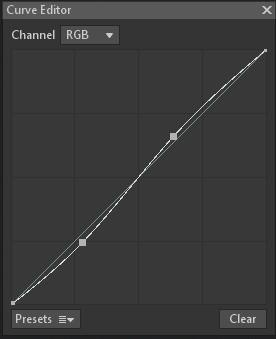
For the camera settings, I recommend using a bit of sharpening and playing with the curve; these tweaks make the material more realistic and interesting to look at.
Conclusion
I’m happy with the result I got here. I did this project in a relaxed way and made the learning experience really enjoyable for me. I think that when you want to learn Substance Designer, it helps a lot to have fun in what you are doing, and it’ll make you improve faster.
When creating this material I asked for some feedback on a Material Artist Discord; having feedback from people in the same field helped me to stay motivated for this project.
I’d like to thank Games Artist for giving me the opportunity to write this article. I think the free resources they provide can really help people improve in Substance Designer.
I’ve done a workshop about this texture on the Future Material Artists Discord. If you want to see it and get all the details of every node, go there, it’s free!
You can also check out the full material on my ArtStation.
I also want to thank Alex Beddows for the ideas for the cracks, and Joe Taylor for his work on rock surfacing that helped this project come to life.
Read more articles
You might also like these articles.