Samurai Lady

Introduction
Hi there! My name is Andres Castañeda and I’m a Senior Character Artist at Teravision Games in Colombia.
Project
I’m an artist who likes both realistic and stylized characters. I find both styles quite interesting and understanding both of them helps me complement the other.
For this project, I really wanted to push what I was able to do with realistic characters and test multiple features inside Unreal Engine.
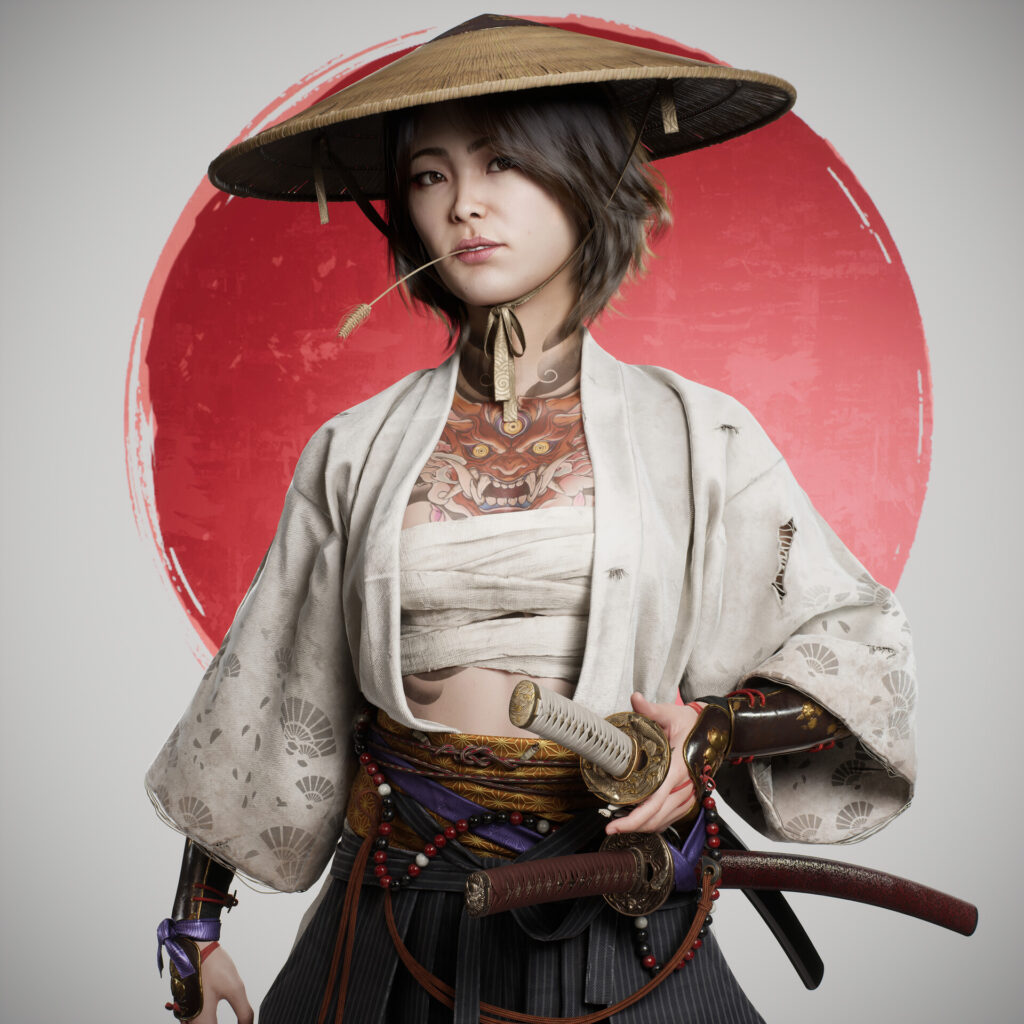
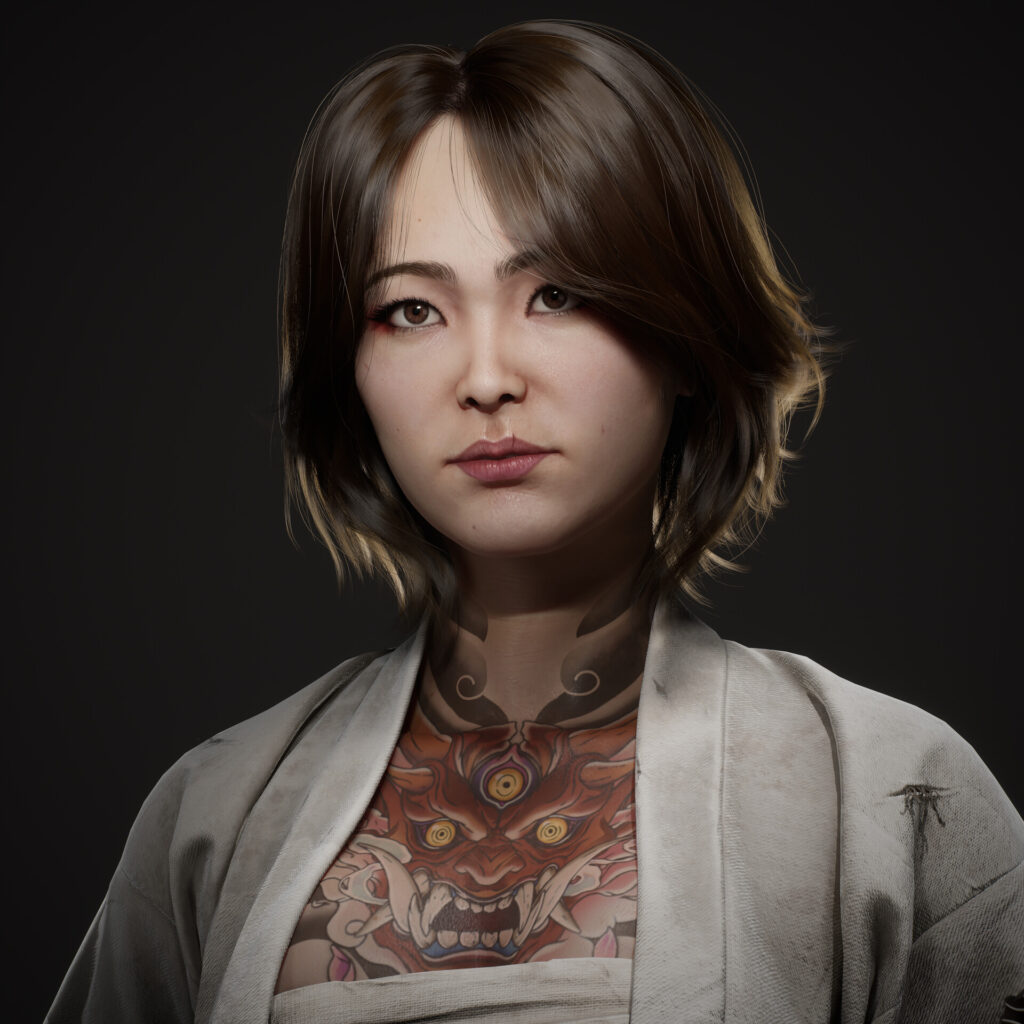
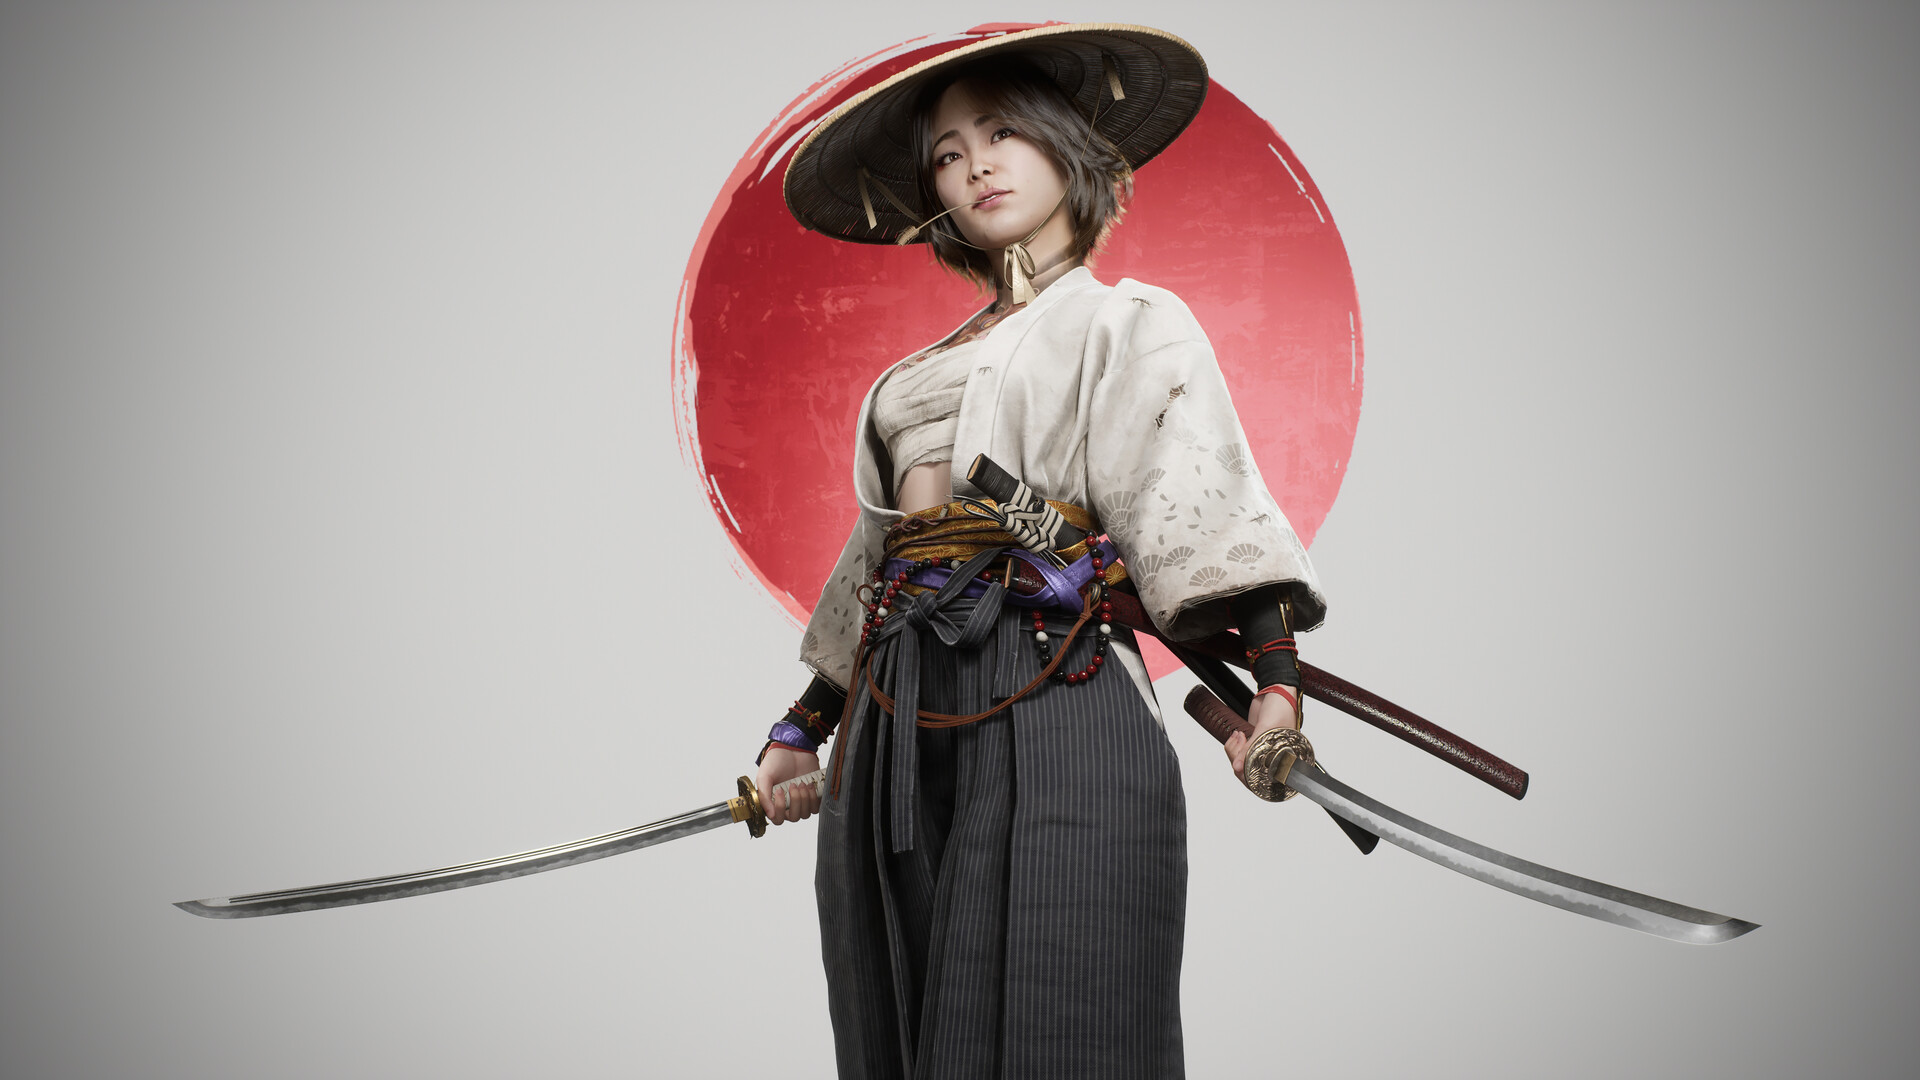
Back when Ghost of Tsushima was released in 2020, I was inspired by the design and outfits of the characters. I wanted to try my own take on a samurai. I’ve always loved samurai, we see them in Anime or Movies and they always look so cool.
That’s something I wanted to convey with my design.
I didn’t use any pre-existing concept, all creative and design decisions came to me and that made it more challenging.
Software
- Maya
- ZBrush
- Xgen
- Marvelous Designer
- Rizom UV
- Substance 3D Painter
- Photoshop
- Unreal Engine 5
References
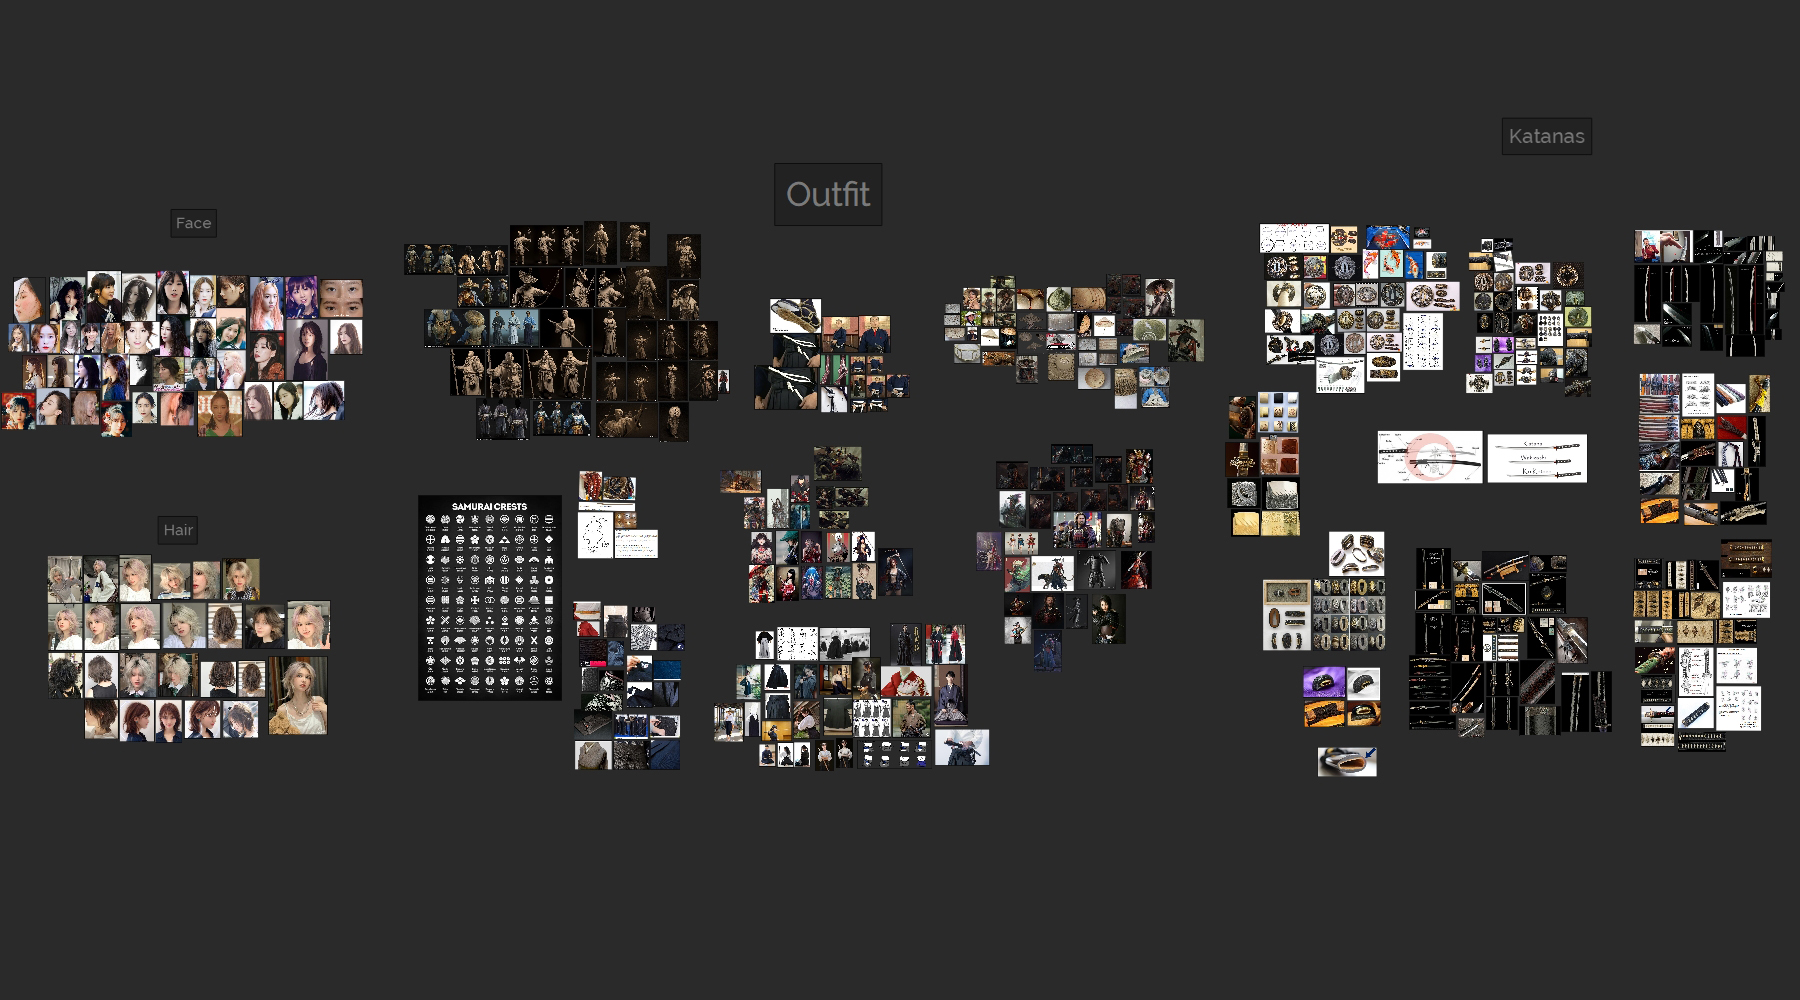
I took my time gathering all kinds of references. Because I was inspired by Ghost of Tsushima I gathered a lot of references from their character models, every character brought interesting ideas. I took all these ideas and adapted them into my own design.
However, I didn’t just want to copy something I saw and call it done. I wanted my character to feel as authentic as possible. So, I did research about everything I could. Every single piece of the outfit, their name, every knot, how to tie them. For the Katanas this was especially true. I researched every single part of the katana, different designs, how to carry them and how to tie their knots, I wanted to know as much as possible about them to get something that looked pretty good.
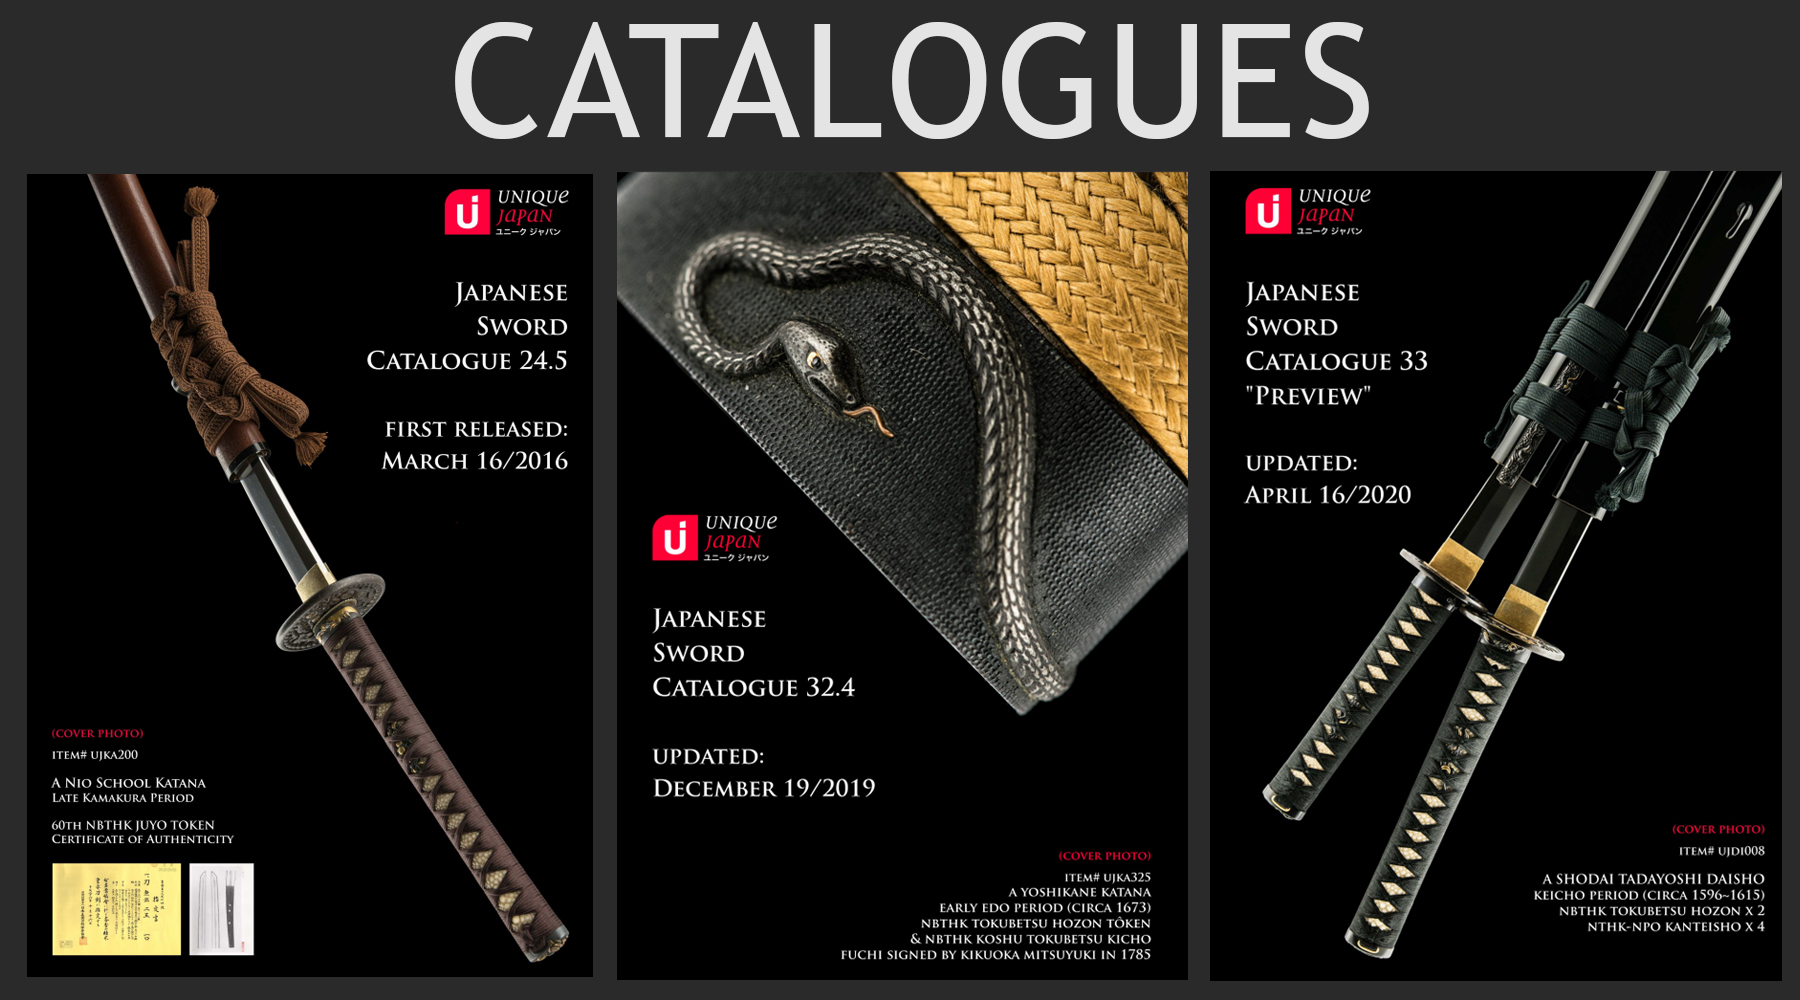
Katana catalogs from Unique Japan were especially useful. They have a ton of catalogs and every single one of them has pages filled with high-resolution images and close-ups of katanas from all styles and ages. I really recommend taking a look at those if you ever want to make a katana. They are full of inspiration and ideas.
Blockout
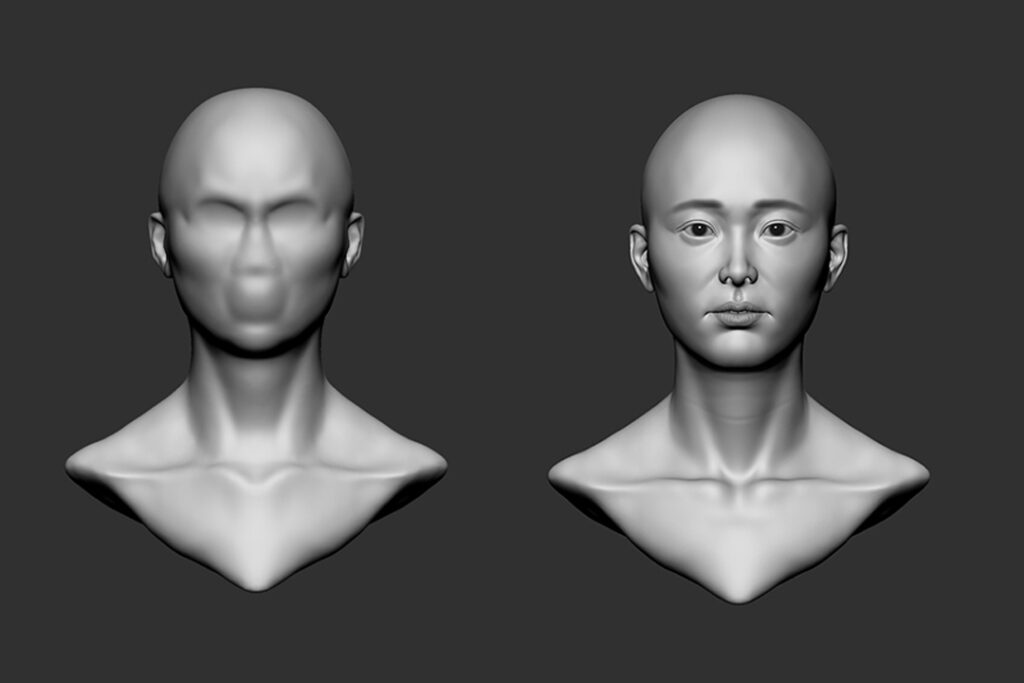
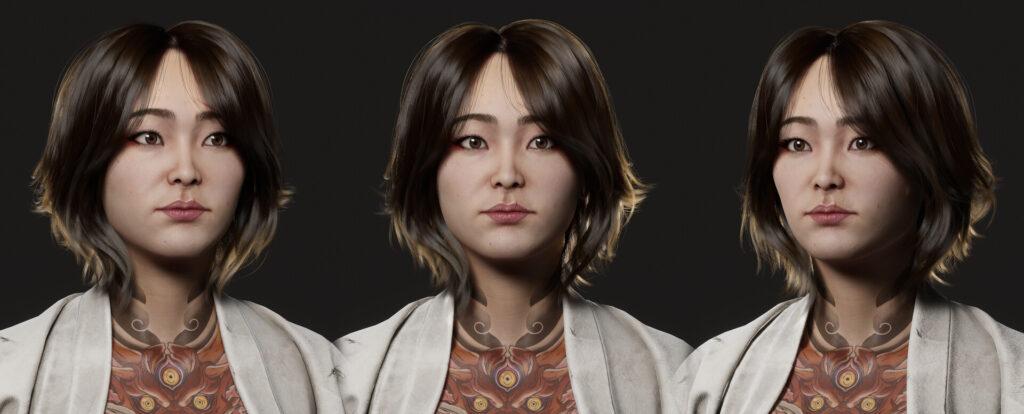
Whenever I start working on a character I always like to define the face first. It’s the most important part of a character so I spent a lot of time on it. I start with primary forms, slowly moving on to secondary and polishing until I get something pretty solid.
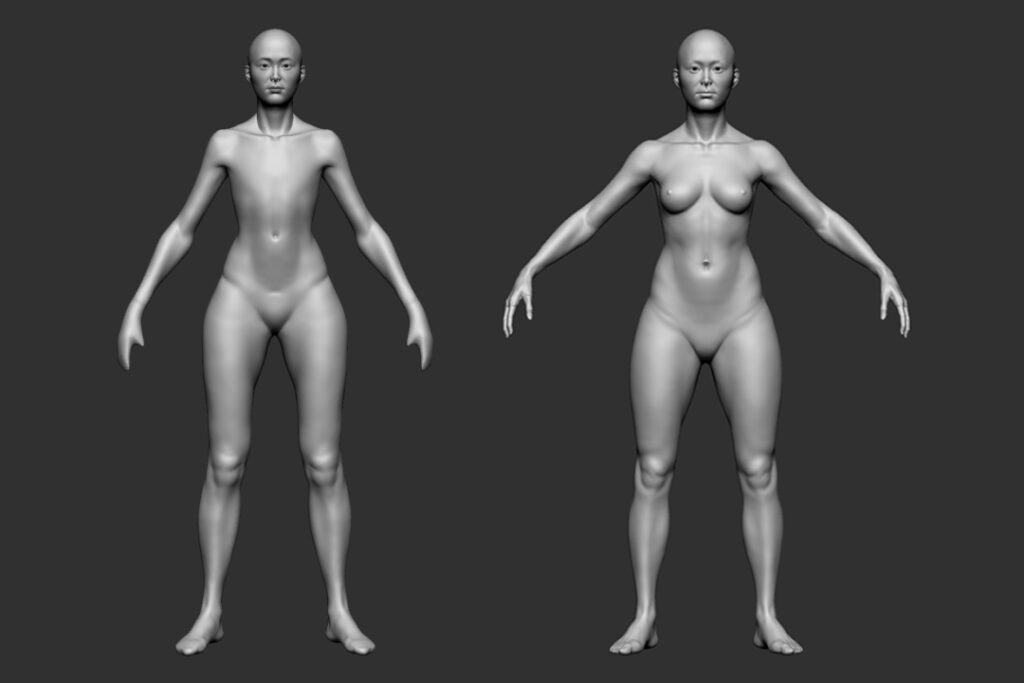
I do the same with the body to get the proportions right. For this project, I spent time working on the body because I also took it as an opportunity to practice some anatomy. I usually won’t go this far especially when 80% of the body is going to be covered.
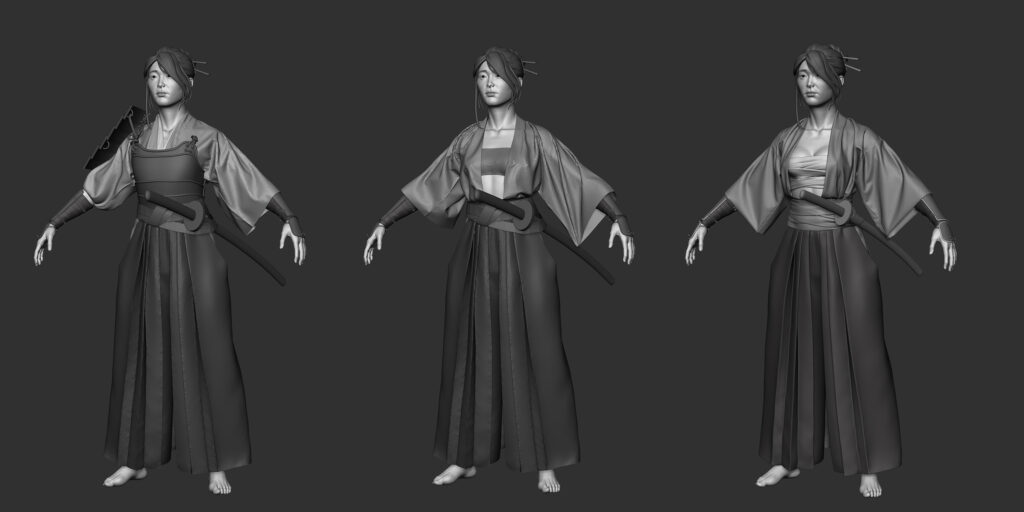
Once I have the body, I move on to blocking the clothes and defining the design. In this case, because I didn’t have a clear idea in mind I tried some quick designs with really simple geometry so I could edit anything at any moment without losing significant work.
I focused on getting a simple design that I could add stuff on top, improving and evolving the design in the process. At the beginning, she was using armor but I scrapped the idea and went for a cleaner design.
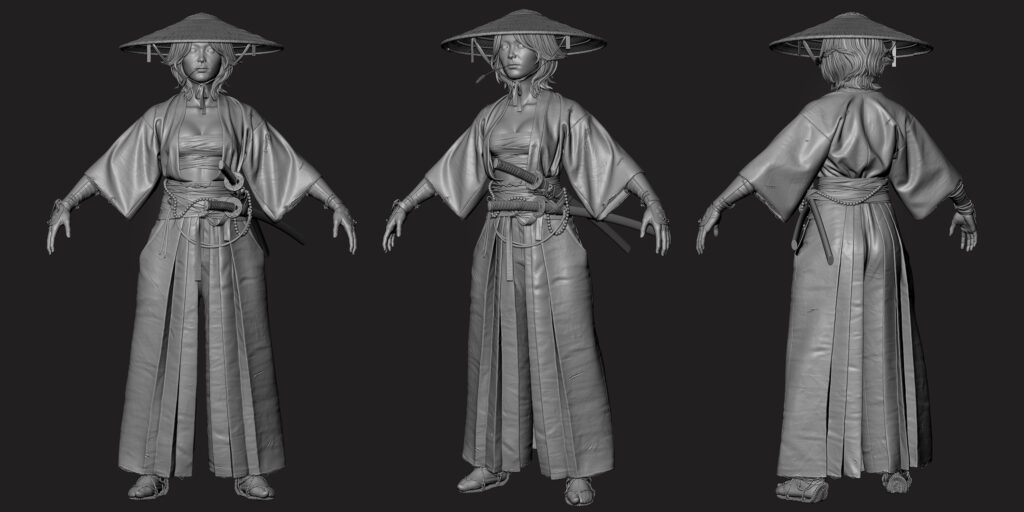
The design looks pretty simple in comparison to the final result. I added the hat, the sandals, a second katana, extra belts and laces later on. I was able to add these without many issues thanks to the simplicity of the main design.
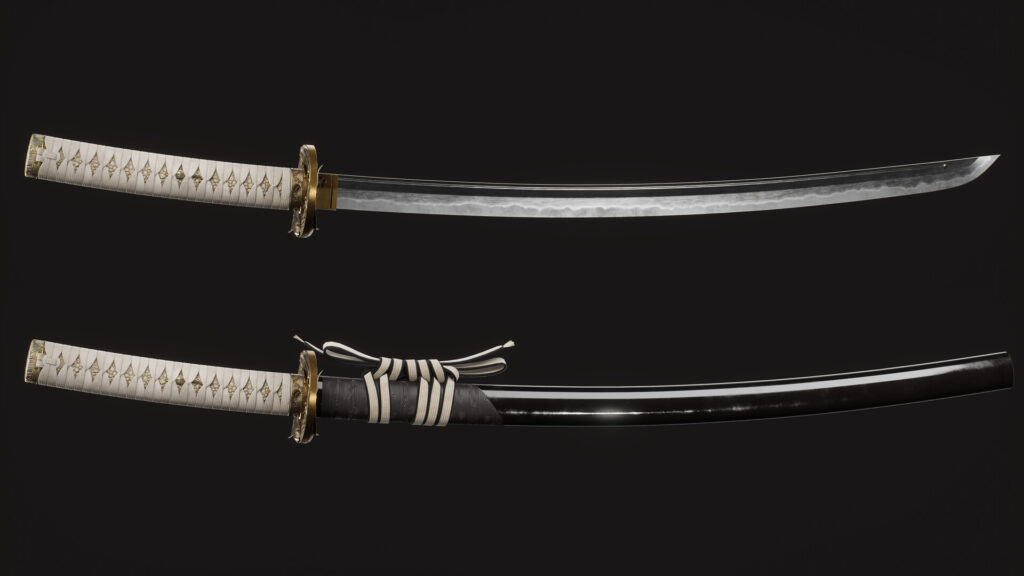
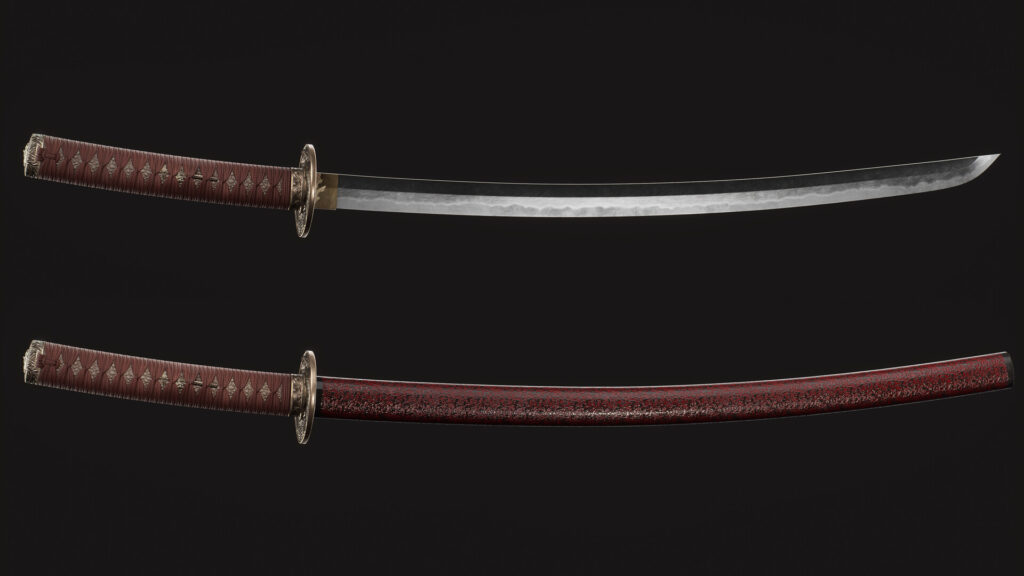
At first, both katanas were going to be exactly the same and with a generic design nothing too fancy or elaborate. It was easier for me because it was less work and time spent. However, by accident, I turned off the polypaint in one of the sheaths resulting in a black sheath and a white sheath.
It was at that moment I got the idea of having contrasting Katanas not just in color but also in design. It would be more work for me but it would end up in something more interesting.
Face Sculpting
I used Zbrush Spotlight along with the Standard Brush in a really low-intensity setting to project my skin textures on the surface.
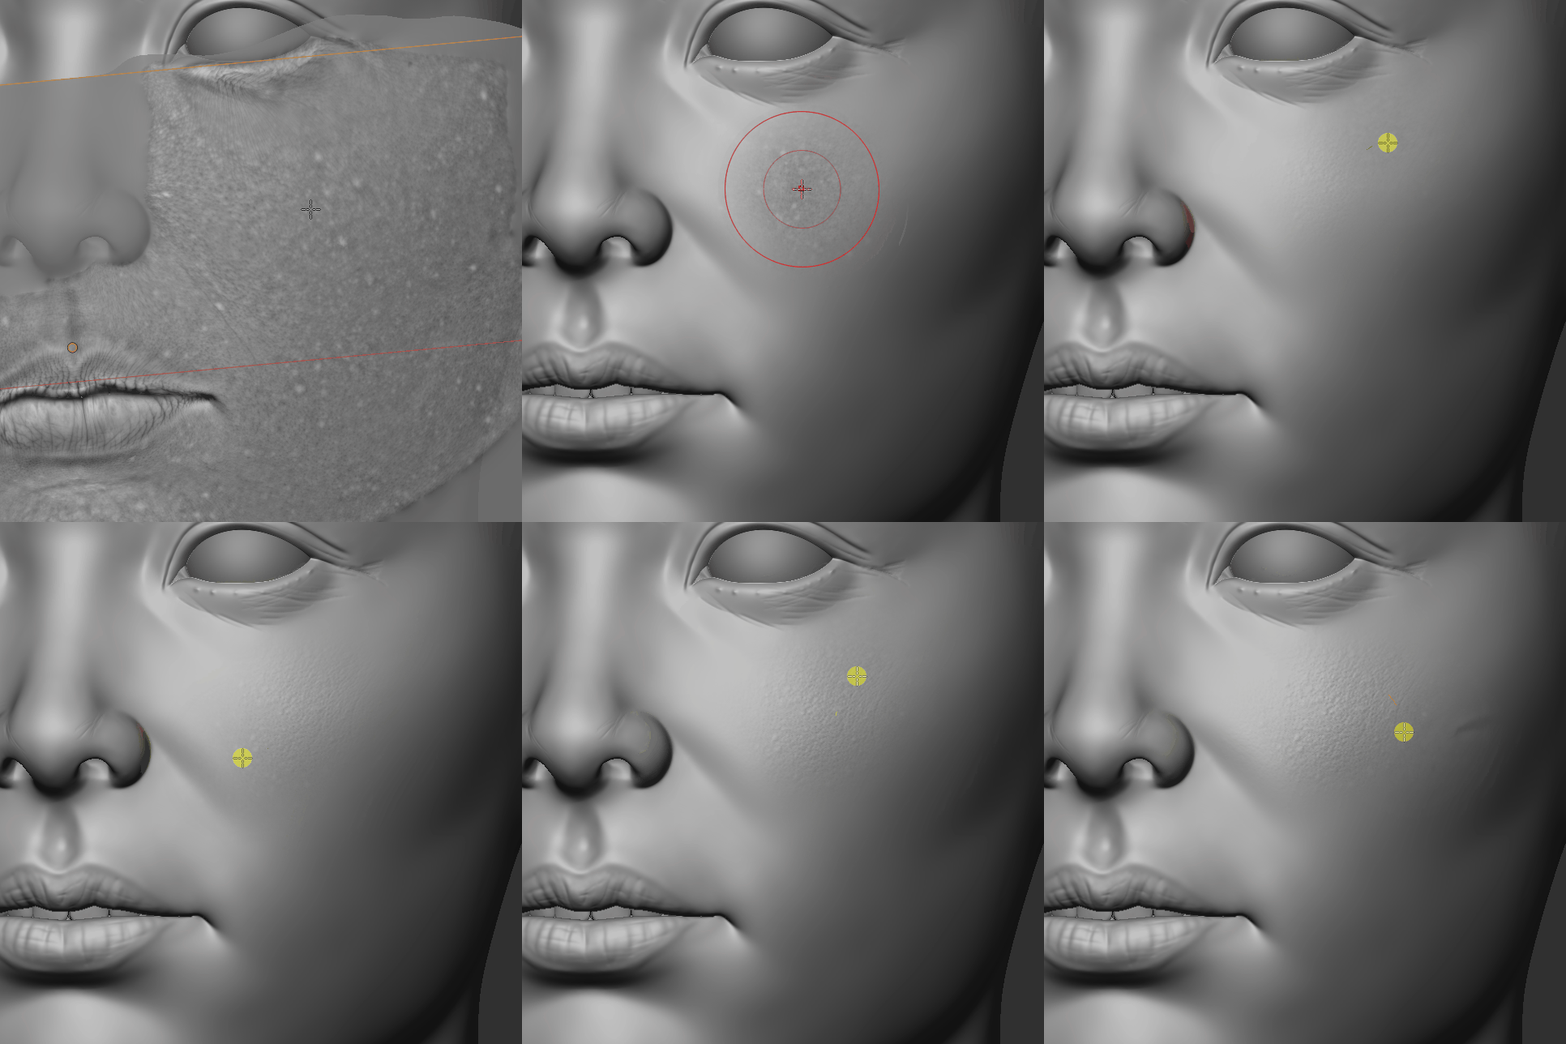
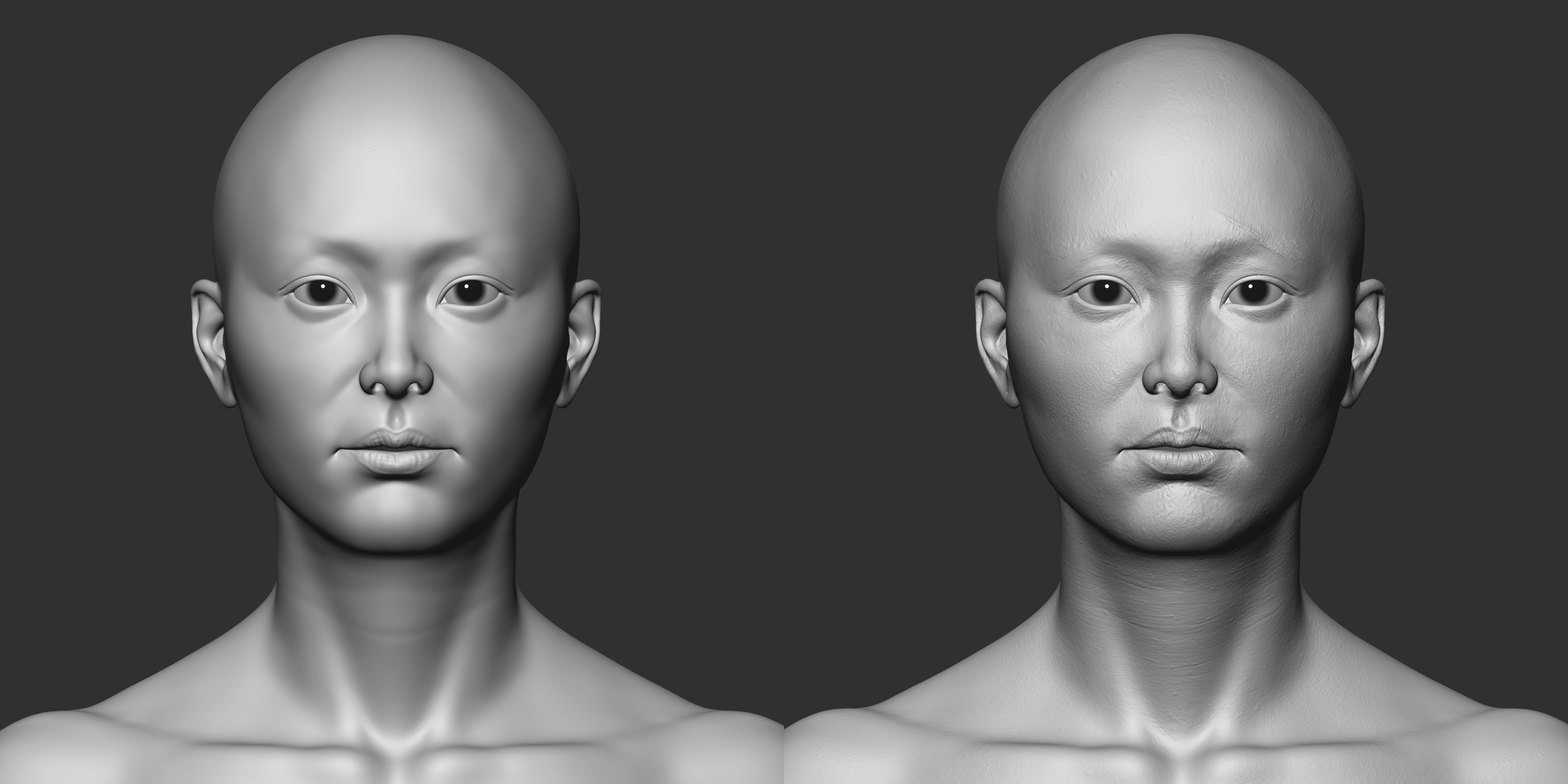
Doing so I was able to cover most of the face but still got some gaps to fill. I have my skin textures library which I’ve built by cropping sections from different skin textures and naming them properly so I know where to use them.
I took different types of these textures depending on the area of the skin that was missing and placed them accordingly using my brush in the DragRect function.
Always be careful of keeping an even intensity across the entire surface otherwise it will look patchy and bumpy.

I use layers to add any extra sculpting or tweaking, such as refining the volume of the lips and lids, breaking the symmetry and adding any imperfections, scars, or extra wrinkles.
Cloth Sculpting
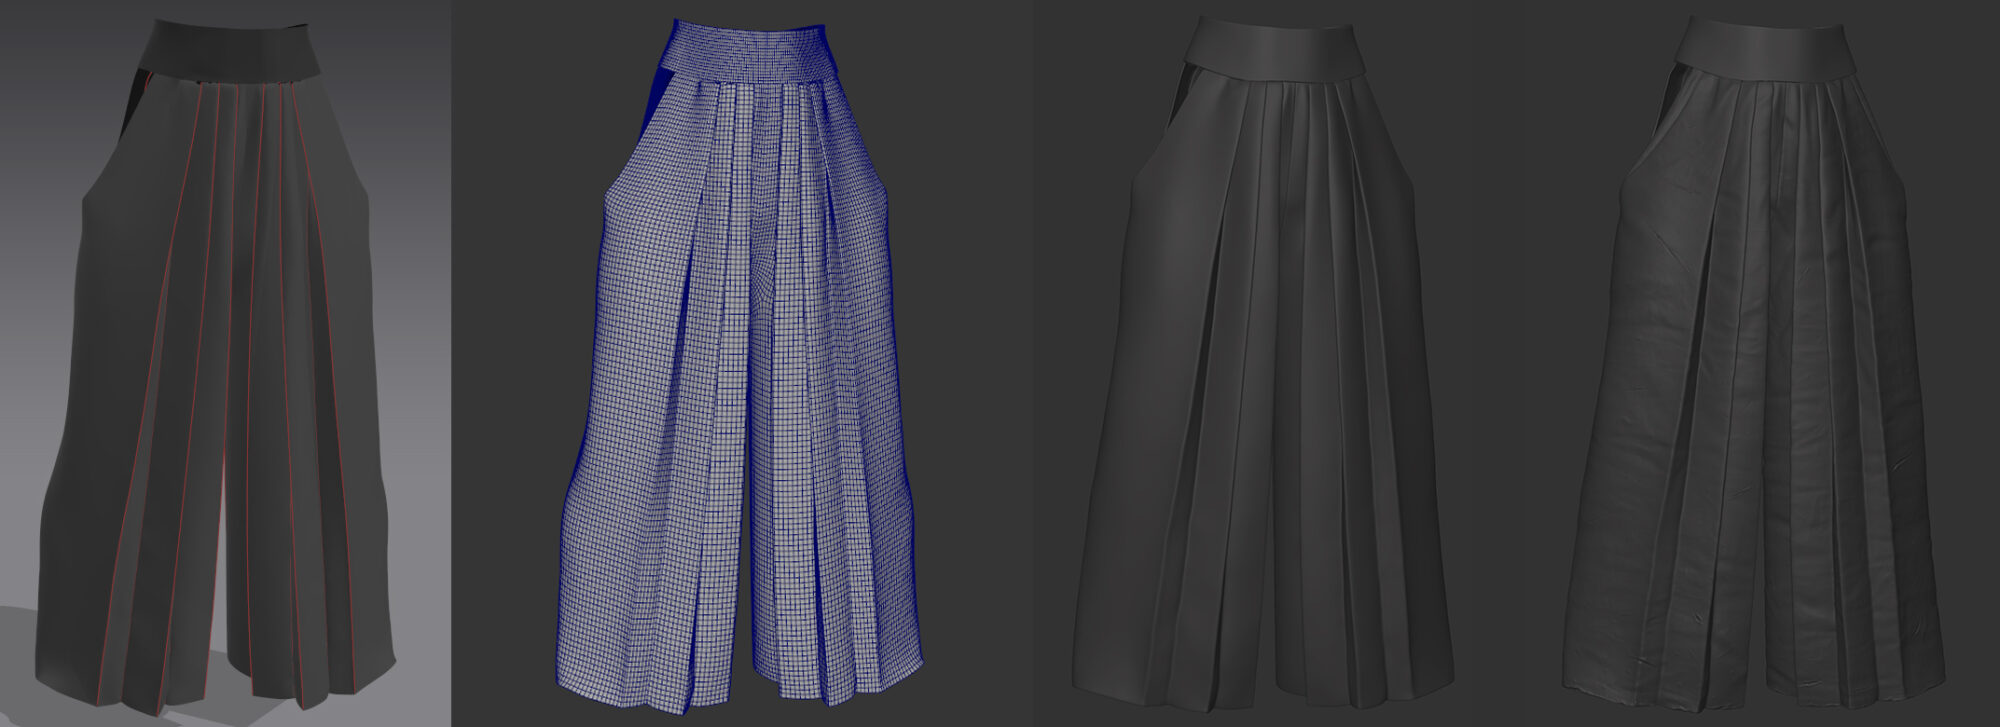
After having a good enough idea of the base design, I was confident to move ahead with refining the clothes. I really wanted to have realistic-looking clothes and Marvelous Designer was the way to go.
For this project, I had to work on each piece of cloth individually.
First, because of performance reasons.
Second, this character had multiple fabrics layered on top of each other.
It became difficult to place all that into a single Marvelous scene and simulate just right without messing something up in the process, the more pieces you have the more likely you are to get artifacts or simulation errors.
This way I can have more control and focus on getting each layer right and combine them later on.
Something I really wanted to get right was the knots of the clothes. I could have gone the easy route and sculpted something that barely resembles a knot and that’s it but wouldn’t look as good.
I made all of them in Marvelous but it proved to be a more difficult task than I expected. Something I noticed was if you simulate by GPU your clothes are more likely to intersect and go through each other which didn’t help.
For this scenario, I went by CPU instead, which allowed me to avoid this issue and get my knots right even if it was slower.
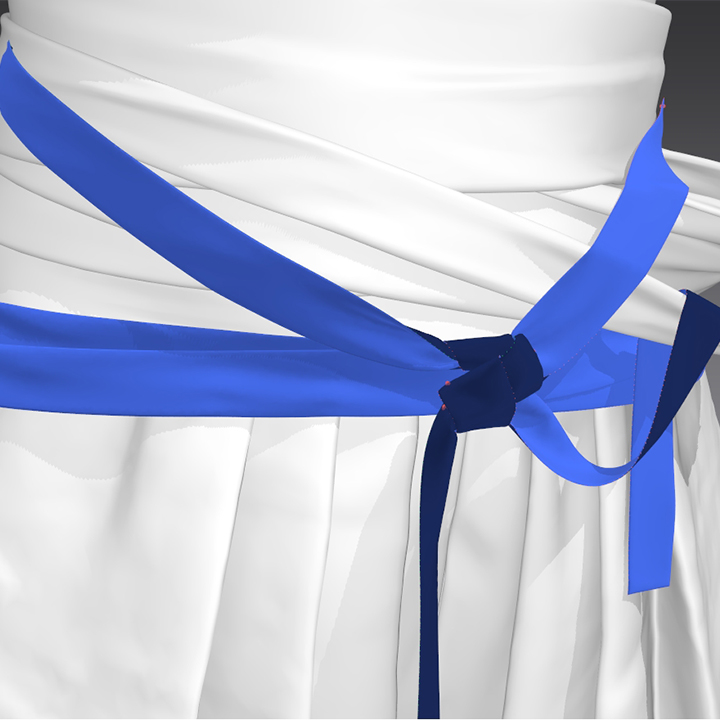
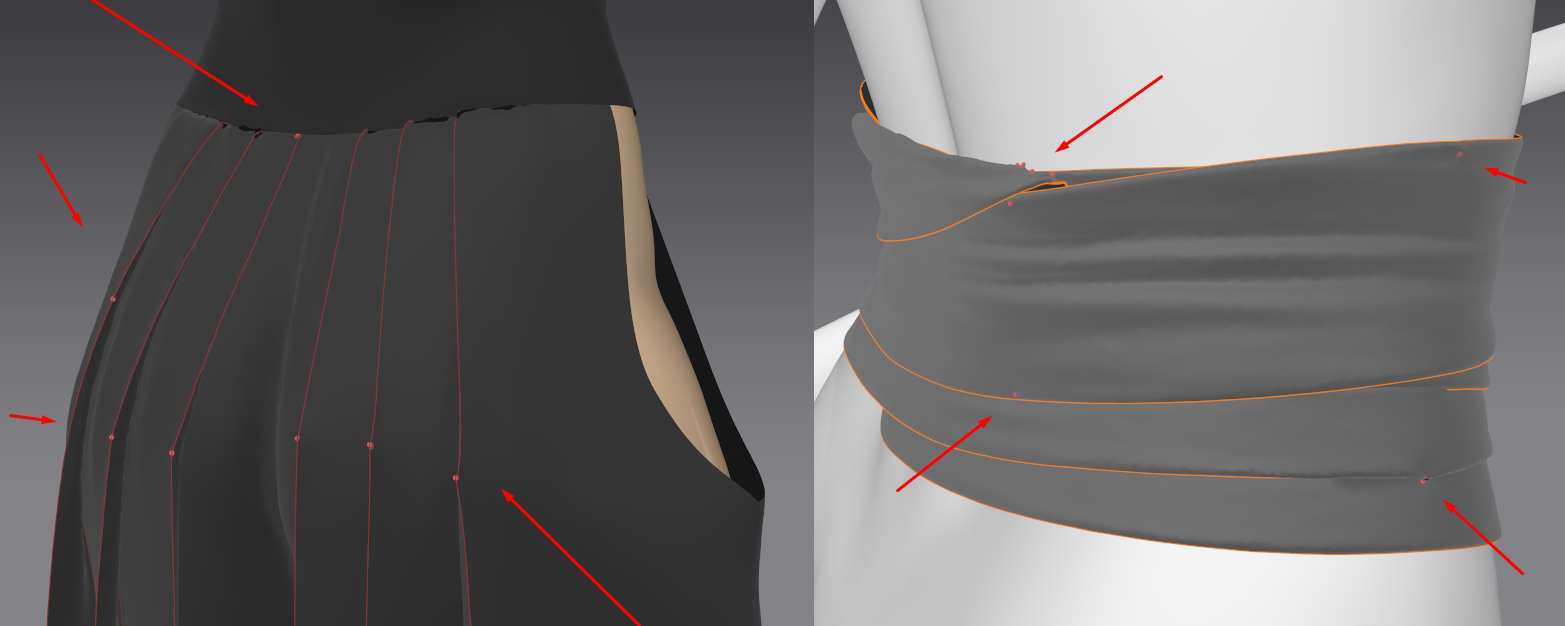
I always use pins to hold specific areas or force the creation of specific wrinkles.
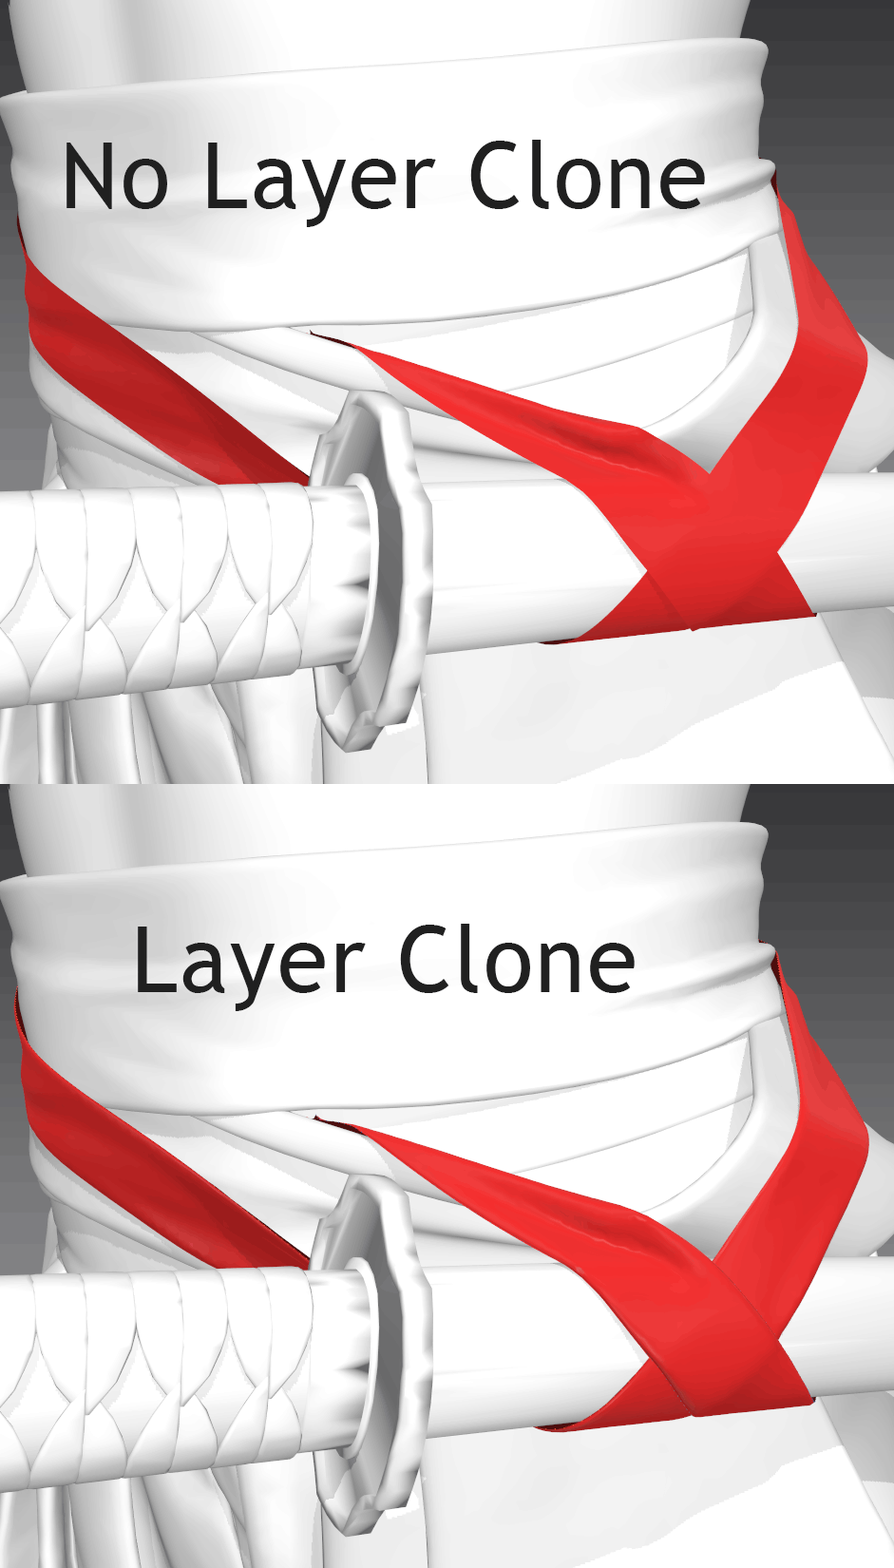
One last thing I like to do is to add a layer clone and simulate again. It makes the clothes look softer and thicker.
After I got my Marvelous Designer simulation I have to clean up the geometry in Maya, then I can use that geometry to sculpt adding all the extra wrinkles, damages and imperfections.
Sandals
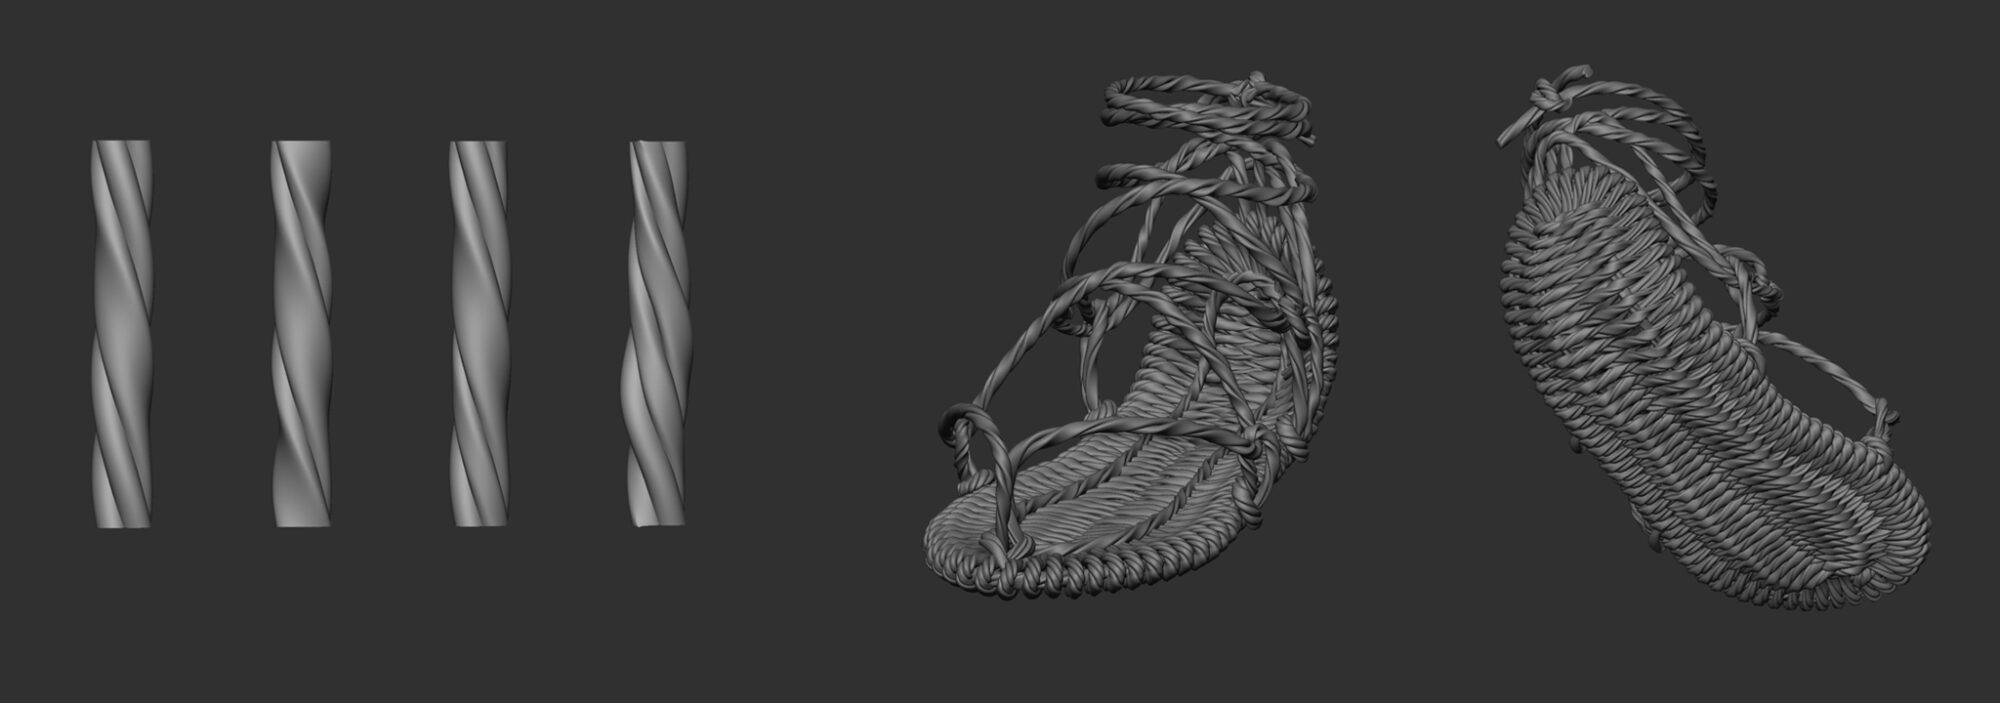
The sandals even when they represent a small part of the character they still intricate. Doing something like a basic mesh with a tilling material to skip the trouble wouldn’t have given me the result I wanted. It would have looked pretty cheap or simple in comparison to the other pieces of the garment.
So, I decided to make a custom Curve Brush to replicate the wicker material and did some variations of it. Then, All I needed was patience. It took a while to place, duplicate and tweak each section.
In the end, the accumulation of small parts made something bigger and more complex. This is a philosophy I follow for anything that is quite detailed.
Katanas
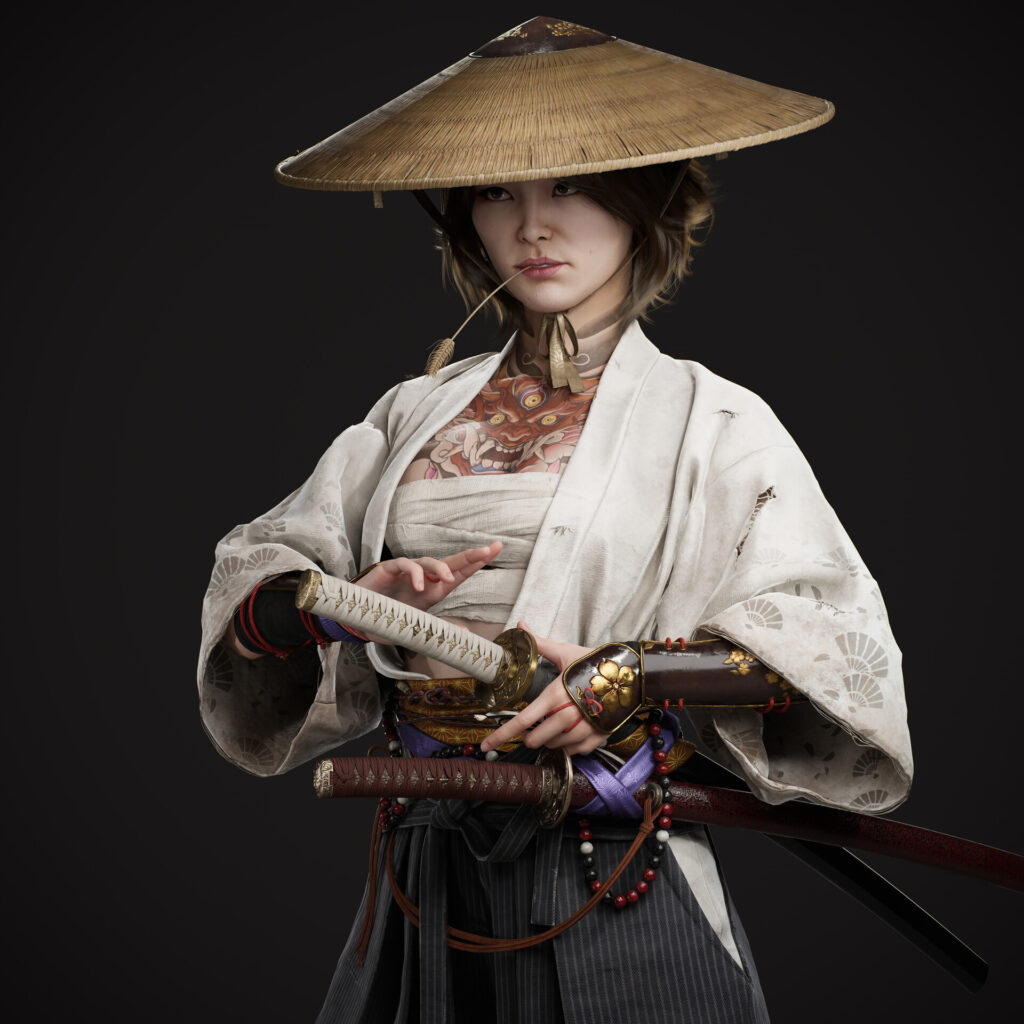
I left the katanas for last. I knew they were going to be a highlight of my character. She’s a samurai after all.
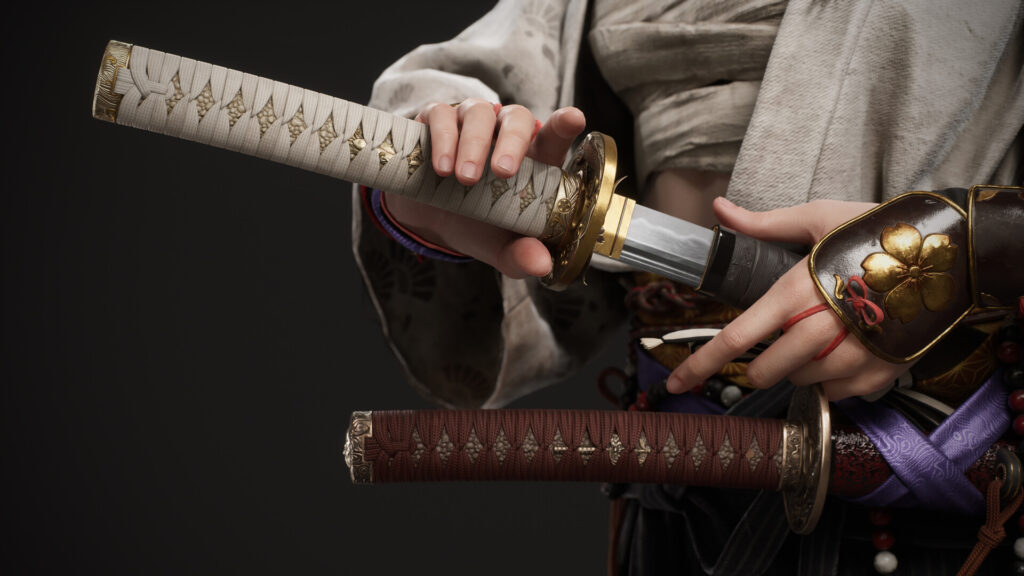
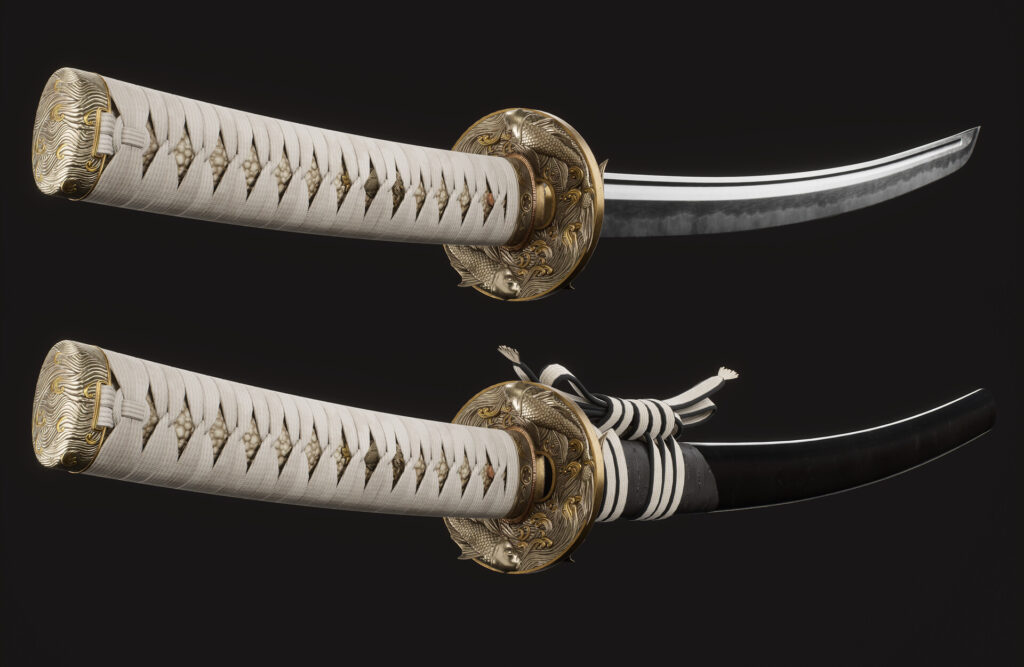
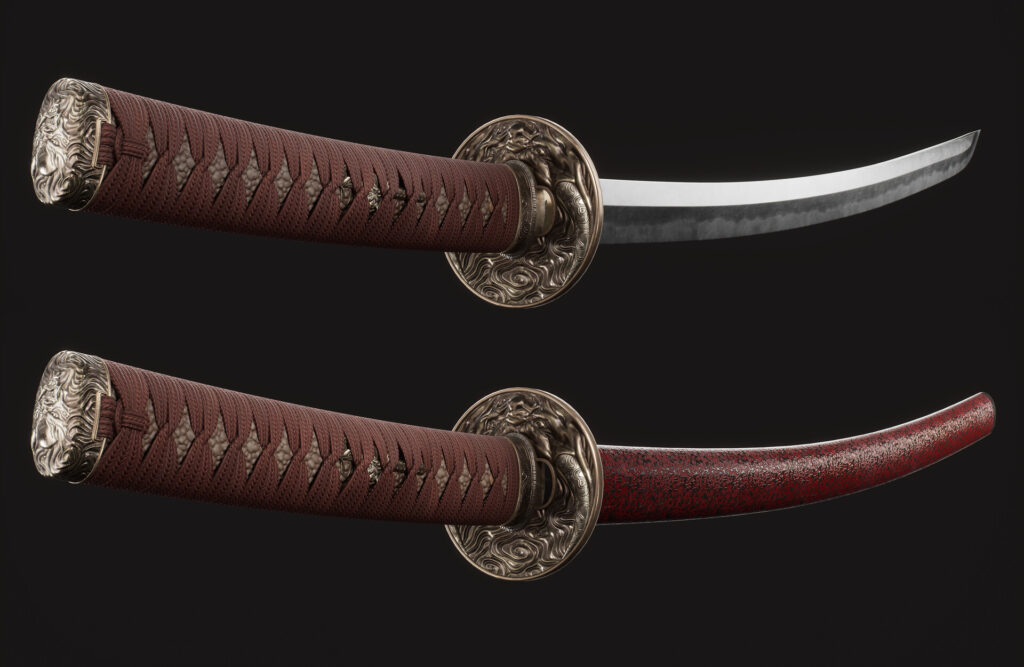
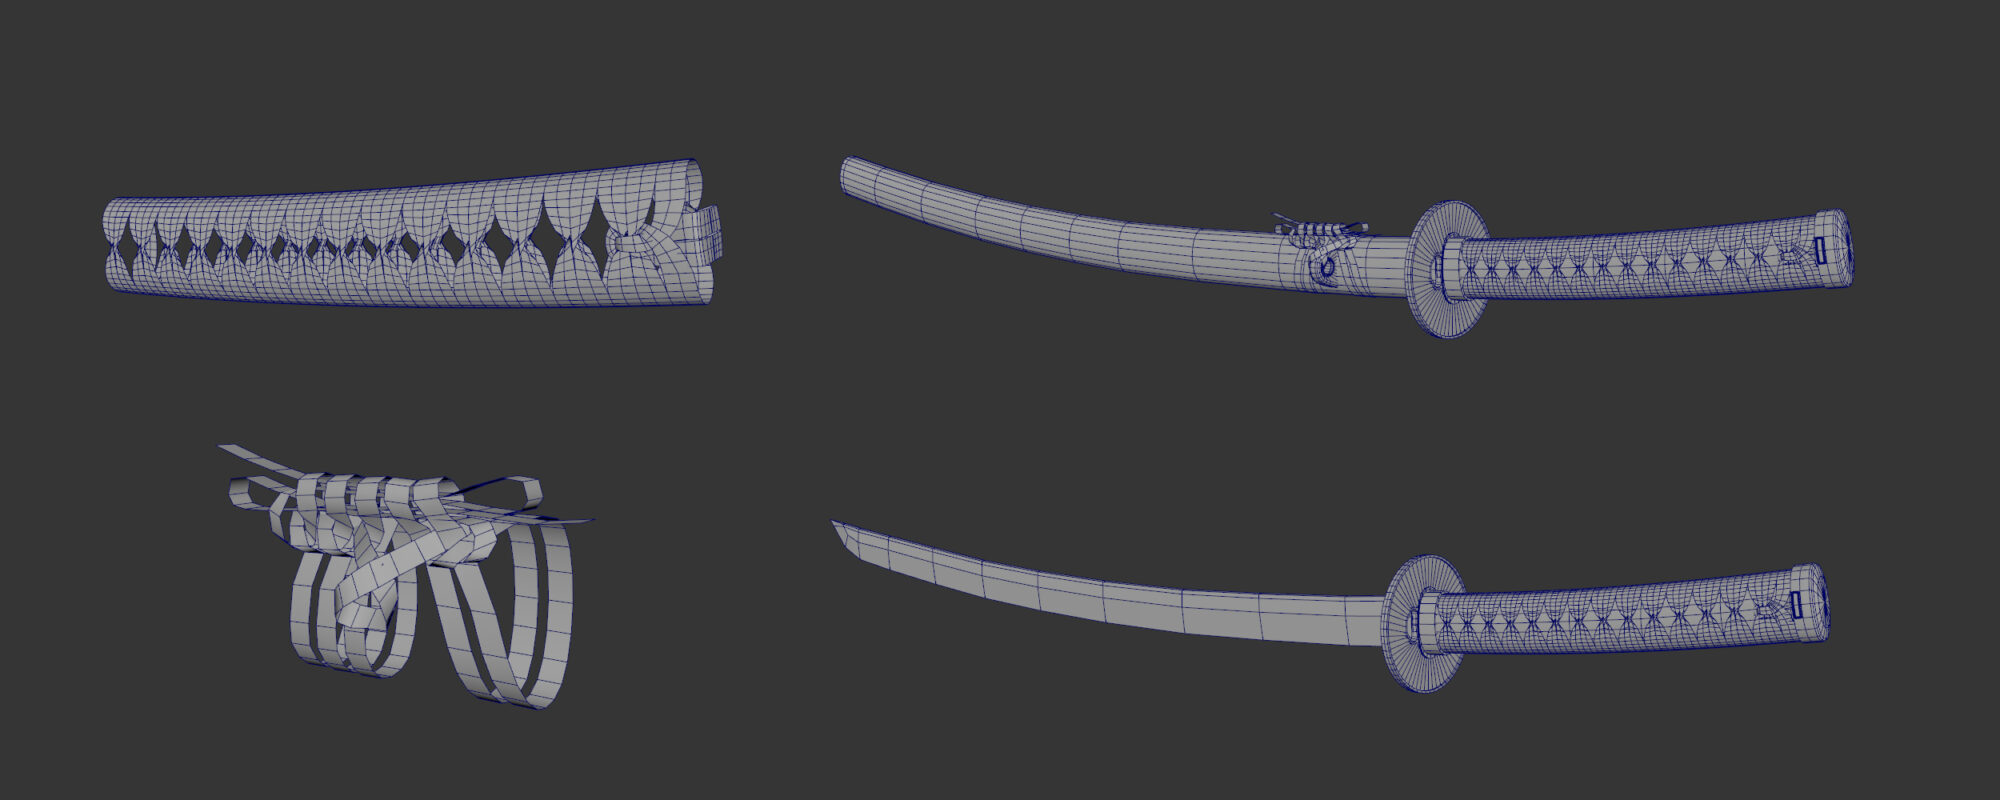
The first thing I needed to get right was a good basemesh, making sure I had the right proportions and shapes. I paid special attention to the Ito (the outer wrap of the handle) and the Sageo (The wrap around the sheath).
I wanted to spend the time to understand their intricacy. I looked through some documents explaining how they were done and watched multiple videos to have a good grasp of the logic behind them. This really helped me understand how to make them look properly.
I found it was way easier to work with a plane and fold it as I needed it. For the Ito, I did it in a repeatable pattern and manually made the ends to match my references. For the Sageo I worked directly on the sheath and follow a step-by-step tutorial on a real katana. I kept them as planes for my basemesh and didn’t give them any thickness until I was in Zbrush.
I was ready to work on the design for each katana. The first thing I had to decide was a “topic”. As I mentioned before, I wanted them to be different from each other representing contrast, not just in colors but in shapes too.
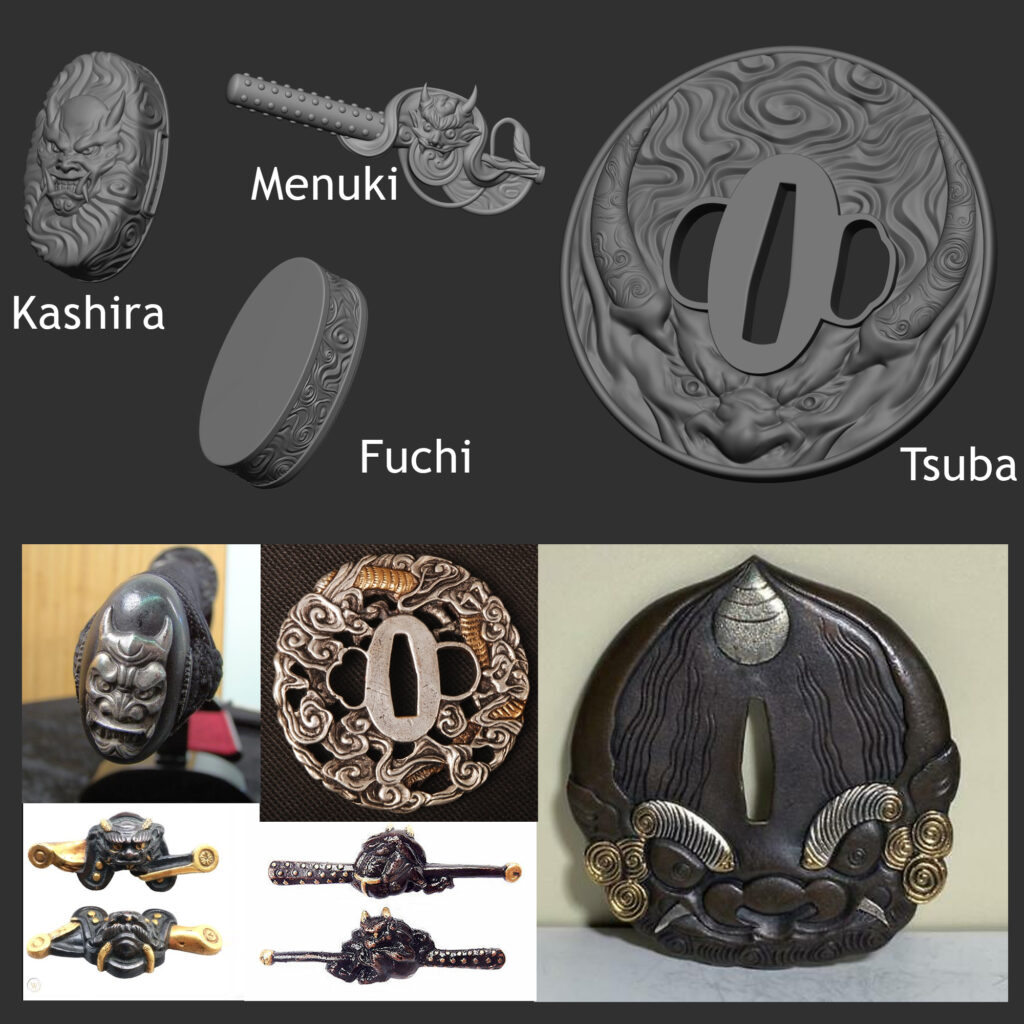
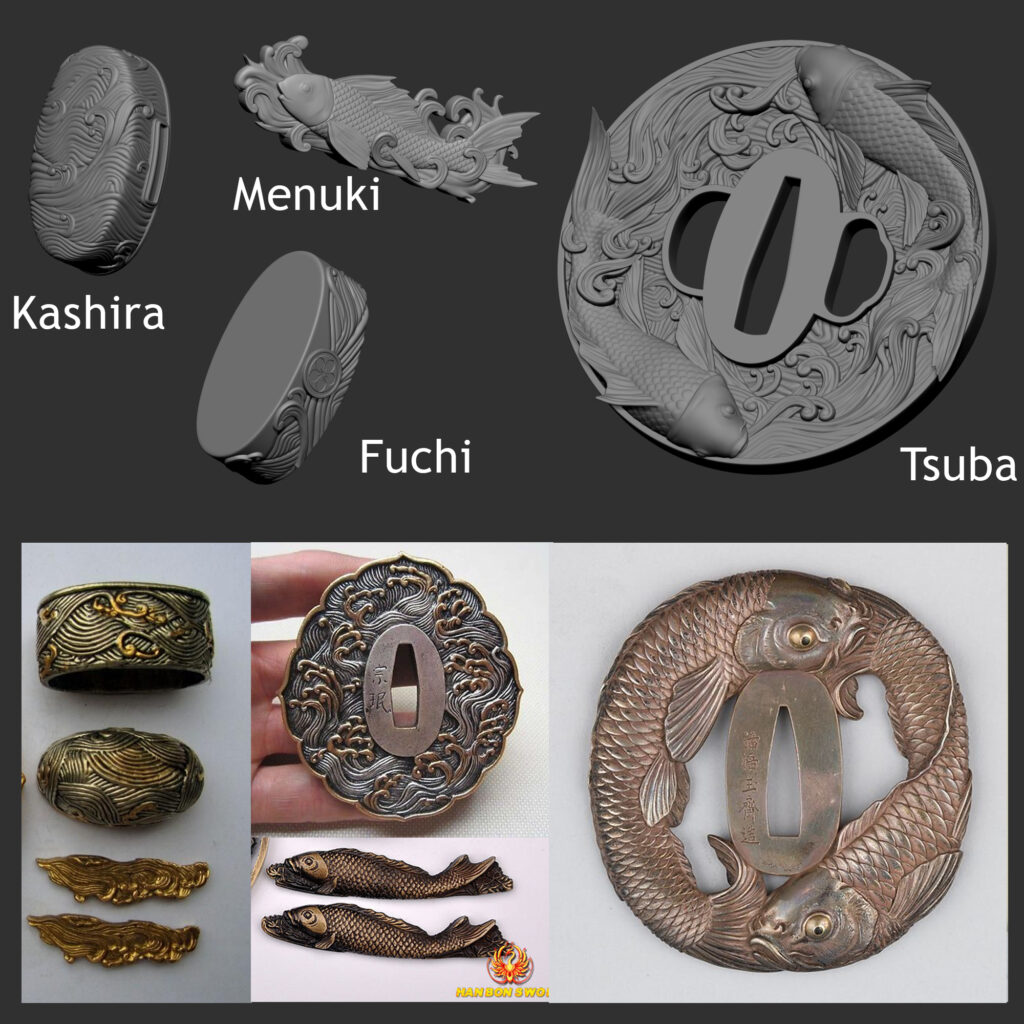
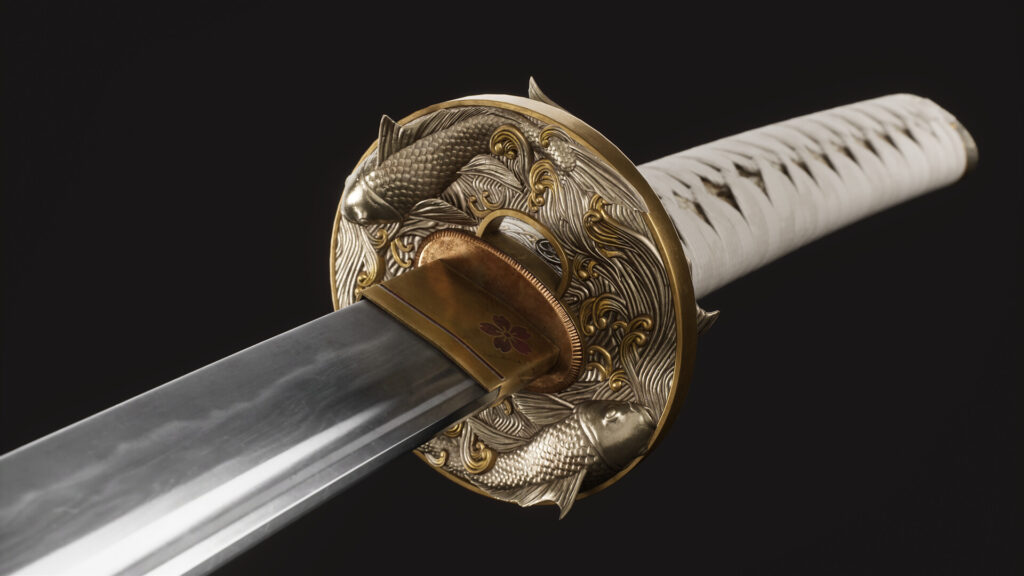
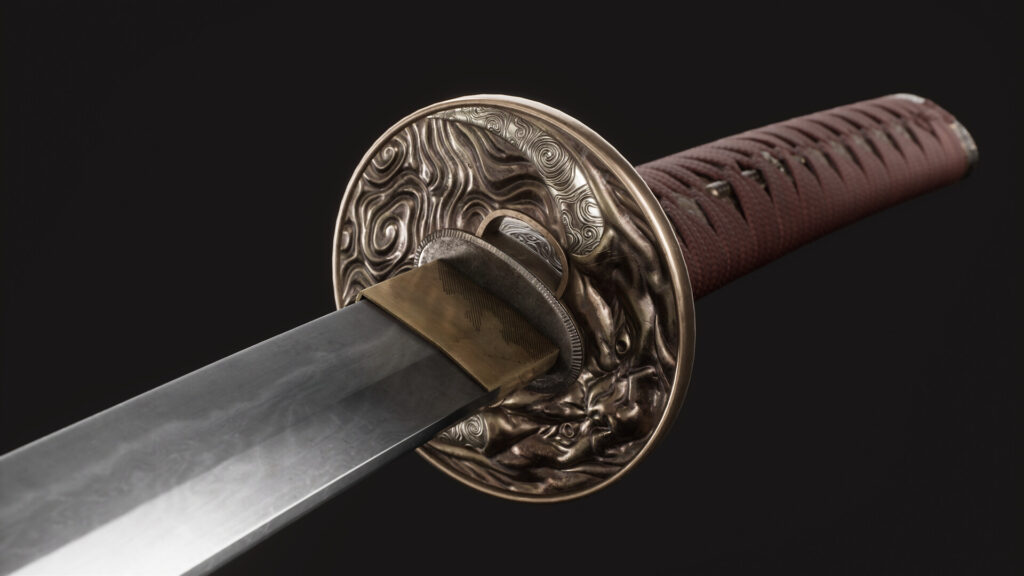
The Tsuba is the piece that defines the design language across the katana. It’s the biggest and most eye-catching piece. So, I spent days looking at many different Tsuba designs for inspiration. I ended up with two ideas.
The Oni and Clouds were used to represent a more aggressive and reckless nature.
The Koi and Waves were picked to represent calm and beauty.
Now I had to represent these topics in each katana. They had to feel like they are part of a set spreading the design language across the Kashira, Menuki and Fuchi. I used references but added my own twist instead of just copying. All had to be hand sculpted so it took a long time but the result was worth it.
Low Res
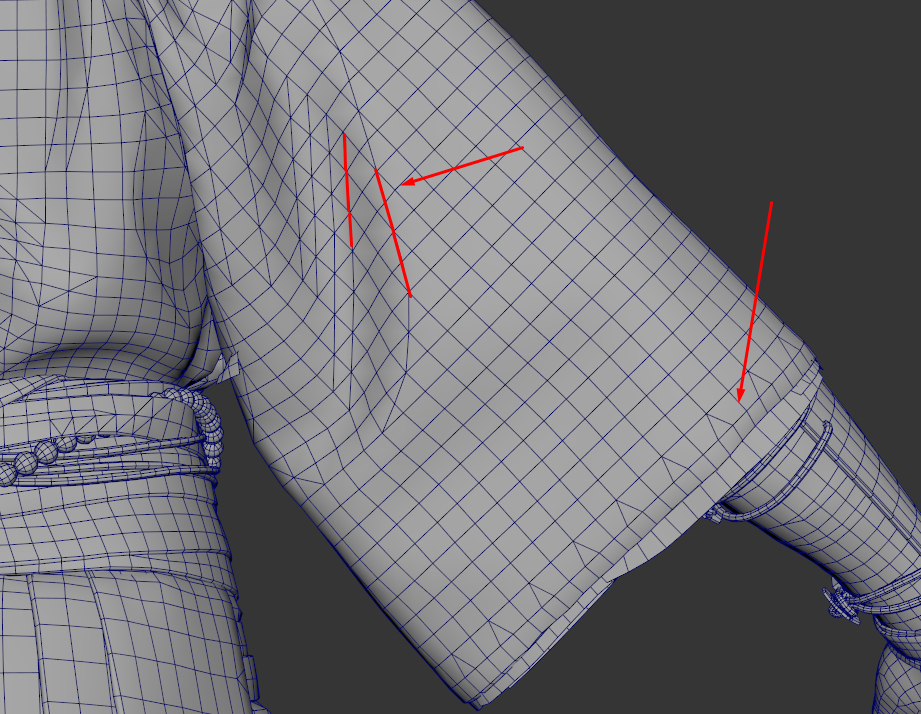
I always keep every subtool with their respective subdivision levels preserved, this way I just had to export everything with the lowest or second lowest subdivision level into Maya.
It gets me 85% of the work done but still, some polygons I had to tweak or pieces I had to merge and retopo manually.
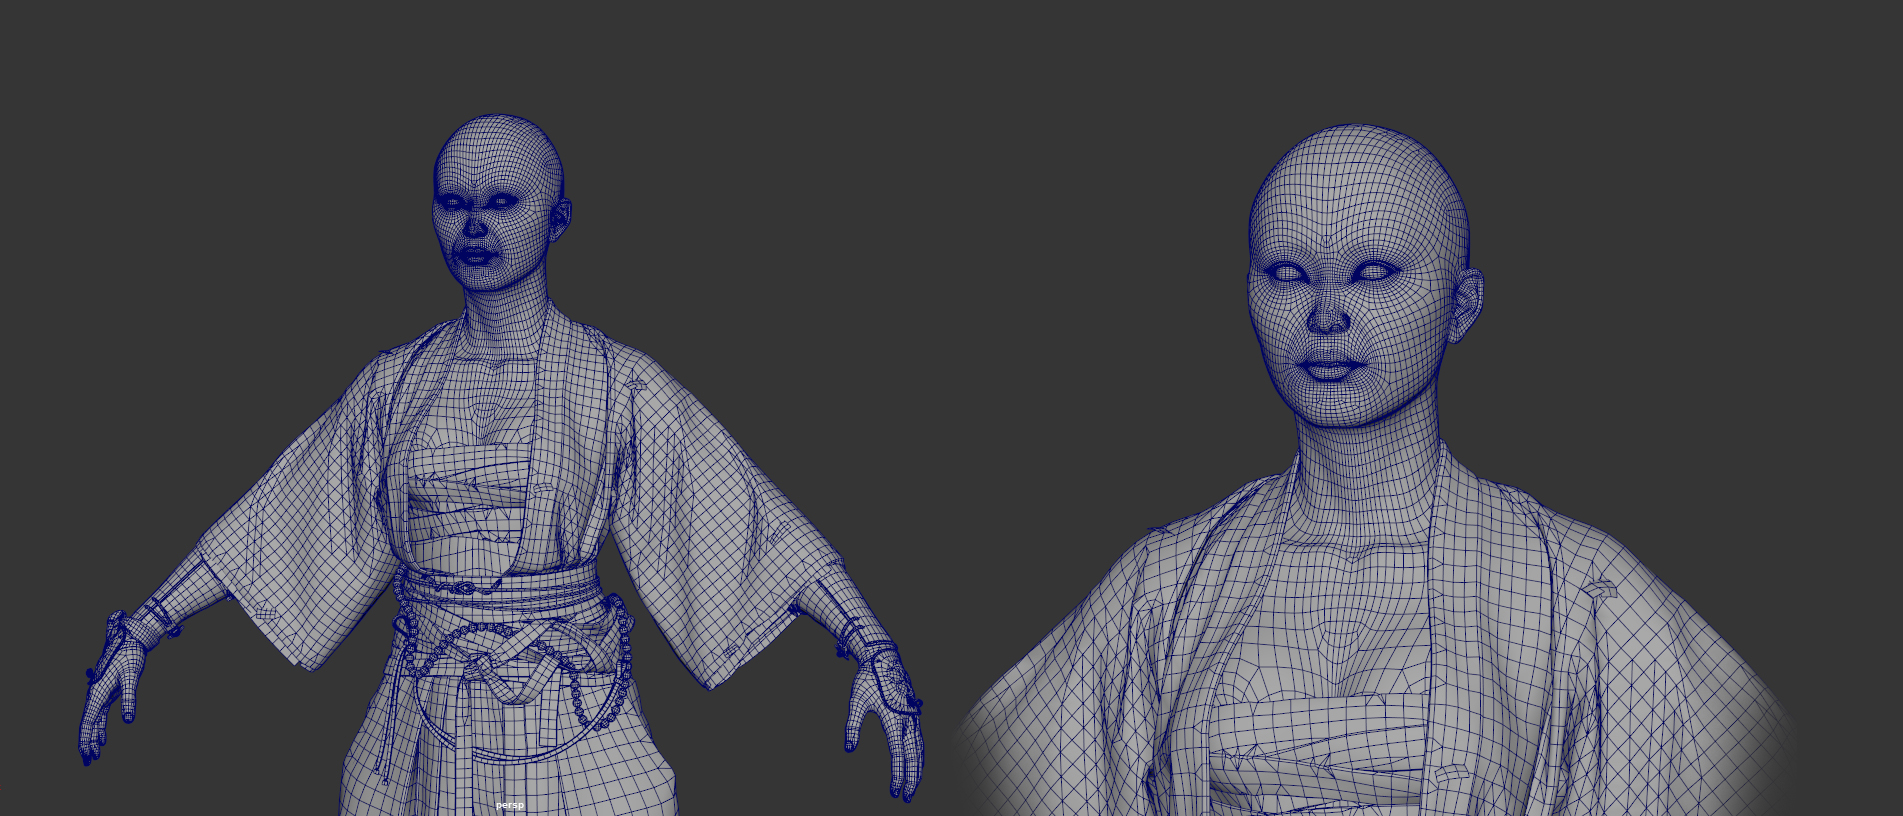
I like to add some edges to keep some of the folds and keep the silhouette, keeping quads as much as possible in the main shape for good deformations.
UV Mapping
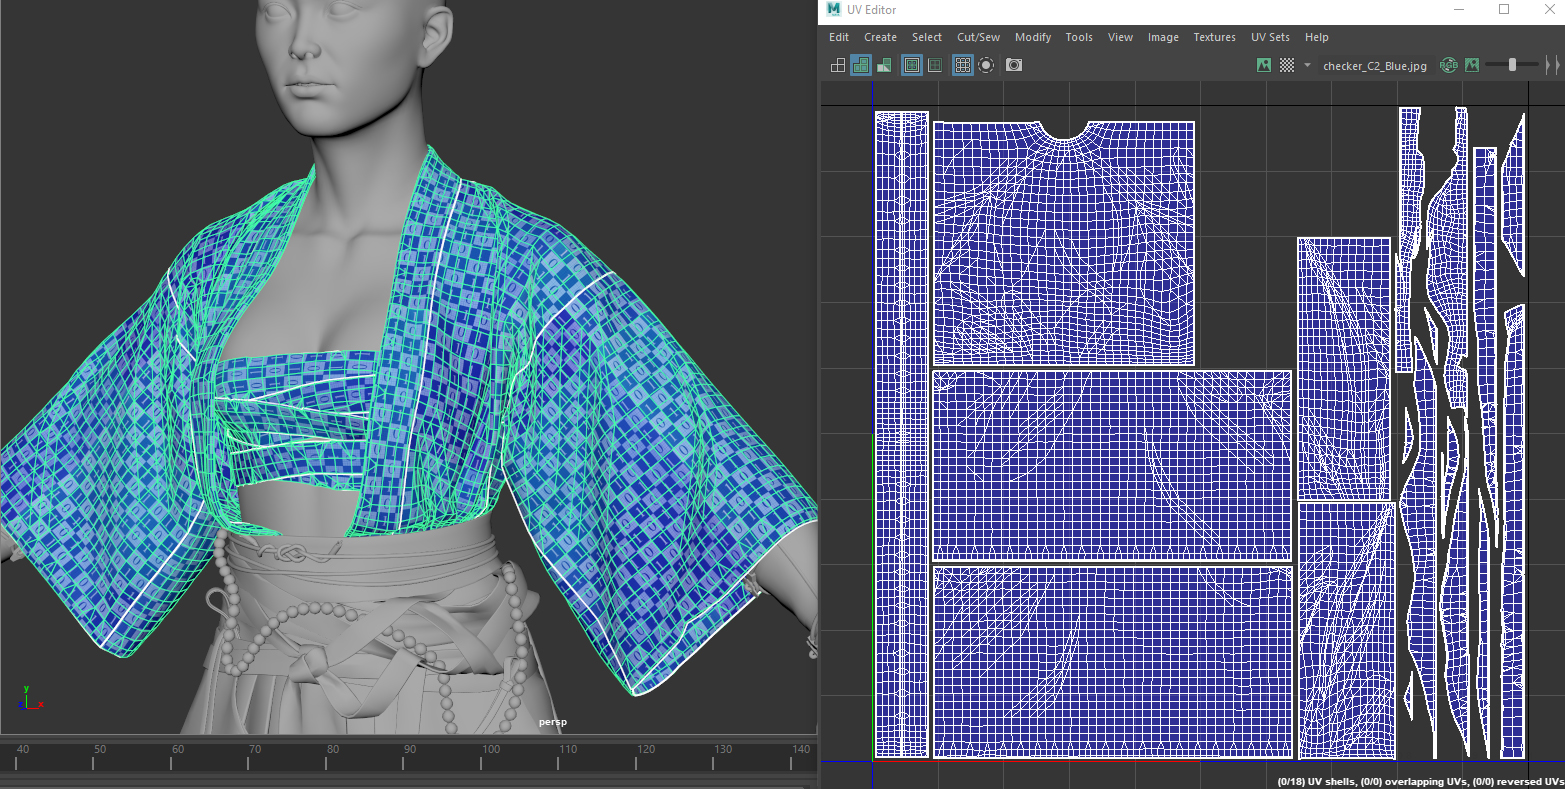
For UVs, I like to move between Maya and RizomUV. For the clothes I like to have my UVs as close as possible to what you would get out of Marvelous Designer, that way I can apply any tillable fabric and it will look realistic.
I really like to have straight UVs whenever possible in my props and clothes.
Texturing
For this project, I followed two different workflows:
- I used the Material Layer System in Unreal Engine for all the fabrics. It allowed me to quickly iterate and come up with different color compositions and designs for my clothes. Everything is in the real-time viewport.
- I followed the traditional texturing workflow in combination with the Material Layer System for everything else, the katanas, the hat and the skin. Texturing and getting everything just as I wanted without feeling procedural.
Tattoo
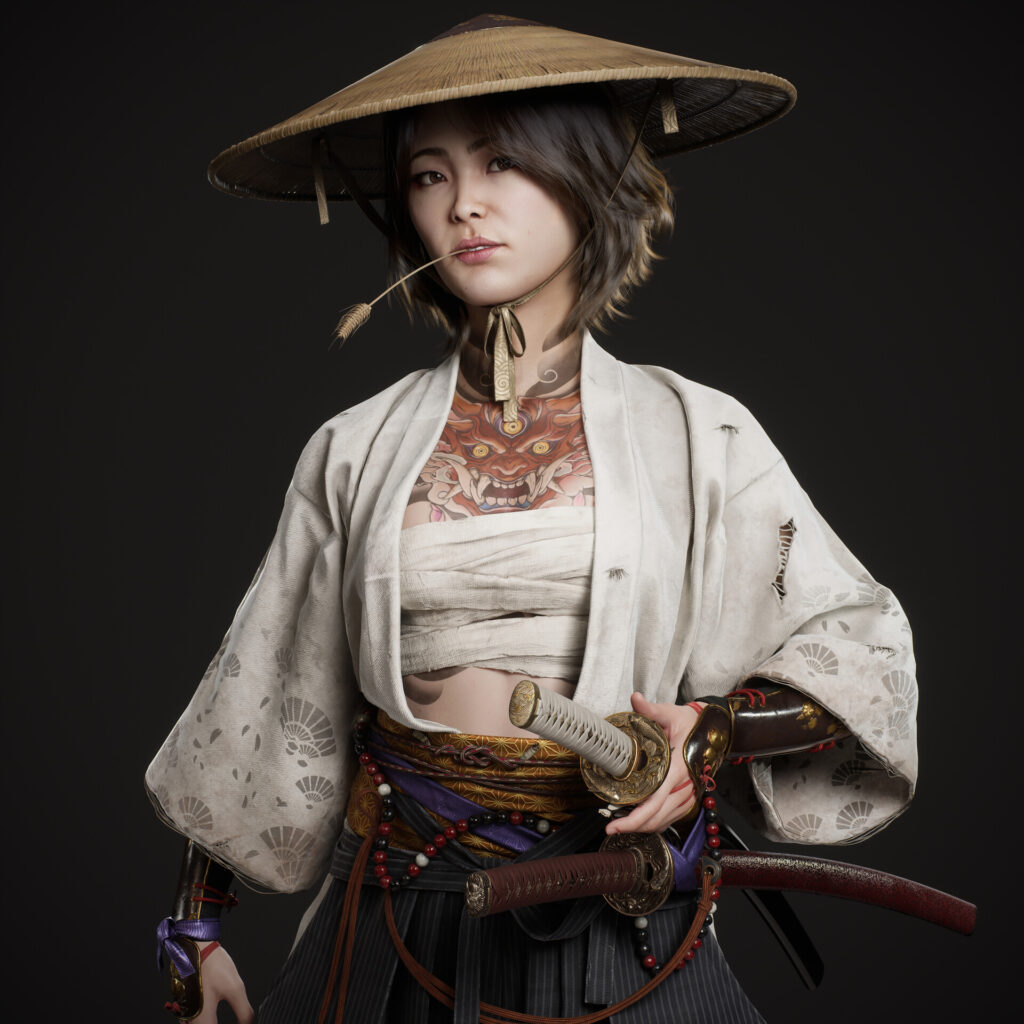
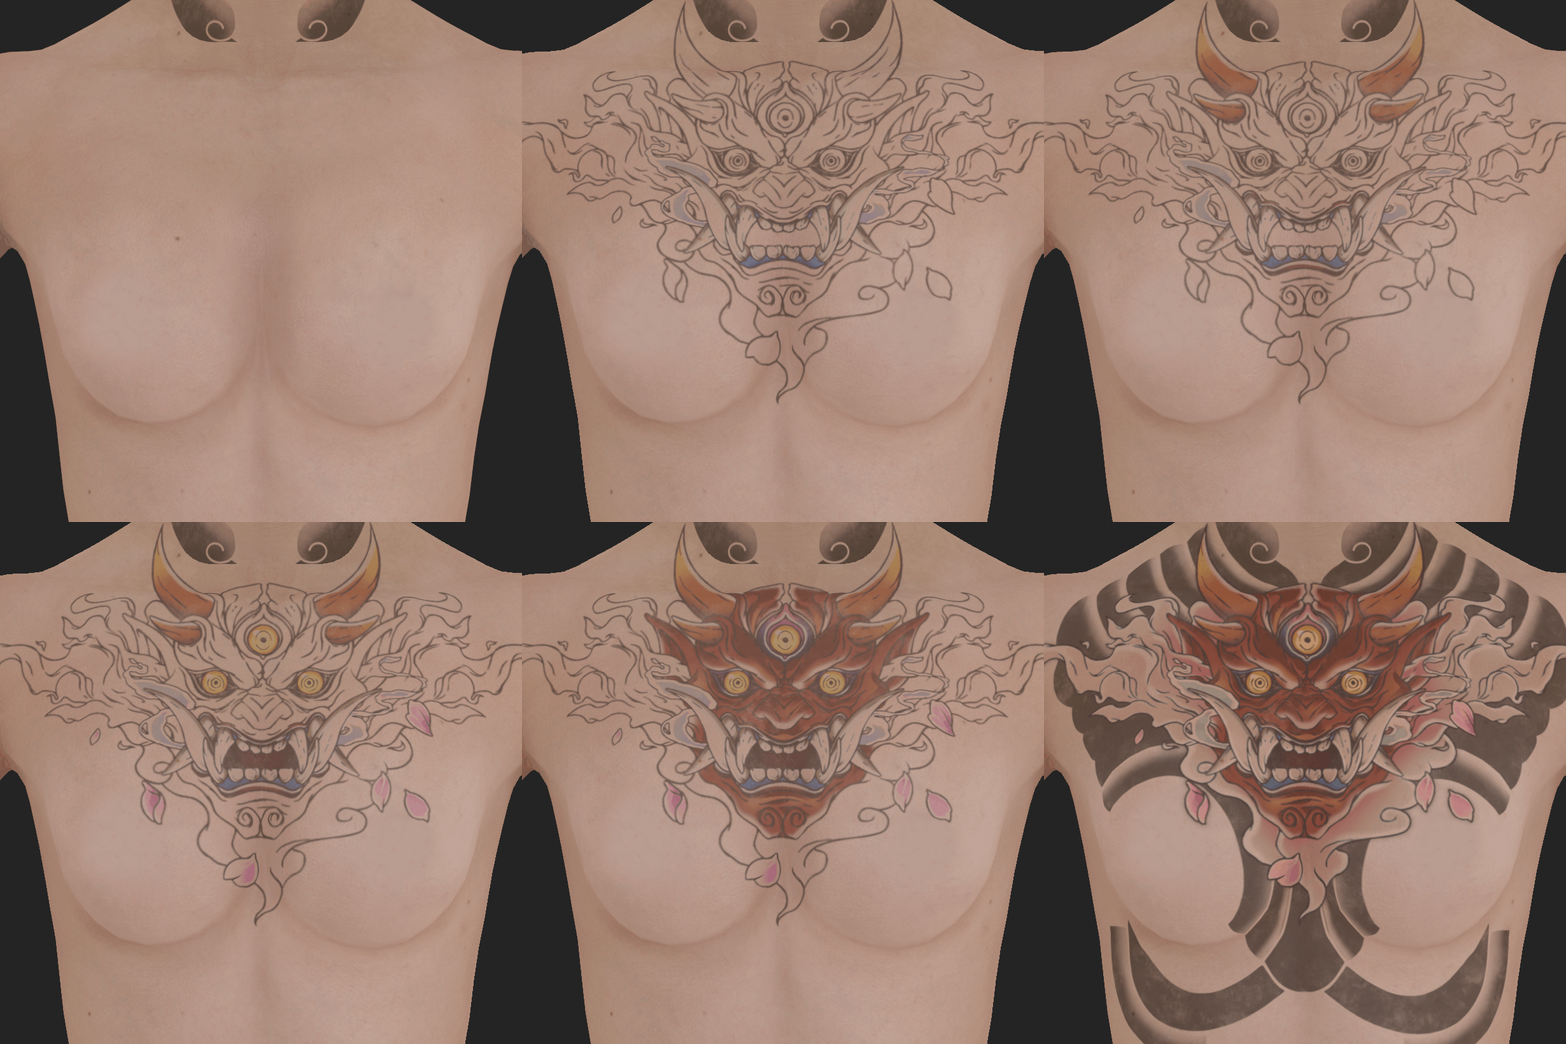
For the tattoo, I took a screenshot of my character’s chest and painted a sketch using Photoshop. I got this sketch into Substance 3D Painter and placed it on my character.
It was really rough but it showed me it was working. So, I moved into polishing the design in Photoshop and getting clean line art.
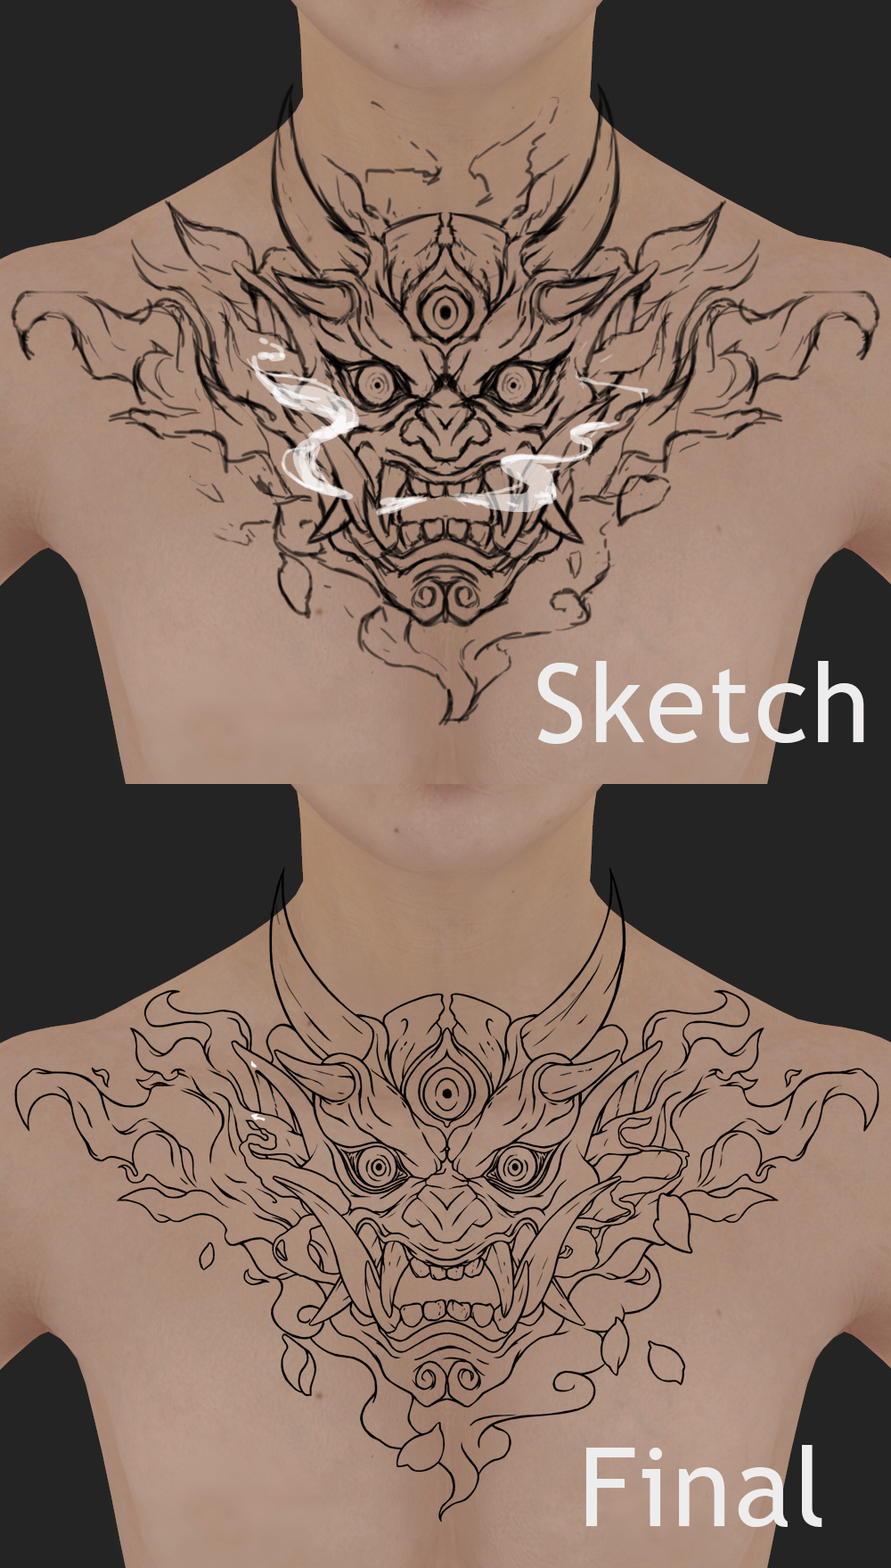
I placed my cleaned line art and added a blur filter so it doesn’t look too perfect or artificial.
Then I added multiple layers to work on the color scheme of my tattoo. I took inspiration from Yakuza-style tattoos, adding the black parts to create more contrast with the skin.
Prop Texturing
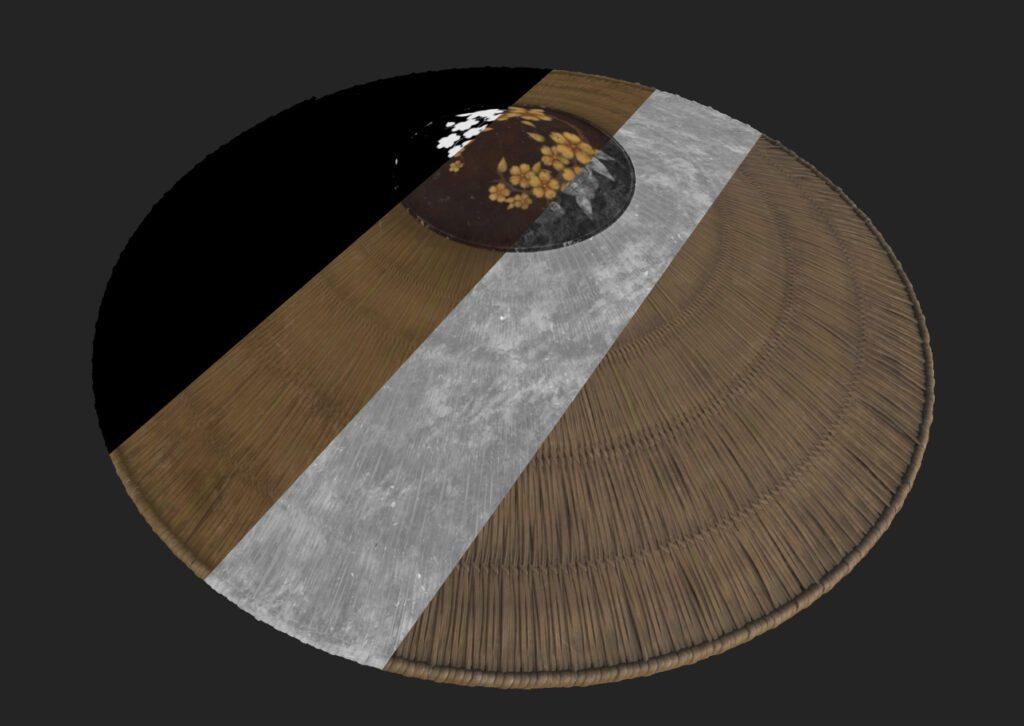
When texturing I have my personal Smart Material Library which I’ve built through the years.
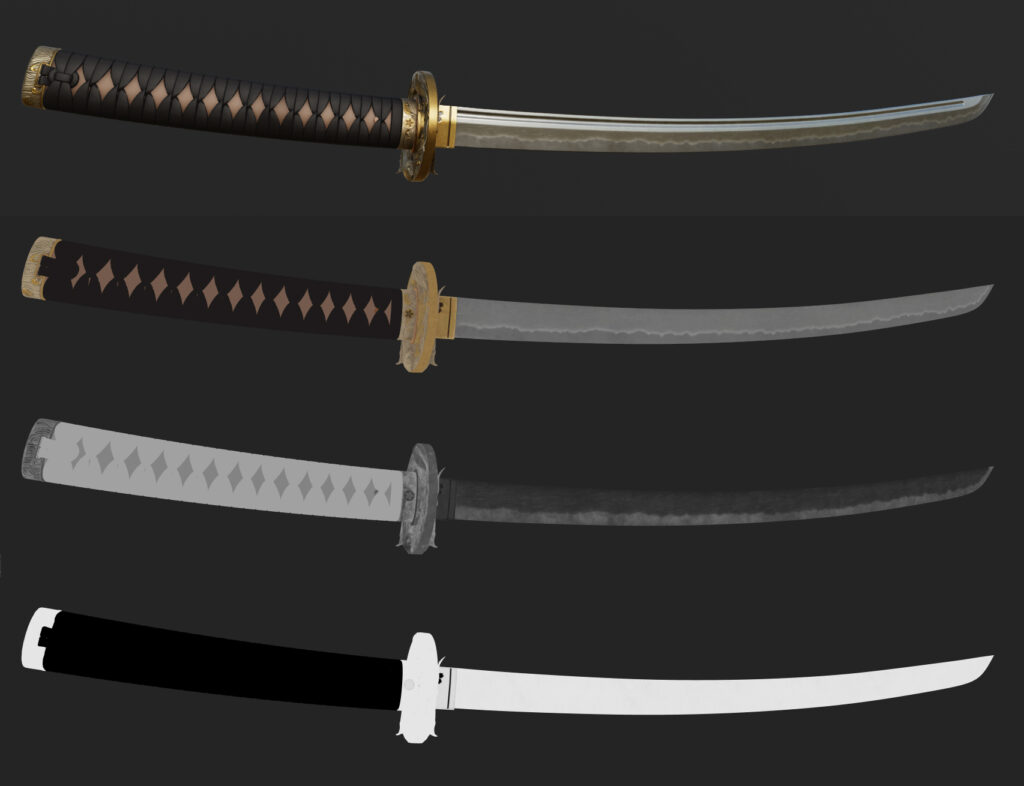
I usually start with some of these Smart Materials or start from scratch if needed. I really focus a lot on the Diffuse map. I like adding color variations, contrast and imperfections to my Diffuse. Then I work on the roughness map which is going to interact the most with my lights so usually I go back and forward between Substance and Unreal to tweak my roughness map until I get what I want. The metalness is pretty straightforward.
Katanas are mostly metal but I had to approach each section differently. For the blade, I had some really good close-up renders from the catalogs I used and it really helped me to get those small details and imperfections.
Skin Texturing
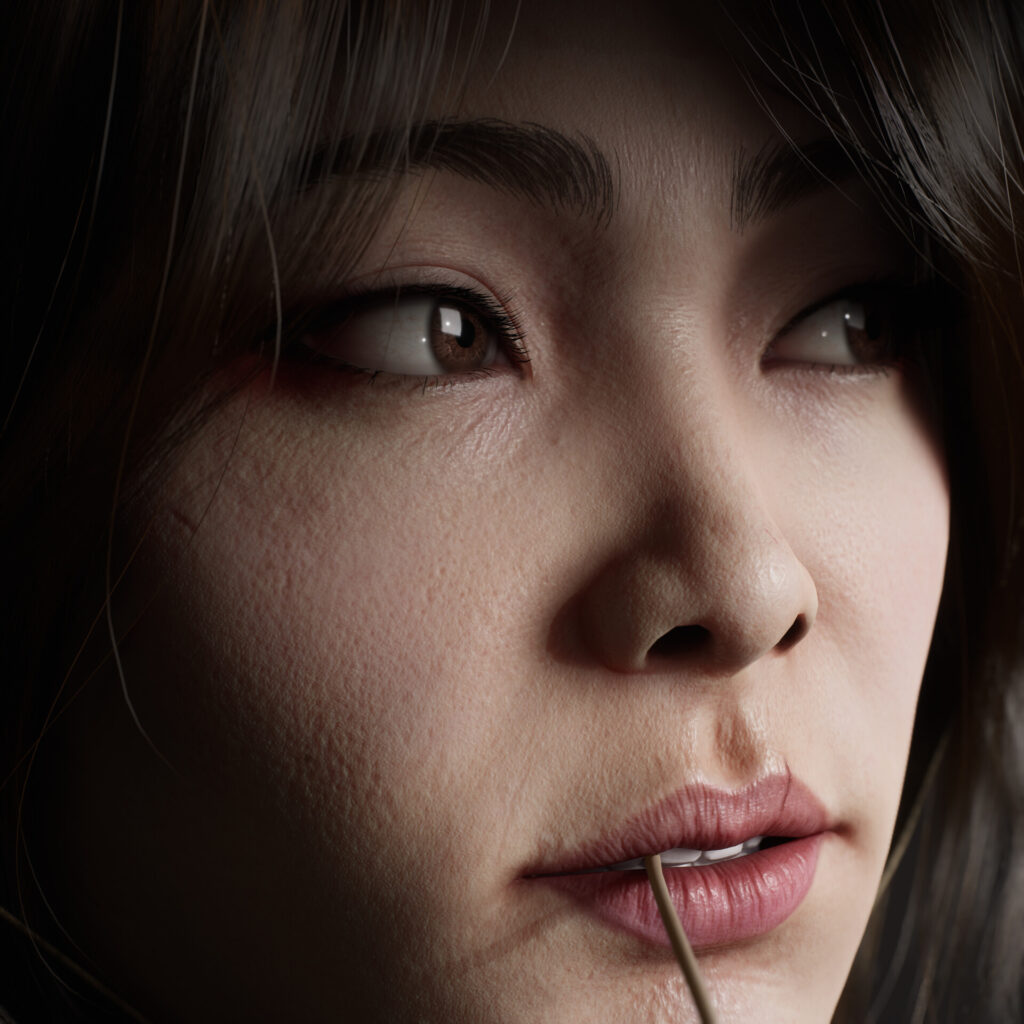
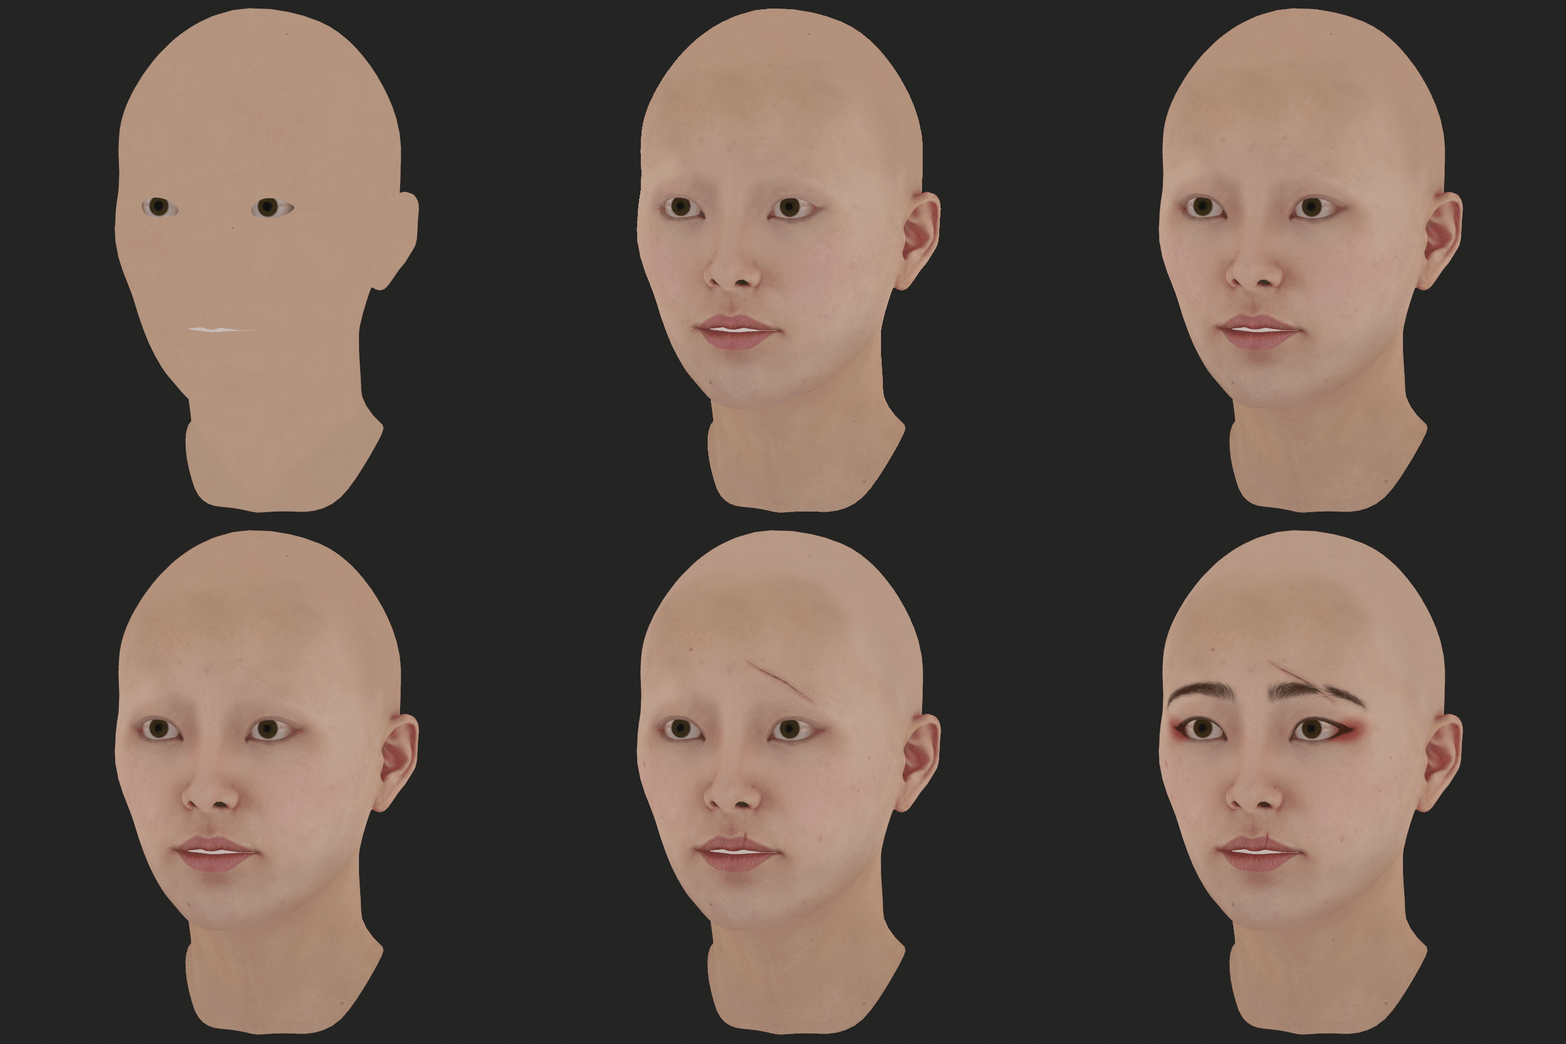
For the skin, I used a scanned texture to get the main pass for the face.
I cleaned up the scan using the clone brush. Then I added multiple layers of lighter and darker tones or added extra colors to get what I wanted.
Something that really helps to push my skin is by using my baked maps to mask different areas and push some details.
The cavity map really helps to push the pore detail that might get lost in the bake. I followed the same process with the body.
Rigging
For rigging, I used Advanced Skeleton for Maya. It allows you to quickly rig your characters. This is especially useful for people like me who are not riggers. You just have to follow the documentation or some tutorials and you can get a pretty good result.
Depending on the complexity of your character it can be more or less difficult and you might need to do some weight clean up afterward but at least it makes 90% of the work for you.
As a great bonus, it creates a face rig and you can edit the blend shapes to get better deformations.
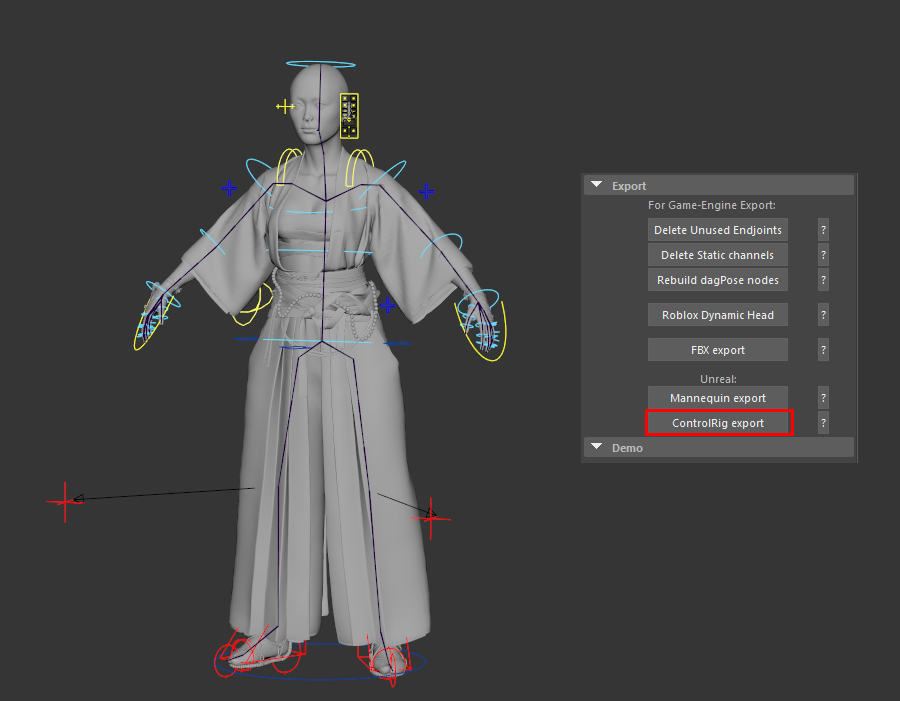
Something pretty cool that this plugin includes is that you can export a .PY file which you can use inside Unreal Engine to access the control rig feature.
Which I used for this project to quickly edit and generate poses directly inside Unreal.
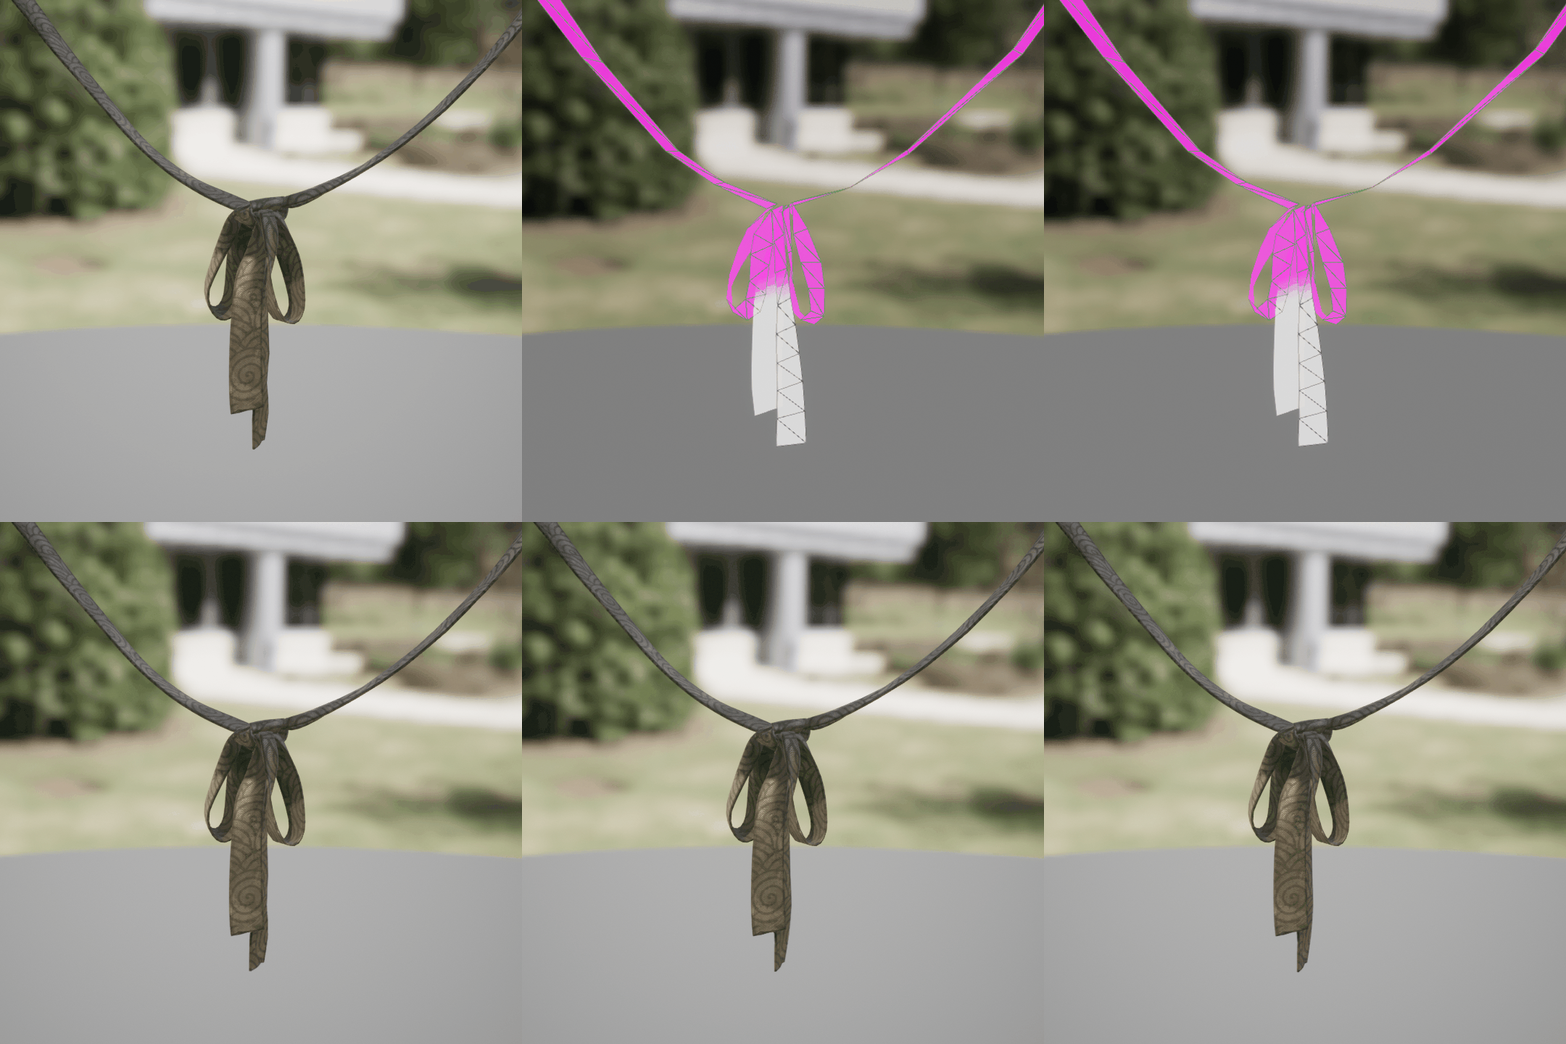
I used chaos cloth for the sleeves. There is not a lot of documentation or tutorials online to really have a deep understanding of how it works so it took a long time of trial and error.
I think the result could have been way better but because of my lack of knowledge in that department, this is the best I could get.
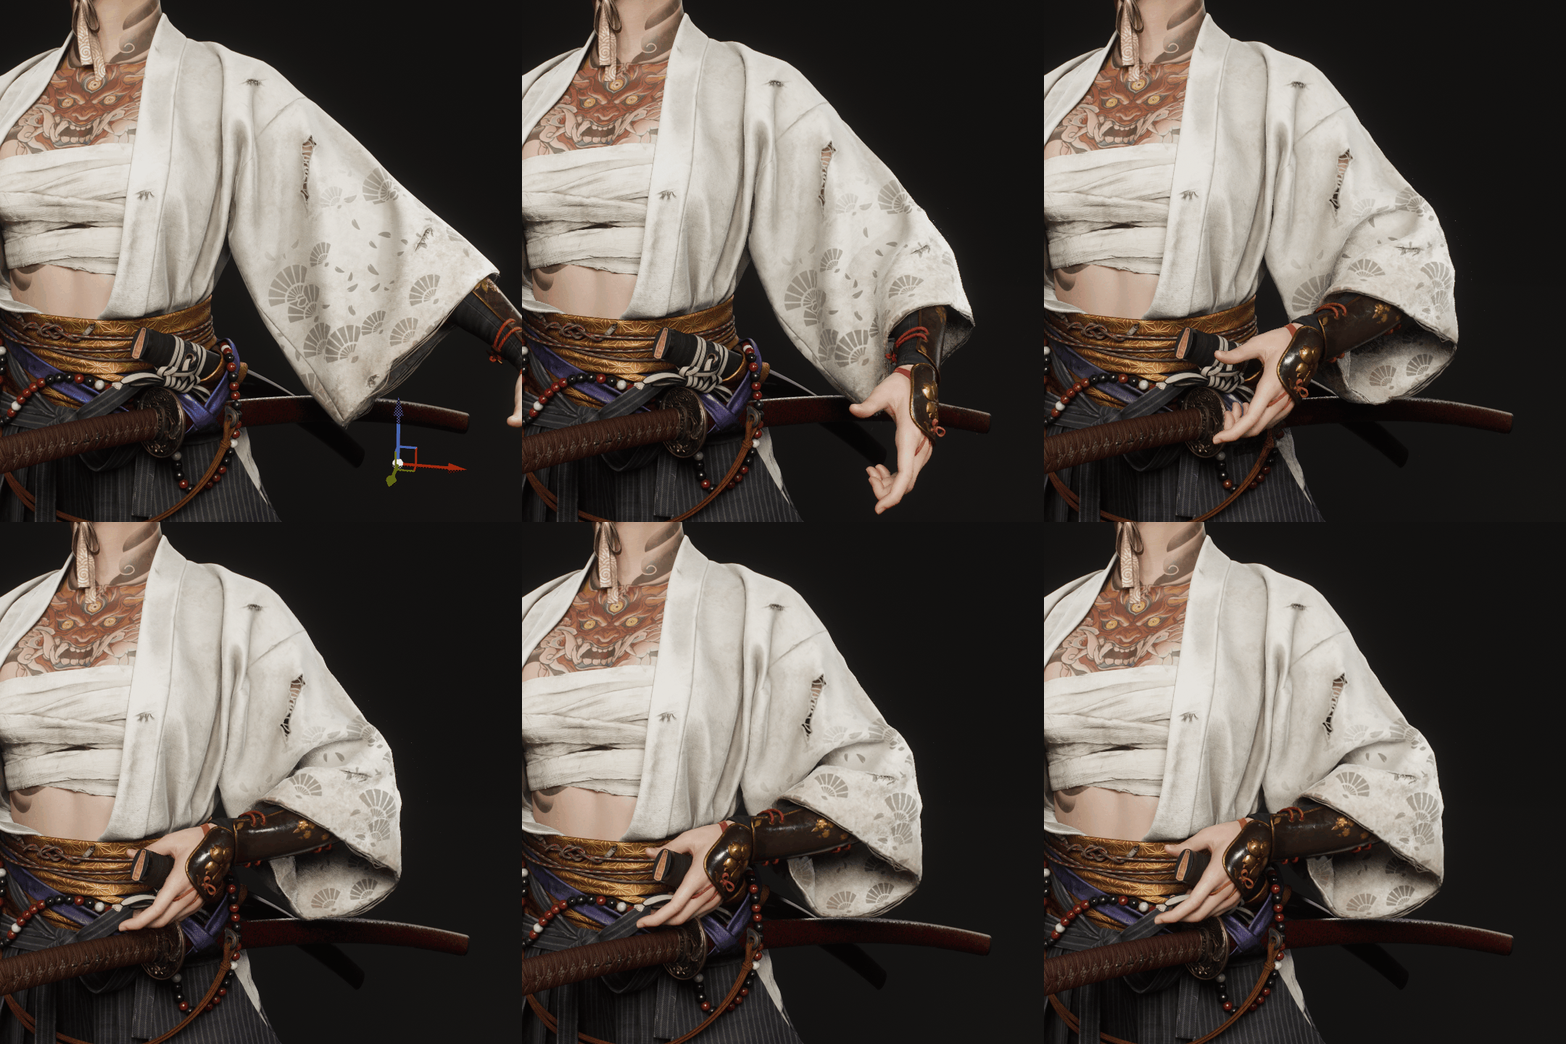
Something I can recommend is using a Proxy Mesh. A proxy mesh is a really low poly version of the mesh you want to apply chaos cloth simulation on.
The objective is to paint in this low poly version and transfer the simulation to the actual mesh. It helps in performance and also makes it easier to paint just a few polygons instead of having to deal with the thickness or extra geometry that is not attached to the original mesh.
Xgen
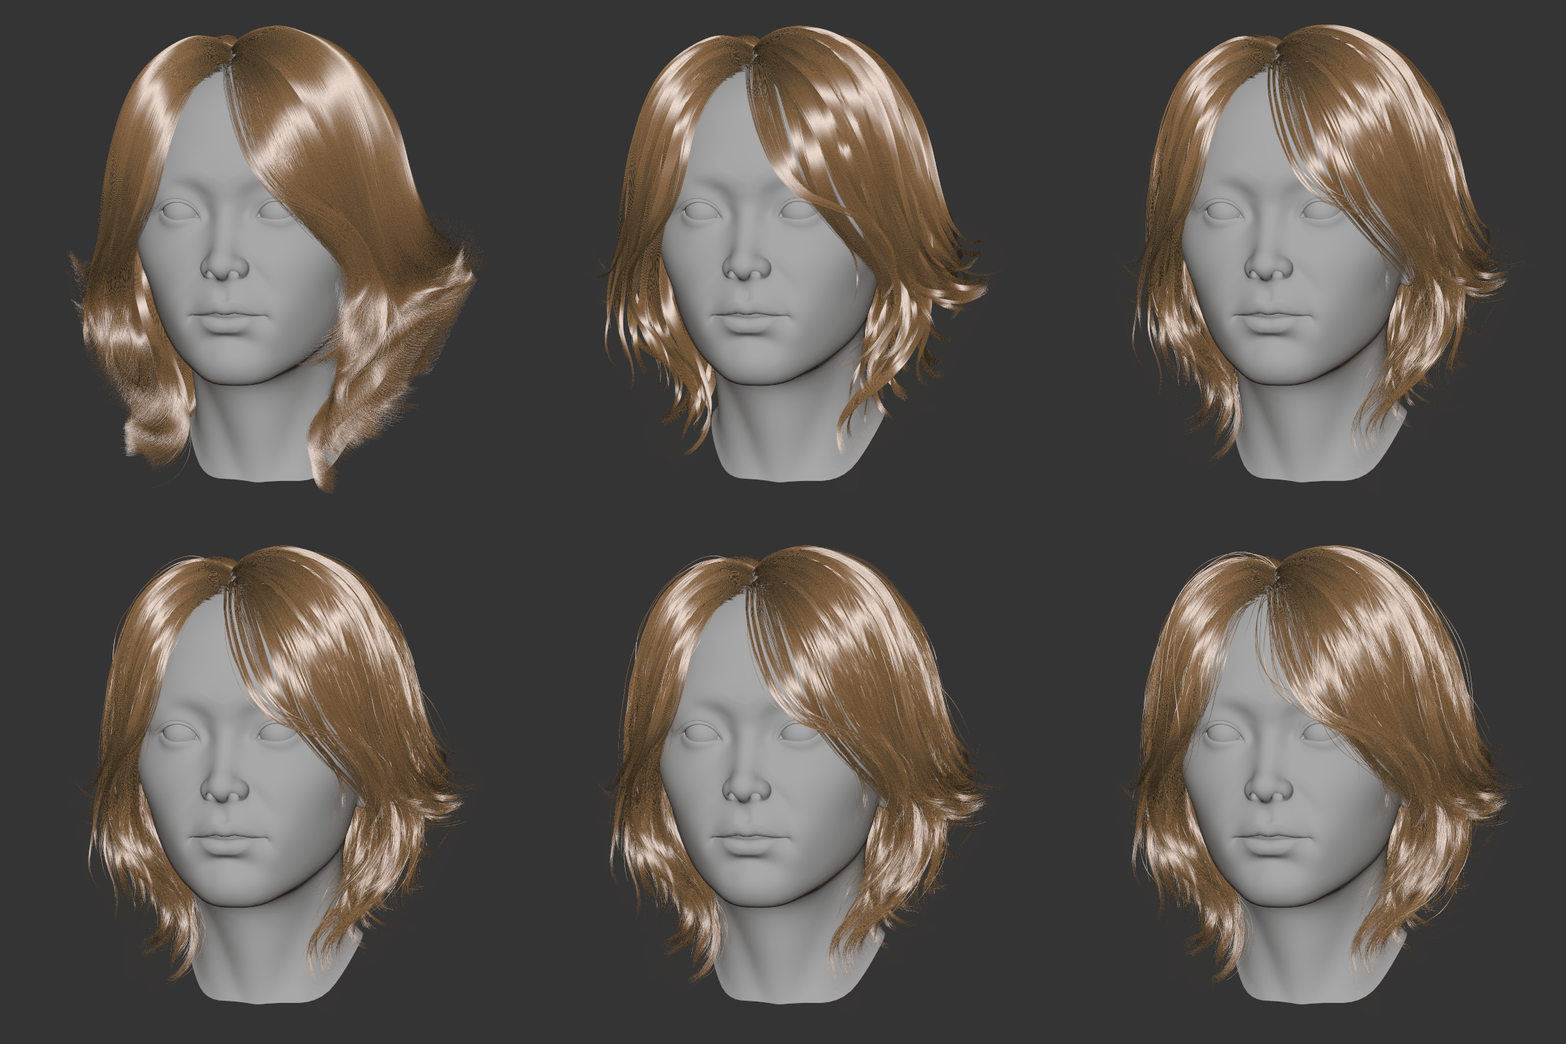
I wanted to use the alembic hair feature in Unreal Engine so I used Xgen. I slowly added guides to shape the hairstyle. Reference is key and understanding how the hair flows in the style really helps. At the beginning it looks like a big mess with no shape whatsoever, but once I applied the first clump modifier the hairstyle took shape and I could start making adjustments. I constantly was sending my Groom to Unreal Engine to see how it looks with my character and made changes. Something I really like to do is once I got my hairstyle is to add an extra description for hand placed flyaways. I really enjoy this stage is almost like drawing hair wherever you over the hairstyle.
Rendering
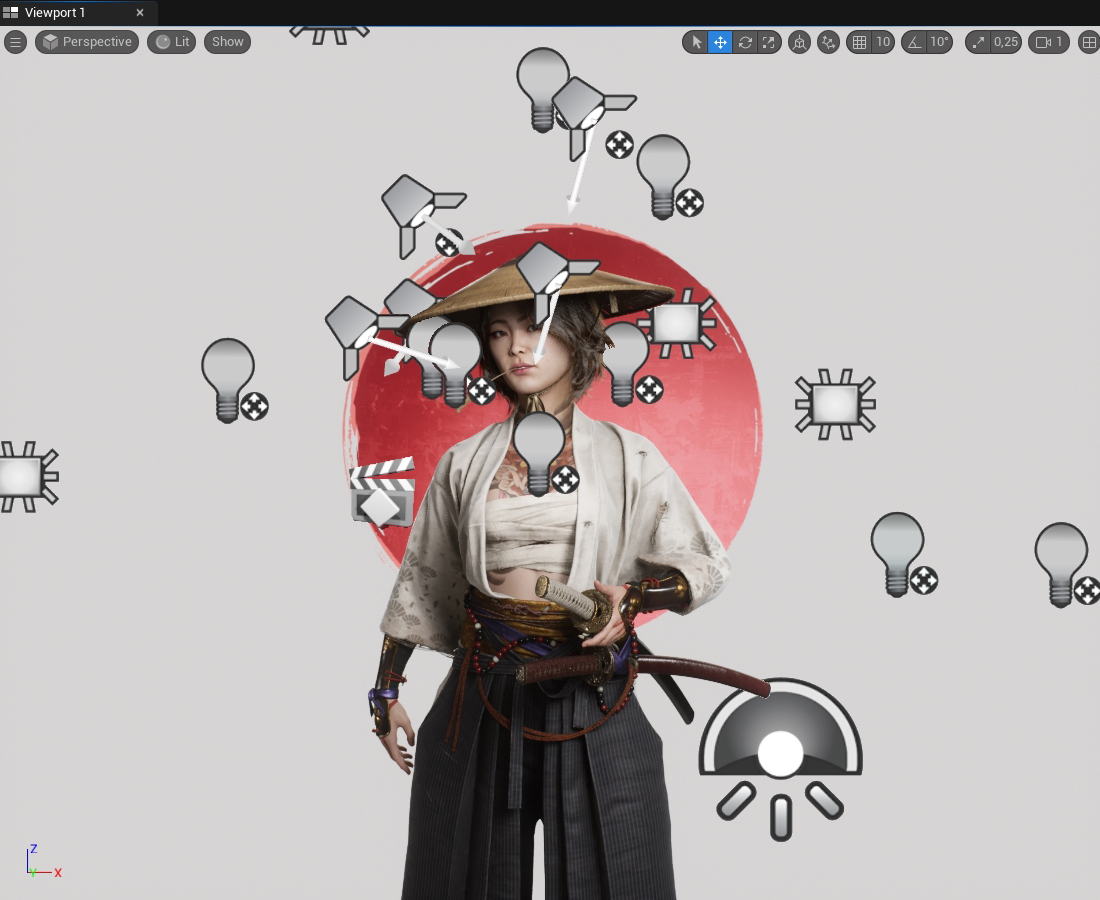
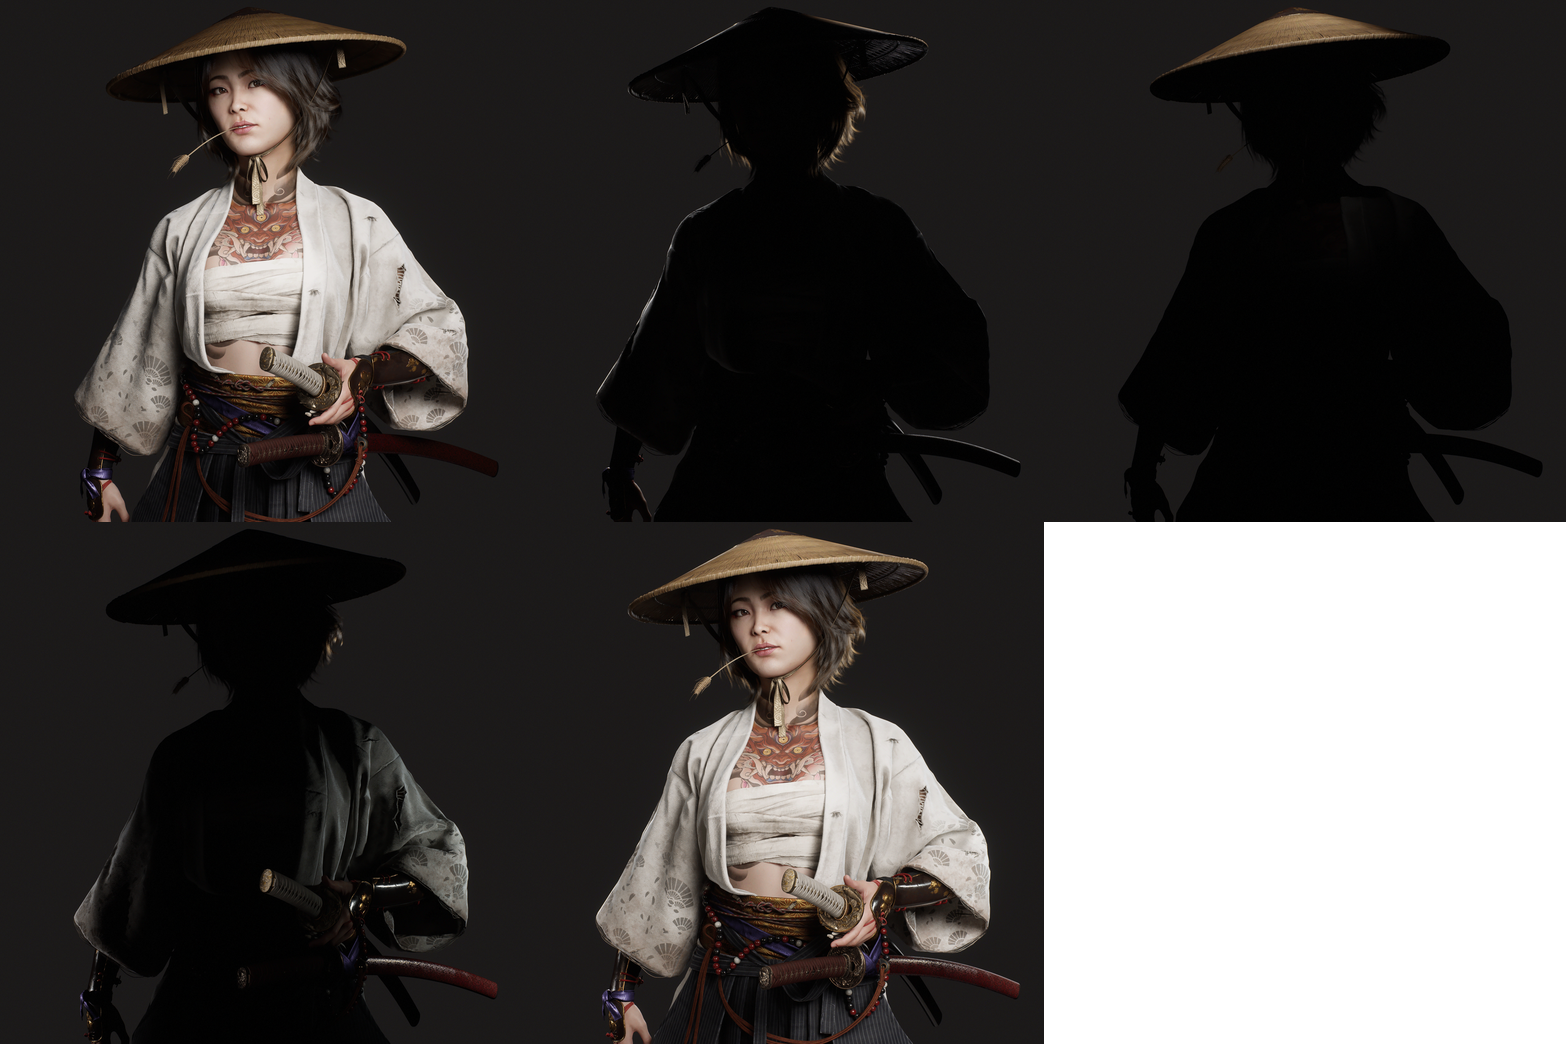
Since the beginning, I knew I wanted to use Unreal Engine and many of its features. I made my lighting setup for characters which is pretty basic, using a key light, rim light and fill light. Then I added extra lights to get some nice highlights in the metallic surfaces such as the katanas and a top light to get some nice lighting on the hat.
It was my first time using the Render Queue to get high-quality renders. I really recommend it, you can control a lot of parameters and customize it to your liking and save different presets.
I set up multiple scenes and different poses, tweaking little things here and there. During this process, I was able to see what didn’t work and made changes really quickly thanks to the Material Layer System and Control Rig.
Conclusion
I’m really happy with how she turned out. I learned so much about new workflows and put to practice new techniques I’d never tried before.
I’m really proud of the final design. It was something I created from scratch and know how much time and effort went into each part.
I feel like I actually leveled up my character art skills by doing this project. I feel motivated to tackle new and more challenging projects in the future.

