
Introduction
Hello, my name is Jesse. In the capacity of this article, I'm a 3D artist, but my background is notably saturated in marketing.
I've been captivated by 3D art for over three years, digging into the artistic form and boisterous surrounding community.
My interest is piqued when developing props and environments.


Scope and Goals
The first crucial decision I undertake is to identify the major attributes required to accomplish the project, or in other words what type of project it is.
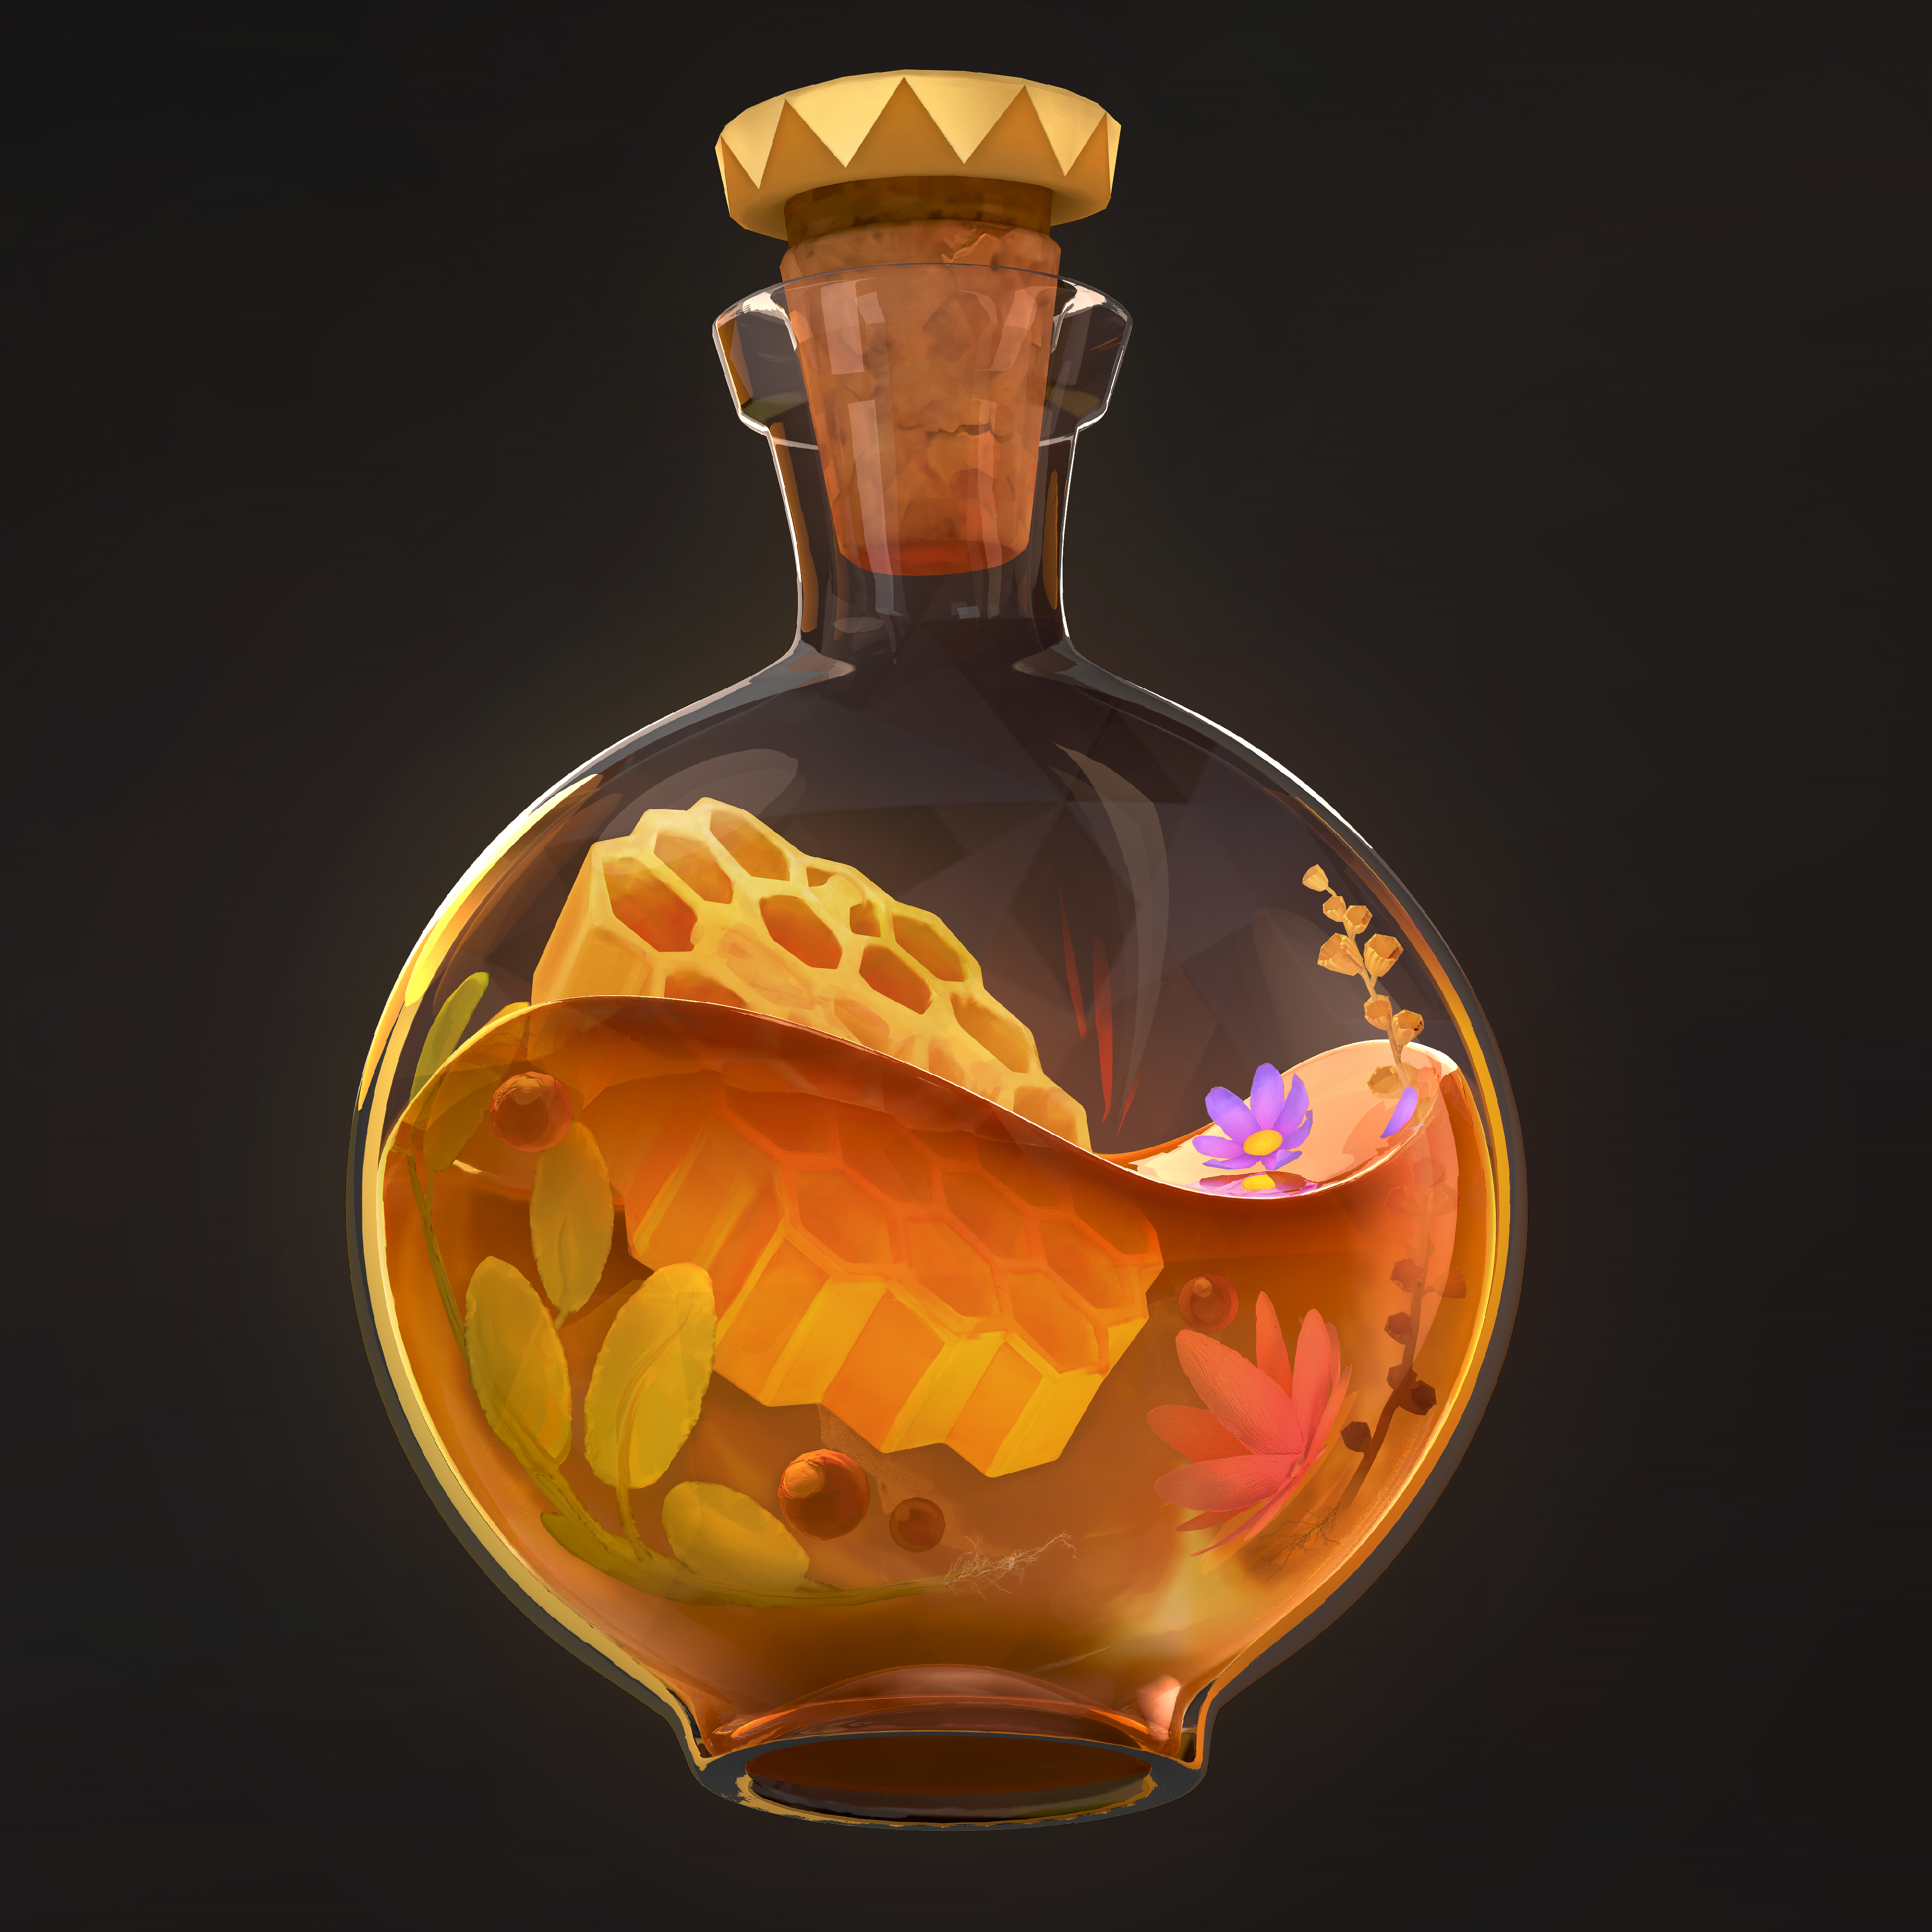
The wonderful concept by Anh Dang focuses heavily on the interaction of light with the prominent glass and honey materials.
As a result, the three primary elements I concentrated upon is the Lighting, Shaders, and Texturing. With the ultimate goal of elevating the concept into 3D while retaining as many 2D intrinsic aspects such as the exterior lines.
Setting up the Scene
The final concept art itself is a key resource that I believe is frequently underutilized to its fullest capability. While orthographic drawings are typically utilized, the perspective concept is usually relegated to conveying broader design aspects rather than functional integration.
Utilizing this perspective concept is where I first start when developing a piece, integrating it as the core of my workflow. With the below gif showcasing the broad precision one can achieve, along with efficiency of such a workflow discussed further below.

Typically to achieve this I employ a perspective matching tool called fSpy, importing the camera through the Maya importer plugin. Yet this workflow was not applicable for this concept in part due to the nonexistent straight lines.
Compounded with the reliance upon orthographic view or extremely high focal length to capture the bottom without distortion. As such I manually matched the concept by rotating a camera upwards twelve degrees, as can be seen below with the 3ds max matched viewport.

Modelling, 3ds Max
Modelling is considerably improved with this approach since I can rely on the concept to directly drive placement, silhouette, and form rather than abstractly guessing. As a result of using this strategy, I’ve discovered that modelling is considerably faster while simultaneously enhancing precision.
An illustration of this technique can be seen in the WIP gifs below with the honey potion modelling occurring over ~2 hours. All while virtually eliminating the need for unceasing refinement passes other techniques appear to be plagued with.

UV, RiziomUV
I routinely devote more time than others to UV production in order to advance texturing efficiency and technological advancements. While automatic or ‘near enough’ unwraps are technically feasible, the additional complexity involved in texturing and implementation is laborious.
As a result, addressing these inconsistencies requires more effort than thinking ahead and implementing them correctly in the first place.

Within this project, I rely upon a few concepts to achieve the final result in both texturing and shading. Given this project amply utilizes masking to reduce unwanted shading errors and overspill, UV-applicable portions of UV islands are placed in one of nine quadrants.
Each area is able to be driven by a 3×3 packed mask which is utilized in the shader development further below. In addition to preserving UV space, materials like glass bottles are reduced by 50-75% since they are mostly driven by shaders requiring minimal texturing.

All islands are regularized or squared to ease texturing, both to maximize texture space and to aid in texture development. Within the honey, a [world space gradient using a planar technique](https://twitter.com/JesseOutback/status/1348615907665268743) would not offer a uniform gradient over the rim.
Instead, by squaring the UV island, a UV space gradient that follows the curvature can be employed.

In addition, attention has been taken to accommodate tiling, with a notable example being the leaf’s that share the same UV geometry repetitively spaced. As a result, importing a custom height map can be accomplished swiftly using horizontal tiling.
Rather than duplicating, altering, and manually applying fill layers for each dispersed leaf.

Textures, Substance Painter
Texture development involves primarily the previously discussed camera matching setup. Typically, I will project and ‘bake’ the concept directly onto the model using 3ds Max’s ‘Camera Map Per Pixel’ node.
With this map utilized in Substance Painter, texturing becomes both more efficient and accurate. Capable of directly matching notable design aspects, while utilizing color matching directly while hand painting.


While not used in this project, this approach can be used to rapidly and precisely produce mid and low-frequency forms while sculpting.
With the image above depicts the disparity between the projected concept and the final texturing. While there are some minor differences between each rendition, using this technique allows you to effectively match the majority of design language.

The flowers were developed from a single petal created with a mixture of illustrator for large forms and with photoshop to develop the subtle grain. I arranged each petal individually to maintain as much flexibility as possible while capturing the silhouette. The height and opacity were driven by sequential anchor point’s, which referenced the diffuse layer.
Furthermore, the edges of each plant were altered using an edge detection mask that was primarily driven by either a UV border generator or previous anchor points. The edges were then ‘clipped’ via a layering of blur slope layers and an opacity fill layer.
Shaders, Ue5
While the shader setup for this project might appear to be complex, the reality is its almost entirely comprised of a single concept. The above falloff material function is at the core of the glass and honey shaders, producing a similar Fresnel effect and 2D equivalent edges.
This falloff function produces smooth curvature-influenced edges with height contrast, as shown below.


With these edges, subsequent interlacing masking helps isolate the colored interior edge, which is further refined through an object-based gradient mask. This step further refines the interior edge, removing and feathering the line from appearing at the top of the glass bottle. Both masks then interact with the albedo, self-illumination and opacity, saturating the colors and increasing opacity for the interior lines.
While the exterior lines’ hue is desaturated providing a clean grey exterior line. Additionally, a low contrast falloff mask is driven to the self-illumination for the honey shader.
Since any falloff lines can emerge in undesirable areas, the previously generated masks assist in constraining them to the desired areas. The glass material for instance forms a thick line on all internal surfaces along with the bottom rim.
Additionally, the honey material is driven by a soft low contrast falloff function which provides both self-illumination and a hue shift for the edges of the material. Which in turn helps brighten the material without distorting the totality of interior objects.

Surprisingly the most difficult and time-consuming portion of this piece comes from the subtle overlaid triangles which appear in the concept’s foreground and background. With no reasonable alternative, I resigned to manually outlining and generating the pattern within Illustrator, then projecting the texture onto the glass material.
While I did experiment with animating these triangles through particle systems or developing an effective triangulated HDRI. The animation and moving triangles in turn take away from the broader composition of the piece and as a result, remain static.
Lighting
The lighting adheres to a straightforward notion of minimizing harsh or direct shadows while emphasizing highlights. Shadows were decreased nearly entirely to achieve this, as they would otherwise overshadow the scene, as shown on the right. Instead, the majority of the balance came from the material’s value, shaders and lighting highlights.
One of the most complicated aspects was the glass illumination, which required an assortment of ball spheres and image planes. Using shallow glancing angles to avoid overpowering the surroundings while still delivering adequate illumination. Given the ‘type’ of the project this is there are limitations to this approach, specifically that different angles aren’t as heavily optimized as can be seen below.


Closing Thoughts
While this project does successfully transition the 2D concept to 3D, it is still lacking in numerous aspects which is to be expected for a 1-2 week project. Notable examples are the honey shader missing a depth pass to occlude distance objects alongside the bubbles requiring a better shader.
Compounded by all glass and honey materials utilizing an IOR of 1.0 for the sole purpose to match the concept. Yet regardless it has achieved the designated purpose of reasonably matching the concept even with the limitations of 3D.
For further inquires or clarifications please do not hesitate to reach out.
Regards,
Jesse.
Read more articles
You might also like these articles.