Pyjama Bottle

Introduction
Hello everyone, my name is Salavat Karimov. I am 22 years old, and I am from Russia, living in the city of Ulyanovsk. I've been involved in 3D for a relatively short time; soon it will be two years. Since childhood, I have enjoyed fantasizing, drawing, and creating my own characters and their weapons.
I wanted to learn how to draw, but somehow it didn't work out, and I forgot about it.
Goals
Many years later, I stumbled upon a group on social media where people shared their portfolios. After discovering ArtStation, I was inspired by many beautiful works and decided to try my hand at this field.
Another big plus for me in this activity is that it offers the opportunity to travel the world and work from different countries.
Throughout this time, by watching educational videos, I learned from my mistakes, experimenting and trying new things. Recently, I have been improving my skills with the help of the talented 3D artist Muhammad Abduhalilov.
To my regret, I have not yet had the chance to work on any projects, so I am open to offers.
Blockout
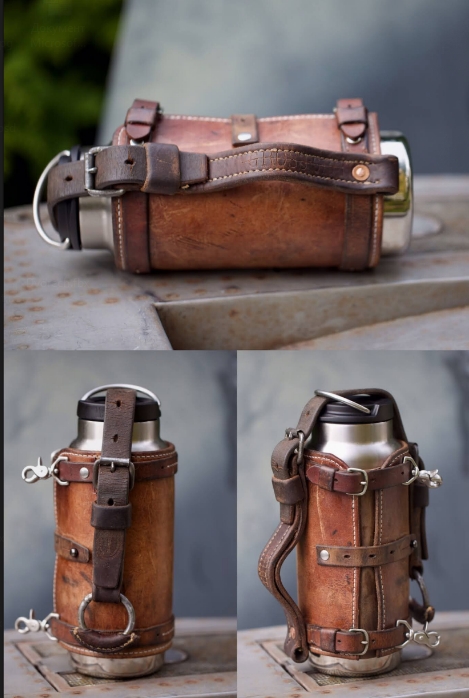
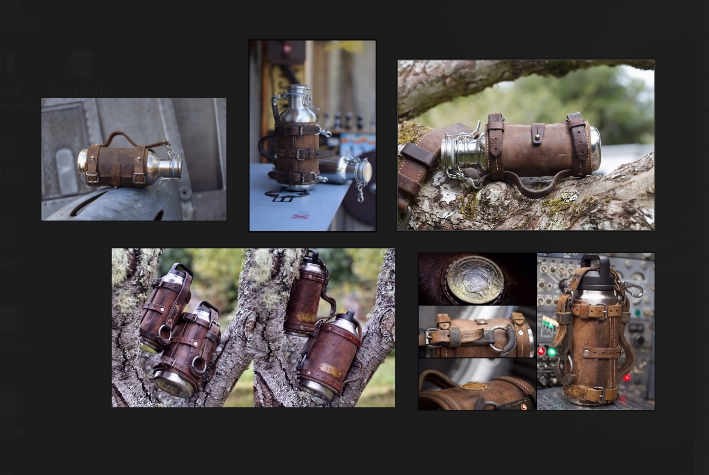
The primary goal was to create something unusual to attract attention on ArtStation, so I selected a reference image as a starting point. The first step was to create a blockout of the model in Blender.
Starting with simple forms, I focused on ensuring the proportions and structure were correct before moving into more detailed modeling.
Modelling
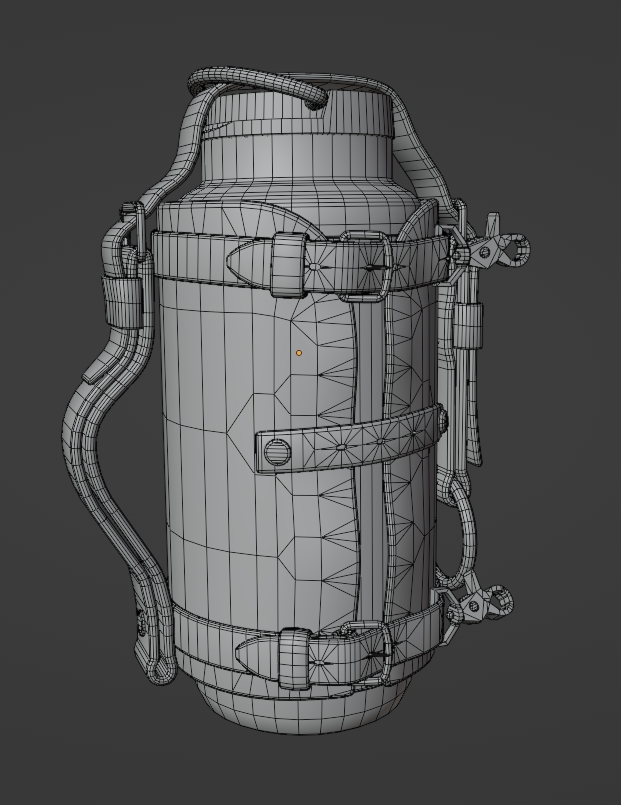
For 3D modeling, I used Blender. I began with simple shapes and gradually moved to more complex ones.
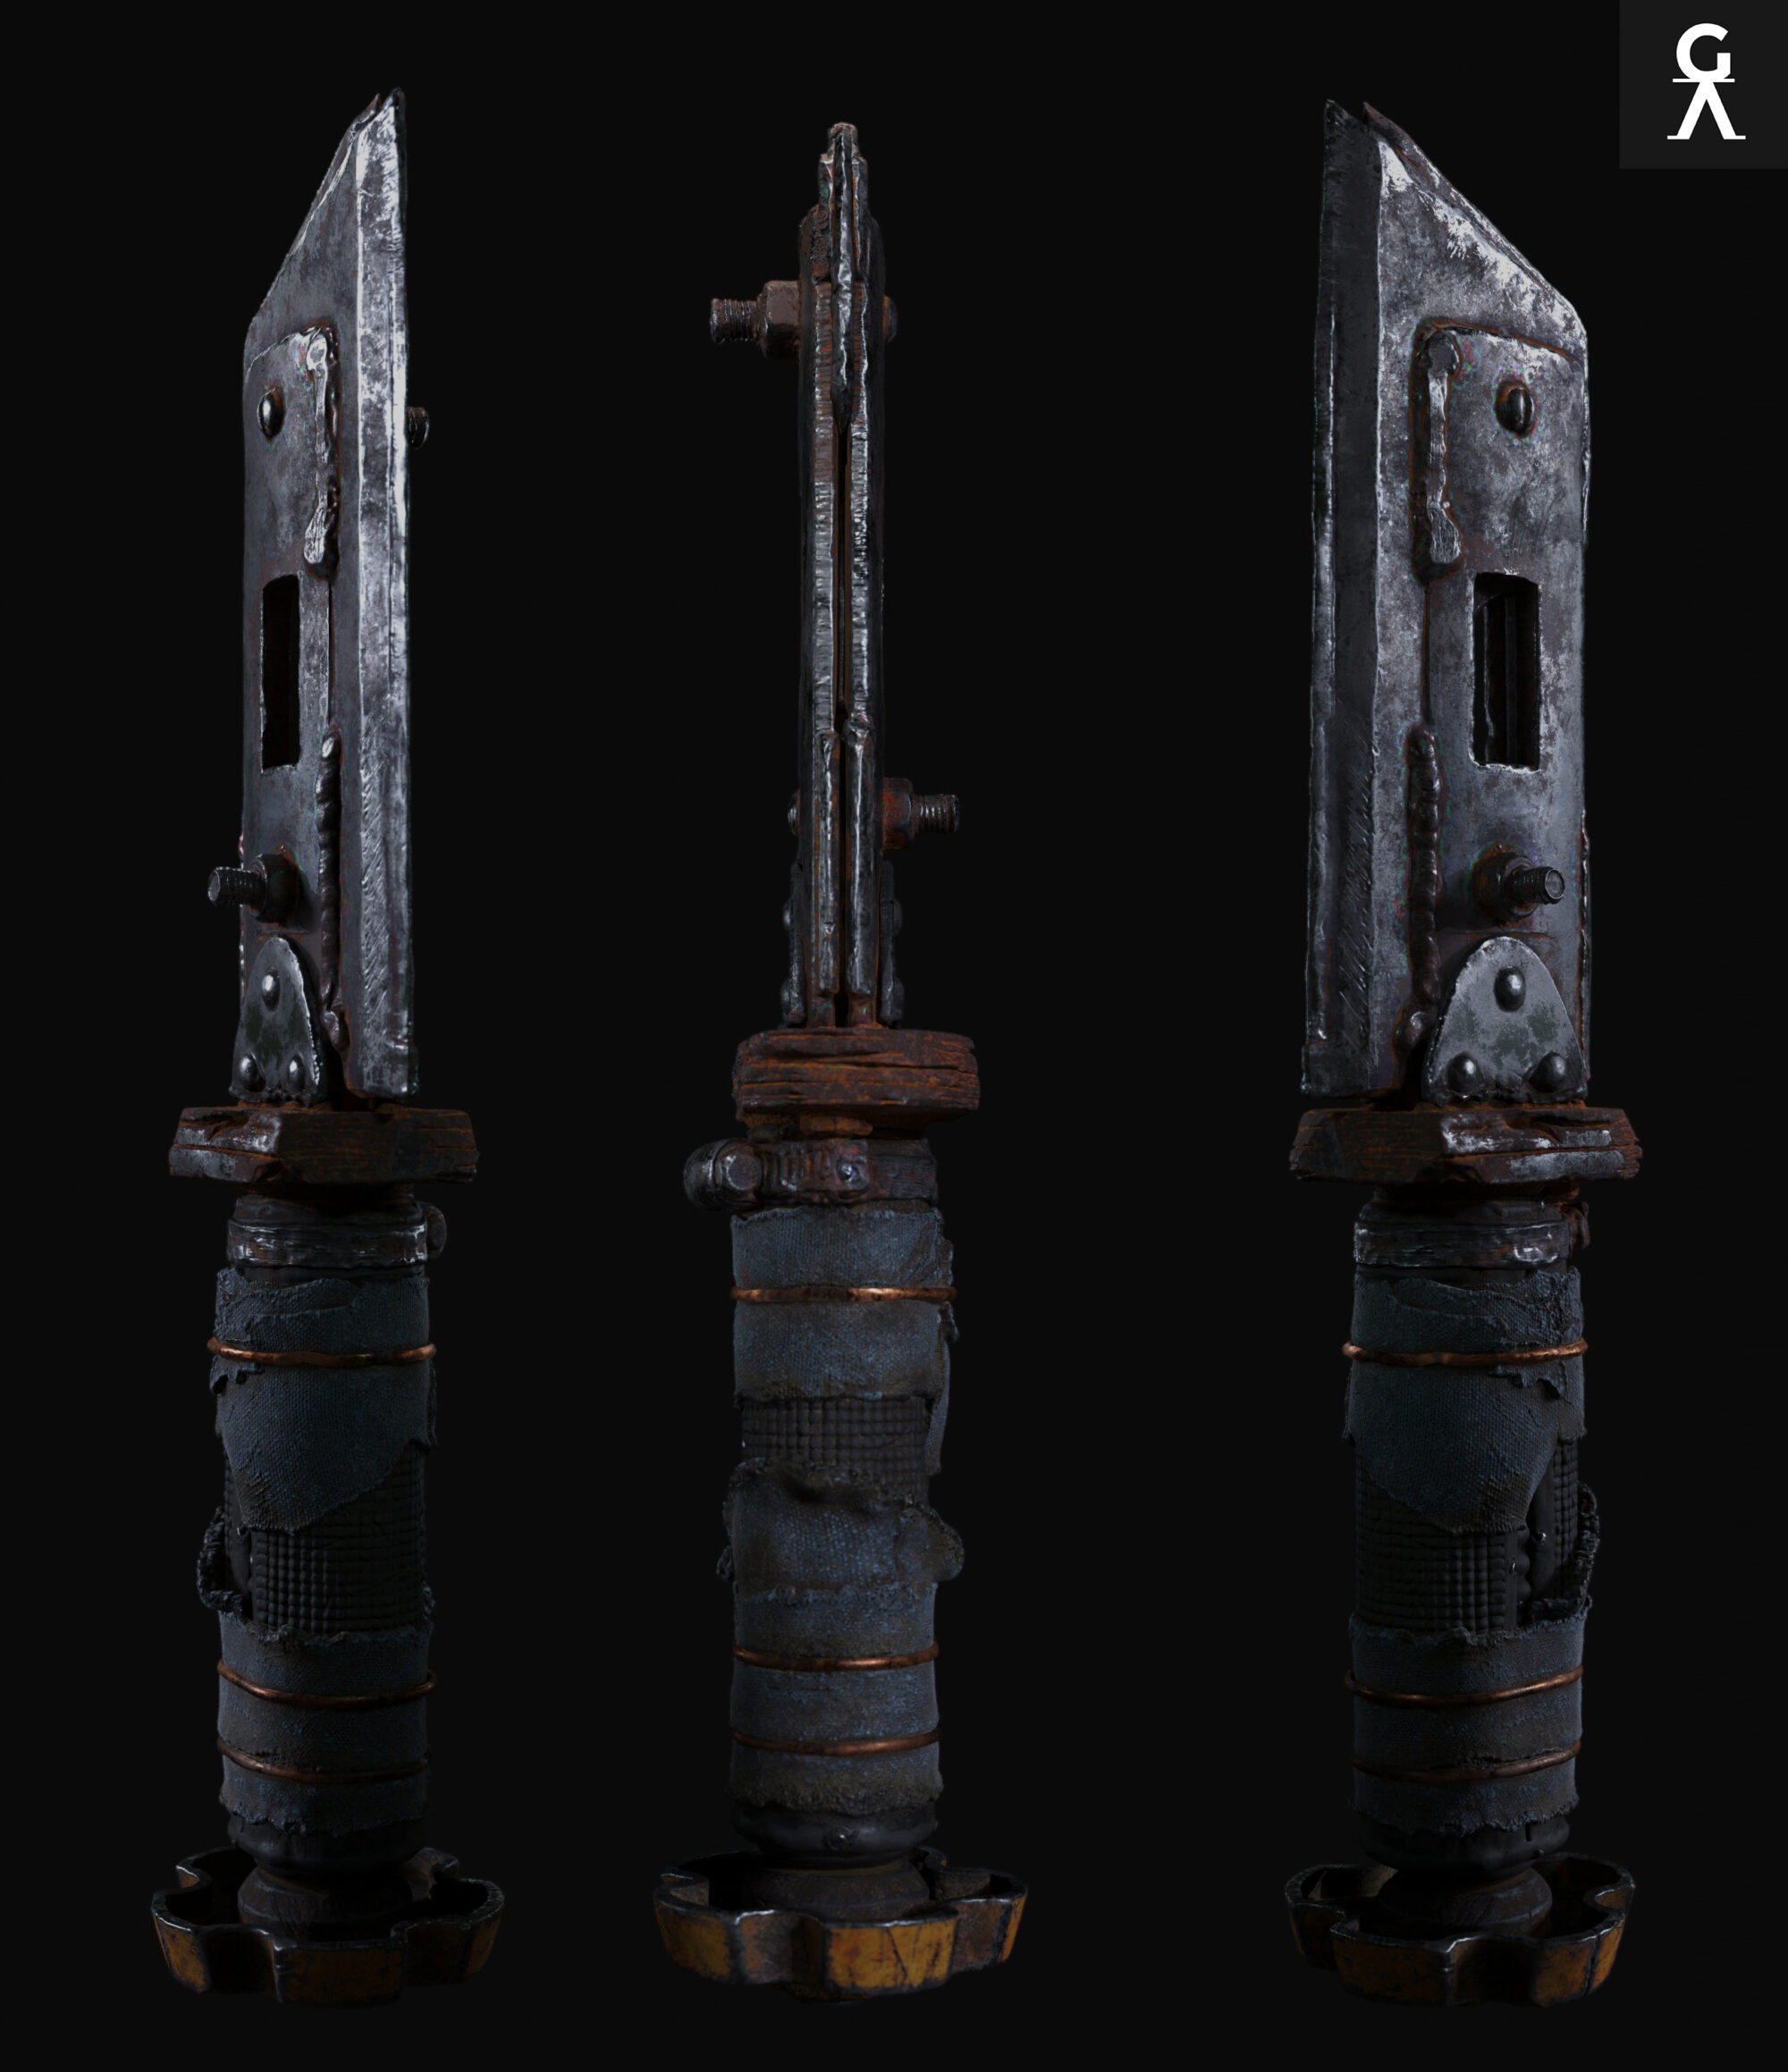
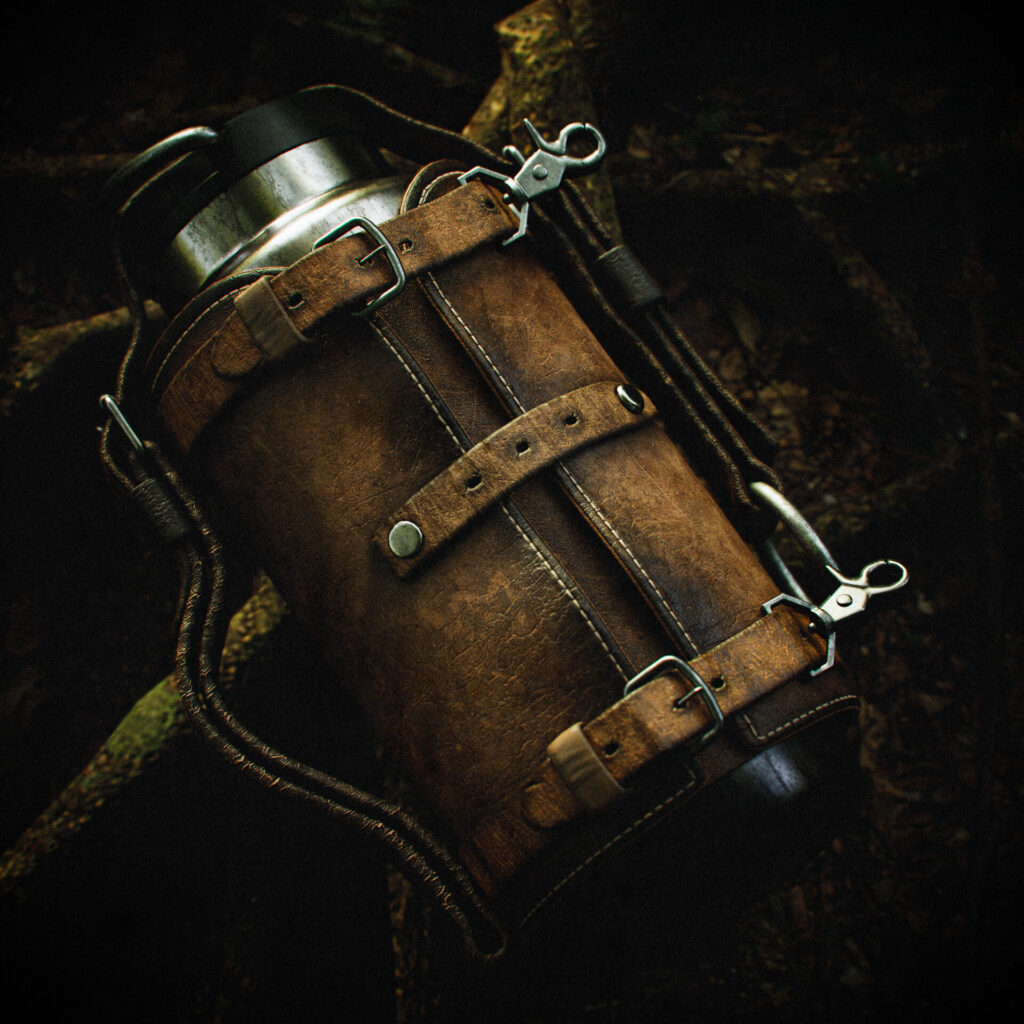
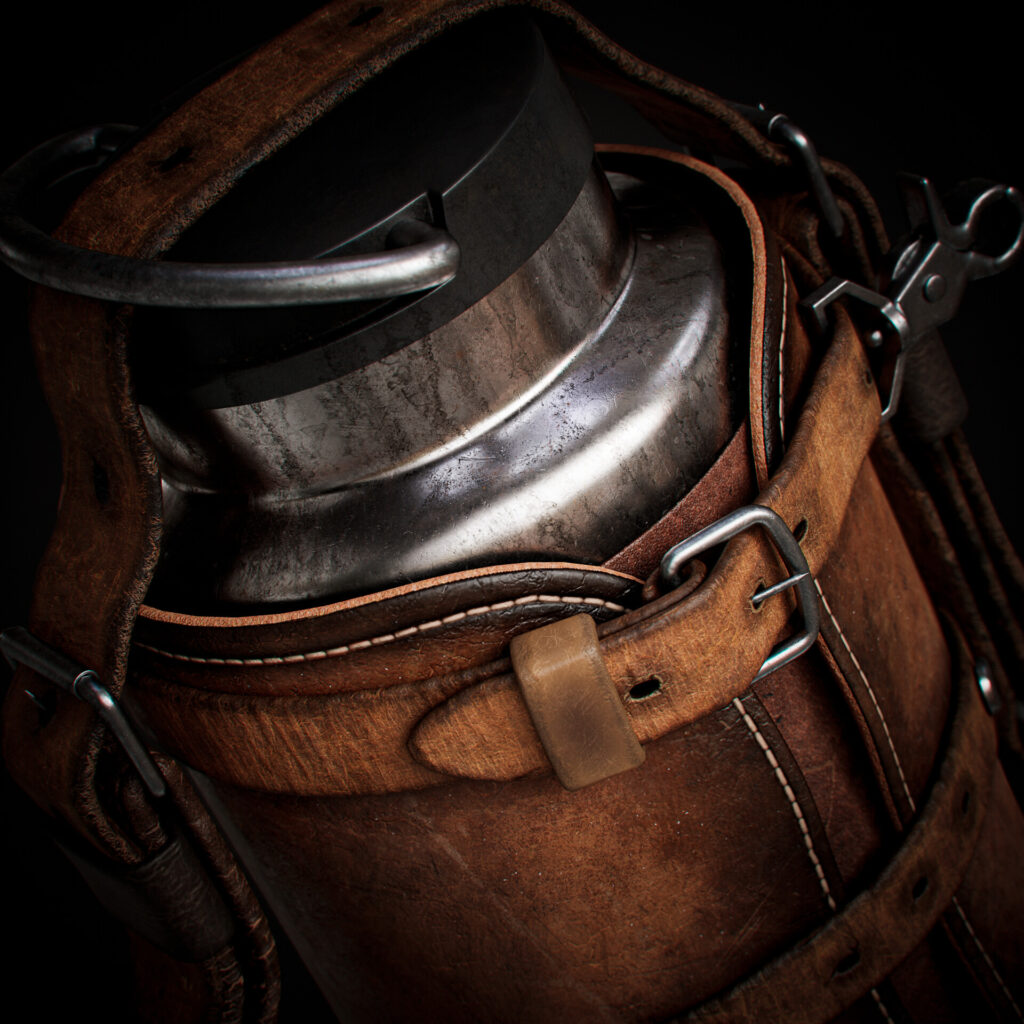
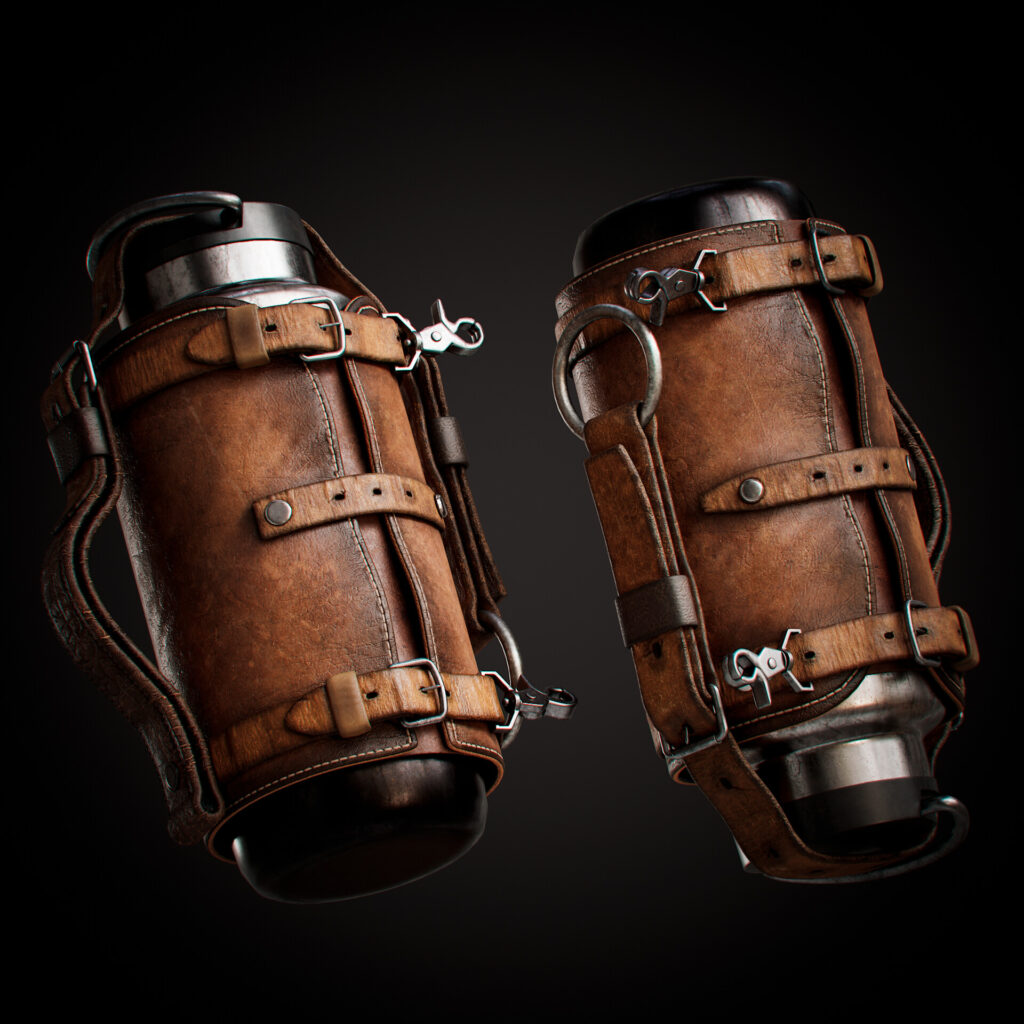
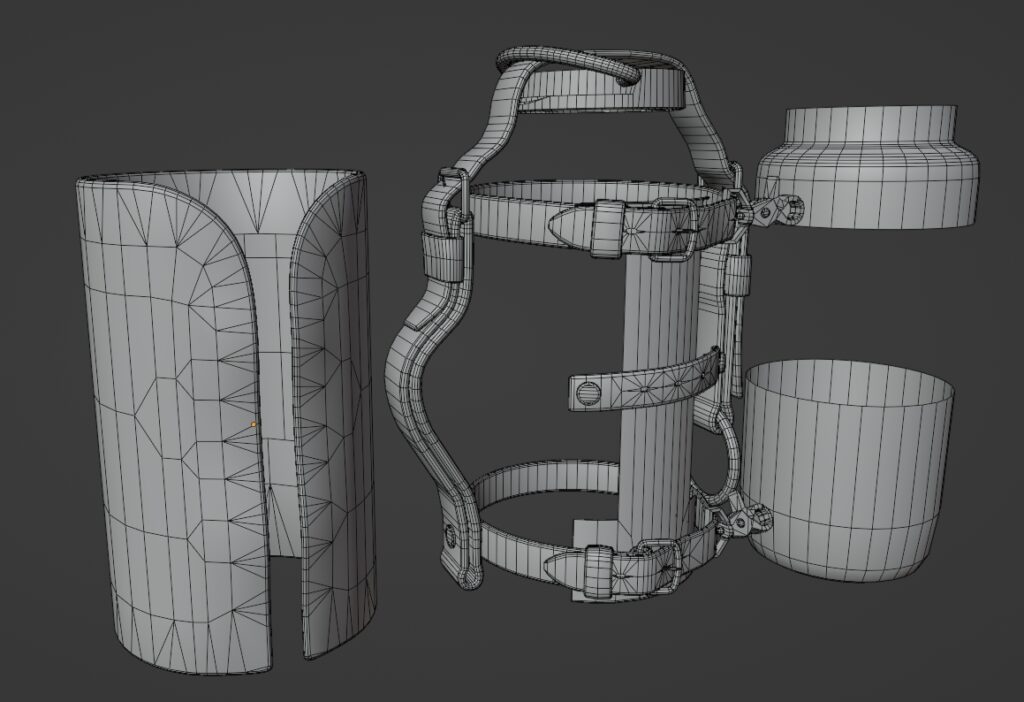
The first step was creating the bottle. After completing the base, I duplicated and slightly moved it, applying the Solidify modifier to create the look of pajamas.

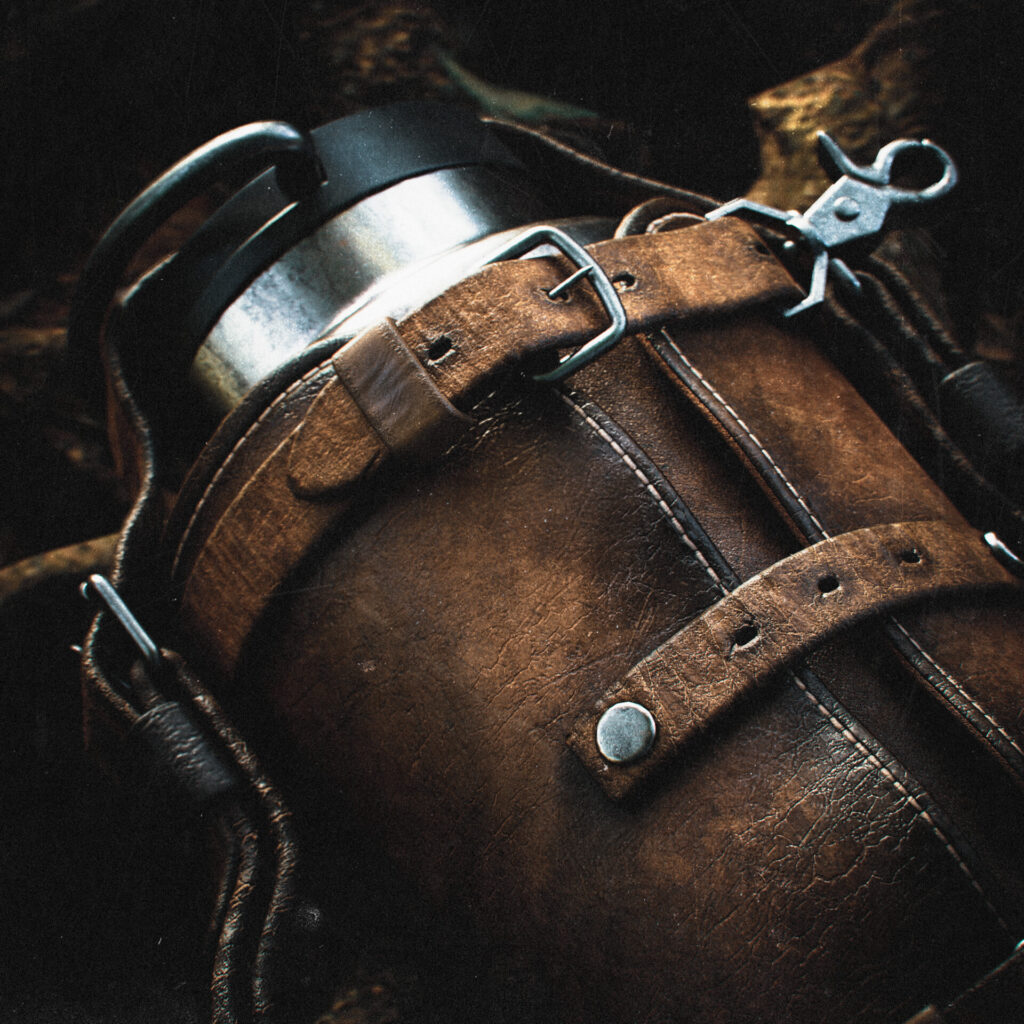
The straps holding the pajamas were modeled similarly. For the fasteners, I started with basic square shapes and used subdivision to achieve smooth, rounded edges.
I added subtle bulging folds under the straps by applying subdivision at one iteration to the main skin, making it appear compressed.
Sculpting
Later, in ZBrush, I detailed the folds of the skin and the straps, adding a thick, cut-skin effect by creating the illusion of a double layer. I masked it and applied a noise effect for realism.
To save time, I opted for regular subdivision modeling instead of retopology for the high-poly model after detailing in ZBrush.
After completing the high-poly, I cleaned up the low-poly geometry in Blender to ensure it was optimized and ready for UV unwrapping.
The final mesh had approximately 24,000 triangles.

UV Unwrapping
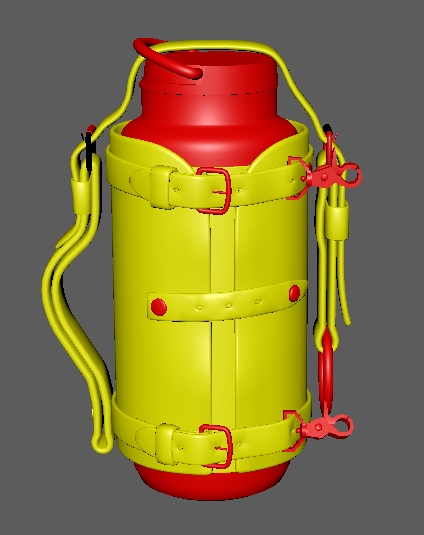
I performed the UV unwrapping in Blender using add-ons such as UVPackMaster and UV Toolkit. The model was divided into two UV sets: one for leather elements and the other for metal parts. Each UV set was packed at a 4K resolution.
To save space and reduce the polycount, I deleted polygons in areas not visible in the final render. For example, polygons between the bottle and the skin were removed.
Baking
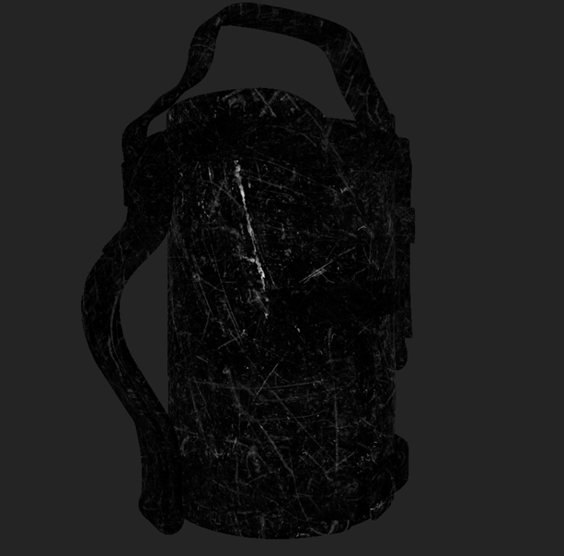
Baking was done in Marmoset Toolbag 4. I baked the Normal map, Ambient Occlusion, Curvature, World Space Normal, Thickness, and ID map for seams. The Position map was baked in Substance Painter to avoid any potential issues in Marmoset.
If needed, I occasionally fixed artifacts in Photoshop, but for this project, it wasn’t necessary.
Texturing
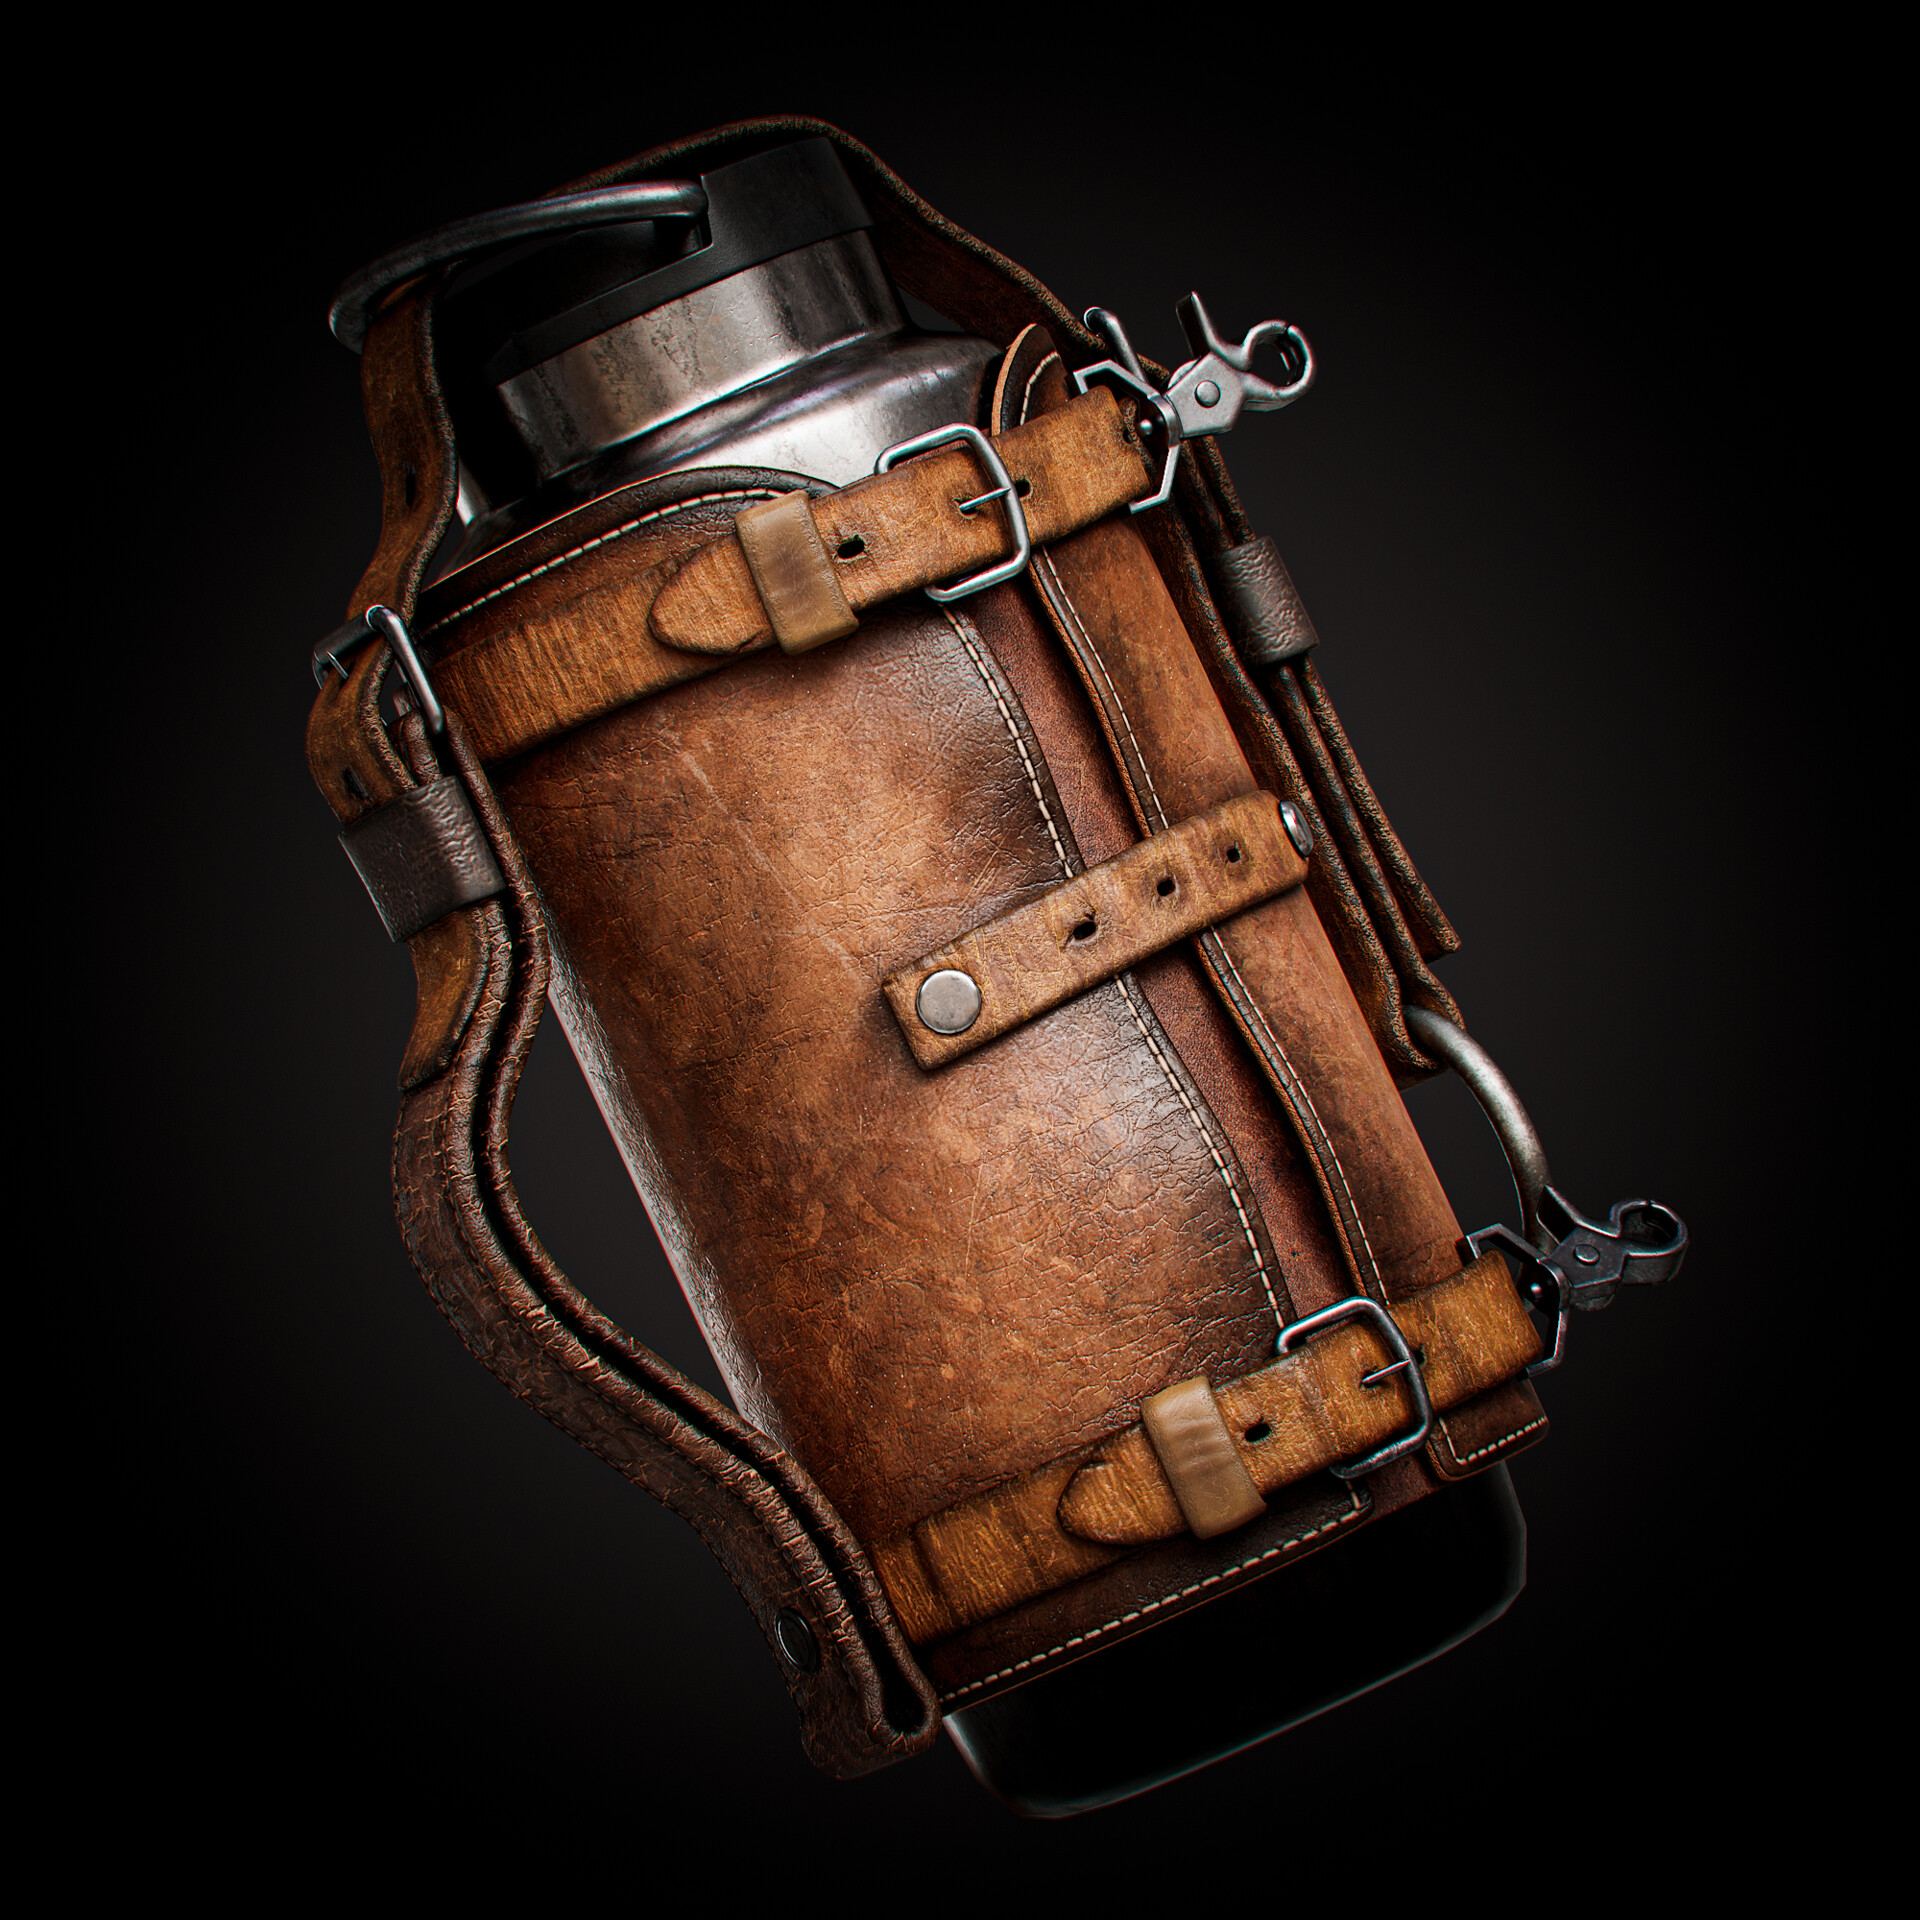
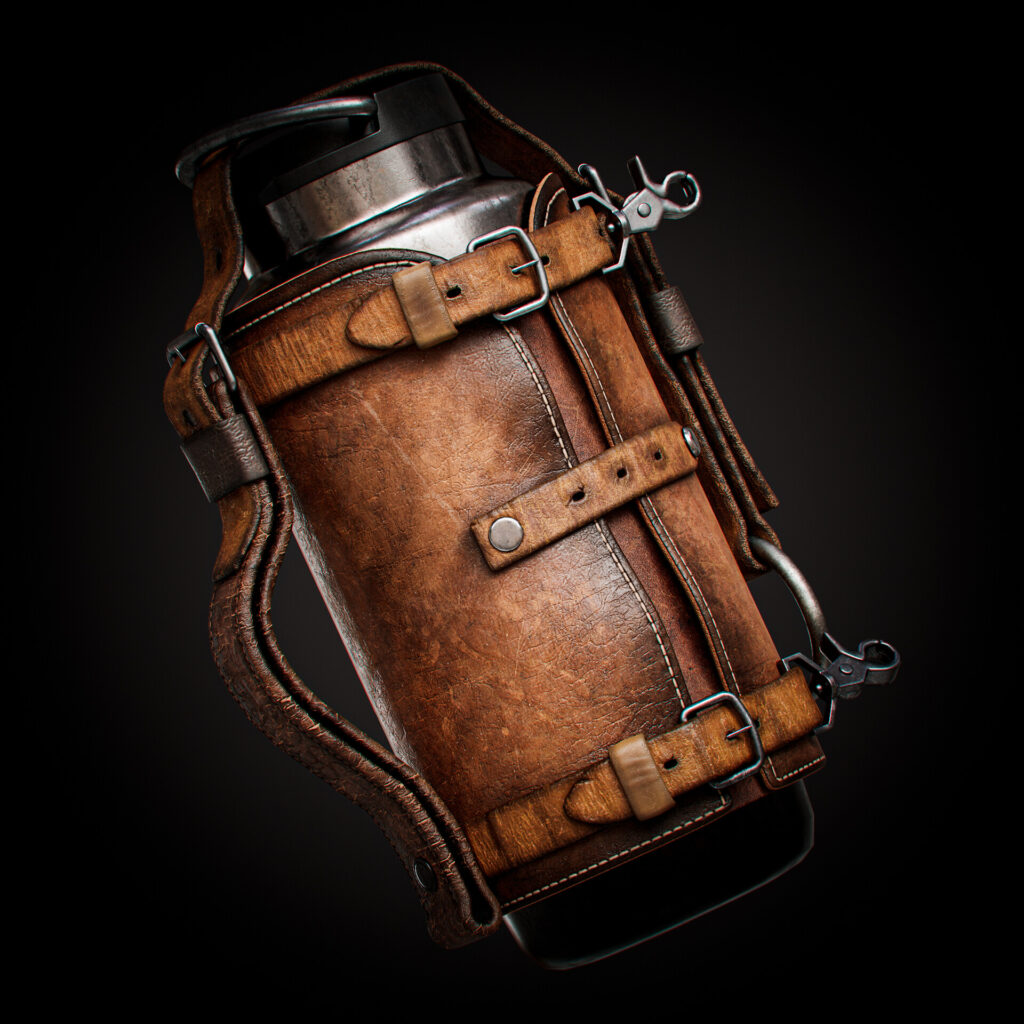
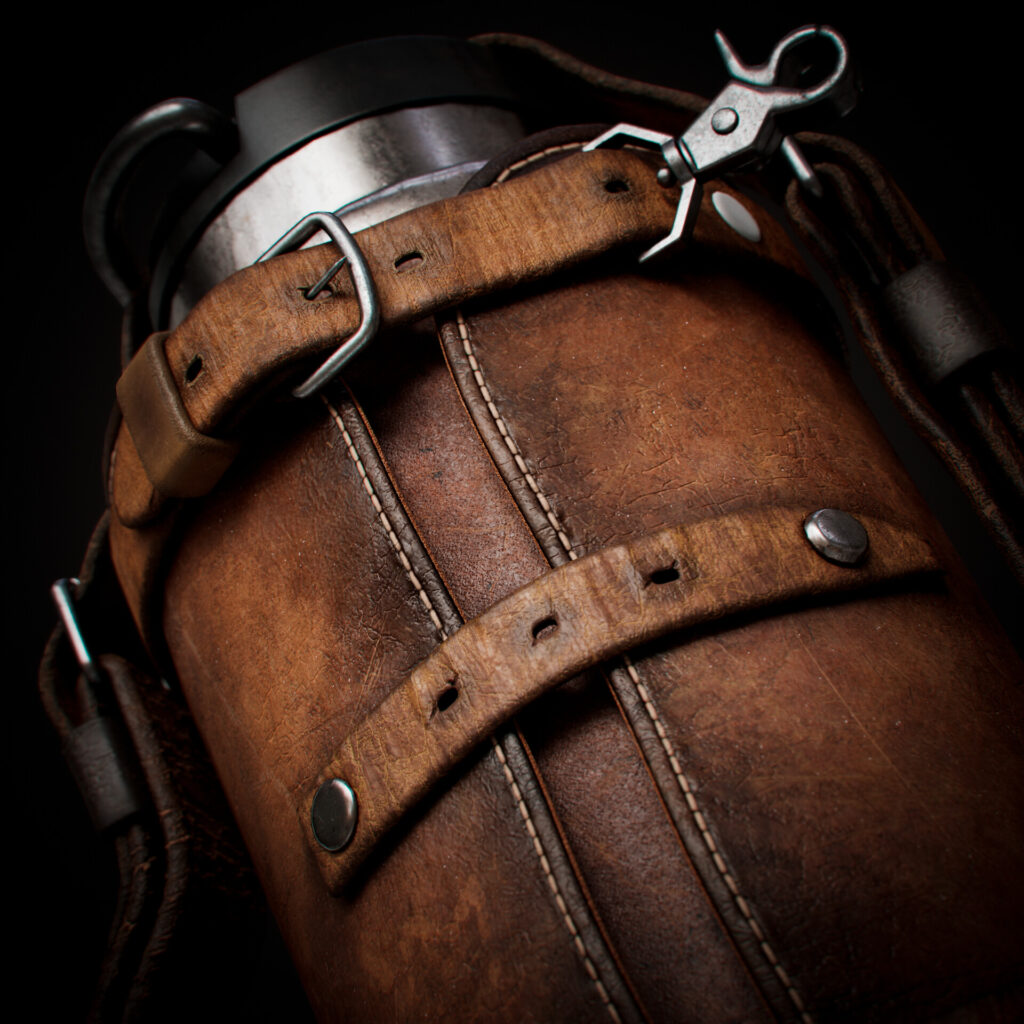
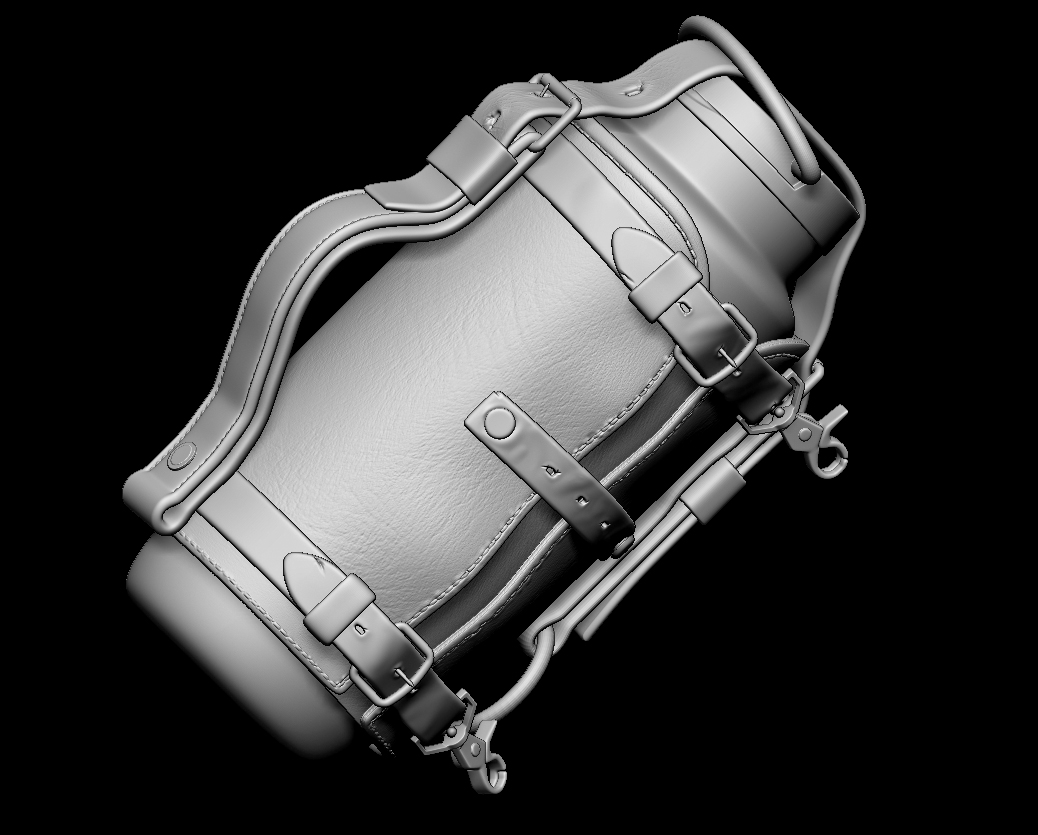
Texturing began with downloading a leather texture from Texture.com. After making it seamless in Photoshop, I imported it as a base layer in Substance Painter. I adjusted its saturation and color, adding roughness and color variations for realism. Using a normal map, I added folds to the texture.
Inspired by the reference, I incorporated scratches to replicate the worn leather effect. I used a smart material to create the metal elements, which were divided into three parts (the bottle, carabiners with fasteners, and the ring). Slight variations in color and roughness were applied to each part.
For the straps, I added folds using a Creases Soft texture as a Normal map. Dark areas were created with Curvature to highlight edges.
To replicate the effect of cracks and folds, I used crack brushes and adjusted the height channel.
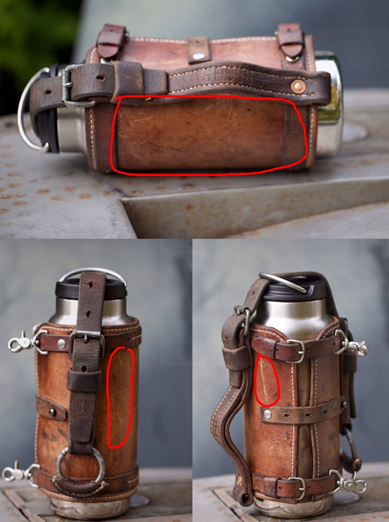
For the “Gross” strap, I exported the UV layout to Photoshop, added text using a matching font, and imported it back into Substance Painter. I applied the text through a mask, embossing it slightly using height adjustments.
To create rough cracks on the skin, I used the MRZ_500_cracks_06 texture. I applied a bulging effect using an anchor point and height adjustments. By inverting masks and applying filters, I enhanced the cracks for more realism.
A final Sharpen filter was applied to enhance the overall clarity of the textures.
Rendering
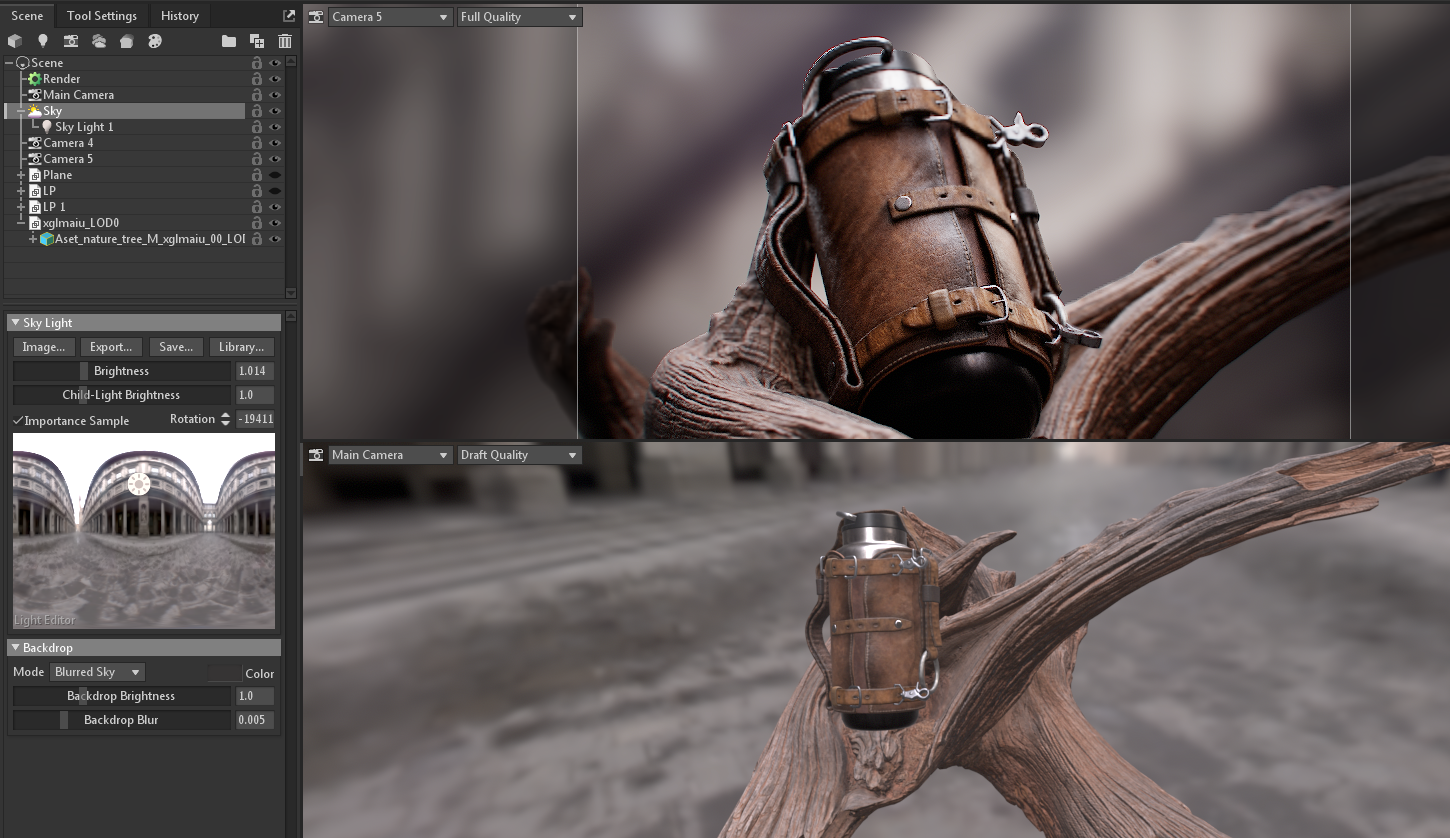
Rendering is my favorite part, as it allows endless experimentation and creativity. For rendering, I used Marmoset Toolbag 4 with ray tracing enabled for realistic shadows. I experimented with multiple HDRIs and used assets from the Quixel Megascans library.
For lighting, I primarily used HDRI and a Spot Light, as these were sufficient for creating a realistic look without overcomplicating the scene.
Post-Processing
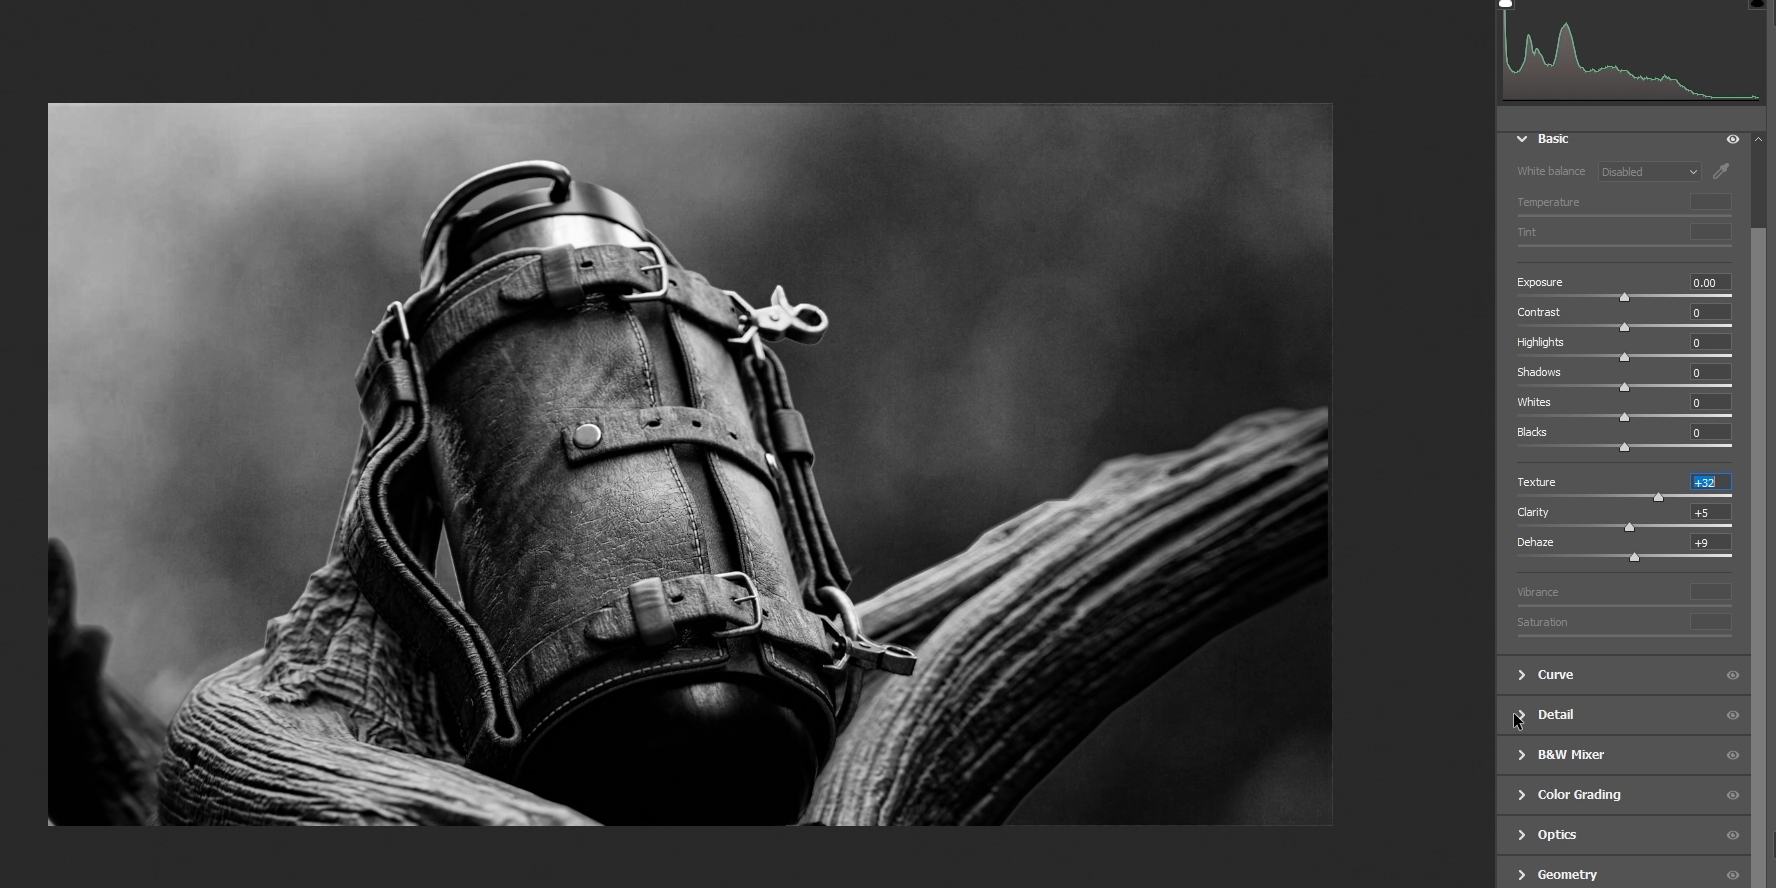
In Photoshop, I made slight adjustments using the Raw Filter. I enhanced contrast, saturation, and texture sharpness. For the first render, I added a black-and-white filter and overlaid texture photos with noise to simulate the appearance of an old, worn photograph.
Conclusion
First and foremost, I believe that creating a beautiful prop requires serious attention to reference selection. It’s crucial to experiment, try, and learn from the process.
As a novice, I don’t feel fully qualified to give advice, but my main suggestion is not to stop and to strive toward your goals. Breaking into the industry is challenging, but with determination and effort, success is achievable.
I want to express my immense gratitude to those who read this to the end and, of course, to Alfred from Games Artist for the opportunity to share my project, Bottle Pajama.
Read more articles
You might also like these articles.