Perched Church

Introduction
Howdy, my name is Lucas; I’m a 3D environment artist currently working at Compulsion Games (Xbox Games Studio).
I finished school in 2018, started making freelance/contracts for VFX and games and landed my first full-time job working on a videogame 2-3 years ago.
As far as I remember, I started playing video games before I could even read, haha. I grew up playing many games (like Rayman, Pokemon and Psychonauts), and stylized games are the ones that impacted me the most.
From then, I developed a huge interest in stylized visuals, which is where I decided to steer my career and portfolio.
Project
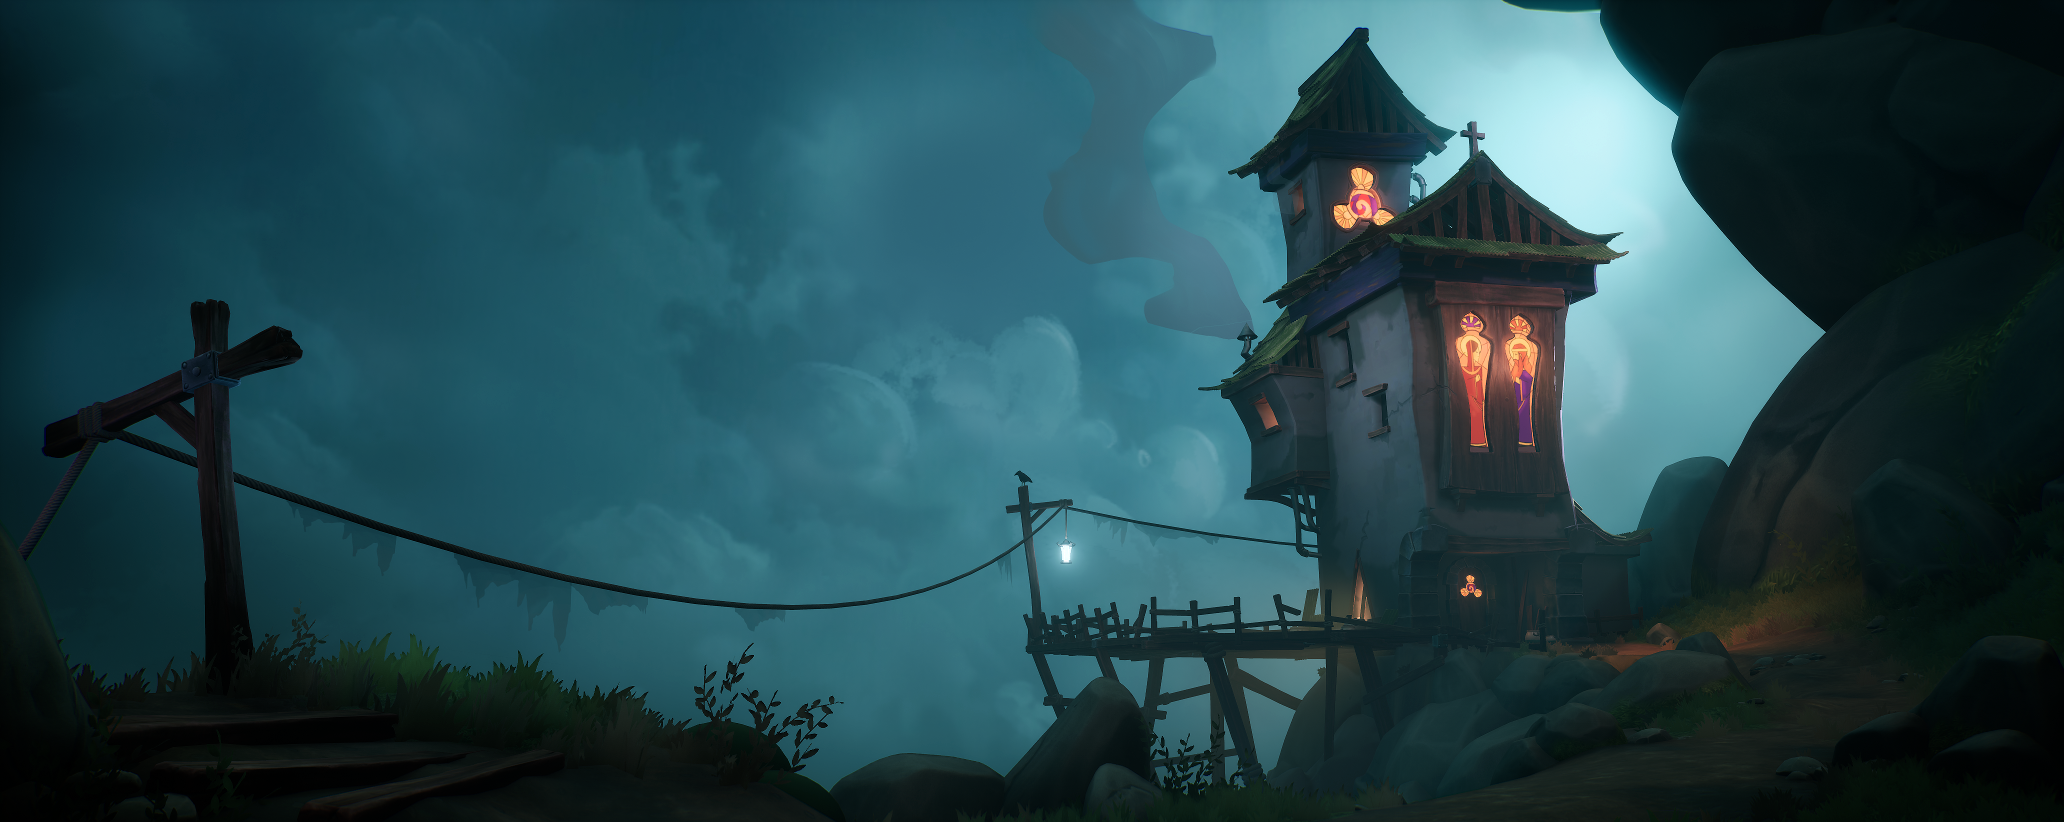
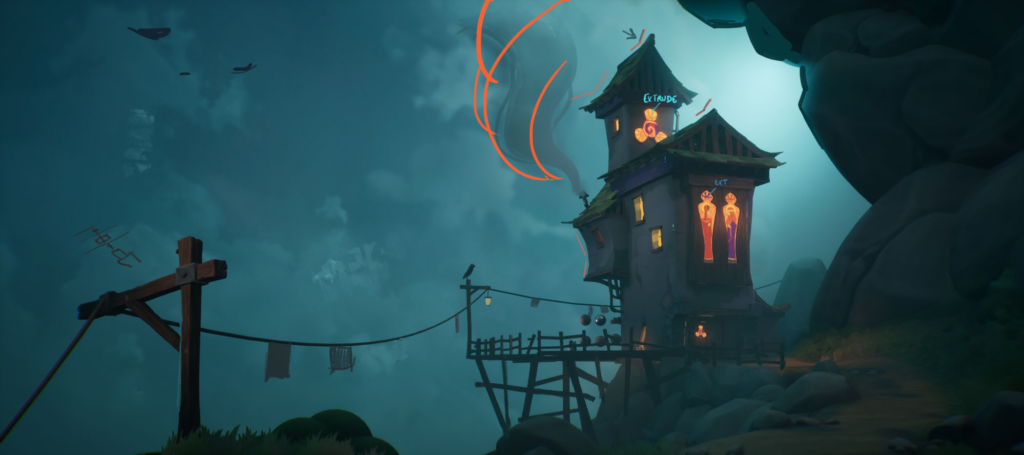
I wanted to recreate this concept from Thomas Michaud for more than a year but couldn’t find the right momentum and motivation to tackle it properly. It contained everything I wanted to train or work on for a personal piece: Rock, 2D paint, Architecture, Sky, and a bit of vegetation, all illustrated with a great art style.
The entire scene took me 3-4 months to complete without working on it, sometimes occasionally and sometimes more regularly. I probably could’ve finished it in less time, but I’m happy I kept a healthy work-life balance.
Preparation
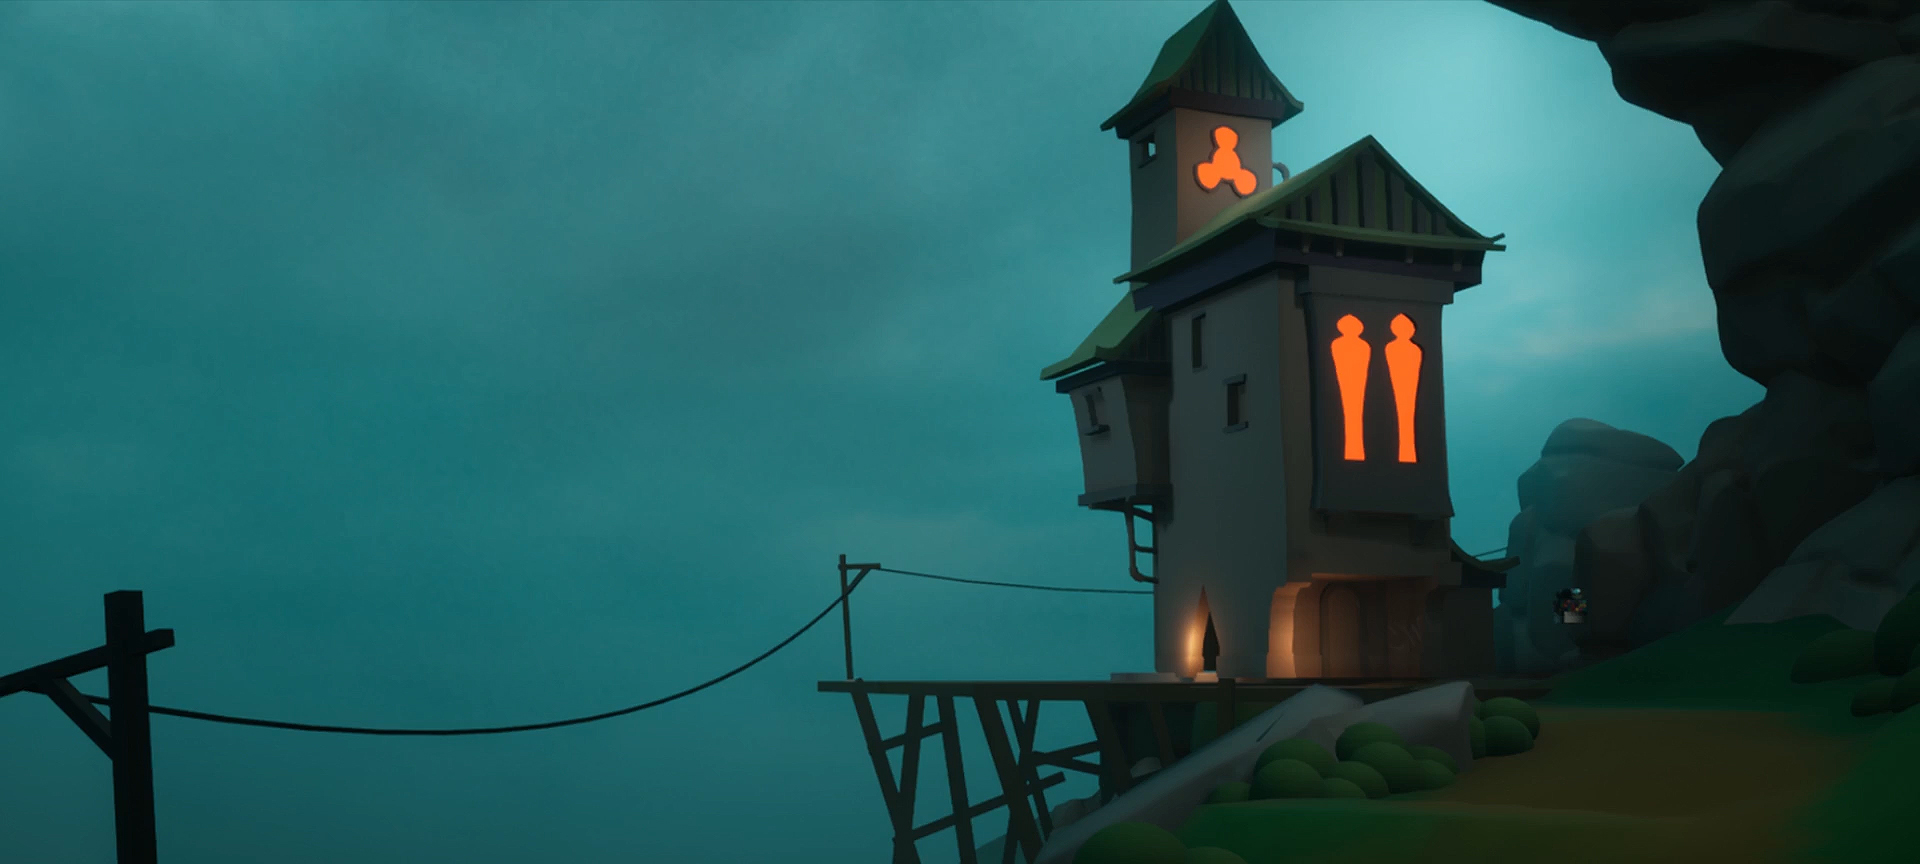
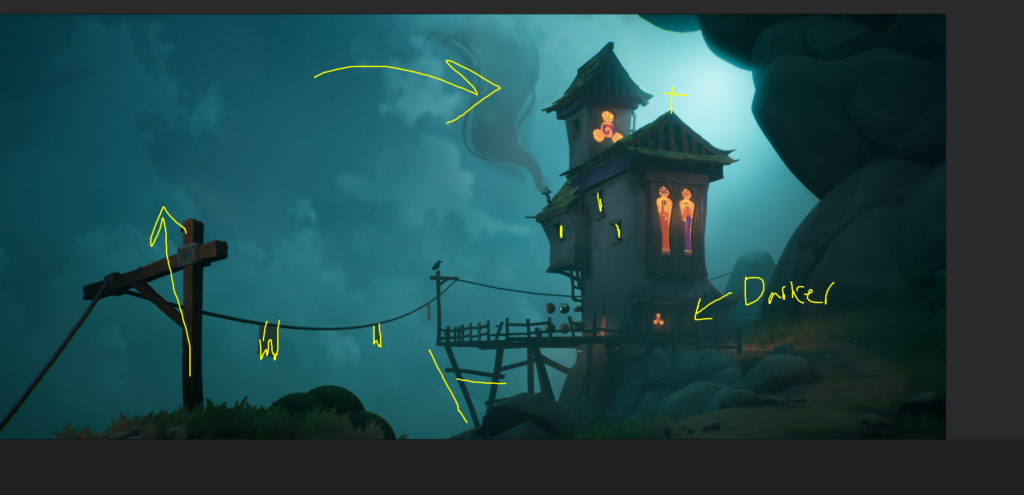
This scene started as a lighting exercise during something called “the learning week” that we have at my current studio. My goal was to block out a scene with close lighting values and intentions concept. Lighting was always something I had a significant interest in, but I never really knew how to light a big scene correctly.
I believe this was one of my blockers on many past personal projects, and this explained why I had such an enormous graveyard of unfinished projects. I was also aware that the reason I lost motivation to work on my personal pieces was that I spent too much time trying to have a detailed blocking when I should have focused my time trying to get the essential assets in there and have the lighting/composition intentions.
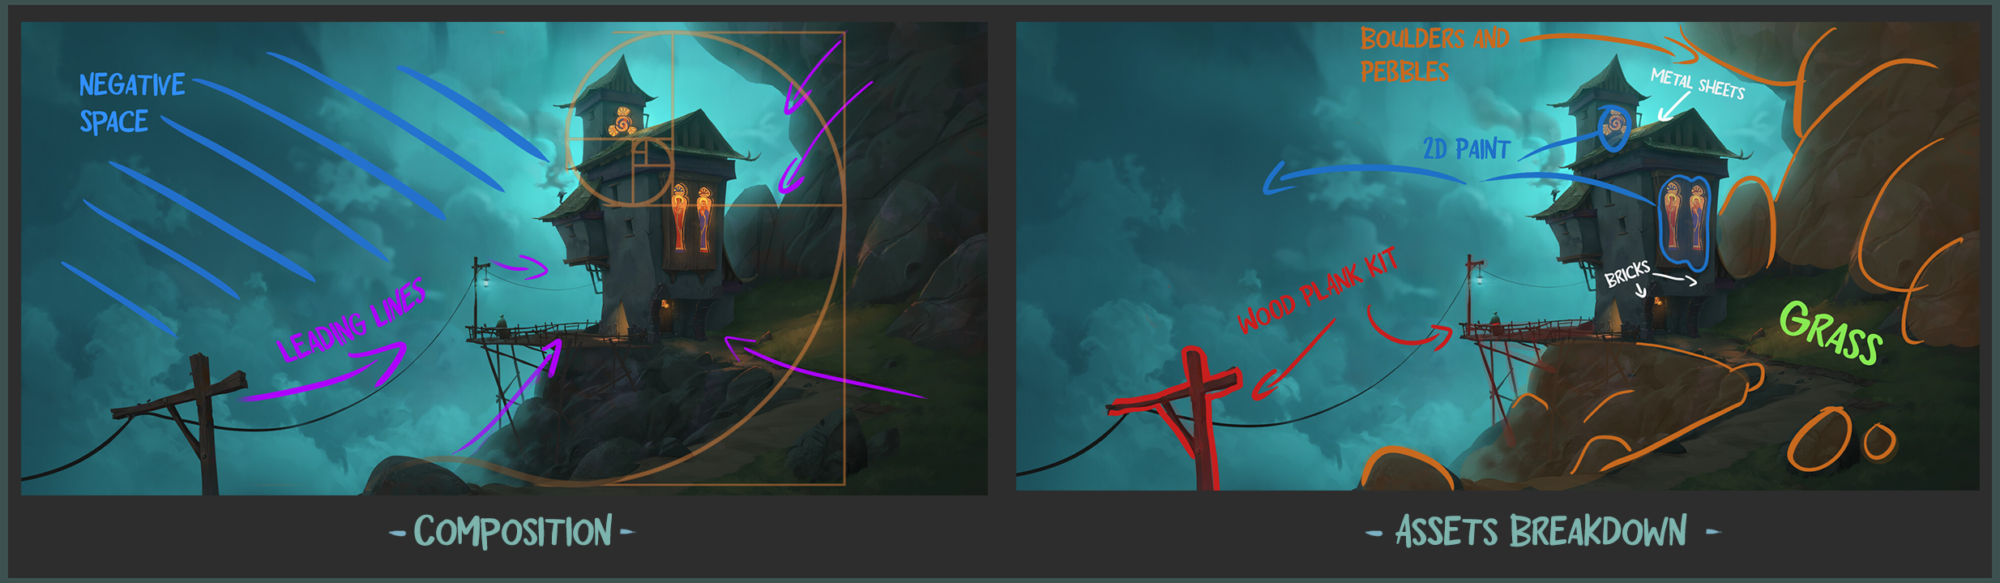
Analyzing your project is an essential part of your preparation; this will allow you to plan your assets, understand the overall artistic intentions, identify the potential blockers and most importantly.
“It gives you enough momentum to kick your project from the ground up”.
From this analysis, you can start getting additional references, find tutorials for the knowledge you’ll need to acquire, and organize your time and priorities. Nonetheless, don`t spend too much-doing research because you can easily fall down the rabbit hole and lose your initial motivation; at some point, you need to get cracking.
Texturing
For this project, I wanted to create all the materials in Designer and have a small library of potentially reusable textures, despite my poor knowledge of Substance Designer (which was an excellent opportunity to explore the software).
My workflow for creating them was a mix of the brush technique used in some of Adam’s Capones work and a few other tricks I learned. The textures are pretty simple, but they’re working as intended, with most details in the brushstroke.
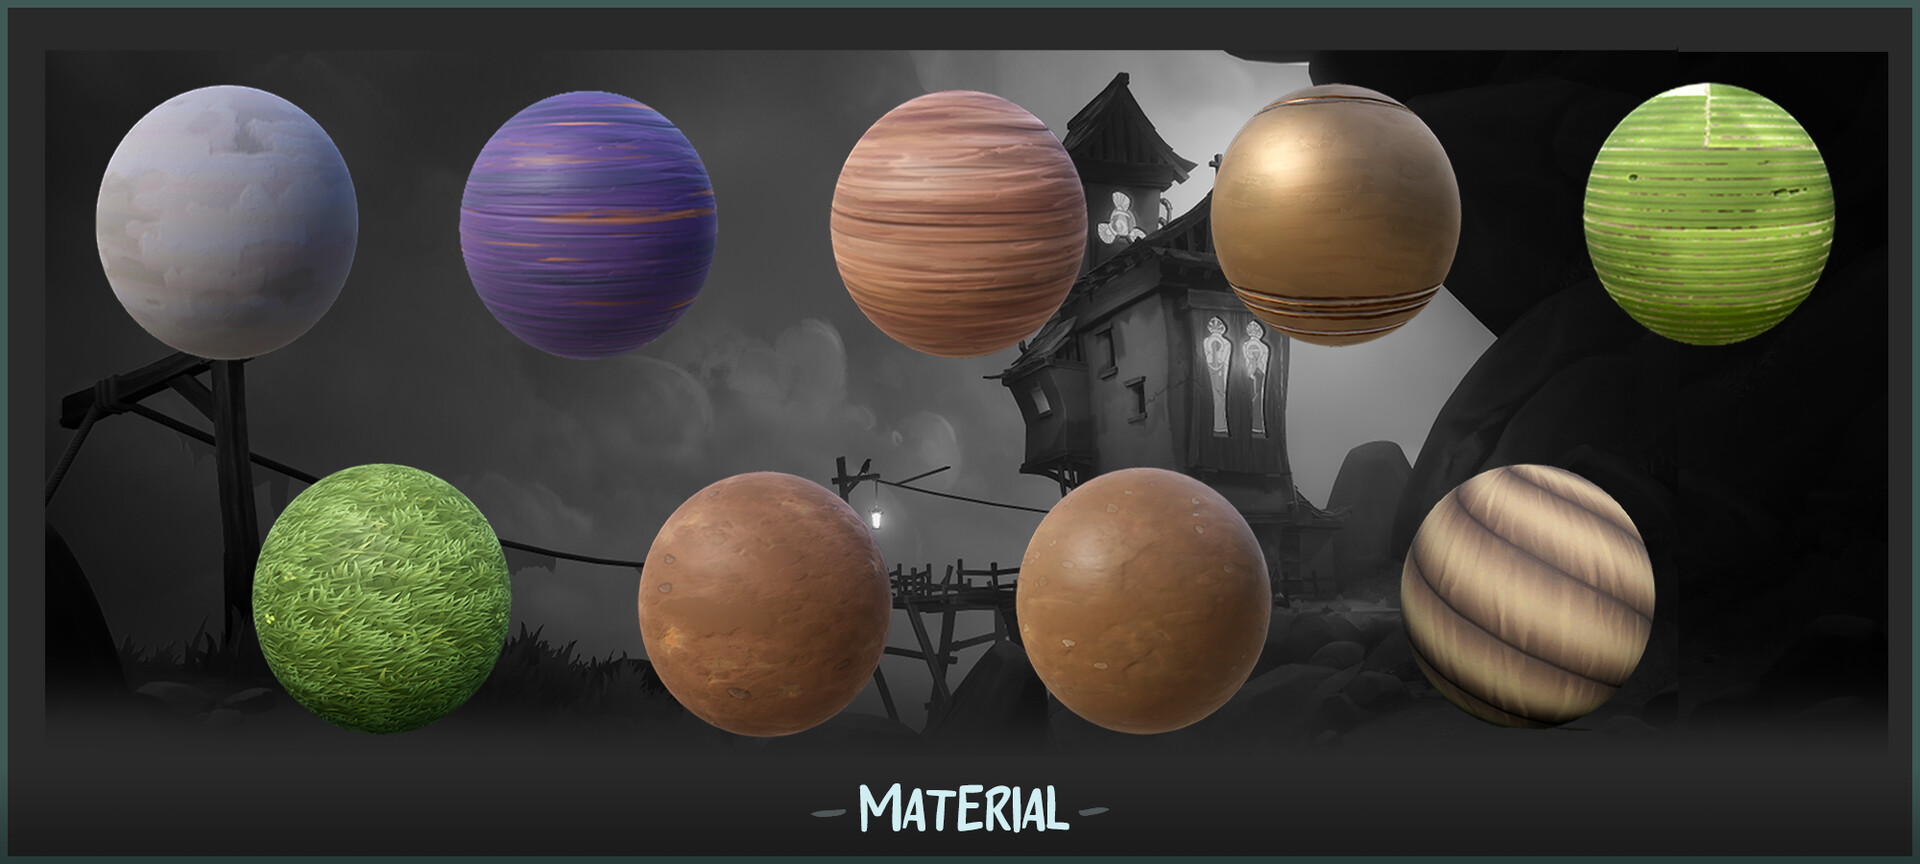
Also, I’ve been using Vertex Painting with color tinting in my master shader to get more color variation on large surfaces.
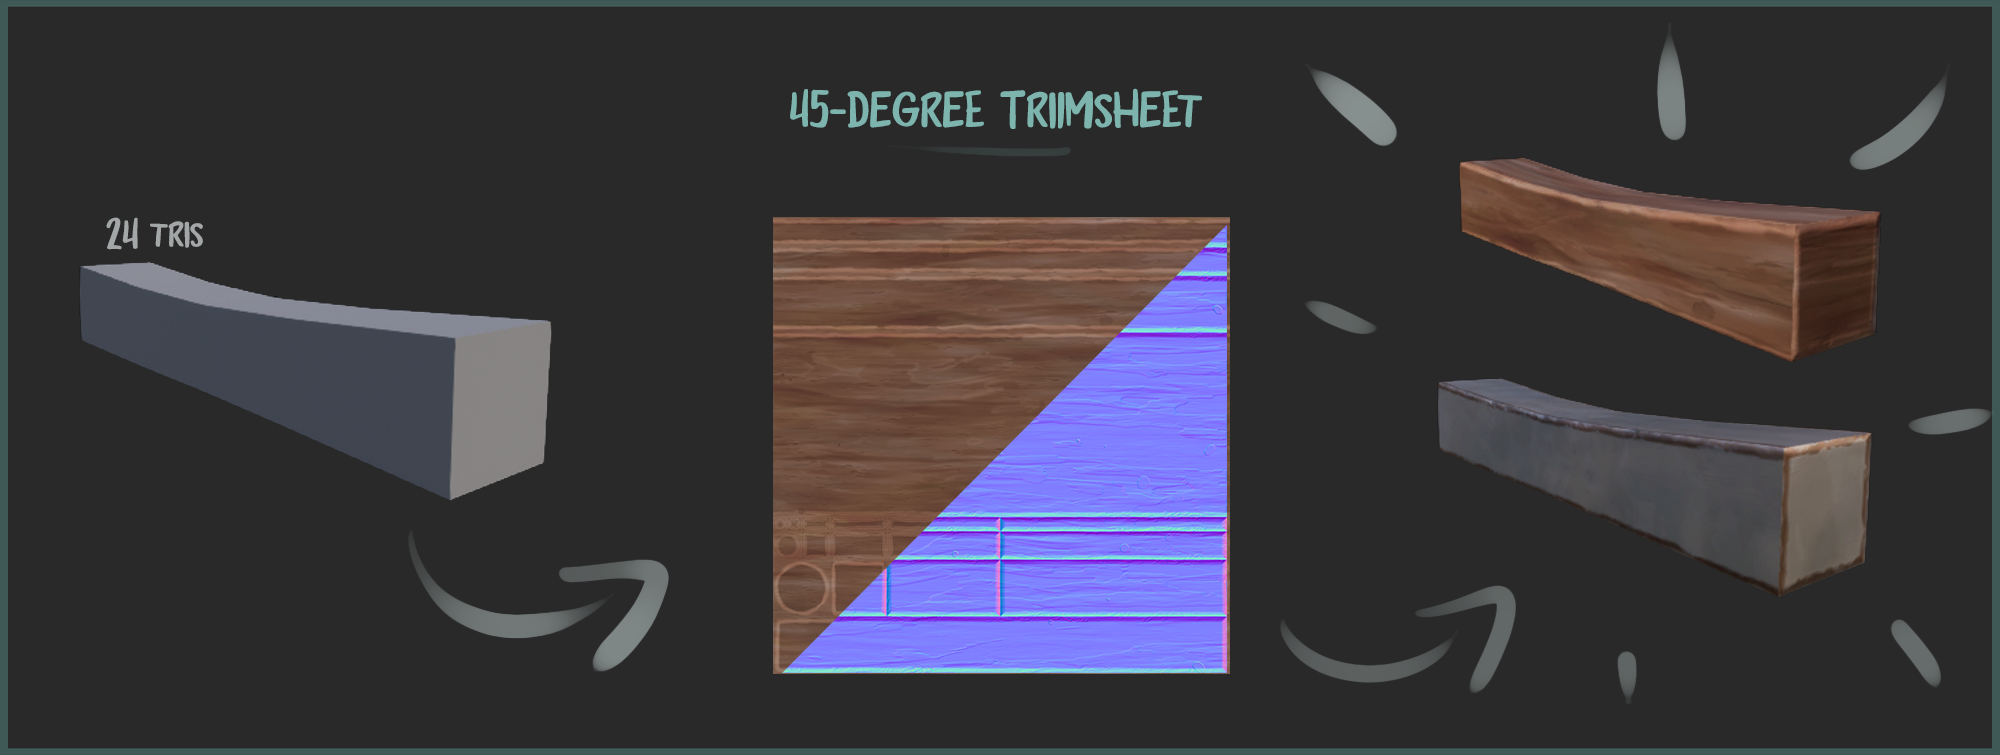
For most of those textures, I transformed them into 45 degrees bevel trim sheet. This technique saves a tremendous amount of time and resources for texturing small to medium assets by having the bevel directly in the normal maps.
Asset modeling & sculpting
For asset modeling, I mainly used Blender and Zbrush. My sculpting workflow consisted mostly of using the trim dynamic for breaking the edges, Orb cracks for cracks and Claytubes, ClayBuildup for adding surface details.
First, on the list, I decided to do a plank kit, bricks and metal sheets that I would heavily use for all my architectural assets (Church, lamppost, fences).
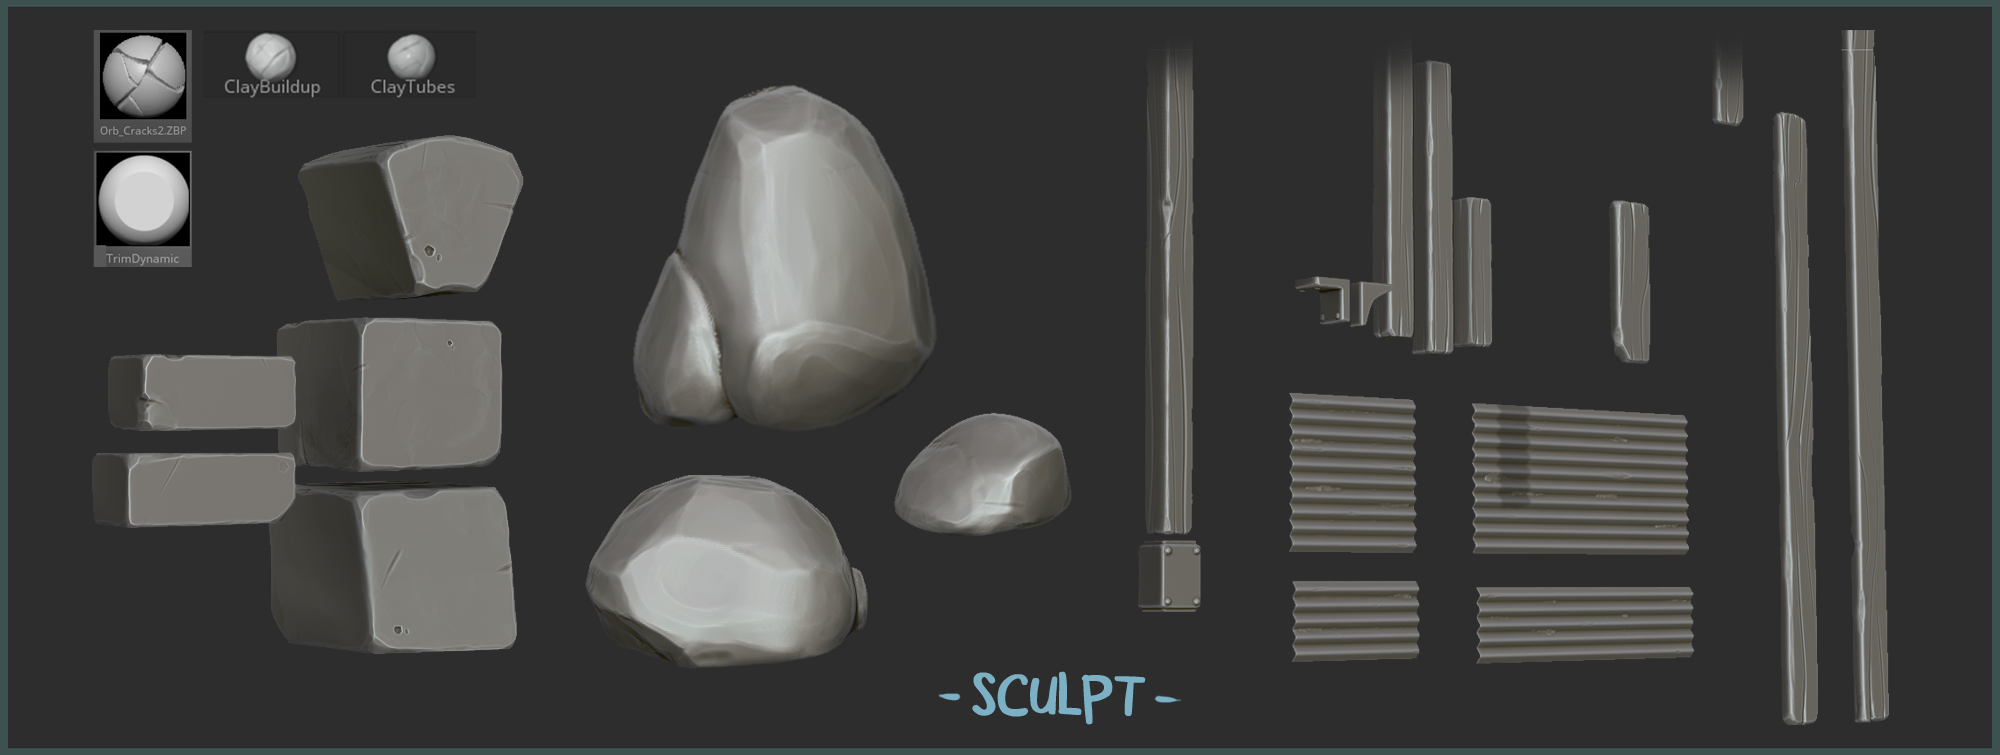
And then, I started working on more natural generic assets, like rocks, pebbles and foliage.
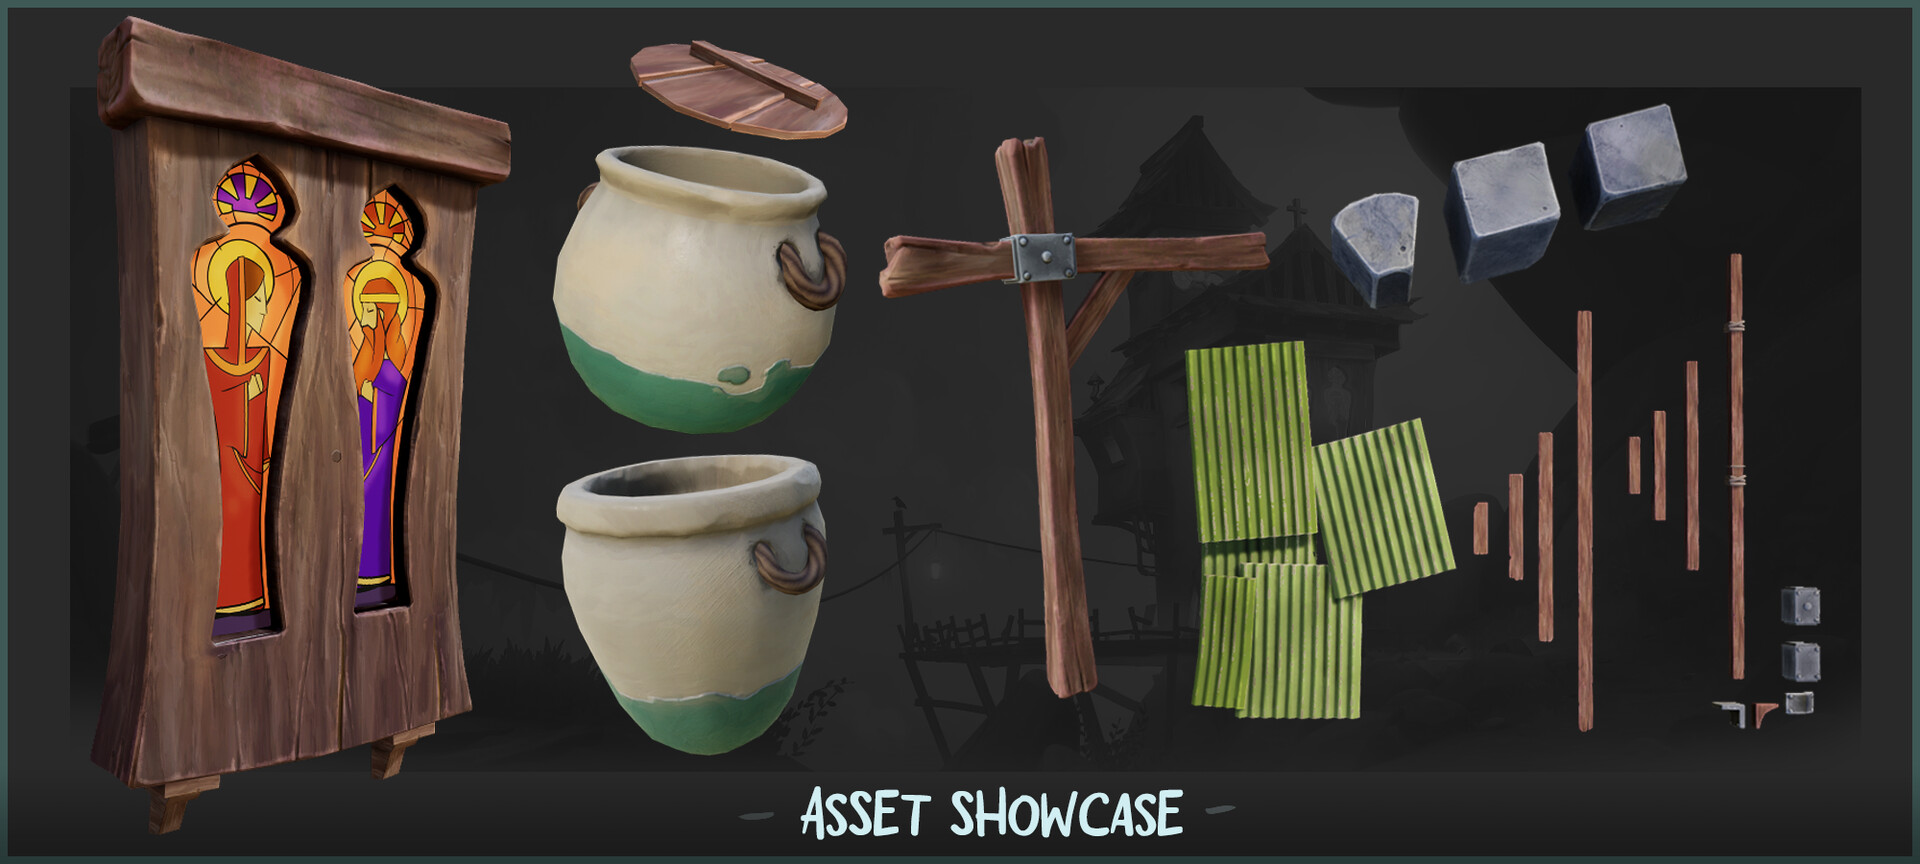
The unique assets + secondary set dressing stuff. (like the jars, ropes and tools).
Feedback
Once everything was in place, I started the longest phase in every project: Getting out of the shit phase™. There are usually many discrepancies between assets/elements in a scene at this stage, and the challenge is to harmonize everything.
At this point, it’s good practice to reach out to a few artist friends for feedback. They quickly pointed out what was missing and what didn’t work. You don’t have to agree with all the feedback given to you, but you should consider everything.
All those comments have the best intentions at heart. If you’re comfortable with it, you could post it in one of the many game-art discords (GamesArtist, The club, Experience Points, etc) to get feedback and connect with other artists.
Once you have addressed all the feedback, you can refine your scene’s different aspects and bring it to the next level.
Lighting
Lighting was the most essential part of this scene. Once I had the scene in a good place, I spent a week adding/tweaking and refining the environment’s lighting and bringing it to a good place.
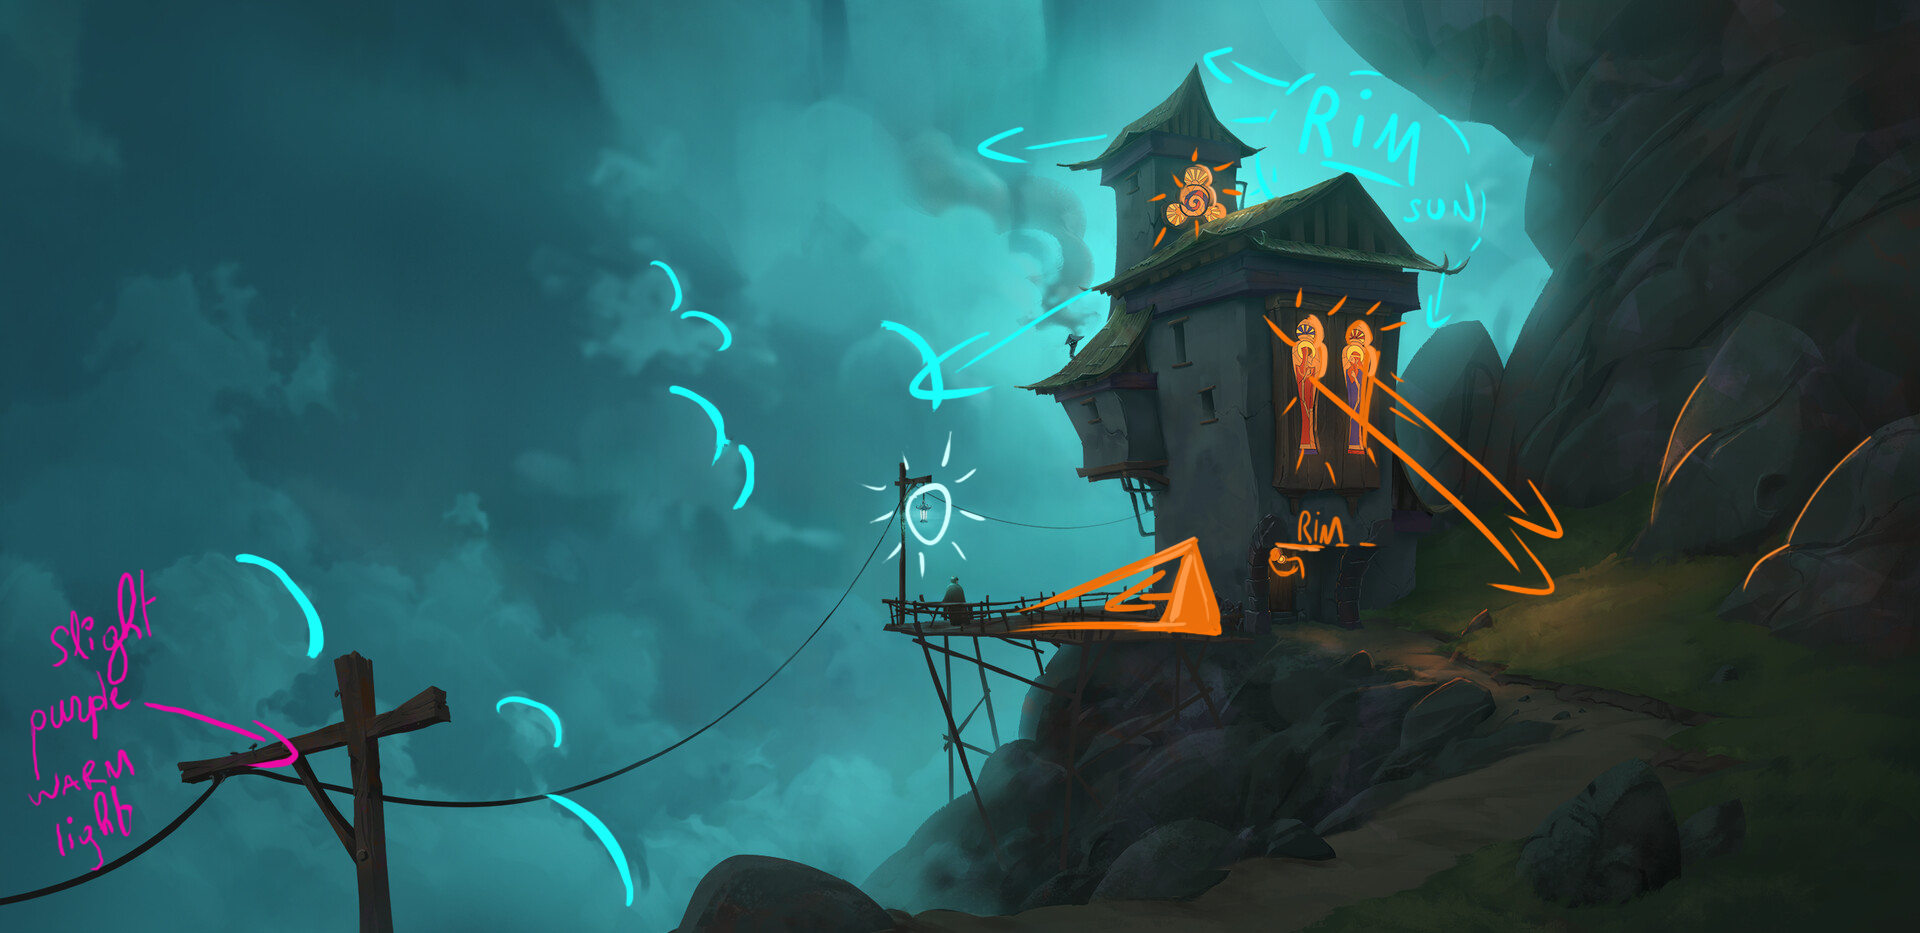
I found it helpful to take some time to look back at the concept lighting’s intentions, identify the important light bounces, the rim lights and where it can be pushed deeper.
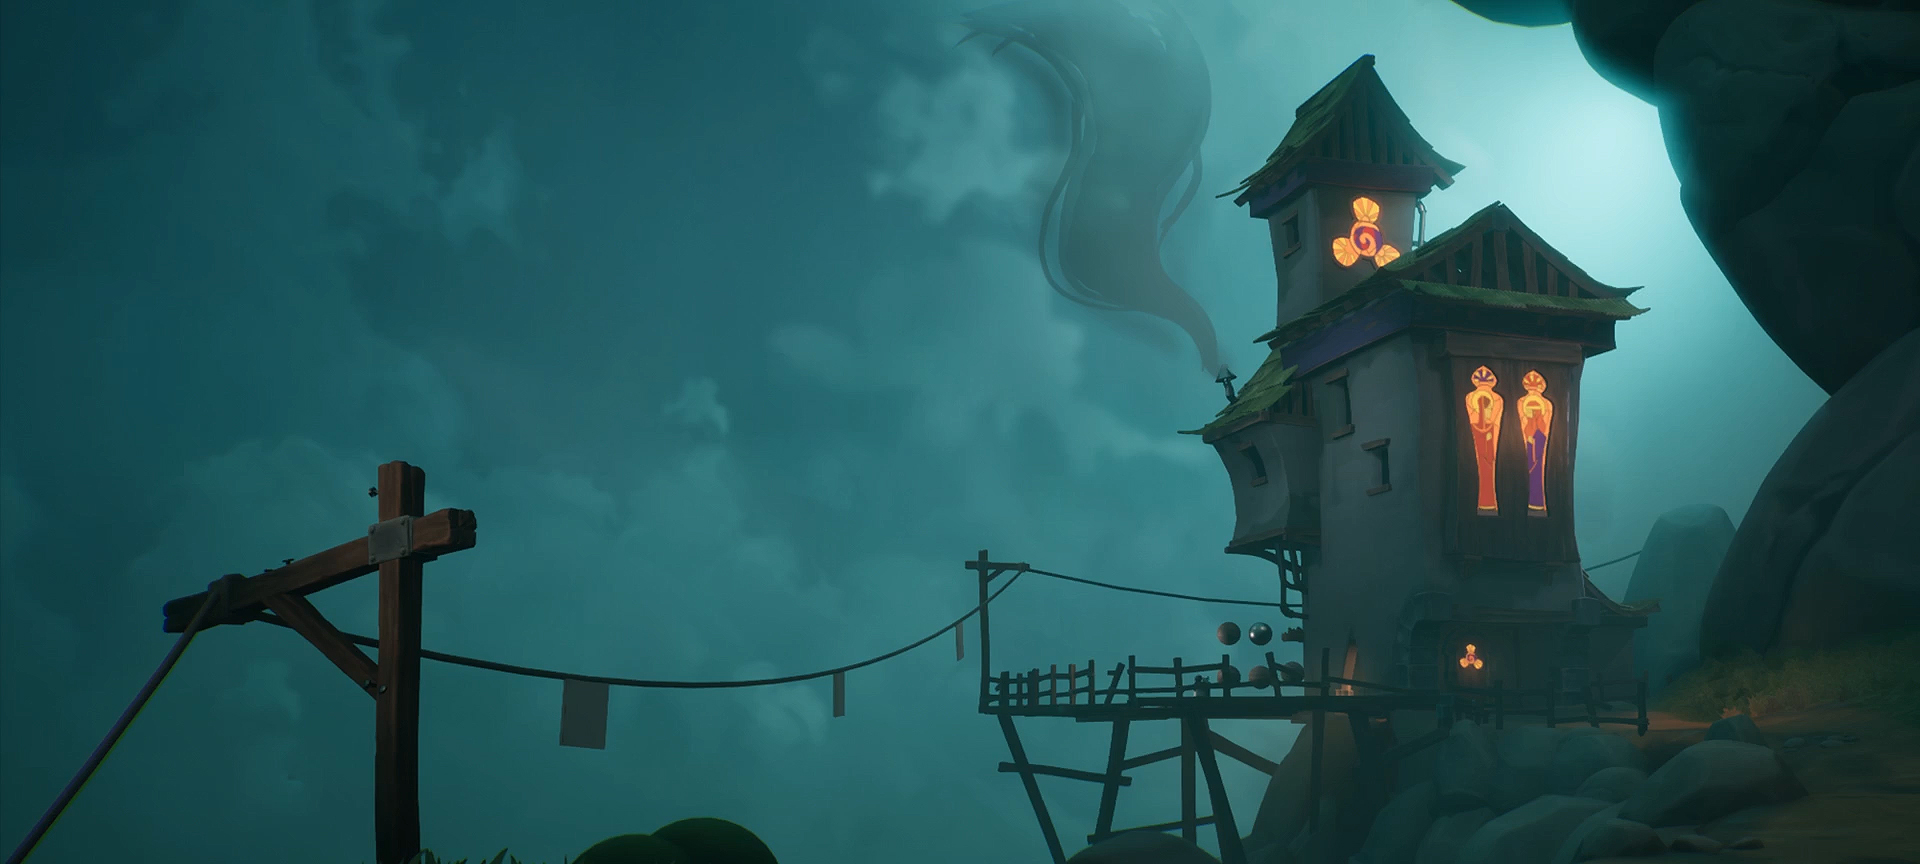
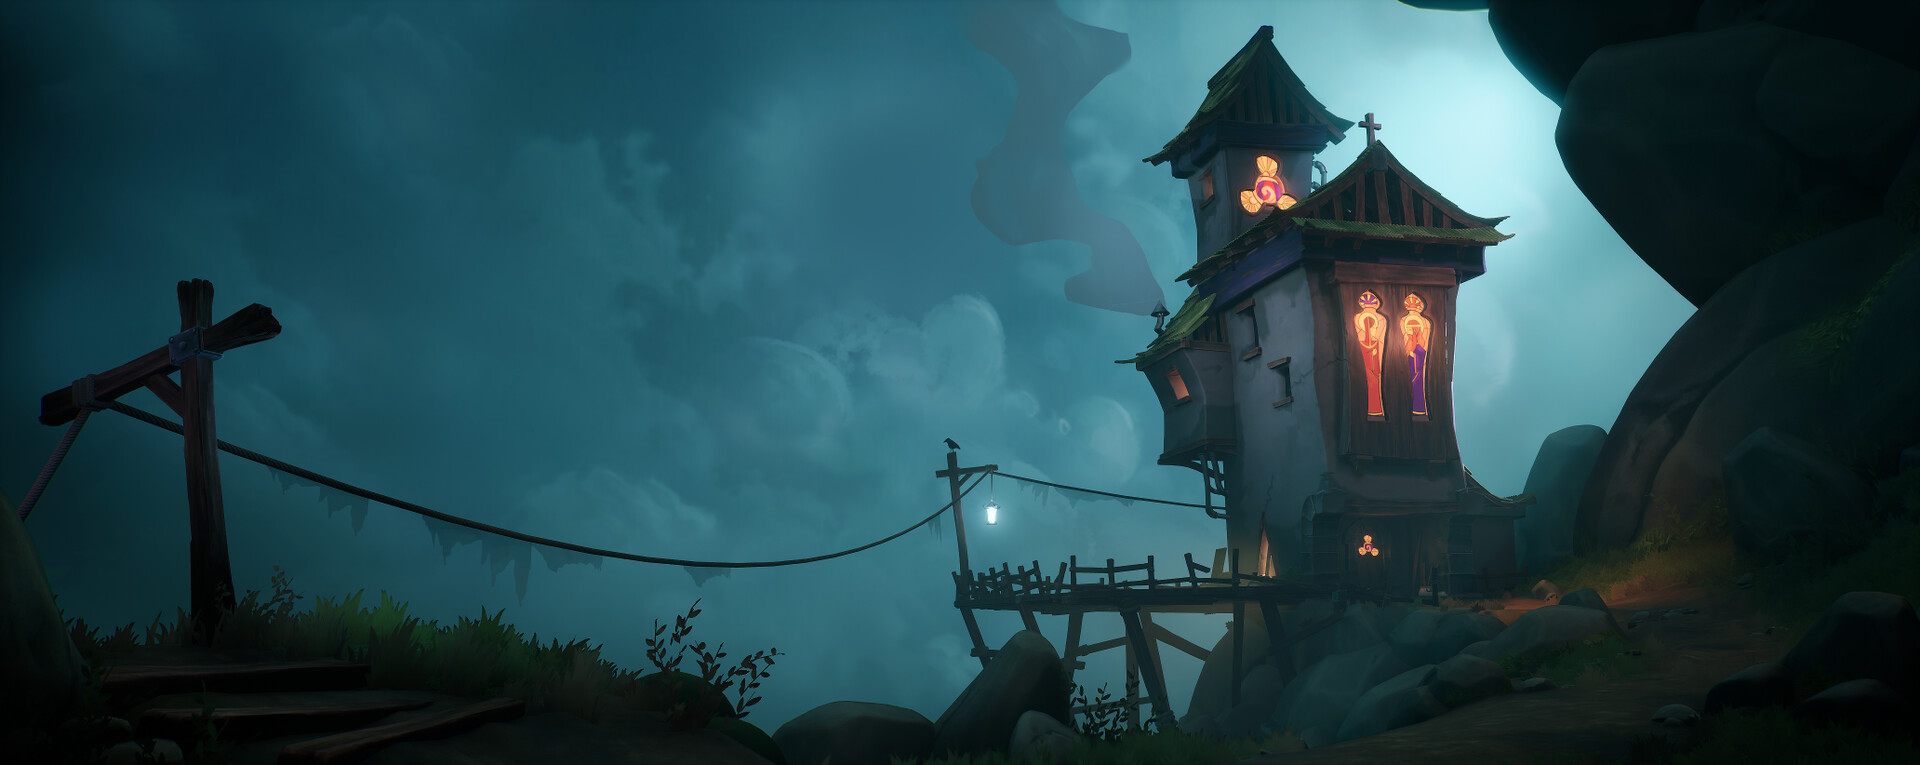
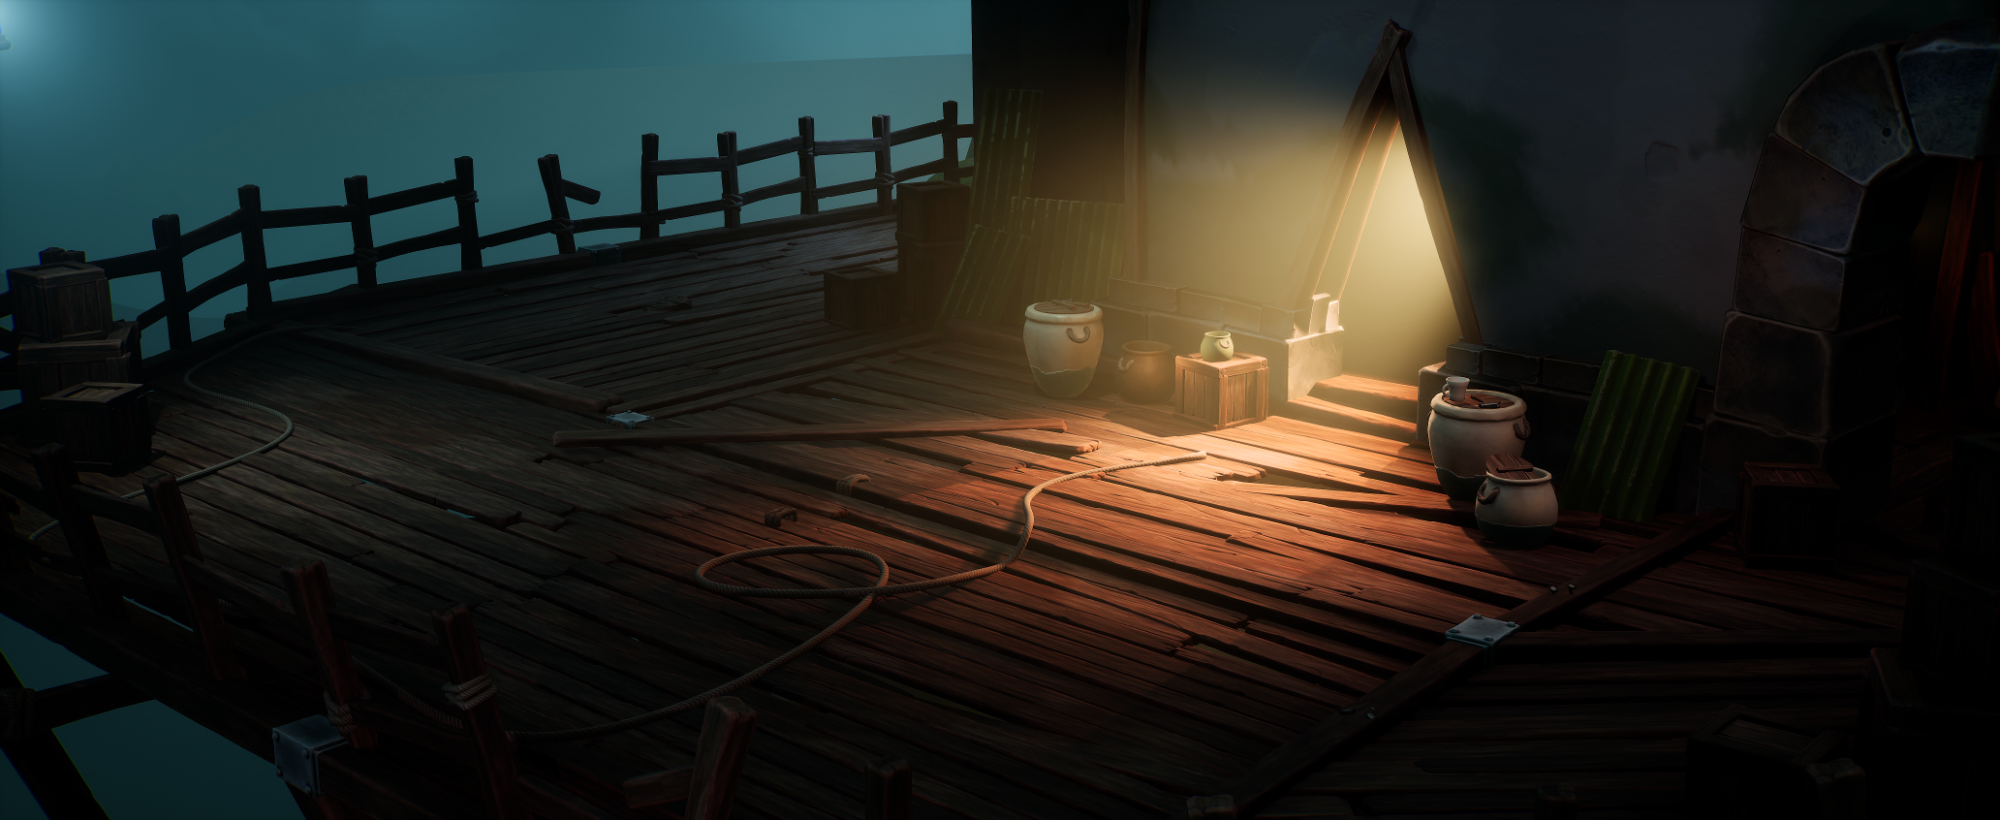
As you can see, this scene’s lighting point of interest consists mainly of the rim light (sun) hitting the church and clouds (in the skybox), along with the light emitted from the church hitting the nearby environment. I added non-shadow casting point light with some light volumetric values to push the bloom and glowing effect.
I then spent a few days realigning in the right direction and added some more lighting details and bounce. Alongside retouching the lighting, I also started color-grading the scene and adjusting all the other post-processing effects.
VFX
The smoke effect I used for the church is one of the oldest tricks in the book, but it works with this kind of art direction.
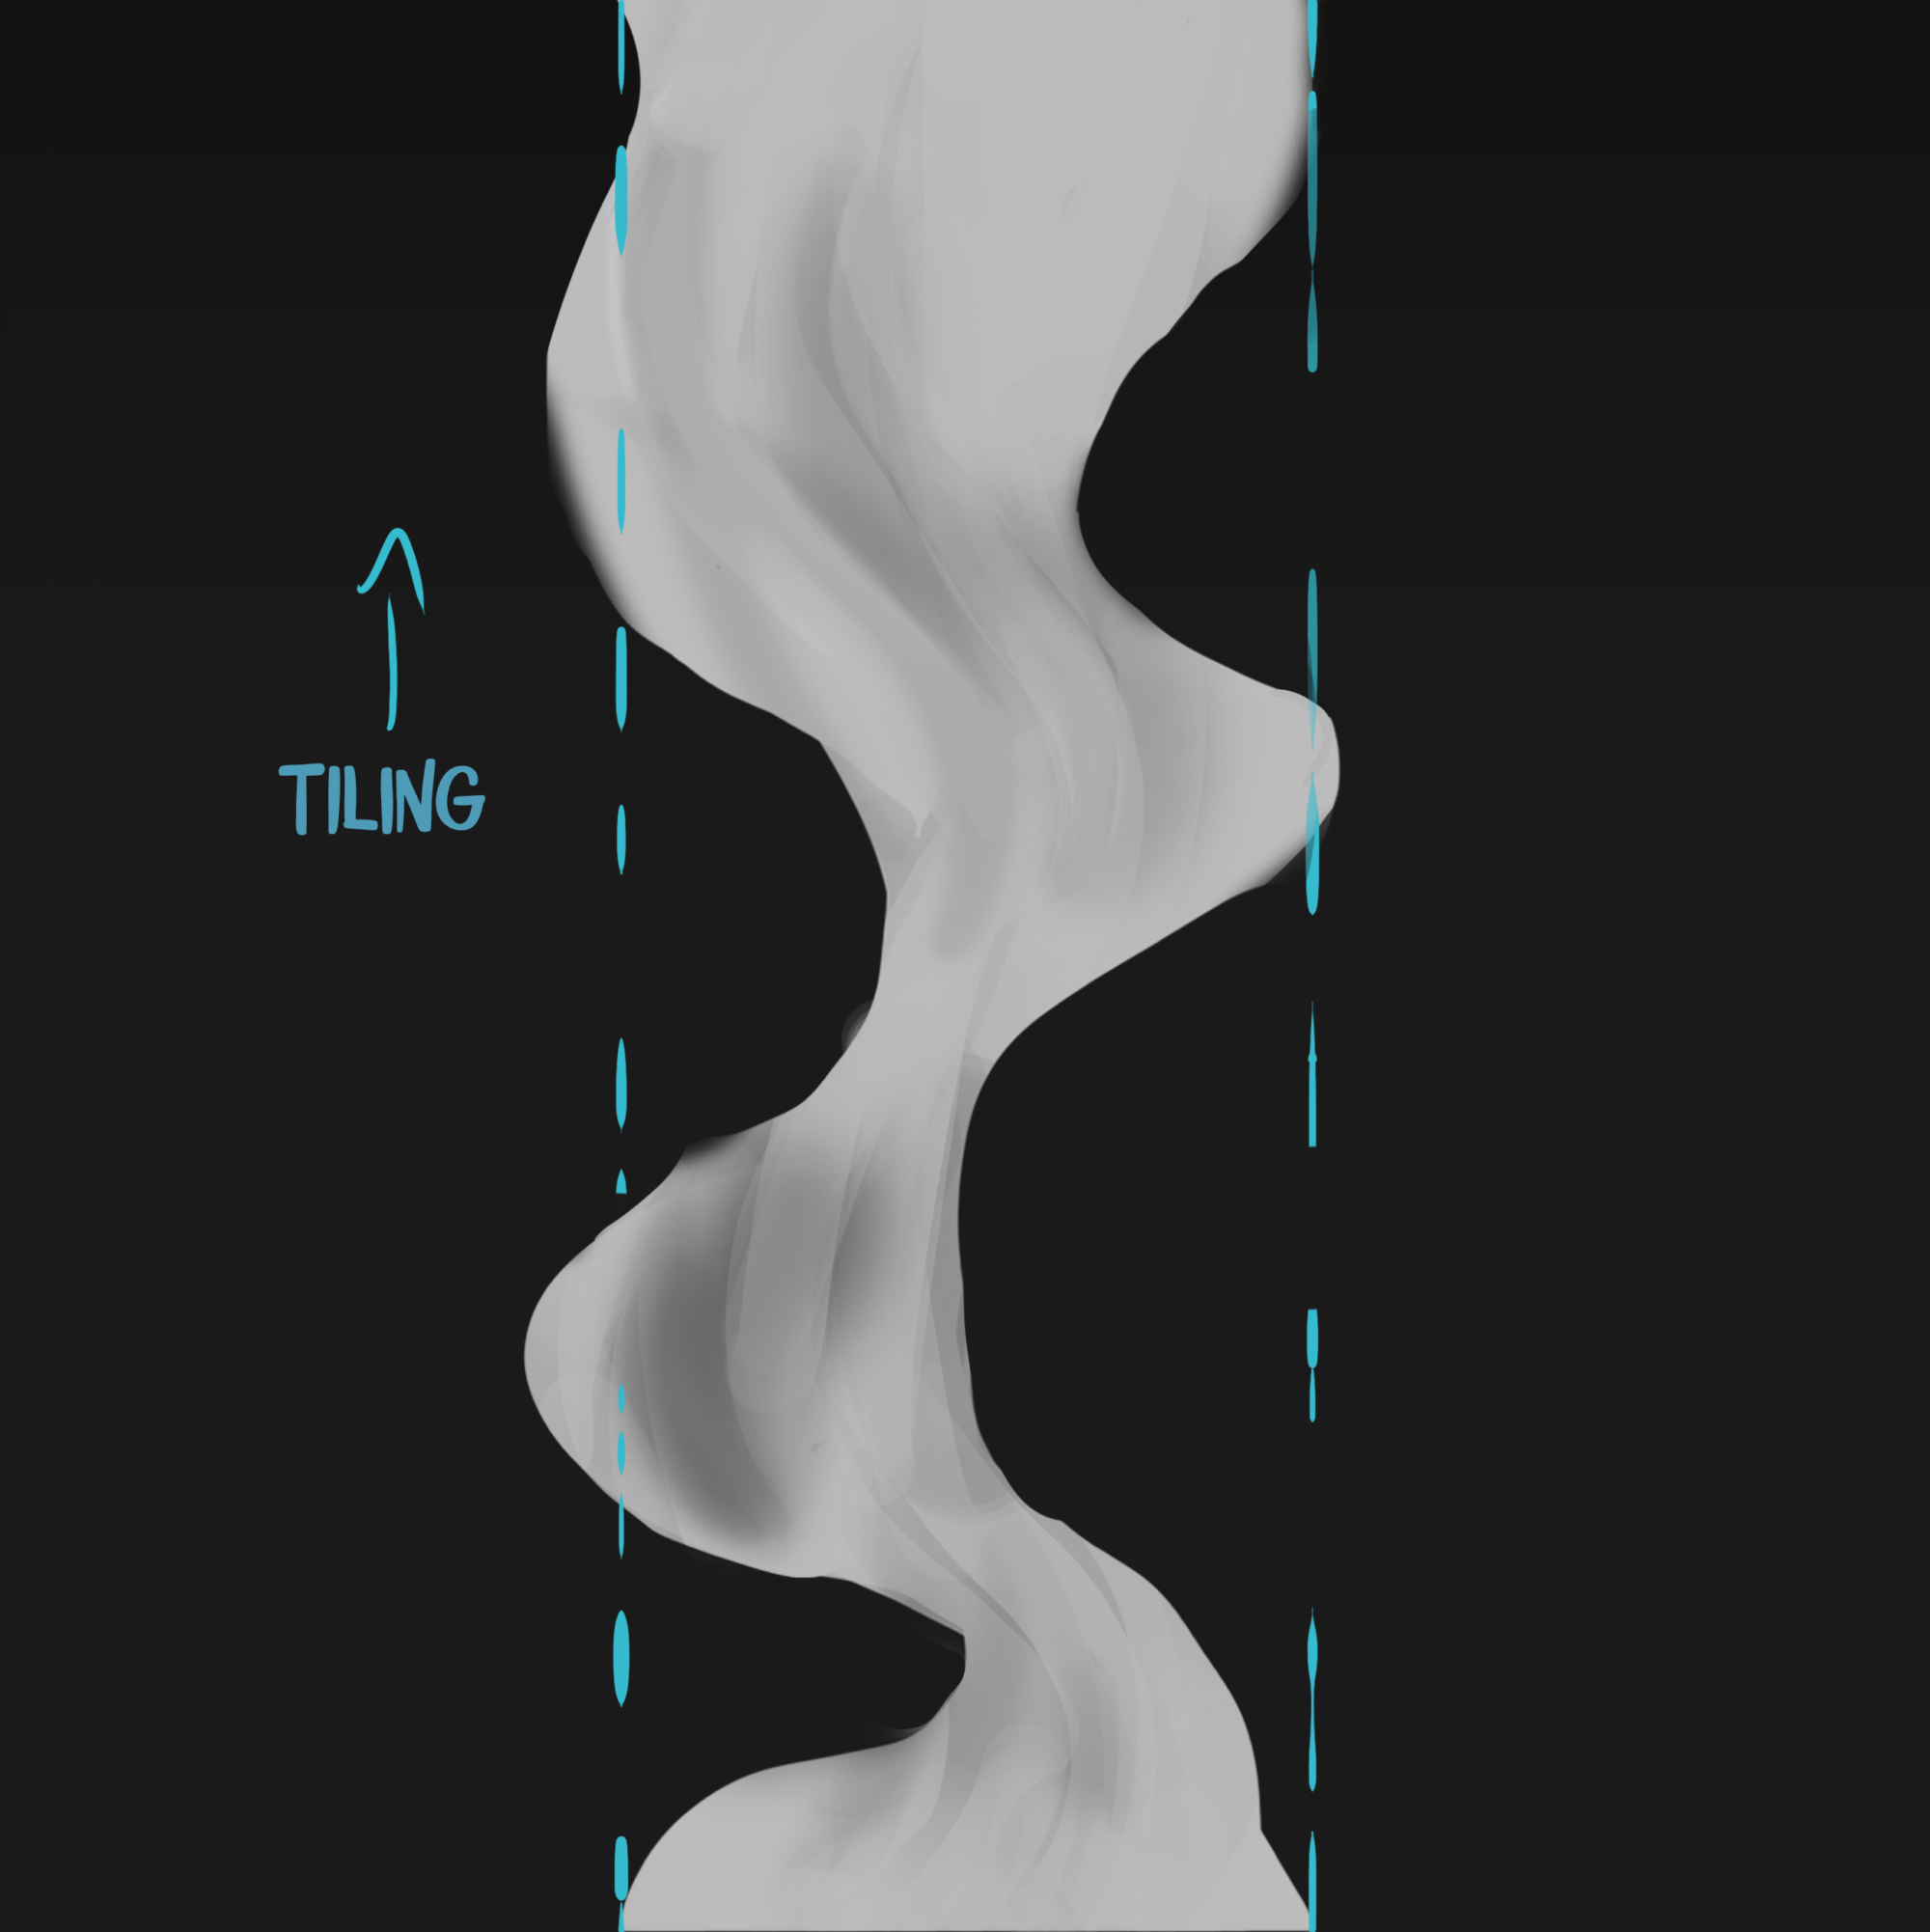
I painted a tileable texture on one axis and used a panner in my unreal shader to get it moving. I also overlayed another transparency for some more light painterly details in the smoke alpha.
Decals played a massive part in breaking up the repetition of the surfaces and introducing small additional details without having to do another texture or disrupting the rest of the environment.
Conclusion
My workflow and pipeline are nothing out of the ordinary, but it’s fast and efficient. Implementing Substance designer definitely sped up the whole texture process (after getting more comfortable with the software); I know it can be intimidating software and feel slow at first, but it’s a big step up in the long run – I can’t wait to experiment more with it!
As you probably noticed, my scene isn’t a pixel-perfect 3D replica of the piece from Thomas. I believe it’s more than fine If a 3D reproduction drifts away from its concept in some forms, and that’s usually where our creativity sparks the most.
Overall, I had a blast working on this concept, and I must thank Thomas Michaud for creating this fantastic 2D piece.
Outro
Despite the current tense situation (Recession, layoffs, AI art). We continue to see people expressing/practicing their art, crafting and building games on their own.
I’m incredibly thankful that the last few months didn’t erode the passion and motivation that makes this community so unique and inspiring. It’s very uplifting.
Thanks to Game Artist for the opportunity to talk about this piece; this was a fun exercise! I’m excited to start working on my next piece.
Read more articles
You might also like these articles.