Introduction
Hello, I'm Geumbi Seo, a Junior 3D Artist active in Korea. I've always enjoyed creating things since childhood, which led me to develop a keen interest in 3D work.
As a non-major, I started my 3D journey and acquired skills through professional courses at academies, providing me with a solid foundation.

Goals
The most enchanting aspect of 3D work, in my perspective, lies in the ability to personally create and preserve things you want to keep by your side for a long time.
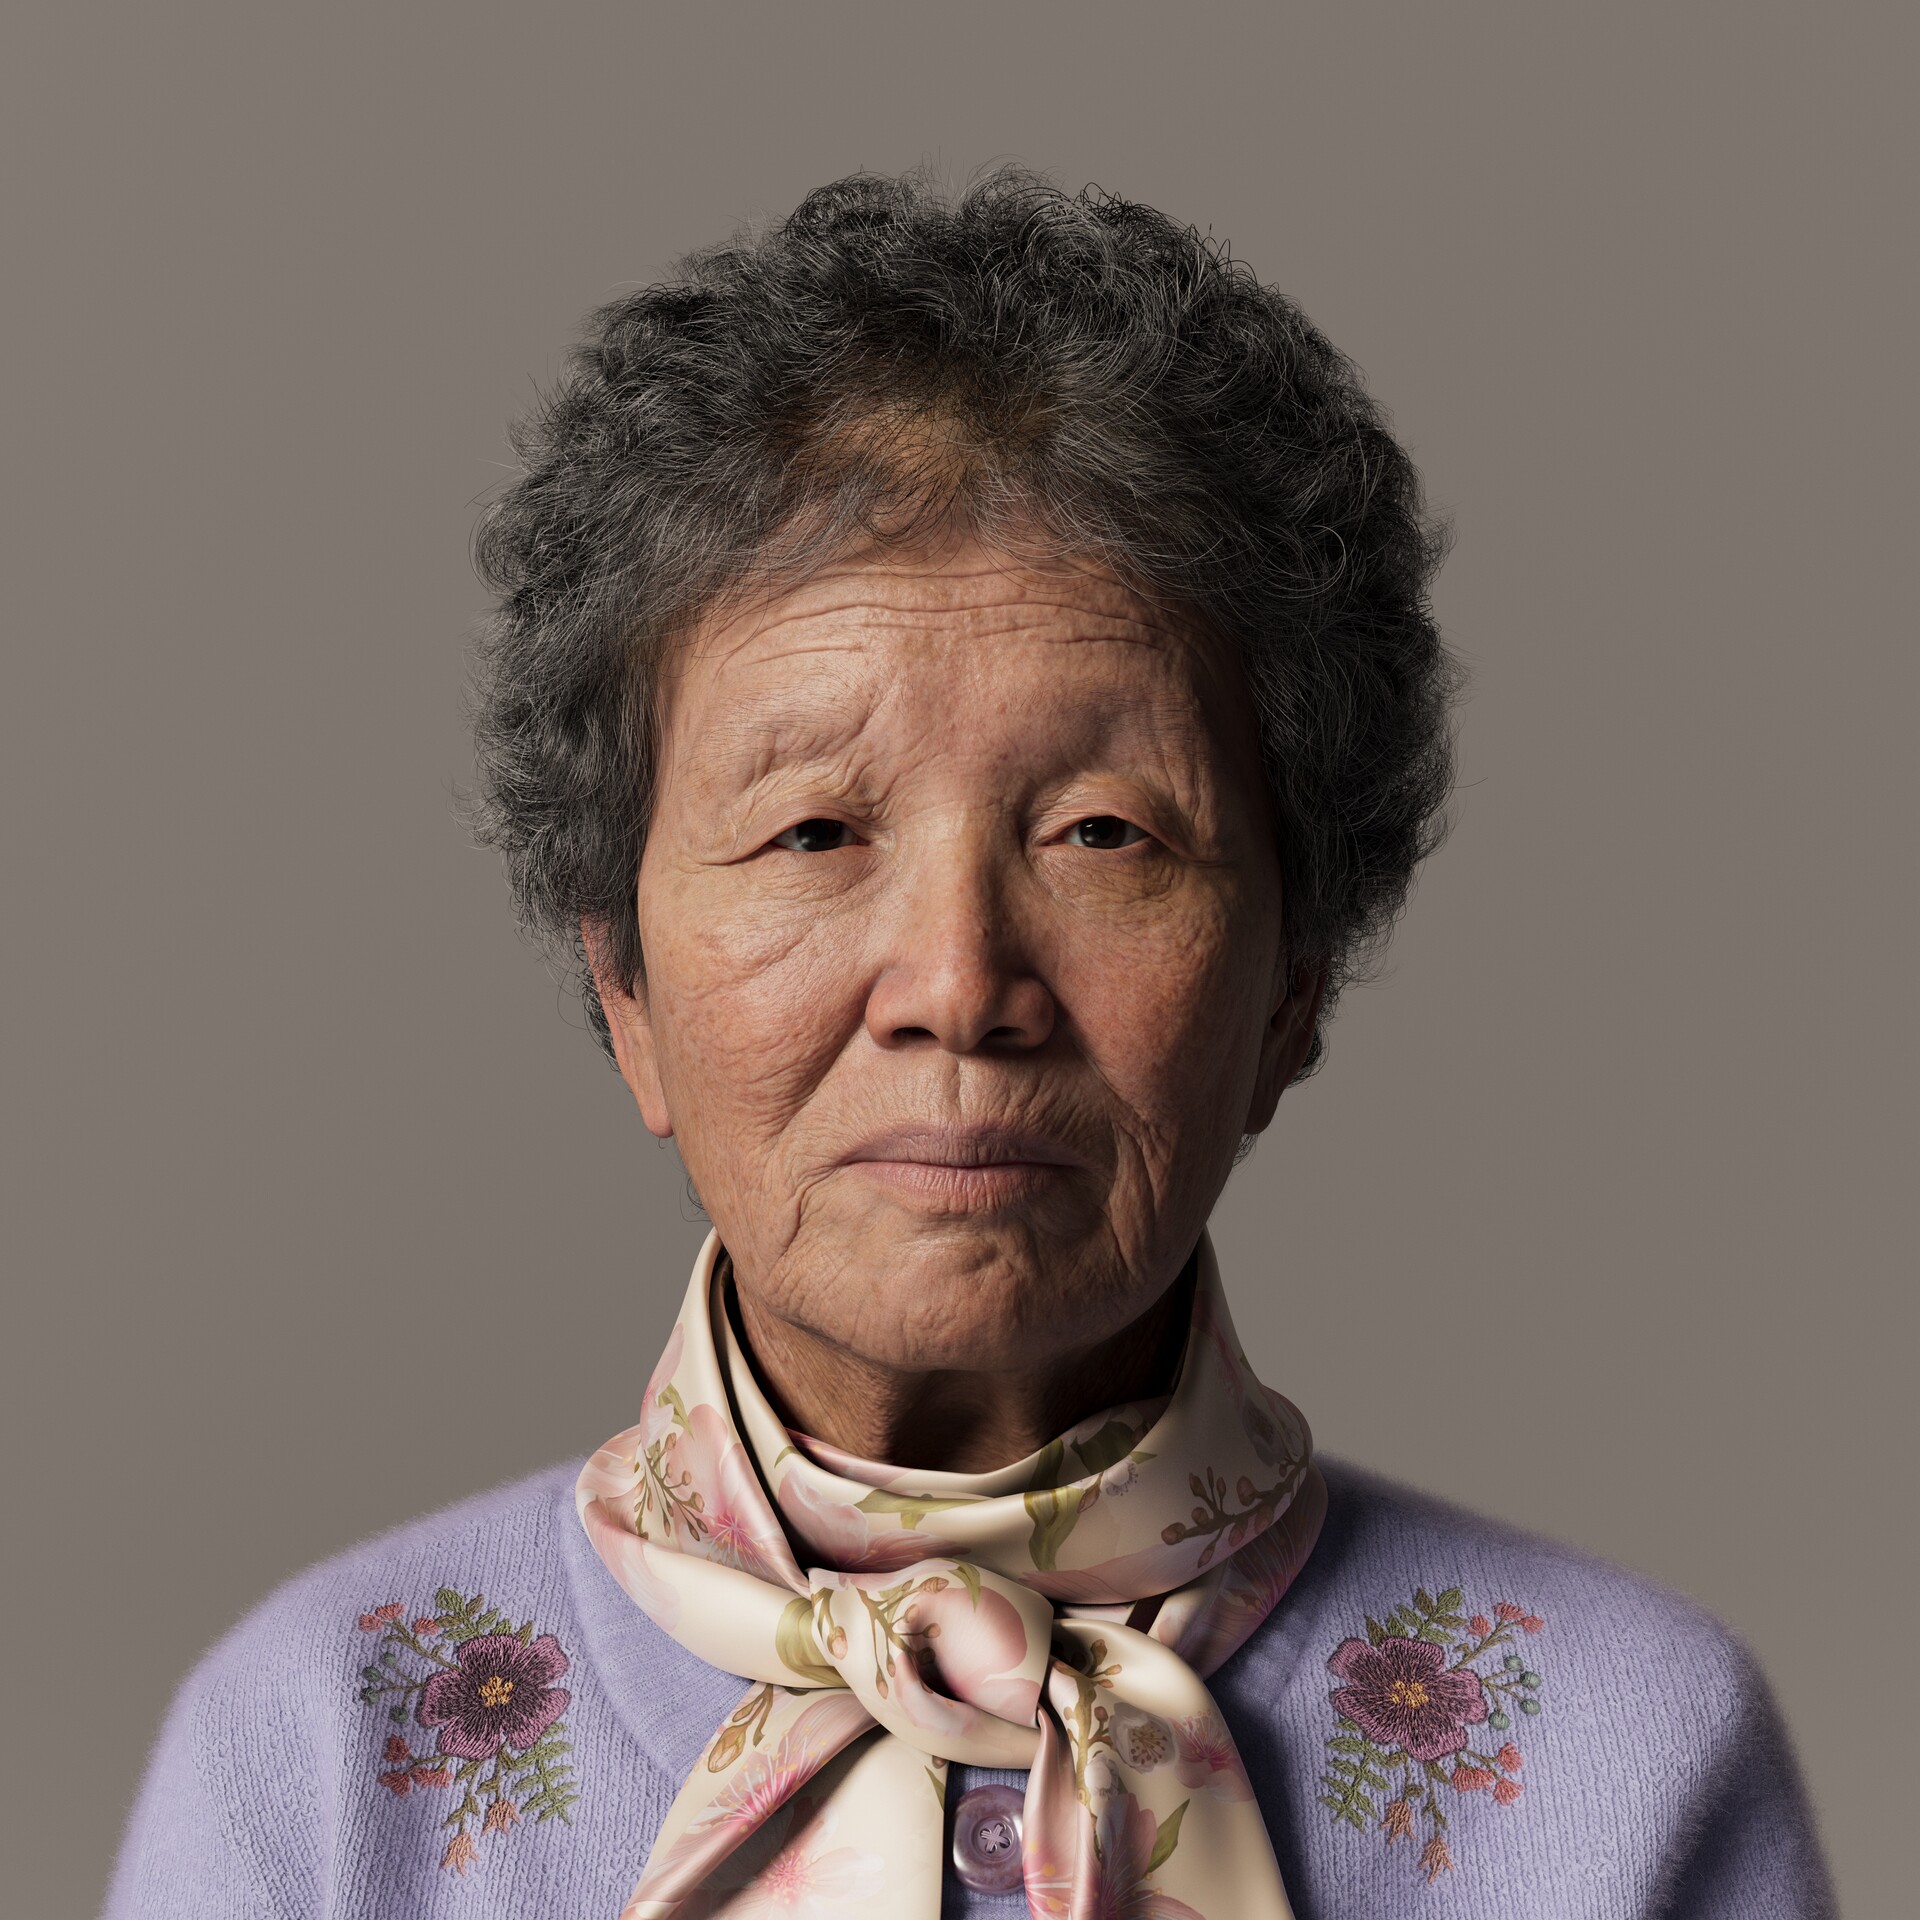
So, first, thoughts of my cherished family came to mind, especially my loving grandparents.
The swift passage of their time has always been poignant, and the thought of a future without them, given their advanced age, was saddening.
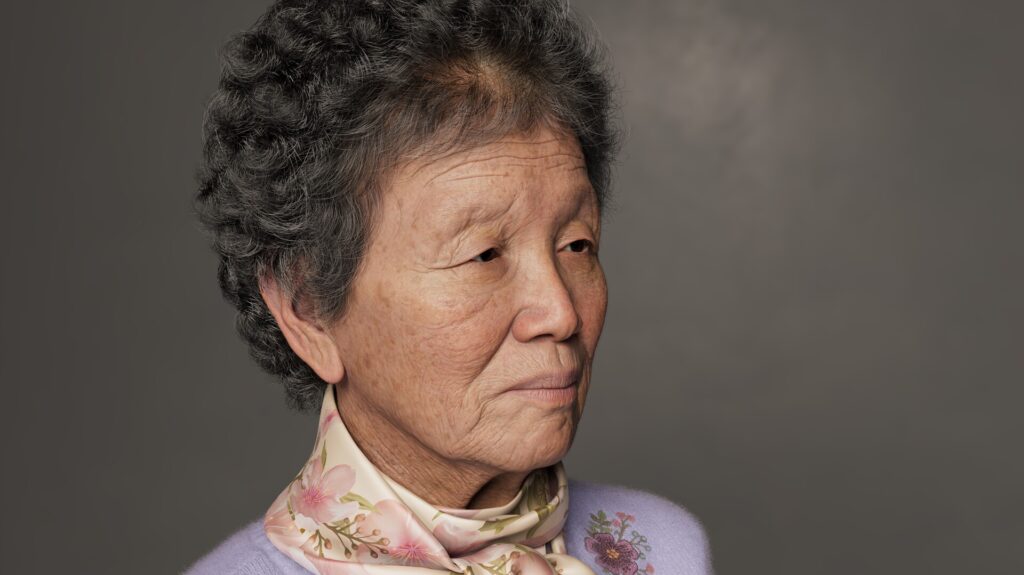
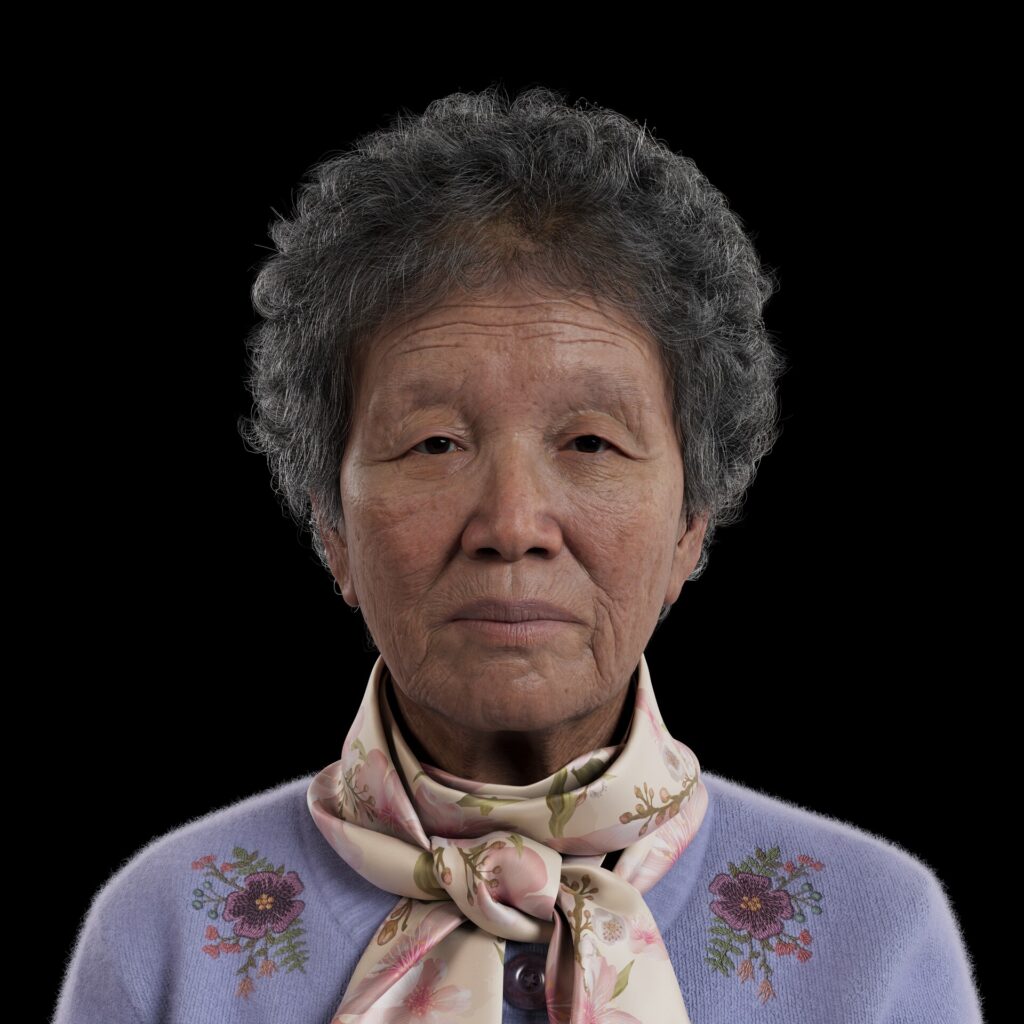
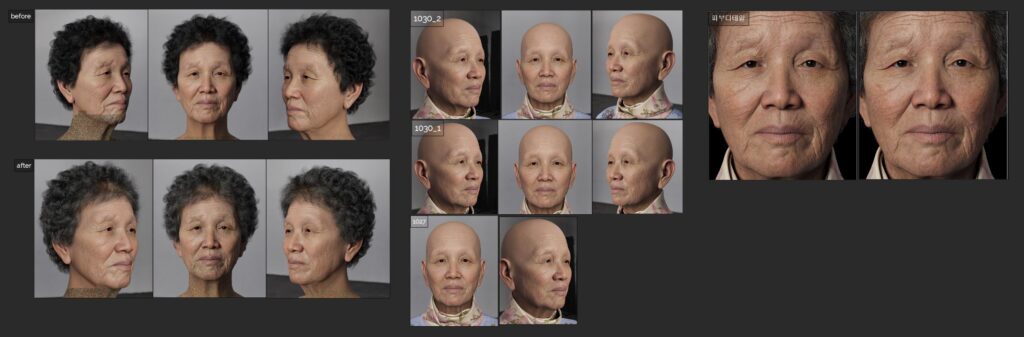
Hence, using the skills I got, I embarked on this project with the desire to capture and preserve their current, healthy, and most beautiful selves. While creating this artwork, I hoped that the love I feel for them would be sensed by those viewing my work.
Working on this project allowed me to express the affection I hold for my grandmother, and I wished that others could also feel her love through my artwork.
References
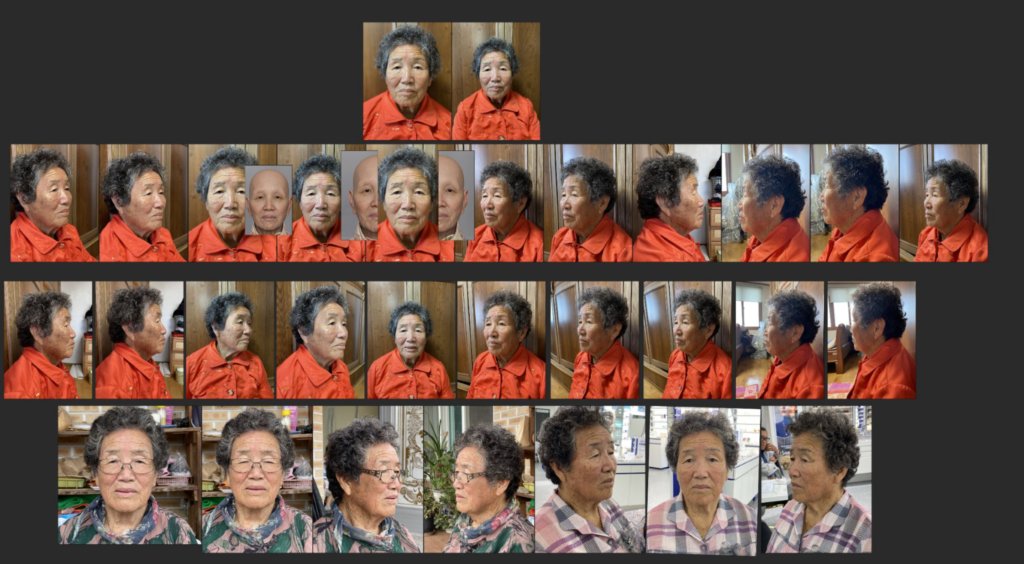
Getting the reference was easy. I visited my grandmother’s house and took the necessary photos.
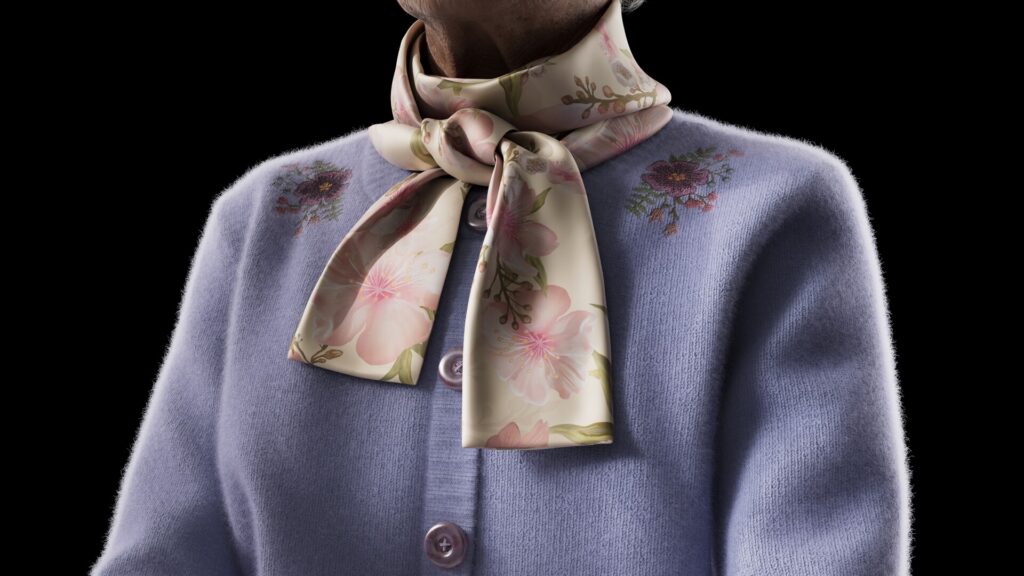
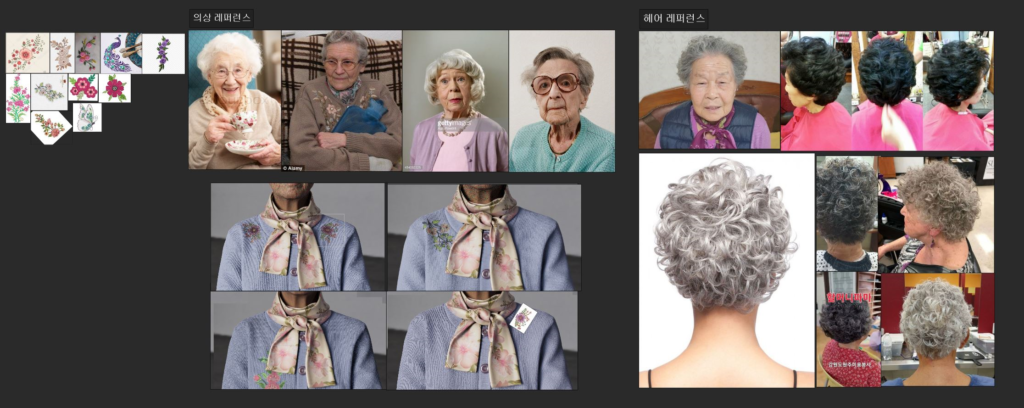
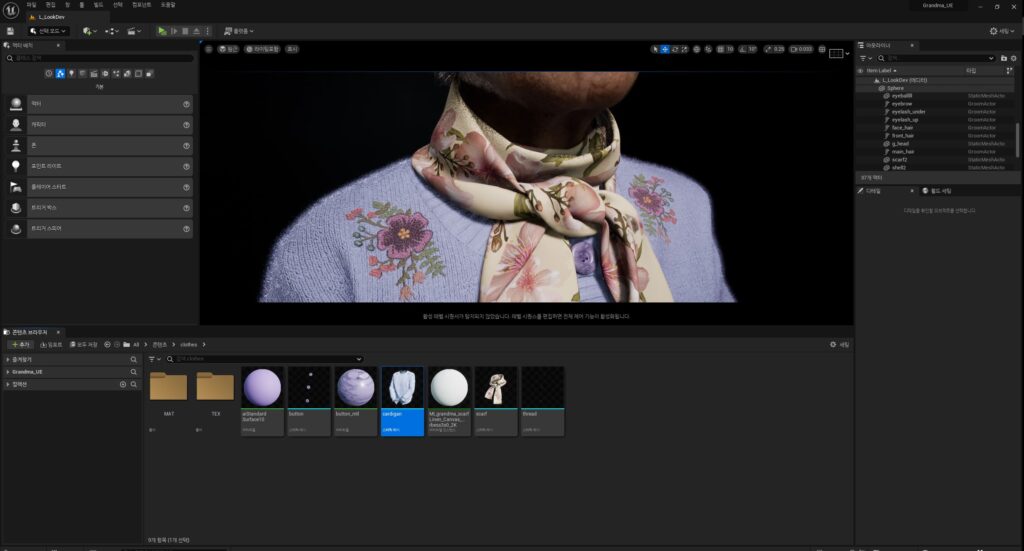
The costume concept is inspired by the typical feelings associated with Korean grandmothers. I sought out colors and designs that they would appreciate, aiming to convey a warm sentiment.
Software
- Zbrush
- Maya 2022, Xgen
- Substance 3D Painter
- Marvelous Designer
- Unreal Engine
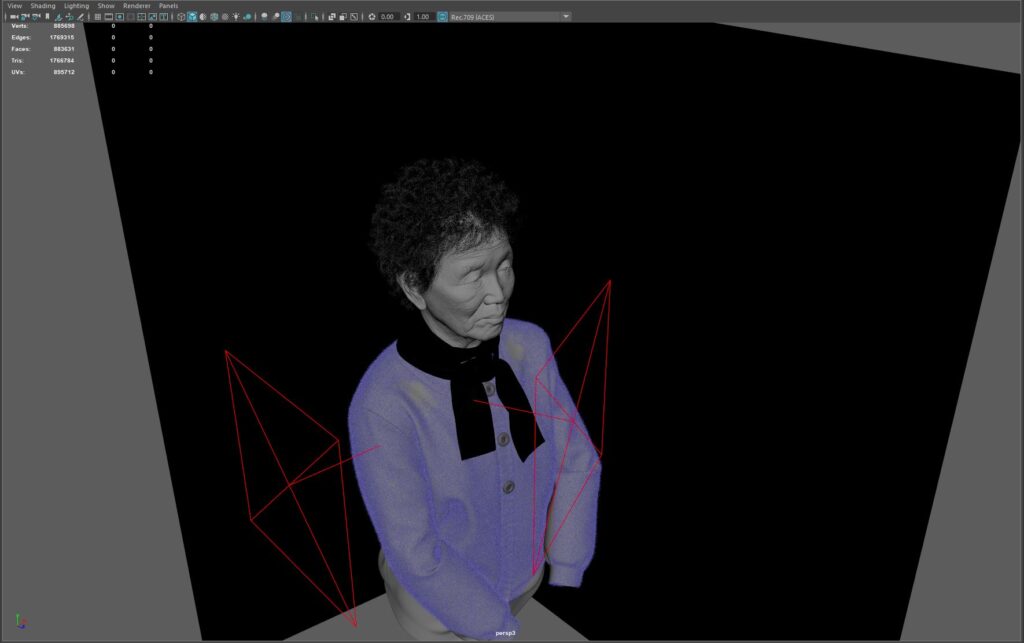
Modelling & Sculpting
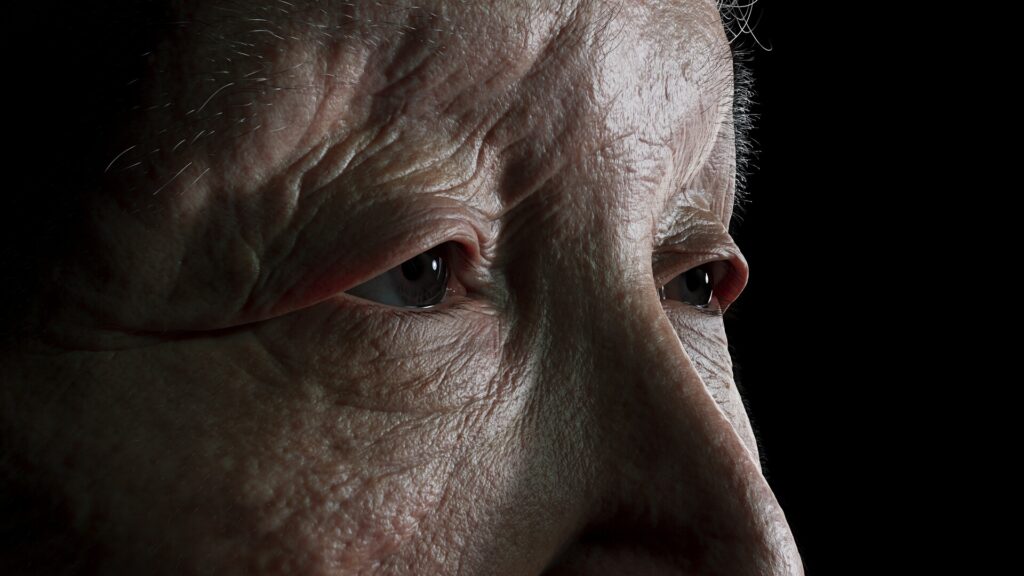
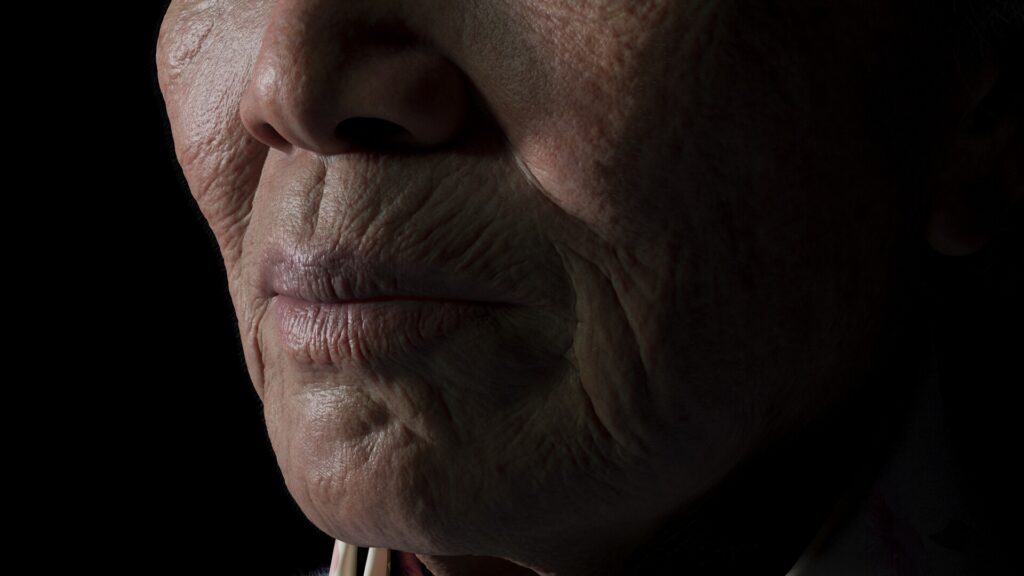
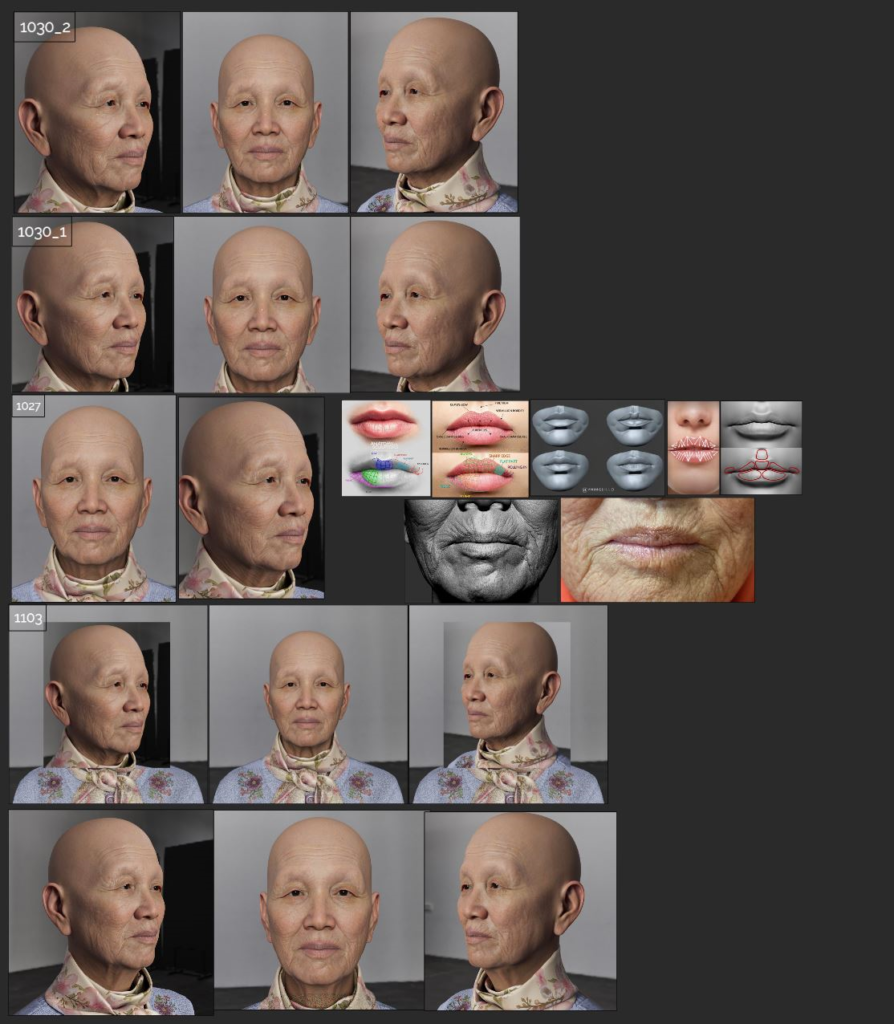
I used ZBrush for facial work to achieve detailed and intricate results. I began by creating a basic shape using DynaMesh and then replaced it with MetaHuman UVs. Gradually increasing the subdivisions, I added details and proceeded with skin sculpting.
For skin work, I applied scanned data as a base and sculpted wrinkles and details on top of it.
To closely match the reference, I focused on achieving a natural flow and shape for the wrinkles, investing a significant amount of time.
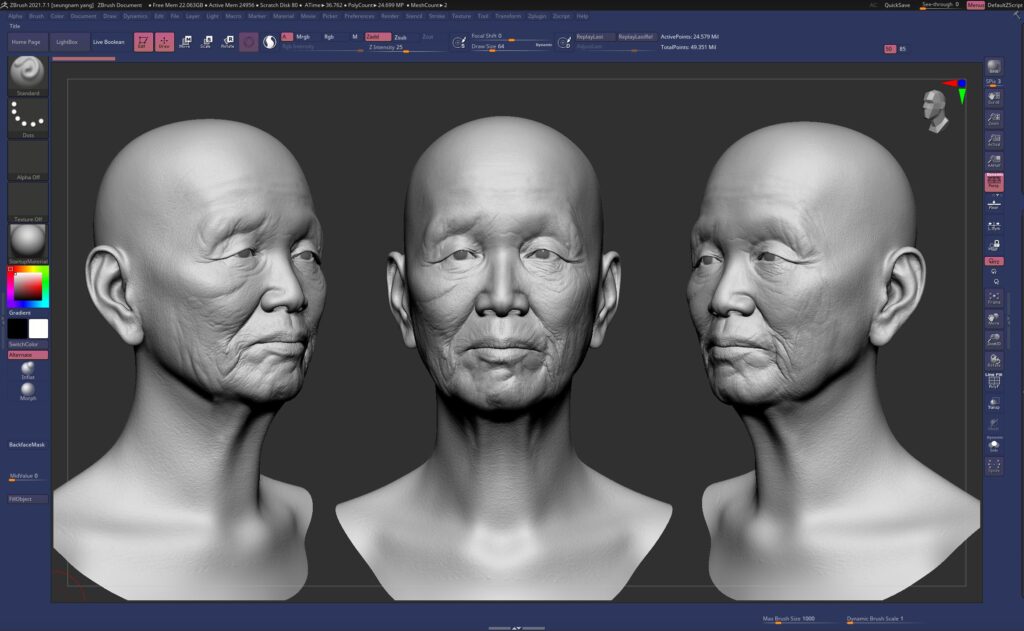
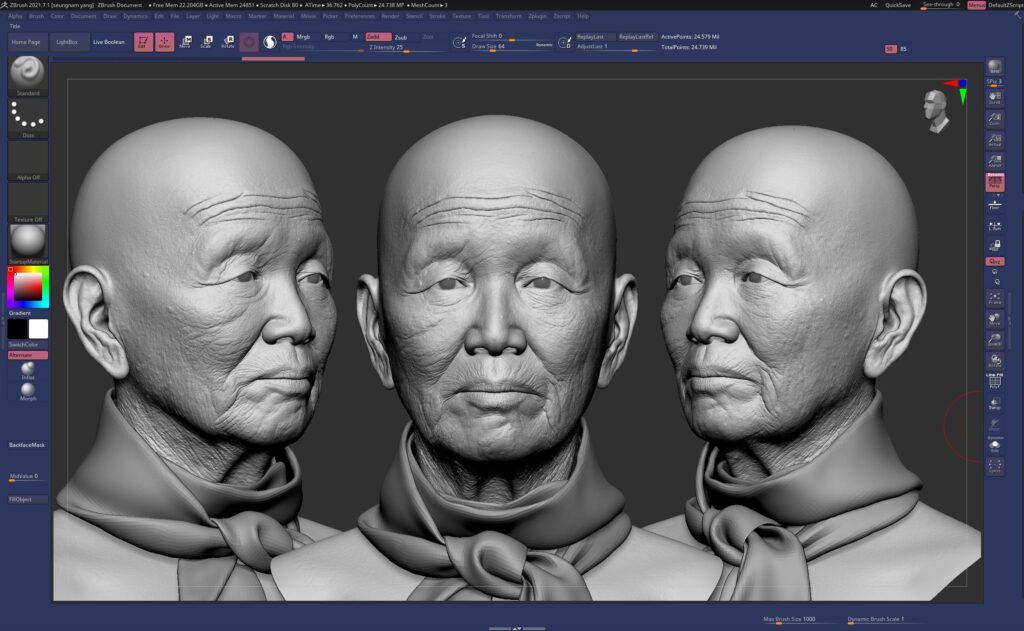
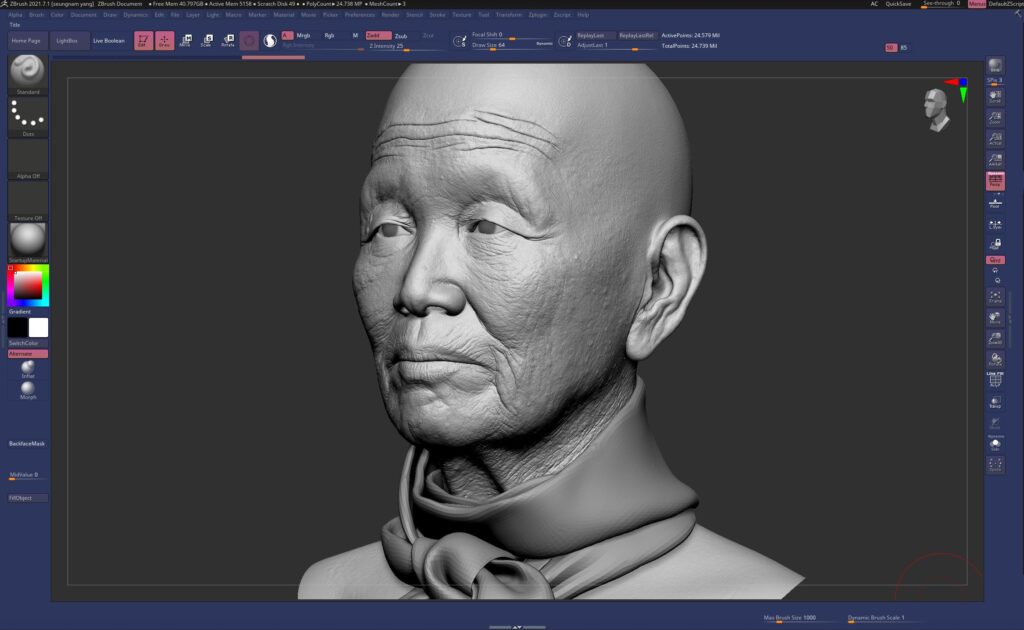
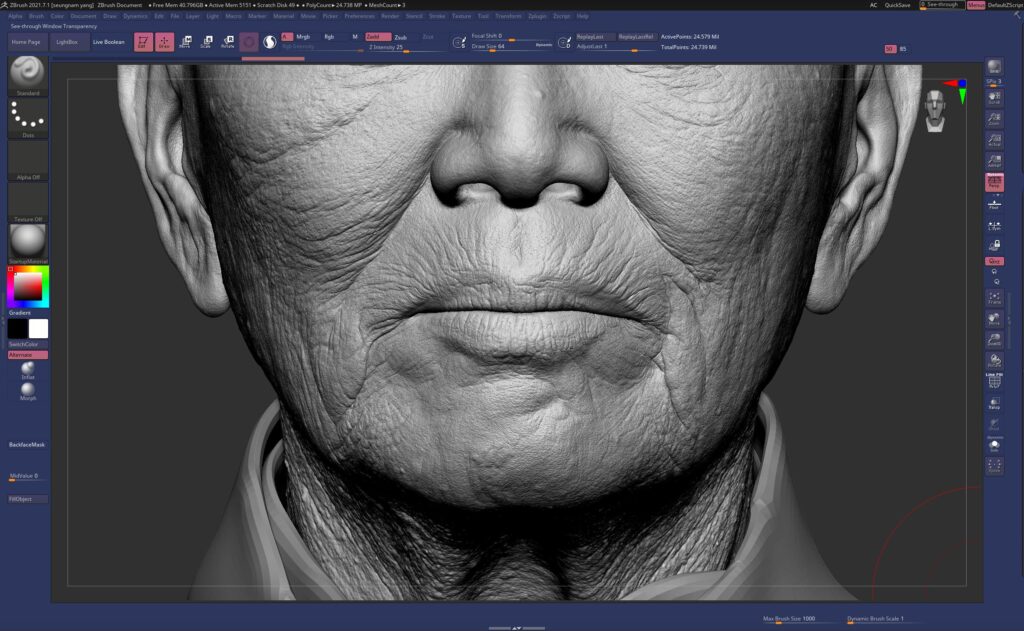
Throughout the process, I regularly extracted displacement maps, carefully checking for any awkward areas and refining the sculpting work.
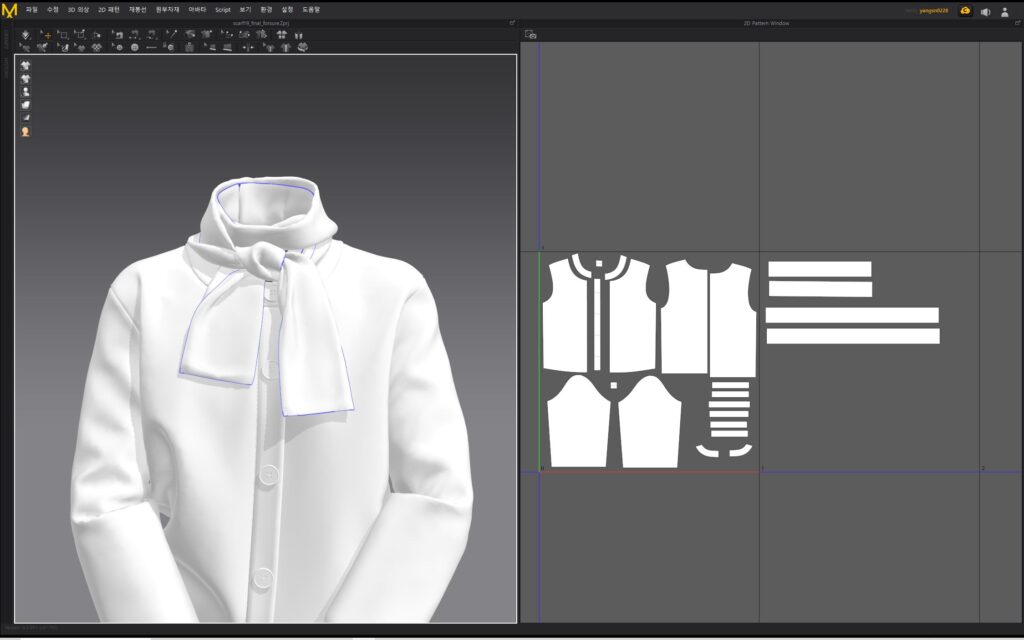
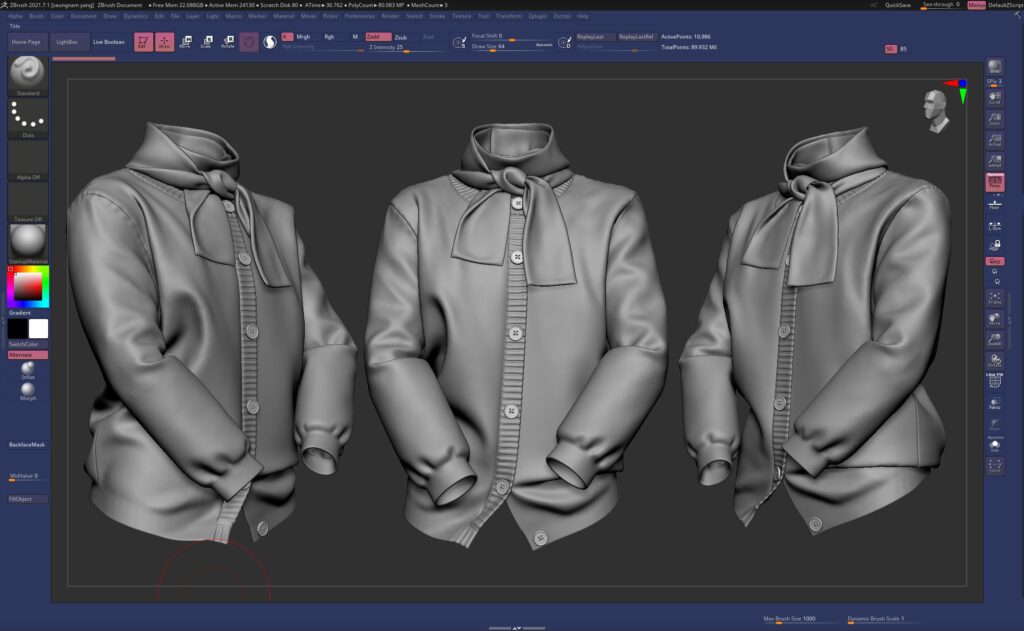
Cloth
At first, there was a bit of difficulty in expressing the tied scarf, but I made an effort to understand the form first. While fixing it with pins in Marvelous Designer, I tried to create the most natural shape and wrinkles possible.
For the parts where additional wrinkles were needed, I created them in ZBrush.
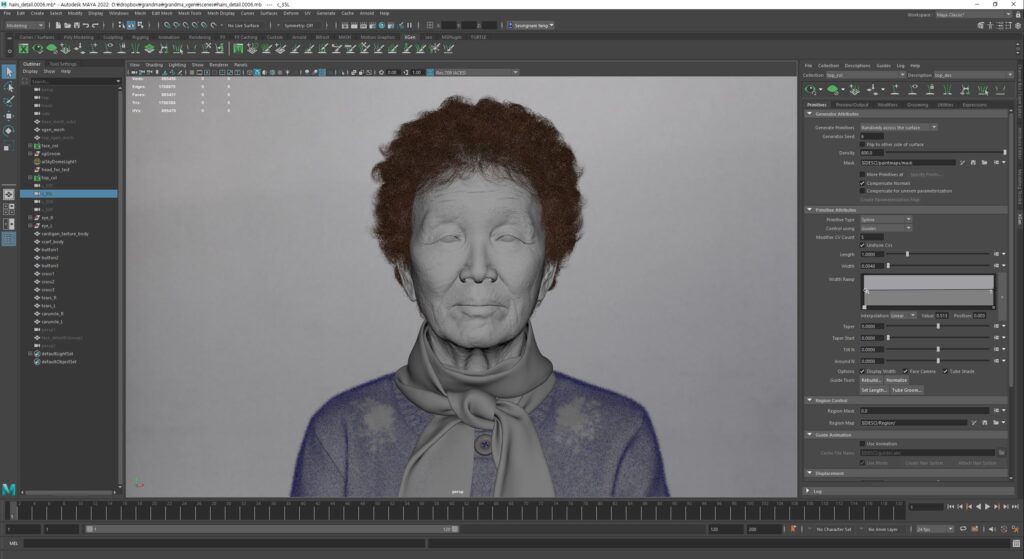
Hair
I worked on the hair using Maya’s XGen, dividing it with descriptions. While sculpting the hair initially, I went through several iterations to achieve the feel from actual references. Despite facing multiple challenges when defining the hair, I ultimately created the desired hairstyle.
I aimed for a more rugged and matte expression compared to the hair of a typical young person and carefully blended the ratio of white hair to maintain a balance that wouldn’t deviate too much from the overall clothing style.
I also worked on the fur of the clothing using XGen, aiming to create a soft and warm texture.

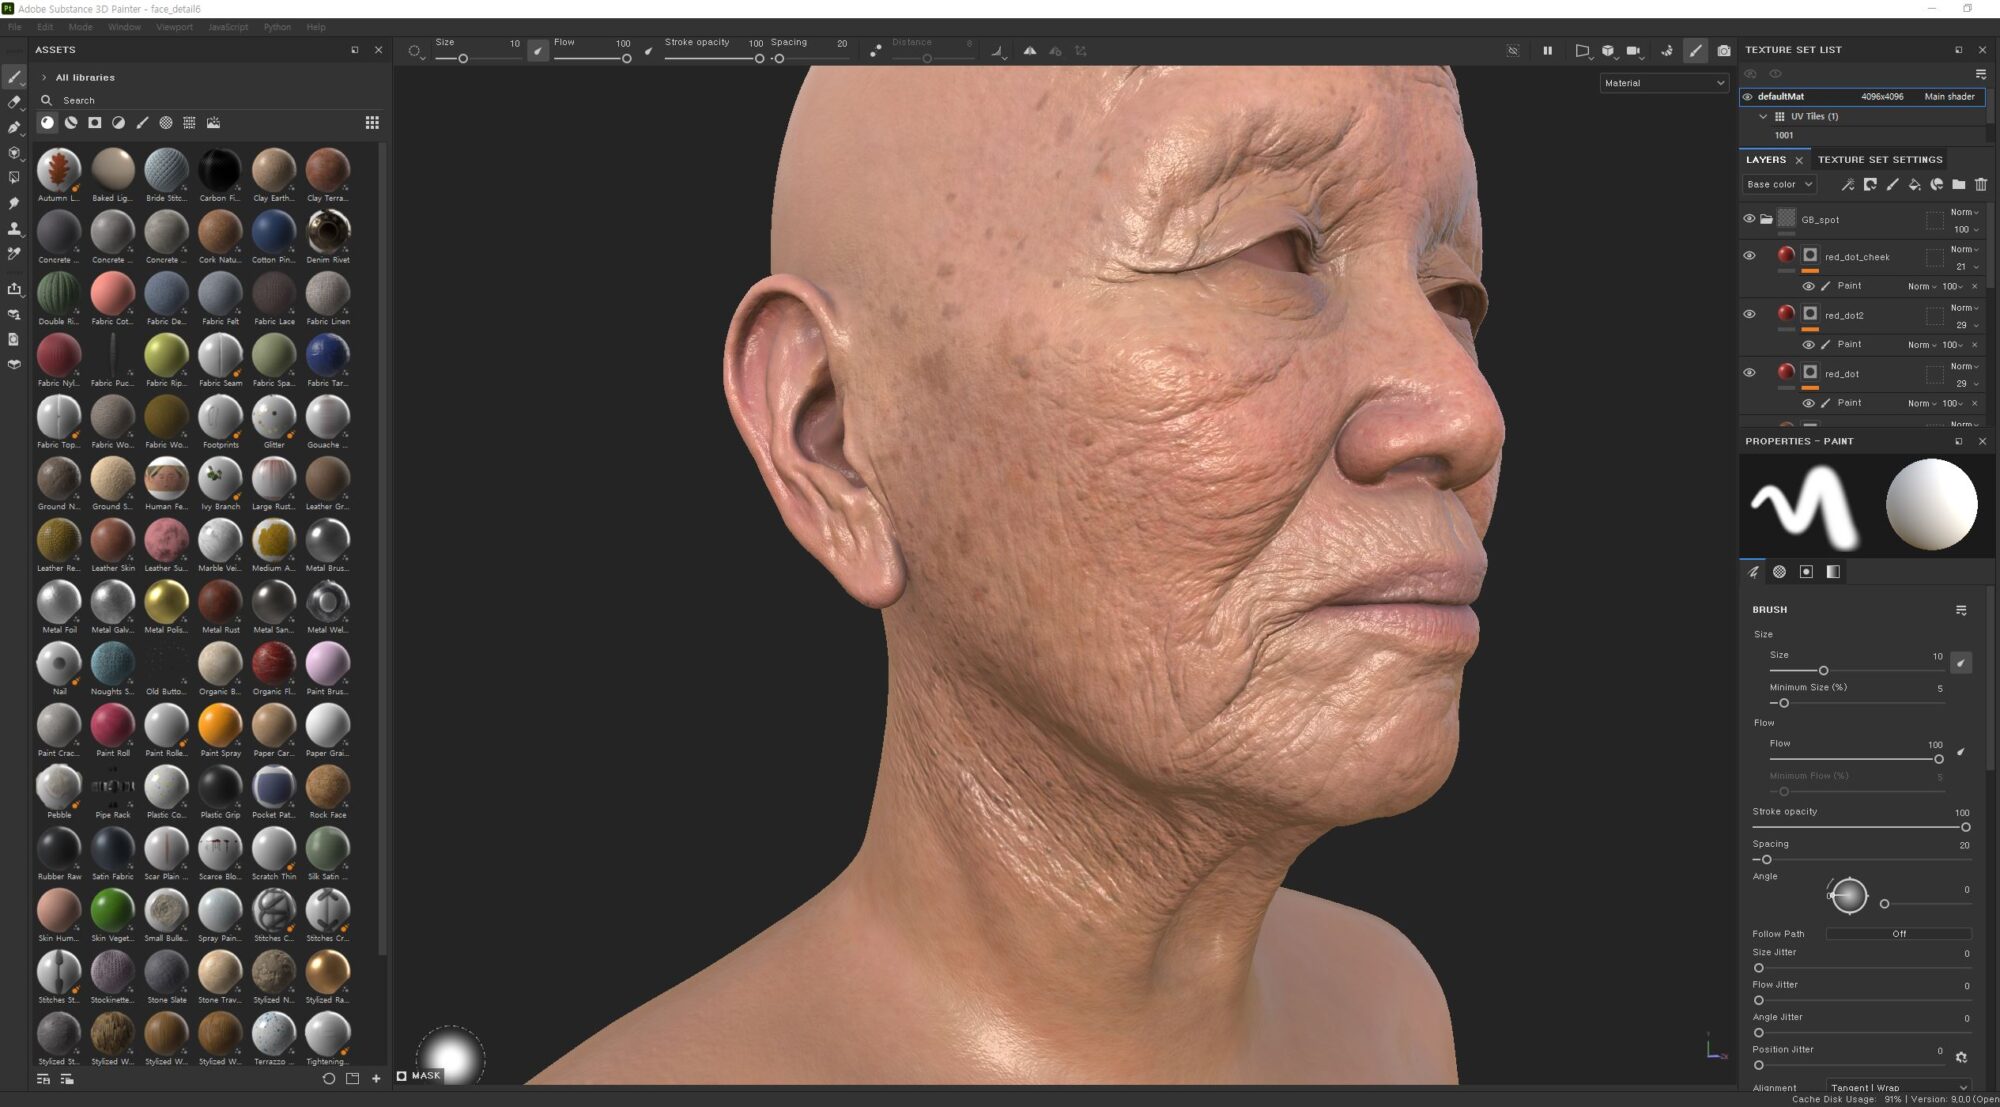
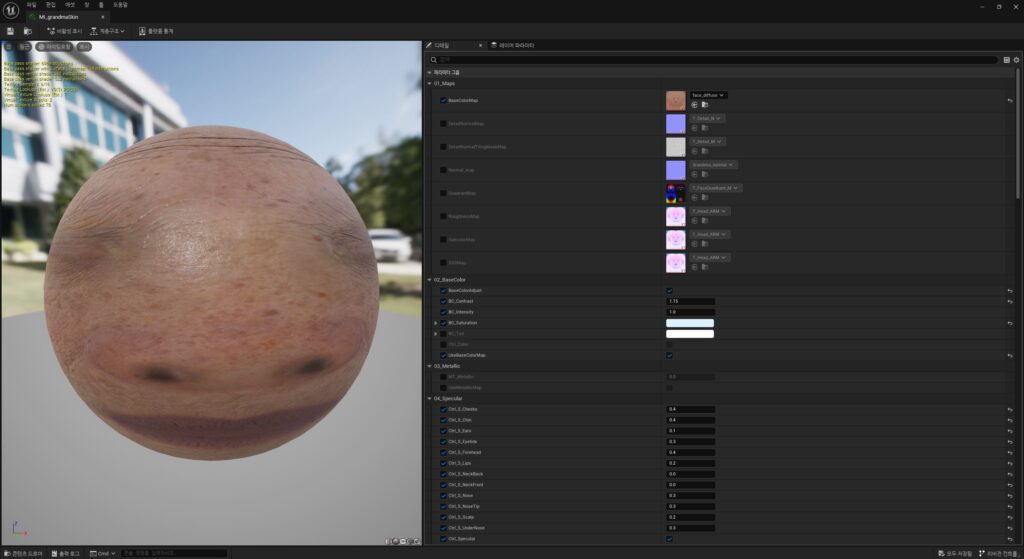
Texturing
I worked on the texturing in Substance Painter, aiming to closely represent the texture of my actual grandmother’s skin. Since the goal was to achieve a realistic portrayal, I continuously extracted textures and applied Arnold renders to test, making adjustments throughout the process.
Finding the right balance was challenging, as overly emphasized details could distract, while insufficient details might make it look bland.
When expressing facial imperfections, I selected the key color that forms the basis and chose surrounding colors that didn’t deviate too much, creating a diverse range of facial details.
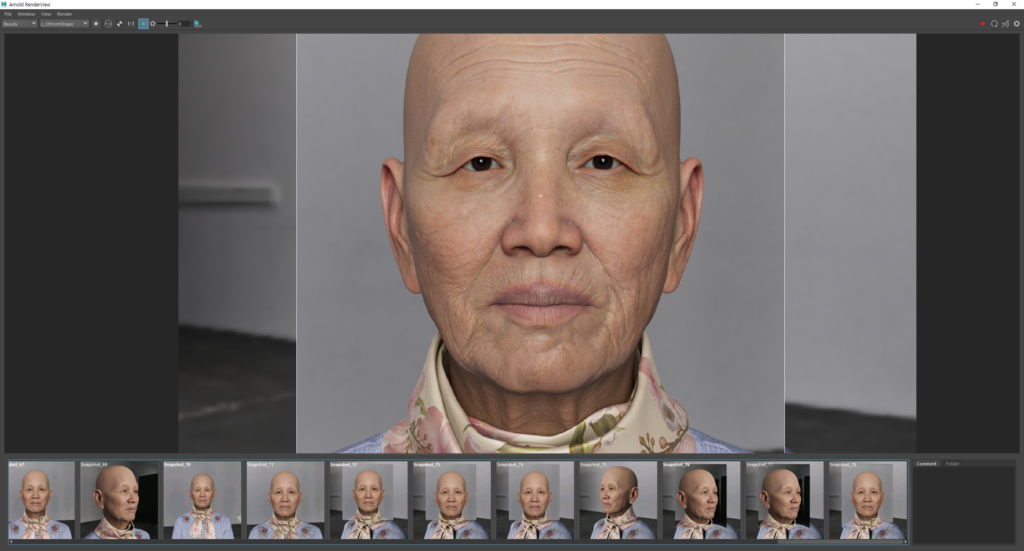
Lighting & Rendering
I created render outputs using both Maya Arnold and Unreal Engine. In Arnold, I chose HDRI for a realistic skin representation, keeping it simple.
For close-up shots, I set up two lights to delicately touch only the skin’s surface, enhancing wrinkles, and captured the render.
In Unreal Engine, I aimed to produce results as close as possible to Maya, focusing on achieving a similar outcome.
Conclusion
I appreciate everyone who provided valuable advice throughout the work period. During this project, I found joy in expressing things realistically. It has been a great opportunity for personal growth, and I hope to continue evolving.
I will remember the areas where I fell short in this project and strive to present an even better next piece of work.
Read more articles
You might also like these articles.