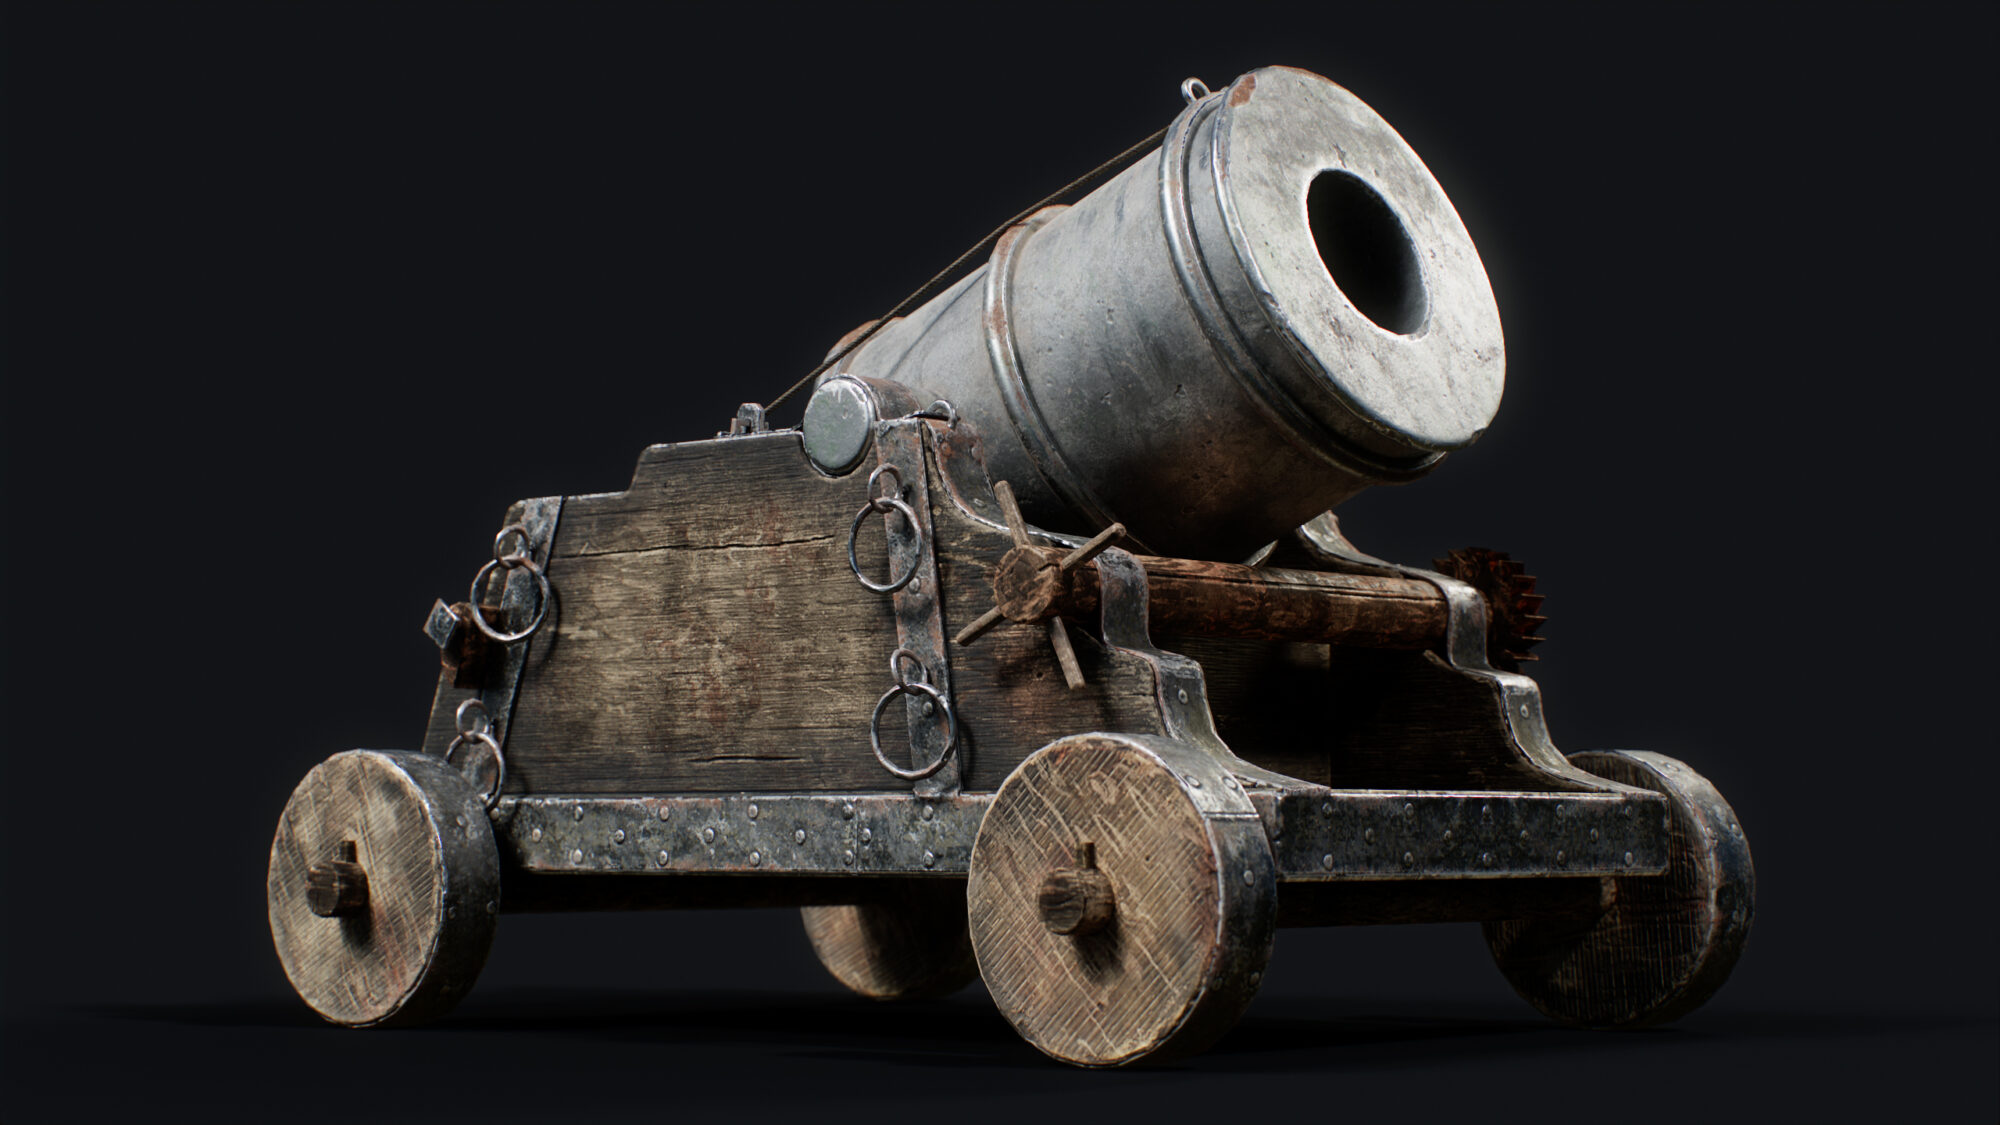
Mortar Cannon
Introduction
Hi everyone! My name is Marco Moschetta and I'm from Italy.
My career started 4 years ago working for VR experiences and teaching the basics of 3D art for games and real-time in a CG school.
At the moment I'm a Freelance 3D Artist and my goal is to improve my skills in 3D Environments for games.
Goals & Requirements
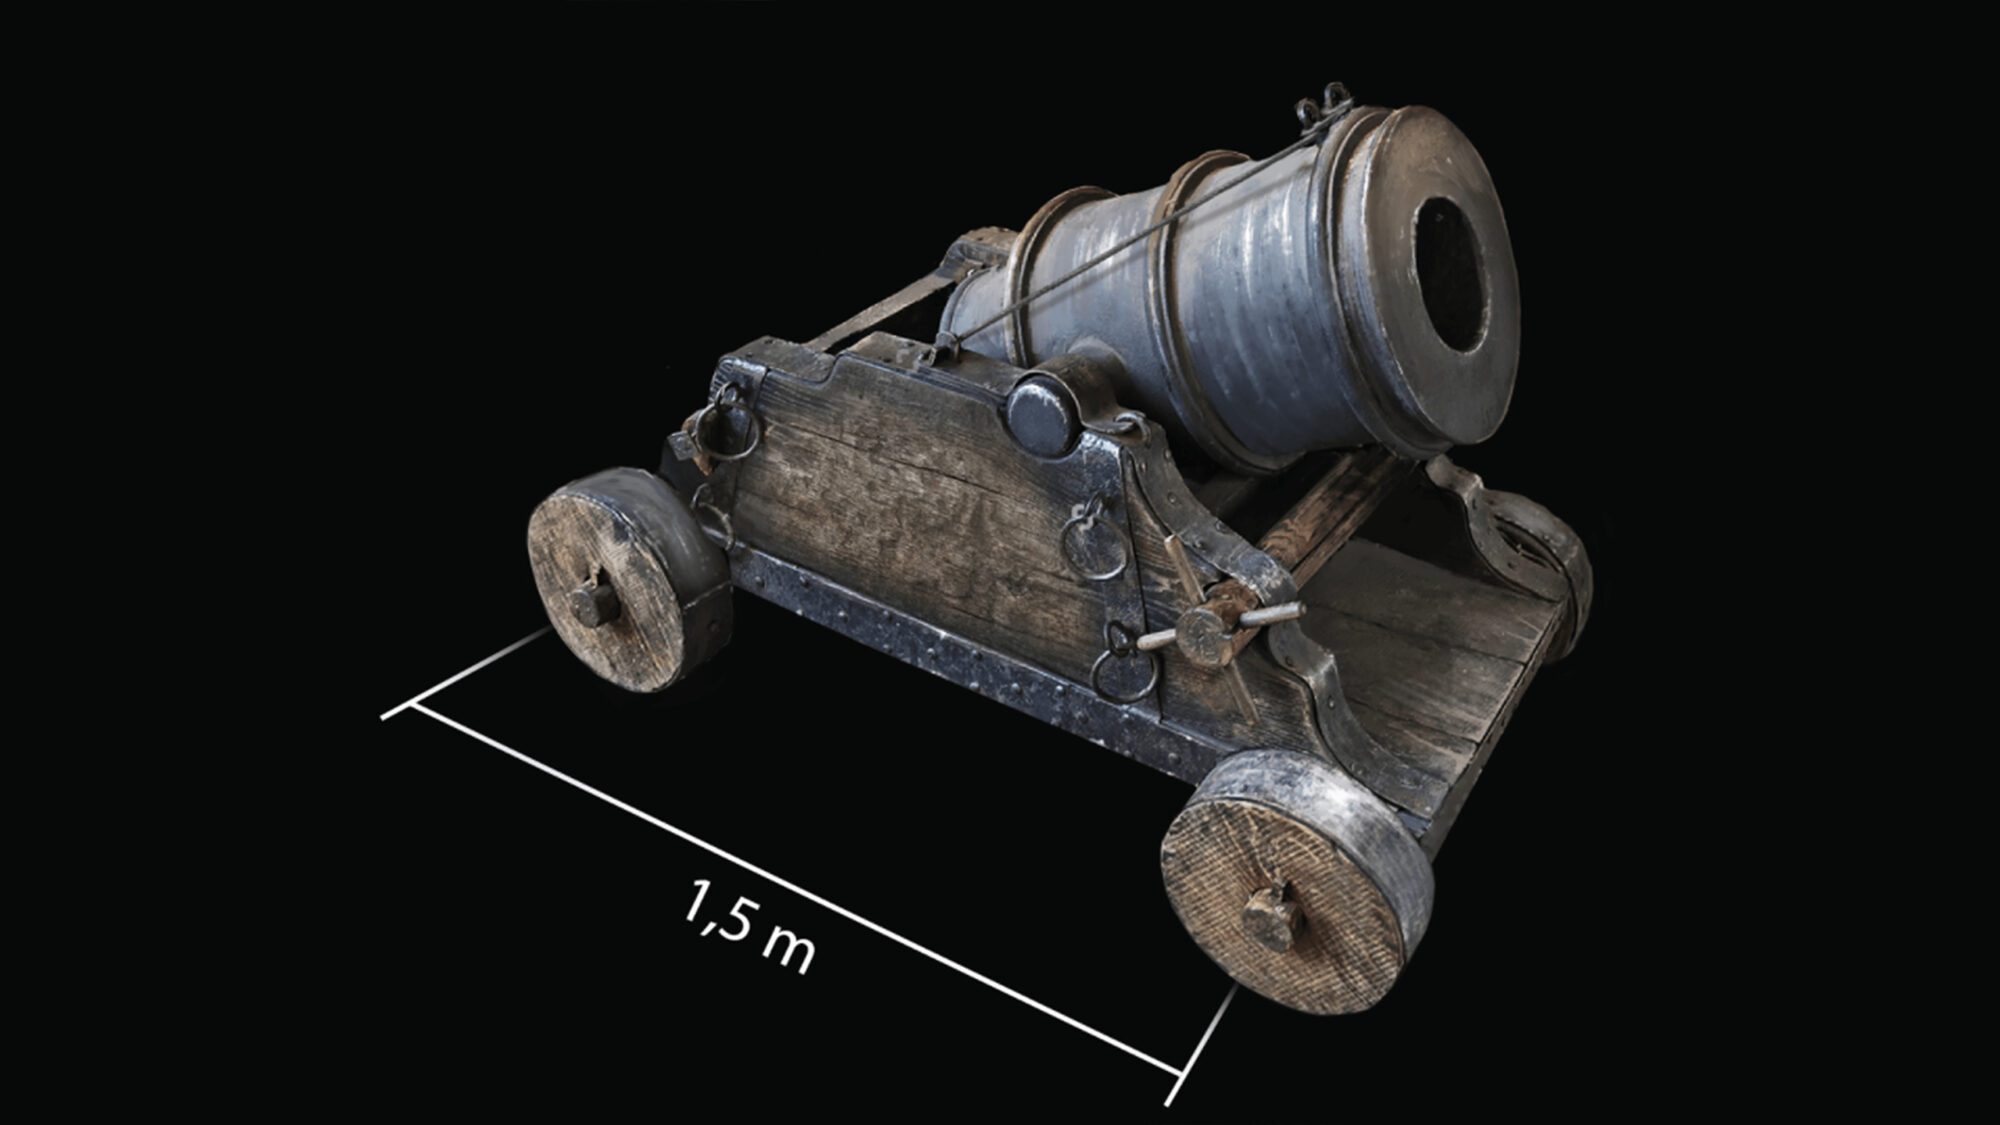
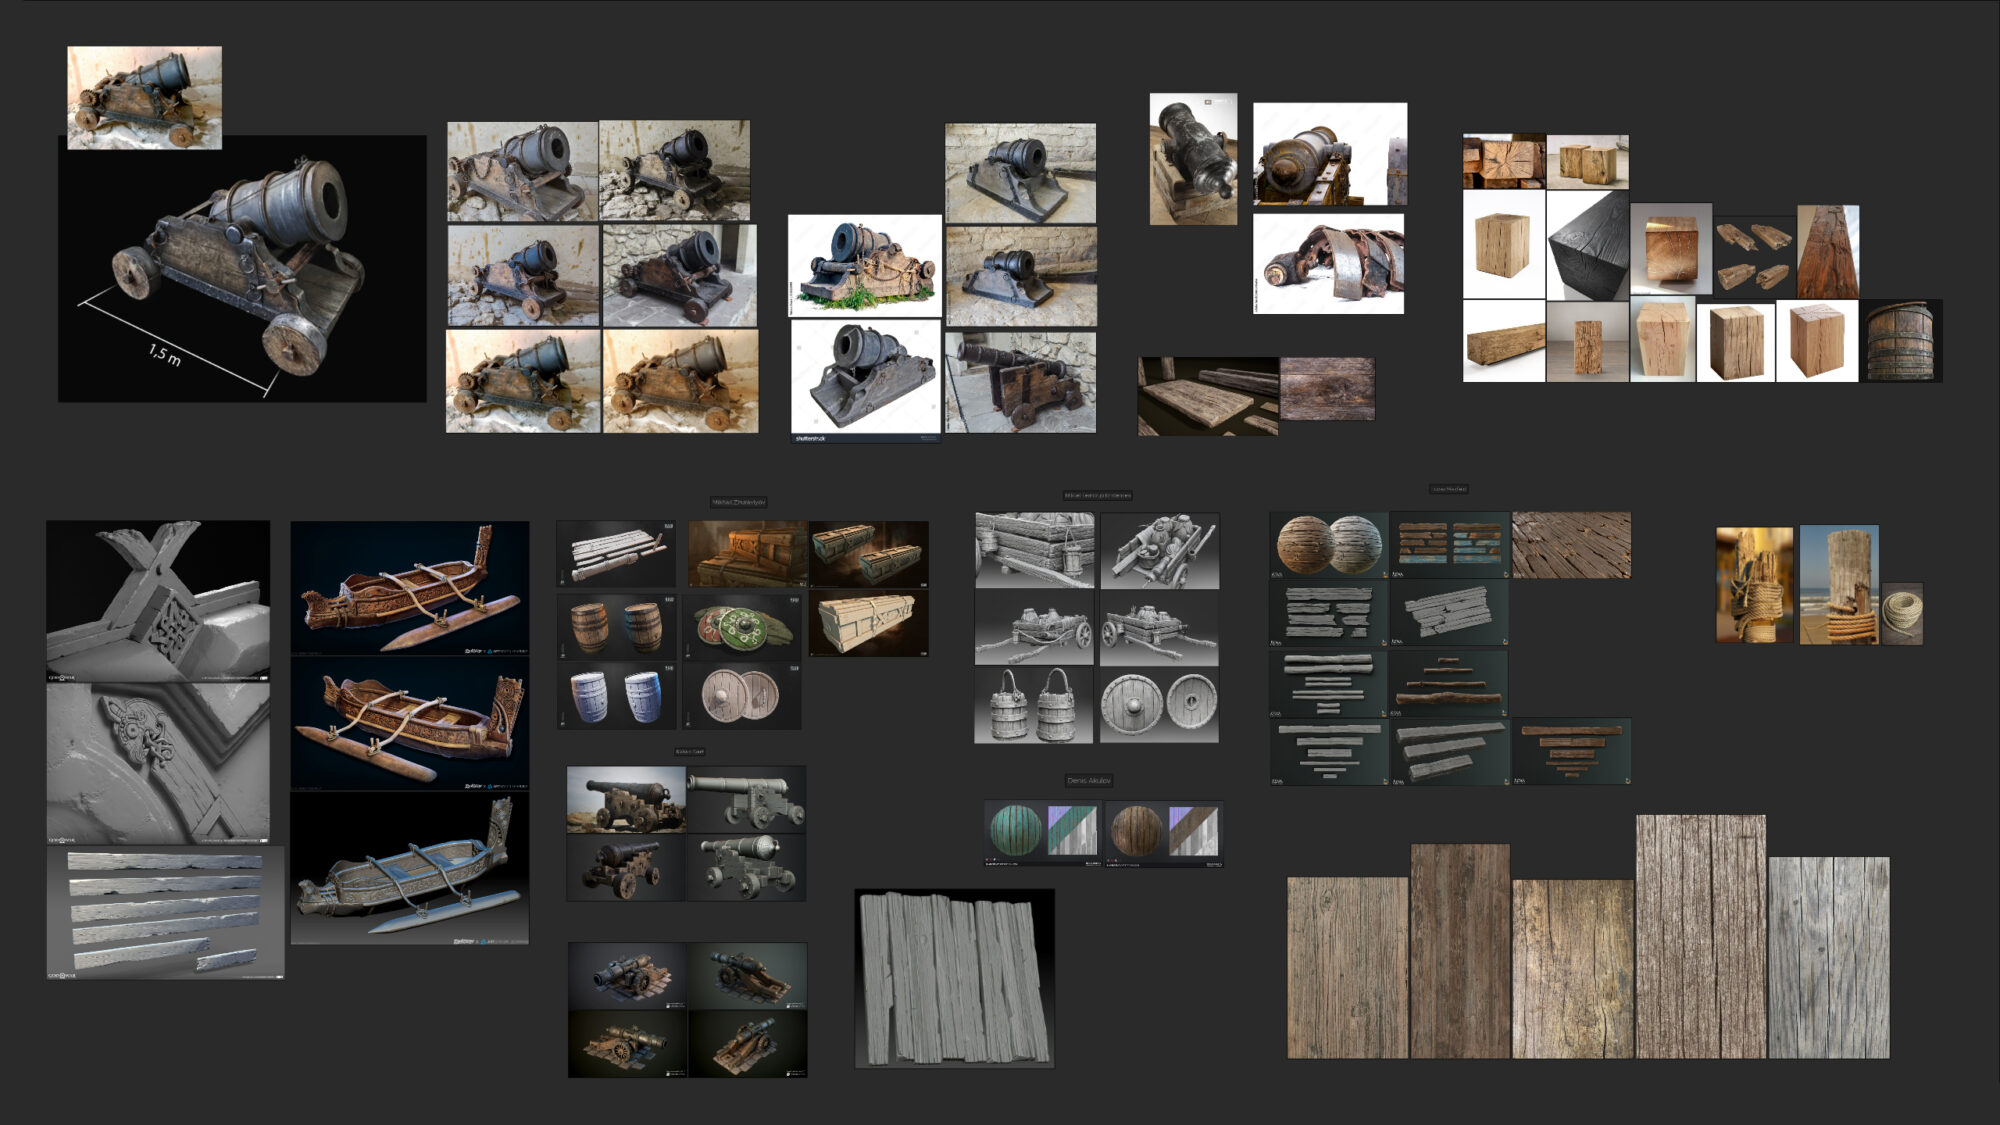
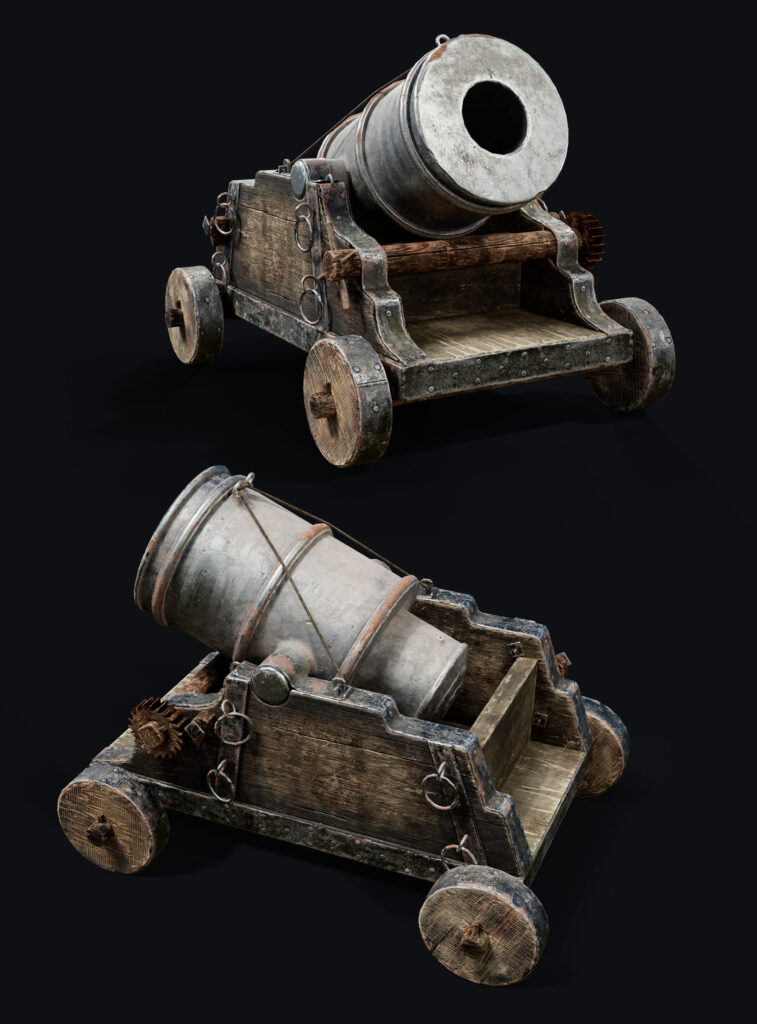
This project was an art test for a 3D Artist Environment job position that went well, the task was to make the mortar with a photorealistic style following the reference they provided (image below).
I had to follow the classic steps for a prop creation:
- Blockout
- Highpoly detailed sculpt
- Low-poly / Retopo
- UVs and Baking
- Texturing
And the technical requirements were:
- Maximum polycount – 8K triangles
- Maximum texture size – 2K
- Minimum Texel Density – 512px/m
- Metal/Roughness pipeline
Another requirement was to not use photo/concept projection in the texturing stage, all layers had to be done inside Substance Painter. So I decided to not use external resources such as textures or alphas in ZBrush either.
Software
- PureRef – Reference, Notes
- Maya – Modeling, UVs
- ZBrush – Highpoly
- Substance Painter – Texturing
- Marmoset Toolbag – Bakes, Rendering
- Unreal Engine 5 – Personal Renders and Cinematic (not a test requirement)
References
The reference board is very important for any kind of CG project, in this case it took me almost a day and a half of work.
I collected photos of different types of cannon and mortar, materials like old iron, wood and some artworks from ArtStation about photorealistic highpoly sculpting and texturing.
After a long research I also found some photos of the real mortar where the main reference was made.
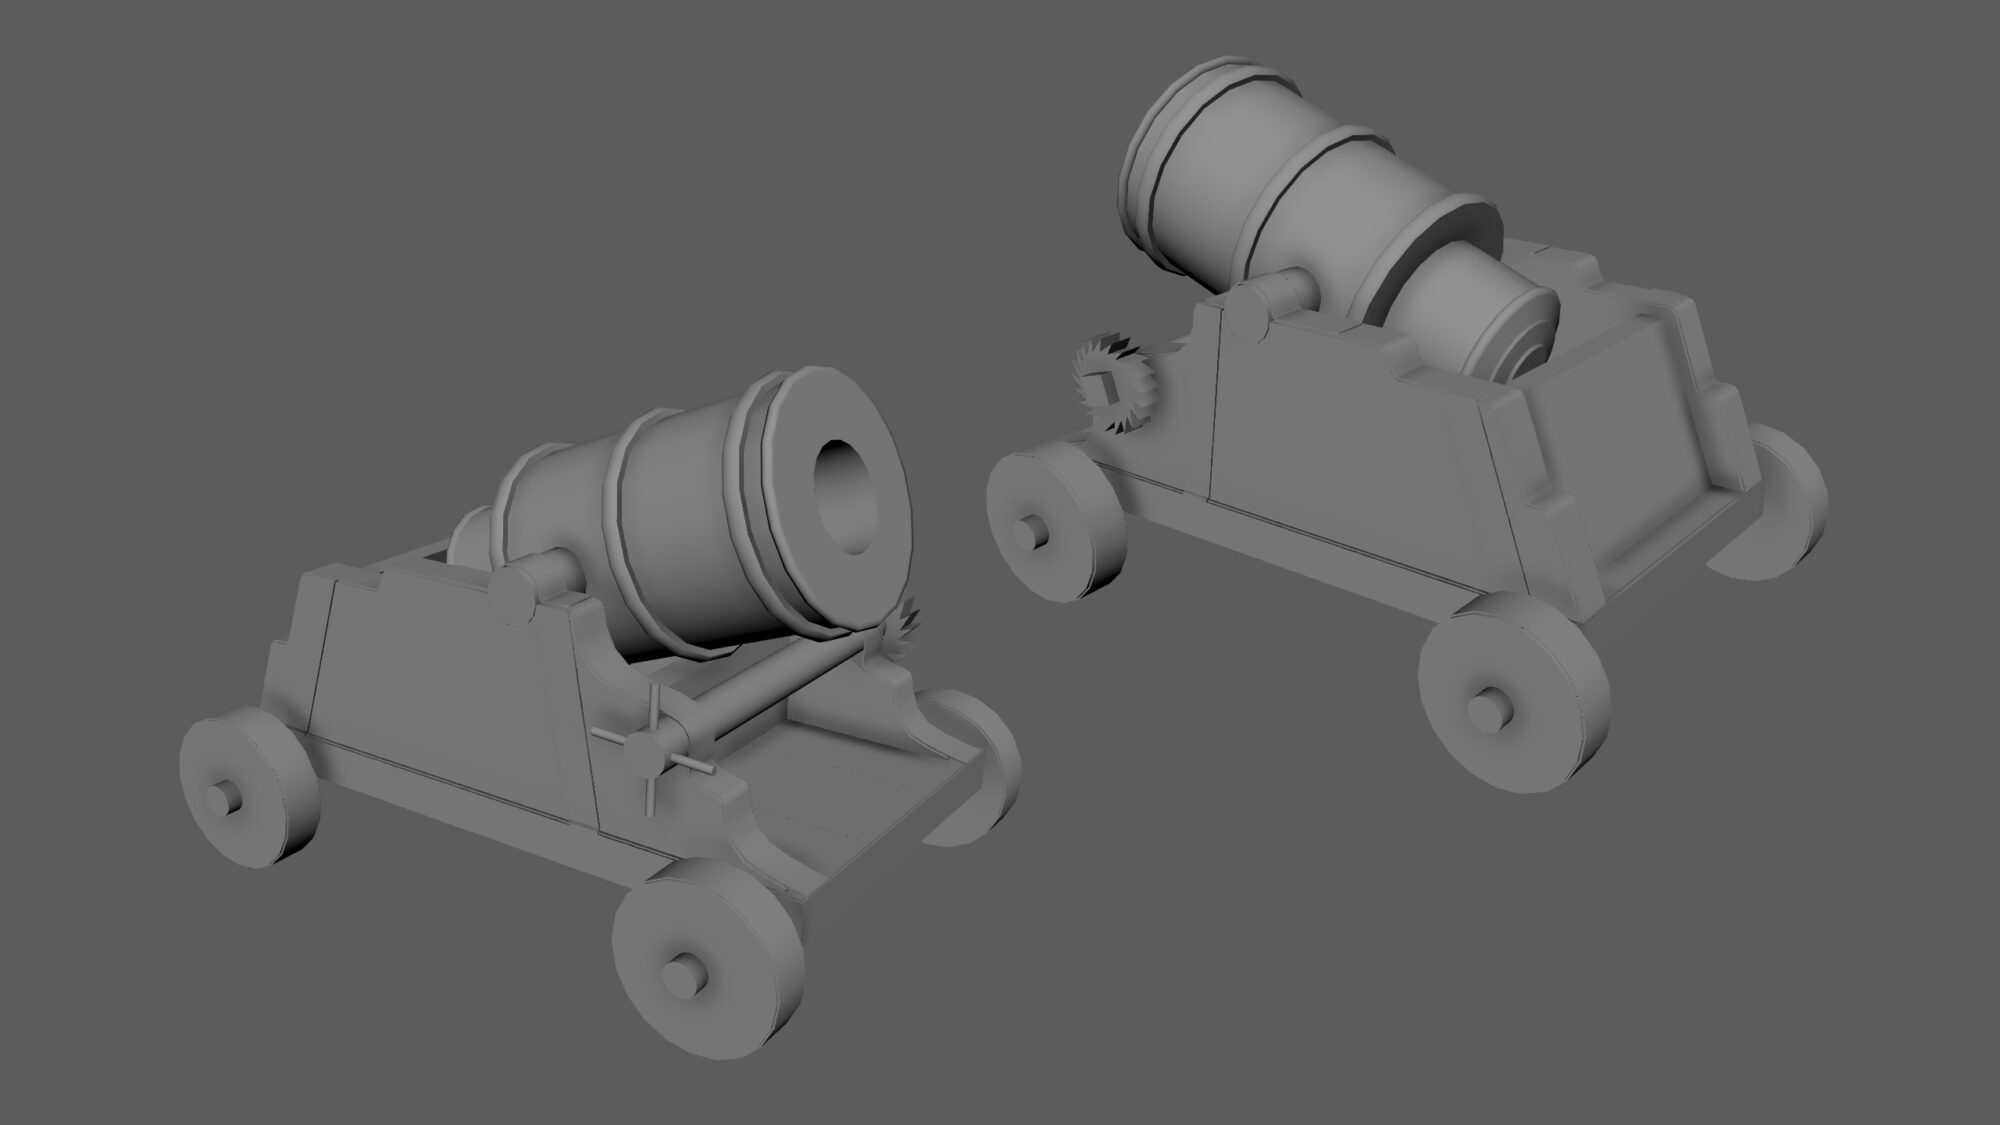
Modeling – Blockout
I started blocking out the main shapes in Maya, not worrying about topology and small details, just to create the volumes of the main reference.
The difficult part of this first step is to keep the right proportions considering the perspective of the concept, so I also used photos of the mortars I collected to help me.
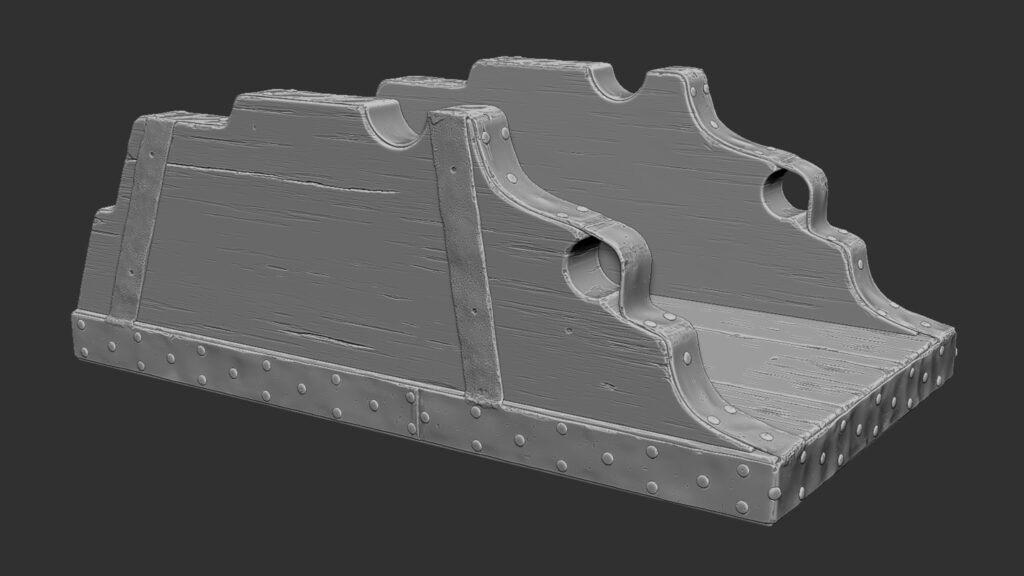
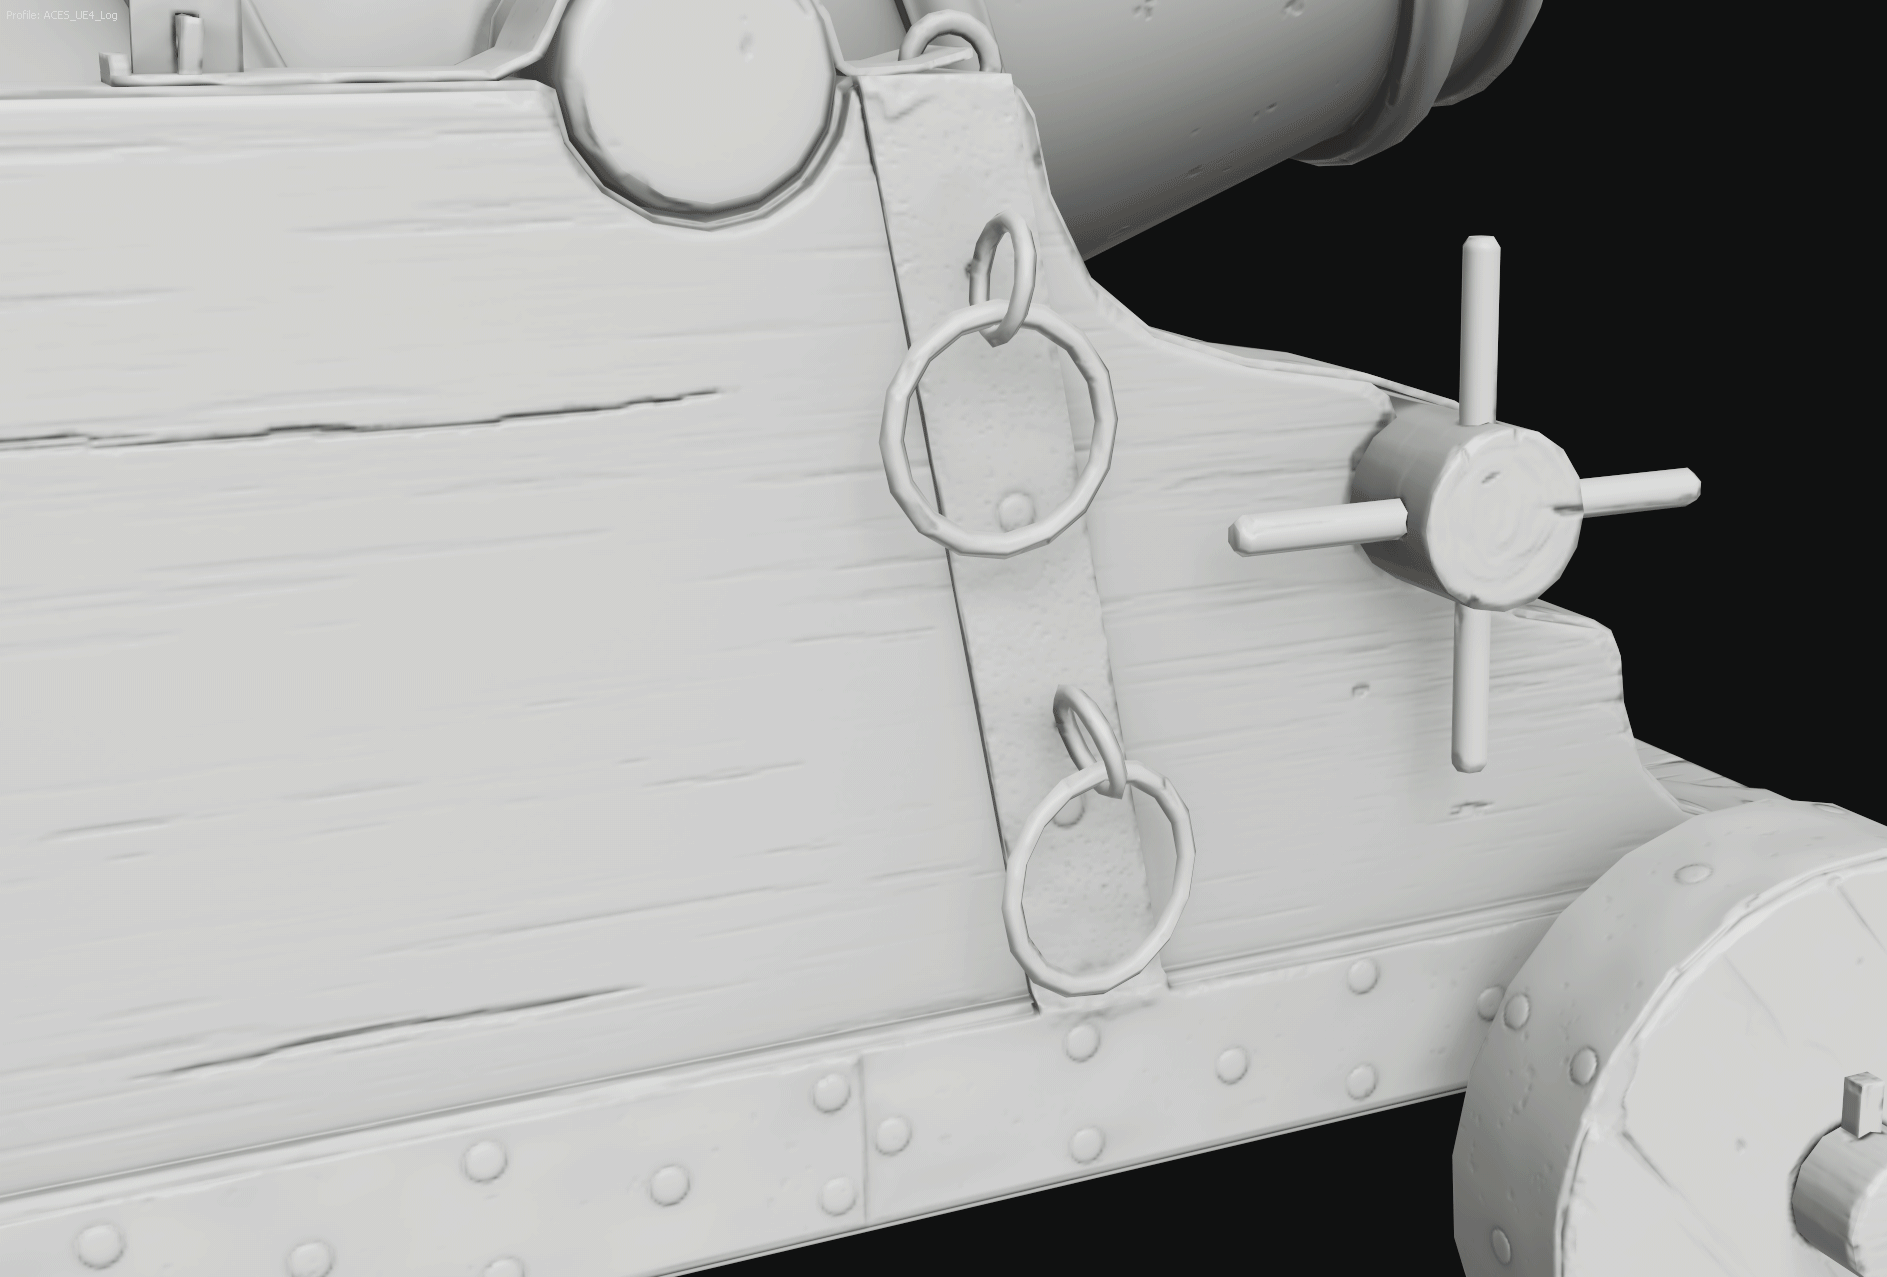
Modeling – Highpoly
It was the first time I sculpted a realistic asset, I had experience only with stylized style.
I used ZBrush and before opening it I separated the blockout mesh into the parts in which the whole mortar is composed, to be more comfortable in the sculpting stage.
Once imported into ZBrush I assigned different polygroups to the pieces and then separated them into different subtools.
At this point, I started the sculpting stage.
First of all, I divided and smoothed each piece and then started sculpting the wooden parts, beginning with the wheels and moving on to the side wood blocks and the three planks below. I worked on the edge damage and created the main classic wood grains.
Then I made the internal grain pattern with the Noise Tool, stretching the noise horizontally and playing with curves to adjust intensity and quantity.

For the cannon I worked similarly for the damage on the edges (of course not recreating the wood grain), and again used the noise tool for the surface dents, masking the areas where I did not want them to be visible.
I made the rope in Maya, following this very simple tutorial from MH Tutorials.
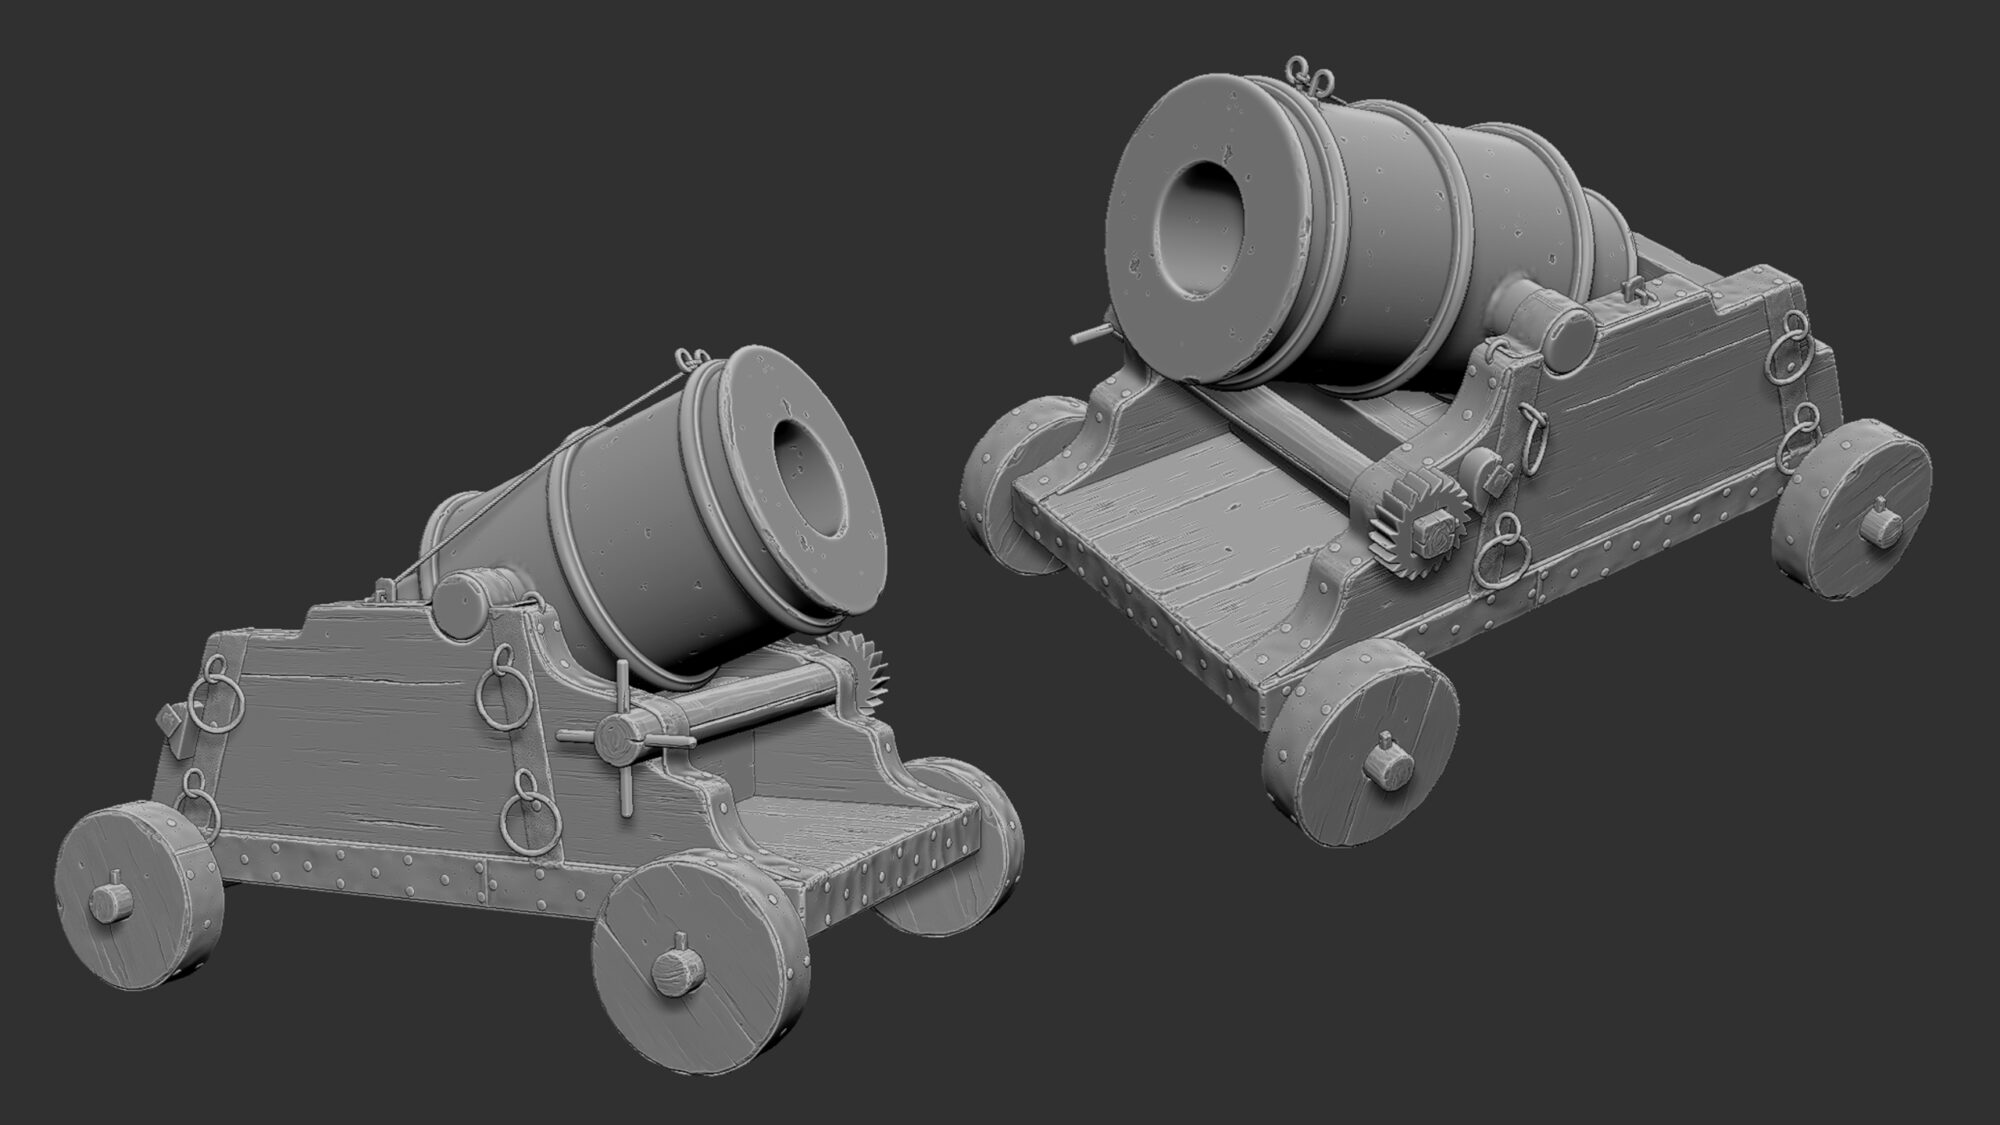
I only sculpted once repeated pieces such as wheels, the horizontal wooden blocks, and half of the iron plates which I then mirrored.
This way I optimized the time spent and the space for UVs (the lowpoly pieces will have the same UV coordinates).
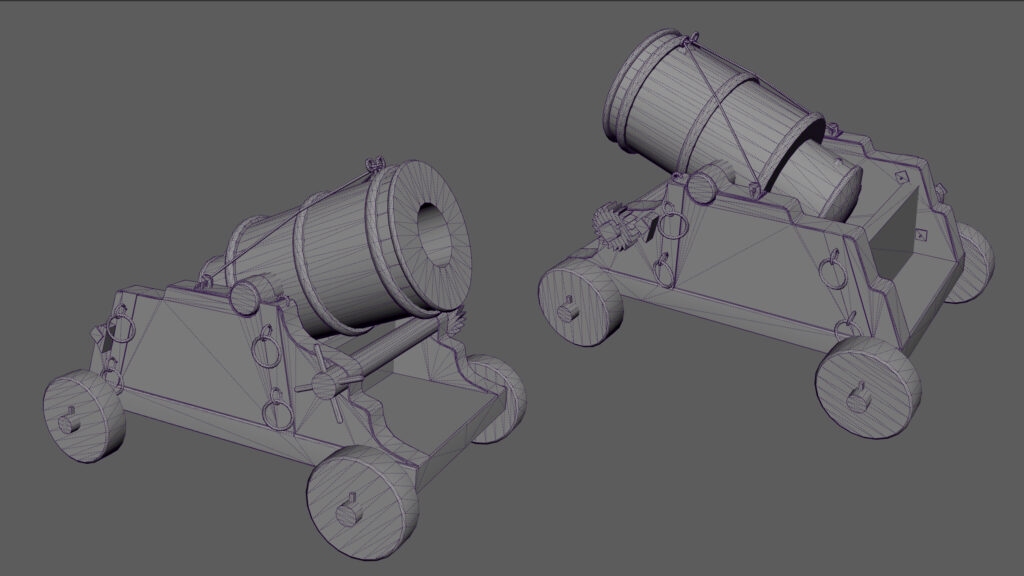
Modeling – Lowpoly
The creation of the lowpoly was a mix of fixing the existing blockout and rebuilding shapes from scratch with the highpoly as a reference.
For this reason I strongly recommend also thinking a little about how the lowpoly should look when working on the blockout, to speed up the work in this last modeling phase.
As mentioned before, one of the requirements was to stay under 8k tris, I got away with 7982 tris. 🙂

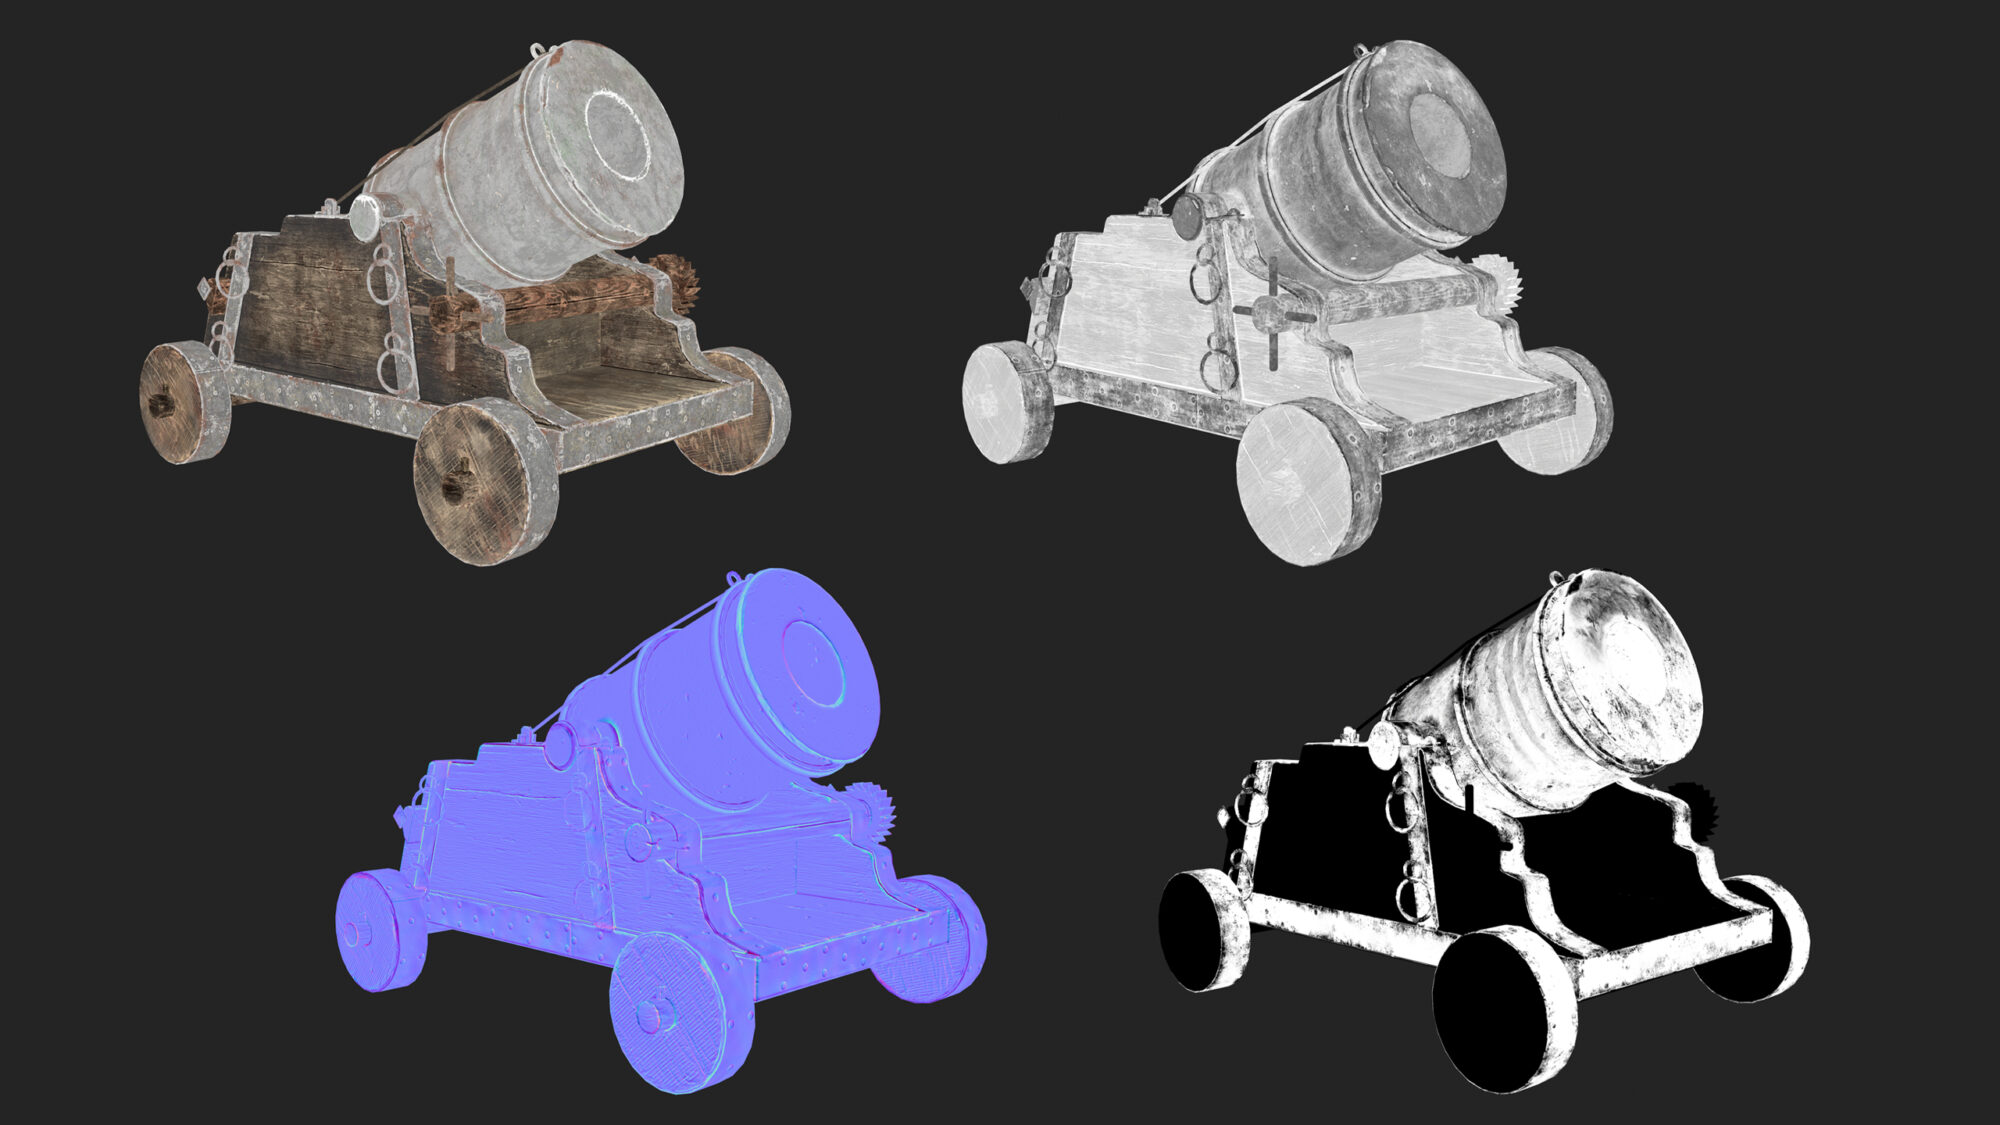
UVs & Bakes
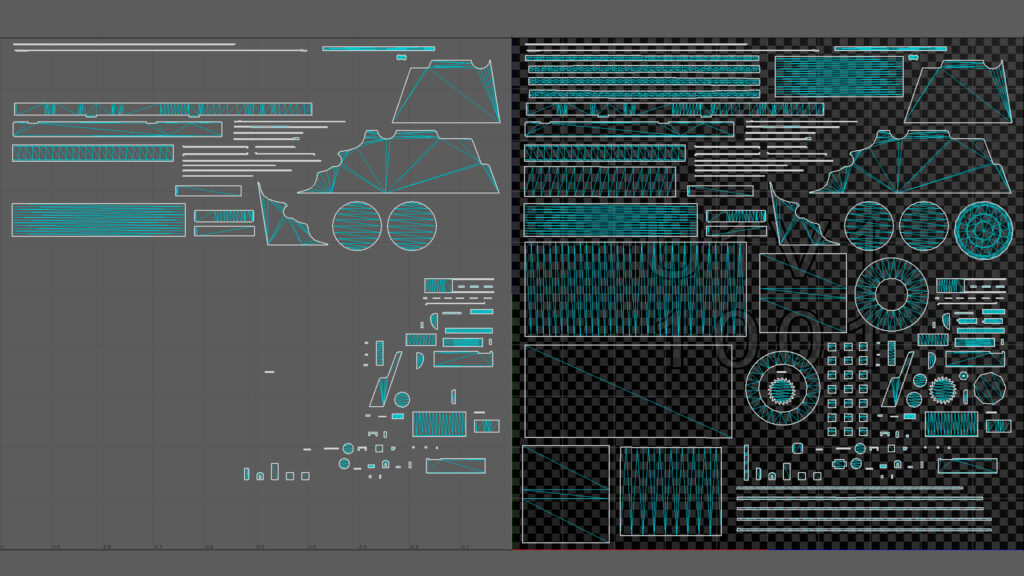
I used Maya for unwrapping and packing the UVs. I had to have a minimum texel density of 512 px/m and spent a lot of time filling the UVs in the UDIM space.
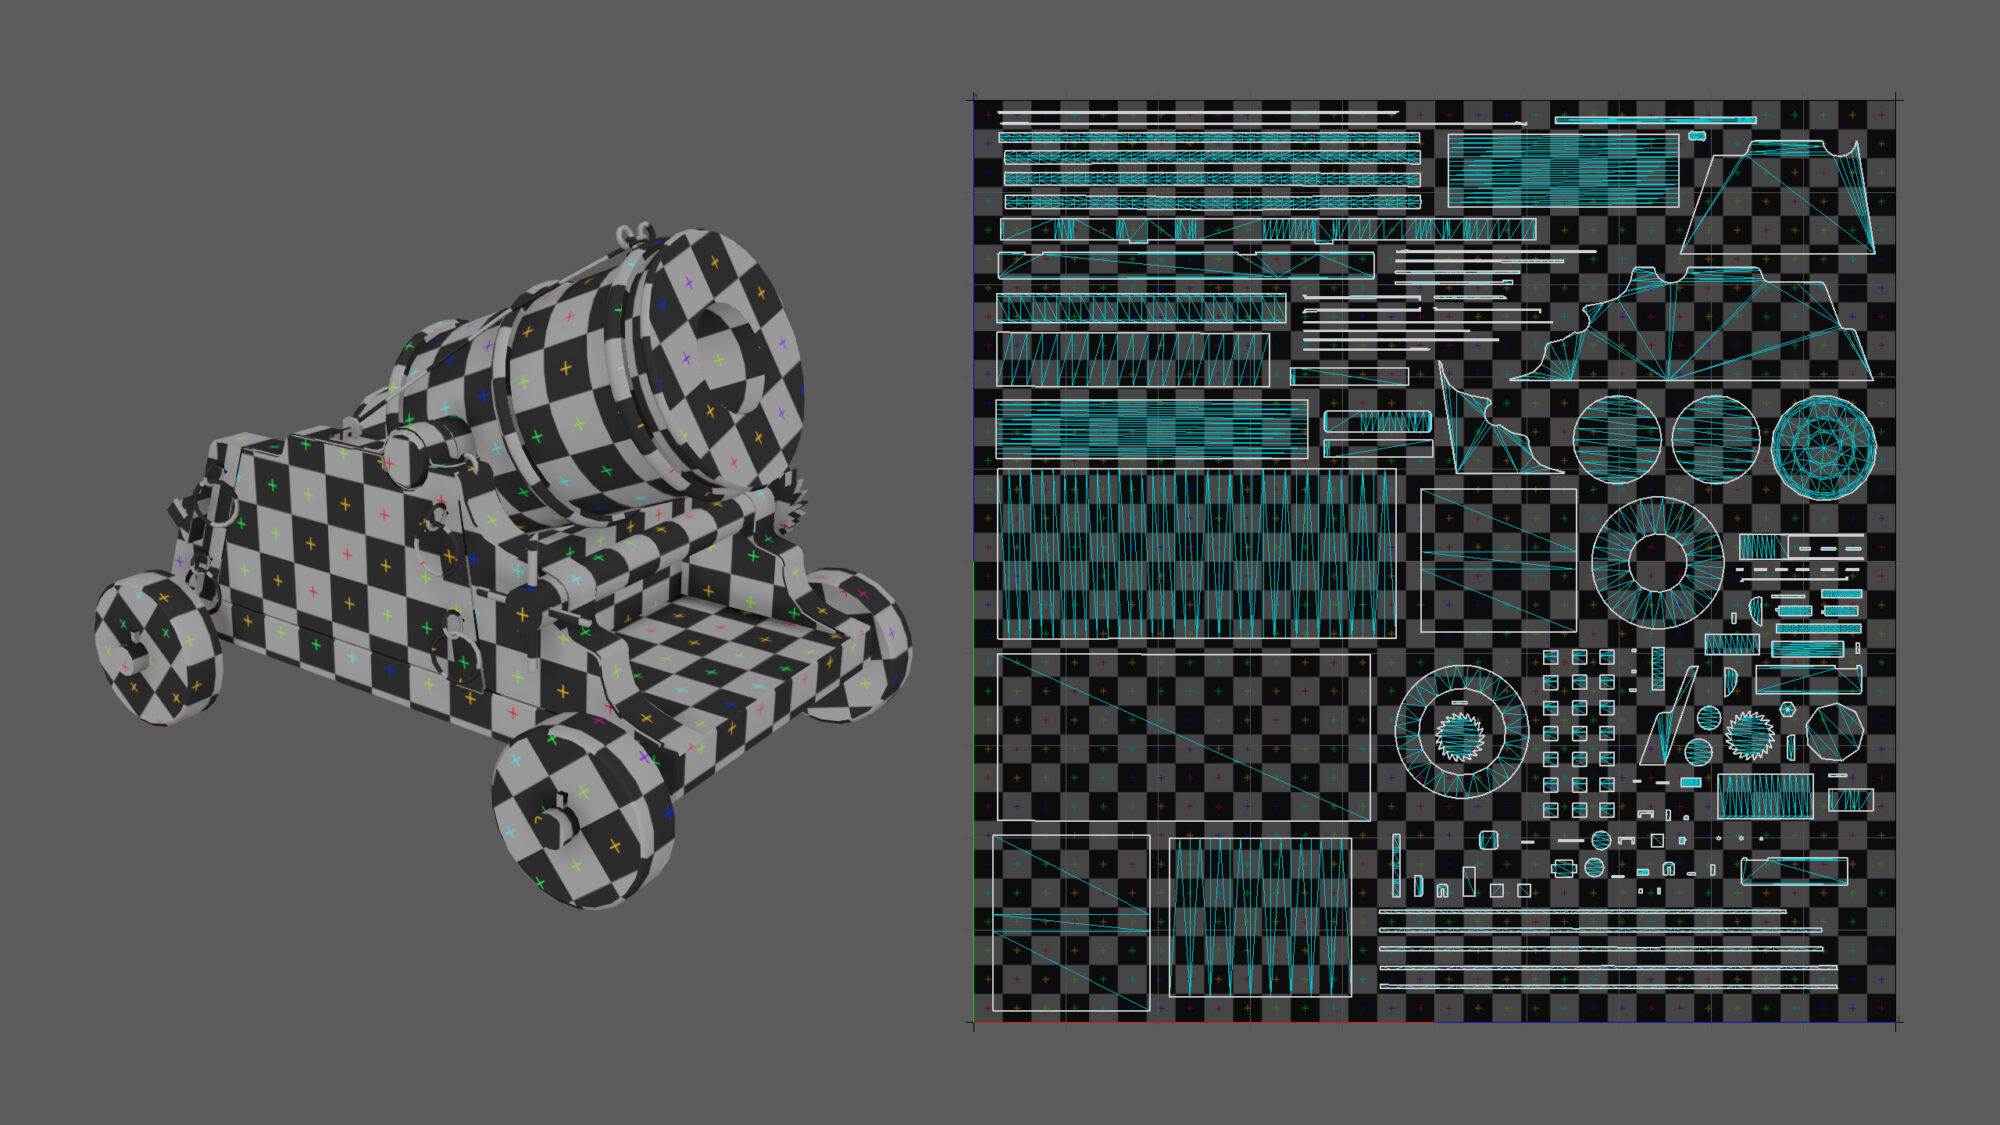
As I said before, to save UVs space I reused the same elements in the modeling stage, so those UVs are overlapped.
I made sure to have the UVs of the repeating pieces in the negative UDIM on the left (in the same UV coordinates), so that there are no problems during the bake, otherwise the normals will be baked twice on the same texture space with some artifacts.
Here is an image with the overlapped elements selected:
This step is only for the baking stage, in the texturing stage make sure not to use the model with these UVs. You can then change the position of the overlapping UV shells before exporting the mesh for texturing.
For the bake I used Marmoset Toolbag, I recommend it.
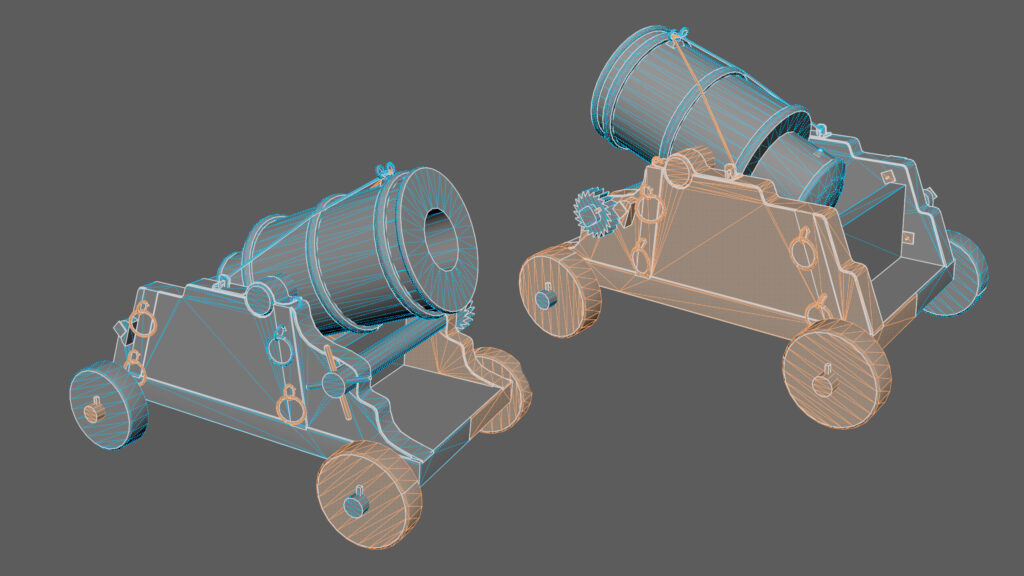
First, in Maya, I renamed the high and lowpoly pieces using the same prefixes and differentiating them only by the suffixes _low and _high.
I assigned different materials on highpoly meshes to get an ID Mask, which is very useful for easy mask creation in the texturing stage. I then created a baking project inside Marmoset Toolbag (toast bread button) and imported the two models from the Quick Loader menu.
Marmoset will automatically separate the high/low pairs so there will be no interference between pieces. I would also have so much more to say but the article would be too long, I recommend this article for a more in-depth tutorial on baking in Marmoset.
Texturing
For the texturing stage, I used Substance Painter.
This is a very important part of the creation of a 3D asset and the different maps deserve the right amount of attention and detail.
I usually hear that the most important map is the Roughness Map because it’s the one that makes the model more interesting because of the play of reflections that can be generated, but I don’t completely agree. It is very important and I love it, but it’s not the only one.
Another equally important and usually underrated one is the Color Map (Albedo or Diffuse). Every object is rich in color variations, large or small, visible or barely perceptible. Take your time to fill the Color Map with details and variations during the texturing stage, always keeping your references in mind.
Before starting, I set up the Substance Painter project as usual from the Display Settings window.
First of all, I chose my HDRI. The standard HDRI is an outdoor image with a blue sky and a green/brown terrain, these change the colors that you see on your model in the viewport. So I chose a black and white HDRI to fix the problem, my favorites are Studio Tomoco and Studio White Umbrella.
Then I fixed Tone Mapping with ACES LUT following this tutorial by William Faucher. In my opinion, it is very useful to see better colors in the viewport.
After that I started finally with texturing.
There are a few steps I often repeat in Substance Painter when I have to start building a material, which mainly concerns the Base Color and Roughness maps:
- Base layer with base Material (not in this case) or average Color and Rough
- Noise Color and Rough variations
- Edge light
- Dirt/Cavity dark
- Different sizes of Color and Rough variations
Of course for each of these steps there may be several layers, or there may not be any at all, it depends very much on the project and the type of material you want to create.
The important thing is always to understand and analyze your references well.
After these first steps there is the part of texturing which consists of adding various details such as hand-painted variations, brush strokes, material changes, etc… based on your references.
Here is an example of how I applied these steps on one of the mortar woods:
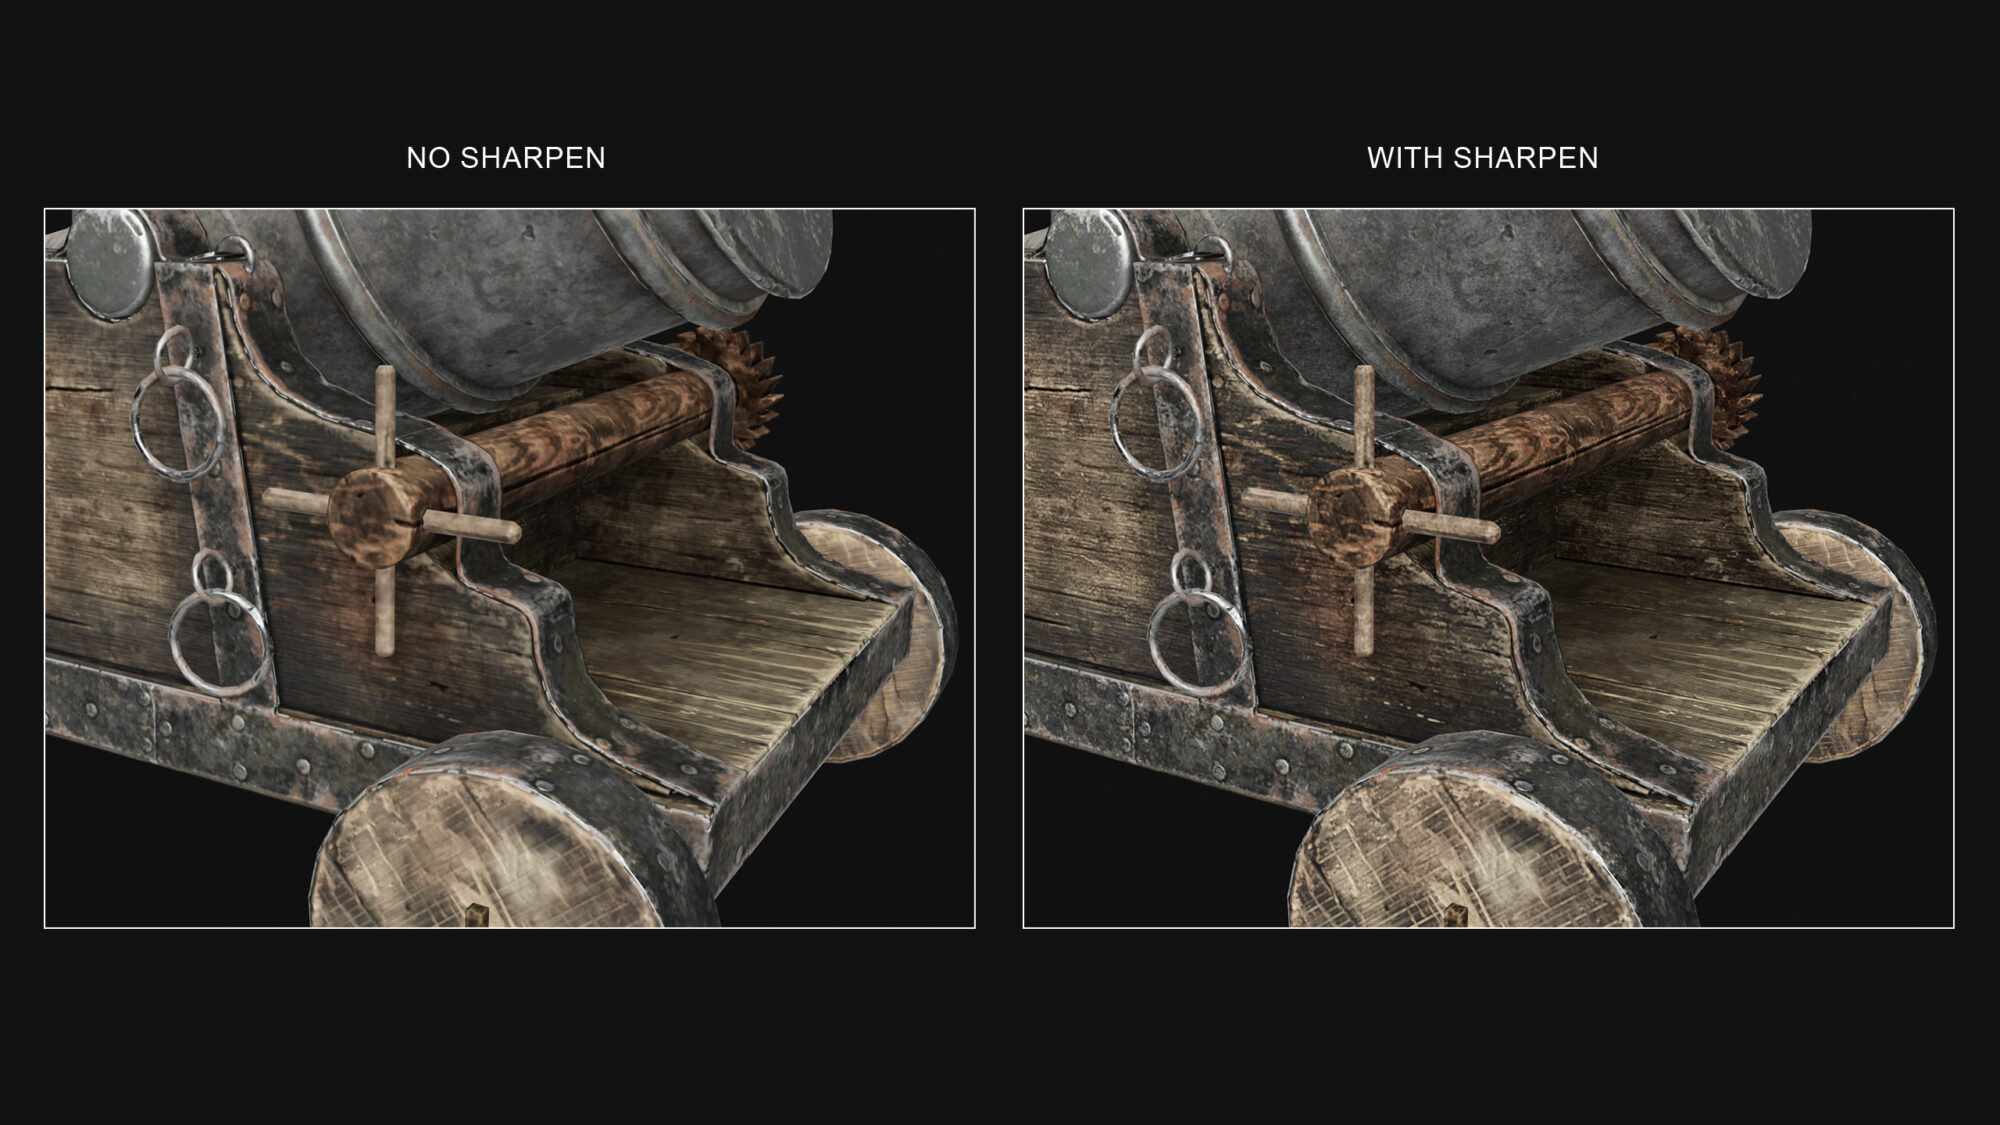
As a final step, I added a final layer of Sharpen, with passthrough as blending mode, which makes everything slightly sharper and gives the perception of increased texture resolution.
Presentation
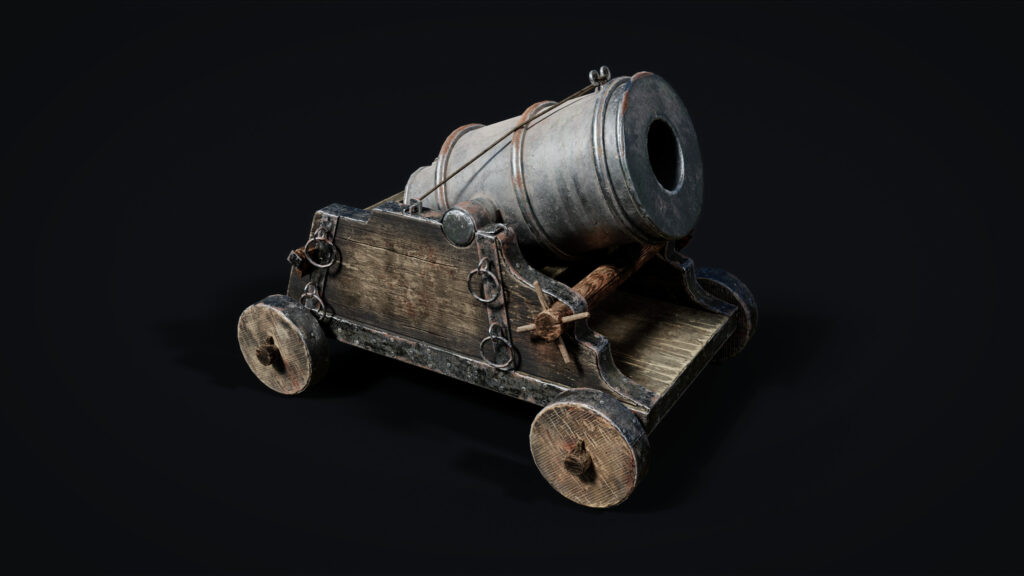
For the rendering stage I used Marmoset Toolbag again, it was a very easy step.
I just chose my HDRI, this time with a blue sky because I wanted to make it look like the main reference, added a Sun Light with the direction of the HDRI sun and another two neutral point lights to brighten some dark areas.
To render different views but with the same lighting, I connected the HDRI and the lights to the camera so that when I rotated it, the light could follow it.
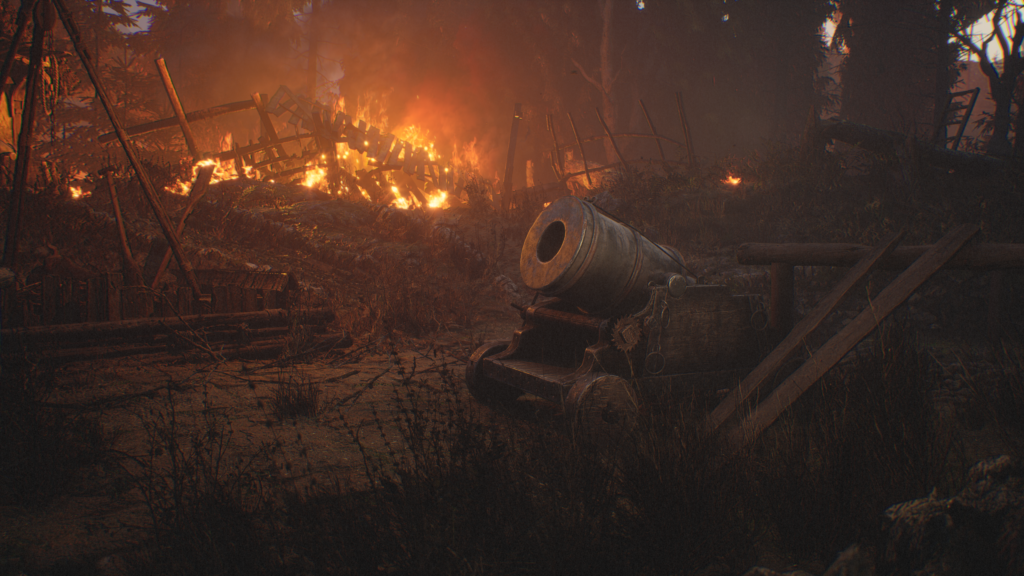
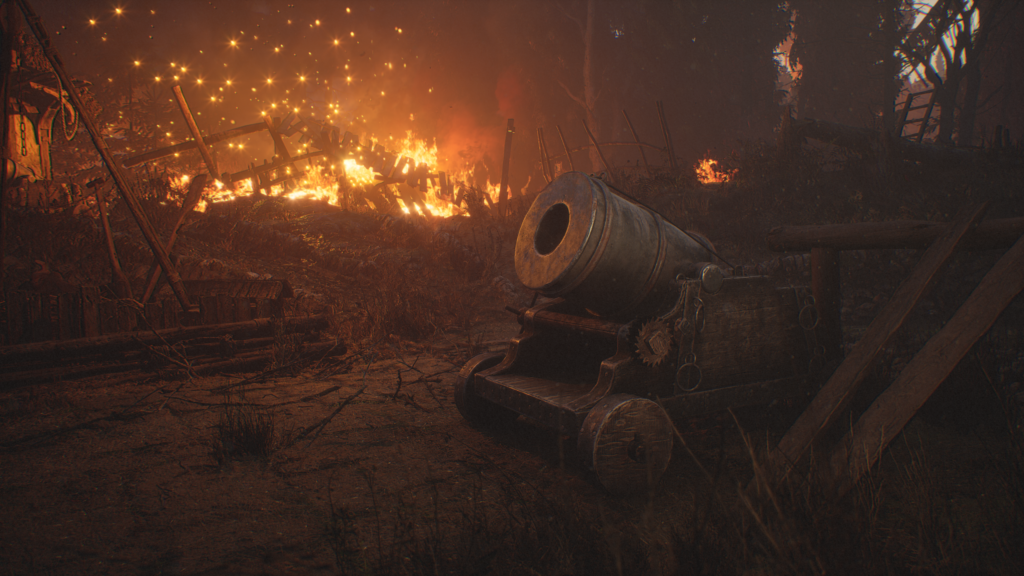
Personal Renders
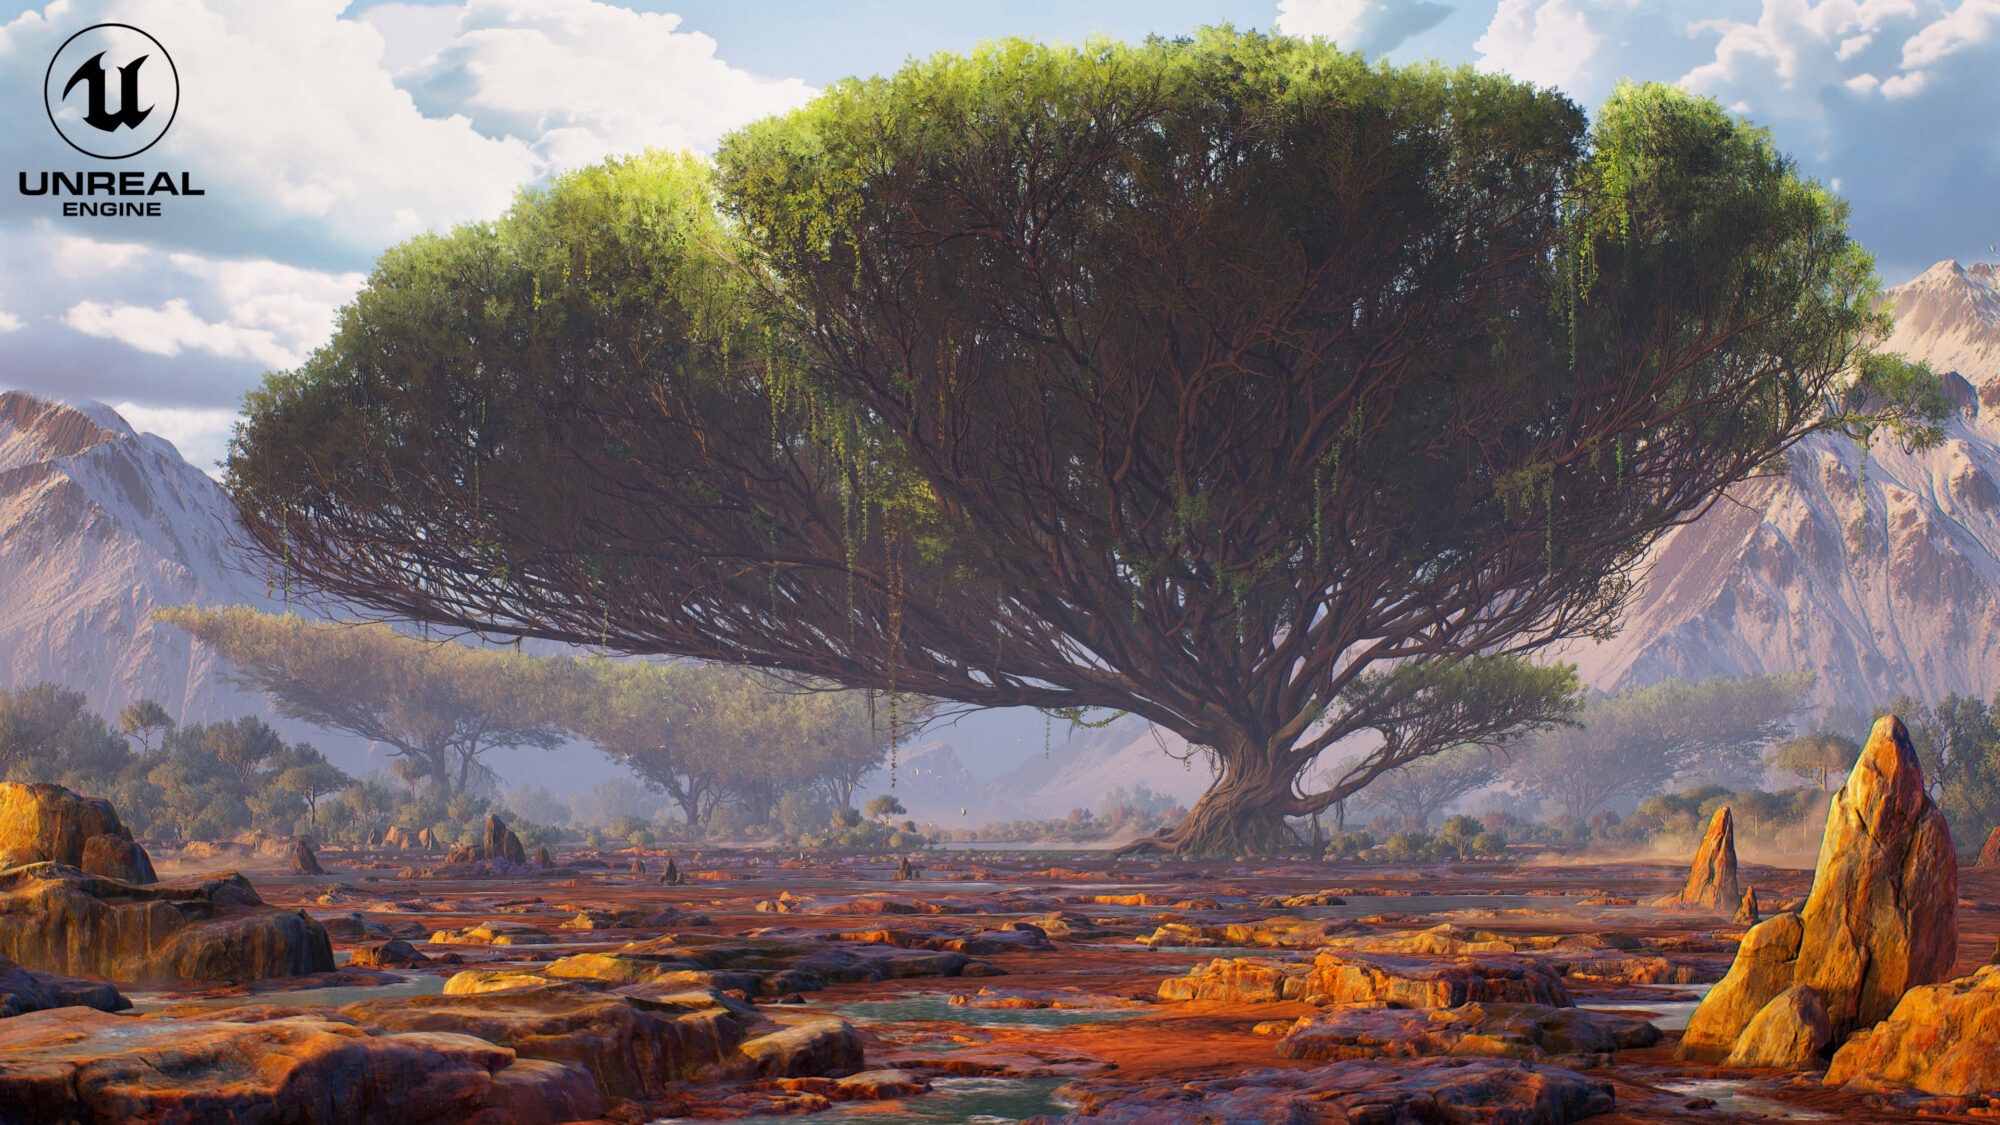
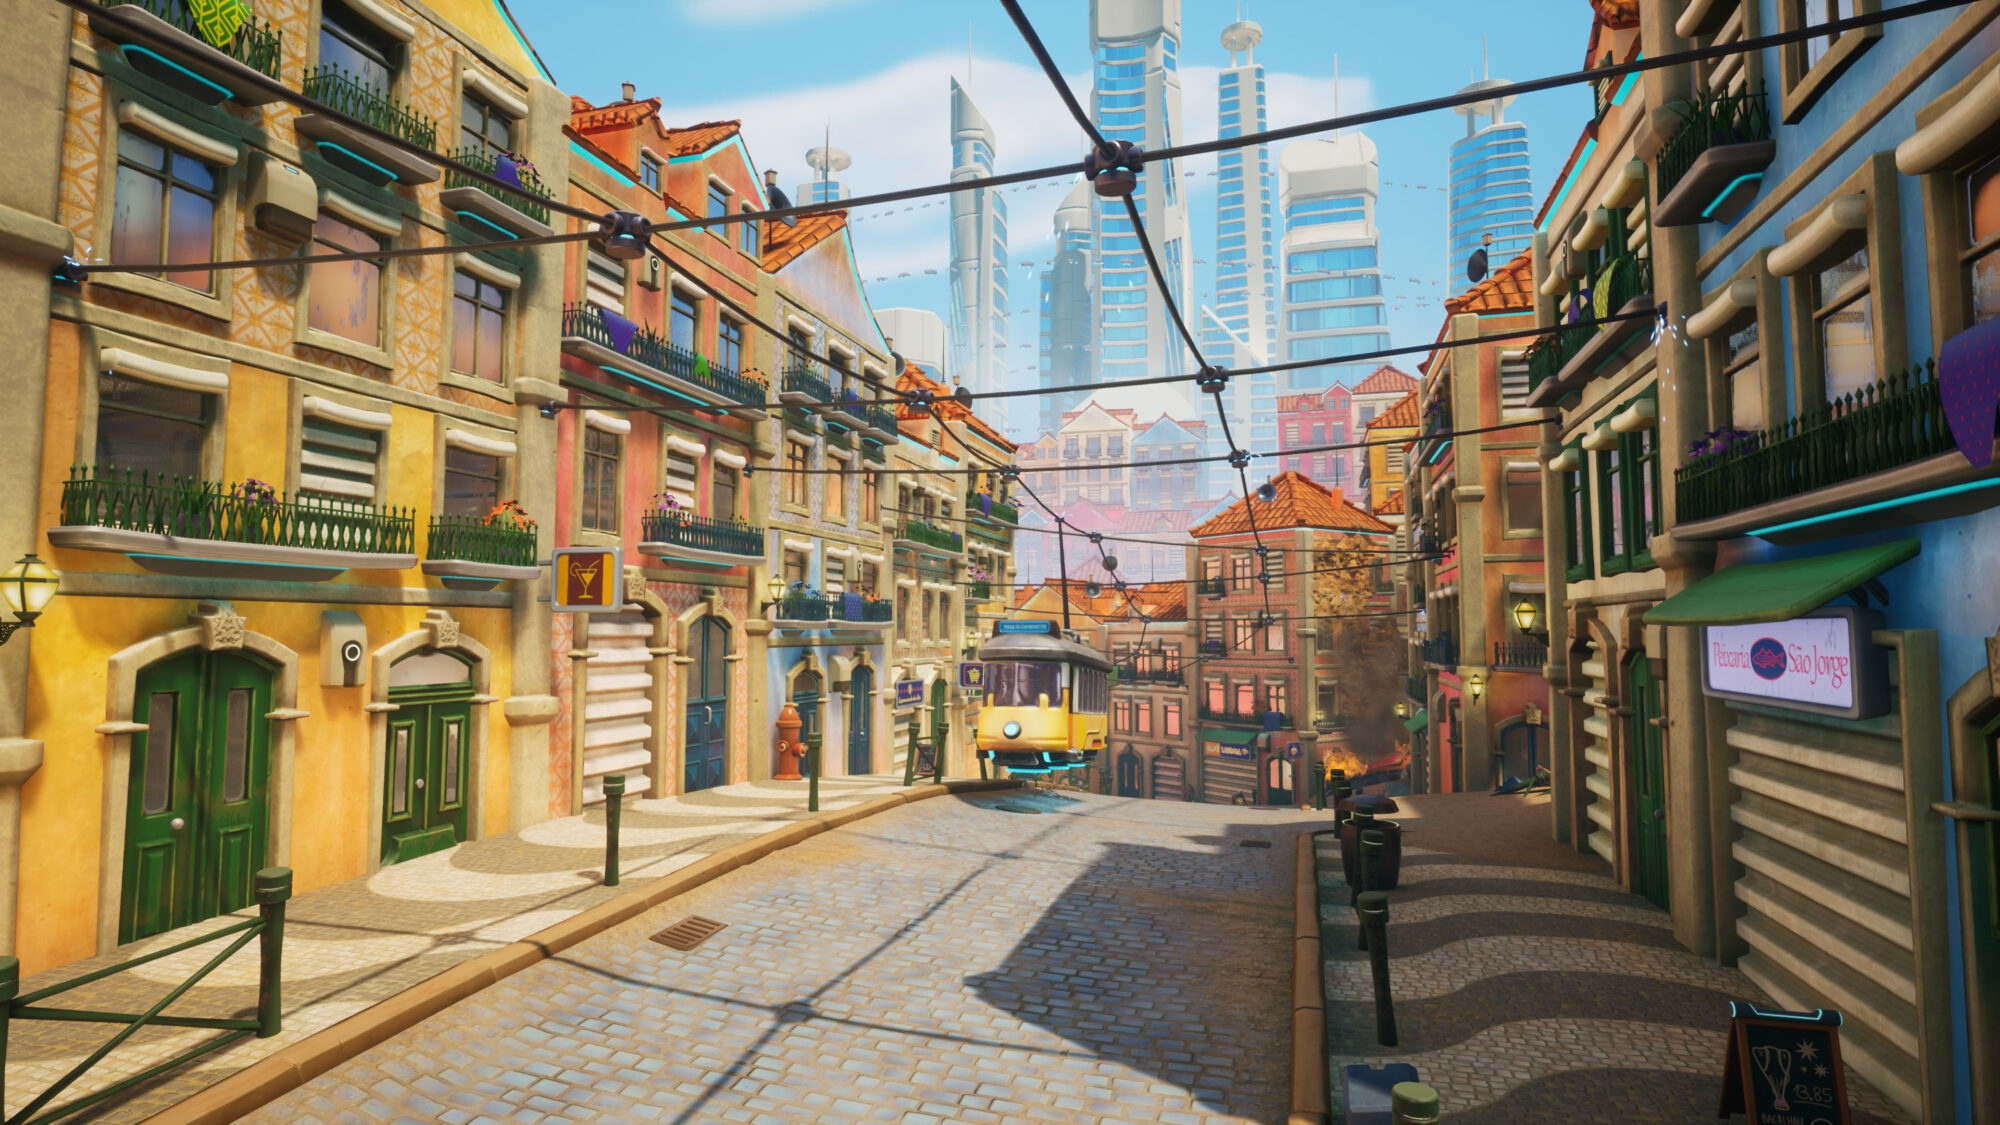
After I sent the test, I decided to try and import the mortar inside Unreal Engine 5.
I wanted to put it in a medieval age context since the mortar was medieval as well, and I found the Medieval Game Environment in the Epic Games Marketplace.
So I looked for the shot I was interested in, composed it by adding and moving small assets in the scene and fixed lighting and post-process according to the mood I wanted to achieve.


I also made a small camera movement and a focal length change with Sequencer.
Conclusions
I would like to thank the Games Artist team so much for the opportunity they have given me to write about my project.
I hope I have been helpful to those who will read with the few tips I have given.
I am always trying to improve myself, so if you also have any advice or feedback for me, I will be more than happy to read it.
Feel free to contact me on ArtStation, LinkedIn, or Instagram!
Read more articles
You might also like these articles.